

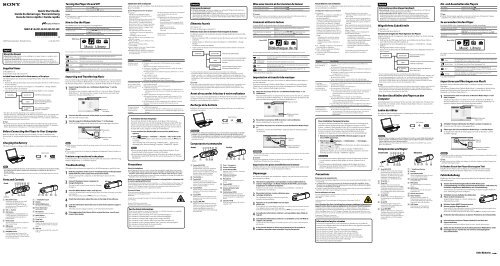
Sony NWZ-B143F - NWZ-B143F Istruzioni per l'uso Inglese
Sony NWZ-B143F - NWZ-B143F Istruzioni per l'uso Inglese
Sony NWZ-B143F - NWZ-B143F Istruzioni per l'uso Inglese

You also want an ePaper? Increase the reach of your titles
YUMPU automatically turns print PDFs into web optimized ePapers that Google loves.
English<br />
About the Manual<br />
Quick Start Guide: Explains set up, enabling you to import songs to a computer, and to<br />
transfer them to the player.<br />
O<strong>per</strong>ation Guide (PDF file): Explains advanced features of the player and offers<br />
troubleshooting information. The O<strong>per</strong>ation Guide (PDF file) is stored in the built-in<br />
flash memory of the player. To view the O<strong>per</strong>ation Guide (PDF file), see “Supplied Items.”<br />
Supplied Items<br />
Headphones (1)<br />
Quick Start Guide (this manual) (1)<br />
Included items in the built-in flash memory of the player<br />
The following items are stored in the [Storage Media] folder of the built-in flash memory<br />
of the player.<br />
1. Remove the USB cap of the player and connect the player directly to a USB connector<br />
on your computer.<br />
2. Double-click [My Computer] or [Computer] - [WALKMAN] - [Storage Media]* 1 .<br />
The following folders are displayed.<br />
3. Copy all data or the necessary data in the following folders to your computer.<br />
Storage Media O<strong>per</strong>ation Guide* 2<br />
Support<br />
PC_Application_<br />
Software<br />
Stored PDF files of the O<strong>per</strong>ation Guide.<br />
There are shortcut icons to “Customer<br />
Support” and “Customer Registration” in<br />
the country/region folders.<br />
There is a shortcut icon to Windows<br />
Media Player 11 download site.<br />
* 1 Data hierarchy may differ, depending on your computer environment.<br />
* 2 PDF files named [xxx_<strong>NWZ</strong>B140.pdf] in this folder are the O<strong>per</strong>ation Guide. The language name<br />
is displayed in the place of “xxx.” Choose the manual of your language. To view the O<strong>per</strong>ation<br />
Guide (PDF file), you need Adobe Reader or Acrobat Reader 5.0 in your computer. Adobe Reader<br />
can be downloaded from the Internet for free.<br />
Hint<br />
To use the free space in the [Storage Media] folder more effectively, back up all necessary<br />
data in the above three folders to your computer, and then delete the folders. To format the<br />
built-in flash memory of the player, see “To initialize (format) the player.”<br />
Before Connecting the Player to Your Computer<br />
Make sure that the OS is Windows XP (Service Pack 2 or later) or Windows Vista<br />
(Service Pack 1), and the installed Windows Media Player version on your computer is<br />
11.<br />
Charging the Battery<br />
The player’s battery is recharged while the player is connected to a running computer.<br />
To<br />
Charging<br />
Fully charged<br />
About 70 minutes<br />
<br />
Note<br />
If the player is used for the first time, or left unused for an extended <strong>per</strong>iod, the player’s display<br />
may remain blank for about 5 minutes after connecting to a computer or other device, or<br />
during charging.<br />
If the player’s display remains blank for more than 5 minutes, press the RESET button to reset the<br />
player.<br />
Parts and Controls<br />
Headphones<br />
Front<br />
Rear<br />
4-145-624-11 (1)<br />
Quick Start Guide<br />
Guide de démarrage / Kurzanleitung<br />
Guía de inicio rápido / Guida rapida<br />
©2009 <strong>Sony</strong> Corporation Printed in China<br />
REC/STOP button<br />
Starts/stops recording. You can record<br />
sound using the player’s built-in<br />
microphone. You can also record the<br />
currently received FM program (<strong>NWZ</strong>-<br />
B142F/<strong>B143F</strong> only).<br />
VOL +/– button<br />
ZAP button<br />
Changes between normal playback and<br />
ZAPPIN playback. ZAPPIN playback is<br />
sequential playback of song clips at a<br />
preset duration.<br />
BASS button<br />
Activates the Bass function to emphasize<br />
the low sound range.<br />
button<br />
Starts/pauses song playback, or pauses/<br />
restarts recording.<br />
/ button<br />
Finds the beginning of a song, or fastrewinds/forwards.<br />
You can also select the<br />
previous/next frequency or preset number<br />
on the FM radio screen.<br />
(Headphone) jack<br />
Display<br />
BACK/HOME button<br />
See “How to Use the Player.”<br />
Power Illuminator<br />
Illuminated by LED.<br />
Microphone<br />
For recording sound by the player.<br />
RESET button<br />
Use a small pin, etc.<br />
Strap hole<br />
HOLD switch<br />
Disables the o<strong>per</strong>ation buttons to avoid<br />
accidental o<strong>per</strong>ation while carrying the<br />
player.<br />
USB cap<br />
When connecting with USB, remove the<br />
USB cap.<br />
<strong>NWZ</strong>-B142/B143/B142F/<strong>B143F</strong><br />
Turning the Player On and Off<br />
To turn on<br />
Press the button.<br />
To turn off<br />
Press and hold the button.<br />
Hint<br />
If song playback is paused and there is no o<strong>per</strong>ation for a certain <strong>per</strong>iod of time, the player<br />
turns off automatically.<br />
How to Use the Player<br />
The HOME menu is the starting point of each application.<br />
To display the HOME menu<br />
Press and hold the BACK/HOME button.<br />
To select an item<br />
Press the / button to select an item, and then press<br />
the button to confirm.<br />
To return to the previous screen<br />
Press the BACK/HOME button.<br />
HOME menu<br />
Music Library<br />
The icons appear in the HOME menu and the color of the selected icon is inverted.<br />
Voice<br />
Plays back/deletes sound files recorded with the player’s built-in<br />
microphone.<br />
Music Library<br />
Plays back transferred songs on the player.<br />
FM* 1<br />
Plays FM radio, or plays back/deletes FM radio programs recorded with the<br />
player.<br />
Settings<br />
Sets function settings of music, FM* 1 , voice recording, or the player.<br />
* 1 <strong>NWZ</strong>-B142F/<strong>B143F</strong> only<br />
Importing and Transferring Music<br />
You can transfer songs to the player using Windows Media Player 11 on your computer.<br />
If you do not have Windows Media Player 11 in your computer, click a shortcut icon to<br />
the Windows Media Player 11 download site in the built-in flash memory of the player.<br />
1 Import songs from CDs, etc., to Windows Media Player 11 on the<br />
computer.<br />
For details on how to import songs from CDs, etc., refer to the Help of Windows<br />
Media Player 11. You do not need to re-import songs that have previously been<br />
imported to Windows Media Player 11.<br />
1 Click “Rip.”<br />
2 Click here to<br />
start importing.<br />
2 Connect the USB connector of the player to your computer.<br />
Insert the USB connector fully.<br />
3 Transfer songs from Windows Media Player 11 to the player.<br />
“DATA ACCESS” appears in the display while transferring songs to the player.<br />
1 Choose albums,<br />
etc.<br />
2 Click here to transfer<br />
to the player.<br />
Note<br />
Do not disconnect the player while files are being transferred. If you do, the file being transferred<br />
will be damaged.<br />
Hint<br />
You can also transfer data to the player by dragging and dropping in Windows Explorer on<br />
your computer.<br />
To delete songs transferred to the player<br />
Connect the player to your computer, and then delete any unnecessary audio files using<br />
Windows Media Player 11 or Windows Explorer.<br />
Troubleshooting<br />
If the player does not function as expected, try the following steps to resolve the issue.<br />
1 Find the symptoms of the issue in “Troubleshooting” in the O<strong>per</strong>ation<br />
Guide (PDF file), and try any corrective actions listed.<br />
About connecting with a computer, see the following “Connection with a<br />
computer.”<br />
2 Connect the player to your computer to<br />
charge the battery.<br />
You may be able to resolve some issues by charging<br />
the battery.<br />
3 Press the RESET button with a small pin, etc.<br />
If you press the RESET button while o<strong>per</strong>ating the player, stored data and settings on the player<br />
may be deleted.<br />
After resetting the player, press the button to turn on the player.<br />
4 Check the information about the issue in the Help of the software.<br />
5 Look for information about the issue on one of the customer support<br />
web sites.<br />
About the customer support web sites, see “For the latest information.”<br />
6 If the approaches listed above fail to resolve the issue, consult your<br />
nearest <strong>Sony</strong> dealer.<br />
RESET button<br />
RESET button<br />
Computer<br />
IBM PC/AT or compatible computer<br />
preinstalled with the following Windows<br />
o<strong>per</strong>ating systems* 1 :<br />
Windows XP Home Edition (Service Pack 2 or<br />
later) / Windows XP Professional (Service<br />
Pack 2 or later)* 2 / Windows Vista Home<br />
Basic (Service Pack 1) / Windows Vista Home<br />
Premium (Service Pack 1) / Windows Vista<br />
Business (Service Pack 1) / Windows Vista<br />
Ultimate (Service Pack 1)<br />
Not supported by OSs other than above.<br />
* 1 Excluding OS Versions not supported by<br />
Microsoft.<br />
* 2 Excluding 64-bit OS Version<br />
CPU: 300 MHz or more (For Windows Vista,<br />
800 MHz or more)<br />
RAM: 128 MB or more (For Windows Vista,<br />
512 MB or more)<br />
USB connector (Hi-Speed USB is<br />
recommended)<br />
Internet Explorer 6.0 or later, Windows Media<br />
Player 11 need to be installed.<br />
Broadband Internet connection is required to<br />
use Electronic Music Distribution (EMD) or<br />
to visit the web site.<br />
We do not guarantee o<strong>per</strong>ation for all computers<br />
even if they meet the above System<br />
Requirements.<br />
Not supported by the following environments:<br />
– Personally constructed computers or<br />
o<strong>per</strong>ating systems<br />
– An environment that is an upgrade of the<br />
original manufacturer-installed o<strong>per</strong>ating<br />
system<br />
– Multi-boot environment<br />
– Multi-monitor environment<br />
– Macintosh<br />
Design and specifications are subject to change<br />
without notice.<br />
Symptom<br />
Cause/Remedy<br />
The player cannot<br />
charge the battery.<br />
The player is not connected to a USB connector on your computer<br />
pro<strong>per</strong>ly.<br />
Disconnect the player, and then reconnect it.<br />
The battery is charged in an ambient tem<strong>per</strong>ature outside the range of<br />
5 °C (41°F) to 35 °C (95°F).<br />
Charge the battery in an ambient tem<strong>per</strong>ature of between 5 °C (41°F)<br />
to 35 °C (95°F).<br />
Your computer is not on.<br />
Turn on the computer.<br />
Your computer enters Sleep or Hibernate status.<br />
Release the computer from Sleep or Hibernate status.<br />
“CONNECTED USB”<br />
does not appear when<br />
the player is connected<br />
to the computer.<br />
The player’s USB connector is not connected to a USB connector on<br />
your computer pro<strong>per</strong>ly.<br />
Disconnect the player, and then reconnect it.<br />
A USB hub is being used.<br />
Connect the player directly to a USB connector, as connection via a<br />
USB hub may not work. However, a USB hub that supplies power can<br />
be used.<br />
Another application is running on the computer.<br />
Disconnect the player, wait a few minutes, and reconnect it. If the<br />
problem <strong>per</strong>sists, disconnect the player, restart the computer, and<br />
then reconnect the player.<br />
The USB connector on your computer may have a problem. Connect<br />
the player’s USB connector to another USB connector on your<br />
computer.<br />
The player becomes<br />
unstable while it is<br />
connected to the<br />
computer.<br />
A USB hub is being used.<br />
Connect the player directly to a USB connector, as connection via a<br />
USB hub may not work. However, a USB hub that supplies power can<br />
be used.<br />
To initialize (format) the player<br />
You can format the built-in flash memory of the player. If the memory is<br />
formatted, all shortcut icons and files including the O<strong>per</strong>ation Guide (PDF file)<br />
will be erased and all setting values returned to their defaults. Be sure to verify<br />
the files stored in memory prior to formatting and export any necessary files to<br />
the hard disk of your computer or other device beforehand.<br />
1 Press and hold the BACK/HOME button until the HOME menu<br />
appears.<br />
2 Select (Settings) – “Initialize” – “Format” – “OK,” in this order.<br />
Press the / button to select the item, and then press the button<br />
to confirm.<br />
After selecting “OK” and confirming, “FORMATTING…” appears and<br />
formatting starts. When formatting is complete, “COMPLETE” appears.<br />
Notes<br />
Do not format the built-in flash memory using Windows Explorer. If you<br />
format the built-in flash memory, format it on the player.<br />
If you format the built-in flash memory of the player by accident, download<br />
the O<strong>per</strong>ation Guide (PDF file) from the web site mentioned in “For the latest<br />
information.”<br />
Precautions<br />
About the headphones<br />
Avoid playing the unit at so loud a volume that extended play might affect your hearing.<br />
At a high volume outside sounds may become inaudible. Avoid listening to the unit in<br />
situations where hearing must not be impaired, for example, while driving or cycling.<br />
As the supplied headphones are of open-air design, sounds go out through the headphones.<br />
Remember not to disturb those close to you.<br />
Notice for customers: the following information is only applicable to equipment sold<br />
in countries applying EU directives<br />
The manufacturer of this product is <strong>Sony</strong> Corporation, 1-7-1 Konan, Minato-ku, Tokyo, Japan. The<br />
Authorized Representative for EMC and product safety is <strong>Sony</strong> Deutschland GmbH, Hedelfinger<br />
Strasse 61, 70327 Stuttgart, Germany. For any service or guarantee matters please refer to the<br />
addresses given in separate service or guarantee documents.<br />
For users in France<br />
When replacing the headphones/earphones, please refer to the model of the headphones/earphones<br />
adapted to your unit that appears below.<br />
MDR-E804<br />
At high volume, prolonged listening to the <strong>per</strong>sonal audio player can damage the<br />
user’s hearing.<br />
Program ©2009 <strong>Sony</strong> Corporation<br />
Documentation ©2009 <strong>Sony</strong> Corporation<br />
For the latest information<br />
If you have any questions or issues with this product, or would like information on compatible<br />
items with this product, visit the following web sites.<br />
For customers in the USA: http://www.sony.com/walkmansupport<br />
For customers in Canada: http://www.sony.ca/ElectronicsSupport/<br />
For customers in Europe: http://support.sony-europe.com/DNA<br />
For customers in Latin America: http://www.sony-latin.com/index.crp<br />
For customers in other countries/regions: http://www.sony-asia.com/support<br />
For customers who purchased the overseas models:<br />
http://www.sony.co.jp/overseas/support/<br />
Connection with a computer<br />
About connecting with a computer, check the following “System Requirements (for the<br />
player)” and tables.<br />
System Requirements (for the player)<br />
Français<br />
A propos du manuel<br />
Guide de démarrage : explique les réglages vous <strong>per</strong>mettant d’importer des pistes vers<br />
un ordinateur, puis de les transférer vers le lecteur.<br />
Mode d’emploi (fichier PDF) : explique les fonctions avancées du lecteur et propose des<br />
informations de dépannage. Le Mode d’emploi (fichier PDF) est stocké dans la mémoire<br />
flash intégrée du lecteur. Pour visualiser le Mode d’emploi (fichier PDF), reportez-vous à<br />
la section « Eléments fournis ».<br />
Eléments fournis<br />
Ecouteurs (1)<br />
Guide de démarrage (ce manuel) (1)<br />
Eléments inclus dans la mémoire flash intégrée du lecteur<br />
Les éléments suivants sont stockés dans le dossier [Storage Media] de la mémoire flash<br />
intégrée du lecteur.<br />
1. Retirez le capuchon USB et raccordez le lecteur directement sur un port USB de votre<br />
ordinateur.<br />
2. Double-cliquez sur [Poste de travail] ou [Ordinateur] - [WALKMAN] - [Storage<br />
Media]* 1 .<br />
Les dossiers suivants sont affichés.<br />
3. Copiez toutes les données ou les données nécessaires dans les dossiers suivants de<br />
votre ordinateur.<br />
Storage Media O<strong>per</strong>ation Guide* 2<br />
Support<br />
PC_Application_<br />
Software<br />
Fichiers PDF stockés du Mode d’emploi.<br />
Contient des icônes de raccourci vers les pages Support à<br />
la clientèle et Enregistrement client des dossiers par<br />
pays/région.<br />
Contient une icône de raccourci vers le site de<br />
téléchargement Windows Media Player 11.<br />
* 1 La hiérarchie des données peut varier selon l’environnement de votre ordinateur.<br />
* 2 Les fichiers PDF de ce dossier portant le nom [xxx_<strong>NWZ</strong>B140.pdf] correspondent au mode<br />
d’emploi. Le préfixe « xxx » indique le nom de la langue. Choisissez le manuel rédigé dans votre<br />
langue. Pour visualiser le mode d’emploi (fichier PDF), Adobe Reader ou Acrobat Reader 5.0 doit<br />
être installé sur votre ordinateur. Il est possible de télécharger Adobe Reader gratuitement sur<br />
Internet.<br />
Conseil<br />
Pour utiliser l’espace disponible du dossier [Storage Media] plus efficacement, sauvegardez toutes<br />
les données nécessaires des trois dossiers ci-dessus sur votre ordinateur, puis supprimez les<br />
dossiers. Pour formater la mémoire flash intégrée du lecteur, reportez-vous à la section « Pour<br />
réinitialiser (formater) le lecteur ».<br />
Avant de raccorder le lecteur à votre ordinateur<br />
Assurez-vous que le système d’exploitation est Windows XP (Service Pack 2 ou ultérieur)<br />
ou Windows Vista (Service Pack 1) et que la version du lecteur Windows Media Player<br />
installé sur votre ordinateur est la version 11.<br />
Recharge de la batterie<br />
La batterie du lecteur est en cours de recharge tandis que le lecteur est raccordé à un<br />
ordinateur sous tension.<br />
Pour<br />
Charge en cours<br />
Charge complète<br />
Environ 70 minutes<br />
<br />
Remarque<br />
Si le lecteur est utilisé pour la première fois ou si vous ne l’utilisez pas pendant une période<br />
prolongée, il est possible que la fenêtre d’affichage du lecteur reste vide pendant environ<br />
5 minutes après le raccordement à un ordinateur ou un autre appareil, ou pendant la recharge.<br />
Si la fenêtre d’affichage reste vide pendant plus de 5 minutes, appuyez sur la touche RESET pour<br />
réinitialiser le lecteur.<br />
Composants et commandes<br />
Ecouteurs<br />
Avant<br />
Arrière<br />
Touche REC/STOP<br />
Permet de lancer et d’arrêter<br />
l’enregistrement. Vous pouvez enregistrer<br />
du son avec le microphone intégré du<br />
lecteur. Vous pouvez également enregistrer<br />
l’émission FM en cours de réception<br />
(<strong>NWZ</strong>-B142F/<strong>B143F</strong> uniquement).<br />
Touche VOL +/–<br />
Touche ZAP<br />
Permet de basculer entre une lecture<br />
normale et une lecture ZAPPIN. ZAPPIN<br />
<strong>per</strong>met de lire des séquences de pistes<br />
selon une durée préréglée.<br />
Touche BASS<br />
Permet d’activer la fonction d’amplification<br />
des graves afin d’accentuer la gamme des<br />
sons graves.<br />
Touche <br />
Permet de lancer/d’interrompre la lecture<br />
d’une piste ou d’interrompre/de reprendre<br />
l’enregistrement.<br />
Touche /<br />
Permet de trouver le début d’une piste ou<br />
d’effectuer un retour ou une avance rapide.<br />
Vous pouvez également sélectionner la<br />
fréquence précédente/suivante ou le<br />
numéro préréglé dans la fenêtre d’affichage<br />
de la radio FM.<br />
Prise (écouteurs)<br />
Fenêtre d’affichage<br />
Touche BACK/HOME<br />
Reportez-vous à la section « Comment<br />
utiliser le lecteur ».<br />
Indicateur lumineux<br />
Eclairé par une LED.<br />
Microphone<br />
Permet l’enregistrement de son par le<br />
lecteur.<br />
Touche RESET<br />
Utilisez une petite épingle, etc.<br />
Anneau de fixation pour<br />
bandoulière<br />
Commutateur HOLD<br />
Permet de désactiver les touches de<br />
commande afin d’éviter toute opération<br />
non intentionnelle en transportant le<br />
lecteur.<br />
Capuchon USB<br />
En cas de raccordement USB, retirez le<br />
capuchon USB.<br />
Mise sous tension et hors tension du lecteur<br />
Pour le mettre sous tension Appuyez sur la touche .<br />
Pour le mettre hors tension<br />
Appuyez sur la touche et maintenez-la enfoncée.<br />
Conseil<br />
Si la lecture des pistes est interrompue et qu’aucune opération n’est effectuée pendant un<br />
certain temps, le lecteur est automatiquement mis hors tension.<br />
Comment utiliser le lecteur<br />
Le menu HOME est le point de départ de chaque application.<br />
Pour afficher le menu HOME<br />
Appuyez sur la touche BACK/HOME et maintenez-la<br />
enfoncée.<br />
Pour sélectionner une option de<br />
menu<br />
Appuyez sur la touche / pour sélectionner une<br />
option, puis appuyez sur la touche pour valider.<br />
Pour revenir à l’écran précédent<br />
Appuyez sur la touche BACK/HOME.<br />
Menu HOME<br />
Les icônes apparaissent dans le menu HOME et la couleur de l’icône sélectionnée est inversée.<br />
Voix<br />
Permet de lire/supprimer des fichiers son enregistrés avec le microphone<br />
intégré du lecteur.<br />
Bibliothèque<br />
de musique<br />
Permet de lire des pistes transférées sur le lecteur.<br />
FM* 1<br />
Permet d’écouter la radio FM ou de lire/supprimer des émissions de radio<br />
FM enregistrées avec le lecteur.<br />
Réglages<br />
Permet de paramétrer les fonctions de musique, de la radio FM* 1 , de<br />
l’enregistrement vocal ou du lecteur.<br />
* 1 <strong>NWZ</strong>-B142F/<strong>B143F</strong> uniquement<br />
Importation et transfert de musique<br />
Vous pouvez transférer des pistes vers le lecteur en utilisant Windows Media Player 11<br />
sur votre ordinateur.<br />
Il n’est pas nécessaire que Windows Media Player 11 soit installé sur votre ordinateur.<br />
Cliquez sur une icône de raccourci vers le site de téléchargement de Windows Media<br />
Player 11 dans la mémoire flash intégrée du lecteur.<br />
1 Importez des pistes de CD, etc. vers Windows Media Player 11 sur<br />
l’ordinateur.<br />
Pour plus d’informations sur l’importation de pistes à partir d’un CD, etc., reportezvous<br />
à l’Aide de Windows Media Player 11. Il n’est pas nécessaire de réimporter des<br />
pistes précédemment importés vers Windows Media Player 11.<br />
1 Cliquez sur « Extraire ».<br />
2 Cliquez ici pour démarrer<br />
l’importation.<br />
2 Raccordez le connecteur USB du lecteur à votre ordinateur.<br />
Insérez complètement le connecteur USB.<br />
3 Transférez des pistes vers le lecteur à partir de Windows Media Player<br />
11.<br />
L’indication « ACCES AUX DONNEES » s’affiche pendant le transfert des pistes<br />
vers le lecteur.<br />
1 Choisissez les<br />
albums, etc.<br />
2 Cliquez ici pour démarrer le<br />
transfert vers le lecteur.<br />
Remarque<br />
Ne débranchez pas le lecteur pendant le transfert des fichiers. Sinon, le fichier en cours de transfert<br />
pourrait être endommagé.<br />
Conseil<br />
Vous pouvez également transférer les données par un simple glisser-déposer dans<br />
l’Explorateur Windows de votre ordinateur.<br />
Suppression des pistes transférées vers le lecteur<br />
Raccordez le lecteur à votre ordinateur, puis supprimez les fichiers audio inutiles à l’aide<br />
de Windows Media Player 11 ou de l’Explorateur Windows.<br />
Dépannage<br />
Si le lecteur ne fonctionne pas normalement, reportez-vous aux instructions suivantes<br />
pour résoudre le problème.<br />
1 Cherchez les symptômes correspondant à votre problème dans la<br />
section « Dépannage » du Mode d’emploi (fichier PDF), puis essayez<br />
d’appliquer les solutions proposées.<br />
Reportez-vous à la section « Raccordement à un ordinateur » à propos du<br />
raccordement à un ordinateur.<br />
2 Raccordez le lecteur à votre ordinateur pour<br />
recharger la batterie.<br />
En rechargeant la batterie, vous pourrez peut-être<br />
résoudre certains problèmes.<br />
3 Appuyez sur la touche RESET avec un objet<br />
pointu, etc.<br />
Si vous appuyez sur la touche RESET pendant que vous utilisez le lecteur, les données stockées<br />
et les réglages du lecteur risquent d’être supprimés.<br />
Après avoir réinitialisé le lecteur, appuyez sur la touche pour le mettre sous tension.<br />
4 Consultez les informations relatives à votre problème dans l’Aide du<br />
logiciel.<br />
5 Consultez les informations relatives à ce problème sur les site Web de<br />
support à la clientèle.<br />
A propos des sites Web de support à la clientèle, reportez-vous à la section « Informations les<br />
plus récentes ».<br />
6 Si les conseils donnés ci-dessus ne <strong>per</strong>mettent pas de résoudre le<br />
problème, consultez votre revendeur <strong>Sony</strong> le plus proche.<br />
Touche RESET<br />
Touche RESET<br />
Ordinateur<br />
IBM PC/AT ou ordinateur compatible avec<br />
les systèmes d’exploitation Windows<br />
suivants préinstallés* 1 :<br />
Windows XP Home Edition (Service Pack<br />
2 ou ultérieur)/Windows XP Professional<br />
(Service Pack 2 ou ultérieur)* 2 /Windows<br />
Vista Home Basic (Service Pack 1)/Windows<br />
Vista Home Premium (Service Pack 1)/<br />
Windows Vista Business (Service Pack 1)/<br />
Windows Vista Ultimate (Service Pack 1)<br />
Les systèmes d’exploitation autres que ceux<br />
mentionnés ci-dessus ne sont pas pris en<br />
charge.<br />
* 1 A l’exception des versions des systèmes<br />
d’exploitation qui ne sont pas prises en<br />
charge par Microsoft.<br />
* 2 A l’exception des systèmes d’exploitation<br />
64 bits.<br />
UC : 300 MHz ou supérieur (sous Windows<br />
Vista, 800 MHz ou supérieur)<br />
RAM : 128 Mo ou plus (pour Windows<br />
Vista, 512 Mo ou plus)<br />
Connecteur USB (l’USB haut débit est<br />
recommandé)<br />
Internet Explorer 6.0 ou une version<br />
ultérieure, Windows Media Player 11 doit<br />
être installé.<br />
Une connexion Internet à large bande est<br />
nécessaire pour utiliser l’EMD (Electronic<br />
Music Distribution) ou pour consulter le<br />
site Web.<br />
Nous ne garantissons pas le fonctionnement<br />
du lecteur sur tous les ordinateurs même s’ils<br />
répondent à la configuration minimale<br />
requise ci-dessus.<br />
Ce logiciel n’est pas pris en charge par les<br />
environnements suivants :<br />
– systèmes d’exploitation ou ordinateurs<br />
assemblés par un particulier;<br />
– environnement constituant une version<br />
mise à jour d’un système d’exploitation<br />
initial installé par le fabricant;<br />
– environnement à double amorçage;<br />
– environnement à plusieurs moniteurs;<br />
– Macintosh.<br />
La conception et les spécifications sont<br />
sujettes à modifications sans préavis.<br />
Symptôme<br />
Cause/Remède<br />
Le lecteur ne parvient<br />
pas à recharger la<br />
batterie.<br />
Le lecteur n’est pas raccordé correctement à un port USB de votre<br />
ordinateur.<br />
Débranchez le lecteur, puis rebranchez-le.<br />
La batterie est rechargée dans un endroit où la température ambiante est<br />
inférieure à 5 °C ou supérieure à 35 °C.<br />
Rechargez la batterie dans un endroit où la température ambiante est<br />
comprise entre 5 °C et 35 °C.<br />
Votre ordinateur n’est pas allumé.<br />
Mettez-le sous tension.<br />
Votre ordinateur passe en mode de veille ou de veille prolongée.<br />
Désactivez le mode de veille ou de veille prolongée de l’ordinateur.<br />
Le message<br />
« USB CONNECTE »<br />
ne s’affiche pas lors du<br />
raccordement du<br />
lecteur à l’ordinateur.<br />
Le connecteur USB du lecteur n’est pas raccordé correctement à un port<br />
USB de votre ordinateur.<br />
Débranchez le lecteur, puis rebranchez-le.<br />
Un concentrateur USB est utilisé.<br />
Raccordez le lecteur directement à un port USB, car la connexion via<br />
un concentrateur USB risque de ne pas fonctionner. Vous pouvez<br />
néanmoins utiliser un concentrateur USB pour fournir<br />
l’alimentation.<br />
Une autre application est exécutée sur votre ordinateur.<br />
Débranchez le lecteur, patientez quelques minutes, puis rebranchezle.<br />
Si le problème <strong>per</strong>siste, débranchez le lecteur, redémarrez votre<br />
ordinateur, puis rebranchez le lecteur.<br />
Le port USB de votre ordinateur est peut-être défectueux. Raccordez le<br />
connecteur USB du lecteur à un autre port USB de votre ordinateur.<br />
Le lecteur devient<br />
instable lorsqu’il est<br />
raccordé à l’ordinateur.<br />
Un concentrateur USB est utilisé.<br />
Raccordez le lecteur directement à un port USB, car la connexion via<br />
un concentrateur USB risque de ne pas fonctionner. Vous pouvez<br />
néanmoins utiliser un concentrateur USB pour fournir<br />
l’alimentation.<br />
Pour réinitialiser (formater) le lecteur<br />
Vous pouvez formater la mémoire flash intégrée du lecteur. Le formatage de la<br />
mémoire supprime définitivement toutes les icônes de raccourci et tous les<br />
fichiers, y compris le Mode d’emploi (fichier PDF) et réinitialise tous les réglages<br />
à leurs valeurs par défaut. Vérifiez bien les fichiers stockés dans la mémoire<br />
avant de commencer le formatage et exportez préalablement les fichiers<br />
essentiels sur le disque dur de votre ordinateur ou sur un autre périphérique.<br />
1 Maintenez la touche BACK/HOME enfoncée jusqu’à ce que le<br />
menu HOME apparaisse.<br />
2 Sélectionnez (Réglages) – « Initialisation » – « Formatage » –<br />
« OK », dans cet ordre.<br />
Appuyez sur la touche / pour sélectionner une option, puis appuyez<br />
sur la touche pour valider.<br />
Après avoir cliqué sur « OK » et validé, le message « FORMATAGE… »<br />
apparaît pour signaler que le processus de formatage commence. Une fois le<br />
formatage terminé, le message « TERMINE » apparaît.<br />
Remarques<br />
Ne formatez pas la mémoire flash intégrée à l’aide de l’Explorateur Windows.<br />
Si vous formatez la mémoire flash intégrée du lecteur, formatez-la sur le<br />
lecteur.<br />
Si vous formatez accidentellement la mémoire flash intégrée du lecteur,<br />
téléchargez le Mode d’emploi (fichier PDF) sur le site Web indiqué dans la<br />
section « Informations les plus récentes ».<br />
Précautions<br />
Remarque sur le casque d’écoute<br />
Eviter de faire fonctionner l’appareil à un niveau sonore tel qu’il serait préjudiciable à votre<br />
sens de l’ouïe.<br />
A volume élevé, les sons en provenance de l’extérieur peuvent être inaudibles. Eviter<br />
d’écouter avec cet appareil dans des situations où le sens de l’ouïe ne doit pas être altéré,<br />
en voiture ou à bicyclette par exemple.<br />
Comme le casque d’écoute fourni présente une conception aéré, les sons seront audibles de<br />
l’extérieur. On veillera à ne pas déranger ses voisins.<br />
Pour les utilisateurs en France<br />
En cas de remplacement du casque/écouteurs, référez-vous au modèle de casques/écouteurs adaptés à<br />
votre appareil et indiqué ci-dessous.<br />
MDR-E804<br />
A pleine puissance, l’écoute prolongée du baladeur peut endommager l’oreille de<br />
l’utilisateur.<br />
Avis à l’intention des clients : les informations suivantes s’appliquent uniquement aux<br />
appareils vendus dans des pays qui appliquent les directives de l’Union Européenne.<br />
Le fabriquant de ce produit est <strong>Sony</strong> Corporation, 1-7-1 Konan, Minato-ku, Tokyo, Japon. Le<br />
représentant agréé en matière de normes CEM et de sécurité des produits est <strong>Sony</strong> Deutschland<br />
GmbH, Hedelfinger Strasse 61, 70327 Stuttgart, Allemagne. Pour toute demande d’entretien ou de<br />
garantie, veuillez écrire aux adresses spécifiées dans les documents d’entretien ou de garantie séparés.<br />
Programme ©2009 <strong>Sony</strong> Corporation<br />
Documentation ©2009 <strong>Sony</strong> Corporation<br />
Informations les plus récentes<br />
Si vous avez des questions ou si vous rencontrez un problème avec ce produit ou<br />
encore si vous souhaitez obtenir des informations relatives aux appareils compatibles,<br />
consultez les sites Web suivants.<br />
Pour les clients aux Etats-Unis : http://www.sony.com/walkmansupport<br />
Pour les clients au Canada : http://fr.sony.ca/ElectronicsSupport/<br />
Pour les clients en Europe : http://support.sony-europe.com/DNA<br />
Pour clients en Amérique latine : http://www.sony-latin.com/index.crp<br />
Pour les clients d’autres pays/régions : http://www.sony-asia.com/support<br />
Pour les clients qui ont acheté des modèles à l’étranger :<br />
http://www.sony.co.jp/overseas/support/<br />
Raccordement à un ordinateur<br />
Consultez la section « Configuration requise (pour le lecteur) » et les tableaux à propos<br />
du raccordement à un ordinateur.<br />
Configuration requise (pour le lecteur)<br />
Deutsch<br />
Informationen über dieses Handbuch<br />
Kurzanleitung: Erläutert das Einrichten, ermöglicht das Importieren von Titeln auf<br />
einen Computer und das Übertragen auf den Player.<br />
Bedienungshandbuch (PDF-Datei): In diesem Handbuch werden die erweiterten<br />
Funktionen des Players sowie Informationen zur Fehlerbehebung erläutert. Das<br />
Bedienungshandbuch (PDF-Datei) ist im integrierten Flash-Speicher des Players<br />
gespeichert. Informationen zum Anzeigen des Bedienungshandbuchs (PDF-Datei)<br />
finden Sie unter „Mitgelieferte Zubehörteile“.<br />
Mitgelieferte Zubehörteile<br />
Kopfhörer (1)<br />
Kurzanleitung (dieses Buch) (1)<br />
Elemente im integrierten Flash-Speicher des Players<br />
Folgende Elemente sind im integrierten Flash-Speicher des Players im Ordner [Storage<br />
Media] gespeichert.<br />
1. Entfernen Sie die USB-Kappe des Players, und schließen Sie den Player direkt an<br />
einen USB-Anschluss auf dem Computer an.<br />
2. Doppelklicken Sie auf [Arbeitsplatz] oder [Computer] - [WALKMAN] - [Storage<br />
Media]* 1 .<br />
Die folgenden Ordner werden angezeigt.<br />
3. Kopieren Sie alle Daten oder die erforderlichen Daten in den folgenden Ordnern auf<br />
den Computer.<br />
Storage Media O<strong>per</strong>ation Guide* 2<br />
Support<br />
PC_Application_<br />
Software<br />
Die gespeicherten PDF-Dateien des<br />
Bedienungshandbuchs.<br />
Linksymbole zum Support und zur Kundenregistrierung<br />
im Ordner für Land bzw. Region.<br />
Ein Linksymbol zur Website für den Download von<br />
Windows Media Player 11.<br />
* 1 Je nach Computerumgebung variiert die Datenhierarchie möglicherweise.<br />
* 2 Bei den PDF-Dateien mit der Bezeichnung [xxx_<strong>NWZ</strong>B140.pdf] in diesem Ordner handelt es sich<br />
um das Bedienungshandbuch. Anstelle von „xxx“ wird der Name der Sprache angezeigt. Wählen<br />
Sie das Bedienungshandbuch in Ihrer Sprache. Zum Anzeigen des Bedienungshandbuchs<br />
(PDF-Datei) ist Adobe Reader oder Acrobat Reader 5.0 auf dem Computer erforderlich. Adobe<br />
Reader kann kostenlos aus dem Internet heruntergeladen werden.<br />
Tipp<br />
Sichern Sie alle erforderlichen Daten in den drei Ordnern oben auf dem Computer, und löschen Sie<br />
anschließend die Ordner, um den freien Speicherplatz im Ordner [Storage Media] effektiv zu<br />
nutzen. Informationen zum Formatieren des integrierten Flash-Speichers des Players finden Sie<br />
unter „So initialisieren (formatieren) Sie den Player“.<br />
Vor dem Anschließen des Players an den<br />
Computer<br />
Als Betriebssystem muss Windows XP (Service Pack 2 oder höher) bzw. Windows Vista<br />
(Service Pack 1) verwendet werden. Windows Media Player Version 11 muss auf dem<br />
Computer installiert sein.<br />
Laden des Akkus<br />
Der Akku des Players wird während der Verbindung des Players mit einem im Betrieb<br />
befindlichen Computer aufgeladen.<br />
Zweck<br />
Laden<br />
Vollständig geladen<br />
Etwa 70 Minuten<br />
<br />
Hinweis<br />
Wird der Player erstmalig verwendet oder längere Zeit nicht verwendet, bleibt das Display des<br />
Players nach dem Anschließen an einen Computer oder ein anderes Gerät bzw. während des<br />
Ladens möglicherweise etwa 5 Minuten lang leer.<br />
Bleibt das Display des Players länger als 5 Minuten leer, drücken Sie die RESET-Taste, um den<br />
Player zurückzusetzen.<br />
Komponenten und Regler<br />
Kopfhörer<br />
Vorderseite<br />
Rückseite<br />
Taste REC/STOP<br />
Mit dieser Taste wird die Aufzeichnung<br />
gestartet/beendet. Sie können mit dem<br />
integrierten Mikrophon des Players Ton<br />
aufzeichnen. Sie können auch das derzeit<br />
empfangene Radioprogramm (FM)<br />
aufzeichnen (nur <strong>NWZ</strong>B142F/<strong>B143F</strong>).<br />
Taste VOL +/–<br />
Taste ZAP<br />
Mit dieser Taste wird zwischen der<br />
normalen Wiedergabe und der ZAPPIN-<br />
Wiedergabe gewechselt. Bei der ZAPPIN-<br />
Wiedergabe werden Titelausschnitte mit<br />
einer voreingestellten Dauer nacheinander<br />
wiedergegeben.<br />
Taste BASS<br />
Mit dieser Taste wird die Bassfunktion zur<br />
Hervorhebung des tiefen Klangbereichs<br />
aktiviert.<br />
Taste <br />
Die Titelwiedergabe wird gestartet/<br />
unterbrochen. Die Aufzeichnung wird<br />
unterbrochen/fortgeführt.<br />
Taste /<br />
Mit dieser Taste wird zum Anfang eines<br />
Titels gewechselt oder zurück-/vorgespult.<br />
Sie können außerdem die vorherige/<br />
nächste Frequenz oder Speichernummer<br />
auf dem Bildschirm „UKW-Empfang“<br />
auswählen.<br />
(Kopfhörer)-Buchse<br />
Display<br />
Taste BACK/HOME<br />
Weitere Informationen finden Sie unter<br />
„So verwenden Sie den Player“.<br />
Leistungs-Leuchtanzeige<br />
Leuchtende LEDs.<br />
Mikrophon<br />
Zur Aufzeichnung von Ton mit dem<br />
Player.<br />
RESET-Taste<br />
Verwenden Sie einen dünnen spitzen<br />
Gegenstand usw.<br />
Öse für den Riemen<br />
HOLD-Schalter<br />
Mit diesem Schalter werden die<br />
Funktionstasten deaktiviert, um eine<br />
versehentliche Betätigung während des<br />
Tragens des Players zu vermeiden.<br />
USB-Kappe<br />
Entfernen Sie zum Herstellen der<br />
USB-Verbindung die USB-Kappe.<br />
Ein- und Ausschalten des Players<br />
Einschalten Drücken Sie die Taste .<br />
Ausschalten<br />
Halten Sie die Taste gedrückt.<br />
Tipp<br />
Falls die Titelwiedergabe angehalten wurde und eine bestimmte Zeit lang kein Vorgang<br />
ausgeführt wird, schaltet sich der Player automatisch aus.<br />
So verwenden Sie den Player<br />
Das Menü HOME ist der Ausgangspunkt für die jeweilige Anwendung.<br />
Anzeigen des Menüs HOME<br />
Halten Sie die Taste BACK/HOME gedrückt.<br />
Auswählen eines Elements<br />
Drücken Sie zum Auswählen eines Elements die Taste<br />
/, und drücken Sie zum Bestätigen die Taste .<br />
Zurückkehren zum vorherigen<br />
Bildschirm<br />
Drücken Sie die Taste BACK/HOME.<br />
Menü HOME<br />
Music Library<br />
Die Symbole erscheinen im Menü HOME, die Farbe des ausgewählten Symbols wird seitenverkehrt<br />
dargestellt.<br />
Voice<br />
Zur Wiedergabe/zum Löschen von Audiodateien, die mit dem integrierten<br />
Mikrophon des Players aufgezeichnet wurden.<br />
Music Library<br />
Zur Wiedergabe der auf den Player übertragenen Titel.<br />
FM* 1<br />
Zur Wiedergabe von Radiosendungen (UKW-Empfang) oder zur<br />
Wiedergabe/zum Löschen von Radiosendungen (UKW-Empfang), die mit<br />
dem Player aufgezeichnet wurden.<br />
Settings<br />
Dient zum Festlegen von Funktionseinstellungen für Musik, FM* 1 ,<br />
Sprachaufzeichnungen oder den Player.<br />
* 1 nur <strong>NWZ</strong>-B142F/<strong>B143F</strong><br />
Importieren und Übertragen von Musik<br />
Sie können Titel mit Windows Media Player 11 auf dem Computer auf den Player<br />
übertragen.<br />
Falls auf dem Computer kein Windows Media Player 11 vorhanden ist, klicken Sie im<br />
integrierten Flash-Speicher des Players auf ein Linksymbol zur Website für den<br />
Download von Windows Media Player 11.<br />
1 Importieren Sie Titel von CDs usw. in Windows Media Player 11 auf<br />
dem Computer.<br />
Details zum Importieren von Titeln von CDs usw. finden Sie in der Hilfe von<br />
Windows Media Player 11. Titel, die bereits zuvor in Windows Media Player 11<br />
importiert wurden, müssen nicht erneut importiert werden.<br />
1 Klicken Sie auf „Von<br />
Medium kopieren“.<br />
2 Klicken Sie hier, um den<br />
Import zu starten.<br />
2 Schließen Sie den USB-Stecker des Players an den Computer an.<br />
Setzen Sie den USB-Stecker ordnungsgemäß ein.<br />
3 Übertragen Sie Titel von Windows Media Player 11 auf den Player.<br />
Im Display wird während der Übertragung von Titeln auf den Player „DATA<br />
ACCESS“ angezeigt.<br />
1 Wählen Sie<br />
Alben usw.<br />
2 Klicken Sie hier, um Dateien auf<br />
den Player zu übertragen.<br />
Hinweis<br />
Trennen Sie den Player während der Datenübertragung nicht vom Computer. Andernfalls wird die<br />
gerade übertragene Datei beschädigt.<br />
Tipp<br />
Daten können auch <strong>per</strong> Ziehen und Ablegen mit Windows Explorer auf dem Computer auf<br />
den Player übertragen werden.<br />
So löschen Sie auf den Player übertragene Titel<br />
Schließen Sie den Player an den Computer an, und löschen Sie nicht benötigte<br />
Audiodateien mithilfe von Windows Media Player 11 oder Windows Explorer.<br />
Fehlerbehebung<br />
Funktioniert der Player nicht wie gewünscht, führen Sie die folgenden Schritte zur<br />
Fehlerbehebung aus:<br />
1 Suchen Sie im Bedienungshandbuch (PDF-Datei) unter<br />
„Fehlerbehebung“ nach den Symptomen des Problems, und testen Sie<br />
sämtliche aufgeführten Maßnahmen zur Fehlerbehebung.<br />
Informationen zum Herstellen einer Verbindung mit einem Computer finden Sie<br />
unter „Verbindung mit einem Computer“.<br />
2 Schließen Sie zum Aufladen des Akkus den<br />
Player an den Computer an.<br />
Einige Probleme können u. U. durch Aufladen des<br />
Akkus behoben werden.<br />
3 Drücken Sie die RESET-Taste mit einem<br />
dünnen spitzen Gegenstand o. ä.<br />
Wenn die RESET-Taste während des Betriebs des Players gedrückt wird, können gespeicherte<br />
Daten und Einstellungen des Players gelöscht werden.<br />
Drücken Sie nach dem Zurücksetzen des Players die Taste , um den Player einzuschalten.<br />
4 Prüfen Sie die Informationen zu diesem Problem in der Softwarehilfe.<br />
5 Informationen zu diesem Thema erhalten Sie auf einer der<br />
Supportwebsites.<br />
Informationen zu den Supportwebsites finden Sie unter „Aktuelle Informationen“.<br />
6 Sollte sich das Problem durch die oben genannten Maßnahmen nicht<br />
beseitigen lassen, wenden Sie sich an Ihren nächstgelegenen<br />
<strong>Sony</strong>-Fachhändler.<br />
RESET-Taste<br />
RESET-Taste<br />
Siehe Rückseite.
Español<br />
Acerca del manual<br />
Guía de inicio rápido: explica cómo configurar el reproductor de manera que pueda<br />
importar canciones al ordenador y transferirlas al reproductor.<br />
Guía de funcionamiento (archivo PDF): explica las características avanzadas del<br />
reproductor y ofrece información sobre la solución de problemas. La Guía de<br />
funcionamiento (archivo PDF) está contenida en la memoria flash incorporada del<br />
reproductor. Para visualizar la Guía de funcionamiento (archivo PDF), consulte la<br />
sección “Artículos suministrados”.<br />
Artículos suministrados<br />
Auriculares (1)<br />
Guía de inicio rápido (este manual) (1)<br />
Elementos incluidos en la memoria flash incorporada del<br />
reproductor<br />
Los elementos que se indican a continuación está almacenado en la carpeta [Storage<br />
Media] de la memoria flash incorporada del reproductor.<br />
1. Quite la tapa del conector USB y enchufe el reproductor directamente en un puerto<br />
USB del ordenador.<br />
2. Haga doble clic en [Mi PC] o [Equipo] - [WALKMAN] - [Storage Media]* 1 .<br />
Se muestran las carpetas siguientes.<br />
3. Copie todos los datos o los datos necesarios de las carpetas siguientes en el ordenador.<br />
Storage Media O<strong>per</strong>ation Guide* 2<br />
Support<br />
PC_Application_<br />
Software<br />
Archivos PDF de la Guía de<br />
funcionamiento almacenados.<br />
Hay iconos de acceso directo a Asistencia al cliente y<br />
Registro del cliente en las carpetas del país/región.<br />
Hay un icono de acceso directo al sitio de<br />
descarga de Windows Media Player 11.<br />
* 1 La jerarquía de datos puede variar en función del entorno informático que se utilice.<br />
* 2 Los archivos PDF con el nombre [xxx_<strong>NWZ</strong>B140.pdf] que contiene esta carpeta corresponden a la<br />
Guía de funcionamiento. El idioma se indica en el lugar de las “xxx”. Seleccione el manual que se<br />
corresponda a su idioma. Para visualizar la Guía de funcionamiento (archivo PDF), debe tener<br />
instalado Adobe Reader o Acrobat Reader 5.0 en el ordenador. Puede descargar Adobe Reader de<br />
Internet de forma gratuita.<br />
Sugerencia<br />
Para utilizar el espacio libre de la carpeta [Storage Media] con mayor eficiencia, realice una copia<br />
de seguridad de todos los datos necesarios de las tres carpetas anteriores en su ordenador y, a<br />
continuación, elimine las carpetas. Para formatear la memoria flash incorporada en el reproductor,<br />
consulte “Para inicializar (formatear) el reproductor”.<br />
Antes de conectar el reproductor al<br />
ordenador<br />
Asegúrese de que su sistema o<strong>per</strong>ativo sea Windows XP (Service Pack 2 o posterior) o<br />
Windows Vista (Service Pack 1), y que la versión instalada de Windows Media Player sea<br />
la 11.<br />
Carga de la batería<br />
La batería del reproductor se carga mientras éste está conectado a un ordenador en<br />
funcionamiento.<br />
Para<br />
Cargando<br />
Totalmente cargada<br />
Aproximadamente 70 minutos<br />
<br />
Nota<br />
Si está utilizando el reproductor por primera vez, o no lo ha utilizado durante un largo <strong>per</strong>íodo<br />
de tiempo, es posible que la pantalla no se active durante aproximadamente 5 minutos tras<br />
conectarlo a un ordenador u otro dispositivo, o durante el tiempo de carga.<br />
Si la pantalla sigue sin activarse transcurridos más de 5 minutos, pulse el botón de RESET para<br />
reiniciar el reproductor.<br />
Componentes y controles<br />
Auriculares<br />
Parte frontal<br />
Parte posterior<br />
Botón REC/STOP<br />
Permite iniciar o detener la grabación.<br />
Puede grabar sonido mediante el<br />
micrófono incorporado del reproductor.<br />
También puede grabar el programa FM<br />
que esté recibiendo en esos momentos<br />
(sólo para los modelos <strong>NWZ</strong>-B142F/<br />
<strong>B143F</strong>).<br />
Botón VOL +/–<br />
Botón ZAP<br />
Permite cambiar entre la reproducción<br />
normal y la reproducción ZAPPIN. La<br />
reproducción ZAPPIN consiste en<br />
reproducir fragmentos de canciones de<br />
forma secuencial con una duración<br />
preajustada.<br />
Botón BASS<br />
Permite activar la función Bass para<br />
realzar las frecuencias graves.<br />
Botón <br />
Permite iniciar o interrumpir la<br />
reproducción de canciones, así como<br />
interrumpir o reiniciar una grabación.<br />
Botón /<br />
Permite ir al inicio de una canción o<br />
rebobinar/avanzar rápidamente. También<br />
puede seleccionar la frecuencia anterior/<br />
siguiente o preajustar el número en la<br />
pantalla de la radio FM.<br />
Toma (auriculares)<br />
Pantalla<br />
Botón BACK/HOME<br />
Consulte “Cómo utilizar el reproductor”.<br />
Iluminador de alimentación<br />
Iluminación por LED.<br />
Micrófono<br />
Permite grabar sonido a través del<br />
reproductor.<br />
Botón de RESET<br />
Utilice una aguja pequeña o un objeto<br />
similar.<br />
Orificio para la correa<br />
Interruptor HOLD<br />
Permite desactivar los botones y evitar un<br />
funcionamiento accidental al transportar<br />
el reproductor.<br />
Tapa del conector USB<br />
Si utiliza el tipo de conexión USB, quite la<br />
tapa del conector correspondiente.<br />
Encendido y apagado del reproductor<br />
Para encenderlo Pulse el botón .<br />
Para apagarlo Mantenga pulsado el botón .<br />
Sugerencia<br />
Si se interrumpe la reproducción de la canción y no se realiza ninguna o<strong>per</strong>ación durante un<br />
<strong>per</strong>íodo de tiempo concreto, el reproductor se apaga automáticamente.<br />
Cómo utilizar el reproductor<br />
El menú HOME es el punto de partida de cada aplicación.<br />
Para mostrar el menú HOME<br />
Mantenga pulsado el botón BACK/HOME.<br />
Para seleccionar un elemento<br />
Pulse el botón / para seleccionar un elemento y, a<br />
continuación, pulse el botón para confirmar la selección.<br />
Para volver a la pantalla anterior<br />
Pulse el botón BACK/HOME.<br />
Menú HOME<br />
Los iconos aparecen en el menú HOME y el color del icono seleccionado se invierte.<br />
Voz<br />
Permite reproducir/eliminar archivos de sonido grabados con el micrófono<br />
incorporado en el reproductor.<br />
Biblioteca<br />
Música<br />
Permite reproducir las canciones transferidas al reproductor.<br />
FM* 1<br />
Permite reproducir radio FM, o reproducir/eliminar programas de radio<br />
FM grabados con el reproductor.<br />
Ajustes<br />
Permite configurar los ajustes de la música, la radio FM* 1 , la grabación de<br />
voz o el reproductor.<br />
* 1 Sólo para los modelos <strong>NWZ</strong>-B142F/<strong>B143F</strong><br />
Importación y transferencia de música<br />
Puede transferir canciones al reproductor mediante Windows Media Player 11 desde el<br />
ordenador.<br />
Si no dispone de Windows Media Player 11 en su ordenador, haga clic en el icono de<br />
acceso directo al sitio de descarga de Windows Media Player 11 en la memoria flash<br />
incorporada del reproductor.<br />
1 Importe canciones desde CD u otros dispositivos a Windows Media<br />
Player 11 en el ordenador.<br />
Para obtener más información acerca de cómo importar canciones desde CD u<br />
otros dispositivos, consulte la Ayuda de Windows Media Player 11. No necesita<br />
volver a importar las canciones que ya haya importado a Windows Media Player<br />
11 anteriormente.<br />
1 Haga clic en “Copiar”.<br />
2 Haga clic aquí para<br />
iniciar la importación.<br />
2 Conecte el conector USB del reproductor al ordenador.<br />
Inserte el conector USB por completo.<br />
3 Transfiera canciones de Windows Media Player 11 al reproductor.<br />
“ACCESO DATOS” aparece en la pantalla durante la transferencia de canciones al<br />
reproductor.<br />
1 Seleccione los<br />
álbumes, etc.<br />
2 Haga clic aquí para<br />
transferirlos al reproductor.<br />
Nota<br />
No desconecte el reproductor durante la transferencia de archivos. De lo contrario, podría dañarse<br />
el archivo que se esté transfiriendo.<br />
Sugerencia<br />
También puede transferir datos al reproductor arrastrándolos y colocándolos en DELETE<br />
Explorador de Windows en el ordenador.<br />
Para eliminar canciones transferidas al reproductor<br />
Conecte el reproductor al ordenador y elimine los archivos de audio que no desee<br />
mediante Windows Media Player 11 o Explorador de Windows.<br />
Solución de problemas<br />
Si el reproductor no funciona correctamente, siga estos pasos para resolver el problema.<br />
1 Busque los síntomas del problema en la sección “Solución de<br />
problemas” de la Guía de funcionamiento (archivo PDF), e intente<br />
llevar a cabo las medidas correctivas que se indican.<br />
Para obtener información acerca de la conexión con un ordenador, consulte la<br />
sección “Conexión a un ordenador”.<br />
2 Conecte el reproductor al ordenador para<br />
cargar la batería.<br />
Es posible que algunos de los problemas se<br />
solucionen al cargar la batería.<br />
3 Pulse el botón de RESET con una aguja<br />
pequeña o un objeto similar.<br />
Si pulsa el botón de RESET cuando el reproductor está en funcionamiento, es posible que se<br />
eliminen los datos y los ajustes almacenados en el reproductor.<br />
Tras restablecer el reproductor, pulse el botón para encender el reproductor.<br />
4 Compruebe la información relativa a este problema en la sección de<br />
Ayuda del software.<br />
5 Busque información sobre el problema en uno de los sitios Web de<br />
asistencia al cliente.<br />
Para obtener información acerca del sitio Web de asistencia al cliente, consulte la<br />
sección “Información más reciente”.<br />
6 Si las indicaciones anteriores no logran resolver el problema, consulte<br />
con su distribuidor <strong>Sony</strong> más cercano.<br />
Botón de RESET<br />
Botón de RESET<br />
Ordenador<br />
IBM PC/AT u otro ordenador compatible<br />
que tenga preinstalado uno de los siguientes<br />
sistemas o<strong>per</strong>ativos de Windows* 1 :<br />
Windows XP Home Edition (Service Pack 2<br />
o posterior) / Windows XP Professional<br />
(Service Pack 2 o posterior)* 2 / Windows<br />
Vista Home Basic (Service Pack 1) /<br />
Windows Vista Home Premium (Service<br />
Pack 1) / Windows Vista Business (Service<br />
Pack 1) / Windows Vista Ultimate (Service<br />
Pack 1)<br />
No compatible con sistemas o<strong>per</strong>ativos<br />
distintos de los indicados anteriormente.<br />
* 1 Excluidas las versiones de sistema o<strong>per</strong>ativo<br />
no compatibles con Microsoft.<br />
* 2 Excluida la versión de 64 bits del sistema<br />
o<strong>per</strong>ativo.<br />
CPU: 300 MHz o más (para Windows<br />
Vista, 800 MHz o más)<br />
RAM: 128 MB o más (para Windows Vista,<br />
512 MB o más)<br />
Conector USB (se recomienda USB de alta<br />
velocidad)<br />
Es necesario disponer de Internet Explorer<br />
6.0 o posterior, así como Windows Media<br />
Player 11.<br />
Asimismo, se necesita una conexión de<br />
banda ancha a Internet para utilizar<br />
Electronic Music Distribution (EMD) o<br />
para visitar el sitio Web.<br />
No se garantiza el funcionamiento con todos<br />
los ordenadores aunque cumplan los<br />
requisitos del sistema mencionados<br />
anteriormente.<br />
No es compatible con los siguientes entornos:<br />
– Ordenadores o sistemas o<strong>per</strong>ativos de<br />
creación propia<br />
– Entornos que sean actualizaciones de los<br />
sistemas o<strong>per</strong>ativos originales instalados<br />
por el fabricante<br />
– Entornos de arranque múltiple<br />
– Entornos con varios monitores<br />
– Macintosh<br />
El diseño y las especificaciones están sujetos a<br />
cambios sin previo aviso.<br />
Problema<br />
Causa/solución<br />
El reproductor no<br />
puede cargar la batería.<br />
El reproductor no está conectado correctamente al conector USB del<br />
ordenador.<br />
Desconecte el reproductor y vuelva a conectarlo.<br />
La batería se ha cargado a una tem<strong>per</strong>atura ambiente fuera del intervalo<br />
de 5 °C a 35 °C.<br />
Cargue la batería a una tem<strong>per</strong>atura ambiente comprendida entre<br />
5 °C y 35 °C.<br />
El ordenador no está encendido.<br />
Encienda el ordenador.<br />
El ordenador entra en modo de reposo o hibernación.<br />
Abandone el modo de reposo o hibernación.<br />
No aparece “USB<br />
CONECTADO” al<br />
conectar el reproductor<br />
al ordenador.<br />
El conector USB del reproductor no está conectado correctamente a un<br />
puerto USB del ordenador.<br />
Desconecte el reproductor y vuelva a conectarlo.<br />
Se está utilizando un concentrador USB.<br />
Conecte el reproductor directamente a un puerto USB, ya que es<br />
posible que la conexión mediante un concentrador USB no funcione.<br />
Sin embargo, se puede utilizar un concentrador USB que proporcione<br />
alimentación.<br />
Se está ejecutando otra aplicación en el ordenador.<br />
Desconecte el reproductor, es<strong>per</strong>e unos minutos y vuelva a<br />
conectarlo. Si el problema continúa, desconecte el reproductor,<br />
reinicie el ordenador y vuelva a conectar el reproductor.<br />
Es posible que el puerto USB del ordenador tenga un problema.<br />
Conecte el conector USB del reproductor en otro puerto USB del<br />
ordenador.<br />
El reproductor se<br />
vuelve inestable si está<br />
conectado al<br />
ordenador.<br />
Se está utilizando un concentrador USB.<br />
Conecte el reproductor directamente a un puerto USB, ya que es<br />
posible que la conexión mediante un concentrador USB no funcione.<br />
Sin embargo, se puede utilizar un concentrador USB que proporcione<br />
alimentación.<br />
Para inicializar (formatear) el reproductor<br />
Puede formatear la memoria flash incorporada del reproductor. Si se formatea<br />
la memoria, se borrarán todos los iconos de acceso directo y archivos, incluida<br />
la Guía de funcionamiento (archivo PDF) y se restablecerán todos los ajustes<br />
predeterminados. Asegúrese de comprobar de antemano los archivos<br />
almacenados en la memoria antes de formatearla y exporte los archivos que<br />
sean necesarios al disco duro del ordenador o a otro dispositivo.<br />
1 Mantenga pulsado el botón BACK/HOME hasta que aparezca el<br />
menú HOME.<br />
2 Seleccione (Ajustes) – “Inicializar” – “Formatear” – “Aceptar”,<br />
en este orden.<br />
Pulse el botón / para seleccionar un elemento y, a continuación,<br />
pulse el botón para confirmar la selección.<br />
Una vez que haya seleccionado “Aceptar” y confirmado la selección,<br />
aparecerá “FORMATEANDO…” y se iniciará el proceso de formateo. Una<br />
vez finalizado el formateo, se mostrará “COMPLETADO”.<br />
Notas<br />
No formatee la memoria flash incorporada con Explorador de Windows. Si<br />
formatea la memoria flash incorporada, hágalo en el reproductor.<br />
Si formatea la memoria flash incorporada en el reproductor de forma<br />
accidental, descargue la Guía de funcionamiento (archivo PDF) del sitio Web<br />
que aparece en “Información más reciente”.<br />
Precauciones<br />
Acerca de los auriculares<br />
Evite escuchar la unidad a muy altos niveles ya que la escucha prolongada afectaría su oído.<br />
A altos niveles, el sonido exterior puede llegar a ser inaudible. Evite escuchar la unidad<br />
en situaciones en las que no deba <strong>per</strong>der la audición, por ejemplo, conduciendo un<br />
automóvil o en bicicleta.<br />
Como los auriculares suministrados son de construcción abierta, el sonido sale fuera. Tenga<br />
presente no molestar a las <strong>per</strong>sonas que estén cerca de usted.<br />
Aviso para los clientes: la información siguiente resulta de aplicación solo a<br />
los equipos comercializados en países afectados por las directivas de la UE.<br />
El fabricante de este producto es <strong>Sony</strong> Corporation, 1-7-1 Konan, Minato-ku, Tokio, Japón. El<br />
representante autorizado para EMC y la seguridad de productos es <strong>Sony</strong> Deutschland GmbH,<br />
Hedelfinger Strasse 61, 70327 Stuttgart, Alemania. Para cualquier servicio o tema relacionado con la<br />
garantía, utilice la dirección que encontrará en los documentos adjuntos de servicio o de garantía.<br />
Programa ©2009 <strong>Sony</strong> Corporation<br />
Documentación ©2009 <strong>Sony</strong> Corporation<br />
Información más reciente<br />
Si tiene alguna pregunta o problema relativos a este producto, o bien desea obtener<br />
información acerca de los artículos compatibles con él, visite los siguientes sitios Web.<br />
Para clientes de EE. UU.: http://www.sony.com/walkmansupport<br />
Para clientes de Canadá: http://www.sony.ca/ElectronicsSupport/<br />
Para clientes de Europa: http://support.sony-europe.com/DNA<br />
Para clientes de Latinoamérica: http://www.sony-latin.com/index.crp<br />
Para clientes de otros países/regiones: http://www.sony-asia.com/support<br />
Para clientes que adquirieron modelos japoneses en el extranjero:<br />
http://www.sony.co.jp/overseas/support/<br />
Conexión a un ordenador<br />
Para obtener información acerca de la conexión al ordenador, consulte la sección<br />
“Requisitos del sistema (para el reproductor)” y las tablas que se muestran a<br />
continuación.<br />
Requisitos del sistema (para el reproductor)<br />
Computer<br />
IBM PC/AT oder kompatibler Computer, auf<br />
dem eines der folgenden Windows-<br />
Betriebssysteme* 1 vorinstalliert ist:<br />
Windows XP Home Edition (Service Pack 2<br />
oder höher) / Windows XP Professional<br />
(Service Pack 2 oder höher)* 2 / Windows<br />
Vista Home Basic (Service Pack 1) / Windows<br />
Vista Home Premium (Service Pack 1) /<br />
Windows Vista Business (Service Pack 1) /<br />
Windows Vista Ultimate (Service Pack 1)<br />
Wird von keinen anderen Betriebssystemen<br />
als den oben genannten unterstützt.<br />
* 1 Außer den Betriebssystemversionen, die<br />
nicht von Microsoft unterstützt werden.<br />
* 2 Außer 64-Bit-Version des Betriebssystems.<br />
CPU: mindestens 300 MHz (Für Windows<br />
Vista: mindestens 800 MHz)<br />
RAM: mind. 128 MB (für Windows Vista<br />
mind. 512 MB)<br />
USB-Anschluss (Hi-Speed-USB wird<br />
empfohlen)<br />
Internet Explorer 6.0 oder höher und<br />
Windows Media Player 11 müssen installiert<br />
sein.<br />
Zur Verwendung von Electronic Music<br />
Distribution (EMD) oder zum Aufrufen der<br />
Website ist eine Breitband-Internetverbindung<br />
erforderlich.<br />
Auch bei Einhaltung der obigen<br />
Systemanforderungen kann der einwandfreie<br />
Betrieb nicht für jeden Computer garantiert<br />
werden.<br />
Nicht unterstützt von folgenden Umgebungen:<br />
– Individuell zusammengestellte Computer<br />
oder selbst programmierte Betriebssysteme<br />
– Eine Umgebung, die ein Upgrade des<br />
ursprünglich vom Hersteller bereitgestellten<br />
Betriebssystems darstellt<br />
– Multi-Boot-Umgebung<br />
– Multi-Monitor-Umgebung<br />
– Macintosh<br />
Änderungen, die dem technischen Fortschritt<br />
dienen, bleiben vorbehalten.<br />
Symptom<br />
Ursache/Abhilfemaßnahme<br />
Der Akku des Players<br />
kann nicht geladen<br />
werden.<br />
Der Player ist nicht ordnungsgemäß an den USB-Anschluss des<br />
Computers angeschlossen.<br />
Trennen Sie die Verbindung zum Player, und schließen Sie ihn<br />
erneut an.<br />
Der Akku wurde nicht bei einer Umgebungstem<strong>per</strong>atur von 5 °C bis<br />
35 °C geladen.<br />
Laden Sie den Akku bei einer Umgebungstem<strong>per</strong>atur zwischen 5 °C<br />
und 35 °C.<br />
Der Computer ist nicht eingeschaltet.<br />
Schalten Sie den Computer ein.<br />
Der Computer wechselt in den Schlaf- oder Ruhemodus.<br />
Reaktivieren Sie den Computer.<br />
„CONNECTED USB“<br />
wird nicht angezeigt,<br />
wenn der Player am<br />
Computer<br />
angeschlossen ist.<br />
Der USB-Anschluss am Player ist nicht ordnungsgemäß mit dem USB-<br />
Anschluss am Computer verbunden.<br />
Trennen Sie die Verbindung zum Player, und schließen Sie ihn<br />
erneut an.<br />
Sie verwenden einen USB-Hub.<br />
Schließen Sie den Player direkt an einen USB-Anschluss an, da der<br />
Anschluss über einen USB-Hub möglicherweise nicht funktioniert.<br />
Sie können jedoch einen USB-Hub zur Stromversorgung verwenden.<br />
Eine andere Anwendung wird auf dem Computer ausgeführt.<br />
Trennen Sie die Verbindung zum Player, warten Sie einige Minuten,<br />
und schließen Sie ihn erneut an. Wenn das Problem damit nicht<br />
behoben ist, trennen Sie die Verbindung zum Player, starten Sie den<br />
Computer neu, und schließen Sie den Player erneut an.<br />
Möglicherweise liegt ein Problem mit dem USB-Anschluss des<br />
Computers vor. Schließen Sie den USB-Stecker des Players an einen<br />
anderen USB-Anschluss des Computers an.<br />
Der Player wird<br />
während der<br />
Verbindung mit dem<br />
Computer instabil.<br />
Sie verwenden einen USB-Hub.<br />
Schließen Sie den Player direkt an einen USB-Anschluss an, da der<br />
Anschluss über einen USB-Hub möglicherweise nicht funktioniert.<br />
Sie können jedoch einen USB-Hub zur Stromversorgung verwenden.<br />
So initialisieren (formatieren) Sie den Player<br />
Sie können den integrierten Flash-Speicher des Players formatieren. Beim<br />
Formatieren des Speichers werden alle Linksymbole und Dateien einschließlich<br />
des Bedienungshandbuchs (PDF-Datei) gelöscht und die Einstellungen auf die<br />
Standardwerte zurückgesetzt. Überprüfen Sie die Dateien im Speicher vor dem<br />
Formatieren, und exportieren Sie alle benötigten Dateien auf die Festplatte des<br />
Computers oder auf ein anderes Gerät.<br />
1 Halten Sie die Taste BACK/HOME so lange gedrückt, bis das Menü<br />
HOME angezeigt wird.<br />
2 Wählen Sie (Settings) – „Initialize“ – „Format“ – „OK“ in dieser<br />
Reihenfolge.<br />
Drücken Sie zum Auswählen des Elements die Taste /, und drücken<br />
Sie zum Bestätigen die Taste .<br />
Nach dem Auswählen von „OK“ und dem anschließenden Bestätigen wird<br />
„FORMATTING...“ angezeigt, und die Formatierung beginnt. Wenn das<br />
Formatieren abgeschlossen ist, wird „COMPLETE“ angezeigt.<br />
Hinweise<br />
Formatieren Sie den integrierten Flash-Speicher nicht mit Windows Explorer.<br />
Soll der integrierte Flash-Speicher formatiert werden, formatieren Sie ihn<br />
mithilfe des Players.<br />
Falls Sie den integrierten Flash-Speicher des Players versehentlich<br />
formatieren, laden Sie das Bedienungshandbuch (PDF-Datei) von der unter<br />
„Aktuelle Informationen“ angegebenen Website herunter.<br />
Vorsichtsmaßnahmen<br />
Bitte vor Inbetriebnahme beachten<br />
Betreiben Sie das Gerät nicht längere Zeit mit extrem hoher Lautstärke, da dies lhre<br />
Hörfähigkeit verschlechtert.<br />
Bei hoher Lautstärke können Sie möglicherweise Umweltgeräusche nicht mehr<br />
wahrnehmen. Verwenden Sie das Gerät deshalb nicht in Situationen, in denen gutes<br />
Hören unerlässlich ist, wie z.B. beim Auto- oder Radfahren.<br />
Da es sich bei lhrem Kopfhörer um einen offenen Typ handelt, wird der Schall auch nach<br />
außen abgestrahlt. Bedenken Sie, dass dadurch Leute in lhrer Nähe gestört werden könnten.<br />
Hinweis für Kunden: Die folgenden Informationen gelten nur für Geräte, die in<br />
Ländern verkauft werden, in denen EU-Richtlinien gelten<br />
Der Hersteller dieses Produkts ist <strong>Sony</strong> Corporation, 1-7-1 Konan, Minato-ku, Tokio, Japan.<br />
Autorisierter Vertreter für EMV und Produktsicherheit ist <strong>Sony</strong> Deutschland GmbH, Hedelfinger<br />
Straße 61,70327 Stuttgart, Deutschland. Kontaktadressen für Kundendienst oder Garantieansprüche<br />
finden Sie in den separaten Kundendienst-oder Garantiedokumenten.<br />
Programm ©2009 <strong>Sony</strong> Corporation<br />
Dokumentation ©2009 <strong>Sony</strong> Corporation<br />
Aktuelle Informationen<br />
Bei Fragen zu oder Problemen mit diesem Produkt oder wenn Sie Informationen zu<br />
Objekten benötigen, die zu diesem Produkt kompatibel sind, besuchen Sie folgende<br />
Websites.<br />
Für Kunden in den USA: http://www.sony.com/walkmansupport<br />
Für Kunden in Kanada: http://www.sony.ca/ElectronicsSupport/<br />
Für Kunden in Europa: http://support.sony-europe.com/DNA<br />
Für Kunden in Lateinamerika: http://www.sony-latin.com/index.crp<br />
Für Kunden in anderen Ländern/Regionen: http://www.sony-asia.com/support<br />
Für Kunden, die Überseemodelle gekauft haben:<br />
http://www.sony.co.jp/overseas/support/<br />
Verbindung mit einem Computer<br />
Informationen zum Herstellen einer Verbindung mit einem Computer finden Sie in den<br />
folgenden „Systemanforderungen (für den Player)“ und Tabellen.<br />
Systemanforderungen (für den Player)<br />
Italiano<br />
Si dichiara che l’apparecchio è stato fabbricato in conformità all’art.2, Comma 1 del D.<br />
M.28.08.1995 No.548.<br />
Informazioni sul manuale<br />
Guida rapida: spiega le procedure di impostazione che consentono di importare i brani<br />
in un computer e di trasferirli nel lettore.<br />
<strong>Istruzioni</strong> <strong>per</strong> <strong>l'uso</strong> (file PDF): spiegano le funzioni avanzate del lettore e contengono<br />
informazioni <strong>per</strong> la risoluzione di eventuali problemi. Le <strong>Istruzioni</strong> <strong>per</strong> l’uso (file PDF)<br />
sono memorizzate nella memoria flash incorporata del lettore. Per visualizzare le<br />
<strong>Istruzioni</strong> <strong>per</strong> <strong>l'uso</strong> (file PDF), vedere “Accessori in dotazione”.<br />
Accessori in dotazione<br />
Cuffie (1)<br />
Guida rapida (il presente manuale) (1)<br />
Elementi inclusi nella memoria flash incorporata del lettore<br />
Di seguito sono riportati gli elementi memorizzati nella cartella [Storage Media] della<br />
memoria flash incorporata del lettore.<br />
1. Rimuovere il cappuccio USB del lettore e collegare il lettore direttamente a un<br />
connettore USB sul computer.<br />
2. Fare doppio clic su [Risorse del computer] o [Computer]- [WALKMAN] - [Storage<br />
Media]* 1 .<br />
Vengono visualizzate le seguenti cartelle.<br />
3. Copiare tutti i dati o i dati necessari nelle seguenti cartelle sul computer.<br />
Storage Media O<strong>per</strong>ation Guide* 2<br />
Support<br />
PC_Application_<br />
Software<br />
I file PDF delle <strong>Istruzioni</strong> <strong>per</strong> l’uso<br />
memorizzati.<br />
Contiene le icone di collegamento a<br />
Customer Support e Customer Registration<br />
nelle cartelle country/region.<br />
Contiene l’icona del collegamento al sito di<br />
download di Windows Media Player 11.<br />
* 1 La gerarchia dei dati potrebbe non corrispondere, a seconda dell’ambiente del computer in uso.<br />
* 2 I file PDF con nome [xxx_<strong>NWZ</strong>B140.pdf] contenuti in questa cartella corrispondono alle<br />
<strong>Istruzioni</strong> <strong>per</strong> l’uso. Il nome della lingua viene visualizzato al posto di “xxx”. Selezionare il manuale<br />
relativo alla lingua desiderata. Per visualizzare le <strong>Istruzioni</strong> <strong>per</strong> <strong>l'uso</strong> (file PDF), è necessario che sul<br />
computer sia installato Adobe Reader o Acrobat Reader 5.0. È possibile scaricare gratuitamente<br />
Adobe Reader da Internet.<br />
Suggerimento<br />
Per utilizzare lo spazio libero disponibile nella cartella [Storage Media] in modo più efficace,<br />
eseguire il backup di tutti i dati necessari contenuti nelle tre cartelle elencate sopra sul computer,<br />
quindi eliminare le cartelle stesse. Per formattare la memoria flash incorporata del lettore, vedere la<br />
sezione “Per inizializzare (formattare) il lettore”.<br />
Prima di collegare il lettore al computer<br />
Accertarsi che il sistema o<strong>per</strong>ativo in uso sia Windows XP (Service Pack 2 o successivo)<br />
o Windows Vista (Service Pack 1) e che sul computer sia installato Windows Media<br />
Player versione 11.<br />
Carica della batteria<br />
La batteria del lettore si ricarica mentre quest'ultimo è collegato a un computer acceso.<br />
A<br />
Carica in corso<br />
Carica completata<br />
Circa 70 minuti<br />
<br />
Nota<br />
Se il lettore viene utilizzato <strong>per</strong> la prima volta o se viene lasciato inutilizzato <strong>per</strong> un <strong>per</strong>iodo<br />
prolungato di tempo, il relativo display rimane vuoto <strong>per</strong> circa 5 minuti dopo il collegamento a<br />
un computer o a un altro dispositivo oppure durante la carica.<br />
Se il display del lettore rimane vuoto <strong>per</strong> più di 5 minuti, premere il tasto RESET <strong>per</strong> ripristinare il<br />
lettore.<br />
Parti e comandi<br />
Cuffie<br />
Parte anteriore<br />
Parte posteriore<br />
Tasto REC/STOP<br />
Consente di avviare/arrestare la<br />
registrazione. È possibile registrare l'audio<br />
utilizzando il microfono incorporato del<br />
lettore. È inoltre possibile registrare il<br />
programma FM in corso di ricezione<br />
(solo <strong>NWZ</strong>-B142F/<strong>B143F</strong>).<br />
Tasto VOL +/–<br />
Tasto ZAP<br />
Consente di passare dal modo di<br />
riproduzione normale alla riproduzione<br />
ZAPPIN e viceversa. La funzione ZAPPIN<br />
consente di riprodurre in sequenza<br />
porzioni di brani con una durata<br />
preselezionata.<br />
Tasto BASS<br />
Consente di attivare la funzione Bass <strong>per</strong><br />
enfatizzare la gamma dei suoni bassi.<br />
Tasto <br />
Consente di avviare/mettere in pausa la<br />
riproduzione del brano o di mettere in<br />
pausa/riavviare la registrazione.<br />
Tasto /<br />
Consente di individuare il punto iniziale di<br />
un brano oppure di riprodurre<br />
rapidamente all’indietro/in avanti. È<br />
inoltre possibile selezionare la frequenza o<br />
il numero di preselezione precedente/<br />
successivo nella schermata della radio FM.<br />
Presa (cuffie)<br />
Display<br />
Tasto BACK/HOME<br />
Vedere la sezione “Come utilizzare il<br />
lettore”.<br />
Illuminazione<br />
Illuminazione tramite LED.<br />
Microfono<br />
Per la registrazione dell'audio mediante il<br />
lettore.<br />
Tasto di RESET<br />
Utilizzare un oggetto appuntito e così via.<br />
Foro <strong>per</strong> la cinghia<br />
Interruttore HOLD<br />
Consente di disattivare i tasti o<strong>per</strong>ativi <strong>per</strong><br />
impedirne la pressione accidentale durante<br />
il trasporto del lettore.<br />
Cappuccio USB<br />
Rimuovere il cappuccio USB <strong>per</strong> effettuare<br />
il collegamento tramite USB.<br />
Accensione e spegnimento del lettore<br />
Per accendere il lettore Premere il tasto .<br />
Per spegnere il lettore Tenere premuto il tasto .<br />
Suggerimento<br />
Se la riproduzione del brano viene impostata sul modo di pausa e se non viene eseguita<br />
alcuna o<strong>per</strong>azione <strong>per</strong> un certo <strong>per</strong>iodo di tempo, il lettore si spegne automaticamente.<br />
Come utilizzare il lettore<br />
Il menu HOME è il punto di partenza di qualsiasi applicazione.<br />
Per visualizzare il menu HOME<br />
Tenere premuto il tasto BACK/HOME.<br />
Per selezionare una voce<br />
Premere il tasto / <strong>per</strong> selezionare una voce, quindi<br />
premere il tasto <strong>per</strong> confermare.<br />
Per tornare alla schermata<br />
precedente<br />
Premere il tasto BACK/HOME.<br />
Menu HOME<br />
Music Library<br />
Le icone vengono visualizzate nel menu HOME e il colore dell’icona selezionata viene invertito.<br />
Voice<br />
Consente di riprodurre/eliminare i file audio registrati utilizzando il<br />
microfono incorporato del lettore.<br />
Music Library<br />
Consente di riprodurre i brani trasferiti sul lettore.<br />
FM* 1<br />
Consente di riprodurre la radio FM o di riprodurre/eliminare i programmi<br />
della radio FM registrati con il lettore.<br />
Settings<br />
Consente di effettuare le impostazioni relative ai brani musicali, alla radio<br />
FM* 1 , alla registrazione vocale o al lettore.<br />
* 1 Solo <strong>NWZ</strong>-B142F/<strong>B143F</strong><br />
Importazione e trasferimento di file audio<br />
È possibile trasferire brani nel lettore utilizzando Windows Media Player 11 installato sul<br />
computer.<br />
Se sul computer in uso non è installato Windows Media Player 11, fare clic sull'icona di<br />
un collegamento al sito di download di Windows Media Player 11 nella memoria flash<br />
incorporata del lettore.<br />
1 Importare brani da CD e così via in Windows Media Player 11 sul<br />
computer.<br />
Per ulteriori informazioni sull'importazione di brani da CD e così via, consultare la<br />
Guida di Windows Media Player 11. Non è necessario importare di nuovo i brani<br />
precedentemente importati in Windows Media Player 11.<br />
1 Fare clic su “Copia da CD”.<br />
2 Fare clic qui <strong>per</strong> avviare<br />
l'importazione.<br />
2 Collegare il connettore USB del lettore al computer.<br />
Inserire il connettore USB a fondo.<br />
3 Trasferire i brani da Windows Media Player 11 al lettore.<br />
Durante il trasferimento di brani nel lettore, sul display viene visualizzato il<br />
messaggio “DATA ACCESS”.<br />
1 Selezionare gli album e così via.<br />
2 Fare clic qui <strong>per</strong> effettuare il<br />
trasferimento nel lettore.<br />
Nota<br />
Non scollegare il lettore mentre è in corso il trasferimento di file. Diversamente, il file in fase di<br />
trasferimento verrà danneggiato.<br />
Suggerimento<br />
È possibile inoltre trasferire i dati sul lettore mediante la funzione di trascinamento della<br />
selezione utilizzando Esplora risorse di Windows sul computer.<br />
Per eliminare i brani trasferiti nel lettore<br />
Collegare il lettore al computer, quindi eliminare i file audio non necessari utilizzando<br />
Windows Media Player 11 o Esplora risorse di Windows.<br />
Guida alla soluzione dei problemi<br />
Se il lettore non funziona in modo corretto, provare a eseguire le o<strong>per</strong>azioni riportate di<br />
seguito <strong>per</strong> risolvere eventuali problemi.<br />
1 Confrontare i sintomi con quanto riportato nella sezione “Guida alla<br />
soluzione dei problemi” delle <strong>Istruzioni</strong> <strong>per</strong> <strong>l'uso</strong> (file PDF) e provare le<br />
azioni correttive elencate.<br />
Per ulteriori informazioni sul collegamento a un computer, consultare la sezione<br />
“Collegamento a un computer” riportata di seguito.<br />
2 Collegare il lettore al computer <strong>per</strong> caricare la<br />
batteria.<br />
Alcuni problemi possono essere risolti caricando la<br />
batteria.<br />
3 Premere il tasto di RESET con un oggetto<br />
appuntito e così via.<br />
Se il tasto di RESET viene premuto durante l’uso del lettore, i file e le impostazioni memorizzati<br />
nel lettore potrebbero venire cancellati.<br />
Dopo aver ripristinato il lettore, premere il tasto <strong>per</strong> accenderlo.<br />
4 Controllare le informazioni sul problema nella Guida del software.<br />
5 Consultare le informazioni desiderate sull’eventuale problema<br />
visitando i siti Web di assistenza clienti.<br />
Per ulteriori informazioni sui siti Web di assistenza clienti, consultare la sezione<br />
“Per informazioni aggiornate”.<br />
6 Se le o<strong>per</strong>azioni correttive descritte non risolvono il problema,<br />
rivolgersi al più vicino rivenditore <strong>Sony</strong>.<br />
Tasto di RESET<br />
Tasto di RESET<br />
Computer<br />
IBM PC/AT o computer compatibile con i<br />
seguenti sistemi o<strong>per</strong>ativi Windows<br />
preinstallati* 1 :<br />
Windows XP Home Edition (Service Pack 2 o<br />
successivo) / Windows XP Professional<br />
(Service Pack 2 o successivo)* 2 / Windows<br />
Vista Home Basic (Service Pack 1) / Windows<br />
Vista Home Premium (Service Pack 1) /<br />
Windows Vista Business (Service Pack 1) /<br />
Windows Vista Ultimate (Service Pack 1)<br />
Non sono supportati sistemi o<strong>per</strong>ativi<br />
diversi da quelli indicati sopra.<br />
* 1 Sono escluse le versioni dei sistemi o<strong>per</strong>ativi<br />
non supportate da Microsoft.<br />
* 2 È esclusa la versione a 64 bit del sistema<br />
o<strong>per</strong>ativo.<br />
CPU: 300 MHz o su<strong>per</strong>iore (<strong>per</strong> Windows<br />
Vista, 800 MHz o su<strong>per</strong>iore)<br />
RAM: 128 MB o su<strong>per</strong>iore (<strong>per</strong> Windows<br />
Vista, 512 MB o su<strong>per</strong>iore)<br />
Connettore USB (USB ad alta velocità<br />
consigliato)<br />
Devono essere installati Internet Explorer<br />
6.0 o successivo e Windows Media Player 11.<br />
Per utilizzare il servizio EMD (Electronic<br />
Music Distribution) o <strong>per</strong> visitare il sito<br />
Web, è necessaria la connessione Internet a<br />
banda larga.<br />
Non è possibile garantire il funzionamento<br />
<strong>per</strong> tutti i computer che rispondono ai<br />
requisiti di sistema di cui sopra.<br />
Non sono supportati i seguenti ambienti:<br />
– Computer o sistemi o<strong>per</strong>ativi assemblati<br />
dall’utente<br />
– Aggiornamenti dei sistemi o<strong>per</strong>ativi<br />
originali installati dal produttore<br />
– Ambienti ad avvio multiplo<br />
– Ambienti a più monitor<br />
– Macintosh<br />
Il design e le caratteristiche tecniche sono<br />
soggetti a modifiche senza preavviso.<br />
Sintomo<br />
Causa/Soluzione<br />
Il lettore non è in grado<br />
di caricare la batteria.<br />
Il lettore non è collegato in modo corretto a un connettore USB del<br />
computer.<br />
Scollegare il lettore, quindi ricollegarlo.<br />
La batteria viene caricata a una tem<strong>per</strong>atura ambiente non compresa tra<br />
5 °C e 35 °C.<br />
Caricare la batteria a una tem<strong>per</strong>atura ambiente compresa tra 5 °C e<br />
35 °C.<br />
Il computer è spento.<br />
Accendere il computer.<br />
Il computer entra nello stato Standby o di ibernazione.<br />
Annullare lo stato Standby o di ibernazione del computer.<br />
“CONNECTED USB”<br />
non viene visualizzato<br />
quando il lettore è<br />
collegato al computer.<br />
Il connettore USB del lettore non è collegato in modo corretto a un<br />
connettore USB del computer.<br />
Scollegare il lettore, quindi ricollegarlo.<br />
Viene utilizzato un hub USB.<br />
Collegare il lettore direttamente a un connettore USB, in quanto il<br />
collegamento tramite un hub USB potrebbe non funzionare. Tuttavia,<br />
è possibile utilizzare un hub USB <strong>per</strong> fornire alimentazione.<br />
Sul computer è in esecuzione un’altra applicazione.<br />
Scollegare il lettore, attendere alcuni minuti, quindi collegarlo di<br />
nuovo. Se il problema <strong>per</strong>siste, scollegare il lettore, riavviare il<br />
computer, quindi ricollegare il lettore.<br />
Il connettore USB del computer potrebbe avere un problema. Collegare<br />
il connettore USB del lettore a un altro connettore USB del computer.<br />
Il funzionamento del<br />
lettore diventa instabile<br />
durante il collegamento<br />
al computer.<br />
Viene utilizzato un hub USB.<br />
Collegare il lettore direttamente a un connettore USB, in quanto il<br />
collegamento tramite un hub USB potrebbe non funzionare. Tuttavia,<br />
è possibile utilizzare un hub USB <strong>per</strong> fornire alimentazione.<br />
Per inizializzare (formattare) il lettore<br />
È possibile formattare la memoria flash incorporata del lettore. La formattazione<br />
della memoria implica la cancellazione di tutti i file e delle icone di<br />
collegamento, incluse le <strong>Istruzioni</strong> <strong>per</strong> l’uso (file PDF) e il ripristino delle<br />
impostazioni sui valori predefiniti. Prima di procedere alla formattazione,<br />
controllare i file salvati nella memoria e, se necessario, esportarli nel disco fisso<br />
del computer o in un altro dispositivo.<br />
1 Tenere premuto il tasto BACK/HOME fino a visualizzare il menu<br />
HOME.<br />
2 Selezionare (Settings) – “Initialize” – “Format” – “OK” in<br />
questo ordine.<br />
Premere il tasto / <strong>per</strong> selezionare la voce, quindi premere il tasto<br />
<strong>per</strong> confermare.<br />
Dopo avere selezionato “OK” e confermato, appare il messaggio<br />
“FORMATTING...”, quindi viene avviata la formattazione. Una volta<br />
completata la formattazione, viene visualizzato il messaggio “COMPLETE”.<br />
Note<br />
Non formattare la memoria flash incorporata utilizzando Esplora risorse di<br />
Windows. Se si desidera formattare la memoria flash incorporata, formattarla<br />
mediante il lettore.<br />
Se la memoria flash incorporata del lettore viene accidentalmente formattata,<br />
scaricare le <strong>Istruzioni</strong> <strong>per</strong> l’uso (file PDF) dal sito Web riportato nella sezione<br />
“Per informazioni aggiornate”.<br />
Precauzioni<br />
Sulle cuffie<br />
Evitate di ascoltare l’apparecchio a livelli di volume cosí alti da danneggiare il vostro udito<br />
con un ascolto prolungato.<br />
Ad alti livelli di volume, i suoni esterni potrebbero risultare inudibili. Evitate di usare le<br />
cuffie in situazioni in cui l’udito non debba essere compromesso, <strong>per</strong> esempio mentre<br />
guidate o andate in bicicletta.<br />
Dato che le cuffie in dotazione sono di tipo a<strong>per</strong>to, i suoni passano attraverso di esse.<br />
Ricordatevi di non disturbare chi vi sta vicino.<br />
Avviso <strong>per</strong> i clienti: le seguenti informazioni riguardano esclusivamente gli apparecchi<br />
venduti in paesi in cui sono applicate le direttive UE<br />
Il presente prodotto è fabbricato da <strong>Sony</strong> Corporation, 1-7-1 Konan, Minato-ku, Tokyo, Giappone.<br />
Il Rappresentante autorizzato <strong>per</strong> la direttiva EMC e la sicurezza del prodotto è <strong>Sony</strong> Deutschland<br />
GmbH, Hedelfinger Strasse 61, 70327 Stuttgart, Germania. Per qualsiasi questione riguardante<br />
l’assistenza o la garanzia, rivolgersi agli indirizzi che si trovano nei documenti di assistenza o di<br />
garanzia.<br />
Program ©2009 <strong>Sony</strong> Corporation<br />
Documentazione ©2009 <strong>Sony</strong> Corporation<br />
Per informazioni aggiornate<br />
In caso di domande o problemi relativi al presente prodotto o <strong>per</strong> informazioni sugli<br />
accessori compatibili con questo prodotto, visitare i siti Web riportati di seguito.<br />
Per gli utenti negli Stati Uniti: http://www.sony.com/walkmansupport<br />
Per gli utenti in Canada: http://www.sony.ca/ElectronicsSupport/<br />
Per gli utenti in Europa: http://support.sony-europe.com/DNA<br />
Per gli utenti in America Latina: http://www.sony-latin.com/index.crp<br />
Per gli utenti in altri paesi o regioni: http://www.sony-asia.com/support<br />
Per gli utenti che hanno acquistato il modello <strong>per</strong> l’estero:<br />
http://www.sony.co.jp/overseas/support/<br />
Collegamento a un computer<br />
Per ulteriori informazioni sul collegamento a un computer, consultare la sezione<br />
“Requisiti di sistema (<strong>per</strong> il lettore)” e le tabelle riportate di seguito.<br />
Requisiti di sistema (<strong>per</strong> il lettore)


