

KitchenAid 3 Q AA W T/ HA - 3 Q AA W T/ HA EN (F078405) Istruzioni per l'Uso
KitchenAid 3 Q AA W T/ HA - 3 Q AA W T/ HA EN (F078405) Istruzioni per l'Uso
KitchenAid 3 Q AA W T/ HA - 3 Q AA W T/ HA EN (F078405) Istruzioni per l'Uso

Create successful ePaper yourself
Turn your PDF publications into a flip-book with our unique Google optimized e-Paper software.
GB<br />
Installation<br />
! Before placing your new appliance into o<strong>per</strong>ation please read these<br />
o<strong>per</strong>ating instructions carefully. They contain important information for<br />
safe use, for installation and for care of the appliance.<br />
! Please keep these o<strong>per</strong>ating instructions for future reference.<br />
Pass them on to possible new owners of the appliance.<br />
Positioning and connection<br />
Positioning<br />
1. Place the appliance in a well-ventilated humidity-free room.<br />
2. Do not obstruct the rear fan grills. The compressor and<br />
condenser give off heat and require good ventilation to o<strong>per</strong>ate<br />
correctly and save energy.<br />
3. Leave a space of at least 10 cm between the top part of the<br />
appliance and any furniture above it, and at least 5 cm between<br />
the sides and any furniture/side walls.<br />
4. Ensure the appliance is away from any sources of heat (direct<br />
sunlight, electric stove, etc.).<br />
5. In order to maintain the correct distance between the appliance<br />
and the wall behind it, fit the spacers supplied in the installation<br />
kit, following the instructions provided.<br />
Levelling<br />
1. Install the appliance on a level and rigid floor.<br />
2. If the floor is not <strong>per</strong>fectly horizontal, adjust the refrigerator by<br />
tightening or loosening the front feet.<br />
Electrical connections<br />
After the appliance has been transported, carefully place it<br />
vertically and wait at least 3 hours before connecting it to the<br />
electricity mains. Before inserting the plug into the electrical socket<br />
ensure the following:<br />
• The appliance is earthed and the plug is compliant with the law.<br />
• The socket can withstand the maximum power of the appliance,<br />
which is indicated on the data plate located on the bottom left<br />
side of the fridge (e.g. 150 W).<br />
• The voltage must be in the range between the values indicated<br />
on the data plate located on the bottom left side (e.g. 220-240V).<br />
• The socket is compatible with the plug of the appliance. If the<br />
socket is incompatible with the plug, ask an authorised<br />
technician to replace it (see Assistance). Do not use extension<br />
cords or multiple sockets.<br />
! Once the appliance has been installed, the power supply cable<br />
and the electrical socket must be easily accessible.<br />
! The cable must not be bent or compressed.<br />
! The cable must be checked regularly and replaced by authorised<br />
technicians only (see Assistance).<br />
! The manufacturer declines any liability should these<br />
safety measures not be observed.<br />
Start-up and use<br />
Starting the appliance<br />
! Before starting the appliance, follow the installation<br />
instructions (see Installation).<br />
! Before connecting the appliance, clean the compartments and<br />
accessories well with lukewarm water and bicarbonate.<br />
! The appliance comes with a motor protection control system which<br />
makes the compressor start approximately 8 minutes after being<br />
switched on. The compressor also starts each time the power supply<br />
is cut off whether voluntarily or involuntarily (blackout).<br />
1. Set the FREEZER OPERATION knob on .<br />
6<br />
2. Insert the plug into the socket and ensure that the green<br />
POWER indicator light illuminates.<br />
3. Turn the REFRIGERATOR OPERATION knob to an average<br />
value. After a few hours you will be able to put food in the<br />
refrigerator.<br />
4. Turn the FREEZER OPERATION knob to an average value and<br />
press the SUPER FREEZE button (rapid freezing): the SUPER<br />
FREEZE indicator light will illuminate. Once the refrigerator has<br />
reached the optimal tem<strong>per</strong>ature, the indicator light goes out<br />
and you can begin food storage.<br />
Chiller system<br />
NO FROST<br />
The No Frost system circulates cold air continuously to collect<br />
humidity and prevent ice and frost formation. The system maintains<br />
an optimal humidity level in the compartment, preserving the<br />
original quality of the food, preventing the food from sticking<br />
together and making defrosting a thing of the past. ! Do not block<br />
the aeration cells by placing food or containers in direct contact<br />
with the refrigerating back panel.<br />
! Close bottles and wrap food tightly.<br />
Using the refrigerator to its full potential<br />
• Use the REFRIGERATOR OPERATION knob to adjust the<br />
tem<strong>per</strong>ature (see Description).<br />
• Press the SUPER COOL button (rapid cooling) to lower the<br />
tem<strong>per</strong>ature quickly. For example, when you place a large number<br />
of new food items inside a fridge the internal tem<strong>per</strong>ature will rise<br />
slightly. The function quickly cools the groceries by temporarily<br />
reducing the tem<strong>per</strong>ature until it reaches the ideal level.<br />
• Place only cold or lukewarm foods in the compartment, not hot<br />
foods (see Precautions and tips).<br />
• Remember that cooked foods do not last longer than raw foods.<br />
• Do not store liquids in open containers. They will increase<br />
humidity in the refrigerator and cause condensation to form.<br />
• SHELVES: with or without grill. Due to the special guides the<br />
shelves are removable and the height is adjustable, allowing<br />
easy storage of large containers and food. Height can be<br />
adjusted without complete removal of the shelf.<br />
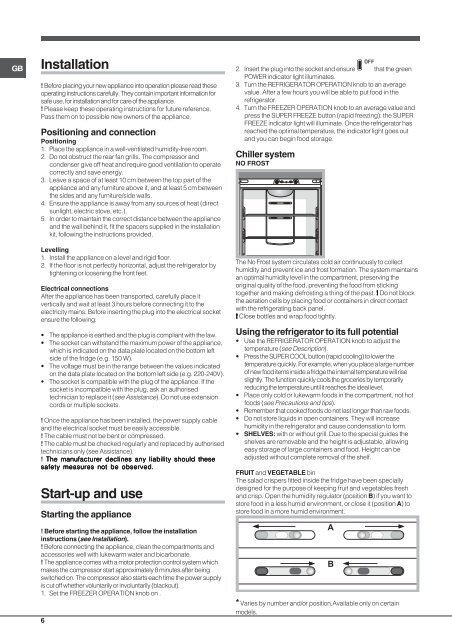
FRUIT and VEGETABLE bin<br />
The salad cris<strong>per</strong>s fitted inside the fridge have been specially<br />
designed for the purpose of keeping fruit and vegetables fresh<br />
and crisp. Open the humidity regulator (position B) if you want to<br />
store food in a less humid environment, or close it (position A) to<br />
store food in a more humid environment.<br />
* Varies by number and/or position,Available only on certain<br />
models.<br />
A<br />
B


