

Sony STR-DN840 - STR-DN840 Guida di configurazione rapid Tedesco
Sony STR-DN840 - STR-DN840 Guida di configurazione rapid Tedesco
Sony STR-DN840 - STR-DN840 Guida di configurazione rapid Tedesco

Create successful ePaper yourself
Turn your PDF publications into a flip-book with our unique Google optimized e-Paper software.
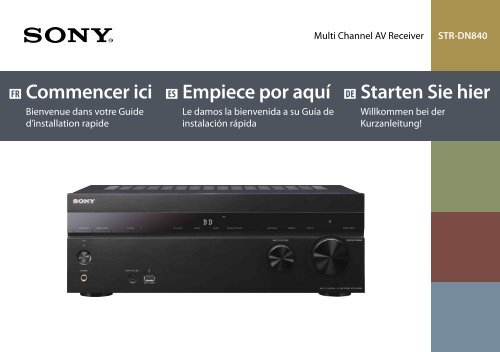
Multi Channel AV Receiver<br />
<strong>STR</strong>-<strong>DN840</strong><br />
FR<br />
Commencer ici<br />
Bienvenue dans votre Guide<br />
d’installation <strong>rapid</strong>e<br />
ES<br />
Empiece por aquí<br />
Le damos la bienvenida a su Guía de<br />
instalación rápida<br />
DE<br />
Starten Sie hier<br />
Willkommen bei der<br />
Kurzanleitung!
FR<br />
ES<br />
DE<br />
1<br />
Configuration des enceintes<br />
Configuración de los<br />
altavoces<br />
Aufstellen der Lautsprecher<br />
2<br />
Raccordement de votre<br />
téléviseur et autres appareils<br />
Conexión del televisor y<br />
otros <strong>di</strong>spositivos<br />
Anschließen von Fernsehgerät<br />
und anderen Geräten<br />
3<br />
Autres raccordements<br />
Otras conexiones<br />
Weitere Anschlüsse<br />
4<br />
Optimisation et [Easy Setup]<br />
à l’écran<br />
Optimización e [Easy Setup]<br />
en pantalla<br />
Optimierung und [Easy Setup]<br />
am Fernsehschirm<br />
5<br />
Lecture<br />
Reproducción<br />
Wiedergabe
FR<br />
Contenu du carton<br />
Vous devez <strong>di</strong>sposer d’un<br />
système d’enceintes installé et/<br />
ou d’autre équipement prêt à être<br />
raccordé.<br />
ES<br />
Contenido de la caja<br />
Necesitará <strong>di</strong>sponer de un<br />
sistema de altavoces instalado<br />
y/o de otros equipos preparados<br />
para ser conectados.<br />
DE<br />
Lieferumfang<br />
Halten Sie ein<br />
Lautsprechersystem und/oder <strong>di</strong>e<br />
anzuschließenden Geräte bereit.<br />
Ampli-tuner AV multicanal (1)<br />
Receptor de AV multicanal (1)<br />
Mehrkanal-AV-Receiver (1)<br />
Microphone optimiseur (ECM-AC2) (1)<br />
Micrófono optimizador (ECM-AC2) (1)<br />
Optimierungsmikrofon (ECM-AC2) (1)<br />
Piles R6 (AA) (2)<br />
Pilas R6 (tamaño AA) (2)<br />
R6-Batterien der Größe AA (2)<br />
Télécommande (RM-AAU169) (1)<br />
Mando a <strong>di</strong>stancia (RM-AAU169) (1)<br />
Fernbe<strong>di</strong>enung (RM-AAU169) (1)<br />
Antenne cadre AM (1)<br />
Antena cerrada de AM (1)<br />
MW-Rahmenantenne (1)<br />
Antenne fil FM (1)<br />
Antena monofilar de FM (1)<br />
UKW-Wurfantenne (1)<br />
03
1<br />
FR<br />
Commencez par <strong>di</strong>sposer vos<br />
enceintes existantes dans la<br />
pièce en utilisant l’exemple cidessous<br />
comme référence.<br />
ēēVous pouvez raccorder deux<br />
enceintes FRONT HIGH au lieu<br />
de deux enceintes SURROUND<br />
BACK, si vous le souhaitez.<br />
ēēVous pouvez aussi raccorder<br />
jusqu’à deux caissons de graves.<br />
ES<br />
En primer lugar, coloque los<br />
altavoces existentes en la<br />
habitación utilizando la siguiente<br />
ilustración a modo de referencia.<br />
ēēSi lo prefiere, es posible<br />
conectar dos altavoces FRONT<br />
HIGH en lugar de dos altavoces<br />
SURROUND BACK.<br />
ēēEs posible conectar hasta dos<br />
altavoces de graves.<br />
DE<br />
Stellen Sie zunächst wie im<br />
Beispiel auf der Abbildung unten<br />
dargestellt <strong>di</strong>e Lautsprecher im<br />
Raum auf.<br />
ēēSie können, wenn Sie wollen,<br />
zwei FRONT HIGH-Lautsprecher<br />
anstelle von zwei SURROUND<br />
BACK-Lautsprechern anschließen.<br />
ēēBis zu zwei Subwoofer können<br />
angeschlossen werden.<br />
04
FR<br />
Ensuite, raccordez vos enceintes<br />
à l’ampli-tuner AV.<br />
Faites concorder les étiquettes de<br />
chaque borne avec la position de<br />
chaque enceinte. N’oubliez pas<br />
de raccorder aussi le(s) câble(s)<br />
du caisson de graves.<br />
ES<br />
A continuación, conecte los<br />
altavoces al receptor de AV.<br />
Haga coinci<strong>di</strong>r las etiquetas de<br />
cada terminal con la posición de<br />
cada altavoz. Asimismo, no olvide<br />
conectar el cable o cables del<br />
altavoz de graves.<br />
DE<br />
Schließen Sie als Nächstes Ihre<br />
Lautsprecher an den AV-Receiver<br />
an.<br />
Achten Sie darauf, dass <strong>di</strong>e<br />
Beschriftung der Anschlüsse<br />
der Position des jeweiligen<br />
Lautsprechers entspricht.<br />
Schließen Sie auch das bzw. <strong>di</strong>e<br />
Subwoofer-Kabel an.<br />
10 mm<br />
<br />
<br />
Caisson de graves<br />
Altavoz de graves<br />
Subwoofer<br />
05
2<br />
FR<br />
Continuez en raccordant votre<br />
téléviseur. Pour profiter d’un son<br />
et d’une image de haute qualité,<br />
la méthode optimale est une<br />
connexion via un câble HDMI<br />
haut débit (non fourni).<br />
ES<br />
Continúe con la conexión del<br />
televisor. El método óptimo para<br />
<strong>di</strong>sfrutar de un vídeo y un au<strong>di</strong>o<br />
de gran calidad es conectarse<br />
con un cable HDMI de alta<br />
velocidad (no suministrado).<br />
DE<br />
Schließen Sie danach das<br />
Fernsehgerät an. Die optimale<br />
Anschlussmethode für hohe<br />
Bild- und Tonqualität ist ein<br />
High-Speed-HDMI-Kabel (nicht<br />
mitgeliefert).<br />
Pour raccorder votre lecteur Bluray<br />
Disc, PlayStation®3 ou tuner<br />
satellite, utilisez simplement un<br />
câble HDMI haut débit.<br />
Para conectar el reproductor de<br />
<strong>di</strong>scos Blu-ray, la PlayStation®3<br />
o el sintonizador de satélite,<br />
simplemente conéctelos con un<br />
cable HDMI de alta velocidad.<br />
Einen Blu-ray-Disc-Player,<br />
eine PlayStation®3 oder einen<br />
Satellitentuner schließen Sie<br />
einfach mit einem High-Speed-<br />
HDMI-Kabel an.<br />
Lecteur Blu-ray Disc, PlayStation®3 ou tuner satellite<br />
Reproductor de <strong>di</strong>scos Blu-ray, PlayStation®3 o sintonizador de<br />
satélite<br />
Blu-ray-Disc-Player, PlayStation®3 oder Satellitentuner<br />
Numérique (meilleure qualité)<br />
Digital (mejor calidad)<br />
Digital (bessere Qualität)<br />
Analogique (bonne qualité)<br />
Analógico (buena calidad)<br />
Analog (gute Qualität)<br />
06
FR<br />
Si votre téléviseur possède une<br />
prise HDMI ARC, vous n’avez<br />
pas besoin de cordon optique<br />
numérique.<br />
Si votre téléviseur ne possède<br />
pas de prise HDMI ARC, vous<br />
devez vous procurer un cordon<br />
optique numérique (non fourni)<br />
pour reproduire le son du<br />
téléviseur via les enceintes du<br />
système.<br />
ES<br />
Si el televisor <strong>di</strong>spone de una<br />
toma HDMI ARC, no necesita un<br />
cable <strong>di</strong>gital óptico.<br />
Si el televisor no <strong>di</strong>spone de<br />
una toma HDMI ARC, necesita<br />
un cable <strong>di</strong>gital óptico (no<br />
suministrado) para escuchar el<br />
sonido del televisor a través de<br />
los altavoces del sistema.<br />
DE<br />
Wenn Ihr Fernsehgerät über<br />
eine HDMI ARC-Buchse verfügt,<br />
benötigen Sie kein optisches<br />
Digitalkabel.<br />
Wenn Ihr Fernsehgerät nicht über<br />
eine HDMI ARC-Buchse verfügt,<br />
benötigen Sie ein optisches<br />
Digitalkabel (nicht mitgeliefert),<br />
um den Ton des Fernsehgeräts<br />
über <strong>di</strong>e Lautsprecher der Anlage<br />
wiederzugeben.<br />
Câble HDMI / Cable HDMI / HDMI-Kabel<br />
Cordon optique numérique / Cable <strong>di</strong>gital óptico / optisches Digitalkabel<br />
07
3<br />
Antenne cadre AM<br />
Antena cerrada de AM<br />
MW-Rahmenantenne<br />
Antenne fil FM<br />
Antena monofilar de FM<br />
UKW-Wurfantenne<br />
FR<br />
Pour la ra<strong>di</strong>o FM, raccordez le fil<br />
d’antenne FM fourni à la prise FM<br />
ANTENNA et déployez-le pour<br />
une réception optimale.<br />
Vous pouvez également raccorder<br />
votre propre antenne externe.<br />
Vous pouvez aussi raccorder votre<br />
iPod/iPhone aux bornes iPod/iPhone.<br />
ES<br />
Para la ra<strong>di</strong>o FM, conecte<br />
la antena monofilar de FM<br />
suministrada en la toma FM<br />
ANTENNA y extiéndala para una<br />
recepción óptima.<br />
También tiene la opción de conectar<br />
su propia antena exterior.<br />
También es posible conectar el iPod/<br />
iPhone a los terminales de iPod/iPhone.<br />
DE<br />
Für den UKW-Ra<strong>di</strong>oempfang<br />
schließen Sie <strong>di</strong>e mitgelieferte<br />
UKW-Wurfantenne an <strong>di</strong>e Buchse<br />
FM ANTENNA an und breiten Sie<br />
so aus, dass Sie einen optimalen<br />
Empfang erzielen.<br />
Alternativ dazu können Sie eine<br />
eigene Außenantenne anschließen.<br />
Ein iPod/iPhone können Sie an <strong>di</strong>e<br />
Anschlüsse iPod/iPhone anschließen.<br />
Vers iPod, iPhone, etc.<br />
A un iPod, iPhone, etc.<br />
An iPod, iPhone usw.<br />
<br />
<br />
Câble USB Apple (non fourni)<br />
Cable Apple USB (no suministrado)<br />
Apple USB-Kabel (nicht mitgeliefert)<br />
08
FR<br />
Connectez-vous à Internet et au réseau<br />
domestique à l’aide d’un LAN sans fil ou d’un<br />
câble LAN (non fourni).<br />
Vous trouverez les paramètres [Network<br />
Settings] dans le menu [Settings] du menu<br />
d’accueil.<br />
Pour plus de détails, visitez le site Web suivant :<br />
http://support.sony-europe.com/<br />
Raccordez le cordon d’alimentation à une<br />
prise murale.<br />
A présent, vous pouvez allumer l’ampli-tuner<br />
AV, le téléviseur, le caisson de graves et les<br />
autres appareils.<br />
ES<br />
Conéctese a Internet y a una red doméstica<br />
a través de una conexión LAN inalámbrica o<br />
cable LAN (no suministrado).<br />
En el menú [Settings] del menú de inicio se<br />
in<strong>di</strong>can los ajustes de [Network Settings].<br />
Para obtener más información, visite la página:<br />
http://support.sony-europe.com/<br />
Conecte el cable de alimentación de ca a<br />
una toma de pared.<br />
Ahora puede encender el receptor de AV,<br />
el televisor, el altavoz de graves y otros<br />
<strong>di</strong>spositivos.<br />
DE<br />
Stellen Sie über WLAN oder ein LAN-Kabel<br />
(nicht mitgeliefert) eine Verbindung zum<br />
Internet und Heimnetzwerk her.<br />
[Network Settings] finden Sie im Menü<br />
[Settings] des Hauptmenüs.<br />
Weitere Informationen finden Sie hier:<br />
http://support.sony-europe.com/<br />
Schließen Sie das Netzkabel an eine<br />
Netzsteckdose an.<br />
Jetzt können Sie den AV-Receiver, das<br />
Fernsehgerät, den Subwoofer und <strong>di</strong>e<br />
übrigen Geräte einschalten.<br />
La forme du cordon d’alimentation et de la<br />
prise secteur varient selon le pays.<br />
La forma del cable de alimentación de ca y de<br />
la toma de pared, varían en función de la zona.<br />
Die Form des Netzkabels und der<br />
Netzsteckdose hängen von der Region ab.<br />
<br />
<br />
09
4<br />
FR<br />
Ensuite, raccordez le microphone<br />
optimiseur fourni à la prise AUTO<br />
CAL MIC.<br />
Placez-le approximativement à<br />
l’endroit où vous vous asseyez<br />
généralement, au niveau de<br />
l’oreille – sur le dos d’un fauteuil,<br />
par exemple.<br />
Confirmez la configuration du<br />
caisson de graves actif.<br />
Quand un caisson de graves est<br />
raccordé, allumez-le et augmentez<br />
le volume avant de l’activer. Faites<br />
tourner le sélecteur LEVEL du<br />
caisson de graves sur environ 1/3<br />
de sa course.<br />
ES<br />
A continuación, conecte<br />
el micrófono optimizador<br />
suministrado en la toma AUTO<br />
CAL MIC.<br />
Colóquelo aproximadamente<br />
en el lugar en el que se sentaría<br />
habitualmente, a la altura de los<br />
oídos – en la parte posterior de<br />
un sofá, por ejemplo.<br />
Confirme la configuración del<br />
altavoz de graves activo.<br />
Cuando conecte un altavoz de<br />
graves, enciéndalo y suba el volumen<br />
antes de activarlo. Gire el <strong>di</strong>al LEVEL<br />
del altavoz de graves hacia arriba<br />
aproximadamente 1/3 del recorrido.<br />
DE<br />
Schließen Sie als Nächstes<br />
das mitgelieferte<br />
Optimierungsmikrofon an <strong>di</strong>e<br />
Buchse AUTO CAL MIC an.<br />
Stellen Sie es an Ihrem üblichen<br />
Sitzplatz auf Ohrhöhe auf, also z.<br />
B. auf der Rückenlehne des Sofas.<br />
Überprüfen Sie <strong>di</strong>e Konfiguration<br />
des Aktivsubwoofers.<br />
Wenn ein Subwoofer<br />
angeschlossen ist, schalten<br />
Sie ihn ein und erhöhen Sie<br />
<strong>di</strong>e Lautstärke, bevor Sie ihn<br />
aktivieren. Drehen Sie den Regler<br />
LEVEL des Subwoofers etwa um<br />
1/3 nach rechts.<br />
10
FR<br />
Insérez des piles dans la télécommande.<br />
Appuyez sur / pour mettre l’amplituner<br />
AV sous tension. « BD » apparaît sur<br />
l’affichage du panneau frontal.<br />
Pour préparer l’ampli-tuner AV en vue de<br />
son utilisation, parcourez [Easy Setup] qui<br />
s’affiche à l’écran à l’aide de la télécommande<br />
fournie. Cette opération ne devrait prendre<br />
que quelques minutes.<br />
Si l’écran de configuration ne s’affiche pas,<br />
sélectionnez l’entrée AV correcte sur votre<br />
téléviseur.<br />
Lorsque [Easy setup is completed] s’affiche à<br />
l’écran, l’ampli-tuner AV est prêt à l’emploi.<br />
ES<br />
Coloque las pilas en el mando a <strong>di</strong>stancia.<br />
Pulse / para encender el Receptor de AV. En el<br />
visor del panel frontal aparecerá “BD”.<br />
Para preparar el Receptor de AV para su<br />
uso, desplácese con el mando a <strong>di</strong>stancia<br />
suministrado por el menú [Easy Setup]<br />
que aparece en pantalla. Sólo tardará unos<br />
minutos.<br />
Si no aparece la pantalla de configuración,<br />
seleccione la entrada de AV correcta en el<br />
televisor.<br />
Cuando aparezca en la pantalla el mensaje<br />
[Easy setup is completed], el Receptor de AV<br />
estará listo para su uso.<br />
DE<br />
Legen Sie <strong>di</strong>e Batterien in <strong>di</strong>e Fernbe<strong>di</strong>enung<br />
ein.<br />
Schalten Sie den AV-Receiver mit / ein. „BD“<br />
erscheint im Display an der Vorderseite.<br />
Um den AV-Receiver für den Gebrauch<br />
vorzubereiten, nehmen Sie mit der mitgelieferten<br />
Fernbe<strong>di</strong>enung <strong>di</strong>e Schnellkonfiguration [Easy<br />
Setup] am Fernsehschirm vor. Dieser Vorgang<br />
dauert nur wenige Minuten.<br />
Wenn der Konfigurationsbildschirm nicht<br />
angezeigt wird, wählen Sie am Fernsehgerät<br />
den richtigen AV-Eingang aus.<br />
Wenn [Easy setup is completed] auf dem<br />
Fernsehschirm erscheint, ist der AV-Receiver<br />
betriebsbereit.<br />
/<br />
///,<br />
11
FR<br />
Si un code d’erreur ou un avertissement<br />
apparaît sur l’écran du téléviseur après l’Autocalibration,<br />
consultez sa description ci-dessous.<br />
Après avoir pris les mesures appropriées,<br />
recommencez l’Auto-calibration.<br />
Error Code 30<br />
Le casque est raccordé à la prise PHONES de<br />
l’ampli-tuner. Débranchez le casque.<br />
Error Code 31<br />
Aucune enceinte n’est sélectionnée. Appuyez<br />
sur SPEAKERS pour régler les enceintes.<br />
Error Code 32<br />
Error Code 33<br />
ēēAucune enceinte avant n’est raccordée<br />
ou seulement une enceinte avant est<br />
raccordée.<br />
ēēLe microphone optimiseur n’est pas<br />
correctement raccordé ou le câble est<br />
endommagé.<br />
ēēL’enceinte surround gauche ou surround<br />
droite n’est pas raccordée.<br />
ēēLes enceintes surround arrière ou les<br />
enceintes avant hautes sont raccordées<br />
alors que les enceintes surround ne sont<br />
pas raccordées. Raccordez l’(les) enceinte(s)<br />
surround aux bornes SPEAKERS SURROUND.<br />
ēēUne seule enceinte surround arrière est<br />
raccordée à la borne SPEAKERS SURROUND<br />
BACK/BI-AMP/FRONT HIGH/FRONT B R.<br />
Lorsque vous ne raccordez qu’une seule<br />
enceinte surround arrière, raccordez-la à la<br />
borne SPEAKERS SURROUND BACK/BI-AMP/<br />
FRONT HIGH/FRONT B L.<br />
ēēL’enceinte avant gauche haute ou avant<br />
droite haute n’est pas raccordée.<br />
Warning 40<br />
Le processus de mesure s’est terminé avec un<br />
haut niveau de détection de bruit. Effectuez la<br />
mesure dans un environnement silencieux.<br />
Warning 41/Warning 42<br />
ēēL’entrée du microphone optimiseur est trop<br />
élevée.<br />
ēēLa <strong>di</strong>stance entre les enceintes et le<br />
microphone optimiseur est insuffisante.<br />
Augmentez la <strong>di</strong>stance qui les sépare.<br />
Warning 43<br />
La <strong>di</strong>stance et la position d’un caisson de<br />
graves n’ont pas pu être détectées. Effectuez<br />
la mesure dans un environnement silencieux.<br />
ES<br />
Si aparece un có<strong>di</strong>go de error o una<br />
advertencia en la pantalla del televisor después<br />
de la Calibración automática, búsquelo a<br />
continuación. Después de seguir los pasos<br />
adecuados, vuelva a realizar la Calibración<br />
automática.<br />
Error Code 30<br />
Los auriculares se conectan a la toma PHONES<br />
del receptor. Retire los auriculares.<br />
Error Code 31<br />
No se han seleccionado altavoces. Pulse<br />
SPEAKERS para ajustar los altavoces.<br />
Error Code 32<br />
Error Code 33<br />
ēēNo se ha conectado ninguno de los<br />
altavoces frontales, o bien, solo se ha<br />
conectado un altavoz frontal.<br />
ēēEl micrófono optimizador no está bien<br />
conectado o el cable está dañado.<br />
ēēEl altavoz de sonido envolvente derecho o<br />
el de sonido envolvente izquierdo no está<br />
conectado.<br />
ēēLos altavoces envolventes traseros o<br />
los altavoces frontales superiores están<br />
conectados aunque los altavoces de sonido<br />
envolvente no están conectados. Conecte<br />
los altavoces de sonido envolvente a los<br />
terminales SPEAKERS SURROUND.<br />
12
ēēUn único altavoz envolvente trasero<br />
está conectado al terminal SPEAKERS<br />
SURROUND BACK/BI-AMP/FRONT HIGH/<br />
FRONT B R. Cuando conecte únicamente<br />
un altavoz envolvente trasero, conéctelo al<br />
terminal SPEAKERS SURROUND BACK/BI-<br />
AMP/FRONT HIGH/FRONT B L.<br />
ēēEl altavoz frontal izquierdo superior o el<br />
frontal derecho superior no está conectado.<br />
Warning 40<br />
El proceso de me<strong>di</strong>ción ha finalizado con la<br />
detección de un nivel alto de ruido. Realice la<br />
me<strong>di</strong>ción en un entorno silencioso.<br />
Warning 41/Warning 42<br />
ēēLa entrada desde el micrófono optimizador<br />
tiene un volumen demasiado alto.<br />
ēēLa <strong>di</strong>stancia entre los altavoces y el<br />
micrófono optimizador es demasiado<br />
pequeña. Sepárelos más<br />
Warning 43<br />
No es posible detectar la <strong>di</strong>stancia y la<br />
posición de un altavoz de graves. Realice la<br />
me<strong>di</strong>ción en un entorno silencioso.<br />
DE<br />
Wenn nach der automatischen Kalibrierung<br />
ein Fehlercode oder eine Warnung auf<br />
dem Fernsehschirm erscheint, schauen<br />
Sie unten nach. Ergreifen Sie <strong>di</strong>e nötigen<br />
Abhilfemaßnahmen und führen Sie <strong>di</strong>e<br />
automatische Kalibrierung erneut aus.<br />
Error Code 30<br />
Kopfhörer sind an <strong>di</strong>e Buchse PHONES am<br />
Receiver angeschlossen. Trennen Sie <strong>di</strong>e<br />
Kopfhörer von der Buchse.<br />
Error Code 31<br />
Es sind keine Lautsprecher ausgewählt.<br />
Drücken Sie SPEAKERS, um <strong>di</strong>e Lautsprecher<br />
einzustellen.<br />
Error Code 32<br />
Error Code 33<br />
ēēEs ist kein Frontlautsprecher angeschlossen<br />
oder es ist nur ein Frontlautsprecher<br />
angeschlossen.<br />
ēēDas Optimierungsmikrofon ist nicht<br />
ordnungsgemäß angeschlossen oder das<br />
Kabel ist möglicherweise beschä<strong>di</strong>gt.<br />
ēēDer linke oder rechte Surroundlautsprecher<br />
ist nicht angeschlossen.<br />
ēēSurround-Back-Lautsprecher oder obere<br />
Frontlautsprecher sind angeschlossen, obwohl<br />
keine Surroundlautsprecher angeschlossen sind.<br />
Schließen Sie den bzw. <strong>di</strong>e Surroundlautsprecher<br />
an <strong>di</strong>e SPEAKERS SURROUND-Anschlüsse an.<br />
ēēEin einzelner Surround-Back-Lautsprecher<br />
ist an den Anschluss SPEAKERS SURROUND<br />
BACK/BI-AMP/FRONT HIGH/FRONT B<br />
R angeschlossen. Wenn Sie nur einen<br />
Surround-Back-Lautsprecher anschließen,<br />
schließen Sie ihn an den Anschluss<br />
SPEAKERS SURROUND BACK/BI-AMP/<br />
FRONT HIGH/FRONT B L an.<br />
ēēDer linke obere oder der rechte obere<br />
Frontlautsprecher ist nicht angeschlossen.<br />
Warning 40<br />
Die Messung wurde beendet, aber ein hoher<br />
Geräuschpegel wurde erkannt. Vermeiden Sie<br />
Nebengeräusche während der Messung.<br />
Warning 41/Warning 42<br />
ēēDas Eingangssignal vom<br />
Optimierungsmikrofon ist zu laut.<br />
ēēDer Abstand zwischen den Lautsprechern<br />
und dem Optimierungsmikrofon ist zu<br />
gering. Stellen Sie sie weiter voneinander<br />
entfernt auf.<br />
Warning 43<br />
Abstand und Position des Subwoofers<br />
können nicht ermittelt werden. Vermeiden Sie<br />
Nebengeräusche während der Messung.<br />
13
5<br />
Touches<br />
d’entrée<br />
Botones de<br />
introducción<br />
Eingangstasten<br />
FR<br />
A présent, vous pouvez<br />
sélectionner n’importe quel autre<br />
équipement ou appareil dont<br />
vous <strong>di</strong>sposez.<br />
1 Sélectionnez l’équipement<br />
souhaité, puis appuyez sur .<br />
L’écran de menu <strong>di</strong>sparaît et<br />
l’écran de lecture de l’entrée<br />
externe apparaît.<br />
Les entrées <strong>di</strong>sponibles sont les<br />
suivantes : BD/DVD, GAME, SAT/<br />
CATV, VIDEO, TV, SA-CD/CD.<br />
2 Allumez l’équipement pour<br />
commencer la lecture.<br />
ES<br />
Ahora es posible seleccionar<br />
cualquier otro equipo o<br />
<strong>di</strong>spositivo del que <strong>di</strong>sponga.<br />
1 Seleccione el equipo que desee<br />
y, a continuación, pulse .<br />
La pantalla de menú desaparece<br />
y aparece la pantalla de<br />
reproducción de la entrada<br />
externa.<br />
Las entradas <strong>di</strong>sponibles son: BD/<br />
DVD, GAME, SAT/CATV, VIDEO, TV,<br />
SA-CD/CD.<br />
2 Encienda el equipo e inicie la<br />
reproducción.<br />
DE<br />
Jetzt können Sie nach Belieben<br />
ein anderes angeschlossenes<br />
Gerät auswählen.<br />
1 Wählen Sie das gewünschte<br />
Gerät aus und drücken Sie .<br />
Der Menübildschirm wird<br />
ausgeblendet und der<br />
Wiedergabebildschirm für den<br />
externen Eingang erscheint.<br />
Die folgenden Eingänge sind<br />
verfügbar: BD/DVD, GAME, SAT/<br />
CATV, VIDEO, TV, SA-CD/CD.<br />
2 Schalten Sie das Gerät ein und<br />
starten Sie <strong>di</strong>e Wiedergabe.<br />
3 Appuyez sur +/– pour régler<br />
le volume.<br />
Vous pouvez aussi utiliser la<br />
commande MASTER VOLUME de<br />
l’ampli-tuner AV.<br />
4 Appuyez sur SOUND FIELD +/–<br />
pour profiter du son surround.<br />
Vous pouvez aussi utiliser les<br />
touches A.F.D./2CH, MOVIE ou<br />
MUSIC sur l’ampli-tuner AV.<br />
3 Pulse +/– para ajustar el<br />
volumen.<br />
También es posible utilizar<br />
MASTER VOLUME en el receptor<br />
de AV.<br />
4 Pulse SOUND FIELD +/– para<br />
escuchar el sonido envolvente.<br />
También se pueden utilizar los<br />
botones A.F.D./2CH, MOVIE o<br />
MUSIC en el receptor de AV.<br />
3 Stellen Sie mit +/– <strong>di</strong>e<br />
Lautstärke ein.<br />
Sie können auch MASTER<br />
VOLUME am AV-Receiver<br />
verwenden.<br />
4 Drücken Sie SOUND FIELD +/–,<br />
wenn Sie Surroundklang hören<br />
möchten.<br />
Sie können auch <strong>di</strong>e Taste<br />
A.F.D./2CH, MOVIE oder MUSIC<br />
am AV-Receiver verwenden.<br />
SOUND<br />
FIELD +/-<br />
+/-<br />
14
FR<br />
Enfin, pour profiter du son surround<br />
multicanal, vous pouvez configurer tous les<br />
autres appareils éventuellement raccordés.<br />
Cela garantit que le signal au<strong>di</strong>o provenant de<br />
chaque appareil est reproduit dans le format<br />
correct.<br />
Son numérique multicanal<br />
Vérifiez le réglage de la sortie au<strong>di</strong>o<br />
numérique sur vos appareils raccordés.<br />
Lecteur de <strong>di</strong>sques Blu-ray <strong>Sony</strong><br />
Vérifiez les éléments suivants :<br />
Réglage de « Au<strong>di</strong>o (HDMI) » sur « Auto ».<br />
Réglage de «Dolby Digital/DTS» sur<br />
«Bitstream».<br />
Réglage de « Dolby Digital » sur « Dolby<br />
Digital ».<br />
Réglage de « DTS » sur « DTS ».<br />
PlayStation®3<br />
Assurez-vous que « Au<strong>di</strong>o Output Settings »<br />
sous « Sound Settings » est réglé sur « HDMI »<br />
et « Automatic » (pour la version 4.21 du<br />
logiciel système).<br />
Pour plus d’informations: Consultez le mode<br />
d’emploi fourni avec vos appareils raccordés.<br />
Bon amusement.<br />
ES<br />
Por último, para escuchar el sonido<br />
envolvente multicanal, debería configurar<br />
también todos los demás <strong>di</strong>spositivos que<br />
haya conectado.<br />
Esto garantizará que la señal de sonido<br />
procedente de cada <strong>di</strong>spositivo sea del<br />
formato adecuado.<br />
Au<strong>di</strong>o <strong>di</strong>gital multicanal<br />
Compruebe el ajuste de la salida de au<strong>di</strong>o<br />
<strong>di</strong>gital de los <strong>di</strong>spositivos conectados.<br />
Reproductor <strong>Sony</strong> de <strong>di</strong>scos Blu-ray<br />
Compruebe que:<br />
“Au<strong>di</strong>o (HDMI)” esté ajustado en “Auto”.<br />
“Dolby Digital/DTS” esté ajustado en<br />
“Bitstream”.<br />
“Dolby Digital” esté ajustado en “Dolby<br />
Digital”.<br />
“DTS” esté ajustado en “DTS”.<br />
PlayStation®3<br />
Compruebe que “Au<strong>di</strong>o Output Settings” de<br />
“Sound Settings” esté ajustado en “HDMI” y<br />
“Automatic” (para la versión 4.21 del software<br />
del sistema).<br />
Si desea obtener más información: Consulte<br />
el manual de instrucciones suministrado con<br />
los <strong>di</strong>spositivos conectados.<br />
Disfrute.<br />
DE<br />
Wenn Sie Mehrkanal-Raumklang hören<br />
möchten, müssen Sie außerdem <strong>di</strong>e<br />
angeschlossenen Geräte entsprechend<br />
einstellen.<br />
So sorgen Sie dafür, dass <strong>di</strong>e Tonsignale von<br />
den Geräten das richtige Format aufweisen.<br />
Mehrkanal-Digitalton<br />
Überprüfen Sie an den angeschlossenen<br />
Geräten <strong>di</strong>e Einstellung für <strong>di</strong>e Ausgabe von<br />
Digitalton.<br />
Blu-ray-Disc-Player von <strong>Sony</strong><br />
Überprüfen Sie Folgendes:<br />
„Au<strong>di</strong>o (HDMI)“ muss auf „Auto“ gesetzt sein.<br />
„Dolby Digital/DTS“ muss auf „Bitstream“<br />
gesetzt sein.<br />
„Dolby Digital“ muss auf „Dolby Digital“<br />
gesetzt sein.<br />
„DTS“ muss auf „DTS“ gesetzt sein.<br />
PlayStation®3<br />
Überprüfen Sie, ob „Au<strong>di</strong>o Output Settings“<br />
unter „Sound Settings“ auf „HDMI“ und<br />
„Automatic“ gesetzt ist (für Systemsoftware-<br />
Version 4.21).<br />
Einzelheiten: Näheres finden Sie in der<br />
Be<strong>di</strong>enungsanleitung zu dem jeweiligen<br />
angeschlossenen Gerät.<br />
Viel Spaß!<br />
15
Le présent guide d’installation <strong>rapid</strong>e économise le<br />
papier<br />
Pour préserver les ressources naturelles, <strong>Sony</strong> a considérablement réduit sa consommation de papier en ne<br />
fournissant plus de manuels imprimés complets.<br />
Cependant, vous trouverez les modes d’emploi complets et d’autres informations en ligne :<br />
Esta Guía de instalación rápida ahorra papel<br />
Para ahorrar recursos naturales, <strong>Sony</strong> ha reducido drásticamente el consumo de papel dejando de incluir los<br />
manuales completos impresos.<br />
Pero el manual de instrucciones completo y demás informaciones pueden encontrarse en línea:<br />
Diese Kurzanleitung reduziert den Papierverbrauch<br />
Zum schonenden Umgang mit natürlichen Ressourcen hat <strong>Sony</strong> den Papierverbrauch drastisch reduziert und<br />
liefert keine vollstän<strong>di</strong>g gedruckten Anleitungen mehr mit.<br />
Die vollstän<strong>di</strong>ge Be<strong>di</strong>enungsanleitung und weitere Informationen finden Sie stattdessen im Internet:<br />
http://support.sony-europe.com/<br />
4-454-471-21(1)<br />
2013 <strong>Sony</strong> Corporation<br />
Printed in Malaysia<br />
(1)


