

KitchenAid OAKZ9 242 P IX - OAKZ9 242 P IX EN (859991544430) Use and care guide
KitchenAid OAKZ9 242 P IX - OAKZ9 242 P IX EN (859991544430) Use and care guide
KitchenAid OAKZ9 242 P IX - OAKZ9 242 P IX EN (859991544430) Use and care guide

Create successful ePaper yourself
Turn your PDF publications into a flip-book with our unique Google optimized e-Paper software.
. AUTOMATIC CLEANING – PYRO<br />
Do not touch the oven during the Pyro cycle.<br />
Keep children <strong>and</strong> animals away from the oven<br />
during <strong>and</strong> after (until the room has finished airing)<br />
running the Pyro cycle.<br />
Remove all accessories - including shelf <strong>guide</strong>s - from<br />
the oven before activating the function. If the oven is<br />
installed below a hob, make sure that all the burners<br />
or electric hotplates are switched off while running<br />
the selfcleaning cycle. For optimum cleaning results,<br />
remove the worst soiling with a damp sponge before<br />
using the Pyro function. We recommend only running<br />
the Pyro function if the appliance contains heavy<br />
soiling or gives off bad odours during cooking. Turn<br />
the selection knob to select the automatic cleaning<br />
function.<br />
PYRO<br />
There are two self-cleaning cycles available: a<br />
complete cycle <strong>and</strong> a quick cycle (ECO).<br />
PYRO<br />
Turn the adjustment knob to select the desired cycle<br />
<strong>and</strong> press to confirm. The oven begins the selfcleaning<br />
cycle, <strong>and</strong> the door locks automatically: a<br />
warning message appears on the display, along with<br />
a countdown indicating the status of the cycle in<br />
progress.<br />
Once the cycle has been completed, the door remains<br />
locked until the temperature inside the oven has<br />
returned to a safe level.<br />
The display will then show the current time.<br />
Please note: like with other manual, it is also possible to set<br />
the end time for the automatic cleaning cycle.<br />
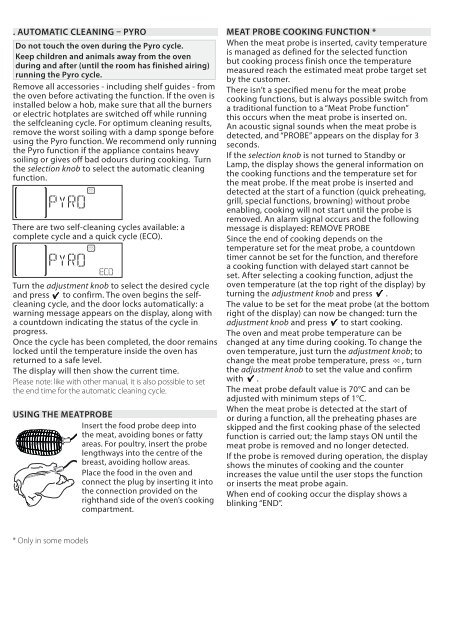
USING THE MEATPROBE<br />
Insert the food probe deep into<br />
the meat, avoiding bones or fatty<br />
areas. For poultry, insert the probe<br />
lengthways into the centre of the<br />
breast, avoiding hollow areas.<br />
Place the food in the oven <strong>and</strong><br />
connect the plug by inserting it into<br />
the connection provided on the<br />
righth<strong>and</strong> side of the oven’s cooking<br />
compartment.<br />
MEAT PROBE COOKING FUNCTION *<br />
When the meat probe is inserted, cavity temperature<br />
is managed as defined for the selected function<br />
but cooking process finish once the temperature<br />
measured reach the estimated meat probe target set<br />
by the customer.<br />
There isn’t a specified menu for the meat probe<br />
cooking functions, but is always possible switch from<br />
a traditional function to a “Meat Probe function”<br />
this occurs when the meat probe is inserted on.<br />
An acoustic signal sounds when the meat probe is<br />
detected, <strong>and</strong> “PROBE” appears on the display for 3<br />
seconds.<br />
If the selection knob is not turned to St<strong>and</strong>by or<br />
Lamp, the display shows the general information on<br />
the cooking functions <strong>and</strong> the temperature set for<br />
the meat probe. If the meat probe is inserted <strong>and</strong><br />
detected at the start of a function (quick preheating,<br />
grill, special functions, browning) without probe<br />
enabling, cooking will not start until the probe is<br />
removed. An alarm signal occurs <strong>and</strong> the following<br />
message is displayed: REMOVE PROBE<br />
Since the end of cooking depends on the<br />
temperature set for the meat probe, a countdown<br />
timer cannot be set for the function, <strong>and</strong> therefore<br />
a cooking function with delayed start cannot be<br />
set. After selecting a cooking function, adjust the<br />
oven temperature (at the top right of the display) by<br />
turning the adjustment knob <strong>and</strong> press .<br />
The value to be set for the meat probe (at the bottom<br />
right of the display) can now be changed: turn the<br />
adjustment knob <strong>and</strong> press to start cooking.<br />
The oven <strong>and</strong> meat probe temperature can be<br />
changed at any time during cooking. To change the<br />
oven temperature, just turn the adjustment knob; to<br />
change the meat probe temperature, press , turn<br />
the adjustment knob to set the value <strong>and</strong> confirm<br />
with .<br />
The meat probe default value is 70°C <strong>and</strong> can be<br />
adjusted with minimum steps of 1°C.<br />
When the meat probe is detected at the start of<br />
or during a function, all the preheating phases are<br />
skipped <strong>and</strong> the first cooking phase of the selected<br />
function is carried out; the lamp stays ON until the<br />
meat probe is removed <strong>and</strong> no longer detected.<br />
If the probe is removed during operation, the display<br />
shows the minutes of cooking <strong>and</strong> the counter<br />
increases the value until the user stops the function<br />
or inserts the meat probe again.<br />
When end of cooking occur the display shows a<br />
blinking “<strong>EN</strong>D”.<br />
* Only in some models


