GL652 GL653 GL655 GL656 - Black & Decker
GL652 GL653 GL655 GL656 - Black & Decker
GL652 GL653 GL655 GL656 - Black & Decker
Create successful ePaper yourself
Turn your PDF publications into a flip-book with our unique Google optimized e-Paper software.
ENGLISH<br />
u Never touch the cutting line while the appliance is running.<br />
u Do not put the appliance down until the cutting line has<br />
come to a complete standstill.<br />
u Use only the appropriate type of cutting line.<br />
Never use metal cutting line or fishing line.<br />
u Be careful not to touch the line trimming blade.<br />
u Take care to keep the mains cable away from the cutting<br />
line. Always be aware of the position of the cable.<br />
u Keep hands and feet away from the cutting line at all<br />
times, especially when switching on the motor.<br />
u Before using the appliance and after any impact, check for<br />
signs of wear or damage and repair as necessary.<br />
u Never operate the appliance with damaged guards or<br />
without guards in place.<br />
u Take care against injury from any device fitted for trimming<br />
the filament line length. After extending new cutter line<br />
always return the machine to its normal operating position<br />
before switching on.<br />
u Always ensure that the ventilation slots are kept clear of<br />
debris.<br />
u Do not use the lawn trimmer (edge trimmer), if the cords<br />
are damaged or worn.<br />
u Keep extension cords away from cutting elements.<br />
Labels on appliance<br />
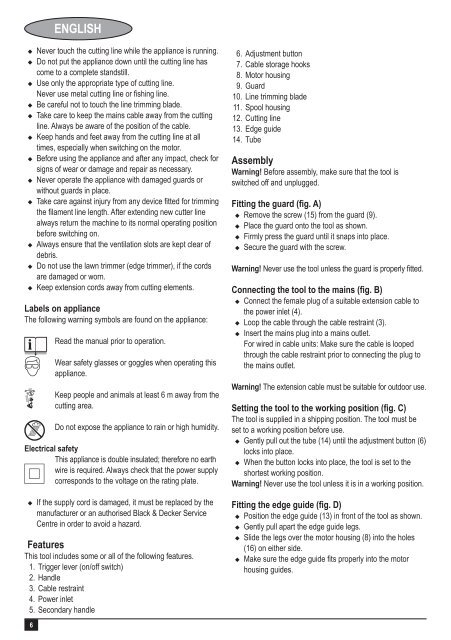
The following warning symbols are found on the appliance:<br />
+<br />
F<br />
8<br />
R<br />
6<br />
Read the manual prior to operation.<br />
Wear safety glasses or goggles when operating this<br />
appliance.<br />
Keep people and animals at least 6 m away from the<br />
cutting area.<br />
Do not expose the appliance to rain or high humidity.<br />
Electrical safety<br />
This appliance is double insulated; therefore no earth<br />
wire is required. Always check that the power supply<br />
corresponds to the voltage on the rating plate.<br />
#<br />
u If the supply cord is damaged, it must be replaced by the<br />
manufacturer or an authorised <strong>Black</strong> & <strong>Decker</strong> Service<br />
Centre in order to avoid a hazard.<br />
Features<br />
This tool includes some or all of the following features.<br />
1. Trigger lever (on/off switch)<br />
2. Handle<br />
3. Cable restraint<br />
4. Power inlet<br />
5. Secondary handle<br />
6. Adjustment button<br />
7. Cable storage hooks<br />
8. Motor housing<br />
9. Guard<br />
10. Line trimming blade<br />
11. Spool housing<br />
12. Cutting line<br />
13. Edge guide<br />
14. Tube<br />
Assembly<br />
Warning! Before assembly, make sure that the tool is<br />
switched off and unplugged.<br />
Fitting the guard (fig. A)<br />
u Remove the screw (15) from the guard (9).<br />
u Place the guard onto the tool as shown.<br />
u Firmly press the guard until it snaps into place.<br />
u Secure the guard with the screw.<br />
Warning! Never use the tool unless the guard is properly fitted.<br />
Connecting the tool to the mains (fig. B)<br />
u Connect the female plug of a suitable extension cable to<br />
the power inlet (4).<br />
u Loop the cable through the cable restraint (3).<br />
u Insert the mains plug into a mains outlet.<br />
For wired in cable units: Make sure the cable is looped<br />
through the cable restraint prior to connecting the plug to<br />
the mains outlet.<br />
Warning! The extension cable must be suitable for outdoor use.<br />
Setting the tool to the working position (fig. C)<br />
The tool is supplied in a shipping position. The tool must be<br />
set to a working position before use.<br />
u Gently pull out the tube (14) until the adjustment button (6)<br />
locks into place.<br />
u When the button locks into place, the tool is set to the<br />
shortest working position.<br />
Warning! Never use the tool unless it is in a working position.<br />
Fitting the edge guide (fig. D)<br />
u Position the edge guide (13) in front of the tool as shown.<br />
u Gently pull apart the edge guide legs.<br />
u Slide the legs over the motor housing (8) into the holes<br />
(16) on either side.<br />
u Make sure the edge guide fits properly into the motor<br />
housing guides.


