

KitchenAid HF1290 AP - Freezer - HF1290 AP - Freezer EN (850796229020) Istruzioni per l'Uso
KitchenAid HF1290 AP - Freezer - HF1290 AP - Freezer EN (850796229020) Istruzioni per l'Uso
KitchenAid HF1290 AP - Freezer - HF1290 AP - Freezer EN (850796229020) Istruzioni per l'Uso

You also want an ePaper? Increase the reach of your titles
YUMPU automatically turns print PDFs into web optimized ePapers that Google loves.
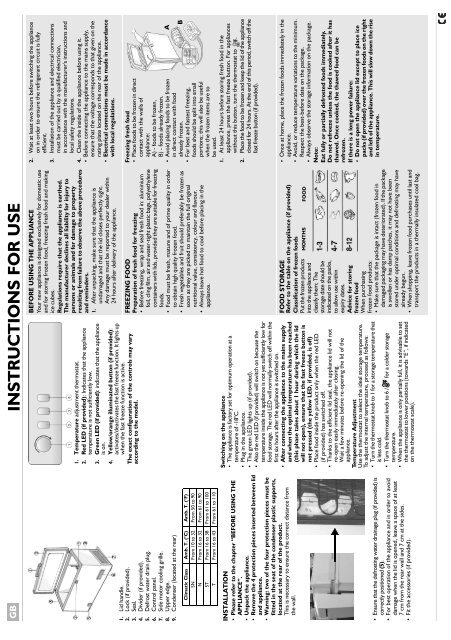
GB INSTRUCTIONS FOR USE<br />
1. Lid handle.<br />
2. Lock (if provided).<br />
3. Seal.<br />
4. Divider (if provided).<br />
5. Defrost water drain plug.<br />
6. Control panel.<br />
7. Side motor cooling grille.<br />
8. Up<strong>per</strong> edge.<br />
9. Condenser (located at the rear)<br />
Climatic Class Amb. T. (°C) Amb. T. (°F)<br />
SN From 10 to 32 From 50 to 90<br />
N From 16 to 32 From 61 to 90<br />
ST From 16 to 38 From 61 to 100<br />
T From 16 to 43 From 61 to 110<br />
INSTALLATION<br />
• Please refer to the chapter “BEFORE USING THE<br />
<strong>AP</strong>PLIANCE”.<br />
• Unpack the appliance.<br />
• Remove the 4 protection pieces inserted between lid<br />
and appliance.<br />
• Warning: two of the four protection pieces must be<br />
fitted in the seat of the condenser plastic supports,<br />
located at the rear of the product.<br />
This is necessary to ensure the correct distance from<br />
the wall.<br />
• Ensure that the defrosting water drainage plug (if provided) is<br />
correctly positioned (5).<br />
• For best o<strong>per</strong>ation of the appliance and in order to avoid<br />
damage when the lid is opened, leave a space of at least<br />
7 cm from the rear wall and 7 cm at the sides.<br />
• Fit the accessories (if provided).<br />
1. Tem<strong>per</strong>ature adjustment thermostat.<br />
2. Red LED (if provided): Indicates that the appliance<br />
tem<strong>per</strong>ature is not sufficiently low.<br />
3. Green LED (if provided): indicates that the appliance<br />
is on.<br />
4. Yellow/orange illuminated button (if provided):<br />
activates/deactivates the fast freeze function. It lights up<br />
when the fast freeze function is active.<br />
The exact configuration of the controls may vary<br />
according to the model.<br />
Switching on the appliance<br />
• The appliance is factory set for optimum o<strong>per</strong>ation at a<br />
tem<strong>per</strong>ature of -18°C.<br />
• Plug in the appliance.<br />
• The green LED lights up (if provided).<br />
• Also the red LED (if provided) will switch on because the<br />
tem<strong>per</strong>ature inside the appliance is not yet sufficiently low for<br />
food storage. The red LED will normally switch off within the<br />
first six hours after the appliance is switched on.<br />
• After connecting the appliance to the mains supply<br />
and when the optimal tem<strong>per</strong>ature has been reached<br />
(this phase takes about 1 hour during which the lid<br />
will not open), ensure that the fast freeze button is<br />
not pressed (the yellow LED, if provided, is off)<br />
• Place food inside the product only when the red LED<br />
(if provided) has switched off.<br />
• Thanks to the efficient lid seal, the appliance lid will not<br />
re-open easily immediately after closing.<br />
Wait a few minutes before re-opening the lid of the<br />
appliance.<br />
Tem<strong>per</strong>ature Adjustment<br />
Use the thermostat to select the ideal storage tem<strong>per</strong>ature.<br />
To adjust the internal tem<strong>per</strong>ature, proceed as follows:<br />
• Turn the thermostat knob to 1 for a storage tem<strong>per</strong>ature that<br />
is less cold.<br />
• Turn the thermostat knob to 6 / for a colder storage<br />
tem<strong>per</strong>ature.<br />
• When the appliance is only partially full, it is advisable to set<br />
the thermostat to lower positions (towards “E”, if indicated<br />
on the thermostat scale).<br />
BEFORE USING THE <strong>AP</strong>PLIANCE<br />
Your new appliance is designed exclusively for domestic use<br />
and for storing frozen food, freezing fresh food and making<br />
ice cubes.<br />
Regulations require that the appliance is earthed.<br />
The manufacturer declines all liability for injury to<br />
<strong>per</strong>sons or animals and for damage to pro<strong>per</strong>ty<br />
resulting from failure to observe the above procedures<br />
and reminders.<br />
1. After unpacking, make sure that the appliance is<br />
undamaged and that the lid closes <strong>per</strong>fectly tight.<br />
Any damage must be reported to your dealer within<br />
24 hours after delivery of the appliance.<br />
FREEZING FOOD<br />
Preparation of fresh food for freezing<br />
• Before freezing, wrap and seal fresh food in: aluminium<br />
foil, cling film, air and water-tight plastic bags, polyethylene<br />
containers with lids, provided they are suitable for freezing<br />
foods.<br />
• Food must be fresh, mature and of prime quality in order<br />
to obtain high quality frozen food.<br />
• Fresh vegetables and fruit should preferably be frozen as<br />
soon as they are picked to maintain the full original<br />
nutritional value, consistency, colour and flavour.<br />
• Always leave hot food to cool before placing in the<br />
appliance.<br />
FOOD STORAGE<br />
Refer to the table on the appliance (if provided)<br />
Classification of frozen foods<br />
Put the frozen products<br />
into the appliance and<br />
classify them; The<br />
storage date should be<br />
indicated on the packs,<br />
to allow use within<br />
expiry dates.<br />
Advice for storing<br />
frozen food<br />
When purchasing<br />
frozen food products:<br />
MONTHS FOOD<br />
• Make sure that the package is intact (frozen food in<br />
damaged packaging may have deteriorated). If the package<br />
is swollen or has damp patches, it may not have been<br />
stored under optimal conditions and defrosting may have<br />
already begun.<br />
• When shopping, leave frozen food purchases until last and<br />
transport the products in a thermally insulated cool bag.<br />
2. Wait at least two hours before switching the appliance<br />
on in order to ensure the refrigerant circuit is fully<br />
efficient.<br />
3. Installation of the appliance and electrical connections<br />
must be carried out by a qualified electrician,<br />
in accordance with the manufacturer's instructions and<br />
local safety regulations.<br />
4. Clean the inside of the appliance before using it.<br />
• Before connecting the appliance to the mains supply,<br />
ensure that the voltage corresponds to that given on the<br />
rating plate located on the rear of the appliance.<br />
• Electrical connections must be made in accordance<br />
with local regulations.<br />
Freezing fresh food<br />
• Place foods to be frozen in direct<br />
contact with the walls of<br />
appliance:<br />
A) - foods to be frozen,<br />
B) - foods already frozen.<br />
• Avoid placing foods to be frozen<br />
in direct contact with food<br />
already frozen.<br />
• For best and fastest freezing,<br />
foods should be split into small<br />
portions; this will also be useful<br />
when the frozen items are to<br />
be used.<br />
1. At least 24 hours before storing fresh food in the<br />
appliance, press the fast freeze button. For appliances<br />
without this button, turn the thermostat to .<br />
2. Place the food to be frozen and keep the lid of the appliance<br />
closed for 24 hours. At the end of this <strong>per</strong>iod, switch off the<br />
fast freeze button (if provided).<br />
A<br />
B<br />
• Once at home, place the frozen foods immediately in the<br />
appliance.<br />
• Avoid, or reduce tem<strong>per</strong>ature variations to the minimum.<br />
Respect the best-before date on the package.<br />
• Always observe the storage information on the package.<br />
Note:<br />
Eat fully or partially defrosted foods immediately.<br />
Do not refreeze unless the food is cooked after it has<br />
thawed. Once cooked, the thawed food can be<br />
refrozen.<br />
If there is a long power failure:<br />
• Do not open the appliance lid except to place ice<br />
packs (if provided) over the frozen foods on the right<br />
and left of the appliance. This will slow down the rise<br />
in tem<strong>per</strong>ature.
GB INSTRUCTIONS FOR USE<br />
PRECAUTIONS AND G<strong>EN</strong>ERAL<br />
RECOMM<strong>EN</strong>DATIONS<br />
• After installation, make sure that the appliance is not<br />
standing on the power supply cable.<br />
• Do not store glass containers with liquids in the appliance<br />
since they may burst.<br />
• Do not eat ice cubes or ice lollies immediately after taking<br />
them out of the appliance since they may cause cold burns.<br />
• Before servicing or cleaning the appliance, unplug it from<br />
the mains or disconnect the electrical power supply.<br />
• Do not install the appliance in places exposed to direct<br />
sunlight or near heat sources in order to avoid increasing<br />
power consumption.<br />
• Do not store or use petrol or other flammable vapours and<br />
liquids in the vicinity of this or any other appliance.<br />
The fumes can create a fire hazard or explosion.<br />
• Install the appliance in a <strong>per</strong>fectly horizontal position, on a floor<br />
strong enough to take its weight and in an area suitable for its<br />
size and use.<br />
• Install the appliance in a dry and well-ventilated place.<br />
The appliance is set for o<strong>per</strong>ation at specific ambient<br />
tem<strong>per</strong>ature ranges, according to the climatic class indicated<br />
on the data plate located at the rear of the product:<br />
The appliance may not work pro<strong>per</strong>ly if it is left for a long<br />
<strong>per</strong>iod at a tem<strong>per</strong>ature above or below the indicated range.<br />
• If the appliance is left empty for short <strong>per</strong>iods, it is<br />
preferable not to switch it off.<br />
• Be careful not to damage the floors when you move the<br />
appliance (e.g. parquet flooring).<br />
• Do not use mechanical devices or any means other than<br />
those recommended by the manufacturer to speed up the<br />
defrosting process.<br />
• Do not use electrical appliances inside the product, unless<br />
such appliances are specifically recommended by the<br />
manufacturer.<br />
• This appliance is not designed for use by young children or<br />
the infirm.<br />
• To avoid the risk of children being trapped and therefore<br />
suffocating, do not allow them to play or hide inside the<br />
appliance.<br />
• The power cable may only be replaced by an authorized<br />
<strong>per</strong>son.<br />
• Do not use extension leads or adapters.<br />
• It must be possible to disconnect the appliance from the<br />
mains by unplugging it or by means of a two-pole switch<br />
fitted upline of the socket.<br />
• Ensure that the voltage indicated on the appliance data<br />
plate corresponds to the domestic supply voltage.<br />
• Do not ingest the contents (non-toxic) of the ice packs<br />
(if provided).<br />
• Restrict the number of times you open the lid.<br />
DEFROSTING THE <strong>AP</strong>PLIANCE<br />
The appliance should be defrosted when the thickness of ice<br />
on the walls reaches 5-6 mm.<br />
• Disconnect the appliance from the mains power supply.<br />
• Remove the packs of food from the appliance and wrap<br />
them close together in newspa<strong>per</strong> and store in a very cool<br />
place or thermally insulated bag.<br />
• Leave the appliance lid open.<br />
• Remove the internal defrost water drain plug (depending<br />
on model).<br />
• Remove the external defrost<br />
water drain plug (depending on<br />
model) and reposition it as<br />
shown in the figure.<br />
• Place a bowl beneath the<br />
drainage channel to collect the<br />
residual water. If available, use<br />
the divider.<br />
• Speed up defrosting by using a<br />
spatula to detach the ice from<br />
the appliance walls.<br />
• Remove the ice from the bottom<br />
of the appliance.<br />
• In order to avoid <strong>per</strong>manent damage to the appliance<br />
interior, do not use pointed or sharp metal<br />
instruments for removing the ice.<br />
• Do not use abrasive products or heat up the interior<br />
artificially.<br />
• Dry the interior of the appliance thoroughly.<br />
• On completion of the defrosting, refit the plug.<br />
CARE AND MAINT<strong>EN</strong>ANCE<br />
• Remove the ice from the up<strong>per</strong> edge (see the<br />
Troubleshooting Guide).<br />
• Clean the inside after defrosting, using a sponge dampened<br />
with warm water and/or mild detergent.<br />
• Clean the side motor cooling grille (depending on model).<br />
• Remove dust from the condenser on the rear of the<br />
appliance.<br />
Before carrying out maintenance, unplug the appliance.<br />
Do not use abrasive products, scourers or<br />
stain-removers (e.g. acetone, trichloroethylene) to<br />
clean the appliance.<br />
To obtain the best results from your appliance, carry<br />
out cleaning and maintenance at least once a year.<br />
CHANGING THE LID<br />
LIGHT BULB<br />
(IF PROVIDED)<br />
• Disconnect the appliance from<br />
the mains power supply.<br />
• Remove the diffuser by<br />
following the sequence of steps<br />
shown in the figure.<br />
• Unscrew the light bulb and<br />
replace it with an identical bulb of the same wattage and<br />
voltage.<br />
• Refit the diffuser and plug in the appliance.<br />
TROUBLESHOOTING GUIDE<br />
1. The red LED (if provided) remains alight.<br />
• Is there a power failure?<br />
• Is defrosting in progress?<br />
• Is the appliance lid pro<strong>per</strong>ly closed?<br />
• Is the appliance positioned near a heat source?<br />
• Is the thermostat setting correct?<br />
• Are the ventilation grille and condenser clean?<br />
2. The appliance is too noisy.<br />
• Is the appliance <strong>per</strong>fectly horizontal?<br />
• Is the appliance in contact with other furniture or objects<br />
that may cause vibrations?<br />
• Has the packaging been removed from under the appliance?<br />
Note: Gurgling noises from the refrigerating circuit after the<br />
compressor cuts out are <strong>per</strong>fectly normal.<br />
3. The green LED (if provided) is off and the appliance is<br />
not working.<br />
• Is there a power failure?<br />
• Is the plug pro<strong>per</strong>ly inserted in the socket?<br />
• Is the electric cable intact?<br />
4. The green LED (if provided) is off and the appliance is<br />
working.<br />
• The green LED is not working. Contact the After Sales<br />
Service for a replacement.<br />
5. The compressor runs continuously.<br />
• Have hot foods been put in the appliance?<br />
• Has the appliance lid been left open for a long time?<br />
• Is the appliance positioned in a very warm room or near<br />
heat sources?<br />
• Is the thermostat setting correct?<br />
• Has the fast freeze function (depending on model) been<br />
pressed by mistake?<br />
6. Too much ice on the up<strong>per</strong> edge.<br />
• Are the defrost water drainage plugs correctly positioned?<br />
• Is the appliance lid pro<strong>per</strong>ly closed?<br />
• Is the appliance lid seal damaged or deformed? (See chapter<br />
“Installation”)<br />
• Have the 4 protection pieces been removed? (See chapter<br />
“Installation”)<br />
7. Condensation forms on the external walls of the<br />
appliance<br />
• It is normal for condensation to form under certain<br />
atmospheric conditions (humidity above 85%) or if the<br />
appliance is located in a damp or poorly ventilated room.<br />
The <strong>per</strong>formance of the appliance is in no way affected.<br />
8. The layer of ice on the internal walls of the appliance<br />
is not uniform.<br />
• This phenomenon is quite normal.<br />
SAFEGUARDING THE <strong>EN</strong>VIRONM<strong>EN</strong>T<br />
1. Packing<br />
The packaging material is entirely recyclable, and marked with<br />
the recycling symbol. Follow local regulations for scrapping.<br />
Keep the packaging materials (plastic bags, polystyrene parts,<br />
etc.) out of reach of children, as they are potentially dangerous.<br />
AFTER-SALES SERVICE<br />
Before contacting After-Sales Service:<br />
1. See if you can solve the problem yourself.<br />
2. Switch the appliance on again to see if the problem has<br />
been solved. If it has not, disconnect the appliance from<br />
the power supply and wait for about an hour before<br />
switching on again.<br />
3. If the problem <strong>per</strong>sists after this course of action, contact<br />
After-Sales Service.<br />
2. Scrapping<br />
The appliance is manufactured using recyclable material .<br />
This appliance is marked according to the European directive<br />
2002/96/EC on Waste Electrical and Electronic Equipment<br />
(WEEE).<br />
By ensuring this product is disposed of correctly, you can<br />
help prevent potential damaging consequences for the<br />
environment and human health.<br />
The symbol on the appliance, or on the accompanying<br />
documents, indicates that this appliance should not be<br />
treated as household waste, but must taken instead to a<br />
suitable collection point for the recycling of electrical and<br />
electronic equipment.<br />
Before scrapping, make the appliance unusable by cutting off<br />
the power cable and removing the doors and shelves so that<br />
children cannot easily climb inside the appliance.<br />
Disposal must be carried out in accordance with local<br />
environmental regulations for waste disposal. Deliver the<br />
appliance immediately to an authorized dump; do not leave it<br />
unattended even for a few days, since it is potentially<br />
dangerous for children. For more detailed information about<br />
treatment, recovery and recycling of this product, please<br />
contact your competent local authority, your household<br />
waste disposal service or the shop where you purchased the<br />
appliance.<br />
Information:<br />
This appliance does not contain CFCs (replaced with R134a)<br />
or HFCs (replaced with R600a).<br />
Appliances with Isobutane (R600a):<br />
Isobutane is a natural gas with low environmental impact.<br />
Caution is required, however, since isobutane is flammable.<br />
Therefore, it is essential to ensure that refrigerant pipelines<br />
are not damaged.<br />
Declaration of conformity<br />
• This appliance is designed to store food and is manufactured<br />
in conformity with European Directive 90/128/EEC,<br />
02/72/EEC and Regulation (EC) No. 1935/2004<br />
• Thisappliance is designed, manufactured, and retailed in<br />
compliance with:<br />
- the safety objectives of the Low Voltage Directive<br />
73/23/EEC;<br />
- the protection requirements of the "EMC" Directive<br />
89/336/EEC amended by Directive 93/68/EEC.<br />
• The electrical safety of the appliance can only be<br />
guaranteed if the product is connected to an approved<br />
earth connection.<br />
Specify:<br />
• the nature of the fault,<br />
• the model,<br />
• the service number (the number after the word SERVICE<br />
on the rating plate on the rear of the appliance)<br />
• your full address,<br />
• your telephone number and area code.


