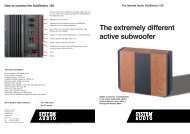
brugsanvisning PDF (465.29 KB) - System Audio
brugsanvisning PDF (465.29 KB) - System Audio
brugsanvisning PDF (465.29 KB) - System Audio

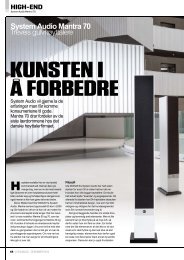
Create successful ePaper yourself
Turn your PDF publications into a flip-book with our unique Google optimized e-Paper software.
1 2 3<br />
4 5 6<br />
7 8<br />
9 10<br />
set up<br />
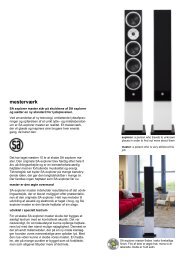
There are several ways of positioning a subwoofer in the room. As the loudspeaker provides only deep tones (sometimes) under quite<br />
heavy sound pressure, the quality of the sound is influenced by the acoustics of the room. It may, therefore, be a good idea to try out<br />
different positions. Please note:<br />
that the amount of bass is increased when the subwoofer is positioned close to a wall and reduced when the distance to the wall is<br />
increased. A corner will increase the amount of bass<br />
that the subwoofer’s sound reproduction can be changed by alternating between bass reflex and sealed chamber – see the special<br />
section about this<br />
that the position of the subwoofer vis-à-vis the stereo system’s other loudspeakers is important for the sound. If possible, you<br />
should place the subwoofer between the main speakers (front speakers) and at the same distance from the listener as the main<br />
speakers<br />
if the subwoofer is placed on a solid base, e.g. a wooden floor, we recommend that you use the rubber feet or protectors under the<br />
spikes. If the subwoofer is placed on a soft base, e.g. a carpet, we recommend that you use spikes.<br />
that if the subwoofer is used in bass reflex mode, you must leave enough free space under the unit for air to be escape freely from<br />
the reflex port<br />
the better your system, the better the subwoofer will sound<br />
that multiple subwoofers in the same system is usually better than a single one<br />
that good cables will improve the sound<br />
never turn the volume up to a level where the sound is no longer clear<br />
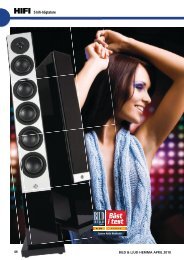
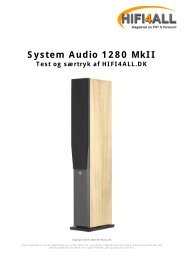
SA subwoofers can be used to supplement centre channel speakers and speakers in a stereo system, etc.<br />
remove the front grille for the best possible sound<br />
visit SA for more good advice and ideas at www.system-audio.com<br />
choice of bass reflex / sealed chamber<br />
the subwoofer is delivered bass reflex configuration but can easily be changed to sealed chamber.<br />
Turn the cabinet around so the underside faces up. You may wish to use the protective frame from the<br />
packaging as a base. Remove the 4 screws shown on the illustration to the right. Turn the bottom<br />
plate 180°. Replace the 4 screws. The reflex port is now sealed and the cabinet will act as a sealed<br />
chamber.<br />
It is a matter of taste which option you choose. Here are a couple of pointers though.<br />
Choose sealed chamber if: Choose bass reflex if:<br />
speed and precision have top priority. efficiency and sonic richness have top priority<br />
11<br />
12<br />
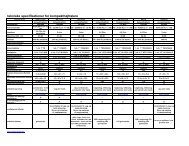
Fig A<br />
1. Indicator for on/off/standby<br />
Indikator for tænd/sluk/standby<br />
2. Volume control<br />
Styrkeregulering<br />
3. Crossover frequency adjust<br />
Delefrekvens justering<br />
4. Input for line signal. Left + Right<br />
Indgangsbøsninger for liniesignal. Venstre + højte<br />
5. Off/On selector with auto function<br />
Tænd/sluk omskifter med automatic function<br />
6. Phase switch<br />
Fase omskifter<br />
7. Speaker high level input right channel + & -<br />
Højttalerindgangsbøsninger højre kanal + & -<br />
8. Speaker high level input left channel + & -<br />
Højttalerindgangsbøsninger venstre kanal + & -<br />
9. Speaker high level output right channel + & -<br />
Højttalerudgansbøsninger højre kanal + & -<br />
10. Speaker high level output left channel + & -<br />
Højttalerudgansbøsninger venstre kanal + & -<br />
11. Mains switch<br />
Hovedafbryder<br />
12. Socket for power cable<br />
Tilslutningsbrønd for strømkabel<br />
3