Práctica de laboratorio 11.2.2b Listas de acceso extendidas sencillas
Práctica de laboratorio 11.2.2b Listas de acceso extendidas sencillas
Práctica de laboratorio 11.2.2b Listas de acceso extendidas sencillas
You also want an ePaper? Increase the reach of your titles
YUMPU automatically turns print PDFs into web optimized ePapers that Google loves.
Objetivo<br />
Situación<br />
En esta práctica <strong>de</strong> <strong>laboratorio</strong>, se configuran listas <strong>de</strong> <strong>acceso</strong> <strong>extendidas</strong> para filtrar tráfico <strong>de</strong> red a<br />
red, <strong>de</strong> host a red y <strong>de</strong> red a host.<br />
Una empresa <strong>de</strong> marketing tiene dos instalaciones. La oficina principal es en Birmingham (BHM) y la<br />
sucursal es en Gads<strong>de</strong>n (GAD). El administrador <strong>de</strong> telecomunicaciones <strong>de</strong> ambas oficinas necesita<br />
planificar e implementar listas <strong>de</strong> control <strong>de</strong> <strong>acceso</strong> para mejorar la seguridad y el <strong>de</strong>sempeño. En la<br />
oficina <strong>de</strong> BHM, hay dos grupos <strong>de</strong> usuarios <strong>de</strong> re<strong>de</strong>s. Uno es el grupo Administrativo y el otro es el<br />
grupo <strong>de</strong> Producción, y cada grupo utiliza una red diferente. Las dos re<strong>de</strong>s se interconectan con un<br />
router.<br />
La oficina <strong>de</strong> GAD es una red stub y sólo tiene una LAN conectada a ella.<br />
Paso 1 Configuraciones básicas <strong>de</strong>l router y el host<br />
a. Interconecte los routers y los hosts <strong>de</strong> acuerdo con el diagrama. Configure todos los aspectos<br />
básicos <strong>de</strong>l router, como el nombre <strong>de</strong> host, contraseña enable, <strong>acceso</strong> <strong>de</strong> telnet, interfaces <strong>de</strong>l<br />
router. Consulte el diagrama y las tablas que aparecen más arriba.<br />
Nota: El router BHM requiere dos interfaces Ethernet.<br />
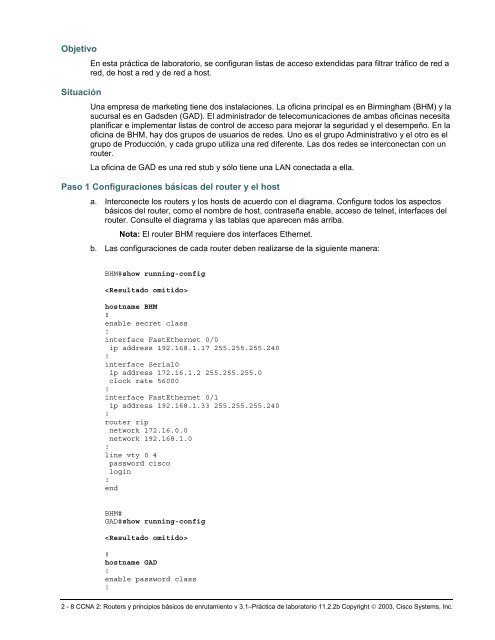
b. Las configuraciones <strong>de</strong> cada router <strong>de</strong>ben realizarse <strong>de</strong> la siguiente manera:<br />
BHM#show running-config<br />
<br />
hostname BHM<br />
!<br />
enable secret class<br />
!<br />
interface FastEthernet 0/0<br />
ip address 192.168.1.17 255.255.255.240<br />
!<br />
interface Serial0<br />
ip address 172.16.1.2 255.255.255.0<br />
clock rate 56000<br />
!<br />
interface FastEthernet 0/1<br />
ip address 192.168.1.33 255.255.255.240<br />
!<br />
router rip<br />
network 172.16.0.0<br />
network 192.168.1.0<br />
!<br />
line vty 0 4<br />
password cisco<br />
login<br />
!<br />
end<br />
BHM#<br />
GAD#show running-config<br />
<br />
!<br />
hostname GAD<br />
!<br />
enable password class<br />
!<br />
2 - 8 CCNA 2: Routers y principios básicos <strong>de</strong> enrutamiento v 3.1–<strong>Práctica</strong> <strong>de</strong> <strong>laboratorio</strong> <strong>11.2.2b</strong> Copyright © 2003, Cisco Systems, Inc.


