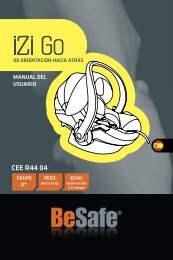
manual de usuario del Vista - Mimame
manual de usuario del Vista - Mimame
manual de usuario del Vista - Mimame

You also want an ePaper? Increase the reach of your titles
YUMPU automatically turns print PDFs into web optimized ePapers that Google loves.
CARRYCOT<br />
STORAGE BAG<br />
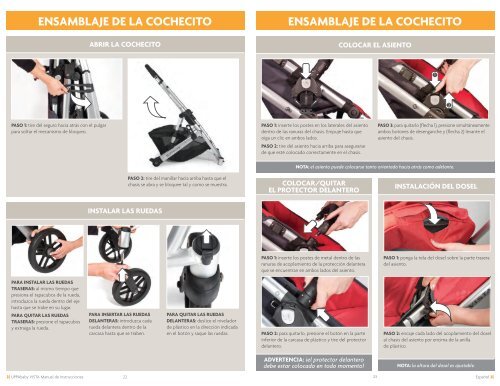
ENSAMBLAJE DE LA COCHECITO<br />
PASO 1: tire <strong>de</strong>l seguro hacia atrás con el pulgar<br />
para soltar el mecanismo <strong>de</strong> bloqueo.<br />
PARA INSTALAR LAS RUEDAS<br />
TRASERAS: al mismo tiempo que<br />
presiona el tapacubos <strong>de</strong> la rueda,<br />
introduzca la rueda <strong>de</strong>ntro <strong>de</strong>l eje<br />
hasta que se trabe en su lugar.<br />
PARA QUITAR LAS RUEDAS<br />
TRASERAS: presione el tapacubos<br />
y extraiga la rueda.<br />
1<br />
1<br />
1<br />
2<br />
2<br />
2<br />
ABRIR LA COCHECITO<br />
INSTALAR LAS RUEDAS<br />
CLICK CLIC<br />
2<br />
PARA INSERTAR LAS RUEDAS<br />
DELANTERAS: introduzca cada<br />
rueda <strong>de</strong>lantera <strong>de</strong>ntro <strong>de</strong> la<br />
carcasa hasta que se traben.<br />
1<br />
1<br />
1<br />
2<br />
2<br />
PASO 2: tire <strong>de</strong>l manillar hacia arriba hasta que el<br />
chasis se abra y se bloquee tal y como se muestra.<br />
CLICK CLIC<br />
PARA QUITAR LAS RUEDAS<br />
DELANTERAS: <strong>de</strong>slice el nivelador<br />
<strong>de</strong> plástico en la dirección indicada<br />
en el botón y saque las ruedas.<br />
ENSAMBLAJE DE LA COCHECITO<br />
PASO 1: inserte los postes en los laterales <strong>de</strong>l asiento<br />
<strong>de</strong>ntro <strong>de</strong> las ranuras <strong>de</strong>l chasis. Empuje hasta que<br />
oiga un clic en ambos lados.<br />
PASO 2: tire <strong>de</strong>l asiento hacia arriba para asegurarse<br />
<strong>de</strong> que esté colocado correctamente en el chasis.<br />
COLOCAR EL ASIENTO<br />
PASO 3: para quitarlo (flecha 1), presione simultáneamente<br />
ambos botones <strong>de</strong> <strong>de</strong>senganche y (flecha 2) levante el<br />
asiento <strong>de</strong>l chasis.<br />
NOTA: el asiento pue<strong>de</strong> colocarse tanto orientado hacia atrás como a<strong>de</strong>lante.<br />
COLOCAR/QUITAR<br />
EL PROTECTOR DELANTERO<br />
PASO 1: inserte los postes <strong>de</strong> metal <strong>de</strong>ntro <strong>de</strong> las<br />
ranuras <strong>de</strong> acoplamiento <strong>de</strong> la protección <strong>de</strong>lantera<br />
que se encuentran en ambos lados <strong>de</strong>l asiento.<br />
PASO 2: para quitarlo, presione el botón en la parte<br />
inferior <strong>de</strong> la carcasa <strong>de</strong> plástico y tire <strong>de</strong>l protector<br />
<strong>de</strong>lantero.<br />
ADVERTENCIA: ¡el protector <strong>de</strong>lantero<br />
<strong>de</strong>be estar colocado en todo momento!<br />
INSTALACIÓN DEL DOSEL<br />
PASO 1: ponga la tela <strong>de</strong>l dosel sobre la parte trasera<br />
<strong>de</strong>l asiento.<br />
PASO 2: encaje cada lado <strong>de</strong>l acoplamiento <strong>de</strong>l dosel<br />
al chasis <strong>de</strong>l asiento por encima <strong>de</strong> la anilla<br />
<strong>de</strong> plástico.<br />
NOTA: la altura <strong>de</strong>l dosel es ajustable.<br />
UPPAbaby VISTA Manual <strong>de</strong> Instrucciones 22<br />
23<br />
Español