metal 50 R (OK 3).indd - Fellowes
metal 50 R (OK 3).indd - Fellowes
metal 50 R (OK 3).indd - Fellowes

You also want an ePaper? Increase the reach of your titles
YUMPU automatically turns print PDFs into web optimized ePapers that Google loves.
ENGLISH<br />
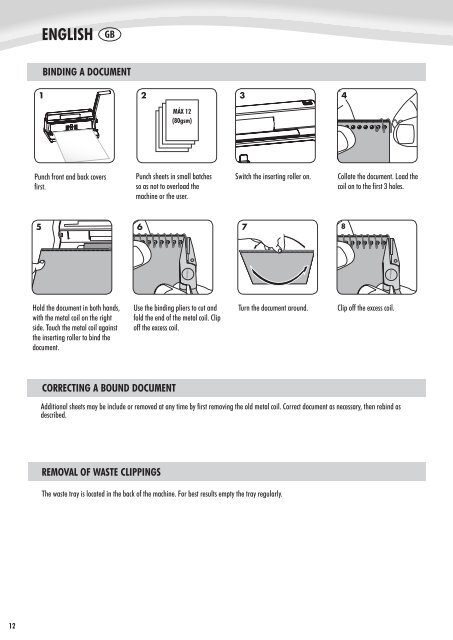
BINDING A DOCUMENT<br />
1<br />
2<br />
3<br />
4<br />
MÁX 12<br />
(80gsm)<br />
Punch front and back covers<br />
first.<br />
Punch sheets in small batches<br />
so as not to overload the<br />
machine or the user.<br />
Switch the inserting roller on.<br />
Collate the document. Load the<br />
coil on to the first 3 holes.<br />
5<br />
6<br />
7<br />
8<br />
Hold the document in both hands,<br />
with the <strong>metal</strong> coil on the right<br />
side. Touch the <strong>metal</strong> coil against<br />
the inserting roller to bind the<br />
document.<br />
Use the binding pliers to cut and<br />
fold the end of the <strong>metal</strong> coil. Clip<br />
off the excess coil.<br />
Turn the document around.<br />
Clip off the excess coil.<br />
CORRECTING A BOUND DOCUMENT<br />
Additional sheets may be include or removed at any time by first removing the old <strong>metal</strong> coil. Correct document as necessary, then rebind as<br />
described.<br />
REMOVAL OF WASTE CLIPPINGS<br />
The waste tray is located in the back of the machine. For best results empty the tray regularly.<br />
12