
You also want an ePaper? Increase the reach of your titles
YUMPU automatically turns print PDFs into web optimized ePapers that Google loves.
ENGLISH<br />
EN<br />
1 GENERAL<br />
This symbol indicates WARNING.<br />
Serious personal injury and/or damage<br />
to property may result if the<br />
instructions are not followed carefully.<br />
You must read these instructions for use<br />
and its SAFETY INSTRUCTIONS<br />
carefully, before starting up the<br />
machine.<br />
SYMBOLS<br />
The following symbols appear on the machine.<br />
They are there to remind you of the care and<br />
attention required during use and maintenance.<br />
This is what the symbols mean:<br />
Warning!<br />
Read the instruction manual and the safety<br />
instructions before using the machine.<br />
Warning!<br />
Keep spectators away. Beware of objects<br />
being flung out.<br />
Warning!<br />
Do not put hands or feet under the cover of<br />
the machine when it is running.<br />
Warning - rotating blades!<br />
The blades will continue to rotate after the<br />
machine has been switched off.<br />
Warning!<br />
Remove the plug from the wall socket<br />
before carrying out any kind of<br />
maintenance.<br />
Warning!<br />
Only use the machine in dry conditions<br />
and never outdoors when it is raining.<br />
Warning!<br />
Wear safety gloves, safety goggles and<br />
hearing protection.<br />
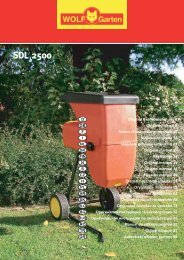
ASSEMBLY<br />
1. Open the box and unpack all the parts.<br />
2. See fig. 1. Open the casing (A) by releasing the<br />
knob (E) to access the leg’s mounting holes.<br />
3. Install the legs using two screws M6x20 (B).<br />
Tighten using the Allen key provided.<br />
4. Install the wheel axle (I) using the two M6x50<br />
screws (C) and nuts. Use the wrenches provided.<br />
5. Slide the wheels (H) on to the axles.<br />
6. Install the lugs (G) in the end of the axles.<br />
Knock in the lugs using a hammer.<br />
7. Install the wheel caps (F).<br />
USING THE MACHINE<br />
GENERAL<br />
This machine is only intended for private use, not<br />
to be used professionally.<br />
The compost grinder is designed to grind organic<br />
material such as dry plant residue, twigs, sticks and<br />
branches.<br />
TRANSPORT<br />
Take great care during transport and when the<br />
machine is to be lifted. Lift the machine by taking<br />
a firm grip of the legs by the mounting to the motor<br />
housing, under the compost grinder, and lift<br />
carefully. Never lift the machine using the cover.<br />
ELECTRICAL CONNECTION<br />
Connect the machine to a 230-240 VAC single<br />
phase electric socket with a protective conductor<br />
(earth). The electric circuit should be fused with a<br />
10A inert fuse.<br />
Always use a protectively earthed rubber<br />
connection cable. The cable should be of good<br />
quality, intended for outdoor use.<br />
The cable’s cross-section should be at least 3 x 1.5<br />
mm 2 .<br />
The connector (female contact) must be moistureproof.<br />
You are recommended to use an earth leakage<br />
circuit breaker which interrupts the current in the<br />
event of something happening to the machine or<br />
connection cable.<br />
29