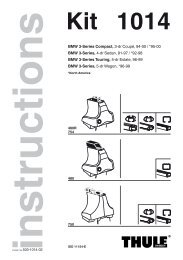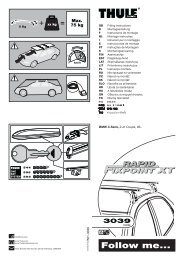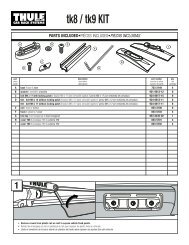
SlickROC 4 - Rack Attack
SlickROC 4 - Rack Attack
SlickROC 4 - Rack Attack

You also want an ePaper? Increase the reach of your titles
YUMPU automatically turns print PDFs into web optimized ePapers that Google loves.
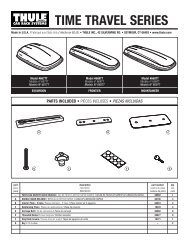
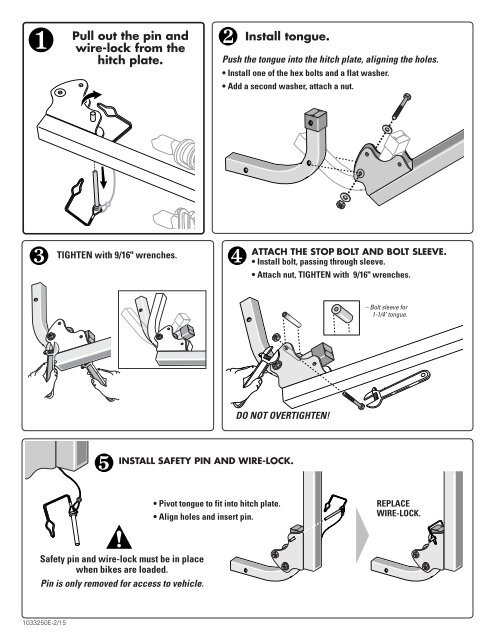
Pull out the pin and<br />
wire-lock from the<br />
hitch plate.<br />
Install tongue.<br />
Push the tongue into the hitch plate, aligning the holes.<br />
• Install one of the hex bolts and a flat washer.<br />
• Add a second washer, attach a nut.<br />
TIGHTEN with 9/16" wrenches.<br />
ATTACH THE STOP BOLT AND BOLT SLEEVE.<br />
• Install bolt, passing through sleeve.<br />
• Attach nut, TIGHTEN with 9/16" wrenches.<br />
– Bolt sleeve for<br />
1-1/4" tongue.<br />
DO NOT OVERTIGHTEN!<br />
INSTALL SAFETY PIN AND WIRE-LOCK.<br />
• Pivot tongue to fit into hitch plate.<br />
• Align holes and insert pin.<br />
REPLACE<br />
WIRE-LOCK.<br />
Safety pin and wire-lock must be in place<br />
when bikes are loaded.<br />
Pin is only removed for access to vehicle.<br />
1033250E-2/15