Betriebsanweisung - Socorex
Betriebsanweisung - Socorex
Betriebsanweisung - Socorex

You also want an ePaper? Increase the reach of your titles
YUMPU automatically turns print PDFs into web optimized ePapers that Google loves.
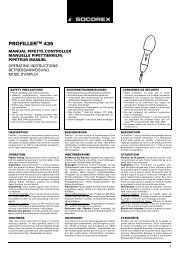
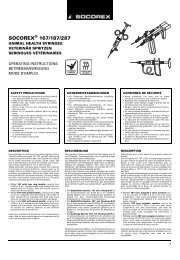
MAINTENANCE<br />
The Acura ® manual 810 pipette are in conformity<br />
with Council directive IVD 98/79 EEC (in vitro diagnostic<br />
medical devices). Consequently, part replacement<br />
and calibration are performed under<br />
user responsibility. The models were designed to<br />
sustain long-term operation with minimal maintenance<br />
and service requirements. However it is recommended<br />
to control instrument performance in<br />
accordance with laboratory internal procedures<br />
(SOP, GLP, etc) or at least once a year. Defects parts<br />
must be replaced, or instrument returned to dealer<br />
for repair. Order original spare parts from authorised<br />
dealers only.<br />
Tightness control<br />
A tight air chamber is paramount for the instrument<br />
to provide accurate and precise results. Leaks can<br />
be detected by observing a droplet forming and falling<br />
from the extremity of the straw. Special attention<br />
must be paid to the following points in case of<br />
leakage:<br />
Matching of straw and nozzle.<br />
Dirty or damaged nozzle.<br />
Worn-out PTFE sleeve and/or O-ring.<br />
Damaged plunger.<br />
Untight plunger calibration screw.<br />
Cleaning<br />
Elements of lower assembly can be cleaned with alcohol,<br />
or soaked in appropriate detergent or desinfectant<br />
solution. This operation is particularly<br />
important if liquid accidentally entered the pipette.<br />
Rinse and dry instrument before reassembling. If<br />
ultrasonic bath is used to remove sticking residues,<br />
slightly grease O-ring before reassembling (see<br />
below).<br />
Sterilization<br />
Instrument has been designed for repeated sterilisation<br />
in the autoclave at 121 °C (20 minutes), fully<br />
assembled. Before autoclaving, remove nozzle filter.<br />
Place instrument horizontally in the autoclave,<br />
avoiding any direct contact with metal.<br />
Allow instrument to dry and cool down before use.<br />
Insert new nozzle filter. Check tightness and accuracy<br />
regularly but at least after 50 autoclaving cycles.<br />
Check volumetric module, tighten barrel if loose.<br />
Repeated autoclaving may affect material colours<br />
and free rotation of Smartie colour caps.<br />
Correct autoclaving and resulting sterility are the<br />
responsibility of the user.<br />
WARTUNG<br />
Die Acura ® manual 810 Pipette entspricht den Bestimmungen<br />
der Richtlinie IVD 98/79 EG (medizinische<br />
Geräte für In-Vitro Diagnostik). Demzufolge<br />
steht jede Modifikation an der Pipette (z. B. Ersatzteilaustausch,<br />
Kalibrierung) unter der Verantwortung<br />
des Anwenders. Das Modell benötigt in der<br />
Regel keine Wartung. Stetige Pflege und Reinigung<br />
tragen zur optimalen Funktion und Langlebigkeit<br />
des Instruments bei. Es wird empfohlen, die Leistungsdaten<br />
gemäss internen Kontrollprozeduren<br />
(SOP, GLP, usw.) oder mindestens einmal pro Jahr<br />
zu prüfen. Defekte Teile nur durch Originalteile vom<br />
Hersteller ersetzen. Instrument zur Reparatur an<br />
den Fachhandel einsenden.<br />
Kontrolle der Abdichtung<br />
Eine korrekte Funktion des Instruments ist nur gegeben,<br />
wenn das Luftpolster dicht schliesst. Undichte<br />
zeigt sich durch Tropfenbildung an der<br />
Halmspitze. Folgende Stellen können betroffen<br />
sein:<br />
Anpassung Halmspitze / Konus.<br />
Schmutziger oder beschädigter Konus.<br />
Abgenützte PTFE Hülse und/oder O-Ring.<br />
Beschädigter Kolben.<br />
Undichte Kolbenkalibrierschraube.<br />
Reinigung<br />
Der abgenommene Unterteil der Pipette kann mit<br />
Wasser oder Alkohol gereinigt werden. Bei starker<br />
Verschmutzung können die einzelnen Teile auch in<br />
eine desinfizierende Lösung getaucht werden. Eine<br />
sachgemässe Reinigung ist notwendig, wenn versehentlich<br />
Flüssigkeit in das Pipetteninnere eingedrungen<br />
ist. Instrument vor dem Zusammensetzen<br />
spülen und trocknen. Besonders hartnäckige Rückstände<br />
im Ultraschall-Bad entfernen. Vor dem Zusammensetzen<br />
der Pipette O-Ring leicht einfetten<br />
(siehe unten).<br />
Sterilisation<br />
Die Konstruktion des Instruments berücksichtigt<br />
ein wiederholtes Sterilisieren im Autoklav bei<br />
121 °C (20 Minuten). Schutzfilter vor dem Autoklavieren<br />
entfernen. Instrument horizontal in den<br />
Autoklav legen, direkten Kontakt mit Metall vermeiden.<br />
Vor Gebrauch prüfen, dass Pipette trocken und vollständig<br />
abgekühlt ist. Neuen Schutzfilter anbringen.<br />
Abdichtung und Leistungsdaten regelmässig,<br />
jedoch mindestens nach 50 Autoklavierungszyklen<br />
kontrollieren. Volumeneinheit, falls lose, wieder anziehen.<br />
Eine Veränderung der Materialfarbe sowie<br />
erschwerte Rotation der Smartie Kappe können<br />
nach wiederholtem Autoklavieren auftreten.<br />
Korrektes Autoklavieren und daraus resultierende<br />
Sterilität stehen unter der Verantwortung des Anwenders.<br />
ENTRETIEN<br />
La pipette Acura ® manual 810 respecte les exigences<br />
de la directive IVD 98/79 CE (dispositifs médicaux<br />
pour le diagnostic in vitro). Par conséquent<br />
tout changement (p. ex. pièces, calibration) est fait<br />
sous la responsabilité de l’opérateur. L’instrument<br />
ne nécessite pratiquement aucun entretien. Le soin<br />
apporté lors de son utilisation et son maintien en<br />
état de propreté contribuent à son bon fonctionnement<br />
et à sa longévité. Il est pourtant recommandé<br />
de contrôler les performances de l’instrument selon<br />
les procédures internes du laboratoire (POS, BPL,<br />
etc.) ou au minimum une fois par année. Toute pièce<br />
défectueuse doit être remplacée ou l’instrument<br />
retourné pour réparation. N’utiliser que des pièces<br />
de rechange d’origine commandées auprès d’un<br />
distributeur agréé.<br />
Contrôle d’étanchéité<br />
Pour que la pipette fonctionne correctement, la<br />
chambre contenant le coussin d'air doit être étanche.<br />
Un défaut d'étanchéité se manifeste par la formation<br />
d'une gouttelette qui se détache de l’extrémité<br />
de la paille. Dans ce cas, porter une attention<br />
particulière aux points suivants:<br />
Adéquation paille / cône.<br />
Cône porte-paille sale ou abîmé.<br />
Joint et/ou manchette PTFE usés.<br />
Piston endommagé.<br />
Vis de calibration du piston non étanche.<br />
Nettoyage<br />
La partie basse peut être nettoyée à l’alcool ou<br />
plongée dans une solution détergente ou désinfectante.<br />
Cette opération est particulièrement importante<br />
si du liquide entre par inadvertance dans l’instrument.<br />
Rincer et sécher avant assemblage.<br />
Le bain à ultrasons est un auxiliaire efficace pour<br />
éliminer les saletés les plus tenaces; graisser<br />
ensuite légèrement le joint avant de remonter<br />
l’instrument (voir ci-dessous).<br />
Stérilisation<br />
La pipette est conçue pour être stérilisée à l'autoclave<br />
à 121 °C, (20 minutes) sans démontage. Avant<br />
l'autoclavage, retirer le filtre de protection. Placer<br />
l'instrument à plat dans l'autoclave en évitant tout<br />
contact direct avec des pièces métalliques.<br />
La pipette doit être sèche et complètement refroidie<br />
avant son utilisation. Introduire un nouveau filtre.<br />
Contrôler la justesse et l'étanchéité de l'instrument<br />
régulièrement, mais au minimum après 50 cycles<br />
d'autoclavage. Contrôler aussi la bonne tenue du<br />
module volumétrique, revisser en cas de besoin.<br />
Un changement de couleur des matériaux de même<br />
qu'une résistance à la rotation du capuchon smartie<br />
peuvent apparaître à long terme.<br />
L’utilisateur est responsable des bonnes conditions<br />
d’autoclavage ainsi que de la stérilité résultante.<br />
3