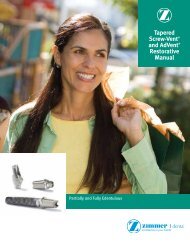
Implants Tapered Screw-Vent et AdVent - Zimmer Dental
Implants Tapered Screw-Vent et AdVent - Zimmer Dental
Implants Tapered Screw-Vent et AdVent - Zimmer Dental

You also want an ePaper? Increase the reach of your titles
YUMPU automatically turns print PDFs into web optimized ePapers that Google loves.
Ø 3,7mm<br />
Ø 4,7mm<br />
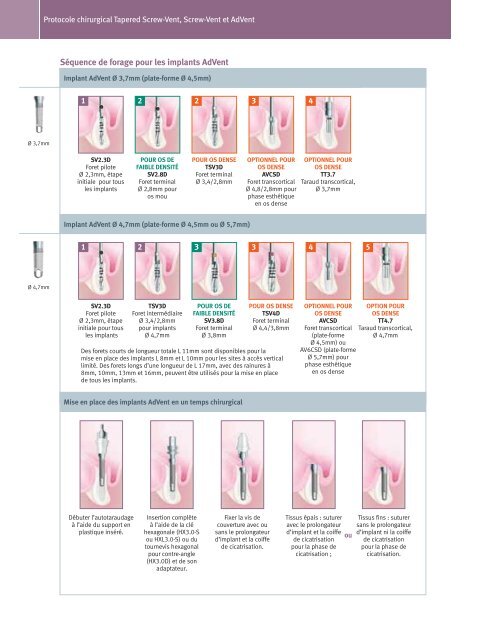
Protocole chirurgical <strong>Tapered</strong> <strong>Screw</strong>-<strong>Vent</strong>, <strong>Screw</strong>-<strong>Vent</strong> <strong>et</strong> Ad<strong>Vent</strong><br />
Séquence de forage pour les implants Ad<strong>Vent</strong><br />
Implant Ad<strong>Vent</strong> Ø 3,7mm (plate-forme Ø 4,5mm)<br />
1 2<br />
SV2.3D<br />
For<strong>et</strong> pilote<br />
Ø 2,3mm, étape<br />
initiale pour tous<br />
les implants<br />
POUR OS DE<br />
FAIBLE DENSITÉ<br />
SV2.8D<br />
For<strong>et</strong> terminal<br />
Ø 2,8mm pour<br />
os mou<br />
2<br />
POUR OS DENSE<br />
TSV3D<br />
For<strong>et</strong> terminal<br />
Ø 3,4/2,8mm<br />
Implant Ad<strong>Vent</strong> Ø 4,7mm (plate-forme Ø 4,5mm ou Ø 5,7mm)<br />
1<br />
SV2.3D<br />
For<strong>et</strong> pilote<br />
Ø 2,3mm, étape<br />
initiale pour tous<br />
les implants<br />
2<br />
TSV3D<br />
For<strong>et</strong> intermédiaire<br />
Ø 3,4/2,8mm<br />
pour implants<br />
Ø 4,7mm<br />
3<br />
POUR OS DE<br />
FAIBLE DENSITÉ<br />
SV3.8D<br />
For<strong>et</strong> terminal<br />
Ø 3,8mm<br />
3<br />
OPTIONNEL POUR<br />
OS DENSE<br />
AVCSD<br />
For<strong>et</strong> transcortical<br />
Ø 4,8/2,8mm pour<br />
phase esthétique<br />
en os dense<br />
POUR OS DENSE<br />
TSV4D<br />
For<strong>et</strong> terminal<br />
Ø 4,4/3,8mm<br />
Des for<strong>et</strong>s courts de longueur totale L 11mm sont disponibles pour la<br />
mise en place des implants L 8mm <strong>et</strong> L 10mm pour les sites à accès vertical<br />
limité. Des for<strong>et</strong>s longs d’une longueur de L 17mm, avec des rainures à<br />
8mm, 10mm, 13mm <strong>et</strong> 16mm, peuvent être utilisés pour la mise en place<br />
de tous les implants.<br />
Mise en place des implants Ad<strong>Vent</strong> en un temps chirurgical<br />
Débuter l’autotaraudage<br />
à l’aide du support en<br />
plastique inséré.<br />
Insertion complète<br />
à l’aide de la clé<br />
hexagonale (HX3.0-S<br />
ou HXL3.0-S) ou du<br />
tournevis hexagonal<br />
pour contre-angle<br />
(HX3.0D) <strong>et</strong> de son<br />
adaptateur.<br />
3<br />
Fixer la vis de<br />
couverture avec ou<br />
sans le prolongateur<br />
d’implant <strong>et</strong> la coiffe<br />
de cicatrisation.<br />
4<br />
OPTIONNEL POUR<br />
OS DENSE<br />
TT3.7<br />
Taraud transcortical,<br />
Ø 3,7mm<br />
4<br />
OPTIONNEL POUR OPTION POUR<br />
OS DENSE<br />
OS DENSE<br />
AVCSD<br />
TT4.7<br />
For<strong>et</strong> transcortical Taraud transcortical,<br />
(plate-forme Ø 4,7mm<br />
Ø 4,5mm) ou<br />
AV6CSD (plate-forme<br />
Ø 5,7mm) pour<br />
phase esthétique<br />
en os dense<br />
Tissus épais : suturer<br />
avec le prolongateur<br />
d’implant <strong>et</strong> la coiffe<br />
de cicatrisation<br />
pour la phase de<br />
cicatrisation ;<br />
ou<br />
5<br />
Tissus fins : suturer<br />
sans le prolongateur<br />
d’implant ni la coiffe<br />
de cicatrisation<br />
pour la phase de<br />
cicatrisation.