Create successful ePaper yourself
Turn your PDF publications into a flip-book with our unique Google optimized e-Paper software.
EN<br />
12. Interlocking knob<br />
13. Mitre guide<br />
14. Nut<br />
15. Screw<br />
16. Spindle<br />
6<br />
2. safety instructions<br />
Explanation of symbols<br />
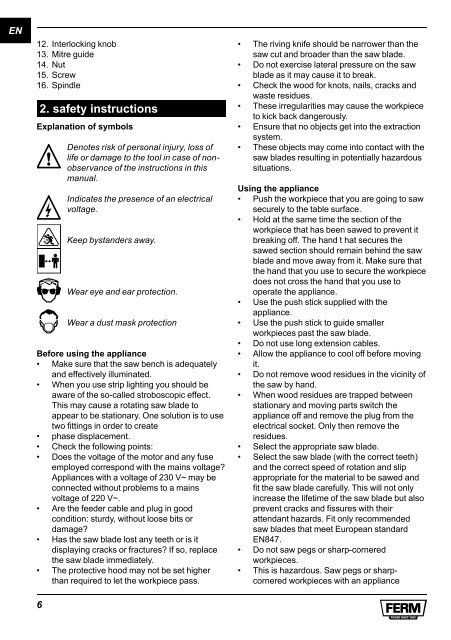
Denotes risk of personal injury, loss of<br />
life or damage to the tool in case of nonobservance<br />
of the instructions in this<br />
manual.<br />
Indicates the presence of an electrical<br />
voltage.<br />
Keep bystanders away.<br />
Wear eye and ear protection.<br />
Wear a dust mask protection<br />
Before using the appliance<br />
• Make sure that the saw bench is adequately<br />
and effectively illuminated.<br />
• When you use strip lighting you should be<br />
aware of the so-called stroboscopic effect.<br />
This may cause a rotating saw blade to<br />
appear to be stationary. One solution is to use<br />
two fittings in order to create<br />
• phase displacement.<br />
• Check the following points:<br />
• Does the voltage of the motor and any fuse<br />
employed correspond with the mains voltage?<br />
Appliances with a voltage of 230 V~ may be<br />
connected without problems to a mains<br />
voltage of 220 V~.<br />
• Are the feeder cable and plug in good<br />
condition: sturdy, without loose bits or<br />
damage?<br />
• Has the saw blade lost any teeth or is it<br />
displaying cracks or fractures? If so, replace<br />
the saw blade immediately.<br />
• The protective hood may not be set higher<br />
than required to let the workpiece pass.<br />
• The riving knife should be narrower than the<br />
saw cut and broader than the saw blade.<br />
• Do not exercise lateral pressure on the saw<br />
blade as it may cause it to break.<br />
• Check the wood for knots, nails, cracks and<br />
waste residues.<br />
• These irregularities may cause the workpiece<br />
to kick back dangerously.<br />
• Ensure that no objects get into the extraction<br />
system.<br />
• These objects may <strong>com</strong>e into contact with the<br />
saw blades resulting in potentially hazardous<br />
situations.<br />
Using the appliance<br />
• Push the workpiece that you are going to saw<br />
securely to the table surface.<br />
• Hold at the same time the section of the<br />
workpiece that has been sawed to prevent it<br />
breaking off. The hand t hat secures the<br />
sawed section should remain behind the saw<br />
blade and move away from it. Make sure that<br />
the hand that you use to secure the workpiece<br />
does not cross the hand that you use to<br />
operate the appliance.<br />
• Use the push stick supplied with the<br />
appliance.<br />
• Use the push stick to guide smaller<br />
workpieces past the saw blade.<br />
• Do not use long extension cables.<br />
• Allow the appliance to cool off before moving<br />
it.<br />
• Do not remove wood residues in the vicinity of<br />
the saw by hand.<br />
• When wood residues are trapped between<br />
stationary and moving parts switch the<br />
appliance off and remove the plug from the<br />
electrical socket. Only then remove the<br />
residues.<br />
• Select the appropriate saw blade.<br />
• Select the saw blade (with the correct teeth)<br />
and the correct speed of rotation and slip<br />
appropriate for the material to be sawed and<br />
fit the saw blade carefully. This will not only<br />
increase the lifetime of the saw blade but also<br />
prevent cracks and fissures with their<br />
attendant hazards. Fit only re<strong>com</strong>mended<br />
saw blades that meet European standard<br />
EN847.<br />
• Do not saw pegs or sharp-cornered<br />
workpieces.<br />
• This is hazardous. Saw pegs or sharpcornered<br />
workpieces with an appliance


