Create successful ePaper yourself
Turn your PDF publications into a flip-book with our unique Google optimized e-Paper software.
6<br />
E2<br />
E3<br />
!<br />
E4<br />
Your switch box incorporates a cable<br />
restraint. To fix the cable to the restraint,<br />
proceed as follows:<br />
• Bring the socket end of the extension<br />
cable from behind and connect it to your<br />
mower plug.<br />
• Form a loop on your extension cable<br />
close to the switchbox.<br />
• Push the loop through the slot from the<br />
opposite side of the restraint hook,<br />
position the loop over the hook and pull<br />
the cable back through the slot. Your<br />
cable will now be restrained.<br />
• The extension cable should now fall<br />
away from your mower and behind the<br />
operator, ready for use.<br />
Warning! Do not attempt to operate your<br />
mower with one hand - you must guide it<br />
with both hands.<br />
• Tilt the handle downwards to slightly raise<br />
the front of your mower and to reduce<br />
the risk of lawn damage whilst starting,<br />
depress the safety lock-off button (16) on<br />
the switchbox and whilst still depressed<br />
pull the switch lever (17) towards you.<br />
Your mower will start and you can now<br />
allow the lock-off button to be released<br />
and lower your mower to its proper<br />
cutting position, and commence cutting.<br />
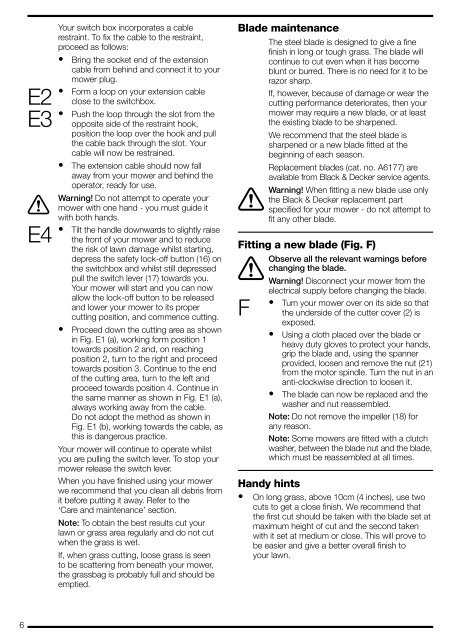
• Proceed down the cutting area as shown<br />
in Fig. E1 (a), working form position 1<br />
towards position 2 and, on reaching<br />
position 2, turn to the right and proceed<br />
towards position 3. Continue to the end<br />
of the cutting area, turn to the left and<br />
proceed towards position 4. Continue in<br />
the same manner as shown in Fig. E1 (a),<br />
always working away from the cable.<br />
Do not adopt the method as shown in<br />
Fig. E1 (b), working towards the cable, as<br />
this is dangerous practice.<br />
Your mower will continue to operate whilst<br />
you are pulling the switch lever. To stop your<br />
mower release the switch lever.<br />
When you have finished using your mower<br />
we recommend that you clean all debris from<br />
it before putting it away. Refer to the<br />
‘Care and maintenance’ section.<br />
Note: To obtain the best results cut your<br />
lawn or grass area regularly and do not cut<br />
when the grass is wet.<br />
If, when grass cutting, loose grass is seen<br />
to be scattering from beneath your mower,<br />
the grassbag is probably full and should be<br />
emptied.<br />
Blade maintenance<br />
The steel blade is designed to give a fine<br />
finish in long or tough grass. The blade will<br />
continue to cut even when it has become<br />
blunt or burred. There is no need for it to be<br />
razor sharp.<br />
If, however, because of damage or wear the<br />
cutting performance deteriorates, then your<br />
mower may require a new blade, or at least<br />
the existing blade to be sharpened.<br />
We recommend that the steel blade is<br />
sharpened or a new blade fitted at the<br />
beginning of each season.<br />
Replacement blades (cat. no. A6177) are<br />
available from <strong>Black</strong> & <strong>Decker</strong> service agents.<br />
! Warning! When fitting a new blade use only<br />
the <strong>Black</strong> & <strong>Decker</strong> replacement part<br />
specified for your mower - do not attempt to<br />
fit any other blade.<br />
Fitting a new blade (Fig. F)<br />
Observe all the relevant warnings before<br />
changing the blade. ! Warning! Disconnect your mower from the<br />
electrical supply before changing the blade.<br />
• Turn your mower over on its side so that<br />
F the underside of the cutter cover (2) is<br />
exposed.<br />
• Using a cloth placed over the blade or<br />
heavy duty gloves to protect your hands,<br />
grip the blade and, using the spanner<br />
provided, loosen and remove the nut (21)<br />
from the motor spindle. Turn the nut in an<br />
anti-clockwise direction to loosen it.<br />
• The blade can now be replaced and the<br />
washer and nut reassembled.<br />
Note: Do not remove the impeller (18) for<br />
any reason.<br />
Note: Some mowers are fitted with a clutch<br />
washer, between the blade nut and the blade,<br />
which must be reassembled at all times.<br />
Handy hints<br />
• On long grass, above 10cm (4 inches), use two<br />
cuts to get a close finish. We recommend that<br />
the first cut should be taken with the blade set at<br />
maximum height of cut and the second taken<br />
with it set at medium or close. This will prove to<br />
be easier and give a better overall finish to<br />
your lawn.


