
Create successful ePaper yourself
Turn your PDF publications into a flip-book with our unique Google optimized e-Paper software.
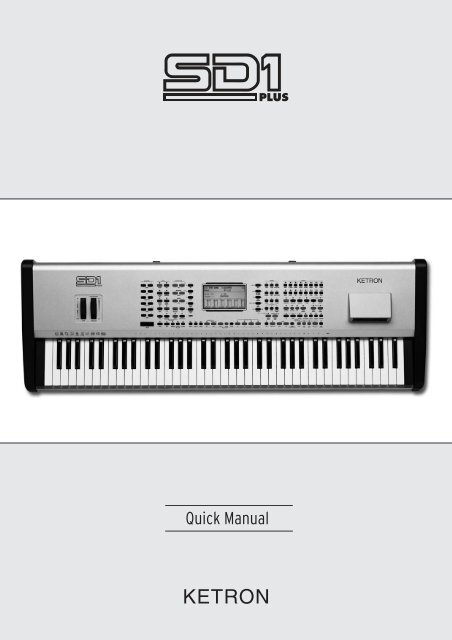
Quick Manual
INDEX<br />
PAGE<br />
ENGLISH<br />
ITALIANO<br />
DEUTSCH<br />
FRANÇAIS<br />
ESPAÑOL<br />
PORTUGUÊS<br />
TABLES<br />
3<br />
7<br />
11<br />
15<br />
19<br />
23<br />
27<br />
Quick manual <strong>SD1</strong> Plus 1
English<br />
The NEW <strong>SD1</strong> <strong>PLUS</strong> Arranger Workstation!<br />
Congratulations on your purchase of the new <strong>SD1</strong> <strong>PLUS</strong>. We know this workstation will bring you years of listening and performance pleasure.<br />
To quickly assist you in utilizing most of the new features, we have put together this manual. It is to be used in conjunction with the main manual<br />
also supplied with this unit. Enjoy!!<br />
Layout<br />
The new layout of the <strong>SD1</strong> <strong>PLUS</strong> was carefully designed to ensure that you have the easiest and quickest access to most of the former (from the<br />
world acclaimed <strong>SD1</strong>) and current features of this workstation. The new color code ensures quick access to main features (accompaniment,<br />
recording, playback etc). The new labels clearly list the new functions (as emphasized with OS 4.0 remarks to follow).<br />
New sounds<br />
The Ketron <strong>SD1</strong> <strong>PLUS</strong> comes with some of the world’s most authentic and realistic new sounds. New orchestral voices are included for the Guitars<br />
(*), Bass, E.Pianos (very clean and precise), Strings (full and spacey), Pads, Brass (more authentic) & Organ groups, while some ROM voices have<br />
been readjusted entirely to produce a cleaner Hi Fi response. The Drum sets of Drum1 and Drum2 have aggressively been restyled with new,<br />
natural Percussion sounds and more Live Drum loops (especially for Dance and Hip Hop styles). A rich Stereo Grand Piano sound (along with<br />
other great Sax, Pads and Guitar sounds) resides within the massive 6GB HD and can be loaded and used within the <strong>SD1</strong> <strong>PLUS</strong>.<br />
NB: The new Stereo Grand piano has already been programmed into the first PROGRAM location and once this sound is loaded from the HD, it<br />
can be played instantly!<br />
(*) Hawaian and Pedal Steel guitars voices are set to play 3 notes max. with Steel Mode. (Assignment easily changeable in new Preset Editing<br />
feature shown below).<br />
LOADING THE NEW BONUS SOUNDS:<br />
The new OS 4.0 (already installed) includes all the modifications made to the Preset voices<br />
to yield a better Hi-Fi response in all sound categories. Extra bonus sounds (and other preexisting<br />
sounds within the HD of the <strong>SD1</strong> <strong>PLUS</strong>) can be loaded as described on page 33 of the<br />
Owner’s Manual (Sound Load).<br />
INSTANTLY HAVE ACCESS TO NEW SOUNDS: You may want to have these sounds ready to use in RAM each time you turn on your <strong>SD1</strong><br />
<strong>PLUS</strong> (since these sounds are lost once the keyboard is powered off). To do this, you will<br />
have to initially create a Block of sounds that will incorporate the sounds you would like loaded<br />
once the keyboard is turned on. This is a one time process that informs the <strong>SD1</strong> <strong>PLUS</strong><br />
on what sound files to load once the keyboard is turned on. To proceed, see page 34 of the<br />
Owner’s Manual (Automated Loading). You may proceed to create multiple sound Blocks featuring<br />
your best sounds within the Sound Folder of the HD. Once the Block(s) is (are) created,<br />
you will now have to proceed as described on page 34 of the Owners Manual (Load a<br />
Sound Block on Switching the <strong>SD1</strong> <strong>PLUS</strong> On). The newly created file (!!inito1.pwr) is a file that<br />
informs the <strong>SD1</strong> <strong>PLUS</strong> of the Sound files you want loaded whenever the keyboard is turned<br />
on. In this way, whenever the keyboard is turned on, the selected BLOCK of sounds will automatically<br />
be loaded. These RAM sounds can also be used within the presets creating new<br />
high quality voices (or used within the Program voices as well) rendering you with a limitless<br />
array of voice patches and creations!<br />
Quick manual <strong>SD1</strong> Plus 3
English<br />
New music!<br />
MUSIC - SONGS:<br />
MUSIC – DATABASE:<br />
SET UP:<br />
We have also incorporated about 166 Midi files for your listening and performing pleasure. These include some of the<br />
world’s famous hits as performed and were programmed by experienced programmers from around the world in<br />
order to maintain authenticity. Most of these songs also utilize some of the new audio loops incorporated within the<br />
<strong>SD1</strong> Plus. These songs are included within the <strong>SD1</strong> <strong>PLUS</strong>’ HD Folder 91 – Midi files. To listen to these songs, Press the<br />
SONG PLAY button on the <strong>SD1</strong> <strong>PLUS</strong> from the default screen. Next, press DIR (F5) to access the entire contents within<br />
the Midi file folder. You can now use the styles buttons to enter the numeric value of the song you would like to listen<br />
to and press the red START button to start the song.<br />
A new music database has been created within the <strong>SD1</strong> <strong>PLUS</strong>. This allows the musician to instantly set up the keyboard<br />
in preparation to perform a particular song. About 200 songs settings are included within the <strong>SD1</strong> <strong>PLUS</strong> as Song<br />
Registrations. These files are located within the HD Folder 91 – Midi files.<br />
To set up the keyboard to perform a particular song listed within this large database, please proceed as follows:<br />
•<br />
Press the DISK button and make sure you are within the HD of the <strong>SD1</strong> <strong>PLUS</strong><br />
Press Single Registr button to display all the Single Registers within Folder 93 - the Registration folder. (With the<br />
Master Folder activated, you can also make this selection from the default disk menu using F3).<br />
•<br />
Use the –Value+ buttons to highlight the Song file you want the keyboard to set up to and SELECT with F10.<br />
Now LOAD this file using F2 and the <strong>SD1</strong> <strong>PLUS</strong> will automatically set up to play the selected song. It should be noted<br />
that you can create your own song settings and add to this database (see page 95 of the Owner’s manual – Calling<br />
ng up and Saving a Single Registration).<br />
New ‘Jam’ STYLES<br />
The best of the best! We have rearranged the FLASH styles within the <strong>SD1</strong> <strong>PLUS</strong> to include 131 new Flash styles. By carefully balancing these new<br />
styles with the initial ROM styles and utilizing the new sounds, the <strong>SD1</strong> <strong>PLUS</strong> is capable of keeping an audience on their dancing feet while you<br />
perform with great satisfaction.<br />
When you access any of these styles (by pressing the style group e.g. Latin), they are denoted with Capital letters, while the re-voiced and perfected<br />
ROM styles are denoted with small letters as you access the following pages. No matter how we try to express these on paper, there’s<br />
nothing more than trying some of them yourself and seeing what you think.<br />
BONUS STYLES: 34 Bonus styles reside within the HD Folder 95 – Styles. Most of these styles utilize the new audio loops created for the <strong>SD1</strong><br />
<strong>PLUS</strong>, especially styles such as Dance and Pop Down.<br />
To utilize these styles, (with the Master Folder LED on),<br />
•<br />
Press the Single RAM style button to access the styles on the HD.<br />
Utilize the Styles groups buttons (8beat, 16beat…) to locate the style you want to load. They will be displayed on the<br />
screen. The format by which these styles are displayed can be changed depending on the mode selected (see<br />
•<br />
Pattern View below).<br />
Use the associated F-button to select the style you want to use.<br />
Try out the new, cool R&B, Dance and Pop rhythms (with authentic intros and endings) plus the new Soft Dancing, Latin and Traditional dancing<br />
(listen carefully to the smooth build up as you progress from Arranger A to D), and you will understand why again, Ketron is out to produce the<br />
best.<br />
New functions for better performances<br />
•<br />
DRUM REMIX - To liven up or simply modify a song, changing the rhythm structure of the drums or the percussion instruments can make a<br />
huge difference, bringing more 'life' to the song. The <strong>SD1</strong> <strong>PLUS</strong> enables the realisation of similar results, granting the capability of replacing<br />
the percussion tracks of a Midi file/song with those from the onboard styles (including the live drum loops), enabling the muting of<br />
single percussion groups of the rhythm track. While the Midi file is being played, it is also possible to switch between the on board styles<br />
and the original drum tracks of the Midi file, activate the Fill-ins and use the four Arrangers in real time!<br />
This feature is activated and used while in 'Song Play' mode with the following buttons:<br />
ON/OFF (Tap): Drum Remix On/Off - ‘Drum Remix’ displays on the Song Play screen when turned on.<br />
STYLE/SONG (Lock): Style/Song selection - Determine if the numeric styles buttons (0-9) should be used to select either a Style to<br />
be associated with a song or a Song from the current disk folder. The corresponding selection type will be displayed on the screen<br />
4<br />
<strong>SD1</strong> Plus Quick manual
English<br />
under the bar counter.<br />
SONG (Key Start): Turns on the drum tracks of the Midi file – Original Drum tracks from the Midi file will be heard when the song is<br />
playing.<br />
STYLE (Key Stop): Turns on the drum tracks of the selected <strong>SD1</strong> <strong>PLUS</strong> style - Styles from the <strong>SD1</strong> <strong>PLUS</strong> will be heard when the song<br />
is playing). You can now choose to maintain this setting permanently (i.e. whenever you next call up this Midi file, it should utilize<br />
the drum tracks of the Ketron <strong>SD1</strong> <strong>PLUS</strong> rather than the original drum tracks of the Midi files).<br />
To memorize the new Song Set up with Remix:<br />
1 ) Press the GM (F1) button while the Midi file is running.<br />
2 ) Press the Start/Stop button to stop the Midi file.<br />
3) While within a GM part, press SAVE/ENTER, then F 10 to confirm the Saving operation.<br />
You may choose to either overwrite the existing Midi file or rename this new file.<br />
For every Midi file it is possible to also choose the starting and ending Bar for the Remix function.<br />
To select the initial Bar press F2 and search the number with Value +/-.<br />
To select the final Bar press again F2 and search the number with Value+/-. The <strong>SD1</strong> <strong>PLUS</strong> will start to play the Remix style only within the<br />
initial and final bar as assigned above when you press START. You can press ‘Song’ to go back to the drum tracks of the Midi file.<br />
Patterns on Disk can be also used with the Drum Remix feature (and saved using the Save Song Set up) but ONLY if they have been loaded<br />
into the Pattern location in RAM.<br />
•<br />
BASSIST<br />
- The Bassist function automatically allows the Manual Bass to be played to the left of the Split point of the keyboard section while<br />
the right side can be used to play chords or solo parts. Every time you take off your hand from the right keyboard section, the chord last<br />
played on the right section remains in memory (if the Hold push button is activated) whereas the Bass can be played freely without affecting<br />
the chord. This is a cool feature used to reduce the redundancy that can be associated with a style and allows the musician to freely<br />
produce natural, human bass lines in real life. This function is automatically set ‘On’ when Pianist/Bassist and Manual (under Bass) are both<br />
activated.<br />
•<br />
INCREASED<br />
•<br />
PATTERN<br />
POLYPHONY - The number of notes that can be played at any given time has been increased. More notes can now be played on<br />
the <strong>SD1</strong> <strong>PLUS</strong> without experiencing note-drop out.<br />
VIEW: Visualization and access to Disk Patterns now works similar to that of the Internal Styles. To access disk styles, just press<br />
the Single Ram Styles button and select the Style family/group; then proceed with the associated function (F1- F10) button to select the<br />
style. A diamond shape after the style denotes that this style has already been loaded. The new GROUP function (accessed by pressing the<br />
Block<br />
•<br />
List button and pressing F8 repeatedly) can be used to select the following Pattern view modes:<br />
Mode 1: Numeric 1; Styles are displayed numerically.<br />
Mode 2: Orderly; Styles are displayed in the order in which they were loaded into HD.<br />
•<br />
Mode 3: Alphabetic; Styles are displayed alphabetically.<br />
Off: Numeric 2; Styles are accessed numerically as was the case with previous OS (see pg 56 & 57 of Owner’s manual).<br />
NB: If there are no patterns within the current disk folder, no Patterns will be displayed.<br />
•<br />
ROM & FLASH STYLES - Internal ROM (denoted with small letters) and FLASH (denoted with Capital letters), styles are now easily distinguishable.<br />
•<br />
FLASH<br />
STYLES BACKUP FOLDER - It is possible to save onto Disk the current configuration for the Flash Styles. Press Save/Enter, then Styles<br />
(F2) and Global Flash to Disk (F7). The next screen will ask for a name to give to this new Backup Folder. Press F10-Save to confirm once<br />
named.<br />
This operation automatically creates a new folder containing all the current Flash Styles.<br />
This very useful feature allows you to save/load from Disk a new, fully personalized Flash Style’s block, thus rendering you with<br />
various blocks of customized Flash styles.<br />
•<br />
ARRANGER ON/OFF - A dedicated Arranger On/Off function has been added to the <strong>SD1</strong> <strong>PLUS</strong>. It is now possible to have the current voice(s)<br />
played over the entire keyboard (i.e. ignoring the SPLIT point) while playing Styles or Midi files. This is obtained by simply pressing the<br />
Arrange On/Off button while playing to turn the arranger OFF (a new split-point value of ‘C-2’ will be displayed). Pressing this button once<br />
more reinitiates the split point and turns the arranger ON.<br />
•<br />
MIDI FILE<br />
•<br />
PLAYER:<br />
XD Remap – This feature XD-Remap [F8] located under the Transposer Menu, (while in Song Play mode) allows for complete<br />
compatibility of Midi files created for the XD-series when played back on the <strong>SD1</strong> <strong>PLUS</strong>.<br />
• VOCALIZER:<br />
•<br />
It is possible to turn on/off the vocalizer with the Demo&Hit buttons.<br />
The Hold function (in harmony mode) is now retained within the vocal set after the settings have been saved.<br />
•<br />
Footswitch – Functions added to the Footswitch table: Lead On/Off, Pianist, Bassist, Drum Off All, Drum&Bass, Accordion On/Off. (Page 99 of<br />
the Owner’s manual – F5 Footswitch lists the other functions that can be controlled by the Footswitch – www.ketron.it includes others that<br />
have been included with successive OS updates).<br />
Quick manual <strong>SD1</strong> Plus 5
English<br />
•<br />
POWER ON SET UP - Functions added to the Power On Set up: Autoclose (for Preset Voices), Intelligent Transposer, Text Mode, Accordion Bass<br />
on Stop, Pattern Group, Transposer Delayed mode. (Page 58 of the Owner’s manual contains the other futures – Power On Set Up).<br />
• ACCORDION:<br />
•<br />
The new function Bass Off Stop has been added. When the Accordion Mode is activated the new feature, BS ACCORD [accessed<br />
from Utility, Accordion (F6) and using F8 to toggle between Off on Stop and Normal] is automatically set to ‘Off on Stop’. This<br />
ensures that the Bass and Chords do not sound after the arranger has been stopped. Into Accordion Mode, on F6, Bass Octave<br />
•<br />
function is shared Sustain.<br />
New Dynamic User Curves have been added, Left Expression controlled via Midi 2 (for Midi Accordion equipped with bellow’s<br />
Expression).<br />
•<br />
1 TOUCH TO STYLE – There is the possibility to assign the 1 Touch voice to a Style. For each style therefore, you can assign your best 10 voices<br />
that you believe best suit the style in question for quicker operation. This function is located within the Arranger Mode - Pg. 2 under<br />
the Retrigger&Mode screen. Using the -Value + buttons, after the Style Setting Etn/Orc4, it is possible to assign any of the 1- 8 One Touch<br />
settings to the style in question. This way, whenever you call up that style, the associated One Touch settings will automatically be associated<br />
with the style when you press the One Touch button (with the Style Setting LED on). Your favourite voices for a particular style will<br />
always be available – quicker access to voices and less time searching for the right voice!<br />
•<br />
TEXT MODE: When displaying text, 40 characters can now be viewed within each line without re-formatting. Under UTILITY, TEXT (F7), 2<br />
modes can now be selected:<br />
•<br />
Mode 1: Standard form centralized within screen – 27 characters per line will be displayed.<br />
Mode 2: New, smaller font utilizing full screen – 40 characters per line will be displayed.<br />
•<br />
DRY ON STOP - This feature has also been added under OnLineEffect (Micro [F6]) for easier, quicker access and operation.<br />
•<br />
RAM FULL - For faster operation, (when the Ram Memory gets full during sound loading), the message ‘Memory Full’ is displayed together<br />
with the new function Clear&Load (F10) and Exit. Pressing (F10) allows the sounds that currently reside in RAM to be cleared and the current<br />
selected sounds automatically loaded, while Exit (F5) aborts the loading operation and retains the current sounds in RAM.<br />
•<br />
Preset Editing: An Editing possibility for Preset Voices exists within the <strong>SD1</strong> Plus. When a Preset voice is selected, by pressing simultaneously<br />
the Edit Preset buttons * and #, the Program window corresponding to the same Preset is opened.<br />
2 new functions have been provided for Saving the voice: To Preset [F8] (overwrites the existing RAM Preset with the same name and new<br />
edits), and To Disk [F7] (Saves all Presets to Disk with an extension .pre).<br />
•<br />
Style Convert - Under the Disk menu - Utility - Disk Control, the Style Convert feature exists. This allows the <strong>SD1</strong> <strong>PLUS</strong> to automatically convert<br />
all the Styles from the X and XD series that reside within HD into Master Styles Folder to the <strong>SD1</strong> <strong>PLUS</strong> format.<br />
•<br />
Chord Solo - The capability to instantly mute all of the accompaniment chord tracks while a selected one remains active is available. Within<br />
the Arrange View window, if one of the 5 automatic Chords (F6 – F10) is selected and highlighted, it is possible to mute all the other unselected<br />
chords, drum and bass leaving the highlighted chord active by simultaneously pressing both Chord/Solo Volume buttons. To exit from<br />
the function and re-activate the other chords, just press one of the 2 master Chord Volumes again or a Fill In.<br />
•<br />
2nd Voice to Disk - It is possible to save the 2nd Voices settings to Disk with the extension .2ND. After pressing Save/Enter, press F6 – 2nd<br />
Voice, then F8 – Disk Save and finally F10 - Save to confirm. Any new 2nd voice setting overwrites the previous 2ndvoice file.<br />
•<br />
Loading Disk Styles from Song Play - When in Song Play mode, by simultaneously pressing the two Edit Preset buttons * and #, it is possible<br />
to view and select a Style from the current HD folder that will be used next. The Style selected will automatically be loaded.<br />
•<br />
New Dynamic Curves - New Dynamic curves have been added to clearly distinguish the difference between Soft1, Soft2, Normal, Hard1, Hard2<br />
… etc. (UTILITY, Page1/3, Vel. Curve [F10]).<br />
PS: All references to the full OS4.0a information (already loaded in this unit) can be obtained from our website at www.ketron.it - under the<br />
Software category.<br />
6<br />
<strong>SD1</strong> Plus Quick manual
Italiano<br />
<strong>SD1</strong> Plus<br />
Congratulazioni per aver scelto il nuovo <strong>SD1</strong> <strong>PLUS</strong>. Siamo certi che questa workstation Vi garantirà anni di piacevole ascolto e di divertimento<br />
musicale. Il presente manuale breve è stato redatto per permetterVi di usare subito la maggior parte delle nuove funzioni e caratteristiche.<br />
Dovrà essere usato assieme al manuale principale che Vi è stato fornito con lo strumento. Buon divertimento !<br />
Pannello<br />
Il nuovo pannello dell'<strong>SD1</strong> <strong>PLUS</strong> è stato studiato accuratamente per garantire un accesso facile e veloce alla maggior parte delle funzioni preesistenti.<br />
I nuovi tasti colorati evidenziano i comandi principali e le nuove scritte invece elencano con chiarezza le nuove funzioni.<br />
Nuovi suoni<br />
Il Ketron <strong>SD1</strong> <strong>PLUS</strong> si presenta con alcuni nuovi suonidi grande realismo.<br />
Sono state incluse nuove voci orchestrali per le Chitarre (*), il Basso, gli E.Pianos (molto puliti e precisi), nonché gli Archi ( pieni ed avvolgenti),<br />
i Pads, gli Ottoni ( più autentici) e gli Organi.<br />
Anche la batteria ( Drum1 e Drum2 ) é state perfezionata con l'aggiunta di nuovi suoni Percussivi ( Casse, Snares etc. ) ed un maggior numero<br />
di Live Drum loop (in particolare per gli stili Dance e Hip Hop). Su Hard Disk sono disponibili un nuovo di Grand Piano Stereo ed altri suoni di<br />
Sax, Pads,Basso e Chitarra.<br />
NB: Il nuovo Stereo Grand piano è già stato inserito nella programmazione del PROGRAM n.1, per cui appena questo suono viene caricato da disco<br />
fisso potrà essere usato immediatamente per le esecuzioni musicali!<br />
(*) Le voci delle chitarre Hawaian e Pedal Steel sono state programmate in maniera tale che vengano suonate al massimo 3 note in modalità<br />
Steel. (Le assegnazioni possono essere facilmente modificate usando la nuova funzione di Preset Editing descritta in seguito).<br />
CARICARE I NUOVI SUONI IN RAM :<br />
CARICAMENTO AUTOMATICO DEI SUONI ALL'ACCENSIONE:<br />
È possibile caricare individualmente in Ram i suoni presenti sul disco fisso dell'<strong>SD1</strong> <strong>PLUS</strong><br />
seguendo la procedura descritta a pagina 33 del manuale d'uso (Sound Load).<br />
Se si desidera avere i nuovi suoni pronti all'uso non appena si accende l'<strong>SD1</strong> <strong>PLUS</strong> occorre<br />
creare un SOUND BLOCK comprendente tutti i suoni che si vogliono caricare. Si tratta di<br />
un'operazione che basta eseguire una sola volta, e che indica appunto all'<strong>SD1</strong> <strong>PLUS</strong> quali<br />
sono i files da caricare al momento in cui viene accesa la tastiera. Per la procedura da seguire,<br />
si veda la pagina n° 34 del Manuale d'uso (Caricamento automatico). Nel Sound Folder<br />
del disco fisso è possibile creare più Sound Blocks contenenti i suoni preferiti. Dopo aver<br />
creato il Block, è sufficiente procedere come descritto a pagina 34 del Manuale d'uso.<br />
(Caricare un Sound Block al momento dell'accensione dell'<strong>SD1</strong> <strong>PLUS</strong> ). Il nuovo file così creato<br />
(!!inito1.pwr) è un file che informa l'<strong>SD1</strong> <strong>PLUS</strong> sui files audio da caricare. Non appena la<br />
tastiera verrà accesa, il Sound BLOCK selezionato verrà caricato automaticamente. I suoni<br />
in RAM potranno essere utilizzati anche all'interno di Preset o Program per creare nuove<br />
voci di alto livello qualitativo.<br />
Nuova libreria<br />
SONGS:<br />
Abbiamo incluso nel Folder 91 dell'H.D 166 Midifiles comprendenti vari generi musicali e brani musicali famosi. Molte<br />
di queste songs comprende anche alcuni dei nuovi audio loop presenti nell'<strong>SD1</strong> Plus. Per ascoltarle le Songs, premere<br />
il pulsante SONG PLAY dalla videata di default dell'<strong>SD1</strong> <strong>PLUS</strong>. Premere poi DIR (F5) per avere accesso a tutto il contenuto<br />
del Folder con i Midifiles. Ora con i pulsanti Styles è possibile digitare il valore numerico della Song che si desidera<br />
ascoltare e premere poi il pulsante START rosso per far partire la song.<br />
SONG REGISTRATIONS: Nel Folder 93 - Registrations sono state inserite circa 200 Song Registration appositamente programmate per una<br />
certa Song. Ciò permette al musicista di avere in pochi istanti la tastiera pronta all'esecuzione di quella song.<br />
Quick manual <strong>SD1</strong> Plus 7
Italiano<br />
SET UP:<br />
Nuovi STILI<br />
Per preparare la tastiera a suonare una song particolare che si trova all'interno del database, procedere come segue:<br />
•<br />
Premere il pulsante DISK ed assicurarsi che ci si trova sul disco fisso dell'<strong>SD1</strong> <strong>PLUS</strong><br />
Premere il pulsante Single Registr per visualizzare tutti i Single Registers che si trovano all'interno del Folder 93<br />
- Registrations folder. (Se il Master Folder è stato attivato, questa selezione potrà essere eseguita anche dal disk<br />
•<br />
menu di default premendo F3)..<br />
Usare i pulsanti –Value+ per evidenziare il Song file per il quale la tastiera deve essere predisposta e premere<br />
•<br />
F10 – SELECT.<br />
Premere ora F2 per CARICARE questo file e l'<strong>SD1</strong> <strong>PLUS</strong> inizierà automaticamente a suonare la song selezionata.<br />
Si rammenta che è possibile creare Song settings individuali ed aggiungerli poi al database (vedi pagina 95<br />
•<br />
del Manuale d'uso – Richiamare e salvare una Single Registration).<br />
Se si conosce il numero della Registration questo può essere digitato anche direttamente con la pulsantiera 0 - 9.<br />
Un altro punto saliente consiste nel fatto che i FLASH styles all'interno dell'<strong>SD1</strong> <strong>PLUS</strong> sono stati rivisti e sono stati inclusi 131 nuovi Flash styles.<br />
Combinando sapientemente questi stili nuovi con quelli originali residenti in ROM ed usando i nuovi suoni, sarà possibile trarre il massimo divertimento<br />
suonando l'<strong>SD1</strong> <strong>PLUS</strong>.<br />
I nuovi stili in Flash verranno indicati con lettere MAIUSCOLE, mentre gli stili in ROM verranno visualizzati con lettere MINUSCOLE.<br />
PATTERNS : Su H.D. , all'interno del Folder 95 – Styles risiedono 34 nuovi Patterns . La maggior parte di essi utilizza i nuovi loop audio<br />
creati per l'<strong>SD1</strong> <strong>PLUS</strong>, in particolar modo gli styles come Dance e Pop Down.<br />
Per usare questi styles, procedere come segue (con il LED del Master Folder acceso):<br />
•<br />
Premere il pulsante Single RAM Style per poter accedere agli styles sul disco fisso.<br />
Usare i pulsanti dei gruppi di stili (8beat, 16beat…) per visualizzare il gruppo nel quale si trova lo stile che si<br />
desidera caricare. Il formato della visualizzazione può essere modificato in base alla modalità selezionata<br />
•<br />
(vedi Pattern View più avanti).<br />
∑ Usare il relativo pulsante funzione per selezionare lo style che si desidera usare.<br />
Provate i nuovi ritmi Dance, Pop&Funk e Pop (con intros ed endings originali), Folk ,Swing e Latin. ( Da notare su Waltz, Polka, Mazurka e Oberwaltz<br />
una nuova risoluzione armonica che porta sull'Arrange A ).<br />
Nuove funzioni<br />
•<br />
DRUM REMIX - Quando si desidera ravvivare o comunque modificare una song, cambiare la struttura ritmica degli strumenti di percussione<br />
o della batteria può fare una differenza enorme, appunto vivacizzando la song. L'<strong>SD1</strong> <strong>PLUS</strong> permette di ottenere risultati di questo genere<br />
offrendo la possibilità di sostituire le tracce della percussione di singoli Midifiles o di songs con quelle degli stili residenti nella memoria<br />
dello strumento (live drum loops compresi) e di escludere temporaneamente singoli gruppi di percussione dalla traccia del ritmo.<br />
Mentre il Midifile sta suonando, sarà possibile anche passare dagli styles della tastiera alle tracce di batteria originali del Midifile e viceversa,<br />
attivare i Fill-ins ed usare i quattro Arrangers in tempo reale!<br />
Questa funzione può essere azionata ed usata in modalità 'Song Play' usando i seguenti pulsanti:<br />
ON/OFF (Tap): Drum Remix On/Off - Sulla videata del Song Play viene indicato se il ‘Drum Remix’ è attivato o meno.<br />
STYLE/SONG (Lock): Selezione di Style/Song - Per scegliere se si desidera usare i pulsanti numerici degli styles (0-9) per selezionare<br />
uno Style da associare ad una song, oppure per selezionare una Song dal folder attualmente aperto sul disco. Il tipo di selezione<br />
attivato verrà visualizzato sullo schermo, sotto al contatore delle battute.<br />
SONG (Key Start): Aziona le tracce di batteria del Midifile – Con la song verranno riprodotte le tracce Drum originali del Midifile.<br />
STYLE (Key Stop): Aziona le tracce di batteria dello stile <strong>SD1</strong> <strong>PLUS</strong> selezionato, che verranno usate durante la riproduzione della<br />
song. Questa selezione può essere memorizzata in maniera permanente (cioè quando questo Midifile verrà richiamato la prossima<br />
volta, userà le tracce di batteria del Ketron <strong>SD1</strong> <strong>PLUS</strong> invece delle tracce di batteria originali dei Midifiles)<br />
Per memorizzare il nuovo Song Set up con Remix:<br />
1 ) Premere il pulsante GM (F1) mentre il Midifile viene riprodotto.<br />
2 ) Premere il pulsante Start/Stop per interrompere il Midifile.<br />
3) All'interno di una parte GM, premere SAVE/ENTER, poi F10 per confermare l'operazione di salvataggio.<br />
Si può scegliere o di sovrascrivere il Midifile esistente o di rinominare questo nuovo file.<br />
Per ogni Midifile è possibile anche scegliere la battuta di inizio e fine della funzione di Remix.<br />
Per selezionare la battuta iniziale, premere F2 e cercare il numero usando Value +/-.<br />
Per selezionare la battuta finale, premere nuovamente F2 e cercare il numero con Value+/-. Premendo START, l'<strong>SD1</strong> <strong>PLUS</strong> inizierà a suonare<br />
lo stile nella versione Remix soltanto dalla battuta iniziale fino a quella finale assegnata come descritto sopra. Premendo ‘Song’ verranno<br />
nuovamente attivate le tracce di batteria del Midifile.<br />
8<br />
<strong>SD1</strong> Plus Quick manual
Italiano<br />
La funzione Drum Remix permette anche di usare i Pattern presenti sul disco (salvati con Save Song Set up) ma SOLTANTO se sono stati<br />
caricati nello spazio previsto nella RAM per i Pattern.<br />
•<br />
BASSIST - La funzione Bassist permette di suonare il basso manuale sulla parte a sinistra del punto di split sulla tastiera, mentre la parte<br />
destra potrà essere usata per suonare accordi o degli assolo. Ogni volta che il musicista solleva la mando dalla parte destra della tastiera,<br />
l'ultimo accordo suonato nella parte destra rimarrà in memoria (a condizione che il pulsante Hold sia stato attivato) mentre il Basso potrà<br />
essere suonato manualmente senza influenzare l'accordo. Si tratta di una funzione molto utile per ridurre la ripetitività connessa con l<br />
'Arranger. Il Bassist risulta automaticamente su ‘On’ quando sono attivati sia il tasto Pianist / Bassist che il tasto Manual Bass.<br />
•<br />
PIÙ POLIFONIA - È stata ottimizzata l'assegnazione dinamica della polifonìa sulle varie sezioni. contemporaneamente.<br />
•<br />
PATTERN VIEW: La visualizzazione e l'accesso ai Disk Patterns avvengono ora in maniera similare agli Internal Styles. Per ottenere accesso<br />
ai disk styles, basta premere il pulsante Single Ram Styles e selezionare il gruppo o la famiglia di Styles; usare poi il relativo pulsante funzione<br />
(F1- F10) per selezionare lo stile specifico. Appare il simbolo "….." dopo lo stile già caricato. La nuova funzione GROUP (attivabile premendo<br />
il pulsante Block List e poi ripetutamente il pulsante F8) potrà essere usata per selezionare le seguenti modalità di visualizzazione<br />
dei Patterns:<br />
Modalità 1: Modalità numerica 1; gli stili verranno visualizzati in ordine numerico.<br />
Modalità 2: Per ordine di caricamento; gli Styles verranno visualizzati secondo l'ordine in cui sono stati caricati nel disco fisso.<br />
•<br />
Modalità 3: Per ordine alfabetico; gli Styles vengono visualizzati in ordine alfabetico.<br />
Off: Modalità numerica 2; gli Styles possono essere richiamati in maniera numerica così come previsto con il software precedente (vedi<br />
pagine 56 & 57 del Manuale d'uso).<br />
NB: Se nel folder del disco attualmente selezionato non sono presenti dei patterns, non verrà visualizzato nessun pattern.<br />
•<br />
FOLDER DI BACKUP PER FLASH STYLES - La configurazione attuale dei Flash Styles può essere salvata su disco. Premere Save/Enter, poi<br />
Styles (F2) e Global Flash to Disk (F7). Sulla videata successiva Le verrà chiesto il nome da assegnare a questo nuovo Folder di backup.<br />
Premere F10-Save per confermare il nome inserito.<br />
Questa operazione crea automaticamente un nuovo folder che conterrà tutti i Flash Styles correnti.<br />
Si tratta di una funzione estremamente utile per salvare/caricare dal disco un nuovo Block di Flash Styles completamente<br />
personalizzati, mettendoLe a disposizione una serie di blocchi diversi di Flash Styles personalizzati.<br />
•<br />
ARRANGER ON/OFF - All'<strong>SD1</strong> <strong>PLUS</strong> è stata aggiunta un'apposita funzione di Arranger On/Off. È ora possibile avere il Suono disponibile su<br />
tutta la tastiera (cioè senza tener conto del punto di SPLIT) mentre si stanno suonando gli Styles o i Midifiles. Per ottenere ciò è sufficiente<br />
premere il pulsante Arrange On/Off mentre si sta suonando, disattivando così l'arranger (verrà visualizzato un nuovo valore per lo split<br />
point, e cioè il ‘C-2’). Premendo nuovamente questo pulsante, il punto di split verrà riattivato e l'Arranger torna su ON.<br />
•<br />
MIDI FILE<br />
•<br />
PLAYER:<br />
XD Remap – La funzione XD-Remap [F8] si trova sotto il Menu Transposer (in modalità Song Play) e garantisce la compatibilità<br />
completa dei Midifiles creati per la serie XD, che potranno quindi essere utilizzati senza alcun problema sull'<strong>SD1</strong> <strong>PLUS</strong>.<br />
• VOCALIZER:<br />
•<br />
Il vocalizer potrà essere attivato / disattivato agendo sui pulsanti Demo&Hit.<br />
La funzione Hold (in modalità harmony) resterà inclusa nel vocal set, dopo il salvataggio delle impostazioni.<br />
•<br />
FOOTSWITCH – Nuove funzioni sono state aggiunte per gli interruttori a pedali: Lead On/Off, Pianist, Bassist, Drum Off All, Drum&Bass,<br />
Accordion On/Off. (A pagina 99 del Manuale d'uso – F5 Footswitch si trova un elenco delle altre funzioni che possono essere controllate con<br />
il pedale – nel sito www.ketron.it si trovano ulteriori funzioni aggiunte con i successivi aggiornamenti di Software)..<br />
•<br />
POWER ON SET UP - Le seguenti funzioni sono state aggiunte al Power On Set up: Autoclose (per Preset Voices), Intelligent Transposer, Text<br />
Mode, Accordion Bass on Stop, Pattern Group, Transposer Delayed mode (a pagina 58 del Manuale d'uso sono elencate le altre funzioni –<br />
Power On Set Up).<br />
• ACCORDION:<br />
•<br />
È stata aggiunta la nuova funzione Bass Off Stop. Quando è attivata la modalità Accordion, la nuova funzione BS ACCORD [accessibile<br />
da Utility, Accordion (F6) e premendo F8 per passare da Off on Stop a Normale e viceversa] è automaticamente impostata<br />
come ‘Off on Stop’. In questo modo si fa sì che il Basso e gli Accordi non continuino a suonare dopo che l'Arranger è stato<br />
•<br />
stoppato. In modalità Accordion, sul pulsante funzione F6, le funzioni Bass Octave e Sustain sono condivise.<br />
Sono state aggiunte nuove Curve di User Dynamic e la Left Expression viene controllata via Midi 2 ( con fisarmoniche Midi corredate<br />
di controllo dell'espressione tramite mantice).<br />
•<br />
1 TOUCH TO STYLE – Esiste la possibilità di assegnare la 1 Touch voice ad uno Style. È quindi possibile assegnare ad ogni style le 10 voci che<br />
meglio si addicono allo style in questione, per una maggiore rapidità durante le esecuzioni. Questa funzione si trova nell'Arranger Mode -<br />
Pg. 2 sotto la schermata Retrigger&Mode. Usando i pulsanti Value +/–, dopo lo Style Setting Etn/Orc4 si potrà assegnare una qualsiasi delle<br />
impostazioni One Touch da 1 a 8 allo style in questione. In questo modo, in qualsiasi momento si richiami questo stile, le impostazioni One<br />
Touch che vi sono state associate verranno automaticamente richiamate non appena si aziona il pulsante One Touch ( il LED dello Style<br />
Setting deve stare acceso<br />
Quick manual <strong>SD1</strong> Plus 9
Italiano<br />
•<br />
TEXT MODE: Durante la visualizzazione di testi, ora potranno essere riprodotti 40 caratteri su ogni riga senza dover riformattare. Sotto UTI-<br />
LITY, TEXT (F7), vi sono 2 modalità a disposizione:<br />
•<br />
Modalità 1: Formato standard visualizzato al centro dello schermo – 27 caratteri per riga.<br />
Modalità 2: Verranno usati caratteri diversi, più piccoli, sullo schermo intero – 40 caratteri per riga.<br />
•<br />
DRY ON STOP - Questa funzione è stata inserita anche sotto OnLineEffect (Micro [F6]) per rendere più facile e più veloce l'accesso.<br />
•<br />
RAM FULL - Quando la memoria Ram si riempie durante il Sound Load, verrà visualizzato il messaggio ‘Memory Full’ assieme alla nuova funzione<br />
Clear&Load (F10) ed Exit. Premendo (F10) si cancellano i suoni che risiedono attualmente nella RAM ed i suoni selezionati al momento<br />
vengono caricati automaticamente. Con Exit (F5) si annulla l'operazione e si mantengono nella RAM i suoni che vi risiedono attualmente.<br />
•<br />
Preset Editing: L'<strong>SD1</strong> Plus prevede la possibilità di modificare le Preset Voices. Dopo aver selezionato una Preset voice, premendo contemporaneamente<br />
i pulsanti Edit Preset * e #, si apre la finestra del Program relativo al Preset in questione.<br />
Sono state previste 2 nuove funzioni per salvare la voce: To Preset [F8] (viene sovrascritto l'attuale RAM Preset con lo stesso nome e le<br />
modifiche effettuate), e To Disk [F7] (Verranno salvati su Disk tutti i Presets con estensione .pre).<br />
•<br />
Style Convert - Nel menu Disk - Utility - Disk Control, esiste la funzione Style Convert. Questa funzione permette all'<strong>SD1</strong> <strong>PLUS</strong> di convertire<br />
automaticamente in formato <strong>SD1</strong> <strong>PLUS</strong> tutti gli Styles delle serie X ed XD residenti sul disco fisso nel Master Styles Folder.<br />
•<br />
Chord Solo - Questa funzione permette di escludere all'istante tutte le tracce degli Accordi di accompagnamento, ad eccezione di una. Nella<br />
finestra Arrange View, dopo aver selezionato ed evidenziato uno dei 5 Chord (F6 – F10), tutti i Chords, Drum e Bass che non siano stati evidenziati<br />
possono essere esclusi premendo contemporaneamente ambedue i pulsanti Chord/Solo Volume. Per uscire da questa funzione e<br />
riattivare gli altri Chord, è sufficiente premere una seconda volta uno dei 2 pulsanti master Chord Volumes oppure un Fill In.<br />
•<br />
2nd Voice to Disk - È possibile salvare le impostazioni della 2nd Voice su disco, con estensione .2ND. Dopo aver premuto Save/Enter, premere<br />
F6 – 2nd Voice, poi F8 – Disk Save ed infine F10 - Save per confermare. Se le impostazioni della 2nd Voice vengono salvate una seconda<br />
volta, verrà sovrascritto il precedente file 2nd Voice.<br />
•<br />
Caricare Styles da Disco in Song Play - In modalità Song Play è sufficiente premere contemporaneamente i due pulsanti * e # ( Edit Preset<br />
) per visualizzare e selezionare il prossimo Style da usare dall'attuale folder del disco fisso. Lo Style selezionato verrà caricato automaticamente.<br />
•<br />
Nuove Curve di Dinamica - Sono state aggiunte nuove curve di Dinamica per rendere più evidente la differenza tra Soft1, Soft2, Normal,<br />
Hard1, Hard2 … ecc. (UTILITY, Page1/3, Vel. Curve [F10]).<br />
PS: Per informazioni più dettagliate sull'OS4.0a (già caricato su <strong>SD1</strong> Plus ) si rinvia al nostro sito web www.ketron.it - sezione Software.<br />
10<br />
<strong>SD1</strong> Plus Quick manual
Deutsch<br />
Die neue Arranger Workstation <strong>SD1</strong> <strong>PLUS</strong>!<br />
Mit dem neuen <strong>SD1</strong> <strong>PLUS</strong> haben Sie eine sehr gute Wahl getroffen – herzlichen Glückwunsch! Wir sind sicher, dass Ihnen diese Workstation Jahre<br />
langen Hörgenuss und Freude am Musikmachen garantiert. Die vorliegende Kurzanleitung ist verfasst worden, um Ihnen zu gestatten, sofort die<br />
meisten der neuen Funktionen und Leistungsmerkmale zu nutzen. Sie ist jedoch nur in Zusammenhang mit dem Benutzerhandbuch, das Ihnen<br />
mit dem Instrument mit geliefert wurde, zu verwenden. Viel Vergnügen!<br />
Layout<br />
Das neue Layout des <strong>SD1</strong> <strong>PLUS</strong> wurde entwickelt, um Ihnen einen einfachen und schnellen Zugriff auf die bereits vorher existierenden (das <strong>SD1</strong><br />
hat weltweit einen riesigen Erfolg erzielt) und neuen Funktionen dieser Workstation sicherzustellen. Die neue Farbkodierung sorgt dafür, dass<br />
die wichtigsten Optionen (Begleitung, Aufnahme, Wiedergabe usw.) geradezu „griffbereit“ sind. Die neuen Beschriftungen hingegen listen die<br />
neuen Funktionen ganz klar auf (siehe auch nachfolgende Anmerkungen zur OS 4.0).<br />
Neue sounds<br />
Das Ketron <strong>SD1</strong> <strong>PLUS</strong> hat einige neue Klänge zu bieten, die einzigartig authentisch und realistisch sind. Es sind neue Orchestersounds für Gitarren<br />
(*), Bass, E-Pianos (sehr sauber und präzise) sowie für Streicher (voll und einbindend), Pads, Bläser (noch echter klingend) und Orgel hinzugekommen,<br />
während einige im ROM-Speicher verfügbare Stimmen neu aufgelegt wurden, um einen noch besseren HiFi-Sound zu erzielen. Auch<br />
die Schlagzeugelemente für Drum1 und Drum2 wurden durch die Integration von neuen natürlichen Klängen und mehr Live Drum Loops (insbesondere<br />
für die Dance- und Hip Hop-Styles) eingehend überarbeitet. Die leistungsstarke 6 GB-Festplatte umfasst ein Stereo Grand Piano von<br />
äußerst vielfältiger Klangfülle (zusammen mit anderen, überaus reizvollen Sax-, Pads- und Gitarrenklängen): allesamt Sounds, die am <strong>SD1</strong> <strong>PLUS</strong><br />
geladen und verwendet werden können.<br />
NB: Das neue Stereo Grand Piano wurde bereits bei der Ausarbeitung des ersten PROGRAMS berücksichtigt, d.h. dass dieser Klang, sobald er von<br />
der Festplatte geladen wird, unmittelbar zum Spielen zur Verfügung steht!<br />
(*) Die Stimmen der Hawaian- und Pedal Steel-Gitarren sind so programmiert, dass höchstens 3 Noten im Steel-Modus gespielt werden. (Die<br />
Zuordnungen können ganz einfach mit der neuen, nachstehend beschriebenen Preset Editing-Funktion geändert werden).<br />
DIE NEUEN KLÄNGE LADEN:<br />
die neue OS 4.0 (bereits installiert) beinhaltet sämtliche Änderungen, die an den Preset<br />
Sounds vorgenommen wurden, um eine bessere HiFi-Klangwirkung in allen Sound-<br />
Kategorien zu gewährleisten . Es ist möglich, weitere zusätzliche Klänge (und andere vorab<br />
auf der Festplatte des <strong>SD1</strong> <strong>PLUS</strong> vorhandene Klänge) zu laden, indem Sie die auf Seite 33 des<br />
Benutzerhandbuchs (Sound Load) erläuterte Vorgangsweise befolgen.<br />
FÜR EINEN UNMITTELBAREN ZUGRIFF AUF DIE NEUEN KLÄNGE: wenn Sie möchten, dass die neuen Klänge beim Einschalten des <strong>SD1</strong> <strong>PLUS</strong> immer sofort zur<br />
Verfügung stehen, ist es erforderlich, einen Sound Block zu kreieren, in dem alle gewünschten<br />
Klänge mit aufzunehmen sind (andernfalls entziehen sich diese Klänge dem unmittelbaren<br />
Zugriff bei Ausschalten des Keyboards). Es handelt sich um eine Aktion, die nur einmal<br />
auszuführen ist, damit das <strong>SD1</strong> <strong>PLUS</strong> „lernt“, welche Dateien beim Einschalten des<br />
Keyboards zu laden sind. Bzgl. der Vorgangsweise lesen Sie auf Seite 34 im<br />
Benutzerhandbuch (Den Ladevorgang automatisieren) nach. Im Sound Folder der Festplatte<br />
können mehrere Sound Blocks mit Ihren Favourite-Klängen erstellt werden. Nachdem der<br />
(die) Block(s) angelegt wurde(n), ist wie auf Seite 34 des Benutzerhandbuchs (Einen Sound<br />
Block beim Einschalten des <strong>SD1</strong> <strong>PLUS</strong> automatisch laden) beschrieben vorzugehen. Die auf<br />
diese Weise neu erstellte Datei (!!inito1.pwr) ist die Datei, die das Keyboard dahingehend<br />
anweist, welche Audiodateien im Rahmen des gewählten Sound BLOCKS beim Einschalten<br />
des Geräts automatisch zu laden sind. Die besagten RAM-Klänge können auch innerhalb der<br />
Presets (oder Program Voices) verwendet werden, um neue, hoch qualitative Stimmen zu<br />
generieren. Damit haben Sie eine schier unendliche Auswahl an Klangelementen und neuen<br />
Kreationen zu Verfügung!<br />
Quick manual <strong>SD1</strong> Plus 11
Deutsch<br />
Neue musik!<br />
MUSIC - SONGS:<br />
MUSIC – DATABASE:<br />
SET UP:<br />
wir haben etwa 166 Midi-Dateien inkludiert, die Sie einfach abspielen oder verwenden können, um beim Musikmachen<br />
noch mehr Spaß zu haben. Diese Dateien enthalten einige der weltweit berühmtesten Stücke und sind von Fachleuten<br />
aus der ganzen Welt programmiert worden, um ihren authentischen Charakter zu garantieren. Der meiste Teil dieser<br />
Songs, die im Folder 91 – Midifiles auf der Festplatte zu finden sind, beinhaltet bereits einige der neuen, im <strong>SD1</strong> Plus<br />
implementierten Audio-Loops. Zur Wiedergabe ist der Push-Button SONG PLAY von der Default-Menüseite des <strong>SD1</strong><br />
<strong>PLUS</strong> aus zu betätigen. Anschließend DIR (F5) drücken, um sich auf den gesamten Inhalt des Ordners mit den Midi-<br />
Dateien Zugriff zu verschaffen. Mit den Styles-Knöpfen ist es nun möglich, die Nummer des Songs, den Sie hören<br />
möchten, einzugeben. Auf den roten START-Knopf drücken, um mit der Wiedergabe zu beginnen.<br />
das <strong>SD1</strong> <strong>PLUS</strong> verfügt über eine neue Datenbank, die es dem Musiker ermöglicht, das Keyboard in nur wenigen<br />
Sekunden auf die Ausführung eines bestimmten Songs vorzubereiten. Etwa 200 Song-Einstellungen sind in Form von<br />
Song Registrations im Folder 91 – Midifiles auf Festplatte zu finden.<br />
um das Keyboard darauf vorzubereiten, einen bestimmten Song aus dieser breit gefächerten Datenbank zu spielen,<br />
ist wie folgt vorzugehen:<br />
•<br />
Den Knopf DISK drücken und sich vergewissern, dass damit die Festplatte des <strong>SD1</strong> Plus angesteuert wird.<br />
Den Knopf Single Registr drücken, um sämtliche Single Registrations, die im Folder 93 - Registrations Folder<br />
vorhanden sind, angezeigt werden (wenn die Master Folder-Funktion aktiviert wurde, kann diese Wahl auch vom<br />
Default-Disk-Menü aus erfolgen, indem F3 betätigt wird).<br />
•<br />
Mit den Value+ -Knöpfen die Song-Datei markieren, auf die das Keyboard vorzubereiten ist, und F10 – SELECT drücken.<br />
Nun über F2 die Datei LADEN, und das <strong>SD1</strong> <strong>PLUS</strong> beginnt automatisch den ausgewählten Song zu spielen. Es wird<br />
daran erinnert, dass es möglich ist, individuelle Song Settings zu erstellen, die dann der Datenbank<br />
hinzuzufügen sind (siehe Seite 95 des Benutzerhandbuchs – Eine Single Registration abrufen und sichern).<br />
Neue ‘Jam’-STYLES<br />
Eine weitere signifikante Neuheit besteht darin, dass die internen FLASH Styles überarbeitet und 131 neue Flash Styles integriert wurden. Durch<br />
die gekonnte Kombination dieser neuen Stile mit den ROM residenten Stilen und den Einsatz der neuen Sounds können Sie sich beim Spielen<br />
des <strong>SD1</strong> <strong>PLUS</strong> vergnügen wie noch nie und gleichzeitig das Publikum begeistern!<br />
Bei der Anzeige der neuen Stile (nach Anwahl der jeweiligen Styles-Gruppe, Latin zum Beispiel) werden diese durch Großbuchstaben gekennzeichnet,<br />
während die überarbeiteten und perfektionierten ROM-Styles in Kleinbuchstaben auf den folgenden Seiten angezeigt werden. Diesen<br />
neuen Aspekt hier ausführlich zu beschreiben, wäre jedoch sinnlos: Sie müssen die Sache ausprobieren und werden verstehen, worum es geht!<br />
NEUE STYLES: auf der Festplatte sind im Folder 95 – Styles 34 Styles gespeichert. Die meisten davon verwenden die neuen, für das <strong>SD1</strong><br />
<strong>PLUS</strong> entwickelten Audio-Loops, insbesondere die Styles wie Dance und Pop Down.<br />
Um mit diesen Styles zu arbeiten, ist wie folgt vorzugehen (bei aktivierter Master Folder-Funktion):<br />
•<br />
Den Single RAM Style-Knopf drücken, um sich auf die Styles auf Festplatte Zugriff zu verschaffen.<br />
Die Knöpfe der Styles-Gruppen (8beat, 16beat…) verwenden, um die Gruppe anzuzeigen, in der sich der Stil<br />
befindet, der geladen werden soll. Das Format der Anzeige kann anhand der Anzeigemoduswahl geändert werden<br />
•<br />
(siehe hierzu in weiterer Folge: Pattern View)..<br />
Über den entsprechenden Funktionsdruckknopf den gewünschten Style anwählen.<br />
Probieren Sie die neuen Rhythmen R&B, Dance und Pop (mit originellen Intros und Endings) sowie den neuen Soft Dancing, Latin und Traditional<br />
Dancing (beachtenswert ist der absolut sanfte Übergang von Arranger A auf D) und Sie werden sofort bemerken, warum Ketron auch diesmal<br />
gleichbedeutend mit Fortschritt ist.<br />
Neue funktionen für bessere musikalische Leistungen<br />
•<br />
DRUM REMIX - Soll ein Song dynamischer oder sonst irgendwie geändert werden, ist es grundlegend, die rhythmische Struktur der<br />
Perkussionsinstrumente bzw. des Schlagzeugs zu ändern, um eben dem Song mehr Power zu verleihen. Das <strong>SD1</strong> <strong>PLUS</strong> gestattet in diesem<br />
Sinne, die Perkussionsspuren der einzelnen Midifiles oder Songs mit denen der speicherresidenten Stile des Instruments zu ersetzen (Live<br />
Drum Loops inklusive) und zeitweilig die einzelnen Perkussionsgruppen von der Rhythmusspur wegzuschalten. Während die Midi-Datei<br />
abgespielt wird, ist es auch möglich, von den Styles der Tastatur auf die Original-Schlagzeugspuren der Midi-Datei überzugehen und<br />
umgekehrt, Fill-ins zu aktivieren und die vier Arranger in Echtzeit zu benutzen!<br />
12<br />
<strong>SD1</strong> Plus Quick manual
Deutsch<br />
Diese Funktion kann im 'Song Play'-Modus zugeschaltet und verwendet werden, indem die folgenden Knöpfe betätigt werden:<br />
ON/OFF (Tap): Drum Remix On/Off – auf der Menüseite von Song Play wird angezeigt, ob die Funktion ‘Drum Remix’ aktiviert ist oder nicht.<br />
STYLE/SONG (Lock): Auswahl von Style/Song – mit dieser Option wird festgelegt, die Zifferntasten der Styles (0-9) zur Anwahl eines<br />
mit einem Song zu koppelnden Styles oder zur Anwahl eines Songs aus dem laufend geöffneten Festplatten-Ordner zu verwenden.<br />
Der aktivierte Wahlmodus wird am Display unter dem Taktzähler angezeigt.<br />
SONG (Key Start): schaltet die Schlagzeugspuren der Midi-Datei zu – mit dem Song werden die Original-Drum-Spuren des Midifiles<br />
wiedergegeben.<br />
STYLE (Key Stop): aktiviert die Schlagzeugspuren des gewählten <strong>SD1</strong> <strong>PLUS</strong>-Styles, die während der Wiedergabe des Songs verwendet<br />
werden. Diese Wahl kann permanent gespeichert werden (d.h. wenn dieselbe Midi-Datei das nächste Mal aufgerufen wird,<br />
verwendet sie die Schlagzeugspuren des Ketron <strong>SD1</strong> <strong>PLUS</strong> anstatt der Original-Schlagzeugspuren der Midi-Datei).<br />
Um ein neues Song Set Up mit Remix zu sichern:<br />
1 ) drücken Sie den Knopf GM (F1), während die Midi-Datei abgespielt wird.<br />
2 ) drücken Sie den Start/Stop-Knopf, um die Midi-Datei anzuhalten.<br />
3) Innerhalb eines GM-Parts drücken Sie SAVE/ENTER, dann F10 um den Speichervorgang zu bestätigen.<br />
Sie können entweder die vorhandene Midi-Datei überschreiben oder die neue Datei mit einem anderen Namen versehen.<br />
Für jede Midi-Datei ist es auch möglich, den Anfangs- und Endtakt von Remix festzulegen.<br />
Um den Anfangstakt zu wählen, ist F2 zu drücken und die entsprechende Taktzahl mit den Value +/- -Knöpfen zu markieren.<br />
Um den Endtakt zu wählen, ist erneut F2 zu drücken und die entsprechende Taktzahl mit den Value +/- -Knöpfen zu markieren. Bei Betätigen<br />
des START-Knopfs beginnt das <strong>SD1</strong> <strong>PLUS</strong> den Stil in der Remix-Version erst ab dem ausgewählten Anfangstakt und bis zu dem wie oben<br />
beschrieben zugewiesenen Endtakt zu spielen. Über den Push-Button ‘Song’ werden erneut die Schlagzeugspuren der Midi-Datei aktiviert.<br />
Die Funktion Drum Remix gestattet auch, die auf Disk vorhandenen Patterns (d.h. die mit Save Song Set Up gespeicherten Patterns) zu<br />
verwenden, allerdings NUR unter der Voraussetzung, dass sie in den für die Patterns vorgesehenen RAM-Bereich geladen wurden.<br />
•<br />
BASSIST<br />
- Die Funktion Bassist gestattet, den manuellen Bass auf der linken Seite vom Splitpunkt der Tastatur zu spielen, während die rechte<br />
Seite dazu verwendet werden kann, Akkorde oder Soli zu spielen. Jedes Mal, wenn der Musiker die Hand von der rechten Seite der<br />
Tastatur abhebt, wird der zuletzt rechts gespielte Akkord gespeichert (sofern der Hold-Knopf aktiviert wurde). Der Bass kann hierbei frei<br />
gespielt werden, ohne den Akkord zu beeinflussen. Es handelt sich um eine äußerst nützliche Funktion, um die Überfülle mancher Stile zu<br />
reduzieren und nach Empfinden des Musikers natürliche, lebendige und realistische Begleitlinien zu kreieren. Diese Funktion ist automatisch<br />
zugeschaltet, sowohl wenn Pianist/Bassist als auch Manual (unter Bass) aktiviert sind.<br />
•<br />
MEHR<br />
•<br />
PATTERN<br />
POLYPHONIE - Es wurde die Zahl der gleichzeitig zu spielenden Noten erhöht. In anderen Worten heißt dies, dass am <strong>SD1</strong> <strong>PLUS</strong> nun<br />
mehr Noten gespielt werden können, ohne dass einige hiervon verloren gehen.<br />
VIEW: die Anzeige der Disk Patterns und der Zugriff auf dieselben erfolgen ähnlich wie bei den Internal Styles. Um auf die Disk<br />
Styles zuzugreifen, ist der Single Ram Styles-Knopf zu drücken und die gewünschte Styles-Gruppe zu wählen; anschließend drücken Sie den<br />
entsprechenden Funktionsdruckknopf (F1- F10), um den einzelnen Stil anzuwählen. Nach dem bereits geladenen Stil wird das Symbol "….."<br />
angezeigt. Die neue Funktion GROUP (über den Block List -Knopf und wiederholte Betätigung des Funktionsdruckknopfs F8 zu aktivieren)<br />
dient<br />
•<br />
dazu, unter den folgenden Anzeigemodi der Patterns zu wählen:<br />
Modus 1: numerischer Anzeigemodus 1; die Styles werden in zahlenmäßiger Reihenfolge angezeigt.<br />
Modus 2: Anzeige nach dem Ladezeitpunkt; die Styles werden in der Reihenfolge angezeigt, in der sie auf die Festplatte geladen wurden.<br />
•<br />
Modus 3: Anzeige nach dem Alphabet; die Styles werden in alphabetischer Reihenfolge angezeigt.<br />
Off: numerischer Anzeigemodus 2; die Styles können anhand ihrer Nummern wie von der vorhergehenden Software vorgesehen<br />
aufgerufen werden (siehe Seiten 56 und 57 des Benutzerhandbuchs).<br />
NB: wenn im laufend angewählten Festplatten-Ordner keine Patterns vorhanden sind, wird kein Pattern angezeigt.<br />
•<br />
ROM<br />
•<br />
BACKUP-FOLDER<br />
& FLASH STYLES - Die ROM residenten Styles (die in Kleinbuchstaben anzeigt werden) und die FLASH Styles (die in Großbuchstaben<br />
angezeigt werden) sind leicht zu unterscheiden.<br />
FÜR FLASH STYLES - Die jeweils aktuelle Konfiguration der Flash Styles kann auf Disk gesichert werden. Save/Enter, Styles<br />
(F2) und Global Flash to Disk (F7) drücken. Auf der folgenden Menüseite müssen Sie dem neuen Backup-Folder einen Namen zuweisen. Über<br />
F10-Save ist der Name zu bestätigen.<br />
Mit dieser Aktion wird automatisch ein neuer Ordner erstellt, der sämtliche laufenden Flash Styles enthält.<br />
Diese Funktion dient dazu, einen neuen Block individuell gestalteter Flash Styles zu speichern bzw. von Festplatte zu laden. Auf diese<br />
Weise können Sie über eine Reihe unterschiedlicher Blocks aus individuell gestalteten Flash Styles disponieren.<br />
•<br />
ARRANGER<br />
ON/OFF - Das <strong>SD1</strong> <strong>PLUS</strong> wurde um die Funktion Arranger On/Off bereichert. Es ist nun möglich, über die laufende(n) Stimme(n)<br />
auf der gesamten Tastatur (d.h. ohne den SPLIT-Punkt zu berücksichtigen) zu verfügen, während Styles oder Midifiles gespielt werden.<br />
Hierfür ist einfach der Arrange On/Off-Knopf während der Ausführung zu drücken. Der Arranger wird ausgeschaltet, und als Split-Punkt wird<br />
‘C-2’angezeigt. Durch erneutes Betätigen desselben Knopfs wird der Split-Punkt wieder aktiviert und der Arranger wieder zugeschaltet<br />
•<br />
MIDI FILE<br />
•<br />
PLAYER:<br />
XD Remap – Die Funktion XD-Remap [F8] findet sich (im Song Play-Modus) unter dem Transposer-Menü und gewährleistet<br />
die perfekte Kompatibilität der für die XD-Serie geschaffenen Midifiles, die hiermit problemlos am <strong>SD1</strong> <strong>PLUS</strong> einzusetzen sind.<br />
• VOCALIZER:<br />
•<br />
Der Vocalizer kann mit den Knöpfen Demo&Hit aktiviert und deaktiviert werden.<br />
Quick manual <strong>SD1</strong> Plus 13
Deutsch<br />
•<br />
Die Funktion Hold (im Harmony-Modus) bleibt im Vocal Set nach Sichern der Einstellungen erhalten.<br />
•<br />
Footswitch – neue Funktionen sind auch für die Pedalschaltungen hinzugekommen: Lead On/Off, Pianist, Bassist, Drum Off All, Drum&Bass,<br />
Accordion On/Off (auf Seite 99 des Benutzerhandbuchs – F5 Footswitch finden Sie eine Liste weiterer Funktionen, die mit dem Pedal<br />
gesteuert werden können).<br />
•<br />
POWER ON SET UP - Die folgenden Funktionen sind dem Power On Set Up hinzugefügt worden: Autoclose (für Preset Voices), Intelligent<br />
Transposer, Text Mode, Accordion Bass on Stop, Pattern Group, Transposer Delayed Mode (auf Seite 58 des Benutzerhandbuchs sind weitere<br />
Funktionen aufgelistet – Power On Set Up).<br />
• ACCORDION:<br />
•<br />
Hinzugekommen ist die Funktion Bass Off Stop. Wenn der Accordion-Modus aktiviert ist, ist die neue Funktion BS ACCORD [aufrufbar<br />
über Utility, Accordion (F6) und F8, um von ‘Off on Stop’ auf ‘Normal’ und umgekehrt zu schalten] automatisch auf ‘Off on<br />
Stop’ gesetzt. Auf diese Weise ist dafür gesorgt, dass der Bass und die Akkorde nicht weiter klingen, nachdem der Arranger<br />
•<br />
gestoppt wurde. Wird im Accordion-Modus F6 betätigt, gelangen Sie zur doppelten Funktion von Bass Octave und Sustain.<br />
Es sind neue User Dynamic-Kurven hinzugekommen; die Left Expression wird über Midi 2 kontrolliert (bei Midi-Akkordeons mit<br />
Expression-Steuerung über Balg).<br />
•<br />
1 TOUCH TO STYLE – Es besteht die Möglichkeit, die 1 Touch Voices einem Style zuzuordnen, d. h. mit jedem Style können die 10 Stimmen, die<br />
am besten zu dem betreffenden Style passen, verknüpft werden, um diese während Live-Darbietungen schneller zur Verfügung zu haben.<br />
Die Funktion ist im Arranger Mode - Seite 2 unter der Retrigger&Mode-Menüseite zu finden. Mit den Value +/–-Knöpfen können Sie nach dem<br />
Style Setting Etn/Orc4 jede der One Touch-Einstellungen von 1 bis 8 dem jeweiligen Style zuweisen. Jedes Mal, wenn dann der Style aufgerufen<br />
wird, werden auch automatisch die damit verknüpften One Touch-Einstellungen aufgerufen, sobald der One Touch-Knopf (bei leuchtender<br />
Style Setting-LED) betätigt wird. Die von Ihnen für einen bestimmten Style bevorzugten Stimmen stehen auf diese Weise immer zur<br />
Verfügung – schnellerer Zugriff auf die Stimmen und weniger Suchzeit für die jeweils am besten geeignete Stimme!<br />
•<br />
TEXT MODE: bei der Textreproduktion können nun 40 Zeichen pro Zeile, ohne neu formatieren zu müssen, angezeigt werden. Unter UTILITY,<br />
TEXT (F7) gibt es 2 Anzeigemodi zur Auswahl:<br />
•<br />
Modus 1: Standardformat, das in der Mitte des Displays angezeigt wird – 27 Zeilen pro Zeile.<br />
Modus 2: Es werden hierbei andere kleinere Zeichen verwendet, die auf dem gesamten Display angezeigt werden – 40 Zeichen pro Zeile.<br />
•<br />
DRY ON STOP - Auch diese Funktion wurde unter OnLineEffect (Micro [F6]) integriert, um sowohl den Zugriff als auch die Verwendung einfacher<br />
und schneller werden zu lassen.<br />
•<br />
RAM FULL - Um die erforderlichen Aktionen zu beschleunigen (wenn sich die RAM-Speicherkapazität während des Sound Loads erschöpft),<br />
wird die Meldung ‘Memory Full’ zusammen mit der neuen Funktion Clear&Load (F10) und Exit angezeigt. Durch Betätigen von F10 werden die<br />
Klänge, die sich im RAM-Speicher befinden, gelöscht und die laufend angewählten Klänge werden automatisch geladen, während über Exit<br />
(F5) die Aktion abgebrochen wird und die im RAM-Speicher residenten Klänge beibehalten werden.<br />
•<br />
Preset Editing: Das <strong>SD1</strong> Plus sieht die Möglichkeit vor, die Preset Voices zu ändern. Nach Anwahl der zu ändernden Preset Voice sind gleichzeitig<br />
die Knöpfe Edit Preset * und # zu betätigen, so dass das Fenster des zum jeweiligen Preset gehörigen Programs geöffnet wird.<br />
Es sind 2 neue Funktionen zur Sicherung der Stimme integriert worden: To Preset [F8] (es wird das laufende RAM-Preset mit demselben<br />
Namen und den durchgeführten Änderungen überschrieben) und To Disk [F7] (es werden auf Disk sämtliche Presets mit Dateizusatz .pre<br />
gespeichert)<br />
•<br />
Style Convert - Im Menü Disk - Utility - Disk Control gibt es die Funktion Style Convert. Diese gestattet es dem <strong>SD1</strong> <strong>PLUS</strong>, automatisch sämtliche<br />
Styles der Serien X und XD, die auf Festplatte im Master Styles Folder resident sind, in <strong>SD1</strong> <strong>PLUS</strong>-Format zu konvertieren.<br />
•<br />
Chord Solo - Diese Funktion gestattet es, in Echtzeit sämtliche Chord-Begleitspuren bis auf eine auszuschließen. Nachdem in dem Fenster<br />
Arrange View eine der 5 Chords (F6 - F10) ausgewählt und markiert wurde, können alle nicht markierten Chord-, Drum- und Bass-Spuren<br />
weggeschaltet werden, indem Sie gleichzeitig die Knöpfe Chord/Solo Volume drücken. Um diese Funktion abzubrechen und die anderen<br />
Chords wieder zuzuschalten, ist einer der beiden Chord Volumes Master-Knöpfe ein zweites Mal zu betätigen oder ein Fill In zu aktivieren.<br />
•<br />
2nd Voice to Disk - Es ist möglich, die Einstellungen der 2nd Voice auf Disk mit Dateizusatz .2ND zu sichern. Save/Enter, F6 – 2nd Voice, F8<br />
– Disk Save und schließlich F10 - Save zur Bestätigung drücken. Werden die Einstellungen der 2nd Voice zum zweiten Mal gesichert, wird die<br />
vorhergehende 2nd Voice-Datei automatisch überschrieben.<br />
•<br />
Disk Styles im Song Play-Modus laden - Im Song Play-Modus sind gleichzeitig die beiden Knöpfe Edit Preset * und # zu drücken, um den als nächsten<br />
zu verwendenden Style aus dem laufenden Festplatten-Ordner anzuzeigen und anzuwählen. Der gewählte Style wird automatisch geladen.<br />
•<br />
Neue Dynamic-Kurven - Es sind neue Dynamic-Kurven integriert worden, um den Unterschied zwischen Soft1, Soft2, Normal, Hard1, Hard2 …<br />
usw. stärker herauszustellen (UTILITY, Page1/3, Vel. Curve [F10]).<br />
PS: zwecks weiterer Informationen über die OS 4.0a (die bereits installiert ist) verweisen wir auf unsere Website www.ketron.it – Bereich<br />
Software.<br />
14<br />
<strong>SD1</strong> Plus Quick manual
Français<br />
La nouvelle Arranger Workstation <strong>SD1</strong> <strong>PLUS</strong>!<br />
Tous nos compliments pour avoir choisi le nouveau <strong>SD1</strong> <strong>PLUS</strong>. Nous sommes sûrs que cette station de travail sera un vrai régal pour vos tympans<br />
et qu’elle vous permettra de réaliser de la musique pendant des années. Ce bref manuel a été rédigé pour faire en sorte que vous puissiez<br />
utiliser tout de suite la plupart des nouvelles fonctions et caractéristiques. Il faudra l’utiliser avec le mode d’emploi principal que l’on Vous<br />
a fourni avec l’instrument. Bon amusement !<br />
Agencement<br />
Le nouvel agencement du <strong>SD1</strong> <strong>PLUS</strong> a été soigneusement étudié dans le but de Vous garantir un accès facile et rapide à la plupart des fonctions<br />
préexistantes ( du <strong>SD1</strong> qui a obtenu un très grand succès dans le monde entier) et aux nouvelles fonctions de cette station de travail. Le nouveau<br />
code chromatique permet un accès très rapide aux caractéristiques principales (accompagnement, enregistrement, écoute, etc.). Les nouvelles<br />
inscriptions, par contre, listent très clairement les nouvelles fonctions (voir aussi ci-dessous les notes relatives au système OS 4.0).<br />
Nouveaux sons<br />
Le Ketron <strong>SD1</strong> <strong>PLUS</strong> présente quelques nouveaux sons qui sont ce qu’il y a de plus authentique et de plus réaliste au niveau mondial. On a inclus<br />
de nouvelles sonorités orchestrales pour les Guitares (*), la Basse, les Pianos E. (très pures et précises), et également pour les groupes de<br />
Cordes (pleines et enveloppantes), Pads, Cuivres (plus authentiques) et Orgue, tandis que quelques-unes des sonorités disponibles sur ROM ont<br />
été complètement revues afin d’obtenir un effet de haute fidélité plus pur. Les éléments de batterie pour Drum1 et Drum2, aussi, ont été revus<br />
de manière très incisive en introduisant de nouveaux sons de percussion naturels et un plus grand nombre de boucles Live Drum (en particulier<br />
pour les styles Dance et Hip Hop). Le disque dur puissant de 6 Giga-octets comprend un Stereo Grand Piano à la sonorité extrêmement riche<br />
(avec d’autres sons de Sax, Pads et des sons de Guitare extrêmement séduisants: on peut charger et utiliser tous ces sons sur le <strong>SD1</strong> <strong>PLUS</strong>.<br />
NB: Le nouveau Stereo Grand piano a déjà été introduit dans la programmation du premier PROGRAM, on pourra donc utiliser ce son immédiatement<br />
pour les performances musicales!<br />
(*) Les sonorités des guitares Hawaian et Pedal Steel ont été programmées de manière à ce que l’on joue au maximum 3 notes en mode Steel.<br />
(On pourra modifier facilement les assignations en utilisant la nouvelle fonction de Preset Editing décrite par la suite).<br />
CHARGER LES NOUVEAUX SONS:<br />
POUR UN ACCES IMMEDIAT AUX NOUVEAUX SONS:<br />
Le nouveau système OS 4.0 (déjà installé) comprend toutes les modifications effectuées sur<br />
les Preset Sounds afin d’obtenir une meilleur réponse de haute fidélité dans toutes les catégories<br />
sonores. Il est possible de charger d’autres sons additionnels ( et d’autres sons<br />
préexistants sur le disque dur du <strong>SD1</strong> <strong>PLUS</strong>) en suivant la procédure décrite à la page 33 du<br />
mode d’emploi (Sound Load).<br />
Si l’on désire avoir les nouveaux sons prêts à l’usage dès que l’on allume le <strong>SD1</strong> <strong>PLUS</strong> (ces<br />
sons ne seront plus présents une fois que l’on éteint le clavier), il faut, tout d’abord, créer<br />
un Sound Block qui comprendra tous les sons que l’on veut charger chaque fois que l’on<br />
allume le clavier. Il s’agit d’une opération qu’il faudra exécuter une seule fois, et qui indique<br />
donc au <strong>SD1</strong> <strong>PLUS</strong> quels sont les fichiers à charger lors de la mise sous tension du clavier.<br />
Pour la procédure à suivre, voir la page n° 34 du Mode d’emploi (Chargement automatique).<br />
Dans le Sound Folder du disque dur on peut créer plusieurs Sound Blocks contenant<br />
les sons préférés. Après avoir créé le ou les Block, il suffit de suivre la procédure<br />
décrite à la page 34 du Mode d’emploi. (Charger un Sound Block lors de la mise sous tension<br />
du <strong>SD1</strong> <strong>PLUS</strong>). Le nouveau fichier ainsi créé (!!inito1.pwr) est un fichier qui informe le<br />
<strong>SD1</strong> <strong>PLUS</strong> sur les fichiers audio que l’on désire charger chaque fois que l’on allume le clavier.<br />
De cette manière, dès que l’on allumera le clavier, le Sound BLOCK sélectionné sera chargé<br />
automatiquement. On pourra utiliser les sons susdits de la Mémoire Vive également dans<br />
les Preset pour créer de nouvelles sonorités ayant un très haut niveau qualitatif (ou bien<br />
dans les Program voices), en mettant ainsi à Votre disposition un gamme infinie d’éléments<br />
sonores et de nouvelles créations!<br />
Quick manual <strong>SD1</strong> Plus 15
Français<br />
De la nouvelle musique!<br />
MUSIC - SONGS:<br />
MUSIC – DATABASE:<br />
SET UP:<br />
Nous avons inclus environ 166 fichiers Midi que Vous pourrez simplement écouter ou utiliser pour vous amuser encore<br />
plus en jouant de la musique. Ces fichiers comprennent certains morceaux de musique parmi les plus célèbres au<br />
niveau mondial et ils ont été programmés par des experts du monde entier afin de garantir leur authenticité. La plupart<br />
de ces songs comprennent déjà certaines des nouvelles boucles audio présentent dans le <strong>SD1</strong> Plus, et elles se<br />
trouvent dans le Folder 91 – Fichiers Midi sur le disque dur du <strong>SD1</strong> <strong>PLUS</strong>. Pour les écouter, appuyer sur le bouton SONG<br />
PLAY à partir de la page-écran par défaut du <strong>SD1</strong> <strong>PLUS</strong>. Puis appuyer sur DIR (F5) pour accéder à tout le contenu du<br />
Folder avec les fichiers Midi. Maintenant à l’aide des boutons Styles on peut taper la valeur numérique de la Song que<br />
l’on désire écouter et appuyer ensuite sur le bouton START rouge pour lancer la song.<br />
Dans le <strong>SD1</strong> <strong>PLUS</strong> on a créé une nouvelle base de données. Cela permet au musicien d’avoir le clavier prêt pour l’exécution<br />
d’une song spécifique en un instant. Dans le <strong>SD1</strong> <strong>PLUS</strong> on trouve environ 200 réglages spécifiques par song<br />
sous la forme de Song Registrations. Ces fichiers se trouvent dans le Folder 91 – fichiers Midi sur le disque dur.<br />
Pour préparer le clavier à jouer une song particulière se trouvant dans cette vaste base de données, procéder de la<br />
manière suivante:<br />
•<br />
Appuyer sur le bouton DISK et s’assurer que l’on se trouve sur le disque dur du <strong>SD1</strong> <strong>PLUS</strong>.<br />
Appuyer sur le bouton Single Registr pour afficher tous les Single Registers se trouvant dans le Folder 93 -<br />
Registrations folder. (Si le Master Folder a été activé, on pourra exécuter cette sélection également à partir du<br />
•<br />
menu disk par défaut en appuyant sur F3).<br />
Utiliser les boutons –Value+ pour mettre en surbrillance le fichier Song pour lequel le clavier doit être<br />
•<br />
prédisposé et appuyer sur F10 – SELECT.<br />
Maintenant appuyer sur F2 pour CHARGER ce fichier et le <strong>SD1</strong> <strong>PLUS</strong> commencera automatiquement à jouer la song<br />
sélectionnée. On rappelle qu’il est possible de créer des réglages Song individuels et des les ajouter ensuite à la<br />
base de données (voir page 95 du Mode d’emploi – Rappeler et sauvegarder une Single Registration).<br />
NOUVEAUX STYLES ‘Jam’<br />
Un autre point important consiste dans le fait que les FLASH styles dans le <strong>SD1</strong> <strong>PLUS</strong> ont été revus et on a inclus 131 nouveaux Flash styles. En<br />
combinant de la juste manière ces nouveaux styles avec ceux originaux se trouvant dans ROM et en utilisant les nouveaux sons, on pourra tirer<br />
le plus grand amusement du <strong>SD1</strong> <strong>PLUS</strong> lors des performances en réussissant en même temps à susciter l’admiration du public!<br />
Si l’on affiche les nouveaux styles (en sélectionnant le groupe de styles relatif, par exemple Latin), ceux-ci seront indiqués avec des lettres majuscules,<br />
tandis que les styles de ROM, revus et perfectionnés, seront affichés avec des lettres minuscules dans les pages suivantes. Il est de toute<br />
manière inutile de décrire ce nouvel aspect : essayez-en quelques-uns et vous comprendrez. !<br />
NOUVEAUX STYLES: Sur le disque dur, dans le Folder 95 – Styles il y a 34 styles. La plupart d’entre eux utilisent les nouvelles boucles audio<br />
créées pour le <strong>SD1</strong> <strong>PLUS</strong>, de manière particulière les styles tels que Dance et Pop Down.<br />
Pour utiliser ces styles, procéder de la manière suivante (avec la DEL du Master Folder allumée):<br />
•<br />
Appuyer sur le bouton Single RAM Style pour pouvoir accéder aux styles sur le disque dur.<br />
Utiliser les boutons des groupes de styles (8beat, 16beat…) pour afficher le groupe dans lequel se trouve le style que l’on désire<br />
•<br />
charger. On peut modifier le format de la visualisation sur la base du mode sélectionné (voir Pattern View par la suite).<br />
Use the associated F-button to select the style you want to use.<br />
Essayez les nouveaux rythmes R&B, Dance et Pop (avec des intros et des fins originales) et le nouveau Soft Dancing, Latin et Traditional Dancing<br />
(il faut remarquer le passage très graduel de Arranger A à D), et vous comprendrez tout de suite pourquoi cette fois aussi Ketron est synonyme<br />
d’avant-garde.<br />
DE NOUVELLES FONCTIONS pour de meilleures<br />
performances musicales.<br />
•<br />
DRUM REMIX - Lorsqu'on désire raviver ou bien modifier une song, la possibilité de changer la structure rythmique des instruments de percussion<br />
ou de la batterie peut constituer une énorme différence, justement en rendant plus vivace la song. Le <strong>SD1</strong> <strong>PLUS</strong> permet d'obtenir<br />
des résultats de ce genre en offrant la possibilité de remplacer les pistes de la percussion de chaque fichier Midi ou de chaque song avec<br />
celles des styles se trouvant dans la mémoire de l'instrument (y compris les boucles des live drum) et d' exclure temporairement chaque<br />
16<br />
<strong>SD1</strong> Plus Quick manual
Français<br />
groupe de percussion de la piste du rythme. Pendant que le fichier Midi est en train de jouer, il sera également possible de passer des styles<br />
du clavier aux pistes de batteries originales du fichier Midi et vice-versa, d'activer les Fill-ins et d'utiliser les quatre Arrangers en temps réel!<br />
On peut activer et utiliser cette fonction en mode 'Song Play' en utilisant les boutons suivants:<br />
ON/OFF (Tap): Drum Remix On/Off - Sur la page-écran du Song Play on indique si le ‘Drum Remix’ est activé ou non.<br />
STYLE/SONG (Lock): Sélection de Style/Song – Pour choisir si l’on désire utiliser les boutons numériques des styles (0-9) pour sélectionner<br />
un Style à associer à une song, ou bien pour sélectionner une Song à partir du répertoire actuellement ouvert sur le<br />
disque. Le type de sélection activé sera affiché à l’écran, sous le compteur des mesures.<br />
SONG (Key Start): Elle actionne les pistes de batterie du fichier Midi – Avec la song on reproduira les pistes Drum originales du<br />
fichier Midi.<br />
STYLE (Key Stop): Elle actionne les pistes de batterie du style <strong>SD1</strong> <strong>PLUS</strong> sélectionné, que l’on utilisera au cours de la reproduction<br />
de la song. On peut mémoriser cette sélection de manière permanente ( cela veut dire que la prochaine fois que l’on rappellera ce<br />
fichier Midi, il utilisera les pistes de batterie du Ketron <strong>SD1</strong> <strong>PLUS</strong> au lieu des pistes de batterie originales des fichiers Midi).<br />
Pour mémoriser le nouveau Song Set up avec Remix:<br />
1 ) Appuyer sur le bouton GM (F1) pendant la reproduction du fichier Midi<br />
2 ) Appuyer sur le bouton Start/Stop pour interrompre le fichier Midi.<br />
3) A l’intérieur d’une partie GM, appuyer sur SAVE/ENTER, puis sur F10 pour confirmer l’opération de sauvegarde.<br />
On peut choisir ou d’écraser par écriture le fichier Midi existant ou bien de renommer ce nouveau fichier.<br />
Pour chaque fichier Midi on peut choisir également la mesure de début et de fin de la fonction de Remix.<br />
Pour sélectionner la mesure initiale, appuyer sur F2 et chercher le numéro en utilisant Value +/-. Pour sélectionner la mesure finale, appuyer<br />
de nouveau sur F2 et chercher le numéro avec Value+/-. Si l’on appuie sur START, le <strong>SD1</strong> <strong>PLUS</strong> commencera à jouer le style dans la version Remix<br />
uniquement à partir de la mesure initiale jusqu’à la mesure finale assignée comme décrit ci-dessus. Si l’on appuie sur ‘Song’ on activera de<br />
nouveau les pistes de batterie du fichier Midi. La fonction Drum Remix permet également d’utiliser les Pattern présents sur le disque (sauvegardés<br />
avec Save Song Set up) mais UNIQUEMENT s’ils ont été chargés dans l’espace prévu dans la Mémoire vive pour les Pattern.<br />
•<br />
BASSIST<br />
- La fonction Bassist permet de jouer la basse manuelle sur la partie à gauche du point de split sur le clavier, tandis que l’on pourra<br />
utiliser la partie de droite pour jouer des accords ou des solos. Chaque fois que le musicien enlève la main de la partie droite du clavier,<br />
le dernier accord joué dans la partie droite restera dans la mémoire (à condition que le bouton Hold ait été activé) tandis que l’on pourra<br />
jouer librement la Basse sans influencer l’accord. Il s’agit d’une fonction très utile pour réduire la redondance qui pourrait exister dans un<br />
style et qui permet au musicien de créer en toute liberté des lignes de basse naturelles, vives et réalistes. Cette fonction est automatiquement<br />
sur ‘On’ lorsque Pianist/Bassist et Manual (sous Bass) sont activés.<br />
•<br />
<strong>PLUS</strong><br />
•<br />
PATTERN<br />
DE POLYPHONIE - On a augmenté le nombre de notes que l’on peut jouer simultanément. En d’autres mots, maintenant il est possible<br />
de jouer plusieurs notes sur le <strong>SD1</strong> <strong>PLUS</strong> sans que certaines d’entre elles ne soient perdues.<br />
VIEW: L’affichage et l’accès au Disk Patterns ont lieu maintenant de manière semblable aux Internal Styles. Pour accéder aux disk<br />
styles, il suffit d’appuyer sur le bouton Single Ram Styles et de sélectionner le groupe ou la famille de Styles; puis utiliser le bouton de fonction<br />
relatif (F1- F10) pour sélectionner le style spécifique. Le symbole "….." apparaît après le style déjà chargé. On pourra utiliser la nouvelle<br />
fonction GROUP (que l’on peut activer en appuyant sur le bouton Block List et puis plusieurs fois sur le bouton F8) pour sélectionner<br />
les<br />
•<br />
modes d’affichage suivants des Patterns:<br />
Mode 1: Mode numérique 1; les styles seront affichés par ordre numérique.<br />
Mode 2: Par ordre de chargement, les Styles seront affichés suivant l’ordre dans lequel ils ont été chargés sur le disque dur.<br />
•<br />
Mode 3: Par ordre alphabétique; les Styles sont affichés par ordre alphabétique.<br />
Off: Mode numérique 2; on peut rappeler les Styles de manière numérique comme cela était prévu par le logiciel précédent (voir page<br />
56 & 57 du Mode d’emploi).<br />
NB: Si dans le répertoire du disque actuellement sélectionné il n’y a pas de patterns, aucun pattern ne sera affiché.<br />
•<br />
ROM<br />
•<br />
FOLDER<br />
& FLASH STYLES - On peut facilement distinguer les styles internes de ROM (indiqués avec des lettres minuscules) et ceux FLASH (indiqués<br />
avec des lettres majuscules)<br />
DE SAUVEGARDE POUR FLASH STYLES - On peut sauvegarder sur disque la configuration actuelle des Flash Styles. Appuyer sur<br />
Save/Enter, puis sur Styles (F2) et sur Global Flash to Disk (F7). Dans la page-écran successive on Vous demandera de nommer ce nouveau<br />
Folder de sauvegarde. Appuyer sur F10-Save pour confirmer le nom entré.<br />
Cette opération crée automatiquement un nouveau répertoire qui contiendra tous les Flash Styles courants.<br />
Il s’agit d’une fonction très utile pour sauvegarder/charger à partir du disque un nouveau Block de Flash Styles complètement personnalisés,<br />
en mettant à Votre disposition une série de blocs différents de Flash Styles personnalisés.<br />
•<br />
ARRANGER<br />
ON/OFF - On a ajouté au <strong>SD1</strong> <strong>PLUS</strong> une fonction appropriée de Arranger On/Off. Maintenant il est possible d’avoir la sonorité /<br />
les sonorités disponibles sur tout le clavier (c’est-à-dire sans tenir compte du point de SPLIT) alors que l’on joue des Styles ou des fichiers<br />
Midi. Pour obtenir cela il suffit d’appuyer sur le bouton Arrange On/Off pendant que l’on joue, on désactive ainsi l’arranger (on affichera<br />
une nouvelle valeur pour le point de split, et c’est-à-dire le ‘C-2’). Si l’ on appuie de nouveau sur ce bouton, le point de split sera réactivé<br />
et l’Arranger revient sur ON<br />
•<br />
MIDI FILE<br />
•<br />
PLAYER:<br />
XD<br />
Remap – La fonction XD-Remap [F8] se trouve sous le Menu Transposer (en mode Song Play) et elle garantit la complète<br />
compatibilité des fichiers Midi créés pour la série XD, qui pourront donc être utilisés sans aucun problème sur le <strong>SD1</strong> <strong>PLUS</strong>.<br />
Quick manual <strong>SD1</strong> Plus 17
Français<br />
• VOCALIZER:<br />
•<br />
On pourra activer / désactiver le vocalizer en agissant sur les boutons Demo&Hit.<br />
La fonction Hold (en mode harmony) restera incluse dans le vocal set, après la sauvegarde des réglages.<br />
•<br />
Footswitch – On a ajouté de nouvelles fonctions pour les interrupteurs à pédales: Lead On/Off, Pianist, Bassist, Drum Off All, Drum&Bass, Accordion<br />
On/Off. (A la page 99 du Mode d’emploi – F5 Footswitch on trouve une liste des autres fonctions que l’on peut contrôler à l’aide de la pédale).<br />
•<br />
POWER ON SET UP - On a ajouté les fonctions suivantes au Power On Set up: Autoclose (pour Preset Voices), Intelligent Transposer, Text Mode,<br />
Accordion Bass on Stop, Pattern Group, Transposer Delayed mode (à la page 58 du Mode d’emploi on liste les autres fonctions – Power On Set Up).<br />
• ACCORDION:<br />
•<br />
On a ajouté la nouvelle fonction Bass Off Stop. Lorsque le mode Accordion est activé, la nouvelle fonction BS ACCORD [à laquelle<br />
on peut accéder à partir de Utility, Accordion (F6) et en appuyant sur F8 pour passer de Off on Stop à Normal et vice-versa]<br />
est réglée automatiquement comme ‘Off on Stop’. De cette façon on fait en sorte que la Basse et les Accords ne continuent pas<br />
à jouer une fois que l’Arranger a été éteint. Dans le mode Accordion, si l’on appuie sur le bouton F6, on accède à la double fonction<br />
de Bass Octave et de Sustain.<br />
•<br />
On a ajouté de nouvelles Courbes de User Dynamic, la Left Expression est contrôlée via Midi 2 (sur des accordéons Midi équipés<br />
de contrôle d’Expression à travers le soufflet).<br />
•<br />
1 TOUCH TO STYLE – On peut assigner la 1 Touch voice à un Style. Il est donc possible d’assigner à chaque style les 10 sonorités qui conviennent<br />
le mieux au style en question, pour une plus grande rapidité pendant les performances. Cette fonction se trouve dans l’Arranger<br />
Mode - Pg. 2 sous la page-écran Retrigger&Mode. Si l’on utilise les boutons Value +/–, après le Style Setting Etn/Orc4 on pourra assigner<br />
n’importe quel des réglages One Touch de 1 à 8 au style en question. De cette manière, quel que soit le moment où l’on rappelle ce style,<br />
les réglages One Touch qui y sont associés seront automatiquement rappelés dès que l’on actionne le bouton One Touch (avec la DEL du<br />
Style Setting allumée). De cette manière les sonorités que Vous préférez pour un style particulier seront toujours disponibles – un accès<br />
plus rapide aux sonorités et moins de temps pour chercher la sonorité la plus adéquate!<br />
•<br />
TEXT MODE: Au cours de l’affichage de textes, maintenant on pourra reproduire 40 caractères sur chaque ligne sans qu’il soit nécessaire<br />
de reformater. Sous UTILITY, TEXT (F7), il y a 2 modes disponibles:<br />
•<br />
Mode 1: Format standard affiché au centre de l’écran – 27 caractères par ligne.<br />
Mode 2: On utilisera des caractères différents, plus petits, sur tout l’écran – 40 caractères par ligne.<br />
•<br />
DRY ON STOP - Cette fonction a été introduite également sous OnLineEffect (Micro [F6]) pour rendre plus facile et plus rapide tant l’accès<br />
que l’utilisation.<br />
•<br />
RAM FULL - Pour accélérer les opérations nécessaires (lorsque la mémoire vive se remplit au cours du Sound Load), on affichera le message<br />
‘Memory Full’ avec la nouvelle fonction Clear&Load (F10) et Exit. Si l’on appuie sur F10 on supprime les sons qui se trouvent actuellement<br />
dans la mémoire vive et les sons sélectionnés en ce moment seront chargés automatiquement, tandis que si l’on appuie sur Exit (F5)<br />
on annule l’opération et on conserve dans la mémoire vive les sons qui s’y trouvent actuellement.<br />
•<br />
Preset Editing: Le <strong>SD1</strong> Plus prévoit la possibilité de modifier les Preset Voices. Après avoir sélectionné une Preset voice, si l’on appuie simultanément<br />
sur les boutons Edit Preset * et #, on ouvre la fenêtre du Program relatif au Preset en question.<br />
On a prévu 2 nouvelles fonctions pour sauvegarder la sonorité: To Preset [F8] (on écrase par écriture le Preset actuel de la mémoire vive<br />
avec le même nom et les modifications effectuées) ; et To Disk [F7] (On sauvegardera sur le Disk tous les Presets avec extension .pre).<br />
•<br />
Style Convert - Dans le menu Disk - Utility - Disk Control, il y a la fonction Style Convert. Cette fonction permet au <strong>SD1</strong> <strong>PLUS</strong> de convertir<br />
automatiquement en format <strong>SD1</strong> <strong>PLUS</strong> tous les Styles des séries X et XD se trouvant sur le disque dur dans le Master Styles Folder.<br />
•<br />
Chord Solo - Cette fonction permet d’exclure immédiatement toutes les pistes de Chord d’accompagnement, sauf une. Dans la fenêtre<br />
Arrange View, après avoir sélectionné et mis en surbrillance l’un des 5 Chord (F6 – F10), on peut exclure tous les Chords, Drum et Bass qui<br />
n’ont pas été mis en surbrillance en appuyant simultanément sur les deux boutons Chord/Solo Volume. Pour sortir de cette fonction et<br />
réactiver les autres Chord, il suffit d’appuyer une deuxième fois sur l’un des deux boutons master Chord Volumes ou bien sur un Fill In.<br />
•<br />
2nd Voice to Disk - On peut sauvegarder les réglages de la 2nd Voice sur disque, avec extension .2ND. Après avoir appuyé sur Save/Enter,<br />
appuyer sur F6 – 2nd Voice, puis sur F8 – Disk Save et pour terminer sur F10 - Save pour confirmer. Si les réglages de la 2nd Voice sont sauvegardés<br />
une deuxième fois, on écrasera par écriture le fichier précédent de 2nd Voice.<br />
•<br />
Charger Disk Styles dans Song Play - Dans le mode Song Play il suffit d’appuyer simultanément sur les deux boutons Edit Preset * et # pour afficher<br />
et sélectionner le prochain Style à utiliser à partir du répertoire actuel du disque dur. Le Style sélectionné sera chargé automatiquement.<br />
•<br />
Nouvelles Courbes Dynamic - On a ajouté de nouvelles courbes Dynamic afin de rendre plus évidente la différence entre Soft1, Soft2,<br />
Normal, Hard1, Hard2 … etc. (UTILITY, Page1/3, Vel. Curve [F10]).<br />
PS: Pour des informations plus détaillées sur le système OS 4.0a (déjà chargé dans cet instrument) visitez notre site web www.ketron.it - section<br />
Logiciel.<br />
18<br />
<strong>SD1</strong> Plus Quick manual
Español<br />
¡La nueva Arranger Workstation <strong>SD1</strong> <strong>PLUS</strong>!<br />
Enhorabuena por haber elegido el nuevo <strong>SD1</strong> <strong>PLUS</strong>. Estamos seguros de que con éste pasará años de escucha agradable y pasándoselo bien<br />
mientras lo toca. Este manual breve ha sido redactado para ayudarle a usar inmediatamente la mayoría de las funciones y características nuevas.<br />
Deberá usarlo junto al manual principal que recibió con el instrumento. ¡Qué disfrute!<br />
Layout<br />
El nuevo layout del <strong>SD1</strong> <strong>PLUS</strong> ha sido estudiado meticulosamente para garantizarle un acceso fácil y rápido a la mayoría de las funciones preexistentes<br />
(del <strong>SD1</strong> que ha cosechado tantísimo éxito en todo el mundo) y nuevas en esta workstation. El nuevo código cromático garantiza un<br />
acceso muy rápido a las características principales (acompañamiento, grabación, escucha, etc.). Los nuevos mensajes enumeran con la máxima<br />
claridad las nuevas funciones (consulte también las anotaciones relativas al OS 4.0 que siguen).<br />
Nuevos sonidos<br />
El Ketron <strong>SD1</strong> <strong>PLUS</strong> presenta algunos sonidos nuevos que se encuentran entre los más auténticos y reales a nivel mundial. Se han incluido nuevas<br />
voces orquestales para las Guitarras (*), el Bajo, los E.Pianos (muy limpias y precisas), así como también para los grupos de Arcos (llenos y<br />
envolventes), Pads, Metales (más auténticos) y Órgano, mientras que, sin embargo, algunas de las voces disponibles en ROM han sido completamente<br />
revistas para obtener un efecto de alta fidelidad más limpio. También los elementos de batería para Drum1 y Drum2 han sido revistos<br />
de forma muy incisiva con nuevos sonidos de percusión naturales y con un mayor número de Live Drum loop (en especial para los styles Dance<br />
y Hip Hop). El potente disco duro de 6GB comprende un Stereo Grand Piano con una sonoridad extremadamente rica (junto a otros sonidos de<br />
Sax, Pads y sonidos de Guitarra extremadamente fascinantes): todos ellos son sonidos que, pueden cargarse y usarse en el <strong>SD1</strong> <strong>PLUS</strong>.<br />
N.B. El nuevo Sterero G Piano ha sido ya introducido en la programación del primer PROGRAM. ¡Por lo que en cuanto se carga este sonido del<br />
disco duro, podrá utilizarlo inmediatamente para las ejecuciones musicales!<br />
(*)Las voces de las Guitarras Hawaian y Pedal Stell han sido programadas para que sean tocadas al máximo 3 notas en modalidad Steel. (Las<br />
asignaciones pueden modificarse fácilmente usando la nueva función de Preset Editing, descrita a continuación).<br />
CARGAR LOS NUEVOS SONIDOS:<br />
el nuevo OS 4.0 (previamente instalado) comprende todas las modificaciones efectuadas en<br />
los Preset Sounds para obtener una mejor respuesta de alta fidelidad en todas las categorías<br />
sonoras. Se pueden cargar otros sonidos adicionales (y otros sonidos preexistentes<br />
en el disco duro del <strong>SD1</strong> <strong>PLUS</strong>) siguiendo el procedimiento descrito en la página 33 del<br />
manual de uso (Sound Load).<br />
PARA ACCEDER INMEDIATAMENTE A LOS NUEVOS SONIDOS: si desea tener los nuevos sonidos listos para el uso en cuanto encienda el <strong>SD1</strong> <strong>PLUS</strong> (estos<br />
sonidos ya no estarán presentes en el momento en que se apaga el teclado), debe ante todo<br />
crear un Sound Block que comprenderá todos los sonidos que quiere cargar cada vez que<br />
encienda el teclado. Deberá realizar solamente una vez esta operación, y que indica precisamente<br />
al <strong>SD1</strong> <strong>PLUS</strong> cuáles son los ficheros a cargar en el momento de encender el teclado.<br />
Para el procedimiento que deberá seguir, consulte la página n° 34 del manual de uso<br />
(Carga automática). En el Sound Folder del disco duro puede crear varios Sounds Blocks con<br />
sus sonidos preferidos. Después de haber creado el o los Blocks, sólo debe realizar las operaciones<br />
indicadas en la página 34 del Manual de uso (Cargar un Sound Block durante el<br />
encendido del <strong>SD1</strong> <strong>PLUS</strong>). El nuevo fichero, creado de esta forma, (!!inito1.pwr) es un fichero<br />
que informa al <strong>SD1</strong> <strong>PLUS</strong> sobre los ficheros audio que se quieren cargar cada vez que se<br />
enciende el teclado. De esta forma, en cuanto se encienda el teclado, el Sound BLOCK seleccionado<br />
será cargado automáticamente. ¡Dichos sonidos desde RAM podrán utilizarse también<br />
en el interior de Preset para crear nuevas voces de muy alto nivel cualitativo ( o en el<br />
interior de los Programs Voices), poniendo a su disposición una gama casi infinita de elementos<br />
sonoros y nuevas creaciones!<br />
Quick manual <strong>SD1</strong> Plus 19
Español<br />
¡Música nueva!<br />
MUSIC - SONGS:<br />
MUSIC – DATABASE:<br />
SET UP:<br />
Hemos incluido unos 166 Midifiles que podrá simplemente escuchar o pasárselo aún mejor tocando música. Estos ficheros<br />
comprenden algunas piezas musicales entre las más famosas a nivel mundial y han sido programados por expertos<br />
de todo el mundo para garantizar su autenticidad. La mayoría de estas canciones comprende ya algunos nuevos audio<br />
loops presentes en el <strong>SD1</strong> Plus y se encuentran en el Folder 91 – Midi Files en el disco duro del <strong>SD1</strong> <strong>PLUS</strong>. Para escucharlos,<br />
presione el pulsador SONG PLAY de la pantalla de default del <strong>SD1</strong> <strong>PLUS</strong>. Presione a continuación DIR (F5) para poder<br />
acceder a todo el contenido del Folder con los Midifiles. Ahora con los pulsadores Styles puede teclear el valor numérico<br />
de la Song que desea escuchar y presione a continuación el pulsador START rojo para que inicie la canción.<br />
En el interior del <strong>SD1</strong> <strong>PLUS</strong> se ha creado una nueva base de datos. Lo cual permite al músico tener en pocos instantes<br />
el teclado listo para la ejecución de una song específica. En el interior del <strong>SD1</strong> <strong>PLUS</strong> se encuentran 200 configuraciones<br />
específicas aproximadamente para songs bajo la forma de Song Registrations. Estos ficheros se encuentran<br />
en el Folder 91 – Midifiles en el disco duro.<br />
Para preparar el teclado para tocar una song particular que se encuentra en el interior de la amplia base de datos,<br />
efectuar las siguientes operaciones:<br />
•<br />
Presione el pulsador DISK y asegúrese que se encuentra en el disco duro del <strong>SD1</strong> <strong>PLUS</strong><br />
Presione el pulsador Single Registr para visualizar todos los Single Registers que se encuentran en el interior del<br />
Folder 93 - Registrations folder. (Si el Master Folder ha sido activado, esta selección podrá ejecutarse también<br />
desde el disk menú de default pulsando F3)..<br />
•<br />
Use los pulsadores –Value+ para destacar el Song file para el que el teclado debe predisponerse y pulse F10 – SELECT.<br />
Pulse ahora F2 para CARGAR este fichero y el <strong>SD1</strong> <strong>PLUS</strong> empezará automáticamente a tocar la song seleccionada.<br />
Le recordamos que puede crear Song settings individuales y añadirlas después a la base de datos (consulte la<br />
página 95 de Manual de uso – Invocar y guardar una Single Registration).<br />
Nuevos estilos ‘Jam’<br />
Otro punto relevante es que los FLASH styles en el interior del <strong>SD1</strong> <strong>PLUS</strong> han sido revistos y se han incluido 131 nuevos Flash styles. ¡Combinando<br />
de forma sabia estos nuevos estilos con los originales contenidos en ROM y usando los nuevos sonidos, podrá divertirse al máximo tocando el<br />
<strong>SD1</strong> <strong>PLUS</strong> y conseguir al mismo tiempo hacer enloquecer al público!<br />
Visualizando los styles nuevos (seleccionando el relativo grupo de styles, por ejemplo Latin), estos serán indicados con letras mayúsculas, mientras<br />
que los estilos de ROM, revistos y perfeccionados, serán visualizados con letras minúsculas en las páginas siguientes. De todas formas es<br />
inútil describir este nuevo aspecto por escrito: ¡pruebe algunos de ellos y lo entenderá!<br />
STYLES NUEVOS: En el disco duro en el interior del Folder 95 – Styles residen 34 Styles. La mayoría de éstos utiliza los nuevos loops audio<br />
creados para el <strong>SD1</strong> <strong>PLUS</strong>, y en particular modo los styles como Dance y Pop Down.<br />
Para utilizar estos styles, efectúe las siguientes operaciones (con el LED del Master Folder encendido):<br />
•<br />
Presione el pulsador Single RAM Style para poder acceder a los styles en el disco duro..<br />
Use los pulsadores de los grupos de styles (8beat, 16beat…) para visualizar el grupo en el que se encuentra el estilo<br />
que quiere cargar. El formato de la visualización puede ser modificado en base a la modalidad seleccionada<br />
•<br />
(consulte Pattern View más adelante).<br />
Use el relativo pulsador función para seleccionar el style que desea usar.<br />
Pruebe los nuevos ritmos R&B, Dance y Pop (con intros y endings originales) y el nuevo Soft Dancing, Latin y Traditional Dancing (observe el<br />
paso muy gradual de Arranger A a D), y entenderá enseguida porque, también esta vez, Ketron es sinónimo de vanguardia.<br />
Nuevas funciones para mejorar prestaciones musicales<br />
•<br />
DRUM REMIX - El querer reavivar o de todas formas modificar una song, cambiar la estructura rítmica de los instrumentos de percusión o<br />
de la batería puede suponer una diferencia enorme, precisamente animando la song. El <strong>SD1</strong> <strong>PLUS</strong> le permite obtener resultados de este tipo<br />
ofreciéndole la posibilidad de sustituir las pistas de la percusión de Midifiles individuales o de songs con las de los estilos residentes en la<br />
memoria del instrumento (live drum loops incluidos) y excluir temporalmente a grupos individuales de percusión de la pista del ritmo.<br />
¡Mientras que el Midifile está tocando, podrá también pasar de los styles del teclado a las pistas de batería originales del Midifile y viceversa,<br />
activar los Fill-ins y usar los cuatro Arrangers en tiempo real!<br />
Esta función puede accionarse y usarse en modalidad "song Play" usando los siguientes pulsadores:<br />
20<br />
<strong>SD1</strong> Plus Quick manual
Español<br />
ON/OFF (Tap): Drum Remix On/Off - En la visualización del Song Play se indica si el ‘Drum Remix’ está activado o no.<br />
STYLE/SONG (Lock): Selección de Style/Song – Para escoger si desea usar los pulsadores numéricos de los styles (0-9) para seleccionar<br />
un Style a asociar a una song, o para seleccionar una Song del folder, actualmente abierto en el disco. El tipo de selección<br />
activado será visualizado en la pantalla, bajo el contador de los compases.<br />
SONG (Key Start): Acciona las pistas de batería del Midifile – Con la song se reproducirán las pistas Drum originales del Midifile.<br />
STYLE (Key Stop): Acciona las pistas de batería del style <strong>SD1</strong> <strong>PLUS</strong> seleccionado, que serán usadas durante la reproducción de la<br />
song. Esta selección puede memorizarse de forma permanente (o sea cuando este Midifile sea invocado posteriormente, usará las<br />
pistas del Ketron <strong>SD1</strong> <strong>PLUS</strong> en lugar de las pistas de batería originales de los Midifiles).<br />
Para memorizar la nueva Song Set up con Remix:<br />
1 ) Presione el pulsador GM (F1) mientras que se reproduce el Midifile.<br />
2 ) Presione el pulsador Start/Stop para interrumpir el Midifile.<br />
3) En el interior de una parte GM, pulse SAVE/ENTER, a continuación F10 para validar la operación de guardado.<br />
Puede elegir entre sobrescribir el Midifile existente o dar otro nombre a este nuevo fichero.<br />
Para cada Midifile es posible también elegir el compás de inicio y final de la función de Remix.<br />
Para seleccionar el compás inicial, presione F2 y busque el número usando Value +/-.<br />
Para seleccionar el compás final, presione de nuevo F2 y busque el número con Value+/-. Pulsando START, el <strong>SD1</strong> <strong>PLUS</strong> empezará a tocar el<br />
estilo en la versión Remix solamente a partir del compás inicial hasta el final como descrito anteriormente. Pulsando ‘Song’ se activarán<br />
de nuevo las pistas de batería del Midifile.<br />
La función Drum Remix permite también usar los Patterns presentes en el disco (guardados con Save Song Set up) pero ÚNICAMENTE si han<br />
sido descargados en el espacio previsto en la RAM para los Patterns.<br />
•<br />
BASSIST<br />
- La función Bassist le permite tocar el bajo manual en la parte izquierda del punto de split en el teclado y podrá usar la parte<br />
derecha mientras para tocar acordes o solos. Cada vez que el músico levanta la mano de la parte derecha del teclado, el último acorde<br />
tocado en la parte derecha quedará memorizado (siempre y cuando el pulsador Hold haya sido activado) mientras que el Bass podrá tocarse<br />
libremente sin influenciar el acorde. Se trata de una función muy útil para reducir la redundancia que podría ser ínsita a un estilo y que<br />
permite al músico crear libremente líneas de bajo naturales, vivas y reales. Esta función se encuentra automáticamente en ‘On’ cuando<br />
están activados tanto Pianist/Bassist como Manual (bajo Bass).<br />
•<br />
VARIAS<br />
•<br />
PATTERN<br />
POLIFONÍAS - se ha aumentado el número de notas que pueden tocarse contemporáneamente. Dicho en otras palabras, ahora<br />
puede tocar en el <strong>SD1</strong> <strong>PLUS</strong> varias notas sin que algunas de ellas se pierdan.<br />
VIEW: La visualización y el acceso a los Disk Patterns se produce ahora de forma similar a los Internal Styles. Para poder acceder<br />
a los disk styles, sólo debe presionar el pulsador Single Ram Styles y seleccionar el grupo o la familia de Styles; usar a continuación el relativo<br />
pulsador función (F1- F10) para seleccionar el style específico. Aparece el símbolo "….." después de haber cargado el style. La nueva<br />
función GROUP (activable al presionar el pulsador Block List y a continuación repetidamente el pulsador F8) podrá usarse para seleccionar<br />
las<br />
•<br />
siguientes modalidades de visualización de los Patterns:<br />
Modalidad 1: Modalidad numérica 1; los styles se visualizan por orden numérico.<br />
Modalidad 2: Por orden de carga; los Styles se visualizarán según el orden en el que se cargaron en el disco duro.<br />
•<br />
Modalidad 3: Por orden alfabético; los Styles se visualizan en orden alfabético.<br />
Off: Modalidad numérica 2; los Styles pueden invocarse de forma numérica como previsto con el software precedente (consulte las<br />
páginas 56 & 57 del Manual de uso).<br />
NB: Si en el folder del disco, actualmente seleccionado, no se encuentran patterns, no se visualizará ningún pattern.<br />
•<br />
ROM<br />
•<br />
FOLDER<br />
& FLASH STYLES - Los styles internos en la ROM (indicados con letras minúsculas) y los FLASH (indicados con letras mayúsculas) se<br />
pueden distinguir fácilmente.<br />
DE BACKUP PARA FLASH STYLES - La configuración actual de los Flash Styles puede guardarse en un disco. Presione Save/Enter, a<br />
continuación Styles (F2) y Global Flash to Disk (F7). En la visualización siguiente, se le pedirá el nombre a asignar a este nuevo Folder de<br />
backup. Pulse F10-Save para validar el nombre introducido.<br />
Esta operación crea automáticamente un nuevo folder que contiene todos los Flash Styles corrientes.<br />
Se trata de una función extremadamente útil para guardar /cargar un nuevo Block de Flash Styles completamente personalizados del<br />
disco, poniendo a su disposición una serie de bloques diferentes de Flash Styles personalizados.<br />
•<br />
ARRANGER<br />
ON/OFF - Se ha añadido una función específica de Arranger On/Off al <strong>SD1</strong> <strong>PLUS</strong>. Ahora es posible disponer de la voz / las voces<br />
actuales en todo el teclado (o sea sin tener en cuenta el punto de SPLIT) mientras que se están tocando Styles o Midifiles. Para ello, sólo debe<br />
presionar el pulsador Arrange On/Off mientras que está tocando, desactivando de este forma el arranger (se visualizará un nuevo valor para<br />
el split point, es decir el ‘C-2’). Presionando de nuevo este pulsador, el punto de split será reactivado y el Arranger regresará en ON.<br />
•<br />
MIDI FILE<br />
•<br />
PLAYER:<br />
XD<br />
Remap – La función XD-Remap [F8] se encuentra en el Menú Transposer (en modalidad Song Play) y garantiza la<br />
compatibilidad de los Midifiles creados para la serie XD, que podrán, por consiguiente, ser utilizados sin ningún problema en el<br />
<strong>SD1</strong> <strong>PLUS</strong>.<br />
• VOCALIZER:<br />
•<br />
El vocalizer podrá activarse / desactivarse mediante los pulsadores Demo&Hit.<br />
Quick manual <strong>SD1</strong> Plus 21
Español<br />
•<br />
La función Hold (en modalidad harmony) quedará incluida en el vocal set, después de haber guardado las configuraciones.<br />
•<br />
Footswitch – Se han añadido nuevas funciones para los interruptores de pedal: Lead On/Off, Pianist, Bassist, Drum Off All, Drum&Bass,<br />
Accordion On/Off. (En la página 99 del Manual de uso – F5 Footswitch se encuentra un listado de las demás funciones que pueden controlarse<br />
con el pedal.<br />
•<br />
POWER ON SET UP - Las siguientes funciones han sido añadidas al Power On Set up: Autoclose (para Preset Voices), Intelligent Transposer,<br />
Text Mode, Accordion Bass on Stop, Pattern Group, Transposer Delayed mode (en la página 58 del Manual de uso se enumeran las demás<br />
funciones – Power On Set Up).<br />
• ACCORDION:<br />
•<br />
Se ha añadido la nueva función Bass Off Stop. Cuando está activada la modalidad Accordion, la nueva función BS ACCORD [accesible<br />
desde Utility, Accordion (F6) y pulsando F8 para pasar de Off on Stop a Normal y viceversa] es automáticamente configurada<br />
como ‘Off on Stop’. De esta forma el Bajo y los Acordes no siguen tocando después de haber parado el Arranger. En la modalidad<br />
Accordion, presionando el pulsador F6, se accede a la doble función de Bass Octave y de Sustain<br />
•<br />
Se han añadido nuevas Curvas de User Dynamic, la Left Expression es controlada mediante Midi 2 (en acordeones Midi equipados<br />
de control de Expression mediante fuelle).<br />
•<br />
1 TOUCH TO STYLE – Existe la posibilidad de asignar la 1 Touch voice a un Style. Por consiguiente, es posible asignar a cada style las 10 voces<br />
que mejor van con el style en cuestión para conseguir una mayor rapidez durante las actuaciones. Esta función se encuentra en el<br />
'Arranger Mode - Pág. 2 en la visualización Retrigger&Mode. Usando los pulsadores Value +/–, y después el Style Setting Etn/Orc4 se podrá<br />
asignar cualquiera de las configuraciones One Touch de 1 a 8 al style en cuestión. De esta forma, si en cualquier momento invocamos este<br />
style, las configuraciones One Touch asociadas previamente serán automáticamente invocadas en cuanto se accione el pulsador One Touch<br />
(con el LED del Style Setting encendido). De esto modo, sus voces preferidas para un style particular estarán siempre disponibles – ¡un acceso<br />
más rápido a las voces y un tiempo menor de búsqueda para la voz más idónea!<br />
•<br />
TEXT MODE: Durante la visualización de textos, ahora se podrán reproducir 40 caracteres en cada renglón sin tener que reformatear. En<br />
UTILITY, TEXT (F7), hay 2 modalidades a disposición:<br />
•<br />
Modalidad 1: Standard form centralized within screen – 27 characters per line will be displayed.<br />
Modalidad 2: Se usarán caracteres diferentes, más pequeños, en toda la pantalla – 40 caracteres por renglón.<br />
•<br />
DRY ON STOP - También esta función ha sido activada bajo OnLineEffect (Micro [F6]) para que sea más fácil y más rápido tanto el acceso<br />
como el uso.<br />
•<br />
RAM FULL - Para acelerar las operaciones necesarias (cuando la memoria Ram se llena durante el Sound Load), se visualizará el mensaje<br />
‘Memory Full’ junto a la nueva función Clear&Load (F10) y Exit. Pulsando (F10) se borran los sonidos que residen actualmente en la RAM y<br />
los sonidos seleccionados entonces son cargados automáticamente, mientras que con Exit (F5) se anula la operación y se mantienen en la<br />
RAM los sonidos que residen en ella actualmente.<br />
•<br />
Preset Editing: El <strong>SD1</strong> Plus prevé la posibilidad de modificar las Preset Voices. Tras haber seleccionado una Preset voice, pulsando contemporáneamente<br />
los pulsadores Edit Preset * y #, se abre la ventana del Program relativo al Preset en cuestión.<br />
Se han previsto 2 nuevas funciones para guardar la voz: To Preset [F8] (se sobrescribe la actual RAM Preset con el mismo nombre y las<br />
modificaciones aportadas), y To Disk [F7] (Se guardarán en Disk todos los Presets con extensión .pre).<br />
•<br />
Style Convert - En el menú Disk - Utility - Disk Control, existe la función Style Convert. Esta función permite al <strong>SD1</strong> <strong>PLUS</strong> convertir automáticamente<br />
en formato <strong>SD1</strong> <strong>PLUS</strong> todos los Styles de las series X y XD residentes en el disco duro en el Master Styles Folder.<br />
•<br />
Chord Solo - Esta función le permit excluir inmediatamente todas las pistas de Chord de acompañamiento, a excepción de una. En la ventana<br />
Arrange View, tras haber seleccionado y destacado uno de los 5 Chords (F6 – F10), todos los Chords, Drum y Bass sin destacar pueden<br />
excluirse pulsando ambos pulsadores Chord/Solo Volume. Para abandonar esta función y reactivar los demás Chords, sólo debe pulsar una<br />
segunda vez uno de los 2 pulsadores Chord Volumes o un Fill In.<br />
•<br />
2nd Voice to Disk - Se pueden guardar las programaciones de la 2nd Voice en disco, con extensión .2ND. Tras haber pulsado Save/Enter,<br />
pulse F6 – 2nd Voice, a continuación F8 – Disk Save y por último F10 - Save para confirmar. Si las configuraciones de la 2nd Voice son guardadas<br />
una segunda vez, se sobrescribirá el fichero anterior de 2nd Voice.<br />
•<br />
Cargar Disk Styles en Song Play - En la modalidad Song Play sólo debe pulsar contemporáneamente los dos pulsadores Edit Preset * y #<br />
para visualizar y seleccionar el próximo Style usado por el actual folder del disco duro. El Style seleccionado se cargará automáticamente.<br />
•<br />
Nuevas Curvas Dynamic - Se han añadido nuevas curvas Dynamic para destacar más la diferencia entre Soft1, Soft2, Normal, Hard1, Hard2<br />
… etc. (UTILITY, Page1/3, Vel. Curvas [F10]).<br />
PS: Para informaciones más detalladas relativas al OS4.0a (previamente cargado en este instrumento) se ruega visitar nuestro sitio web<br />
www.ketron.it - sección Software.<br />
22<br />
<strong>SD1</strong> Plus Quick manual
Português<br />
A nova Arranger Workstation <strong>SD1</strong> <strong>PLUS</strong>!<br />
Congratulações por ter escolhido o novo <strong>SD1</strong> <strong>PLUS</strong>. Temos a certeza de que esta workstation irá garantir-lhe anos de prazer em ouvi-la e de<br />
divertimento em tocar. Este breve manual foi redigido para consentir-lhe de utilizar imediatamente a maior parte das novas funções e características.<br />
Deverá ser utilizado junto com o manual principal que lhe foi fornecido com o instrumento. Bom divertimento!<br />
Layout<br />
O novo layout do <strong>SD1</strong> <strong>PLUS</strong> foi estudado cuidadosamente para garantir-lhe um acesso fácil e rápido à maior parte das funções já existentes (do<br />
<strong>SD1</strong> que teve tanto sucesso em todo o mundo) e às novas funções desta workstation. O novo código cromático garante um acesso muito rápido<br />
às características principais (acompanhamento, gravação, reprodução, etc.). As novas escritas, ao contrário, descrevem com a máxima clareza<br />
as novas funções (ver também as anotações relativas ao OS 4.0 que seguirão).<br />
Novos sons<br />
O Ketron <strong>SD1</strong> <strong>PLUS</strong> apresenta alguns sons novos que são entre os mais autênticos e realísticos que se possam encontrar a nível mundial. Foram<br />
incluídas novas vozes de orquestra para as Guitarras (*), o Baixo, os E.Pianos (muito nítidas e exactas), assim como para os grupos de Arcos<br />
(completas e envolventes), Pads, família dos metálicos (mais autênticos) e Órgão, enquanto que algumas das vozes disponíveis na ROM foram<br />
completamente rearranjadas para produzir um efeito de Hi Fi mais nítido. Os elementos de bateria para Drum1 e Drum2 foram rearranjados de<br />
maneira muito incisiva com novos sons de percussão naturais e com um maior número de Live Drum loop (especialmente para os estilos Dance<br />
e Hip Hop). O potente disco rígido com 6GB compreende um Stereo Grand Piano com sonoridade extremamente rica (junto com os outros sons<br />
de Sax, Pads e sons de Guitarra extremamente sedutores): todos estes sons podem ser carregados e utilizados no <strong>SD1</strong> <strong>PLUS</strong>.<br />
NB: O novo Stereo Grand piano já foi inserido na programação do primeiro PROGRAM e, por isso, assim que este som é carregado do disco rígido<br />
poderá ser utilizado imediatamente para as execuções musicais!<br />
(*) As vozes das guitarras Hawaian e Pedal Steel foram programadas de maneira que são tocadas ao máximo 3 notas no modo Steel. (As atribuições<br />
podem ser facilmente modificadas utilizando a nova função de Preset Editing descrita a seguir).<br />
CARREGAR OS NOVOS SONS:<br />
O novo OS 4.0 (já instalado) compreende todas as modificações efectuadas nos Preset<br />
Sounds para obter uma melhor resposta de alta fidelidade em todas as categorias sonoras.<br />
É possível carregar outros sons adicionais (e outros sons preexistentes no disco rígido do<br />
<strong>SD1</strong> <strong>PLUS</strong>) seguindo o procedimento descrito na página 33 do manual de uso (Sound Load).<br />
PARA TER ACESSO IMEDIATO AOS NOVOS SONS: Se pretender ter os novos sons prontos para o uso assim que se acende o <strong>SD1</strong> <strong>PLUS</strong> (estes<br />
sons serão perdidos quando se desliga o teclado), é preciso antes de mais nada criar um<br />
Block of sounds que compreenderá todos os sons que se pretendem carregar todas as<br />
vezes que se acende o teclado. Trata-se de uma operação que é suficiente executar uma<br />
única vez, e que informa ao <strong>SD1</strong> <strong>PLUS</strong> quais são os files a carregar quando se acende o teclado.<br />
Para o procedimento a seguir, consulte a página n° 34 do Manual de uso (Carregamento<br />
automático). Na Sound Folder do disco rígido é possível criar vários Sound Blocks que contenham<br />
os seus sons preferidos. Depois de ter criado o ou os Block(s), é suficiente agir tal<br />
como está descrito na página 34 do Manual de uso. (Carregar um Sound Block quando se<br />
acende o <strong>SD1</strong> <strong>PLUS</strong> ). O novo file assim criado (!!inito1.pwr) é um file que informa o <strong>SD1</strong> <strong>PLUS</strong><br />
sobre os files audio que se pretende carregar todas as vezes que se acende o teclado. Deste<br />
modo, assim que se acende o teclado, o Sound BLOCK seleccionado será carregado automaticamente.<br />
Os acima referidos sons da RAM também poderão ser utilizados no interior de<br />
Preset para criar novas vozes de excelente qualidade (ou no interior dos Program voices),<br />
colocando à sua disposição uma gama praticamente infinita de elementos sonoros e novas<br />
criações!<br />
Quick manual <strong>SD1</strong> Plus 23
Português<br />
Música nova!<br />
MUSIC - SONGS:<br />
MUSIC – DATABASE:<br />
SET UP:<br />
Também incluímos cerca de 166 Midifiles que poderá simplesmente escutar ou utilizar para divertir-se ainda mais executando<br />
música. Estes files, compreendem alguns trechos musicais entre os mais famosos a nível mundial e foram programados<br />
por peritos de todo o mundo para garantir a autenticidade dos mesmos. A maior parte destas songs compreende<br />
já alguns dos novos audio loop presentes no D1 Plus, e encontram-se na Folder 91 - Midi Files no disco rígido do<br />
<strong>SD1</strong> <strong>PLUS</strong>. Para escutar estas songs, pressione o botão SONG PLAY do ecrã de default do <strong>SD1</strong> <strong>PLUS</strong>. Em seguida, pressione<br />
DIR (F5) para ter acesso a todo o conteúdo da Folder com os Midifiles. Agora, com os botões Styles pode-se introduzir<br />
o valor numérico da Song que se pretende escutar e pressionar o botão START vermelho para fazer iniciar a song.<br />
No interior do <strong>SD1</strong> <strong>PLUS</strong> foi criada uma nova database. Isso consente ao músico de ter o teclado instantaneamente<br />
pronto para a execução de uma song específica. No interior do <strong>SD1</strong> <strong>PLUS</strong> encontram-se cerca de 200 configurações<br />
de songs sob a forma de Song Registrations. Estes files encontram-se na Folder 91 – Midifiles no disco rígido<br />
Para preparar o teclado a executar uma determinada song que se encontra no interior desta vasta database, agir<br />
como segue:<br />
•<br />
Pressione o botão DISK e acertar-se de estar no disco rígido do <strong>SD1</strong> <strong>PLUS</strong><br />
Pressione o botão Single Registr para visualizar todos os Single Registers que se encontram no interior da Folder<br />
93 - Registrations folder. (Se a Master Folder foi activada, esta selecção também poderá ser executada do disk<br />
•<br />
menu de default pressionando F3).<br />
Utilize os botões –Value+ para destacar o Song file para o qual se pretende predispor o teclado e pressione<br />
•<br />
F10 – SELECT.<br />
Agora, pressione F2 para CARREGAR este file e o <strong>SD1</strong> <strong>PLUS</strong> iniciará automaticamente a tocar a song seleccionada.<br />
Fazemos notar que você pode criar as suas Song settings personalizadas e adicioná-las à database (veja<br />
página 95 do Manual de uso – Chamar e armazenar uma Single Registration).<br />
Novos estilos ‘Jam’<br />
Um outro ponto saliente consiste no facto que os FLASH styles no interior do <strong>SD1</strong> <strong>PLUS</strong> foram rearranjados e foram incluídos 131 novos Flash styles.<br />
Associando cuidadosamente estes estilos novos com os originais residentes na ROM e utilizando os novos sons, será possível tocar o <strong>SD1</strong><br />
<strong>PLUS</strong> divertindo-se ao máximo e ao mesmo fazer o público delirar!<br />
Visualizando os estilos novos (seleccionando o relativo grupo de estilos, por exemplo Latin), estes serão indicados com letras maiúsculas,<br />
enquanto que os estilos da ROM, rearranjados e aperfeiçoados, serão visualizados com letras minúsculas nas páginas sucessivas. Todavia, é inútil<br />
descrever este novo aspecto com palavras, a melhor coisa é experimentar alguns deles para entender de que se trata !<br />
STYLES NOVOS: No disco rígido, no interior da Folder 95 – Styles residem 34 styles. A maior parte desses utiliza os novos loop audio criados<br />
para o <strong>SD1</strong> <strong>PLUS</strong>, especialmente os styles como Dance e Pop Down.<br />
Para utilizar estes styles, agir como segue (com o LED da Master Folder acesa):<br />
•<br />
Pressione o botão Single RAM Style para ter acesso aos styles no disco rígido.<br />
Utilize os botões dos grupos de estilos (8beat, 16beat…) para localizar o grupo em que se encontra o estilo que se<br />
pretende carregar. Estes serão visualizados no ecrã. O formato de visualização destes estilos pode ser modificado em<br />
•<br />
função do modo seleccionado (veja Pattern View mais adiante).<br />
∑ Utilize o relativo botão função para seleccionar o style que pretende utilizar.<br />
Experimente os novos ritmos R&B, Dance e Pop (com intros e endings originais) e o novo Soft Dancing, Latin e Traditional Dancing (escute com<br />
atenção a passagem muito gradual do Arranger A para o D), e irá perceber imediatamente porque uma vez mais a Ketron é sinónimo de vanguarda.<br />
NOVAS FUNÇÕES per melhores execuções musicais<br />
•<br />
DRUM REMIX - Quando se pretende animar ou simplesmente modificar uma song, modificar a estrutura rítmica dos instrumentos de percussão<br />
ou da bateria pode fazer uma grande diferença e, portanto, dar vivacidade à song. O <strong>SD1</strong> <strong>PLUS</strong> consente de obter resultados deste<br />
tipo, dando a possibilidade de substituir as pistas de percussão de Midifiles ou de songs com as pistas dos estilos residentes na memória<br />
do instrumento (incluindo os live drum loops) e de colocar provisoriamente em surdina grupos de percussão da pista do ritmo. Enquanto<br />
o Midifile estiver a tocar, também será possível passar dos styles do teclado para as pistas de bateria originais do Midifile e vice-versa,<br />
activar os Fill-ins e utilizar os quatro Arrangers em tempo real!<br />
24<br />
<strong>SD1</strong> Plus Quick manual
Português<br />
Esta função pode ser accionada e utilizada no modo 'Song Play' utilizando os seguintes botões:<br />
ON/OFF (Tap): Drum Remix On/Off - Sobre o ecrã do Song Play é indicado se o ‘Drum Remix’ está activado ou não.<br />
STYLE/SONG (Lock): Selecção de Style/Song – Determina se os botões numéricos dos styles (0-9) serão utilizados para seleccionar<br />
um Style a associar a uma song, ou para seleccionar uma Song da folder actualmente aberta no disco. O tipo de selecção activado<br />
será visualizado no ecrã, por baixo do contador de compassos.<br />
SONG (Key Start): Acciona as pistas de bateria do Midifile – Com a song serão reproduzidas as pistas Drum originais do Midifile.<br />
STYLE (Key Stop): Acciona as pistas de bateria do estilo <strong>SD1</strong> <strong>PLUS</strong> seleccionado, que serão utilizadas durante a reprodução da song.<br />
Esta selecção pode ser armazenada permanentemente (isto é, sempre que voltar a chamar este Midifile, esse utilizará as pistas de<br />
bateria do Ketron <strong>SD1</strong> <strong>PLUS</strong> em vez das pistas de bateria originais dos Midifiles).<br />
Para guardar o novo Song Set up com Remix:<br />
1 ) Pressione o botão GM (F1) enquanto que o Midifile está em reprodução.<br />
2 ) Pressione o botão Start/Stop para interromper o Midifile.<br />
3) No interior de uma parte GM, pressione SAVE/ENTER e, em seguida F10 para confirmar a operação de armazenamento.<br />
É possível optar por substituir o Midifile existente ou de mudar o nome deste novo file.<br />
Para cada Midifile também é possível escolher o compasso de início e fim da função de Remix.<br />
Para seleccionar o compasso inicial, pressione F2 e procure o número utilizando Value +/-.<br />
Para seleccionar o compasso final, pressione novamente F2 e procure o número com Value+/-. Pressionando START, o <strong>SD1</strong> <strong>PLUS</strong> iniciará a<br />
tocar o estilo na versão Remix somente do compasso inicial até ao final atribuído tal como descrito acima. Pressionando ‘Song’ serão novamente<br />
activadas as pistas de bateria do Midifile.<br />
A função Drum Remix consente também de utilizar os Patterns presentes no disco (guardados com Save Song Set up) mas SOMENTE se<br />
foram carregados no espaço previsto na RAM para os Patterns.<br />
•<br />
BASSIST<br />
- A função Bassist consente de tocar o baixo manual na parte a esquerda do ponto de split do teclado, enquanto que a parte direita<br />
poderá ser utilizada para tocar acordes ou solos. Todas as vezes que o músico levanta a mão da parte direita do teclado, o último acorde<br />
tocado na parte direita permanecerá na memória (se o botão Hold foi activado) enquanto que o Bass poderá ser tocado livremente sem<br />
influenciar o acorde. Trata-se de uma função muito útil para reduzir a redundância que poderia estar associada a um estilo e que consente<br />
ao músico de criar livremente linhas de baixo naturais, vivas e realísticas. Esta função está automaticamente em ‘On’ quando estão activados<br />
tanto Pianist/Bassist que Manual (sob Bass).<br />
•<br />
POLIFONIA<br />
•<br />
PATTERN<br />
INCREMENTADA - O número de notas que pode ser tocado simultaneamente foi incrementado. Em outras palavras, agora é possível<br />
tocar no <strong>SD1</strong> <strong>PLUS</strong> várias notas sem que se percam algumas dessas.<br />
VIEW: A visualização e o acesso aos Disk Patterns agora executam-se de modo semelhante aos Internal Styles. Para ter acesso<br />
aos disk styles, é suficiente pressionar o botão Single Ram Styles e seleccionar o grupo ou a família de Styles; em seguida, utilize o relativo<br />
botão de função (F1- F10) para seleccionar o estilo específico. Aparece o símbolo "….." depois do estilo para indicar que este já foi carregado.<br />
A nova função GROUP (pode ser activada pressionando o botão Block List e pressionando repetidamente o botão F8) poderá ser<br />
utilizada<br />
•<br />
para seleccionar os seguintes modos de visualização dos Patterns:<br />
Modo 1: Modo numérico 1; os Styles serão visualizados por ordem numérica.<br />
Modo 2: Por ordem de carregamento; os Styles serão visualizados segundo a ordem com que foram carregados no disco rígido.<br />
•<br />
Modo 3: Por ordem alfabética; os Styles são visualizados por ordem alfabética.<br />
Off: Modo numérico2; os Styles podem ser chamados por ordem numérica tal como previsto com o software precedente (veja páginas<br />
56 & 57 do Manual de uso).<br />
NB: Se não há patterns na folder do disco actualmente seleccionada, não será visualizado nenhum pattern.<br />
•<br />
ROM<br />
•<br />
FLASH<br />
& FLASH STYLES - Os estilos internos da ROM (indicados com letras minúsculas) e os FLASH (indicados com letras maiúsculas) distinguem-se<br />
facilmente.<br />
STYLES BACKUP FOLDER - A configuração actual dos Flash Styles pode ser guardada no disco. Pressione Save/Enter e, em seguida<br />
Styles (F2) e Global Flash to Disk (F7). O ecrã sucessivo irá pedir-lhe o nome a atribuir a esta nova Folder de backup. Pressione F10-Save<br />
para confirmar o nome inserido.<br />
Esta operação cria automaticamente uma nova folder que conterá todos os Flash Styles actuais.<br />
Trata-se de uma função extremamente útil que consente-lhe de guardar/carregar do disco, um novo Block de Flash Styles<br />
completamente personalizados, colocando-lhe à disposição uma série de blocos diferentes de Flash Styles personalizados.<br />
•<br />
ARRANGER<br />
ON/OFF - Ao <strong>SD1</strong> <strong>PLUS</strong> foi acrescentada uma função dedicada de Arranger On/Off. Agora é possível ter a voz / as vozes actuais<br />
disponíveis em todo o teclado (isto é, ignorando o ponto de SPLIT) enquanto que se estiver a tocar os Styles ou os Midifiles. Para obter isso, é<br />
suficiente pressionar o botão Arrange On/Off enquanto se está a tocar, desactivando dessa maneira o arranger (será visualizado um novo valor<br />
para o split point, ou seja, o ‘C-2’). Pressionando novamente este botão, o ponto de split será reactivado e o Arranger volta para ON.<br />
•<br />
•<br />
MIDI FILE PLAYER:<br />
XD<br />
Remap – A função XD-Remap [F8] encontra-se no Menu Transposer (no modo Song Play) e garante a compatibilidade<br />
completa dos Midifiles criados para a série XD e, que portanto poderão ser utilizados sem algum problema no <strong>SD1</strong> <strong>PLUS</strong>.<br />
• VOCALIZER:<br />
•<br />
O vocalizer poderá ser activado / desactivado com os botões Demo&Hit.<br />
Quick manual <strong>SD1</strong> Plus 25
Português<br />
•<br />
A função Hold (no modo harmony) permanecerá incluída no vocal set, depois do armazenamento das configurações.<br />
•<br />
Footswitch – Foram acrescentadas novas funções para os interruptores de pedais: Lead On/Off, Pianist, Bassist, Drum Off All, Drum&Bass,<br />
Accordion On/Off. (Na página 99 do Manual de uso – F5 Footswitch encontra-se uma lista das outras funções que podem ser controladas<br />
com o pedal.<br />
•<br />
POWER ON SET UP - Foram acrescentadas as seguintes funções no Power On Set up: Autoclose (para Preset Voices), Intelligent Transposer,<br />
Text Mode, Accordion Bass on Stop, Pattern Group, Transposer Delayed mode (na página 58 do Manual de uso estão listadas as outras<br />
funções – Power On Set Up).<br />
• ACCORDION:<br />
•<br />
Foi acrescentada a nova função Bass Off Stop. Quando o modo Accordion está activado, a nova função BS ACCORD [acessível<br />
de Utility, Accordion (F6) e pressionando F8 para passar de Off on Stop para Normal e vice-versa] é automaticamente programada<br />
como ‘Off on Stop’. Deste modo, faz-se com que o Baixo e os Acordes não continuem a tocar depois da interrupção do<br />
•<br />
Arranger. No modo Accordion, pressionando o botão F6, tem-se acesso à dupla função de Bass Octave e de Sustain.<br />
Foram acrescentadas novas Curvas de User Dynamic; a Left Expression é controlada através de Midi 2 (para acordeões Midi equipados<br />
de controlo de Expression por meio de fole).<br />
•<br />
1 TOUCH TO STYLE – Existe a possibilidade de atribuir a 1 Touch voice a um Style. Portanto, é possível atribuir a cada style as 10 vozes que<br />
melhor se adaptam com o style em questão, para uma maior rapidez durante as execuções. Esta função encontra-se no Arranger Mode -<br />
Pg. 2 no ecrã Retrigger&Mode. Utilizando os botões Value +/–, depois do style Setting Etn/Orc4 poder-se-á atribuir qualquer uma das configurações<br />
One Touch de 1 a 8 ao style em questão. Deste modo, todas as vezes que chamar este estilo, as configurações One Touch associadas<br />
a esse serão automaticamente chamadas assim que se accionar o botão One Touch (com o LED do style Setting aceso). Deste modo<br />
as suas vozes preferidas para um determinado estilo estarão sempre disponíveis – um acesso mais rápido às vozes e menos tempo de<br />
pesquisa para a voz mais apropriada!<br />
•<br />
TEXT MODE: Durante a visualização de textos, agora poderão ser reproduzidos 40 caracteres em cada linha sem que se deva formatar de<br />
novo. Em UTILITY, TEXT (F7), podem ser seleccionados 2 modos:<br />
•<br />
Modo 1: Formato standard visualizado no centro do ecrã – 27 caracteres por linha.<br />
Modo 2: Serão utilizados caracteres diferentes, mais pequenos, no ecrã completo – 40 caracteres por linha.<br />
•<br />
DRY ON STOP - Esta função também foi inserida em OnLineEffect (Micro [F6]) para facilitar e tornar mais rápido tanto o acesso que o uso.<br />
•<br />
RAM FULL - Para acelerar as operações necessárias (quando a memória Ram enche-se durante o Sound Load), será visualizada a mensagem<br />
‘Memory Full’ junto com a nova função Clear&Load (F10) e Exit. Pressionando (F10), cancelam-se os sons residentes actualmente na<br />
RAM e são carregados automaticamente os sons seleccionados de momento, enquanto que com Exit (F5) anula-se a operação e mantémse<br />
os sons actualmente residentes na RAM.<br />
•<br />
Preset Editing: O <strong>SD1</strong> Plus prevê a possibilidade de modificar as Preset Voices. Depois de ter seleccionado uma Preset voice, pressionando<br />
ao mesmo tempo os botões Edit Preset * e #, abre-se a janela do Program relativo ao Preset em questão.<br />
Foram previstas 2 novas funções para guardar a voz: To Preset [F8] (substitui-se o actual RAM Preset com o mesmo nome e as modificações<br />
efectuadas), e To Disk [F7] (Serão guardados no Disk todos os Presets com extensão .pre).<br />
•<br />
Style Convert - No menu Disk - Utility - Disk Control, existe a função Style Convert. Esta função, consente ao <strong>SD1</strong> <strong>PLUS</strong> de converter automaticamente<br />
todos os Styles da série X e XD residentes no disco rígido na Master Styles Folder para o formato <strong>SD1</strong> <strong>PLUS</strong>.<br />
•<br />
Chord Solo - Esta função consente de abafar instantaneamente todas as pistas de Chord de acompanhamento, excepto uma. Na janela<br />
Arrange View, depois de ter seleccionado e destacado um dos 5 Chords (F6 – F10), todos os Chords, Drum e Bass que não foram destacados<br />
podem ser abafados pressionando simultaneamente ambos os botões Chord/Solo Volume. Para sair desta função e reactivar os outros<br />
Chords, é suficiente pressionar uma segunda vez um dos 2 botões master Chord Volumes ou um Fill In.<br />
•<br />
2nd Voice to Disk - É possível guardar as configurações da 2nd Voice no disco, com extensão .2ND. Depois de ter pressionado Save/Enter,<br />
pressione F6 – 2nd Voice, depois F8 – Disk Save e enfim F10 - Save para confirmar. Se as configurações da 2nd Voice são guardadas uma<br />
segunda vez, será substituído o file de 2nd Voice anterior.<br />
•<br />
Carregar Disk Styles em Song Play - No modo Song Play é suficiente pressionar ao mesmo tempo os dois botões Edit Preset * e # para<br />
visualizar e seleccionar o próximo Style a utilizar da actual folder do disco rígido. O style seleccionado será carregado automaticamente.<br />
•<br />
Novas Curvas Dynamic - Foram acrescentadas novas curvas Dynamic para tornar mais evidente a diferença entre Soft1, Soft2, Normal,<br />
Hard1, Hard2 … etc. (UTILITY, Page1/3, Vel. Curve [F10]).<br />
PS: Para informações mais detalhadas sobre o OS4.0a (já carregado neste instrumento) podem ser obtidas no nosso site web www.ketron.it -<br />
secção Software.<br />
26<br />
<strong>SD1</strong> Plus Quick manual
Tables<br />
Technical Tables<br />
KEYBOARD<br />
76 half-weighted keys.After touch. 6 new Velocity Curves.<br />
POLIPHONY<br />
64 notes.32 multitimbral.<br />
SOUND GENERATION<br />
310 New Presets ( programmable ), 350 GM Voices.<br />
128 User Voices. 80 One Touch setting.<br />
16 digital Drawbars.Up to 1000 Drum Percussion Sounds.<br />
RAM<br />
16 MB RAM. Single &Block Sound loading. Files.Wav,Msp and Ins supported.<br />
ARRANGER<br />
131 New Flash Styles (rewritable ).168 ROM Styles. Style setting. 4<br />
Arranger, 3 Intros/Endings, 3Fills Ins, Break, Fill To End, Jump.<br />
Interactive accompaniment. Tap tempo. Accelerando &<br />
Ritardando.Tempo Slow/Fast. 1 Touch to Style. Chord solo .<br />
BASS<br />
Manual Bass, Bass to Lowest, Basso to Root. Bassist .<br />
PIANIST<br />
Auto/Standard mode.<br />
DRUM SETS<br />
24 New Internal Drum Sets.24 User Drum Sets. 50 Live Drums. Manual<br />
Drums.Drum Mixer.10 Drum Sections.<br />
PROGRAMS<br />
128 Programs.4 voices.Modes :Duet,Trio,Steel,Morphing. Single &<br />
Global Program Disk loading.<br />
2ND VOICE<br />
2nd Voice programmable for each Preset and User Voice. 2nd Voice<br />
to Disk.<br />
MIDIFILE PLAYER<br />
SMF Song playback.Real Time song recording.Songs with<br />
lyrics,karaoke and files Txt. Juke box.Intelligent Transposer.<br />
Demo&Hit folder. Drum&Bass. Lead Off. XD Series Remap.<br />
DRUM REMIX<br />
Real time interactive MIDI file and Style playing. Song and Style<br />
select.<br />
OCTAVE<br />
Up/Down +/-1 Octave.<br />
HARMONY<br />
Full,Jazz,Double Up, Double Down, 5th, Bluegrass,Trill,Folk1, Folk 2,<br />
Repeat & Speed control.<br />
PORTAMENTO<br />
Rate control +/-64.Mono Legato function.<br />
TRANSPOSER<br />
+/-24 half tones<br />
AFTERTOUCH<br />
Assignable to Cut off,Volume,Bend,Slide,LFO,Attack,Treshold and<br />
Sensitivity control.<br />
MOD.WHEEL<br />
LFO to Pitch,to DCF,to DCA,Wha Wha,Swell,Rate.Rotor speed control.<br />
PITCH WHEEL<br />
Tune +/-99 Cents .Vibrato On/Off.Bend value 0/24.Bend to<br />
LFO,DCF,DCA.<br />
ARABIC SCALE<br />
Tune +/-99 Cents per note.13 Arabic set ups footswitch assignable.<br />
ACCORDION MODE<br />
International,Belgique.Left/Right velocity control.Bass octave.Bass<br />
Sustain.Bass to Chord recognition, Lower octave. Left drum to Bass<br />
&Chord. Bass Off on Stop.<br />
EFFECTS<br />
3 digital multi effects DSP 's.60 differents<br />
effects,Reverberation,Chorus ,Flanger,Delay,Wha<br />
Wha,Distorsion,Overdrive,Rotor,Equalizer +/-12 Db (Low,Middle,High).16<br />
User Effects.<br />
SAMPLER<br />
16 Mbyte sampling 16 Bit -44.1 KHz. Multisampler editor. Wav Sync to<br />
Style.<br />
VOCALIZER<br />
Vocalizer unit.Harmonizer.Vocoder,Melody types.MIDI Vocalist<br />
track.Left&Right assignment.<br />
Filter edit.Vocalizer modes.<br />
MICRO<br />
2 Micro input:XRL Balanced,Mono Jack.2 Micro Out to external<br />
mixer.Level Pan Pot,Echo,Reverb,Pitch Shift+/- 12,Dry.<br />
MIDI<br />
In1,In2,Out,Thru.32 MIDI channels.General MIDI Standard.<br />
SEQUENCER<br />
16 Tracks,150.000 notes.<br />
FLOPPY DISK<br />
3.5 2DD/HD.<br />
HARD DISK<br />
Type ATA IDE 2.5. 6Gbyte .Up to 99 folders.Master folder.<br />
Bonus Library : Stereo Grand Piano.Orchestral sounds. 200 Midi files.<br />
200 Song Single Registrations. 35 Patterns. Internal Style backup folder.<br />
X & XD Series Style Conversion.<br />
DISPLAY<br />
240 X 128 Pixel baklit graphic TCF<br />
OUTPUTS<br />
Out 1Left/Mono.Out 2Right.Out 3.Out 4.Sustain Pedal.Footswitch (6 or<br />
13 switches).Micro1 Out.Micro2 Out. GM/Keyboard Out assignment to 4<br />
audio Outputs<br />
INPUTS<br />
Stereo headphone.MicroXRL.Micro Jack.Micro Gain control.<br />
OPTIONAL<br />
Video Interface .Volume Pedal.Volume Pedal 4 switches.Sustain<br />
pedal.Footswitch FS6-FS13.MIDI Pedalboard.<br />
COMPUTER<br />
PC/Mac Interface .Cable&Software.<br />
DIMENSIONS<br />
119 X 39 X 12 Cms<br />
WEIGHT<br />
Kg 16.5<br />
Specifications and appearance are subject to change without notice<br />
Quick manual <strong>SD1</strong> Plus 27
Tables<br />
Drum<br />
Drum 1 Drum 2 (Control 0 - Value 4)<br />
P. Ch. Name<br />
9 FOLK<br />
10 ACOUSTIC<br />
11 POP<br />
12 JAZZ DRY<br />
17 HARD ROCK<br />
25 DANCE<br />
26 TECHNO<br />
28 PROGRESSIVE<br />
29 RAVE<br />
30 HIP-HOP<br />
33 FUSION<br />
41 BRUSH<br />
49 ORCHESTRA<br />
57 MS DRUM<br />
58 VOCAL 1<br />
59 VOCAL 2<br />
65 LATIN 1<br />
66 LATIN 2<br />
73 ROCK&ROLL<br />
121 URBAN<br />
122 ELECTRO<br />
123 COUNTRY<br />
124 R&B<br />
P. Ch. Name<br />
2 BOLERO 1<br />
3 CHACHA<br />
4 CUMBIA<br />
5 GUAJRA 1<br />
6 MAMBO<br />
7 SALSA 1<br />
8 RHUMBA 1<br />
9 MERENGUE 1<br />
10 MERENGUE 2<br />
11 CONGAS 1<br />
12 CONGAS 2<br />
13 GIPSY 1<br />
14 MARACAS 1<br />
15 TAMBOURINE<br />
16 BRUSH<br />
17 HOUSE<br />
18 RAP 1<br />
19 RAP 2<br />
20 JAKSON<br />
21 DANCE 1<br />
22 UNDER<br />
23 ETHNIC 1<br />
24 ETHNIC 2<br />
25 LATINGR 1<br />
26 LATINGR 2<br />
27 LATINGR 3<br />
28 LATINGR 4<br />
29 LATINGR 5<br />
30 LATINGR 6<br />
31 LATINGR 7<br />
32 LATINGR 8<br />
33 TEKNO 1<br />
34 TEKNO 2<br />
35 NEWAGE<br />
36 LATINHOU<br />
37 SLOWBEAT<br />
38 HIPHOP 1<br />
39 POP<br />
40 VOCALS<br />
41 ROCK<br />
42 JAZZ 1<br />
43 SHUFFLE 1<br />
44 JAZZ 2<br />
45 BOSSA NOVA<br />
46 SAMBA 1<br />
47 SAMBA 2<br />
48 PANDERO 1<br />
49 SALSA 2<br />
50 EUROLATIN<br />
52 DANCE 2<br />
53 DANCE 3<br />
54 DANCE 4<br />
55 TRADITIONA<br />
56 BOLERO 2<br />
57 CUMBIA 2<br />
58 GUAJRA 2<br />
59 RHUMBA 2<br />
60 MERENGUE 3<br />
61 MERENGUE 4<br />
62 CONGAS 3<br />
63 CONGAS 4<br />
64 GIPSY 2<br />
65 MARACAS 2<br />
66 HIPHOP 2<br />
67 JAZZ 3<br />
68 SHUFFLE 2<br />
69 JAZZ 4<br />
70 SAMBA 3<br />
71 SAMBA 4<br />
72 PANDERO 2<br />
28<br />
<strong>SD1</strong> Plus Quick manual
Tables<br />
GM VOICE BANK A (Control 0 - Value 0)<br />
P. Ch. Name<br />
1 Grand<br />
2 Rock<br />
3 Upright<br />
4 Honky<br />
5 Rodes<br />
6 Dx Piano<br />
7 Harpsich<br />
8 Clavinet<br />
9 Celesta<br />
10 Glocken<br />
11 Music Box<br />
12 Vibraphon<br />
13 Marimba<br />
14 Xilophon<br />
15 Bell<br />
16 Santur<br />
17 Leslies<br />
18 Jazzorgan1<br />
19 Rock B3<br />
20 Church<br />
21 Theatre<br />
22 Musette<br />
23 Harmonica<br />
24 Accordeon<br />
25 Brazilian<br />
26 Folk<br />
27 Jazz<br />
28 Clean<br />
29 Muted<br />
30 Overdrive<br />
31 Distorted<br />
32 Harmonics<br />
33 Jazzbass<br />
34 Finger<br />
35 Picked<br />
36 Fretless<br />
37 Slap<br />
38 Funk<br />
39 Synbass 1<br />
40 Synbass 2<br />
41 Violin<br />
42 Viola<br />
43 Cello<br />
44 Contrabass<br />
45 Tremolos<br />
46 Pizzicato<br />
47 Harp<br />
48 Timpani<br />
49 Strings<br />
50 Slowstrgs<br />
51 Synstrgs 1<br />
52 Synstrgs 2<br />
53 Choir 1<br />
54 Choir 2<br />
55 Synvoice<br />
56 Hits<br />
57 Mexican<br />
58 Trombone<br />
59 Euphonium<br />
60 Muted Tpt<br />
61 French Hrn<br />
62 Brass 1<br />
63 Synbrass 1<br />
64 Synbrass 2<br />
65 Altosoft<br />
66 Contralto<br />
67 Rocksax<br />
68 Tenor<br />
69 Oboe<br />
70 Englishorn<br />
71 Bassoon<br />
72 Clarinet<br />
73 Piccolo<br />
74 Flute<br />
75 Recorder<br />
76 Andes<br />
77 Bottle<br />
78 Shakuhashi<br />
79 Whistle<br />
80 Ocarina<br />
81 Square<br />
82 Saw<br />
83 Calliope<br />
84 Wha<br />
85 Plate<br />
86 Vox<br />
87 Saw 5th<br />
88 FM Lead<br />
89 Fantasy<br />
90 Warmness<br />
91 Score<br />
92 Space<br />
93 Softpad<br />
94 Metal<br />
95 Halo<br />
96 Sweep<br />
97 Ice Rain<br />
98 Soundtrack<br />
99 Crystal<br />
100 Atmosphere<br />
101 Brightness<br />
102 Goblin<br />
103 Echodrops<br />
104 Startheme<br />
105 Sitar<br />
106 Banjo<br />
107 Shamisen<br />
108 Koto<br />
109 Kalimba<br />
110 Bagpipe<br />
111 Fiddle<br />
112 Zurna<br />
113 Tinkle<br />
114 Agogo<br />
115 Steeldrum<br />
116 Woodblock<br />
117 Taiko<br />
118 Melotom<br />
119 Syntom<br />
120 Reverse<br />
121 Fretslide<br />
122 Breath<br />
123 Seashore<br />
124 Bird<br />
125 Telephone<br />
126 Helicopter<br />
127 Applause<br />
128 Gunshot<br />
Quick manual <strong>SD1</strong> Plus 29
Tables<br />
GM VOICE BANK B (Control 0 - Value 1)<br />
P. Ch. Name<br />
1 Jingle<br />
2 Electric<br />
3 House<br />
4 Elopiano<br />
5 Stage<br />
6 Funky DX<br />
7 FM Piano<br />
8 Vintage<br />
9 Toybox<br />
10 Chimes<br />
11 Mallets<br />
12 Long Vibes<br />
13 Malimba<br />
14 Carillon<br />
15 Tinkles<br />
16 Windchimes<br />
17 Rotary<br />
18 Jazzorgan2<br />
19 Drawbars<br />
20 Positive<br />
21 Master<br />
22 Diatonic<br />
23 Jazzfisa<br />
24 Bandoneon<br />
25 Spanish<br />
26 Country<br />
27 Ms Guitar<br />
28 60' Stopped<br />
29 Plucked<br />
30 Blues Lead<br />
31 12 Strings<br />
32 Strato<br />
33 Warmbass<br />
34 Precision<br />
35 Mutebass<br />
36 Rockbass<br />
37 Flatbass<br />
38 Synbass 3<br />
39 Synbass 4<br />
40 Synbass 5<br />
41 Philarmoni<br />
42 Violas<br />
43 Glockstrgs<br />
44 Octastrgs1<br />
45 Octastrgs2<br />
46 Marcato<br />
47 Orchestra<br />
48 Slow Arcos<br />
49 Synphony<br />
50 Darkstrgs<br />
51 Vocals<br />
52 Mmmh<br />
53 Toooh<br />
54 Uuuh<br />
55 Aaah<br />
56 Boom&Uap<br />
57 Softrumpet<br />
58 Hi Tpt<br />
59 Tuba&Bass<br />
60 Miles Tpt<br />
61 Flugelhorn<br />
62 Brass 2<br />
63 Growlbras1<br />
64 Brass Fx<br />
65 Soprano<br />
66 Circusax<br />
67 Nightsax<br />
68 Hi Tenor<br />
69 Mariachi<br />
70 Growlbras2<br />
71 Cornet<br />
72 Horns<br />
73 Clarino<br />
74 Fife<br />
75 Lip Flute<br />
76 Panflute<br />
77 Analogs<br />
78 Flanger<br />
79 Bright<br />
80 Wiring<br />
81 Wow<br />
82 Saw Wave<br />
83 Square Wave<br />
84 Sine Wave<br />
85 Hip Bass<br />
86 Synbass 6<br />
87 Synbass 7<br />
88 Synbass 8<br />
89 2nd Perc<br />
90 3th Perc<br />
91 Click<br />
92 Whiter<br />
93 Hot Organ<br />
94 Pop Organ<br />
95 Powerfast<br />
96 Jazzy<br />
97 Singlecoil<br />
98 Pop Guitar<br />
99 Solid Body<br />
100 Texas<br />
101 Tremolo<br />
102 Telecast<br />
103 Rock Stops<br />
104 Wha Guitar<br />
105 Hawaian<br />
106 Mandolin<br />
107 Acoust<br />
108 Bouzouki<br />
109 Pedalsteel<br />
110 Rock&Roll<br />
111 Fisa 8'<br />
112 Blow<br />
113 Fx 1<br />
114 Fx 2<br />
115 Fx 3<br />
116 Fx 4<br />
117 Rave 1<br />
118 Rave 2<br />
119 Rave 3<br />
120 Rave 4<br />
121 Vocal 1<br />
122 Vocal 2<br />
123 Vocal 3<br />
124 Vocal 4<br />
125 Vocal 5<br />
126 Jodles<br />
127 Science-Fx<br />
128 Scratches<br />
30<br />
<strong>SD1</strong> Plus Quick manual
Tables<br />
GM VOICE BANK C (Control 0 - Value 10)<br />
P. Ch. Name<br />
1 Piano 1<br />
2 Piano 2<br />
3 Piano 3<br />
4 Piano 4<br />
5 Mark<br />
6 Thin<br />
7 Rodeslow<br />
8 Rodeshi<br />
9 Bank A Remap<br />
10 Bank A Remap<br />
11 Bank A Remap<br />
12 Soft Vibes<br />
13 Bank A Remap<br />
14 Bank A Remap<br />
15 Bank A Remap<br />
16 Bank A Remap<br />
17 Dark B3<br />
18 Tonewheel<br />
19 Fulldraw<br />
20 Pipe 1<br />
21 Pipe 2<br />
22 Softmuset<br />
23 Bellow<br />
24 Tango<br />
25 Flamenco<br />
26 Fing Pick<br />
27 Django<br />
28 Oldcountry<br />
29 Guitarmix<br />
30 Nylon<br />
31 Unplugged<br />
32 Squire<br />
33 Subbass<br />
34 Bas&Guitar<br />
35 Oberbass<br />
36 60' Bass<br />
37 Fusion<br />
38 HardFunky<br />
39 Motown<br />
40 Slappin<br />
41 Tzigano<br />
42 Longviolin<br />
43 Softviolin<br />
44 Old Violin<br />
45 Rondo'<br />
46 Bowed<br />
47 Harp&Strgs<br />
48 Synphonic<br />
49 Shortstrgs<br />
50 Stringmix<br />
51 Ensemble<br />
52 Legato<br />
53 Scat<br />
54 Corale<br />
55 Slow Choir<br />
56 Ends<br />
57 Trumpet<br />
58 Golden Tpt<br />
59 JazTrumpet<br />
60 Trombones<br />
61 Fall Off<br />
62 Brass&Sax<br />
63 Sawbrass<br />
64 Octabrass<br />
65 Jazz Alto<br />
66 Alto Dry<br />
67 Tenor Dry<br />
68 Dyna Sax<br />
69 Alto Pop<br />
70 Open Tbn<br />
71 Blare<br />
72 Old Tbn<br />
73 Bank A Remap<br />
74 Bank A Remap<br />
75 Bank A Remap<br />
76 Bank A Remap<br />
77 Bank A Remap<br />
78 Bank A Remap<br />
79 Bank A Remap<br />
80 Bank A Remap<br />
81 Digisaw<br />
82 Synclead<br />
83 Chop<br />
84 Syn Mallets<br />
85 Syntax<br />
86 Whau<br />
87 Tecnosynt1<br />
88 Tecnosynt2<br />
89 Starcase<br />
90 Nicepad<br />
91 Darkpad<br />
92 Voicepad<br />
93 Planet<br />
94 Dance Hit<br />
95 Dreamin<br />
96 Glockpad<br />
97 Reflection<br />
98 Magicpad<br />
99 Whisper<br />
100 Comedy<br />
101 Vision<br />
102 Prelude<br />
103 Sweepy<br />
104 Movie<br />
105 Hackbrett<br />
106 Tres<br />
107 FM Guitar<br />
108 Mute<br />
109 Bank A Remap<br />
110 Bank A Remap<br />
111 Bank A Remap<br />
112 Bank A Remap<br />
113 Bank A Remap<br />
114 Bank A Remap<br />
115 Bank A Remap<br />
116 Bank A Remap<br />
117 Bank A Remap<br />
118 Bank A Remap<br />
119 Bank A Remap<br />
120 Bank A Remap<br />
121 Bank A Remap<br />
122 Bank A Remap<br />
123 Bank A Remap<br />
124 Bank A Remap<br />
125 Bank A Remap<br />
126 Bank A Remap<br />
127 Bank A Remap<br />
128 Bank A Remap<br />
Quick manual <strong>SD1</strong> Plus 31
Tables<br />
Presets program change<br />
P.ch. Bank 0 Bank 1 Bank 10 Bank 11 Bank 12 Bank 13 Bank 14<br />
1 Grand Latinpiano<br />
2 Rock Grand House<br />
3 Upright Jingle<br />
4 Honky Tonky Octapiano<br />
5 Vintage Markpiano Rodes<br />
6 Dxpiano Funkypno Electropno<br />
7 Harpsichord Elopiano Elpiano1<br />
8 Clavinet Stage Elpiano2<br />
9 Celesta Chimes<br />
10 Glocken<br />
11 Toybox<br />
12 Vibraphon Dry Vibes<br />
13 Marimba<br />
14 Xylophon<br />
15 Bell<br />
16 Santur<br />
17 Leslies Jazz B3 Jazzy Poporgan<br />
18 Jazz Organ Gospel Full Fullhamm<br />
19 Rock B3 Shade Rotary Tutti<br />
20 Church Positive Clickorgan Tonewheel<br />
21 Theatre Rocker Drawbar Farfis<br />
22 Musette Master Diatonic Fisa Irish Elisées Octafisa<br />
23 Harmonica Alpen Valse Celeste Organetto Bellow Reed<br />
24 Accordeon Bandoneon Tango Jazzfisa Classica Cassotto<br />
25 Brazilian Flamenco Spanish Takamin<br />
26 Acoustic 12 Strings Django Unplugg<br />
27 Jazz Guitar Solidbody Chorus Gtr Electric<br />
28 Clean Nashville Telecast Rock&Roll<br />
29 Muted 60' Stopped Plucked Tremolo<br />
30 Carlos Rocklead Blueslead Popguitar<br />
31 Power Valve<br />
32 Texas Strato Hawaiian Pedalsteel<br />
33 Jazzbass Softbass<br />
34 Finger Precision<br />
35 Picked Rockbass<br />
36 Freetles Tuba&Bass<br />
37 Slap Mutebass<br />
38 Funk Slapmix Hardfunk<br />
39 Synbass1 Synbass3 Synbass5<br />
40 Synbass2 Synbass4 Synbass6 Synbass7<br />
41 Violin Stradivar<br />
42 Viola Tzigano<br />
43 Violas Zivago<br />
44 Cellos<br />
45 Philarmoni Baroque<br />
46 Pizzicato Marcato<br />
47 Harp Glockstrings<br />
48 Mantovani<br />
49 Strings Symphony<br />
50 Slowstrings Orchestra51 Synstrings<br />
52 Digistrings Mmmh<br />
53 Corale Toooh Classic Slowchoir Concert<br />
54 Uuuh Synchoir Softchoir Warmvoice<br />
55 Aaah Vocals Fadechoir 1 Spacevoice Breathvox<br />
56 Soulsister Boom&Uap Fadechoir 2 Cathedral Synvoice<br />
57 Golden Tpt Mexican Softrumpet<br />
58 Trombone Trombones<br />
59 Trumpet Posaune<br />
60 Milesmute Mute Tpt<br />
61 Frenchorn Flugelhorn<br />
62 Brass Tijuana Mariachi<br />
32<br />
<strong>SD1</strong> Plus Quick manual
Tables<br />
P.ch. Bank 0 Bank 1 Bank 10 Bank 11 Bank 12 Bank 13 Bank 14<br />
63 Synbrass Octabrass Growlbrass<br />
64 Dixie Tpt Salseros Fall Off<br />
65 Altosoft Soprano Sax&Brass<br />
66 Contralto Circus Oberduet<br />
67 Rocksax Nightsax Obertrio<br />
68 Tenor Miller Saxsection<br />
69 Oboe Jazzalto<br />
70 Englishorn Boogiesax<br />
71 Bassoon Popsax<br />
72 Clarinet Baritone<br />
73 Piccolo Voiceflute Shanai<br />
74 Flute Jungle Softflute<br />
75 Recorder Newage Octaflute<br />
76 Andes Panflute Lipflute<br />
77 Bottle Flutevox<br />
78 Shakuhashi Chiff<br />
79 Whistle Ethnic<br />
80 Ocarina Warmflute<br />
81 Polysynth Sawlead Calliope<br />
82 Synclead Stack Taurus<br />
83 Square Maxisaw Heavy<br />
84 Oldmatrix Fusion Wha<br />
85 Sweeplead Whau<br />
86 Syntax Pulse<br />
87 Saw5th Sequence<br />
88 Plate Chop<br />
89 Fantasy Warmpad<br />
90 Breaths Newera<br />
91 Dancehit Technopad<br />
92 Airpad Spiral<br />
93 Glockpad Moviepad<br />
94 Metal Rave<br />
95 Halo Progressive<br />
96 Sweep Planet<br />
97 Ice rain Galaxy<br />
98 Xylopad Resopad<br />
99 Cosmic Glasdros<br />
100 Dramin Flanger<br />
101 Bightness Morphing<br />
102 Goblin Action<br />
103 Echodrop<br />
104 Startheme<br />
105 Sitar Mandolin<br />
106 Banjo Zither Bluegras<br />
107 Shamisen Hackbrett Tres<br />
108 Koto Fado<br />
109 Kalimba Charango<br />
110 Bagpipe Bouzouki<br />
111 Fiddle Ukulele<br />
112 Zurna Lute<br />
113 Tinkle<br />
114 Windchimes<br />
115 Steeldrum<br />
116 Woodblock<br />
117 Belltree<br />
118 Science-Fx<br />
119 Syntom<br />
120 Scratches<br />
121 Fretslide Vocal 1<br />
122 Ends Vocal 2<br />
123 Seashore Vocal 3<br />
124 Bird Vocal 4<br />
125 Telephone Vocal 5<br />
126 Helicopter Jodlers<br />
127 Applause<br />
128 Gunshot<br />
Quick manual <strong>SD1</strong> Plus 33
<strong>SD1</strong> Plus Quick manual<br />
34<br />
Tables<br />
Presets<br />
PIANO<br />
GRAND<br />
LATINPIANO<br />
UPRIGHT<br />
HONKYTONKY<br />
OCTAPIANO<br />
ROCKGRAND<br />
HOUSE<br />
JINGLE<br />
HARPSICHORD<br />
CLAVINET<br />
EL.PIANO<br />
VINTAGE<br />
DXPIANO<br />
MARKPIANO<br />
FUNKPNO<br />
ELOPIANO<br />
STAGE<br />
RODES<br />
ELECTROPNO<br />
ELPIANO1<br />
ELPIANO2<br />
CHOM<br />
CELESTA<br />
MARIMBA<br />
VIBRAPHON<br />
GLOCKEN<br />
XYLOPHON<br />
CHIMES<br />
TOYBOX<br />
TINKLE<br />
BELL<br />
DRY VIBES<br />
ORGAN<br />
JAZZB3<br />
GOSPEL<br />
SHADE<br />
ROCKER<br />
JAZZORGAN<br />
JAZZY<br />
FULL<br />
ROTARY<br />
CHURCH<br />
LESLIES<br />
CLICKORGAN<br />
POSITIVE<br />
DRAWBARS<br />
ROCKB3<br />
THEATRE<br />
POPORGAN<br />
FULLHAMM<br />
TUTTI<br />
TONEWHEEL<br />
FARFIS<br />
CHOIR<br />
AAAH<br />
CORALE<br />
UUUH<br />
MMMH<br />
TOOOH<br />
SOULSISTER<br />
VOCALS<br />
BOOM&UAP<br />
CLASSIC<br />
SYNVOICE<br />
FADECHOIR 1<br />
FADECHOIR 2<br />
SLOWCHOIR<br />
SYNCHOIR<br />
SOFTCHOIR<br />
SPACEVOICE<br />
CATHEDRAL<br />
CONCERT<br />
WARMVOICE<br />
BREATHVOX<br />
BRASS<br />
GOLDEN TPT<br />
TROMBONE<br />
MILESMUTE<br />
BRASS<br />
FRENCHORN<br />
TRUMPET<br />
FLUGELHORN<br />
DIXIE TPT<br />
MEXICAN<br />
OCTABRASS<br />
SYNBRASS<br />
SALSEROS<br />
TROMBONES<br />
GROWLBRASS<br />
POSAUNE<br />
MUTE TPT<br />
SOFTRUMPET<br />
TIJUANA<br />
MARIACHI<br />
FALLOFF<br />
ACCORD<br />
MUSETTE<br />
ACCORDEON<br />
MASTER<br />
BANDONEON<br />
ALPEN<br />
JAZZFISA<br />
HARMONICA<br />
DIATONIC<br />
VALSE<br />
TANGO<br />
FISA<br />
CELESTA<br />
IRISH<br />
ORGANETTO<br />
REED<br />
CLASSICA<br />
ELYSEES<br />
OCTAFISA<br />
BELLOW<br />
CASSOTTO<br />
GUITAR<br />
BRAZILIAN<br />
ACOUSTIC<br />
JAZZGUITAR<br />
CLEAN<br />
MUTED<br />
CARLOS<br />
FLAMENCO<br />
TEXAS<br />
NASHVILLE<br />
SOLIDBODY<br />
SPANISH<br />
12STRINGS<br />
TREMOLO<br />
VALVE<br />
STRATO<br />
HAWAIAN<br />
CHORUSGTR<br />
ROCKLEAD<br />
POWER<br />
PLUCKED<br />
DJANGO<br />
TELEACAST<br />
PEDALSTEEL<br />
BLUESLEAD<br />
POPGUITAR<br />
ROCK&ROLL<br />
UNPLUGG<br />
ELECTRIC<br />
TAKAMIN<br />
60' STOPPED<br />
SAX<br />
ALTOSOFT<br />
CONTRALTO<br />
ROCKSAX<br />
TENOR<br />
BARITONE<br />
NIGHTSAX<br />
CIRCUS<br />
CLARINET<br />
OBOE<br />
ENGLISHORN<br />
JAZZALTO<br />
BOOGIESAX<br />
POPSAX<br />
SOPRANO<br />
MILLER<br />
SAX&BRASS<br />
OBERDUET<br />
OBERTRIO<br />
SAXSECTION<br />
BASSOON<br />
FLUTE<br />
FLUTE<br />
ANDES<br />
JUNGLE<br />
BOTTLE<br />
VOICEFLUTE<br />
RECORDER<br />
WHISTLE<br />
OCARINA
Quick manual <strong>SD1</strong> Plus 35<br />
Tables<br />
PANFLUTE<br />
NEWAGE<br />
FLUTEVOX<br />
SHAKUHASHI<br />
CHIFF<br />
PICCOLO<br />
ETHNIC<br />
WARMFLUTE<br />
SHANAI<br />
OCTAFLUTE<br />
LIPFLUTE<br />
SOFTFLUTE<br />
BASS<br />
JAZZBASS<br />
FINGER<br />
PICKED<br />
FREETLES<br />
SLAP<br />
SYNBASS1<br />
SYNBASS2<br />
MUTEBASS<br />
ROCKBASS<br />
HARDFUNK<br />
PRECISION<br />
FUNK<br />
SOFTBASS<br />
TUBA&BASS<br />
SLAPMIX<br />
SYNBASS3<br />
SYNBASS4<br />
SYNBASS5<br />
SYNBASS6<br />
SYNBASS7<br />
VIOLIN<br />
VIOLIN<br />
STRINGS<br />
VIOLAS<br />
SYMPHONY<br />
SYNSTRING<br />
SLOWSTRING<br />
PHILARMONI<br />
MARCATO<br />
CELLOS<br />
PIZZICATO<br />
VIOLA<br />
HARP<br />
MANTOVANI<br />
GLOCKSTRGS<br />
ORCHESTRA<br />
DIGISTRING<br />
STRADIVAR<br />
TZIGANO<br />
BAROQUE<br />
ZIVAGO<br />
PAD<br />
TECHNOPAD<br />
DANCEHIT<br />
WARMPAD<br />
AIRPAD<br />
GLOCKPAD<br />
NEWERA<br />
SPIRAL<br />
MOVIEPAD<br />
FANTASY<br />
RAVE<br />
ECHODROP<br />
BREATHS<br />
METAL<br />
ICERAIN<br />
BRIGHTNESS<br />
HALO<br />
PROGRESSIVE<br />
COSMIC<br />
SWEEP<br />
DREAMIN<br />
PLANET<br />
GALAXY<br />
GOBLIN<br />
RESOPAD<br />
STARTHEME<br />
GLASDROS<br />
FLANGER<br />
XYLOPAD<br />
MORPHING<br />
ACTION<br />
SYNTH<br />
POLYSYNTH<br />
SYNCLEAD<br />
SQUARE<br />
OLDMATRIX<br />
SWEEPLEAD<br />
SYNTAX<br />
CALLIOPE<br />
PLATE<br />
SAWLEAD<br />
STACK<br />
MAXISAW<br />
FUSION<br />
WHAU<br />
PULSE<br />
SEQUENCE<br />
CHOP<br />
TAURUS<br />
HEAVY<br />
WHA<br />
SAW5TH<br />
ETHNIC<br />
SITAR<br />
BANJO<br />
SHAMISEN<br />
KOTO<br />
KALIMBA<br />
BAGPIPE<br />
FIDDLE<br />
MANDOLIN<br />
ZITHER<br />
HACKBRETT<br />
FADO<br />
CHARANGO<br />
BOUZOUKI<br />
STEELDRUM<br />
SANTUR<br />
ZURNA<br />
BLUEGRASS<br />
UKULELE<br />
LUTE<br />
TRES<br />
EFFECTS<br />
VOCAL1<br />
VOCAL2<br />
VOCAL3<br />
VOCAL4<br />
VOCAL5<br />
JODLERS<br />
SCIENCE-FX<br />
SCRATCHES<br />
SEASHORE<br />
APPLAUSE<br />
ELICOPTER<br />
TELEPHONE<br />
BIRD<br />
GUNSHOT<br />
FRETSLIDE<br />
WINDCHIMES<br />
BELLTREE<br />
ENDS<br />
SYNTOM<br />
WOODBLOCK
Tables<br />
Styles<br />
8 BEAT PUBSONG<br />
EASY BEAT<br />
70's BEAT<br />
DOWN LOW<br />
SLOWMOTION<br />
ITALBEAT<br />
ENGL.ROCK<br />
90 BEAT<br />
GUIT&ORGAN<br />
MODERATO<br />
8Beat 1<br />
8Beat 2<br />
8beat 3<br />
8Beat 4<br />
8Beat 5<br />
8Ballad 1<br />
8Ballad 2<br />
8Ballad 3<br />
8Ballad 4<br />
16 BEAT FOLKSINGER<br />
PNO BALLAD<br />
SLOW BEAT<br />
GUITARCLUB<br />
URBAN<br />
SHUFF.BEAT<br />
SLOWBALLAD<br />
12 BEAT<br />
SOFT&SWEET<br />
SMOOTH<br />
16Beat 1<br />
16Beat 2<br />
16Beat 3<br />
16Beat 4<br />
16Ballad 1<br />
16Ballad 2<br />
16Ballad 3<br />
16Ballad 4<br />
POP&FUNK<br />
NICEPOP<br />
GROOVIN<br />
HIPHOP<br />
FUSION<br />
SWEET DOWN<br />
VOCALIZE<br />
FOLK&POP<br />
CITYRAP<br />
ACIDFUNK<br />
R&B<br />
EASY DOWN<br />
STREET<br />
Lightpop<br />
Popfunk 1<br />
Popfunk 2<br />
Popfunk 3<br />
Hiphop 1<br />
Hiphop 2<br />
Hiphop 3<br />
Easyrap 1<br />
COUNTRY<br />
PARTY<br />
Easyrap 2<br />
Acidjazz 1<br />
Acidjazz 2<br />
Acidjazz 3<br />
Grunge<br />
Funky 1<br />
Funky 2<br />
Funky 3<br />
Funky 4<br />
CNTRY FOX<br />
BANJO&FIDL<br />
ONTHEROAD<br />
CTRYBALLAD<br />
KRAMER<br />
BLUEGRASS<br />
CNTRY ROCK<br />
CTRY SLOW<br />
Western 1<br />
Western 2<br />
Ctryrock 1<br />
Ctryrock 2<br />
Ctryslow 1<br />
Ctryslow 2<br />
Cntrypop 1<br />
Cntrypop 2<br />
Cntrypop 3<br />
Cntryfox 1<br />
Cntryfox 2<br />
Bluegras 1<br />
Bluegras 2<br />
Cntrywalz1<br />
Cntrywalz2<br />
Cntrybeat<br />
TROPICAL<br />
ITALMAMBO<br />
DISCOLATIN<br />
NOCHEMIX<br />
HULLYGULLY<br />
HULLYDANCE<br />
DISCOSAMBA<br />
BAILAR<br />
DISCO CHA<br />
60REVIVAL<br />
PEREZMAMBO<br />
Meneito<br />
Macarena<br />
Happysamba<br />
Partybeat1<br />
Partybeat2<br />
Disco 1<br />
Disco 2<br />
Prtypolka1<br />
Prtypolka2<br />
Gipsy<br />
Caribe<br />
Limbo<br />
Lambada<br />
ROCK&SOUL<br />
SWING<br />
Bajon<br />
Letkiss<br />
ROCKBALLAD<br />
HARDROCK<br />
R&BLUES<br />
ROCK SHUFF<br />
SOUL<br />
USAROCK<br />
BASIC ROCK<br />
MEMPHIS<br />
LATIN ROCK<br />
B.B.ROCK<br />
Gospel<br />
Rock 1<br />
Rock 2<br />
R&Soul<br />
Motown<br />
R&Blues 1<br />
R&Blues 2<br />
R&Blues 3<br />
Blues 1<br />
Blues 2<br />
Slowblues<br />
Rockbeat<br />
Rockshuff 1<br />
Rockshuff 2<br />
R&B Groove<br />
SWING<br />
MEDIUM FOX<br />
FOXTROT<br />
SHUF.BLUES<br />
JAZZMAN<br />
JAZZ COMBO<br />
SHUFFBALL<br />
ORCH.SLOW<br />
FOX DIXIE<br />
NEWORLEANS<br />
QUICKSTEP<br />
Jamsession<br />
Broadway<br />
Moonlight<br />
Jazzorgan1<br />
Jazzorgan2<br />
Swing 1<br />
Swing 2<br />
Slow 1<br />
Slow 2<br />
5/4,<br />
Django<br />
Bigband 1<br />
Bigband 2<br />
Bigband 3<br />
Slowdixie<br />
Charleston<br />
Jazzsamba<br />
Jazzwaltz<br />
36<br />
<strong>SD1</strong> Plus Quick manual
Tables<br />
LATIN<br />
R&ROLL<br />
FOLK<br />
ROMANTICA<br />
MERENGUE<br />
SAMBA<br />
CHACHA<br />
FLAMENCA<br />
NEW BOLERO<br />
LATIN JAZZ<br />
CUMBION<br />
BRAZILBOSSA<br />
BACHATA<br />
PR SALSA<br />
NYMERENGUE<br />
VALLENATO<br />
MEXICAN<br />
SONCUBANO<br />
BATUCADA<br />
SOFTBOSSA<br />
RUMBAMIX<br />
LATIN 3-4<br />
BALADA<br />
CUMBIA<br />
REGGAE<br />
Bossanova1<br />
Bossanova2<br />
Latin Cha<br />
Rio Samba<br />
Salsa 1<br />
Salsa 2<br />
Mambo<br />
Merengue 1<br />
Merengue 2<br />
Pasodoble1<br />
Pasodoble2<br />
Oldbachata<br />
Guajra<br />
R.Flamenca<br />
Sevillana<br />
Ranchera<br />
Bolero<br />
Lat.Cumbia<br />
Reggae 1<br />
Reggae 2<br />
ROCK&ROLL<br />
BOOGIE<br />
SURF<br />
60's POP<br />
SLOWROCK<br />
TWIST<br />
SCAND BUGG<br />
TERZINATO<br />
Poptwist<br />
Rock&Roll1<br />
Rock&Roll2<br />
Tex Mex<br />
Boogie<br />
Bugg<br />
Shuffle<br />
Slowrock 1<br />
Slowrock 2<br />
Slowrock 3<br />
Slowrock 4<br />
Pop 60<br />
WALTZ<br />
DANCE<br />
POLKA<br />
MAZURKA<br />
TANGO<br />
FR.MUSETTE<br />
TARANTELLA<br />
BEGUINE<br />
ENGL.WALTZ<br />
MILONGA<br />
PDOBLE3-4<br />
HABANERA<br />
PERUANO<br />
OBERPOLKA<br />
OBERWALTZ<br />
SLOWALTZ<br />
QUADRIGLIA<br />
Beguine 1<br />
Beguine 2<br />
Bavarian<br />
Softwalz<br />
Foxballad1<br />
Foxballad2<br />
Foxtrot 1<br />
Foxtrot 2<br />
Waltz 1<br />
Waltz 2<br />
Waltz 3<br />
Polka 1<br />
Polka 2<br />
Polka 3<br />
Tango 1<br />
Tango 2<br />
Tango 3<br />
Mazurka 1<br />
Mazurka 2<br />
R.Napolet1<br />
R.Napolet2<br />
Wiener<br />
Saltarello<br />
Jigs<br />
Reels<br />
DANCE80<br />
DISCONIGHT<br />
HOUSE<br />
REMIX<br />
TEKNO<br />
LAT.DANCE<br />
DISCO DOWN<br />
TOYDANCE<br />
DJ SAMBA<br />
GITANOS<br />
DANCE HIT<br />
DISCOFEVER<br />
RUMBADANCE<br />
Lat.Dance1<br />
Lat.Dance2<br />
Techno 1<br />
Techno 2<br />
Techno 3<br />
House 1<br />
House 2<br />
House 3<br />
Rap 1<br />
Rap 2<br />
Jungle<br />
ORCH.ETHNIC<br />
Moviesong<br />
Newage<br />
Celtic 1<br />
Celtic 2<br />
March 1<br />
March 2<br />
Cancan<br />
Westride<br />
Romantic<br />
Baroque<br />
Quick manual <strong>SD1</strong> Plus 37
38 <strong>SD1</strong> Plus Quick manual
Notes<br />
Quick manual <strong>SD1</strong> Plus 39
FLAMINI srl - Aspio di Osimo - AN
<strong>KETRON</strong> s.r.l.60020 Ancona ITALYVia Giuseppe Taliercio, 7Ph. +39 (0)71 285771Fax +39 (0)71 2857748www.ketron.it