BlackandDecker Balai Laveur Vapeur- Fsmh1621 - Type 1 - Instruction Manual (Anglaise - Arabe)
BlackandDecker Balai Laveur Vapeur- Fsmh1621 - Type 1 - Instruction Manual (Anglaise - Arabe)
BlackandDecker Balai Laveur Vapeur- Fsmh1621 - Type 1 - Instruction Manual (Anglaise - Arabe)
Create successful ePaper yourself
Turn your PDF publications into a flip-book with our unique Google optimized e-Paper software.
(Original instructions)<br />
ENGLISH<br />
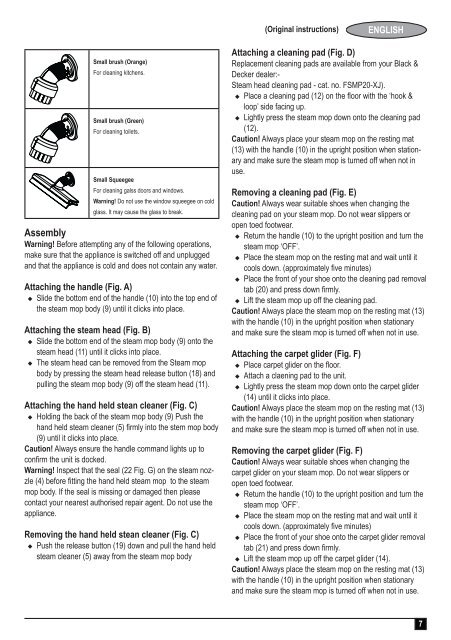
Small brush (Orange)<br />
For cleaning kitchens.<br />
Small brush (Green)<br />
For cleaning toilets.<br />
Small Squeegee<br />
For cleaning galss doors and windows.<br />
Warning! Do not use the window squeegee on cold<br />
glass. It may cause the glass to break.<br />
Assembly<br />
Warning! Before attempting any of the following operations,<br />
make sure that the appliance is switched off and unplugged<br />
and that the appliance is cold and does not contain any water.<br />
Attaching the handle (Fig. A)<br />
u Slide the bottom end of the handle (10) into the top end of<br />
the steam mop body (9) until it clicks into place.<br />
Attaching the steam head (Fig. B)<br />
u Slide the bottom end of the steam mop body (9) onto the<br />
steam head (11) until it clicks into place.<br />
u The steam head can be removed from the Steam mop<br />
body by pressing the steam head release button (18) and<br />
pulling the steam mop body (9) off the steam head (11).<br />
Attaching the hand held stean cleaner (Fig. C)<br />
u Holding the back of the steam mop body (9) Push the<br />
hand held steam cleaner (5) firmly into the stem mop body<br />
(9) until it clicks into place.<br />
Caution! Always ensure the handle command lights up to<br />
confirm the unit is docked.<br />
Warning! Inspect that the seal (22 Fig. G) on the steam nozzle<br />
(4) before fitting the hand held steam mop to the steam<br />
mop body. If the seal is missing or damaged then please<br />
contact your nearest authorised repair agent. Do not use the<br />
appliance.<br />
Removing the hand held stean cleaner (Fig. C)<br />
u Push the release button (19) down and pull the hand held<br />
steam cleaner (5) away from the steam mop body<br />
Attaching a cleaning pad (Fig. D)<br />
Replacement cleaning pads are available from your Black &<br />
Decker dealer:-<br />
Steam head cleaning pad - cat. no. FSMP20-XJ).<br />
u Place a cleaning pad (12) on the floor with the ‘hook &<br />
loop’ side facing up.<br />
u Lightly press the steam mop down onto the cleaning pad<br />
(12).<br />
Caution! Always place your steam mop on the resting mat<br />
(13) with the handle (10) in the upright position when stationary<br />
and make sure the steam mop is turned off when not in<br />
use.<br />
Removing a cleaning pad (Fig. E)<br />
Caution! Always wear suitable shoes when changing the<br />
cleaning pad on your steam mop. Do not wear slippers or<br />
open toed footwear.<br />
u Return the handle (10) to the upright position and turn the<br />
steam mop ‘OFF’.<br />
u Place the steam mop on the resting mat and wait until it<br />
cools down. (approximately five minutes)<br />
u Place the front of your shoe onto the cleaning pad removal<br />
tab (20) and press down firmly.<br />
u Lift the steam mop up off the cleaning pad.<br />
Caution! Always place the steam mop on the resting mat (13)<br />
with the handle (10) in the upright position when stationary<br />
and make sure the steam mop is turned off when not in use.<br />
Attaching the carpet glider (Fig. F)<br />
u Place carpet glider on the floor.<br />
u Attach a claening pad to the unit.<br />
u Lightly press the steam mop down onto the carpet glider<br />
(14) until it clicks into place.<br />
Caution! Always place the steam mop on the resting mat (13)<br />
with the handle (10) in the upright position when stationary<br />
and make sure the steam mop is turned off when not in use.<br />
Removing the carpet glider (Fig. F)<br />
Caution! Always wear suitable shoes when changing the<br />
carpet glider on your steam mop. Do not wear slippers or<br />
open toed footwear.<br />
u Return the handle (10) to the upright position and turn the<br />
steam mop ‘OFF’.<br />
u Place the steam mop on the resting mat and wait until it<br />
cools down. (approximately five minutes)<br />
u Place the front of your shoe onto the carpet glider removal<br />
tab (21) and press down firmly.<br />
u Lift the steam mop up off the carpet glider (14).<br />
Caution! Always place the steam mop on the resting mat (13)<br />
with the handle (10) in the upright position when stationary<br />
and make sure the steam mop is turned off when not in use.<br />
7


