

Pioneer VSX-D1011-S - User manual - anglais
Pioneer VSX-D1011-S - User manual - anglais
Pioneer VSX-D1011-S - User manual - anglais

Create successful ePaper yourself
Turn your PDF publications into a flip-book with our unique Google optimized e-Paper software.
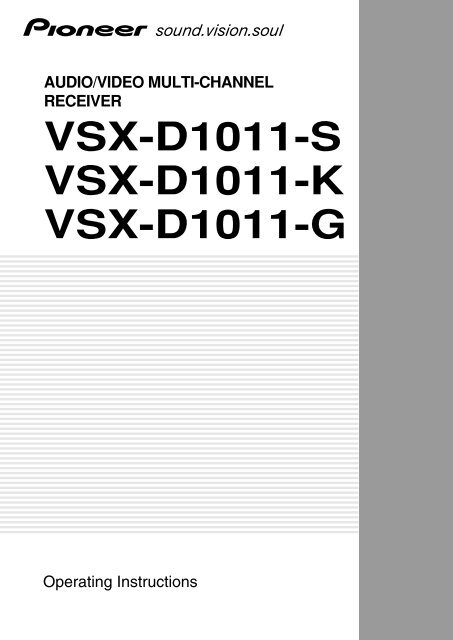
AUDIO/VIDEO MULTI-CHANNEL<br />
RECEIVER<br />
<strong>VSX</strong>-<strong>D1011</strong>-S<br />
<strong>VSX</strong>-<strong>D1011</strong>-K<br />
<strong>VSX</strong>-<strong>D1011</strong>-G<br />
Operating Instructions
NOTE: THE NO USER-SERVICEABLE PARTS COMPARTMENT WARNING IS LOCATED ON THE APPLIANCE BONNET<br />
Thank you for buying this <strong>Pioneer</strong> product.<br />
Please read through these operating instructions<br />
so you will know how to operate your model<br />
properly. After you have finished reading the<br />
instructions, put them away in a safe place for<br />
future reference.<br />
Installing the Receiver<br />
VENTILATION: When installing this unit,<br />
make sure to leave space around the unit for<br />
ventilation to improve heat radiation (at least 60<br />
cm at top, 10 cm at rear, and 30 cm at each side).<br />
WARNING: Slot and openings in the cabinet<br />
are provided for ventilation and to ensure reliable<br />
operation of the product and to protect it from<br />
overheating, to prevent fire hazard, the openings<br />
should never be blocked and covered with items,<br />
such as newspapers, tablecloths, curtains, etc.<br />
Also do not put the apparatus on the thick carpet,<br />
bed, sofa, or fabric having a thick pile. H040 En<br />
2<br />
En
TWO VOLTAGE SELECTOR<br />
SWITCHES (multi-voltage<br />
model only)<br />
Only multi-voltage model is provided with these<br />
switches. Mains voltages in Saudi Arabia are 127<br />
V and 220 V only. Never use this model with the<br />
110 V setting in Saudi Arabia.<br />
Only multi-voltage model is provided with<br />
this(these) switch(switches).<br />
European models are not pro-vided with these<br />
switches.<br />
Operating Environment<br />
Operating environment temperature and<br />
humidity:<br />
+5°C – +35°C (+41°F – +95°F); less than 85%RH<br />
(cooling vents not blocked)<br />
Do not install in the following locations<br />
• Location exposed to direct sunlight or strong<br />
artificial light<br />
• Location exposed to high humidity, or poorly<br />
ventilated location<br />
H045 En<br />
[For European model]<br />
The line voltage selector switches are on the rear<br />
panel. Check that they are set properly before<br />
plugging the power cord into the household wall<br />
socket. If the voltage is not properly set or if you<br />
move to an area where the voltage requirements<br />
differ, adjust the selector switches as follows.<br />
1. Use a medium-size screwdriver.<br />
2. First, insert the screwdriver in the groove of the<br />
larger voltage selector, and adjust so that the tip<br />
of the groove points to the voltage value of your<br />
area.<br />
3. Next, insert the screwdriver in the groove of the<br />
amaller voltage selector and adjust until the<br />
voltage is the same as at the larger one.<br />
TWO VOLTAGE SELECTORS<br />
220V<br />
110V<br />
120−127V<br />
230<br />
240V<br />
110V<br />
120-127V<br />
220V<br />
230-240V<br />
CAUTION 220 V<br />
Power source voltage is factory adjusted 220 volts. If<br />
your area is different, change voltage selectors settings.<br />
3<br />
En
Table of Contents<br />
Features ................................................. 6<br />
Before You Start .................................... 7<br />
Checking the Supplied Accessories ........................... 7<br />
Preparing the Remote Control .................................... 7<br />
Loading the batteries ............................................. 7<br />
Operating range of remote control unit ............... 8<br />
Installing the Receiver ................................................. 8<br />
Opening the Front Panel ............................................. 8<br />
Easy Setup Guide Part 1 ....................... 9<br />
Home Theater: The Basics .......................................... 9<br />
1) Your Home System ............................................ 9<br />
2) The Source Material ........................................... 9<br />
3) The Listening Modes .......................................... 9<br />
Conclusion .............................................................. 9<br />
1 Hooking Up Your DVD Player & TV ..................... 10<br />
Digital Connections .............................................. 10<br />
2 Speaker Connections ........................................... 11<br />
3 Setting up the Main Unit ...................................... 12<br />
4 Assigning the Digital Inputs ................................ 12<br />
Easy Setup Guide Part 2 ..................... 13<br />
1 QUICK Setup ......................................................... 13<br />
2 Playing a DVD with Surround Sound ................. 14<br />
Connecting Your Equipment .............. 15<br />
Connecting your TV ................................................... 15<br />
Connecting Video Components ................................ 16<br />
Connecting a DVD player ..................................... 16<br />
Connecting VCRs or DVRs ................................... 17<br />
Connecting a Video Component<br />
to the Front Panel ................................................. 17<br />
Connecting Satellite TV (SAT) Components ...... 18<br />
Connecting Analog Audio Components .................. 19<br />
Connecting to the Multi Channel Analog Inputs<br />
(DVD-Audio or Super Audio CD (SACD) compatible<br />
player) ............................................................................. 20<br />
Connecting Digital Audio Components ................... 21<br />
Digital Input Default Settings .............................. 22<br />
Connecting the Radio Antennas ............................... 23<br />
Using outdoor antennas ...................................... 23<br />
Connecting Speakers................................................. 24<br />
Speaker impedance .............................................. 25<br />
Placing Your Speakers ............................................... 26<br />
Speaker placement ............................................... 26<br />
AC Power Cord ........................................................... 26<br />
AC Outlet [switched 100W max]<br />
(European model only).............................................. 26<br />
Displays & Controls ............................ 27<br />
Display ........................................................................ 27<br />
Front Panel ................................................................. 28<br />
Remote Control .......................................................... 30<br />
Back Panel .................................................................. 32<br />
Setting Up for Surround Sound ........ 34<br />
SURRBACK SYSTEM (Surround Back System) ...... 35<br />
NORMAL setup .......................................................... 36<br />
SPEAKER SETTING .............................................. 37<br />
CHANNEL LEVEL (channel balance) ................... 39<br />
CHANNEL DELAY ................................................. 40<br />
Basic Operation ................................... 41<br />
Stereo and Multichannel Playback ........................... 41<br />
Switching ANALOG/DIGITAL Signal Input ......... 42<br />
Listening Modes ........................................................ 43<br />
STEREO modes ..................................................... 43<br />
MOVIE modes (SURROUND mode) .................... 44<br />
MUSIC modes (SURROUND mode) .................... 45<br />
Adjusting the Effect of a Listening Mode ........... 46<br />
Adding/Adjusting the Effect in<br />
Dolby Pro Logic II Music Mode ........................... 46<br />
Listening with ACOUSTIC CALIBRATION EQ .......... 47<br />
Reducing Noise During Playback<br />
(DIGITAL NR Function) .............................................. 47<br />
Listening in MIDNIGHT Mode ................................... 48<br />
Listening in LOUDNESS Mode ................................. 48<br />
Adjusting Bass and Treble (TONE CONTROL) ........ 49<br />
Listening in HI–BIT/SAMPLING Mode ...................... 50<br />
DVD-Audio/MULTI CHANNEL IN Playback .............. 50<br />
SB CH MODE button .................................................. 51<br />
SB CH MODE ......................................................... 51<br />
VIRTUAL SURROUND BACK Mode ..................... 51<br />
DUAL MONO setting and Playback .......................... 52<br />
Using Headphones .................................................... 52<br />
Video Select ............................................................... 53<br />
Adjusting the Brightness of the Display<br />
(DIMMER) ................................................................... 53<br />
Using the Tuner ................................... 54<br />
Automatic and Manual Tuning ................................. 54<br />
MPX Mode ............................................................ 54<br />
RF ATT Mode (European model only) ................ 54<br />
Channel Step Setting (multi-voltage model only) ... 55<br />
To Change Channel Steps<br />
(multi-voltage model only) .................................. 55<br />
Direct Access Tuning ................................................. 55<br />
Memorizing Frequently Used Stations .................... 56<br />
Naming Memorized Stations .................................... 57<br />
Recalling Memorized Stations .................................. 58<br />
4<br />
En
Table of Contents<br />
An introduction to RDS (European model only) ..... 59<br />
Using the RDS display ......................................... 59<br />
Searching for RDS programs<br />
(European model only) .............................................. 60<br />
Basics of EON (Enhanced Other Network<br />
information) (European model only) ....................... 61<br />
Using EON (European model only) .......................... 61<br />
Clearing all stations from<br />
the RDS or EON search (European model only) ..... 62<br />
Remote Control of Other<br />
Components ........................................ 63<br />
Setting Up the Remote Control to Control Other<br />
Components ............................................................... 63<br />
Recalling Settings Stored in the<br />
Remote Control ..................................................... 63<br />
Programming Signals from Other Remote<br />
Controls (LEARNING Mode) ................................ 64<br />
Using Remote Control with Other Components ..... 65<br />
CD/MD/CD-R/VCR/DVD/LD/DVD Recorder/<br />
Cassette Deck operations ..................................... 65<br />
Cable TV/ Satellite TV/<br />
Digital TV/ TV operations ..................................... 66<br />
Setting up the DIRECT FUNCTION ........................... 67<br />
Using Other Functions........................ 68<br />
Recording from Audio/Video Components ............. 68<br />
SECOND ZONE (Speaker System B)/FRONT BI-AMP<br />
Setup ........................................................................... 69<br />
Stereo playback in another room (SECOND<br />
ZONE) .................................................................... 69<br />
Bi-amping the front speakers<br />
(FRONT BI-AMP) ................................................... 69<br />
A/B Speaker Button .............................................. 70<br />
Connecting Additional Amplifiers ............................ 71<br />
Multi Operations ........................................................ 72<br />
Performing Multi Operations ............................... 73<br />
SYSTEM OFF .............................................................. 74<br />
Using SYSTEM OFF .............................................. 75<br />
The PIONEER SR System: Operating other PIONEER<br />
components ............................................................... 75<br />
Resetting the Remote Control .................................. 76<br />
Erasing Multi Operations ..................................... 76<br />
Erasing Learned Remote Control Commands ... 76<br />
Erasing All Remote Control settings ................... 76<br />
Resetting the Main Unit ............................................ 77<br />
Fine Tuning Your System ................... 78<br />
Other System Settings .............................................. 78<br />
THX CINEMA Setup ................................................... 79<br />
Assigning the Digital Inputs ...................................... 80<br />
FUNCTION RENAME ................................................. 81<br />
Expert Setup ............................................................... 82<br />
CROSSOVER NETWORK ...................................... 83<br />
FINE CHANNEL LEVEL ......................................... 84<br />
FINE CHANNEL DELAY ........................................ 85<br />
ACOUSTIC CAL EQ ............................................... 87<br />
BASS PEAK LEVEL ............................................... 89<br />
DYNAMIC RANGE CONTROL .............................. 90<br />
Techno Tidbits & Problem-solving..... 91<br />
Dolby ........................................................................... 91<br />
Dolby Digital ......................................................... 91<br />
Dolby Pro Logic II ................................................. 91<br />
Dolby Digital Surround EX .................................. 92<br />
DTS ............................................................................. 92<br />
DTS ........................................................................ 92<br />
DTS-ES .................................................................. 92<br />
DTS Neo:6 ............................................................. 92<br />
DTS 96/24 .............................................................. 92<br />
THX ............................................................................. 93<br />
Speaker Placement Information ............................... 94<br />
Preset Code List ......................................................... 96<br />
Troubleshooting ......................................................... 98<br />
Schemata of Setup .................................................. 103<br />
Specifications (European model) ........................... 104<br />
Specifications (multi-voltage model) ...................... 105<br />
EASY SETUP PREPARATION GUIDE PREPARATION SURROUND SETUP BASIC<br />
EXPERT<br />
5<br />
En
Features<br />
High Quality, Balanced Multichannel Design<br />
The <strong>VSX</strong>-<strong>D1011</strong> receiver is constructed with <strong>Pioneer</strong>’s industry-leading advanced and well balanced<br />
multichannel Featuresconcept. This means it is designed to reproduce music and movie soundtracks as close as<br />
possible to the intentions of the producer during mastering. The receiver uses a revolutionary 3-D Frame<br />
Construction technique and a Symmetrical Power Train Design, with high-performance Advanced Direct Energy<br />
MOS-FET output devices, generating 100 watts of power for 7 independent channels.<br />
Multichannel Acoustic Calibration EQ System (MCACC)<br />
In order to make setting up as easy as possible for users we have created the MCACC system. This unique and<br />
convenient way of getting good surround sound from the receiver makes trouble-free set up a snap. The<br />
MCACC system creates a monitoring environment to establish the parameters of the sound in regards to each<br />
speaker for the specific room you are using. The Acoustic Calibration EQ feature makes sure each speaker is<br />
used to maximum effect in conjunction with the overall sound. The resulting settings finely attune the overall<br />
surround sound for the space used.<br />
Dolby Digital EX, DTS-ES, DTS 96/24 and the Latest Audio and Video<br />
Formats<br />
The <strong>VSX</strong>-<strong>D1011</strong> is equipped with Dolby Digital EX decoding, the very latest Dolby Digital contribution to home<br />
theater with surround back speakers in addition to surround speakers. These additional speakers make home<br />
theater even more realistic and powerful. Naturally, you can also play all existing audio formats, including the<br />
recently developed Dolby Pro Logic II and DTS-ES Extended Surround formats on the <strong>VSX</strong>-<strong>D1011</strong> as well. On<br />
the video side, the component video output is fully compatible with high definition, progressive-scan digital<br />
video (720p).<br />
Lucasfilm and THX are trademarks or registered<br />
trademarks of Lucasfilm, Ltd. & TM. Surround EX<br />
is a jointly developed technology of THX and Dolby<br />
Laboratories, and is a trademark of Dolby<br />
Laboratories. All rights reserved. Used under<br />
authorization.<br />
Universal Player Compatibility (DVD Audio/Super Audio CD [SACD])<br />
This receiver incorporates the latest technology and is able to handle cutting edge audio formats, like DVD Audio<br />
and Super Audio CD (SACD) which are just hitting the market. Its high compatibility offers a variety of inputs to<br />
decode all types of sources at the highest possible quality. The receiver’s multichannel input connections lets you<br />
hook up eight discrete channels of audio.<br />
Audio Scaler (HI BIT/HI SAMPLING)<br />
This new technology enables the user to hear CD and DVD, as well as other soundtracks at a wider dynamic<br />
range, allowing for finer audio reproduction. This Audio Scaler approximates the audio of high end formats just<br />
becoming available now.<br />
Easy-to-use Remote Control<br />
This new remote control is extremely convenient to use. One button is dedicated to one task in the control of the<br />
receiver, eliminating confusing buttons whose purpose are unclear. In addition, this remote can be used to<br />
operate a variety of other components simply by recalling the appropriate setup codes.<br />
The Energy-saving Design<br />
Manufactured under license from Dolby Laboratories.<br />
“Dolby”, “Pro Logic”, “Surround EX” and double-D<br />
symbol are trademarks of Dolby Laboratories.<br />
"DTS", "DTS-ES Extended Surround" and "Neo:6" are<br />
trademarks of Digital Theater Systems, Inc.<br />
The European model is designed to use 0.7 W of energy when the receiver is in standby mode, while the multivoltage<br />
model is designed to use 0.9 W.<br />
6<br />
En
ST<br />
ST<br />
Before You Start<br />
Checking the Supplied Accessories<br />
Please check that you have received all of the following supplied accessories.<br />
AM Loop Antenna<br />
RECEIVER<br />
RECEIVER MULTI SYSTEM SOURCE<br />
OPERATION O F<br />
MULTI CONTROL<br />
DVD/LD TV/SAT VCR1/DVR TV CONT<br />
VCR 2 CD TUNER RECEIVER<br />
ACOUSTIC<br />
MOVIE MUSIC EQ INPUT<br />
SURROUND<br />
SB CH MULTI CH<br />
MODE<br />
MODE INPUT<br />
STEREO/<br />
DIRECT ENTER MIDNIGHT<br />
MUTE<br />
MASTER<br />
VOLUME<br />
MENU TUNER EDIT TEXT ON TOP MENU<br />
TUNE<br />
SYSTEM<br />
GUIDE<br />
SETUP<br />
ENTER<br />
AUDIO RETURN<br />
TUNE<br />
CHANNEL− TEXT OFF BAND CHANNEL+<br />
RF A T D.ACCE S MPX<br />
CLA S<br />
DIMMER LOUDNESS TONE EFFECT/CH SEL<br />
ENTER<br />
SIGNAL SEL DNR BA S/TREBLE DISC<br />
VIDEO SEL HI-BIT<br />
+ − +10<br />
TV CONTROL<br />
SUB TITLE<br />
CHANNEL VOLUME REMOTE<br />
SETUP<br />
INPUT<br />
SELECT<br />
Remote Control Unit<br />
FM Wire Antenna<br />
AUDIO/VIDEO MULTI-CHANNEL<br />
RECEIVER<br />
<strong>VSX</strong>-<strong>D1011</strong>-S<br />
<strong>VSX</strong>-<strong>D1011</strong>-K<br />
<strong>VSX</strong>-<strong>D1011</strong>-G<br />
Operating Instructions<br />
Operating<br />
Instructions<br />
“AA” IEC LR6<br />
batteries x 2<br />
AC Power Cord x 2<br />
(multi-voltage model only)<br />
PREPARATION PREPARATION<br />
memo<br />
Multi-voltage model has two power cords. These accessories will be different depending on the<br />
country of purchase. Please use the correct cord for your country.<br />
Preparing the Remote Control<br />
Loading the batteries<br />
Load the batteries into the remote control as shown below. Please use alkaline batteries. When you notice a<br />
decrease in the operating range, replace all batteries with new ones.<br />
“AA” IEC LR6<br />
1 2 3<br />
batteries x 2<br />
CAUTION!<br />
Incorrect use of batteries may result in such hazards as leakage and bursting. Observe the following precautions.<br />
• Never use new and old batteries together.<br />
• Insert the plus and minus sides of the batteries properly according to the marks in the battery case.<br />
• Batteries with the same shape may have different voltages. Do not use different batteries together.<br />
• When disposing of used batteries, please comply with governmental regulations or environmental public institution’s<br />
rules that apply in your country or area.<br />
7<br />
En
Before You Start<br />
Operating range of remote control unit<br />
The area in which you can use the remote control to operate the <strong>VSX</strong>-<strong>D1011</strong> is fairly large. To use, point the<br />
remote control toward the remote sensor on the front panel of this unit while within the range shown below.<br />
Remote control may not function properly if:<br />
• There are obstacles between the remote control and the<br />
remote sensor.<br />
• Direct sunlight or fluorescent light is shining onto the<br />
remote sensor.<br />
• The receiver located near a device emitting infrared rays.<br />
• Operated simultaneously with another remote control<br />
which uses infrared rays.<br />
30<br />
30<br />
7m<br />
Installing the Receiver<br />
CAUTION!<br />
• Do not cover this unit in any way, for example<br />
with a sheet or piece of cloth. This would<br />
prevent proper heat dispersal.<br />
• Do not any place object directly on top of this<br />
unit. This also would prevent proper heat<br />
dispersal.<br />
Opening the Front Panel<br />
To open the front panel push gently on the lower third of the<br />
panel with your finger.<br />
8<br />
En
EASY SETUP GUIDE<br />
PREPARATION<br />
Easy Setup Guide Part1<br />
Home Theater: The Basics<br />
Most consumers are used to using stereo equipment to listen to music but many people are not used to home theater<br />
systems that give you many more options when listening to soundtracks. In fact, home theater is not really<br />
complicated and this little guide should give you an understanding of the basics. Home theater refers to the use of<br />
multiple audio tracks combined with multiple speakers to create a surround sound effect.<br />
There are three different factors involved in getting surround sound. Each contribute to what kind of sound you get.<br />
These factors are:<br />
1) The equipment you are using for your home theater setup. Particularly important is the number of speakers you are<br />
using. We call this your speaker configuration.<br />
2) The source material you are using. This is the actual product (like a DVD) or broadcast (like cable TV) you are listening<br />
to/watching. We call this the source.<br />
3) The last factor is the listening mode you choose on the <strong>VSX</strong>-<strong>D1011</strong> receiver. These are explained below and in<br />
subsequent chapters but most likely the PRO LOGIC II MOVIE for moves and the PRO LOGIC II MUSIC for music will<br />
be fine.<br />
Let's start with the home theater setup you have in your home.<br />
1) Your Home System<br />
The heart of your system is the <strong>VSX</strong>-<strong>D1011</strong> receiver and it is very flexible in getting you theater-like surround sound.<br />
You can use this receiver with anywhere from two to seven speakers (front left, front right, center, surround left and<br />
right, and surround back left and right) and a subwoofer to get home theater surround sound. We recommend you use<br />
seven speakers and a subwoofer. If this is not possible follow the instructions in "QUICK Setup" in the "Easy Setup<br />
Guide Part 2" and you will still be able to get good surround sound. Also, a DVD player is essential for home theater and<br />
you can also hook up satellite or cable TV tuner to this receiver and get a more home theater-like sound from these<br />
sources.<br />
2) The Source Material<br />
DVDs have become the basic source material for home theater because they are convenient to use and offer excellent<br />
sound and picture quality as well as allow users to enjoy home theater soundtracks with more than two channels of<br />
audio. For example, Dolby Pro Logic plays back four channels (front left, front right, center and a single channel for both<br />
surround speakers), Dolby Digital and DTS sources usually have six discrete channels (front left, front right, center,<br />
surround left and right and a channel that powers the subwoofer) of sound. Since the subwoofer channel is only for<br />
bass sounds it is expressed as .1 of a channel and this multichannel setup has been named 5.1 channel sound.<br />
It is important you consult the <strong>manual</strong> that came with your DVD player as well to make sure the player is outputting a<br />
surround soundtrack and all the other settings are appropriate for your home theater.<br />
3) The Listening Modes<br />
This receiver has many different listening modes and they are designed to cover all the speaker configurations and<br />
types of sources you might be using. In general, the PRO LOGIC II MOVIE listening mode is the easiest way to get<br />
realistic surround sound for movies. For music the basic listening mode for music is PRO LOGIC II MUSIC.<br />
To listen to music in stereo simply choose the STEREO listening mode. Other possibilities (like listening to a stereo CD<br />
with all seven speakers or taking a stereo source and getting multichannel home theater-like sound) are explained in<br />
listening modes (pages 43–45).<br />
Conclusion<br />
These are the three basic factors that contribute to your home theater sound. The easiest thing is to hook up seven<br />
speakers and a subwoofer and simply play your DVDs with PRO LOGIC II MOVIE listening mode. This will give you<br />
realistic and enjoyable home theater sound. First hook up your equipment, like your DVD player, TV and speakers. Then<br />
follow the Easy Setup Guide instructions to set up your system for surround sound. It is very important you do one of<br />
the surround sound setups to get optimal sound from your receiver.<br />
For more details on any of the information presented here check the main section of the <strong>manual</strong>.<br />
9<br />
En
IN<br />
OUT<br />
REC<br />
REC<br />
(Single)<br />
Easy Setup Guide Part1<br />
Before making or changing the connections, switch off the power and disconnect the power cord from<br />
the AC outlet.<br />
1 Hooking Up Your DVD Player & TV<br />
In order to use Dolby Digital/DTS soundtracks, which are at the heart of home theater, you need to hook up your<br />
DVD player with digital audio connections. You can do this by either a coaxial or an optical connection, you don’t<br />
need to do both. The quality of these two types of connections is the same but since some DVD players only<br />
have one type of digital terminal you need to figure out which yours has and hook it up to the appropriate<br />
terminal on the receiver. In order to do this you will need the proper cable. For coaxial connections you can use a<br />
regular RCA video cord or the specially-made coaxial cords, they have the same type of plugs. For optical<br />
connections you will need a special optical cable which you can buy at your local stereo store. For more<br />
information on cords and cables see page 21. You should also hook up your DVD player with analog audio<br />
connections. Use regular RCA stereo cords for these connections. Also hook up the video connection on your<br />
DVD player, and your TV to this receiver. For your TV it's easiest to use a regular composite (RCA) video cord, as<br />
shown below. S Video and Component video cords are of higher quality than RCA video cords and may also be<br />
used with this unit.<br />
Digital Connections<br />
Some DVD players have both coaxial and optical terminals, but there is no need to connect both. If your DVD<br />
player has a coaxial terminal (not a PCM-only output) for the audio out hook it up using this terminal. Follow the<br />
diagram below. This is the best scenario, as you will be able to follow the default settings of this receiver and<br />
won't need to assign the digital inputs (you should use DIGITAL IN 3).<br />
If your DVD player only has an optical terminal for the audio output you can hook it up using one of the DIGITAL<br />
IN terminals between 1-2 (for example, DIGITAL IN 2). In this case, you will need to assign the digital input<br />
(which means tell the receiver which input you used for your DVD digital audio). See page 12 for this.<br />
RCA video cord<br />
IN 1<br />
(TV/<br />
SAT)<br />
IN 2<br />
(CD-R/<br />
TAPE1)<br />
DIGITAL<br />
IN 3<br />
(DVD/<br />
LD)<br />
IN 4<br />
(CD)<br />
ASSIGNABLE<br />
MONITOR OUT<br />
PCM/<br />
2DIGITAL /<br />
DTS/MPEG<br />
OUT1<br />
OUT2<br />
IN 1<br />
(TV/<br />
SAT)<br />
IN 2<br />
(CD-R/<br />
TAPE1)<br />
ASSIGNABLE<br />
DIGITAL<br />
PLAY<br />
IN<br />
CD-R/<br />
TAPE1<br />
OUT<br />
IN 3 PLAY<br />
(DVD/ IN<br />
LD)<br />
MD/<br />
TAPE2<br />
IN 4<br />
(CD)<br />
OUT<br />
CD<br />
IN<br />
LINE<br />
IN<br />
ANTENNA<br />
R<br />
FM UNBAL<br />
L<br />
75Ω<br />
CONTROL<br />
AM LOOP<br />
MONITOR OUT 1<br />
R L R L<br />
VCR1/<br />
DVR<br />
VCR2<br />
TV/<br />
SAT<br />
IN<br />
DVD/<br />
LD<br />
IN<br />
AUDIO AUDIO VIDEO<br />
IN<br />
OUT<br />
IN<br />
OUT<br />
VIDEO<br />
S VIDEO<br />
CENTER<br />
FRONT<br />
R<br />
SUR-<br />
ROUND<br />
R<br />
SUR-<br />
ROUND<br />
BACK<br />
R<br />
FRONT<br />
R<br />
SUR-<br />
ROUND<br />
R<br />
SUR-<br />
ROUND<br />
BACK<br />
R<br />
PRE OUT<br />
SUB<br />
WOOFER<br />
MULTI CH IN<br />
L<br />
L<br />
L<br />
L<br />
L<br />
SUB<br />
WOOF-<br />
ER<br />
CEN-<br />
TER<br />
L<br />
R<br />
R<br />
RCA stereo cord<br />
L<br />
L<br />
DVD/<br />
LD<br />
IN<br />
VIDEO S VIDEO<br />
AC OUTLET<br />
AC OUTLET<br />
RCA video cord<br />
SPEAKERS<br />
SURROUND BACK / ı<br />
Å SURROUND<br />
RFRONT<br />
FRONT CENTER R SURROUND<br />
L L CENTER SURROUND<br />
R R L<br />
L L R<br />
BACK<br />
ª<br />
·<br />
coaxial cord<br />
optical cord<br />
ª<br />
·<br />
ª<br />
·<br />
L<br />
R<br />
ANALOG<br />
AUDIO<br />
VIDEO<br />
VIDEO<br />
OUT<br />
DIGITAL<br />
OUTPUT<br />
VIDEO INPUT<br />
L<br />
R<br />
DVD player<br />
(not a PCM-only<br />
output)<br />
You only need to make<br />
one DIGITAL connection.<br />
10<br />
En
EASY SETUP GUIDE<br />
2 Speaker Connections<br />
Easy Setup Guide Part1<br />
Home theater is designed to be setup with five, or seven speakers (front left & right; center; surround left &<br />
right; and, optimally, surround back left & right) and a subwoofer, but you can use this receiver with fewer<br />
speakers. Hook up the speakers you have to the A speaker terminals on the back of the receiver. If you only<br />
have two speakers hook them up as FRONT. If you have three hook up the single speaker as CENTER. Follow<br />
the diagram below in order to hook up all your speakers. A center speaker is very important for watching films<br />
because in digital soundtracks the dialog comes from the center speaker. If you do not have a center speaker<br />
you must tell the receiver the center channel is off or when you listen to digital soundtracks you won't hear any<br />
dialog. This can be easily accomplished by following the steps in the Surround Sound QUICK setup instructions<br />
from page 13 in this Easy Setup Guide.<br />
If possible, use surround back speakers. These speakers are important to take full advantage of all the sound<br />
channels on new, eight channel home theater DVDs. The diagram below also explains how to hook up a<br />
subwoofer which provides realistic bass sounds. For the subwoofer use a mono (single plug) RCA cord and for<br />
the other speakers use regular speaker cords. See pages 94–95 for advice on speaker placement.<br />
Make sure you connect the speaker on the right to the R terminal and the speaker on the left to the L terminal.<br />
Also make sure the positive and negative (+/–) terminals on the receiver match those on the speakers.<br />
Front<br />
speaker<br />
(Left)<br />
Powered<br />
subwoofer<br />
TV/monitor<br />
Front<br />
speaker<br />
(Right)<br />
Center<br />
speaker<br />
INPUT<br />
Surround<br />
speaker<br />
(Left)<br />
PCM/<br />
2DIGITAL /<br />
DTS/MPEG<br />
OUT1<br />
OUT2<br />
IN 1<br />
(TV/<br />
SAT)<br />
IN 2<br />
(CD-R/<br />
TAPE1)<br />
IN 3<br />
(DVD/<br />
LD)<br />
IN 4<br />
(CD)<br />
IN<br />
OUT<br />
PLAY<br />
IN<br />
CD-R/<br />
TAPE1<br />
OUT<br />
REC<br />
PLAY<br />
IN<br />
MD/<br />
TAPE2<br />
OUT<br />
REC<br />
ANTENNA<br />
R<br />
FM UNBAL<br />
L<br />
75Ω<br />
CONTROL<br />
AM LOOP<br />
MONITOR OUT 1<br />
IN<br />
VCR1/<br />
DVR<br />
OUT<br />
IN<br />
VCR2<br />
OUT<br />
CENTER<br />
FRONT<br />
R<br />
SUR-<br />
ROUND<br />
R<br />
SUR-<br />
ROUND<br />
BACK<br />
R<br />
FRONT<br />
R<br />
SUR-<br />
ROUND<br />
R<br />
PRE OUT<br />
SUB<br />
WOOFER<br />
L<br />
L<br />
(Single)<br />
L<br />
L<br />
L<br />
AC OUTLET<br />
SWITCHED 100W MAX<br />
SPEAKERS<br />
SURROUND BACK /<br />
Å R FRONT L CENTER R SURROUND<br />
ı<br />
L R<br />
L<br />
ª<br />
ª<br />
Surround<br />
speaker<br />
(Right)<br />
ASSIGNABLE<br />
CD<br />
IN<br />
TV/<br />
SAT<br />
IN<br />
SUB<br />
WOOF-<br />
ER<br />
CEN-<br />
TER<br />
DIGITAL<br />
LINE<br />
IN<br />
R L R L<br />
DVD/<br />
LD<br />
IN<br />
VIDEO<br />
S VIDEO<br />
SUR-<br />
ROUND<br />
BACK<br />
R<br />
L<br />
·<br />
·<br />
AUDIO AUDIO VIDEO<br />
MULTI CH IN<br />
Surround back<br />
speaker (Left)<br />
Surround back<br />
speaker (Right)<br />
memo<br />
• We recommend speakers with a nominal impedance rated 8 Ω-16 Ω, but you can change the<br />
speaker impedance setting of the receiver (see page 25).<br />
• If you only have one surround back speaker hook it up to the left surround back terminal.<br />
• If you use a THX certified subwoofer use the THX INPUT jack on the subwoofer (if your subwoofer<br />
has one) or switch the filter position to THX on your subwoofer.<br />
• When you attached your speaker wire to the speaker terminal make sure that not even one strand<br />
of wire touches the back of the receiver. If this happens it could short out the receiver.<br />
7 Speaker terminals<br />
1 Twist exposed wire<br />
strands together<br />
tightly.<br />
10mm<br />
2 Loosen speaker terminal<br />
and insert exposed wire.<br />
3 Tighten<br />
terminal.<br />
11<br />
En
Easy Setup Guide Part1<br />
3 Setting up the Main Unit<br />
1 Plug the AC power cord into a wall outlet.<br />
2 Press the –OFF-ON button to put the receiver in ON mode.<br />
3 Press the STANDBY/ON button to switch the receiver ON.<br />
4 Assigning the Digital Inputs<br />
This is only necessary if you did not hook up your DVD player to DIGITAL IN 3 using a coaxial cable but<br />
rather connected it to one of the optical digital inputs. The following example shows how to assign the<br />
DIGITAL IN 2 jack to DVD. Use the arrow buttons (5∞) and the ENTER button on the remote control to<br />
navigate the display on the receiver. Conversely, you can use the MULTI JOG dial and ENTER button on<br />
the front panel.<br />
RECEIVER MULTI<br />
OPERATION<br />
DVD/LD<br />
VCR 2<br />
MOVIE<br />
SURROUND<br />
MODE<br />
MULTI CONTROL<br />
TV/SAT<br />
CD<br />
MUSIC<br />
SYSTEM<br />
OFF<br />
VCR1/DVR<br />
TUNER<br />
ACOUSTIC<br />
EQ<br />
SB CH<br />
MODE<br />
SOURCE<br />
TV CONT<br />
RECEIVER<br />
INPUT<br />
MULTI CH<br />
INPUT<br />
1<br />
4 DIGITAL-IN should be selected, if<br />
not use the 5∞ buttons to select<br />
it. Press the ENTER button.<br />
SIGNAL PRO LOGIC Neo :6<br />
AUTO DIGITAL<br />
RF DTS ES EX<br />
DIGITAL MPEG AAC<br />
ANALOG STEREO<br />
SB CH DSP<br />
AUTO ON MOVIE<br />
OFF MUSIC<br />
LOUDNESS MIDNIGHT TONE DNR ATT STEREO MONO<br />
TUNED RF ATT<br />
RDS EON<br />
Hi-BIT/<br />
SAMPLING<br />
MULTI-ROOM<br />
dB<br />
STEREO/<br />
DIRECT<br />
ENTER<br />
MIDNIGHT<br />
MUTE<br />
L C R LFE<br />
LS S RS SP A B<br />
2,7<br />
MENU<br />
SYSTEM<br />
SETUP<br />
AUDIO<br />
CHANNEL−<br />
TUNER EDIT<br />
ST<br />
MASTER<br />
VOLUME<br />
TUNE<br />
ENTER<br />
TUNE<br />
TEXT OFF<br />
TEXT ON<br />
BAND<br />
ST<br />
TOP MENU<br />
GUIDE<br />
RETURN<br />
CHANNEL+<br />
3-6<br />
5 Use the 5∞ buttons to select<br />
DIGI-2: CD-R and press ENTER.<br />
SIGNAL PRO LOGIC Neo :6<br />
AUTO DIGITAL<br />
RF DTS ES EX<br />
DIGITAL MPEG AAC<br />
ANALOG STEREO<br />
SB CH DSP<br />
AUTO ON MOVIE<br />
OFF MUSIC<br />
LOUDNESS MIDNIGHT TONE DNR ATT STEREO MONO<br />
TUNED RF ATT<br />
RDS EON<br />
Hi-BIT/<br />
SAMPLING<br />
MULTI-ROOM<br />
dB<br />
L C R LFE<br />
1 Turn on the receiver, press the<br />
RECEIVER button on the remote<br />
control.<br />
LS S RS SP<br />
A B<br />
When you press ENTER, CD-R blinks.<br />
6 Use the 5∞ buttons to select<br />
DVD/LD and press ENTER.<br />
2 Press the SYSTEM SETUP<br />
button.<br />
SIGNAL PRO LOGIC Neo :6<br />
AUTO DIGITAL<br />
RF DTS ES EX<br />
DIGITAL MPEG AAC<br />
ANALOG STEREO<br />
SB CH DSP<br />
AUTO ON MOVIE<br />
OFF MUSIC<br />
L C R LFE<br />
LS S RS SP A B<br />
LOUDNESS MIDNIGHT TONE DNR ATT STEREO MONO<br />
TUNED RF ATT<br />
RDS EON<br />
Hi-BIT/<br />
SAMPLING<br />
MULTI-ROOM<br />
dB<br />
SIGNAL PRO LOGIC Neo :6<br />
AUTO DIGITAL<br />
RF DTS ES EX<br />
DIGITAL MPEG AAC<br />
ANALOG STEREO<br />
SB CH DSP<br />
AUTO ON MOVIE<br />
OFF MUSIC<br />
L C R LFE<br />
LS S RS SP A B<br />
LOUDNESS MIDNIGHT TONE DNR ATT STEREO MONO<br />
TUNED RF ATT<br />
RDS EON<br />
Hi-BIT/<br />
SAMPLING<br />
MULTI-ROOM<br />
This display appears on the receiver.<br />
dB<br />
7 Press the SYSTEM SETUP<br />
button.<br />
The receiver exits the setup process.<br />
3 Looking at the display on your<br />
receiver, use the 5∞ buttons to<br />
select INPUT ASSIGN. Press the<br />
ENTER button.<br />
SIGNAL PRO LOGIC Neo :6<br />
AUTO DIGITAL<br />
RF DTS ES EX<br />
DIGITAL MPEG AAC<br />
ANALOG STEREO<br />
SB CH DSP<br />
AUTO ON MOVIE<br />
OFF MUSIC<br />
LOUDNESS MIDNIGHT TONE DNR ATT STEREO MONO<br />
TUNED RF ATT<br />
RDS EON<br />
Hi-BIT/<br />
SAMPLING<br />
MULTI-ROOM<br />
dB<br />
L C R LFE<br />
LS S RS SP A B<br />
12<br />
En
EASY SETUP GUIDE<br />
Easy Setup Guide Part2<br />
1 QUICK setup<br />
With this QUICK setup you can quickly and easily adjust the speakers settings so that you get enjoyable<br />
surround sound with minimum effort.<br />
You must have front and surround speakers hooked up to use this setup.<br />
You only need to do these settings once (unless you change the placement of your current speaker system or<br />
add new speakers, etc.).<br />
2,8<br />
RECEIVER MULTI<br />
OPERATION<br />
DVD/LD<br />
VCR 2<br />
MOVIE<br />
MULTI CONTROL<br />
MUSIC<br />
SURROUND<br />
MODE<br />
STEREO/<br />
DIRECT ENTER<br />
MENU<br />
SYSTEM<br />
SETUP<br />
AUDIO<br />
CHANNEL−<br />
TUNER EDIT<br />
ST<br />
TV/SAT<br />
CD<br />
TUNE<br />
TEXT OFF<br />
SYSTEM<br />
OFF<br />
TUNER<br />
ACOUSTIC<br />
EQ<br />
SB CH<br />
MODE<br />
MIDNIGHT<br />
MASTER<br />
VOLUME<br />
ENTER<br />
TUNE<br />
VCR1/DVR<br />
TEXT ON<br />
BAND<br />
ST<br />
SOURCE<br />
TV CONT<br />
RECEIVER<br />
INPUT<br />
MULTI CH<br />
INPUT<br />
MUTE<br />
TOP MENU<br />
GUIDE<br />
RETURN<br />
CHANNEL+<br />
1<br />
3-7<br />
1 Press the RECEIVER button on<br />
the remote control.<br />
2 Press the SYSTEM SETUP<br />
button.<br />
SIGNAL PRO LOGIC Neo :6<br />
AUTO DIGITAL<br />
RF DTS ES EX<br />
DIGITAL MPEG AAC<br />
ANALOG STEREO<br />
SB CH DSP<br />
AUTO ON MOVIE<br />
OFF MUSIC<br />
L C R LFE<br />
LS S RS SP A B<br />
LOUDNESS MIDNIGHT TONE DNR ATT STEREO MONO<br />
TUNED RF ATT<br />
RDS EON<br />
Hi-BIT/<br />
SAMPLING<br />
MULTI-ROOM<br />
This display appears on the receiver.<br />
3 SURROUND SETUP should be<br />
selected, if not use the 5∞<br />
buttons to select it. Press the<br />
ENTER button.<br />
4 Use the 5∞ buttons to select<br />
QUICK. Press the ENTER button.<br />
SIGNAL PRO LOGIC Neo :6<br />
AUTO DIGITAL<br />
RF DTS ES EX<br />
DIGITAL MPEG AAC<br />
ANALOG STEREO<br />
SB CH DSP<br />
AUTO ON MOVIE<br />
OFF MUSIC<br />
L C R LFE<br />
LS S RS SP A B<br />
LOUDNESS MIDNIGHT TONE DNR ATT STEREO MONO<br />
TUNED RF ATT<br />
RDS EON<br />
Hi-BIT/<br />
SAMPLING<br />
MULTI-ROOM<br />
dB<br />
dB<br />
In each mode, the current settings are displayed<br />
automatically. We suggest you adjust all<br />
these settings when you first hook up the<br />
receiver.<br />
SUBWOOFER setting:<br />
If you connected a subwoofer select YES, if you<br />
didn’t select NO.<br />
CENTER SP setting:<br />
If you connected a CENTER speaker select YES,<br />
if you didn’t select NO.<br />
SURRBACK SP setting:<br />
If you connected a SURROUND speaker(s) select<br />
YES, if you didn’t select NO.<br />
ROOM SIZE setting:<br />
Tell the receiver your room size so it can equalize<br />
the speakers properly. Use the chart below for an<br />
approximate definition of the settings.<br />
S: 2.5 m by 3.5 m<br />
M: 4 m by 5 m<br />
L: 5.5 m by 7.5 m<br />
LISTENING POSITION setting:<br />
This setting establishes where your ideal listening<br />
position is. Choose from the three possibilities<br />
following the guide below.<br />
FRONT: your listening position is closer to the<br />
front speakers.<br />
CENTER: your listening position is equidistant<br />
from the front and surround speakers.<br />
REAR: your listening position is closer to the<br />
surround speakers.<br />
6 In a menu use the 5∞ buttons to<br />
select the different settings.<br />
When you have the setting you<br />
want in a particular menu, press<br />
ENTER.<br />
SIGNAL PRO LOGIC Neo :6<br />
AUTO DIGITAL<br />
RF DTS ES EX<br />
DIGITAL MPEG AAC<br />
ANALOG STEREO<br />
SB CH DSP<br />
AUTO ON MOVIE<br />
OFF MUSIC<br />
L C R LFE<br />
LS S RS SP A B<br />
LOUDNESS MIDNIGHT TONE DNR ATT STEREO MONO<br />
TUNED RF ATT<br />
RDS EON<br />
Hi-BIT/<br />
SAMPLING<br />
MULTI-ROOM<br />
dB<br />
5 Use the 5∞ buttons to navigate<br />
through the QUICK setup menus.<br />
When you get a menu you want<br />
to adjust press ENTER.<br />
SIGNAL PRO LOGIC Neo :6<br />
AUTO DIGITAL<br />
RF DTS ES EX<br />
DIGITAL MPEG AAC<br />
ANALOG STEREO<br />
SB CH DSP<br />
AUTO ON MOVIE<br />
OFF MUSIC<br />
LOUDNESS MIDNIGHT TONE DNR ATT STEREO MONO<br />
TUNED RF ATT<br />
RDS EON<br />
Hi-BIT/<br />
SAMPLING<br />
MULTI-ROOM<br />
dB<br />
7 Repeat steps 5 and 6 to change<br />
other menus.<br />
8 Press the SYSTEM SETUP<br />
button.<br />
The receiver exits the setup process.<br />
L C R LFE<br />
LS S RS SP A B<br />
When ENTER is pressed, the setting for each<br />
selected menu blinks.<br />
13<br />
En
Easy Setup Guide Part2<br />
2 Playing a DVD with Surround Sound<br />
1 Make sure the receiver, your TV, your subwoofer and your DVD player<br />
are switched ON.<br />
2 Press the DVD/LD button on the remote control.<br />
You should see DVD/LD in the display on the receiver.<br />
3 Play a DVD then adjust the MASTER VOLUME.<br />
memo<br />
To get a more refined sound, make the sound settings in "Expert setup" (starting on page<br />
82).<br />
If you're having trouble getting surround sound playback look at this Frequently<br />
Asked Questions (FAQ) guide:<br />
Q1: Even though I'm playing a DVD I'm not getting 5.1 channel playback.<br />
A1: Either the DVD is not set for digital output, or the Dolby Digital/DTS output settings are not<br />
correct.<br />
Set the DVD player to output a digital signal and set the Dolby Digital and DTS output properly. If you are<br />
unsure how to do this check the DVD initial setup in the <strong>manual</strong> that came with your DVD player.<br />
Q2: There is no sound from the subwoofer or it is very low.<br />
A2: There is a good possibility you haven't reached a part of the DVD that has an LFE channel<br />
(which feeds the subwoofer) yet. The LFE channel only appears in selected parts of the<br />
soundtrack. Continue playing and listen for the subwoofer.<br />
If you want to hear more sound from the subwoofer set it to PLUS (see page 37 for more information and<br />
consult the memo on page 38).<br />
14<br />
En
PREPARATION PREPARATION<br />
Connecting Your Equipment<br />
Connecting your TV<br />
Before making or changing the connections, switch off the power and disconnect the power cord from<br />
the AC outlet.<br />
Connect your TV to the jacks as shown below. Hook up with either S video or composite video cords (the<br />
quality descends in this order) but you must use the same type of video cords to hook up your DVD<br />
player (and all other video components) as you use to hook up your TV. If you plan to hook up your<br />
DVD player with S video cords hook up your TV with them as well. Composite video cords, which look just<br />
like regular RCA audio cords (see page 19) but have only one cable are the most common.<br />
*The arrows<br />
indicate the<br />
direction of<br />
the signal.<br />
PCM/<br />
2DIGITAL /<br />
DTS/MPEG<br />
OUT1<br />
OUT2<br />
IN 1<br />
(TV/<br />
SAT)<br />
IN 2<br />
(CD-R/<br />
TAPE1)<br />
IN 3<br />
(DVD/<br />
LD)<br />
IN 4<br />
(CD)<br />
ASSIGNABLE<br />
DIGITAL<br />
IN<br />
OUT<br />
PLAY<br />
IN<br />
CD-R/<br />
TAPE1<br />
OUT<br />
REC<br />
PLAY<br />
IN<br />
MD/<br />
TAPE2<br />
OUT<br />
REC<br />
CD<br />
IN<br />
LINE<br />
IN<br />
ANTENNA<br />
R<br />
FM UNBAL<br />
L<br />
75Ω<br />
CONTROL<br />
AM LOOP<br />
MONITOR OUT 1<br />
R L R L<br />
VCR1/<br />
DVR<br />
VCR2<br />
TV/<br />
SAT<br />
IN<br />
DVD/<br />
LD<br />
IN<br />
AUDIO AUDIO VIDEO<br />
IN<br />
OUT<br />
IN<br />
OUT<br />
VIDEO<br />
S VIDEO<br />
CENTER<br />
FRONT<br />
R<br />
SUR-<br />
ROUND<br />
R<br />
SUR-<br />
ROUND<br />
BACK<br />
R<br />
FRONT<br />
R<br />
SUR-<br />
ROUND<br />
R<br />
SUR-<br />
ROUND<br />
BACK<br />
R<br />
PRE OUT<br />
SUB<br />
WOOFER<br />
MULTI CH IN<br />
L<br />
L<br />
(Single)<br />
L<br />
L<br />
L<br />
SUB<br />
WOOF-<br />
ER<br />
CEN-<br />
TER<br />
L<br />
TV/monitor<br />
VIDEO IN<br />
VIDEO<br />
S-VIDEO<br />
Composite Video<br />
Composite video cords are the most common or standard video cord but also<br />
the lowest quality. The color on the connector is yellow to distinguish it from<br />
regular RCA audio cords which have white and red connectors (see page 19).<br />
It is important to use a true composite video cord and not an audio cord<br />
(though they look exactly the same) because the impedance is different and<br />
this will affect the picture quality.<br />
S VideoS VIDEO<br />
S video cables produce clearer picture reproduction by sending separate<br />
signals for the luminance and the color.<br />
15<br />
En
Connecting Your Equipment<br />
Connecting Video Components<br />
Before making or changing the connections, switch off the power and disconnect the power cord from<br />
the AC outlet.<br />
Connect your video components as shown on this and the following page. For video components (for<br />
example, a DVD player) there are two types of connections to make, video and audio.<br />
Hook up your video signal with either S video or composite video cords (the quality descends in<br />
this order) but you must use the same type of cord as you used to hook up your TV.<br />
For the audio signal, in order to use digital soundtracks like Dolby Digital or DTS you must hook up a digital<br />
input, with either a coaxial or optical cord (see page 21). It is also a good idea to hook up your<br />
components with analog audio connections as well.<br />
If you want to record from your DVD player composite (or S video) cord connections and analog audio<br />
connections are necessary.<br />
Connecting a DVD player<br />
Before making or changing the connections, switch off the power and disconnect the power cord from<br />
the AC outlet.<br />
Hook up your audio signal with either a coaxial or optical digital cords (you don't need to do both). If you<br />
have a DVD-Audio or Super Audio CD (SACD) compatible player, see "Connecting to the Multi Channel<br />
Analog Inputs" on page 20.<br />
You need to hook up your audio with analog connections as well.<br />
*The arrows indicate the direction of the signal.<br />
PCM/<br />
2DIGITAL /<br />
DTS/MPEG<br />
OUT1<br />
OUT2<br />
IN 1<br />
(TV/<br />
SAT)<br />
IN 2<br />
(CD-R/<br />
TAPE1)<br />
IN 3<br />
(DVD/<br />
LD)<br />
IN 4<br />
(CD)<br />
ASSIGNABLE<br />
DIGITAL<br />
IN<br />
OUT<br />
PLAY<br />
IN<br />
CD-R/<br />
TAPE1<br />
OUT<br />
REC<br />
PLAY<br />
IN<br />
MD/<br />
TAPE2<br />
OUT<br />
REC<br />
CD<br />
IN<br />
LINE<br />
IN<br />
ANTENNA<br />
R<br />
FM UNBAL<br />
L<br />
75Ω<br />
CONTROL<br />
AM LOOP<br />
MONITOR OUT 1<br />
R L R L<br />
VCR1/<br />
DVR<br />
VCR2<br />
TV/<br />
SAT<br />
IN<br />
DVD/<br />
LD<br />
IN<br />
AUDIO AUDIO VIDEO<br />
IN<br />
OUT<br />
IN<br />
OUT<br />
VIDEO<br />
S VIDEO<br />
CENTER<br />
FRONT<br />
R<br />
SUR-<br />
ROUND<br />
R<br />
SUR-<br />
ROUND<br />
BACK<br />
R<br />
FRONT<br />
R<br />
SUR-<br />
ROUND<br />
R<br />
SUR-<br />
ROUND<br />
BACK<br />
R<br />
PRE OUT<br />
SUB<br />
WOOFER<br />
MULTI CH IN<br />
L<br />
L<br />
(Single)<br />
L<br />
L<br />
L<br />
SUB<br />
WOOF-<br />
ER<br />
CEN-<br />
TER<br />
L<br />
1<br />
2 3<br />
VIDEO<br />
VIDEO<br />
OUT<br />
S-VIDEO<br />
ANALOG<br />
AUDIO<br />
DIGITAL OUT<br />
(not a PCM-only output)<br />
DVD player<br />
L<br />
R<br />
memo<br />
• Be sure to make either a digital coaxial or digital optical connection (pictured as DIGITAL<br />
jack 3 or DIGITAL jack 2 in this diagram) but you DON'T need to make both.<br />
• If your digital connections are different than the default settings you will need to assign<br />
the digital jacks to the proper component(s) with the "Assigning the Digital Inputs"<br />
procedure. See page 80 to do this.<br />
16<br />
En
COLOR BRIGHT MONITOR<br />
PHONES<br />
DIGITAL OUT (OPTICAL)<br />
ON/OFF<br />
HOLD<br />
PREPARATION PREPARATION<br />
Connecting VCRs or DVRs<br />
Connecting Your Equipment<br />
Before making or changing the connections, switch off the power and disconnect the power cord from<br />
the AC outlet.<br />
Connect the video out of your VCR/DVR using either S video or composite video cords, depending on how<br />
you connected the receiver to your TV (see page 15). Use analog audio cords for the audio signal. To<br />
record, you also need to connect a set of audio/video outputs from the receiver to the audio/video inputs<br />
on your VCR/DVR. Note that to record video from a source component, the video connection from the<br />
source to the receiver and from the receiver to the recorder must be the same type.<br />
*The arrows indicate the direction of the signal.<br />
OUT<br />
AUDIO<br />
(PLAY)<br />
IN<br />
AUDIO<br />
(REC)<br />
PCM/<br />
2DIGITAL /<br />
DTS/MPEG<br />
OUT1<br />
FM UNBAL 75Ω<br />
ANTENNA<br />
IN<br />
CONTROL<br />
AM LOOP<br />
CENTER<br />
PRE OUT<br />
SUB<br />
WOOFER<br />
VIDEO<br />
L<br />
R<br />
VIDEO<br />
L<br />
R<br />
OUT2<br />
IN 1<br />
(TV/<br />
SAT)<br />
IN 2<br />
(CD-R/<br />
TAPE1)<br />
OUT<br />
PLAY<br />
IN<br />
CD-R/<br />
TAPE1<br />
OUT<br />
REC<br />
R<br />
L<br />
MONITOR OUT 1<br />
IN<br />
VCR1/<br />
DVR<br />
OUT<br />
FRONT<br />
R<br />
SUR-<br />
ROUND<br />
R<br />
SUR-<br />
ROUND<br />
BACK<br />
R<br />
L<br />
L<br />
(Single)<br />
L<br />
S-VIDEO<br />
S-VIDEO<br />
VCR 1/DVR<br />
IN 3<br />
(DVD/<br />
LD)<br />
IN 4<br />
(CD)<br />
PLAY<br />
IN<br />
MD/<br />
TAPE2<br />
OUT<br />
REC<br />
IN<br />
VCR2<br />
OUT<br />
FRONT<br />
R<br />
SUR-<br />
ROUND<br />
R<br />
L<br />
L<br />
OUT<br />
AUDIO<br />
(PLAY)<br />
IN<br />
AUDIO<br />
(REC)<br />
ASSIGNABLE<br />
CD<br />
IN<br />
TV/<br />
SAT<br />
IN<br />
SUB<br />
WOOF-<br />
ER<br />
CEN-<br />
TER<br />
L<br />
L<br />
DIGITAL<br />
LINE<br />
IN<br />
R L R L<br />
DVD/<br />
LD<br />
IN<br />
VIDEO<br />
S VIDEO<br />
SUR-<br />
ROUND<br />
BACK<br />
R<br />
L<br />
R<br />
VIDEO<br />
R<br />
VIDEO<br />
AUDIO AUDIO VIDEO<br />
MULTI CH IN<br />
VCR 2<br />
S-VIDEO<br />
S-VIDEO<br />
Connecting a Video Component to the Front Panel<br />
Before making or changing the connections, switch off the power and disconnect the power cord from<br />
the AC outlet.<br />
Connect a portable DVD player, video game console or any video component to the front panel as show<br />
here. Front video connections are accessed via the front panel input selector as VIDEO.<br />
*The arrows indicate the direction of the signal.<br />
SELECT<br />
STATION TUNING<br />
TUNER CHARACTER/<br />
EDIT SEARCH<br />
EON<br />
MODE<br />
MULTI JOG/ENTER<br />
S-VIDEO<br />
VIDEO L AUDIO R<br />
VIDEO INPUT<br />
AUDIO-IN/OUT<br />
VIDEO-IN/OUT<br />
Be careful! For portable DVD players you will need a<br />
specialized cord (for the audio) that has a mini plug on<br />
one end and a regular plug on the other.<br />
17<br />
En
Connecting Your Equipment<br />
Connecting Satellite TV (SAT) Components<br />
Before making or changing the connections, switch off the power and disconnect the power cord from<br />
the AC outlet.<br />
Hook up the video signal with either S video or composite video cords, depending on how you connected<br />
the receiver to your TV (see page 15).<br />
For the audio signal, in order to use digital soundtracks broadcast you must hook up a digital input. Use<br />
either a coaxial or optical cable, it doesn't matter which (see page 21–22). We recommend hooking up<br />
your audio with analog cables as well (see below).<br />
*The arrows indicate the direction of the TV signal.<br />
VIDEO<br />
VIDEO<br />
OUT<br />
S-VIDEO<br />
PCM/<br />
2DIGITAL /<br />
DTS/MPEG<br />
OUT1<br />
FM UNBAL 75Ω<br />
ANTENNA<br />
IN<br />
CONTROL<br />
AM LOOP<br />
CENTER<br />
PRE OUT<br />
SUB<br />
WOOFER<br />
Satellite tuner<br />
OUT<br />
OUT2<br />
IN 1<br />
(TV/<br />
SAT)<br />
IN 2<br />
(CD-R/<br />
TAPE1)<br />
IN 3<br />
(DVD/<br />
LD)<br />
IN 4<br />
(CD)<br />
ASSIGNABLE<br />
DIGITAL<br />
PLAY<br />
IN<br />
CD-R/<br />
TAPE1<br />
OUT<br />
REC<br />
PLAY<br />
IN<br />
MD/<br />
TAPE2<br />
OUT<br />
REC<br />
CD<br />
IN<br />
LINE<br />
IN<br />
R<br />
L<br />
MONITOR OUT 1<br />
R L R L<br />
VCR1/<br />
DVR<br />
VCR2<br />
TV/<br />
SAT<br />
IN<br />
DVD/<br />
LD<br />
IN<br />
AUDIO AUDIO VIDEO<br />
IN<br />
OUT<br />
IN<br />
OUT<br />
VIDEO<br />
S VIDEO<br />
FRONT<br />
R<br />
SUR-<br />
ROUND<br />
R<br />
SUR-<br />
ROUND<br />
BACK<br />
R<br />
FRONT<br />
R<br />
SUR-<br />
ROUND<br />
R<br />
SUR-<br />
ROUND<br />
BACK<br />
R<br />
MULTI CH IN<br />
L<br />
L<br />
(Single)<br />
L<br />
L<br />
L<br />
SUB<br />
WOOF-<br />
ER<br />
CEN-<br />
TER<br />
L<br />
ANALOG<br />
AUDIO<br />
L<br />
R<br />
DIGITAL<br />
DIGITAL<br />
memo<br />
• If your digital connections are different than the default settings you will need to assign<br />
the digital jacks to the proper component(s) with the "Assigning the Digital Inputs"<br />
procedure. See page 80 to do this.<br />
18<br />
En
PREPARATION PREPARATION<br />
Connecting Analog Audio Components<br />
Connecting Your Equipment<br />
Before making or changing the connections, switch off the power and disconnect the power cord from<br />
the AC outlet.<br />
Connect your audio components to the jacks as shown below. These are all analog connections and your<br />
analog audio components (turntable, cassette deck) use these jacks. Remember that for components you<br />
want to record with you need to hook up four plugs (a set of stereo ins and a set of stereo outs), but for<br />
components that only play (like a turntable) you only need to hook up one set of stereo plugs (two plugs).<br />
If you want to record to/from digital components (like a CD-R) to/from analog components you must hook<br />
up your digital equipment with these analog connections.<br />
*The arrows indicate the direction of the audio signal.<br />
ANALOG<br />
OUTPUT<br />
PCM/<br />
2DIGITAL /<br />
DTS/MPEG<br />
OUT1<br />
OUT2<br />
IN<br />
OUT<br />
ANTENNA<br />
FM UNBAL<br />
75Ω<br />
CONTROL<br />
AM LOOP<br />
CENTER<br />
FRONT<br />
PRE OUT<br />
SUB<br />
WOOFER<br />
L<br />
R<br />
CD player<br />
IN 1<br />
(TV/<br />
SAT)<br />
IN 2<br />
(CD-R/<br />
TAPE1)<br />
IN 3<br />
(DVD/<br />
LD)<br />
IN 4<br />
(CD)<br />
PLAY<br />
IN<br />
CD-R/<br />
TAPE1<br />
OUT<br />
REC<br />
PLAY<br />
IN<br />
MD/<br />
TAPE2<br />
OUT<br />
REC<br />
R<br />
L<br />
MONITOR OUT 1<br />
IN<br />
VCR1/<br />
DVR<br />
OUT<br />
IN<br />
VCR2<br />
OUT<br />
R<br />
SUR-<br />
ROUND<br />
R<br />
SUR-<br />
ROUND<br />
BACK<br />
R<br />
FRONT<br />
R<br />
SUR-<br />
ROUND<br />
R<br />
L<br />
L<br />
(Single)<br />
L<br />
L<br />
L<br />
OUTPUT<br />
(PLAY)<br />
ANALOG<br />
L<br />
R<br />
INPUT<br />
(REC)<br />
L<br />
R<br />
Recorder 1 (CD-R/TAPE)<br />
ASSIGNABLE<br />
DIGITAL<br />
CD<br />
IN<br />
LINE<br />
IN<br />
R L R L<br />
TV/<br />
SAT<br />
IN<br />
DVD/<br />
LD<br />
IN<br />
VIDEO<br />
S VIDEO<br />
SUR-<br />
ROUND<br />
BACK<br />
R<br />
SUB<br />
WOOF-<br />
ER<br />
CEN-<br />
TER<br />
L<br />
OUTPUT<br />
(PLAY)<br />
ANALOG<br />
L<br />
R<br />
INPUT<br />
(REC)<br />
L<br />
R<br />
AUDIO AUDIO VIDEO<br />
MULTI CH IN<br />
Recorder 2 (MD/TAPE)<br />
7 Audio cords<br />
Use (RCA) audio cords (not supplied) to connect<br />
the audio components.<br />
Turntable (etc)<br />
If you use a turntable with this<br />
LINE IN jack only connect one<br />
with a built-in phono equalizer.<br />
L<br />
R<br />
Connect red plugs to<br />
R (right) and white<br />
plugs to L (left).<br />
Be sure to insert<br />
completely.<br />
memo<br />
• Depending on where the cassette<br />
deck is placed, noise may occur<br />
during playback of your cassette<br />
deck which is caused by leakage flux<br />
from the transformer in the receiver.<br />
If you experience noise, move the<br />
cassette deck farther away from the<br />
receiver.<br />
19<br />
En
Connecting Your Equipment<br />
Connecting to the Multi Channel Analog Inputs (DVD-Audio or Super<br />
Audio CD (SACD) compatible player)<br />
Before making or changing the connections, switch off the power and disconnect the power cord from<br />
the AC outlet.<br />
If you have a DVD-Audio or Super Audio CD (SACD) compatible player, or are using an external Dolby<br />
Digital/DTS decoder, connect it to the multichannel analog inputs as shown below.<br />
PCM/<br />
2DIGITAL /<br />
DTS/MPEG<br />
OUT1<br />
OUT2<br />
IN 1<br />
(TV/<br />
SAT)<br />
IN 2<br />
(CD-R/<br />
TAPE1)<br />
IN 3<br />
(DVD/<br />
LD)<br />
IN 4<br />
(CD)<br />
ASSIGNABLE<br />
DIGITAL<br />
IN<br />
OUT<br />
PLAY<br />
IN<br />
CD-R/<br />
TAPE1<br />
OUT<br />
REC<br />
PLAY<br />
IN<br />
MD/<br />
TAPE2<br />
OUT<br />
REC<br />
CD<br />
IN<br />
LINE<br />
IN<br />
ANTENNA<br />
R<br />
FM UNBAL<br />
L<br />
75Ω<br />
CONTROL<br />
AM LOOP<br />
MONITOR OUT 1<br />
R L R L<br />
VCR1/<br />
DVR<br />
VCR2<br />
TV/<br />
SAT<br />
IN<br />
DVD/<br />
LD<br />
IN<br />
AUDIO AUDIO VIDEO<br />
IN<br />
OUT<br />
IN<br />
OUT<br />
VIDEO<br />
S VIDEO<br />
CENTER<br />
FRONT<br />
R<br />
SUR-<br />
ROUND<br />
R<br />
SUR-<br />
ROUND<br />
BACK<br />
R<br />
FRONT<br />
R<br />
SUR-<br />
ROUND<br />
R<br />
SUR-<br />
ROUND<br />
BACK<br />
R<br />
PRE OUT<br />
SUB<br />
WOOFER<br />
MULTI CH IN<br />
L<br />
L<br />
(Single)<br />
L<br />
L<br />
L<br />
SUB<br />
WOOF-<br />
ER<br />
CEN-<br />
TER<br />
L<br />
Components equipped with<br />
5.1 (7.1) channel analog output jack<br />
FRONT<br />
L<br />
R<br />
SURR-<br />
OUND<br />
L<br />
R<br />
ANALOG<br />
CENTER<br />
SUB<br />
WOOFER<br />
SURR-<br />
OUND BACK<br />
L<br />
R<br />
memo<br />
If you use only one surround back input, be sure to hook up to the SURROUND BACK Ò<br />
jack.<br />
20<br />
En
PREPARATION PREPARATION<br />
Connecting Digital Audio Components<br />
Connecting Your Equipment<br />
Before making or changing the connections, switch off the power and disconnect the power cord from<br />
the AC outlet.<br />
Connect your digital components as shown below. The <strong>VSX</strong>-<strong>D1011</strong> has two coaxial, two optical inputs for<br />
a total of four digital inputs. In order to use digital soundtracks like Dolby Digital or DTS (among others)<br />
you need to make digital audio connections. You can do this by either a coaxial or an optical connection<br />
(you don’t need to do both). The quality of these two types of connections is the same but since some<br />
digital components only have one type of digital terminal, it is a matter of matching like with like (for<br />
example, the coaxial out from the component to coaxial in on the receiver).<br />
Hook up your digital equipment in accordance with this receiver's default settings (see next page) unless<br />
you want to, or need to, change them. To do this see "Assigning the Digital Inputs" on page 80.<br />
There are two optical digital out jacks (the CD recorder is connected to one in the diagram below). If you<br />
connect this to the optical input on a digital recorder (currently these include MD, DAT and CD-R) you can<br />
make direct digital recordings with this unit.<br />
We also recommend hooking up your digital components to analog audio jacks (see page 19) in order to<br />
make recordings (some digital sources may be protected against making digital copies).<br />
*The arrows indicate the direction of the audio signal.<br />
PCM/<br />
2DIGITAL /<br />
DTS/MPEG<br />
OUT1<br />
FM UNBAL 75Ω<br />
ANTENNA<br />
IN<br />
CONTROL<br />
AM LOOP<br />
CENTER<br />
PRE OUT<br />
SUB<br />
WOOFER<br />
DIGITAL<br />
OUTPUT<br />
OUT<br />
OUT2<br />
IN 1<br />
(TV/<br />
SAT)<br />
IN 2<br />
(CD-R/<br />
TAPE1)<br />
IN 3<br />
(DVD/<br />
LD)<br />
IN 4<br />
(CD)<br />
ASSIGNABLE<br />
DIGITAL<br />
PLAY<br />
IN<br />
CD-R/<br />
TAPE1<br />
OUT<br />
REC<br />
PLAY<br />
IN<br />
MD/<br />
TAPE2<br />
OUT<br />
REC<br />
CD<br />
IN<br />
LINE<br />
IN<br />
R<br />
L<br />
MONITOR OUT 1<br />
R L R L<br />
VCR1/<br />
DVR<br />
VCR2<br />
TV/<br />
SAT<br />
IN<br />
DVD/<br />
LD<br />
IN<br />
AUDIO AUDIO VIDEO<br />
IN<br />
OUT<br />
IN<br />
OUT<br />
VIDEO<br />
S VIDEO<br />
FRONT<br />
R<br />
SUR-<br />
ROUND<br />
R<br />
SUR-<br />
ROUND<br />
BACK<br />
R<br />
FRONT<br />
R<br />
SUR-<br />
ROUND<br />
R<br />
SUR-<br />
ROUND<br />
BACK<br />
R<br />
MULTI CH IN<br />
L<br />
L<br />
(Single)<br />
L<br />
L<br />
L<br />
SUB<br />
WOOF-<br />
ER<br />
CEN-<br />
TER<br />
L<br />
DIGITAL<br />
OUTPUT<br />
(PLAY)<br />
DIGITAL<br />
OUTPUT<br />
DIGITAL<br />
INPUT<br />
(REC)<br />
(not a PCM-only output)<br />
Satellite tuner<br />
CD recorder<br />
DVD player<br />
DIGITAL<br />
OUTPUT<br />
CD player<br />
7 Coaxial cords/Optical cables<br />
Commercially available digital audio coaxial<br />
cords (standard video cords can also be used) or<br />
optical cables (not supplied) are used to connect<br />
digital components to this receiver.<br />
Be sure to insert completely and in the case of<br />
the optical cable, right-side up. If it is inserted<br />
improperly it can break the shutter on the<br />
optical terminal (this won't, however, affect the<br />
connection or insertion of an optical cable).<br />
Coaxial cord<br />
(or standard [composite]<br />
video cord)<br />
Optical cable<br />
21<br />
En
Connecting Your Equipment<br />
Digital Input Default Settings<br />
Unlike analog connections, the jacks for digital connections are not dedicated to one type of component,<br />
they can be used freely. Thus you must tell the receiver what digital component is connected to which<br />
jack so your components will be in sync with the names on the remote control buttons and the like. To<br />
avoid having to assign the digital inputs you can hook up your equipment in accordance with the receiver's<br />
default settings.<br />
The default settings are:<br />
DIGITAL IN 1 (optical): TV/SAT<br />
DIGITAL IN 2 (optical): CD-R/TAPE1<br />
DIGITAL IN 3 (coaxial): DVD/LD<br />
DIGITAL IN 4 (coaxial): CD<br />
See "Assigning the Digital Inputs" on page 80 if the way you hook up your equipment is different from the<br />
default settings listed here.<br />
22<br />
En
PREPARATION PREPARATION<br />
Connecting Your Equipment<br />
Connecting the Radio Antennas<br />
Before making or changing the connections, switch off the power and disconnect the power cord from<br />
the AC outlet.<br />
Connect the supplied FM wire antenna and the AM loop antenna to the ANTENNA terminals as shown<br />
below. These antennas should provide adequate reception quality in most cases, but connecting outdoor<br />
antennas should noticeably improve sound quality.<br />
FM wire<br />
antenna<br />
AM loop<br />
antenna<br />
PCM/<br />
2DIGITAL /<br />
DTS/MPEG<br />
OUT1<br />
FM UNBAL 75Ω<br />
AM LOOP<br />
ANTENNA<br />
IN<br />
CONTROL<br />
CENTER<br />
PRE OUT<br />
SUB<br />
WOOFER<br />
AC OUTLET<br />
OUT<br />
OUT2<br />
FRONT<br />
IN 1<br />
(TV/<br />
SAT)<br />
IN 2<br />
(CD-R/<br />
TAPE1)<br />
PLAY<br />
IN<br />
CD-R/<br />
TAPE1<br />
OUT<br />
REC<br />
R<br />
L<br />
MONITOR OUT 1<br />
IN<br />
VCR1/<br />
DVR<br />
OUT<br />
R<br />
SUR-<br />
ROUND<br />
R<br />
SUR-<br />
ROUND<br />
BACK<br />
R<br />
L<br />
L<br />
(Single)<br />
L<br />
SWITCHED 100W MAX<br />
7 AM loop antenna<br />
1 Assemble the antenna. 2 Twist exposed wire strands<br />
together and insert.<br />
3 Attach to a wall, etc. (if<br />
desired) and face toward<br />
the direction providing<br />
the best reception.<br />
10 mm<br />
Using outdoor antennas<br />
7 To improve FM reception<br />
Connect an external FM antenna.<br />
PAL connector<br />
7 To improve AM reception<br />
Connect a 5 – 6 meter length of vinyl-coated wire to the<br />
AM LOOP ANTENNA terminal in addition to the<br />
supplied AM loop antenna.<br />
For best possible reception, suspend horizontally<br />
outdoors.<br />
Outdoor antenna<br />
AM loop antenna<br />
75 Ω coaxial<br />
cable<br />
FM UNBAL75Ω<br />
ANTENNA<br />
AM LOOP<br />
5–6 m<br />
Indoor antenna<br />
(vinyl-coated wire)<br />
FM UNBAL75Ω<br />
ANTENNA<br />
AM LOOP<br />
23<br />
En
Connecting Your Equipment<br />
Connecting Speakers<br />
Before making or changing the connections, switch off the power and disconnect the power cord from<br />
the AC outlet.<br />
We recommend a full complement of seven speakers and a subwoofer as shown here but, naturally,<br />
everyone's home setup will vary. Simply connect the speakers you have in the manner described below.<br />
One of the latest features of home theater is the use of surround back speakers. These speakers add<br />
even greater realism in movie sound effects and some new discs with soundtracks in Dolby Digital or DTS<br />
incorporate these channels. See the page 26 for speaker placement.<br />
In general, make sure you connect the speaker on the right to the R terminal and the speaker on the left<br />
to the L terminal. Also make sure the positive and negative (+/–) terminals on the receiver match those on<br />
the speakers.<br />
memo<br />
• We recommend speakers with a nominal impedance rated 8 Ω-16 Ω, but you can change the<br />
speaker impedance setting of the receiver (see page 25).<br />
• If you only have one surround back speaker hook it up to the left surround back terminal.<br />
• If you use a THX certified subwoofer use the THX INPUT jack on the subwoofer (if your<br />
subwoofer has one) or switch the filter position to THX on your subwoofer.<br />
Front<br />
speaker<br />
(Left)<br />
Powered<br />
subwoofer<br />
TV/monitor<br />
Front<br />
speaker<br />
(Right)<br />
Center<br />
speaker<br />
INPUT<br />
Surround<br />
speaker<br />
(Left)<br />
PCM/<br />
2DIGITAL /<br />
DTS/MPEG<br />
OUT1<br />
OUT2<br />
IN 1<br />
(TV/<br />
SAT)<br />
IN 2<br />
(CD-R/<br />
TAPE1)<br />
IN 3<br />
(DVD/<br />
LD)<br />
IN 4<br />
(CD)<br />
IN<br />
OUT<br />
PLAY<br />
IN<br />
CD-R/<br />
TAPE1<br />
OUT<br />
REC<br />
PLAY<br />
IN<br />
MD/<br />
TAPE2<br />
OUT<br />
REC<br />
ANTENNA<br />
R<br />
FM UNBAL<br />
L<br />
75Ω<br />
CONTROL<br />
AM LOOP<br />
MONITOR OUT 1<br />
IN<br />
VCR1/<br />
DVR<br />
OUT<br />
IN<br />
VCR2<br />
OUT<br />
CENTER<br />
FRONT<br />
R<br />
SUR-<br />
ROUND<br />
R<br />
SUR-<br />
ROUND<br />
BACK<br />
R<br />
FRONT<br />
R<br />
SUR-<br />
ROUND<br />
R<br />
PRE OUT<br />
SUB<br />
WOOFER<br />
L<br />
L<br />
(Single)<br />
L<br />
L<br />
L<br />
AC OUTLET<br />
SWITCHED 100W MAX<br />
SPEAKERS<br />
SURROUND BACK /<br />
Å R FRONT L CENTER R SURROUND<br />
ı<br />
L R<br />
L<br />
ª<br />
ª<br />
Surround<br />
speaker<br />
(Right)<br />
ASSIGNABLE<br />
CD<br />
IN<br />
TV/<br />
SAT<br />
IN<br />
SUB<br />
WOOF-<br />
ER<br />
CEN-<br />
TER<br />
DIGITAL<br />
LINE<br />
IN<br />
R L R L<br />
DVD/<br />
LD<br />
IN<br />
VIDEO<br />
S VIDEO<br />
SUR-<br />
ROUND<br />
BACK<br />
R<br />
L<br />
·<br />
·<br />
AUDIO AUDIO VIDEO<br />
MULTI CH IN<br />
Surround back<br />
speaker (Left)<br />
Surround back<br />
speaker (Right)<br />
7 Speaker terminals<br />
1 Twist exposed wire<br />
strands tightly<br />
together.<br />
10mm<br />
2 Loosen speaker terminal<br />
and insert exposed wire.<br />
3 Tighten<br />
terminal.<br />
24<br />
En
STANDBY/ON<br />
MOVIE<br />
MUSIC<br />
MULTI JOG<br />
ENTER<br />
STANDBY<br />
MULTI JOG CONTROL<br />
SET UP RETURN<br />
PHONES<br />
SPEAKERS<br />
SIGNAL<br />
SELECT<br />
TONE<br />
HI-BIT<br />
HI-SAMPLING<br />
SB CH<br />
MODE<br />
TONE CONTROL<br />
BASS/TREBLE<br />
BAND<br />
CLASS<br />
SELECT<br />
STATION TUNING<br />
S-VIDEO<br />
TUNER<br />
EDIT<br />
MULTI JOG/ENTER<br />
AUTO<br />
AUTO<br />
AUTO<br />
AUTO<br />
CHARACTER/<br />
SEARCH<br />
VIDEO L<br />
VIDEO INPUT<br />
AUDIO<br />
EON<br />
MODE<br />
R<br />
AUDIO/VID<br />
PREPARATION PREPARATION<br />
Speaker impedance<br />
Connecting Your Equipment<br />
You can change the speaker impedance for <strong>VSX</strong>-<strong>D1011</strong> but we recommend using speakers with an<br />
impedance of 8 Ω-16 Ω (the default setting). If you are using 6 Ω- less than 8 Ω impedance speakers, you<br />
need to change the impedance setting. Use any speaker rated between 6 Ω-16 Ω.<br />
STANDBY/ON<br />
SPEAKERS<br />
First put the receiver in STANDBY mode, then<br />
press the power button while holding down the<br />
SPEAKERS button.<br />
The receiver will reset to the new impedance<br />
setting. With this method you can choose the 8 Ω-<br />
16 Ω setting or the 6 Ω-8 Ω setting.<br />
To check which impedance setting<br />
to hold down the SPEAKERS<br />
button for 2-3 seconds. You'll get<br />
a display like these telling you the<br />
speaker impedance setting.<br />
SIGNAL PRO LOGIC Neo :6<br />
DIGITAL<br />
RF DTS ES EX<br />
DIGITAL MPEG AAC<br />
ANALOG STEREO<br />
SB CH DSP<br />
ON MOVIE<br />
OFF MUSIC<br />
L C R LFE<br />
LS S RS SP A B<br />
SIGNAL PRO LOGIC Neo :6<br />
DIGITAL<br />
RF DTS ES EX<br />
DIGITAL MPEG AAC<br />
ANALOG STEREO<br />
SB CH DSP<br />
ON MOVIE<br />
OFF MUSIC<br />
L C R LFE<br />
LS S RS SP A B<br />
LOUDNESS MIDNIGHT TONE DNR ATT STEREO MONO<br />
TUNED RF ATT<br />
RDS EON<br />
Hi-BIT/<br />
SAMPLING<br />
MULTI-ROOM<br />
LOUDNESS MIDNIGHT TONE DNR ATT STEREO MONO<br />
TUNED RF ATT<br />
RDS EON<br />
Hi-BIT/<br />
SAMPLING<br />
MULTI-ROOM<br />
dB<br />
dB<br />
(This display indicates an<br />
8Ω-16Ω impedance setting.)<br />
(This display indicates a 6Ωless<br />
than 8Ω impedance<br />
setting.)<br />
25<br />
En
Connecting Your Equipment<br />
Placing Your Speakers<br />
Proper speaker placement is essential to realize the best sound from your system. The diagram and tips<br />
given here are just a rough guide, for more information see pages 94 & 95. Also, it is very important for<br />
speaker placement to read the instructions that come with your speakers so please be sure to do so.<br />
Speaker placement<br />
If you have a multiple speaker arrangement the placement of the speakers is extremely important. To<br />
achieve the best possible surround sound, install your speakers as shown below. Make sure all speakers<br />
are installed securely to prevent accidents and improve sound quality. Some speakers are designed to be<br />
floor-standing but others benefit greatly from speaker stands which raise them off the floor. Be sure to<br />
read your speaker <strong>manual</strong>s for the best placement of the speakers.<br />
Front Speaker<br />
(L)<br />
Surround<br />
Speaker (L)<br />
Surround Back<br />
Speaker (L)<br />
Center Speaker<br />
Front Speaker<br />
(R)<br />
Surround Back<br />
Speaker (R)<br />
Subwoofer<br />
Surround<br />
Speaker (R)<br />
memo<br />
• When installing speakers near the<br />
TV, we recommend using<br />
magnetically shielded speakers to<br />
prevent distortion in the color of<br />
the TV screen. If you do not have<br />
magnetically shielded speakers<br />
and notice discoloration of the TV<br />
screen, place the speakers farther<br />
away from the TV.<br />
• Install the center speaker above or<br />
below the TV so that the sound of<br />
the center channel is localized at<br />
the TV screen.<br />
• THX recommends that if you have<br />
two surround back speakers place<br />
them close together.<br />
CAUTION:<br />
When installing the center speaker on top of the TV, be sure to secure it with suitable means.<br />
AC Power Cord<br />
Plug in the power cord to a wall outlet after you have finished hooking up the rest of your equipment.<br />
CAUTION!<br />
• Do not use any other power cord than the one supplied with this unit. (multi-voltage model only)<br />
• The equipment should be disconnected by removing the mains plug from the wall socket when not in<br />
regular use, e.g. when on vacation.<br />
AC Outlet [switched 100 W max] (European model only)<br />
Power supplied through this outlet is turned on and off by this unit’s STANDBY/ON button. Total electrical<br />
power consumption of connected equipment should not exceed 100 W.<br />
26<br />
En<br />
CAUTION!<br />
• Do not connect appliances with high power consumption such as heaters, irons, or television sets to the<br />
AC OUTLET in order to avoid overheating or fire risk. This can cause the unit to malfunction.<br />
• DO NOT CONNECT A MONITOR OR TV SET TO THIS UNIT’S AC OUTLET.
Displays & Controls<br />
Display<br />
All the display information is explained and/or referenced here.<br />
1<br />
SIGNAL<br />
AUTO<br />
RF<br />
DIGITAL<br />
ANALOG<br />
SB CH<br />
ON<br />
AUTO<br />
OFF<br />
PRO LOGIC Neo :6 LOUDNESS MIDNIGHT TONE DNR ATT STEREO MONO dB<br />
DIGITAL<br />
TUNED RF ATT<br />
DTS ES EX<br />
RDS EON<br />
MPEG AAC<br />
Hi-BIT/<br />
STEREO<br />
SAMPLING<br />
DSP<br />
MULTI-ROOM<br />
MOVIE<br />
MUSIC<br />
L C R LFE<br />
LS S RS SP<br />
2 3 4 5 6<br />
7<br />
A B<br />
12 11 10 9<br />
1 SIGNAL SELECT indicators<br />
Light to indicate the input signal you selected.<br />
AUTO: Lights when the receiver is set to select<br />
the input signal automatically.<br />
DIGITAL: Lights when digital audio signals are<br />
selected.<br />
ANALOG: Lights when analog signals are<br />
selected.<br />
2 Digital format indicators<br />
PRO LOGIC II: Lights during Dolby Pro Logic II<br />
processing.<br />
NEO:6: Lights during NEO:6 processing.<br />
2 DIGITAL: Lights when a Dolby Digital signal is<br />
detected.<br />
DTS: Lights when a DTS signal is detected.<br />
ES: Lights when playing back a DTS ES signal.<br />
EX: Lights when playing back a Dolby Digital EX<br />
signal.<br />
STEREO: Lights during two-channel playback.<br />
3 LOUDNESS indicator<br />
Lights when LOUDNESS is on.<br />
4 MIDNIGHT indicator<br />
Lights when MIDNIGHT is on.<br />
5 TONE indicator<br />
Lights when the TONE control is on.<br />
6 DNR indicator<br />
Lights when DIGITAL NR is on.<br />
7 TUNER indicators<br />
STEREO: Lights when an FM stereo broadcast<br />
is received in the auto stereo mode.<br />
MONO: Lights when the tuner is set to receive<br />
FM broadcasts and when MPX mode is selected.<br />
TUNED: Lights when a broadcast is received.<br />
RF ATT (European model only): Lights when<br />
the RF ATT is on (see page 54).<br />
RDS (European model only): Lights when an<br />
RDS broadcast is received.<br />
8<br />
EON o (European model only): EON lights<br />
when it has been set. The dot indicator next to<br />
it lights when the station you are currently<br />
tuned to carries the EON data service.<br />
8 Volume level indicator<br />
9 Hi-BIT/SAMPLING indicator<br />
Lights when a HI-BIT/SAMPLING mode is on.<br />
10 DSP indicators<br />
MOVIE: Lights when a MOVIE mode is<br />
selected. When a DSP MOVIE mode is selected<br />
DSP will light with a box around it.<br />
MUSIC: Lights when a MUSIC mode is<br />
selected. When a DSP MUSIC mode is selected<br />
DSP will light with a box around it.<br />
11 Program Format indicators<br />
For Dolby Digital or DTS sources: These<br />
indicators change according to which channels<br />
are active in the source. When all three LS (left<br />
surround), S (surround) and RS (right surround)<br />
light at the same time it means a source with a<br />
6.1 channel playback flag is being used.<br />
L – Left front channel.<br />
C – Center channel.<br />
R – Right front channel.<br />
LS – Left surround channel.<br />
S – Surround channel or Surround back channel.<br />
RS – Right surround channel.<br />
LFE – Low Frequency Effects channel.<br />
‡ – Lights when LFE signal is input.<br />
12 SB CH indicators<br />
Light to indicate the status of the surround<br />
back channels.<br />
AUTO – Lights when the SB CH MODE or<br />
VIRTUAL SURROUND BACK mode is set to<br />
AUTO.<br />
ON – Lights when the SB CH MODE or VIRTUAL<br />
SURROUND BACK mode is set to ON.<br />
OFF – Lights when the SB CH MODE or VIRTUAL<br />
SURROUND BACK mode is set to OFF.<br />
27<br />
En<br />
PREPARATION PREPARATION
Displays & Controls<br />
Front Panel<br />
All the controls on the front panel are explained and/or referenced here. To open the front panel push<br />
gently on the lower third of the panel.<br />
2<br />
1 3 4 5 6 7 8<br />
9 10 11<br />
AUDIO/VIDEO MULTI-CHANNEL RECEIVER <strong>VSX</strong>-<strong>D1011</strong><br />
STANDBY/ON<br />
STANDBY<br />
MOVIE<br />
MUSIC<br />
ENTER STEREO/DIRECT MULTI CH IN<br />
ACOUSTIC EQ<br />
MULTI JOG<br />
MASTER VOLUME<br />
MULTI JOG CONTROL<br />
SET UP<br />
RETURN<br />
SIGNAL HI-BIT SB CH<br />
SELECT HI-SAMPLING MODE<br />
BAND<br />
CLASS<br />
SELECT<br />
STATION TUNING<br />
TUNER CHARACTER/ EON<br />
EDIT SEARCH MODE<br />
PHONES<br />
SPEAKERS<br />
TONE<br />
TONE CONTROL<br />
BASS/TREBLE<br />
MULTI JOG/ENTER<br />
S-VIDEO<br />
VIDEO L AUDIO R<br />
VIDEO INPUT<br />
12<br />
13 14 15 16<br />
17 18<br />
MULTI JOG CONTROL<br />
SET UP<br />
RETURN<br />
SIGNAL<br />
SELECT<br />
HI-BIT<br />
HI-SAMPLING<br />
SB CH<br />
MODE<br />
BAND CLASS SELECT<br />
STATION TUNING<br />
TUNER<br />
EDIT<br />
CHARACTER/<br />
SEARCH<br />
EON<br />
MODE<br />
PHONES<br />
SPEAKERS<br />
TONE<br />
TONE CONTROL<br />
BASS/TREBLE<br />
MULTI JOG/ENTER<br />
S-VIDEO<br />
VIDEO L<br />
VIDEO INPUT<br />
AUDIO<br />
R<br />
European model<br />
19 20 21<br />
22<br />
12 13 14 15<br />
23 24 16<br />
MULTI JOG CONTROL<br />
SET UP<br />
RETURN<br />
SIGNAL<br />
SELECT<br />
HI-BIT<br />
HI-SAMPLING<br />
SB CH<br />
MODE<br />
MIDNIGHT<br />
LOUDNESS BAND CLASS<br />
SELECT<br />
STATION TUNING<br />
TUNER<br />
EDIT<br />
PHONES<br />
SPEAKERS<br />
TONE<br />
TONE CONTROL<br />
BASS/TREBLE<br />
MULTI JOG/ENTER<br />
S-VIDEO<br />
VIDEO L<br />
VIDEO INPUT<br />
AUDIO<br />
R<br />
multi-voltage<br />
model<br />
19 20<br />
21<br />
22<br />
28<br />
En<br />
1 MULTI JOG dial<br />
You can use this dial for many purposes. When<br />
you press the SET UP button (12), you can use<br />
it to perform SYSTEM SETUP operations;<br />
select a function (like a DVD) or a listening<br />
mode (like Dolby Pro logic ll) or do TUNER EDIT<br />
functions (in TUNER mode).<br />
2 Listening mode buttons (see pages 43-<br />
45)<br />
There are two types of SURROUND modes:<br />
MOVIE: Press to put the receiver into MOVIE<br />
listening mode (see page 44).<br />
MUSIC: Press to put the receiver into MUSIC<br />
listening mode (see page 45).<br />
STEREO/DIRECT (see page 43): Switches<br />
the receiver into STEREO mode if it was in a<br />
different sound mode or toggles between<br />
DIRECT and STEREO mode.<br />
DIRECT playback bypasses the tone controls<br />
and channel level for the most accurate<br />
reproduction of a program source.<br />
3 –OFF -ON button<br />
Press to switch the receiver between OFF and<br />
STANDBY mode or ON.<br />
STANDBY/ON button<br />
Press to switch the receiver between ON and<br />
STANDBY mode.
Displays & Controls<br />
4 ENTER button<br />
Use this button to enter information concerning<br />
the SYSTEM SETUP, listening mode or the tuner.<br />
5 STANDBY indicator<br />
Lights when the receiver is in STANDBY mode.<br />
(Please note that this receiver consumes a<br />
small amount of power [0.7 W for the European<br />
model and 0.9 W for the multi-voltage model] in<br />
the standby mode.)<br />
6 Remote sensor<br />
Receives the signals from the remote control.<br />
7 Display (See page 27)<br />
8 MCACC indicator (see page 47)<br />
Lights when the ACOUSTIC CAL EQ is on.<br />
9 MULTI CH IN button<br />
Use this button to select the component you<br />
have hooked up to the MULTI CH IN terminals<br />
(for example, a DVD-Audio player).<br />
10 ACOUSTIC EQ button (see page 47)<br />
Use to switch on and off the Acoustic Calibration<br />
EQ.<br />
11 MASTER VOLUME dial<br />
Use to raise or lower the volume of the receiver.<br />
12 MULTI JOG CONTROL buttons<br />
SET UP<br />
Press to switch the SYSTEM SETUP mode.<br />
RETURN<br />
Press to move back one step in the SYSTEM<br />
SETUP process.<br />
13 SIGNAL SELECT button (see page 42)<br />
Press SIGNAL SELECT repeatedly to select one<br />
of the following:<br />
AUTO – If there are analog and digital signals<br />
input, the receiver automatically selects the<br />
digital signal.<br />
DIGITAL – To select an optical or coaxial<br />
digital signal.<br />
ANALOG – To select an analog signal.<br />
14 HI-BIT HI-SAMPLING button (see page<br />
50)<br />
Use this button to switch the HI-BIT<br />
HI-SAMPLING on or off. Use to hear CD and<br />
DVD, as well as other digital soundtracks at a<br />
wider dynamic range, allowing for finer audio<br />
reproduction.<br />
15 SB CH MODE button (see page 51)<br />
Use this button to turn the surround back<br />
channels ON/OFF/AUTO or switch the VIRTU-<br />
AL SURROUND BACK mode between ON/<br />
OFF/AUTO.<br />
16 TUNER CONTROL buttons (See page<br />
54-62)<br />
BAND<br />
Press to select the AM or FM band.<br />
CLASS<br />
Press repeatedly to switch the preset station<br />
classes.<br />
SELECT<br />
Switches the –/+ buttons between station<br />
memory and frequency select modes.<br />
–/+<br />
Selects station memories or frequencies when<br />
using the tuner.<br />
TUNER EDIT<br />
Press to memorize and name a station for recall<br />
using the MULTI JOG and ENTER buttons.<br />
17 CHARACTER/SEARCH button (See page<br />
60)<br />
Use to search for different program types in<br />
RDS mode.<br />
18 EON MODE button (see pages 61-62)<br />
Use to search for different programs that are<br />
transmitting traffic or news information (this<br />
search method is called EON).<br />
19 PHONES jack<br />
Connect headphones for private listening (no<br />
sound will be heard through the speakers).<br />
20 SPEAKERS (A/B) button<br />
The use of this button depends on how the<br />
SURRBACK SYSTEM (see page 35) are set. If<br />
NORMAL SYSTEM is chosen this button<br />
toggles between A and OFF. If SECOND ZONE<br />
is chosen this button toggles between A, B,<br />
A+B and OFF (see page 70). If FRONT BI-AMP<br />
is chosen this button toggles between A+B and<br />
OFF (see page 70).<br />
21 TONE CONTROL buttons (see page 49)<br />
TONE button<br />
This button switches between TONE ON and<br />
TONE BYPASS, which bypasses the tone circuitry.<br />
BASS/TREBLE button<br />
Use to select whether the bass or treble will be<br />
adjusted.<br />
–/+ buttons<br />
Use to adjust the frequency levels.<br />
22 VIDEO INPUT jacks (see page 17)<br />
S-VIDEO<br />
Video input for connecting a portable DVD player,<br />
video camera (etc.), that has an S video out.<br />
RCA VIDEO / AUDIO (L/R)<br />
Video input for connecting a portable DVD<br />
player, video camera, etc., that has standard<br />
RCA video/audio outputs.<br />
23 MIDNIGHT button (see page 48)<br />
Switches the MIDNIGHT listening mode on or<br />
off (for all modes except THX CINEMA and<br />
MULTI CH IN).<br />
24 LOUDNESS button (see page 48)<br />
Switches the LOUDNESS mode on or off (for all<br />
modes except THX CINEMA and MULTI CH IN).<br />
29<br />
En<br />
PREPARATION PREPARATION
Displays & Controls<br />
Remote Control<br />
This page describes the buttons on the remote control used to operate the receiver.<br />
30<br />
En<br />
1<br />
2<br />
3<br />
4<br />
5<br />
6<br />
7<br />
8<br />
RECEIVER MULTI<br />
OPERATION<br />
DVD/LD<br />
VCR 2<br />
MOVIE<br />
MULTI CONTROL<br />
MUSIC<br />
SURROUND<br />
MODE<br />
STEREO/<br />
DIRECT ENTER<br />
MENU TUNER EDIT<br />
SYSTEM<br />
SETUP<br />
AUDIO<br />
CHANNEL−<br />
RF ATT<br />
DIMMER<br />
TEXT OFF<br />
LOUDNESS<br />
SYSTEM<br />
OFF<br />
TUNER<br />
ACOUSTIC<br />
EQ<br />
SB CH<br />
MODE<br />
MIDNIGHT<br />
SOURCE<br />
1 RECEIVER (STANDBY/ON) button<br />
Press to turn power of the receiver on or to<br />
standby (off).<br />
2 MULTI CONTROL buttons<br />
These buttons are the basic controls that<br />
switch the mode of the receiver and the<br />
remote control, which allows you to control<br />
your other components.<br />
TV CONT: Press so that the remote control can<br />
operate the TV control commands.<br />
3 Listening mode buttons (see page 43-<br />
45)<br />
SURROUND buttons (MOVIE, MUSIC, | \<br />
& ENTER):<br />
MOVIE: Press to put the receiver into MOVIE<br />
listening mode (see page 44).<br />
MUSIC: Press to put the receiver into MUSIC<br />
listening mode (see page 45).<br />
BAND<br />
TONE<br />
INPUT<br />
| \: Use to select the MOVIE or MUSIC<br />
listening mode.<br />
+<br />
−<br />
CHANNEL+<br />
EFFECT/CH SEL<br />
SIGNAL SEL DNR BASS/TREBLE DISC<br />
VIDEO SEL<br />
INPUT<br />
SELECT<br />
ST<br />
TV/SAT<br />
CD<br />
MASTER<br />
VOLUME<br />
D.ACCESS<br />
HI-BIT<br />
TUNE<br />
TUNE<br />
TV CONTROL<br />
CHANNEL<br />
ENTER<br />
VCR1/DVR<br />
MPX<br />
MUTE<br />
TEXT ON TOP MENU<br />
VOLUME<br />
RECEIVER<br />
ST<br />
TV CONT<br />
RECEIVER<br />
MULTI CH<br />
INPUT<br />
GUIDE<br />
RETURN<br />
CLASS<br />
ENTER<br />
+10<br />
SUB TITLE<br />
REMOTE<br />
SETUP<br />
9<br />
0<br />
-<br />
=<br />
~<br />
!<br />
@<br />
#<br />
$<br />
%<br />
^<br />
ENTER: Use this button to enter information<br />
concerning the listening modes.<br />
STEREO/DIRECT: Switches the receiver into<br />
STEREO mode if it was in a different sound<br />
mode or toggles between DIRECT and<br />
STEREO mode (see page 43).<br />
4 SYSTEM SETUP button<br />
Use for all system setups, including the<br />
speaker and sound systems. For more information<br />
see. “Setting up for Surround Sound“<br />
starting on page 34. For a DVD player use this<br />
button to bring up the DVD menu and for a<br />
tuner use this button in the same way as the<br />
TUNER EDIT button.<br />
5 AUDIO button<br />
Use to switch the audio tracks of a DVD when<br />
in DVD mode.<br />
6 Command button for other components<br />
(see pages 65–66)<br />
Use these buttons to control other components<br />
you selected with the MULTI CONTROL<br />
buttons. You must input the preset code in<br />
order use this function (see page 63).<br />
7 Number buttons<br />
These can be used for many purposes depending<br />
on the mode of the remote control.<br />
When in receiver mode the buttons operate as<br />
below:<br />
DIMMER button (see page 53)<br />
Use to adjust the brightness of the receiver's<br />
display.<br />
LOUDNESS button (see page 48)<br />
Switches the LOUDNESS mode on or off (for<br />
all modes except THX CINEMA and MULTI CH<br />
IN).<br />
TONE button (see page 49)<br />
This button switches between TONE ON and<br />
TONE BYPASS, which bypasses the tone<br />
circuitry.<br />
SIGNAL SELECT button (see page 42)<br />
Press SIGNAL SELECT repeatedly to select one<br />
of the following:<br />
AUTO – If there are analog and digital signals<br />
input, the receiver automatically selects the<br />
digital signal.<br />
DIGITAL – To select an optical or coaxial<br />
digital signal.<br />
ANALOG – To select an analog signal.
Displays & Controls<br />
DNR (DIGITAL NR) button (see page 47)<br />
Switches the DIGITAL NR on or off.<br />
BASS/TREBLE button (see page 49)<br />
Use to select whether the bass or treble will be<br />
adjusted.<br />
VIDEO SELECT button (see page 53)<br />
Use to toggle between the different video input<br />
possibilities.<br />
HI-BIT button (see page 50)<br />
Use this button to switch the HI-BIT<br />
HI-SAMPLING on or off. Use to hear CD and<br />
DVD, as well as other digital soundtracks at a<br />
wider dynamic range, allowing for finer audio<br />
reproduction.<br />
(+/–) buttons (see page 49)<br />
Use to adjust the TONE level, effect level and<br />
channel level as well as make Dolby Pro Logic<br />
II MUSIC parameter settings.<br />
EFFECT/CH SEL button<br />
Switches between the different channels so<br />
you can add volume individually to each<br />
channel with the + and – buttons. Also selects<br />
EFFECT mode of <strong>Pioneer</strong> original sound modes<br />
and Dolby Pro Logic II MUSIC parameter<br />
settings. You can then use the + and – buttons<br />
to make these adjustments.<br />
8 TV CONTROL buttons<br />
The following buttons are used to control the TV<br />
only and can be used once they are preset to<br />
control your TV.<br />
: This is a dedicated TV button. Use it to turn on/<br />
off your TV.<br />
INPUT SELECT: Press to select the input<br />
source for the TV.<br />
CHANNEL +/– : Use these buttons to change<br />
the channel of the TV.<br />
VOLUME +/– : Press to control the volume of<br />
the TV.<br />
9 MULTI OPERATION button<br />
Use this button to start the MULTI OPERATION<br />
mode. See pages 72–73 for how to program<br />
and use the MULTI OPERATION mode.<br />
0 LED DISPLAY<br />
This display flashes when a command is sent<br />
from the remote control to the receiver. It also<br />
flashes at other times, for example when<br />
teaching the receiver preset codes.<br />
- SOURCE button<br />
Use this button to turn on/off other<br />
components. You must input the preset code in<br />
order to use this function (see page 65).<br />
= RECEIVER button<br />
Use this button to switch the remote control<br />
into receiver mode in order to get certain<br />
receiver functions or do receiver setups.<br />
~ RECEIVER control buttons<br />
ACOUSTIC EQ button (see page 47)<br />
Use to switch on and off the Acoustic Calibration<br />
EQ.<br />
SB CH MODE button (see pages 51)<br />
Use this button to turn the surround back<br />
channels ON/OFF/AUTO or switch the VIRTU-<br />
AL SURROUND BACK mode between ON/<br />
OFF/AUTO.<br />
MIDNIGHT button (see page 48)<br />
Switches the MIDNIGHT listening mode on or<br />
off (for all modes except THX CINEMA and<br />
MULTI CH IN).<br />
INPUT button<br />
Press to select an input source. The button will<br />
cycle through all the possible sources.<br />
MULTI CH INPUT button (see page 50)<br />
Use this button to select the component you<br />
have hooked up to the MULTI CH IN terminals<br />
(for example, a DVD-Audio player).<br />
MUTE button<br />
Press to mute or restore the volume.<br />
! MASTER VOLUME (–/+) buttons<br />
Use to raise or lower the volume of the receiver.<br />
@ TOP MENU/GUIDE button<br />
Use to find stations or menus on a digital TV<br />
tuner. For a DVD player use this button to bring<br />
up the DVD menu.<br />
# » ˜«˜|˜\˜ENTER buttons<br />
These buttons can be used for a variety of<br />
operations in the SYSTEM SETUP menu.<br />
These buttons are used to control the menus<br />
for other components when in those modes<br />
(DVD, digital TV tuner, satellite tuner, cable<br />
tuner, etc.). In TUNER mode, they can select a<br />
station and/or a frequency.<br />
$ RETURN button<br />
When you are in a receiver setup operation this<br />
button will go back one step in the SYSTEM<br />
SETUP procedure. When you are using your<br />
DVD menu screen this button acts the same as<br />
the DVD player's "RETURN" button. When you<br />
are using cable tuners, satellite tuners or digital<br />
TV tuners this button will either exit you from<br />
the menu screen or act like a "RETURN" button<br />
above, depending on the maker of the unit.<br />
% SUBTITLE button<br />
Use to switch the subtitles on a DVD player or<br />
disc.<br />
^ REMOTE SETUP button.<br />
Use to customize the remote control functions<br />
and the remote control itself. (See “Setting Up<br />
the Remote Control to Control Other Components“<br />
starting on page 63).<br />
31<br />
En<br />
PREPARATION PREPARATION
Displays & Controls<br />
Back Panel<br />
All the terminals on the back panel are explained and/or referenced here.<br />
1 2 3 4 5 6<br />
PCM/<br />
2DIGITAL /<br />
DTS/MPEG<br />
OUT1<br />
IN<br />
FM UNBAL 75Ω<br />
ANTENNA<br />
CONTROL<br />
AM LOOP<br />
CENTER<br />
PRE OUT<br />
SUB<br />
WOOFER<br />
OUT2<br />
R<br />
IN 1<br />
PLAY<br />
(TV/<br />
SAT) IN<br />
IN 2 CD-R/<br />
(CD-R/ TAPE1<br />
TAPE1) OUT<br />
IN 3<br />
(DVD/<br />
LD)<br />
IN 4<br />
(CD)<br />
ASSIGNABLE<br />
DIGITAL<br />
OUT<br />
REC<br />
PLAY<br />
IN<br />
MD/<br />
TAPE2<br />
OUT<br />
REC<br />
CD<br />
IN<br />
LINE<br />
IN<br />
L<br />
MONITOR OUT 1<br />
R L R L<br />
VCR1/<br />
DVR<br />
VCR2<br />
TV/<br />
SAT<br />
IN<br />
DVD/<br />
LD<br />
IN<br />
AUDIO AUDIO VIDEO<br />
IN<br />
OUT<br />
IN<br />
OUT<br />
VIDEO<br />
S VIDEO<br />
FRONT<br />
R<br />
SUR-<br />
ROUND<br />
R<br />
SUR-<br />
ROUND<br />
BACK<br />
R<br />
FRONT<br />
R<br />
SUR-<br />
ROUND<br />
R<br />
SUB<br />
WOOF-<br />
ER<br />
SUR-<br />
ROUND<br />
BACK<br />
R<br />
MULTI CH IN<br />
L<br />
L<br />
(Single)<br />
L<br />
L<br />
L<br />
CEN-<br />
TER<br />
L<br />
11<br />
1 DIGITAL IN terminals (see page 21–22)<br />
Use these terminals to input the signal from a<br />
DVD, CD player or any other kind of digital<br />
player. To be able to play Dolby Digital and<br />
other surround soundtracks you need to make<br />
digital connections. To do this use the digital<br />
terminals here. If you don't connect as per the<br />
default settings (see page 22) you need to<br />
complete "Assigning the Digital Inputs" (see<br />
page 80).<br />
2 DIGITAL OUT terminals (see page 21)<br />
Use these terminals to output a digital signal to<br />
a DVD-R, CD-R, MD recorder or any other kind<br />
of digital recorder.<br />
3 CONTROL IN/OUT terminal (see page<br />
75)<br />
You can use this jack to hook up other<br />
PIONEER equipment, that has a CONTROL<br />
terminal, so that you can control them all by<br />
pointing the remote control(s) at one remote<br />
sensor.<br />
12 13<br />
4 Radio antenna terminals (see page 23)<br />
Hook up antennas for the radio tuner built into<br />
the receiver here.<br />
5 MONITOR OUT terminals (connect a TV<br />
or monitor here, see page 15)<br />
Use these terminals to output a video signal to<br />
a TV or monitor.<br />
6 PRE OUT analog terminals (connect an<br />
amplifier here, see page 71)<br />
Use these terminals to output the audio signal<br />
from this amplifier to a different amplifier if<br />
that's how you choose to set up your system.<br />
7 SPEAKERS terminals (see page 24)<br />
Use these terminals to connect speakers to the<br />
receiver. The FRONT, CENTER and SURROUND<br />
terminals are for the main speaker system and<br />
the SURROUND BACK speakers can be set to<br />
either the main system, the SECOND ZONE or<br />
the FRONT BI-AMP setting. See page 35 to set<br />
the SURROUND BACK speakers.<br />
32<br />
En
Displays & Controls<br />
7<br />
SWITCHED 100W MAX<br />
SPEAKERS<br />
SURROUND BACK /<br />
Å R FRONT L CENTER R SURROUND<br />
ı<br />
L R<br />
L<br />
ª<br />
9<br />
(multi-voltage<br />
model only)<br />
TWO VOLTAGE SELECTORS<br />
220V<br />
110V<br />
110V<br />
120-127V<br />
230<br />
240V<br />
120−127V<br />
220V<br />
230-240V<br />
AC IN<br />
AC OUTLET<br />
ª<br />
10<br />
(multi-voltage<br />
model only)<br />
8<br />
(European<br />
model only)<br />
PREPARATION PREPARATION<br />
·<br />
·<br />
8 AC OUTLET (European model only)<br />
(switced 100 W max)<br />
Hook up an external component to the power<br />
supply of this receiver. Only do this with audio<br />
or video components being used in this system<br />
and never hook up heavy equipment (like TVs,<br />
heaters, air conditioners, refrigerators, etc.) to<br />
this receiver.<br />
9 Voltage Selector (multi-voltage model<br />
only)<br />
Use to match the voltage coming into the<br />
receiver with the voltage in your country or<br />
region (see page 3).<br />
10 AC IN (multi-voltage model only)<br />
Hook up the power cord to this terminal.<br />
11 Audio input/output terminals (connect<br />
analog components here, see page 19)<br />
Use these terminals to input/output the audio<br />
signal from analog components (like a cassette<br />
deck or turntable). These are analog jacks.<br />
12 Video components input/output<br />
terminals<br />
Input/output signals from your video components<br />
(DVD, VCR, TV tuners, SAT tuners, etc.)<br />
here. (see page 16–18).<br />
13 MULTI CH IN terminals (see page 20)<br />
Use these terminals to input a multichannel<br />
surround signal (for example, a DVD-Audio<br />
signal) in an analog fashion. These are analog<br />
jacks.<br />
33<br />
En
STANDBY/ON<br />
MOVIE<br />
MUSIC<br />
MULTI JOG<br />
ENTER<br />
STANDBY<br />
MULTI JOG CONTROL<br />
SET UP RETURN<br />
PHONES<br />
SPEAKERS<br />
SIGNAL<br />
SELECT<br />
HI-BIT<br />
HI-SAMPLING<br />
SB CH<br />
MODE<br />
TONE CONTROL<br />
TONE BASS/TREBLE<br />
BAND<br />
CLASS<br />
SELECT<br />
AUTO<br />
AUTO<br />
AUTO<br />
AUTO<br />
AUTO<br />
AUTO<br />
AUTO<br />
AUTO<br />
Setting Up for Surround Sound<br />
To ensure the best possible surround sound, complete the following setup operations. Some of these are the<br />
same (and take precedence over) the settings you made in the Easy Setup Guide, so consider if the ones you<br />
made at that time were adequate. If you feel they were, move on to the next setting in this section.<br />
Use the arrow buttons (5∞) and the ENTER button on the remote control to navigate the display on the<br />
receiver. Conversely, you can use the MULTI JOG dial and ENTER button on the front panel.<br />
2<br />
RECEIVER MULTI<br />
OPERATION<br />
DVD/LD<br />
VCR 2<br />
MOVIE<br />
STEREO/<br />
DIRECT<br />
MENU<br />
SYSTEM<br />
SETUP<br />
AUDIO<br />
SURROUND<br />
MODE<br />
MULTI CONTROL<br />
MUSIC<br />
ENTER<br />
TUNER EDIT<br />
ST<br />
TV/SAT<br />
CD<br />
TUNE<br />
SYSTEM<br />
OFF<br />
TUNER<br />
ACOUSTIC<br />
EQ<br />
SB CH<br />
MODE<br />
MIDNIGHT<br />
MASTER<br />
VOLUME<br />
ENTER<br />
TUNE<br />
VCR1/DVR<br />
TEXT ON<br />
ST<br />
SOURCE<br />
TV CONT<br />
RECEIVER<br />
INPUT<br />
MULTI CH<br />
INPUT<br />
MUTE<br />
TOP MENU<br />
GUIDE<br />
RETURN<br />
1<br />
3-4<br />
3-4 2 RETURN button<br />
4 Use the 5∞ buttons to navigate<br />
through the menus. When you<br />
have the setting you want in a<br />
particular menu, press ENTER.<br />
In each mode, the current settings are displayed.<br />
We suggest you do a basic system setup for<br />
surround sound when you first hook up the<br />
receiver. That gets it out of the way and you won't<br />
need to do it again unless you change your home<br />
set up (by adding new speakers, etc.). To do a<br />
basic setup use SURRBACK and NORMAL setups<br />
below.<br />
To do a more advanced setup for surround sound<br />
see EXPERT setup starting on page 82.<br />
SURRBACK (Surround Back) SYSTEM (See<br />
page 35)<br />
Use to choose options for your surround back<br />
speakers.<br />
SIGNAL PRO LOGIC Neo :6<br />
DIGITAL<br />
RF DTS ES EX<br />
DIGITAL MPEG AAC<br />
ANALOG STEREO<br />
SB CH DSP<br />
ON MOVIE<br />
OFF MUSIC<br />
LOUDNESS MIDNIGHT TONE DNR ATT STEREO MONO<br />
TUNED RF ATT<br />
RDS EON<br />
Hi-BIT/<br />
SAMPLING<br />
MULTI-ROOM<br />
dB<br />
L C R LFE<br />
LS S RS SP A B<br />
QUICK setup (see page 13)<br />
Use to setup your surround sound system in the<br />
minimum amount of time.<br />
SIGNAL PRO LOGIC Neo :6<br />
DIGITAL<br />
RF DTS ES EX<br />
DIGITAL MPEG AAC<br />
ANALOG STEREO<br />
SB CH DSP<br />
ON MOVIE<br />
OFF MUSIC<br />
LOUDNESS MIDNIGHT TONE DNR ATT STEREO MONO<br />
TUNED RF ATT<br />
RDS EON<br />
Hi-BIT/<br />
SAMPLING<br />
MULTI-ROOM<br />
dB<br />
L C R LFE<br />
LS S RS SP A B<br />
1 Turn on the receiver and press<br />
the RECEIVER button on the<br />
remote control.<br />
2 Press the SYSTEM SETUP<br />
button.<br />
SIGNAL PRO LOGIC Neo :6<br />
AUTO DIGITAL<br />
RF DTS ES EX<br />
DIGITAL MPEG AAC<br />
ANALOG STEREO<br />
SB CH DSP<br />
AUTO ON MOVIE<br />
OFF MUSIC<br />
L C R LFE<br />
LS S RS SP A B<br />
LOUDNESS MIDNIGHT TONE DNR ATT STEREO MONO<br />
TUNED RF ATT<br />
RDS EON<br />
Hi-BIT/<br />
SAMPLING<br />
MULTI-ROOM<br />
This display appears on the receiver.<br />
3 SURROUND SETUP should be<br />
selected. If it isn’t use the 5∞<br />
buttons to select it. Press the<br />
ENTER button.<br />
dB<br />
NORMAL setup (see pages 36–40)<br />
Use this method to <strong>manual</strong>ly adjust all the<br />
surround sound functions.<br />
SIGNAL PRO LOGIC Neo :6<br />
DIGITAL<br />
RF DTS ES EX<br />
DIGITAL MPEG AAC<br />
ANALOG STEREO<br />
SB CH DSP<br />
ON MOVIE<br />
OFF MUSIC<br />
L C R LFE<br />
LS S RS SP A B<br />
LOUDNESS MIDNIGHT TONE DNR ATT STEREO MONO<br />
TUNED RF ATT<br />
RDS EON<br />
Hi-BIT/<br />
SAMPLING<br />
MULTI-ROOM<br />
EXPERT setup (see page 82–90)<br />
Use these settings to fine tune your surround<br />
sound and make it more personalized.<br />
SIGNAL PRO LOGIC Neo :6<br />
DIGITAL<br />
RF DTS ES EX<br />
DIGITAL MPEG AAC<br />
ANALOG STEREO<br />
SB CH DSP<br />
ON MOVIE<br />
OFF MUSIC<br />
L C R LFE<br />
LS S RS SP A B<br />
LOUDNESS MIDNIGHT TONE DNR ATT STEREO MONO<br />
TUNED RF ATT<br />
RDS EON<br />
Hi-BIT/<br />
SAMPLING<br />
MULTI-ROOM<br />
dB<br />
dB<br />
SIGNAL PRO LOGIC Neo :6<br />
AUTO DIGITAL<br />
RF DTS ES EX<br />
DIGITAL MPEG AAC<br />
ANALOG STEREO<br />
SB CH DSP<br />
AUTO ON MOVIE<br />
OFF MUSIC<br />
LOUDNESS MIDNIGHT TONE DNR ATT STEREO MONO<br />
TUNED RF ATT<br />
RDS EON<br />
Hi-BIT/<br />
SAMPLING<br />
MULTI-ROOM<br />
dB<br />
L C R LFE<br />
LS S RS SP A B<br />
34<br />
En<br />
This display appears on the receiver.
STANDBY/ON<br />
MOVIE<br />
MUSIC<br />
MULTI JOG<br />
ENTER<br />
STANDBY<br />
MULTI JOG CONTROL<br />
SET UP RETURN<br />
PHONES<br />
SPEAKERS<br />
SIGNAL<br />
SELECT<br />
HI-BIT<br />
HI-SAMPLING<br />
SB CH<br />
MODE<br />
TONE CONTROL<br />
TONE BASS/TREBLE<br />
BAND<br />
CLASS<br />
STA<br />
SELECT<br />
AUTO<br />
AUTO<br />
AUTO<br />
AUTO<br />
AUTO<br />
AUTO<br />
SURROUND SET UP<br />
Setting Up for Surround Sound<br />
SURRBACK SYSTEM (Surround Back System)<br />
This setup selects how your surround back system will be used. If you want to use it for surround back speakers<br />
in your main speaker system choose NORMAL SYSTEM. In this case you won’t have any B (or secondary)<br />
speaker system as these speakers fill that role also for the <strong>VSX</strong>-<strong>D1011</strong>. If you want to use your surround back<br />
speakers in a different room choose SECOND ZONE. Alternatively, you can choose the FRONT BI-AMP setting,<br />
in order to deliver more power to the front speakers. If starting fresh, complete steps 1-3 in page 34.<br />
RECEIVER MULTI<br />
OPERATION<br />
DVD/LD<br />
VCR 2<br />
MOVIE<br />
STEREO/<br />
DIRECT<br />
MENU<br />
SYSTEM<br />
SETUP<br />
AUDIO<br />
CHANNEL−<br />
SURROUND<br />
MODE<br />
MULTI CONTROL<br />
MUSIC<br />
ENTER<br />
TUNER EDIT<br />
ST<br />
TV/SAT<br />
CD<br />
TUNE<br />
TEXT OFF<br />
SYSTEM<br />
OFF<br />
TUNER<br />
ACOUSTIC<br />
EQ<br />
SB CH<br />
MODE<br />
MIDNIGHT<br />
MASTER<br />
VOLUME<br />
ENTER<br />
TUNE<br />
VCR1/DVR<br />
TEXT ON<br />
BAND<br />
ST<br />
SOURCE<br />
TV CONT<br />
RECEIVER<br />
INPUT<br />
MULTI CH<br />
INPUT<br />
MUTE<br />
TOP MENU<br />
GUIDE<br />
RETURN<br />
CHANNEL+<br />
RF ATT D.ACCESS MPX CLASS<br />
1-3<br />
2 Use the 5∞ buttons to select<br />
NORMAL SYSTEM, SECOND<br />
ZONE or FRONT BI-AMP setting.<br />
Press the ENTER button.<br />
NORMAL SYSTEM: if you want to use these<br />
speaker terminals for your surround back speakers<br />
in your main speaker system (referred to as the A<br />
speaker system).<br />
SIGNAL PRO LOGIC Neo :6<br />
DIGITAL<br />
RF DTS ES EX<br />
DIGITAL MPEG AAC<br />
ANALOG STEREO<br />
SB CH DSP<br />
ON MOVIE<br />
OFF MUSIC<br />
L C R LFE<br />
LS S RS SP A B<br />
LOUDNESS MIDNIGHT TONE DNR ATT STEREO MONO<br />
TUNED RF ATT<br />
RDS EON<br />
Hi-BIT/<br />
SAMPLING<br />
MULTI-ROOM<br />
SECOND ZONE: if you want to use the these<br />
speaker terminals for an independent speaker<br />
system (referred to as speaker system B).<br />
SIGNAL PRO LOGIC Neo :6<br />
DIGITAL<br />
RF DTS ES EX<br />
DIGITAL MPEG AAC<br />
ANALOG STEREO<br />
SB CH DSP<br />
ON MOVIE<br />
OFF MUSIC<br />
LOUDNESS MIDNIGHT TONE DNR ATT STEREO MONO<br />
TUNED RF ATT<br />
RDS EON<br />
Hi-BIT/<br />
SAMPLING<br />
MULTI-ROOM<br />
dB<br />
dB<br />
L C R LFE<br />
LS S RS SP A B<br />
1-3<br />
FRONT BI-AMP: Choose this setting if you want<br />
to deliver more power to your front speakers. This<br />
setting will use your surround back speaker<br />
terminals so you will only be able to get 5.1<br />
channel playback (see page 69).<br />
SIGNAL PRO LOGIC Neo :6<br />
DIGITAL<br />
RF DTS ES EX<br />
DIGITAL MPEG AAC<br />
ANALOG STEREO<br />
SB CH DSP<br />
ON MOVIE<br />
OFF MUSIC<br />
L C R LFE<br />
LOUDNESS MIDNIGHT TONE DNR ATT STEREO MONO<br />
TUNED RF ATT<br />
RDS EON<br />
Hi-BIT/<br />
SAMPLING<br />
MULTI-ROOM<br />
dB<br />
LS S RS SP A B<br />
3 EXIT should be selected. Press<br />
the ENTER button.<br />
SIGNAL PRO LOGIC Neo :6<br />
AUTO DIGITAL<br />
RF DTS ES EX<br />
DIGITAL MPEG AAC<br />
ANALOG STEREO<br />
SB CH DSP<br />
AUTO ON MOVIE<br />
OFF MUSIC<br />
LOUDNESS MIDNIGHT TONE DNR ATT STEREO MONO<br />
TUNED RF ATT<br />
RDS EON<br />
Hi-BIT/<br />
SAMPLING<br />
MULTI-ROOM<br />
dB<br />
L C R LFE<br />
1 SURRBACK should be selected.<br />
If it isn’t use the 5∞ buttons to<br />
select it. Press the ENTER<br />
button.<br />
SIGNAL PRO LOGIC Neo :6<br />
AUTO DIGITAL<br />
RF DTS ES EX<br />
DIGITAL MPEG AAC<br />
ANALOG STEREO<br />
SB CH DSP<br />
AUTO ON MOVIE<br />
OFF MUSIC<br />
LOUDNESS MIDNIGHT TONE DNR ATT STEREO MONO<br />
TUNED RF ATT<br />
RDS EON<br />
Hi-BIT/<br />
SAMPLING<br />
MULTI-ROOM<br />
dB<br />
LS S RS SP<br />
A B<br />
You will return to the SURROUND SETUP display.<br />
Next, proceed to either QUICK (on page 13) or<br />
NORMAL (on page 36).<br />
If you want to change a setting before<br />
proceeding<br />
start over from step 1.<br />
L C R LFE<br />
LS S RS SP A B<br />
35<br />
En
STANDBY/ON<br />
MOVIE<br />
MUSIC<br />
MULTI JOG<br />
ENTER<br />
STANDBY<br />
MULTI JOG CONTROL<br />
SET UP RETURN<br />
PHONES<br />
SPEAKERS<br />
SIGNAL<br />
SELECT<br />
HI-BIT<br />
HI-SAMPLING<br />
SB CH<br />
MODE<br />
TONE CONTROL<br />
TONE BASS/TREBLE<br />
BAND<br />
CLASS<br />
STA<br />
SELECT<br />
AUTO<br />
AUTO<br />
AUTO<br />
AUTO<br />
AUTO<br />
AUTO<br />
Setting Up for Surround Sound<br />
NORMAL setup<br />
This is the <strong>manual</strong> method to setup your sound parameters for surround sound. It is more exact than the QUICK<br />
set up and should give you finer surround sound.<br />
You only need to do these settings once (unless you change the placement of your current speaker system or<br />
add new speakers, etc.). If starting fresh, complete steps 1-3 in page 34.<br />
RECEIVER MULTI<br />
OPERATION<br />
SYSTEM<br />
OFF<br />
SOURCE<br />
SPEAKER SET (See pages 37–38)<br />
Use to specify the type and number of speakers<br />
you connected.<br />
DVD/LD<br />
MULTI CONTROL<br />
TV/SAT<br />
VCR1/DVR<br />
TV CONT<br />
SIGNAL PRO LOGIC Neo :6<br />
DIGITAL<br />
RF DTS ES EX<br />
DIGITAL MPEG AAC<br />
ANALOG STEREO<br />
SB CH DSP<br />
ON MOVIE<br />
OFF MUSIC<br />
LOUDNESS MIDNIGHT TONE DNR ATT STEREO MONO<br />
TUNED RF ATT<br />
RDS EON<br />
Hi-BIT/<br />
SAMPLING<br />
MULTI-ROOM<br />
dB<br />
VCR 2<br />
CD<br />
TUNER<br />
RECEIVER<br />
L C R LFE<br />
LS S RS SP A B<br />
MOVIE<br />
MUSIC<br />
ACOUSTIC<br />
EQ<br />
INPUT<br />
STEREO/<br />
DIRECT<br />
MENU<br />
SYSTEM<br />
SETUP<br />
AUDIO<br />
CHANNEL−<br />
SURROUND<br />
MODE<br />
ENTER<br />
TUNER EDIT<br />
ST<br />
1-2<br />
TUNE<br />
TEXT OFF<br />
SB CH<br />
MODE<br />
MIDNIGHT<br />
MASTER<br />
VOLUME<br />
ENTER<br />
TUNE<br />
TEXT ON<br />
BAND<br />
ST<br />
MULTI CH<br />
INPUT<br />
MUTE<br />
TOP MENU<br />
GUIDE<br />
RETURN<br />
CHANNEL+<br />
1-2<br />
CHANNEL LEVEL (See page 39)<br />
Use to balance the volumes of your different speakers.<br />
This is also necessary for the most realistic<br />
surround sound.<br />
SIGNAL PRO LOGIC Neo :6<br />
DIGITAL<br />
RF DTS ES EX<br />
DIGITAL MPEG AAC<br />
ANALOG STEREO<br />
SB CH DSP<br />
ON MOVIE<br />
OFF MUSIC<br />
L C R LFE<br />
LS S RS SP A B<br />
LOUDNESS MIDNIGHT TONE DNR ATT STEREO MONO<br />
TUNED RF ATT<br />
RDS EON<br />
Hi-BIT/<br />
SAMPLING<br />
MULTI-ROOM<br />
CHANNEL DELAY (See page 40)<br />
Use to select the distance settings for each set<br />
of speakers. You must add distance settings to<br />
all your speakers for the most realistic surround<br />
sound. Adding a slight delay to some speakers<br />
enhances sound separation and is particularly<br />
important for achieving a surround sound effect.<br />
You need to figure out the distance from your<br />
listening position to your speakers to add the<br />
proper delay.<br />
dB<br />
SIGNAL PRO LOGIC Neo :6<br />
DIGITAL<br />
RF DTS ES EX<br />
DIGITAL MPEG AAC<br />
ANALOG STEREO<br />
SB CH DSP<br />
ON MOVIE<br />
OFF MUSIC<br />
LOUDNESS MIDNIGHT TONE DNR ATT STEREO MONO<br />
TUNED RF ATT<br />
RDS EON<br />
Hi-BIT/<br />
SAMPLING<br />
MULTI-ROOM<br />
dB<br />
L C R LFE<br />
LS S RS SP A B<br />
1 Use the 5∞ buttons to select<br />
NORMAL. Press the ENTER<br />
button.<br />
See the next four pages for more information on<br />
these settings.<br />
SIGNAL PRO LOGIC Neo :6<br />
AUTO DIGITAL<br />
RF DTS ES EX<br />
DIGITAL MPEG AAC<br />
ANALOG STEREO<br />
SB CH DSP<br />
AUTO ON MOVIE<br />
OFF MUSIC<br />
LOUDNESS MIDNIGHT TONE DNR ATT STEREO MONO<br />
TUNED RF ATT<br />
RDS EON<br />
Hi-BIT/<br />
SAMPLING<br />
MULTI-ROOM<br />
dB<br />
L C R LFE<br />
LS S RS SP A B<br />
36<br />
En<br />
2 Use the 5∞ buttons to navigate<br />
through the NORMAL setup<br />
menus. When you have the<br />
setting you want in a particular<br />
menu, press ENTER.<br />
In each mode the current settings are displayed.<br />
We suggest you adjust all these settings when<br />
you first hook up the receiver. That gets them out<br />
of the way and you won't need to return to this<br />
setting mode unless you change your home set up<br />
by adding new speakers (etc.).
SURROUND SET UP<br />
Setting Up for Surround Sound<br />
SPEAKER SETTING<br />
The information below shows you how to select the correct settings for the type and number of speakers you<br />
connected. Most importantly, you need to decide how to route the sound for all the speakers you connected. To<br />
do this select the size of the front, center, surround and surround back speakers (if you hooked them up). It is<br />
important to make these settings as accurately as possible or, in some cases, you may not get the full<br />
soundtrack from a disc.<br />
Use the information below to complete the steps that follow and set up the receiver to match the speakers you<br />
have hooked up.<br />
If starting fresh, complete steps 1-2 in page 36.<br />
FRONT (default setting is SMALL)<br />
Select SMALL to send bass frequencies to the subwoofer. Select LARGE if your speakers will reproduce bass<br />
frequencies effectively or if you did not connect a subwoofer. (If you select SMALL for the front speakers the<br />
subwoofer will automatically be switched YES. Also, the center and surround speakers cannot be set to<br />
LARGE if the front speakers are set to SMALL. In this case, all bass frequencies are sent to the subwoofer.)<br />
CENTER (default setting is SMALL)<br />
• Select LARGE if your speaker will reproduce bass frequencies effectively.<br />
• Select SMALL to send bass frequencies to the other speakers or subwoofer.<br />
• If you did not connect a center speaker, choose NO. In this case, the center channel is output from the<br />
front speakers.<br />
SURROUND (default setting is SMALL)<br />
• Select LARGE if your speakers will reproduce bass frequencies effectively.<br />
• Select SMALL to send bass frequencies to the other speakers or subwoofer.<br />
• If you did not connect surround speakers choose NO. In this case, the sound of the surround channels is<br />
output from the front and center speakers.<br />
• If the front speakers are set to SMALL, the surround speakers will automatically be set to SMALL.<br />
SURROUND BACK (default setting is SMALL X2)<br />
If you chose SECOND ZONE or FRONT BI-AMP in SURRBACK SYSTEM on page 35, or if you chose<br />
NO for SURROUND SPEAKERS, you won’t be able to choose this setting.<br />
• Select the number of surround back speakers you have. You can choose one speaker, two, or none.<br />
• If you select one, make sure that speaker if hooked up to the left surround back terminal.<br />
• Select LARGE if your speakers will reproduce bass frequencies effectively.<br />
• Select SMALL to send bass frequencies to the other speakers or subwoofer.<br />
• If you did not connect surround back speakers choose NO.<br />
• If the front speakers or the surround speakers are set to SMALL, the surround back speakers will automatically<br />
be set to SMALL.<br />
• If you choose THX in step 2 then the surround back speakers can only be set to SMALL (X1 or X2), or NO.<br />
SUBWOOFER (default setting is YES)<br />
• Leave it selected if you connected a subwoofer.<br />
• If you selected SMALL for the front speakers the subwoofer will automatically be set to on (you won’t be<br />
able to choose NO or PLUS).<br />
• If you did not connect a subwoofer choose NO. In this case, the bass frequencies are output from the front<br />
or surround speakers.<br />
• Choose the PLUS setting if you want stronger reproduction of deep bass sounds.<br />
• If you select PLUS the bass frequencies that would normally come out the front and center speakers are all<br />
routed to the subwoofer.<br />
37<br />
En
AUTO<br />
AUTO<br />
AUTO<br />
AUTO<br />
STANDBY/ON<br />
MOVIE<br />
MUSIC<br />
MULTI JOG<br />
ENTER<br />
STANDBY<br />
MULTI JOG CONTROL<br />
SET UP RETURN<br />
PHONES<br />
SPEAKERS<br />
SIGNAL<br />
SELECT<br />
HI-BIT<br />
HI-SAMPLING<br />
SB CH<br />
MODE<br />
TONE CONTROL<br />
TONE BASS/TREBLE<br />
BAND<br />
CLASS<br />
STA<br />
SELECT<br />
Setting Up for Surround Sound<br />
MENU<br />
SYSTEM<br />
SETUP<br />
TUNER EDIT<br />
ST<br />
MASTER<br />
VOLUME<br />
TUNE<br />
TEXT ON<br />
ST<br />
TOP MENU<br />
GUIDE<br />
AUDIO<br />
CHANNEL−<br />
ENTER<br />
1-6<br />
3 With the 5∞ buttons choose the<br />
speakers that you want to set.<br />
Press the ENTER button.<br />
TUNE<br />
TEXT OFF<br />
BAND<br />
RETURN<br />
CHANNEL+<br />
SIGNAL PRO LOGIC Neo :6<br />
AUTO DIGITAL<br />
RF DTS ES EX<br />
DIGITAL MPEG AAC<br />
ANALOG STEREO<br />
SB CH DSP<br />
AUTO ON MOVIE<br />
OFF MUSIC<br />
LOUDNESS MIDNIGHT TONE DNR ATT STEREO MONO<br />
TUNED RF ATT<br />
RDS EON<br />
Hi-BIT/<br />
SAMPLING<br />
MULTI-ROOM<br />
dB<br />
L C R LFE<br />
LS S RS SP<br />
A B<br />
RF ATT D.ACCESS MPX CLASS<br />
1-6<br />
You can select from FRONT, CENTER, SUR-<br />
ROUND or SURROUND BACK. The selected<br />
setting blinks.<br />
4 Use the 5∞ buttons to choose<br />
the number (YES or NO, X1 or<br />
X2) and the size (LARGE or<br />
SMALL) for each set of speakers.<br />
Press the ENTER button.<br />
SIGNAL PRO LOGIC Neo :6<br />
AUTO DIGITAL<br />
RF DTS ES EX<br />
DIGITAL MPEG AAC<br />
ANALOG STEREO<br />
SB CH DSP<br />
AUTO ON MOVIE<br />
OFF MUSIC<br />
LOUDNESS MIDNIGHT TONE DNR ATT STEREO MONO<br />
TUNED RF ATT<br />
RDS EON<br />
Hi-BIT/<br />
SAMPLING<br />
MULTI-ROOM<br />
dB<br />
L C R LFE<br />
LS S RS SP A B<br />
1 SPEAKER SET should be selected.<br />
If it isn’t use the 5∞ buttons to<br />
select it. Press the ENTER button.<br />
SIGNAL PRO LOGIC Neo :6<br />
AUTO DIGITAL<br />
RF DTS ES EX<br />
DIGITAL MPEG AAC<br />
ANALOG STEREO<br />
SB CH DSP<br />
AUTO ON MOVIE<br />
OFF MUSIC<br />
L C R LFE<br />
LS S RS SP A B<br />
LOUDNESS MIDNIGHT TONE DNR ATT STEREO MONO<br />
TUNED RF ATT<br />
RDS EON<br />
Hi-BIT/<br />
SAMPLING<br />
MULTI-ROOM<br />
2 Use the 5∞ buttons to select<br />
FREE or THX speaker system<br />
setting. Press the ENTER button.<br />
FREE: To set all the speakers.<br />
SIGNAL PRO LOGIC Neo :6<br />
DIGITAL<br />
RF DTS ES EX<br />
DIGITAL MPEG AAC<br />
ANALOG STEREO<br />
SB CH DSP<br />
ON MOVIE<br />
OFF MUSIC<br />
L C R LFE<br />
LS S RS SP A B<br />
LOUDNESS MIDNIGHT TONE DNR ATT STEREO MONO<br />
TUNED RF ATT<br />
RDS EON<br />
Hi-BIT/<br />
SAMPLING<br />
MULTI-ROOM<br />
THX: All speakers are set to SMALL and the<br />
SUBWF to YES. You can select the number of<br />
surround back speakers.<br />
SIGNAL PRO LOGIC Neo :6<br />
DIGITAL<br />
RF DTS ES EX<br />
DIGITAL MPEG AAC<br />
ANALOG STEREO<br />
SB CH DSP<br />
ON MOVIE<br />
OFF MUSIC<br />
L C R LFE<br />
LS S RS SP A B<br />
LOUDNESS MIDNIGHT TONE DNR ATT STEREO MONO<br />
TUNED RF ATT<br />
RDS EON<br />
Hi-BIT/<br />
SAMPLING<br />
MULTI-ROOM<br />
For FREE, select it and press ENTER. Then go to<br />
step 3.<br />
For THX, select it and press ENTER. Then go to<br />
step 4 but you only need to set the number of<br />
surround back speakers.<br />
dB<br />
dB<br />
dB<br />
PLUS is also a possibility for the SUBWF.<br />
If you selected THX in step 2, you only need to<br />
set the number of surround back speakers (X1,<br />
X2, or NO).<br />
5 Repeat steps 3 & 4 for all<br />
speakers channels.<br />
6 Use the 5∞ buttons to select<br />
EXIT and press ENTER.<br />
memo<br />
SIGNAL PRO LOGIC Neo :6<br />
AUTO DIGITAL<br />
RF DTS ES EX<br />
DIGITAL MPEG AAC<br />
ANALOG STEREO<br />
SB CH DSP<br />
AUTO ON MOVIE<br />
OFF MUSIC<br />
L C R LFE<br />
LS S RS SP A B<br />
LOUDNESS MIDNIGHT TONE DNR ATT STEREO MONO<br />
TUNED RF ATT<br />
RDS EON<br />
Hi-BIT/<br />
SAMPLING<br />
MULTI-ROOM<br />
Next, proceed to CHANNEL LEVEL next page.<br />
If you want to change a setting before<br />
proceeding<br />
start over from step 1.<br />
If you have a subwoofer and like lots of bass, it may<br />
seem logical to select LARGE for your front speakers<br />
and leave the subwoofer selected. This may not,<br />
however, yield the best bass results. Depending on<br />
the size and shape of your room you may actually<br />
experience a decrease in the amount of bass due to<br />
what is called low frequency cancellations. If you<br />
have a subwoofer, listen to the bass response with<br />
the front speakers set to LARGE and SMALL<br />
alternately and let your ears judge which sounds best.<br />
If you have a subwoofer, the safest option is to route<br />
all the bass sounds to it by selecting SMALL for the<br />
front speakers.<br />
dB<br />
38<br />
En
AUTO<br />
AUTO<br />
AUTO<br />
AUTO<br />
STANDBY/ON<br />
MOVIE<br />
MUSIC<br />
MULTI JOG<br />
ENTER<br />
STANDBY<br />
MULTI JOG CONTROL<br />
SET UP RETURN<br />
PHONES<br />
SPEAKERS<br />
SIGNAL<br />
SELECT<br />
HI-BIT<br />
HI-SAMPLING<br />
SB CH<br />
MODE<br />
TONE CONTROL<br />
TONE BASS/TREBLE<br />
BAND<br />
CLASS<br />
STA<br />
SELECT<br />
SURROUND SET UP<br />
CHANNEL LEVEL (channel balance)<br />
Setting Up for Surround Sound<br />
The following steps show you how to balance the sound output level of your speakers. Proper speaker balance<br />
is essential for obtaining high quality surround sound. If continuing from SPEAKER SETTING go to step 1. If<br />
starting fresh, complete steps 1-2 in page 36.<br />
1 CHANNEL LEVEL should be<br />
selected. If it isn’t use the 5∞<br />
buttons to select and press ENTER.<br />
SIGNAL PRO LOGIC Neo :6<br />
AUTO DIGITAL<br />
RF DTS ES EX<br />
DIGITAL MPEG AAC<br />
ANALOG STEREO<br />
SB CH DSP<br />
AUTO ON MOVIE<br />
OFF MUSIC<br />
L C R LFE<br />
LS S RS SP A B<br />
LOUDNESS MIDNIGHT TONE DNR ATT STEREO MONO<br />
TUNED RF ATT<br />
RDS EON<br />
Hi-BIT/<br />
SAMPLING<br />
MULTI-ROOM<br />
2 There are two ways to set the<br />
CHANNEL LEVEL: MANUAL or<br />
AUTO. Select a setting mode<br />
with the 5∞ buttons and press<br />
ENTER.<br />
Test tones will be output.<br />
WARNING : Be prepared! The test tones are<br />
output at a high volume level.<br />
MASTER VOLUME rotates to the reference<br />
position (0 dB) and the display on the receiver<br />
flashes TEST TONE. After a few seconds the<br />
test tone is output.<br />
MANUAL: move the test tone <strong>manual</strong>ly and<br />
adjust the channel level.<br />
SIGNAL PRO LOGIC Neo :6<br />
DIGITAL<br />
RF DTS ES EX<br />
DIGITAL MPEG AAC<br />
ANALOG STEREO<br />
SB CH DSP<br />
ON MOVIE<br />
OFF MUSIC<br />
L C R LFE<br />
LS S RS SP A B<br />
LOUDNESS MIDNIGHT TONE DNR ATT STEREO MONO<br />
TUNED RF ATT<br />
RDS EON<br />
Hi-BIT/<br />
SAMPLING<br />
MULTI-ROOM<br />
AUTO: the test tone moves by itself and you<br />
adjust the levels.<br />
SIGNAL PRO LOGIC Neo :6<br />
DIGITAL<br />
RF DTS ES EX<br />
DIGITAL MPEG AAC<br />
ANALOG STEREO<br />
SB CH DSP<br />
ON MOVIE<br />
OFF MUSIC<br />
L C R LFE<br />
LS S RS SP A B<br />
MENU TUNER EDIT<br />
SYSTEM<br />
SETUP<br />
AUDIO<br />
ST<br />
1-5<br />
TEXT ON<br />
TOP MENU<br />
LOUDNESS MIDNIGHT TONE DNR ATT STEREO MONO<br />
TUNED RF ATT<br />
RDS EON<br />
Hi-BIT/<br />
SAMPLING<br />
MULTI-ROOM<br />
TUNE<br />
GUIDE<br />
1-5<br />
ST<br />
ENTER<br />
TUNE<br />
RETURN<br />
dB<br />
dB<br />
dB<br />
3 Adjust the speaker level with the<br />
below instructions for the<br />
method you chose.<br />
Adjust the channel level from –10 dB to +10 dB in<br />
0.5 dB increments.<br />
The default setting is 0 dB.<br />
In MANUAL (<strong>manual</strong> test tone) mode<br />
To switch the test tone between each speaker use<br />
the 5∞ buttons and push ENTER. Adjust the level<br />
of each speaker using the 5∞ buttons and<br />
ENTER. When done go to step 4.<br />
In AUTO (automatic test tone) mode<br />
This mode switches the test tone between each<br />
speaker automatically. The test tone output cycles<br />
through the speakers in the following order:<br />
memo<br />
FRONT<br />
L<br />
SUB<br />
WOOFER<br />
CENTER<br />
SURROUND<br />
L<br />
FRONT<br />
R<br />
SURRBACK<br />
L<br />
SURROUND<br />
R<br />
SURRBACK<br />
R<br />
Adjust the level of each speaker using the 5∞<br />
buttons as the test tone is emitted and wait for it<br />
to move to the next speaker. When done go to<br />
step 5.<br />
If you want to change a setting before proceeding<br />
you need to complete the procedure and start<br />
over from step 1.<br />
4 When you have the levels you<br />
want press ENTER. EXIT should<br />
be selected (if it isn’t select it<br />
with the 5∞ buttons).<br />
5 Press ENTER.<br />
Next, proceed to CHANNEL DELAY next page.<br />
• If your subwoofer has a volume control, set it to the<br />
middle position before doing these operations.<br />
• If you are using a Sound Pressure Level (SPL) meter<br />
take the readings from your main listening position<br />
and adjust the level of each speaker to 75 dB SPL (Cweighting/slow<br />
reading).<br />
• The volume of the subwoofer test tone tends to<br />
sound lower than it actually is. You may need to<br />
adjust the level after testing your system with an<br />
actual soundtrack.<br />
39<br />
En
STANDBY/ON<br />
MOVIE<br />
MUSIC<br />
MULTI JOG<br />
ENTER<br />
STANDBY<br />
MULTI JOG CONTROL<br />
SET UP RETURN<br />
PHONES<br />
SPEAKERS<br />
SIGNAL<br />
SELECT<br />
HI-BIT<br />
HI-SAMPLING<br />
SB CH<br />
MODE<br />
TONE CONTROL<br />
TONE BASS/TREBLE<br />
BAND<br />
Setting Up for Surround Sound<br />
CHANNEL DELAY<br />
Adding a slight delay to some speakers is necessary to achieve proper sound depth, separation as well as an<br />
effective surround sound effect. You need to figure out the distance from your listening position to your<br />
speakers to add the proper delay. The following steps show you how to set the delay time for each channel by<br />
specifying the distances from your listening position to each speaker. If continuing from CHANNEL LEVEL go to<br />
step 1. If starting fresh, complete steps 1-2 in page 36.<br />
6<br />
MASTER<br />
VOLUME<br />
MENU TUNER EDIT TEXT ON TOP MENU<br />
SYSTEM<br />
SETUP<br />
AUDIO<br />
CHANNEL−<br />
ST<br />
TUNE<br />
GUIDE<br />
1-5<br />
ST<br />
ENTER<br />
TUNE<br />
TEXT OFF<br />
BAND<br />
RETURN<br />
CHANNEL+<br />
3 Use the 5∞ buttons to add or<br />
subtract the distance in feet that<br />
the speaker is from your normal<br />
listening position. Press the<br />
ENTER button.<br />
1-5<br />
6<br />
SIGNAL PRO LOGIC Neo :6<br />
AUTO DIGITAL<br />
RF DTS ES EX<br />
DIGITAL MPEG AAC<br />
ANALOG STEREO<br />
SB CH DSP<br />
AUTO ON MOVIE<br />
OFF MUSIC<br />
L C R LFE<br />
LS S RS SP A B<br />
LOUDNESS MIDNIGHT TONE DNR ATT STEREO MONO<br />
TUNED RF ATT<br />
RDS EON<br />
Hi-BIT/<br />
SAMPLING<br />
MULTI-ROOM<br />
Adjust the speaker distance in 0.1 m<br />
increments from 0.1 to 9.0 m.<br />
The default setting is 2.0 m.<br />
dB<br />
4 Repeat steps 2 & 3 for all<br />
speaker channels.<br />
5 Use the 5∞ buttons to select<br />
EXIT and press ENTER.<br />
1 The CHANNEL DELAY should be<br />
selected. If it isn’t use the 5∞<br />
buttons to select it. Press the<br />
ENTER button.<br />
SIGNAL PRO LOGIC Neo :6<br />
AUTO DIGITAL<br />
RF DTS ES EX<br />
DIGITAL MPEG AAC<br />
ANALOG STEREO<br />
SB CH DSP<br />
AUTO ON MOVIE<br />
OFF MUSIC<br />
L C R LFE<br />
LS S RS SP A B<br />
LOUDNESS MIDNIGHT TONE DNR ATT STEREO MONO<br />
TUNED RF ATT<br />
RDS EON<br />
Hi-BIT/<br />
SAMPLING<br />
MULTI-ROOM<br />
2 Select each speaker channel with<br />
the 5∞ buttons and press<br />
ENTER.<br />
dB<br />
SIGNAL PRO LOGIC Neo :6<br />
AUTO DIGITAL<br />
RF DTS ES EX<br />
DIGITAL MPEG AAC<br />
ANALOG STEREO<br />
SB CH DSP<br />
AUTO ON MOVIE<br />
OFF MUSIC<br />
L C R LFE<br />
LS S RS SP A B<br />
LOUDNESS MIDNIGHT TONE DNR ATT STEREO MONO<br />
TUNED RF ATT<br />
RDS EON<br />
Hi-BIT/<br />
SAMPLING<br />
MULTI-ROOM<br />
If you want to change a setting before<br />
proceeding<br />
start over from step 1.<br />
6 Press the SYSTEM SETUP<br />
button to leave the SYSTEM<br />
SETUP mode.<br />
dB<br />
SIGNAL PRO LOGIC Neo :6<br />
AUTO DIGITAL<br />
RF DTS ES EX<br />
DIGITAL MPEG AAC<br />
ANALOG STEREO<br />
SB CH DSP<br />
AUTO ON MOVIE<br />
OFF MUSIC<br />
LOUDNESS MIDNIGHT TONE DNR ATT STEREO MONO<br />
TUNED RF ATT<br />
RDS EON<br />
Hi-BIT/<br />
SAMPLING<br />
MULTI-ROOM<br />
dB<br />
L C R LFE<br />
LS S RS SP A B<br />
You can select from L, C, R, RS, SBR, SBL, LS and<br />
SW. The selected setting blinks.<br />
40<br />
En
STANDBY/ON<br />
MOVIE<br />
MUSIC<br />
MULTI JOG<br />
STANDBY<br />
AUDIO/VIDEO MULTI-CHANNEL RECEIVER <strong>VSX</strong>-<strong>D1011</strong><br />
ENTER STEREO/DIRECT MULTI CH IN ACOUSTIC EQ<br />
MASTER VOLUME<br />
MULTI JOG CONTROL SIGNAL HI-BIT SB CH<br />
STATION TUNING<br />
TUNER CHARACTER/ EON<br />
SET UP RETURN SELECT HI-SAMPLING MODE BAND CLASS SELECT<br />
EDIT SEARCH MODE<br />
MULTI JOG/ENTER<br />
PHONES<br />
TONE CONTROL<br />
SPEAKERS TONE BASS/TREBLE<br />
S-VIDEO<br />
VIDEO L<br />
VIDEO INPUT<br />
AUDIO<br />
R<br />
STANDBY/ON<br />
MOVIE MUSIC ENTER<br />
STANDBY<br />
BASIC<br />
Basic Operation<br />
Stereo and Multichannel Playback<br />
The following instructions show you how to play sound sources with the <strong>VSX</strong>-<strong>D1011</strong>.<br />
Before doing so be sure to complete the setup procedures described in "Easy Setup Guide Part 2" (starting on<br />
page 13) or "Setting Up for Surround Sound" (starting on page 34). This is particularly important to achieve a<br />
surround sound effect with Dolby Digital or DTS sources.<br />
2<br />
3<br />
4<br />
RECEIVER MULTI<br />
OPERATION<br />
DVD/LD<br />
VCR 2<br />
MOVIE<br />
STEREO/<br />
DIRECT<br />
MENU<br />
SYSTEM<br />
SETUP<br />
AUDIO<br />
CHANNEL−<br />
RF ATT<br />
DIMMER<br />
SURROUND<br />
MODE<br />
MULTI CONTROL<br />
MUSIC<br />
ENTER<br />
TUNER EDIT<br />
ST<br />
TV/SAT<br />
CD<br />
TEXT OFF<br />
D.ACCESS<br />
TUNE<br />
LOUDNESS<br />
SYSTEM<br />
OFF<br />
TUNER<br />
ACOUSTIC<br />
EQ<br />
SB CH<br />
MODE<br />
MIDNIGHT<br />
MASTER<br />
VOLUME<br />
ENTER<br />
TUNE<br />
VCR1/DVR<br />
TEXT ON<br />
BAND<br />
MPX<br />
TONE<br />
ST<br />
SOURCE<br />
TV CONT<br />
RECEIVER<br />
INPUT<br />
MULTI CH<br />
INPUT<br />
MUTE<br />
TOP MENU<br />
GUIDE<br />
RETURN<br />
CHANNEL+<br />
CLASS<br />
EFFECT/CH SEL<br />
ENTER<br />
3<br />
6<br />
1 Turn on the power of the playback<br />
component.<br />
2 Press the RECEIVER<br />
button ( STANDBY/ON<br />
on the front panel) to turn<br />
on the receiver.<br />
Be sure that the STANDBY indicator<br />
turns off on the front panel.<br />
3 Press the MULTI CONTROL (or<br />
INPUT) on the remote control to<br />
select the source you want to<br />
playback.<br />
Choose the type of signal input with the SIGNAL<br />
SELECT button.<br />
See the next page for more details, if necessary.<br />
STANDBY<br />
indicator<br />
SIGNAL SEL DNR BASS/TREBLE DISC<br />
VIDEO SEL<br />
INPUT<br />
SELECT<br />
HI-BIT<br />
TV CONTROL<br />
CHANNEL<br />
VOLUME<br />
RECEIVER<br />
+<br />
−<br />
+10<br />
SUB TITLE<br />
REMOTE<br />
SETUP<br />
4 Choose a LISTENING MODE one of<br />
two ways.<br />
For SURROUND modes: press MOVIE or MUSIC, use<br />
the | \ buttons to select the mode you want and<br />
press ENTER.<br />
For STEREO/DIRECT: for press the button for that<br />
mode.<br />
2<br />
4 4<br />
On the front panel, use the MOVIE or MUSIC buttons<br />
and the MULTI JOG dial. Press the button of the mode<br />
type you want and then use the dial to cycle through<br />
the possibilities. Press ENTER.<br />
See “SURROUND Modes” on pages 44–45 for details<br />
on which modes are available and in which situations<br />
they are designed to be used.<br />
5 Start playback of the component<br />
you selected in step 3.<br />
3<br />
6<br />
6 Adjust the volume by using the<br />
MASTER VOLUME –/+ buttons on<br />
the remote control. On the front<br />
panel use the MASTER VOLUME<br />
dial.<br />
41<br />
En
MULTI JOG CONTROL<br />
SET UP RETURN<br />
PHONES<br />
SPEAKERS<br />
SIGNAL<br />
SELECT<br />
TONE<br />
HI-BIT<br />
HI-SAMPLING<br />
SB CH<br />
MODE<br />
TONE CONTROL<br />
BASS/TREBLE<br />
BAND<br />
CLASS<br />
SELECT<br />
STATION TUNING<br />
S-VIDEO<br />
TUNER<br />
EDIT<br />
MULTI JOG/ENTER<br />
CHARACTER/<br />
SEARCH<br />
VIDEO L<br />
VIDEO INPUT<br />
AUDIO<br />
EON<br />
MODE<br />
R<br />
Basic Operation<br />
Switching ANALOG/DIGITAL Signal Input<br />
This button selects the type of input signal, ANALOG or DIGITAL, sent to the receiver. You need to take special<br />
care to switch to the appropriate input when necessary. For example, the switch would have to be on DIGITAL<br />
to hear digital sources like Dolby Digital or DTS but it would have to be on analog to record from the ANALOG<br />
out jacks on the receiver. The default setting is AUTO (which chooses digital over analog when both are<br />
available but goes with whatever is available) for: DVD/LD, TV/SAT, VIDEO, CD, CDR/TAPE1. The default setting<br />
is ANALOG for: VCR1/DVR, VCR2, MD/TAPE2, TUNER and LINE.<br />
1 Press RECEIVER.<br />
RECEIVER MULTI<br />
OPERATION<br />
DVD/LD<br />
VCR 2<br />
MOVIE<br />
STEREO/<br />
DIRECT<br />
MENU<br />
SYSTEM<br />
SETUP<br />
SURROUND<br />
MODE<br />
MULTI CONTROL<br />
MUSIC<br />
ENTER<br />
TUNER EDIT<br />
ST<br />
TV/SAT<br />
CD<br />
SYSTEM<br />
OFF<br />
TUNER<br />
ACOUSTIC<br />
EQ<br />
SB CH<br />
MODE<br />
MIDNIGHT<br />
MASTER<br />
VOLUME<br />
TUNE<br />
ENTER<br />
VCR1/DVR<br />
TEXT ON<br />
ST<br />
SOURCE<br />
TV CONT<br />
RECEIVER<br />
INPUT<br />
MULTI CH<br />
INPUT<br />
MUTE<br />
TOP MENU<br />
GUIDE<br />
1<br />
2 Press the SIGNAL SEL (SIGNAL<br />
SELECT on the front panel) button to<br />
select the input signal corresponding<br />
to the format of the source<br />
component.<br />
Each press switches the signal in the order below:<br />
AUTO ANALOG DIGITAL<br />
AUDIO<br />
TUNE<br />
RETURN<br />
CHANNEL−<br />
TEXT OFF<br />
BAND<br />
CHANNEL+<br />
memo<br />
2<br />
2<br />
RF ATT<br />
DIMMER<br />
LOUDNESS<br />
TONE<br />
EFFECT/CH SEL<br />
SIGNAL SEL DNR BASS/TREBLE DISC<br />
VIDEO SEL<br />
INPUT<br />
SELECT<br />
D.ACCESS<br />
HI-BIT<br />
TV CONTROL<br />
CHANNEL<br />
MPX<br />
VOLUME<br />
RECEIVER<br />
+<br />
−<br />
CLASS<br />
ENTER<br />
+10<br />
SUB TITLE<br />
REMOTE<br />
SETUP<br />
• When DIGITAL signal is selected, 2 DIGITAL lights<br />
when a Dolby Digital signal is input; DTS lights when a<br />
DTS signal is input.<br />
• If no digital inputs are assigned (see page 80) you can<br />
only choose ANALOG in the SIGNAL SELECT.<br />
• Because the audio signal from a karaoke microphone<br />
and LDs are recorded with analog audio only, they are<br />
not output from the digital outputs. Set SIGNAL<br />
SELECT to ANALOG to listen to these formats.<br />
• When an LD with DTS is played back with the SIGNAL<br />
SELECT set in ANALOG, digital noise caused by playing<br />
back the DTS signal directly (with no decoding) is<br />
output. To prevent noise, you need to make digital<br />
connections (See pages 21 & 22) and set SIGNAL<br />
SELECT to AUTO or DIGITAL.<br />
• Some DVD players don’t output DTS signals. For more<br />
details, refer to the instruction <strong>manual</strong> supplied with<br />
your DVD player.<br />
• This receiver can only play back Dolby Digital, PCM (32<br />
kHz, 44.1 kHz, 48 kHz, 88.2 kHz and 96 kHz sampling<br />
frequency), and DTS digital signal formats. If your<br />
source is not one of these select ANALOG for playback.<br />
42<br />
En
BASIC<br />
Basic Operation<br />
Listening Modes<br />
The three listening mode types on the receiver are explained here (to select listening modes see page 41).<br />
The kind of playback you can get in the three modes depends on what kind of a source (DVD, etc.) you are<br />
using. The basic distinction is between 2 channel sources and multichannel sources. The MOVIE and MUSIC<br />
modes that are available to you will also differ according to your source and which SB CH MODE you choose.<br />
This is explained below as well.<br />
For home theater the MOVIE and MUSIC listening modes are designed to deliver realistic and powerful<br />
multichannel surround sound that recreates the movie theater or concert experience. The first four MOVIE<br />
modes (THX CINEMA, 2PRO LOGIC II MOVIE, 2PRO LOGIC, NEO:6 CINEMA) and first two MUSIC modes<br />
(2PRO LOGIC II MUSIC, NEO:6 MUSIC) incorporate pure decoding of the signal. That is they present it as it<br />
was recorded in the sound studio. The other modes are DSP modes. They add some type of effect to the signal.<br />
You may need to experiment with these modes to see which suit your home system and personal tastes.<br />
The MUSIC and STEREO modes are designed to be used with music sources but some MUSIC modes are also<br />
suitable for film soundtracks. Again, try different modes with various soundtracks to see which you like but you<br />
must choose one of the MOVIE and MUSIC listening modes in order to get surround sound.<br />
Depending on your setup, in STEREO mode only the front two speakers, and sometimes the subwoofer (if you<br />
have one), are used.<br />
STEREO modes<br />
When a source is played in this mode, it plays through just the front left and right speakers (and possibly your<br />
subwoofer depending on your speaker settings). Dolby Digital and DTS multichannel sources are downmixed<br />
to stereo.<br />
STEREO<br />
In STEREO mode the audio plays according to the surround setup settings and you can still use ACOUSTIC<br />
CALIBRATION EQ, DIGITAL NR, MIDNIGHT, LOUDNESS, HI-BIT HI-SAMPLING mode and TONE Control<br />
functions.<br />
DIRECT<br />
In DIRECT mode, the audio bypasses all types of signal processing to remain as close to the source audio<br />
quality as possible.<br />
memo<br />
If you switch on ACOUSTIC CALIBRATION EQ, DIGITAL NR, MIDNIGHT, LOUDNESS, HI-BIT HI-<br />
SAMPLING mode and TONE Control functions when DIRECT is selected, the receiver automatically<br />
switches to STEREO.<br />
43<br />
En
Basic Operation<br />
MOVIE modes (SURROUND mode)<br />
The MOVIE mode is a newly designed system for enhancing movie soundtracks and other audio-visual sources<br />
that optimizes its effects in accordance with your source, SB CH MODE and speaker configuration. The first four<br />
modes (THX CINEMA, 2PRO LOGIC II MOVIE, 2PRO LOGIC, NEO:6 CINEMA) are for pure decoding of<br />
multichannel sound sources (for example, Dolby Digital or DTS). With these modes the receiver will<br />
automatically employ the format of the sound source (for example, Dolby Digital or DTS) and display it on<br />
receiver. With two channel sources these first four modes will create surround channels. Next, there are six<br />
PIONEER original sound modes that use DSP (Digital Signal Processing) to create different types of sound<br />
environments as described below.<br />
THX CINEMA<br />
THX is a set of technical standards created by Lucasfilm Ltd. These standards were designed to emulate a<br />
film sound stage and thus reproduce, with the greatest possible accuracy, the soundtrack intended by the<br />
filmmakers.<br />
2PL II MOVIE (2PRO LOGIC II MOVIE)*<br />
This mode gives 5.1 channel surround sound. It is suitable for movies, especially those recorded in Dolby<br />
Surround. The channel separation and movement of surround effects is comparable to Dolby Digital 5.1.<br />
With sources other than stereo (5.1, etc.) the display will automatically show the type of decoding being<br />
employed (Dolby Digital, DTS-ES, etc.).<br />
2PRO LOGIC*<br />
This mode gives 4.1 channel surround sound. It is less sensitive to the quality of the source material, so<br />
may be useful when 2 PRO LOGIC II MOVIE or 2 PRO LOGIC II MUSIC modes do not give good<br />
results. With sources other than stereo (5.1, etc.) the display will automatically show the type of decoding<br />
being employed (Dolby Digital, DTS-ES, etc.).<br />
NEO:6 CINEMA*<br />
This mode gives 6.1 channel surround sound and is suitable for movies. The NEO:6 CINEMA mode delivers<br />
good channel separation for movie soundtracks. With sources other than stereo (5.1, etc.) the display will<br />
automatically show the type of decoding being employed (Dolby Digital, DTS-ES, etc.).<br />
ACTION<br />
This mode is designed for action movies, which generally use lots of sound effects. The mode enriches the<br />
sound to make it more realistic and extends the parameters to pick up high and low sound effects.<br />
SCI-FI<br />
This mode is designed for science fiction movies. It creates a broad sound space, separating dialog from<br />
sound effects to heighten the overall impact of the soundtrack.<br />
DRAMA<br />
This mode is designed for movies with a lot of dialog. The elements of dialog are enhanced, making the<br />
characters seem more real. The mode also compresses the dynamic range somewhat so loud sounds do<br />
not overpower softer ones (compare this with the MIDNIGHT listening mode explained on page 48).<br />
MUSICAL<br />
This mode is primarily for music and adds a spacious feeling to the sound. A long delay time of reflected<br />
sounds provides resonant tones which emulate a concert hall.<br />
MONOFILM<br />
This mode is designed for older movies which are recorded with mono soundtracks. The special sound<br />
processing of this mode will allow you to experience these movies in surround sound even though they<br />
were not recorded that way originally.<br />
5/7-D THEATER<br />
This mode is especially designed to give sound depth to stereo sources. The overall effect builds a<br />
dynamic and broad sound space, allowing two-channel (stereo) signals to faithfully imitate a five speaker<br />
sound. The mode should be used in conjunction with Dolby Pro Logic for sources bearing the<br />
DOLBY SURROUND mark. The display will show either 5-D THEATER or 7-D THEATER according to the source,<br />
SB CH MODE and speaker configuration.<br />
* When you input a multichannel signal the decoding is done automatically so you cannot choose these<br />
modes.<br />
44<br />
En
BASIC<br />
Basic Operation<br />
MUSIC modes (SURROUND mode)<br />
The MUSIC modes allow you to transform your living room into a variety of different sonic environments when<br />
playing either two-channel or multichannel sources. It optimizes its effects in accordance with your source, SB<br />
CH MODE and speaker configuration. The first two modes (2PRO LOGIC II MUSIC, NEO:6 MUSIC) for pure<br />
decoding of multichannel sound sources (for example, Dolby Digital or DTS). With these modes the receiver will<br />
automatically employ the format of the sound source (for example, Dolby Digital or DTS) and display it on<br />
receiver. With two channel sources these first two modes will create surround channels. Then there are five<br />
PIONEER original sound modes that use DSP (Digital Signal Processing) to create different types of sound<br />
environments as described below. Lastly, the 5/7-CH STEREO mode simply outputs a stereo signal through all<br />
of your speakers.<br />
2PL II MUSIC (2PRO LOGIC II MUSIC)*<br />
This mode gives 5.1 channel surround sound and is suitable for music. Compared to the Movie Mode PRO<br />
LOGIC, the surround effect is more enveloping. With sources other than stereo (5.1, etc.) the display will<br />
automatically show the type of decoding being employed (Dolby Digital, DTS-ES, etc.).<br />
NEO:6 MUSIC*<br />
This mode gives 6.1 channel surround sound and is suitable for music. The NEO:6 MUSIC mode plays the<br />
stereo source as is through the front left/right speakers, and generates a natural, ambient surround and<br />
center sound. With sources other than stereo (5.1, etc.) the display will automatically show the type of<br />
decoding being employed (Dolby Digital, DTS-ES, etc.).<br />
CLASSICAL<br />
Simulates the acoustic effects of a large concert hall. Suitable for classical music. A long delay time of<br />
reflected sounds, coupled with reverb effects, let the listener experience the dynamic and rich sounds<br />
characteristic of concert halls and powerful orchestral performances.<br />
CHAMBER<br />
Simulates the acoustic environment of a very resonant concert hall. Rich reverberation and a full sound<br />
create the impression of a lively performance space.<br />
JAZZ<br />
Simulates the acoustic effects of a jazz club. Reflected sound is virtually below 100 msec so that the<br />
listener can experience a live band effect.<br />
ROCK<br />
Simulates the acoustic effects of a mid-sized concert hall. The listener can experience a live band effect<br />
with good separation of the instruments, a strong bass and the vivid feeling of a live performance.<br />
DANCE<br />
Simulates the acoustic effects of a dance club. Features a strong bass sound.<br />
Reflected sound delay time is virtually below 50 msec, for the listener to experience the visceral power of<br />
dance music.<br />
5/7-CH STEREO<br />
Simulates the acoustic environment of a regular stereo while using all the speakers in the system to induce<br />
a rich, all-around sound. The display will change to 5-CH STEREO or 7-CH STEREO according to the SB CH<br />
MODE and speaker configuration.<br />
* When you input a multichannel signal the decoding is done automatically so you cannot choose<br />
these modes.<br />
45<br />
En
Basic Operation<br />
Adjusting the Effect of a Listening Mode<br />
The DSP (Digital Signal Processing) listening modes have sound processing added to accentuate a certain kind<br />
of atmosphere or effect (see the preceding pages for explanation). You can choose if you want to strengthen or<br />
weaken this effect in the given mode. The DSP MOVIE modes are: ACTION, SCI-FI, DRAMA, MUSICAL,<br />
MONOFILM, 5/7-D THEATER. The DSP MUSIC modes are: CLASSICAL, CHAMBER, JAZZ, ROCK, DANCE.<br />
The following instructions show you how to adjust the amount of effect.<br />
1 Press RECEIVER.<br />
RECEIVER MULTI<br />
OPERATION<br />
DVD/LD<br />
VCR 2<br />
MOVIE<br />
STEREO/<br />
DIRECT<br />
MENU<br />
MULTI CONTROL<br />
TV/SAT<br />
CD<br />
SURROUND<br />
MODE<br />
MUSIC<br />
ENTER<br />
TUNER EDIT<br />
SYSTEM<br />
OFF<br />
VCR1/DVR<br />
TUNER<br />
ACOUSTIC<br />
EQ<br />
SB CH<br />
MODE<br />
MIDNIGHT<br />
MASTER<br />
VOLUME<br />
TEXT ON<br />
SOURCE<br />
TV CONT<br />
RECEIVER<br />
INPUT<br />
MULTI CH<br />
INPUT<br />
MUTE<br />
TOP MENU<br />
1<br />
2 Press the EFFECT/CH SEL button<br />
repeatedly until you see EFFECT in the<br />
receiver’s display.<br />
3 Use the +/– buttons to add or subtract<br />
the amount of effect.<br />
SYSTEM<br />
SETUP<br />
ST<br />
TUNE<br />
ENTER<br />
ST<br />
GUIDE<br />
memo<br />
• The amount of effect can be adjusted ranging from 10<br />
to 90 (the default setting value is 50) by pressing +/–.<br />
AUDIO<br />
TUNE<br />
RETURN<br />
CHANNEL−<br />
RF ATT<br />
DIMMER<br />
TEXT OFF<br />
LOUDNESS<br />
BAND<br />
TONE<br />
+<br />
−<br />
CHANNEL+<br />
EFFECT/CH SEL<br />
SIGNAL SEL DNR BASS/TREBLE DISC<br />
VIDEO SEL<br />
INPUT<br />
SELECT<br />
D.ACCESS<br />
HI-BIT<br />
TV CONTROL<br />
CHANNEL<br />
MPX<br />
VOLUME<br />
RECEIVER<br />
CLASS<br />
ENTER<br />
+10<br />
SUB TITLE<br />
REMOTE<br />
SETUP<br />
2<br />
3<br />
Adding/Adjusting the Effect in Dolby Pro<br />
Logic II MUSIC Mode<br />
The Dolby Pro Logic II MUSIC mode has three settings you can<br />
choose from which adjust the spatial feeling of the surround sound.<br />
These settings are best matched to each individual source instead<br />
of one setting being left on for all sources. The three settings and<br />
how to apply them are explained here. To start this setup select<br />
Dolby Pro Logic ll (if necessary) with the MUSIC button.<br />
1 Press RECEIVER.<br />
2 Press the EFFECT/CH SEL button<br />
repeatedly and select the setting you<br />
want. They appear in the receiver’s<br />
display.<br />
CENTER WIDTH : With Pro Logic decoding center channel<br />
signals can come only from the center speaker. If no center<br />
speaker is present this channel is split between the two front<br />
speakers, creating a "phantom" channel. The CENTER WIDTH<br />
feature lets you adjust the center channel so it can heard only<br />
from the center speaker, only as a "phantom" channel or in<br />
varying degrees of both.<br />
DIMENSION: This allows you to adjust the soundfield<br />
towards the front or towards the rear of your room.<br />
PANORAMA: This gives the music a wraparound surround<br />
feel.<br />
46<br />
En<br />
3 Use the +/– buttons to add or subtract<br />
the amount of effect or turn on/off.<br />
CENTER WIDTH : Strengthen or weaken the effect between<br />
0–7. The default is 3.<br />
DIMENSION: Move soundfield backward or forward with -3<br />
being the furthest back and +3 being the furthest forward.<br />
The default is 0.<br />
PANORAMA: Turn on or off. The default is off.
BASIC<br />
Basic Operation<br />
Listening with ACOUSTIC CALIBRATION EQ<br />
You can listen to the soundtrack with the ACOUSTIC CALIBRATION EQ if you have adjusted ACOUSTIC CAL<br />
EQ in the EXPERT Setup menu (see page 87). To do so follow the instructions below.<br />
RECEIVER MULTI<br />
OPERATION<br />
DVD/LD<br />
VCR 2<br />
MOVIE<br />
STEREO/<br />
DIRECT<br />
MULTI CONTROL<br />
TV/SAT<br />
CD<br />
SURROUND<br />
MODE<br />
MUSIC<br />
ENTER<br />
SYSTEM<br />
OFF<br />
VCR1/DVR<br />
TUNER<br />
ACOUSTIC<br />
EQ<br />
SB CH<br />
MODE<br />
MIDNIGHT<br />
MASTER<br />
VOLUME<br />
SOURCE<br />
TV CONT<br />
RECEIVER<br />
INPUT<br />
MULTI CH<br />
INPUT<br />
MUTE<br />
MCACC indicator<br />
1<br />
1<br />
1 Press the ACOUSTIC EQ button.<br />
Each press switches ACOUSTIC CALIBRATION EQ<br />
mode on or off.<br />
When ACOUSTIC EQ is being applied the MCACC<br />
indicator lights.<br />
memo<br />
• You can’t turn on ACOUSTIC EQ on in MULTI CH<br />
IN mode.<br />
• If you turn ACOUSTIC EQ on in DIRECT mode,<br />
the receiver automatically switches to STEREO<br />
mode.<br />
AUDIO/VIDEO MULTI-CHANNEL RECEIVER<br />
<strong>VSX</strong>-<strong>D1011</strong><br />
STEREO/DIRECT<br />
MULTI CH IN<br />
ACOUSTIC EQ<br />
MASTER VOLUME<br />
Reducing Noise During Playback (DIGITAL NR Function)<br />
To reduce extraneous noise switch on DIGITAL NR. This feature is effective with sources containing a lot of<br />
background noise like cassette and video tape.<br />
1 Press RECEIVER.<br />
RECEIVER MULTI<br />
OPERATION<br />
DVD/LD<br />
VCR 2<br />
MOVIE<br />
SURROUND<br />
MODE<br />
SYSTEM<br />
OFF<br />
SOURCE<br />
MULTI CONTROL<br />
TV/SAT VCR1/DVR TV CONT<br />
1<br />
CD TUNER RECEIVER<br />
ACOUSTIC<br />
MUSIC EQ INPUT<br />
SB CH<br />
MODE<br />
MULTI CH<br />
INPUT<br />
2 Press the DNR button on the remote<br />
control.<br />
Each press switches DIGITAL NR on or off.<br />
When on, DNR lights in the display.<br />
STEREO/<br />
DIRECT<br />
ENTER<br />
MIDNIGHT<br />
MUTE<br />
memo<br />
2<br />
MENU<br />
SYSTEM<br />
SETUP<br />
AUDIO<br />
CHANNEL−<br />
RF ATT<br />
DIMMER<br />
TEXT OFF<br />
LOUDNESS<br />
BAND<br />
TONE<br />
+<br />
−<br />
CHANNEL+<br />
EFFECT/CH SEL<br />
SIGNAL SEL DNR BASS/TREBLE DISC<br />
VIDEO SEL<br />
INPUT<br />
SELECT<br />
TUNER EDIT<br />
ST<br />
MASTER<br />
VOLUME<br />
D.ACCESS<br />
HI-BIT<br />
TUNE<br />
TV CONTROL<br />
CHANNEL<br />
ENTER<br />
TUNE<br />
TEXT ON<br />
MPX<br />
VOLUME<br />
ST<br />
TOP MENU<br />
GUIDE<br />
RETURN<br />
CLASS<br />
ENTER<br />
+10<br />
SUB TITLE<br />
REMOTE<br />
SETUP<br />
• In cases described below, noise may not be reduced even<br />
if DIGITAL NR is on.<br />
· Sudden noise<br />
· Extremely loud noise<br />
· Signals that contain too many high frequencies<br />
Signals which are very clean to begin with.<br />
• DIGITAL NR is effective at levels shown below for each<br />
source.<br />
STEREO<br />
· Analog input ..................................................... 10-18 dB<br />
· Digital input ...................................................... 10-15 dB<br />
· AM/FM tuner ................................................... 10-15 dB<br />
MOVIE/MUSIC ...................................................... 6-10 dB<br />
• Depending on the condition of the source, there may not<br />
be a noticeable improvement in the quality of the sound.<br />
• You can’t use the DIGITAL NR mode with the THX<br />
CINEMA or MULTI CH IN modes, or a 96 kHz signal.<br />
• If you set the DIGITAL NR on in DIRECT mode the<br />
receiver will switch to STEREO mode.<br />
47<br />
En
MULTI JOG CONTROL<br />
SET UP RETURN<br />
PHONES<br />
SPEAKERS<br />
MULTI JOG CONTROL<br />
SET UP RETURN<br />
PHONES<br />
SPEAKERS<br />
SIGNAL<br />
SELECT<br />
TONE<br />
SIGNAL<br />
SELECT<br />
TONE<br />
HI-BIT<br />
HI-SAMPLING<br />
SB CH<br />
MODE<br />
TONE CONTROL<br />
BASS/TREBLE<br />
HI-BIT<br />
HI-SAMPLING<br />
SB CH<br />
MODE<br />
TONE CONTROL<br />
BASS/TREBLE<br />
MIDNIGHT<br />
MIDNIGHT<br />
LOUDNESS<br />
LOUDNESS<br />
BAND<br />
BAND<br />
CLASS<br />
CLASS<br />
SELECT<br />
S-VIDEO<br />
SELECT<br />
S-VIDEO<br />
STATION TUNING<br />
VIDEO L<br />
VIDEO INPUT<br />
STATION TUNING<br />
VIDEO L<br />
VIDEO INPUT<br />
MULTI JOG/ENTER<br />
AUDIO<br />
AUDIO<br />
TUNER<br />
EDIT<br />
R<br />
TUNER<br />
EDIT<br />
MULTI JOG/ENTER<br />
R<br />
Basic Operation<br />
Listening in MIDNIGHT Mode<br />
This useful feature makes it possible to get excellent surround sound effects even when listening at low<br />
volumes. It can be used with any surround sound source and play soundtracks so that the quieter sounds are<br />
audible even while playing a soundtrack at low volumes. This feature is applicable only when the master volume<br />
is under –20 dB.<br />
RECEIVER MULTI<br />
OPERATION<br />
DVD/LD<br />
SYSTEM<br />
OFF<br />
MULTI CONTROL<br />
TV/SAT<br />
VCR1/DVR<br />
SOURCE<br />
TV CONT<br />
1 Press the MIDNIGHT button on the<br />
remote control.<br />
Each press switches MIDNIGHT mode on or off.<br />
When on, MIDNIGHT lights in the display.<br />
VCR 2<br />
CD<br />
TUNER<br />
RECEIVER<br />
MOVIE<br />
STEREO/<br />
DIRECT<br />
MENU<br />
SURROUND<br />
MODE<br />
MUSIC<br />
ENTER<br />
TUNER EDIT<br />
ACOUSTIC<br />
EQ<br />
SB CH<br />
MODE<br />
MIDNIGHT<br />
MASTER<br />
VOLUME<br />
TEXT ON<br />
INPUT<br />
MULTI CH<br />
INPUT<br />
MUTE<br />
TOP MENU<br />
1<br />
memo<br />
• The surround effect adjusts itself automatically<br />
in accordance with the volume level.<br />
• You can’t use the MIDNIGHT mode with the THX<br />
CINEMA, MULTI CH IN modes.<br />
• If you set MIDNIGHT on when in DIRECT mode<br />
the receiver switches to STEREO mode.<br />
1<br />
multi-voltage model only<br />
Listening in LOUDNESS Mode<br />
The LOUDNESS mode boosts the bass and treble in a signal. It is useful for listening to music at low volumes.<br />
This feature is applicable only when the master volume is under –20 dB.<br />
1 Press RECEIVER.<br />
RECEIVER MULTI<br />
OPERATION<br />
DVD/LD<br />
VCR 2<br />
MOVIE<br />
SURROUND<br />
MODE<br />
SYSTEM<br />
OFF<br />
SOURCE<br />
MULTI CONTROL<br />
TV/SAT VCR1/DVR TV CONT<br />
1<br />
CD TUNER RECEIVER<br />
ACOUSTIC<br />
MUSIC EQ INPUT<br />
SB CH<br />
MODE<br />
MULTI CH<br />
INPUT<br />
2 Press the LOUDNESS button on the<br />
remote control.<br />
Each press switches LOUDNESS mode on or off.<br />
When on, LOUDNESS lights in the display.<br />
2<br />
CHANNEL−<br />
DIMMER<br />
TEXT OFF<br />
LOUDNESS<br />
BAND<br />
TONE<br />
+<br />
−<br />
CHANNEL+<br />
RF ATT D.ACCESS MPX CLASS<br />
EFFECT/CH SEL<br />
SIGNAL SEL DNR BASS/TREBLE DISC<br />
VIDEO SEL<br />
HI-BIT<br />
ENTER<br />
+10<br />
memo<br />
• You can’t use the LOUDNESS mode with the THX<br />
CINEMA, MULTI CH IN modes.<br />
• If you set LOUDNESS on in DIRECT mode the<br />
receiver will switch to STEREO mode.<br />
48<br />
En<br />
2<br />
multi-voltage model only
MULTI JOG CONTROL<br />
SET UP RETURN<br />
PHONES<br />
SPEAKERS<br />
SIGNAL<br />
SELECT<br />
TONE<br />
HI-BIT<br />
HI-SAMPLING<br />
SB CH<br />
MODE<br />
TONE CONTROL<br />
BASS/TREBLE<br />
BAND<br />
CLASS<br />
SELECT<br />
STATION TUNING<br />
S-VIDEO<br />
TUNER<br />
EDIT<br />
MULTI JOG/ENTER<br />
CHARACTER/<br />
SEARCH<br />
VIDEO L<br />
VIDEO INPUT<br />
AUDIO<br />
EON<br />
MODE<br />
R<br />
BASIC<br />
Adjusting Bass and Treble (TONE CONTROL)<br />
Basic Operation<br />
You can adjust the low (bass) and high (treble) frequencies. The TONE button can also be used to bypass the<br />
tone circuitry.<br />
1 Press RECEIVER.<br />
RECEIVER MULTI<br />
OPERATION<br />
DVD/LD<br />
VCR 2<br />
MOVIE<br />
STEREO/<br />
DIRECT<br />
MENU<br />
SURROUND<br />
MODE<br />
MULTI CONTROL<br />
TV/SAT<br />
CD<br />
MUSIC<br />
ENTER<br />
TUNER EDIT<br />
SYSTEM<br />
OFF<br />
VCR1/DVR<br />
TUNER<br />
ACOUSTIC<br />
EQ<br />
SB CH<br />
MODE<br />
MIDNIGHT<br />
MASTER<br />
VOLUME<br />
TEXT ON<br />
SOURCE<br />
TV CONT<br />
RECEIVER<br />
INPUT<br />
MULTI CH<br />
INPUT<br />
MUTE<br />
TOP MENU<br />
1<br />
2 Press the TONE button on the<br />
remote control or the front panel to<br />
put the receiver in tone adjust mode.<br />
There are two tone modes TONE: ON and TONE:<br />
BYPASS. The first means the tone functions are active<br />
and also lets you adjust these functions. The second<br />
means the tone controls are being bypassed, and thus<br />
have no effect on the sound.<br />
2<br />
3<br />
SYSTEM<br />
SETUP<br />
AUDIO<br />
CHANNEL−<br />
RF ATT<br />
DIMMER<br />
TEXT OFF<br />
LOUDNESS<br />
BAND<br />
TONE<br />
+<br />
−<br />
CHANNEL+<br />
EFFECT/CH SEL<br />
SIGNAL SEL DNR BASS/TREBLE DISC<br />
VIDEO SEL<br />
INPUT<br />
SELECT<br />
ST<br />
D.ACCESS<br />
HI-BIT<br />
TUNE<br />
TUNE<br />
TV CONTROL<br />
CHANNEL<br />
ENTER<br />
MPX<br />
VOLUME<br />
ST<br />
GUIDE<br />
RETURN<br />
CLASS<br />
ENTER<br />
+10<br />
SUB TITLE<br />
REMOTE<br />
SETUP<br />
4<br />
3 Press the BASS/TREBLE button<br />
repeatedly to select BASS or<br />
TREBLE.<br />
If TONE: BYPASS appears, press the TONE button to<br />
get TONE: ON.<br />
4 Use the +/– buttons to adjust the low<br />
or high frequency levels.<br />
A few seconds after you finish adjusting the tone the<br />
receiver will revert to the sound mode it was in at the<br />
beginning of the process.<br />
RECEIVER<br />
memo<br />
• The TONE CONTROL can be adjusted in a range of ±6<br />
dB.<br />
• The TONE CONTROL cannot be set on in THX<br />
CINEMA, MULTI CH IN modes.<br />
• If you set TONE CONTROL on in DIRECT mode the<br />
receiver will switch to STEREO mode.<br />
234<br />
49<br />
En
MULTI JOG CONTROL<br />
SET UP RETURN<br />
PHONES<br />
SPEAKERS<br />
SIGNAL<br />
SELECT<br />
TONE<br />
HI-BIT<br />
HI-SAMPLING<br />
SB CH<br />
MODE<br />
TONE CONTROL<br />
BASS/TREBLE<br />
BAND<br />
CLASS<br />
SELECT<br />
STATION TUNING<br />
S-VIDEO<br />
TUNER<br />
EDIT<br />
MULTI JOG/ENTER<br />
CHARACTER/<br />
SEARCH<br />
VIDEO L<br />
VIDEO INPUT<br />
AUDIO<br />
EON<br />
MODE<br />
R<br />
Basic Operation<br />
Listening in HI–BIT/SAMPLING Mode<br />
Use to hear CD and DVD, as well as other digital soundtracks, at a wider dynamic range, allowing for finer audio<br />
reproduction.<br />
1 Press RECEIVER.<br />
2<br />
RECEIVER MULTI<br />
OPERATION<br />
DVD/LD<br />
VCR 2<br />
MOVIE<br />
SYSTEM<br />
OFF<br />
SOURCE<br />
MULTI CONTROL<br />
TV/SAT VCR1/DVR TV CONT<br />
1<br />
CD TUNER RECEIVER<br />
ACOUSTIC<br />
MUSIC EQ INPUT<br />
SIGNAL SEL DNR BASS/TREBLE DISC<br />
VIDEO SEL<br />
INPUT<br />
SELECT<br />
HI-BIT<br />
TV CONTROL<br />
CHANNEL<br />
VOLUME<br />
+<br />
−<br />
ENTER<br />
+10<br />
SUB TITLE<br />
REMOTE<br />
SETUP<br />
2 Press the HI–BIT button on the<br />
remote control or HI-BIT HI-<br />
SAMPLING button on the front<br />
panel.<br />
Each press switches HI-BIT/SAMPLING mode on or off.<br />
HI-BIT/SAMPLING lights in the display.<br />
memo<br />
RECEIVER<br />
• HI–BIT mode cannot be set on MULTI CH IN mode.<br />
• If the receiver is in DIRECT mode and you press the<br />
HI–BIT button the receiver will switch to STEREO<br />
mode.<br />
• This feature can’t be used with 96 kHz and 88.2 kHz<br />
sources.<br />
2<br />
DVD-Audio/MULTI CHANNEL IN Playback<br />
MULTI CH IN allows you to connect a DVD-Audio player or an external decoder to enjoy certain multichannel<br />
discs. To use MULTI CH IN playback follow the instructions below.<br />
RECEIVER MULTI<br />
OPERATION<br />
DVD/LD<br />
VCR 2<br />
MOVIE<br />
STEREO/<br />
DIRECT<br />
SURROUND<br />
MODE<br />
MULTI CONTROL<br />
TV/SAT<br />
CD<br />
MUSIC<br />
ENTER<br />
SYSTEM<br />
OFF<br />
VCR1/DVR<br />
TUNER<br />
ACOUSTIC<br />
EQ<br />
SB CH<br />
MODE<br />
MIDNIGHT<br />
MASTER<br />
VOLUME<br />
SOURCE<br />
TV CONT<br />
RECEIVER<br />
INPUT<br />
MULTI CH<br />
INPUT<br />
MUTE<br />
1<br />
1 Press the MULTI CH INPUT button on<br />
the remote control or the MULTI CH<br />
IN button on the front panel.<br />
Each press switches the input between the previous<br />
mode and MULTI CH IN.<br />
ON: This is a true playback of the signal from the<br />
MULTI CH INPUT terminals, output without digital<br />
processing. You can only control each channel level.<br />
OFF: Cancels the MULTI CH IN modes.<br />
50<br />
En<br />
1<br />
AUDIO/VIDEO MULTI-CHANNEL RECEIVER <strong>VSX</strong>-<strong>D1011</strong><br />
STEREO/DIRECT MULTI CH IN ACOUSTIC EQ<br />
MASTER VOLUME<br />
memo<br />
• You can’t use any kind of sound processing with MULTI<br />
CH IN. Selecting a listening mode, or switching these<br />
modes, cancels the MULTI CH IN.<br />
• If any other speakers are set to NO the signal for that<br />
(those) channel(s) won’t get output at all.<br />
• You cannot set sound features (pages 47–49) on, in<br />
MULTI CH IN mode.<br />
• You cannot listen to the SECOND ZONE in MULTI CH<br />
IN mode.<br />
• If you’re listening to DVD-Audio but can only get stereo<br />
sound set your DVD player’s 5.1 channel analog<br />
playback to on.
MULTI JOG CONTROL<br />
SET UP RETURN<br />
PHONES<br />
PHONES<br />
SPEAKERS<br />
MULTI JOG CONTROL<br />
SET UP RETURN<br />
SPEAKERS<br />
SIGNAL<br />
SELECT<br />
TONE<br />
SIGNAL<br />
SELECT<br />
TONE<br />
HI-BIT<br />
HI-SAMPLING<br />
HI-BIT<br />
HI-SAMPLING<br />
SB CH<br />
MODE<br />
TONE CONTROL<br />
BASS/TREBLE<br />
SB CH<br />
MODE<br />
TONE CONTROL<br />
BASS/TREBLE<br />
BAND<br />
BAND<br />
CLASS<br />
CLASS<br />
SELECT<br />
SELECT<br />
STATION TUNING<br />
STATION TUNING<br />
S-VIDEO<br />
S-VIDEO<br />
TUNER<br />
EDIT<br />
MULTI JOG/ENTER<br />
TUNER<br />
EDIT<br />
MULTI JOG/ENTER<br />
CHARACTER/<br />
SEARCH<br />
VIDEO L<br />
VIDEO INPUT<br />
CHARACTER/<br />
SEARCH<br />
VIDEO L<br />
VIDEO INPUT<br />
AUDIO<br />
AUDIO<br />
EON<br />
MODE<br />
EON<br />
MODE<br />
R<br />
R<br />
BASIC<br />
Basic Operation<br />
SB CH MODE button<br />
SB CH MODE<br />
The SB CH MODE makes available surround back channels through your surround back speakers. You must<br />
have chosen NORMAL SYSTEM in the SURRBACK SYSTEM setting (see page 35) and have SURROUND and<br />
SURROUND BACK speakers set to something other than NO (see pages 37–38) to use this feature.<br />
RECEIVER MULTI<br />
OPERATION<br />
DVD/LD<br />
VCR 2<br />
MOVIE<br />
STEREO/<br />
DIRECT<br />
MULTI CONTROL<br />
TV/SAT<br />
CD<br />
SURROUND<br />
MODE<br />
MUSIC<br />
ENTER<br />
SYSTEM<br />
OFF<br />
VCR1/DVR<br />
TUNER<br />
ACOUSTIC<br />
EQ<br />
SB CH<br />
MODE<br />
MIDNIGHT<br />
MASTER<br />
VOLUME<br />
SOURCE<br />
TV CONT<br />
RECEIVER<br />
INPUT<br />
MULTI CH<br />
INPUT<br />
MUTE<br />
1<br />
1 Press the SB CH MODE button on the<br />
remote control.<br />
Each press switches between ON, OFF and AUTO.<br />
ON<br />
OFF<br />
AUTO<br />
For each choice you can create SURROUND BACK<br />
channels under the conditions listed below.<br />
ON: surround back channels are available with all<br />
SURROUND modes.<br />
AUTO: same as above except whether SURROUND BACK<br />
channels are available with any of the PRO LOGIC II (or<br />
PRO LOGIC) modes depends on whether the source has<br />
an EX or ES flag or not.<br />
With the NEO:6 modes surround back channels will<br />
always be available.<br />
OFF: SURROUND BACK channels will not be heard.<br />
1<br />
memo<br />
• You can’t use the SB CH MODE with MULTI CH IN<br />
or STEREO/DIRECT modes.<br />
VIRTUAL SURROUND BACK Mode<br />
The VIRTUAL SURROUND BACK mode emulates surround back channels through your surround speakers. You<br />
must have chosen NORMAL SYSTEM in the SURRBACK SYSTEM setting (see page 35); have SURROUND<br />
speakers set to something other than NO, and have chosen NO for the SURROUND BACK speakers in<br />
SPEAKER SETTING (see page 37-38) to use this mode.<br />
RECEIVER MULTI<br />
OPERATION<br />
DVD/LD<br />
VCR 2<br />
MOVIE<br />
STEREO/<br />
DIRECT<br />
SURROUND<br />
MODE<br />
MULTI CONTROL<br />
TV/SAT<br />
CD<br />
1<br />
MUSIC<br />
ENTER<br />
SYSTEM<br />
OFF<br />
VCR1/DVR<br />
TUNER<br />
ACOUSTIC<br />
EQ<br />
SB CH<br />
MODE<br />
MIDNIGHT<br />
MASTER<br />
VOLUME<br />
SOURCE<br />
TV CONT<br />
RECEIVER<br />
INPUT<br />
MULTI CH<br />
INPUT<br />
MUTE<br />
1<br />
1 Press the SB CH MODE button on the<br />
remote control.<br />
Each press switches between VIRTL SB ON, VIRTL SB<br />
OFF and VIRTL SB AUTO.<br />
For each choice you can create VIRTUAL SURROUND<br />
BACK channels under the conditions listed below.<br />
VIRTL SB ON: virtual surround back sound is available<br />
with all SURROUND modes except THX CINEMA; for a<br />
stereo signal you must choose the NEO:6 MOVIE/MUSIC<br />
SURROUND mode or a <strong>Pioneer</strong> original sound mode (see<br />
pages 44–45).<br />
VIRTL SB AUTO: same as above except whether virtual<br />
surround back sound is available with any of the PRO<br />
LOGIC II (or PRO LOGIC) modes depends on whether the<br />
source has an EX or ES flag or not.<br />
With the NEO:6 modes virtual surround back sound will<br />
always be available.<br />
VIRTL SB OFF: virtual surround back sound will not be heard.<br />
memo<br />
VIRTL SB ON<br />
VIRTL SB OFF<br />
VIRTL SB AUTO<br />
• You can’t use the VIRTUAL SURROUND BACK<br />
mode with the THX CINEMA, MULTI CH IN,<br />
STEREO/DIRECT modes.<br />
51<br />
En
MULTI JOG CONTROL<br />
SET UP RETURN<br />
PHONES<br />
SPEAKERS<br />
MULTI JOG CONTROL<br />
SET UP RETURN<br />
PHONES<br />
SPEAKERS<br />
SIGNAL<br />
SELECT<br />
TONE<br />
SIGNAL<br />
SELECT<br />
TONE<br />
HI-BIT<br />
HI-SAMPLING<br />
SB CH<br />
MODE<br />
TONE CONTROL<br />
BASS/TREBLE<br />
HI-BIT<br />
HI-SAMPLING<br />
SB CH<br />
MODE<br />
TONE CONTROL<br />
BASS/TREBLE<br />
BAND<br />
BAND<br />
CLASS<br />
CLASS<br />
SELECT<br />
SELECT<br />
STATION TUNING<br />
STATION TUNING<br />
S-VIDEO<br />
S-VIDEO<br />
TUNER<br />
EDIT<br />
MULTI JOG/ENTER<br />
CHARACTER/<br />
SEARCH<br />
VIDEO L<br />
VIDEO INPUT<br />
TUNER<br />
EDIT<br />
MULTI JOG/ENTER<br />
CHARACTER/<br />
SEARCH<br />
VIDEO L<br />
VIDEO INPUT<br />
AUDIO<br />
AUDIO<br />
EON<br />
MODE<br />
R<br />
EON<br />
MODE<br />
R<br />
Basic Operation<br />
DUAL MONO setting and playback<br />
The dual mono setting can only be used when listening to Dolby Digital or homemade discs that have dual mono<br />
software encoded in them. Dual mono software usually is used to put two different mono soundtracks, that you<br />
have the capability of listening to at the same time, on one DVD. With this setting you can choose which dual<br />
mono setting you want to listen to. Remember this setting is only applicable if you are using Dolby Digital<br />
software with dual mono and want to isolate one of the channels therein.<br />
1<br />
1 Press the RETURN button for more<br />
than three seconds to put the<br />
receiver in DUAL MONO mode.<br />
Hold down the RETURN button to cycle through the<br />
different DUAL MONO settings. When you find the<br />
one you want release the button. The L (ch1) and R<br />
(ch2) indicators in the display light to indicate the<br />
playback channel.<br />
DUAL : ch1<br />
DUAL : ch2<br />
DUAL: ch1/ch2<br />
The different settings are: DUAL ch1, where you only<br />
hear channel 1; DUAL ch2, where you only hear channel<br />
2; and DUAL ch1/ch2, where you hear both channels,<br />
but independently from different speakers.<br />
memo<br />
• The default setting is DUAL ch1.<br />
• You can only use this function with Dolby Digital<br />
sources that have this function<br />
Using Headphones<br />
1 PHONES jack<br />
1 Plug headphones into the PHONES<br />
jack on the front of the receiver.<br />
No sound will be audible from the speakers when<br />
headphones are plugged in except in MULTI CH IN<br />
mode or when using the pre-outs. In MULTI CH IN<br />
mode the subwoofer will be audible even if the<br />
headphones are plugged in.<br />
memo<br />
• All SURROUND modes will be downmixed to 2<br />
channels.<br />
• If you’re listening to a 2 channel source there will<br />
be no matrix decoding (i.e. you will not be able to<br />
get surround sound decoding).<br />
• For MULTI CH IN mode, only the signal input from<br />
the MULTI CH IN FRONT L and R channels can<br />
be heard.<br />
52<br />
En
BASIC<br />
Basic Operation<br />
Video Select<br />
This function allows you to listen to one sound source while you watch a different video source on your TV. The<br />
sound source is set in the normal fashion as explained on page 41. You then change the video input with the<br />
VIDEO SEL button.<br />
1 Press RECEIVER.<br />
RECEIVER MULTI<br />
OPERATION<br />
DVD/LD<br />
VCR 2<br />
MOVIE<br />
STEREO/<br />
DIRECT<br />
MENU<br />
SYSTEM<br />
SETUP<br />
AUDIO<br />
CHANNEL−<br />
RF ATT<br />
SURROUND<br />
MODE<br />
MULTI CONTROL<br />
MUSIC<br />
ENTER<br />
TUNER EDIT<br />
ST<br />
TV/SAT<br />
CD<br />
TEXT OFF<br />
SYSTEM<br />
OFF<br />
TUNER<br />
ACOUSTIC<br />
EQ<br />
SB CH<br />
MODE<br />
MIDNIGHT<br />
MASTER<br />
VOLUME<br />
D.ACCESS<br />
TUNE<br />
ENTER<br />
TUNE<br />
VCR1/DVR<br />
TEXT ON<br />
BAND<br />
MPX<br />
ST<br />
SOURCE<br />
TV CONT<br />
RECEIVER<br />
INPUT<br />
MULTI CH<br />
INPUT<br />
MUTE<br />
TOP MENU<br />
GUIDE<br />
RETURN<br />
CHANNEL+<br />
CLASS<br />
1<br />
2 Press the VIDEO SEL button on the<br />
remote control to cycle through the<br />
different possible video inputs.<br />
The first press shows the video input you are currently<br />
using. After that pressing VIDEO SELECT cycles though<br />
the possibilities in the following order:<br />
DVD/LD<br />
OFF<br />
TV/SAT<br />
VCR2<br />
VIDEO<br />
VCR1/DVR<br />
The OFF setting means you are listening without a<br />
video signal. (Also, when you select CD, CD-R/TAPE1,<br />
MD/TAPE2, TUNER or LINE functions the VIDEO<br />
SELECT will be set to off.)<br />
2<br />
DIMMER<br />
LOUDNESS<br />
TONE<br />
EFFECT/CH SEL<br />
SIGNAL SEL DNR BASS/TREBLE DISC<br />
VIDEO SEL<br />
INPUT<br />
SELECT<br />
HI-BIT<br />
TV CONTROL<br />
CHANNEL<br />
VOLUME<br />
RECEIVER<br />
+<br />
−<br />
ENTER<br />
+10<br />
SUB TITLE<br />
REMOTE<br />
SETUP<br />
After choosing a video input the display on the receiver<br />
will show that input for about 5 seconds and then<br />
revert to showing the listening mode the receiver is in.<br />
memo<br />
• The VIDEO SELECT remains set to the input<br />
you chose until you change the audio input.<br />
• If you change functions the receiver will reset<br />
itself to make the video and audio inputs<br />
correspond.<br />
Also, if you switch the power of the receiver off<br />
when you turn it back on the video and audio<br />
inputs will reset so that they correspond.<br />
Adjusting the Brightness of the Display (DIMMER)<br />
Use the display DIMMER button to adjust the brightness of the fluorescent display.<br />
1 Press RECEIVER.<br />
2<br />
RECEIVER MULTI<br />
OPERATION<br />
DVD/LD<br />
VCR 2<br />
MOVIE<br />
STEREO/<br />
DIRECT<br />
RF ATT<br />
DIMMER<br />
LOUDNESS<br />
TONE<br />
EFFECT/CH SEL<br />
SIGNAL SEL DNR BASS/TREBLE DISC<br />
VIDEO SEL<br />
INPUT<br />
SELECT<br />
SURROUND<br />
MODE<br />
ENTER<br />
D.ACCESS<br />
HI-BIT<br />
TV CONTROL<br />
CHANNEL<br />
SYSTEM<br />
OFF<br />
MPX<br />
VOLUME<br />
SOURCE<br />
MULTI CONTROL<br />
TV/SAT VCR1/DVR TV CONT<br />
1<br />
CD TUNER RECEIVER<br />
ACOUSTIC<br />
MUSIC EQ INPUT<br />
SB CH<br />
MODE<br />
MIDNIGHT<br />
MULTI CH<br />
INPUT<br />
MUTE<br />
+<br />
−<br />
CLASS<br />
ENTER<br />
+10<br />
SUB TITLE<br />
REMOTE<br />
SETUP<br />
2 Use the display DIMMER button on<br />
the remote control to alternate<br />
between the different levels of<br />
brightness for the display.<br />
Four levels of brightness ranging from very dim to very<br />
bright can be selected. Each press changes the<br />
brightness of the display. When cycling through the<br />
options, the default brightness can also be selected.<br />
memo<br />
• It is a feature of this unit that the fluorescent<br />
display will be brighter for a few seconds after<br />
you choose a function (like DVD/LD, CD, etc.)<br />
and then get softer. This will still happen when<br />
you adjust the brightness but the new setting<br />
will be the one the display softens to.<br />
53<br />
En
STANDBY/ON<br />
MOVIE<br />
STANDBY/ON<br />
MOVIE<br />
MUSIC<br />
MULTI JOG<br />
MUSIC<br />
MULTI JOG<br />
STANDBY<br />
ENTER STEREO/DIRECT MULTI CH IN<br />
STANDBY<br />
MULTI JOG CONTROL<br />
SET UP RETURN<br />
PHONES<br />
SPEAKERS<br />
SIGNAL<br />
SELECT<br />
TONE<br />
HI-BIT<br />
HI-SAMPLING<br />
SB CH<br />
MODE<br />
TONE CONTROL<br />
BASS/TREBLE<br />
BAND<br />
CLASS<br />
STATION TUNING<br />
S-VIDEO<br />
MULTI JOG/ENTER<br />
CHARACTER/<br />
SEARCH<br />
VIDEO L<br />
VIDEO INPUT<br />
AUDIO/VIDEO MULTI-CHANNEL RECEIVER<br />
MASTER VOLUME<br />
ENTER STEREO/DIRECT MULTI CH IN<br />
MULTI JOG CONTROL<br />
SET UP RETURN<br />
PHONES<br />
SPEAKERS<br />
SIGNAL<br />
SELECT<br />
TONE<br />
HI-BIT<br />
HI-SAMPLING<br />
SB CH<br />
MODE<br />
TONE CONTROL<br />
BASS/TREBLE<br />
MIDNIGHT<br />
LOUDNESS<br />
SELECT<br />
BAND<br />
CLASS<br />
SELECT<br />
S-VIDEO<br />
TUNER<br />
EDIT<br />
STATION TUNING<br />
VIDEO L<br />
VIDEO INPUT<br />
AUDIO<br />
AUDIO<br />
EON<br />
MODE<br />
R<br />
TUNER<br />
EDIT<br />
MULTI JOG/ENTER<br />
R<br />
AUDIO/VIDEO MULTI-CHANNEL RECEIVER<br />
MASTER VOLUME<br />
<strong>VSX</strong>-<strong>D1011</strong><br />
ACOUSTIC EQ<br />
<strong>VSX</strong>-<strong>D1011</strong><br />
ACOUSTIC EQ<br />
Using the Tuner<br />
Automatic and Manual Tuning<br />
The following steps show you how to tune in FM and AM radio broadcasts using the automatic (search) and<br />
<strong>manual</strong> (step) tuning functions. If you already know the exact frequency of the station you want, see “Direct<br />
Access Tuning“ on the following page.<br />
RECEIVER MULTI<br />
OPERATION<br />
DVD/LD<br />
VCR 2<br />
MOVIE<br />
SURROUND<br />
MODE<br />
MULTI CONTROL<br />
TV/SAT<br />
CD<br />
MUSIC<br />
SYSTEM<br />
OFF<br />
VCR1/DVR<br />
TUNER<br />
ACOUSTIC<br />
EQ<br />
SB CH<br />
MODE<br />
SOURCE<br />
TV CONT<br />
RECEIVER<br />
INPUT<br />
MULTI CH<br />
INPUT<br />
1<br />
1 Press the TUNER button.<br />
On the remote, this selects the tuner function on the<br />
receiver and sets the remote to the tuner operation<br />
mode.<br />
SIGNAL PRO LOGIC Neo :6<br />
AUTO DIGITAL<br />
RF DTS ES EX<br />
DIGITAL MPEG AAC<br />
ANALOG STEREO<br />
SB CH DSP<br />
AUTO ON MOVIE<br />
OFF MUSIC<br />
L C R LFE<br />
LS S RS SP A B<br />
LOUDNESS MIDNIGHT TONE DNR ATT STEREO MONO<br />
TUNED RF ATT<br />
RDS EON<br />
Hi-BIT/<br />
SAMPLING<br />
MULTI-ROOM<br />
dB<br />
2<br />
RF ATT<br />
button<br />
1<br />
STEREO/<br />
DIRECT<br />
MENU<br />
SYSTEM<br />
SETUP<br />
AUDIO<br />
CHANNEL−<br />
RF ATT<br />
DIMMER<br />
ENTER<br />
TEXT OFF<br />
LOUDNESS<br />
MIDNIGHT<br />
BAND<br />
TONE<br />
+<br />
−<br />
CHANNEL+<br />
EFFECT/CH SEL<br />
SIGNAL SEL DNR BASS/TREBLE DISC<br />
VIDEO SEL<br />
INPUT<br />
SELECT<br />
TUNER EDIT<br />
ST<br />
MASTER<br />
VOLUME<br />
D.ACCESS<br />
HI-BIT<br />
TUNE<br />
TUNE<br />
TV CONTROL<br />
CHANNEL<br />
ENTER<br />
TEXT ON<br />
MPX<br />
VOLUME<br />
RECEIVER<br />
ST<br />
MUTE<br />
TOP MENU<br />
GUIDE<br />
RETURN<br />
CLASS<br />
ENTER<br />
+10<br />
SUB TITLE<br />
REMOTE<br />
SETUP<br />
3<br />
MPX<br />
button<br />
European model<br />
2 Press the BAND button to select the<br />
band (FM or AM).<br />
Each press switches the band: FM j AM<br />
SIGNAL PRO LOGIC Neo :6<br />
AUTO DIGITAL<br />
RF DTS ES EX<br />
DIGITAL MPEG AAC<br />
ANALOG STEREO<br />
SB CH DSP<br />
AUTO ON MOVIE<br />
OFF MUSIC<br />
L C R LFE<br />
LS S RS SP A B<br />
LOUDNESS MIDNIGHT TONE DNR ATT STEREO MONO<br />
TUNED RF ATT<br />
RDS EON<br />
Hi-BIT/<br />
SAMPLING<br />
MULTI-ROOM<br />
3 Tune in the station.<br />
For Automatic Tuning<br />
Press and hold TUNE –/+ for about one second, then<br />
release.<br />
The tuner starts searching the selected band and stop<br />
automatically at the first station it locates. Repeat to<br />
locate other stations.<br />
For Manual Tuning<br />
• To change frequencies one step at a time, press<br />
TUNE –/+ repeatedly.<br />
• To change frequencies quickly, hold down TUNE –/+<br />
and release when you reach the frequency you<br />
desire.<br />
dB<br />
1<br />
2 3<br />
multi-voltage model<br />
MPX Mode<br />
If the TUNED or STEREO indicators do not light when<br />
tuning an FM station, because the station is too far away or<br />
the broadcast signal is weak, press MPX on the remote<br />
control to switch to MONO reception. This should improve<br />
reception enough for you to enjoy the broadcast.<br />
RF ATT Mode (European model only)<br />
If the radio signal is too strong and/or the sound is distorting<br />
press the RF ATT button to attenuate (lower) the radio<br />
signal input and reduce the distortion (for FM stations only).<br />
When on, RF ATT lights in the display.<br />
54<br />
En<br />
2 3
BASIC<br />
Channel Step Setting (multi-voltage model only)<br />
Using the Tuner<br />
The unit has been factory preset to the channel allocation value for the area in which it is to be sold. If this<br />
value is set incorrectly, the tunes in frequency may be wrong, or sound may be distorted, resulting in an<br />
inability to reproduce reception signals at their proper sound quality. For this reason, be sure to confirm<br />
that the values are set correctly before first using the unit.<br />
FM 50 kHz, AM 9 kHz:<br />
Set to this position, for areas with an FM reception step of 50 kHz and AM 9 kHz.<br />
FM 100 kHz, AM 10 kHz:<br />
Set to this position for areas with an FM reception step of 100 kHz and AM 10 kHz.<br />
memo<br />
When unsure about the channel allocation for your area, consult your dealer for correct<br />
information.<br />
To Change Channel Steps<br />
1 Turn the power off (standby mode).<br />
2 While holding down the TONE – button press the STANDBY/ON button.<br />
3 When you see STEP 9K/50K or STEP 10K/100K appear in the display. To change channel steps again<br />
repeat steps 1 and 2.<br />
Direct Access Tuning<br />
The following steps show you how to tune directly to a specific frequency using the remote control.<br />
RECEIVER MULTI<br />
OPERATION<br />
DVD/LD<br />
VCR 2<br />
MOVIE<br />
STEREO/<br />
DIRECT<br />
MENU<br />
SYSTEM<br />
SETUP<br />
SURROUND<br />
MODE<br />
ENTER<br />
SYSTEM<br />
OFF<br />
SOURCE<br />
MULTI CONTROL<br />
1<br />
TV/SAT VCR1/DVR TV CONT<br />
CD TUNER RECEIVER<br />
ACOUSTIC<br />
MUSIC EQ INPUT<br />
TUNER EDIT<br />
ST<br />
SB CH<br />
MODE<br />
MIDNIGHT<br />
MASTER<br />
VOLUME<br />
TUNE<br />
ENTER<br />
TEXT ON<br />
ST<br />
MULTI CH<br />
INPUT<br />
MUTE<br />
TOP MENU<br />
GUIDE<br />
1 Press the TUNER button.<br />
This selects the tuner function on the receiver and sets<br />
the remote to the tuner operation mode.<br />
2 Press the BAND button to select the<br />
band (FM or AM).<br />
Each press switches the band : FM j AM<br />
3 Press the D.ACCESS button to<br />
activate the direct access tuning<br />
mode.<br />
The cursor blinks in the display on the front panel.<br />
3<br />
4<br />
AUDIO<br />
CHANNEL−<br />
RF ATT<br />
DIMMER<br />
TEXT OFF<br />
LOUDNESS<br />
BAND<br />
TONE<br />
+<br />
−<br />
CHANNEL+<br />
EFFECT/CH SEL<br />
SIGNAL SEL DNR BASS/TREBLE DISC<br />
VIDEO SEL<br />
INPUT<br />
SELECT<br />
D.ACCESS<br />
HI-BIT<br />
TUNE<br />
TV CONTROL<br />
CHANNEL<br />
MPX<br />
VOLUME<br />
RETURN<br />
CLASS<br />
ENTER<br />
+10<br />
SUB TITLE<br />
REMOTE<br />
SETUP<br />
2<br />
SIGNAL PRO LOGIC Neo :6<br />
AUTO DIGITAL<br />
RF DTS ES EX<br />
DIGITAL MPEG AAC<br />
ANALOG STEREO<br />
SB CH DSP<br />
AUTO ON MOVIE<br />
OFF MUSIC<br />
L C R LFE<br />
LS S RS SP A B<br />
LOUDNESS MIDNIGHT TONE DNR ATT STEREO MONO<br />
TUNED RF ATT<br />
RDS EON<br />
Hi-BIT/<br />
SAMPLING<br />
MULTI-ROOM<br />
4 Use the number buttons to enter the<br />
frequency of the station you want.<br />
Example:<br />
To tune station 106.00 (FM), press: 1 = ` = 6 =<br />
` = `<br />
To cancel before inputting the frequency<br />
Press D.ACCESS, and enter the frequency again.<br />
dB<br />
RECEIVER<br />
55<br />
En
STANDBY/ON<br />
MOVIE<br />
STANDBY/ON<br />
MOVIE<br />
MUSIC<br />
MULTI JOG<br />
MUSIC<br />
MULTI JOG<br />
STANDBY<br />
ENTER STEREO/DIRECT MULTI CH IN ACOUSTIC EQ<br />
STANDBY<br />
MULTI JOG CONTROL<br />
SET UP RETURN<br />
PHONES<br />
SPEAKERS<br />
SIGNAL HI-BIT<br />
SELECT HI-SAMPLING<br />
TONE<br />
SB CH<br />
MODE<br />
TONE CONTROL<br />
BASS/TREBLE<br />
BAND<br />
CLASS<br />
SELECT<br />
STATION TUNING<br />
S-VIDEO<br />
MULTI JOG/ENTER<br />
CHARACTER/<br />
SEARCH<br />
VIDEO L<br />
VIDEO INPUT<br />
AUDIO/VIDEO MULTI-CHANNEL RECEIVER <strong>VSX</strong>-<strong>D1011</strong><br />
MASTER VOLUME<br />
ENTER STEREO/DIRECT MULTI CH IN<br />
MULTI JOG CONTROL<br />
SET UP RETURN<br />
PHONES<br />
SPEAKERS<br />
SIGNAL<br />
HI-BIT<br />
SELECT<br />
HI-SAMPLING<br />
TONE<br />
SB CH<br />
MODE<br />
TONE CONTROL<br />
BASS/TREBLE<br />
MIDNIGHT<br />
LOUDNESS<br />
BAND<br />
CLASS<br />
SELECT<br />
S-VIDEO<br />
TUNER<br />
EDIT<br />
STATION TUNING<br />
VIDEO L<br />
VIDEO INPUT<br />
AUDIO<br />
AUDIO<br />
EON<br />
MODE<br />
R<br />
TUNER<br />
EDIT<br />
MULTI JOG/ENTER<br />
R<br />
AUDIO/VIDEO MULTI-CHANNEL RECEIVER<br />
MASTER VOLUME<br />
<strong>VSX</strong>-<strong>D1011</strong><br />
ACOUSTIC EQ<br />
Using the Tuner<br />
Memorizing Frequently Used Stations<br />
The following steps show you how to memorize up to 30 radio stations in 3 classes (each holding 10 stations).<br />
When memorizing FM frequencies, the receiver also memorizes the MPX mode (STEREO or MONO) and the RF<br />
ATT mode (European model only).<br />
RECEIVER MULTI<br />
OPERATION<br />
SYSTEM<br />
OFF<br />
MULTI CONTROL<br />
SOURCE<br />
1 Tune in the station you want.<br />
See "Automatic and Manual Tuning" or "Direct Access<br />
Tuning" on page 54 and 55.<br />
DVD/LD<br />
VCR 2<br />
MOVIE<br />
TV/SAT<br />
CD<br />
SURROUND<br />
MODE<br />
MUSIC<br />
VCR1/DVR<br />
TUNER<br />
ACOUSTIC<br />
EQ<br />
SB CH<br />
MODE<br />
TV CONT<br />
RECEIVER<br />
INPUT<br />
MULTI CH<br />
INPUT<br />
2 Press the TUNER EDIT button to<br />
activate the memory function.<br />
STEREO/<br />
DIRECT<br />
ENTER<br />
MIDNIGHT<br />
MUTE<br />
SIGNAL<br />
dB<br />
2<br />
MENU<br />
SYSTEM<br />
SETUP<br />
AUDIO<br />
CHANNEL−<br />
TUNER EDIT<br />
ST<br />
MASTER<br />
VOLUME<br />
TUNE<br />
ENTER<br />
TUNE<br />
TEXT OFF<br />
TEXT ON<br />
BAND<br />
ST<br />
TOP MENU<br />
GUIDE<br />
RETURN<br />
CHANNEL+<br />
4<br />
5<br />
ANALOG<br />
SIGNAL<br />
ANALOG<br />
STEREO<br />
SP<br />
STEREO<br />
A B<br />
«<br />
dB<br />
RF ATT<br />
DIMMER<br />
LOUDNESS<br />
TONE<br />
EFFECT/CH SEL<br />
SIGNAL SEL DNR BASS/TREBLE DISC<br />
VIDEO SEL<br />
INPUT<br />
SELECT<br />
D.ACCESS<br />
HI-BIT<br />
TV CONTROL<br />
CHANNEL<br />
MPX<br />
VOLUME<br />
+<br />
−<br />
CLASS<br />
ENTER<br />
+10<br />
SUB TITLE<br />
REMOTE<br />
SETUP<br />
3<br />
SP<br />
A B<br />
3 Press the CLASS button repeatedly<br />
to select a class number.<br />
Each press switches the display:<br />
CLASS A CLASS B CLASS C<br />
4<br />
5<br />
RECEIVER<br />
European model<br />
4 Press the ST –/+ buttons repeatedly<br />
(or use the MULTI JOG) to select a<br />
channel (0–9) within the respective<br />
class.<br />
SIGNAL PRO LOGIC Neo :6<br />
AUTO DIGITAL<br />
RF DTS ES EX<br />
DIGITAL MPEG AAC<br />
ANALOG STEREO<br />
SB CH DSP<br />
AUTO ON MOVIE<br />
OFF MUSIC<br />
L C R LFE<br />
LOUDNESS MIDNIGHT TONE DNR ATT STEREO MONO<br />
TUNED RF ATT<br />
RDS EON<br />
Hi-BIT/<br />
SAMPLING<br />
MULTI-ROOM<br />
dB<br />
LS S RS SP<br />
A B<br />
5 Press the ENTER button to input<br />
your choice.<br />
4<br />
5<br />
2<br />
multi-voltage model<br />
56<br />
En<br />
2
STANDBY/ON<br />
MOVIE<br />
STANDBY/ON<br />
MOVIE<br />
MUSIC<br />
MULTI JOG<br />
MUSIC<br />
MULTI JOG<br />
STANDBY<br />
ENTER STEREO/DIRECT MULTI CH IN ACOUSTIC EQ<br />
STANDBY<br />
MULTI JOG CONTROL<br />
SET UP RETURN<br />
PHONES<br />
SPEAKERS<br />
SIGNAL<br />
SELECT<br />
TONE<br />
HI-BIT<br />
HI-SAMPLING<br />
SB CH<br />
MODE<br />
TONE CONTROL<br />
BASS/TREBLE<br />
BAND<br />
CLASS<br />
STATION TUNING<br />
S-VIDEO<br />
MULTI JOG/ENTER<br />
CHARACTER/<br />
SEARCH<br />
VIDEO L<br />
VIDEO INPUT<br />
AUDIO/VIDEO MULTI-CHANNEL RECEIVER <strong>VSX</strong>-<strong>D1011</strong><br />
MASTER VOLUME<br />
ENTER STEREO/DIRECT MULTI CH IN<br />
MULTI JOG CONTROL<br />
SET UP RETURN<br />
PHONES<br />
SPEAKERS<br />
SIGNAL<br />
SELECT<br />
TONE<br />
HI-BIT<br />
HI-SAMPLING<br />
SB CH<br />
MODE<br />
TONE CONTROL<br />
BASS/TREBLE<br />
MIDNIGHT<br />
LOUDNESS<br />
SELECT<br />
BAND<br />
CLASS<br />
SELECT<br />
S-VIDEO<br />
TUNER<br />
EDIT<br />
STATION TUNING<br />
VIDEO L<br />
VIDEO INPUT<br />
AUDIO<br />
AUDIO<br />
EON<br />
MODE<br />
R<br />
TUNER<br />
EDIT<br />
MULTI JOG/ENTER<br />
R<br />
AUDIO/VIDEO MULTI-CHANNEL RECEIVER<br />
MASTER VOLUME<br />
<strong>VSX</strong>-<strong>D1011</strong><br />
ACOUSTIC EQ<br />
BASIC<br />
Using the Tuner<br />
Naming Memorized Stations<br />
You can input a name of up to four characters for each preset station in the receiver’s memory (see the previous<br />
page). This name can be anything you choose. For example, you could input JAZZ for that station and when you<br />
listen to it the name, rather than the frequency number, will appear on your display.<br />
RECEIVER MULTI<br />
OPERATION<br />
SYSTEM<br />
OFF<br />
SOURCE<br />
1 Press the TUNER button on the<br />
remote control.<br />
4<br />
DVD/LD<br />
VCR 2<br />
MOVIE<br />
STEREO/<br />
DIRECT<br />
MENU<br />
SYSTEM<br />
SETUP<br />
AUDIO<br />
CHANNEL−<br />
SURROUND<br />
MODE<br />
MULTI CONTROL<br />
MUSIC<br />
ENTER<br />
TUNER EDIT<br />
ST<br />
TV/SAT<br />
CD<br />
TUNE<br />
TEXT OFF<br />
TUNER<br />
ACOUSTIC<br />
EQ<br />
SB CH<br />
MODE<br />
MIDNIGHT<br />
MASTER<br />
VOLUME<br />
ENTER<br />
TUNE<br />
VCR1/DVR<br />
TEXT ON<br />
BAND<br />
ST<br />
TV CONT<br />
RECEIVER<br />
INPUT<br />
MULTI CH<br />
INPUT<br />
MUTE<br />
TOP MENU<br />
GUIDE<br />
RETURN<br />
CHANNEL+<br />
1<br />
3,5<br />
5,6<br />
2 Press CLASS repeatedly to select the<br />
class.<br />
Repeatedly pressing this button cycles through the<br />
three available classes, A, B and C.<br />
3 Press ST –/+ to select the preset<br />
channel.<br />
4 Press TUNER EDIT to select the<br />
station name mode.<br />
RF ATT D.ACCESS MPX CLASS<br />
DIMMER<br />
LOUDNESS<br />
TONE<br />
EFFECT/CH SEL<br />
2<br />
SIGNAL<br />
ANALOG<br />
STEREO<br />
dB<br />
SIGNAL SEL DNR BASS/TREBLE DISC<br />
VIDEO SEL<br />
HI-BIT<br />
+<br />
−<br />
ENTER<br />
+10<br />
SP<br />
A B<br />
«<br />
SIGNAL<br />
dB<br />
ANALOG<br />
STEREO<br />
1,5<br />
5,6<br />
European model<br />
SP<br />
A B<br />
5 Enter the station name you want.<br />
Names can be up to four characters long.<br />
• On the front panel use the MULTI JOG dial or the +/<br />
– buttons. On the remote control use the ST +/–<br />
buttons to select characters.<br />
• Press ENTER to confirm a character. If no character<br />
is input, a space is input.<br />
1,5<br />
5,6<br />
2 3 4<br />
multi-voltage model<br />
The possible selections are shown below.<br />
ABCDEFGHIJKLMNOPQRSTUVWXYZ<br />
abcdefghijklmnopqrstuvwxyz<br />
0123456789<br />
!”#$%&’()*+,–./:;?@[ \ ]ˆ_{|} [space]<br />
To erase a station name, simply repeat steps 1-4 and<br />
input four spaces instead of a name.<br />
2 3 4<br />
6 Press ENTER when you have got the<br />
characters you want to enter.<br />
Repeat steps 2 to 5 to memorize up to 30 preset<br />
broadcast station names.<br />
memo<br />
• To change a station name, enter a new name over the<br />
top of the existing one.<br />
57<br />
En
MOVIE<br />
MOVIE<br />
MUSIC<br />
MULTI JOG<br />
MUSIC<br />
MULTI JOG<br />
ENTER<br />
ENTER<br />
STANDBY<br />
STANDBY<br />
MULTI JOG CONTROL<br />
SET UP RETURN<br />
PHONES<br />
SPEAKERS<br />
MULTI JOG CONTROL<br />
SET UP RETURN<br />
PHONES<br />
SPEAKERS<br />
SIGNAL<br />
SELECT<br />
TONE<br />
SIGNAL<br />
SELECT<br />
TONE<br />
HI-BIT<br />
HI-SAMPLING<br />
SB CH<br />
MODE<br />
TONE CONTROL<br />
BASS/TREBLE<br />
HI-BIT<br />
HI-SAMPLING<br />
SB CH<br />
MODE<br />
TONE CONTROL<br />
BASS/TREBLE<br />
BAND<br />
MIDNIGHT<br />
CLASS<br />
LOUDNESS<br />
SELECT<br />
BAND<br />
STATION TUNING<br />
CLASS<br />
S-VIDEO<br />
SELECT<br />
S-VIDEO<br />
TUNER<br />
EDIT<br />
MULTI JOG/ENTER<br />
CHARACTER/<br />
SEARCH<br />
VIDEO L<br />
VIDEO INPUT<br />
STATION TUNING<br />
VIDEO L<br />
VIDEO INPUT<br />
AUDIO<br />
AUDIO<br />
EON<br />
MODE<br />
R<br />
TUNER<br />
EDIT<br />
MULTI JOG/ENTER<br />
R<br />
Using the Tuner<br />
Recalling Memorized Stations<br />
RECEIVER MULTI<br />
OPERATION<br />
DVD/LD<br />
VCR 2<br />
MOVIE<br />
STEREO/<br />
DIRECT<br />
MENU<br />
SYSTEM<br />
SETUP<br />
SURROUND<br />
MODE<br />
ENTER<br />
SYSTEM<br />
OFF<br />
SOURCE<br />
MULTI CONTROL<br />
1<br />
TV/SAT VCR1/DVR TV CONT<br />
CD TUNER RECEIVER<br />
ACOUSTIC<br />
MUSIC EQ INPUT<br />
TUNER EDIT<br />
ST<br />
TUNE<br />
SB CH<br />
MODE<br />
MIDNIGHT<br />
MASTER<br />
VOLUME<br />
ENTER<br />
TEXT ON<br />
ST<br />
MULTI CH<br />
INPUT<br />
MUTE<br />
TOP MENU<br />
GUIDE<br />
1 Press the TUNER button.<br />
This selects the TUNER function on the receiver and<br />
sets the remote to the TUNER operation mode.<br />
SIGNAL PRO LOGIC Neo :6<br />
AUTO DIGITAL<br />
RF DTS ES EX<br />
DIGITAL MPEG AAC<br />
ANALOG STEREO<br />
SB CH DSP<br />
AUTO ON MOVIE<br />
OFF MUSIC<br />
L C R LFE<br />
LS S RS SP A B<br />
LOUDNESS MIDNIGHT TONE DNR ATT STEREO MONO<br />
TUNED RF ATT<br />
RDS EON<br />
Hi-BIT/<br />
SAMPLING<br />
MULTI-ROOM<br />
2 Press the CLASS button repeatedly<br />
to select a class number.<br />
Each press switches the display:<br />
CLASS A CLASS B CLASS C<br />
dB<br />
3<br />
AUDIO<br />
CHANNEL−<br />
RF ATT<br />
DIMMER<br />
TEXT OFF<br />
LOUDNESS<br />
BAND<br />
TONE<br />
+<br />
−<br />
CHANNEL+<br />
EFFECT/CH SEL<br />
SIGNAL SEL DNR BASS/TREBLE DISC<br />
VIDEO SEL<br />
INPUT<br />
SELECT<br />
D.ACCESS<br />
HI-BIT<br />
TUNE<br />
TV CONTROL<br />
CHANNEL<br />
MPX<br />
VOLUME<br />
RETURN<br />
CLASS<br />
ENTER<br />
+10<br />
SUB TITLE<br />
REMOTE<br />
SETUP<br />
2<br />
3 Use the number buttons to select<br />
the channel you desire.<br />
To select channel 7, press 7.<br />
To select channel 0, press `.<br />
For example : If 99.50 MHz (FM) was memorized in<br />
class B at channel 7.<br />
SIGNAL PRO LOGIC Neo :6<br />
AUTO DIGITAL<br />
RF DTS ES EX<br />
DIGITAL MPEG AAC<br />
ANALOG STEREO<br />
SB CH DSP<br />
AUTO ON MOVIE<br />
OFF MUSIC<br />
L C R LFE<br />
LOUDNESS MIDNIGHT TONE DNR ATT STEREO MONO<br />
TUNED RF ATT<br />
RDS EON<br />
Hi-BIT/<br />
SAMPLING<br />
MULTI-ROOM<br />
dB<br />
LS S RS SP<br />
A B<br />
RECEIVER<br />
To step through each channel in order<br />
Press the ST –/+ buttons repeatedly.<br />
European model<br />
AUDIO/V<br />
STANDBY/ON<br />
2<br />
3<br />
multi-voltage model<br />
AUDIO/VI<br />
STANDBY/ON<br />
58<br />
En<br />
2<br />
3
BASIC<br />
An introduction to RDS (European model only)<br />
Using the Tuner<br />
Radio Data System, or RDS as it’s usually known, is a system used by FM radio stations to provide listeners<br />
with various kinds of information—the name of the station and the kind of show they’re broadcasting, for<br />
example. This information shows up as text on the display, and you can switch between the kind of information<br />
shown. Although you don’t get RDS information from all FM radio stations, you do with most.<br />
Probably the best feature of RDS is that you can search automatically by type of program. So, if you felt like<br />
listening to jazz, you could search for a station that’s broadcasting a show with the program type, JAZZ. There<br />
are around 30 such program types, including various genres of music, news, sport, talk shows, financial<br />
information, and so on.<br />
The receiver lets you display three different kinds of RDS information: Radio Text, Program Service Name, and<br />
Program Type.<br />
Radio Text (RT) is messages sent by the radio station. These can be anything the broadcaster chooses—a talk<br />
radio station might give out it telephone number as RT, for example.<br />
Program Service Name (PS) is the name of the radio station.<br />
Program Type (PTY) indicates the kind of program currently being broadcast.<br />
The receiver can search for and display the following program types:<br />
NEWS News<br />
AFFAIRS Current affairs<br />
INFO General information<br />
SPORT Sports<br />
EDUCATE Educational material<br />
DRAMA Radio drama<br />
CULTURE Arts and culture<br />
SCIENCE Science and technology<br />
VARIED Usually talk-based material,<br />
such as quiz shows or<br />
interviews<br />
POP M Pop music<br />
ROCK M Rock music<br />
EASY M “Middle of the road” music<br />
LIGHT M ‘Light’ classical music<br />
CLASSICS ‘Serious’ classical music<br />
OTHER M Other music not fitting any of<br />
the above categories<br />
WEATHER Weather reports<br />
FINANCE Finance and business<br />
CHILDREN Children’s entertainment<br />
SOCIAL Social affairs<br />
RELIGION Religious programming<br />
PHONE IN Phone-in talk shows<br />
TRAVEL Travel<br />
LEISURE Leisure interests and hobbies<br />
JAZZ Jazz music<br />
COUNTRY Country music<br />
NATION M Popular music in a language<br />
other than English<br />
OLDIES Popular music from the ’50s<br />
FOLK M Folk music<br />
DOCUMENT Documentaries<br />
In addition, there is a program type called<br />
ALARM, used for exceptional emergency<br />
announcements. You can’t search for this, but<br />
the tuner will switch automatically to this RDS<br />
broadcast signal.<br />
Using the RDS display<br />
To display the different types of RDS information available,<br />
press TUNER button on the remote control and use the<br />
SUB TITLE button to cycle through the types of RDS<br />
information.<br />
Each press changes the display as follows:<br />
memo<br />
R T<br />
P S<br />
FREQ<br />
PTY<br />
• If any noise is picked up while displaying<br />
the RT scroll, some characters may be<br />
displayed incorrectly.<br />
• If you see NO RADIO TEXT DATA in the<br />
RT display, it means no RT data is being<br />
transmitted from the broadcast station. If<br />
you have entered a name for the station,<br />
it is displayed instead of RT data. If you<br />
haven’t, the display will automatically<br />
switch to the PS data display. If no PS<br />
data is transmitted from the station, the<br />
frequency will be displayed.<br />
• In the PTY display, there are cases where<br />
NO DATA or NO TYPE is shown. If this<br />
happens, the PS display is shown after a<br />
few seconds.<br />
• This unit converts lower case characters<br />
transmitted by broadcast station to upper<br />
case characters.<br />
59<br />
En
MOVIE<br />
MUSIC<br />
MULTI JOG<br />
ENTER<br />
STANDBY<br />
MULTI JOG CONTROL<br />
SET UP RETURN<br />
PHONES<br />
SPEAKERS<br />
SIGNAL<br />
SELECT<br />
TONE<br />
HI-BIT<br />
HI-SAMPLING<br />
SB CH<br />
MODE<br />
TONE CONTROL<br />
BASS/TREBLE<br />
BAND<br />
CLASS<br />
SELECT<br />
STATION TUNING<br />
S-VIDEO<br />
TUNER<br />
EDIT<br />
MULTI JOG/ENTER<br />
CHARACTER/<br />
SEARCH<br />
VIDEO L<br />
VIDEO INPUT<br />
AUDIO<br />
EON<br />
MODE<br />
R<br />
Using the Tuner<br />
Searching for RDS programs (European model only)<br />
One of the most useful features of RDS is the ability to search for a particular kind of radio program. You can<br />
search for any of the program types (listed on page 59).<br />
STANDBY/ON<br />
AUDIO/V<br />
1 Tune into an FM station.<br />
Refer to “Automatic and Manual Tuning” or “Direct<br />
Access Tuning” on p. 54 and 55.<br />
2 Use the BAND button to select the<br />
FM band.<br />
RDS is only broadcast on FM.<br />
1,4 5-6 2 4 3<br />
3 Press the SEARCH MODE button.<br />
SEARCH shows in the display.<br />
4 Press the +/– buttons or use the<br />
MULTI JOG dial to select the<br />
program type you want to hear.<br />
5 Press ENTER to search for the<br />
program type.<br />
The system starts searching through the station<br />
presets for a match. When it finds one, the search<br />
stops and the station plays for five seconds.<br />
6 If you want to keep listening to the<br />
station, press ENTER within the 5<br />
seconds.<br />
If you don’t press ENTER, searching resumes.<br />
If NO PTY is displayed it means the tuner couldn’t find<br />
that program type at the time of the search.<br />
memo<br />
• RDS searches memorized stations only. If no<br />
stations have been (see page 59 to do this), NO<br />
PTY is displayed.<br />
• FINISH means the search is complete.<br />
60<br />
En
MOVIE<br />
MUSIC<br />
MULTI JOG<br />
ENTER<br />
STANDBY<br />
MULTI JOG CONTROL<br />
SET UP RETURN<br />
PHONES<br />
SPEAKERS<br />
SIGNAL<br />
SELECT<br />
TONE<br />
HI-BIT<br />
HI-SAMPLING<br />
SB CH<br />
MODE<br />
TONE CONTROL<br />
BASS/TREBLE<br />
BAND<br />
CLASS<br />
SELECT<br />
STATION TUNING<br />
S-VIDEO<br />
TUNER<br />
EDIT<br />
MULTI JOG/ENTER<br />
CHARACTER/<br />
SEARCH<br />
VIDEO L<br />
VIDEO INPUT<br />
AUDIO<br />
EON<br />
MODE<br />
R<br />
BASIC<br />
Using the Tuner<br />
Basics of EON (Enhanced Other Network information)<br />
(European model only)<br />
When EON is turned on, the receiver jumps to an EON-linked broadcast when it begins, even if a receiver<br />
function other than the tuner is being used. It cannot be used in areas that EON information is not transmitted<br />
and when FM broadcast stations do not transmit PTY data. When the broadcast ends, the tuner returns to the<br />
original frequency or function.<br />
There are two types of EON you can set:<br />
1 TA (Traffic Announcement)<br />
This mode will set the tuner to pick up traffic information when it’s broadcast.<br />
2 NEWS<br />
This mode will set the tuner to pick up news when it is broadcast.<br />
memo<br />
EON does not work when the tuner is in the AM band.<br />
Using EON (European model only)<br />
Use the front panel controls to do this.<br />
STANDBY/ON<br />
AUDIO/VI<br />
1 Press the BAND button to select the<br />
FM band.<br />
EON is only broadcast on FM.<br />
2 Tune into an EON FM station.<br />
The ‡ indicator lights to inform you that the currently<br />
tuned station carries the EON data service. See pages<br />
59–60 for more on tuning into radio broadcasts.<br />
memo<br />
1 3<br />
3 Press the EON MODE button to<br />
select the mode you want.<br />
These modes are explained above.<br />
Each press changes the display as follows:<br />
EON TA<br />
EON NEWS<br />
• The EON mode is canceled if you switch<br />
to AM reception while setting EON. It<br />
starts once again when you return to FM<br />
reception.<br />
• You can’t search for traffic<br />
announcements and news at the same<br />
time.<br />
• You can’t operate the TUNER EDIT and<br />
CHARACTER SEARCH buttons while the<br />
EON indicator is lit.<br />
• If you want to change to a function other<br />
than the tuner, press the EON MODE<br />
button and turn the EON mode off.<br />
OFF<br />
If EON information is being transmitted, the receiver<br />
jumps to the type of broadcast you selected. When the<br />
EON mode is set, the EON indicator lights, but during<br />
actual reception of an EON broadcast the EON<br />
indicator will flash.<br />
61<br />
En
MOVIE<br />
MUSIC<br />
MULTI JOG<br />
ENTER<br />
STANDBY<br />
MULTI JOG CONTROL<br />
SET UP RETURN<br />
PHONES<br />
SPEAKERS<br />
SIGNAL<br />
SELECT<br />
TONE<br />
HI-BIT<br />
HI-SAMPLING<br />
SB CH<br />
MODE<br />
TONE CONTROL<br />
BASS/TREBLE<br />
BAND<br />
CLASS<br />
SELECT<br />
STATION TUNING<br />
S-VIDEO<br />
TUNER<br />
EDIT<br />
MULTI JOG/ENTER<br />
CHARACTER/<br />
SEARCH<br />
VIDEO L<br />
VIDEO INPUT<br />
AUDIO<br />
EON<br />
MODE<br />
R<br />
Using the Tuner<br />
Clearing all stations from the RDS or EON search<br />
(European model only)<br />
The receiver will automatically register an identifying marker (called a PI code) for any station you input into the<br />
memory classes which can receive RDS or EON data. If you want to remove the currently memorized stations<br />
from RDS and EON searches, you can do it by erasing the PI codes.<br />
STANDBY/ON<br />
AUDIO/V<br />
1 Press and hold EON MODE (front<br />
panel) for about two seconds.<br />
ERASE PI will be displayed.<br />
2 Press ENTER.<br />
ERASE PI flashes for two seconds to indicate the PI<br />
codes have been erased.<br />
2<br />
1<br />
62<br />
En
BASIC<br />
Remote Control of Other Components<br />
Setting Up the Remote Control to Control Other<br />
Components<br />
In addition to controlling the receiver, the supplied remote control can operate your other components (VCR, TV,<br />
DVD, CD, etc.) after you program it to do so. In this way, instead of fumbling with many different controls and<br />
buttons, you only need to use one remote control. If your component(s) are listed in the remote control's<br />
memory, simply follow the steps below. If your component(s) are not listed, or if you want the remote to learn<br />
additional operations, you can use the learning mode to input the information from the remote controls supplied<br />
with your other components.<br />
Recalling Settings Stored in the Remote Control<br />
The following steps show you how to recall the setting stored in the remote control. Once a setting is recalled<br />
and the component assigned, you can use this remote to easily operate the component.<br />
memo<br />
• To exit from the remote control setup mode at any time, press REMOTE SETUP.<br />
• See "Using Remote Control with Other Components" on pages 65–66 to operate your other<br />
components.<br />
• The TUNER button cannot be assigned.<br />
2<br />
RECEIVER MULTI<br />
OPERATION<br />
DVD/LD<br />
VCR 2<br />
MOVIE<br />
MULTI CONTROL<br />
TV/SAT<br />
CD<br />
SURROUND<br />
MODE<br />
MUSIC<br />
SYSTEM<br />
OFF<br />
VCR1/DVR<br />
TUNER<br />
ACOUSTIC<br />
EQ<br />
SB CH<br />
MODE<br />
SOURCE<br />
TV CONT<br />
RECEIVER<br />
INPUT<br />
MULTI CH<br />
INPUT<br />
LED<br />
1 While holding down the REMOTE<br />
SETUP button press to select the<br />
preset recall setup mode.<br />
The LED begins to blink.<br />
To cancel the preset recall setup mode press REMOTE<br />
SETUP.<br />
3<br />
STEREO/<br />
DIRECT<br />
MENU<br />
SYSTEM<br />
SETUP<br />
AUDIO<br />
CHANNEL−<br />
RF ATT<br />
DIMMER<br />
ENTER<br />
TEXT OFF<br />
LOUDNESS<br />
MIDNIGHT<br />
BAND<br />
TONE<br />
+<br />
−<br />
CHANNEL+<br />
EFFECT/CH SEL<br />
SIGNAL SEL DNR BASS/TREBLE DISC<br />
VIDEO SEL<br />
INPUT<br />
SELECT<br />
TUNER EDIT<br />
ST<br />
MASTER<br />
VOLUME<br />
D.ACCESS<br />
HI-BIT<br />
TUNE<br />
TV CONTROL<br />
CHANNEL<br />
ENTER<br />
TUNE<br />
TEXT ON<br />
MPX<br />
VOLUME<br />
RECEIVER<br />
ST<br />
MUTE<br />
TOP MENU<br />
GUIDE<br />
RETURN<br />
CLASS<br />
ENTER<br />
+10<br />
SUB TITLE<br />
REMOTE<br />
SETUP<br />
1<br />
1,4<br />
2 Press the MULTI CONTROL button<br />
for the component you want to<br />
control.<br />
The LED lights continously.<br />
3 Point the remote toward the<br />
component to be controlled, enter<br />
the 4 digit setup code (see pages 96-<br />
97 for codes).<br />
The LED blinks.<br />
After a code has been input the power of the component<br />
being input will turn on or off.<br />
The remote will return to the previous mode after<br />
thirty seconds of inactivity.<br />
The power of the component being input will only turn<br />
on or off if that component is able to be turned on<br />
directly by remote control.<br />
Repeat steps 2 through 3 to assign preset codes<br />
for as many components as necessary.<br />
If you can't get your component to respond to<br />
any of the codes you can still program the<br />
component into the remote control using the<br />
procedure in the next section.<br />
4 Press the REMOTE SETUP button to<br />
exit the preset recall setup mode.<br />
The remote control and receiver return to their<br />
previous operation modes.<br />
63<br />
En
INPUT<br />
SELECT<br />
VCR 2<br />
ST<br />
CD<br />
HI-BIT<br />
TUNE<br />
TUNE<br />
ST<br />
INPUT<br />
CLASS<br />
+10<br />
Remote Control of Other Components<br />
Programming Signals from Other Remote Controls (LEARNING Mode)<br />
If preset codes are not available for your component(s), or the available preset codes do not operate correctly,<br />
you can use this procedure to program in signals from the remote control(s) of your other component(s). These<br />
steps can also be used to add further operations to the remote control that were successfully set with the<br />
stored settings (see page 63).<br />
memo<br />
• To exit from the remote control setup mode at any time, press REMOTE SETUP.<br />
• You can also program the »˜«˜|˜\ and ENTER buttons with the LEARNING mode.<br />
• The TUNER button cannot be assigned.<br />
• Some commands cannot be learned.<br />
2<br />
RECEIVER MULTI<br />
OPERATION<br />
DVD/LD<br />
VCR 2<br />
MOVIE<br />
SURROUND<br />
MODE<br />
MULTI CONTROL<br />
TV/SAT<br />
CD<br />
MUSIC<br />
SYSTEM<br />
OFF<br />
VCR1/DVR<br />
TUNER<br />
ACOUSTIC<br />
EQ<br />
SB CH<br />
MODE<br />
SOURCE<br />
TV CONT<br />
RECEIVER<br />
INPUT<br />
MULTI CH<br />
INPUT<br />
LED<br />
1 While holding down the REMOTE<br />
SETUP button press to select the<br />
learning setup mode.<br />
The LED begins to blink.<br />
To cancel the learning setup mode press REMOTE<br />
SETUP.<br />
STEREO/<br />
DIRECT<br />
MENU<br />
SYSTEM<br />
SETUP<br />
AUDIO<br />
CHANNEL−<br />
RF ATT<br />
DIMMER<br />
ENTER<br />
TEXT OFF<br />
LOUDNESS<br />
MIDNIGHT<br />
BAND<br />
TONE<br />
+<br />
−<br />
CHANNEL+<br />
EFFECT/CH SEL<br />
SIGNAL SEL DNR BASS/TREBLE DISC<br />
VIDEO SEL<br />
TUNER EDIT<br />
ST<br />
MASTER<br />
VOLUME<br />
D.ACCESS<br />
HI-BIT<br />
TUNE<br />
ENTER<br />
TUNE<br />
TEXT ON<br />
MPX<br />
ST<br />
MUTE<br />
TOP MENU<br />
GUIDE<br />
RETURN<br />
CLASS<br />
ENTER<br />
+10<br />
3<br />
1<br />
Buttons<br />
that are<br />
able to<br />
learn new<br />
commands<br />
2 Press the MULTI CONTROL button<br />
for the component you want to<br />
control.<br />
The LED lights continously.<br />
3 Press the button to be programmed.<br />
For example DVD/LD<br />
The LED blinks rapidly.<br />
• The TV , TV INPUT SELECT, TV CHANNEL +/–<br />
and TV VOLUME +/– buttons are only available for<br />
learning when programming TV CONTROL<br />
operations.<br />
INPUT<br />
SELECT<br />
TV CONTROL<br />
CHANNEL<br />
VOLUME<br />
RECEIVER<br />
SUB TITLE<br />
REMOTE<br />
SETUP<br />
1<br />
4 Point the remote controls at each<br />
other and press the button on the<br />
other remote control for the<br />
operation you wish to program .<br />
RECEIVER<br />
CHANNEL VOLUME<br />
REMOTE<br />
SETUP<br />
TV CONTROL<br />
SUB TITLE<br />
VIDEO SEL<br />
SIGNAL SEL DNR BASS/TREBLE DISC<br />
DIMMER TONE<br />
LOUDNESS EFFECT/CH SEL<br />
CHANNEL+<br />
ENTER<br />
+ −<br />
RF ATT D.ACCESS MPX<br />
CHANNEL−<br />
TEXT OFF BAND<br />
AUDIO RETURN<br />
ENTER<br />
SYSTEM<br />
SETUP<br />
GUIDE<br />
MENU TUNER EDIT TEXT ON TOP MENU<br />
MASTER<br />
VOLUME<br />
SURROUND<br />
MODE<br />
STEREO/<br />
DIRECT<br />
MUTE<br />
ENTER<br />
MIDNIGHT<br />
MOVIE MUSIC<br />
TUNER RECEIVER<br />
ACOUSTIC<br />
EQ<br />
SB CH MULTI CH<br />
MODE INPUT<br />
DVD/LD<br />
TV/SAT<br />
VCR1/DVR TV CONT<br />
MULTI CONTROL<br />
RECEIVER MULTI<br />
OPERATION<br />
SYSTEM<br />
OFF<br />
SOURCE<br />
5–20 cm<br />
1 Point the remote controls toward each other.<br />
2 Press the button on the other remote control<br />
corresponding to the operation you wish to<br />
program.<br />
The LED will turn off and then light again.<br />
To program additional operations for the current<br />
component, repeat steps 3 and 4.<br />
To program operations for another component,<br />
repeat steps 2 through 4.<br />
64<br />
En<br />
5 Press the REMOTE SETUP button to<br />
exit the learning setup mode.<br />
The remote control and receiver return to their<br />
previous operation modes.
BASIC<br />
Remote Control of Other Components<br />
Using Remote Control with Other Components<br />
CD/MD/CD-R/VCR/DVD/LD/DVD recorder/Cassette Deck operations<br />
memo<br />
• The following operations are available from the receiver's remote control after you program it<br />
(see “Setting Up the Remote Control to Control Other Components,“ page 63).<br />
• To perform these operations, press the MULTI CONTROL button for the component you want to<br />
control.<br />
• For more information on individual commands consult the <strong>manual</strong> that came with the component.<br />
Button(s)<br />
SOURCE<br />
Function<br />
Press<br />
to switch the components between<br />
S<br />
TANDB<br />
Y a<br />
Press to return to the start of the current track or<br />
skips to the start of previous tracks or chapter.<br />
nd<br />
ON<br />
.<br />
chapter. Repeated presses<br />
Components<br />
CD/MD/CD-R/VCR/DVD/LD/<br />
DVD recorder/Cassette deck<br />
CD/MD/CD-R/DVD/LD<br />
4 Go<br />
back channels (channel<br />
− ).<br />
VCR/DVD recorder<br />
¢<br />
Play<br />
the reverse side of the tape on a reversible deck.<br />
Press to advance to the start of the next track or<br />
skips to the start of following tracks or chapter.<br />
Go<br />
forward channels (channel +).<br />
8 Pause playback or recording.<br />
¡ Hold down for fast forward playback.<br />
1 Hold down for fast reverse playback.<br />
3 Start playback.<br />
7<br />
SUBTITLE<br />
Button<br />
Stop playback (on some models, pressing<br />
stopped will cause the disc tray to open).<br />
Displays/changes<br />
the subtitles on multilingual DVDs.<br />
Change<br />
the DISPLAY mode.<br />
N umber Directly<br />
access tracks on a program source.<br />
B uttons Directly<br />
access chapter on a program source.<br />
+10 Button<br />
ENTER/DISC<br />
Button<br />
Directly<br />
select a channel.<br />
chapter. Repeated presses<br />
this when the disc is already<br />
Select tracks or chapter higher than 10. Press this button and the remaining<br />
number to get the track or chapter (+10 Button + 3= track or chapter 13).<br />
Some components may operate differently.<br />
Press<br />
to start Search mode.<br />
Takes<br />
you to the disc navigator.<br />
Changes<br />
between sides A & B of the disc.<br />
Press<br />
to enter the selected channel.<br />
Selects<br />
a disc in a multi-disc CD player.<br />
M ENU Displays<br />
menus concerning the current DVD, DVR or VCR you are using.<br />
A UDIO Changes<br />
the audio track of discs with more than one audio track.<br />
TOP MENU<br />
/GUIDE<br />
button<br />
RETURN<br />
button<br />
| \» «&<br />
ENTER<br />
Changes<br />
between the tuner in the TV and the tuner in the VCR.<br />
Play<br />
the reverse side of the tape on a reversible deck.<br />
Press<br />
to select a track<br />
Displays<br />
the top menu of the current DVD, LD or DVR you are using.<br />
Takes<br />
you to the guide menu of that system.<br />
Press<br />
to select a track<br />
Takes<br />
you to the previous menu.<br />
Navigate<br />
menus/options.<br />
Basic<br />
playback options.<br />
Cassette deck<br />
CD/MD/CD-R/DVD/LD<br />
VCR/DVD recorder<br />
CD/MD/CD-R/VCR/DVD/LD/<br />
DVD recorder/Cassette deck<br />
CD/MD/CD-R/VCR/DVD/LD/<br />
DVD recorder/Cassette deck<br />
CD/MD/CD-R/VCR/DVD/LD/<br />
DVD recorder/Cassette deck<br />
CD/MD/CD-R/VCR/DVD/LD/<br />
DVD recorder/Cassette deck<br />
CD/MD/CD-R/VCR/DVD/LD/<br />
DVD recorder/Cassette deck<br />
DVD/DVD recorder<br />
CD/MD/CD-R/VCR/LD<br />
CD/MD/CD-R/LD<br />
DVD/DVD recorder<br />
VCR/DVD recorder<br />
CD/MD/CD-R/DVD/LD/<br />
DVD recorder<br />
DVD<br />
DVD recorder<br />
LD<br />
VCR<br />
CD<br />
DVD/DVD recorder/VCR<br />
DVD/LD/DVD recorder<br />
VCR<br />
Double cassette 1st deck<br />
CD<br />
DVD/LD/DVD recorder<br />
VCR<br />
CD<br />
DVD/LD/VCR/DVD recorder<br />
DVD/LD/DVD recorder/VCR<br />
Double cassette 1st deck<br />
65<br />
En
Remote Control of Other Components<br />
Cable TV/Satellite TV/TV operations<br />
memo<br />
Button(s)<br />
TV<br />
INPUT<br />
SELECT<br />
TV<br />
CHANNEL<br />
( +/ −)<br />
TV VOLUME<br />
( +/ −)<br />
• The following operations are available from the receiver's remote control after you program it<br />
(see “Setting Up the Remote Control to Control Other Components,“ page 63).<br />
• To perform these operations, press the MULTI CONTROL button for the component you want to<br />
control.<br />
• For more information on individual commands consult the <strong>manual</strong> that came with the component.<br />
Function<br />
Press<br />
to switch the TV, Satellite TV or Cable TV between<br />
Press<br />
to switch the TV input.<br />
Select<br />
channels.<br />
Adjust<br />
the TV volume.<br />
M ENU Takes<br />
you to the TV menu of that system.<br />
G UIDE Takes<br />
you to the guide menu of that system.<br />
TEXT<br />
ON<br />
R ETURN Exits<br />
the menu you are viewing.<br />
1 Use<br />
to move back a page in the menu.<br />
Use<br />
to move back channels.<br />
3 A/TEXT<br />
OFF<br />
¡ Use<br />
to move forward a page in the menu.<br />
Use<br />
to move forward channels.<br />
4 B/RED<br />
Use<br />
to move back a page in the menu.<br />
8 C/GREEN<br />
7 D/YELLOW<br />
¢ E/CYAN<br />
Number<br />
Buttons<br />
ENTER/DISC<br />
button<br />
| \» «&<br />
ENTER<br />
Use<br />
to move forward a page in the menu.<br />
Use<br />
to select a specific TV channel.<br />
Use<br />
this button to immediately enter a new channel.<br />
S<br />
TANDB<br />
Y a<br />
Press<br />
to select or adjust and navigate items on the menu screen.<br />
nd<br />
ON<br />
.<br />
Components<br />
Cable TV/ Satellite TV/ TV<br />
TV<br />
Cable TV/ Satellite TV/ TV<br />
TV<br />
Cable TV/ Satellite TV/ TV<br />
Cable TV/ Satellite TV<br />
TV<br />
Cable TV/ Satellite TV<br />
Satellite TV<br />
Cable TV/ TV<br />
Satellite TV/ TV<br />
Satellite TV<br />
Cable TV/ TV<br />
Satellite TV/ TV<br />
Cable TV<br />
Satellite TV/ TV<br />
Satellite TV/ TV<br />
Satellite TV/ TV<br />
Cable TV<br />
Cable TV/ Satellite TV/ TV<br />
Cable TV/ TV<br />
Cable TV/ Satellite TV/ TV<br />
memo<br />
• The first four buttons are dedicated to control the TV assigned to the TV CONT button. Thus if you<br />
only have one TV hooked up to this system, assign it to the TV CONT button. If you have two TVs,<br />
assign the main TV to the TV CONT button. If you hook up your system this way, the first four TV<br />
controls will always be accessible.<br />
For example, if you connect your TV to TV monitor, then use TV CONT for your TV. If you connect your<br />
TV to input source then use TV.<br />
• Depending on the maker and individual model, there are some buttons that may not be able operate<br />
some equipment or may operate it in a different way.<br />
66<br />
En
BASIC<br />
Setting up the DIRECT FUNCTION<br />
Remote Control of Other Components<br />
The direct function will not be necessary for most users. It is designed in case you have an external video<br />
source connected to your TV (a video source that is not going through the <strong>VSX</strong>-<strong>D1011</strong>). For this explanation we'll<br />
call this the external video deck. You'd like to control external video deck with this unit's remote control so<br />
you've assigned it a function button (for example purposes, the VCR 2 button). Yet, if you put the receiver in<br />
VCR 2 mode you'll get no picture on your TV because the external video deck signal is not going through the<br />
<strong>VSX</strong>-<strong>D1011</strong>. To get around this problem you set the DIRECT FUNCTION for VCR 2 to OFF. Now when you press<br />
VCR 2 function button you can control the external video deck with the remote but the receiver does not go into<br />
VCR 2 mode.<br />
memo<br />
• To exit from the remote control setup mode at any time, press REMOTE SETUP.<br />
• The default setting for all DIRECT FUNCTIONs is ON.<br />
2<br />
RECEIVER MULTI<br />
OPERATION<br />
DVD/LD<br />
VCR 2<br />
MOVIE<br />
MULTI CONTROL<br />
TV/SAT<br />
CD<br />
SURROUND<br />
MODE<br />
MUSIC<br />
SYSTEM<br />
OFF<br />
VCR1/DVR<br />
TUNER<br />
ACOUSTIC<br />
EQ<br />
SB CH<br />
MODE<br />
SOURCE<br />
TV CONT<br />
RECEIVER<br />
INPUT<br />
MULTI CH<br />
INPUT<br />
LED<br />
1 While holding down the REMOTE<br />
SETUP button press to select the<br />
direct function setup mode.<br />
The LED begins to blink.<br />
To cancel the direct function setup mode press<br />
REMOTE SETUP.<br />
STEREO/<br />
DIRECT<br />
MENU<br />
SYSTEM<br />
SETUP<br />
AUDIO<br />
ENTER<br />
TUNER EDIT<br />
ST<br />
MIDNIGHT<br />
MASTER<br />
VOLUME<br />
TUNE<br />
ENTER<br />
TUNE<br />
TEXT ON<br />
ST<br />
MUTE<br />
TOP MENU<br />
GUIDE<br />
RETURN<br />
2 Press the MULTI CONTROL button of<br />
the component whose direct<br />
function you want to turn on or off.<br />
The LED lights and remains lit.<br />
For example, if you want to turn off direct function for<br />
VCR 2, you would press VCR 2.<br />
3<br />
3<br />
1<br />
CHANNEL−<br />
RF ATT<br />
DIMMER<br />
TEXT OFF<br />
LOUDNESS<br />
BAND<br />
TONE<br />
+<br />
−<br />
CHANNEL+<br />
EFFECT/CH SEL<br />
SIGNAL SEL DNR BASS/TREBLE DISC<br />
VIDEO SEL<br />
INPUT<br />
SELECT<br />
D.ACCESS<br />
HI-BIT<br />
TV CONTROL<br />
CHANNEL<br />
MPX<br />
VOLUME<br />
RECEIVER<br />
CLASS<br />
ENTER<br />
+10<br />
SUB TITLE<br />
REMOTE<br />
SETUP<br />
1<br />
3 Set the DIRECT FUNCTION of each<br />
external source to OFF by pressing<br />
, ON by pressing .<br />
The LED blinks.<br />
ON: The direct function is on.<br />
OFF: The direct function is off.<br />
For example, if you want to turn off direct function for<br />
VCR 2, you would press .<br />
4 Repeat steps 2–3 to set the direct<br />
function for as many components as<br />
you want.<br />
5 Press the REMOTE SETUP button to<br />
exit the direct function setup mode.<br />
67<br />
En
Using Other Functions<br />
Recording from Audio/Video Components<br />
The following explanations show you how make a recording from one component to another connected to this receiver.<br />
Note that an analog recorder (such as a VCR) cannot record from a source that is connected using only a digital<br />
connection. Likewise, a digital recorder (such as a CD-R) cannot record digitally from a component that is connected using<br />
only analog connections. In both of these cases, make sure that the digital component also has analog connections to the<br />
receiver, and that the SIGNAL SELECT is set to ANALOG.<br />
When recording from one digital component to another, bear in mind that the digital signal output from this receiver<br />
mirrors the input from the source. So if the input is, say, Dolby Digital, the output will also be Dolby Digital. Before<br />
recording, make sure that the recorder is compatible with the source digital audio format.<br />
See page 19 for more on analog audio connections and page 21–22 for digital audio connections.<br />
memo<br />
• The receiver's volume, channel level, balance, TONE, DIGITAL NR, MIDNIGHT, LOUDNESS,<br />
ACOUSTIC CAL EQ and surround effects have no effect on the recorded signal.<br />
• In some cases, digital recordings have copy guard protections and making a digital copy is not possible.<br />
In this case you can only copy them in an analog manner.<br />
• Some video recordings are copy-protected; these sources cannot be recorded.<br />
• When recording video, the source must be connected to the receiver using the same type of video<br />
cord (composite, or S video) as you used to connect the recorder to the receiver.<br />
Functions that can be recorded<br />
RECEIVER MULTI<br />
OPERATION<br />
DVD/LD<br />
VCR 2<br />
MOVIE<br />
STEREO/<br />
DIRECT<br />
MULTI CONTROL<br />
TV/SAT<br />
CD<br />
SURROUND<br />
MODE<br />
MUSIC<br />
ENTER<br />
SYSTEM<br />
OFF<br />
VCR1/DVR<br />
TUNER<br />
ACOUSTIC<br />
EQ<br />
SB CH<br />
MODE<br />
MIDNIGHT<br />
SOURCE<br />
TV CONT<br />
RECEIVER<br />
INPUT<br />
MULTI CH<br />
INPUT<br />
MUTE<br />
1<br />
1 Select the source component. Set<br />
SIGNAL SELECT according to the<br />
source component's signal (ANALOG<br />
or DIGITAL).<br />
2 Start recording (tape deck, CD<br />
recorder, VCR, etc.)<br />
3 Playback the source to be recorded.<br />
MASTER<br />
VOLUME<br />
MENU<br />
TUNER EDIT<br />
TEXT ON<br />
TOP MENU<br />
SYSTEM<br />
SETUP<br />
ST<br />
TUNE<br />
ENTER<br />
ST<br />
GUIDE<br />
AUDIO<br />
TUNE<br />
RETURN<br />
CHANNEL−<br />
TEXT OFF<br />
BAND<br />
CHANNEL+<br />
RF ATT<br />
D.ACCESS<br />
MPX<br />
CLASS<br />
1<br />
DIMMER<br />
LOUDNESS<br />
TONE<br />
EFFECT/CH SEL<br />
SIGNAL SEL DNR BASS/TREBLE DISC<br />
VIDEO SEL<br />
HI-BIT<br />
+<br />
−<br />
ENTER<br />
+10<br />
TV CONTROL<br />
SUB TITLE<br />
INPUT<br />
SELECT<br />
CHANNEL<br />
VOLUME<br />
REMOTE<br />
SETUP<br />
RECEIVER<br />
68<br />
En
EXPERT<br />
Stereo playback in another room (SECOND ZONE)<br />
Using Other Functions<br />
SECOND ZONE (Speaker System B)/FRONT BI-AMP Setup<br />
This setup enables you to listen to a pair of stereo speakers independently of the main speaker system<br />
hooked up to the receiver. You can choose SECOND ZONE, and use the speakers hooked up to the<br />
surround back terminals as a B speaker system, that is, playing the same source as the main speaker<br />
system but from independent stereo speakers.<br />
1 Connect a pair of speakers to the surround back speaker terminals.<br />
2 Select SECOND ZONE in the SURRBACK SYSTEM setup (see page 35)<br />
setup.<br />
memo<br />
Please use speakers with a nominal impedance rated 8 Ω-16 Ω.<br />
Bi-amping the front speakers (FRONT BI-AMP)<br />
For bi-amp playback you can connect both the A and B speaker terminals to your front speakers. To do this<br />
your speakers must be bi-wireable (that is they must have separate terminals for the high and low<br />
frequencies).<br />
Bi-amping delivers more power to the front speakers, but disables the surround back speakers, so you will<br />
be limited to 5.1 channel playback.<br />
SPEAKERS<br />
SURROUND BACK / ı<br />
Å R FRONT L CENTER R SURROUND L R<br />
L<br />
ª<br />
·<br />
ª<br />
·<br />
FRONT Speaker<br />
rear side<br />
· ª<br />
· ª<br />
Hi<br />
Lo<br />
Caution!<br />
Most speakers with both<br />
HI and LOW terminals<br />
have two metal plates<br />
that connect the HI to<br />
the LOW terminals.<br />
These must be removed<br />
when you are bi-amping<br />
the speakers or you<br />
could severely damage<br />
the amplifier. See your<br />
speaker <strong>manual</strong> for more<br />
information.<br />
Caution!<br />
Do not allow any speaker wire from any<br />
terminal to touch a wire from a different<br />
terminal.<br />
1 Connect your speakers as shown.<br />
Since both Front A and B speaker terminals output<br />
the same audio, it doesn’t matter which set (A or<br />
B) is powering which part (HI or LOW) of the<br />
speaker.<br />
2 Select FRONT BI-AMP in the<br />
SURRBACK SYSTEM setup (see<br />
page 35).<br />
The surround back channel amplifier is now used<br />
to power the B set of speaker terminals and the<br />
A+B (SP3AB) speaker setting is automatically<br />
selected. The speaker setting in this case can only<br />
be A+B or OFF.<br />
69<br />
En
MULTI JOG CONTROL<br />
SET UP RETURN<br />
PHONES<br />
SPEAKERS<br />
SIGNAL<br />
SELECT<br />
TONE<br />
HI-BIT<br />
HI-SAMPLING<br />
SB CH<br />
MODE<br />
TONE CONTROL<br />
BASS/TREBLE<br />
BAND<br />
CLASS<br />
SELECT<br />
STATION TUNING<br />
S-VIDEO<br />
TUNER<br />
EDIT<br />
MULTI JOG/ENTER<br />
CHARACTER/<br />
SEARCH<br />
VIDEO L<br />
VIDEO INPUT<br />
AUDIO<br />
EON<br />
MODE<br />
R<br />
Using Other Functions<br />
A/B Speaker Button<br />
If you selected NORMAL SYSTEM in the SURRBACK SYSTEM setup (see page 35) your surround back<br />
speakers will be used was part of your of main speaker systems and this button will simply switch if off or on.<br />
If you selected SECOND ZONE in the SURRBACK SYSTEM setup (see page 35) this button will cycle through<br />
the A (main) speaker system, the B speaker system (the surround back speakers acting as a separate second<br />
zone), both speaker systems, and off.<br />
1<br />
1 Press the SPEAKERS button (on the<br />
front panel) to switch speakers on/<br />
off or cycle through the different<br />
speaker systems if SECOND ZONE<br />
or FRONT BI-AMP has been selected<br />
in the SURRBACK SYSTEM setup.<br />
A(SP3A):<br />
B(SP3B):<br />
Sound is output from speaker system A and the same signal is output from the pre out<br />
terminals.<br />
Sound is output from the two speakers in speaker system B (the surround back speakers).<br />
Multichannel sources will be downmixed to these two speakers.<br />
A&B(SP3AB): Sound is output from speaker system A speakers and the B speakers. Also, for FRONT BI-<br />
AMP playback.<br />
OFF(SP3 ):<br />
No sound is output from the speakers. Depending on the input signal and settings in<br />
SPEAKER SETTING sound may be output from the subwoofer. The same sound is output<br />
from the pre out terminals as when selecting speaker system A (above).<br />
memo<br />
• What is output from the subwoofer depends on the SPEAKER SETTING and the type of source.<br />
• Depending on the settings in SPEAKER SETTING and the MULTI CH IN SELECT, output from the<br />
SURROUND BACK PRE OUT terminals may change.<br />
• When using headphones the speakers are switched off.<br />
• Please use speakers with a nominal impedance rated 8 Ω-16 Ω.<br />
70<br />
En
EXPERT<br />
Using Other Functions<br />
Connecting Additional Amplifiers<br />
This receiver has more than sufficient power for any home use, but it is possible to add additional amplifiers to<br />
every channel of your system. Make the connections shown below to add amplifiers to power your speakers.<br />
Before making or changing the connections, switch off the power and disconnect the power cord from<br />
the AC outlet.<br />
ANALOG<br />
INPUT<br />
Powered subwoofer<br />
PCM/<br />
2DIGITAL /<br />
DTS/MPEG<br />
OUT1<br />
OUT2<br />
IN 1<br />
(TV/<br />
SAT)<br />
IN 2<br />
(CD-R/<br />
TAPE1)<br />
IN 3<br />
(DVD/<br />
LD)<br />
IN 4<br />
(CD)<br />
ASSIGNABLE<br />
DIGITAL<br />
IN<br />
OUT<br />
PLAY<br />
IN<br />
CD-R/<br />
TAPE1<br />
OUT<br />
REC<br />
PLAY<br />
IN<br />
MD/<br />
TAPE2<br />
OUT<br />
REC<br />
CD<br />
IN<br />
LINE<br />
IN<br />
ANTENNA<br />
R<br />
FM UNBAL<br />
CONTROL<br />
L<br />
75Ω<br />
AM LOOP<br />
MONITOR OUT 1<br />
R L R L<br />
VCR1/<br />
DVR<br />
VCR2<br />
TV/<br />
SAT<br />
IN<br />
DVD/<br />
LD<br />
IN<br />
AUDIO AUDIO VIDEO<br />
IN<br />
OUT<br />
IN<br />
OUT<br />
VIDEO<br />
S VIDEO<br />
CENTER<br />
FRONT<br />
R<br />
SUR-<br />
ROUND<br />
R<br />
SUR-<br />
ROUND<br />
BACK<br />
R<br />
FRONT<br />
R<br />
SUR-<br />
ROUND<br />
R<br />
SUR-<br />
ROUND<br />
BACK<br />
R<br />
PRE OUT<br />
SUB<br />
WOOFER<br />
MULTI CH IN<br />
L<br />
L<br />
(Single)<br />
L<br />
L<br />
L<br />
SUB<br />
WOOF-<br />
ER<br />
CEN-<br />
TER<br />
L<br />
ANALOG<br />
INPUT<br />
L R<br />
ANALOG<br />
INPUT<br />
L R<br />
ANALOG<br />
INPUT<br />
L R<br />
ANALOG<br />
INPUT<br />
Front channel<br />
amplifier<br />
Surround channel<br />
amplifier<br />
Surround back<br />
channel amplifier<br />
Center channel<br />
amplifier (mono)<br />
memo<br />
• You can use the additional amplifier on the surround back channels for a single speaker as well. In this<br />
case plug the amplifier into the L (SINGLE) terminal only.<br />
• The sound from the surround back terminals will depend on how you have set up the SURRBACK<br />
SYSTEM (see pages 35).<br />
71<br />
En
Using Other Functions<br />
Multi Operations<br />
Multi operations allow you to tell the receiver and your other components to do a number of things with the<br />
push of only two buttons on the remote control (see "Performing Multi Operations" on the next page). For<br />
example, you can program the unit to turn on your TV, turn on your DVD player and start playing the loaded<br />
DVD. This allows you to freely decide which operations you want performed as well as the order in which you<br />
want them performed. The steps below show you how to program a string of up to 5 different operations for<br />
each MULTI CONTROL button. You don't need to program the power of this receiver (or any PIONEER<br />
component used) to go on, it (or they) will do so automatically when multi operations are performed.<br />
memo<br />
• Be sure to set up each component before programming multi operations (see “Setting Up the<br />
Remote Control to Control Other Components", pages 63–64).<br />
• To exit from the REMOTE SETUP mode at anytime press the REMOTE SETUP button.<br />
2<br />
RECEIVER MULTI<br />
OPERATION<br />
DVD/LD<br />
VCR 2<br />
MOVIE<br />
MULTI CONTROL<br />
TV/SAT<br />
CD<br />
SURROUND<br />
MODE<br />
MUSIC<br />
SYSTEM<br />
OFF<br />
VCR1/DVR<br />
TUNER<br />
ACOUSTIC<br />
EQ<br />
SB CH<br />
MODE<br />
SOURCE<br />
TV CONT<br />
RECEIVER<br />
INPUT<br />
MULTI CH<br />
INPUT<br />
1 While holding down the REMOTE<br />
SETUP button press to select the<br />
multi operation setup mode.<br />
The LED begins to blink.<br />
To cancel the multi operation setup mode press<br />
REMOTE SETUP.<br />
STEREO/<br />
DIRECT<br />
MENU<br />
SYSTEM<br />
SETUP<br />
AUDIO<br />
ENTER<br />
TUNER EDIT<br />
ST<br />
MIDNIGHT<br />
MASTER<br />
VOLUME<br />
TUNE<br />
ENTER<br />
TUNE<br />
TEXT ON<br />
ST<br />
MUTE<br />
TOP MENU<br />
GUIDE<br />
RETURN<br />
2 Select a MULTI CONTROL button for<br />
this multi operation.<br />
The LED lights and remains lit.<br />
Each MULTI CONTROL button can be used for one<br />
multi operation. If a multi operation relates to using a<br />
DVD player, for example, it makes sense to select the<br />
DVD/LD button.<br />
CHANNEL−<br />
RF ATT<br />
TEXT OFF<br />
D.ACCESS<br />
BAND<br />
MPX<br />
CHANNEL+<br />
CLASS<br />
1<br />
3 Press the operation button.<br />
for example 3 (play), you want to input.<br />
DIMMER<br />
LOUDNESS<br />
TONE<br />
EFFECT/CH SEL<br />
ENTER<br />
SIGNAL SEL DNR BASS/TREBLE DISC<br />
VIDEO SEL<br />
HI-BIT<br />
+<br />
−<br />
+10<br />
INPUT<br />
SELECT<br />
TV CONTROL<br />
CHANNEL<br />
VOLUME<br />
SUB TITLE<br />
REMOTE<br />
SETUP<br />
1<br />
RECEIVER<br />
Buttons that can be<br />
programmed with<br />
Multi Operations<br />
72<br />
En
EXPERT<br />
Using Other Functions<br />
4-2<br />
4-3<br />
RECEIVER MULTI<br />
OPERATION<br />
DVD/LD<br />
VCR 2<br />
MOVIE<br />
STEREO/<br />
DIRECT<br />
MENU<br />
SYSTEM<br />
SETUP<br />
AUDIO<br />
CHANNEL−<br />
RF ATT<br />
DIMMER<br />
SURROUND<br />
MODE<br />
MULTI CONTROL<br />
MUSIC<br />
ENTER<br />
TUNER EDIT<br />
ST<br />
TV/SAT<br />
CD<br />
TEXT OFF<br />
LOUDNESS<br />
SYSTEM<br />
OFF<br />
TUNER<br />
ACOUSTIC<br />
EQ<br />
SB CH<br />
MODE<br />
MIDNIGHT<br />
MASTER<br />
VOLUME<br />
D.ACCESS<br />
TUNE<br />
ENTER<br />
TUNE<br />
VCR1/DVR<br />
TEXT ON<br />
BAND<br />
MPX<br />
TONE<br />
ST<br />
SOURCE<br />
TV CONT<br />
RECEIVER<br />
INPUT<br />
MULTI CH<br />
INPUT<br />
MUTE<br />
TOP MENU<br />
GUIDE<br />
RETURN<br />
CHANNEL+<br />
CLASS<br />
EFFECT/CH SEL<br />
ENTER<br />
SIGNAL SEL DNR BASS/TREBLE DISC<br />
4-1<br />
4 Repeat steps 2 and 3 to input multi<br />
operations to the MULTI CONTROL<br />
button you pressed in step 3.<br />
You can repeat this process for up to five<br />
commands.<br />
For example : you could enter the following three<br />
operations using the preceding steps 2 and 3.<br />
1 Press the TV CONTROL button and TV (POWER)<br />
to turn on your TV (as explained above).<br />
2 Press the DVD/LD button then (POWER) to turn<br />
on your DVD player (if it is not a PIONEER product).<br />
3 Press the DVD/LD button then 3 (play) to start<br />
playing the DVD player.<br />
When you employ multi operations (see below), these<br />
three tasks will be performed in the same order.<br />
5 Press the REMOTE SETUP button to<br />
exit the multi operation setup mode.<br />
The remote control return to their previous operation<br />
modes.<br />
VIDEO SEL<br />
HI-BIT<br />
+<br />
−<br />
+10<br />
INPUT<br />
SELECT<br />
TV CONTROL<br />
CHANNEL<br />
VOLUME<br />
RECEIVER<br />
SUB TITLE<br />
REMOTE<br />
SETUP<br />
5<br />
memo<br />
You don't need to program power on for PIONEER<br />
components (except for the first generation of <strong>Pioneer</strong><br />
DVRs), they will go on automatically if a command for<br />
that unit is entered in the Multi Operations settings.<br />
Also, your TV will go on automatically if a TV related<br />
command is entered in the Multi Operations.<br />
Performing Multi Operations<br />
Do the following to use the MULTI OPERATIONS.<br />
2<br />
RECEIVER MULTI<br />
OPERATION<br />
DVD/LD<br />
VCR 2<br />
MOVIE<br />
STEREO/<br />
DIRECT<br />
MULTI CONTROL<br />
TV/SAT<br />
CD<br />
SURROUND<br />
MODE<br />
MUSIC<br />
ENTER<br />
SYSTEM<br />
OFF<br />
VCR1/DVR<br />
TUNER<br />
ACOUSTIC<br />
EQ<br />
SB CH<br />
MODE<br />
MIDNIGHT<br />
MASTER<br />
VOLUME<br />
SOURCE<br />
TV CONT<br />
RECEIVER<br />
INPUT<br />
MULTI CH<br />
INPUT<br />
MUTE<br />
1<br />
1 Press the MULTI OPERATION<br />
button.<br />
2 Press the MULTI CONTROL button<br />
for the component that has been set<br />
up with multi operations.<br />
The power of the receiver (and any <strong>Pioneer</strong> components<br />
use in the program) goes on and the programmed multi<br />
operations are performed automatically.<br />
73<br />
En
Using Other Functions<br />
SYSTEM OFF<br />
The SYSTEM OFF feature allows you to tell the receiver and your other components to stop and/or turn off with<br />
the push of only one button on the remote control. For example, you can program the unit to turn off your TV<br />
and turn off your DVD player, etc. You don't need to program power off for PIONEER components, they will go<br />
off automatically in this mode. The receiver itself will go off automatically as well.<br />
The steps below show you how to program a string of up to 5 different SYSTEM OFF operations.<br />
memo<br />
• Be sure to set up each component before programming SYSTEM OFF operations (see “Setting<br />
Up the Remote Control to Control Other Components", pages 63).<br />
• To exit from the REMOTE SETUP mode at anytime press the REMOTE SETUP button.<br />
3<br />
RECEIVER MULTI<br />
OPERATION<br />
DVD/LD<br />
VCR 2<br />
MOVIE<br />
MULTI CONTROL<br />
TV/SAT<br />
CD<br />
SURROUND<br />
MODE<br />
MUSIC<br />
SYSTEM<br />
OFF<br />
VCR1/DVR<br />
TUNER<br />
ACOUSTIC<br />
EQ<br />
SB CH<br />
MODE<br />
SOURCE<br />
TV CONT<br />
RECEIVER<br />
INPUT<br />
MULTI CH<br />
INPUT<br />
4<br />
2<br />
1 While holding down the REMOTE<br />
SETUP button press to select the<br />
SYSTEM OFF setup mode.<br />
The LED begins to blink.<br />
To cancel the SYSTEM OFF setup mode press RE-<br />
MOTE SETUP.<br />
STEREO/<br />
DIRECT<br />
ENTER<br />
MIDNIGHT<br />
MASTER<br />
VOLUME<br />
MUTE<br />
2 Press the RECEIVER button.<br />
The LED lights and remains lit.<br />
MENU<br />
SYSTEM<br />
SETUP<br />
AUDIO<br />
CHANNEL−<br />
RF ATT<br />
DIMMER<br />
TEXT OFF<br />
LOUDNESS<br />
BAND<br />
TONE<br />
+<br />
−<br />
CHANNEL+<br />
EFFECT/CH SEL<br />
SIGNAL SEL DNR BASS/TREBLE DISC<br />
VIDEO SEL<br />
INPUT<br />
SELECT<br />
TUNER EDIT<br />
ST<br />
D.ACCESS<br />
HI-BIT<br />
TUNE<br />
TV CONTROL<br />
CHANNEL<br />
ENTER<br />
TUNE<br />
TEXT ON<br />
MPX<br />
VOLUME<br />
RECEIVER<br />
ST<br />
TOP MENU<br />
GUIDE<br />
RETURN<br />
CLASS<br />
ENTER<br />
+10<br />
SUB TITLE<br />
REMOTE<br />
SETUP<br />
1<br />
1,5<br />
3 Select a MULTI CONTROL button for<br />
SYSTEM OFF.<br />
Each MULTI CONTROL button can be used for<br />
SYSTEM OFF. If a SYSTEM OFF command relates to<br />
using a DVD player, for example, it makes sense to<br />
select the DVD/LD button.<br />
4 Press the SOURCE button of the<br />
component to be set with SYSTEM<br />
OFF operations.<br />
5 Press the REMOTE SETUP button to<br />
exit the SYSTEM OFF setup mode.<br />
The remote control return to their previous operation<br />
modes.<br />
74<br />
En
EXPERT<br />
Using SYSTEM OFF<br />
Using Other Functions<br />
Do the following to use the SYSTEM OFF function.<br />
The SYSTEM OFF feature allows you to tell the receiver and your other components to stop and/or turn off with<br />
the remote control. Most PIONEER components will automatically turn off. The receiver itself will go off<br />
automatically as well.<br />
The following PIONEER components can be turned off using the SYSTEM OFF function:<br />
DVD, DVD-Recorder, LD, CATV, CD, CD-R, MD, Satellite Tuner, Tape, Tuner, VCR, and TV.<br />
RECEIVER MULTI<br />
OPERATION<br />
DVD/LD<br />
VCR 2<br />
MOVIE<br />
MULTI CONTROL<br />
TV/SAT<br />
CD<br />
MUSIC<br />
SYSTEM<br />
OFF<br />
VCR1/DVR<br />
TUNER<br />
ACOUSTIC<br />
EQ<br />
SOURCE<br />
TV CONT<br />
RECEIVER<br />
INPUT<br />
1<br />
1<br />
1 Press the MULTI OPERATION button<br />
and within 5 seconds press the<br />
RECEIVER button.<br />
All the PIONEER components connected to the<br />
receiver and the receiver will stop and/or go off.<br />
SURROUND<br />
MODE<br />
SB CH<br />
MODE<br />
MULTI CH<br />
INPUT<br />
STEREO/<br />
DIRECT<br />
ENTER<br />
MIDNIGHT<br />
MUTE<br />
The PIONEER SR System: Operating other PIONEER<br />
components<br />
Connecting an optional control cord allows you to operate other PIONEER components simply by pointing the<br />
receiver's remote control at the remote sensor on the front panel of the receiver. The receiver then sends the<br />
remote control signals to the other devices via the CONTROL OUT terminal.<br />
Receiver<br />
Remote Control<br />
PIONEER component<br />
with an CONTROL<br />
terminals.<br />
To CONTROL IN<br />
terminal of another<br />
PIONEER component<br />
with an CONTROL<br />
terminals.<br />
memo<br />
• You can also control PIONEER components (and those made by other manufacturers) by pointing the<br />
receiver's remote control directly at the respective component. This type of operation does not require<br />
control cords. All you have to do is recall the appropriate stored settings (see page 63).<br />
• If you use a remote control hooked up via the CONTROL IN jack with a control cord, you won't be able<br />
to use this unit's remote control.<br />
• If you use this feature make sure an analog (audio and/or video) connection has been made between<br />
the units.<br />
75<br />
En
Using Other Functions<br />
Resetting the Remote Control<br />
The following operations allow you to erase the settings stored in the remote control.<br />
Erasing Multi Operations<br />
1<br />
DIMMER<br />
LOUDNESS<br />
TONE<br />
EFFECT/CH SEL<br />
SIGNAL SEL DNR BASS/TREBLE DISC<br />
VIDEO SEL<br />
INPUT<br />
SELECT<br />
HI-BIT<br />
TV CONTROL<br />
CHANNEL<br />
VOLUME<br />
+<br />
−<br />
ENTER<br />
+10<br />
SUB TITLE<br />
REMOTE<br />
SETUP<br />
1<br />
1 Press and hold both the REMOTE<br />
SETUP button and for more<br />
than 3 seconds.<br />
LED lights will blink 3 times and all multi operation<br />
settings will be erased.<br />
RECEIVER<br />
Erasing Learned Remote Control Commands<br />
DIMMER<br />
LOUDNESS<br />
TONE<br />
EFFECT/CH SEL<br />
SIGNAL SEL DNR BASS/TREBLE DISC<br />
VIDEO SEL<br />
INPUT<br />
SELECT<br />
HI-BIT<br />
TV CONTROL<br />
CHANNEL<br />
VOLUME<br />
+<br />
−<br />
ENTER<br />
+10<br />
SUB TITLE<br />
REMOTE<br />
SETUP<br />
1<br />
1<br />
1 Press and hold both the REMOTE<br />
SETUP button and for more<br />
than 3 seconds.<br />
LED lights will blink 3 times and all learned remote<br />
control commands will be erased.<br />
RECEIVER<br />
Erasing All Remote Control settings<br />
DIMMER<br />
LOUDNESS<br />
TONE<br />
EFFECT/CH SEL<br />
SIGNAL SEL DNR BASS/TREBLE DISC<br />
VIDEO SEL<br />
INPUT<br />
SELECT<br />
HI-BIT<br />
TV CONTROL<br />
CHANNEL<br />
VOLUME<br />
+<br />
−<br />
ENTER<br />
+10<br />
SUB TITLE<br />
REMOTE<br />
SETUP<br />
1<br />
1<br />
1 Press and hold both the REMOTE<br />
SETUP button and for more<br />
than 3 seconds.<br />
LED lights will blink 3 times and all remote control<br />
settings will be erased.<br />
RECEIVER<br />
76<br />
En
STANDBY/ON<br />
MOVIE<br />
MUSIC<br />
MULTI JOG<br />
AUDIO/VIDEO MULTI-CHANNEL RECEIVER <strong>VSX</strong>-<strong>D1011</strong><br />
ENTER STEREO/DIRECT MULTI CH IN ACOUSTIC EQ<br />
MULTI JOG CONTROL<br />
SET UP RETURN<br />
PHONES<br />
STANDBY<br />
SPEAKERS<br />
MULTI JOG CONTROL<br />
SET UP RETURN<br />
PHONES<br />
SPEAKERS<br />
SIGNAL<br />
SELECT<br />
TONE<br />
SIGNAL<br />
SELECT<br />
TONE<br />
HI-BIT<br />
HI-SAMPLING<br />
HI-BIT<br />
HI-SAMPLING<br />
SB CH<br />
MODE<br />
TONE CONTROL<br />
BASS/TREBLE<br />
SB CH<br />
MODE<br />
TONE CONTROL<br />
BASS/TREBLE<br />
BAND<br />
BAND<br />
CLASS<br />
CLASS<br />
SELECT<br />
SELECT<br />
STATION TUNING<br />
S-VIDEO<br />
STATION TUNING<br />
TUNER<br />
EDIT<br />
MULTI JOG/ENTER<br />
CHARACTER/<br />
SEARCH<br />
VIDEO L<br />
VIDEO INPUT<br />
S-VIDEO<br />
AUDIO<br />
TUNER<br />
EDIT<br />
EON<br />
MODE<br />
R<br />
MULTI JOG/ENTER<br />
CHARACTER/<br />
SEARCH<br />
VIDEO L<br />
VIDEO INPUT<br />
AUDIO<br />
EON<br />
MODE<br />
R<br />
MASTER VOLUME<br />
EXPERT<br />
Using Other Functions<br />
Resetting the Main Unit<br />
The following operations allow you to reset the unit to the default settings.<br />
(Put the receiver in the STANDBY mode.)<br />
1 While holding down the TONE<br />
button press the STANDBY/ON<br />
button for about three seconds.<br />
1 1<br />
2 When you see RESET? appear in<br />
the display, press the TONE –<br />
button. OK? appears in the<br />
display, press TONE +.<br />
When OK appears in the display all the settings,<br />
including the speaker, surround sound settings<br />
and tuner settings, will be reset in the unit to the<br />
default settings.<br />
22<br />
memo<br />
If the receiver is disconnected from a power<br />
source, or the main power is turned off, for<br />
about a month or longer it will reset to the<br />
default settings.<br />
77<br />
En
STANDBY/ON<br />
MOVIE<br />
MUSIC<br />
MULTI JOG<br />
ENTER<br />
STANDBY<br />
MULTI JOG CONTROL<br />
SET UP RETURN<br />
PHONES<br />
SPEAKERS<br />
SIGNAL<br />
SELECT<br />
HI-BIT<br />
HI-SAMPLING<br />
SB CH<br />
MODE<br />
TONE CONTROL<br />
TONE BASS/TREBLE<br />
BAND<br />
CLASS<br />
SELECT<br />
AUTO<br />
AUTO<br />
AUTO<br />
AUTO<br />
AUTO<br />
AUTO<br />
Fine Tuning Your System<br />
Other System Settings<br />
These settings are more advanced. Some could add depth or listenability to your sound (like the THX CINEMA<br />
setup) and others are for your convenience (like the FUNCTION RENAME). You can decide if you want to make<br />
these settings or not. They are not crucial to good surround sound. You only need to make these settings once<br />
(unless you change the placement of your current speaker system, add new speakers or components to your<br />
system, etc.). Use the arrow buttons (5∞) and the ENTER button on the remote control to navigate the<br />
display on the receiver. Conversely, you can use the MULTI JOG dial and ENTER button on the front panel.<br />
RECEIVER MULTI<br />
OPERATION<br />
SYSTEM<br />
OFF<br />
SOURCE<br />
2 Press the SYSTEM SETUP<br />
button.<br />
DVD/LD<br />
VCR 2<br />
MOVIE<br />
MULTI CONTROL<br />
TV/SAT<br />
CD<br />
MUSIC<br />
VCR1/DVR<br />
TUNER<br />
ACOUSTIC<br />
EQ<br />
TV CONT<br />
RECEIVER<br />
INPUT<br />
1<br />
SIGNAL PRO LOGIC Neo :6<br />
AUTO DIGITAL<br />
RF DTS ES EX<br />
DIGITAL MPEG AAC<br />
ANALOG STEREO<br />
SB CH DSP<br />
AUTO ON MOVIE<br />
OFF MUSIC<br />
L C R LFE<br />
LS S RS SP A B<br />
LOUDNESS MIDNIGHT TONE DNR ATT STEREO MONO<br />
TUNED RF ATT<br />
RDS EON<br />
Hi-BIT/<br />
SAMPLING<br />
MULTI-ROOM<br />
dB<br />
SURROUND<br />
MODE<br />
SB CH<br />
MODE<br />
MULTI CH<br />
INPUT<br />
This display appears on the receiver.<br />
2<br />
STEREO/<br />
DIRECT<br />
MENU<br />
SYSTEM<br />
SETUP<br />
AUDIO<br />
CHANNEL−<br />
RF ATT<br />
ENTER<br />
TUNER EDIT<br />
ST<br />
TEXT OFF<br />
D.ACCESS<br />
MIDNIGHT<br />
MASTER<br />
VOLUME<br />
TUNE<br />
ENTER<br />
TUNE<br />
TEXT ON<br />
BAND<br />
MPX<br />
ST<br />
MUTE<br />
TOP MENU<br />
GUIDE<br />
RETURN<br />
CHANNEL+<br />
CLASS<br />
3<br />
3 Follow the order below to make<br />
advance settings. Use the 5∞<br />
buttons to choose a menu. When<br />
you have the setup you want<br />
press ENTER.<br />
In each mode, the current settings are displayed<br />
automatically.<br />
THX CINEMA Setup (page 79)<br />
DIMMER<br />
LOUDNESS<br />
TONE<br />
EFFECT/CH SEL<br />
ENTER<br />
SIGNAL SEL DNR BASS/TREBLE DISC<br />
SIGNAL PRO LOGIC Neo :6<br />
DIGITAL<br />
RF DTS ES EX<br />
DIGITAL MPEG AAC<br />
ANALOG STEREO<br />
SB CH DSP<br />
ON MOVIE<br />
OFF MUSIC<br />
LOUDNESS MIDNIGHT TONE DNR ATT STEREO MONO<br />
TUNED RF ATT<br />
RDS EON<br />
Hi-BIT/<br />
SAMPLING<br />
MULTI-ROOM<br />
dB<br />
VIDEO SEL<br />
INPUT<br />
SELECT<br />
HI-BIT<br />
TV CONTROL<br />
CHANNEL<br />
VOLUME<br />
+<br />
−<br />
+10<br />
SUB TITLE<br />
REMOTE<br />
SETUP<br />
L C R LFE<br />
LS S RS SP A B<br />
This setup lets you choose which multichannel<br />
decoding method, from stereo sources, the<br />
receiver will use for THX CINEMA.<br />
INPUT ASSIGN (page 80)<br />
RECEIVER<br />
SIGNAL PRO LOGIC Neo :6<br />
DIGITAL<br />
RF DTS ES EX<br />
DIGITAL MPEG AAC<br />
ANALOG STEREO<br />
SB CH DSP<br />
ON MOVIE<br />
OFF MUSIC<br />
L C R LFE<br />
LOUDNESS MIDNIGHT TONE DNR ATT STEREO MONO<br />
TUNED RF ATT<br />
RDS EON<br />
Hi-BIT/<br />
SAMPLING<br />
MULTI-ROOM<br />
dB<br />
3 2 RETURN button<br />
LS S RS SP<br />
A B<br />
If you hook up your digital components in a<br />
different way than the default settings you need<br />
to tell the receiver how you hooked them up so<br />
the names on the remote control and front panel<br />
match your home setup. Do this with the<br />
DIGITAL–IN SELECT setup.<br />
FUNCTION RENAME (page 81)<br />
SIGNAL PRO LOGIC Neo :6<br />
DIGITAL<br />
RF DTS ES EX<br />
DIGITAL MPEG AAC<br />
ANALOG STEREO<br />
SB CH DSP<br />
ON MOVIE<br />
OFF MUSIC<br />
L C R LFE<br />
LOUDNESS MIDNIGHT TONE DNR ATT STEREO MONO<br />
TUNED RF ATT<br />
RDS EON<br />
Hi-BIT/<br />
SAMPLING<br />
MULTI-ROOM<br />
dB<br />
LS S RS SP<br />
A B<br />
This feature allows you to change the names that<br />
appear in the receiver display to reflect what you<br />
have connected.<br />
1 Turn on the receiver, press the<br />
RECEIVER button on the remote<br />
control.<br />
78<br />
En
STANDBY/ON<br />
MOVIE<br />
MUSIC<br />
MULTI JOG<br />
ENTER<br />
STANDBY<br />
MULTI JOG CONTROL<br />
SET UP RETURN<br />
PHONES<br />
SPEAKERS<br />
SIGNAL<br />
SELECT<br />
HI-BIT<br />
HI-SAMPLING<br />
SB CH<br />
MODE<br />
TONE CONTROL<br />
TONE BASS/TREBLE<br />
BAND<br />
CLASS<br />
SELECT<br />
AUTO<br />
AUTO<br />
AUTO<br />
AUTO<br />
AUTO<br />
AUTO<br />
EXPERT<br />
Fine Tuning Your System<br />
THX CINEMA Setup<br />
This setup lets you choose which decoding method for 2 channel sources the receiver will use for THX<br />
CINEMA. The three THX CINEMA decoding methods are; PRO LOGIC II MOVIE, PRO LOGIC and NEO:6<br />
CINEMA. For more information on the decoding (playback) formats see "Techno Tidbits" on page 91.<br />
RECEIVER MULTI<br />
OPERATION<br />
SYSTEM<br />
OFF<br />
SOURCE<br />
2 Press the SYSTEM SETUP<br />
button.<br />
DVD/LD<br />
VCR 2<br />
MOVIE<br />
MULTI CONTROL<br />
TV/SAT<br />
CD<br />
MUSIC<br />
VCR1/DVR<br />
TUNER<br />
ACOUSTIC<br />
EQ<br />
TV CONT<br />
RECEIVER<br />
INPUT<br />
1<br />
SIGNAL PRO LOGIC Neo :6<br />
AUTO DIGITAL<br />
RF DTS ES EX<br />
DIGITAL MPEG AAC<br />
ANALOG STEREO<br />
SB CH DSP<br />
AUTO ON MOVIE<br />
OFF MUSIC<br />
L C R LFE<br />
LS S RS SP A B<br />
LOUDNESS MIDNIGHT TONE DNR ATT STEREO MONO<br />
TUNED RF ATT<br />
RDS EON<br />
Hi-BIT/<br />
SAMPLING<br />
MULTI-ROOM<br />
dB<br />
SURROUND<br />
MODE<br />
SB CH<br />
MODE<br />
MULTI CH<br />
INPUT<br />
This display appears on the receiver.<br />
2<br />
STEREO/<br />
DIRECT<br />
MENU<br />
SYSTEM<br />
SETUP<br />
AUDIO<br />
CHANNEL−<br />
ENTER<br />
TUNER EDIT<br />
ST<br />
TEXT OFF<br />
MIDNIGHT<br />
MASTER<br />
VOLUME<br />
TUNE<br />
ENTER<br />
TUNE<br />
TEXT ON<br />
BAND<br />
ST<br />
MUTE<br />
TOP MENU<br />
GUIDE<br />
RETURN<br />
CHANNEL+<br />
3-6<br />
3 Looking at the display on your<br />
receiver, use the 5∞ buttons to<br />
select THX CINEMA SETUP.<br />
Press the ENTER button.<br />
SIGNAL PRO LOGIC Neo :6<br />
AUTO DIGITAL<br />
RF DTS ES EX<br />
DIGITAL MPEG AAC<br />
ANALOG STEREO<br />
SB CH DSP<br />
AUTO ON MOVIE<br />
OFF MUSIC<br />
LOUDNESS MIDNIGHT TONE DNR ATT STEREO MONO<br />
TUNED RF ATT<br />
RDS EON<br />
Hi-BIT/<br />
SAMPLING<br />
MULTI-ROOM<br />
dB<br />
L C R LFE<br />
RF ATT<br />
D.ACCESS<br />
MPX<br />
CLASS<br />
LS S RS SP A B<br />
DIMMER<br />
LOUDNESS<br />
TONE<br />
EFFECT/CH SEL<br />
SIGNAL SEL DNR BASS/TREBLE DISC<br />
VIDEO SEL<br />
INPUT<br />
SELECT<br />
HI-BIT<br />
TV CONTROL<br />
CHANNEL<br />
VOLUME<br />
+<br />
−<br />
ENTER<br />
+10<br />
SUB TITLE<br />
REMOTE<br />
SETUP<br />
4 Use the 5∞ buttons to choose a<br />
THX CINEMA decoding method.<br />
Press the ENTER button.<br />
PRO LOGIC II MOVIE is selected.<br />
SIGNAL PRO LOGIC Neo :6<br />
DIGITAL<br />
RF DTS ES EX<br />
DIGITAL MPEG AAC<br />
ANALOG STEREO<br />
SB CH DSP<br />
ON MOVIE<br />
OFF MUSIC<br />
LOUDNESS MIDNIGHT TONE DNR ATT STEREO MONO<br />
TUNED RF ATT<br />
RDS EON<br />
Hi-BIT/<br />
SAMPLING<br />
MULTI-ROOM<br />
dB<br />
L C R LFE<br />
LS S RS SP A B<br />
RECEIVER<br />
PRO LOGIC is selected.<br />
3-5 2<br />
RETURN button<br />
SIGNAL PRO LOGIC Neo :6<br />
DIGITAL<br />
RF DTS ES EX<br />
DIGITAL MPEG AAC<br />
ANALOG STEREO<br />
SB CH DSP<br />
ON MOVIE<br />
OFF MUSIC<br />
L C R LFE<br />
LS S RS SP A B<br />
LOUDNESS MIDNIGHT TONE DNR ATT STEREO MONO<br />
TUNED RF ATT<br />
RDS EON<br />
Hi-BIT/<br />
SAMPLING<br />
MULTI-ROOM<br />
NEO:6 CINEMA is selected.<br />
dB<br />
SIGNAL PRO LOGIC Neo :6<br />
DIGITAL<br />
RF DTS ES EX<br />
DIGITAL MPEG AAC<br />
ANALOG STEREO<br />
SB CH DSP<br />
ON MOVIE<br />
OFF MUSIC<br />
LOUDNESS MIDNIGHT TONE DNR ATT STEREO MONO<br />
TUNED RF ATT<br />
RDS EON<br />
Hi-BIT/<br />
SAMPLING<br />
MULTI-ROOM<br />
dB<br />
L C R LFE<br />
LS S RS SP A B<br />
5 EXIT should be selected (if not,<br />
use the 5∞ buttons to select it).<br />
Press ENTER.<br />
(If you are continuing from page 78 you can skip<br />
the first two steps.)<br />
1 Turn on the receiver, press the<br />
RECEIVER button on the remote<br />
control.<br />
6 Use the 5∞ buttons to select<br />
EXIT and press ENTER, again.<br />
This exits the SYSTEM SETUP mode and returns<br />
to normal operation.<br />
memo<br />
The default is PRO LOGIC ll MOVIE.<br />
79<br />
En
STANDBY/ON<br />
MOVIE<br />
MUSIC<br />
MULTI JOG<br />
ENTER<br />
STANDBY<br />
MULTI JOG CONTROL<br />
SET UP RETURN<br />
PHONES<br />
SPEAKERS<br />
SIGNAL<br />
SELECT<br />
HI-BIT<br />
HI-SAMPLING<br />
SB CH<br />
MODE<br />
TONE CONTROL<br />
TONE BASS/TREBLE<br />
BAND<br />
CLASS<br />
SELECT<br />
Fine Tuning Your System<br />
Assigning the Digital Inputs<br />
If you did not hook up your digital equipment in accordance with the default settings for the digital inputs<br />
(see page 16, 18 & 21) you need to complete the procedure below. You have to do this in order to tell the<br />
receiver what digital equipment is hooked up to which terminal so the buttons on the remote correspond<br />
to what you have hooked up.<br />
DVD/LD<br />
VCR 2<br />
MOVIE<br />
STEREO/<br />
DIRECT<br />
TV/SAT<br />
CD<br />
SURROUND<br />
MODE<br />
MUSIC<br />
ENTER<br />
VCR1/DVR<br />
TUNER<br />
ACOUSTIC<br />
EQ<br />
SB CH<br />
MODE<br />
MIDNIGHT<br />
TV CONT<br />
RECEIVER<br />
INPUT<br />
MULTI CH<br />
INPUT<br />
MUTE<br />
1<br />
5 Use the 5∞ buttons to move<br />
through the different digital input<br />
settings and press the ENTER<br />
button.<br />
2<br />
MENU<br />
SYSTEM<br />
SETUP<br />
AUDIO<br />
TUNER EDIT<br />
ST<br />
MASTER<br />
VOLUME<br />
TUNE<br />
ENTER<br />
TUNE<br />
TEXT ON<br />
ST<br />
TOP MENU<br />
GUIDE<br />
RETURN<br />
3-8<br />
3-8 2 RETURN button<br />
SIGNAL PRO LOGIC Neo :6<br />
AUTO DIGITAL<br />
RF DTS ES EX<br />
DIGITAL MPEG AAC<br />
ANALOG STEREO<br />
SB CH DSP<br />
AUTO ON MOVIE<br />
OFF MUSIC<br />
L C R LFE<br />
LS S RS SP A B<br />
LOUDNESS MIDNIGHT TONE DNR ATT STEREO MONO<br />
TUNED RF ATT<br />
RDS EON<br />
Hi-BIT/<br />
SAMPLING<br />
MULTI-ROOM<br />
The available digital input settings are:<br />
DIGI-1: TV/SAT, DIGI-2: CD-R,<br />
DIGI-3: DVD/LD, DIGI-4: CD<br />
The selected setting will blink.<br />
6 Use the 5∞ buttons select the<br />
component that you hooked up<br />
to that digital in. Press the<br />
ENTER button.<br />
dB<br />
SIGNAL PRO LOGIC Neo :6<br />
AUTO DIGITAL<br />
RF DTS ES EX<br />
DIGITAL MPEG AAC<br />
ANALOG STEREO<br />
SB CH DSP<br />
AUTO ON MOVIE<br />
OFF MUSIC<br />
LOUDNESS MIDNIGHT TONE DNR ATT STEREO MONO<br />
TUNED RF ATT<br />
RDS EON<br />
Hi-BIT/<br />
SAMPLING<br />
MULTI-ROOM<br />
dB<br />
L C R LFE<br />
LS S RS SP<br />
A B<br />
(If you are continuing from page 78 you can skip<br />
the first two steps.)<br />
1 Turn on the receiver, press the<br />
RECEIVER button on the remote<br />
control.<br />
2 Press the SYSTEM SETUP<br />
button.<br />
3 Looking at the display on your<br />
receiver, use the 5∞ buttons to<br />
select INPUT ASSIGN. Press the<br />
ENTER button.<br />
If you're not sure which component is connected<br />
to which digital in, look on the back of the<br />
receiver and check the cables you connected.<br />
7 When you're finished use the 5∞<br />
buttons to select EXIT and press<br />
ENTER.<br />
This exits the DIGITAL-IN SELECT mode.<br />
8 Use the 5∞ buttons to select<br />
EXIT and press ENTER. Then, use<br />
the 5∞ buttons to select EXIT<br />
and press ENTER.<br />
This exits the SYSTEM SETUP mode and returns<br />
to normal operation.<br />
SIGNAL PRO LOGIC Neo :6<br />
AUTO DIGITAL<br />
RF DTS ES EX<br />
DIGITAL MPEG AAC<br />
ANALOG STEREO<br />
SB CH DSP<br />
AUTO ON MOVIE<br />
OFF MUSIC<br />
L C R LFE<br />
LS S RS SP A B<br />
LOUDNESS MIDNIGHT TONE DNR ATT STEREO MONO<br />
TUNED RF ATT<br />
RDS EON<br />
Hi-BIT/<br />
SAMPLING<br />
MULTI-ROOM<br />
dB<br />
memo<br />
80<br />
En<br />
4 DIGITAL-IN should be selected, if<br />
not use the 5∞ buttons to select<br />
it. Press the ENTER button.<br />
SIGNAL PRO LOGIC Neo :6<br />
AUTO DIGITAL<br />
RF DTS ES EX<br />
DIGITAL MPEG AAC<br />
ANALOG STEREO<br />
SB CH DSP<br />
AUTO ON MOVIE<br />
OFF MUSIC<br />
L C R LFE<br />
LS S RS SP A B<br />
LOUDNESS MIDNIGHT TONE DNR ATT STEREO MONO<br />
TUNED RF ATT<br />
RDS EON<br />
Hi-BIT/<br />
SAMPLING<br />
MULTI-ROOM<br />
dB<br />
• The possible digital inputs that can be assigned are:<br />
DVD/LD, TV/SAT, VCR1, VCR2, CD, CD-R, MD.<br />
• If you assign a digital input to a certain function (for<br />
example DVD/LD) then any digital inputs previously<br />
assigned to that function will automatically be set to<br />
OFF. This is because one function cannot be assigned<br />
to two different places.
STANDBY/ON<br />
MOVIE<br />
MUSIC<br />
MULTI JOG<br />
ENTER<br />
STANDBY<br />
MULTI JOG CONTROL<br />
SET UP RETURN<br />
PHONES<br />
SPEAKERS<br />
SIGNAL<br />
SELECT<br />
HI-BIT<br />
HI-SAMPLING<br />
SB CH<br />
MODE<br />
TONE CONTROL<br />
TONE BASS/TREBLE<br />
BAND<br />
CLASS<br />
SELECT<br />
EXPERT<br />
Fine Tuning Your System<br />
FUNCTION RENAME<br />
Use the FUNCTION RENAME capability to rename the display on the receiver for different functions (DVD, etc.).<br />
For example, you could rename DVD/LD as DVR-7000. For this setup in particular using the controls on the front<br />
panel is more convenient than using the remote control. Use the MULTI JOG dial instead of the 5∞ buttons and<br />
use the ENTER button on the front panel.<br />
3-9 2<br />
RETURN button<br />
5 Use the MULTI JOG to cycle the<br />
cursor through the letters,<br />
numbers and symbols. Use the<br />
ENTER button to enter one of the<br />
possibilities or move forward a<br />
space.<br />
SIGNAL PRO LOGIC Neo :6<br />
AUTO DIGITAL<br />
RF DTS ES EX<br />
DIGITAL MPEG AAC<br />
ANALOG STEREO<br />
SB CH DSP<br />
AUTO ON MOVIE<br />
OFF MUSIC<br />
LOUDNESS MIDNIGHT TONE DNR ATT STEREO MONO<br />
TUNED RF ATT<br />
RDS EON<br />
Hi-BIT/<br />
SAMPLING<br />
MULTI-ROOM<br />
dB<br />
L C R LFE<br />
LS S RS SP A B<br />
(If you are continuing from page 78 you can skip<br />
the first two steps.)<br />
1 Turn on the receiver. (If you<br />
want to use the remote control<br />
for this setup, press the<br />
RECEIVER button.)<br />
2 Press the SET UP button.<br />
SIGNAL PRO LOGIC Neo :6<br />
AUTO DIGITAL<br />
RF DTS ES EX<br />
DIGITAL MPEG AAC<br />
ANALOG STEREO<br />
SB CH DSP<br />
AUTO ON MOVIE<br />
OFF MUSIC<br />
L C R LFE<br />
LS S RS SP A B<br />
LOUDNESS MIDNIGHT TONE DNR ATT STEREO MONO<br />
TUNED RF ATT<br />
RDS EON<br />
Hi-BIT/<br />
SAMPLING<br />
MULTI-ROOM<br />
This display appears on the receiver.<br />
3 Looking at the display on your<br />
receiver, use the MULTI JOG to<br />
select FUNCTION RENAME.<br />
Press the ENTER button.<br />
SIGNAL PRO LOGIC Neo :6<br />
AUTO DIGITAL<br />
RF DTS ES EX<br />
DIGITAL MPEG AAC<br />
ANALOG STEREO<br />
SB CH DSP<br />
AUTO ON MOVIE<br />
OFF MUSIC<br />
L C R LFE<br />
LS S RS SP A B<br />
LOUDNESS MIDNIGHT TONE DNR ATT STEREO MONO<br />
TUNED RF ATT<br />
RDS EON<br />
Hi-BIT/<br />
SAMPLING<br />
MULTI-ROOM<br />
4 Use the MULTI JOG to select the<br />
name of the function (for<br />
example, DVD/LD) you want to<br />
change. Press ENTER.<br />
SIGNAL PRO LOGIC Neo :6<br />
AUTO DIGITAL<br />
RF DTS ES EX<br />
DIGITAL MPEG AAC<br />
ANALOG STEREO<br />
SB CH DSP<br />
AUTO ON MOVIE<br />
OFF MUSIC<br />
L C R LFE<br />
LS S RS SP A B<br />
LOUDNESS MIDNIGHT TONE DNR ATT STEREO MONO<br />
TUNED RF ATT<br />
RDS EON<br />
Hi-BIT/<br />
SAMPLING<br />
MULTI-ROOM<br />
dB<br />
dB<br />
dB<br />
The possible selections are shown below.<br />
ABCDEFGHIJKLMNOPQRSTUVWXYZ<br />
abcdefghijklmnopqrstuvwxyz<br />
0123456789<br />
!”#$%&’()*+,–./:;?@[ \ ]ˆ_{|} [space]<br />
6 Repeat step 5 until you get the<br />
name as you want it.<br />
SIGNAL PRO LOGIC Neo :6<br />
AUTO DIGITAL<br />
RF DTS ES EX<br />
DIGITAL MPEG AAC<br />
ANALOG STEREO<br />
SB CH DSP<br />
AUTO ON MOVIE<br />
OFF MUSIC<br />
L C R LFE<br />
LS S RS SP A B<br />
LOUDNESS MIDNIGHT TONE DNR ATT STEREO MONO<br />
TUNED RF ATT<br />
RDS EON<br />
Hi-BIT/<br />
SAMPLING<br />
MULTI-ROOM<br />
You can input up to ten characters.<br />
7 Press ENTER repeatedly to exit<br />
the name. The new function<br />
name is set.<br />
SIGNAL PRO LOGIC Neo :6<br />
AUTO DIGITAL<br />
RF DTS ES EX<br />
DIGITAL MPEG AAC<br />
ANALOG STEREO<br />
SB CH DSP<br />
AUTO ON MOVIE<br />
OFF MUSIC<br />
L C R LFE<br />
LS S RS SP A B<br />
LOUDNESS MIDNIGHT TONE DNR ATT STEREO MONO<br />
TUNED RF ATT<br />
RDS EON<br />
Hi-BIT/<br />
SAMPLING<br />
MULTI-ROOM<br />
8 Repeat steps 4-7 to change other<br />
function names. Use the MULTI<br />
JOG to select EXIT and press<br />
ENTER.<br />
9 Use the MULTI JOG to select<br />
EXIT and press ENTER.<br />
This exits the SYSTEM SETUP mode and returns<br />
to normal operation.<br />
dB<br />
dB<br />
Either the cursor underline bar or a character<br />
(depending on which is selected) will blink.<br />
The functions are divided into three different onscreen<br />
displays so you may have to move<br />
through them to find the function you want to<br />
rename.<br />
memo<br />
Use the RETURN button to move the<br />
cursor back one character when entering<br />
a name.<br />
81<br />
En
STANDBY/ON<br />
MOVIE<br />
MUSIC<br />
MULTI JOG<br />
ENTER<br />
STANDBY<br />
MULTI JOG CONTROL<br />
SET UP RETURN<br />
PHONES<br />
SPEAKERS<br />
SIGNAL<br />
SELECT<br />
HI-BIT<br />
HI-SAMPLING<br />
SB CH<br />
MODE<br />
TONE CONTROL<br />
TONE BASS/TREBLE<br />
BAND<br />
CLASS<br />
SELECT<br />
AUTO<br />
AUTO<br />
AUTO<br />
AUTO<br />
AUTO<br />
AUTO<br />
AUTO<br />
AUTO<br />
AUTO<br />
AUTO<br />
AUTO<br />
AUTO<br />
Fine Tuning Your System<br />
Expert Setup<br />
The settings here can only be done if you've performed the more basic preliminary setups. Thus, before doing<br />
these settings do either QUICK setup (page 13) or NORMAL setup (page 36-40).<br />
These settings are to further heighten your surround sound. They are not absolutely necessary but may give<br />
more defined and enjoyable surround sound. You can decide if you want to make these settings or not. You only<br />
need to make these settings once (unless you change the placement of your current speaker system, add new<br />
speakers or components to your system, etc.). View these settings on the receiver display. Use the arrow<br />
buttons (5∞) and the ENTER button on the remote control to navigate the display on the receiver.<br />
Conversely, you can use the MULTI JOG dial and ENTER button on the front panel.<br />
2<br />
DVD/LD<br />
VCR 2<br />
MOVIE<br />
STEREO/<br />
DIRECT<br />
MENU<br />
SYSTEM<br />
SETUP<br />
AUDIO<br />
SURROUND<br />
MODE<br />
MUSIC<br />
ENTER<br />
TUNER EDIT<br />
ST<br />
TV/SAT<br />
CD<br />
TUNE<br />
ACOUSTIC<br />
EQ<br />
SB CH<br />
MODE<br />
MIDNIGHT<br />
MASTER<br />
VOLUME<br />
ENTER<br />
TUNE<br />
VCR1/DVR<br />
TUNER<br />
TEXT ON<br />
ST<br />
TV CONT<br />
RECEIVER<br />
INPUT<br />
MULTI CH<br />
INPUT<br />
MUTE<br />
TOP MENU<br />
GUIDE<br />
RETURN<br />
1<br />
3-5<br />
5 Follow the order below to make<br />
expert settings. Use the 5∞<br />
buttons to navigate through the<br />
menus. When you have the<br />
setting you want in particular<br />
menu, press ENTER.<br />
In each mode the current settings are displayed<br />
by the receiver.<br />
CROSSOVER NETWORK (page 83)<br />
SIGNAL PRO LOGIC Neo :6<br />
DIGITAL<br />
RF DTS ES EX<br />
DIGITAL MPEG AAC<br />
ANALOG STEREO<br />
SB CH DSP<br />
ON MOVIE<br />
OFF MUSIC<br />
LOUDNESS MIDNIGHT TONE DNR ATT STEREO MONO<br />
TUNED RF ATT<br />
RDS EON<br />
Hi-BIT/<br />
SAMPLING<br />
MULTI-ROOM<br />
dB<br />
3-5 2 RETURN button<br />
L C R LFE<br />
LS S RS SP A B<br />
This feature determines which frequencies will<br />
be sent to the subwoofer (or large speakers).<br />
FINE CHANNEL LEVEL (page 84)<br />
SIGNAL PRO LOGIC Neo :6<br />
DIGITAL<br />
RF DTS ES EX<br />
DIGITAL MPEG AAC<br />
ANALOG STEREO<br />
SB CH DSP<br />
ON MOVIE<br />
OFF MUSIC<br />
LOUDNESS MIDNIGHT TONE DNR ATT STEREO MONO<br />
TUNED RF ATT<br />
RDS EON<br />
Hi-BIT/<br />
SAMPLING<br />
MULTI-ROOM<br />
dB<br />
L C R LFE<br />
LS S RS SP<br />
A B<br />
This feature balances the sound output level of your<br />
speakers more finely than in the NORMAL setup.<br />
FINE CHANNEL DELAY (page 85–86)<br />
SIGNAL PRO LOGIC Neo :6<br />
DIGITAL<br />
RF DTS ES EX<br />
DIGITAL MPEG AAC<br />
ANALOG STEREO<br />
SB CH DSP<br />
ON MOVIE<br />
OFF MUSIC<br />
LOUDNESS MIDNIGHT TONE DNR ATT STEREO MONO<br />
TUNED RF ATT<br />
RDS EON<br />
Hi-BIT/<br />
SAMPLING<br />
MULTI-ROOM<br />
dB<br />
L C R LFE<br />
82<br />
En<br />
1 Turn on the receiver and press<br />
the RECEIVER button on the<br />
remote control.<br />
2 Press the SYSTEM SETUP<br />
button.<br />
3 SURROUND SETUP should be<br />
selected (if it's not use the 5∞<br />
buttons to select it). Press the<br />
ENTER button.<br />
SIGNAL PRO LOGIC Neo :6<br />
AUTO DIGITAL<br />
RF DTS ES EX<br />
DIGITAL MPEG AAC<br />
ANALOG STEREO<br />
SB CH DSP<br />
AUTO ON MOVIE<br />
OFF MUSIC<br />
L C R LFE<br />
LS S RS SP A B<br />
LOUDNESS MIDNIGHT TONE DNR ATT STEREO MONO<br />
TUNED RF ATT<br />
RDS EON<br />
Hi-BIT/<br />
SAMPLING<br />
MULTI-ROOM<br />
4 Select EXPERT with the 5∞<br />
buttons. Press the ENTER button.<br />
SIGNAL PRO LOGIC Neo :6<br />
AUTO DIGITAL<br />
RF DTS ES EX<br />
DIGITAL MPEG AAC<br />
ANALOG STEREO<br />
SB CH DSP<br />
AUTO ON MOVIE<br />
OFF MUSIC<br />
L C R LFE<br />
LS S RS SP A B<br />
LOUDNESS MIDNIGHT TONE DNR ATT STEREO MONO<br />
TUNED RF ATT<br />
RDS EON<br />
Hi-BIT/<br />
SAMPLING<br />
MULTI-ROOM<br />
dB<br />
dB<br />
LS S RS SP<br />
A B<br />
This feature adjusts the delay level of your speakers<br />
more finely than in the NORMAL setup.<br />
ACOUSTIC CAL EQ (page 87–88)<br />
SIGNAL PRO LOGIC Neo :6<br />
DIGITAL<br />
RF DTS ES EX<br />
DIGITAL MPEG AAC<br />
ANALOG STEREO<br />
SB CH DSP<br />
ON MOVIE<br />
OFF MUSIC<br />
L C R LFE<br />
LS S RS SP A B<br />
LOUDNESS MIDNIGHT TONE DNR ATT STEREO MONO<br />
TUNED RF ATT<br />
RDS EON<br />
Hi-BIT/<br />
SAMPLING<br />
MULTI-ROOM<br />
This feature allows you to adjust the amount of a<br />
certain frequency in a soundtrack, acting as a<br />
kind of room equalizer for your speakers.<br />
BASS PEAK LEVEL (page 89)<br />
SIGNAL PRO LOGIC Neo :6<br />
DIGITAL<br />
RF DTS ES EX<br />
DIGITAL MPEG AAC<br />
ANALOG STEREO<br />
SB CH DSP<br />
ON MOVIE<br />
OFF MUSIC<br />
L C R LFE<br />
LS S RS SP A B<br />
LOUDNESS MIDNIGHT TONE DNR ATT STEREO MONO<br />
TUNED RF ATT<br />
RDS EON<br />
Hi-BIT/<br />
SAMPLING<br />
MULTI-ROOM<br />
Dolby Digital and DTS audio sources include<br />
ultra-low bass tones. Set the bass peak level as<br />
needed to prevent the ultra-low bass tones from<br />
distorting the sound from the speakers.<br />
DYNAMIC RANGE CONTROL (page 90)<br />
SIGNAL PRO LOGIC Neo :6<br />
DIGITAL<br />
RF DTS ES EX<br />
DIGITAL MPEG AAC<br />
ANALOG STEREO<br />
SB CH DSP<br />
ON MOVIE<br />
OFF MUSIC<br />
L C R LFE<br />
LS S RS SP A B<br />
LOUDNESS MIDNIGHT TONE DNR ATT STEREO MONO<br />
TUNED RF ATT<br />
RDS EON<br />
Hi-BIT/<br />
SAMPLING<br />
MULTI-ROOM<br />
This feature makes possible excellent surround<br />
sound effects when listening to Dolby Digital and<br />
DTS sources at low volumes.<br />
dB<br />
dB<br />
dB
STANDBY/ON<br />
MOVIE<br />
MUSIC<br />
MULTI JOG<br />
ENTER<br />
STANDBY<br />
MULTI JOG CONTROL<br />
SET UP RETURN<br />
PHONES<br />
SPEAKERS<br />
SIGNAL<br />
SELECT<br />
HI-BIT<br />
HI-SAMPLING<br />
SB CH<br />
MODE<br />
TONE CONTROL<br />
TONE BASS/TREBLE<br />
BAND<br />
CLASS<br />
STA<br />
SELECT<br />
AUTO<br />
AUTO<br />
AUTO<br />
AUTO<br />
AUTO<br />
AUTO<br />
AUTO<br />
AUTO<br />
AUTO<br />
AUTO<br />
EXPERT<br />
CROSSOVER NETWORK<br />
Fine Tuning Your System<br />
Crossover frequency is the point where the receiver divides the high and low sounds (the frequencies) between<br />
the speakers. Certain bass sounds will play back from the subwoofer if you selected it as YES (or PLUS) or from<br />
the front speakers if you selected them as LARGE. This setting decides where the cutoff will be between those<br />
bass sounds playing back from the speaker selected as above and the bass sounds for the entire soundtrack,<br />
which play back from all speakers used.<br />
If all speakers are set to LARGE (see pages 37–38) this setup is unnecessary.<br />
RECEIVER MULTI<br />
OPERATION<br />
DVD/LD<br />
VCR 2<br />
MOVIE<br />
STEREO/<br />
DIRECT<br />
MENU<br />
SYSTEM<br />
SETUP<br />
AUDIO<br />
CHANNEL−<br />
SURROUND<br />
MODE<br />
MULTI CONTROL<br />
MUSIC<br />
ENTER<br />
TUNER EDIT<br />
ST<br />
TV/SAT<br />
CD<br />
TUNE<br />
TEXT OFF<br />
SYSTEM<br />
OFF<br />
TUNER<br />
ACOUSTIC<br />
EQ<br />
SB CH<br />
MODE<br />
MIDNIGHT<br />
MASTER<br />
VOLUME<br />
ENTER<br />
TUNE<br />
VCR1/DVR<br />
TEXT ON<br />
BAND<br />
ST<br />
SOURCE<br />
TV CONT<br />
RECEIVER<br />
INPUT<br />
MULTI CH<br />
INPUT<br />
MUTE<br />
TOP MENU<br />
GUIDE<br />
RETURN<br />
CHANNEL+<br />
1-3<br />
2 Use the 5∞ buttons to select<br />
frequency cut off point. Press<br />
ENTER.<br />
50 Hz: Sends bass frequencies below 50 Hz to<br />
the subwoofer (or large speakers).<br />
SIGNAL PRO LOGIC Neo :6<br />
DIGITAL<br />
RF DTS ES EX<br />
DIGITAL MPEG AAC<br />
ANALOG STEREO<br />
SB CH DSP<br />
ON MOVIE<br />
OFF MUSIC<br />
L C R LFE<br />
LS S RS SP A B<br />
LOUDNESS MIDNIGHT TONE DNR ATT STEREO MONO<br />
TUNED RF ATT<br />
RDS EON<br />
Hi-BIT/<br />
SAMPLING<br />
MULTI-ROOM<br />
80 Hz: Sends bass frequencies below 80 Hz to<br />
the subwoofer (or large speakers).<br />
SIGNAL PRO LOGIC Neo :6<br />
DIGITAL<br />
RF DTS ES EX<br />
DIGITAL MPEG AAC<br />
ANALOG STEREO<br />
SB CH DSP<br />
ON MOVIE<br />
OFF MUSIC<br />
L C R LFE<br />
LS S RS SP A B<br />
LOUDNESS MIDNIGHT TONE DNR ATT STEREO MONO<br />
TUNED RF ATT<br />
RDS EON<br />
Hi-BIT/<br />
SAMPLING<br />
MULTI-ROOM<br />
100 Hz: Sends bass frequencies below 100 Hz to<br />
the subwoofer (or large speakers).<br />
dB<br />
dB<br />
RF ATT D.ACCESS MPX CLASS<br />
SIGNAL PRO LOGIC Neo :6<br />
DIGITAL<br />
RF DTS ES EX<br />
DIGITAL MPEG AAC<br />
ANALOG STEREO<br />
SB CH DSP<br />
ON MOVIE<br />
OFF MUSIC<br />
L C R LFE<br />
LOUDNESS MIDNIGHT TONE DNR ATT STEREO MONO<br />
TUNED RF ATT<br />
RDS EON<br />
Hi-BIT/<br />
SAMPLING<br />
MULTI-ROOM<br />
dB<br />
1-3<br />
LS S RS SP<br />
A B<br />
150 Hz: Sends bass frequencies below 150 Hz to<br />
the subwoofer (or large speakers).<br />
SIGNAL PRO LOGIC Neo :6<br />
DIGITAL<br />
RF DTS ES EX<br />
DIGITAL MPEG AAC<br />
ANALOG STEREO<br />
SB CH DSP<br />
ON MOVIE<br />
OFF MUSIC<br />
LOUDNESS MIDNIGHT TONE DNR ATT STEREO MONO<br />
TUNED RF ATT<br />
RDS EON<br />
Hi-BIT/<br />
SAMPLING<br />
MULTI-ROOM<br />
dB<br />
L C R LFE<br />
LS S RS SP<br />
A B<br />
200 Hz: Sends bass frequencies below 200 Hz to<br />
the subwoofer (or large speakers).<br />
SIGNAL PRO LOGIC Neo :6<br />
DIGITAL<br />
RF DTS ES EX<br />
DIGITAL MPEG AAC<br />
ANALOG STEREO<br />
SB CH DSP<br />
ON MOVIE<br />
OFF MUSIC<br />
LOUDNESS MIDNIGHT TONE DNR ATT STEREO MONO<br />
TUNED RF ATT<br />
RDS EON<br />
Hi-BIT/<br />
SAMPLING<br />
MULTI-ROOM<br />
dB<br />
L C R LFE<br />
LS S RS SP A B<br />
Follow steps 1-5 on page 82, if necessary, to get<br />
to the starting point mentioned here.<br />
1 CROSSOVER should be selected,<br />
if it isn’t use the 5∞ buttons to<br />
select it. Press ENTER.<br />
SIGNAL PRO LOGIC Neo :6<br />
AUTO DIGITAL<br />
RF DTS ES EX<br />
DIGITAL MPEG AAC<br />
ANALOG STEREO<br />
SB CH DSP<br />
AUTO ON MOVIE<br />
OFF MUSIC<br />
LOUDNESS MIDNIGHT TONE DNR ATT STEREO MONO<br />
TUNED RF ATT<br />
RDS EON<br />
Hi-BIT/<br />
SAMPLING<br />
MULTI-ROOM<br />
dB<br />
3 EXIT should be selected (if it's<br />
not use the 5∞ buttons to select<br />
it). Press ENTER.<br />
Next, proceed to FINE CHANNEL LEVEL.<br />
If you want to change a setting before proceeding<br />
start over from step 1.<br />
memo<br />
The default is 80 Hz.<br />
L C R LFE<br />
LS S RS SP A B<br />
83<br />
En
STANDBY/ON<br />
MOVIE<br />
MUSIC<br />
MULTI JOG<br />
ENTER<br />
STANDBY<br />
MULTI JOG CONTROL<br />
SET UP RETURN<br />
PHONES<br />
SPEAKERS<br />
SIGNAL<br />
SELECT<br />
HI-BIT<br />
HI-SAMPLING<br />
SB CH<br />
MODE<br />
TONE CONTROL<br />
TONE BASS/TREBLE<br />
BAND<br />
CLASS<br />
STA<br />
SELECT<br />
Fine Tuning Your System<br />
FINE CHANNEL LEVEL<br />
The following steps show you how to balance the sound output level of your speakers more finely than in the<br />
NORMAL setup (see page 36). Proper speaker balance is essential for obtaining high quality surround sound and<br />
the better the speaker balance the better surround sound you can get. Do this procedure if you want to try and<br />
get even finer surround sound.<br />
The main difference with this setup method and the CHANNEL LEVEL setup method in NORMAL setup is that<br />
here the test tone alternates between the front left speaker (which is used as the reference channel) and the<br />
target speaker (that is, the speaker whose level you want to adjust). Listen to the two tones and try to make<br />
them the same volume.<br />
MENU<br />
SYSTEM<br />
SETUP<br />
AUDIO<br />
CHANNEL−<br />
TUNER EDIT<br />
ST<br />
MASTER<br />
VOLUME<br />
TEXT OFF<br />
TEXT ON<br />
BAND<br />
TOP MENU<br />
TUNE<br />
GUIDE<br />
1-5<br />
ST<br />
ENTER<br />
TUNE<br />
RETURN<br />
CHANNEL+<br />
The adjustable channels are:<br />
R (Front right), C (Center), LS (Surround left), RS<br />
(Surround right), SBL (Surround back left), SBR<br />
(Surround back right) and SW (Subwoofer).<br />
3 Adjust the level of the channel<br />
using the 5∞ buttons.<br />
RF ATT D.ACCESS MPX CLASS<br />
1-5<br />
SIGNAL PRO LOGIC Neo :6<br />
AUTO DIGITAL<br />
RF DTS ES EX<br />
DIGITAL MPEG AAC<br />
ANALOG STEREO<br />
SB CH DSP<br />
AUTO ON MOVIE<br />
OFF MUSIC<br />
L C R LFE<br />
LS S RS SP A B<br />
LOUDNESS MIDNIGHT TONE DNR ATT STEREO MONO<br />
TUNED RF ATT<br />
RDS EON<br />
Hi-BIT/<br />
SAMPLING<br />
MULTI-ROOM<br />
Try to get the volume level of the target speaker<br />
to match that of the front left speaker, which is<br />
the reference in this setup. The levels can be set<br />
within a range of –10 dB to +10 dB in 0.5 dB<br />
steps.<br />
When you press ENTER you will automatically go<br />
to the next channel.<br />
dB<br />
Follow steps 1-5 on page 82, if necessary, to get<br />
to the starting point mentioned here.<br />
1 FINE CH LEVEL should be<br />
selected, if it isn’t use the 5∞<br />
buttons to select it. Press ENTER.<br />
SIGNAL PRO LOGIC Neo :6<br />
AUTO DIGITAL<br />
RF DTS ES EX<br />
DIGITAL MPEG AAC<br />
ANALOG STEREO<br />
SB CH DSP<br />
AUTO ON MOVIE<br />
OFF MUSIC<br />
L C R LFE<br />
LS S RS SP A B<br />
LOUDNESS MIDNIGHT TONE DNR ATT STEREO MONO<br />
TUNED RF ATT<br />
RDS EON<br />
Hi-BIT/<br />
SAMPLING<br />
MULTI-ROOM<br />
2 Use the 5∞ buttons to select the<br />
channel you want to adjust.<br />
Press ENTER.<br />
dB<br />
4 Press ENTER to select a new<br />
channel. Repeat step 3 for every<br />
channel.<br />
If you want to change a setting before<br />
proceeding<br />
Use the 5∞ buttons to go back to the channel<br />
you want to adjust and press ENTER. Then<br />
follow step 3.<br />
5 When done select EXIT (if it's not<br />
already selected) and press<br />
ENTER.<br />
SIGNAL PRO LOGIC Neo :6<br />
AUTO DIGITAL<br />
RF DTS ES EX<br />
DIGITAL MPEG AAC<br />
ANALOG STEREO<br />
SB CH DSP<br />
AUTO ON MOVIE<br />
OFF MUSIC<br />
L C R LFE<br />
LS S RS SP A B<br />
LOUDNESS MIDNIGHT TONE DNR ATT STEREO MONO<br />
TUNED RF ATT<br />
RDS EON<br />
Hi-BIT/<br />
SAMPLING<br />
MULTI-ROOM<br />
Next, if you want, proceed to FINE CHANNEL<br />
DELAY.<br />
dB<br />
SIGNAL PRO LOGIC Neo :6<br />
AUTO DIGITAL<br />
RF DTS ES EX<br />
DIGITAL MPEG AAC<br />
ANALOG STEREO<br />
SB CH DSP<br />
AUTO ON MOVIE<br />
OFF MUSIC<br />
LOUDNESS MIDNIGHT TONE DNR ATT STEREO MONO<br />
TUNED RF ATT<br />
RDS EON<br />
Hi-BIT/<br />
SAMPLING<br />
MULTI-ROOM<br />
dB<br />
L C R LFE<br />
LS S RS SP A B<br />
Test tones will be output.<br />
WARNING : Be prepared! The test tones are<br />
output at a high volume level.<br />
MASTER VOLUME rotates to the reference<br />
position (0 dB) and the display on the receiver<br />
flashes TEST TONE. After a few seconds the test<br />
tone is output.<br />
84<br />
En
STANDBY/ON<br />
MOVIE<br />
MUSIC<br />
MULTI JOG<br />
ENTER<br />
STANDBY<br />
MULTI JOG CONTROL<br />
SET UP RETURN<br />
PHONES<br />
SPEAKERS<br />
SIGNAL<br />
SELECT<br />
HI-BIT<br />
HI-SAMPLING<br />
SB CH<br />
MODE<br />
TONE CONTROL<br />
TONE BASS/TREBLE<br />
BAND<br />
CLASS<br />
STA<br />
SELECT<br />
EXPERT<br />
Fine Tuning Your System<br />
FINE CHANNEL DELAY<br />
The following steps show you how to adjust the delay level of your speakers more finely than in the NORMAL<br />
setup (see page 36). Adding a slight delay to some speakers is necessary to achieve proper sound depth,<br />
separation as well as an effective surround sound effect. Do this procedure if you want to try and get even finer<br />
surround sound.<br />
The main difference with this setup method and the CHANNEL DELAY setup method in NORMAL setup is that<br />
here the test tone sounds from a reference channel and you use that to measure the target speaker (that is, the<br />
speaker whose level you want to adjust).<br />
MENU<br />
SYSTEM<br />
SETUP<br />
TUNER EDIT<br />
ST<br />
MASTER<br />
VOLUME<br />
TUNE<br />
TEXT ON<br />
ST<br />
TOP MENU<br />
GUIDE<br />
AUDIO<br />
CHANNEL−<br />
ENTER<br />
1-6<br />
3 Use the 5∞ buttons to select the<br />
channel you want to adjust.<br />
Press ENTER.<br />
TUNE<br />
TEXT OFF<br />
BAND<br />
RETURN<br />
CHANNEL+<br />
SIGNAL PRO LOGIC Neo :6<br />
AUTO DIGITAL<br />
RF DTS ES EX<br />
DIGITAL MPEG AAC<br />
ANALOG STEREO<br />
SB CH DSP<br />
AUTO ON MOVIE<br />
OFF MUSIC<br />
LOUDNESS MIDNIGHT TONE DNR ATT STEREO MONO<br />
TUNED RF ATT<br />
RDS EON<br />
Hi-BIT/<br />
SAMPLING<br />
MULTI-ROOM<br />
dB<br />
L C R LFE<br />
RF ATT D.ACCESS MPX CLASS<br />
1-6<br />
LS S RS SP<br />
A B<br />
Test tones will be output for the channel you<br />
want to adjust and a reference channel.<br />
Listen to the reference channel and use to<br />
measure the target channel.<br />
The adjustable channels are:<br />
R (Front right), C (Center), LS (Surround left), RS<br />
(Surround right), SBL (Surround back left), SBR<br />
(Surround back right) and SW (Subwoofer).<br />
4 Adjust the level of each channel<br />
using the 5∞ buttons.<br />
SIGNAL PRO LOGIC Neo :6<br />
AUTO DIGITAL<br />
RF DTS ES EX<br />
DIGITAL MPEG AAC<br />
ANALOG STEREO<br />
SB CH DSP<br />
AUTO ON MOVIE<br />
OFF MUSIC<br />
LOUDNESS MIDNIGHT TONE DNR ATT STEREO MONO<br />
TUNED RF ATT<br />
RDS EON<br />
Hi-BIT/<br />
SAMPLING<br />
MULTI-ROOM<br />
dB<br />
L C R LFE<br />
LS S RS SP A B<br />
Follow steps 1-5 on page 82, if necessary, to get<br />
to the starting point mentioned here.<br />
1 FINE CH DELAY should be<br />
selected, if it isn’t use the 5∞<br />
buttons to select and press<br />
ENTER.<br />
Listen to the reference channel and use it to<br />
measure the target channel. Stand facing the two<br />
speakers with your arms outstretched pointing at<br />
each speaker. Try to make the two tones sound<br />
as if they are arriving simultaneously at a postion<br />
slightly in front of you and between your arm<br />
span.<br />
The distance can be set within a range of 0.1 m<br />
to 9.0 m in 0.1 m steps.<br />
SIGNAL PRO LOGIC Neo :6<br />
AUTO DIGITAL<br />
RF DTS ES EX<br />
DIGITAL MPEG AAC<br />
ANALOG STEREO<br />
SB CH DSP<br />
AUTO ON MOVIE<br />
OFF MUSIC<br />
LOUDNESS MIDNIGHT TONE DNR ATT STEREO MONO<br />
TUNED RF ATT<br />
RDS EON<br />
Hi-BIT/<br />
SAMPLING<br />
MULTI-ROOM<br />
dB<br />
L C R LFE<br />
LS S RS SP A B<br />
2 Use the 5∞ buttons to adjust<br />
the distance of the FRONT L<br />
channel. Press ENTER.<br />
SIGNAL PRO LOGIC Neo :6<br />
AUTO DIGITAL<br />
RF DTS ES EX<br />
DIGITAL MPEG AAC<br />
ANALOG STEREO<br />
SB CH DSP<br />
AUTO ON MOVIE<br />
OFF MUSIC<br />
L C R LFE<br />
LS S RS SP A B<br />
LOUDNESS MIDNIGHT TONE DNR ATT STEREO MONO<br />
TUNED RF ATT<br />
RDS EON<br />
Hi-BIT/<br />
SAMPLING<br />
MULTI-ROOM<br />
dB<br />
When you press ENTER you will automatically go<br />
to the next channel.<br />
Test tones will be output.<br />
This channel will be the target distance which<br />
you use to measure the other channels.<br />
85<br />
En
Fine Tuning Your System<br />
5 Press ENTER to select a new<br />
channel. Repeat step 4 for every<br />
channel.<br />
If you want to change a setting before proceeding<br />
Use the 5∞ buttons to go back to the channel<br />
you want to adjust and press ENTER. Then follow<br />
step 3.<br />
6 When done select EXIT (if it's not<br />
already selected) and press<br />
ENTER.<br />
SIGNAL PRO LOGIC Neo :6<br />
AUTO DIGITAL<br />
RF DTS ES EX<br />
DIGITAL MPEG AAC<br />
ANALOG STEREO<br />
SB CH DSP<br />
AUTO ON MOVIE<br />
OFF MUSIC<br />
LOUDNESS MIDNIGHT TONE DNR ATT STEREO MONO<br />
TUNED RF ATT<br />
RDS EON<br />
Hi-BIT/<br />
SAMPLING<br />
MULTI-ROOM<br />
dB<br />
L C R LFE<br />
LS S RS SP A B<br />
Next, if you want, proceed to ACOUSTIC CAL<br />
EQ.<br />
86<br />
En
STANDBY/ON<br />
MOVIE<br />
MUSIC<br />
MULTI JOG<br />
ENTER<br />
STANDBY<br />
MULTI JOG CONTROL<br />
SET UP RETURN<br />
PHONES<br />
SPEAKERS<br />
SIGNAL<br />
SELECT<br />
HI-BIT<br />
HI-SAMPLING<br />
SB CH<br />
MODE<br />
TONE CONTROL<br />
TONE BASS/TREBLE<br />
BAND<br />
CLASS<br />
STA<br />
SELECT<br />
EXPERT<br />
ACOUSTIC CAL EQ<br />
Fine Tuning Your System<br />
This setting is a kind of room equalizer for your speakers. This receiver let's you equalize the speakers in<br />
accordance with the front speakers.<br />
The front left speaker will serve as the reference tone. The front left tone and the target speaker (the one you<br />
are trying to adjust) will sound in turns, so you can judge which needs to be louder.<br />
MENU<br />
SYSTEM<br />
SETUP<br />
TUNER EDIT<br />
ST<br />
MASTER<br />
VOLUME<br />
TUNE<br />
TEXT ON<br />
ST<br />
TOP MENU<br />
GUIDE<br />
AUDIO<br />
CHANNEL−<br />
ENTER<br />
1-10<br />
2 Use the 5∞ buttons to select the<br />
channel that you want to adjust.<br />
Press ENTER.<br />
TUNE<br />
TEXT OFF<br />
BAND<br />
RETURN<br />
CHANNEL+<br />
SIGNAL PRO LOGIC Neo :6<br />
AUTO DIGITAL<br />
RF DTS ES EX<br />
DIGITAL MPEG AAC<br />
ANALOG STEREO<br />
SB CH DSP<br />
AUTO ON MOVIE<br />
OFF MUSIC<br />
LOUDNESS MIDNIGHT TONE DNR ATT STEREO MONO<br />
TUNED RF ATT<br />
RDS EON<br />
Hi-BIT/<br />
SAMPLING<br />
MULTI-ROOM<br />
dB<br />
L C R LFE<br />
RF ATT D.ACCESS MPX CLASS<br />
1-10<br />
LS S RS SP<br />
A B<br />
The adjustable channels are:<br />
Center, Surround L, Surround R, Surr Back<br />
(surround back) L, Surr Back (surround back) R.<br />
3 Use the 5∞ buttons to select the<br />
frequency you want to adjust.<br />
Press ENTER.<br />
SIGNAL PRO LOGIC Neo :6<br />
AUTO DIGITAL<br />
RF DTS ES EX<br />
DIGITAL MPEG AAC<br />
ANALOG STEREO<br />
SB CH DSP<br />
AUTO ON MOVIE<br />
OFF MUSIC<br />
LOUDNESS MIDNIGHT TONE DNR ATT STEREO MONO<br />
TUNED RF ATT<br />
RDS EON<br />
Hi-BIT/<br />
SAMPLING<br />
MULTI-ROOM<br />
dB<br />
Follow steps 1-5 on page 82, if necessary, to get<br />
to the starting point mentioned here.<br />
1 ACOUSTIC CAL. should be<br />
selected, if it isn’t use the 5∞<br />
buttons to select and press<br />
ENTER.<br />
SIGNAL PRO LOGIC Neo :6<br />
AUTO DIGITAL<br />
RF DTS ES EX<br />
DIGITAL MPEG AAC<br />
ANALOG STEREO<br />
SB CH DSP<br />
AUTO ON MOVIE<br />
OFF MUSIC<br />
L C R LFE<br />
LS S RS SP A B<br />
LOUDNESS MIDNIGHT TONE DNR ATT STEREO MONO<br />
TUNED RF ATT<br />
RDS EON<br />
Hi-BIT/<br />
SAMPLING<br />
MULTI-ROOM<br />
Test tones will be output.<br />
WARNING: the test tones are very loud!!<br />
Make sure there are no infants or small children<br />
in the room and that no one who will be scared,<br />
upset or damaged by loud noise is present. You<br />
yourself may want to wear earplugs.<br />
ACOUSTIC CAL EQ: All speakers (except for<br />
the subwoofer) are set in accordance with the<br />
settings of the FRONT speakers. You can adjust<br />
each speaker individually to suit your taste. This<br />
setting allows the listener to enjoy a sound<br />
balance defined by the front speakers (the main<br />
speakers for home theater). The front left<br />
speaker will serve as the reference tone. The<br />
front left tone and the target speaker (the one<br />
you are trying to adjust) will sound in turns, so<br />
you can judge which needs to be louder.<br />
dB<br />
L C R LFE<br />
LS S RS SP A B<br />
The adjustable frequencys are:<br />
63Hz, 125Hz, 250Hz, 4kHz, 11.3kHz.<br />
For the speakers you set to SMALL (see pages<br />
37–38) you won't be able to adjust the 63 Hz<br />
setting.<br />
4 Use the 5∞ buttons to adjust<br />
the frequency. When you have it<br />
at the level you want press<br />
ENTER.<br />
SIGNAL PRO LOGIC Neo :6<br />
AUTO DIGITAL<br />
RF DTS ES EX<br />
DIGITAL MPEG AAC<br />
ANALOG STEREO<br />
SB CH DSP<br />
AUTO ON MOVIE<br />
OFF MUSIC<br />
L C R LFE<br />
LS S RS SP A B<br />
LOUDNESS MIDNIGHT TONE DNR ATT STEREO MONO<br />
TUNED RF ATT<br />
RDS EON<br />
Hi-BIT/<br />
SAMPLING<br />
MULTI-ROOM<br />
Set the frequencies within the –6 dB to +6 dB<br />
range in steps of 0.5 dB. If OVER appears in the<br />
display you have set the levels too high. Reduce<br />
them until OVER disappears.<br />
5 The cursor automatically goes to<br />
the next frequency. Press ENTER<br />
and repeat steps 3 & 4 to adjust<br />
all the frequencies.<br />
SIGNAL PRO LOGIC Neo :6<br />
AUTO DIGITAL<br />
RF DTS ES EX<br />
DIGITAL MPEG AAC<br />
ANALOG STEREO<br />
SB CH DSP<br />
AUTO ON MOVIE<br />
OFF MUSIC<br />
L C R LFE<br />
LS S RS SP A B<br />
LOUDNESS MIDNIGHT TONE DNR ATT STEREO MONO<br />
TUNED RF ATT<br />
RDS EON<br />
Hi-BIT/<br />
SAMPLING<br />
MULTI-ROOM<br />
dB<br />
dB<br />
87<br />
En
Fine Tuning Your System<br />
6 TRIM should be selected (if it<br />
isn’t use the 5∞ buttons to<br />
select it) and press ENTER.<br />
SIGNAL PRO LOGIC Neo :6<br />
AUTO DIGITAL<br />
RF DTS ES EX<br />
DIGITAL MPEG AAC<br />
ANALOG STEREO<br />
SB CH DSP<br />
AUTO ON MOVIE<br />
OFF MUSIC<br />
LOUDNESS MIDNIGHT TONE DNR ATT STEREO MONO<br />
TUNED RF ATT<br />
RDS EON<br />
Hi-BIT/<br />
SAMPLING<br />
MULTI-ROOM<br />
dB<br />
L C R LFE<br />
LS S RS SP A B<br />
7 Use the 5∞ buttons to adjust<br />
the TRIM and press ENTER.<br />
SIGNAL PRO LOGIC Neo :6<br />
AUTO DIGITAL<br />
RF DTS ES EX<br />
DIGITAL MPEG AAC<br />
ANALOG STEREO<br />
SB CH DSP<br />
AUTO ON MOVIE<br />
OFF MUSIC<br />
LOUDNESS MIDNIGHT TONE DNR ATT STEREO MONO<br />
TUNED RF ATT<br />
RDS EON<br />
Hi-BIT/<br />
SAMPLING<br />
MULTI-ROOM<br />
dB<br />
L C R LFE<br />
LS S RS SP A B<br />
TRIM will balance the volume level of each<br />
frequency in the overall volume of that speaker.<br />
8 EXIT should be selected (if it isn’t<br />
use the 5∞ buttons to select it)<br />
and press ENTER.<br />
SIGNAL PRO LOGIC Neo :6<br />
AUTO DIGITAL<br />
RF DTS ES EX<br />
DIGITAL MPEG AAC<br />
ANALOG STEREO<br />
SB CH DSP<br />
AUTO ON MOVIE<br />
OFF MUSIC<br />
LOUDNESS MIDNIGHT TONE DNR ATT STEREO MONO<br />
TUNED RF ATT<br />
RDS EON<br />
Hi-BIT/<br />
SAMPLING<br />
MULTI-ROOM<br />
dB<br />
L C R LFE<br />
LS S RS SP A B<br />
9 The cursor automatically goes to<br />
the next channel. Press ENTER<br />
and repeat steps 2–9 to adjust all<br />
the channels.<br />
SIGNAL PRO LOGIC Neo :6<br />
AUTO DIGITAL<br />
RF DTS ES EX<br />
DIGITAL MPEG AAC<br />
ANALOG STEREO<br />
SB CH DSP<br />
AUTO ON MOVIE<br />
OFF MUSIC<br />
LOUDNESS MIDNIGHT TONE DNR ATT STEREO MONO<br />
TUNED RF ATT<br />
RDS EON<br />
Hi-BIT/<br />
SAMPLING<br />
MULTI-ROOM<br />
dB<br />
L C R LFE<br />
LS S RS SP A B<br />
10 EXIT should be selected (if it isn’t<br />
use the 5∞ buttons to select it)<br />
and press ENTER.<br />
SIGNAL PRO LOGIC Neo :6<br />
AUTO DIGITAL<br />
RF DTS ES EX<br />
DIGITAL MPEG AAC<br />
ANALOG STEREO<br />
SB CH DSP<br />
AUTO ON MOVIE<br />
OFF MUSIC<br />
LOUDNESS MIDNIGHT TONE DNR ATT STEREO MONO<br />
TUNED RF ATT<br />
RDS EON<br />
Hi-BIT/<br />
SAMPLING<br />
MULTI-ROOM<br />
dB<br />
L C R LFE<br />
LS S RS SP A B<br />
Next, if you want, proceed to BASS PEAK LEVEL.<br />
88<br />
En
AUTO<br />
AUTO<br />
AUTO<br />
AUTO<br />
STANDBY/ON<br />
MOVIE<br />
MUSIC<br />
MULTI JOG<br />
ENTER<br />
STANDBY<br />
MULTI JOG CONTROL<br />
SET UP RETURN<br />
PHONES<br />
SPEAKERS<br />
SIGNAL<br />
SELECT<br />
HI-BIT<br />
HI-SAMPLING<br />
SB CH<br />
MODE<br />
TONE CONTROL<br />
TONE BASS/TREBLE<br />
BAND<br />
CLASS<br />
STA<br />
SELECT<br />
EXPERT<br />
BASS PEAK LEVEL<br />
Fine Tuning Your System<br />
The LFE (Low Frequency Effect) channel in Dolby Digital and DTS program sources can produce heavily<br />
concentrated ultra-low bass tones that may exceed the capabilities of your speaker system. The following steps<br />
show you how to set the peak level for the LFE channel. If continuing from the preceding page the BASS PEAK<br />
LEVEL should be selected.<br />
MENU<br />
SYSTEM<br />
SETUP<br />
TUNER EDIT<br />
ST<br />
MASTER<br />
VOLUME<br />
TUNE<br />
TEXT ON<br />
ST<br />
TOP MENU<br />
GUIDE<br />
AUDIO<br />
CHANNEL−<br />
ENTER<br />
1-5<br />
3 Use the 5∞ buttons to adjust the<br />
test tones and specify the bass<br />
peak level.<br />
TUNE<br />
TEXT OFF<br />
BAND<br />
RETURN<br />
CHANNEL+<br />
SIGNAL PRO LOGIC Neo :6<br />
AUTO DIGITAL<br />
RF DTS ES EX<br />
DIGITAL MPEG AAC<br />
ANALOG STEREO<br />
SB CH DSP<br />
AUTO ON MOVIE<br />
OFF MUSIC<br />
LOUDNESS MIDNIGHT TONE DNR ATT STEREO MONO<br />
TUNED RF ATT<br />
RDS EON<br />
Hi-BIT/<br />
SAMPLING<br />
MULTI-ROOM<br />
dB<br />
L C R LFE<br />
RF ATT D.ACCESS MPX CLASS<br />
1-5<br />
LS S RS SP<br />
A B<br />
If you set this level before the receiver<br />
will have that level input but it will not appear on<br />
this setup screen. (The screen will always open<br />
with the level showing [– – – dB].)<br />
1 Raise the level gradually.<br />
2 Set the bass peak level at the point just before<br />
the tone starts to distort.<br />
Be careful! Test tones play back at loud<br />
volumes . Make sure there are no infants or<br />
small children in the room.<br />
You can leave this setup any time by pressing<br />
ENTER.<br />
Follow steps 1-5 on page 82, if necessary, to get<br />
to the starting point mentioned here.<br />
1 BASSPEAK LEVEL should be<br />
selected, if it isn’t use the 5∞<br />
buttons to select it. Press<br />
ENTER.<br />
SIGNAL PRO LOGIC Neo :6<br />
AUTO DIGITAL<br />
RF DTS ES EX<br />
DIGITAL MPEG AAC<br />
ANALOG STEREO<br />
SB CH DSP<br />
AUTO ON MOVIE<br />
OFF MUSIC<br />
L C R LFE<br />
LS S RS SP A B<br />
LOUDNESS MIDNIGHT TONE DNR ATT STEREO MONO<br />
TUNED RF ATT<br />
RDS EON<br />
Hi-BIT/<br />
SAMPLING<br />
MULTI-ROOM<br />
2 Use the 5∞ buttons to select<br />
SETTING START or SETTING<br />
CANCEL. Press ENTER.<br />
SETTING START: The MASTER VOLUME is set<br />
to MIN (– – – dB), a test tone plays back and you<br />
make the setting (go to step 3).<br />
dB<br />
If the YES or PLUS setting on the subwoofer is<br />
selected the test tone will only play back from the<br />
subwoofer. If not, the test tone will play back<br />
from all speakers set to LARGE except for the<br />
subwoofer.<br />
4 Press ENTER.<br />
The display on the receiver will show FADE and<br />
then RESUME while the MASTER VOLUME<br />
returns to its original position.<br />
5 EXIT should be selected (if it isn’t<br />
use the 5∞ buttons to select it),<br />
press ENTER.<br />
If you want to change a setting before proceeding<br />
Start over from step 1.<br />
Next, if you want, proceed to DYNAMIC RANGE<br />
CONTROL.<br />
SIGNAL PRO LOGIC Neo :6<br />
DIGITAL<br />
RF DTS ES EX<br />
DIGITAL MPEG AAC<br />
ANALOG STEREO<br />
SB CH DSP<br />
ON MOVIE<br />
OFF MUSIC<br />
LOUDNESS MIDNIGHT TONE DNR ATT STEREO MONO<br />
TUNED RF ATT<br />
RDS EON<br />
Hi-BIT/<br />
SAMPLING<br />
MULTI-ROOM<br />
dB<br />
L C R LFE<br />
LS S RS SP A B<br />
SETTING CANCEL: This setting won't limit the<br />
peak level of the LFE channel.<br />
SIGNAL PRO LOGIC Neo :6<br />
DIGITAL<br />
RF DTS ES EX<br />
DIGITAL MPEG AAC<br />
ANALOG STEREO<br />
SB CH DSP<br />
ON MOVIE<br />
OFF MUSIC<br />
LOUDNESS MIDNIGHT TONE DNR ATT STEREO MONO<br />
TUNED RF ATT<br />
RDS EON<br />
Hi-BIT/<br />
SAMPLING<br />
MULTI-ROOM<br />
dB<br />
L C R LFE<br />
LS S RS SP A B<br />
If you selected SETTING CANCEL go to step 4.<br />
89<br />
En
STANDBY/ON<br />
MOVIE<br />
MUSIC<br />
MULTI JOG<br />
ENTER<br />
STANDBY<br />
MULTI JOG CONTROL<br />
SET UP RETURN<br />
PHONES<br />
SPEAKERS<br />
SIGNAL<br />
SELECT<br />
HI-BIT<br />
HI-SAMPLING<br />
SB CH<br />
MODE<br />
TONE CONTROL<br />
TONE BASS/TREBLE<br />
BAND<br />
CLASS<br />
STA<br />
SELECT<br />
Fine Tuning Your System<br />
DYNAMIC RANGE CONTROL<br />
This feature makes it possible to enjoy full surround sound effects on Dolby Digital and DTS sources even at low<br />
volumes. It does this by compressing the dynamic range. Dynamic range is the difference between the loudest<br />
and the softest sounds in any given signal. Compressing the range plays sounds so the quieter ones are audible<br />
and the louder ones don’t get distorted or become overpowering. This feature only applies to Dolby Digital and<br />
DTS sources but the MIDNIGHT mode (explained on page 48) accomplishes the same end for a variety of<br />
sources. If continuing from BASS PEAK LEVEL, DYNAMIC RANGE CONTROL should be selected.<br />
MENU<br />
SYSTEM<br />
SETUP<br />
AUDIO<br />
CHANNEL−<br />
TUNER EDIT<br />
ST<br />
MASTER<br />
VOLUME<br />
TEXT OFF<br />
TEXT ON<br />
BAND<br />
TOP MENU<br />
TUNE<br />
GUIDE<br />
1-6<br />
ST<br />
ENTER<br />
TUNE<br />
RETURN<br />
CHANNEL+<br />
3 EXIT should be selected (if it<br />
isn’t use the 5∞ buttons to<br />
select it), ENTER.<br />
SIGNAL PRO LOGIC Neo :6<br />
AUTO DIGITAL<br />
RF DTS ES EX<br />
DIGITAL MPEG AAC<br />
ANALOG STEREO<br />
SB CH DSP<br />
AUTO ON MOVIE<br />
OFF MUSIC<br />
LOUDNESS MIDNIGHT TONE DNR ATT STEREO MONO<br />
TUNED RF ATT<br />
RDS EON<br />
Hi-BIT/<br />
SAMPLING<br />
MULTI-ROOM<br />
dB<br />
L C R LFE<br />
RF ATT D.ACCESS MPX CLASS<br />
1-6<br />
LS S RS SP<br />
A B<br />
If you want to change a setting before<br />
proceeding<br />
Start over from step 1.<br />
4 You are now finished with<br />
EXPERT SETUP, EXIT should be<br />
selected (if it isn’t use the 5∞<br />
buttons to select it), press<br />
ENTER.<br />
SIGNAL PRO LOGIC Neo :6<br />
AUTO DIGITAL<br />
RF DTS ES EX<br />
DIGITAL MPEG AAC<br />
ANALOG STEREO<br />
SB CH DSP<br />
AUTO ON MOVIE<br />
OFF MUSIC<br />
LOUDNESS MIDNIGHT TONE DNR ATT STEREO MONO<br />
TUNED RF ATT<br />
RDS EON<br />
Hi-BIT/<br />
SAMPLING<br />
MULTI-ROOM<br />
dB<br />
L C R LFE<br />
LS S RS SP A B<br />
Follow steps 1-5 on page 82, if necessary, to get<br />
to the starting point mentioned here.<br />
1 D-RANGE CTRL should be<br />
selected, if it isn’t use the 5∞<br />
buttons to select and press<br />
ENTER.<br />
SIGNAL PRO LOGIC Neo :6<br />
AUTO DIGITAL<br />
RF DTS ES EX<br />
DIGITAL MPEG AAC<br />
ANALOG STEREO<br />
SB CH DSP<br />
AUTO ON MOVIE<br />
OFF MUSIC<br />
LOUDNESS MIDNIGHT TONE DNR ATT STEREO MONO<br />
TUNED RF ATT<br />
RDS EON<br />
Hi-BIT/<br />
SAMPLING<br />
MULTI-ROOM<br />
dB<br />
5 EXIT should be selected (if it<br />
isn’t use the 5∞ buttons to<br />
select it), press ENTER.<br />
6 Use the 5∞ buttons to select<br />
EXIT, press ENTER.<br />
The receiver returns to normal operation.<br />
L C R LFE<br />
LS S RS SP A B<br />
2 Use the 5∞ buttons to choose<br />
either OFF, MID or MAX. Press<br />
ENTER.<br />
memo<br />
The default is OFF.<br />
SIGNAL PRO LOGIC Neo :6<br />
AUTO DIGITAL<br />
RF DTS ES EX<br />
DIGITAL MPEG AAC<br />
ANALOG STEREO<br />
SB CH DSP<br />
AUTO ON MOVIE<br />
OFF MUSIC<br />
LOUDNESS MIDNIGHT TONE DNR ATT STEREO MONO<br />
TUNED RF ATT<br />
RDS EON<br />
Hi-BIT/<br />
SAMPLING<br />
MULTI-ROOM<br />
dB<br />
L C R LFE<br />
LS S RS SP A B<br />
Dynamic Range Control is set.<br />
OFF: No Dynamic Range Control.<br />
MID: A moderate amount of Dynamic Range<br />
Control is applied.<br />
MAX: The most Dynamic Range Control available<br />
is applied.<br />
90<br />
En
EXPERT<br />
Techno Tidbits & Problem-solving<br />
Dolby<br />
Dolby Digital<br />
Dolby Digital is a discrete digital surround format used for multichannel surround sound. It was developed after<br />
the Dolby Surround system and Dolby Pro Logic Surround system. Dolby Digital is a high quality digital sound<br />
format that is used by many theatrical film releases.<br />
Soundtracks using linear PCM audio generate too much<br />
5.1 channel 4 channel analog data for multichannel use. Dolby Digital technology was<br />
developed in response to the need for efficient<br />
multichannel digital sound. It uses masking technology and<br />
Adaptive Transform Coding, resulting in no audible loss of<br />
sound quality. In the present age of digital sound Dolby<br />
Digital is a standard audio format for DVD and has been<br />
adopted by HDTV broadcasts throughout the USA.<br />
Dolby<br />
Digital<br />
Dolby Digital for movie<br />
Dolby Pro Logic II<br />
Other features include:<br />
1) Downmixing on playback for compatibility with mono,<br />
stereo, Dolby Pro Logic and 5.1 channel audio.<br />
2) A wide range of bitrates and channels.<br />
3) Decoding dynamic range information and adjusting the<br />
dialog level in the soundtrack (called Dialog Normalization,<br />
see below for more information).<br />
The advantages of the Dolby Digital system of encoding<br />
allow it to maintain its high quality sound while at the same<br />
time being very flexible, with the ability to handle many<br />
different types of soundtracks.<br />
Dialog Normalization<br />
When a Dolby Digital soundtrack is played back the Dialog Normalization function of the receiver activates automatically.<br />
Dialog Normalization is a Dolby Digital function that establishes the average dialog level for the program<br />
source being played. If the receiver's level does not match the average dialog level, first you see "DIAL NORM" and<br />
"OFFSET +4 dB" (as an example) appear in the receiver's display. In this example, the number +4 dB is the difference<br />
between the receiver's gain structure and the Dolby Digital average dialog level. To match the average dialog<br />
level, subtract or add the OFFSET level. For example, if the OFFSET level is +4 dB, the amplifier's output is 4 dB<br />
over the average recorded level.<br />
Dolby Pro Logic II is an improved version of Dolby Pro Logic technology with extended matrix decoding<br />
technology that can create 5.1 channel sound from two channel sources. Dolby Pro Logic II creates basic 5<br />
channel sound by using the innovative "steering logic" circuit. Therefore when listening to typical two-channel<br />
sources like CD, the listener can enjoy a richer spatial effect. When using software encoded with Dolby<br />
Surround, this decoding system affords the listener an improved surround experience with greater sound detail.<br />
Chart Comparing Dolby Pro Logic and Dolby Pro Logic II<br />
Pro Logic<br />
Pro Logic II<br />
Effective sound source Dolby Surround encoded sources All two channel stereo sources<br />
Surround Sound Mono Stereo<br />
Frequency Range Surround within 7 kHz All Channels/Full Range<br />
This unit has a three Dolby Pro Logic II functions. The first is "MOVIE Mode" (suitable for film soundtracks);<br />
"MUSIC Mode" (suitable for music); "Pro Logic Mode" (this mode is less sensitive to the quality of the source<br />
material, so may be useful when MOVIE Mode or MUSIC Mode do not give good results). One can select one<br />
of them depending on your soundtrack of choice.<br />
memo<br />
• For receivers and components other than the <strong>VSX</strong>-<strong>D1011</strong> Dolby Pro Logic II may not have the above<br />
mentioned functions.<br />
91<br />
En
Techno Tidbits & Problem-solving<br />
Dolby Digital Surround EX<br />
This new recording technology is able to play 6.1 channel sound and was developed in a collaboration between<br />
Dolby Laboratories and Lucasfilm, Ltd. for the film "Stars Wars: The First Episode", the first movie ever to be<br />
made with Dolby Digital Surround EX technology. In a movie theater this format affords the listener vivid<br />
surround sound experience replete with the effect of sounds flying overhead, even for those seated towards the<br />
sides of the theater.<br />
Dolby Digital Surround EX contains surround back channels which are dubbed into the soundtrack in the studio.<br />
The channels are encoded into the left and right channels of the soundtrack so this format can be compatible<br />
with Dolby Digital 5.1 channel decoding. For a list of movies that contain Dolby Digital Surround EX soundtracks<br />
see Dolby website at: http://www.dolby.com<br />
THX Surround EX technology was developed for movie theater use originally but has been extended for home<br />
theater use and consumers can no benefit from this excellent, realistic sound format. (For more details see "THX<br />
Surround EX" on the next page.) This unit is equipped with a THX Surround EX decoder.<br />
DTS<br />
DTS<br />
DTS has been adopted as a sound recording format in the movie theaters since the release of “JURASSIC<br />
PARK” in 1993, and has a good reputation for high quality sound and dynamic surround effects.<br />
In this system, 6 channels of digital sound are recorded on CD-ROM. DTS adopts a simultaneous playback<br />
format. With a low rate of compression of sound signals and a high rate of transmittance, a higher sound quality<br />
format is produced. For this reason, the format is being introduced in more and more movie theaters, and is<br />
being adopted for home use as DTS Digital Surround. When used with movies it's called DTS-LD DVD and for<br />
music software (5.1 channel CD) as DTS-CD.<br />
DTS-ES<br />
DTS launched a new surround format in November 2000. This has come to be known as DTS Extended<br />
Surround or simply DTS-ES. The technology has been advanced to include two new home formats DTS-ES<br />
Discrete 6.1 format, and DTS-ES Matrix 6.1 ch format, both are able to playback discrete, 6.1-channel content<br />
from DVDs and CDs. Both of these formats are compatible with a conventional DTS 5.1 ch decoder. In this<br />
system each channel is encoded and decoded individually, adding to the separation of the channels. Since DTS<br />
adds a third surround channel, the surround back channel, the realism and all-encompassing nature of the sound<br />
reaches levels not seen before in home theater. This unit is equipped with a DTS-ES decoder.<br />
DTS Neo:6<br />
This is a matrix decoding technology that transforms two-channel sources into 6.0 channel surround sound.<br />
There are two modes, CINEMA MODE and MUSIC MODE.<br />
DTS 96/24<br />
This high-quality format will be used for software which will be available from November, 2001. For compatibility<br />
with equipment that was produced before this format was made, DVD players can play this software using a<br />
conventional DTS 5.1ch decoder. This unit is equipped with a DTS 96 kHz/24 bit decoder to take advantage of<br />
the higher sound quality available.<br />
92<br />
En
EXPERT<br />
Techno Tidbits & Problem-solving<br />
THX ®<br />
THX is a Lucasfilm, Ltd. program dedicated to maximum accuracy in movie presentation. Movie sound tracks are<br />
recorded in large movie dubbing stages using movie theater equipment. For a sound track to be presented<br />
accurately in your home, special technologies are required. In your home the room is much smaller and has a<br />
bright sound, the speakers are very different and there are only six-eight of them, plus, you sit much closer to<br />
each one of those speakers. Because of these differences we often miss the power and emotion that thrills us<br />
in a good movie. Now <strong>Pioneer</strong> and THX have teamed up to bring the full glory of accurate cinema sound to the<br />
comfort and convenience of your home.<br />
Re-Equalization : In a theater the room is very large and dead sounding, you sit a long way back from the<br />
speakers and the speakers themselves are very specialized. Because a sound track recorded in this dead<br />
sounding space when it is played at home it sounds overbright. THX Re-Equalization adjusts for this difference in<br />
a very precise way.<br />
Adaptive Decorrelation : When a sound track sends mono sound to the surround speakers it often seems to<br />
be coming come from one side instead of from all around you as it would in a theater. Adaptive Decorrelation<br />
helps to correct this inaccuracy.<br />
Timbre Matching : When recording a sound track it is very important that the surround sounds move<br />
smoothly and seamlessly around the theater. It is very distracting when sounds seem to jump from speaker to<br />
speaker. Timbre Matching helps to smooth the movement of the surround sounds even though you are using<br />
only two speakers.<br />
Bass Peak Level Manager : Some Dolby Digital sound tracks can produce bass peaks that are undesirable in<br />
a home theater environment. The Bass Peak Level Manager allows you to set the maximum peak levels<br />
appropriate to your system. (Set this function according to the Bass Peak Level instructions on page 89.)<br />
Loudspeaker Position Time Synchronization : This feature allows you to adjust for the difference in the<br />
distance from each individual loudspeaker to the listening position. Doing this ensures that all the speakers<br />
operate in precise synchronization improving the seamless nature of the soundfield. (Set this function according<br />
to the Channel Delay instructions on page 40 and the Fine Channel Delay instructions on page 85–86.)<br />
THX Surround EX : THX Surround EX–Dolby Digital Surround EX is a joint development of Dolby Laboratories<br />
and the THX division of Lucasfilm Ltd.<br />
In a movie theater, film soundtracks that have been encoded with Dolby Digital Surround EX technology are able<br />
to reproduce an extra channel which has been added during the mixing of the program. This channel, called<br />
Surround Back, places sounds behind the listener in addition to the currently available front left, front center,<br />
front right, surround right, surround left and subwoofer channels. This additional channel provides the<br />
opportunity for more detailed imaging behind the listener and brings more depth, spacious ambience and sound<br />
localization than ever before.<br />
When released to the home consumer market, movies that were created using the Dolby Digital Surround EX<br />
technology, may have a note to that effect on the packaging. A list of movies created using this technology can<br />
be found on the Dolby web site at http://www.dolby.com.<br />
Only receiver and controller products bearing the THX Surround EX logo, when in the THX Surround EX mode,<br />
faithfully reproduce this new technology in the home.<br />
This product may also engage the "THX Surround EX" mode during the playback of 5.1 channel material that is<br />
not Dolby Digital Surround EX encoded. In such case the information delivered to the Surround Back channel will<br />
be program dependent and may or may not be very pleasing depending on the particular soundtrack and the<br />
tastes of the individual listener.<br />
93<br />
En
Techno Tidbits & Problem-solving<br />
Speaker Placement Information<br />
Placement of your speakers is a crucial aspect of attaining accurate and realistic surround sound.<br />
Certain pointers concerning speakers stands, direction, angle and distance of speakers will be useful<br />
in this regard.<br />
Firstly, it is best not to put your speakers directly on the floor. If you do this some of the sound vibration<br />
(especially bass) will go directly into the flooring and be lost. Instead we recommend using extremely<br />
hard objects (like cinder blocks) or designated speaker stands to support your speakers. Avoid<br />
placing the speakers on soft (like cushions or sofas) as these will also lead to sound loss and unstable<br />
surfaces (like flimsy shelving) as they may cause speaker accidents. In order to achieve a surround<br />
sound effect, make sure the speakers are a reasonable distance from your main listening position.<br />
Follow the diagrams and instructions below for optimum placement of each set of speakers.<br />
F L<br />
C<br />
F R<br />
F L<br />
C<br />
F R<br />
F L<br />
C<br />
F R<br />
45~60<br />
If you're using a CENTER speaker<br />
set the FRONT speakers to a wider<br />
angle. If not, set them to a narrower<br />
angle.<br />
Make sure the CENTER speaker<br />
does not cross the forward plane<br />
of the FRONT speakers.<br />
It is best to angle the speakers<br />
towards the listening position.<br />
The angle depends on the size<br />
of the room. Use less angle for<br />
bigger rooms.<br />
90~120<br />
90~120<br />
S L<br />
S R<br />
S L<br />
S R<br />
S L<br />
S R<br />
0~60<br />
S L<br />
S R<br />
S L<br />
S B<br />
S R<br />
SBL SBL SBR<br />
SBR<br />
Surround speakers should be<br />
positioned 45 cm–90 cm higher than<br />
your ears and titledslight downward.<br />
Make sure the speakers don't face<br />
each other. For DVD Audio the<br />
speakers should be more directly<br />
behind the listener than<br />
for home theater playback.<br />
Surround back speakers should also be positioned 45 cm–90 cm higher<br />
than your ears and titled slight downward. Make sure the speakers<br />
don't face each other. For DVD Audio the speakers should be more<br />
directly behind the listener than for home theater playback.<br />
94<br />
En
EXPERT<br />
Techno Tidbits & Problem-solving<br />
Speaker Placement for a Complete THX Speaker System<br />
If you have a complete THX Speaker System set (LucasFilm authorized), follow the diagram below to<br />
place your speakers.<br />
Notice the surround speakers should output at an angle parallel to the listener. Also, notice the angle<br />
of the front speakers.<br />
FL<br />
C<br />
FR<br />
Di-polar Radiating Speaker<br />
SL<br />
SR<br />
Surround<br />
Surround<br />
SBL<br />
SBR<br />
Surround Back<br />
Speaker Placement for DVD-Audio (etc.) Sources<br />
The best speaker placement for DVD-Audio (and other multichannel music sources) may be different<br />
than for regular DVD discs. For these formats follow the diagram at right as opposed to the home<br />
theater setups of the preceding pages.<br />
60˚<br />
120˚<br />
95<br />
En
Techno Tidbits & Problem-solving<br />
Preset Code List<br />
You should have no problem controlling a component if you find the manufacturer in this list, but you can only<br />
set these codes for the button that is assigned to that component. So, for example, the TV codes can only be<br />
set to the TV/SAT or TV CONT button. Please note that there are cases where only certain functions may be<br />
controllable after assigning the proper preset code, or the codes for the manufacturer in the list<br />
will not work for the model that you are using. If you can’t find a preset code that matches the component you<br />
want to control, you can still teach the remote individual commands from another remote control (page 64).<br />
96<br />
En<br />
DVD<br />
Manufacturer Code<br />
TOSHIBA 1010<br />
PANASONIC 1002<br />
SONY 1009<br />
JVC 1005<br />
SAMSUNG 1008<br />
RCA 1007<br />
DENON 1004<br />
PHILIPS 1006<br />
TOSHIBA 1010<br />
YAMAHA 1011, 1012<br />
PIONEER 1001, 1002, 1003<br />
LD<br />
Manufacturer Code<br />
SONY 2008<br />
PHILIPS 2006, 2007<br />
PANASONIC 2005<br />
KENWOOD 2004<br />
DENON 2003<br />
YAMAHA 2009<br />
PIONEER 2001, 2002<br />
TV<br />
Manufacturer Code<br />
PIONEER 5001, 5002, 5003,<br />
5004, 5005, 5006,<br />
5007, 5008, 5009,<br />
5010<br />
ADMIRAL 5011, 5012, 5013<br />
AIWA 5014, 5015<br />
AKAI 5016<br />
ALBA 5017<br />
AOC 5018<br />
BESTAR 5019<br />
BLAUPUNKT 5020<br />
BLUE SKY 5021<br />
BRANDT 5022<br />
BROCSONIC 5023<br />
BUSH 5024<br />
CLATRONIC 5025<br />
CRAIG 5026, 5027, 5028,<br />
5029<br />
CROSLEX 5030<br />
CURTIS MATHIS 5031, 5032, 5033<br />
DAEWOO 5034, 5035, 5036,<br />
5037, 5038, 5039<br />
DAYTRON 5040<br />
DUAL 5041<br />
EMERSON 5042, 5043, 5044,<br />
5045, 5046, 5047,<br />
5045, 5046, 5047,<br />
5048<br />
FERGUSON 5049, 5050<br />
FIRST 5051<br />
FISHER 5052<br />
FUJITSU 5053<br />
FUNAI 5054, 5055, 5056<br />
GE 5057, 5058, 5059,<br />
5060<br />
GOLDSTAR 5061, 5062, 5063,<br />
5064<br />
GOODMANS 5065, 5066<br />
HITACHI 5067, 5068, 5069,<br />
5070, 5071<br />
ICE 5072<br />
IRRADIO 5073<br />
ITT/NOKIA 5074, 5075<br />
JC PENNY 5076, 5077, 5078,<br />
5079<br />
JVC 5080, 5081<br />
KENDO 5082<br />
KTV 5083, 5084<br />
LOEWE 5085<br />
LXI 5086, 5087, 5088,<br />
5089, 5090<br />
MAGNAVOX 5091<br />
MARK 5092<br />
MATSUI 5093, 5094<br />
MATSUSHITA 5095, 5096<br />
MED I ON 5097<br />
MITSUBISHI 5098, 5099<br />
MIVAR 5100<br />
NEC 5101, 5102<br />
NOKIA OCEANIC 5103<br />
NORDMENDE 5104, 5105<br />
OKANO 5106<br />
ONWA 5107<br />
PANASONIC 5108, 5109, 5110,<br />
5111<br />
PHILCO 5112, 5113, 5114<br />
PHILLIPS 5004<br />
PHONOLA 5115<br />
PORTLAND 5116, 5117<br />
PROSCAN 5118<br />
QUASAR 5119, 5120<br />
RADIO 5121, 5122<br />
RADIO SHACK 5123, 5124, 5125<br />
RADIOLA 5126<br />
RCA/PROSCAN 5127, 5128, 5129<br />
SABA 5130<br />
SAMSUNG 5131, 5132<br />
SANYO 5133, 5134, 5135<br />
SCHNE I DER 5136<br />
SCOTT 5137, 5138<br />
SHARP 5139, 5140<br />
SIEMENS 5141<br />
SIGNATURE 5142, 5143<br />
SONY 5144, 5145<br />
SYLVANIA 5146, 5147<br />
SYMPHONIC 5148<br />
TATUNG 5149<br />
TELEFUNKEN 5150, 5151<br />
THORN 5152<br />
TOSHIBA 5153, 5154<br />
UNIVERSUM 5155<br />
VIDECH 5156, 5157<br />
W. WHOUSE 5158<br />
WARDS 5159, 5160, 5161<br />
WATSON 5162<br />
ZENITH 5163, 5164<br />
VCR<br />
Manufacturer Code<br />
PIONEER 3001, 3002, 3003,<br />
3004, 3005<br />
ADMIRAL 3006<br />
AIWA 3007, 3008, 3009<br />
AKAI 3010, 3011<br />
ALBA 3012<br />
AUDIO DYNAMIC 3013, 3014<br />
BELL&HOWELL 3015<br />
BLAUPUNKT 3016, 3017<br />
BROCSONIC 3018, 3019<br />
BUSH 3020<br />
CANON 3021<br />
CGM 3022, 3023<br />
CITIZEN 3024<br />
CLATRONIC 3025<br />
CRAIG 3026<br />
CURTIS MATHIS 3027, 3028, 3029<br />
DAEWOO 3030, 3031, 3032<br />
DBX 3033, 3034<br />
DIMENSIA 3035<br />
EMERSON 3036, 3037, 3038,<br />
3039, 3040, 3041<br />
FERGUSON 3042<br />
FISHER 3043, 3044, 3045,<br />
3046<br />
FUNAI 3047, 3048<br />
GE 3049, 3050, 3051<br />
GOLDSTAR 3052<br />
GOODMANS 3053, 3054<br />
GRUNDIG 3055<br />
HITACHI 3056, 3057, 3058,<br />
3059, 3060<br />
INSTANT REPLAY 3061, 3062<br />
ITT/NOKIA 3063<br />
JC PENNY 3064, 3065, 3066,<br />
3067, 3068, 3069<br />
JVC 3070, 3071, 3072<br />
KENDO 3073<br />
KENWOOD 3074, 3075, 3076<br />
LOEWE 3077, 3078<br />
LUXOR 3079
EXPERT<br />
Techno Tidbits & Problem-solving<br />
LXI 3080, 3081, 3082,<br />
3083, 3084, 3085,<br />
3086<br />
MARANTZ 3087, 3088<br />
MARTA 3089<br />
MATSUI 3090<br />
MEMOREX 3091, 3092<br />
MINOLTA 3093, 3094<br />
MITSUBISHI 3095, 3096, 3097,<br />
3098, 3099<br />
MULTITECH 3100, 3101, 3102<br />
NEC 3103<br />
NOKIA OCEANIC 3104<br />
NOKIA 3105, 3106<br />
NORDMENDE 3107<br />
OKANO 3108<br />
OLYMPIC 3109, 3110<br />
ORION 3111<br />
PANASONIC 3112, 3113, 3114,<br />
3115, 3116, 3117<br />
PENTAX 3118, 3119<br />
PHILCO 3120, 3121<br />
PHILIPS 3122<br />
PHONOLA 3123<br />
QUASAR 3124, 3125<br />
RCA/PROSCAN 3126<br />
REALISTIC 3127, 3128, 3129,<br />
3130, 3131, 3132<br />
SABA 3133<br />
SAMSUNG 3134, 3135<br />
SANSUI 3136<br />
SANYO 3137, 3138<br />
SCHNE I DER 3139, 3140<br />
SCOTT 3141, 3142, 3143,<br />
3144, 3145, 3146,<br />
3147<br />
SEG 3148<br />
SELECO 3149<br />
SHARP 3150, 3151, 3152<br />
SIEMENS 3153, 3154, 3155<br />
SIGNATURE 3156, 3157<br />
SONY 3158, 3159, 3160,<br />
3161, 3162, 3163<br />
SYLVANIA 3164, 3165, 3166,<br />
3167<br />
SYMPHONIC 3168<br />
TANDBERG 3169<br />
TASHIRO 3170<br />
TATUNG 3171, 3172<br />
TEAC 3173, 3174, 3175<br />
TECHNICS 3176, 3177<br />
TELEFUNKEN 3178, 3179<br />
THORN 3180, 3181<br />
TOSHIBA 3182, 3183, 3184<br />
UNIVERSUM 3185, 3186, 3187<br />
W. WHOUSE 3188<br />
WARDS 3189, 3190, 3191,<br />
3192, 3193<br />
YAMAHA 3194, 3195, 3196<br />
ZENITH 3197<br />
STB<br />
Manufacturer Code<br />
PIONEER 6001, 6002, 6003,<br />
6004, 6005, 6006<br />
BELL 6049<br />
BLAUPUNKT 6007<br />
ECHOSTAR 6047<br />
GENERAL INSTRUMENT<br />
6008<br />
GOLDSTAR 6009<br />
GRUNDIG 6010, 6011<br />
HAMLIN 6012, 6013<br />
HNS/HUGHES 6014<br />
HITACHI 6015<br />
ITT/NOKIA 6016<br />
JERROLD 6017, 6018, 6019<br />
6020, 6021<br />
NEC 6022, 6023<br />
OAK 6024, 6025, 6026<br />
PANASONIC 6027, 6028, 6029<br />
PHILIPS 6030, 6031<br />
PRIMESTAR 6048<br />
RADIO SHACK 6032<br />
RCA 6033<br />
SAMSUNG 6034, 6035<br />
SCIENTIFIC ATLANTA<br />
6036, 6037, 6038<br />
SIEMENS 6039, 6040<br />
SONY 6041<br />
STAR CHOICE 6048<br />
TOSHIBA 6042, 6043<br />
TOCOM 6044<br />
ZENITH 6045, 6046<br />
CD/CD-R<br />
Manufacturer Code<br />
PIONEER 7001, 7002<br />
DENON 7003, 7004, 7005<br />
FISHER 7006, 7007<br />
JVC 7008, 7009, 7010,<br />
7011<br />
KENWOOD 7012, 7013, 7014,<br />
7015, 7016<br />
MAGNAVOX 7017, 7018<br />
MARANTZ 7019<br />
ONKYO 7020, 7021<br />
PANASONIC 7022, 7023<br />
PHILIPS 7024, 7025<br />
RCA 7026, 7027<br />
SANYO 7028<br />
SHARP 7029<br />
SONY 7030<br />
TEAC 7031, 7032, 7033<br />
TECHNICS 7034, 7035<br />
YAMAHA 7036, 7037, 7038,<br />
7039<br />
DENON 7040, 7041<br />
JVC 7042<br />
KENWOOD 7043<br />
PHILIPS 7044<br />
SONY 7045<br />
DVR<br />
Manufacturer Code<br />
PIONEER 4001<br />
MD<br />
Manufacturer Code<br />
PIONEER 8001, 8002, 8003<br />
DENON 8004<br />
JVC 8005<br />
KENWOOD 8006<br />
SONY 8007<br />
SHARP 8002<br />
YAMAHA 8008, 8009<br />
TAPE<br />
Manufacturer Code<br />
PIONEER 9001, 9002<br />
DENON 9003, 9004<br />
FISHER 9005, 9006<br />
JVC 9007, 9008<br />
KENWOOD 9009, 9010, 9011<br />
NAKAMICHI 9012<br />
ONKYO 9013, 9014, 9015<br />
PHILIPS 9016, 9017<br />
SONY 9018, 9019<br />
TEAC 9020, 9021<br />
TECHNICS 9022<br />
YAMAHA 9023, 9024, 9025,<br />
9026<br />
97<br />
En
Techno Tidbits & Problem-solving<br />
Troubleshooting<br />
Incorrect operations are often mistaken for trouble and malfunctions. If you think that there is something wrong with<br />
this component, check the points below. Sometimes the trouble may lie in another component. Investigate the other<br />
components and electrical appliances being used. If the trouble cannot be rectified even after exercising the checks<br />
listed below, ask your nearest PIONEER authorized service center or your dealer to carry out repair work.<br />
Symptom Cause Remedy<br />
Power<br />
The power does not turn on.<br />
• The power plug is disconnected.<br />
• The protection circuit may have been<br />
activated.<br />
• Connect the power plug to the wall outlet.<br />
• Disconnect the power plug from the<br />
outlet, and insert again.<br />
During loud playback the<br />
power suddenly switches<br />
off.<br />
The unit does not respond<br />
when the buttons are<br />
pressed.<br />
During operation, the unit<br />
suddenly switches off.<br />
AMP ERR blinks in the<br />
display and the unit turns<br />
off. The STANDBY indicator<br />
will blink and the unit<br />
cannot be turned on.<br />
FAN STOP blinks in the<br />
display and the unit turns<br />
off.<br />
OVERHEAT blinks in the<br />
display and no sound is<br />
output.<br />
THDCT NG blinks in the<br />
display and the unit turns<br />
off.<br />
Setup<br />
After the proper settings<br />
have been made, there still<br />
seems to be something<br />
wrong with the sound.<br />
No audio<br />
No sound is output when a<br />
function is selected.<br />
• The protection circuit has been activated<br />
because the lowest actual impedance of<br />
the speakers (as opposed to the speakers’<br />
rated impedance) is dangerously low.<br />
• Static electricity caused by dry air.<br />
• The speaker wires are frayed or sticking<br />
out of the jack, and are touching the back of<br />
the receiver or another set of wires.<br />
• The receiver probably has a serious<br />
problem.<br />
• Something is stuck in the fan and/or the<br />
fan is broken.<br />
• The receiver has gotten too hot.<br />
• The thermistor (temperature sensor) is<br />
broken.<br />
• The speakers have been incorrectly<br />
connected (+/– connections are reversed).<br />
• Improper connections.<br />
• Sound is muted.<br />
• The volume is turned down.<br />
• Speakers are turned off.<br />
• DIGITAL/ANALOG setting is incorrect.<br />
• MULTI CH IN mode is on.<br />
• Turn down the volume.<br />
• When it’s convenient go to ACOUSTIC<br />
CALIBRATION EQ (page 87–88) and lower<br />
the 63 Hz and 125 Hz equalizer levels using<br />
MANUAL setting.<br />
• Switch the unit off, then on again.<br />
• Disconnect the power plug from the<br />
outlet, and insert again.<br />
• Reinsert the speaker wires, making sure<br />
there are no stray strands of wire and that<br />
they are inserted fully (see page 24).<br />
• Don't try to turn on the receiver. Call a<br />
<strong>Pioneer</strong>-accredited repair center to look at<br />
the problem.<br />
• Remove the foreign object from the fan.<br />
If you can't do this and/or the fan is broken<br />
call a <strong>Pioneer</strong>-accredited repair center to<br />
look at the problem.<br />
• Turn the receiver off and allow it to cool<br />
down with good ventilation. It is very likely<br />
that you have a heat dispersal and ventilation<br />
problem so please follow the instructions in<br />
“Installing the Receiver” (page 2, 8) carefully.<br />
• Turn the receiver off, unplug from wall<br />
and call a <strong>Pioneer</strong>-accredited repair center<br />
to look at the problem.<br />
• Check all connections (see page 24).<br />
• Make sure the component is connected<br />
correctly (see pages 15–22).<br />
• Press MUTING on the remote control.<br />
• Adjust MASTER VOLUME.<br />
• Press SPEAKERS (A/B) to select the<br />
speakers you connected (see page 70).<br />
• Select the proper signal with the SIGNAL<br />
SELECT button (see page 42).<br />
• Turn MULTI CH IN mode off (see page<br />
50).<br />
98<br />
En
EXPERT<br />
Symptom Cause Remedy<br />
No sound output from the<br />
front speakers.<br />
• The front speakers are connected to the<br />
B speaker system jack.<br />
Techno Tidbits & Problem-solving<br />
• Connect the front speakers to the A<br />
speaker system jacks (see page 24).<br />
No sound output from<br />
surround or center speakers.<br />
No sound output from the<br />
subwoofer.<br />
No sound output from the<br />
surround back speakers.<br />
No sound output from one<br />
(set of) speaker(s).<br />
Sound is produced from<br />
some components, but not<br />
from digital components.<br />
• Speaker settings are incorrect.<br />
• The surround and/or center speakers are<br />
disconnected.<br />
• The listening mode is STEREO.<br />
• The subwoofer setting is NO.<br />
• The subwoofer output setting is too low.<br />
• The bass peak level setting is too low.<br />
• There is very little low frequency<br />
information in your source.<br />
• The crossover frequency is set too low.<br />
• There is a problem with the subwoofer.<br />
• The subwoofer isn't connected properly.<br />
• The SB CH MODE is set to OFF.<br />
• The source is not a 6.1 channel playback<br />
source.<br />
• The surround back speakers aren't<br />
connected properly.<br />
• The surround back channel is set to 1<br />
speaker setting only, and the speaker is<br />
connected to the right channel output.<br />
• The speaker system setting is NO.<br />
• The speaker isn't connected properly.<br />
• The source has no sound output for that<br />
channel.<br />
• The speaker output level is set too small.<br />
• SIGNAL SELECT is set incorrectly.<br />
• The digital inputs are assigned<br />
incorrectly, or not at all.<br />
• See SPEAKER SETTING on pages 37–38<br />
to check the speaker settings.<br />
• Connect the speakers (see page 24).<br />
• Choose a surround listening mode (see<br />
pages 43–45).<br />
• Change the setting to YES or PLUS (see page<br />
37–38).<br />
• Adjust the output setting to the level you<br />
want (see pages 39, 84).<br />
• Adjust the peak level setting to the level<br />
you want.<br />
• Change your subwoofer setting to one of<br />
the following (see pages 37–38):<br />
Front: SMALL Subwoofer:YES<br />
Front:LARGE Subwoofer:PLUS<br />
• Raise the frequency level to match your<br />
speakers' characteristics (see page 83)<br />
• Check the three following points:<br />
• Check the power.<br />
• Check the subwoofer volume control .<br />
• Check the subwoofer hasn't<br />
automatically switched to standby mode<br />
(check the subwoofer <strong>manual</strong>)<br />
• Check all connections.<br />
• Set the SB CH MODE to ON or AUTO<br />
(see page 51).<br />
• Set the SB CH MODE to ON or AUTO<br />
and choose one of the SURROUND<br />
listening modes (see pages 44–45, 51).<br />
• Check all connections (see pages 15–22).<br />
• Connect the speaker to the surround<br />
back left channel output (see page 24).<br />
• Change the speaker setting to YES (see<br />
pages 37–38).<br />
• Check all connections.<br />
• If you choose one of the SURROUND<br />
listening modes, a channel may be created<br />
for the speaker (see pages 44–45).<br />
• Increase the speaker output level.<br />
• Set SIGNAL SELECT to AUTO or<br />
according to the type of connections made<br />
(see page 42).<br />
• Set the digital input settings correctly<br />
(see page 80).<br />
• The digital components aren't connected<br />
properly.<br />
• The player is not compatible with the<br />
source you're using, or the player settings<br />
are incorrect.<br />
• The MULTI CH IN mode has been<br />
selected.<br />
• The digital output level has been turned<br />
down on a CD player or other component<br />
equipped with digital output level<br />
adjustment capability.<br />
• Check all connections (see page 24).<br />
• Choose a compatible source, or check<br />
the player's <strong>manual</strong> for the correct settings.<br />
• Choose one of the listening modes (see<br />
page 43). The MULTI CH IN switches off<br />
automatically.<br />
• Set the digital volume level of the player<br />
to full, or to the neutral position.<br />
99<br />
En
Techno Tidbits & Problem-solving<br />
Symptom Cause Remedy<br />
Other audio problems<br />
Subwoofer output is very<br />
low.<br />
• Settings route signal away from<br />
subwoofer.<br />
• To get more signal to the subwoofer set<br />
it to PLUS or choose SMALL for the front<br />
speakers (see pages 37–38).<br />
During multi channel<br />
playback, there is no sound<br />
output from one speaker.<br />
A multi channel DVD source<br />
appears to be downmixed<br />
from 2 channels during<br />
playback.<br />
Considerable noise in radio<br />
broadcasts.<br />
Broadcast stations cannot<br />
be selected.<br />
Broadcast stations cannot<br />
be selected automatically.<br />
Noise or hum can be heard<br />
even when there is no sound<br />
being input.<br />
When a search is performed<br />
by a DTS compatible CD<br />
player during playback,<br />
noise is output.<br />
When playing a DTS format<br />
LD there is noise audible on<br />
the soundtrack.<br />
Audio doesn't record (in<br />
some cases, even if video<br />
does).<br />
• That speaker is set to NO.<br />
• The source is coming from something<br />
other than the MULTI CH IN jacks (for<br />
example, digital PCM output, etc.)<br />
• Incorrect frequency.<br />
• The antenna is not connected.<br />
• Digital cables are near the antenna<br />
terminals and wires.<br />
• The channel step interval doesn't match<br />
that of your country or region. (multi-voltage<br />
model only)<br />
• The antenna is poorly positioned.<br />
• Interference caused by other equipment<br />
(fluorescent lamp, motor, etc.).<br />
• Weak radio signals.<br />
• There is electrical interference from<br />
another component or appliance.<br />
• The search function performed by the<br />
player interferes with the reading of digital<br />
information.<br />
• The SIGNAL SELECT is on ANALOG.<br />
• You are trying to make an analog<br />
recording from a digital signal, or a digital<br />
recording of an analog source.<br />
• The digital source is copy protected.<br />
• The jacks for recording have not been<br />
connected properly.<br />
• Set the speaker to YES.<br />
• Check the MULTI CH IN connection (see<br />
page 19) and select the type of playback<br />
with the MULTI CH IN button (see page 50).<br />
• Tune in the correct frequency.<br />
• Connect the antenna (see page 23).<br />
• Route digital cables away from the<br />
antenna terminals and wires.<br />
• Match the channel step interval with that<br />
of your country or region (see page 55).<br />
• Adjust the direction and position for best<br />
reception.<br />
• Turn off the equipment causing the noise<br />
or move it away from the receiver.<br />
• Place the antenna farther away from the<br />
equipment causing the noise.<br />
• Connect an outdoor AM or FM antenna<br />
(see page 23).<br />
• Check that personal computers or other<br />
digital components connected to the same<br />
power source are not causing interference.<br />
• This is not a malfunction, but be sure to<br />
turn the volume down to prevent the output<br />
of loud noise from your speakers.<br />
• Set the SIGNAL SELECT to DIGITAL (see<br />
page 42).<br />
• You can only record analog to analog, or<br />
digital to digital. Make sure the playback<br />
and recording components are hooked up<br />
with the same kind of connections.<br />
• You can't record digital sources that have<br />
been copy protected.<br />
• Check connections (see pages 19 & 21).<br />
100<br />
En
EXPERT<br />
Symptom Cause Remedy<br />
Video<br />
No image is output when a<br />
function is selected.<br />
• Improper connections.<br />
• The input source is not properly selected.<br />
• The video input selected on the TV<br />
monitor is incorrect.<br />
• The TV or monitor is hooked up with cord<br />
that is different than that used for the video<br />
player.<br />
Techno Tidbits & Problem-solving<br />
• Make sure the component is connected<br />
correctly (see pages 15,16–18).<br />
• Press the correct function button.<br />
• Please read the TV monitor <strong>manual</strong> and<br />
change the settings accordingly.<br />
• Use the same cable to connect to your<br />
TV and all your video equipment (see pages<br />
15–22).<br />
There is no image coming<br />
from the selected<br />
component video jacks.<br />
Can't record video.<br />
Input/display<br />
The display is dark.<br />
You can't get DIGITAL to<br />
come up when using the<br />
SIGNAL SELECT button.<br />
The digital format indicator<br />
doesn't light up even when<br />
playing a non-PCM digital<br />
source.<br />
A compressed digital source<br />
is being played, but the<br />
digital format indicators<br />
don't light up.<br />
During playback of a<br />
compressed digital source,<br />
the PRO LOGIC ll or NEO:6<br />
indicators show in the<br />
display.<br />
During playback of a<br />
Surround EX or DTS ES<br />
source on the AUTO setting,<br />
the EX and ES indicators<br />
won't light.<br />
During playback of a DVD<br />
audio source, the player<br />
shows a transfer rate of<br />
96kHz, but the receiver does<br />
not.<br />
• The type of cord connected to the TV<br />
doesn't match your video input settings.<br />
• The source is copy protected.<br />
• The recorder's video input is hooked up<br />
using a different type of cord to the source<br />
video output.<br />
• The display DIMMER button is pushed.<br />
• Either the digital connections or the<br />
DIGITAL IN SELECT is incorrect.<br />
• MULTI CH IN mode is on.<br />
• The player is paused or stopped.<br />
• There is a mistake in the player settings<br />
for audio output.<br />
• Although it's a non-PCM digital source<br />
there is a possibility the present track is not<br />
the proper format (5.1, 6.1, or 7.1 channel).<br />
• The digital signal is not being sent with<br />
the source.<br />
• The audio is in two channel format.<br />
• It has already been Dolby Surround<br />
encoded.<br />
• The source may be 6.1 playback<br />
compatible, but there is no signal from the<br />
source to indicate this.<br />
• The multichannel connections are analog,<br />
so there is no digital transfer.<br />
• Change the settings to match the cord<br />
connected (see pages 15–22).<br />
• You can't record sources that have been<br />
copy protected.<br />
• Hook up the source and the recorder<br />
using the same type of video cord (see<br />
pages 16–18).<br />
• Press DIMMER on the remote control<br />
repeatedly to return to the default setting<br />
(see page 53).<br />
• Make sure the digital connections (see<br />
page 16–18 & 21) and the DIGITAL-IN<br />
SELECT (see page 80) are done correctly.<br />
• Turn MULTI CH IN mode off (see page<br />
50).<br />
• Play the source.<br />
• Fix the audio settings (check the <strong>manual</strong><br />
that came with your DVD player).<br />
• There is no problem. The indicator won't<br />
light when the track is not a compressed<br />
digital source.<br />
• Choose DIGITAL or AUTO with the signal<br />
select button (see page 42).<br />
• This is not a malfunction. Check the<br />
manufacturer information for the source.<br />
• Switch the SB CH MODE to ON (see<br />
page 51).<br />
• This is not a malfunction. See the<br />
player's <strong>manual</strong> for more details.<br />
101<br />
En
Techno Tidbits & Problem-solving<br />
Symptom Cause Remedy<br />
During playback of a 96 kHz<br />
source, the display doesn't<br />
show 96 kHz<br />
• The receiver may be on a different mode<br />
than STEREO.<br />
• One of the DIGITAL NR, MIDNIGHT,<br />
LOUDNESS, or TONE features is switched<br />
on.<br />
• Switch to STEREO mode (see page 43).<br />
• Turn it/them off (see page 47–49).<br />
Remote control<br />
Cannot be remote<br />
controlled.<br />
Other components can't be<br />
operated with the system<br />
remote.<br />
The SR cable is connected,<br />
but the connected<br />
components can't be<br />
operated with the remote.<br />
• The remote control batteries have worn<br />
out.<br />
• Too far away or improper angle of<br />
operation.<br />
• There is an obstacle between the<br />
receiver and the remote control.<br />
• Strong light such as fluorescent light is<br />
shining onto the unit's remote control signal<br />
light-receiving window.<br />
• A cord is connected to the CONTROL IN<br />
terminal on this unit.<br />
• The IR Receiver type is mismatched with<br />
the setting.<br />
• The preset code settings are wrong.<br />
• The batteries wore out and the system<br />
settings were cleared.<br />
• The SR cable hasn't been connected<br />
properly.<br />
• The rest of the component connection<br />
have not been made.<br />
• The component you have hooked up is<br />
not SR compatible.<br />
• Replace the batteries (see page 8).<br />
• Operate within 7 m and a 30° angle of<br />
the remote sensor on the front panel (see<br />
page 8).<br />
• Remove the obstacle or operate from<br />
another position (see page 8).<br />
• Avoid exposing the remote sensor on the<br />
front panel to direct light.<br />
• Connect cord to the correct jack.<br />
• Disconnect the IR Receiver from the rear<br />
panel, and set to the other IR Receiver type<br />
using the remote control.<br />
• Input the correct preset code.<br />
• Reset the proper system settings.<br />
• Reinsert the SR cable, making sure it is<br />
the right jack (see page 75).<br />
• Make sure an analog connection has<br />
been made between the units.<br />
• This is not a malfunction.<br />
If the unit does not operate normally due to external effects such as static electricity<br />
Disconnect the power plug from the outlet and insert again to return to normal operating conditions.<br />
Maintenance of External Surfaces<br />
• Use a polishing cloth or dry cloth to wipe off dust<br />
and dirt.<br />
• When the surfaces are dirty, wipe with a soft<br />
cloth dipped in some neutral cleanser diluted five<br />
or six times with water, and wrung out well, and<br />
then wipe again with a dry cloth. Do not use<br />
furniture wax or cleaners.<br />
• Never use thinners, benzine, insecticide sprays<br />
or other chemicals on or near this unit, since<br />
these will corrode the surfaces.<br />
102<br />
En
EXPERT<br />
Techno Tidbits & Problem-solving<br />
Schemata of Setup<br />
1<br />
1.Surround Setup<br />
[ SurrBack System ]<br />
[ Quick ]<br />
[ Normal ]<br />
[ Expert ]<br />
[ Exit ]<br />
SurrBack System<br />
[ Normal System ]<br />
[ Secound Zone ]<br />
[ Front Bi-Amp ]<br />
[ Exit<br />
]<br />
System Setup<br />
2<br />
2. THX CINEMA Setup<br />
[ PRO LOGIC II MOVIE ]<br />
[ PRO LOGIC ]<br />
[ Neo:6 CINEMA ]<br />
[ Exit ]<br />
QUICK<br />
Subwoofer [ YES]<br />
Center SP [ YES]<br />
SurrBack SP [ YES]<br />
Room size [ Medium]<br />
Listening Position<br />
[ Center ]<br />
[Exit]<br />
Speaker Setting<br />
[ Free ]<br />
[ THX ]<br />
Front<br />
[SMALL]<br />
Center [SMALL]<br />
Surround [SMALL]<br />
SurrBack [SMALL X2]<br />
Subwoofer [ YES ]<br />
[Exit]<br />
[1. Surround Setup ]<br />
[2. THX CINEMA Setup ]<br />
[3. Input Assign ]<br />
[4. Function Rename ]<br />
[Exit<br />
]<br />
3<br />
3.Input Assign<br />
Digital-In Select<br />
Normal<br />
[ Speaker Setting ]<br />
[ Channel Level ]<br />
[ Channel Delay ]<br />
[ Exit ]<br />
Channel Level<br />
Test Tone [Manual]<br />
[Auto]<br />
[Exit ]<br />
[ Digital-In Select ]<br />
[Exit]<br />
Digital-1 [ TV/SAT ]<br />
Digital-2 [ CD-R ]<br />
Digital-3 [DVD/LD]<br />
[ CD ]<br />
Digital-4<br />
[Exit]<br />
Channel Delay<br />
4<br />
(4. Function Rename)<br />
DVD/LD [ DVD/LD ]<br />
TV/SAT [ TV/SAT ]<br />
VCR1/DVR [ VCR1/DVR ]<br />
VCR2 [ VCR2 ]<br />
VIDEO [ VIDEO ]<br />
LINE [ LINE ]<br />
CD [ CD ]<br />
CD-R/TAPE1 [ CDR/TAPE1 ]<br />
MD/TAPE2 [ MD/TAPE2 ]<br />
Front L [ 3.0m ]<br />
Center [ 2.7m ]<br />
Front R [ 3.0m ]<br />
Surround R [ 2.7m ]<br />
SurrBack R [ 2.1m ]<br />
SurrBack L [ 1.8m ]<br />
Surround L [ 2.4m ]<br />
Subwoofer [ 3.3m ]<br />
[Exit ]<br />
[Exit ]<br />
Expert<br />
Crossover Network<br />
[Crossover Network ]<br />
[Fine Channel Level ]<br />
[Fine Channel Delay ]<br />
[Acoustic Cal EQ ]<br />
[Bass Peak Level ]<br />
[D-Range Control ]<br />
[Exit ]<br />
Frequency [ 50Hz ]<br />
[ 80Hz ]<br />
[ 100Hz ]<br />
[ 150Hz ]<br />
[ 200Hz ]<br />
[ Exit ]<br />
(THX Speaker = 80Hz)<br />
Fine Channel Level<br />
STD:Front L +1. 5dB<br />
Front R [ +1. 5dB]<br />
Center [ +1. 5dB]<br />
Surround L [ +2. 0dB]<br />
Surround R [ -1. 5dB]<br />
SurrBack L [ +3. 0dB]<br />
SurrBack R [ +2. 0dB]<br />
Subwoofer [ +10. 0dB]<br />
[Exit ]<br />
Fine Channel Delay<br />
STD:Front L 3.0m<br />
Front R [ 3.0m ]<br />
Center [ 3.3m ]<br />
Surround L [ 2.4m ]<br />
Surround R [ 2.1m ]<br />
SurrBack L [ 1.8m ]<br />
SurrBack R [ 1.5m ]<br />
Subwoofer [ 4.0m ]<br />
[Exit ]<br />
Acoustic Cal EQ<br />
[ Center EQ]<br />
[ Surround R EQ ]<br />
[ SurrBack R EQ ]<br />
[ SurrBack L EQ ]<br />
[ Surround L EQ ]<br />
[Exit ]<br />
Bass Peak Level<br />
[Setting Start ]<br />
[Setting Cancel ]<br />
[Exit ]<br />
Dynamic Range Control<br />
Select Mode<br />
dts<br />
[OFF]<br />
[MID]<br />
[MAX]<br />
[Exit ]<br />
103<br />
En
Techno Tidbits & Problem-solving<br />
Specifications (European model)<br />
Amplifier Section<br />
Continuous Power Output (DIN)<br />
FRONT .......... 100 W + 100 W (DIN 1 kHz, THD 1 %, 8 Ω)<br />
CENTER ....................... 100 W (DIN 1 kHz, THD 1 %, 8 Ω)<br />
SURROUND ......................................... 100 W + 100 W<br />
(DIN 1 kHz, THD 1 %, 8 Ω)<br />
SURROUND BACK ............................... 100 W + 100 W<br />
(DIN 1 kHz, THD 1 %, 8 Ω)<br />
Rated Power Output ................................ 100 W + 100 W<br />
(20 Hz – 20 kHz, 0.09 %, 8 Ω)<br />
Input (Sensitivity/Impedance)<br />
VCR 1/DVR, VCR 2, DVD/LD, TV/SAT, VIDEO, CD,<br />
LINE, CD-R/TAPE 1, MD/TAPE 2 ............. 335 mV/47 kΩ<br />
Frequency Response<br />
VCR 1/DVR, VCR 2, DVD/LD, TV/SAT, VIDEO, CD, LINE,<br />
+0<br />
CD-R/TAPE 1, MD/TAPE 2 ......5 Hz to 100,000 Hz –3 dB<br />
Output (Level/Impedance)<br />
VCR 1/DVR REC, VCR 2 REC, CD-R/TAPE 1 REC,<br />
MD/TAPE 2 REC .................................... 335 mV/2.2 kΩ<br />
Tone Control<br />
BASS ..................................................... ± 6 dB (100 Hz)<br />
TREBLE ................................................. ± 6 dB (10 kHz)<br />
LOUDNESS .......................... +4/+2 dB (100 Hz/10 kHz)<br />
(at volume position -40dB)<br />
Signal-to-Noise Ratio (IHF, short circuited, A network)<br />
VCR 1/DVR, VCR 2, DVD/LD, TV/SAT, VIDEO, CD,<br />
CD-R/TAPE 1, MD/TAPE 2, MULTI CH IN .......... 101 dB<br />
Signal-to-Noise Ratio<br />
[DIN (Continuous rated power output/50 mW)]<br />
VCR 1/DVR, VCR 2, DVD/LD, TV/SAT, VIDEO, CD,<br />
CD-R/TAPE 1, MD/TAPE 2 ............................... 92/65 dB<br />
VIDEO Section (S jack)<br />
Input (Sensitivity/Impedance)<br />
VCR 1/DVR, VCR 2, VIDEO, DVD/LD, TV/SAT<br />
Luminance signal (Y) ............................... 1 Vp-p/75 Ω<br />
Chrominance signal (C) ..................... 0.286 Vp-p/75 Ω<br />
Output (Level/Impedance)<br />
VCR 1/DVR, VCR 2, MONITOR OUT<br />
Luminance signal (Y) ............................... 1 Vp-p/75 Ω<br />
Chrominance signal (C) ..................... 0.286 Vp-p/75 Ω<br />
Frequency Response<br />
VCR 1/DVR, VCR 2, VIDEO, DVD/LD, TV/SAT<br />
+0<br />
Luminance signal (Y) ................ 5 Hz to 10 MHz –3 dB<br />
Signal-to-Noise Ratio<br />
Luminance signal (Y) ........................................ 65 dB<br />
VIDEO Section (Composite)<br />
Input (Sensitivity/Impedance)<br />
VCR 1/DVR, VCR 2, VIDEO, DVD/LD,<br />
TV/SAT ......................................................... 1 Vp-p/75 Ω<br />
Output (Level/Impedance)<br />
VCR 1/DVR, VCR 2, MONITOR OUT, .......... 1 Vp-p/75 Ω<br />
Frequency Response<br />
VCR 1/DVR, VCR 2, TV/SAT, DVD/LD<br />
+0<br />
VIDEO=MONITOR OUT, ............. 5 Hz to 10 MHz –3 dB<br />
Signal-to-Noise Ratio ................................................ 65 dB<br />
FM Tuner Section<br />
Frequency Range ........................... 87.5 MHz to 108 MHz<br />
Usable Sensitivity ........ Mono: 13.2 dBf, IHF (1.3 µV/75 Ω)<br />
50 dB Quieting Sensitivity ......................... Mono: 20.2 dBf<br />
Stereo: 38.6 dBf<br />
Signal-to-Noise Ratio ................... Mono: 73 dB (at 85 dBf)<br />
Stereo: 70 dB (at 85 dBf)<br />
Distortion ........................................ Stereo: 0.5 % (1 kHz)<br />
Alternate Channel Selectivity ................... 60 dB (400 kHz)<br />
Stereo Separation ........................................ 40 dB (1 kHz)<br />
Frequency Response ................. 30 Hz to 15 kHz (± 1 dB)<br />
Antenna Input .........................................75 Ω unbalanced<br />
AM Tuner Section<br />
Frequency Range ............................ 531 kHz to 1,602 kHz<br />
Sensitivity (IHF, Loop antenna) ........................... 350 µV/m<br />
Selectivity ................................................................. 25 dB<br />
Signal-to-Noise Ratio ................................................ 50 dB<br />
Antenna ........................................................ Loop antenna<br />
Miscellaneous<br />
Power Requirements ................. AC 220 - 230 V, 50/60 Hz<br />
Power Consumption ............................................... 600 W<br />
Power Consumption in Standby mode .................... 0.7 W<br />
AC Outlets<br />
SWITCHED ...................................... 100 W (0.8A) MAX.<br />
Dimensions .................... 420 (W) × 188 (H) × 464 (D) mm<br />
Weight (without package) ...................................... 18.2 kg<br />
Furnished Parts<br />
FM Wire Antenna ............................................................. 1<br />
AM Loop Antenna ........................................................... 1<br />
“AA” IEC LR6 batteries .................................................. 2<br />
Remote Control Unit ........................................................1<br />
Operating Instructions .................................................... 1<br />
NOTE:<br />
Specifications and the design are subject to possible<br />
modifications without notice, due to improvements.<br />
104<br />
En
EXPERT<br />
Specifications (multi-voltage model)<br />
Techno Tidbits & Problem-solving<br />
Amplifier Section<br />
Maximum Output Power .......................... 130 W/channel<br />
(1 kHz, THD 10.0 %, 8 Ω)<br />
Continuous Power Output (DIN)<br />
FRONT .......... 100 W + 100 W (DIN 1 kHz, THD 1 %, 8 Ω)<br />
CENTER ....................... 100 W (DIN 1 kHz, THD 1 %, 8 Ω)<br />
SURROUND ......................................... 100 W + 100 W<br />
(DIN 1 kHz, THD 1 %, 8 Ω)<br />
SURROUND BACK ............................... 100 W + 100 W<br />
(DIN 1 kHz, THD 1 %, 8 Ω)<br />
Rated Power Output ................................ 100 W + 100 W<br />
(20 Hz – 20 kHz, 0.09 %, 8 Ω)<br />
Input (Sensitivity/Impedance)<br />
VCR 1/DVR, VCR 2, DVD/LD, TV/SAT, VIDEO, CD,<br />
LINE, CD-R/TAPE 1, MD/TAPE 2 ............. 335 mV/47 kΩ<br />
Frequency Response<br />
VCR 1/DVR, VCR 2, DVD/LD, TV/SAT, VIDEO, CD, LINE,<br />
CD-R/TAPE 1, MD/TAPE 2 ...... 5 Hz to 100,000 Hz dB<br />
Output (Level/Impedance)<br />
VCR 1/DVR REC, VCR 2 REC, CD-R/TAPE 1,<br />
MD/TAPE 2 REC .................................... 335 mV/2.2 kΩ<br />
Tone Control<br />
BASS ..................................................... ± 6 dB (100 Hz)<br />
TREBLE ................................................. ± 6 dB (10 kHz)<br />
LOUDNESS .......................... +4/+2 dB (100 Hz/10 kHz)<br />
(at volume position -40dB)<br />
Signal-to-Noise Ratio (IHF, short circuited, A network)<br />
VCR 1/DVR, VCR 2, DVD/LD, TV/SAT, VIDEO, CD,<br />
CD-R/TAPE 1, MD/TAPE 2, MULTI CH IN .......... 101 dB<br />
Signal-to-Noise Ratio<br />
[DIN (Continuous rated power output/50 mW)]<br />
VCR 1/DVR, VCR 2, DVD/LD, TV/SAT, VIDEO, CD,<br />
CD-R/TAPE 1, MD/TAPE 2 ............................... 92/65 dB<br />
Signal-to Noise Ratio [EIA, at 1 W (1 kHz)]<br />
VCR 1/DVR, VCR 2, DVD/LD, TV/SAT, VIDEO, CD,<br />
CD-R/TAPE 1, MD/TAPE 2 .................................... 93 dB<br />
VIDEO Section (S jack)<br />
Input (Sensitivity/Impedance)<br />
VCR 1/DVR, VCR 2, VIDEO, DVD/LD, TV/SAT<br />
Luminance signal (Y) ............................... 1 Vp-p/75 Ω<br />
Chrominance signal (C) ..................... 0.286 Vp-p/75 Ω<br />
Output (Level/Impedance)<br />
VCR 1/DVR, VCR 2, MONITOR OUT<br />
Luminance signal (Y) ............................... 1 Vp-p/75 Ω<br />
Chrominance signal (C) ..................... 0.286 Vp-p/75 Ω<br />
Frequency Response<br />
VCR 1/DVR, VCR 2, VIDEO, DVD/LD, TV/SAT<br />
+0<br />
Luminance signal (Y) ................ 5 Hz to 10 MHz –3 dB<br />
Signal-to-Noise Ratio<br />
Luminance signal (Y) ........................................ 65 dB<br />
+0<br />
–3<br />
VIDEO Section (Composite)<br />
Input (Sensitivity/Impedance)<br />
VCR 1/DVR, VCR 2, VIDEO, DVD/LD,<br />
TV/SAT ......................................................... 1 Vp-p/75 Ω<br />
Output (Level/Impedance)<br />
VCR 1/DVR, VCR 2, MONITOR OUT,<br />
MONITOR OUT2 .........................................1 Vp-p/75 Ω<br />
Frequency Response<br />
VCR 1/DVR, VCR 2, TV/SAT, DVD/LD<br />
+0<br />
VIDEO=MONITOR OUT, ............. 5 Hz to 10 MHz –3dB<br />
Signal-to-Noise Ratio ................................................ 65 dB<br />
FM Tuner Section<br />
Frequency Range ........................... 87.5 MHz to 108 MHz<br />
Usable Sensitivity .............. Mono:13.2 dBf, IHF (1.3 µV/ 75 Ω)<br />
50 dB Quieting Sensitivity .........................Mono: 20.2 dBf<br />
............................................................ Stereo: 38.6 dBf<br />
Signal-to-Noise Ratio ................... Mono: 73 dB (at 85 dBf)<br />
............................................... Stereo: 70 dB (at 85 dBf)<br />
Distortion ........................................ Stereo: 0.5 % (1 kHz)<br />
Alternate Channel Selectivity ................... 60 dB (400 kHz)<br />
Stereo Separation ........................................ 40 dB (1 kHz)<br />
Frequency Response ................. 30 Hz to 15 kHz (± 1 dB)<br />
Antenna Input ......................................... 75 Ω unbalanced<br />
AM Tuner Section<br />
Frequency Range ............ 531 kHz to 1,602 kHz (9 kHz step)<br />
.................................... 530 kHz to 1,700 kHz (10 kHz step)<br />
Sensitivity (IHF, Loop antenna) ........................... 350 µV/m<br />
Selectivity ................................................................. 25 dB<br />
Signal-to-Noise Ratio ................................................ 50 dB<br />
Antenna ........................................................ Loop antenna<br />
Miscellaneous<br />
Power Requirements<br />
............................ AC 110/120-127/220/230-240 V, 50/60 Hz<br />
Power Consumption ............................................... 600 W<br />
Power Consumption in Standby mode .................... 0.9 W<br />
Dimensions .................... 420 (W) × 188 (H) × 464 (D) mm<br />
Weight (without package) ...................................... 18.2 kg<br />
Furnished Parts<br />
FM Wire Antenna .............................................................1<br />
AM Loop Antenna ........................................................... 1<br />
“AA” IEC LR6 batteries .................................................. 2<br />
Remote Control Unit ........................................................1<br />
AC Power Cord ............................................................... 2<br />
Operating Instructions .................................................... 1<br />
NOTE:<br />
Specifications and the design are subject to possible<br />
modifications without notice, due to improvements.<br />
105<br />
En
106<br />
En<br />
Techno Tidbits & Problem-solving
EXPERT<br />
Techno Tidbits & Problem-solving<br />
107<br />
En
PIONEER CORPORATION<br />
Published by <strong>Pioneer</strong> Corporation.<br />
Copyright © 2002 <strong>Pioneer</strong> Corporation.<br />
All rights reserved.<br />
4-1, Meguro 1-Chome, Meguro-ku, Tokyo 153-8654, Japan<br />
PIONEER ELECTRONICS [USA] INC. P.O. BOX 1540, Long Beach, California 90801-1540, U.S.A.<br />
PIONEER ELECTRONICS OF CANADA, INC. 300 Allstate Parkway, Markham, Ontario L3R OP2, Canada<br />
PIONEER EUROPE NV Haven 1087, Keetberglaan 1, B-9120 Melsele, Belgium TEL: 03/570.05.11<br />
PIONEER ELECTRONICS AUSTRALIA PTY. LTD. 178-184 Boundary Road, Braeside, Victoria 3195, Australia, TEL: [03] 9586-6300<br />
PIONEER ELECTRONICS DE MEXICO S.A. DE C.V. San Lorenzo 1009 3er Piso Desp. 302 Col. Del Valle Mexico D.F. C.P. 03100<br />
TEL: 55-5688-5290<br />
<br />
Printed in<br />


