

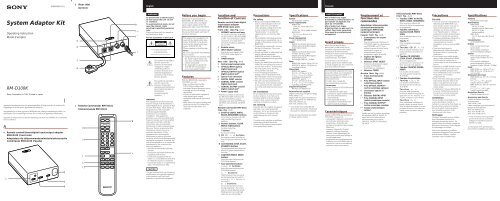
Sony RM-D100K - RM-D100K Consignes d’utilisation Français
Sony RM-D100K - RM-D100K Consignes d’utilisation Français
Sony RM-D100K - RM-D100K Consignes d’utilisation Français

Create successful ePaper yourself
Turn your PDF publications into a flip-book with our unique Google optimized e-Paper software.
3-859-925-11(1)<br />
b<br />
(Rear side)<br />
(Arrière)<br />
English<br />
Franç<strong>ais</strong><br />
A<br />
a<br />
System Adaptor Kit<br />
Operating Instruction<br />
Mode d’emploi<br />
<strong>RM</strong>-<strong>D100K</strong><br />
<strong>Sony</strong> Corporation © 1997 Printed in Japan<br />
Apparaten bortkopplas inte fran spänningskällan så länge som den är ansluten till<br />
vägguttaget, även om själva apparaten her stängts av.<br />
Netspændingen til dette apparat er IKKE afbrudt, sålænge netledningen sidder i en<br />
stikkontakt, som er tændt-også selvom der er slukket på apparatets netafbryder.<br />
Appratet er forsynet med en speciel netledning, der kun ma udskiftes af et autoriseret<br />
serviceværksted.<br />
Remote control/timer/digital input/output adaptor<br />
<strong>RM</strong>R-D100 (Front side)<br />
Adaptateur de télécommande/minuterie/entrée/sortie<br />
numériques <strong>RM</strong>R-D100 (Façade)<br />
1<br />
2<br />
3<br />
4<br />
5<br />
6<br />
7<br />
8<br />
c Remote Commander <strong>RM</strong>T-D101<br />
Télécommande <strong>RM</strong>T-D101<br />
!£<br />
!¢<br />
!<br />
!⁄<br />
!ƒ<br />
START ID<br />
!¥<br />
!»<br />
9<br />
!…<br />
!`<br />
!“<br />
WARNING<br />
To prevent fire or shock hazard,<br />
do not expose the unit to rain<br />
or moisture.<br />
To avoid electrical shock, do not<br />
open the cabinet. Refer<br />
servicing to qualified personnel<br />
only.<br />
Mains cord must only be changed at<br />
qualified service shop.<br />
For the Customers in the U.S.A.<br />
This symbol is intended to<br />
alert the user to the<br />
presence of uninsulated<br />
“dangerous voltage”<br />
within the product’s<br />
enclosure that may be of<br />
sufficient magnitude to<br />
constitute a risk of electric<br />
shock to persons.<br />
This symbol is intended to<br />
alert the user to the<br />
presence of important<br />
operating and maintenance<br />
(servicing) instructions in<br />
the literature<br />
accompanying the<br />
appliance.<br />
WARNING<br />
This equipment has been tested and<br />
found to comply with the limits for a<br />
Class B digital device, pursuant to Part<br />
15 of the FCC Rules. These limits are<br />
designed to provide reasonable<br />
protection against harmful<br />
interference in a residential<br />
installation. This equipment<br />
generates, uses, and can radiate radio<br />
frequency energy and, if not installed<br />
and used in accordance with the<br />
instructions, may cause harmful<br />
interference to radio communications.<br />
However, there is no guarantee that<br />
interference will not occur in a<br />
particular installation. If this<br />
equipment does cause harmful<br />
interference to radio or television<br />
reception, which can be determined by<br />
turning the equipment off and on, the<br />
user is encouraged to try to correct the<br />
interference by one or more of the<br />
following measures:<br />
– Reorient or relocate the receiving<br />
antenna.<br />
– Increase the separation between the<br />
equipment and receiver.<br />
– Connect the equipment into an<br />
outlet on a circuit different from that<br />
to which the receiver is connected.<br />
– Consult the dealer or an experienced<br />
radio/TV technician for help.<br />
CAUTION<br />
You are cautioned that any changes or<br />
modifications not expressly approved<br />
in this manual could void your<br />
authority to operate this equipment.<br />
Before you begin<br />
Thank you for purchasing <strong>Sony</strong><br />
<strong>RM</strong>-<strong>D100K</strong>! The <strong>RM</strong>-<strong>D100K</strong> is the<br />
remote control, timer, and digital<br />
input/output adaptor kit for the<br />
digital audio tape-corder TCD-D100.<br />
Before operating the unit, please read<br />
this manual thoroughly and retain it<br />
for future reference.<br />
This adaptor kit is designed to be<br />
used with the digital audio tapecorder<br />
TCD-D100. It can also be<br />
used with the digital audio tapecorder<br />
TCD-D8/D7/D3.<br />
Please attention to the following.<br />
Notes<br />
Be sure to operate the TCD-D100 on<br />
house current.<br />
• Using batteries may interfere with<br />
the input/output signals and<br />
may cause a malfunction of the<br />
remote commander.<br />
• It is impossible to operate the<br />
TCD-D8/D7/D3 during lowpower<br />
consumption mode.<br />
Features<br />
With the <strong>RM</strong>-<strong>D100K</strong> connected to<br />
TCD-D100, you can:<br />
– Enjoy wireless control of the<br />
TCD-D100 (including direct<br />
selecting of desired programs, music<br />
scanning, and record muting<br />
operations);<br />
– Connect to other audio equipment<br />
using digital input/output<br />
connectors (both optical and coaxial<br />
digital);<br />
– Make timer-activated recordings and<br />
playbacks on the TCD-D100 (when<br />
used with an audio timer, not<br />
supplied).<br />
Location and<br />
Function of Controls<br />
Remote control/timer/digital<br />
input/output adaptor<br />
<strong>RM</strong>R-D100 (main unit)<br />
Front side (See fig. A-a)<br />
1 OPERATE switch and lamp<br />
To remote control the TCD-D100,<br />
set the switch to either STANDBY<br />
or ON. To use the input/output<br />
connectors or to make timeractivated<br />
recording or playback,<br />
set it to ON.<br />
2 Remote sensor<br />
3 INPUT SELECT selector<br />
Selects the input signals of the<br />
TCD-D100 (either digital or<br />
analog).<br />
4 TIMER selector<br />
Rear side (See fig. A-b)<br />
5 Optical input/output jacks<br />
6 OPTICAL INPUT (optical<br />
digital input) jack<br />
7 OPTICAL OUTPUT (optical<br />
digital output) jack*<br />
8 Special 7-pin connector<br />
9 DIGITAL INPUT selector<br />
! º COAXIAL INPUT (coaxial<br />
digital input) jack<br />
! ¡ COAXIAL OUTPUT (coaxial<br />
digital output) jack*<br />
! Power supply cord<br />
* Whichever position is selected on<br />
the DIGITAL INPUT selector, the<br />
signal of TCD-D100 is output<br />
simultaneously from the OPTICAL<br />
OUTPUT and COAXIAL OUTPUT<br />
jacks.<br />
Remote Commander <strong>RM</strong>T-D101<br />
(See fig. A-c)<br />
!£ START ID (AUTO, WRITE,<br />
ERASE, RENUMBER) buttons<br />
For writing or erasing a start ID<br />
and renumbering program<br />
numbers.<br />
!¢ Numeric buttons, CLEAR,<br />
MUSIC SCAN buttons<br />
For direct selecting.<br />
! R button<br />
For record-muting.<br />
!§ CD (P, =, +) buttons<br />
For remote-control operation of<br />
<strong>Sony</strong> CD players connected to this<br />
unit.<br />
! CD SYNCHRO (STOP, START,<br />
STANDBY) buttons<br />
For synchronized recording with<br />
SONY CD players connected to<br />
this unit.<br />
! • COUNTER (MODE, RESET)<br />
buttons<br />
(have the same function as the<br />
TCD-D100 buttons.)<br />
! ª Tape operation buttons<br />
r, p, (, P, buttons:<br />
(have the same function as the<br />
TCD-D100 buttons.)<br />
= , + buttons:<br />
AMS Function (You can search<br />
for the beginning of a track by<br />
pressing = or + buttons in<br />
any mode.)<br />
0 , ) buttons:<br />
For rewind and fast-forward<br />
during stop mode. For review<br />
and cue during playback mode.<br />
(High speed review and high<br />
speed cue are not possible.)<br />
Precautions<br />
On safety<br />
• Before connecting the <strong>RM</strong>R-D100<br />
remote control adaptor to the wall<br />
outlet, check to be sure that the<br />
unit’s operating voltage is the same<br />
as your local power supply (see<br />
“Specifications”). Use only the<br />
supplied power cord and no other<br />
type.<br />
• The nameplate indicating operating<br />
voltage, power consumption, etc., is<br />
located on the bottom exterior of the<br />
<strong>RM</strong>R-D100.<br />
• To operate the commander, use two<br />
R6 (size AA) batteries. Never use<br />
any other type.<br />
• Should any liquid or solid object fall<br />
into the cabinet, unplug the<br />
<strong>RM</strong>R-D100 and have it checked by<br />
qualified personnel before operating<br />
it any further.<br />
• Unplug the <strong>RM</strong>R-D100 from the wall<br />
outlet if it is not going to be used for<br />
several days or more. To disconnect<br />
the cord, pull it out by the plug;<br />
never pull the cord itself.<br />
• To avoid damage from battery<br />
leakage, remove the batteries from<br />
the commander when it is not going<br />
to be used for several days or more.<br />
• The unit is not disconnected from<br />
the AC power source (mains) as long<br />
as it is connected to the wall outlet,<br />
even if the unit itself has been turned<br />
off.<br />
On installation<br />
Do not install the kit near heat sources<br />
such as radiators or air ducts, or in<br />
locations subjects to direct sunlight,<br />
excessive dust, excessive moisture,<br />
mechanical vibrations or shock.<br />
On cleaning<br />
Clean the kit with a lightly dampened<br />
soft cloth. Use a mild household<br />
detergent. Never use strong solvents<br />
such as thinner or benzine as they<br />
might damage the unit’s exterior<br />
finish.<br />
If you have any questions or problems<br />
concerning your unit that is not<br />
covered in this manual, please consult<br />
your nearest <strong>Sony</strong> dealer.<br />
Specifications<br />
System<br />
Infrared pulse method<br />
Power requirements<br />
<strong>RM</strong>R-D100:<br />
120 V AC, 60 Hz (the USA<br />
model)<br />
230 V AC, 50 Hz (other models)<br />
<strong>RM</strong>T-D101:<br />
DC 3 V, two R6 (size AA)<br />
batteries<br />
Power consumption<br />
2.2 W (<strong>RM</strong>R-D100)<br />
Inputs<br />
Digital coaxial jack (phono-jack)<br />
Digital optical jack (Rectangularshaped<br />
optical jack)<br />
Outputs<br />
Digital coaxial jack (phono-jack)<br />
75 ohms, 0.5 Vp-p, ±20%<br />
Digital optical jack (Rectangularshaped<br />
optical jack)<br />
wavelength: 680 nm, –18 dBm<br />
Mass<br />
<strong>RM</strong>R-D100: approx. 360 g (12.7 oz)<br />
<strong>RM</strong>T-D101: approx. 130 g (4.6 oz)<br />
including batteries<br />
Dimensions<br />
<strong>RM</strong>R-D100: approx.<br />
83 × 35 × 117 mm (w/h/d)<br />
(3 3 / 8 × 1 7 / 16 × 4 5 / 8 inches)<br />
including projecting parts<br />
<strong>RM</strong>T-D101: approx.<br />
45 × 26 × 210 mm (w/h/d)<br />
(1 13 / 16 × 1 1 / 16 × 8 3 / 8 inches)<br />
including projecting parts<br />
Supplied accessories<br />
R6 (Size AA) batteries (2)<br />
Accessories not supplied<br />
Digital connecting cord (phono-plug)<br />
VMC-10HG (1 m)<br />
Digital cable for optical transmission<br />
(optical plug) POC-5A/5AB (0.5 m),<br />
POC-10A/10AB (1 m),<br />
POC-15A/15AB (1.5 m)<br />
* Your dealer may not handle the<br />
above listed accessories. Please ask<br />
the dealer for detailed information.<br />
Design and specifications are subject<br />
to change without notice.<br />
AVERTISSEMENT<br />
Afin d’éviter tout risque<br />
d’incendie ou d’électrocution, ne<br />
pas exposer cet appareil à la<br />
pluie ou à l’humidité.<br />
Afin d’éviter tout risque<br />
d’électrocution, ne pas ouvrir le<br />
coffret. Pour toute réparation,<br />
faire appel à un professionnel<br />
uniquement.<br />
Avant propos<br />
Merci d’avoir choisi le <strong>Sony</strong><br />
<strong>RM</strong>-<strong>D100K</strong>! Le <strong>RM</strong>-<strong>D100K</strong> est un<br />
ensemble comprenant entre autres<br />
l’adaptateur de télécommande,<br />
minuterie et entrée/sortie numérique,<br />
conçu pour l’enregistreur<br />
audionumérique TCD-D100.<br />
Avant la mise en service de cet<br />
appareil, prière de lire attentivement<br />
ce mode d’emploi que l’on conservera<br />
pour toute référence future.<br />
Cet ensemble adaptateur est conçu<br />
pour être utilisé avec l’enregistreur<br />
audionumérique TCD-D100. Il<br />
peut être également utilisé avec les<br />
TCD-D8/D7/D3.<br />
Veuillez tenir compte des<br />
recommandations suivantes.<br />
Remarques<br />
Veillez à utiliser le TCD-D100 sur le<br />
courant secteur.<br />
• L’<strong>utilisation</strong> des piles peut<br />
perturber le signal d’entrée/sortie<br />
et le fonctionnement de la<br />
télécommande.<br />
• Il est impossible de faire<br />
fonctionner le TCD-D8/D7/D3<br />
dans le mode économique.<br />
Caractéristiques<br />
Quand le <strong>RM</strong>-<strong>D100K</strong> est raccordé au<br />
TCD-D100, vous pouvez:<br />
– commander à distance le TCD-D100,<br />
en particulier sélectionner des<br />
programmes, rechercher des<br />
passages et enregistrer des passages<br />
silencieux.<br />
– connecter l’appareil à d’autres<br />
appareils audio par les prises<br />
d’entrée/sortie numériques (les<br />
deux prises sont de type optique et<br />
coaxial numérique).<br />
– programmer un enregistrement ou<br />
la lecture sur le TCD-D100, dans la<br />
mesure où vous avez raccordé une<br />
minuterie audio (non fournie).<br />
Emplacement et<br />
fonctions des<br />
commandes<br />
Adaptateur télécommande/<br />
minuterie/entrée/sortie<br />
numériques <strong>RM</strong>R-D100<br />
(appareil principal)<br />
Façade (Voir fig. A-a)<br />
1 Commutateur et voyant<br />
OPERATE<br />
Pour la commande à distance du<br />
TCD-D100, réglez le commutateur<br />
sur STANDBY ou ON. Pour<br />
utiliser les prises d’entrée/sortie<br />
numériques ou pour un<br />
enregistrement/lecture<br />
programmé, réglez-le sur ON.<br />
2 Capteur de signaux<br />
infrarouges<br />
3 Sélecteur INPUT SELECT<br />
Permet de sélectionner le signal<br />
d’entrée du TCD-D100<br />
(numérique ou analogique).<br />
4 Sélecteur TIMER<br />
Arrière (Voir fig. A-b)<br />
5 Prises d’entrée/sortie<br />
optiques<br />
6 Prise OPTICAL INPUT (entrée<br />
numérique optique)<br />
7 Prise OPTICAL OUTPUT*<br />
(sortie numérique optique)<br />
8 Connecteur spécial à 7<br />
broches<br />
9 Sélecteur DIGITAL INPUT<br />
! º Prise COAXIAL INPUT<br />
(entrée numérique coaxiale)<br />
! ¡ Prise COAXIAL OUTPUT*<br />
(sortie numérique coaxiale)<br />
! Cordon d’alimentation<br />
secteur<br />
* Quelle que soit la position de réglage<br />
du sélecteur DIGITAL INPUT, le<br />
signal du TCD-D100 est fourni<br />
simultanément par les prises<br />
OPTICAL OUTPUT et COAXIAL<br />
OUTPUT.<br />
Télécommande <strong>RM</strong>T-D101<br />
(Voir fig. A-c)<br />
!£ Touches START ID (AUTO,<br />
WRITE, ERASE, RENUMBER)<br />
Pour inscrire ou effacer des<br />
indices de départ et renuméroter<br />
un programme.<br />
!¢ Touches numériques,<br />
touches CLEAR, MUSIC<br />
SCAN<br />
Pour la sélection directe d’un<br />
programme.<br />
! Touche R<br />
Pour enregistrer un passage<br />
silencieux.<br />
!§ Touches CD (P, =, +)<br />
Pour le contrôle à distance d’un<br />
lecteur CD <strong>Sony</strong> raccordé à cet<br />
appareil.<br />
! Touches CD SYNCHRO<br />
(STOP, START, STANDBY)<br />
Pour l’enregistrement<br />
synchronisé avec un lecteur CD<br />
<strong>Sony</strong> raccordé à cet appareil.<br />
! • Touches COUNTER (MODE,<br />
RESET)<br />
Ces touches ont les mêmes<br />
fonctions que les touches du<br />
TCD-D100.<br />
! ª Touches d’exploitation<br />
Touches r, p, (, P:<br />
Ces touches ont les mêmes<br />
fonctions que les touches du<br />
TCD-D100.<br />
Touches = , + :<br />
Fonction AMS (permet de<br />
localiser le début d’une plage en<br />
appuyant sur les touches = ou<br />
+ dans n’importe quel mode.)<br />
Touches 0 , ) :<br />
Pour rembobiner ou bobiner la<br />
bande à partir du mode d’arrêt.<br />
Pour la recherche arrière ou avant<br />
en cours de lecture. (La recherche<br />
rapide avant et arrière n’est pas<br />
possible.)<br />
Précautions<br />
Sécurité<br />
• Avant de raccorder l’adaptateur de<br />
télécommande <strong>RM</strong>R-D100 à une<br />
prise murale, assurez-vous que sa<br />
tension de fonctionnement est<br />
identique à la tension secteur locale<br />
(voir “Spécifications”). Utilisez<br />
seulement le cordon d’alimentation<br />
fourni à l’exclusion de tout autre.<br />
• La plaque signalétique indiquant la<br />
tension de fonctionnement, la<br />
consommation et d’autres<br />
paramètres, se trouve sous le <strong>RM</strong>R-<br />
D100.<br />
• Pour faire fonctionner la<br />
télécommande, utilisez deux piles<br />
R6 (format AA) à l’exclusion de<br />
toute autre.<br />
• Si un liquide ou un solide tombe<br />
dans le coffre, débranchez le <strong>RM</strong>R-<br />
D100 et faites-le vérifier par un<br />
professionnel avant de le remettre en<br />
service.<br />
• Débranchez le <strong>RM</strong>R-D100 de la prise<br />
murale si vous prévoyez de ne pas<br />
l’utiliser pendant quelques jours.<br />
Pour le débrancher, tirez sur la fiche.<br />
Ne pas tirer sur le cordon<br />
proprement dit.<br />
• Pour éviter tout dommage causé par<br />
l’électrolyte des piles, enlevez les<br />
piles si vous prévoyez de ne pas<br />
utiliser la télécommande pendant un<br />
certain temps.<br />
• L’adaptateur n’est pas débranché de<br />
la source d’alimentation (secteur)<br />
tant qu’il est raccordé à une prise<br />
murale, même s’il a été arrêté.<br />
Installation<br />
Ne pas installer l’ensemble près de<br />
sources de chaleur, comme un<br />
radiateur ou une sortie d’air chaud, ou<br />
dans des lieux exposés à la lumière<br />
directe du soleil, à une poussière et<br />
une humidité excessives, à des<br />
vibrations ou à des chocs.<br />
Nettoyage<br />
Nettoyez l’ensemble avec un chiffon<br />
doux légèrement mouillé d’un<br />
détergent domestique neutre. Ne<br />
jam<strong>ais</strong> utiliser de solvants, comme les<br />
diluants ou la benzine, car ils risquent<br />
d’endommager la finition.<br />
Pour toute question ou problème<br />
concernant cet appareil, non couverts<br />
dans le mode d’emploi, veuillez<br />
consulter votre revendeur <strong>Sony</strong>.<br />
Spécifications<br />
Système<br />
Impulsions infrarouges<br />
Alimentation<br />
<strong>RM</strong>R-D100:<br />
120 V CA, 60 Hz<br />
(modèle pour les Etats-Unis).<br />
230 V CA, 50 Hz<br />
(autres modèles)<br />
<strong>RM</strong>T-D101:<br />
3 V CC, deux piles R6 (format<br />
AA)<br />
Consommation<br />
2,2 W (<strong>RM</strong>R-D100)<br />
Entrées<br />
Prise coaxiale numérique<br />
(prise cinch)<br />
Prise optique numérique<br />
(prise rectangulair optique)<br />
Sorties<br />
Prise coaxiale numérique<br />
(prise cinch) 75 ohms, 0,5 Vc-c,<br />
±20%<br />
Prise optique numérique<br />
(prise rectangulair optique)<br />
longueur d’onde: 680 nm, –18 dBm<br />
Poids<br />
<strong>RM</strong>R-D100: env. 360 g (12.7 on.)<br />
<strong>RM</strong>T-D101: env. 130 g (4.6 on.)<br />
avec les piles<br />
Dimensions hors tout<br />
<strong>RM</strong>R-D100: env. 83 × 35 × 117 mm<br />
(l/h/p)<br />
(3 3 / 8 × 1 7 / 16 × 4 5 / 8 pouces)<br />
compris pièces en saillie<br />
<strong>RM</strong>T-D101: env. 45 × 26 × 210 mm<br />
(l/h/p)<br />
(1 13 / 16 × 1 1 / 16 × 8 3 / 8 po.)<br />
compris pièces en saillie<br />
Accessoires fournis<br />
Piles R6 (format AA) (2)<br />
Accessoires non fournis<br />
Cordon de li<strong>ais</strong>on numérique<br />
(à fiches cinch)<br />
VMC-10HG (1 m)<br />
Câble numérique pour transmission<br />
optique (à fiche optique)<br />
POC-5A/5AB (0,5 m),<br />
POC-10A/10AB (1 m),<br />
POC-15A/15AB (1,5 m)<br />
* Votre revendeur n’aura peut-être<br />
pas en stock tous les accessoires<br />
indiqués. Consultez-le pour les<br />
détails à ce sujet.<br />
La conception et les spécifications<br />
peuvent être modifiées sans préavis.
B<br />
E<br />
English<br />
Franç<strong>ais</strong><br />
C<br />
D<br />
<strong>RM</strong>R-D100<br />
<strong>RM</strong>R-D100<br />
AC power adaptor<br />
(supplied with the<br />
TCD-D100)<br />
Adaptateur d’alimentation<br />
secteur (fourni avec le<br />
TCD-D100)<br />
DIGITAL INPUT<br />
OPERATE<br />
<strong>RM</strong>T-D101<br />
TCD-D100<br />
To a wall outlet<br />
à une prise murale<br />
REMOTE•DIGITAL I/O<br />
R6 (AA) × 2<br />
INPUT SELECT<br />
TCD-D100<br />
CD player,<br />
BS tuner,<br />
DAT deck,<br />
digital amplifier,<br />
and other<br />
equipment having<br />
OPTICAL digital<br />
input/output<br />
connectors<br />
Lecteur CD,<br />
tuner BS,<br />
platine DAT,<br />
amplificateur<br />
numérique et autre<br />
appareil munis de<br />
prises d’entrée/<br />
sortie numériques<br />
F<br />
or<br />
ou<br />
CD player,<br />
BS tuner,<br />
DAT deck,<br />
digital amplifier,<br />
and other<br />
equipment having<br />
COAXIAL digital<br />
input/output<br />
connectors<br />
Lecteur CD,<br />
tuner BS,<br />
platine DAT,<br />
amplificateur<br />
numérique et autre<br />
appareil munis de<br />
prises d’entrée/<br />
sortie numériques<br />
coaxiales<br />
: Signal flow<br />
Sens du signal<br />
<strong>RM</strong>R-D100<br />
DIGITAL INPUT<br />
To digital input<br />
à l’entrée numérique<br />
To digital output<br />
à la sortie<br />
numérique<br />
OPTICAL<br />
INPUT<br />
To digital output<br />
à la sortie numérique<br />
To digital input<br />
à l’entrée numérique<br />
Audio timer<br />
Minuterie audio<br />
AC power adaptor<br />
Adaptateur secteur<br />
OPERATE TIMER<br />
COAXIAL<br />
INPUT<br />
INPUT SELECT<br />
POC-5, POC-10, POC-15<br />
(not supplied)<br />
(non fourni)<br />
OPTICAL<br />
OUTPUT<br />
<strong>RM</strong>R-D100<br />
VMC-1S,VMC-2S<br />
(not supplied)<br />
(non fourni)<br />
COAXIAL<br />
OUPUT<br />
To a wall outlet<br />
à une prise<br />
murale<br />
Remote Control<br />
Operations<br />
You can remote control the TCD-D100<br />
when the <strong>RM</strong>R-D100 is connected to<br />
the TCD-D100.<br />
• Be sure to operate the TCD-D100 on<br />
house current.<br />
• You can remote control the<br />
TCD-D100 even when the hold<br />
function of the TCD-D100 is<br />
activated.<br />
Preparations<br />
Connections (See fig. B)<br />
1 Connect the unit to the<br />
REMOTE•DIGITAL I/O jack of<br />
the TCD-D100.<br />
2 Connect the power supply<br />
cord of the unit and the AC<br />
power adaptor connected to<br />
the TCD-D100 to the wall<br />
outlet.<br />
Note<br />
To avoid causing noise or other<br />
malfunctioning, be sure to turn off the<br />
power of the <strong>RM</strong>R-D100 and to stop<br />
the TCD-D100 before you connect or<br />
disconnect the <strong>RM</strong>R-D100 from the<br />
REMOTE•DIGITAL I/O connector of<br />
the TCD-D100.<br />
To install batteries<br />
(See fig. C)<br />
Insert two R6 (size AA) batteries into<br />
the battery compartment of the remote<br />
commander.<br />
When to replace the batteries<br />
As the batteries become weak, the<br />
maximum control distance of the<br />
commander lessens. When this effect<br />
becomes noticeable, replace both the<br />
batteries with new ones.<br />
Direct Selecting<br />
If the program numbers are written on<br />
your tape, you can play the desired<br />
track simply by entering the number<br />
on the remote commander.<br />
1 Press a numeric button<br />
during playback or stop<br />
mode.<br />
(Example: direct selecting and<br />
playback of the 3rd selection)<br />
Display of the TCD-D100<br />
2 Press the MUSIC SCAN or (<br />
button.<br />
PGM<br />
NO.<br />
PGM<br />
NO.<br />
Flashing<br />
Program<br />
numbers are<br />
scanned.<br />
( Flashing<br />
Searching the 3rd<br />
selection<br />
(<br />
Playback<br />
starts.<br />
If you designate a program<br />
number not written on the tape<br />
The TCD-D100 searches for the<br />
designated program number on the<br />
recorded portion of the tape one time<br />
back and forth and then stops.<br />
If you designate the wrong<br />
program number<br />
Press the CLEAR button and select the<br />
correct number.<br />
Music Scanning<br />
You can listen to the first 9 seconds of<br />
each track successively. This MUSIC<br />
SCAN function allows you to check<br />
the recorded tracks.<br />
1 Press the MUSIC SCAN<br />
button during playback or<br />
stop mode.<br />
Display of the TCD-D100<br />
2 Press the = or +<br />
button.<br />
The TCD-D100 searches the<br />
nearest Start ID in the = or +<br />
direction and starts playing.<br />
The TCD-D100 plays the first 9<br />
seconds of the track and then<br />
moves to the next track having a<br />
Start ID.<br />
Record Muting<br />
While recording, you can make a<br />
sound-muted period (a period on<br />
which a recording has been made but<br />
with the sound muted) between the<br />
tracks. The sound-muted periods are<br />
useful during later playback or editing<br />
of the tape.<br />
1 Press the R button when<br />
you want to record the<br />
sound muted.<br />
A four-second sound-muted<br />
period is automatically recorded<br />
on the tape.<br />
Then recording pauses.<br />
Display of TCD-D100<br />
NO.<br />
REC ( P<br />
Flashing<br />
Press the P or ( button when<br />
you want to resume recording.<br />
Recording resumes.<br />
Note<br />
When you make sound-muted<br />
periods, do not use ( or ) to<br />
advance the tape.<br />
If you depress the R button for<br />
more than 4 seconds<br />
A sound-muted period will be<br />
recorded for as long as you press the<br />
R button.<br />
CD Synchronized<br />
Recording<br />
By using the commander together<br />
with a remote-control <strong>Sony</strong> CD player,<br />
you can start recording on the<br />
TCD-D100 and playback of the CD<br />
player simultaneously.<br />
1 Insert a cassette into the<br />
TCD-D100.<br />
2 Set a compact disc in the CD<br />
player.<br />
3 Press the CD SYNCHRO<br />
STANDBY button on the<br />
commander.<br />
The CD player enters pause mode,<br />
ready for playback.<br />
The TCD-D100 also enters pause<br />
mode, ready for recording.<br />
4 Press the CD SYNCHRO<br />
START button on the<br />
commander.<br />
Recording starts. After one<br />
second, disc playing starts.<br />
To stop synchronized<br />
recording<br />
Press the CD SYNCHRO STOP button<br />
on the commander.<br />
Notes<br />
• If the CD player and the TCD-D100<br />
are located at too great a distance<br />
from one another, the synchronized<br />
recording will not work.<br />
• Make sure that you press CD<br />
SYNCHRO STANDBY button at<br />
step 3. Otherwise the beginning of a<br />
track cannot be recorded.<br />
Writing the Start ID<br />
You can write the Start ID with the<br />
commander in the same way as you<br />
do with the TCD-D100.<br />
To write the Start ID during<br />
recording<br />
Press the WRITE button at the point<br />
where you wish to write a Start ID.<br />
A Start ID is written.<br />
To write the start ID during<br />
playback<br />
1 Press the WRITE button at<br />
the point you wish to write<br />
a Start ID.<br />
The TCD-D100 plays back<br />
repeatedly the several-seconds<br />
period beginning at the designated<br />
point–Rehearsal function. (For<br />
further details on the rehearsal<br />
function, refer to the operating<br />
instructions of the<br />
TCD-D100.)<br />
2 Press the WRITE button<br />
again at exactly the point<br />
you wish to write the Start<br />
ID during repeated playback.<br />
A Start ID is written.<br />
To erase the Start ID<br />
1 Locate the point on the tape<br />
just ahead of the Start ID<br />
that you wish to erase.<br />
2 Press the ERASE button<br />
during playback or stop<br />
mode.<br />
The Start ID at the beginning of the<br />
track or the nearest Start ID going<br />
towards the beginning of the tape<br />
is erased.<br />
To renumber the program<br />
numbers<br />
Press the RENUMBER button during<br />
playback or in stop mode.<br />
The TCD-D100 automatically rewinds<br />
the tape and starts renumbering the<br />
program numbers from the beginning.<br />
When the renumbering is completed,<br />
the tape is automatically rewound to<br />
the beginning again and stops.<br />
Note<br />
The WRITE button of the commander<br />
corresponds with the ENTER button<br />
of the TCD-D100. For more detailed<br />
information about the use of the Start<br />
ID, please refer to the operating<br />
instructions of the TCD-D100.<br />
Digital Input and<br />
Output Connection<br />
(See fig. D)<br />
The <strong>RM</strong>R-D100 has both optical and<br />
coaxial digital input/output jacks. You<br />
can enjoy recording and playback via<br />
these digital jacks by connecting your<br />
unit to other digital audio equipment.<br />
1 Turn the OPERATE switch to<br />
ON.<br />
2 Set the DIGITAL INPUT<br />
selector to:<br />
OPTICAL: when connecting via<br />
optical input jack<br />
COAXIAL: when connecting via<br />
coaxial input jack<br />
3 Set the INPUT SELECT<br />
selector to DIGITAL.<br />
Note<br />
Be sure to stop the TCD-D100 before<br />
changing the DIGITAL INPUT<br />
selector setting. If you change the<br />
setting during digital recording, a<br />
noise may be generated or recorded<br />
on your tape.<br />
Connnecting to other audio<br />
equipment (See fig. E)<br />
Connect your unit to other audio<br />
equipment as illustrated.<br />
When recording the signal via<br />
the MIC/LINE IN jack of the<br />
TCD-D100<br />
Set the INPUT SELECT selector of the<br />
front panel to ANALOG. (You can set<br />
the DIGITAL INPUT selector either to<br />
OPTICAL or COAXIAL.)<br />
Timer-Activated<br />
Recording and<br />
Playback (See fig. F)<br />
To make a timer-activated recording<br />
or playback, connect the <strong>RM</strong>R-D100 to<br />
an audio timer (not supplied).<br />
1 Set the OPERATE switch of<br />
the <strong>RM</strong>R-D100 to ON.<br />
2 Set the TIMER selector to<br />
REC for timer-activated<br />
recording or to PLAY for<br />
timer-activated playback.<br />
3 Set the INPUT SELECT<br />
selector to:<br />
DIGITAL:<br />
When recording the signal via the<br />
digital input connectors (Set the<br />
DIGITAL INPUT selector on the<br />
top panel of the <strong>RM</strong>R-D100 to<br />
OPTICAL or COAXIAL according<br />
to the type of jacks being used.)<br />
ANALOG:<br />
When recording the signal via the<br />
MIC/LINE IN jack of the TCD-<br />
D100<br />
4 Set the starting time(s) of a<br />
desired program on the<br />
audio timer. (You can also<br />
set the ending time.)<br />
At the preset time, the recording or<br />
playback starts.<br />
The power source of the<br />
TCD-D100<br />
Be sure that the TCD-D100 is powered<br />
by the AC power adaptor. If you use<br />
batteries, the TCD-D100’s auto power<br />
off function will be activated and the<br />
TCD-D100 will automatically enters<br />
the low-power consumption mode<br />
during standby mode.<br />
Note<br />
Be sure to connect the AC power<br />
adaptor of the TCD-D100 to a wall<br />
outlet. Never connect it to an audio<br />
timer.<br />
Power source of an FM or BS<br />
tuner being used as a sound<br />
source for timer-activated<br />
recording<br />
We recommend you to plug the power<br />
cord of the FM or BS tuner into the<br />
audio timer. The tuner is<br />
simultaneously turned on.<br />
HOLD switch of the TCD-D100<br />
To avoid mis-operation of the<br />
TCD-D100, activate the hold function<br />
of the TCD-D100 during the timer<br />
standby or recording mode. Even the<br />
hold function is activated, recording<br />
and playback will start at the preset<br />
time.<br />
Setting the starting time<br />
Set the starting time a little before the<br />
desired program starts. Recording or<br />
playback actually starts approximately<br />
15 seconds later than the preset time.<br />
To record a program completely, set<br />
the starting time 1 or 2 minutes before<br />
the desired recording starts.<br />
When the ending time comes<br />
Recording or playback stops and the<br />
TCD-D100 enters stop mode.<br />
(The <strong>RM</strong>R-D100 is turned off.)<br />
Commande à distance<br />
Vous pouvez commander le<br />
TCD-D100 à distance quand le<br />
<strong>RM</strong>R-D100 est raccordé au TCD-D100.<br />
• Veillez à faire fonctionner le<br />
TCD-D100 sur le courant secteur.<br />
• La commande à distance est possible<br />
même si la fonction HOLD<br />
(verrouillage des commandes) du<br />
TCD-D100 est activée.<br />
Préparatifs<br />
Raccordements (voir fig. B)<br />
1 Raccordez l’adaptateur à la<br />
prise REMOTE•DIGITAL I/O<br />
du TCD-D100.<br />
2 Raccordez le cordon<br />
d’alimentation de l’appareil<br />
et l’adaptateur secteur au<br />
TCD-D100 et à une prise<br />
murale.<br />
Remarque<br />
Afin d’éviter des bruits ou d’autres<br />
problèmes, prenez soin de mettre le<br />
<strong>RM</strong>R-D100 et le TCD-D100 hors<br />
tension avant de brancher ou de<br />
débrancher le cordon qui relie le<br />
<strong>RM</strong>R-D100 à la prise REMOTE•<br />
DIGITAL I/O du TCD-D100.<br />
Pour mettre les piles en<br />
place (Voir fig. C)<br />
Mettez deux piles R6 (format AA)<br />
dans le logement des piles de la<br />
télécommande.<br />
Remplacement des piles<br />
Quand les piles sont faibles, la<br />
distance maximale de commande à<br />
distance diminue. Lorsque ce<br />
changement est sensible, remplacez les<br />
deux piles par des neuves.<br />
Sélection directe<br />
Si vous avez inscrit des numéros de<br />
programme sur la bande, vous<br />
pourrez sélectionner directement la<br />
plage souhaitée en entrant simplement<br />
le numéro sur la télécommande.<br />
1 Appuyez sur les touches<br />
numériques pendant la<br />
lecture ou l’arrêt.<br />
(Exemple: pour sélectionner et<br />
écouter la 3e plage)<br />
Affichage du TCD-D100<br />
2 Appuyez sur la touche<br />
MUSIC SCAN ou (.<br />
PGM<br />
NO.<br />
PGM<br />
NO.<br />
(<br />
(<br />
Clignotement<br />
Balayage des<br />
numéros de<br />
programme<br />
Clignotement<br />
Recherche de la 3e plage<br />
Commencement<br />
de la lecture<br />
Si vous désignez un numéro qui<br />
n’est pas inscrit sur la bande<br />
Le TCD-D100 recherche le numéro de<br />
programme désigné sur la partie<br />
enregistrée de la bande une fois vers<br />
l’avant et l’arrière, puis s’arrête.<br />
Si vous vous trompez de numéro<br />
Appuyez sur la touche CLEAR et<br />
sélectionnez le numéro de programme<br />
correct.<br />
Balayage des introductions<br />
Vous pouvez écouter les 9 premières<br />
secondes de chaque plage dans<br />
l’ordre. La fonction MUSIC SCAN<br />
permet de contrôler les plages qui ont<br />
été enregistrées.<br />
1 Appuyez sur la touche<br />
MUSIC SCAN pendant la<br />
lecture ou à l’arrêt.<br />
Affichage du TCD-D100<br />
2 Appuyez sur la touche =<br />
ou + .<br />
Le TCD-D100 recherche l’indice de<br />
départ le plus proche dans le sens<br />
de = ou +, puis la lecture<br />
commence.<br />
Les 9 premières secondes de la<br />
plage sont reproduites, puis le<br />
lecteur passe à la plage suivante,<br />
marquée par un autre indice.<br />
Enregistrement d’un<br />
passage silencieux<br />
En cours d’enregistrement, vous<br />
pouvez insérer un passage silencieux<br />
entre le plages (l’enregistrement se<br />
poursuit m<strong>ais</strong> le son est coupé). Ces<br />
passages silencieux seront utiles<br />
ultérieurement lors de la lecture et du<br />
montage.<br />
1 Appuyez sur la touche R<br />
quand vous voulez<br />
enregistrer un passage<br />
silencieux.<br />
Un passage silencieux de quatre<br />
secondes est enregistré sur la<br />
bande, puis l’enregistrement<br />
s’arrête.<br />
Affichage du TCD-D100<br />
NO.<br />
REC ( P<br />
Clignotement<br />
Appuyez sur la touche P ou (<br />
quand vous voulez continuer<br />
l’enregistrement.<br />
L’enregistrement se poursuit.<br />
Remarque<br />
Quand vous enregistrez des passages<br />
silencieux, n’utilisez pas les touches<br />
( ou ) pour avancer sur la bande.<br />
Si vous tenez plus de 4 secondes<br />
la touche R enfoncée<br />
Un passage silencieux sera enregistré<br />
tant que vous maintiendrez la touche<br />
R enfoncée.<br />
Enregistrement<br />
synchronisé d’un CD<br />
Si vous utilisez la télécommande avec<br />
un lecteur CD <strong>Sony</strong> contrôlable à<br />
distance, l’enregistrement<br />
commencera sur le<br />
TCD-D100 en même temps que la<br />
lecture sur le lecteur CD.<br />
1 Insérez une cassette dans le<br />
TCD-D100.<br />
2 Mettez un disque compact<br />
dans le lecteur CD.<br />
3 Appuyez sur la touche CD<br />
SYNCHRO STANDBY de la<br />
télécommande.<br />
Le lecteur CD se met en pause,<br />
prêt pour la lecture.<br />
Le TCD-D100 se met aussi en<br />
pause, prêt pour l’enregistrement.<br />
4 Appuyez sur la touche CD<br />
SYNCHRO START de la<br />
télécommande.<br />
L’enregistrement commence. Une<br />
seconde plus tard, la lecture du<br />
disque commence.<br />
Pour arrêter l’enregistrement<br />
synchronisé<br />
Appuyez sur la touche CD SYNCHRO<br />
STOP de la télécommande.<br />
Remarques<br />
• Si le lecteur CD et le TCD-D100 sont<br />
trop éloignés l’un de l’autre,<br />
l’enregistrement synchronisé ne<br />
fonctionnera pas.<br />
• Veillez à appuyer sur la touche CD<br />
SYNCHRO STANDBY à l’étape 3,<br />
sinon le début de la plage ne sera<br />
pas enregistré.<br />
Inscription d’un indice de<br />
départ<br />
Vous pouvez inscrire des indices de<br />
départ avec la télécommande de la<br />
même manière qu’avec le TCD-D100.<br />
Pour inscrire un indice de<br />
départ pendant<br />
l’enregistrement<br />
Appuyez sur la touche WRITE au<br />
point où vous voulez inscrire un<br />
indice.<br />
L’indice de départ est inscrit.<br />
Pour inscrire un indice de<br />
départ pendant la lecture<br />
1 Appuyez sur la touche<br />
WRITE au point où vous<br />
voulez inscrire un indice de<br />
départ.<br />
Le TCD-D100 reproduit plusieurs<br />
fois le passage commençant au<br />
point désigné pendant quelques<br />
secondes. (Pour de plus amples<br />
informations sur la fonction de<br />
répétition, voir le mode d’emploi<br />
du TCD-D100.)<br />
2 Appuyez une nouvelle fois<br />
sur la touche WRITE<br />
exactement au point où<br />
vous voulez inscrire l’indice<br />
de départ pendant la<br />
répétition du passage.<br />
Un indice de départ est inscrit.<br />
Pour supprimer un indice de<br />
départ<br />
1 Localisez le point de la<br />
bande juste avant l’indice<br />
de départ que vous<br />
souhaitez effacer.<br />
2 Appuyez sur la touche<br />
ERASE pendant la lecture<br />
ou à l’arrêt.<br />
L’indice de départ au début de la<br />
plage ou l’indice le plus proche<br />
vers le début de la bande est<br />
supprimé.<br />
Pour renuméroter tous les<br />
programmes<br />
Appuyez sur la touche RENUMBER<br />
pendant la lecture ou à l’arrêt.<br />
Le TCD-D100 rembobine<br />
automatiquement la bande et<br />
renumérote les programmes à partir<br />
du début. Quand cette opération est<br />
terminée, la bande est<br />
automatiquement rembobinée<br />
jusqu’au début et s’arrête.<br />
Remarque<br />
La touche WRITE de la télécommande<br />
correspond à la touche ENTER du<br />
TCD-D100. Pour de plus amples<br />
informations au sujet de l’<strong>utilisation</strong><br />
des indices de départ, veuillez vous<br />
reporter au mode d’emploi du<br />
TCD-D100.<br />
Raccordement à<br />
l’entrée et à la sortie<br />
numériques (Voir fig. D)<br />
Le <strong>RM</strong>R-D100 a des prises d’entrée et<br />
de sortie optiques et numériques<br />
coaxiales. Vous pouvez enregistrer et<br />
reproduire une cassette via les prises<br />
numériques en reliant votre appareil à<br />
un autre appareil audionumérique.<br />
1 Réglez le commutateur<br />
OPERATE sur ON.<br />
2 Réglez le sélecteur DIGITAL<br />
INPUT sur:<br />
OPTICAL: pour une li<strong>ais</strong>on<br />
optique<br />
COAXIAL: pour une li<strong>ais</strong>on<br />
coaxiale.<br />
3 Réglez le sélecteur INPUT<br />
SELECT sur DIGITAL.<br />
Remarque<br />
Veillez à arrêter le TCD-D100 avant de<br />
changer le réglage du sélecteur<br />
DIGITAL INPUT. Si vous changez de<br />
réglage en cours d’enregistrement, un<br />
bruit peut être audible et enregistré<br />
sur la bande.<br />
Raccordement à un autre<br />
appareil audio (Voir fig. E)<br />
Raccordez l’appareil à un autre<br />
appareil audio, comme indiqué.<br />
Enregistrement du signal par la<br />
prise MIC/LINE IN du TCD-D100<br />
Réglez le sélecteur INPUT SELECT en<br />
façade sur ANALOG. (Vous pouvez<br />
régler le sélecteur DIGITAL INPUT<br />
soit sur OPTICAL soit sur COAXIAL.)<br />
Enregistrement et<br />
lecture programmés<br />
(Voir fig. F)<br />
Pour programmer un enregistrement<br />
ou la lecture, raccordez le <strong>RM</strong>R-D100 à<br />
une minuterie audio (non fournie).<br />
1 Réglez le commutateur<br />
OPERATE du <strong>RM</strong>R-D100 sur<br />
ON.<br />
2 Réglez le sélecteur TIMER<br />
sur REC pour<br />
l’enregistrement programmé<br />
ou sur PLAY pour la lecture<br />
programmée.<br />
3 Réglez le sélecteur INPUT<br />
SELECT sur:<br />
DIGITAL:<br />
Pour enregistrer le signal par les<br />
prises d’entrée numérique (réglez<br />
le sélecteur DIGITAL INPUT sur<br />
le <strong>RM</strong>R-D100 sur la position<br />
OPTICAL ou COAXIAL selon les<br />
raccordements effectués).<br />
ANALOG:<br />
Pour enregistrer le signal par la<br />
prise MIC/LINE IN du<br />
TCD-D100.<br />
4 Désignez sur la minuterie<br />
audio l’heure à laquelle le<br />
programme audio souhaité<br />
doit commencer et<br />
éventuellement l’heure à<br />
laquelle il doit s’arrêter.<br />
A l’heure préréglée,<br />
l’enregistrement ou la lecture<br />
commencera.<br />
Alimentation du TCD-D100<br />
Veillez à faire fonctionner le<br />
TCD-D100 sur le courant secteur par<br />
l’intermédiaire de l’adaptateur<br />
secteur. Si vous utilisez des piles,<br />
l’arrêt automatique sera activé et le<br />
TCD-D100 se mettra automatiquement<br />
en mode économique pendant le mode<br />
de veille.<br />
Remarque<br />
Ne pas oublier de raccorder<br />
l’adaptateur secteur du TCD-D100 à<br />
une prise murale. Ne jam<strong>ais</strong> le<br />
raccorder à une minuterie audio.<br />
Alimentation d’un tuner FM ou<br />
BS servant comme source pour<br />
l’enregistrement programmé<br />
Branchez le cordon d’alimentation du<br />
tuner FM ou BS sur la minuterie<br />
audio. Le tuner se mettra en même<br />
temps sous tension que l’enregistreur.<br />
Commutateur HOLD du TCD-D100<br />
Pour éviter un enclenchement<br />
accidentel des commandes du<br />
TCD-D100, verrouillez les commandes<br />
du TCD-D100 pendant l’attente<br />
d’enregistrement programmé ou<br />
l’enregistrement. Même si la fonction<br />
HOLD (verrouillage) est en service,<br />
l’enregistrement ou la lecture<br />
commencera à l’heure préréglée.<br />
Réglage de l’heure de début<br />
d’enregistrement<br />
Réglez l’heure un peu avant le début<br />
de l’émission souhaitée.<br />
L’enregistrement ou la lecture<br />
commence environ 15 secondes après<br />
l’heure préréglée. Pour enregistrer<br />
complètement un programme, réglez<br />
l’heure de départ 1 ou 2 minutes avant<br />
le début de l’enregistrement.<br />
A l’heure d’arrêt préréglée<br />
L’enregistrement ou la lecture s’arrête<br />
et le TCD-D100 s’éteint.<br />
(Le <strong>RM</strong>R-D100 s’éteint.)


