

Sony AC-VQ1051D - AC-VQ1051D Mode d'emploi
Sony AC-VQ1051D - AC-VQ1051D Mode d'emploi
Sony AC-VQ1051D - AC-VQ1051D Mode d'emploi

Create successful ePaper yourself
Turn your PDF publications into a flip-book with our unique Google optimized e-Paper software.
Disposal of Old Electrical & Electronic Equipment (Applicable<br />
in the European Union and other European countries with<br />
separate collection systems)<br />
This symbol on the product or on its packaging indicates that this<br />
product shall not be treated as household waste. Instead it shall<br />
be handed over to the applicable collection point for the recycling<br />
of electrical and electronic equipment. By ensuring this product<br />
is disposed of correctly, you will help prevent potential negative<br />
consequences for the environment and human health, which<br />
could otherwise be caused by inappropriate waste handling of this<br />
product. The recycling of materials will help to conserve natural<br />
resources. For more detailed information about recycling of this<br />
product, please contact your local Civic Office, your household<br />
waste disposal service or the shop where you purchased the<br />
product.<br />
Notes on Use<br />
This unit does not have dust-proof, splash-proof or waterproof<br />
specifications.<br />
Warranty for Recorded Content<br />
Contents of the recording cannot be compensated if recording or playback is not<br />
made due to a malfunction of the battery pack, <strong>AC</strong> Power Adaptor, <strong>AC</strong> Power<br />
Adaptor/Charger, etc.<br />
Charging<br />
ˎˎDesigned for use with genuine <strong>Sony</strong> battery packs.<br />
ˎˎOnly charge recommended battery packs with this unit.<br />
ˎˎAttach the battery pack firmly.<br />
Charging temperature<br />
ˎˎTo provide maximum battery efficiency, the recommended temperature range<br />
when charging is 10 °C to 30 °C (50 °F to 86 °F). Charging becomes more<br />
difficult at lower temperatures.<br />
ˎˎThis unit provides quick charging, but charging outside the recommended<br />
temperature range leads to longer charging times in order to protect the<br />
battery pack. Once the charging time has been extended, it will not return to<br />
quick charging even if the temperature is brought within the recommended<br />
temperature range. Reattach the battery pack and then charge it again.<br />
Where not to put this unit<br />
Do not put this unit in any of the following places, whether it is in use or in storage.<br />
Doing so may lead to a malfunction.<br />
ˎˎWhere it gets extremely hot<br />
Near a heater or in direct sunlight such as on a dashboard. The interior of cars<br />
ˋˋ<br />
gets particularly hot if the windows are shut during summer or on a sweltering<br />
day. This unit may become deformed or malfunction.<br />
ˎˎWhere there is excessive vibration<br />
ˎˎWhere there is strong magnetism or radiation<br />
ˎˎWhere there is excessive sand or dust<br />
Protect this unit from sand and dust in places such as the seashore and other<br />
ˋˋ<br />
sandy areas or where dust clouds occur, as there is risk of malfunction.<br />
Precautions on Use<br />
ˎˎDo not use the unit placed in a narrow space, such as between a wall and<br />
furniture.<br />
ˎˎA negligible amount of electric current will flow into this unit as long as it is<br />
plugged into a wall outlet.<br />
ˎˎThe nameplate indicating operating voltage, power consumption, etc. is located on<br />
the bottom.<br />
ˎˎAttach the battery pack firmly to this unit when charging the battery pack.<br />
ˎˎDo not use this unit where there are strong radio waves or radiation. Video<br />
cameras etc. may not be able to record or play back correctly.<br />
ˎˎDo not drop or otherwise cause shock to this unit.<br />
ˎˎKeep this unit away from TVs, AM receivers and other tuners. They may be<br />
affected by interference if placed nearby.<br />
ˎˎUse the nearby wall outlet (wall socket) when using this unit. Even if the CHARGE<br />
lamp of this unit is off, the power is still connected. If some trouble occurs while<br />
using this unit, immediately shut off the power by disconnecting the plug from the<br />
wall outlet (wall socket).<br />
ˎˎBe sure that nothing metallic comes into contact with the metal parts of this unit<br />
or connecting cord. If it does, a short may occur and this unit may be damaged.<br />
ˎˎDo not connect this unit to a voltage adaptor for overseas travel. This may result<br />
in overheating or some other malfunction.<br />
ˎˎUnplug this unit from the wall outlet after use. To disconnect the cord, pull it out<br />
by the plug. Never pull the cord itself.<br />
ˎˎDo not place objects filled with liquids, such as vases, on this unit.<br />
ˎˎThis unit or the battery pack may get warm during or immediately after charging.<br />
This is not a malfunction.<br />
ˎˎRemove the battery pack from this unit when charging is complete. Keeping the<br />
battery pack attached may decrease the battery life.<br />
Using the car battery cord (DCC-VQ1)<br />
ˎˎOnly use this unit with a car that has a 12 volt or 24 volt battery.<br />
ˎSome cars are negatively grounded and others are positively grounded.<br />
ˎ<br />
This unit<br />
is for negatively grounded cars only.<br />
ˎˎUse the unit with the car engine running. If you use the unit with the car engine<br />
stopped, the car battery may go flat.<br />
ˎˎUnplug the car battery cord from the cigarette lighter socket when not in use. To<br />
disconnect the cord, pull it out by the plug. Never pull the cord itself.<br />
Maintenance<br />
ˎˎIf this unit gets dirty, wipe it using a soft, dry cloth or tissue.<br />
ˎˎIf this unit gets very dirty, wipe it using a well-wrung soft cloth dipped in a diluted<br />
neutral solvent, and then finish it with a dry cloth.<br />
ˎˎDo not use thinners, benzine, alcohol, etc., as they may cause deterioration or<br />
damage to the surface of this unit.<br />
ˎˎWhen using a chemical cleaning cloth, refer to its instruction manual.<br />
ˎˎSpraying with a volatile solvent such as an insecticide or prolonged contact with<br />
rubber or vinyl may cause deterioration or damage to this unit.<br />
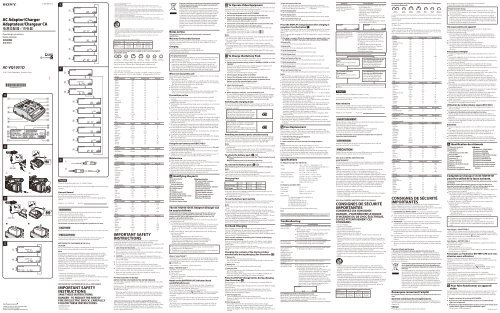
Identifying the parts<br />
Terminal shutter<br />
Slot <br />
DC IN connector<br />
(only for DCC-VQ1)<br />
DC OUT connector<br />
CHARGE lamp <br />
Slot <br />
CHARGE lamp <br />
Output change switch<br />
Charging mode change switch<br />
Display window<br />
Slot indicator lamp<br />
DISPLAY change button<br />
Display window<br />
“InfoLITHIUM” indicator<br />
WAITING indicator<br />
WARNING indicator<br />
TIME TO CHG (charge) indicator<br />
Time/LOG indicator<br />
BATTERY LIFE indicator<br />
VCR/CAMERA indicator<br />
Normal charge indicator<br />
Full charge indicator<br />
Battery life indicator<br />
The <strong>AC</strong>-<strong>VQ1051D</strong> <strong>AC</strong> Adaptor/Charger can<br />
be used as follows<br />
The <strong>AC</strong>-<strong>VQ1051D</strong> <strong>AC</strong> Adaptor/Charger can be used in your home or car.<br />
Connect the power cord (supplied) to a wall outlet, or connect the car<br />
battery cord DCC-VQ1 to the cigarette lighter socket in your car. (For<br />
negative (-) grounded vehicles only.)<br />
ˎˎFor operating <strong>Sony</strong> equipment (video cameras, etc.,) use the connecting cords<br />
included with this unit.<br />
ˎˎFor charging <strong>Sony</strong> rechargeable battery packs (L series).<br />
You can set the level of charge completion to “Full charge” or “Normal charge”<br />
ˋˋ<br />
with the charging mode change switch. If you want to use the battery pack<br />
quickly, set to “Normal charge” to complete charging in the normal charged<br />
state.<br />
ˎˎWhen “InfoLITHIUM” battery packs are attached to this unit, the following<br />
functions are available.<br />
Quick charging<br />
ˋˋ<br />
(Faster than charging with your video camera, etc.)<br />
“BATTERY LOG” and charging information can be displayed.<br />
ˋˋ<br />
Usage history and charging status of the battery pack is displayed.<br />
ˎˎTotal charging time, charge count, last use year and month<br />
ˎˎBattery life, remaining time until charging is complete<br />
ˎˎThis unit is for charging lithium ion battery packs. It cannot be used to<br />
recharge Ni-Cd or Ni-MH batteries.<br />
ˎˎThis unit cannot be used with some model video cameras or other equipment.<br />
Confirm the compatibility of your equipment before use.<br />
What is “InfoLITHIUM”?<br />
“InfoLITHIUM” is a lithium ion battery pack which can exchange data on battery<br />
consumption with compatible electronic equipment. We recommend that you use<br />
an “InfoLITHIUM” battery pack (L series) with electronic equipment that has the<br />
mark.<br />
“InfoLITHIUM” is a trademark of <strong>Sony</strong> Corporation.<br />
What is “BATTERY LOG”?<br />
“BATTERY LOG” displays the usage history it recorded in the battery pack.<br />
ˎˎTotal charging time<br />
ˎˎCharge count<br />
ˎˎLast use year and month<br />
(Displays are approximate. Depending on the battery pack, the contents of the<br />
display are limited.)<br />
Notes on the BATTERY LIFE indicator (Read<br />
carefully before use)<br />
While charging the battery pack, this unit shows the status of charging and<br />
information of the battery pack so long as the following conditions are met.<br />
ˎˎYou are using an “InfoLITHIUM” battery pack.<br />
ˎˎYour video camera, etc. is compatible with “InfoLITHIUM”.<br />
Check that your battery pack has the<br />
mark. Check in the operating<br />
instructions supplied with your video equipment whether it is “InfoLITHIUM”<br />
compatible.<br />
If you use the battery pack with more than one video camera, etc. that is compatible<br />
with “InfoLITHIUM”, information is shown for the equipment last attached to the<br />
battery pack.<br />
“BATTERY LOG” is available with the rechargeable battery packs NP-F970, NP-<br />
F770 and NP-F570. Other battery packs may not be compatible or may display<br />
limited information.<br />
4-289-309-11(1)<br />
Operating Instructions<br />
<strong>Mode</strong> d’emploi<br />
<strong>AC</strong> Adaptor/Charger<br />
Adaptateur/Chargeur CA<br />
电 源 适 配 器 / 充 电 器<br />
© 2011 <strong>Sony</strong> Corporation Printed in China<br />
<strong>AC</strong>-<strong>VQ1051D</strong><br />
<br />
To Operate Video Equipment<br />
When the <strong>AC</strong> power cord and car battery cord DCC-VQ1 are connected at the same<br />
time, power input from the car battery cord is given priority.<br />
For details of connection, refer to the operating instructions of the video camera etc.<br />
1 Set the output change switch to VCR/CAMERA.<br />
2 Connect the <strong>AC</strong> power cord or car battery cord to this unit.<br />
3 Connect the <strong>AC</strong> power cord to a wall outlet, or connect the car<br />
battery cord to the cigarette lighter socket.<br />
There is a beep and the display window comes on.<br />
4 Connect the connecting cord to the DC OUT connector of this unit.<br />
5 Connect the connecting cord to the video camera.<br />
For the direction in which to fit the connecting cord, refer to the operating<br />
instructions of video camera, etc.<br />
When using the connecting cord DK-215 (Illustration -)<br />
When using the connecting cord DK-415 (Illustration -)<br />
Notes<br />
ˎˎSetting the output change switch to CHARGE while operating the video camera,<br />
etc. cuts the power supply to the video camera.<br />
ˎˎYou cannot charge a battery pack attached to this unit when this unit is in VCR/<br />
CAMERA mode.<br />
ˎˎMove this unit away from your video camera, etc. if the image is distorted.<br />
ˎˎThe connecting cord DK-415 can be used with equipment compatible with the<br />
rechargeable battery pack (L series). Confirm the compatibility of your equipment<br />
before use.<br />
ˎˎThe illustration shows connection to an HDR-AX2000 digital HD video camera<br />
recorder.<br />
To Charge the Battery Pack<br />
When the <strong>AC</strong> power cord and car battery cord DCC-VQ1 are connected at the same<br />
time, power input from the car battery cord is given priority.<br />
1 Set the charging mode change switch to “NORMAL CHARGE” or “FULL<br />
CHARGE”.<br />
If you want to charge the battery pack until full charging is complete, set the<br />
charging mode change switch to “FULL CHARGE”.<br />
If you want to finish charging when normal charging is complete, set it to<br />
“NORMAL CHARGE”.<br />
For details, refer to “Switching the charging mode”.<br />
2 Set the output change switch to CHARGE.<br />
3 Connect the <strong>AC</strong> power cord or car battery cord to this unit.<br />
4 Connect the <strong>AC</strong> power cord to a wall outlet, or connect the car<br />
battery cord to the cigarette lighter socket.<br />
There is a beep and the display window comes on.<br />
5 Attach the battery pack.<br />
Refer to “To attach the battery pack”. When charging starts, the battery life<br />
indicator in the display window blinks in sequence and the CHARGE lamp lights<br />
up.<br />
6 When charging is complete, remove the battery pack.<br />
This unit finishes charging on the charging level that you set with the charging<br />
mode change switch. When the CHARGE lamp turns off, charging is complete.<br />
For details about charge completion, refer to “Switching the charging mode”.<br />
Refer to “To remove the battery pack” when removing the battery pack.<br />
Switching the charging mode<br />
There are two levels of charge completion: “Normal charge” and “Full charge”. You<br />
can change the charging mode with the charging mode change switch on this unit.<br />
ˎˎNORMAL CHARGE<br />
When charge is completed, the battery life<br />
indicator is displayed as illustrated on the right.<br />
The condition of the battery pack can be better<br />
maintained, but the battery life will be slightly<br />
shorter than when in the full charged state.<br />
ˎˎFULL CHARGE<br />
When charging is complete in the full charged<br />
state, the battery life indicator is displayed as<br />
illustrated on the right.<br />
The battery life will be slightly longer than when<br />
in the normal charged state, but the charging time<br />
will also be longer.<br />
Attaching two battery packs simultaneously<br />
You can attach two battery packs in this unit at the same time. You can charge just<br />
one battery pack as well. Charging starts with the battery pack installed in Slot .<br />
When two battery packs are attached but not simultaneously, charging starts with<br />
the battery pack attached first regardless of whether it is in Slot or .<br />
Notes<br />
ˎˎTwo battery backs can be attached, but they cannot be charged at normal charging<br />
simultaneously.<br />
ˎˎWhen the charging mode change switch is set to “FULL CHARGE”, this unit<br />
completes normal charging in the order that the battery packs were attached and<br />
then completes full charging for both battery packs simultaneously.<br />
To attach the battery pack (-)<br />
Place the battery pack on this unit with the mark facing the terminal<br />
shutter.<br />
Slide the battery pack in the direction of the arrow.<br />
Press the battery pack until the terminal shutter is completely concealed.<br />
To remove the battery pack (-)<br />
Slide the battery pack in the direction of the arrow and lift it straight out.<br />
Notes<br />
ˎˎDo not pick this unit up by holding the battery pack.<br />
ˎˎBe sure not to hit the terminal shutter. When attaching the battery pack, be<br />
particularly careful not to hit the battery pack against it.<br />
ˎˎBe careful not to pinch your fingers while attaching or removing the battery pack.<br />
Charging time<br />
Quick Charge<br />
NP-F970 NP-F770 NP-F570<br />
Normal charge 285 min 185 min 110 min<br />
Full charge 345 min 245 min 170 min<br />
ˎˎThe times shown are for charging an empty battery pack, using this unit at an<br />
ambient temperature of 25 °C (77 °F).<br />
ˎˎThe charging time may differ depending on the condition of the battery pack and<br />
the ambient temperature.<br />
To use the battery pack quickly<br />
You can use the battery pack even if you remove it from this unit before charging is<br />
completed. However, a shorter charging time means a shorter useable time.<br />
Notes<br />
ˎˎIf the output change switch is set to VCR/CAMERA during charging, charging<br />
stops.<br />
ˎˎIf the CHARGE lamp does not light up or blink, check that the battery pack is<br />
correctly attached to this unit. If it is not correctly attached, it will not be charged.<br />
ˎˎQuick charging is only performed with “InfoLITHIUM” battery packs.<br />
ˎˎWhen the charging mode change switch is set to “NORMAL CHARGE”, this unit<br />
finishes charging when normal charging is complete.<br />
ˎˎYou can change the charging mode before each charging is complete.<br />
If anything goes wrong during charging, the CHARGE lamp blinks and “WARNING”<br />
appears on the display. For details, see “Troubleshooting”.<br />
To Check Charging<br />
When charging starts, the battery life lights up in the display window.<br />
The battery life displayed is the approximate time remaining for recording images<br />
using the viewfinder. The battery life is shorter if the LCD display is used.<br />
The battery life may not be displayed with certain video cameras. For details, refer to<br />
“Notes on the BATTERY LIFE indicator”.<br />
There are two methods of switching the contents of the display<br />
window during charging.<br />
There are two methods of switching the contents of the display window: display<br />
changing automatically and display changing each time you press the DISPLAY<br />
change button.<br />
The slot indicator lamp corresponds to the slot number.<br />
Following is an example of installing a battery pack in Slot followed by another in<br />
Slot .<br />
Changing the contents of the display window<br />
automatically during charging (See illustration )<br />
Battery life<br />
The battery life of the first attached battery pack.<br />
This is the battery life when attached to the “InfoLITHIUM” compatible video<br />
camera, etc. last used.<br />
Battery life<br />
The battery life of the subsequently attached battery pack.<br />
Charging time<br />
The total remaining time until full charging of the battery packs installed in Slot<br />
and Slot is complete.<br />
When the charging mode change switch is set to “NORMAL CHARGE”, the<br />
remaining time until normal charging is complete is displayed.<br />
Press the DISPLAY change button during charging.<br />
(See illustration )<br />
During charging, “BATTERY LOG” can be displayed by pressing the DISPLAY<br />
change button.<br />
The contents of the display window change each time you press the DISPLAY change<br />
button as follows.<br />
About five seconds after pressing the DISPLAY change button, battery life is<br />
displayed and then this automatically switches between the battery life and the<br />
remaining time until charging is complete.<br />
Total charging time<br />
The total charging time of the first attached battery pack.<br />
Displays the approximate total charging time from first charging. The minimum<br />
displayed is 5 hours.<br />
Total charge count<br />
The number of times the first attached battery pack has been charged.<br />
Displays the approximate number of times the battery pack has been charged<br />
since its first charging. The minimum displayed is 5 times, and the count is<br />
displayed in multiples of five. Top-up charges and suspended charges may not be<br />
counted.<br />
Thank you for purchasing the <strong>Sony</strong> <strong>AC</strong> Adaptor/Charger.<br />
Before operating the unit, please read this manual thoroughly and retain it for future<br />
reference.<br />
Owner’s Record<br />
The model and serial numbers are located on the bottom of the unit.<br />
Record the serial number in the space provided below.<br />
Refer to these numbers whenever you call upon your <strong>Sony</strong> dealer regarding this<br />
product.<br />
<strong>Mode</strong>l No. <strong>AC</strong>-<strong>VQ1051D</strong><br />
Serial No.<br />
WARNING<br />
To reduce fire or shock hazard, do not expose the unit to rain or moisture.<br />
To reduce the risk of fire or electric shock,<br />
1) do not expose the unit to rain or moisture.<br />
2) do not place objects filled with liquids, such as vases, on the apparatus.<br />
To avoid electrical shock, do not open the cabinet.<br />
Refer servicing to qualified personnel only.<br />
The <strong>AC</strong> Power cord must only be changed at a qualified service shop.<br />
CAUTION<br />
Replace the battery with the specified type only. Otherwise, fire or injury may result.<br />
PRECAUTION<br />
The set is not disconnected from the <strong>AC</strong> power source (mains) as long as it is<br />
connected to the wall outlet, even if the set itself has been turned off.<br />
NOTICE FOR THE CUSTOMERS IN THE U.S.A.<br />
CAUTION<br />
You are cautioned that any changes or modifications not expressly approved in this<br />
manual could void your authority to operate this equipment.<br />
Note:<br />
This equipment has been tested and found to comply with the limits for a Class<br />
B digital device, pursuant to Part 15 of the FCC Rules. These limits are designed<br />
to provide reasonable protection against harmful interference in a residential<br />
installation. This equipment generates, uses, and can radiate radio frequency<br />
energy and, if not installed and used in accordance with the instructions, may cause<br />
harmful interference to radio communications.<br />
However, there is no guarantee that interference will not occur in a particular<br />
installation. If this equipment does cause harmful interference to radio or television<br />
reception, which can be determined by turning the equipment off and on, the user<br />
is encouraged to try to correct the interference by one or more of the following<br />
measures:<br />
Reorient or relocate the receiving antenna.<br />
ˋˋ<br />
Increase the separation between the equipment and receiver.<br />
ˋˋ<br />
Connect the equipment into an outlet on a circuit different from that to which the<br />
ˋˋ<br />
receiver is connected.<br />
Consult the dealer or an experienced radio/TV technician for help.<br />
ˋˋ<br />
NOTICE FOR THE CUSTOMERS IN THE U.S.A. AND CANADA<br />
IMPORTANT SAFETY<br />
INSTRUCTIONS<br />
SAVE THESE INSTRUCTIONS.<br />
DANGER - TO REDUCE THE RISK OF<br />
FIRE OR ELECTRIC SHOCK, CAREFULLY<br />
FOLLOW THESE INSTRUCTIONS.<br />
Read these instructions.<br />
Keep these instructions.<br />
Heed all warnings.<br />
Follow all instructions.<br />
<br />
<br />
<br />
<br />
<br />
<br />
<br />
<br />
<br />
Do not use this apparatus near water.<br />
Clean only with dry cloth.<br />
Do not block any ventilation openings. Install in accordance with the manufacturer’s instructions.<br />
Do not install near any heat sources such as radiators, heat registers, stoves, or other apparatus (including<br />
amplifiers) that produce heat.<br />
Do not defeat the safety purpose of the polarized or grounding-type plug. A polarized plug has two blades<br />
with one wider than the other. A grounding type plug has two blades and a third grounding prong. The wide<br />
blade or the third prong are provided for your safety. If the provided plug does not fit into your outlet, consult<br />
an electrician for replacement of the obsolete outlet.<br />
Protect the power cord from being walked on or pinched particularly at plugs, convenience receptacles, and<br />
the point where they exit from the apparatus.<br />
Only use attachments/accessories specified by the manufacturer.<br />
Use only with the cart, stand, tripod, bracket, or table specified by the manufacturer, or sold with the<br />
apparatus. When a cart is used, use caution when moving the cart/apparatus combination to avoid injury from<br />
tip-over.<br />
Unplug this apparatus during lightning storms or when unused for long periods of time.<br />
Refer all servicing to qualified service personnel. Servicing is required when the apparatus has been damaged<br />
in any way, such as power-supply cord or plug is damaged, liquid has been spilled or objects have fallen into<br />
the apparatus, the apparatus has been exposed to rain or moisture, does not operate normally, or has been<br />
dropped.<br />
If the shape of the plug does not fit the power outlet, use an attachment plug adaptor of the proper<br />
configuration for the power outlet.<br />
Battery to be recharged for this product is follows<br />
Brand Name<br />
<strong>Sony</strong><br />
Battery Type NP-F570 NP-F770 NP-F970<br />
Rating<br />
(Typical Capacity)<br />
DC 7.2 V<br />
15.8 Wh<br />
(2,200 mAh)<br />
DC 7.2 V<br />
31.7 Wh<br />
(4,400 mAh)<br />
DC 7.2 V<br />
47.5 Wh<br />
(6,600 mAh)<br />
Representative plug of power supply cord of countries/regions<br />
around the world.<br />
A type<br />
(American Type)<br />
B type<br />
(British Type)<br />
BF type<br />
(British Type)<br />
B3 type<br />
(British Type)<br />
C type<br />
(CEE Type)<br />
SE type<br />
(CEE Type)<br />
O type<br />
(Ocean Type)<br />
The representative supply voltage and plug type are described in this chart.<br />
Depend on an area, Different type of plug and supply voltage are used.<br />
Attention: Power cord meeting demands from each country shall be used.<br />
For only the United States<br />
ˋˋ<br />
Use a UL Listed, 1.5-3 m (5-10 ft), Type SPT-2 or NISPT-2, AWG no. 18 power<br />
supply cord, rated for 125V 7A, with a NEMA 1-15P plug rated for 125V 15A.”<br />
Europe<br />
Countries/Regions Voltage Frequency (Hz) Plug type<br />
Austria 230 50 C<br />
Belgium 230 50 C<br />
Czech 220 50 C<br />
Denmark 230 50 C<br />
Finland 230 50 C<br />
France 230 50 C<br />
Germany 230 50 C<br />
Greece 220 50 C<br />
Hungary 220 50 C<br />
Iceland 230 50 C<br />
Ireland 230 50 C/BF<br />
Italy 220 50 C<br />
Luxemburg 230 50 C<br />
Netherlands 230 50 C<br />
Norway 230 50 C<br />
Poland 220 50 C<br />
Portugal 230 50 C<br />
Romania 220 50 C<br />
Russia 220 50 C<br />
Slovak 220 50 C<br />
Spain 127/230 50 C<br />
Sweden 230 50 C<br />
Switzerland 230 50 C<br />
UK 240 50 BF<br />
Asia<br />
Countries/Regions Voltage Frequency (Hz) Plug type<br />
China 220 50 A<br />
Hong Kong 200/220 50 BF<br />
India 230/240 50 C<br />
Indonesia 127/230 50 C<br />
Japan 100 50/60 A<br />
Korea (rep) 220 60 C<br />
Malaysia 240 50 BF<br />
Philippines 220/230 60 A/C<br />
Singapore 230 50 BF<br />
Taiwan 110 60 A<br />
Thailand 220 50 C/BF<br />
Vietnam 220 50 A/C<br />
Oceania<br />
Countries/Regions Voltage Frequency (Hz) Plug type<br />
Australia 240 50 O<br />
New Zealand 230/240 50 O<br />
North America<br />
Countries/Regions Voltage Frequency (Hz) Plug type<br />
Canada 120 60 A<br />
USA 120 60 A<br />
Central America<br />
Countries/Regions Voltage Frequency (Hz) Plug type<br />
Bahamas 120/240 60 A<br />
Costa Rica 110 60 A<br />
Cuba 110/220 60 A/C<br />
Dominican (rep) 110 60 A<br />
El Salvador 110 60 A<br />
Guatemala 120 60 A<br />
Honduras 110 60 A<br />
Jamaica 110 50 A<br />
Mexico 120/127 60 A<br />
Nicaragua 120/240 60 A<br />
Panama 110/220 60 A<br />
South America<br />
Countries/Regions Voltage Frequency (Hz) Plug type<br />
Argentina 220 50 C/BF/O<br />
Brazil 127/220 60 A/C<br />
Chile 220 50 C<br />
Colombia 120 60 A<br />
Peru 220 60 A/C<br />
Venezuela 120 60 A<br />
Middle East<br />
Countries/Regions Voltage Frequency (Hz) Plug type<br />
Iran 220 50 C/BF<br />
Iraq 220 50 C/BF<br />
Israel 230 50 C<br />
Saudi Arabia 127/220 50 A/C/BF<br />
Turkey 220 50 C<br />
UAE 240 50 C/BF<br />
Africa<br />
Countries/Regions Voltage Frequency (Hz) Plug type<br />
Algeria 127/220 50 C<br />
Congo (dem) 220 50 C<br />
Egypt 220 50 C<br />
Ethiopia 220 50 C<br />
Kenya 240 50 C/BF<br />
Nigeria 230 50 C/BF<br />
South Africa 220/230 50 C/BF<br />
Tanzania 230 50 C/BF<br />
Tunisia 220 50 C<br />
IMPORTANT SAFETY<br />
INSTRUCTIONS<br />
For your protection, please read these safety instructions completely before<br />
operating the appliance, and keep this manual for future reference.<br />
Carefully observe all warnings, precautions and instructions on the appliance, or the<br />
one described in the operating instructions and adhere to them.<br />
1 SAVE THESE INSTRUCTIONS — This manual contains important safety and<br />
operating instructions for battery charger.<br />
2 Before using battery charger, read all instructions and cautionary markings on<br />
battery charger, battery, and product using battery.<br />
3 CAUTION — To reduce risk of injury, charge only designated Lithium-ion<br />
type rechargeable batteries. Other types of batteries may burst causing injury to<br />
persons and damage.<br />
4 Do not expose charger to rain, moisture, or snow.<br />
5 Use of an attachment not recommended or sold by the battery charger<br />
manufacturer may result in a risk of fi re, electric shock, or injury to persons.<br />
6 To reduce risk of damage to cigarette lighter connector and cord, pull by cigarette<br />
lighter connector rather than cord when disconnecting charger.<br />
7 Make sure cord is located so that it will not be stepped on, tripped over, or<br />
otherwise subjected to damage or stress.<br />
For the Customers in Europe<br />
NOTICE FOR THE CUSTOMERS IN THE UNITED KINGDOM<br />
A moulded plug complying with BS 1363 is fitted to this equipment for your safety<br />
and convenience.<br />
Should the fuse in the plug supplied need to be replaced, a fuse of the same rating as<br />
the supplied one and approved by ASTA or BSI to BS1362 (i.e., marked with<br />
or<br />
mark) must be used.<br />
If the plug supplied with this equipment has a detachable fuse cover, be sure to<br />
attach the fuse cover after you change the fuse. Never use the plug without the<br />
fuse cover. If you should lose the fuse cover, please contact your nearest <strong>Sony</strong><br />
service station.<br />
<br />
The manufacturer of this product is <strong>Sony</strong> Corporation, 1-7-1 Konan Minato-ku<br />
Tokyo, 108-0075 Japan. The Authorized Representative for EMC and product safety<br />
is <strong>Sony</strong> Deutschland GmbH, Hedelfinger Strasse 61, 70327 Stuttgart, Germany.<br />
For any service or guarantee matters please refer to the addresses given in separate<br />
service or guarantee documents.<br />
<br />
<br />
<br />
<br />
<br />
<br />
<br />
<br />
<br />
<br />
<br />
<br />
<br />
<br />
<br />
<br />
<br />
<br />
<br />
<br />
<br />
<br />
2<br />
4<br />
3<br />
1<br />
3<br />
2<br />
4<br />
DCC-VQ1<br />
3<br />
4<br />
5<br />
1 2<br />
2<br />
4<br />
3 5<br />
DCC-VQ1<br />
<br />
1<br />
2<br />
Year and month of last use<br />
The year and month when the first attached battery pack was last used.<br />
Displays “Month” followed by “Year” (last two digits of the year). If used with a<br />
video camera that has no calendar set, “-- --” is displayed.<br />
Total charging time<br />
The total charging time of the subsequently attached battery pack.<br />
Total charge count<br />
The number of times the subsequently attached battery pack has been charged.<br />
Year and month of last use<br />
The year and month when the subsequently attached battery pack was last used.<br />
Press the DISPLAY change button after charging is<br />
complete. (See illustration )<br />
After charging is complete, the display does not change automatically. The contents<br />
of the display window change each time you press the DISPLAY change button as<br />
follows.<br />
About five seconds after pressing the DISPLAY change button, returns to the display<br />
shown in .<br />
Charging is complete. When the charging mode change switch is set<br />
to “NORMAL CHARGE”, the battery life indicator shows “NORMAL”.<br />
Battery life<br />
The battery life of the first attached battery pack.<br />
Battery life<br />
The battery life of the subsequently attached battery pack.<br />
Total charging time<br />
The total charging time of the first attached battery pack.<br />
Total charge count<br />
The number of times the first attached battery pack has been charged.<br />
Year and month of last use<br />
The year and month when the first attached battery pack was last used.<br />
Total charging time<br />
The total charging time of the subsequently attached battery pack.<br />
Total charge count<br />
The number of times the subsequently attached battery pack has been charged.<br />
Year and month of last use<br />
The year and month when the subsequently attached battery pack was last used.<br />
Notes<br />
ˎˎThe time display is an approximate time when charging at 25 °C (77 °F). It may<br />
differ from the actual time depending on the environment. Also, depending on the<br />
condition of the battery, a time may not be displayed. This is not a malfunction.<br />
ˎˎIt may take some time for the time to be displayed after starting the charging.<br />
ˎˎThe time display and remaining battery life of the battery pack on the side not<br />
being charged may take some time to appear.<br />
ˎˎTo display the battery life of a new battery pack, first attach it to your video camera<br />
and use it for about 20 seconds, and then charge it with this unit.<br />
ˎˎIf you attach a fully charged battery pack to this unit, “TIME TO CHG FULL 1h”<br />
may appear on the display. This is not a malfunction.<br />
ˎˎIn the following cases, the time/LOG display may show “-- --” or the time display<br />
may be out. This is not a malfunction.<br />
There is a difference between the time display and actual charging time. (Even if<br />
ˋˋ<br />
this happens, continue charging until fully charged.)<br />
When charging a battery other than an “InfoLITHIUM” battery pack (Battery<br />
ˋˋ<br />
life display and other functions are not available.)<br />
When last use year and month are unclear. (When you attach the battery pack<br />
ˋˋ<br />
to a video camera but do not turn on the power of the video camera, or the<br />
calendar function of the video camera is not setup, etc.)<br />
If the battery pack is removed from this unit after normal charging is complete<br />
ˋˋ<br />
but before full charging is complete. (It takes about one hour from when normal<br />
charging is complete to when full charging is complete.)<br />
When charging a battery pack that has not been used for a long time. (Fully<br />
ˋˋ<br />
charge once first.)<br />
When two battery packs are attached to this unit, similar symptoms may appear if<br />
either one of the batteries is in the above condition.<br />
ˎˎ“BATTERY LOG” display is available with the rechargeable battery packs NP-<br />
F970, NP-F770 and NP-F570. With other battery packs, the contents of the display<br />
are limited.<br />
Fuse Replacement<br />
The car battery cord (DCC-VQ1) contains a fuse in the cigarette lighter plug.<br />
If the car battery cord (DCC-VQ1) does not work properly, check to see if the fuse<br />
has blown. If it has, replace it by purchasing a fuse with the same rating (4 A, 125 V)<br />
such as from your nearest <strong>Sony</strong> dealer.<br />
1 Twist the end of the plug and remove it.<br />
2 Remove the blown fuse.<br />
3 Insert a new fuse and twist the end of the plug to tighten.<br />
Notes<br />
ˎˎReplace the fuse with a fuse with the same rating (4 A, 125 V).<br />
ˎˎIf your car’s cigarette lighter socket is dirty with ash, etc., the plug part can become<br />
hot due to a poor connection. Always clean before use.<br />
ˎˎDo not replace the fuse with anything except a fuse with the specified rating.<br />
ˎˎIf the new fuse blows soon after replacement, consult your nearest <strong>Sony</strong> dealer.<br />
Contact your car dealer about the polarity of your car’s grounding, the voltage of<br />
your car battery, etc.<br />
Specifications<br />
<strong>AC</strong> Adapter/Charger (<strong>AC</strong>-<strong>VQ1051D</strong>)<br />
Input<br />
100 V - 240 V <strong>AC</strong> 50 Hz/60 Hz 22 W<br />
12 V/24 V DC (only for negative grounded cars)<br />
Output<br />
8.4 V DC 2.0 A (VCR/CAMERA)<br />
8.4 V DC 1.6 A (CHARGE)<br />
Operating temperature<br />
0 °C to 40 °C (32 °F to 104 °F)<br />
Storage temperature<br />
–20 °C to +60 °C (–4 °F to +140 °F)<br />
Dimensions (Approx.)<br />
123 mm × 53 mm × 135 mm (w/h/d)<br />
(4 7/8 in. × 2 1/8 in. × 5 3/8 in.)<br />
(excluding the projecting parts)<br />
Mass<br />
Approx. 400 g (14.1 oz.)<br />
Car battery cord (DCC-VQ1)<br />
Input voltage<br />
DC 12 V/24 V<br />
Fuse rating<br />
125 V 4 A<br />
Cord length<br />
Approx. 1.5 m (59 1/8 in.)<br />
Mass<br />
Approx. 80 g (3.0 oz.)<br />
Included items<br />
<strong>AC</strong> Adaptor/Charger (<strong>AC</strong>-<strong>VQ1051D</strong>) (1)<br />
<strong>AC</strong> Power cord (1)<br />
Connecting cord (DK-215) (1)<br />
Connecting cord (DK-415) (1)<br />
Car battery cord (DCC-VQ1) (1)<br />
Set of printed documentation<br />
Design and specifications are subject to change without notice.<br />
Note<br />
This unit supports worldwide voltages 100 V to 240 V.<br />
Do not use an electronic voltage transformer, as this may cause a malfunction.<br />
Troubleshooting<br />
Symptom<br />
Cause/Solution<br />
Video equipment<br />
does not work.<br />
ˎˎThe power plug is disconnected from the wall outlet (wall<br />
socket).<br />
ˎˎThe car battery cord DCC-VQ1 is disconnected from the<br />
cigarette lighter socket.<br />
Insert into a wall outlet or cigarette lighter socket.<br />
ˎˎThe connector cable is not properly connected.<br />
Connect properly.<br />
ˎˎThe output change switch is set to CHARGE.<br />
Set the output change switch to VCR/CAMERA.<br />
The battery pack<br />
does not charged.<br />
ˎˎThe output change switch is set to VCR/CAMERA.<br />
Set the output change switch to CHARGE.<br />
Power immediately<br />
turns off even<br />
though there is<br />
sufficient battery life<br />
remaining, or the<br />
displayed battery<br />
life differs from the<br />
actual battery life.<br />
ˎˎRun down the battery pack and then fully charge it again.<br />
The battery life will be correctly displayed.<br />
The display does not<br />
changed.<br />
Refer to “Notes on the BATTERY LIFE indicator”.<br />
“Lo” is displayed in<br />
the display window.<br />
ˎˎThe temperature of the battery pack is too low.<br />
ˎˎCharging is performed at lower temperature than the<br />
recommended charging temperature range.<br />
The display shown below may appear if a battery pack<br />
with a low temperature is attached, or if charging<br />
is performed at a lower temperature than the<br />
recommended charging temperature range. Although<br />
charging can still be performed in these cases, if<br />
this situation continues, this unit will switch to the<br />
standby state (refer to the following item) or charging<br />
will be not performed properly in order to protect the<br />
battery pack. We recommend charging the battery<br />
pack at 10 ºC to 30 ºC (50 ºF to 86 ºF).<br />
The CHARGE lamp blinks in the following two ways.<br />
Blinks quickly: Turns on and off repeatedly every 0.15 seconds<br />
Blinks slowly: Turns on and off repeatedly every 1.5 seconds<br />
When the CHARGE lamp blinks, read the following and take suitable action<br />
depending on how the CHARGE lamp blinks.<br />
Symptom<br />
Cause/Solution<br />
When the CHARGE lamp<br />
keeps blinking slowly and<br />
“WAITING” is displayed in the<br />
display window.<br />
Charging is temporarily stopped. This unit is<br />
in the standby state.<br />
If the room temperature or the battery<br />
temperature is out of the appropriate<br />
temperature range, charging stops<br />
automatically.<br />
When the room temperature returns to the<br />
appropriate range, the CHARGE lamp lights<br />
up and charging restarts.<br />
We recommend charging the battery pack at<br />
10 °C to 30 °C (50 °F to 86 °F).<br />
When the CHARGE lamp<br />
keeps blinking quickly and<br />
“WARNING” is displayed in<br />
the display window.<br />
When charging the battery pack for the first<br />
time in one of the following situations, the<br />
CHARGE lamp may blink quickly. If this<br />
happens, remove the battery pack from this<br />
unit, reattach it and charge it again.<br />
When the battery pack has been left for a<br />
long time<br />
When the battery pack has been left<br />
attached to the camera for a long time<br />
Immediately after purchase<br />
If “WARNING” is still displayed, check by<br />
following the steps below.<br />
Remove the battery pack from this unit and then reattach it.<br />
The CHARGE lamp starts blinking<br />
again:<br />
Attach another “InfoLITHIUM”<br />
battery pack.<br />
The CHARGE lamp lights up but<br />
does not start blinking again:<br />
If the CHARGE lamp goes out<br />
because the charging time has<br />
passed, there is no problem.<br />
The CHARGE lamp starts<br />
blinking again:<br />
The problem is possibly with this<br />
unit.<br />
The CHARGE lamp lights up and<br />
does not start blinking again:<br />
If the CHARGE lamp goes out<br />
because the charging time has<br />
passed, the problem is with the<br />
battery pack first attached.<br />
Please contact your nearest <strong>Sony</strong> dealer regarding any products that may have a<br />
problem.<br />
Merci pour l’achat de cet adaptateur/chargeur CA <strong>Sony</strong>.<br />
Avant d’utiliser cet appareil, veuillez lire attentivement ce manuel et le conserver<br />
pour toute référence future.<br />
Aide-mémoire<br />
Les numéros de modèle et de série se situent sous l’appareil. Prendre en note le<br />
numéro de série dans l’espace prévu ci-dessous. Se reporter à ces numéros lors des<br />
communications avec le détaillant <strong>Sony</strong> au sujet de ce produit.<br />
Modèle no. <strong>AC</strong>-<strong>VQ1051D</strong><br />
No de série<br />
AVERTISSEMENT<br />
Afin de réduire les risques d’incendie ou de décharge électrique, n’exposez pas cet<br />
appareil à la pluie ou à l’humidité.<br />
Pour réduire les risques d’incendie ou d’électrocution,<br />
1) n’exposez l’appareil à la pluie ou à l’humidité ;<br />
2) ne placez pas d’objets remplis de liquides (vases, etc.) sur l’appareil.<br />
Pour éviter toute décharge électrique n’ouvrez pas le chargeur.<br />
Confiez toute réparation à un personnel qualifié seulement.<br />
Le cordon d’alimentation secteur doit être remplacé dans un centre de<br />
réparations agréé uniquement.<br />
ATTENTION<br />
Remplacer la pile par une pile du type spécifié uniquement. Sinon, cela peut<br />
provoquer un incendie ou des blessures.<br />
PRÉCAUTION<br />
L’appareil n’est pas déconnecté de la source d’alimentation secteur tant qu’il reste<br />
branché sur la prise murale, même s’il a été mis hors tension.<br />
AVIS À LA CLIENTÈLE AUX ÉTATS-UNIS<br />
AVERTISSEMENT<br />
Par la présente, vous êtes avisé du fait que tout changement ou toute modification<br />
ne faisant pas l’objet d’une autorisation expresse dans le présent manuel pourrait<br />
annuler votre droit d’utiliser l’appareil.<br />
Note<br />
L’appareil a été testé et est conforme aux exigences d’un appareil numérique de<br />
Classe B, conformément à la Partie 15 de la réglementation de la FCC.<br />
Ces critères sont conçus pour fournir une protection raisonnable contre les<br />
interférences nuisibles dans un environnement résidentiel. L’appareil génère, utilise et<br />
peut émettre des fréquences radio; s’il n’est pas installé et utilisé conformément aux<br />
instructions, il pourrait provoquer des interférences nuisibles aux communications<br />
radio. Cependant, il n’est pas possible de garantir que des interférences ne seront pas<br />
provoquées dans certaines conditions particulières. Si l’appareil devait provoquer<br />
des interférences nuisibles à la réception radio ou à la télévision, ce qui peut être<br />
démontré en allumant et éteignant l’appareil, il est recommandé à l’utilisateur<br />
d’ essayer de corriger cette situation par l’une ou l’autre des mesures suivantes :<br />
Réorienter ou déplacer l’antenne réceptrice.<br />
ˋˋ<br />
Augmenter la distance entre l’appareil et le récepteur.<br />
ˋˋ<br />
Brancher l’appareil dans une prise ou sur un circuit différent de celui sur lequel le<br />
ˋˋ<br />
récepteur est branché.<br />
Consulter le détaillant ou un technicien expérimenté en radio/téléviseurs.<br />
ˋˋ<br />
AVIS À LA CLIENTÈLE AUX ÉTATS-UNIS ET AU CANADA<br />
CONSIGNES DE SÉCURITÉ<br />
IMPORTANTES<br />
CONSERVEZ CES CONSIGNES<br />
DANGER – POUR RÉDUIRE LE RISQUE<br />
D’INCENDIE OU DE CHOC ÉLECTRIQUE,<br />
SUIVEZ ATTENTIVEMENT CES<br />
CONSIGNES.<br />
Lire ces consignes.<br />
Conserver ces consignes.<br />
Tenir compte de tous les avertissements.<br />
Suivre toutes les instructions.<br />
Ne pas utiliser cet appareil près de l’eau.<br />
Nettoyer uniquement avec un chiffon sec.<br />
Ne pas bloquer les ailettes de ventilation. Installer selon les instructions du<br />
fabricant.<br />
Ne pas installer près de sources de chaleur, comme les radiateurs, les résistances<br />
électriques, les poêles ou autres appareils (amplificateurs compris) diffusant de la<br />
chaleur.<br />
Ne pas supprimer le dispositif de sécurité d’une fiche polarisée ou avec terre. Une<br />
fiche polarisée a deux lames, dont une est plus large que l’autre. Une fiche avec<br />
terre a deux lames et une broche. La lame la plus large et la broche servent de<br />
dispositif de sécurité. Si la fiche fournie ne s’insère pas dans la prise électrique,<br />
consulter un électricien pour faire remplacer la prise obsolète.<br />
Protéger le cordon d’alimentation particulièrement au niveau des fiches, des prises<br />
de courant et de la sortie du câble de l’appareil pour qu’il ne soit pas piétiné ou<br />
coincé.<br />
N’utiliser que les fixations et accessoires spécifiés par le fabricant.<br />
N’utiliser qu’avec le chariot, meuble, trépied, support ou table spécifié par le<br />
fabricant, ou vendu avec l’appareil. Si un chariot est utilisé, faire très attention<br />
pendant le transport de ne pas renverser le chariot avec l’appareil pour éviter toute<br />
blessure.<br />
Débrancher cet appareil pendant les orages électriques et s’il ne doit pas être utilisé<br />
pendant un certain temps.<br />
Pour toute réparation s’adresser à un personnel qualifié. Une réparation est<br />
nécessaire lorsque l’appareil a été endommagé d’une façon quelconque, par<br />
exemple lorsque le cordon d’alimentation ou sa fiche a été endommagé, du liquide<br />
s’est répandu ou des objets sont tombés dans l’appareil, l’appareil a été exposé à la<br />
pluie ou à l’humidité, ne fonctionne pas normalement ou est tombé.<br />
Si la forme de la fiche ne correspond pas à celle de la prise murale, utilisez un<br />
adaptateur de fiche correspondant à la prise murale.<br />
Les batteries pouvant être rechargées pour ce produit sont les suivantes<br />
Marque<br />
<strong>Sony</strong><br />
Type de batterie NP-F570 NP-F770 NP-F970<br />
Valeur nominale<br />
(Capacité typique)<br />
CC 7,2 V<br />
15,8 Wh<br />
(2 200 mAh)<br />
CC 7,2 V<br />
31,7 Wh<br />
(4 400 mAh)<br />
CC 7,2 V<br />
47,5 Wh<br />
(6 600 mAh)<br />
Représentation des fiches des cordons d’alimentation CA des pays<br />
ou régions du monde<br />
Type A<br />
(américain)<br />
Type B<br />
(anglais)<br />
Type BF<br />
(anglais)<br />
Type B3<br />
(anglais)<br />
Type C<br />
(CEE)<br />
Type SE<br />
(CEE)<br />
Type O<br />
(océanien)<br />
La tension d’alimentation et le type de fiche représentatifs sont décrits dans le tableau<br />
suivant.<br />
Il est possible que plusieurs types de fiches et tensions d’alimentation soient utilisés<br />
dans une région.<br />
Attention : il convient d’utiliser un cordon d’alimentation satisfaisant aux exigences<br />
de chaque pays.<br />
Pour les États-Unis uniquement<br />
ˋˋ<br />
Utilisez, dans la liste UL, un cordon d’alimentation de 1,5 à 3 m (5 à 10 pieds), type<br />
SPT-2 ou NISPT-2, AWG n° 18, pour une tension nominale de 125 V 7 A, avec une<br />
fiche 1-15P NEMA pour une tension nominale de 125 V 15 A.<br />
Europe<br />
Pays/régions Tension Fréquence (Hz) Type de fiche<br />
Autriche 230 50 C<br />
Belgique 230 50 C<br />
République tchèque 220 50 C<br />
Danemark 230 50 C<br />
Finlande 230 50 C<br />
France 230 50 C<br />
Allemagne 230 50 C<br />
Grèce 220 50 C<br />
Hongrie 220 50 C<br />
Islande 230 50 C<br />
Irlande 230 50 C/BF<br />
Italie 220 50 C<br />
Luxembourg 230 50 C<br />
Pays-Bas 230 50 C<br />
Norvège 230 50 C<br />
Pologne 220 50 C<br />
Portugal 230 50 C<br />
Roumanie 220 50 C<br />
Russie 220 50 C<br />
Slovaquie 220 50 C<br />
Espagne 127/230 50 C<br />
Suède 230 50 C<br />
Suisse 230 50 C<br />
Royaume-Uni 240 50 BF<br />
Asie<br />
Pays/régions Tension Fréquence (Hz) Type de fiche<br />
Chine 220 50 A<br />
Hong Kong 200/220 50 BF<br />
Inde 230/240 50 C<br />
Indonésie 127/230 50 C<br />
Japon 100 50/60 A<br />
République de Corée 220 60 C<br />
Malaisie 240 50 BF<br />
Philippines 220/230 60 A/C<br />
Singapour 230 50 BF<br />
Taiwan 110 60 A<br />
Thaïlande 220 50 C/BF<br />
Vietnam 220 50 A/C<br />
Océanie<br />
Pays/régions Tension Fréquence (Hz) Type de fiche<br />
Australie 240 50 O<br />
Nouvelle-Zélande 230/240 50 O<br />
Amérique du nord<br />
Pays/régions Tension Fréquence (Hz) Type de fiche<br />
Canada 120 60 A<br />
États-Unis 120 60 A<br />
Amérique centrale<br />
Pays/régions Tension Fréquence (Hz) Type de fiche<br />
Bahamas 120/240 60 A<br />
Costa Rica 110 60 A<br />
Cuba 110/220 60 A/C<br />
République<br />
dominicaine<br />
110 60 A<br />
El Salvador 110 60 A<br />
Guatemala 120 60 A<br />
Honduras 110 60 A<br />
Jamaïque 110 50 A<br />
Mexique 120/127 60 A<br />
Nicaragua 120/240 60 A<br />
Panama 110/220 60 A<br />
Amérique du sud<br />
Pays/régions Tension Fréquence (Hz) Type de fiche<br />
Argentine 220 50 C/BF/O<br />
Brésil 127/220 60 A/C<br />
Chili 220 50 C<br />
Colombie 120 60 A<br />
Pérou 220 60 A/C<br />
Venezuela 120 60 A<br />
Moyen-Orient<br />
Pays/régions Tension Fréquence (Hz) Type de fiche<br />
Iran 220 50 C/BF<br />
Irak 220 50 C/BF<br />
Israël 230 50 C<br />
Arabie saoudite 127/220 50 A/C/BF<br />
Turquie 220 50 C<br />
EAU 240 50 C/BF<br />
Afrique<br />
Pays/régions Tension Fréquence (Hz) Type de fiche<br />
Algérie 127/220 50 C<br />
République<br />
démocratique du<br />
Congo<br />
220 50 C<br />
Égypte 220 50 C<br />
Éthiopie 220 50 C<br />
Kenya 240 50 C/BF<br />
Nigeria 230 50 C/BF<br />
Afrique du Sud 220/230 50 C/BF<br />
Tanzanie 230 50 C/BF<br />
Tunisie 220 50 C<br />
CONSIGNES DE SÉCURITÉ<br />
IMPORTANTES<br />
Pour votre protection, veuillez lire ces consignes de sécurité complètement avant<br />
d'utiliser l’appareil, et conserver ce manuel pour toute référence future.<br />
Respectez attentivement et suivez tous les avertissements, précautions et instructions<br />
mentionnés sur l’appareil, ou décrits dans le mode <strong>d'emploi</strong>.<br />
1 CONSERVEZ CES INSTRUCTIONS — Ce manuel contient des consignes<br />
importantes sur la sécurité et le fonctionnement du chargeur de batterie.<br />
2 Avant d'utiliser le chargeur de batterie, lisez toutes les instructions et tous les<br />
signes de précautions présents sur le chargeur de batterie, la batterie et le produit<br />
utilisant la batterie.<br />
3 ATTENTION — Pour réduire le risque de blessure, n'insérez que les batteries<br />
rechargeables au lithium-ion préconisées. Les autres types de batteries peuvent<br />
éclater, causant des blessures et des dommages.<br />
4 N'exposez pas le chargeur à la pluie, l'humidité ou la neige.<br />
5 L'emploi d'une fixation non recommandée ou vendue par le fabricant du<br />
chargeur de batterie peut être à l'origine d'un incendie, d'une décharge électrique<br />
ou de blessures.<br />
6 Pour éviter d'endommager la fiche et le cordon de l'allume-cigare, tirez sur la<br />
fiche de l'allume-cigare et non pas sur le cordon lorsque vous débranchez le<br />
chargeur.<br />
7 Assurez-vous que le cordon est disposé de sorte qu'on ne risque pas de marcher<br />
dessus, de se prendre les pieds dedans ou de l'endommager ou étirer de quelque<br />
façon.<br />
Pour les clients en Europe<br />
< Avis aux consommateurs des pays appliquant les Directives UE ><br />
Le fabricant de ce produit est <strong>Sony</strong> Corporation, 1-7-1 Konan Minato-ku Tokyo,<br />
108-0075 Japon. Le représentant agréé pour la compatibilité électromagnétique et<br />
la sécurité du produit est <strong>Sony</strong> Deutschland GmbH, Hedelfinger Strasse 61, 70327<br />
Stuttgart, Allemagne. Pour toute question relative à la garantie ou aux réparations,<br />
reportez-vous à ľadresse que vous trouverez dans les documents ci-joints, relatifs à la<br />
garantie et aux réparations.<br />
Traitement des appareils électriques et électroniques en fin<br />
de vie (Applicable dans les pays de l’Union Européenne et<br />
aux autres pays européens disposant de systèmes de collecte<br />
sélective)<br />
Ce symbole, apposé sur le produit ou sur son emballage, indique<br />
que ce produit ne doit pas être traité avec les déchets ménagers. Il<br />
doit être remis à un point de collecte approprié pour le recyclage<br />
des équipements électriques et électroniques. En s’assurant que<br />
ce produit est bien mis au rebut de manière appropriée, vous<br />
aiderez à prévenir les conséquences négatives potentielles pour<br />
l’environnement et la santé humaine. Le recyclage des matériaux<br />
aidera à préserver les ressources naturelles. Pour toute information<br />
supplémentaire au sujet du recyclage de ce produit, vous pouvez<br />
contacter votre municipalité, votre déchetterie ou le magasin où<br />
vous avez acheté le produit.<br />
Remarques concernant l’emploi<br />
Cet appareil n’est pas étanche à la poussière, aux éclaboussures d’eau ou à<br />
l’eau.<br />
Garantie concernant les enregistrements<br />
L’utilisateur ne pourra pas être dédommagé pour une absence d’enregistrement ou<br />
de lecture due à une défectuosité de la batterie, de l’adaptateur CA, de l’adaptateur/<br />
chargeur CA.<br />
Charge<br />
ˎˎCet appareil est conçu pour les batteries <strong>Sony</strong> d’origine.<br />
ˎˎNe chargez que les batteries recommandées avec cet appareil.<br />
ˎˎInsérez bien comme il faut chaque batterie.<br />
Température de charge<br />
ˎˎPour une charge optimale de la batterie, une température de 10 °C à 30 °C<br />
(50 °F à 86 °F) est conseillée lors de la charge. La charge devient plus difficile à<br />
basses températures.<br />
ˎˎCet appareil permet d’effectuer des charges rapides, mais hors de la plage de<br />
températures recommandée les temps de charge sont allongés pour protéger la<br />
batterie. Lorsque le temps de charge a été allongé, vous ne pouvez pas revenir<br />
à une charge rapide en ramenant la température à la plage conseillée. Remettez<br />
la batterie en place et chargez-la de nouveau.<br />
Où ne pas mettre cet appareil<br />
Ne mettez pas cet appareil aux endroits suivants, ni pour la charge ni pour<br />
l’entreposage. Ceci peut entraîner une panne.<br />
ˎˎEndroits extrêmement chauds.<br />
Près d’un appareil de chauffage ou en plein soleil, comme sur le tableau de<br />
ˋˋ<br />
bord d’une voiture. L’intérieur des voitures devient particulièrement chaud si<br />
les vitres restent fermées en été, ou les jours de grosses chaleurs. Cet appareil<br />
pourrait se déformer ou mal fonctionner.<br />
ˎˎÀ un endroit exposé à des vibrations excessives<br />
ˎˎÀ un endroit exposé à un magnétisme ou à des radiations<br />
ˎˎÀ un endroit où il y a beaucoup de sable ou de poussière<br />
Protégez cet appareil du sable et de la poussière, par exemple sur une plage ou à<br />
ˋˋ<br />
des endroits exposés au sable ou à une grande quantité de poussière, sous peine<br />
de panne.<br />
Précautions d’emploi<br />
ˎˎN’utilisez pas l’appareil dans un endroit exigu, notamment entre un mur et un<br />
meuble.<br />
ˎˎUne quantité négligeable de courant électrique circule dans cet appareil tant qu’il<br />
est branché sur une prise murale.<br />
ˎˎLa plaque signalétique indiquant la tension de fonctionnement, la consommation,<br />
etc. se trouve sous l’appareil.<br />
ˎˎInsérez bien la batterie rechargeable dans cet appareil avant de la charger.<br />
ˎˎN’utilisez pas cet appareil à un endroit exposé à des ondes radio ou à des<br />
radiations puissantes. Votre caméscope, etc. pourrait ne pas effectuer correctement<br />
l’enregistrement et la lecture.<br />
ˎˎNe laissez pas tomber ou ne soumettez pas à des chocs cet appareil.<br />
ˎˎGardez cet appareil à l’écart des téléviseurs, récepteurs AM et autres tuners. Placés<br />
à proximité, ils pourraient être affectés par des interférences.<br />
ˎˎUtilisez une prise murale (prise électrique) proche lorsque vous utilisez cet<br />
appareil. Même si le témoin CHARGE de cet appareil est éteint, l’appareil reste<br />
sous tension. Si un problème se présente lorsque vous utilisez cet appareil, coupez<br />
immédiatement l’alimentation en débranchant le cordon de la prise murale (prise<br />
électrique).<br />
ˎˎFaites attention à ce qu’aucun objet métallique ne touche les parties métalliques<br />
de cet appareil ou du cordon de liaison. Ceci pourrait causer un court-circuit et<br />
endommager l’appareil.<br />
ˎˎNe branchez pas cet appareil sur un adaptateur de tension pour voyages à l’étranger.<br />
Ceci pourrait causer une surchauffe ou une autre défaillance.<br />
ˎˎDébranchez cet appareil de la prise murale après utilisation. Pour débrancher le<br />
cordon, tirez sur la fiche. Ne tirez jamais sur le cordon proprement dit.<br />
ˎˎNe posez pas d’objets remplis de liquides, comme des vases, sur cet appareil.<br />
ˎˎCet appareil ou la batterie peut devenir chaud pendant ou immédiatement après la<br />
charge. C’est normal.<br />
ˎˎRetirez la batterie de cet appareil lorsque la charge est terminée. Si vous la laissez<br />
sur l’appareil son autonomie peut être réduite.<br />
Utilisation du cordon allume-cigare (DCC-VQ1)<br />
ˎˎUtilisez cet appareil seulement dans une voiture disposant d’une batterie de 12<br />
volts ou de 24 volts.<br />
ˎˎCertaines voitures sont négatives à la masse et d’autres sont positives à la masse.<br />
Cet appareil est destiné aux voitures négatives à la masse.<br />
ˎˎUtilisez cet appareil quand le moteur de la voiture tourne. Si vous utilisez cet<br />
appareil quand le moteur de la voiture est à l’arrêt, la batterie de la voiture risque<br />
de se vider.<br />
ˎˎDébranchez le cordon allume-cigare de la prise allume-cigare lorsque vous ne<br />
l’utilisez pas. Pour débrancher le cordon, tirez sur la fiche. Ne tirez jamais sur le<br />
cordon proprement dit.<br />
Entretien<br />
ˎˎLorsque cet appareil est sale, essuyez-le avec un chiffon sec et doux ou du papier<br />
soie.<br />
ˎˎSi cet appareil est très sale, essuyez-le avec un chiffon trempé dans un solvant<br />
neutre dilué, après l’avoir bien essoré, puis essuyez-le avec un chiffon sec.<br />
ˎˎN’utilisez pas de diluants, benzine, alcool, etc. qui risquent de détériorer ou<br />
d’endommager la surface de cet appareil.<br />
ˎˎSi vous utilisez un tissu de nettoyage chimique, consultez son mode d’emploi.<br />
ˎˎLa vaporisation d’un solvant volatil, tel qu’un insecticide ou un contact prolongé<br />
avec du caoutchouc ou du vinyle peut détériorer ou endommager cet appareil.<br />
Identification des éléments<br />
Obturateur de borne<br />
Logement <br />
Prise DC IN<br />
(seulement pour le DCC-VQ1)<br />
Prise DC OUT<br />
Témoin CHARGE <br />
Logement <br />
Témoin CHARGE <br />
Sélecteur de sortie<br />
Sélecteur de mode de charge<br />
Afficheur<br />
Indicateur de logement<br />
Touche de changement DISPLAY<br />
Afficheur<br />
Indicateur « InfoLITHIUM »<br />
Indicateur WAITING<br />
Indicateur WARNING<br />
Indicateur TIME TO CHG (charge)<br />
Indicateur Temps/LOG<br />
Indicateur BATTERY LIFE<br />
Indicateur VCR/CAMERA<br />
Indicateur de charge normale<br />
Indicateur de charge complète<br />
Indicateur d’autonomie de la<br />
batterie<br />
L'adaptateur/chargeur CA <strong>AC</strong>-<strong>VQ1051D</strong><br />
peut être utilisé de la façon suivante.<br />
L’adaptateur/chargeur CA <strong>AC</strong>-<strong>VQ1051D</strong> peut être utilisé à la maison ou dans<br />
une voiture.<br />
Raccordez le cordon d’alimentation (fourni) sur une prise murale, ou<br />
branchez le cordon allume-cigare DCC-VQ1 sur l’allume-cigare de votre<br />
voiture. (Pour les voitures négatives (-) à la masse seulement.)<br />
ˎˎPour faire fonctionner un appareil <strong>Sony</strong> (caméscopes, etc.), utilisez les cordons de<br />
liaison fournis avec cet appareil.<br />
ˎˎPour charger des batteries rechargeables <strong>Sony</strong> (séries L).<br />
Vous pouvez régler le niveau de charge souhaité sur « Charge complète » ou<br />
ˋˋ<br />
« Charge normale » avec le sélecteur de mode de charge. Si vous voulez charger<br />
rapidement une batterie, réglez le sélecteur sur « Charge normale » pour<br />
atteindre un niveau de charge normal.<br />
ˎˎLorsque des batteries « InfoLITHIUM » sont insérées dans cet appareil, les<br />
fonctions suivantes sont disponibles.<br />
Charge rapide<br />
ˋˋ<br />
(Plus rapide que la charge avec votre caméscope, etc.)<br />
« BATTERY LOG » et les informations concernant la charge s’affichent.<br />
ˋˋ<br />
Un historique de l’utilisation de la batterie et son état de charge s’affichent.<br />
ˎˎLe temps de charge total, le nombre de charges, l’année et le mois de la<br />
dernière utilisation<br />
ˎˎL’autonomie de la batterie, le temps restant jusqu’à la fin de la charge<br />
ˎˎCet appareil est conçu pour les batteries au lithium-ion. Il ne peut pas être<br />
utilisé pour charger des batteries Ni-Cd ou Ni-MH.<br />
ˎˎCet appareil ne peut pas être utilisé avec certains modèles de caméscopes et<br />
certains appareils. Assurez-vous de la compatibilité de votre appareil avant<br />
usage.<br />
Que désigne « InfoLITHIUM »?<br />
« InfoLITHIUM » désigne un nouveau type de batterie au lithium-ion qui peut<br />
échanger des données sur la consommation d’énergie avec un appareil électronique<br />
compatible. Il est conseillé d’utiliser des batteries « InfoLITHIUM » (série L) avec un<br />
appareil électronique portant la marque .<br />
« InfoLITHIUM » est une marque commerciale de <strong>Sony</strong> Corporation.<br />
Que désigne « BATTERY LOG »?<br />
« BATTERY LOG » désigne l’historique des utilisations, enregistré dans la batterie.<br />
ˎˎTemps total de charge<br />
ˎˎNombre de charges<br />
ˎˎAnnée et mois de la dernière utilisation<br />
(Les indications sont approximatives. Selon la batterie, les informations affichées<br />
peuvent être moins complètes.)<br />
Remarques sur l’indicateur BATTERY LIFE (Lire avec<br />
attention avant utilisation.)<br />
Pendant la charge de la batterie, cet appareil indique l’état de charge et les<br />
informations concernant la batterie dans la mesure où les conditions suivantes sont<br />
remplies.<br />
ˎˎVous utilisez une batterie « InfoLITHIUM ».<br />
ˎˎVotre caméscope, etc. est compatible avec « InfoLITHIUM ».<br />
Assurez-vous que votre batterie présente le signe<br />
. Vérifiez dans le<br />
mode d’emploi fourni avec votre appareil vidéo si celui-ci est compatible<br />
« InfoLITHIUM ».<br />
Si vous utilisez la batterie avec plusieurs caméscopes, etc. compatibles<br />
« InfoLITHIUM », les informations qui apparaissent se rapportent à l’appareil sur<br />
lequel la batterie a été rattachée en dernier lieu.<br />
« BATTERY LOG » est disponible sur les batteries rechargeables NP-F970, NP-F770<br />
et NP-F570. Les autres batteries rechargeables peuvent ne pas être compatibles ou<br />
peuvent afficher des informations moins complètes.<br />
Pour faire fonctionner un appareil<br />
vidéo<br />
Lorsque le cordon d’alimentation secteur et le cordon allume-cigare DCC-VQ1 sont<br />
tout deux raccordés, le courant est fourni en priorité par le cordon allume-cigare.<br />
Pour le détail sur le raccordement, reportez-vous au mode d’emploi du caméscope,<br />
etc.<br />
1 Réglez le sélecteur de sortie sur VCR/CAMERA.<br />
2 Branchez le cordon d’alimentation secteur ou le cordon allumecigare<br />
sur cet appareil.<br />
3 Branchez le cordon d’alimentation secteur sur une prise murale ou le<br />
cordon allume-cigare sur une prise d’allume-cigare.<br />
Un bip retentit et l’affichage apparaît.<br />
(Suite au recto.)
(Suite au recto)<br />
4 Raccordez le cordon de liaison à la prise DC OUT de cet appareil.<br />
5 Raccordez le cordon de liaison au camescope.<br />
Pour le sens d’insertion du cordon de liaison, reportez-vous au mode d’emploi du<br />
caméscope, etc.<br />
Lorsque le cordon de liaison DK-215 est utilisé (Illustration -)<br />
Lorsque le cordon de liaison DK-415 est utilisé (Illustration -)<br />
Remarques<br />
ˎˎLe réglage du sélecteur de sortie sur CHARGE pendant le fonctionnement du<br />
caméscope, etc. a pour effet de couper l’alimentation du caméscope.<br />
ˎˎVous ne pouvez pas charger la batterie rattachée à cet appareil lorsque celui-ci est<br />
en mode VCR/CAMERA.<br />
ˎˎÉloignez cet appareil du caméscope, etc. si l’image est déformée.<br />
ˎˎLe cordon de liaison DK-415 peut être utilisé avec un appareil compatible avec la<br />
batterie rechargeable (séries L). Assurez-vous de la compatibilité de votre appareil<br />
avant usage.<br />
ˎˎL’illustration montre le raccordement d’un Caméscope numérique HD HDR-<br />
AX2000.<br />
Pour charger la batterie<br />
Lorsque le cordon d’alimentation secteur et le cordon allume-cigare DCC-VQ1 sont<br />
tout deux raccordés, le courant est fourni en priorité par le cordon allume-cigare.<br />
1 Réglez le sélecteur de mode de charge sur « NORMAL CHARGE » ou<br />
« FULL CHARGE ».<br />
Si vous voulez que la batterie soit complètement chargée, réglez le sélecteur de<br />
mode de charge sur « FULL CHARGE ».<br />
Si vous voulez que la charge s’arrête quand la batterie est normalement chargée,<br />
réglez-le sur « NORMAL CHARGE ».<br />
Pour le détail, reportez-vous à « Sélection du mode de charge ».<br />
2 Réglez le sélecteur de sortie sur CHARGE.<br />
3 Branchez le cordon d’alimentation secteur ou le cordon allumecigare<br />
sur cet appareil.<br />
4 Branchez le cordon d’alimentation secteur sur une prise murale ou le<br />
cordon allume-cigare sur une prise d’allume-cigare.<br />
Un bip retentit et l’affichage apparaît.<br />
5 Insérez la batterie rechargeable.<br />
Reportez-vous à « Pour rattacher la batterie rechargeable ». Lorsque la charge<br />
commence, l’indicateur d’autonomie de la batterie clignote dans l’afficheur et le<br />
témoin CHARGE s’allume.<br />
6 Lorsque la charge est terminée, retirez la batterie.<br />
La charge s’arrête sur cet appareil selon le niveau de charge spécifié avec le<br />
sélecteur de mode de charge. Lorsque le témoin CHARGE s’éteint, la charge est<br />
terminée. Pour le détail sur la fin de la charge, reportez-vous à « Sélection du<br />
mode de charge ».<br />
Reportez-vous à « Pour retirer la batterie » lorsque vous voulez retirer la batterie.<br />
Sélection du mode de charge<br />
Il y a deux niveaux de fin de charge : « Charge normale » et « Charge complète ».<br />
Vous pouvez changer de mode de charge avec le sélecteur de mode de charge sur cet<br />
appareil.<br />
ˎˎCharge normale (NORMAL CHARGE)<br />
Lorsque la charge est terminée, l’indicateur<br />
d’autonomie de la batterie apparaît de la façon<br />
illustrée à droite.<br />
La batterie restera en meilleur état mais son<br />
autonomie sera un peu inférieure à celle d’une<br />
batterie complètement chargée.<br />
ˎˎCharge complète (FULL CHARGE)<br />
Lorsque la charge est terminée et la batterie<br />
complètement chargée, l’indicateur d’autonomie<br />
de la batterie apparaît de la façon illustrée à<br />
droite.<br />
L’autonomie de la batterie sera légèrement plus<br />
courte que lors d’une charge normale, mais le<br />
temps de charge sera plus long.<br />
Rattachement simultané de deux batteries<br />
Vous pouvez rattacher deux batteries en même temps à cet appareil. Vous pouvez<br />
aussi charger une seule batterie. La charge commence par la batterie installée dans le<br />
logement .<br />
Si deux batteries sont rattachées mais pas simultanément, la charge commence par la<br />
première batterie rattachée, que ce soit dans le logement ou le logement .<br />
Remarques<br />
ˎˎDeux batteries peuvent être rattachées, mais elles ne peuvent pas être chargées<br />
simultanément dans le cas d’une charge normale.<br />
ˎˎLorsque le sélecteur de mode de charge est en position « FULL CHARGE »,<br />
l’appareil charge d’abord les batteries dans l’ordre dans lequel elles ont été<br />
rattachées jusqu’au niveau normal, puis complète la charge simultanément sur les<br />
deux batteries.<br />
Pour rattacher la batterie rechargeable (-)<br />
Placez la batterie sur cet appareil avec le repère du côté de<br />
l’obturateur de borne.<br />
Faites glisser la batterie dans le sens de la flèche.<br />
Appuyez sur la batterie jusqu’à ce que l’obturateur de borne soit complètement<br />
dissimulé.<br />
Pour retirer la batterie rechargeable (-)<br />
Faites glisser la batterie dans le sens de la flèche et levez-la tout droit.<br />
Remarques<br />
ˎˎNe saisissez pas cet appareil par la batterie.<br />
ˎˎVeillez à ne pas heurter l’obturateur de borne. Lorsque vous rattachez la batterie,<br />
faites attention à ne pas heurter la batterie contre l’obturateur.<br />
ˎˎFaites attention à ne pas vous pincer les doigts lorsque vous rattachez ou retirez la<br />
batterie.<br />
Temps de charge<br />
Charge rapide<br />
NP-F970 NP-F770 NP-F570<br />
Charge normale 285 min 185 min 110 min<br />
Charge complète 345 min 245 min 170 min<br />
ˎˎLes temps indiqués correspondent à la charge d’une batterie vide avec cet appareil<br />
à une température ambiante de 25 °C (77 °F).<br />
ˎˎLe temps de charge peut être différent selon l’état de la batterie et la température<br />
ambiante.<br />
Pour utiliser rapidement la batterie<br />
Vous pouvez utiliser la batterie même si vous la retirez de cet appareil avant la fin de<br />
la charge. Toutefois, le temps d’utilisation sera d’autant plus court que le temps de<br />
charge est court.<br />
Remarques<br />
ˎˎSi le sélecteur de sortie est sur VCR/CAMERA pendant la charge, la charge s’arrête.<br />
ˎˎSi le témoin CHARGE ne s’allume ou clignote pas, vérifiez si la batterie est<br />
installée correctement sur cet appareil. Si elle n’est pas installée correctement, elle<br />
ne se chargera pas.<br />
ˎˎLa charge rapide n’est possible qu’avec les batteries « InfoLITHIUM ».<br />
ˎˎLorsque le sélecteur de mode de charge est en position « NORMAL CHARGE », la<br />
charge s’arrête quand le niveau de charge normal est atteint.<br />
ˎˎVous pouvez changer de mode de charge avant la fin de chaque charge.<br />
Si quelque chose ne fonctionne pas pendant la charge, le témoin CHARGE clignote<br />
et « WARNING » apparaît sur l’afficheur. Pour le détail, voir « En cas de problème ».<br />
Pour vérifier la charge<br />
Lorsque la charge démarre, l’autonomie s’éclaire dans l’afficheur.<br />
L’autonomie de la batterie indiquée est le temps restant approximativement pour la<br />
prise de vue avec le viseur. L’autonomie de la batterie sera plus courte si l’écran LCD<br />
est utilisé.<br />
L’autonomie de la batterie peut ne pas être indiquée avec certains caméscopes. Pour<br />
le détail, reportez-vous à « Remarques sur l’indicateur BATTERY LIFE ».<br />
Pendant la charge, le contenu de l’afficheur peut être changé de<br />
deux façons.<br />
Le contenu de l’afficheur peut être changé de deux façons : changement automatique<br />
de l’afficheur ou changement à chaque pression sur la touche de changement<br />
DISPLAY.<br />
Le témoin de logement correspond au numéro de logement.<br />
L’installation d’une batterie dans le logement puis d’une autre dans le logement<br />
est donnée à titre d’exemple ci-dessous.<br />
Changement automatique du contenu de l’afficheur<br />
pendant la charge (Voir l’illustration )<br />
Autonomie de la batterie<br />
L'autonomie de la première batterie rattachée.<br />
C'est l'autonomie de la batterie rattachée au dernier caméscope, etc. compatible<br />
« InfoLITHIUM » utilisé.<br />
Autonomie de la batterie<br />
L'autonomie de la seconde batterie rattachée.<br />
Temps de charge<br />
Le temps restant total jusqu’à la fin de la charge complète des batteries installées<br />
dans le logement et le logement .<br />
Lorsque le sélecteur de mode de charge est en position « NORMAL CHARGE »,<br />
le temps restant jusqu’à la fin d’une charge normale apparaît.<br />
Appuyez sur la touche de changement DISPLAY<br />
pendant la charge. (Voir l’illustration )<br />
Pendant la charge « BATTERY LOG » peut être affiché par une pression sur la<br />
touche de changement DISPLAY.<br />
Le contenu de l’afficheur change chaque fois que vous appuyez sur la touche de<br />
changement DISPLAY de la façon suivante.<br />
Environ cinq secondes après une pression sur la touche de changement DISPLAY,<br />
l’autonomie de la batterie est indiquée puis l’affichage bascule automatiquement<br />
entre l’autonomie de la batterie et le temps restant jusqu’à la fin de la charge.<br />
Temps total de charge<br />
Le temps de charge total de la première batterie rattachée.<br />
Indique le temps de charge total approximatif depuis la première charge. Le<br />
minimum affiché est 5 heures.<br />
Nombre total de charges<br />
Le nombre de fois que la première batterie rattachée a été chargée.<br />
Indique le nombre approximatif de fois que la batterie a été chargée depuis sa<br />
première charge. Le minimum affiché est 5 fois, et ensuite le nombre est indiqué<br />
par un multiple de cinq. Les charges d’appoint et les charges interrompues<br />
peuvent ne pas être prises en compte.<br />
Année et mois de la dernière utilisation<br />
L'année et le mois où la première batterie rattachée a été utilisée en dernier.<br />
Indique « le mois » puis « l’année » (deux derniers chiffres de l’année). Si la<br />
batterie est utilisée avec un caméscope sur lequel la date n’a pas été spécifiée,<br />
« -- » s’affichera.<br />
Temps total de charge<br />
Le temps de charge total de la seconde batterie rattachée.<br />
Nombre total de charges<br />
Le nombre de fois que la seconde batterie rattachée a été chargée.<br />
Année et mois de la dernière utilisation<br />
L'année et le mois où la seconde batterie rattachée a été utilisée en dernier.<br />
Appuyez sur la touche de changement DISPLAY<br />
lorsque la charge est terminée. (Voir l’illustration<br />
)<br />
Lorsque la charge est terminée, l’affichage ne change pas automatiquement. Le<br />
contenu de l’afficheur change chaque fois que vous appuyez sur la touche de<br />
changement DISPLAY de la façon suivante.<br />
Environ cinq secondes après une pression sur la touche de changement DISPLAY, il<br />
revient à l’affichage indiqué dans .<br />
La charge est terminée. Lorsque le sélecteur de mode de charge est<br />
en position « NORMAL CHARGE », l’indicateur d’autonomie de la<br />
batterie indique « NORMAL ».<br />
Autonomie de la batterie<br />
L'autonomie de la première batterie rattachée.<br />
Autonomie de la batterie<br />
L'autonomie de la seconde batterie rattachée.<br />
Temps total de charge<br />
Le temps de charge total de la première batterie rattachée.<br />
Nombre total de charges<br />
Le nombre de fois que la première batterie rattachée a été chargée.<br />
Année et mois de la dernière utilisation<br />
L'année et le mois où la première batterie rattachée a été utilisée en dernier.<br />
Temps total de charge<br />
Le temps de charge total de la seconde batterie rattachée.<br />
Nombre total de charges<br />
Le nombre de fois que la seconde batterie rattachée a été chargée.<br />
Année et mois de la dernière utilisation<br />
L'année et le mois où la seconde batterie rattachée a été utilisée en dernier.<br />
Remarques<br />
ˎˎLe temps indiqué est une valeur approximative pour une charge à 25 °C (77 °F). Il<br />
peut être différent du temps réel selon l’environnement. De plus, selon l’état de la<br />
batterie, un temps peut ne pas s’afficher. C’est normal.<br />
ˎˎL’indication du temps après le début de la charge nécessite un certain temps.<br />
ˎˎL’indication du temps et l’autonomie restante de la batterie sur le côté non chargé<br />
peut mettre un certain temps à apparaître.<br />
ˎˎPour afficher l’autonomie d’une batterie neuve, rattachez-la d’abord à votre<br />
caméscope et utilisez-la environ 20 secondes, puis chargez-la sur cet appareil.<br />
ˎˎSi vous rattachez une batterie complètement chargée sur cet appareil, « TIME TO<br />
CHG FULL 1h » peut apparaître sur l’afficheur. C’est normal.<br />
ˎˎDans les cas suivants, le temps/LOG peut être remplacé par « -- -- » ou l’indication<br />
du temps peut être absente. C’est normal.<br />
ˋˋIl y a une différence entre l’indication du temps et le temps de charge réel. (Même<br />
si ce cas se présente, continuez de charger la batterie jusqu’à ce qu’elle soit<br />
complètement chargée).<br />
ˋˋSi vous chargez une autre batterie qu’une batterie « InfoLITHIUM » (L’indication<br />
de l’autonomie de la batterie et d’autres fonctions ne sont pas disponibles.)<br />
ˋˋSi l’année et le mois de la dernière année d’utilisation ne sont pas évidents.<br />
(Lorsque vous rattachez la batterie à un caméscope mais n’allumez pas le<br />
caméscope, ou lorsque la date n’a pas été réglée sur le caméscope, etc.)<br />
ˋˋSi la batterie est retirée de cet appareil après la charge normale mais avant la<br />
fin de la charge complète. (Il faut attendre environ une heure depuis la fin de la<br />
charge normale jusqu’à la fin de la charge complète.)<br />
ˋˋSi la batterie chargée n’a pas été utilisée depuis longtemps. (Chargez-la d’abord<br />
complètement.)<br />
Lorsque deux batteries sont rattachées à cet appareil, des symptômes similaires<br />
peuvent apparaître si une des batteries se trouve dans une des situations précédentes.<br />
ˎˎL’affichage « BATTERY LOG » apparaît avec les batteries rechargeables NP-F970,<br />
NP-F770 et NP-F570. Avec d’autres batteries, les informations affichées sont moins<br />
complètes.)<br />
Remplacement du fusible<br />
Le cordon allume-cigare (DCC-VQ1) contient un fusible dans la fiche allume-cigare.<br />
Si le cordon allume-cigare (DCC-VQ1) ne fonctionne pas correctement, vérifiez si le<br />
fusible n’a pas sauté. Si c’est le cas, remplacez-le par un fusible de même calibre (4 A,<br />
125 V) en vous adressant, par exemple, au revendeur <strong>Sony</strong> le plus proche.<br />
1 Dévissez l’extrémité de la fiche et détachez-la.<br />
2 Retirez le fusible grillé.<br />
3 Insérez un fusible neuf et revissez l’extrémité de la fiche.<br />
Remarques<br />
ˎˎRemplacez le fusible par un fusible de même calibre (4 A, 125 V).<br />
ˎˎSi la prise d'allume-cigare de votre voiture est sale et couverte de cendres, etc.,<br />
le contact est mauvais et l’extrémité de la fiche peut devenir chaude. Nettoyez<br />
toujours la prise avant de l’utiliser.<br />
ˎˎNe remplacez pas le fusible par autre chose qu’un fusible de même calibre.<br />
ˎˎSi le fusible saute de nouveau brièvement après son remplacement, consultez le<br />
revendeur <strong>Sony</strong> le plus proche.<br />
Contactez votre concessionnaire auto au sujet de la polarité de la masse de votre<br />
voiture, la tension de la batterie de votre voiture, etc.<br />
Spécifications<br />
Adaptateur/chargeur CA (<strong>AC</strong>-<strong>VQ1051D</strong>)<br />
Entrée<br />
100 V - 240 V CA 50 Hz/60 Hz 22 W<br />
12 V/24 V CC (seulement pour voitures négatives à<br />
la masse)<br />
Sortie<br />
8,4 V CC 2,0 A (VCR/CAMERA)<br />
8,4 V CC 1,6 A (CHARGE)<br />
Température de<br />
0 °C à 40 °C (32 °F à 104 °F)<br />
fonctionnement<br />
Température d’entreposage –20 °C à +60 °C (–4 °F à +140 °F)<br />
Dimensions (Environ) 123 mm × 53 mm × 135 mm (l/h/p)<br />
(4 7/8 po. × 2 1/8 po. × 5 3/8 po.)<br />
(parties saillantes non comprises)<br />
Poids<br />
Environ 400 g (14,1 oz)<br />
Cordon allume-cigare (DCC-VQ1)<br />
Tension d’entrée<br />
CC 12 V/24 V<br />
Calibre du fusible<br />
125 V 4 A<br />
Longueur du cordon Environ 1,5 m (59 1/8 po.)<br />
Poids<br />
Environ 80 g (3,0 oz)<br />
Articles inclus<br />
Adaptateur/Chargeur CA (<strong>AC</strong>-<strong>VQ1051D</strong>) (1)<br />
Cordon d’alimentation secteur (1)<br />
Cordon de liaison (DK-215) (1)<br />
Cordon de liaison (DK-415) (1)<br />
Cordon allume-cigare (DCC-VQ1) (1)<br />
Jeu de documents imprimés<br />
La conception et les spécifications peuvent être modifiées sans préavis.<br />
Remarque<br />
Cet appareil supporte les tensions du monde entier, de 100 V à 240 V.<br />
N'utilisez pas un transformateur électronique de tension car ceci pourrait<br />
provoquer un dysfonctionnement.<br />
En cas de problème<br />
Symptôme<br />
L’appareil vidéo ne<br />
fonctionne pas.<br />
La batterie ne se<br />
charge pas.<br />
L’appareil s’éteint<br />
immédiatement bien<br />
que la batterie soit<br />
encore suffisamment<br />
chargée, ou bien<br />
l’autonomie de la<br />
batterie indiquée<br />
est différente de<br />
l’autonomie réelle de<br />
la batterie.<br />
L’affichage ne change<br />
pas.<br />
Cause/Solution<br />
ˎˎLa fiche d’alimentation est débranchée de la prise murale<br />
(prise électrique).<br />
ˎˎLe cordon allume-cigare DCC-VQ1 est débranché de la<br />
prise allume-cigare.<br />
Insérez-le dans une prise murale ou dans une prise<br />
d'allume-cigare.<br />
ˎˎLe câble de liaison n’est pas branché correctement.<br />
Branchez-le correctement.<br />
ˎˎLe sélecteur de sortie est réglé sur CHARGE.<br />
Réglez le sélecteur de sortie sur VCR/CAMERA.<br />
ˎˎLe sélecteur de sortie est réglé sur VCR/CAMERA.<br />
Réglez le sélecteur de sortie sur CHARGE.<br />
ˎˎVidez la batterie puis chargez-la complètement une<br />
nouvelle fois.<br />
L’autonomie de la batterie sera indiquée correctement.<br />
Reportez-vous à « Remarques sur l’indicateur BATTERY<br />
LIFE ».<br />
Symptôme<br />
« Lo » apparaît sur<br />
l’afficheur.<br />
Cause/Solution<br />
ˎˎLa température de la batterie est trop basse.<br />
ˎˎLa batterie est chargée à une température inférieure à la<br />
plage de températures de charge recommandée.<br />
Bien qu’il soit possible de charger la batterie dans ces<br />
cas, si cette situation persiste, cet appareil se mettra en<br />
veille (voir la rubrique suivante) ou la batterie ne sera<br />
pas chargée correctement pour protéger la batterie. Il<br />
est conseillé de charger la batterie entre 10 ºC et 30 ºC<br />
(50 ºF et 86 ºF).<br />
Le témoin CHARGE clignote des deux façons suivantes.<br />
Clignotement rapide : S’allume et s’éteint toutes les 0,15 secondes de façon répétée.<br />
Clignotement lent : S’allume et s’éteint toutes les 1,5 secondes de façon répétée.<br />
Lorsque le témoin CHARGE clignote, lisez ce qui suit et prenez la mesure appropriée<br />
selon la façon dont le témoin CHARGE clignote.<br />
Lorsque le témoin CHARGE<br />
continue de clignoter lentement<br />
et « WAITING » apparaît sur<br />
l’afficheur.<br />
Lorsque le témoin CHARGE<br />
clignote rapidement et<br />
« WARNING » apparaît sur<br />
l’afficheur.<br />
La charge est temporairement arrêtée. Cet<br />
appareil est en attente.<br />
Si la température de la pièce ou de<br />
la batterie est hors de la plage de<br />
températures appropriée, la charge s’arrête<br />
automatiquement.<br />
Lorsque la température de la pièce revient à la<br />
plage appropriée, le témoin CHARGE s’allume<br />
et la charge redémarre.<br />
Il est conseillé de charger la batterie<br />
rechargeable entre 10°C et 30°C (50 °F et 86<br />
°F).<br />
La première fois que vous chargez la batterie<br />
dans une des situations suivantes, le témoin<br />
CHARGE peut clignoter rapidement. Dans<br />
ce cas, retirez la batterie de cet appareil puis<br />
réinsérez-la et chargez-la de nouveau.<br />
Si la batterie est restée longtemps inutilisée<br />
Si la batterie est restée longtemps rattachée<br />
au caméscope<br />
Immédiatement après l’achat<br />
Si « WARNING » s’affiche toujours, vérifiez les<br />
points suivants.<br />
Retirez la batterie de cet appareil et rattachez-la de nouveau.<br />
Le témoin CHARGE se remet à<br />
clignoter :<br />
Rattachez une autre batterie<br />
« InfoLITHIUM ».<br />
Le témoin CHARGE se remet à<br />
clignoter :<br />
Le problème vient peut-être de cet<br />
appareil.<br />
Le témoin CHARGE s’allume mais<br />
ne se remet pas à clignoter :<br />
Si le témoin CHARGE s’éteint parce<br />
que le temps de charge est dépassé, il<br />
n’y a aucun problème.<br />
Le témoin CHARGE s’allume et ne<br />
se remet pas à clignoter :<br />
Si le témoin CHARGE s’éteint parce<br />
que le temps de charge est dépassé,<br />
le problème vient de la première<br />
batterie rattachée.<br />
Veuillez contacter le revendeur <strong>Sony</strong> le plus proche au sujet des produits qui sont<br />
peut-être défectueux.<br />
<br />
<br />
<br />
<br />
<br />
<br />
<br />
<br />
<br />
<br />
<br />
<br />
<br />
<br />
<br />
<br />
<br />
<br />
<br />
<br />
<br />
<br />
<br />
<br />
<br />
<br />
<br />
<br />
<br />
<br />
<br />
<br />
<br />
<br />
<br />
<br />
<br />
<br />
<br />
<br />
<br />
<br />
<br />
<br />
<br />
<br />
<br />
<br />
<br />
<br />
<br />
<br />
<br />
<br />
<br />
<br />
<br />
<br />
<br />
<br />
<br />
<br />
<br />
<br />
<br />
<br />
<br />
<br />
<br />
<br />
<br />
<br />
<br />
<br />
<br />
<br />
<br />
<br />
<br />
<br />
<br />
<br />
<br />
<br />
<br />
<br />
<br />
<br />
<br />
<br />
<br />
<br />
<br />
<br />
<br />
<br />
<br />
<br />
<br />
<br />
<br />
<br />
<br />
<br />
<br />
<br />
<br />
<br />
<br />
<br />
<br />
<br />
<br />
<br />
<br />
<br />
<br />
<br />
<br />
<br />
<br />
<br />
<br />
<br />
<br />
<br />
<br />
<br />
<br />
<br />
<br />
<br />
<br />
<br />
<br />
<br />
<br />
<br />
<br />
<br />
<br />
<br />
<br />
<br />
<br />
<br />
<br />
<br />
<br />
<br />
<br />
<br />
<br />
<br />
<br />
<br />
<br />
<br />
<br />
<br />
<br />
<br />
<br />
<br />
<br />
<br />
<br />
<br />
<br />
<br />
<br />
<br />
1 <br />
2 <br />
3 <br />
<br />
4 <br />
5 <br />
<br />
<br />
<br />
<br />
<br />
<br />
<br />
<br />
<br />
<br />
<br />
<br />
<br />
1 <br />
<br />
<br />
<br />
<br />
<br />
2 <br />
3 <br />
4 <br />
<br />
5 <br />
<br />
<br />
6 <br />
<br />
<br />
<br />
<br />
<br />
<br />
<br />
<br />
<br />
<br />
<br />
<br />
<br />
<br />
<br />
<br />
<br />
<br />
<br />
<br />
<br />
<br />
<br />
<br />
<br />
<br />
<br />
<br />
<br />
<br />
<br />
<br />
<br />
<br />
<br />
<br />
<br />
<br />
<br />
<br />
<br />
<br />
<br />
<br />
<br />
<br />
<br />
<br />
<br />
<br />
<br />
<br />
<br />
<br />
<br />
<br />
<br />
<br />
<br />
<br />
<br />
<br />
<br />
<br />
<br />
<br />
<br />
<br />
<br />
<br />
<br />
<br />
<br />
<br />
<br />
<br />
<br />
<br />
<br />
<br />
<br />
<br />
<br />
<br />
<br />
<br />
<br />
<br />
<br />
<br />
<br />
<br />
<br />
<br />
<br />
<br />
<br />
<br />
<br />
<br />
<br />
<br />
<br />
<br />
<br />
<br />
<br />
<br />
<br />
<br />
<br />
<br />
<br />
<br />
<br />
<br />
<br />
<br />
<br />
<br />
<br />
<br />
<br />
<br />
<br />
<br />
<br />
<br />
<br />
<br />
<br />
<br />
<br />
<br />
<br />
<br />
<br />
<br />
<br />
<br />
<br />
<br />
<br />
<br />
<br />
<br />
<br />
<br />
<br />
<br />
<br />
<br />
<br />
<br />
<br />
1 <br />
2 <br />
3 <br />
<br />
<br />
<br />
<br />
<br />
<br />
<br />
<br />
<br />
<br />
<br />
<br />
<br />
<br />
<br />
<br />
<br />
<br />
<br />
<br />
<br />
<br />
<br />
<br />
<br />
<br />
<br />
<br />
<br />
<br />
<br />
<br />
<br />
<br />
<br />
<br />
<br />
<br />
<br />
<br />
<br />
<br />
<br />
<br />
<br />
<br />
<br />
<br />
<br />
<br />
<br />
<br />
<br />
<br />
<br />
<br />
<br />
<br />
<br />
<br />
<br />
<br />
<br />
<br />
<br />
<br />
<br />
<br />
<br />
<br />
<br />
<br />
<br />
<br />
<br />
<br />
<br />
<br />
<br />
<br />
<br />
<br />
<br />
<br />
<br />
<br />
<br />
<br />
<br />
<br />
<br />
<br />
<br />
<br />
<br />
<br />
<br />
<br />
<br />
<br />
<br />
<br />
<br />
<br />
<br />
<br />
<br />
<br />
<br />
<br />
<br />
<br />
<br />
<br />
<br />
<br />
<br />
<br />
<br />
<br />
<br />
<br />
<br />
<br />
<br />
<br />
<br />
<br />
<br />
<br />
<br />
<br />
<br />
<br />
<br />
<br />
<br />
<br />
<br />
<br />
<br />
<br />
<br />
<br />
<br />
<br />
<br />
<br />
<br />
<br />
<br />
<br />
<br />
<br />
<br />
<br />
<br />
<br />
<br />
<br />
<br />
<br />
<br />
<br />
<br />
<br />
<br />
<br />
<br />
<br />
<br />
<br />
<br />
<br />
<br />
<br />
<br />
<br />
<br />
<br />
<br />
<br />
<br />
<br />
<br />
<br />
<br />
<br />
<br />
<br />
<br />
<br />
<br />
<br />
<br />
<br />
<br />
<br />
<br />
<br />
<br />
<br />
<br />
<br />
<br />
<br />
<br />
<br />
<br />
<br />
<br />
<br />
<br />
<br />
<br />
<br />
<br />
<br />
<br />
<br />
<br />
<br />
<br />
<br />
<br />
<br />
<br />
<br />
<br />
<br />
<br />
<br />
<br />
<br />
<br />
<br />
<br />
<br />
<br />
<br />
<br />
<br />
<br />
<br />
<br />
<br />
<br />
<br />
<br />
<br />
<br />
<br />
<br />
<br />
<br />
<br />
<br />
<br />
<br />
<br />
<br />
<br />
<br />
<br />
<br />
<br />
<br />
<br />
<br />
<br />
<br />
<br />
<br />
<br />
<br />
<br />
<br />
<br />
<br />
<br />
<br />
<br />
<br />
<br />
<br />
<br />
<br />
<br />
<br />
<br />
<br />
<br />
<br />
<br />
<br />
<br />
<br />
<br />
<br />
<br />
<br />
<br />
<br />
<br />
<br />
<br />
<br />
<br />
<br />
<br />
<br />
<br />
<br />
<br />
<br />
<br />
<br />
<br />
<br />
<br />
<br />
1 <br />
2 <br />
3 <br />
<br />
<br />
4 <br />
5 <br />
<br />
<br />
<br />
<br />
<br />
<br />
<br />
<br />
<br />
<br />
<br />
<br />
<br />
<br />
1 <br />
<br />
<br />
<br />
<br />
<br />
<br />
2 <br />
3 <br />
4 <br />
<br />
<br />
5 <br />
<br />
<br />
6 <br />
<br />
<br />
<br />
<br />
<br />
<br />
<br />
<br />
<br />
<br />
<br />
<br />
<br />
<br />
<br />
<br />
<br />
<br />
<br />
<br />
<br />
<br />
<br />
<br />
<br />
<br />
<br />
<br />
<br />
<br />
<br />
<br />
<br />
<br />
<br />
<br />
<br />
<br />
<br />
<br />
<br />
<br />
<br />
<br />
<br />
<br />
<br />
<br />
<br />
<br />
<br />
<br />
<br />
<br />
<br />
<br />
<br />
<br />
<br />
<br />
<br />
<br />
<br />
<br />
<br />
<br />
<br />
<br />
<br />
<br />
<br />
<br />
<br />
<br />
<br />
<br />
<br />
<br />
<br />
<br />
<br />
<br />
<br />
<br />
<br />
<br />
<br />
<br />
<br />
<br />
<br />
<br />
<br />
<br />
<br />
<br />
<br />
<br />
<br />
<br />
<br />
<br />
<br />
<br />
<br />
<br />
<br />
<br />
<br />
<br />
<br />
<br />
<br />
<br />
<br />
<br />
<br />
<br />
<br />
<br />
<br />
<br />
<br />
<br />
<br />
<br />
<br />
<br />
<br />
<br />
<br />
<br />
<br />
<br />
<br />
<br />
<br />
<br />
<br />
<br />
<br />
<br />
<br />
<br />
<br />
<br />
<br />
<br />
<br />
<br />
<br />
<br />
<br />
<br />
<br />
<br />
<br />
<br />
<br />
<br />
<br />
<br />
<br />
<br />
1 <br />
2 <br />
3


