

Sony PCM-M10 - PCM-M10 Consignes d’utilisation Anglais
Sony PCM-M10 - PCM-M10 Consignes d’utilisation Anglais
Sony PCM-M10 - PCM-M10 Consignes d’utilisation Anglais

You also want an ePaper? Increase the reach of your titles
YUMPU automatically turns print PDFs into web optimized ePapers that Google loves.
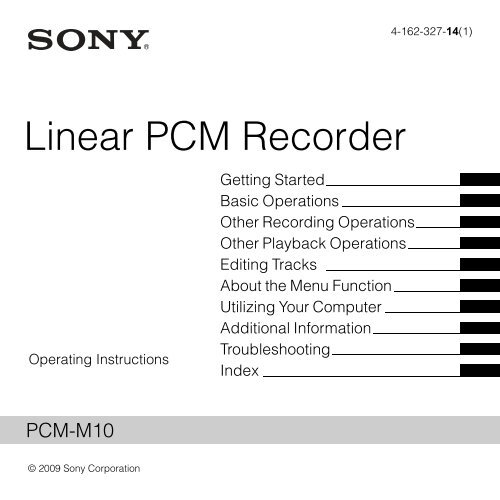
4-162-327-14(1)<br />
Linear <strong>PCM</strong> Recorder<br />
Operating Instructions<br />
Getting Started<br />
Basic Operations<br />
Other Recording Operations<br />
Other Playback Operations<br />
Editing Tracks<br />
About the Menu Function<br />
Utilizing Your Computer<br />
Additional Information<br />
Troubleshooting<br />
Index<br />
<strong>PCM</strong>-<strong>M10</strong><br />
© 2009 <strong>Sony</strong> Corporation
Do not install the AC power adaptor in a confined<br />
space, such as a bookcase or built-in cabinet.<br />
To reduce the risk of fire or electric shock, do not<br />
expose the AC power adaptor to dripping or<br />
splashing, and do not place objects filled with liquids,<br />
such as vases, on the AC power adaptor.<br />
As the main plug of AC power adaptor is used to<br />
disconnect the AC power adaptor from the mains,<br />
connect it to an easily accessible AC outlet. Should<br />
you notice an abnormality in it, disconnect it from the<br />
AC outlet immediately<br />
Excessive sound pressure from earphones and<br />
headphones can cause hearing loss.<br />
For customers in Europe<br />
Disposal of Old Electrical &<br />
Electronic Equipment (Applicable<br />
in the European Union and other<br />
European countries with separate<br />
collection systems)<br />
This symbol on the product or on<br />
its packaging indicates that this<br />
product shall not be treated as<br />
household waste. Instead it shall be<br />
handed over to the applicable<br />
collection point for the recycling of<br />
electrical and electronic<br />
equipment. By ensuring this<br />
product is disposed of correctly, you will help prevent<br />
potential negative consequences for the environment<br />
and human health, which could otherwise be caused<br />
by inappropriate waste handling of this product. The<br />
recycling of materials will help to conserve natural<br />
resources. For more detailed information about<br />
2 GB<br />
recycling of this product, please contact your local<br />
Civic Office, your household waste disposal service<br />
or the shop where you purchased the product.<br />
Applicable accessories:<br />
Remote commander RM-<strong>PCM</strong>001<br />
Disposal of waste batteries<br />
(applicable in the European Union<br />
and other European countries with<br />
separate collection systems)<br />
This symbol on the battery or on the<br />
packaging indicates that the battery<br />
provided with this product shall not<br />
be treated as household waste.<br />
On certain batteries this symbol<br />
might be used in combination with a<br />
chemical symbol. The chemical<br />
symbols for mercury (Hg) or lead (Pb) are added if the<br />
battery contains more than 0.0005% mercury or<br />
0.004% lead.<br />
By ensuring these batteries are disposed of correctly,<br />
you will help prevent potentially negative<br />
consequences for the environment and human health<br />
which could otherwise be caused by inappropriate<br />
waste handling of the battery. The recycling of the<br />
materials will help to conserve natural resources.<br />
In case of products that for safety, performance or<br />
data integrity reasons require a permanent connection<br />
with an incorporated battery, this battery should be<br />
replaced by qualified service staff only.<br />
To ensure that the battery will be treated properly,<br />
hand over the product at end-of-life to the applicable<br />
collection point for the recycling of electrical and<br />
electronic equipment.<br />
For all other batteries, please view the section on how<br />
to remove the battery from the product safely. Hand<br />
the battery over to the applicable collection point for<br />
the recycling of waste batteries.
For more detailed information about recycling of this<br />
product or battery, please contact your local Civic<br />
Office, your household waste disposal service or the<br />
shop where you purchased the product.<br />
• The recorded music is limited to private use only.<br />
Use of the music beyond this limit requires<br />
permission of the copyright holders.<br />
• <strong>Sony</strong> is not responsible for incomplete recording/<br />
downloading or damaged data due to problems of<br />
the <strong>PCM</strong> recorder or computer.<br />
• Depending on the types of the text and characters,<br />
the text shown on the <strong>PCM</strong> recorder may not be<br />
displayed properly on device. This is due to:<br />
– The capacity of the connected <strong>PCM</strong> recorder.<br />
– The <strong>PCM</strong> recorder is not functioning normally.<br />
– Content information is written in the language<br />
or the character that is not supported by the<br />
<strong>PCM</strong> recorder.<br />
Notice for users<br />
Program © 1999, 2000, 2001, 2002, 2003, 2004,<br />
2005, 2006, 2007, 2008, 2009 <strong>Sony</strong> Corporation<br />
Documentation ©2009 <strong>Sony</strong> Corporation<br />
All rights reserved. This manual or the software<br />
described herein, in whole or in part, may not be<br />
reproduced, translated or reduced to any machine<br />
readable form without prior written approval from<br />
<strong>Sony</strong> Corporation.<br />
IN NO EVENT SHALL SONY CORPORATION BE<br />
LIABLE FOR ANY INCIDENTAL,<br />
CONSEQUENTIAL OR SPECIAL DAMAGES,<br />
WHETHER BASED ON TORT, CONTRACT, OR<br />
OTHERWISE, ARISING OUT OF OR IN<br />
CONNECTION WITH THIS MANUAL, THE<br />
SOFTWARE OR OTHER INFORMATION<br />
CONTAINED HEREIN OR THE USE THEREOF.<br />
<strong>Sony</strong> Corporation reserves the right to make any<br />
modification to this manual or the information<br />
contained herein at any time without notice.<br />
The software described herein may also be governed<br />
by the terms of a separate user license agreement.<br />
This software is for Windows and cannot be used for<br />
Macintosh.<br />
The supplied connecting cable is for the <strong>PCM</strong>-<strong>M10</strong><br />
linear <strong>PCM</strong> Recorder. You cannot connect other<br />
linear <strong>PCM</strong> recorders.<br />
3 GB
Table of Contents<br />
Techniques for Better Recording ..............7<br />
Getting Started<br />
Step 1: Checking the Contents of the<br />
Package ...................................................10<br />
Index to parts and controls .................11<br />
Step 2: Inserting the Batteries .................13<br />
When to replace batteries ...................14<br />
To operate with the AC power<br />
adaptor ................................................15<br />
Step 3: Turning the <strong>PCM</strong> recorder On ....16<br />
Turning the power on .........................16<br />
Turning the power off .........................16<br />
Step 4: Setting the Clock ........................17<br />
Setting the clock after inserting<br />
batteries ...............................................17<br />
Setting the clock using the menu ........17<br />
Step 5: Setting the Language to Be<br />
Used in the Display Window ..................19<br />
Preventing Accidental Operation –<br />
HOLD .....................................................21<br />
Locking the buttons of the<br />
<strong>PCM</strong> recorder .....................................21<br />
Unlocking the buttons of the <strong>PCM</strong><br />
recorder ...............................................21<br />
Basic Operations<br />
Recording ............................................22<br />
Listening ..............................................26<br />
Deleting ...............................................30<br />
Other Recording Operations<br />
Changing the Recording Method ............32<br />
Recording using the remote<br />
commander .........................................32<br />
Manual recording ................................33<br />
Recording a few seconds in advance –<br />
the Pre-Recording function .................34<br />
Recording on a memory card ..............36<br />
Recording across memory media –<br />
Cross-Memory Recording ..................39<br />
Changing the Recording Settings ............41<br />
Selecting the recording mode .............41<br />
Setting the microphone sensitivity ......42<br />
Cutting out low frequency –<br />
the LCF function .................................43<br />
Preventing sound distortion –<br />
the LIMITER function ........................44<br />
Recording via Other Devices ..................46<br />
Recording with an external<br />
microphone .........................................46<br />
Recording from other equipment ........47<br />
4 GB
Other Playback Operations<br />
Changing the Playback Method ..............49<br />
Changing the display during<br />
playback ..............................................49<br />
Listening the playback sounds<br />
with the headphones or external<br />
speakers ..............................................50<br />
Quickly locating the point you<br />
wish to start playback –<br />
Easy Search ........................................51<br />
Selecting the playback mode ..............51<br />
Playing back repeatedly ......................52<br />
Changing the Playback Sounds ..............54<br />
Adjusting the playback speed –<br />
the DPC function ................................54<br />
Adjusting the playback tones –<br />
Key Control ........................................55<br />
Reinforcing the bass sound –<br />
Effect ..................................................56<br />
Playback via Other Devices ....................58<br />
Recording with other equipment ........58<br />
Editing Tracks<br />
Adding a Mark to a Track .......................60<br />
Using a track mark ..............................60<br />
Adding a “TAKE” or “KEEP” to<br />
a file name ..........................................62<br />
Protecting a track ................................64<br />
Arranging Tracks ....................................65<br />
Copying a track to the<br />
other memory ......................................65<br />
Dividing a track into two ....................66<br />
Deleting all tracks in a folder ..............69<br />
About the Menu Function<br />
Making Settings for the Menu ................71<br />
Menu settings ..........................................72<br />
Utilizing Your Computer<br />
Using the <strong>PCM</strong> recorder with Your<br />
Computer .................................................83<br />
Connecting the <strong>PCM</strong> recorder to<br />
your computer .....................................84<br />
Structure of folders and files ...............85<br />
Copying Tracks from the <strong>PCM</strong><br />
recorder to Your Computer .....................87<br />
Copying Files from Your Computer<br />
to the <strong>PCM</strong> recorder and Playing<br />
Them Back ..............................................88<br />
Using the <strong>PCM</strong> Recorder as a USB<br />
Memory – Data Storage Function ...........90<br />
Disconnecting the <strong>PCM</strong> Recorder<br />
from Your Computer ...............................91<br />
5 GB
Precautions ..............................................92<br />
Specifications ..........................................95<br />
System requirements ..........................95<br />
Battery life ........................................100<br />
Additional Information<br />
Troubleshooting<br />
6 GB<br />
Troubleshooting ....................................102<br />
Error Messages .....................................108<br />
System Limitations ...............................112<br />
Display Window ...................................113<br />
Index .....................................................116<br />
Trademarks ...........................................119<br />
What you record is for personal<br />
enjoyment and use only. Copyright laws<br />
prohibit other forms of use without the<br />
permission of the copyright holders.<br />
The use of Memory Stick media for<br />
recording copyright-protected graphics or<br />
other data is limited to the restrictions<br />
specified under applicable copyright<br />
laws. Any use beyond those restriction is<br />
prohibited.<br />
This product is compatible with<br />
Memory Stick Micro (M2) media.<br />
M2 is the abbreviated product name for<br />
a Memory Stick Micro.<br />
In this booklet, M2 is used to describe<br />
Memory Stick Micro media.
Techniques for Better Recording<br />
The <strong>PCM</strong>-<strong>M10</strong> linear <strong>PCM</strong> recorder allows you to enjoy high-quality recording in a variety<br />
of situations. This section introduces easy recording setups for 6 typical music scenes.<br />
For recording a solo acoustic<br />
guitar performance<br />
For recording a piano performance<br />
z Tips for setup<br />
• Use a tripod or other device to set the <strong>PCM</strong><br />
recorder about 1 meter from the guitar.<br />
• Set the <strong>PCM</strong> recorder so that its built-in<br />
microphones face the sound box of the<br />
guitar.<br />
• To start, stop recording, or add track marks<br />
remotely, use the supplied remote<br />
commander.<br />
REC LEVEL<br />
AUTO<br />
z Tips for setup<br />
• Use a tripod or other device to set the <strong>PCM</strong><br />
recorder level with the piano keyboard.<br />
• Set the <strong>PCM</strong> recorder approximately 1.5<br />
meters from the piano.<br />
REC LEVEL<br />
AUTO<br />
MIC SENS(ATT) • When recording near the<br />
piano: LOW<br />
• When recording far from<br />
the piano: HI<br />
MIC SENS(ATT)<br />
HI<br />
7 GB
For recording a jazz trio<br />
performance<br />
z Tips for setup<br />
• Use a tripod or other device to set the <strong>PCM</strong><br />
recorder as close to the lead instrument as<br />
possible.<br />
• While monitoring recording, move the <strong>PCM</strong><br />
recorder to the position where volume levels<br />
from instruments are well-balanced.<br />
REC LEVEL AUTO<br />
MIC SENS(ATT) • When recording near the<br />
instrument: LOW<br />
• When recording far from<br />
the instrument: HI<br />
8 GB<br />
For recording a band performance<br />
at a recording studio<br />
z Tips for setup<br />
• Use a tripod or other device to set the <strong>PCM</strong><br />
recorder.<br />
• Adjust the orientation and height of the <strong>PCM</strong><br />
recorder, so that the built-in microphones<br />
face the vocalist.<br />
• Adjust the positions of guitar amplifier and<br />
base amplifier so that their volume levels are<br />
well-balanced.<br />
REC LEVEL<br />
MIC SENS(ATT)<br />
AUTO<br />
LOW
For recording an electronic piano<br />
performance via a line connection<br />
For recording a musical<br />
performance of large number of<br />
performers such as a children’s<br />
chorus at a concert hall<br />
z Tips for setup<br />
• Connect the line output jack of an electronic<br />
piano to the LINE IN jack of the <strong>PCM</strong><br />
recorder with a cable (not supplied).<br />
• Adjust the recording level to the optimum<br />
with the REC LEVEL dial.<br />
REC LEVEL<br />
LIMITER<br />
MANUAL<br />
ON (menu setting)<br />
z Tips for setup<br />
• Set the <strong>PCM</strong> recorder as close to the<br />
conductor or to the stage as possible.<br />
• Set the <strong>PCM</strong> recorder so that the built-in<br />
microphones face the performers.<br />
REC LEVEL<br />
MANUAL<br />
LIMITER<br />
ON (menu setting)<br />
z For better recording<br />
• For the most natural and dynamic recording,<br />
manual recording is recommended.<br />
(Adjustment using the REC LEVEL dial is<br />
required.)<br />
• To obtain the best recording results, perform<br />
a trial recording in advance.<br />
• The <strong>PCM</strong> recorder provides a level guide<br />
function that displays an error message when<br />
an excessive recording level is detected<br />
during automatic recording.<br />
9 GB
Step 1: Checking the Contents of the<br />
Package<br />
Linear <strong>PCM</strong> recorder (1)<br />
Remove the film on the display window<br />
before you use the <strong>PCM</strong> recorder.<br />
Remote commander (1)<br />
AC power adaptor (3V) (1)<br />
10 GB Getting Started<br />
USB connecting cable (1)<br />
LR6 (size AA) alkaline batteries (2)<br />
Hand strap (1)<br />
CD-ROM (2)<br />
• Sound Forge Audio Studio LE (1)<br />
• Operating instructions as PDF files (1)<br />
Operating Instructions<br />
“Sound Forge Audio Studio LE” is a<br />
software application that supports editing<br />
and CD creation on your computer. For an<br />
introduction to installation of the software,<br />
see the “Sound Forge Audio Studio LE<br />
Guide.”<br />
You are cautioned that any changes or<br />
modifications not expressly approved in this<br />
manual could void your authority to operate<br />
this equipment.
Index to parts and controls<br />
Front<br />
L (repeat) A-B button<br />
M DISPLAY button<br />
N REC LEVEL (recording level) dial<br />
O POWER/HOLD switch<br />
P REMOTE jack<br />
Q ACCESS indicator<br />
R T-MARK (track mark) button<br />
S Strap hole<br />
Rear<br />
Getting Started<br />
A Peak level L/R (-12 dB/OVER)<br />
indicators<br />
B Display window<br />
C DELETE button<br />
D MENU button<br />
E (folder) button<br />
F > FF/ v (fast-forward/up) button<br />
G . FR/ V (fast-rewind/down) button<br />
H x STOP button<br />
I X PAUSE button/indicator<br />
J N PLAY/ENTER button/indicator*<br />
K z REC (record) button/indicator<br />
T LINE IN (line input) jack<br />
U MIC SENS(ATT) (microphone<br />
sensitivity (attenuator)) HI/LOW (high/<br />
low) switch<br />
V m (microphone) jack (Plug In Power<br />
compatible)*<br />
11 GB
W REC LEVEL (recording level)<br />
MANUAL/AUTO switch<br />
X Hole for attaching the tripod (not<br />
supplied)<br />
Y Battery compartment<br />
Z Speaker (on the basement)<br />
wj Built-in microphones (stereo)<br />
wk DPC (SPEED CTRL) (speed control)<br />
ON/OFF switch<br />
wl i/LINE OUT (headphone/line output)<br />
jack<br />
e; USB connector<br />
ea M2/microSD memory card slot<br />
es DC IN 3V jack<br />
ed VOLUME (volume) +*/– button<br />
* These buttons and jack have a tactile dot.<br />
Use it as a reference point for operations, or<br />
to identify each terminal.<br />
12 GB<br />
Remote commander (supplied)<br />
1 X PAUSE button<br />
2 x STOP button<br />
3 OPR (Operation) indicator<br />
4 Connecting plug<br />
5 z REC button<br />
6 T-MARK (track mark) button
Step 2: Inserting the Batteries<br />
1 Slide and lift the battery compartment lid<br />
in the direction of the arrow.<br />
If the battery compartment lid is<br />
detached<br />
Getting Started<br />
2 Insert the two supplied LR6 (size AA)<br />
alkaline batteries into the battery<br />
compartment, and then close the lid.<br />
Be sure to insert the batteries with the 3<br />
and # ends in the right position.<br />
If you drop the <strong>PCM</strong> recorder or handle it<br />
roughly, the battery compartment lid may<br />
become detached.<br />
If this occurs, insert a projected part at one<br />
end of the battery compartment lid into the<br />
opening on the <strong>PCM</strong> recorder (1), and<br />
then align the other projected part of the lid<br />
along the slit of the <strong>PCM</strong> recorder (2) as<br />
illustrated above. Then stand up the lid and<br />
push it down until the lid is attached to the<br />
<strong>PCM</strong> recorder.<br />
When using rechargeable<br />
batteries<br />
You can use rechargeable batteries with the<br />
<strong>PCM</strong> recorder. To use rechargeable<br />
13 GB
atteries, select “NiMH Battery” in the<br />
“Battery Setting” submenu of the “Detail<br />
Menu.” With this setting, the battery<br />
remain indicator for the rechargeable<br />
batteries will be displayed more precisely.<br />
See “Making Settings for the Menu” on<br />
page 71.<br />
14 GB<br />
z Tips<br />
• Even if fully-charged rechargeable batteries<br />
are inserted, the battery indicator may not<br />
show the full status.<br />
• Use a charger to recharge batteries at room<br />
temperatures.<br />
• Use the following charger and rechargeable<br />
batteries for the <strong>PCM</strong> recorder:<br />
– Nickel metal hydride rechargeable battery:<br />
NH-AA-B2K<br />
– Quick battery charger for nickel metal<br />
hydride rechargeable batteries:<br />
BCG-34HS2K<br />
When to replace batteries<br />
When using batteries, the battery indicator<br />
on the display shows the battery condition.<br />
Battery remain indication<br />
m<br />
: “Low Battery Level” appears.<br />
Replace two old batteries with new<br />
ones soon.<br />
: “Change Battery” appears and the<br />
<strong>PCM</strong> recorder will stop operation.<br />
z Tips<br />
• Do not use manganese batteries for this <strong>PCM</strong><br />
recorder.<br />
• When replacing the batteries, tracks<br />
recorded are not deleted even when you<br />
remove the batteries.<br />
• When replacing batteries, the clock<br />
continues moving for about 3 minutes after<br />
you remove the batteries.<br />
• When replacing batteries, turn off the power<br />
of the <strong>PCM</strong> recorder.<br />
• Do not mix different types of batteries.
To operate with the AC<br />
power adaptor<br />
Insert the supplied AC power adaptor<br />
securely into the DC IN 3V jack until it<br />
stops to the end.<br />
Getting Started<br />
to the DC IN<br />
3V jack<br />
to a wall<br />
outlet<br />
AC power<br />
adaptor<br />
(supplied)<br />
15 GB
Step 3: Turning the <strong>PCM</strong> recorder On<br />
Turning the power on<br />
Slide the POWER/HOLD switch in the<br />
direction of “POWER” for more than<br />
1 second. The <strong>PCM</strong> recorder is turned on,<br />
and an animation of “Accessing...” is<br />
displayed.<br />
Turning the power off<br />
Slide the POWER/HOLD switch in the<br />
direction of “POWER” for more than<br />
2 seconds, and an animation of “See You!”<br />
is displayed.<br />
z Tips<br />
• The <strong>PCM</strong> recorder is accessing memory<br />
while “Accessing...” appears on the display<br />
or the ACCESS indicator flashes. During<br />
this time, do not remove or insert batteries<br />
and do not disconnect or connect the AC<br />
power adaptor, or the USB connecting cable.<br />
Doing so may damage the data.<br />
• Even if you do not use the <strong>PCM</strong> recorder, the<br />
batteries are consumed slightly. When you<br />
are not going to use the <strong>PCM</strong> recorder for an<br />
extend period of time, it is recommended<br />
that you turn the power off and remove the<br />
batteries.<br />
• When the <strong>PCM</strong> recorder remains turned on<br />
and in the stop mode for about 10 minutes or<br />
longer, the window display turns off<br />
automatically and the <strong>PCM</strong> recorder enters<br />
the sleep mode. You can operate the <strong>PCM</strong><br />
recorder by pressing a button.<br />
16 GB
Step 4: Setting the Clock<br />
> FF/ v,<br />
. FR/ V<br />
MENU<br />
Setting the clock after<br />
inserting batteries<br />
1 Press > FF/ v or . FR/ V to set the<br />
year, and then press N PLAY/ENTER.<br />
Perform the same operations to set<br />
month, day, hour, and minute in<br />
sequence.<br />
Getting Started<br />
N PLAY/<br />
ENTER<br />
x STOP<br />
Recorded audio files (tracks) are named<br />
using the date and time of the clock. By<br />
setting the clock before recording, the<br />
recording’s date and time will be correctly<br />
saved.<br />
When the <strong>PCM</strong> recorder is turned on before<br />
the clock has been set, “Set Clock” appears<br />
on the display. Then the “Clock” display of<br />
the menu appears, and the year section<br />
flashes in the display window.<br />
2 Press x STOP to return to the stop mode<br />
display.<br />
Setting the clock using the<br />
menu<br />
While the <strong>PCM</strong> recorder is in the stop<br />
mode, you can set the clock using the menu.<br />
1 Select “Clock” in the menu in the stop<br />
mode.<br />
17 GB
1 Press MENU to enter the menu mode.<br />
The menu mode window will be<br />
displayed.<br />
2 Press > FF/ v or . FR/ V to<br />
select “Detail Menu,” and then press<br />
N PLAY/ENTER.<br />
3 Press > FF/ v or . FR/ V to<br />
select “Clock,” and then press N<br />
PLAY/ENTER.<br />
2 Press > FF/ v or . FR/ V to select<br />
the date, and then press N PLAY/<br />
ENTER.<br />
18 GB<br />
3 Press > FF/ v or . FR/ V to set the<br />
year, and then press N PLAY/ENTER.<br />
Perform the same operations to set<br />
month, day, hour, and minute in<br />
sequence.<br />
4 Press x STOP to return to the stop mode<br />
display.<br />
P Notes<br />
• If you do not press a button within 1 minute<br />
of entering the clock setting data, the clock<br />
setting mode is cancelled and the window<br />
will return to the stop mode display.<br />
• If you leave the <strong>PCM</strong> recorder for<br />
approximately 3 minutes or longer, with no<br />
batteries inserted, the clock is reset to the<br />
default settings. In this case, set the clock<br />
again.
Step 5: Setting the Language to Be Used in<br />
the Display Window<br />
> FF/ v,<br />
. FR/ V<br />
2 Press > FF/ v or . FR/ V to select<br />
“Detail Menu,” and then press N<br />
PLAY/ENTERT.<br />
Getting Started<br />
MENU<br />
N PLAY/<br />
ENTER<br />
x STOP<br />
3 Press > FF/ v or . FR/ V to select<br />
“Language,” and then press N PLAY/<br />
ENTER.<br />
You can select the language to be used for<br />
tracks, menus, folder names, file names,<br />
etc. from 6 languages.<br />
1 Press MENU to enter the menu mode.<br />
The menu mode window will be displayed.<br />
19 GB
4 Press > FF/ v or . FR/ V to select<br />
the language that you want to use, and<br />
then press N PLAY/ENTER.<br />
You can select the following languages.<br />
Deutsch (German), English,<br />
Español (Spanish), Français (French),<br />
Italiano (Italian), Русский (Russian)<br />
5 Press x STOP to return to the stop mode<br />
display.<br />
20 GB
Preventing Accidental Operation – HOLD<br />
Locking the buttons of the<br />
<strong>PCM</strong> recorder<br />
Slide the POWER/HOLD switch in the<br />
direction of “HOLD.”<br />
“HOLD” will appear for approximately 3<br />
seconds and all the functions of the buttons<br />
of the <strong>PCM</strong> recorder are locked.<br />
Unlocking the buttons of the<br />
<strong>PCM</strong> recorder<br />
Slide the POWER/HOLD switch towards<br />
the center so that all buttons will be<br />
unlocked.<br />
P Note<br />
When the HOLD function is activated during<br />
recording, all the functions of the buttons of<br />
the <strong>PCM</strong> recorder are locked to prevent<br />
accidental operation. To stop recording, cancel<br />
the HOLD function first.<br />
z Tip<br />
Even if the HOLD function is activated, you<br />
can start, pause, or stop recording, or add track<br />
marks by using the remote commander<br />
connected to the <strong>PCM</strong> recorder.<br />
Getting Started<br />
21 GB
Basic Operations<br />
Recording<br />
P Note<br />
Before making a recording, turn on the power of the <strong>PCM</strong> recorder.<br />
Selecting a folder<br />
1 Press to display the folder selection window in the<br />
stop mode.<br />
2 Press > FF/ v or . FR/ V to select the folder in<br />
which you want to record tracks ( FOLDER01-10).<br />
When you purchase the <strong>PCM</strong> recorder, there are 10<br />
folders already available.<br />
3 Press N PLAY/ENTER.<br />
22 GB<br />
> FF/ v<br />
. FR/ V<br />
N PLAY/<br />
ENTER
Starting recording (automatic recording)<br />
1 Set the REC LEVEL switch to “AUTO,” and press<br />
z REC in the stop mode to enter the recording standby<br />
mode.<br />
The z REC indicator lights in red and the X PAUSE<br />
indicator flashes in orange (Recording Standby mode).<br />
When you select “AUTO,” the recording level will be<br />
adjusted automatically.<br />
The REC LEVEL dial adjustment is enabled when you<br />
select “MANUAL.”<br />
You can change the microphone sensitivity with the<br />
MIC SENS(ATT) switch.<br />
z REC<br />
X PAUSE<br />
Basic Operations<br />
2 Turn the built-in microphones in the direction of the<br />
source to be recorded, and press X PAUSE, or<br />
N PLAY/ENTER.<br />
Recording starts. The new track will be recorded at the<br />
end in the selected folder.<br />
L<br />
R<br />
Built-in<br />
microphones<br />
X PAUSE<br />
N PLAY/<br />
ENTER<br />
23 GB
To stop recording<br />
Press x STOP.<br />
The ACCESS indicator flashes in orange and the <strong>PCM</strong><br />
recorder stops at the beginning of the current recording.<br />
x STOP<br />
Note while accessing<br />
The <strong>PCM</strong> recorder is recording data and saving it in memory when the ACCESS indicator flashes<br />
in orange. While the <strong>PCM</strong> recorder is accessing data, do not remove the batteries, plug or unplug<br />
the AC power adaptor or connecting cables. Doing so may damage the data.<br />
Other operations<br />
pause recording Press X PAUSE. During recording pause, “ ” flashes in the<br />
display window.<br />
release pause and resume Press X PAUSE again or press N PLAY/ENTER. Recording<br />
recording<br />
resumes from that point. (To stop recording after pausing recording,<br />
press x STOP.)<br />
24 GB<br />
z Tips<br />
• You can record up to 99 tracks in each folder.<br />
• When an excessive recording level (exceeding –1 dB) is detected during the recording standby<br />
mode, the peak level L/R OVER indicators light in red and the following level guide is displayed.<br />
You may solve the problem by moving the <strong>PCM</strong> recorder far from the sound source, or setting the<br />
MIC SENS(ATT) switch to “LOW.” If the problem persists, use manual recording (page 33).
• When a memory card is being inserted, you can continue recording a track by changing the folder<br />
to save the track from the internal memory to the memory card automatically after the internal<br />
memory is full (Cross-Memory Recording)(page 39).<br />
• When you connect the supplied wired remote commander to the <strong>PCM</strong> recorder, you can also<br />
press z REC, X PAUSE, and x STOP on the remote commander to perform recording<br />
operations.<br />
• Before you start recording, we recommend you make a trial recording first.<br />
P Notes<br />
• Operating or touch noises may be recorded if an object, such as your finger, etc., accidentally rubs<br />
or scratches the <strong>PCM</strong> recorder during recording.<br />
• You do not need to press and hold z REC while recording.<br />
• Before making a recording, be sure to check the battery indicator (page 14).<br />
• In automatic recording, the REC LEVEL dial adjustment and the LIMITER setting will not work.<br />
Listening the recording with headphones (not supplied) – Monitoring<br />
If you connect headphones (not supplied) to the i/LINE OUT (headphone/line output) jack,<br />
you can monitor the recording. You can adjust the monitoring volume by pressing VOLUME<br />
+/–, but the recording level is fixed.<br />
i/LINE OUT<br />
(headphone/line<br />
output) jack<br />
P Note<br />
Make sure that “Audio Out” in the menu<br />
is set to “Headphones.” If “LINE OUT” is<br />
selected, do not connect headphones; the<br />
playback sound from the headphones will<br />
be very loud.<br />
The “Audio Out” in the menu is set to<br />
“Headphones,” when you purchase the<br />
<strong>PCM</strong> recorder (page 58).<br />
Basic Operations<br />
VOLUME +/–<br />
25 GB
Listening<br />
P Note<br />
Before the playback starts, turn on the power of the <strong>PCM</strong> recorder.<br />
Before you start playback<br />
Connect headphones (not supplied) to the i/LINE OUT<br />
(headphone/line output) jack for better playback sound.<br />
P Note<br />
Make sure that “Audio Out” in the menu is set to<br />
“Headphones.” If “LINE OUT” is selected, do not connect<br />
headphones; the playback sound from the headphones will be<br />
very loud.<br />
The “Audio Out” in the menu is set to “Headphones,” when<br />
you purchase the <strong>PCM</strong> recorder (page 58).<br />
i/LINE<br />
OUT jack<br />
Headphones<br />
plug<br />
To start playback<br />
1 Press in the stop mode.<br />
2 Press > FF/ v or . FR/ V to select the folder.<br />
> FF/ v<br />
. FR/ V<br />
26 GB
3 Press N PLAY/ENTER.<br />
N PLAY/<br />
ENTER<br />
4 Press > FF/ v or . FR/ V to select the track you<br />
want to play.<br />
> FF/ v<br />
. FR/ V<br />
Basic Operations<br />
5 Press N PLAY/ENTER.<br />
Playback will start soon, and the N PLAY/ENTER<br />
indicator will light in green. (When “LED” is set to<br />
“OFF” in the menu (page 79), the indicator does not<br />
light.)<br />
6 Press VOLUME +/– to adjust the volume.<br />
N PLAY/<br />
ENTER<br />
VOLUME +/–<br />
27 GB
To stop playback<br />
Press x STOP.<br />
x STOP<br />
The <strong>PCM</strong> recorder stops at the current position. To resume<br />
playback from that point, press N PLAY/ENTER.<br />
N PLAY/<br />
ENTER<br />
Other operations<br />
stop at the current position Press X PAUSE. To resume playback from that point, press X<br />
(Playback Pause function) PAUSE again or press N PLAY/ENTER.<br />
During playback pause, “ ” flashes in the display window.<br />
go back to the beginning of Press . FR/ V once.* 1<br />
the current track<br />
go back to previous tracks Press . FR/ V repeatedly.*2<br />
(During the stop mode, keep the button pressed to go back the tracks<br />
continuously.)*3<br />
skip to the next track Press > FF/ v once.*1<br />
skip to the succeeding Press > FF/ v repeatedly.*2<br />
tracks<br />
(During the stop mode, keep the button pressed to skip the tracks<br />
continuously.)* 3<br />
Fast forward (Cue) Press and hold the > FF/ v during playback.*4<br />
Fast reverse (Review) Press and hold the . FR/ V during playback.* 4<br />
28 GB<br />
*1 When a track mark is set, the <strong>PCM</strong> recorder goes backward or forward to the track mark before or<br />
after the current point.<br />
*2 These operations are for when “Easy Search” is set to “OFF” (page 77).<br />
*3 In the continuous searching mode, the <strong>PCM</strong> recorder does not locate track marks.<br />
*4 If you press and hold the button, the <strong>PCM</strong> recorder goes forward or backward slowly at first, and then<br />
at gradually higher speed.
z Quickly locating the point you want to start playback (Easy Search)<br />
By setting “Easy Search” to “ON” in the menu, you can go back approximately 3 seconds by<br />
pressing . FR/ V, or advance approximately 10 seconds during playback by pressing > FF/<br />
v (page 51).<br />
z Tracks that the <strong>PCM</strong> recorder can play back<br />
In addition to the tracks that the <strong>PCM</strong> recorder has recorded as L<strong>PCM</strong> (WAV) or MP3 files, the<br />
<strong>PCM</strong> recorder can play back WMA, AAC-LC (m4a), MP3, and L<strong>PCM</strong> (WAV) files copied from<br />
your computer or other external device.<br />
To select a folder<br />
The <strong>PCM</strong> recorder saves the tracks it has recorded and the files copied from your computer or<br />
other external device in the following folder structure. There are two types of folders, which<br />
can be distinguished by the folder indicators in the display window as follows:<br />
Basic Operations<br />
Folder selection window<br />
MUSIC<br />
Part of the folder structure of the<br />
internal memory<br />
: Folder for tracks recorded using the<br />
<strong>PCM</strong> recorder<br />
(FOLDER01-FOLDER10) (They<br />
have already been made when you<br />
purchase the <strong>PCM</strong> recorder.)<br />
: Folder copied from a computer<br />
(These folders are displayed when<br />
music files have been copied from a<br />
computer.)<br />
29 GB
Deleting<br />
P Notes<br />
• Once a track has been deleted, you cannot retrieve it.<br />
• Before deleting the track, turn on the power.<br />
Selecting a track and deleting it<br />
1 Select the track you want to delete when the <strong>PCM</strong><br />
recorder is in the stop or playback mode.<br />
2 Press DELETE.<br />
“Delete?” appears with the track title.<br />
DELETE<br />
3 Press > FF/ v or . FR/ V to select “Execute.”<br />
> FF/ v<br />
. FR/ V<br />
4 Press N PLAY/ENTER.<br />
“Deleting...” appears in the display window and the<br />
selected track will be deleted.<br />
When a track is deleted, the remaining tracks will<br />
advance so that there will be no space between tracks.<br />
N PLAY/<br />
ENTER<br />
30 GB
To cancel deleting midway<br />
Select “Cancel” in step 3 of “Selecting a track and deleting<br />
it,” and then press N PLAY/ENTER.<br />
Deleting another track<br />
Proceed with the steps 1 through 4 in “Selecting a track and deleting it.”<br />
N PLAY/<br />
ENTER<br />
Deleting a part of a track<br />
Use the Divide function in the menu to divide a track into two first, one you want to delete<br />
and the other you do not want to delete. Then proceed with the steps 1 through 4 in “Selecting<br />
a track and deleting it.”<br />
Basic Operations<br />
31 GB
Changing the Recording Method<br />
Other Recording Operations<br />
Recording using the remote<br />
commander<br />
to REMOTE<br />
jack<br />
You can use the supplied wired remote<br />
commander to perform recorder operations<br />
remotely. Insert the remote commander<br />
plug securely into the REMOTE jack.<br />
Press the appropriate buttons on the remote<br />
commander to perform operations such as<br />
32 GB<br />
recording, pausing and stopping recording,<br />
and adding track marks.<br />
You can operate the <strong>PCM</strong> recorder even<br />
while it is in the hold state.<br />
z Using the remote commander for<br />
better recorded sound<br />
• By operating the <strong>PCM</strong> recorder using the<br />
remote commander, you can prevent the<br />
<strong>PCM</strong> recorder from picking up noises which<br />
may be caused by accidentally pressing a<br />
button, touching the case, or holding the<br />
<strong>PCM</strong> recorder.<br />
• By placing the <strong>PCM</strong> recorder at the most<br />
suitable position for recording (e.g. at the<br />
center of multiple players, or near the stage),<br />
and by starting and stopping recording<br />
remotely, you can obtain a more lively and<br />
natural stereo sound recording.
Manual recording<br />
1 Set the REC LEVEL switch to<br />
“MANUAL.”<br />
Built-in<br />
microphones<br />
REC LEVEL<br />
z REC<br />
N PLAY/ENTER<br />
2 Select a folder.<br />
3 Press z REC.<br />
The <strong>PCM</strong> recorder enters the recording<br />
standby mode. When the microphones<br />
pick up sound, the level meter in the<br />
display window moves.<br />
Other Recording Operations<br />
x STOP<br />
> FF/ v,<br />
. FR/ V<br />
When you set the REC LEVEL switch to<br />
“MANUAL,” you can adjust the recording<br />
level manually, according to the sound<br />
source. If necessary, you can also utilize the<br />
“LIMITER” (page 44) and “LCF(Low Cut<br />
Filter)” (page 43) in the menu to reduce<br />
sound distortion.<br />
4 Adjust the recording level with the REC<br />
LEVEL dial.<br />
You can check the recording level with<br />
both the peak meter of the display<br />
window and the peak level indicators.<br />
Adjust the level closer to –12 dB, into a<br />
range that is appropriate for your sound<br />
source.<br />
33 GB
If the peak level OVER indicator lights<br />
in red when the recording level exceeds<br />
–1 dB, or “ ” appears on the<br />
display window, distortion may occur.<br />
Reduce the recording level.<br />
Adjust the OVER indication<br />
maximum level<br />
of the sound to<br />
about –12 dB.<br />
5 Make other settings for recording, such<br />
as “LIMITER” (page 44), “LCF(Low<br />
Cut Filter)” (page 43), etc., in the menu.<br />
6 To start recording, press X PAUSE or<br />
N PLAY/ENTER.<br />
7 To stop recording, press x STOP.<br />
34 GB<br />
Recording a few seconds in<br />
advance –<br />
the Pre-Recording function<br />
MENU<br />
z REC<br />
N PLAY/<br />
ENTER<br />
x STOP<br />
> FF/ v,<br />
. FR/ V<br />
The pre-recording function allows you to<br />
record sound sources for approximately 5<br />
seconds prior to the point when recording is<br />
actually started.<br />
This is useful for recording during<br />
interviews or when making an open-air<br />
recording so that you will not miss an<br />
opportunity to start recording.
Sounds for 5 seconds are<br />
buffered in the memory<br />
Press z REC to<br />
enter the recording<br />
standby mode.<br />
Press X PAUSE or<br />
N PLAY/ENTER.<br />
Recording<br />
starts.<br />
1 Press MENU to enter the menu mode.<br />
The menu mode window will be<br />
displayed.<br />
4 Press > FF/ v or . FR/ V to select<br />
“ON,” and then press N PLAY/<br />
ENTER.<br />
Other Recording Operations<br />
2 Press > FF/ v or . FR/ V to select<br />
“Detail Menu,” and then press N<br />
PLAY/ENTER.<br />
3 Press > FF/ v or . FR/ V to select<br />
“PRE REC,” and then press N PLAY/<br />
ENTER.<br />
5 Press x STOP to exit the menu mode.<br />
6 Select a folder.<br />
7 Press z REC.<br />
The <strong>PCM</strong> recorder enters the recording<br />
standby mode. Pre-recording starts and<br />
sounds for a maximum of the last 5<br />
seconds are buffered in the memory.<br />
Displays how<br />
long the sound<br />
is buffered in the<br />
memory.<br />
35 GB
8 To start recording, press X PAUSE or<br />
N PLAY/ENTER.<br />
The standby for recording mode is<br />
released, and recording continues from<br />
the sound buffered in step 7.<br />
9 To stop recording, press x STOP.<br />
P Notes<br />
• If you start recording with the pre-recording<br />
function using the built-in microphones, a<br />
click noise may be recorded when you press<br />
z REC. To record with the pre-recording<br />
function, we recommend you use the<br />
supplied wired remote commander or an<br />
external microphone.<br />
• When the remaining recordable time is less<br />
than 10 seconds, the pre-recording function<br />
is disabled. Before starting to use the prerecording<br />
function, delete unwanted files.<br />
• If you stop recording before step 8, sounds<br />
buffered in the memory will not be saved.<br />
To cancel the pre-recording<br />
function<br />
Set “PRE REC” to “OFF” in step 4.<br />
36 GB<br />
Recording on a memory<br />
card<br />
> FF/ v,<br />
. FR/ V<br />
MENU<br />
N PLAY/ENTER<br />
Insert M2 with the terminal side<br />
facing toward you .*<br />
*when you are inserting<br />
a memory card with<br />
the back side of the<br />
<strong>PCM</strong> recorder facing<br />
toward you.<br />
Insert microSD card with the label<br />
side facing toward you.*<br />
In addition to the built-in memory, you can<br />
record a track on a memory card.
About compatible memory cards<br />
Memory cards that you can use with the<br />
<strong>PCM</strong> recorder are as follows:<br />
• Memory Stick Micro (M2) media:<br />
Up to16 GB is supported. For compatible<br />
M2, please refer to the <strong>Sony</strong> web site<br />
(page 95).<br />
• microSD card:<br />
A microSD (FAT16) card smaller than<br />
2 GB and a microSDHC (FAT32) card<br />
from 4 GB to 16 GB are supported.<br />
A memory card of 64 MB or less is not<br />
supported.<br />
The microSD/microSDHC cards that have<br />
been operationally tested according to our<br />
standards are as follows.<br />
Supplier 1 GB 2 GB 4 GB 8 GB 16 GB<br />
Toshiba a a a a a<br />
Panasonic a a a a a<br />
SanDisk a a a a a<br />
a :Operation tested<br />
– :Operation not tested<br />
As of September 2009<br />
For the <strong>PCM</strong> recorder, the operational tests<br />
performed were using microSD/microSDHC<br />
cards available as of September 2009.<br />
In this manual, M2 and microSD<br />
memory cards are generally referred to as a<br />
“memory card.”<br />
The M2/microSD card slot is referred to<br />
as the “memory card slot.”<br />
Due to the file system specifications of the<br />
<strong>PCM</strong> recorder, you can record and play<br />
back an L<strong>PCM</strong> file smaller than 2 GB, and<br />
an MP3, AAC-LC, or WMA file smaller<br />
than 1 GB using a memory card.<br />
The maximum number of tracks you can<br />
record on a memory card is 5,000.<br />
P Note<br />
Operations of all types of compatible memory<br />
cards are not guaranteed.<br />
Inserting a memory card<br />
Before recording, be sure to copy all the<br />
data saved on the memory card to your<br />
computer and format the memory card on<br />
the <strong>PCM</strong> recorder so it contains no data.<br />
1 Open the cover of the memory card slot<br />
in the stop mode.<br />
2 Insert an M2 or microSD card, in the<br />
direction shown in the illustration on<br />
page 36, securely to the end of the slot<br />
until it clicks into place. Then close the<br />
cover.<br />
Other Recording Operations<br />
37 GB
To remove a memory card<br />
Be sure that the ACCESS indicator is off,<br />
and then push the memory card into the<br />
slot. When it pops out, remove it from the<br />
memory card slot.<br />
38 GB<br />
On folder and track file structure<br />
Ten folders are created in a memory card in<br />
addition to those in the built-in memory.<br />
The structure of folders and track files is<br />
somewhat different from that of the built-in<br />
memory (page 85).<br />
P Notes<br />
• Do not insert or remove a memory card<br />
during recording/playback. Doing so may<br />
cause a malfunction of the <strong>PCM</strong> recorder.<br />
• Do not remove a memory card while<br />
“Accessing...” appears on the display<br />
window or the ACCESS indicator flashes in<br />
orange. Doing so may damage the data.<br />
• If a memory card is not recognized, remove<br />
it and then insert it into the <strong>PCM</strong> recorder<br />
again.<br />
• Close the cover of the memory card slot<br />
firmly. Also, do not insert any liquid, metal,<br />
flammable or any object other than a<br />
memory card into the slot. Doing so may<br />
cause fire, electric shock, or malfunctions.<br />
Using a memory card for<br />
recording and playback (Memory<br />
setting)<br />
1 Press MENU to enter the menu mode.<br />
The menu mode window will be<br />
displayed.<br />
2 Press > FF/ v or . FR/ V to select<br />
“Memory,” and then press N PLAY/<br />
ENTER.<br />
3 Press > FF/ v or . FR/ V to select<br />
“Memory Card,” and then press N<br />
PLAY/ENTER.<br />
4 Press x STOP to exit the menu mode.<br />
To use the built-in memory<br />
Select “Built-In Memory” in step 3.
To start recording<br />
Select the folder and press z REC to enter<br />
recording standby mode. Then press X<br />
PAUSE or N PLAY/ENTER to start<br />
recording.<br />
For automatic recording, see “Recording”<br />
on page 22. For manual recording, see<br />
“Manual recording” on page 33.<br />
Recording across memory<br />
media –<br />
Cross-Memory Recording<br />
recorder automatically switches its<br />
destination to the other memory media and<br />
continues recording (Cross-Memory<br />
Recording).<br />
1 Press MENU to enter the menu mode.<br />
The menu mode window will be<br />
displayed.<br />
2 Press > FF/ v or . FR/ V to select<br />
“Detail Menu,” and then press N<br />
PLAY/ENTER.<br />
Other Recording Operations<br />
> FF/ v,<br />
. FR/ V<br />
MENU<br />
3 Press > FF/ v or . FR/ V to select<br />
“Cross-Memory Recording,” and then<br />
press N PLAY/ENTER.<br />
N PLAY/<br />
ENTER<br />
x STOP<br />
When the memory currently being used<br />
becomes full during recording, the <strong>PCM</strong><br />
39 GB
4 Press > FF/ v or . FR/ V to select<br />
“ON,” and then press N PLAY/<br />
ENTER.<br />
5 Press x STOP to exit the menu mode.<br />
To cancel Cross-Memory<br />
Recording<br />
Select “OFF” in step 4.<br />
When the current memory media<br />
becomes full during recording<br />
The following message appears on the<br />
display window. Recording continues as a<br />
new track in a recordable folder of the<br />
smallest folder number available for the<br />
other memory media.<br />
A new track is created with a new file<br />
name.<br />
40 GB<br />
When the recording stops, the <strong>PCM</strong><br />
recorder stops at the beginning of the new<br />
track.<br />
P Notes<br />
• If the other memory media is also full, a<br />
message is displayed and the <strong>PCM</strong> recorder<br />
stops recording.<br />
• When you play back the original track<br />
recorded with Cross-Memory Recording, the<br />
<strong>PCM</strong> recorder does not play the succeeding<br />
track automatically.<br />
• Before attempting Cross-Memory<br />
Recording, check to see if the memory card<br />
is detected in the “Memory” menu in<br />
advance (page 38).
Changing the Recording Settings<br />
Selecting the recording<br />
mode<br />
> FF/ v,<br />
. FR/ V<br />
MENU<br />
N PLAY/<br />
ENTER<br />
x STOP<br />
• L<strong>PCM</strong> (Linear <strong>PCM</strong>): This is a WAV file<br />
and you can record the sound without<br />
compression, providing higher quality<br />
than MP3. On the other hand, the file size<br />
is large, it takes time to copy to a<br />
computer, and the available recording<br />
time in the <strong>PCM</strong> recorder is shorter than<br />
MP3. We recommend this recording<br />
mode for recording when the sound<br />
quality is important.<br />
• MP3: A standard method of sound<br />
compression, which can be played back<br />
using many different kinds of computers.<br />
1 Press MENU to enter the menu mode.<br />
The menu mode window will be<br />
displayed.<br />
Other Recording Operations<br />
You can select the recording mode in the<br />
menu when the <strong>PCM</strong> recorder is in the stop<br />
mode.<br />
About the recording modes<br />
The <strong>PCM</strong> recorder is compatible with 2<br />
types of recording modes: L<strong>PCM</strong> (Linear<br />
<strong>PCM</strong>) and MP3. The features offered by<br />
each are as follows.<br />
2 Press > FF/ v or . FR/ V to select<br />
“REC Mode,” and then press N PLAY/<br />
ENTER.<br />
41 GB
3 Press > FF/ v or . FR/ V to select<br />
the desired recording mode, and then<br />
press N PLAY/ENTER.<br />
L<strong>PCM</strong> 22.05kHz/16bit L<strong>PCM</strong> (Not<br />
compressed)<br />
L<strong>PCM</strong> 44.10kHz/16bit* mode<br />
L<strong>PCM</strong> 44.10kHz/24bit<br />
You can<br />
L<strong>PCM</strong> 48.00kHz/16bit record with<br />
L<strong>PCM</strong> 48.00kHz/24bit higher sound<br />
quality.<br />
L<strong>PCM</strong> 96.00kHz/16bit<br />
L<strong>PCM</strong> 96.00kHz/24bit<br />
MP3<br />
(compressed)<br />
MP3 44.10kHz/64kbps** mode<br />
MP3 44.10kHz/128kbps You can<br />
record with<br />
MP3 44.10kHz/320kbps higher sound<br />
quality.<br />
* default setting<br />
** for a long-time recording<br />
4 Press x STOP to exit the menu mode.<br />
P Note<br />
You cannot set the recording mode while<br />
recording.<br />
42 GB<br />
z About the sampling frequency<br />
and quantifying bit number<br />
• Sampling frequency is a value that<br />
represents how many times an analog signal<br />
is converted into a digital signal (A/D<br />
conversion) per second. The larger the value<br />
of sampling frequency, the better the sound<br />
quality, but also the larger the amount of<br />
data.<br />
• Quantifying bit number is a value that<br />
represents the amount of data it takes for<br />
1second of audio. The larger the value of the<br />
bit number, the larger amount of data it takes<br />
and the better the sound quality.<br />
Setting the microphone<br />
sensitivity
You can set the sensitivity of the built-in<br />
microphones and an external microphone<br />
connected to the m (microphone) jack of<br />
the <strong>PCM</strong> recorder. Switch the MIC<br />
SENS(ATT) switch according to the<br />
recording conditions or to suit your<br />
purposes, when the <strong>PCM</strong> recorder is either<br />
stopped or is recording.<br />
HI (high)*<br />
LOW<br />
Usually select this position.<br />
• The microphone attenuator is<br />
set to “HI.” (In manual<br />
recording)<br />
• The microphone sensitivity is<br />
set to high. (In automatic<br />
recording)<br />
Select this position to record a<br />
sudden loud sound.<br />
• The microphone attenuator is<br />
set to “LOW.” (In manual<br />
recording)<br />
• The microphone sensitivity is<br />
set to low. (In automatic<br />
recording)<br />
* The microphone sensitivity is set to “HI” when<br />
you purchase the <strong>PCM</strong> recorder.<br />
Cutting out low frequency –<br />
the LCF function<br />
> FF/ v,<br />
. FR/ V<br />
MENU<br />
N PLAY/<br />
ENTER<br />
x STOP<br />
When you set the LCF(Low Cut Filter)<br />
function to “ON” in the stop or recording<br />
mode, you cut out a low frequency to<br />
reduce the air conditioner noise, roaring<br />
noise from wind, etc.; therefore you can<br />
record a track more clearly.<br />
1 Press MENU to enter the menu mode.<br />
The menu mode window will be<br />
displayed.<br />
Other Recording Operations<br />
43 GB
2 Press > FF/ v or . FR/ V to select<br />
“LCF(Low Cut Filter),” and then press<br />
N PLAY/ENTER.<br />
3 Press > FF/ v or . FR/ V to select<br />
“ON,” and then press N PLAY/<br />
ENTER.<br />
The LCF function is set to “OFF” when<br />
you purchase the <strong>PCM</strong> recorder.<br />
4 Press x STOP to exit the menu mode.<br />
To cancel the LCF function<br />
Set “LCF(Low Cut Filter)” to “OFF” in<br />
step 3.<br />
44 GB<br />
Preventing sound distortion–<br />
the LIMITER function<br />
> FF/ v,<br />
. FR/ V<br />
MENU<br />
N PLAY/<br />
ENTER<br />
x STOP<br />
During the stop or recording mode, you can<br />
set the LIMITER function.<br />
When the “LIMITER” is set to “ON,” the<br />
input sound that is too loud is adjusted<br />
automatically to the maximum input level<br />
to prevent sound distortion.<br />
1 Press MENU to enter the menu mode.<br />
The menu mode window will be<br />
displayed.
2 Press > FF/ v or . FR/ V to select<br />
“Detail Menu,” and then press N<br />
PLAY/ENTER.<br />
3 Press > FF/ v or . FR/ V to select<br />
“LIMITER,” and then press N PLAY/<br />
ENTER.<br />
To cancel the LIMITER function<br />
Set “LIMITER” to “OFF” in step 4.<br />
P Notes<br />
• When the REC LEVEL switch is set to<br />
“AUTO,” the LIMITER function does not<br />
work.<br />
• When the “LIMITER” is set to “ON,” the<br />
limiter function of the <strong>PCM</strong> recorder covers<br />
the input from the maximum input level to<br />
+12 dB. If the input exceeds this limit,<br />
sounds may be distorted.<br />
Other Recording Operations<br />
4 Press > FF/ v or . FR/ V to select<br />
“ON,” and then press N PLAY/<br />
ENTER.<br />
The LIMITER function is set to “OFF”<br />
when you purchase the <strong>PCM</strong> recorder.<br />
5 Press x STOP to exit the menu mode.<br />
45 GB
Recording via Other Devices<br />
Recording with an external<br />
microphone<br />
> FF/ v,<br />
. FR/ V<br />
Stereo<br />
microphone<br />
m (microphone) jack<br />
REC LEVEL<br />
You can record from an external<br />
microphone. When an external microphone<br />
is connected, the built-in microphones and<br />
the input from the LINE IN jack become<br />
disabled.<br />
1 Connect an external microphone to the<br />
m (microphone) jack when the <strong>PCM</strong><br />
recorder is in the stop mode.<br />
“Plug In Power” appears in the display<br />
window.<br />
If “Plug In Power” is not displayed, set it<br />
in the menu (page 82).<br />
2 Press> FF/ v or . FR/ V to select<br />
“ON,” and then press N PLAY/<br />
ENTER.<br />
z REC<br />
N PLAY/ENTER<br />
X PAUSE<br />
x STOP<br />
When a plug in power type microphone<br />
is connected, power is automatically<br />
supplied to the microphone from the<br />
<strong>PCM</strong> recorder.<br />
46 GB
3 Press x STOP to exit the menu mode.<br />
4 Set the REC LEVEL switch to “AUTO”<br />
for automatic recording, or “MANUAL”<br />
for manual recording.<br />
5 Press z REC.<br />
The <strong>PCM</strong> recorder enters the recording<br />
standby mode. The built-in microphones<br />
and input from the LINE IN are<br />
automatically cut off.<br />
You can adjust the microphone<br />
sensitivity with the MIC SENS(ATT)<br />
switch (page 42).<br />
Recording from other<br />
equipment<br />
Tape recorder or CD<br />
player<br />
Audio<br />
connecting<br />
cable<br />
LINE IN<br />
REC LEVEL<br />
Other Recording Operations<br />
6 To start recording, press X PAUSE or<br />
N PLAY/ENTER.<br />
7 When “MANUAL” has been selected in<br />
step 4, adjust the recording level with the<br />
REC LEVEL dial.<br />
8 To stop recording, press x STOP.<br />
z Recommended microphones (not<br />
supplied)<br />
We recommend you use the <strong>Sony</strong><br />
ECM-MS957 electret condenser microphone.<br />
z REC<br />
N PLAY/ENTER<br />
X PAUSE<br />
x STOP<br />
You can make music files without using the<br />
computer by recording the sound from<br />
other equipment connected to the <strong>PCM</strong><br />
recorder. When an external equipment is<br />
47 GB
connected, the built-in microphones<br />
become disabled.<br />
1 Connect an external equipment to the<br />
<strong>PCM</strong> recorder in the stop mode.<br />
Connect the audio output jacks (stereo<br />
minijack) of external equipment to the<br />
LINE IN jack of the <strong>PCM</strong> recorder using<br />
a commercially-available audio<br />
connecting cable (not supplied).<br />
2 Set the REC LEVEL switch to “AUTO”<br />
for automatic recording, or “MANUAL”<br />
for manual recording.<br />
3 Press z REC.<br />
The <strong>PCM</strong> recorder enters the recording<br />
standby mode.<br />
4 Start playback with the connected<br />
external equipment.<br />
5 To start recording, press X PAUSE or<br />
N PLAY/ENTER.<br />
6 When “MANUAL” has been selected in<br />
step 2, adjust the recording level with the<br />
REC LEVEL dial.<br />
7 To stop recording, press x STOP.<br />
48 GB<br />
P Note<br />
When both m (microphone) jack and LINE IN<br />
jack are connected with an external<br />
microphone and an external device<br />
respectively, the input from the m<br />
(microphone) jack has the priority. When<br />
using the input from the LINE IN jack, remove<br />
an external microphone from the m<br />
(microphone) jack.
Other Playback Operations<br />
Changing the Playback Method<br />
Changing the display during<br />
playback<br />
You can change the display during<br />
playback between the file information<br />
display and the level meter display.<br />
• File information display<br />
Title name<br />
Artist name<br />
File name<br />
Current folder icon<br />
A track recorded using the <strong>PCM</strong> recorder<br />
is displayed as follows.<br />
: Track title name: Date<br />
(yymmdd)_file number (e.g.<br />
090101_01)<br />
: Artist name (e.g. My Recording)<br />
File Name: Date (yymmdd)_file number<br />
_file extension (e.g.<br />
090101_01.wav)<br />
: Current folder name: 01 (FOLDER<br />
01) to 10 (FOLDER 10)<br />
You can change the folder name, title,<br />
artist name, and/or file name using your<br />
computer.<br />
• Level meter display<br />
You can play back a track while checking<br />
the recorded levels.<br />
level meter<br />
Selecting the level meter display<br />
1 Press MENU to enter the menu mode.<br />
The menu mode window will be<br />
displayed.<br />
2 Press > FF/ v or . FR/ V to select<br />
“Detail Menu,” and then press N<br />
PLAY/ENTER.<br />
Other Playback Operations<br />
49 GB
3 Press > FF/ v or . FR/ V to select<br />
“Level Meter in Playback,” and then<br />
press N PLAY/ENTER.<br />
4 Press > FF/ v or . FR/ V to select<br />
“ON,” and then press N PLAY/<br />
ENTER.<br />
The Level Meter in Playback function is<br />
set to “OFF” when you purchase the<br />
<strong>PCM</strong> recorder.<br />
5 Press x STOP to exit the menu mode.<br />
To display file information<br />
Set “Level Meter in Playback” to “OFF in step<br />
3.<br />
50 GB<br />
Listening the playback<br />
sounds with the<br />
headphones or external<br />
speakers<br />
• To listen with the headphones:<br />
Connect stereo headphones (not supplied)<br />
to the i/LINE OUT (headphone/line<br />
output) jack. The built-in speaker will be<br />
automatically disconnected. Adjust the<br />
volume with the VOLUME +/– buttons.<br />
• To listen from an external speaker:<br />
Connect the speaker cord of the carrying<br />
case speaker CKS-<strong>M10</strong> (not supplied) to<br />
the i/LINE OUT (headphone/line<br />
output) jack of the <strong>PCM</strong> recorder. Adjust<br />
the volume with the VOLUME +/–<br />
buttons.<br />
Or use a commercially-available audio<br />
connecting cable (not supplied) to<br />
connect the microphone or line input jack<br />
of an external active or passive speaker<br />
(not supplied) with the i/LINE OUT<br />
(headphone/line output) jack of the <strong>PCM</strong><br />
recorder.<br />
P Notes<br />
• Set “Audio Out” in the menu to<br />
“Headphones” to use the i/LINE OUT<br />
(headphone/line output) jack as a<br />
headphone.
• When “Audio Out” in the menu is set to<br />
“LINE OUT,” do not connect headphones;<br />
the playback sound from the headphones<br />
will be very loud.<br />
Quickly locating the point<br />
you wish to start playback –<br />
Easy Search<br />
When “Easy Search” is set to “ON” in the<br />
menu, you can quickly locate the point at<br />
which you wish to start playback by<br />
pressing > FF/ v or . FR/ V<br />
repeatedly during playback (page 77). You<br />
can go back approx. 3 seconds by pressing<br />
. FR/ V once, or advance approx. 10<br />
seconds by pressing > FF/ v once. This<br />
function is useful for locating a desired<br />
point in a long recording, such as in a<br />
recording of musical instruments.<br />
z When tracks are played back to<br />
the end of the last track<br />
• When you play back or fast play back to the<br />
end of the last track, “TRACK END” lights<br />
up for approx. 5 seconds.<br />
• When “TRACK END” goes off, the <strong>PCM</strong><br />
recorder will stop at the beginning of the last<br />
track.<br />
• If you press and hold . FR/ V while<br />
“TRACK END” is lit, the tracks are played<br />
back rapidly, and normal playback will start<br />
at the point you release the button.<br />
• If the last track is long and you wish to start<br />
playback at a later part of the track, press and<br />
hold > FF/ v to go to the end of the track,<br />
and then press . FR/ V while “TRACK<br />
END” is lit to go back to the desired point.<br />
• For tracks other than the last one, go to the<br />
beginning of the next track and play<br />
backward to the desired point.<br />
Selecting the playback<br />
mode<br />
> FF/ v,<br />
. FR/ V<br />
MENU<br />
N PLAY/<br />
ENTER<br />
x STOP<br />
You can select the playback mode in the<br />
menu.<br />
Other Playback Operations<br />
51 GB
1 Press MENU to enter the menu mode<br />
when the <strong>PCM</strong> recorder is in the stop or<br />
playback mode.<br />
The menu mode window will be<br />
displayed.<br />
2 Press > FF/ v or . FR/ V to select<br />
“Play Mode,” and then press N PLAY/<br />
ENTER.<br />
3 Press > FF/ v or . FR/ V to select<br />
“1,” “ ,” “ALL,” “ 1,” “ ,” or<br />
“ ALL,” and then press N PLAY/<br />
ENTER.<br />
1 A track is played back.<br />
Tracks in one folder are played back<br />
continuously.<br />
52 GB<br />
ALL<br />
All the tracks are played back<br />
continuously.<br />
1 One track is played back repeatedly.<br />
Tracks in one folder are played back<br />
repeatedly.<br />
ALL All the tracks are played back<br />
repeatedly.<br />
4 Press x STOP to exit the menu mode.<br />
Playing back repeatedly<br />
A-B<br />
N PLAY/<br />
ENTER
Playing back a track repeatedly<br />
During playback, press and hold N PLAY/<br />
ENTER until “ 1” appears. The selected<br />
track will be played back repeatedly.<br />
To resume normal playback, press N<br />
PLAY/ENTER again.<br />
Playing back a specified section<br />
repeatedly – A-B Repeat<br />
1 During playback, press (repeat) A-B<br />
to specify the starting point A.<br />
“A-B B?” is displayed.<br />
• To change the segment specified for A-B<br />
Repeat playback:<br />
During A-B Repeat playback, press<br />
(repeat) A-B again to specify a new<br />
starting point A. Then specify a new<br />
finishing point B, as in step 2.<br />
Other Playback Operations<br />
2 Press (repeat) A-B again to specify<br />
the finishing point B.<br />
“ A-B” is displayed and the specified<br />
section is played back repeatedly.<br />
Other operations<br />
• To resume normal playback:<br />
Press N PLAY/ENTER.<br />
• To stop A-B Repeat playback:<br />
Press x STOP.<br />
53 GB
Changing the Playback Sounds<br />
Adjusting the playback<br />
speed – the DPC function<br />
1 Slide the DPC (SPEED CTRL) switch to<br />
“ON.”<br />
2 Press MENU to enter the menu mode.<br />
The menu mode window will be<br />
displayed.<br />
> FF/ v,<br />
. FR/ V<br />
3 Press > FF/ v or . FR/ V to select<br />
“DPC(Speed Control),” and then press<br />
N PLAY/ENTER.<br />
MENU<br />
N PLAY/<br />
ENTER<br />
x STOP<br />
When you slide the DPC (SPEED CTRL)<br />
(Digital Pitch Speed Control) switch to<br />
“ON,” you can adjust the playback speed<br />
between +100% and –75% of normal speed<br />
in the menu.<br />
The track is played back in natural tones<br />
thanks to the digital processing function.<br />
4 Press > FF/ v or . FR/ V to adjust<br />
the playback speed.<br />
Press > FF/ v to increase the speed, or<br />
. FR/ V to make it slower. Every time<br />
the button is pressed, you can decrease<br />
the speed by 5% for – from –75% to 0%,<br />
and increase the speed by 10% for +<br />
between 0% and 100%.<br />
54 GB
Adjusting the playback<br />
tones – Key Control<br />
5 Press N PLAY/ENTER to execute the<br />
playback speed.<br />
6 Press x STOP to exit the menu mode.<br />
7 Press N PLAY/ENTER to start<br />
playback.<br />
Tracks are played back at the selected<br />
playback speed.<br />
To resume normal playback<br />
Slide the DPC (SPEED CTRL) switch to<br />
“OFF.”<br />
> FF/ v,<br />
. FR/ V<br />
MENU<br />
N PLAY/<br />
ENTER<br />
x STOP<br />
You can adjust the playback sounds in<br />
semitones higher or lower, each in 6 step<br />
(Key Control), whichever is best suited for<br />
practicing songs to the recorded<br />
accompaniment.<br />
Other Playback Operations<br />
1 Press MENU to enter the menu mode.<br />
The menu mode window will be<br />
displayed.<br />
2 Press > FF/ v or . FR/ V to select<br />
“Key Control,” and then press N<br />
PLAY/ENTER.<br />
55 GB
3 Press > FF/ v or . FR/ V to adjust<br />
the playback tone.<br />
Press > FF/ v to adjust the sounds by<br />
a halftone higher (#1 to #6), or . FR/<br />
V to adjust it by a halftone lower (21 to<br />
26), each in 6 steps.<br />
4 Press N PLAY/ENTER to set the<br />
playback tone.<br />
5 Press x STOP to exit the menu mode.<br />
6 Press N PLAY/ENTER to start<br />
playback.<br />
Tracks are played back at the selected<br />
tone. The setting ( #1 to #6, 21 to 26) is<br />
displayed on the display window.<br />
56 GB<br />
To resume normal playback<br />
sounds<br />
Select “0” in step 3.<br />
Reinforcing the bass<br />
sound – Effect<br />
Key control<br />
setting<br />
> FF/ v,<br />
. FR/ V<br />
MENU<br />
N PLAY/<br />
ENTER<br />
x STOP<br />
You can set the bass sound you want for the<br />
playback in the menu.
1 Press MENU to enter the menu mode<br />
when the <strong>PCM</strong> recorder is in the stop or<br />
playback mode.<br />
The menu mode window will be<br />
displayed.<br />
2 Press > FF/ v or . FR/ V to select<br />
“Effect,” and then press N PLAY/<br />
ENTER.<br />
4 Press x STOP to exit the menu mode.<br />
5 Press N PLAY/ENTER to start<br />
playback.<br />
Tracks are played back with the selected<br />
effect.<br />
P Notes<br />
• When you play back using the built-in<br />
speaker, this setting does not work.<br />
• When “LINE OUT” is selected in “Audio<br />
Out” in the menu, the Effect function does<br />
not work.<br />
Other Playback Operations<br />
3 Press > FF/ v or . FR/ V to select<br />
effect you want for the playback, and<br />
then press N PLAY/ENTER.<br />
Bass1<br />
Bass2<br />
OFF<br />
Emphasizes the bass sound.<br />
Emphasizes the bass sound even more.<br />
The Effect function does not work.<br />
57 GB
Playback via Other Devices<br />
Recording with other<br />
equipment<br />
Tape recorder, etc.<br />
i/LINE OUT<br />
jack<br />
Audio<br />
connecting<br />
cable<br />
x STOP<br />
the audio input connector (stereo<br />
minijack) of other equipment using an<br />
audio connecting cable.<br />
2 Press MENU to enter the menu mode in<br />
the stop mode.<br />
The menu mode window will be<br />
displayed.<br />
3 Press > FF/ v or . FR/ V to select<br />
“Detail Menu,” and then press N<br />
PLAY/ENTER.<br />
N PLAY/ENTER<br />
You can record the sound of the <strong>PCM</strong><br />
recorder with other equipment.<br />
Before you start recording, we recommend<br />
you to make a trial recording first.<br />
4 Press > FF/ v or . FR/ V to select<br />
“Audio Out,” and then press N PLAY/<br />
ENTER.<br />
1 Connect the i/LINE OUT (headphone/<br />
line output) jack of the <strong>PCM</strong> recorder to<br />
58 GB
5 Press > FF/ v or . FR/ V to select<br />
“LINE OUT,” and then press N PLAY/<br />
ENTER.<br />
“Headphones” is selected when you<br />
purchase the <strong>PCM</strong> recorder.<br />
6 Press x STOP to exit the menu mode.<br />
7 Press N PLAY/ENTER to start<br />
playback and at the same time set the<br />
connected equipment to the recording<br />
mode.<br />
A track from the <strong>PCM</strong> recorder will be<br />
recorded on the equipment connected.<br />
adjust the volume with VOLUME +/–<br />
buttons.<br />
• When “LINE OUT” is selected, the Effect<br />
function does not work.<br />
• While the “LINE OUT” is selected, you<br />
cannot adjust the output volume with the<br />
VOLUME +/– buttons.<br />
Other Playback Operations<br />
8 Press x STOP on the <strong>PCM</strong> recorder and<br />
the connected equipment at the same<br />
time to stop recording.<br />
P Notes<br />
• To listen playback with the headphones, set<br />
“Audio Out” to “Headphones” (page 50).<br />
• If input from an external equipment is<br />
distorted, select “Headphones” in step 5 and<br />
59 GB
Adding a Mark to a Track<br />
Editing Tracks<br />
Using a track mark<br />
> FF/ v,<br />
. FR/ V<br />
MENU<br />
N PLAY/ENTER<br />
T-MARK<br />
x STOP<br />
Adding a track mark<br />
You can add a track mark at a point at<br />
which you would like to divide a track later<br />
or locate during playback.<br />
You can add a maximum of 98 track marks<br />
to each track.<br />
During recording, playback, or pausing,<br />
press the T-MARK button at the position<br />
you want to add a track mark.<br />
60 GB<br />
The (track mark) icon flashes three<br />
times, and a track mark is added.<br />
z Using the remote commander<br />
When the supplied remote commander is<br />
connected, you can also press T-MARK button<br />
on the remote commander to add a track mark.<br />
P Notes<br />
• You can add a track mark only to a track<br />
recorded using the <strong>PCM</strong> recorder. You<br />
cannot add a track mark to an MP3/WMA/<br />
AAC-LC (m4a)/L<strong>PCM</strong> (WAV) file copied<br />
from a computer.<br />
• You cannot add a track mark at a point<br />
within 0.5 seconds from another track mark.<br />
• You cannot add a track mark at the very<br />
beginning or at the very end of the track.<br />
• If there are already 98 track marks in a track,<br />
you cannot add any more track marks.<br />
• When a track mark is added during<br />
playback, the playback stops.
Locating a track mark and<br />
starting playback at the track<br />
mark<br />
In the stop mode, press > FF/ v or .<br />
FR/ V. When the (track mark) icon<br />
flashes once, press N PLAY/ENTER<br />
Dividing a track at all the track<br />
mark positions<br />
Select “Divide All T-MARK(Track<br />
Marks)” from the Divide menu.<br />
Deleting a track mark<br />
1 Stop at a position after the track mark<br />
you would like to delete.<br />
2 Press MENU to enter the menu mode.<br />
The menu mode window will be<br />
displayed.<br />
4 Press > FF/ v or . FR/ V to select<br />
“Delete T-MARK(Track Mark),” and<br />
then press N PLAY/ENTER.<br />
The message “Delete T-MARK(Track<br />
Mark)?” is displayed.<br />
5 Press > FF/ v or . FR/ V to select<br />
“Execute,” and then press N PLAY/<br />
ENTER.<br />
A deletion animation and the message<br />
“Deleting...” appear. The selected track<br />
mark will be deleted.<br />
Editing Tracks<br />
3 Press > FF/ v or . FR/ V to select<br />
“Delete,” and then press N PLAY/<br />
ENTER.<br />
The Delete menu is displayed.<br />
61 GB
Stop position<br />
Adding a “TAKE” or “KEEP”<br />
to a file name<br />
Delete T-Mark<br />
The track mark just before the stop<br />
position will be deleted.<br />
6 Press x STOP to exit the menu mode.<br />
Deleting all the track marks in<br />
the selected track at one time<br />
Select a track from which you would like to<br />
delete the track marks, and then select<br />
“Delete All T-MARK(Track Marks)” in<br />
step 4. All the track marks will be deleted at<br />
one time.<br />
62 GB<br />
> FF/ v,<br />
. FR/ V<br />
MENU<br />
N PLAY/<br />
ENTER<br />
x STOP<br />
You can add a “TAKE” or “KEEP” to a file<br />
name of a track, so that you can narrow<br />
down your selections to only marked files.<br />
This feature is useful when you want to<br />
select one from many recordings, by adding<br />
a “TAKE” to the ones most likely to be<br />
selected, or adding a “KEEP” to the ones<br />
that you would like to save just for possible<br />
selection.<br />
1 Display the track from which you would<br />
like to add a “TAKE” or “KEEP” to the<br />
file name.
2 Press MENU to enter the menu mode.<br />
The menu mode window will be<br />
displayed.<br />
A suffix (“TAKE” or “KEEP”) is added<br />
to the file name of the track.<br />
3 Press > FF/ v or . FR/ V to select<br />
“Add “TAKE”,” and then press N<br />
PLAY/ENTER.<br />
4 Press > FF/ v or . FR/ V to select<br />
“Add “TAKE”,” or “Add “KEEP”,” and<br />
then press N PLAY/ENTER.<br />
A confirmation message is displayed.<br />
6 Press x STOP to exit the menu mode.<br />
Removing “TAKE” or “KEEP” from<br />
the file name of a track<br />
Select “Remove “TAKE/KEEP”” in step 4.<br />
Editing Tracks<br />
5 Press > FF/ v or . FR/ V to select<br />
“Execute,” and then press N PLAY/<br />
ENTER.<br />
63 GB
To prevent a track from being accidentally<br />
deleted or edited, you can protect an<br />
important track. A protected track is<br />
Protecting a track<br />
marked with the<br />
64 GB<br />
> FF/ v,<br />
. FR/ V<br />
MENU<br />
N PLAY/<br />
ENTER<br />
x STOP<br />
(protect) indicator and<br />
is regarded as a read-only file you cannot<br />
delete or edit.<br />
1 Display the track which you would like<br />
to protect.<br />
2 Press MENU to enter the menu mode.<br />
The menu mode window will be<br />
displayed.<br />
3 Press > FF/ v or . FR/ V to select<br />
“Protect,” and then press N PLAY/<br />
ENTER.<br />
A confirmation message is displayed.<br />
4 Press > FF/ v or . FR/ V to select<br />
“Execute,” and then press N PLAY/<br />
ENTER.<br />
The track is protected and added with a<br />
(protect) indicator.<br />
5 Press x STOP to exit the menu mode.<br />
To release protection<br />
Select the protected file, and then proceed<br />
with the steps 1 through 5. The protection is<br />
released.
Arranging Tracks<br />
Copying a track to the other<br />
memory<br />
> FF/ v, .<br />
FR/ V<br />
MENU<br />
N PLAY/ENTER<br />
x STOP<br />
Memory card slot<br />
P Notes<br />
• You cannot copy a track that the <strong>PCM</strong><br />
recorder does not recognize.<br />
• Before starting to copy the target track, make<br />
sure to check the battery remain indication.<br />
If the batteries are weak, you may not be<br />
able to copy tracks (page 14).<br />
• If the remaining memory capacity of the<br />
destination memory is insufficient, you may<br />
not be able to copy tracks.<br />
1 Select the track you want to copy.<br />
When you want to copy a track from a<br />
memory card to the built-in memory, set<br />
the “Memory” in the menu to “Memory<br />
Card” (page 38).<br />
2 Press MENU to enter the menu mode.<br />
The menu mode window will be<br />
displayed.<br />
Editing Tracks<br />
You can copy tracks between the built-in<br />
memory and a memory card, which is<br />
useful in saving a backup. Before starting<br />
the operation, insert a memory card to be<br />
used for copying into the memory card slot.<br />
3 Press > FF/ v or . FR/ V to select<br />
“File Copy,” and then press N PLAY/<br />
ENTER.<br />
The message “Copy to Memory Card<br />
Select Folder” or “Copy to Built-In<br />
65 GB
Memory Select Folder” is displayed and<br />
the folder selection window is displayed.<br />
4 Press > FF/ v or . FR/ V to select<br />
the folder that you want to copy the track<br />
into, and then press N PLAY/ENTER.<br />
“Copying...” is displayed and the track is<br />
copied to the end in the destination<br />
folder.<br />
A file will be copied with the identical<br />
file name. The artist name and other<br />
settings will also be retained.<br />
5 Press x STOP to exit the menu mode.<br />
To cancel the copy operation<br />
Press x STOP before step 4.<br />
66 GB<br />
P Note<br />
Do not remove or insert a memory card, or<br />
turn off the <strong>PCM</strong> recorder while copying. Files<br />
may be damaged.<br />
Dividing a track into two<br />
> FF/ v,<br />
. FR/ V<br />
MENU<br />
N PLAY/<br />
ENTER<br />
x STOP<br />
You can divide a track during playback, so<br />
that the track is divided into two parts, and<br />
the respective tracks are suffixed with “_1”<br />
and “_2.” You can also divide a track at<br />
each and every track mark.<br />
By dividing a track, you can easily find the<br />
point from which you want to start<br />
playback when you make a long recording.
You can divide a track until the total<br />
number of tracks in the folder reaches 99.<br />
Dividing a track at the current<br />
position<br />
A period for approximately 4 seconds<br />
from the dividing point will be played<br />
back repeatedly.<br />
1 Stop the track at the position where you<br />
want to divide a track.<br />
2 Press MENU to enter the menu mode.<br />
The menu mode window will be<br />
displayed.<br />
3 Press > FF/ v or . FR/ V to select<br />
“Divide,” and then press N PLAY/<br />
ENTER.<br />
The Divide menu is displayed.<br />
5 Adjust the position to be divided, if you<br />
wish.<br />
Press > FF/ v to move the position<br />
backward, or . FR/ V to move it<br />
forward.<br />
Editing Tracks<br />
4 Press > FF/ v or . FR/ V to select<br />
“Divide Current Position,” and then<br />
press N PLAY/ENTER.<br />
You can adjust the position to be divided<br />
by approximately 0.3 seconds in a period<br />
approximately 6 seconds each, both<br />
before and after the current position.<br />
6 Press N PLAY/ENTER to execute the<br />
position to be divided.<br />
“Divide?” is displayed.<br />
67 GB
7 Press > FF/ v or . FR/ V to select<br />
“Execute,” and then press N PLAY/<br />
ENTER.<br />
“Dividing...” appears, and the divided<br />
tracks will be suffixed with a sequential<br />
number (“_1” for the original track, and<br />
“_2” for the new track).”<br />
track 1 track 2 track 3<br />
v<br />
f A track is divided.<br />
track 1 track 2_1 track 2_2 track 3<br />
A suffix made up of a sequential number is<br />
added to each of the divided files.<br />
8 Press x STOP to exit the menu mode.<br />
P Notes<br />
• You need a certain amount of free space in<br />
the memory to divide a track. For details, see<br />
“System Limitations” on page 112.<br />
• When you divide a track with a title and<br />
artist name, the new track has the same title,<br />
and artist name.<br />
68 GB<br />
• You can divide a track recorded using the<br />
<strong>PCM</strong> recorder only. An MP3/WMA/<br />
AAC-LC (m4a)/L<strong>PCM</strong> (WAV) file copied<br />
from a computer cannot be divided.<br />
• Once a track is divided, you cannot return it<br />
to the original status again.<br />
• If you divide a track at the position within<br />
0.5 seconds from a track mark, the track<br />
mark will be deleted.<br />
• Because of the system limitations, you<br />
cannot divide a track at the very beginning or<br />
end of the track.<br />
Dividing a track at all the track<br />
mark positions<br />
1 Perform steps 1 to 3 of “Dividing a track<br />
at the current position” on page 67 to<br />
display the Divide menu.<br />
2 Press > FF/ v or . FR/ V to select<br />
“Divide All T-MARK(Track Marks),”<br />
and then press N PLAY/ENTER.<br />
“Divide All T-MARK(Track Marks)?” is<br />
displayed.
3 Press > FF/ v or . FR/ V to select<br />
“Execute,” and then press N PLAY/<br />
ENTER.<br />
“Dividing...” appears, and the track is<br />
divided at all the track mark positions.<br />
The tracks divided from a single track<br />
will be suffixed with a sequential number<br />
(_1 and so on).<br />
z Tip<br />
To cancel division during the operation at all<br />
the remaining track marks, press x STOP.<br />
The tracks that have been divided before the<br />
cancellation remain divided.<br />
Deleting all tracks in a folder<br />
Track1<br />
A track is divided.<br />
Track1_1 Track1_2<br />
Track1_3<br />
A suffix made up of a sequential number is<br />
added each of the divided files.<br />
MENU<br />
N PLAY/<br />
ENTER<br />
x STOP<br />
Editing Tracks<br />
4 Press x STOP to exit the menu mode.<br />
To play a divided track<br />
Press > FF/ v or . FR/ V to display<br />
the track number, as the divided tracks now<br />
each have different track numbers.<br />
> FF/ v,<br />
. FR/ V<br />
P Note<br />
If the selected folder contains a protected<br />
track, you cannot delete the track.<br />
69 GB
1 Select the folder containing the tracks<br />
you want to delete when the <strong>PCM</strong><br />
recorder is in the stop mode.<br />
2 Press MENU to enter the menu mode.<br />
The menu mode window will be<br />
displayed.<br />
70 GB<br />
3 Press > FF/ v or . FR/ V to select<br />
“Delete,” and then press N PLAY/<br />
ENTER.<br />
The Delete menu is displayed.<br />
4 Press > FF/ v or . FR/ V to select<br />
“Delete All,” and then press N PLAY/<br />
ENTER.<br />
A confirmation message is displayed.<br />
5 Press > FF/ v or . FR/ V to select<br />
“Execute,” and then press N PLAY/<br />
ENTER.<br />
“Deleting...” appears in the display<br />
window and all tracks in the selected<br />
folder will be deleted.<br />
6 Press x STOP to exit the menu mode.<br />
To cancel deleting<br />
Select “Cancel” in step 5, and then press<br />
N PLAY/ENTER.
About the Menu Function<br />
Making Settings for the Menu<br />
> FF/ v,<br />
. FR/ V<br />
MENU<br />
N PLAY/<br />
ENTER<br />
x STOP<br />
1 Press MENU to enter the menu mode.<br />
The menu mode window will be<br />
displayed.<br />
2 Press > FF/ v or . FR/ V to select<br />
the menu item for which you want to<br />
make setting, and then press N PLAY/<br />
ENTER.<br />
3 Press > FF/ v or . FR/ V to select<br />
the setting that you want to set, and then<br />
press N PLAY/ENTER.<br />
4 Press x STOP or MENU to exit the<br />
menu mode.<br />
P Note<br />
If you do not press any button for 1 minute, the<br />
menu mode is automatically cancelled and the<br />
window will return to the normal display.<br />
To return to the previous window<br />
Press MENU during the menu mode.<br />
To exit the menu mode<br />
Press x STOP.<br />
About the Menu Function<br />
71 GB
Menu settings<br />
Menu items Settings Operation mode<br />
(a : the setting can be made/<br />
— : the setting cannot be made)<br />
Stop<br />
mode<br />
Playback<br />
mode<br />
Divide a — —<br />
Divide Current Position Execute, Cancel a — —<br />
Divide All T-MARK(Track Execute, Cancel a — —<br />
Marks)<br />
Delete a — —<br />
Delete All Execute, Cancel a — —<br />
Delete T-MARK(Track Execute, Cancel a — —<br />
Mark)<br />
Delete All T-MARK(Track Execute, Cancel a — —<br />
Marks)<br />
File Copy Execute, Cancel a — —<br />
Add “TAKE”<br />
Add “TAKE”, Add “KEEP”, Remove a — —<br />
“TAKE/KEEP”<br />
Protect Execute, Cancel a — —<br />
Memory Built-In Memory, Memory Card a — —<br />
REC Mode<br />
L<strong>PCM</strong> 22.05kHz/16bit, L<strong>PCM</strong> 44.10kHz/ a — —<br />
16bit, L<strong>PCM</strong> 44.10kHz/24bit, L<strong>PCM</strong><br />
48.00kHz/16bit, L<strong>PCM</strong> 48.00kHz/24bit,<br />
L<strong>PCM</strong> 96.00kHz/16bit, L<strong>PCM</strong> 96.00kHz/<br />
24bit, MP3 44.10kHz/64kbps, MP3<br />
44.10kHz/128kbps, MP3 44.10kHz/320kbps<br />
LCF(Low Cut Filter) ON, OFF a — a<br />
DPC(Speed Control) –75 % to +100% a a —<br />
Recording<br />
mode<br />
72 GB
Menu items Settings Operation mode<br />
(a : the setting can be made/<br />
— : the setting cannot be made)<br />
Stop<br />
mode<br />
Playback<br />
mode<br />
Effect Bass1, Bass2, OFF a a —<br />
Key Control 21 to 26, #1 to #6 a a —<br />
Easy Search ON, OFF a a —<br />
Play Mode 1, , ALL, 1, , ALL a a —<br />
Detail Menu a a a<br />
Format Execute, Cancel a — —<br />
Clock _ _ y _ _ m _ _ d _ _ : _ _ a — —<br />
LED ON, OFF a — —<br />
Backlight 10 SEC, 60 SEC, Always-ON, OFF a — —<br />
Language<br />
Deutsch (German), English,<br />
a — —<br />
Español (Spanish), Français (French),<br />
Italiano (Italian), Русский (Russian)<br />
Level Meter in Playback ON, OFF a a —<br />
Battery Setting Alkaline Battery, NiMH Battery a — —<br />
LIMITER ON, OFF a — a<br />
PRE REC ON, OFF a — —<br />
Audio Out Headphones, LINE OUT a — —<br />
Plug In Power ON, OFF a — —<br />
Cross-Memory Recording ON, OFF a — —<br />
Recording<br />
mode<br />
About the Menu Function<br />
73 GB
Menu items Settings (*: Initial setting) See page<br />
Divide Divide a track into two. 61, 66<br />
Divide Current A track will be divided into two at the current position.<br />
Position<br />
Divide All T- A track will be divided at all the track mark positions.<br />
MARK(Track<br />
Marks)<br />
Delete Delete tracks or track marks. 30, 61,<br />
62, 69<br />
Delete All All tracks in the selected folder will be deleted.<br />
Press to return to the folder window before deleting the<br />
tracks and select a folder from which all tracks are to be deleted,<br />
and then go to the menu window and select “Execute.”<br />
Delete T- The track mark just before the current position will be deleted.<br />
MARK(Track<br />
Mark)<br />
Delete All T- All the track marks of the selected track will be deleted.<br />
MARK(Track<br />
Marks)<br />
File Copy<br />
Copy the selected track from the built-in memory to the desired 65<br />
folder on a memory card, or from a memory card to the desired<br />
folder in the built-in memory.<br />
Before attempting to copy a track, select the track to be copied<br />
and then go to the menu window.<br />
Add “TAKE” Add “TAKE” or “KEEP” to the file name of the selected track. 62<br />
Add “TAKE”*:<br />
Add “TAKE” to the file name of the selected track.<br />
Add “KEEP”:<br />
Add “KEEP” to the file name of the selected track.<br />
Remove “TAKE/KEEP”:<br />
Remove “TAKE” or “KEEP” from the file name of the<br />
selected track.<br />
74 GB
Menu items Settings (*: Initial setting) See page<br />
Protect<br />
Protect the selected track to prevent the track from being deleted 64<br />
or divided.<br />
Execute:<br />
Protect the selected track. If you specify a track which has<br />
already been protected, cancel the protection.<br />
Cancel*:<br />
Protection or cancel protection is not executed.<br />
Memory<br />
Select the memory in which you want to save a track, or which<br />
contains the track you want to play, edit, or copy.<br />
Built-In Memory*:<br />
The built-in memory of the <strong>PCM</strong> recorder is selected.<br />
Memory Card:<br />
The memory card inserted in the memory card slot is selected.<br />
36<br />
P Note<br />
When no memory card is currently inserted in the <strong>PCM</strong> recorder,<br />
the built-in memory is automatically selected.<br />
About the Menu Function<br />
75 GB
Menu items Settings (*: Initial setting) See page<br />
REC Mode Set the sampling frequency and quantifying bit number for 41<br />
recording:<br />
L<strong>PCM</strong> 22.05kHz/16bit L<strong>PCM</strong> (not compressed) mode<br />
L<strong>PCM</strong> 44.10kHz/16bit*<br />
L<strong>PCM</strong> 44.10kHz/24bit<br />
L<strong>PCM</strong> 48.00kHz/16bit<br />
L<strong>PCM</strong> 48.00kHz/24bit You can record with higher sound<br />
L<strong>PCM</strong> 96.00kHz/16bit quality.<br />
L<strong>PCM</strong> 96.00kHz/24bit<br />
MP3 44.10kHz/64kbps MP3 (compressed) mode<br />
(for a long-time recording)<br />
MP3 44.10kHz/128kbps You can record with higher<br />
sound quality.<br />
MP3 44.10kHz/320kbps<br />
z About the sampling frequency and quantifying<br />
bit number<br />
• Sampling frequency is a value that represents how many times<br />
an analog signal is converted into a digital signal (A/D<br />
conversion) per second. The larger the value of sampling<br />
frequency, the better the sound quality, but also the larger the<br />
amount of data.<br />
• Quantifying bit number is a value that represents the amount of<br />
data it takes for one second of audio. The larger the value of the<br />
bit number, the larger amount of data it takes and the better the<br />
sound quality.<br />
LCF(Low Cut Filter) Set the LCF(Low Cut Filter) function to cut a low frequency to 43<br />
reduce the roaring noise from wind or noises such as those of air<br />
conditioner fans; therefore you can record a track more clearly.<br />
ON:<br />
The LCF function is activated.<br />
OFF*:<br />
The LCF function is cancelled.<br />
76 GB
Menu items Settings (*: Initial setting) See page<br />
DPC(Speed Control) Set the DPC(Speed Control) function.<br />
54<br />
You can adjust the playback speed between +100% and –75% of<br />
normal speed in the menu.You can set the speed by 5% for – from<br />
–75% to 0%, 10% for + between 0% and 100%.<br />
(–30%*)<br />
Effect<br />
Set the effect you want for the playback in the menu.<br />
Bass1:<br />
The bass sound is emphasized.<br />
Bass2:<br />
The bass sound is emphasized even more.<br />
OFF*:<br />
The Effect function does not work.<br />
56<br />
Key Control<br />
Easy Search<br />
P Notes<br />
• When playing back tracks using a built-in speaker, the Effect<br />
function does not work.<br />
• When “LINE OUT” is selected, the Effect function does not<br />
work.<br />
Adjust the playback sounds in semitones higher or lower.<br />
You can adjust from #1 to #6, and 21 to 26. (0*)<br />
Set the easy search function.<br />
ON:<br />
You can go forward for about 10 seconds by pressing > FF/<br />
v and go back for about 3 seconds by pressing . FR/ V.<br />
This function is useful when attempting to locate desired point<br />
in a long recording.<br />
OFF*:<br />
The easy search function does not work. When you press .<br />
FR/ V or > FF/ v, a track will be moved forward or<br />
backward.<br />
55<br />
51<br />
About the Menu Function<br />
77 GB
Menu items Settings (*: Initial setting) See page<br />
Play Mode Set the playback mode.<br />
51<br />
1:<br />
A track is played back.<br />
*:<br />
Tracks in one folder are played back continuously.<br />
ALL:<br />
All the tracks are played back continuously.<br />
1:<br />
One track is played back repeatedly.<br />
:<br />
Tracks in one folder are played back repeatedly.<br />
ALL:<br />
All the tracks are played back repeatedly.<br />
Detail Menu<br />
Format Format the memory currently selected in “Memory” setting in the –<br />
menu, deleting all the data in the memory and resetting the folder<br />
structure to its default status.<br />
Execute:<br />
“Formatting...” appears and the memory will be formatted.<br />
Cancel*:<br />
The memory will not be formatted.<br />
P Notes<br />
• Do not use your computer to format a memory card you use<br />
with the <strong>PCM</strong> recorder. Format it with the formatting function<br />
of the <strong>PCM</strong> recorder.<br />
• Once the memory has been deleted, you cannot retrieve the data<br />
that was deleted.<br />
78 GB
Menu items Settings (*: Initial setting) See page<br />
Clock Set the clock by setting year, month, day, hour, and minute in<br />
sequence.<br />
(09y01m01d 0:00*)<br />
17<br />
LED<br />
z Tip<br />
The clock is displayed in 24-hour system.<br />
0:00 = midnight, 12:00 = noon<br />
Turn the operation of ACCESS indicator, peak level indicators,<br />
z REC button, N PLAY/ENTER button, and X PAUSE button<br />
on or off during operation.<br />
ON*:<br />
During recording or playback, the indicators light or flash.<br />
OFF:<br />
The operation indicator does not light or flash, even during<br />
operation.<br />
P Note<br />
When the <strong>PCM</strong> recorder is connected to a computer, the<br />
operation indicators light or flash even if “LED” is set to “OFF.”<br />
–<br />
About the Menu Function<br />
79 GB
80<br />
Menu items Settings (*: Initial setting) See page<br />
GB<br />
Backlight Turn the backlight in the display window on or off.<br />
–<br />
10 SEC*:<br />
The backlight in the display window lights up for approx. 10<br />
seconds.<br />
60 SEC:<br />
The backlight in the display window lights up for approx. 60<br />
seconds.<br />
Always-ON:<br />
The backlight in the display window lights up always.<br />
OFF:<br />
The backlight in the display window does not light, even<br />
during operation.<br />
P Note<br />
When you select “Always-ON,” the batteries will be consumed<br />
quickly. When you use the <strong>PCM</strong> recorder with batteries, we<br />
recommend you select other options than “Always-ON.”<br />
Language Set the language to be used for messages, menus, folder names, 19<br />
file names, etc.: Deutsch (German), English*, Español (Spanish),<br />
Français (French), Italiano (Italian), Русский (Russian)<br />
Level Meter in Set whether the level meter is displayed on the display window 49<br />
Playback when a track is being played back.<br />
ON:<br />
The level meter will be displayed.<br />
OFF*:<br />
The artist name and title name of the track will be displayed.<br />
Battery Setting Set the battery type for the <strong>PCM</strong> recorder.<br />
Alkaline Battery*:<br />
Select this option to use alkaline batteries for the <strong>PCM</strong><br />
recorder.<br />
NiMH Battery:<br />
Select this option to use rechargeable batteries (not supplied)<br />
for the <strong>PCM</strong> recorder.<br />
13
Menu items Settings (*: Initial setting) See page<br />
LIMITER Set the input level automatically to prevent the sound distortion<br />
that may occur when a too loud sound is input in Manual<br />
recording.<br />
ON:<br />
The LIMITER function is activated.<br />
OFF*:<br />
The LIMITER function is cancelled.<br />
44<br />
PRE REC<br />
P Note<br />
This feature is effective only when REC LEVEL switch is set to<br />
“MANUAL.”<br />
z On the limiter circuit<br />
• The limiter circuit functions to keep the signal level below the<br />
maximum input level. When a loud sound is input suddenly, the<br />
excess part of the sound is automatically set within the range of<br />
the maximum input level in order to prevent distortion.<br />
• The limiter circuit of the <strong>PCM</strong> recorder does not compensate<br />
for clipping when audio over 12 dB is input. In this case, sound<br />
may be distorted.<br />
Set the pre-recording function on and off. The pre-recording<br />
function allows you to record sound sources for approximately 5<br />
seconds prior to the point when the recording is started. Sounds<br />
for approximately 5 seconds are buffered in the memory.<br />
ON:<br />
The pre-recording function is activated.<br />
OFF*:<br />
The pre-recording function is cancelled.<br />
34<br />
About the Menu Function<br />
81 GB
82<br />
Menu items Settings (*: Initial setting) See page<br />
GB<br />
Audio Out Set the output of the i/LINE OUT (headphone/line output) jack. 58<br />
Headphones*: You can use the jack as a headphone jack. Select<br />
this option to listen playback sound with the headphones (not<br />
supplied) or an external speaker.<br />
LINE OUT: You can use the jack as a line output jack. Select this<br />
option to connect an external recorder such as a tape recorder<br />
for recording playback sound of the <strong>PCM</strong> recorder.<br />
P Notes<br />
• If “LINE OUT” is selected, do not connect headphones; the<br />
playback sound from the headphones will be very loud.<br />
• If “LINE OUT” is selected, you cannot adjust output volume<br />
with the VOLUME +/– buttons and cannot use the Effect<br />
function.<br />
Plug In Power Set the Plug In Power function on and off. When a microphone –<br />
compatible with the Plug In Power function is connected to the<br />
m (microphone) jack of the <strong>PCM</strong> recorder, the <strong>PCM</strong> recorder<br />
can supply power to the microphone.<br />
ON*: The <strong>PCM</strong> recorder supplies power to the connected Plug In<br />
Power type microphone.<br />
OFF: The <strong>PCM</strong> recorder does not supply power to a connected<br />
microphone.<br />
Cross-Memory<br />
Recording<br />
Set the Cross-Memory Recording function on and off. When the<br />
memory currently selected in the “Memory” setting in the menu<br />
becomes full during recording, the <strong>PCM</strong> recorder automatically<br />
switches its destination to the other memory media and continues<br />
recording (Cross-Memory Recording). The new recording is<br />
saved as another track.<br />
ON: The Cross-Memory Recording function is activated.<br />
OFF*: The Cross-Memory Recording function is disabled.<br />
Recording stops when the memory currently being selected<br />
becomes full.<br />
39
Utilizing Your Computer<br />
Using the <strong>PCM</strong> recorder with Your Computer<br />
When the <strong>PCM</strong> recorder is connected to<br />
your computer, it is recognized by the<br />
computer, and you can transfer data<br />
between them.<br />
Copying tracks from the <strong>PCM</strong><br />
recorder to your computer to<br />
save them (page 87)<br />
You can copy the tracks recorded on the<br />
<strong>PCM</strong> recorder to save them.<br />
Copying music files from your<br />
computer to the <strong>PCM</strong> recorder to<br />
play them back (page 88)<br />
You can copy WAV/MP3/WMA/AAC-LC<br />
(m4a) files saved on your computer by a<br />
simple drag and drop operation when you<br />
connect the <strong>PCM</strong> recorder to your<br />
computer. You can also play back the<br />
copied files.<br />
Using the <strong>PCM</strong> recorder as a<br />
USB memory – data storage<br />
function (page 90)<br />
You can store image data or text data saved<br />
on the computer temporarily in the <strong>PCM</strong><br />
recorder.<br />
z System requirements for your<br />
computer<br />
See “System requirements” on page 95.<br />
z When you are using Windows®<br />
2000 Professional<br />
Install the driver using<br />
“<strong>Sony</strong>Recorder_Driver.exe” in the <strong>PCM</strong><br />
recorder.<br />
Utilizing Your Computer<br />
83 GB
Connecting the <strong>PCM</strong><br />
recorder to your computer<br />
Computer<br />
To USB port<br />
USB connecting<br />
cable (supplied)<br />
<strong>PCM</strong> recorder<br />
84 GB<br />
To exchange tracks (files) between the<br />
<strong>PCM</strong> recorder and your computer, connect<br />
the <strong>PCM</strong> recorder to your computer.<br />
1 Connect the USB connector of the<br />
<strong>PCM</strong> recorder with the USB port of your<br />
running computer with the supplied<br />
USB connecting cable inserted into the<br />
connectors securely until each plug stops<br />
to the end.<br />
2 Make sure the <strong>PCM</strong> recorder has been<br />
recognized properly.<br />
On the Windows screen; open “My<br />
Computer” and make sure that “<strong>PCM</strong><br />
RECORDER” has been recognized.<br />
On the Macintosh screen; make sure that<br />
an “<strong>PCM</strong> RECORDER” drive is<br />
displayed on the desktop.<br />
While the <strong>PCM</strong> recorder is connected to the<br />
computer, “Connecting” is displayed in the<br />
display window of the <strong>PCM</strong> recorder.<br />
P Notes<br />
• If you connect more than two USB devices<br />
to your computer, normal operation will not<br />
be guaranteed.<br />
• Use of this <strong>PCM</strong> recorder with a USB hub or<br />
a USB extension cable other than the<br />
supplied cable is not guaranteed.<br />
• A malfunction may occur depending on the<br />
USB devices connected at the same time.<br />
• Before connecting the <strong>PCM</strong> recorder to the<br />
computer, make sure that the batteries are<br />
inserted in the <strong>PCM</strong> recorder.<br />
• It is recommended that you disconnect the<br />
<strong>PCM</strong> recorder from the computer when you<br />
are not using the <strong>PCM</strong> recorder connected to<br />
the computer.
Structure of folders and<br />
files<br />
Built-In Memory and M2<br />
“<strong>PCM</strong> RECORDER” or “MEMORY CARD”* 4<br />
Folder for tracks<br />
recorded using the<br />
<strong>PCM</strong> recorder<br />
microSD card<br />
“MEMORY CARD”* 4<br />
Folder for tracks<br />
recorded using the<br />
<strong>PCM</strong> recorder<br />
Lesson<br />
MUSIC<br />
*1<br />
POP<br />
Folder copied<br />
from your<br />
computer<br />
Lesson<br />
MUSIC<br />
J-POP * 1<br />
* 2<br />
* 3<br />
*1<br />
POP<br />
*3<br />
Folder copied from<br />
your computer<br />
J-POP * 1<br />
*2<br />
Utilizing Your Computer<br />
85 GB
If you connect the <strong>PCM</strong> recorder to your<br />
computer, you can see the structure of<br />
folders and files of the built-in memory,<br />
memory card (M2 or microSD card) on<br />
the computer screen.<br />
The folders and files are displayed on the<br />
computer screen as shown on the previous<br />
page.<br />
The folder indicators in the display window<br />
of the <strong>PCM</strong> recorder are as follows:<br />
: Folder for tracks recorded using the<br />
<strong>PCM</strong> recorder (They have been<br />
already made when you purchase<br />
the <strong>PCM</strong> recorder.)<br />
: Folder copied from a computer<br />
(They are displayed when music<br />
files have been copied from a<br />
computer.)<br />
P Note<br />
You can record tracks in up to 10 folders<br />
(FOLDER01-10), each for the built-in<br />
memory and memory card, using the <strong>PCM</strong><br />
recorder.<br />
*1 The name of a folder in which music files<br />
are stored will be displayed on the <strong>PCM</strong><br />
recorder as it is, so it is convenient if you<br />
86 GB<br />
put an easy-to-remember name on the<br />
folder in advance.<br />
Folders shown in the illustration are<br />
examples of folder names.<br />
*2 The <strong>PCM</strong> recorder can recognize up to 8<br />
levels of folders copied to the <strong>PCM</strong><br />
recorder.<br />
*3 If you copy music files separately, they are<br />
classified as being in “No Folder.”<br />
*4 The volume label of the built-in memory is<br />
“<strong>PCM</strong> RECORDER.” That of M2 and<br />
microSD cards is “MEMORY CARD.”<br />
z Tips<br />
• You can rename a folder name, title, artist<br />
name, and file name with your computer.<br />
• The title or artist name, etc., registered in the<br />
music files can be displayed on the <strong>PCM</strong><br />
recorder. It is useful if you input the ID3 tag<br />
information using the software you use to<br />
make the music files on your computer.<br />
P Notes<br />
• You cannot copy more than 511 folders or<br />
files to the directory that is located<br />
immediately below “MEMORY CARD” on<br />
your computer. This is due to FAT file<br />
system limitations.<br />
• If no title, or artist name has been registered<br />
in the ID3 tag information, “Unknown” will<br />
be displayed.
Copying Tracks from the <strong>PCM</strong> recorder to<br />
Your Computer<br />
z To copy a track or folder<br />
(Drag and drop)<br />
You can save tracks or folders by copying<br />
them from the <strong>PCM</strong> recorder to your<br />
computer.<br />
When you wish to create a CD, you can use<br />
“Sound Forge Audio Studio LE,” the<br />
supplied software application, to create a<br />
CD. For the details, see the “Sound Forge<br />
Audio Studio LE Guide.”<br />
1 Connect the <strong>PCM</strong> recorder to your<br />
computer (page 84).<br />
2 Copy tracks or folders you want to copy<br />
to your computer.<br />
Drag and drop the tracks or folders you<br />
want to copy from “<strong>PCM</strong> RECORDER”<br />
or “MEMORY CARD” to the local disc<br />
on your computer.<br />
1 Click and hold,<br />
2 drag,<br />
3 and then drop.<br />
3 Disconnect the <strong>PCM</strong> recorder from your<br />
computer (page 91).<br />
P Note<br />
If you remove a USB connecting cable while<br />
the <strong>PCM</strong> recorder is transferring data to your<br />
computer, data may be damaged. For how to<br />
disconnect the <strong>PCM</strong> recorder, see page 91.<br />
Utilizing Your Computer<br />
87 GB
Copying Files from Your Computer to the<br />
<strong>PCM</strong> recorder and Playing Them Back<br />
You can copy music or the other audio files<br />
(L<strong>PCM</strong>/MP3/WMA/AAC-LC*) from your<br />
computer to the <strong>PCM</strong> recorder by dragging<br />
and dropping them, and you can play them<br />
back using the <strong>PCM</strong> recorder.<br />
You can make an L<strong>PCM</strong>/MP3/WMA/<br />
AAC-LC file using either a player software<br />
application, etc., installed on your<br />
computer.<br />
* For the file formats that can be played back<br />
using the <strong>PCM</strong> recorder, see<br />
“Specifications” (page 95).<br />
1 Connect the <strong>PCM</strong> recorder to your<br />
computer (page 84).<br />
2 Copy the folder in which the music files<br />
are stored to the <strong>PCM</strong> recorder.<br />
On the Windows screen using Explorer,<br />
and on the Macintosh screen using<br />
Finder, drag and drop the folder<br />
containing the music files onto “<strong>PCM</strong><br />
RECORDER” or “MEMORY CARD.”<br />
The <strong>PCM</strong> recorder can recognize up to<br />
500 folders. You can copy up to 99 files<br />
to one folder and up to 5,000 files in<br />
total.<br />
3 Disconnect the <strong>PCM</strong> recorder from your<br />
computer.<br />
4 Press .<br />
5 Press > FF/ v or . FR/ V to select<br />
the folder ( ) in which music files are<br />
stored, and then press N PLAY/<br />
ENTER.<br />
6 Press > FF/ v or . FR/ V to select<br />
the music file you want to play.<br />
88 GB
7 Press N PLAY/ENTER to start<br />
playback.<br />
8 Press x STOP to stop playback.<br />
The maximum playback time (tracks*),<br />
when playing music files using the <strong>PCM</strong><br />
recorder, is as follows.<br />
48 kbps 128 kbps 256 kbps<br />
178hr.<br />
55 min.<br />
(2,683 tracks)<br />
67 hr.<br />
(1,005 tracks)<br />
33 hr.<br />
30 min.<br />
(502 tracks)<br />
* In the case where tracks of 4 minutes each<br />
are copied to the <strong>PCM</strong> recorder.<br />
P Notes<br />
• A music file copied from your computer can<br />
be played back with the <strong>PCM</strong> recorder.<br />
Dividing a track and setting a track mark,<br />
however, may not be performed.<br />
• If you have copied music files using your<br />
computer, those files may not be copied in<br />
order of copying because of the system<br />
limitations. If you copy a music file one by<br />
one to the <strong>PCM</strong> recorder, you can display<br />
and play back tracks in order of copying.<br />
• When removing the <strong>PCM</strong> recorder, see<br />
“Disconnecting the <strong>PCM</strong> Recorder from<br />
Your Computer” on page 91.<br />
• The fs/bit (sampling frequency and<br />
quantifying bit number) information will not<br />
be displayed for a WAV file copied from<br />
your computer.<br />
• The bit rate information will not be<br />
displayed for a MP3/WMA/AAC-LC (m4a)<br />
file copied from your computer.<br />
z Tip<br />
You can use your computer to change a folder<br />
name, track name, artist name, and file name<br />
of a track.<br />
z To enjoy music files more<br />
• Selecting the playback mode<br />
You can select the playback mode, such as<br />
playback of one music file, continuous<br />
playback of music files in one folder,<br />
continuous playback of all music files,<br />
repeat playback of one music file, repeat<br />
playback of music files in one folder and<br />
repeat playback of all music files, in the<br />
“Play Mode” menu (page 51).<br />
• Adjusting the playback speed (DPC(Speed<br />
Control))<br />
You can adjust a playback speed between<br />
+100% and –75% of normal speed<br />
(page 54).<br />
• Selecting a sound effect and tone (Key<br />
Control, Effect)<br />
You can reinforce bass sound by selecting a<br />
sound effect from “Bass1” or “Bass2” for<br />
playback in the “Effect” menu (page 56).<br />
You can also adjust the playback tones in the<br />
“Key Control” menu (page 55).<br />
Utilizing Your Computer<br />
89 GB
Using the <strong>PCM</strong> Recorder as a USB Memory –<br />
Data Storage Function<br />
When the <strong>PCM</strong> recorder is connected to<br />
your computer using a USB connecting<br />
cable, image data or text data on the<br />
computer, as well as tracks or files recorded<br />
using the <strong>PCM</strong> recorder can be temporarily<br />
stored in the <strong>PCM</strong> recorder.<br />
Your computer must meet the operating<br />
system requirements and port environment<br />
to use the <strong>PCM</strong> recorder as a USB memory.<br />
For details on the system requirements, see<br />
page 95.<br />
P Note<br />
When you format the memory with the <strong>PCM</strong><br />
recorder, all the data temporarily stored in the<br />
<strong>PCM</strong> recorder will be deleted. You cannot<br />
restore the data.<br />
90 GB
Disconnecting the <strong>PCM</strong> Recorder from Your<br />
Computer<br />
Follow the procedures below; otherwise,<br />
data may be damaged.<br />
3 Disconnect the <strong>PCM</strong> recorder from the<br />
USB port of the computer.<br />
1 Make sure that the <strong>PCM</strong> recorder is in<br />
the stop mode.<br />
2 Perform the following operation on your<br />
computer.<br />
On the Windows screen, left-click the<br />
icon at the bottom of the desktop of the<br />
computer.<br />
t Left-click “Safely remove USB<br />
Mass Storage Device.”<br />
The icon can be different on different<br />
operating systems.<br />
On the Macintosh screen, drag the “<strong>PCM</strong><br />
recorder” on the desktop to “Trash” and<br />
drop it there.<br />
For details on disconnecting the <strong>PCM</strong><br />
recorder from your computer, refer to the<br />
operating instructions supplied with your<br />
computer.<br />
Utilizing Your Computer<br />
91 GB
Additional Information<br />
Precautions<br />
92 GB<br />
On noise<br />
• Noise may be heard when the unit is placed<br />
near an AC power source, a fluorescent lamp<br />
or a mobile phone during recording or<br />
playback.<br />
• Operation and touch noises may be recorded<br />
when you press the button on the <strong>PCM</strong><br />
recorder, touch the case, or hold the <strong>PCM</strong><br />
recorder during recording. By using the<br />
supplied remote commander, you can<br />
perform recording operations without<br />
touching the <strong>PCM</strong> recorder.<br />
• Roaring noise from wind, or other noises<br />
from electric fans, air conditioners, air<br />
cleaners, or PC fans will also be recorded.<br />
You can reduce the low frequencies noise by<br />
setting the LCF(Low Cut Filter) function<br />
(page 43). You can also reduce the roaring<br />
noise from wind by using the wind screen<br />
AD-<strong>PCM</strong>2 (not supplied).<br />
On safety<br />
Do not operate the unit while driving, cycling<br />
or operating any motorized vehicle.<br />
On the built-in microphones<br />
The built-in microphones are highperformance<br />
electret condenser microphones.<br />
Do not expose them to strong wind or water.<br />
On handling<br />
• Do not subject the <strong>PCM</strong> recorder to strong<br />
shock or vibration. Doing so may cause a<br />
malfunction of the <strong>PCM</strong> recorder.<br />
• Do not place the recorder in the following<br />
locations:<br />
– Anywhere extremely hot. Never expose it<br />
to temperatures above 60ºC.<br />
– Under direct sunlight or close to heaters<br />
– In a sun-heated car with the windows<br />
closed (especially in summer)<br />
– In a humid place, such as in a bathroom<br />
– Anywhere dusty<br />
• Be careful not to allow water to splash on the<br />
unit. The unit is not water-proof. In<br />
particular, be careful in the following<br />
situations.<br />
– When you have the unit in your pocket and<br />
go to the bathroom, etc.<br />
– When you bend down, the unit may drop<br />
into the water and may get wet.<br />
– When you use the unit in an environments<br />
where the unit is exposed to rain, snow, or<br />
humidity.<br />
– In circumstances where you get sweaty.<br />
If you touch the unit with wet hands or if<br />
you put the unit in the pocket of sweaty<br />
clothes, the unit may get wet.
• You may feel pain in your ears if you use the<br />
headphones when the ambient air is very<br />
dry. This is not because of a malfunction of<br />
the headphones, but because of static<br />
electricity accumulated in your body. You<br />
can reduce static electricity by wearing nonsynthetic<br />
clothes that prevent the emergence<br />
of static electricity.<br />
• Should any solid object or liquid fall into the<br />
unit, remove the batteries and have the unit<br />
checked by qualified personnel before<br />
operating it any further.<br />
On maintenance<br />
To clean the exterior, use a soft cloth slightly<br />
moistened in water. Do not use alcohol,<br />
benzine or thinner.<br />
If you have any questions or problems<br />
concerning your unit, please consult your<br />
nearest <strong>Sony</strong> dealer.<br />
Backup recommendations<br />
To avoid potential risk of data loss caused<br />
by accidental operation or malfunction of<br />
the <strong>PCM</strong> recorder, we recommend that you<br />
save a backup copy of your recorded tracks<br />
on a tape recorder or to a computer, etc.<br />
On the AC power adaptor<br />
• Use the supplied<br />
AC power adaptor<br />
for the <strong>PCM</strong><br />
recorder. Do not<br />
use any other AC Polarity of the plug<br />
power adaptor.<br />
• Connect the AC power adaptor to an easily<br />
accessible wall outlet close by. If trouble<br />
occurs while using the adaptor, immediately<br />
shut off the power by disconnecting the plug<br />
from the wall outlet.<br />
• Do not use the AC power Adaptor placed in<br />
a narrow space, such as between a wall and<br />
furniture.<br />
• To reduce the risk of electrical shock, avoid<br />
placing the AC power adaptor in a location<br />
subject to humidity.<br />
On using a memory card<br />
• When formatting (initializing) a memory<br />
card, make sure to use the <strong>PCM</strong> recorder to<br />
format it. Memory cards formatted with<br />
Windows or other devices may be<br />
recognized as incompatible media and<br />
cannot be used with the <strong>PCM</strong> recorder.<br />
• If you format a memory card containing<br />
recorded data, the recorded data will be<br />
deleted. Be careful not to delete important<br />
data.<br />
• Do not leave a memory card within the reach<br />
of small children. They might accidentally<br />
swallow it.<br />
Additional Information<br />
93 GB
• Do not remove or insert a memory card<br />
while recording or playing back files.<br />
• Do not remove a memory card while<br />
“Accessing...” appears on the display<br />
window or the ACCESS indicator is flashing<br />
in orange. Otherwise, data may be damaged.<br />
• We do not guarantee the operations of all<br />
types of compatible memory cards with the<br />
<strong>PCM</strong> recorder.<br />
• M2 card other than those manufactured by<br />
<strong>Sony</strong> have not been demonstrated as<br />
operable with the <strong>PCM</strong> recorder, and may<br />
have problems when used with the <strong>PCM</strong><br />
recorder. For compatible M2, please refer<br />
to the <strong>Sony</strong> web site (page 95).<br />
• “MagicGate” is copyright protection<br />
technology that uses encryption technology.<br />
The <strong>PCM</strong> recorder does not support data<br />
recording/playback that requires<br />
MagicGate functions.<br />
• The <strong>PCM</strong> recorder does not support parallel<br />
data transfer.<br />
• A ROM (read-only-memory) type or writeprotected<br />
memory card is for playback only.<br />
You cannot record or edit data on the card.<br />
• SonicStage will create a group on a Memory<br />
Stick media. The group function,<br />
however, cannot be used except with a<br />
compatible device.<br />
• Data may be corrupted in the following<br />
cases:<br />
– When a memory card is removed or the<br />
<strong>PCM</strong> recorder is turned off during a read<br />
or write operation.<br />
94 GB<br />
– When a memory card is used in locations<br />
subject to static electricity or electrical<br />
noise.<br />
• We assume no responsibility for any loss or<br />
damage of recorded data.<br />
• We recommend that you save a backup copy<br />
of the important data.<br />
• Do not touch the terminal of a memory card<br />
with your hand or a metal object.<br />
• Do not strike, bend or drop a memory card.<br />
• Do not disassemble or modify a memory<br />
card.<br />
• Do not expose a memory card to water.<br />
• Do not use a memory card under the<br />
following conditions:<br />
– Locations beyond the required operating<br />
conditions, including locations such as the<br />
hot interior of a car parked in the sun and/<br />
or in the summer, the outdoors exposed to<br />
direct sunlight, or a place near a heater.<br />
– Humid locations or locations with<br />
corrosive substances present.<br />
• When using a memory card, make sure to<br />
check the correct insertion direction into the<br />
memory card slot.
Specifications<br />
System requirements<br />
Operating systems:<br />
– Windows Vista® Ultimate Service Pack<br />
1 or higher<br />
– Windows Vista ® Business Service Pack 1<br />
or higher<br />
– Windows Vista® Home Premium Service<br />
Pack 1 or higher<br />
– Windows Vista® Home Basic Service<br />
Pack 1 or higher<br />
– Windows ® XP Media Center Edition<br />
2005 Service Pack 3 or higher<br />
– Windows® XP Media Center Edition<br />
2004 Service Pack 3 or higher<br />
– Windows® XP Media Center Edition<br />
Service Pack 3 or higher<br />
– Windows ® XP Professional Service Pack<br />
3 or higher<br />
– Windows® XP Home Edition Service<br />
Pack 3 or higher<br />
– Windows® 2000 Professional Service<br />
Pack 4 or higher<br />
– Mac OS X (v10.2.8-v10.5)<br />
– Pre-Installed<br />
Hardware environment:<br />
– Port: USB port<br />
– Sound board: Sound cards compatible<br />
with any of the supported Microsoft®<br />
Windows® operating systems<br />
P Notes<br />
• Operation is not guaranteed if any operating<br />
system other than those indicated on the left<br />
(Windows ® 98 or Linux, etc.) is used.<br />
• 64 bit versions of Windows® XP are not<br />
supported.<br />
• For the latest version information and<br />
compatibility with your operating system,<br />
please access the support home page for the<br />
<strong>PCM</strong> recorder:<br />
http://support.sony-europe.com/DNA<br />
• The following systems are not supported:<br />
– Operating systems other than the ones<br />
indicated on the left<br />
– Personally constructed computers or<br />
operating systems<br />
– Upgraded operating systems<br />
– Multi-boot environment<br />
– Multi-monitor environment<br />
Additional Information<br />
95 GB
When you are using Windows ®<br />
2000 Professional<br />
Install the driver using<br />
“<strong>Sony</strong>Recorder_Driver.exe” in the <strong>PCM</strong><br />
recorder.<br />
<strong>PCM</strong> recorder section<br />
Capacity (User available capacity)<br />
Built-In Memory:<br />
4 GB (approx. 3.60 GB =<br />
3,865,470,566 Byte)<br />
A part of the memory capacity is used as a<br />
management area.<br />
Frequency range (in recording/<br />
playback, LINE IN input)<br />
•L<strong>PCM</strong><br />
96.00 kHz: 20 Hz – 40,000 Hz<br />
(0 dB, –2 dB)<br />
48.00 kHz: 20 Hz – 22,000 Hz<br />
(0 dB, –2 dB)<br />
44.10 kHz: 20 Hz – 20,000 Hz<br />
(0 dB, –2 dB)<br />
22.05 kHz: 20 Hz – 10,000 Hz<br />
(0 dB, –3.5 dB)<br />
•MP3<br />
320 kbps: 50 Hz – 15,000 Hz (0 dB, –3 dB)<br />
128 kbps: 50 Hz – 15,000 Hz (0 dB, –3 dB)<br />
64 kbps: 50 Hz – 13,000 Hz (0 dB, –3 dB)<br />
Recording modes<br />
See page 41.<br />
96 GB<br />
Bit rate and sampling frequencies for<br />
MP3 files* 1<br />
Bit rate: 32 kbps – 320 kbps, VBR<br />
Sampling frequencies:<br />
16 kHz/22.05 kHz/24 kHz/32 kHz/<br />
44.1kHz/48kHz<br />
File extension: .mp3<br />
*1 Not all encoders are supported.<br />
Bit rate and sampling frequencies* 2 for<br />
WMA files<br />
Bit rate: 32 kbps - 192 kbps , VBR<br />
Sampling frequencies: 44.1 kHz<br />
File extension: .wma<br />
*2 WMA Ver. 9 is compatible, however, MBR<br />
(Multi Bit Rate), Lossless, Professional,<br />
and Voice are not supported.<br />
Copyright-protected file cannot be played<br />
back.<br />
Not all encoders are supported<br />
Bit rate and sampling frequencies *3 for<br />
AAC-LC (m4a) files<br />
Bit rate: 16 kbps - 320 kbps, VBR<br />
Sampling frequencies:<br />
11.025 kHz/12 kHz/16 kHz/22.05 kHz/<br />
24 kHz/32 kHz/44.1 kHz/48 kHz<br />
File extension: .m4a<br />
*3 Copyright-protected file cannot be played<br />
back.<br />
Not all AAC encoders are supported.
Signal-to-noise ratio (S/N)<br />
(Input from the LINE IN jack and output from<br />
LINE OUT jack when recording/playing back<br />
L<strong>PCM</strong>)<br />
87 dB (1 kHz IHF-A) (for 24 bit)<br />
General<br />
Speaker<br />
Approx. 16 mm dia.<br />
Input/Output<br />
• Microphone jack (minijack, stereo), input for<br />
plug in power<br />
– Input impedance: 3.9 kΩ<br />
– Minimum input level: 0.9 mV<br />
– Rated input level: 2.5 mV<br />
• LINE IN jack (minijack, stereo)<br />
– Input impedance: 22 kΩ<br />
– Minimum input level: 500 mV<br />
– Rated input level: 2 V<br />
• Headphone/LINE OUT jack (minijack,<br />
stereo)<br />
Headphone mode<br />
– Load impedance: 16 Ω<br />
– Output level: 20 mW + 20 mW<br />
LINE OUT mode<br />
– Load impedance: 22 kΩ<br />
– Rated output level: 1 Vrms<br />
• USB connector (mini-B jack, High-speed<br />
USB, Mass Storage Class)<br />
• REMOTE jack<br />
• DC IN 3V jack<br />
• Memory Stick Micro (M2)/microSD<br />
memory card slot<br />
Playback speed control (DPC)<br />
+100% to –75% (L<strong>PCM</strong>/MP3/WMA/AAC-<br />
LC)<br />
Maximum power output<br />
250 mW<br />
Power requirements<br />
DC 3.0 V: When using the AC power adaptor<br />
(supplied)<br />
DC 3.0 V: LR6 (size AA) alkaline batteries<br />
(supplied) (2)<br />
DC 2.4 V: NH-AA nickel metal hydride<br />
rechargeable batteries (not supplied) (2)<br />
Operating temperature<br />
5°C - 35°C<br />
Dimensions (w/h/d) (not incl. projecting<br />
parts and controls) (JEITA)*4<br />
62.0 mm × 114.0 mm × 21.8 mm<br />
Mass (JEITA)* 4<br />
Approx. 187 g including 2 LR6 (size AA)<br />
alkaline batteries<br />
*4 Measured value by the standard of JEITA<br />
(Japan Electronics and Information<br />
Technology Industries Association)<br />
Supplied accessories<br />
See page 10.<br />
Additional Information<br />
97 GB
Optional accessories<br />
Memory Stick Micro (M2) MS-A1GN,<br />
MS-A2GN, MS-A4GN, MS-A8GN,<br />
MS-A16GN<br />
Stereo headphones MDR-7502,<br />
MDR-7509HD<br />
Electret condenser microphone ECM-MS957<br />
Rechargeable battery NH-AA-B2K<br />
Battery charger BCG-34HS2K<br />
Carrying case speaker CKS-<strong>M10</strong><br />
Wind screen AD-<strong>PCM</strong>2<br />
Tripod VCT-<strong>PCM</strong>1<br />
Your dealer may not handle some of the above<br />
listed optional accessories. Please ask the<br />
dealer for detailed information.<br />
Design and specifications are subject to<br />
change without notice.<br />
98 GB
Maximum recording time* 5 * 6<br />
The maximum recording time of all the folders is as follows (rounded figures by 5 minutes).<br />
Recording modes<br />
L<strong>PCM</strong> 96.00kHz/24bit<br />
L<strong>PCM</strong> 96.00kHz/16bit<br />
L<strong>PCM</strong> 48.00kHz/24bit<br />
L<strong>PCM</strong> 48.00kHz/16bit<br />
Built-in<br />
Memory card<br />
memory<br />
4GB 1 GB 2 GB 4 GB 8 GB 16 GB<br />
1 hr.<br />
50 min.<br />
2 hr.<br />
45 min.<br />
3 hr.<br />
40 min.<br />
5 hr.<br />
30 min.<br />
25 min. 55 min. 1 hr.<br />
55 min.<br />
40 min. 1 hr.<br />
25 min.<br />
50 min. 1 hr.<br />
55 min.<br />
1hr.<br />
20 min.<br />
2hr.<br />
50 min.<br />
L<strong>PCM</strong> 44.10kHz/24bit 4 hr. 55 min. 2 hr.<br />
5min.<br />
L<strong>PCM</strong> 44.10kHz/16bit 6 hr. 1 hr.<br />
25 min.<br />
L<strong>PCM</strong> 22.05kHz/16bit<br />
MP3 44.10kHz/320kbps<br />
MP3 44.10kHz/128kbps<br />
MP3 44.10kHz/64kbps<br />
12 hr.<br />
5min.<br />
26 hr.<br />
45 min.<br />
67 hr.<br />
5min.<br />
134 hr.<br />
10 min.<br />
2hr.<br />
55 min.<br />
6hr.<br />
35 min.<br />
16 hr.<br />
30 min.<br />
3hr.<br />
5min.<br />
6hr.<br />
15 min.<br />
13 hr.<br />
50 min.<br />
34 hr.<br />
45 min.<br />
33 hr. 69 hr.<br />
35 min.<br />
2hr.<br />
50 min.<br />
3hr.<br />
50 min.<br />
5hr.<br />
45 min.<br />
4hr.<br />
10 min.<br />
6hr.<br />
15 min.<br />
12 hr.<br />
35 min.<br />
27 hr.<br />
50 min.<br />
69 hr.<br />
40 min.<br />
139 hr.<br />
30 min.<br />
3hr.<br />
50 min.<br />
5hr.<br />
45 min.<br />
7hr.<br />
40 min.<br />
11 hr.<br />
35 min.<br />
8hr.<br />
25 min.<br />
12 hr.<br />
35 min.<br />
25 hr.<br />
20 min.<br />
55 hr.<br />
50 min.<br />
139 hr.<br />
45 min.<br />
279 hr.<br />
30 min.<br />
7hr.<br />
45 min.<br />
11 hr.<br />
35 min.<br />
15 hr.<br />
30 min.<br />
23 hr.<br />
15 min.<br />
16 hr.<br />
50 min.<br />
25 hr.<br />
20 min.<br />
50 hr.<br />
40 min.<br />
111 hr.<br />
55 min.<br />
279 hr.<br />
45 min.<br />
559 hr.<br />
35 min.<br />
(hr. : hours/min. : minutes)<br />
Additional Information<br />
99 GB
*5 When you are going to record continuously for a long time, you may have to replace the batteries<br />
with new ones in the midst of recording. For details on the battery life, see the next table.<br />
*6 The maximum recording time varies if you record tracks in mixed recording mode.<br />
Battery life *1<br />
When using <strong>Sony</strong> LR6 (SG) (size AA) alkaline batteries<br />
Recording modes<br />
Recording Recording with Playback *2 Playback using<br />
without monitoring through speaker the headphones<br />
monitoring<br />
L<strong>PCM</strong> 96.00kHz/24bit 28 hr. 19 hr. 19 hr. 22 hr.<br />
L<strong>PCM</strong> 96.00kHz/16bit 28 hr. 19 hr. 19 hr. 24 hr.<br />
L<strong>PCM</strong> 48.00kHz/24bit 39 hr. 23 hr. 23 hr. 27 hr.<br />
L<strong>PCM</strong> 48.00kHz/16bit 39 hr. 24 hr. 24 hr. 27 hr.<br />
L<strong>PCM</strong> 44.10kHz/24bit 41 hr. 24 hr. 24 hr. 28 hr.<br />
L<strong>PCM</strong> 44.10kHz/16bit 46 hr. 24 hr. 24 hr. 30 hr.<br />
L<strong>PCM</strong> 22.05kHz/16bit 45 hr. 24 hr. 24 hr. 30 hr.<br />
MP3 44.10kHz/320kbps 40 hr. 26 hr. 24 hr. 28 hr.<br />
MP3 44.10kHz/128kbps 40 hr. 26 hr. 24 hr. 28 hr.<br />
MP3 44.10kHz/64kbps 43 hr. 26 hr. 24 hr. 28 hr.<br />
(hr. : hours/min. : minutes)<br />
100 GB
When using <strong>Sony</strong> NH-AA rechargeable batteries<br />
Recording modes<br />
Recording<br />
without<br />
monitoring<br />
Recording with<br />
monitoring<br />
Playback*2<br />
through speaker<br />
Playback using<br />
the headphones<br />
L<strong>PCM</strong> 96.00kHz/24bit 28 hr. 19 hr. 19 hr. 21 hr.<br />
L<strong>PCM</strong> 96.00kHz/16bit 28 hr. 19 hr. 19 hr. 23 hr.<br />
L<strong>PCM</strong> 48.00kHz/24bit 38 hr. 22 hr. 22 hr. 26 hr.<br />
L<strong>PCM</strong> 48.00kHz/16bit 39 hr. 23 hr. 23 hr. 26 hr.<br />
L<strong>PCM</strong> 44.10kHz/24bit 38 hr. 23 hr. 23 hr. 27 hr.<br />
L<strong>PCM</strong> 44.10kHz/16bit 44 hr. 23 hr. 23 hr. 29 hr.<br />
L<strong>PCM</strong> 22.05kHz/16bit 41 hr. 23 hr. 23 hr. 29 hr.<br />
MP3 44.10kHz/320kbps 32 hr. 26 hr. 24 hr. 28 hr.<br />
MP3 44.10kHz/128kbps 37 hr. 26 hr. 24 hr. 28 hr.<br />
MP3 44.10kHz/64kbps 38 hr. 26 hr. 24 hr. 28 hr.<br />
(hr. : hours/min. : minutes)<br />
*1 The battery life is measured in testing using methods proprietary to <strong>Sony</strong>. The battery life may<br />
shorten depending on how you operate the <strong>PCM</strong> recorder.<br />
*2 When playing back music through the internal speaker with the volume level set to 16.<br />
Additional Information<br />
101 GB
Troubleshooting<br />
Troubleshooting<br />
Before taking the <strong>PCM</strong> recorder for repair, check the following sections. Should any problem<br />
persist after you have made these checks, consult your nearest <strong>Sony</strong> dealer.<br />
Please note that recorded tracks may be deleted during service or repair work.<br />
Symptom<br />
Remedy<br />
The <strong>PCM</strong> recorder cannot be • Slide the POWER/HOLD switch in the direction of “POWER” for<br />
turned off.<br />
more than 2 seconds when the <strong>PCM</strong> recorder is stopped (page 16).<br />
The <strong>PCM</strong> recorder cannot be • The power to the <strong>PCM</strong> recorder is off. Slide the POWER/HOLD<br />
turned on.<br />
switch in the direction of “POWER” for more than 1 second<br />
(page 16).<br />
• The batteries have been inserted with incorrect polarity (page 13).<br />
Display does not disappear. • Remove the protective film on the display window before you use<br />
Display appears blurred. the <strong>PCM</strong> recorder.<br />
The <strong>PCM</strong> recorder does not • The batteries are weak (page 14).<br />
operate.<br />
• The power to the <strong>PCM</strong> recorder is off. Slide the POWER/HOLD<br />
switch in the direction of “POWER” for more than 1 second<br />
(page 16).<br />
• The HOLD function is activated. Slide the POWER/HOLD switch<br />
in the center direction (page 21).<br />
No sound comes from the • The volume is turned down completely (page 27).<br />
speaker.<br />
• Headphones are plugged in (page 50).<br />
Sound comes from the • If you plug in the headphones not securely during playback, the<br />
speaker even when the sound may come from the speaker. Unplug the headphones and<br />
headphones are plugged in. then insert them securely.<br />
102 GB
Symptom<br />
The ACCESS indicator, peak<br />
level indicators, z REC<br />
button, N PLAY/ENTER<br />
button, or X PAUSE button<br />
indicators do not light.<br />
“Memory Full” is displayed<br />
and you cannot start<br />
recording.<br />
“Track Full” is displayed and<br />
you cannot operate the <strong>PCM</strong><br />
recorder.<br />
Noise is heard.<br />
Remedy<br />
• “LED” is set to “OFF”. Display the menu and set “LED” to “ON”<br />
(page 79).<br />
• The memory is full. Delete some of the tracks or delete all the<br />
tracks after you store them on your computer (page 30, 69).<br />
• 99 tracks have been recorded in the selected folder. Therefore<br />
you cannot record another track, or copy a track. Delete some of<br />
the tracks or delete all the tracks after you store them on your<br />
computer (page 30, 69).<br />
• A button on the <strong>PCM</strong> recorder is pressed, the case is touched, or<br />
the <strong>PCM</strong> recorder is held, so that noise was recorded.<br />
• The <strong>PCM</strong> recorder was placed near an AC power source, a<br />
fluorescent lamp or a mobile phone during recording or playback.<br />
• Roaring noise from wind, or other noises from electric fans, air<br />
conditioners, air cleaners, or PC fans have been recorded. You can<br />
reduce the noise by setting the LCF(Low Cut Filter) function<br />
(page 43).<br />
• Plug of the connected microphone was dirty when recording.<br />
Clean the plug.<br />
• The headphone plug is dirty. Clean the plug.<br />
The input sound is distorted. • The level is too high in automatic recording.<br />
When a guide is displayed, set the MIC SENS(ATT) switch to<br />
“LOW,” or place the <strong>PCM</strong> recorder away from the sound source.<br />
If the problem persists, switch to manual recording, and adjust the<br />
recording level manually using the REC LEVEL dial.<br />
• The sound source has parts that are too loud. Set “LIMITER” in<br />
the menu to “ON” (page 44).<br />
Troubleshooting<br />
103 GB
Symptom<br />
A howling noise is heard<br />
during recording.<br />
104 GB<br />
You cannot divide a track.<br />
When recording from other<br />
equipment, the input level is<br />
too strong or not strong<br />
enough.<br />
Playback speed is too fast or<br />
too slow.<br />
• If you turn up the volume excessively or place the headphones<br />
near the microphone while monitoring recording, the microphone<br />
may pick up the sound from the headphones, causing acoustic<br />
feedback (howling sound). Turn down the volume, or place the<br />
headphones far from the microphone.<br />
• You need a certain amount of free space in the memory to divide a<br />
track.<br />
• If 99 tracks have been recorded in the selected folder, you<br />
cannot divide a track in that folder. Delete some of the tracks or<br />
delete all the tracks after you store them on your computer<br />
(page 30, 69).<br />
• Because of the system limitations, you may not be able to divide a<br />
track at the very beginning or end of the track.<br />
• You can divide or move a track recorded using the <strong>PCM</strong> recorder<br />
only. An MP3/WMA/AAC-LC (m4a) /L<strong>PCM</strong> (WAV) file copied<br />
from a computer cannot be divided or moved.<br />
• Connect the headphone jack of other equipment to the<br />
m (microphone) jack of the <strong>PCM</strong> recorder and adjust the volume<br />
level with the equipment connected to the <strong>PCM</strong> recorder.<br />
• The playback speed is adjusted in DPC. Slide the DPC (SPEED<br />
CTRL) switch to “OFF” or adjust the playback speed in the<br />
DPC(Speed Control) menu (pages 54).<br />
“--:--” is displayed. • You have not set the clock (page 17).<br />
“--y--m--d” or “ --:--” is<br />
displayed on the recording<br />
date display.<br />
Remedy<br />
• The date of recording will not be displayed if you recorded the<br />
track when the clock was not set.<br />
There are fewer menu items • The menu items displayed are different depending on the<br />
displayed in the menu mode. operation modes (stop mode, playback mode, and recording<br />
mode) (pages 72).
Symptom<br />
The battery life is short.<br />
There is no battery power<br />
remaining after you have left<br />
the batteries inserted for long<br />
time without using the <strong>PCM</strong><br />
recorder.<br />
The battery life of the<br />
rechargeable batteries are<br />
short.<br />
The memory card is not<br />
recognized.<br />
A character in a folder or<br />
track name is displayed in<br />
unreadable characters.<br />
Remedy<br />
• The battery life on page 100 is based on playback with the volume<br />
level set to 16. The battery life may shorten depending on the<br />
operation of the <strong>PCM</strong> recorder.<br />
• Even if you do not use the <strong>PCM</strong> recorder, the batteries are<br />
consumed slightly. The battery life in this case varies depending<br />
on humidity or other environmental conditions. Usually, the<br />
batteries last about 4 months. If you do not intend to use the <strong>PCM</strong><br />
recorder for an extended period of time, it is recommended that<br />
you turn the power off diligently or remove the batteries<br />
(page 16).<br />
• You are using the rechargeable batteries in an environment with a<br />
temperature of under 5 °C. Charge the batteries in an environment<br />
with a temperature of 5 °C - 35 °C.<br />
• The <strong>PCM</strong> recorder has not been used for a certain time. Charge<br />
and discharge the rechargeable batteries using the <strong>PCM</strong> recorder<br />
several times.<br />
• Replace the old ones with new rechargeable batteries.<br />
• Since the memory card may contain image data or other files, the<br />
memory required for creating initial folders is insufficient. Use<br />
Windows Explorer or other tools to delete unwanted files or<br />
initialize the memory card on the <strong>PCM</strong> recorder (page 30).<br />
• Select “Memory Card” for the “Memory” item of the menu<br />
(page 36).<br />
• Remove a memory card and check the side of the memory card.<br />
Then insert it with correct side and direction (page 37).<br />
• The <strong>PCM</strong> recorder cannot support or display some special<br />
characters and symbols that are entered on a computer using<br />
Windows Explorer or the Macintosh desktop.<br />
Troubleshooting<br />
105 GB
Symptom<br />
Remedy<br />
The “Accessing...” display • If the <strong>PCM</strong> recorder is required to process a large amount of data,<br />
does not disappear.<br />
the message may be displayed for an extended period of time.<br />
This is not a malfunction of the <strong>PCM</strong> recorder. Wait until the<br />
message disappears. In this case, do not remove the batteries or<br />
AC power adaptor, while the message is displayed.<br />
It takes a long time to copy a • If the file size of a track is large, it takes a considerable time to<br />
track.<br />
finish copying. Please wait until the copying is finished.<br />
The <strong>PCM</strong> recorder does not • You cannot use the USB AC adaptor for the <strong>PCM</strong> recorder.<br />
operate with the USB AC<br />
adaptor.<br />
The copied tracks are not • The <strong>PCM</strong> recorder can recognize up to 8 levels of folders copied<br />
displayed.<br />
to the <strong>PCM</strong> recorder.<br />
• If tracks are incompatible, other than an L<strong>PCM</strong> (WAV)/MP3/<br />
WMA/AAC-LC (m4a) file that the <strong>PCM</strong> recorder support, they<br />
may not be displayed. See “Specifications” on page 95.<br />
It takes a long time for the • If the <strong>PCM</strong> recorder is required to process a large amount of data,<br />
<strong>PCM</strong> recorder to start. it may take longer for the <strong>PCM</strong> recorder to start. This is not a<br />
malfunction of the <strong>PCM</strong> recorder. Wait until the start-up display<br />
disappears.<br />
Menu does not reflect the • Batteries might have been removed just after the menu settings. In<br />
change in settings.<br />
this case, the change in settings may not be reflected.<br />
Some character information • When the “Level Meter in Playback” in the menu is set to “ON,”<br />
does not appear.<br />
you can scroll the title name only. When “OFF” is selected, you<br />
can scroll the file name. In both cases, artist name cannot be<br />
displayed by scrolling (page 49).<br />
The <strong>PCM</strong> recorder does not • Take out the batteries and insert them again (page 13).<br />
operate correctly.<br />
106 GB
Symptom<br />
The <strong>PCM</strong> recorder does not<br />
operate.<br />
The <strong>PCM</strong> recorder is not<br />
recognized by your<br />
computer.<br />
A folder/file cannot be<br />
copied from your computer.<br />
The file copied from your<br />
computer cannot be played<br />
back.<br />
The computer cannot start.<br />
Remedy<br />
• You may have formatted the memory of the <strong>PCM</strong> recorder using a<br />
computer. Use the <strong>PCM</strong> recorder formatting function to format<br />
the memory (page 78).<br />
• Disconnect the <strong>PCM</strong> recorder from your computer and reconnect<br />
it.<br />
• Do not use a USB hub or USB extension cable other than the<br />
supplied USB connecting cable. Connect the <strong>PCM</strong> recorder to<br />
your computer using the supplied USB connecting cable.<br />
• Operation is not guaranteed if you use any system requirements<br />
other than those described on page 95.<br />
• Depending on the USB port position of the computer you are<br />
using, the <strong>PCM</strong> recorder may not be recognized. If there are<br />
multiple USB ports, try another port.<br />
• The file format may differ from those that can be played back<br />
using the <strong>PCM</strong> recorder (.wav/.mp3/.wma/.m4a) (page 96). Check<br />
the file name.<br />
• If you reboot the computer with the <strong>PCM</strong> recorder connected to<br />
the computer, the computer may freeze or may not start properly.<br />
Disconnect the <strong>PCM</strong> recorder from the computer and reboot the<br />
computer again.<br />
Troubleshooting<br />
107 GB
Error Messages<br />
Error message<br />
Low Battery Level<br />
Change Battery<br />
Power Problem<br />
Memory Full<br />
Track Full<br />
T-MARK(Track Marks) are<br />
Full<br />
Cannot Divide - Exceeding<br />
Maximum Number of Tracks<br />
in Folder<br />
Cause/Remedy<br />
• You cannot format the memory or delete all the files in a folder<br />
because of insufficient battery power. Prepare new batteries to<br />
replace the current ones.<br />
• Batteries are exhausted. Replace the old LR6 (size AA) alkaline<br />
batteries with new ones. Or charge the rechargeable batteries, or<br />
replace the old rechargeable batteries with new ones (page 14).<br />
• An incompatible AC power adaptor may be connected. Check the<br />
AC power adaptor. Use the supplied AC power adaptor for the<br />
<strong>PCM</strong> recorder.<br />
• The remaining memory capacity of the <strong>PCM</strong> recorder is<br />
insufficient. Delete some tracks before recording (page 30).<br />
• If you copy a large number of files or folders to the directory that<br />
is located immediately below “MEMORY CARD” on the<br />
computer, editing operations with the <strong>PCM</strong> recorder may become<br />
disabled. Save a backup copy of unwanted files or folders on your<br />
computer and delete them from the <strong>PCM</strong> recorder.<br />
• When there are already 99 tracks in the selected folder, you cannot<br />
record a new track. Delete some tracks before recording a new<br />
track (page 30).<br />
• You can set up to 98 track marks for a track. Cancel unwanted<br />
marks (page 60).<br />
• When there are already 99 tracks in the selected folder or the total<br />
number of files stored in the <strong>PCM</strong> recorder exceeds the maximum,<br />
you cannot divide a track. Delete some tracks before recording a<br />
new track.<br />
108 GB
Error message<br />
File Damaged<br />
Format Error<br />
Process Error<br />
Memory Card Error<br />
Set Clock<br />
Empty Folder<br />
Same File Name Exists<br />
No Entry<br />
No T-MARK(Track Mark)<br />
No Memory Card<br />
File Protected<br />
Cause/Remedy<br />
• You cannot play or edit tracks, because the data of the selected file<br />
is damaged.<br />
• The <strong>PCM</strong> recorder has been formatted using a computer. You<br />
cannot perform operations, including recording or playing,<br />
because there is no copy of the control file required for operation.<br />
Format the <strong>PCM</strong> recorder using the formatting function in the<br />
menu.<br />
• The <strong>PCM</strong> recorder failed in memory access. Remove and then reinsert<br />
the batteries.<br />
• Save a backup copy of your data and format the <strong>PCM</strong> recorder<br />
using the menu.<br />
• An error occurred while a memory card was being inserted into<br />
the memory card slot. Remove and try inserting it again. If this<br />
message persists, use a new memory card.<br />
• Set the clock.<br />
• The selected folder does not have any tracks.<br />
• A track of the same file name already exists in the destination<br />
folder when a file is named or copied to the other memory media.<br />
• There are no tracks with “TAKE” or “KEEP” attached to their<br />
file names.<br />
• There are no track marks when you attempt to delete or locate a<br />
track mark.<br />
• There is no memory card inserted into the memory card slot when<br />
you attempt to set the “Memory” or “Cross-Memory Recording”<br />
menus.<br />
• The selected track is protected or is a “Read only” file. You<br />
cannot delete it. You can release the “Read only” attribute using<br />
the <strong>PCM</strong> recorder.<br />
Troubleshooting<br />
109 GB
Error message<br />
Cause/Remedy<br />
Memory Card Locked • The memory card is write-protected. You cannot record, delete, or<br />
edit tracks. To save a track on the card, use a non-write-protected<br />
memory card.<br />
Read Only Memory Card • A read-only memory card is inserted. You cannot record, delete,<br />
or edit tracks.<br />
Memory Card Access • Since a memory card containing an access control function is<br />
Denied<br />
inserted, you cannot use it.<br />
Memory Card Not Supported • A memory card that the <strong>PCM</strong> recorder does not support is<br />
inserted. Use a compatible memory card.<br />
Unknown Memory Card • A memory card inserted is incompatible.<br />
Stop and Reinsert Memory • A memory card was inserted during recording or playback.<br />
Card<br />
Remove the memory card and insert it while the <strong>PCM</strong> recorder is<br />
in the stop mode.<br />
Unknown Data<br />
• The data does not have a file format which the <strong>PCM</strong> recorder<br />
supports.<br />
The file formats (file extensions) that the <strong>PCM</strong> recorder supports<br />
are L<strong>PCM</strong> (.wav) files, MP3 (.mp3) files, WMA (.wma) files, and<br />
AAC-LC (.m4a) files. For details, see the “Specifications”<br />
(page 96).<br />
• The copyright-protected files cannot be played back.<br />
Invalid Operation<br />
• You cannot copy a track or divide a track, because there is more<br />
than one folder that has files with same name. Change the file<br />
names.<br />
• You cannot divide or set a track mark to a track not recorded using<br />
the <strong>PCM</strong> recorder.<br />
• The “Divide All T-MARK(Track Marks)” cannot be executed<br />
because there is a track mark within 0.5 seconds from the dividing<br />
position.<br />
• The file name has reached the maximum number of characters;<br />
you cannot divide or add “TAKE/KEEP.” Shorten the file name.<br />
110 GB
Error message<br />
New Track<br />
Only Effective During<br />
MANUAL Recording Mode<br />
Level Too High<br />
Set MIC SENS to LOW<br />
Or Adjust MIC Position<br />
Continue Recording in<br />
Different Memory<br />
• The file size of the track being recorded has reached the maximum<br />
file size: 1 GB for MP3 files, and 2 GB for a L<strong>PCM</strong> file. The file<br />
will be divided automatically and recording will continue as a new<br />
track.<br />
• When the REC LEVEL switch is set to “AUTO” (automatic<br />
recording), you cannot enable “LIMITER” in the menu.<br />
• When the REC LEVEL switch is set to “AUTO” (automatic<br />
recording), the message is displayed when the <strong>PCM</strong> recorder<br />
detects the microphone level is too high to continue automatic<br />
recording. If the MIC SENS(ATT) switch is set to “HI,” set it to<br />
“LOW.” Or, place the <strong>PCM</strong> recorder far from the sound source. If<br />
the message persists, switch the REC LEVEL switch to<br />
“MANUAL” (manual recording).<br />
• When the “Cross-Memory Recording” in the menu is enabled and<br />
the memory currently being used becomes full during recording,<br />
the <strong>PCM</strong> recorder switches to the other memory and continues<br />
recording.<br />
Change Folder • If there are no tracks in the folder, no folders are displayed in<br />
the display window. Only a folder with a track will be displayed.<br />
Deleted T-MARK(Track • When there is a track mark set within 0.5 seconds from the<br />
Marks) Too Close to Divided dividing position, the track mark is automatically deleted.<br />
Position<br />
Invalid when LINE OUT<br />
Setting<br />
System Error<br />
Cause/Remedy<br />
• When “Audio Out” is set to “LINE OUT,” the sound volume<br />
adjustment with the VOLUME +/– buttons is disabled. Set the<br />
“Audio Out” to “Headphones.”<br />
• A system error other than the above has occurred. Remove the<br />
batteries and re-insert them.<br />
Troubleshooting<br />
111 GB
System Limitations<br />
There are some system limitations of the <strong>PCM</strong> recorder. Troubles as mentioned below are not<br />
malfunctions of the <strong>PCM</strong> recorder.<br />
Symptom<br />
You cannot record tracks up<br />
to the maximum recording<br />
time.<br />
You cannot display or play<br />
back music files in order of<br />
copying.<br />
A track/music file is divided<br />
automatically.<br />
You cannot enter lower-case<br />
characters.<br />
“s” is displayed in place of<br />
a folder name, title, artist<br />
name, or file name.<br />
When you set A-B Repeat<br />
playback, the set positions<br />
move a little.<br />
Cause/Remedy<br />
• If you record tracks in a mixture of the recording modes, the<br />
recordable time varies from the maximum recording time of the<br />
highest recording mode to those of the lowest recording mode.<br />
• The sum of the number on the counter (elapsed recording time)<br />
and the remaining recording time may be less than the <strong>PCM</strong><br />
recorder’s maximum recording time.<br />
• If you have copied music files using your computer, those files<br />
may not be copied in order of copying because of the system<br />
limitations. If you copy a music file one by one to the <strong>PCM</strong><br />
recorder, you can display and play back tracks in order of<br />
copying.<br />
• The track/music file being recorded has reached the maximum<br />
size limit (1 GB for an MP3/WMA/AAC-LC file, 2 GB for an<br />
L<strong>PCM</strong> file), therefore it is divided automatically.<br />
• Depending on the combination of the characters used for the<br />
folder name that was made on your computer, those characters<br />
may change to all capitals.<br />
• A character which cannot be displayed on the <strong>PCM</strong> recorder has<br />
been used. Using your computer, replace it with one which can be<br />
displayed on the <strong>PCM</strong> recorder.<br />
• Depending on the files, the set positions may move.<br />
112 GB
Display Window<br />
Display when stop or recording<br />
Level meter display when playback<br />
In manual recording<br />
Display when playback (without<br />
level meter display)<br />
A Operation mode indicator<br />
Displays the following, depending on<br />
the current operation mode<br />
: stop<br />
: playback<br />
: recording<br />
: recording standby/recording<br />
pause (The indicator flashes.)<br />
: playback pause (The indicator<br />
flashes.)<br />
: review/fast backward,<br />
cue/fast forward<br />
: going backward/forward<br />
continuously<br />
B Time indication<br />
Each time you press DISPLAY button,<br />
the time indication changes in the<br />
following order: elapsed time (hours,<br />
minutes, seconds), remaining time<br />
(hours, minutes, seconds), recording<br />
Troubleshooting<br />
113 GB
date (year, month, day), and recording<br />
time (hour, minute)<br />
C Level meter display in Auto (AGC)<br />
recording mode<br />
In manual recording, the level meter<br />
whose colors are reverse is displayed.<br />
D Auto (AGC) recording indication<br />
In the manual recording mode, a peak<br />
level value is displayed.<br />
E Memory Card indication<br />
When a “Memory Card” is selected as<br />
“Memory,” the indication is displayed.<br />
When the “Built-In Memory” is<br />
selected, no indication is displayed.<br />
F Battery indicator<br />
G The track mark number at the current<br />
position/the number of all the track<br />
marks<br />
Appears when a track mark is set for a<br />
track.<br />
H Selected track number/Total number of<br />
tracks in the folder<br />
114 GB<br />
I Folder indication<br />
Displays the information of the current<br />
folder:<br />
: A folder where you can record a<br />
track (folder number)<br />
: A folder whose folder number<br />
cannot be obtained.<br />
:A folder for playback only<br />
J Recording mode indicator<br />
Displays the recording mode set using<br />
the menu when the <strong>PCM</strong> recorder is in<br />
the stop mode, and displays the current<br />
recording mode when the <strong>PCM</strong><br />
recorder is in the playback or recording<br />
mode.<br />
22/16, 44/16, 44/24, 48/16, 48/<br />
24, 96/16, 96/24: L<strong>PCM</strong> file recorded<br />
with the <strong>PCM</strong> recorder<br />
64k, 128k, 320k: MP3 file<br />
recorded with the <strong>PCM</strong> recorder<br />
When the files are copied from your<br />
computer, file formats only are<br />
displayed.<br />
:WMA files copied<br />
: AAC-LC (m4a) files copied<br />
Displays as follows when the <strong>PCM</strong><br />
recorder cannot get the recording mode.<br />
: Unknown
K File information<br />
The file name of the track is displayed.<br />
L Limiter indicator<br />
: Appears when the LIMITER is<br />
set for a track.<br />
M LCF(Low Cut Filter) indicator<br />
: Appears when the LCF(Low<br />
Cut Filter) is set for a track.<br />
N Remaining recording time indication<br />
Displays the remaining recording time<br />
of the memory currently being used in<br />
hours, minutes, and seconds.<br />
If there is more than 10 hours time<br />
remaining, the time is displayed in<br />
hours.<br />
If there is more than 10 minutes and<br />
less than 10 hours time remaining, the<br />
time is displayed in hours and minutes.<br />
If there is less than 10 minutes time<br />
remaining, the time is displayed in<br />
minutes and seconds.<br />
O Track information indication<br />
Track information is displayed:<br />
Track title name<br />
Artist name<br />
(Depending on the menu setting, the<br />
level meter is displayed.)<br />
P Protect indicator<br />
: Appears when the protect is set<br />
for a track.<br />
Q Repeat playback<br />
: Appears when one track is<br />
played back repeatedly.<br />
: Appears when tracks in one<br />
folder are played back repeatedly.<br />
: Appears when all the tracks<br />
are played back repeatedly.<br />
R Key Control indicator<br />
Displays the Key Control is set for a<br />
track:<br />
: Tone is adjusted higher than the<br />
natural step (from #1 to #6 in each<br />
halftone step)<br />
: Tone is adjusted lower than the<br />
natural step (from 21 to 26 in each<br />
halftone step)<br />
S Effect indicator<br />
Displays when Effect is set for a track.<br />
: Bass1<br />
: Bass2<br />
T Level meter to display L/R channels<br />
output levels<br />
U Peak position marker<br />
V Peak level<br />
Troubleshooting<br />
115 GB
Index<br />
A<br />
A-B Repeat .............................................53<br />
AC power adaptor .............................15, 93<br />
Adding a track mark ...............................60<br />
Adding TAKE or KEEP to a file name ..62<br />
Adjusting the playback sound tones .......55<br />
Adjusting the volume ..................25, 27, 50<br />
Auto (automatic) recording .....................22<br />
B<br />
Battery life ............................................100<br />
Battery remain indication .......................14<br />
Built-in microphones ..............................23<br />
C<br />
Compatible memory cards ......................37<br />
Connecting the <strong>PCM</strong> recorder to your<br />
computer .................................................84<br />
Copying files ...........................................88<br />
Copying tracks to your computer ...........87<br />
Cross-Memory Recording ......................39<br />
D<br />
Data Storage ............................................90<br />
DC IN 3V ................................................15<br />
Deleting .............................................30, 69<br />
Dividing a track .......................................66<br />
DPC (the Digital Pitch Control<br />
function) ..................................................54<br />
E<br />
Easy Search .............................................51<br />
Editing tracks ..........................................60<br />
Effect .......................................................56<br />
Error messages ......................................108<br />
F<br />
File information display ..........................49<br />
Folder ..........................................22, 26, 29<br />
Folder structure .......................................85<br />
H<br />
HOLD ......................................................21<br />
I<br />
Index to parts and controls<br />
Display window ................................113<br />
Front ....................................................11<br />
Inserting and removing a memory card ..36<br />
Inserting batteries ....................................13<br />
116 GB
K<br />
KEEP ......................................................62<br />
Key Control ............................................55<br />
L<br />
LCF(Low Cut Filter) ...............................43<br />
Level meter display .................................49<br />
LIMITER ................................................44<br />
Locking the buttons ................................21<br />
L<strong>PCM</strong> .....................................................41<br />
M<br />
Maintenance ............................................93<br />
Manual recording ....................................33<br />
Memory card .....................................37, 93<br />
Memory setting .......................................38<br />
Menu<br />
Add “TAKE” ................................72, 74<br />
Audio Out .....................................73, 82<br />
Backlight .......................................73, 80<br />
Battery Setting ..............................73, 80<br />
Clock .............................................73, 79<br />
Cross-Memory Recording ............73, 82<br />
Delete ............................................72, 74<br />
Detail Menu ..................................73, 78<br />
Divide ...........................................72, 74<br />
DPC(Speed Control) .....................72, 77<br />
Easy Search ...................................73, 77<br />
Effect .............................................73, 77<br />
File Copy ......................................72, 74<br />
Format ...........................................73, 78<br />
Key Control ..................................73, 77<br />
Language .......................................73, 80<br />
LCF(Low Cut Filter) .....................72, 76<br />
LED ...............................................73, 79<br />
Level Meter in Playback ...............73, 80<br />
LIMITER ......................................73, 81<br />
Making settings ...................................71<br />
Memory .........................................72, 75<br />
Menu settings ......................................72<br />
Play Mode .....................................73, 78<br />
Plug In Power ...............................73, 82<br />
PRE REC ......................................73, 81<br />
Protect ...........................................72, 75<br />
REC Mode ....................................72, 76<br />
Microphone sensitivity ............................42<br />
Monitoring the recording ........................25<br />
MP3 .........................................................41<br />
N<br />
Noise .......................................................92<br />
P<br />
Playback ............................................26, 49<br />
Index<br />
117 GB
Playback modes ................................51, 78<br />
Plug In Power .........................................46<br />
POWER ..................................................16<br />
POWER/HOLD switch .....................16, 21<br />
Precautions ..............................................92<br />
Pre-Recording .........................................34<br />
Protect .....................................................64<br />
R<br />
Recharging batteries .......................13, 101<br />
Recording ..........................................22, 33<br />
Recording from other equipment ............47<br />
Recording mode ................................41, 76<br />
Recording time ........................................99<br />
Recording with an external microphone ...46<br />
Recording with other equipment ............58<br />
Reinforcing the bass sound .....................56<br />
Remote commander ................................32<br />
Repeat .....................................................52<br />
S<br />
Selecting the sound effect ...........56, 73, 77<br />
Setting the clock .....................................17<br />
Setting the language ................................19<br />
Specifications ..........................................95<br />
Structure of folders .................................85<br />
Supplied accessories ...............................10<br />
118 GB<br />
System Limitations ...............................112<br />
T<br />
TAKE ......................................................62<br />
Track mark ..............................................60<br />
Troubleshooting ....................................102<br />
Turning on the power ..............................16<br />
U<br />
USB Memory ..........................................90<br />
Using the remote commander .................32<br />
Using your computer ...............................83
Trademarks<br />
• “Memory Stick,” , “Memory Stick” and<br />
“Memory Stick Micro” (M2) are trademarks<br />
or registered trademarks of <strong>Sony</strong> Corporation.<br />
• “MagicGate” is a trademark of <strong>Sony</strong><br />
Corporation.<br />
• microSD and microSDHC logos are trademarks of<br />
SD-3C, LLC.<br />
• Microsoft, Windows, Windows Vista and Windows<br />
Media are registered trademarks or trademarks of<br />
the Microsoft Corporation in the United States and/<br />
or other countries.<br />
• Apple, Macintosh and Mac OS are trademarks of<br />
Apple Inc., registered in the USA and other<br />
countries.<br />
• MPEG Layer-3 audio coding technology and<br />
patents licensed from Fraunhofer IIS and Thomson.<br />
• Sound Forge is a trademark or registered trademark<br />
of <strong>Sony</strong> Creative Software, Inc. in the United<br />
States and other countries.<br />
All other trademarks and registered trademarks are<br />
trademarks or registered trademarks of their<br />
respective holders. Furthermore, “ ” and “ ® ” are<br />
not mentioned in each case in this manual.<br />
119 GB


