

Samsung AVMCH070EA4 (AVMCH070EA4 ) - Manuel de l'utilisateur 0.59 MB, pdf, Anglais
Samsung AVMCH070EA4 (AVMCH070EA4 ) - Manuel de l'utilisateur 0.59 MB, pdf, Anglais
Samsung AVMCH070EA4 (AVMCH070EA4 ) - Manuel de l'utilisateur 0.59 MB, pdf, Anglais

Create successful ePaper yourself
Turn your PDF publications into a flip-book with our unique Google optimized e-Paper software.
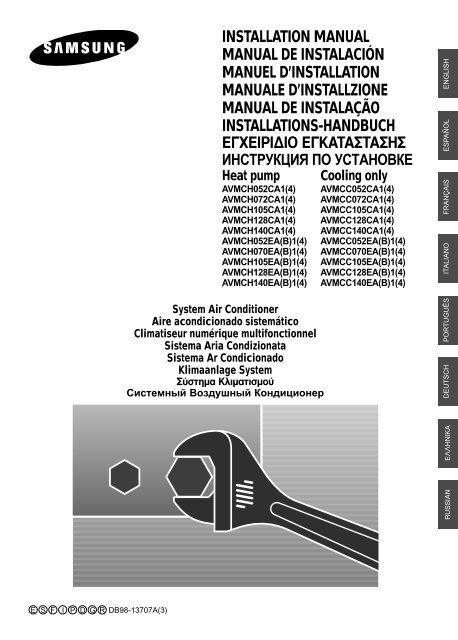
INSTALLATION MANUAL<br />
MANUAL DE INSTALACIÓN<br />
MANUEL D’INSTALLATION<br />
MANUALE D’INSTALLZIONE<br />
MANUAL DE INSTALAÇÃO<br />
INSTALLATIONS-HANDBUCH<br />
E°XEIPI¢IO E°KATATAH<br />
àçëíêìäñàü èé ìëíÄçéÇäÖ<br />
Heat pump<br />
AVMCH052CA1(4)<br />
AVMCH072CA1(4)<br />
AVMCH105CA1(4)<br />
AVMCH128CA1(4)<br />
AVMCH140CA1(4)<br />
AVMCH052EA(B)1(4)<br />
AVMCH070EA(B)1(4)<br />
AVMCH105EA(B)1(4)<br />
AVMCH128EA(B)1(4)<br />
AVMCH140EA(B)1(4)<br />
Cooling only<br />
AVMCC052CA1(4)<br />
AVMCC072CA1(4)<br />
AVMCC105CA1(4)<br />
AVMCC128CA1(4)<br />
AVMCC140CA1(4)<br />
AVMCC052EA(B)1(4)<br />
AVMCC070EA(B)1(4)<br />
AVMCC105EA(B)1(4)<br />
AVMCC128EA(B)1(4)<br />
AVMCC140EA(B)1(4)<br />
ITALIANO FRANÇAIS ESPAÑOL ENGLISH<br />
System Air Conditioner<br />
Aire acondicionado sistemático<br />
Climatiseur numérique multifonctionnel<br />
Sistema Aria Condizionata<br />
Sistema Ar Condicionado<br />
Klimaanlage System<br />
‡ÛÙËÌ· ∫ÏÈÌ·ÙÈÛÌÔ‡<br />
ëËÒÚÂÏÌ˚È ÇÓÁ‰Û¯Ì˚È äÓ̉ˈËÓÌÂapple<br />
PORTUGUÊS<br />
DEUTSCH<br />
RUSSIAN<br />
E§§HNIKA<br />
E S F I P D G R DB98-13707A(3)
Contents<br />
Chapter<br />
4 WAY CASSETTE INSTALLATION<br />
■ Preparation for Installation . . . . . . . . . . . . . . . . . . . . . . . . . . . . . . . 4<br />
■ Deciding on Where to Install the Indoor Unit . . . . . . . . . . . . . . . . . 5<br />
■ Indoor Unit Installation . . . . . . . . . . . . . . . . . . . . . . . . . . . . . . . . . . 8<br />
■ Purging the Unit . . . . . . . . . . . . . . . . . . . . . . . . . . . . . . . . . . . . . . . 9<br />
■ Connecting the Refrigerant Pipe . . . . . . . . . . . . . . . . . . . . . . . . . 10<br />
■ Cutting/Flaring the Pipes . . . . . . . . . . . . . . . . . . . . . . . . . . . . . . . 11<br />
■ Performing Leak Test & Insulation . . . . . . . . . . . . . . . . . . . . . . . . 12<br />
■ Drainpipe and Drain Hose Installation . . . . . . . . . . . . . . . . . . . . . 13<br />
■ Connecting the Connection Cord . . . . . . . . . . . . . . . . . . . . . . . . . 15<br />
■ Assigning Address to Indoor Unit . . . . . . . . . . . . . . . . . . . . . . . . . 16<br />
■ Additional Functions . . . . . . . . . . . . . . . . . . . . . . . . . . . . . . . . . . . 17<br />
■ Bio-pure Filter Installation(Optional) . . . . . . . . . . . . . . . . . . . . . . . 18<br />
■ Troubleshooting . . . . . . . . . . . . . . . . . . . . . . . . . . . . . . . . . . . . . . 19<br />
Chapter<br />
OPTIONAL ACCESSORIES<br />
■ Parts List . . . . . . . . . . . . . . . . . . . . . . . . . . . . . . . . . . . . . . . . . . . 23<br />
E-2
ENGLISH<br />
Chapter<br />
4 WAY CASSETTE INSTALLATION<br />
■ Preparation for Installation . . . . . . . . . . . . . . . . . 4<br />
■ Deciding on Where to Install the Indoor Unit . . . 5<br />
■ Indoor Unit Installation . . . . . . . . . . . . . . . . . . . . 8<br />
■ Purging the Unit . . . . . . . . . . . . . . . . . . . . . . . . 9<br />
■ Connecting the Refrigerant Pipe . . . . . . . . . . . 10<br />
■ Cutting/Flaring the Pipes . . . . . . . . . . . . . . . . . 11<br />
■ Performing Leak Test & Insulation . . . . . . . . . . 12<br />
■ Drainpipe and Drain Hose Installation . . . . . . . 13<br />
■ Connecting the Connection Cord . . . . . . . . . . 15<br />
■ Assigning Address to Indoor Unit . . . . . . . . . . 16<br />
■ Additional Functions . . . . . . . . . . . . . . . . . . . . 17<br />
■ Bio-pure Filter Installation(Optional) . . . . . . . . 18<br />
■ Troubleshooting . . . . . . . . . . . . . . . . . . . . . . . . 19<br />
E-3
Preparation for Installation<br />
When <strong>de</strong>ciding on the location of the air conditioner with the owner,<br />
the following restrictions must be taken into account.<br />
General<br />
Do NOT install the air conditioner in a location where it will come into<br />
contact with the following elements:<br />
◆ Combustible gases<br />
◆ Saline air<br />
◆ Machine oil<br />
◆ Sulphi<strong>de</strong> gas<br />
◆ Special environmental conditions<br />
If you must install the unit in such conditions, first consult your <strong>de</strong>aler.<br />
Accessories<br />
◆<br />
The following accessories are supplied with the indoor unit.<br />
The type and quantity may differ <strong>de</strong>pending on the specifications<br />
Pattern sheet<br />
Insulation cover<br />
drain<br />
Insulation<br />
Insulation cover<br />
band<br />
Insulation pipe<br />
Insulation drain<br />
hose<br />
Installation manual<br />
Cable-tie<br />
Flexible hose<br />
M4x12 tapped<br />
Screw<br />
Pad stopper<br />
Insulation drain sub<br />
E-4
Deciding on Where to Install the Indoor Unit<br />
ENGLISH<br />
Indoor Unit<br />
◆<br />
◆<br />
◆<br />
◆<br />
◆<br />
There must be no obstacles near the air inlet and outlet.<br />
Install the indoor unit on a ceiling that can support its weight.<br />
Maintain sufficient clearance around the indoor unit.<br />
Make sure that the water dripping from the drain hose runs away correctly<br />
and safely.<br />
The indoor unit must be installed in this way, that they are out of public<br />
access. (Not touchable by the users)<br />
Space Requirements for Indoor Unit<br />
E-5
Deciding on Where to Install the Indoor Unit (cont.)<br />
Drawing of the indoor unit<br />
✴✴052/070/072✴✴<br />
Unit : mm<br />
404<br />
403<br />
55<br />
25<br />
840 55 10-M4 Hole<br />
290<br />
(prepared hole)<br />
2x230=260 25<br />
20<br />
Suspension bolt<br />
4-M8~M10<br />
246<br />
230<br />
100<br />
80<br />
198<br />
196<br />
111<br />
141<br />
Fresh air intake hole<br />
293<br />
255<br />
256<br />
318<br />
41<br />
No. Name Remark<br />
1<br />
2<br />
3<br />
4<br />
5<br />
6<br />
Liquid pipe connection<br />
Gas pipe connection<br />
Drain pipe connection<br />
Power supply connection<br />
Air discharge grille<br />
Air suction grille<br />
ø9.52<br />
ø15.88<br />
E-6
ENGLISH<br />
✴✴105/128/140✴✴<br />
Unit : mm<br />
404<br />
403<br />
750<br />
adjustable 0~550<br />
55<br />
840<br />
55<br />
Suspention bolt<br />
4-M8~M10<br />
304<br />
288<br />
55 840 55<br />
290<br />
25 2x230=260 25<br />
20<br />
158<br />
138<br />
68<br />
288<br />
48<br />
198<br />
10-M4 Hole<br />
(prepared hole)<br />
196<br />
41<br />
111<br />
141<br />
Branch duct<br />
connection<br />
293 255<br />
256<br />
318<br />
No. Name Remark<br />
1<br />
2<br />
3<br />
4<br />
5<br />
6<br />
Liquid pipe connection<br />
Gas pipe connection<br />
Drain pipe connection<br />
Power supply connection<br />
Air discharge grille<br />
Air suction grille<br />
ø9.52<br />
ø19.05<br />
E-7
Indoor Unit Installation<br />
It is recommen<strong>de</strong>d to install the refnet joint before installing the indoor unit.<br />
1 Place the pattern sheet on the ceiling at the spot where you want to<br />
install the indoor unit.<br />
Note<br />
◆ Since the diagram is ma<strong>de</strong> of paper, it may shrink or stretch<br />
slightly due to temperature or humidity. For this reason, before<br />
drilling the holes maintain the correct dimensions between the<br />
markings; refer to page 6 or 7.<br />
Concrete<br />
Insert<br />
2 Insert bolt anchors, use existing ceiling supports or construct a suitable<br />
support as shown in figure.<br />
Hole in anchor<br />
Hole in plug<br />
3 Install the suspension bolts <strong>de</strong>pending on the ceiling type.<br />
Suspension bolt(M8)-field supply<br />
Ceiling support<br />
IMPORTANT<br />
◆ Ensure that the ceiling is strong enough to support<br />
the weight of the indoor unit.<br />
Before hanging the unit, test the strength of each<br />
attached suspension bolt.<br />
◆ If the length of suspension bolt is more than 1.5m,<br />
it is required to prevent vibration.<br />
4 Screw eight nuts to the suspension bolts making space for hanging<br />
the indoor unit.<br />
IMPORTANT<br />
You must install the suspension bolts more than four<br />
when installing the indoor unit.<br />
5 Hang the indoor unit to the suspension bolts between two nuts.<br />
Pad stopper<br />
Bracket<br />
Note<br />
◆ Piping must be laid and connected insi<strong>de</strong> the ceiling when<br />
suspending the unit. If the ceiling is already constructed,<br />
lay the piping into position for connection to the unit before<br />
placing the unit insi<strong>de</strong> the ceiling.<br />
6 Screw the nuts to suspend the unit. Cut a pad stopper and place it on the<br />
bracket at this time.<br />
Indoor Unit<br />
17mm<br />
Gauge of<br />
Dimensions<br />
20mm<br />
Ceiling<br />
7 Adjust the unit to the appropriate position consi<strong>de</strong>ring the installation area for the front<br />
panel.<br />
7-1 Place the pattern sheet on the indoor unit.<br />
7-2 Adjust a space between the ceiling and the indoor unit by using the gauge<br />
of dimensions.<br />
7-3 Fix the indoor unit securely after adjusting level of the unit by using a leveler.<br />
7-4 Remove the pattern sheet, connect the other cables and install the front panel.<br />
E-8
Purging the unit<br />
ENGLISH<br />
On <strong>de</strong>livery, the indoor unit is loa<strong>de</strong>d with refrigerant gas.<br />
All this gas must therefore be purged before connecting the assembly<br />
piping. To purge the inert gas, proceed as follows.<br />
Unscrew the pinch pipe at the end of each refrigerant pipe.<br />
Result: All inert gas escapes from the indoor unit. Liquid refrigerant<br />
port<br />
Note<br />
◆ To prevent dirt or foreign objects from getting into the pipes<br />
during installation, do NOT remove the pinch pipe completely<br />
until you are ready to connect the piping.<br />
Gas refrigerant port<br />
E-9
Connecting the Refrigerant Pipe<br />
There are two refrigerant pipes of differing diameters:<br />
◆ A smaller one for the liquid refrigerant<br />
◆ A larger one for the gas refrigerant<br />
◆ The insi<strong>de</strong> of copper pipe must be clean & has no dust.<br />
Refrigerant oil<br />
1<br />
Remove the pinch pipe on the pipes and connect the assembly pipes to<br />
each pipe, tightening the nuts, first manually and then with a torque<br />
wrench, a spanner applying the following torque.<br />
Torque wrench<br />
Flare nut<br />
Spanner<br />
Union<br />
Note<br />
Outer Diameter Torque (kgf•cm)<br />
6.35 mm (1/4") 140~170<br />
9.52 mm (3/8") 250~280<br />
12.70 mm (1/2") 380~420<br />
15.88 mm (5/8") 440~480<br />
19.05 mm (3/4") 990~1210<br />
22.23 mm (7/8") 990~1210<br />
◆ If the pipes must be shortened refer to page 11.<br />
2<br />
Must use insulator which is thick enough to cover the refrigerant pipe to<br />
protect the con<strong>de</strong>nsate water on the outsi<strong>de</strong> of pipe falling onto the floor<br />
and the efficiency of the unit will be better.<br />
3<br />
Cut off any excess foam insulation.<br />
4<br />
Be sure that there must be no crack or wave on the ben<strong>de</strong>d area.<br />
5<br />
It would be necessary to double the insulation thickness(10mm or more)<br />
to prevent con<strong>de</strong>nsation even on the insulator when if the installed area is<br />
warm and humid.<br />
E-10
Cutting/Flaring the Pipes<br />
ENGLISH<br />
1<br />
Make sure that you have the required tools available (pipe cutter, reamer,<br />
flaring tool and pipe hol<strong>de</strong>r).<br />
2<br />
If you wish to shorten the pipes, cut it with a pipe cutter, taking care to ensure<br />
that the cut edge remains at a 90° angle with the si<strong>de</strong> of the pipe. Refer to the<br />
illustrations below for examples of edges cut correctly and incorrectly.<br />
90 O<br />
Oblique Rough Burr<br />
3<br />
4<br />
To prevent any gas from leaking out, remove all burrs at the cut edge of the<br />
pipe, using a reamer.<br />
Sli<strong>de</strong> a flare nut on to the pipe and modify the flare.<br />
Outer Diameter (D) Depth (A)<br />
6.35 mm (1/4") 1.3mm<br />
9.52 mm (3/8") 1.8mm<br />
12.70 mm (1/2") 2.0mm<br />
15.88 mm (5/8") 2.2mm<br />
19.05 mm (3/4") 2.2mm<br />
22.23 mm (7/8") 2.2mm<br />
5<br />
Check that the flaring is correct, referring to the illustrations below for<br />
examples of incorrect flaring.<br />
Inclined Damaged Surface Cracked Uneven Thickness<br />
6<br />
Align the pipes and tighten the flare nuts first manually and then with<br />
a torque wrench, applying the following torque.<br />
Outer Diameter Torque (kgf•cm)<br />
6.35 mm (1/4") 140~170<br />
9.52 mm (3/8") 250~280<br />
12.70 mm (1/2") 380~420<br />
15.88 mm (5/8") 440~480<br />
19.05 mm (3/4") 990~1210<br />
22.23 mm (7/8") 990~1210<br />
CAUTION<br />
◆ In case of welding the pipe, you must weld with nitrogen<br />
gas blowing.<br />
E-11
Performing Leak Test & Insulation<br />
Leak Test<br />
To check for gas leaks on the indoor unit, check the connection part<br />
of each refrigerant pipe by using a leak <strong>de</strong>tector.<br />
Insulation<br />
Once you have checked that there are no leaks in the system,<br />
you can insulate the piping and hose.<br />
No gap<br />
1<br />
To avoid con<strong>de</strong>nsation problems, place T13.0 or thicker Acrylonitrile<br />
Butadien Rubber around each refrigerant pipe.<br />
Note<br />
◆ Always make the seam of pipes face upwards.<br />
NBR(T13.0 or thicker)<br />
Insulation<br />
cover pipe<br />
Insulation pipe<br />
2<br />
Wind insulating tape around the pipes and drain hose.<br />
Indoor Unit<br />
CAUTION<br />
Be sure to overlap<br />
the insulation<br />
Must fit tightly against<br />
body without any gap.<br />
3<br />
Finish wrapping insulating tape around the rest of the pipes leading to the<br />
outdoor unit.<br />
E-12
Drainpipe and Drain Hose Installation<br />
ENGLISH<br />
Care must be taken when installing the drainpipe and drain hose for<br />
the indoor unit so that con<strong>de</strong>nsate water is drained correctly outsi<strong>de</strong>.<br />
Flexible<br />
hose<br />
Drainpipe<br />
1<br />
Fix the flexible hose to the drainpipe.<br />
◆ The connection port of the flexible hose and PVC drainpipe must be<br />
fixed with PVC adhesives.<br />
◆ Check out that the connected part doesn’t leak.<br />
2<br />
Connect the flexible hose to the flexible hose port.<br />
◆ Make sure that a rubber ring is installed on the drain hose port.<br />
Drain<br />
hose port<br />
3<br />
Install the drainpipe as shortly as possible.<br />
◆ Give a slightly slant to the drainpipe for proper drainage of con<strong>de</strong>nsate<br />
water.<br />
◆ There must be no gap on the connected part so that the drainpipe is<br />
not separated from the flexible hose<br />
Indoor<br />
Unit<br />
Insulation cover band<br />
Insulation drainpipe<br />
Insulation cover drain<br />
Band(Not supplied)<br />
4<br />
Insulate the drainpipe, and then fix it as indicated.<br />
Drain<br />
hose<br />
port<br />
Flexible<br />
hose<br />
Band<br />
Adhesives<br />
Drainpipe<br />
Band<br />
CAUTION<br />
Check that the indoor unit is level with the ceiling by using the leveler.<br />
Install air ventilation to drain con<strong>de</strong>nsate<br />
water smoothly.<br />
Air ventilation<br />
If it is necessary to increase the height of the drainpipe,<br />
install the drainpipe straightly within 300 mm from the<br />
flexible hose port. If it is raised higher than 550 mm,<br />
there can be water leaks.<br />
Band joint<br />
300mm or less<br />
Flexible hose<br />
1/100 or more<br />
20mm or more<br />
550mm or less<br />
Ceiling<br />
Do not give the hose and upward gradient<br />
after the connection port.<br />
This will cause water to flow backwards when<br />
the unit is stopped, resulting in water leaks.<br />
Upward gradient<br />
Ceiling<br />
Do not apply force to the piping on the unit si<strong>de</strong> when<br />
connecting the drain hose. The hose should not be<br />
allowed to hang loose from its connection to the unit.<br />
Fasten the hose to a wall, frame or other support as<br />
close to the unit as possible.<br />
Support pieces<br />
1~1.5m<br />
1/100 or more<br />
Ceiling<br />
Ceiling<br />
E-13
Drain Hose Installation (cont.)<br />
Note<br />
◆ If a concentrated drain hose is installed, refer to the figure below.<br />
Air ventilation<br />
Drain clamp<br />
100mm or<br />
more<br />
1/100 or<br />
more slope<br />
Concentrated drain hose<br />
Testing the drainage<br />
You should test the drainage after completing the installation.<br />
Prepare a little water about 2.0 liters.<br />
1<br />
Turn the cover drain pump, then pull it out.<br />
Cover drain pump<br />
2<br />
Pour water into the indoor unit as shown in figure.<br />
Note<br />
◆ If you do not pour water insi<strong>de</strong> the water supply intake,<br />
water may spill from the indoor unit.<br />
3<br />
Confirm that the water flows out through the drain hose.<br />
Note<br />
◆ You can check the drainage only when the air conditioner<br />
is in cool mo<strong>de</strong>.<br />
4<br />
Reassemble the cover drain pump.<br />
E-14
Connecting the Connection Cord<br />
ENGLISH<br />
The indoor unit is powered from the outdoor unit via the connection cord.<br />
1<br />
Remove the screw on the electrical component box and remove the cover<br />
plate.<br />
2<br />
Route the connection cord through the si<strong>de</strong> of the indoor unit and connect<br />
the cable to terminals; refer to the figure below.<br />
3<br />
Route the other end of the cable to the outdoor unit through the ceiling &<br />
the hole on the wall.<br />
4<br />
Reassemble the electrical component box cover, carefully tightening the<br />
screw.<br />
Wiring Diagram<br />
Indoor Unit<br />
Next Indoor unit<br />
(Communication)<br />
Next Indoor<br />
unit(Power)<br />
Outdoor Unit<br />
Communication<br />
Power<br />
E-15
Assigning Address to Indoor Unit<br />
1<br />
2<br />
Before installing the indoor unit, assign an address to the indoor unit<br />
according to the air conditioning system plan.<br />
The address of the indoor unit is assigned by adjusting MAIN(SW01, SW02)<br />
and RMC(SW03) rotary switches.<br />
K1 K2 K3 K4<br />
SW04<br />
K5 K6 K7 K8<br />
SW05<br />
K9 K10<br />
SW06<br />
SW01 SW02 RMC SW03<br />
Setting Main Address<br />
◆<br />
◆<br />
◆<br />
The MAIN address is for communication between the indoor unit and the<br />
outdoor unit. Therefore, you must set it to operate the air conditioner<br />
properly.<br />
You can set the MAIN address from ‘00’ to ‘39’ by mixing SW01 and<br />
SW02. The MAIN address from ‘00’ to ‘39’ should differ from each other.<br />
Check the indoor unit address on the plan that you are to install and set<br />
the address according to the plan.<br />
SW01<br />
SW02<br />
Indoor unit<br />
address<br />
SW01<br />
SW02<br />
Indoor unit<br />
address<br />
0, 1, 2~9 00 ~ 09<br />
0, 1, 2~9 20 ~ 29<br />
0, 1, 2~9 10 ~ 19<br />
0, 1, 2~9 30 ~ 39<br />
Setting RMC Address<br />
◆<br />
◆<br />
◆<br />
The SW03 RMC switch is the address setting switch for controlling the<br />
indoor unit with the wired remote controller and centralized controller.<br />
You must set the SW03, K1 and K2 switch when using the wired remote<br />
controller and centralized controller.<br />
You don’t have to set the SW03 RMC switch when not using the wired<br />
remote controller and centralized controller.<br />
E-16
Additional Functions<br />
ENGLISH<br />
Increasing fan speed<br />
◆<br />
If external static pressure is too great, the air flow volume may drop too low<br />
at each air outlet. This problem can be solved by increasing the fan speed.<br />
Switch No. Switch ON Switch OFF<br />
K3 Normal fan speed High fan speed<br />
K1 K2 K3 K4<br />
SW04<br />
Compensation for lost temperature in heating operation<br />
◆<br />
Reduces the difference between an actual room temperature and a sensed<br />
temperature by the air conditioner when heating.<br />
Switch No. Switch ON Switch OFF<br />
K5 5°C compensation 2°C compensation<br />
K5 K6 K7 K8<br />
SW05<br />
Adjusting filter cleaning cycle<br />
◆<br />
You can adjust the cycle for filter sign indicator.<br />
Switch No. Switch ON Switch OFF<br />
K6 1000 hours 2000 hours<br />
K5 K6 K7 K8<br />
SW05<br />
Control of electronic expansion valve at the indoor unit off<br />
◆<br />
When an indoor unit off makes refrigerant noise, set K9 to OFF position to<br />
reduce the noise. However, if a distributor kit is installed, K9 must be at ON<br />
position.<br />
K9 K10<br />
Switch No. Switch ON Switch OFF<br />
K9<br />
Electronic expansion valve<br />
step 80<br />
Electronic expansion valve<br />
step 0 (Sub cool control)<br />
SW06<br />
E-17
Bio-pure Filter installation (optional)<br />
The air conditioner can be fitted with a Bio-Pure filter to remove minute<br />
dust particles. The service life of the filter is approximately three months<br />
<strong>de</strong>pending on the time during which the air conditioner is used.<br />
Accessories<br />
Bio-pure filter<br />
1<br />
M4x10 tapped<br />
Screw<br />
4<br />
1<br />
Remove the vinyl packing from the filter.<br />
Note<br />
Do not remove the packing from a bio-pure filter until you wish<br />
to use the filter, as it will lose its properties.<br />
2<br />
Open the front grille by pulling the tabs on the grille.<br />
3<br />
Remove the safety clips to open the grille completely.<br />
4<br />
Pull out the air filter.<br />
5<br />
Locate the bio-pure filter on the center of the air filter.<br />
6<br />
Secure the bio-pure filter with four screws.<br />
7<br />
Reinstall the filter and the front grille.<br />
E-18
Troubleshooting<br />
ENGLISH<br />
Detection of errors<br />
◆ If an error occurs during the operation, an LED flickers and the operation is stopped except the LED.<br />
◆ If you re-operate the air conditioner, it operates normally at first, then <strong>de</strong>tect an error again.<br />
LED Display on the indoor unit<br />
LED Display<br />
Indicators<br />
Abnormal conditions<br />
Operating<br />
Power reset<br />
X<br />
X<br />
X<br />
X<br />
Error of temperature sensor in indoor unit<br />
(OPEN/SHORT)<br />
X X<br />
X X<br />
Displayed on appropriate indoor<br />
unit which is operating<br />
Error of heat exchanger sensor in indoor unit<br />
Error of heat exchanger OUT sensor in indoor unit<br />
Error of outlet temperature sensor in indoor unit<br />
(OPEN/SHORT): For heat pump mo<strong>de</strong>ls only<br />
X<br />
X<br />
X<br />
Displayed on appropriate indoor<br />
unit which is operating<br />
Error of mixed operation<br />
X<br />
X<br />
X<br />
Error of outdoor temperature sensor<br />
Error of COND sensor<br />
Error of DISCHARGE sensor<br />
X<br />
X<br />
X<br />
Displayed on appropriate indoor<br />
unit which is operating<br />
Displayed on outdoor unit<br />
1. No communication for 2 minutes between<br />
indoor unit and outdoor unit (communication<br />
error for more than 2 minutes)<br />
2. Indoor unit receiving the communication<br />
error from outdoor unit<br />
3. Outdoor unit tracking 3 minute error<br />
4. When sending the communication error<br />
from outdoor unit the mismatching of the<br />
communication numbers and installed<br />
numbers after completion of tracking.<br />
(communication error for more than<br />
2 minutes)<br />
X<br />
X<br />
X<br />
1. Error of indoor unit: Displayed<br />
on the indoor unit regardless<br />
of operation<br />
2. Error of outdoor unit:<br />
Displayed on the indoor unit<br />
which is operating<br />
● On Flickering X Off<br />
◆ If you turn off the air conditioner when the LED is flickering, the LED is also turned off.<br />
◆ If you re-operate the air conditioner, it operates normally at first, then <strong>de</strong>tect an error again.<br />
E-19
Troubleshooting (cont.)<br />
LED Display<br />
Indicators<br />
Abnormal conditions<br />
Operating<br />
Self-diagnostic error<br />
(including the indoor unit not <strong>de</strong>tected)<br />
1. Error of electronic expansion valve close<br />
2. Error of electronic expansion valve open<br />
3. Breakaway of EVA OUT sensor<br />
4. Breakaway of EVA IN sensor<br />
X<br />
X<br />
Displayed on appropriate indoor<br />
unit which is operating<br />
Displayed on outdoor unit<br />
5. Breakaway of COND MID sensor<br />
6. 2nd <strong>de</strong>tection of refrigerant completely leak<br />
7. 2nd <strong>de</strong>tection of high temperature COND<br />
8. 2nd <strong>de</strong>tection of high temperature DISCHARGE<br />
9. COMP DOWN due to 2nd <strong>de</strong>tection of<br />
low pressure switch<br />
10. Error of reverse phase<br />
11. Compressor down due to 6th <strong>de</strong>tection of<br />
freezing<br />
12. Self-diagnosis of con<strong>de</strong>nsation sensor (G8, G9)<br />
13. Compressor down due to con<strong>de</strong>nsation<br />
ratio control<br />
X<br />
X<br />
Displayed on appropriate indoor<br />
unit which is operating<br />
Displayed on outdoor unit<br />
Error of float switch<br />
X X X<br />
Error of setting option switches for optional accessories<br />
X<br />
X<br />
X<br />
EEPROM error<br />
EEPROM option error<br />
X<br />
X<br />
● On Flickering X Off<br />
◆ If you turn off the air conditioner when the LED is flickering, the LED is also turned off.<br />
◆ If you re-operate the air conditioner, it operates normally at first, then <strong>de</strong>tect an error again.<br />
E-20
ENGLISH<br />
Wired remote controller<br />
◆ If an error occurs, is displayed on the wired remote controller.<br />
◆ If you would like to see an error co<strong>de</strong>, press the Test button.<br />
Display<br />
Explanation<br />
Remark<br />
x<br />
x<br />
x<br />
x<br />
x<br />
x<br />
x<br />
x<br />
x<br />
x<br />
x<br />
x<br />
Error of communication between the outdoor unit and the wired<br />
remote controller<br />
Error of communication between the indoor unit and the wired<br />
remote controller<br />
Breakaway of indoor unit eva sensor<br />
Breakaway of indoor unit eva out sensor<br />
Open error of electronic expansion valve<br />
Close error of electronic expansion valve<br />
Breakaway of eva mid and eva out sensors in indoor unit<br />
Error of float switch<br />
OPEN/SHORT error of room sensor in indoor unit<br />
OPEN/SHORT error of eva in sensor in indoor unit<br />
OPEN/SHORT error of eva out sensor in indoor unit<br />
EEPROM error<br />
EEPROM option error<br />
Error of fan starting<br />
Error of outdoor unit<br />
Communication<br />
errors<br />
Displays related to<br />
indoor unit<br />
(x : 0~F)<br />
For the <strong>de</strong>tails, refer to<br />
the installation manual<br />
of the outdoor unit.<br />
The or<strong>de</strong>r of priority : EA → Eb → Cx → dx → bx → Ax → Fx → ox → qx → rx → sx → tx → Ux → vx → Eo<br />
- In case that the same error displays from multi-indoor units, the one having the faster address<br />
has the priority.<br />
E-21
Chapter<br />
OPTIONAL ACCESSORIES<br />
■ Parts List . . . . . . . . . . . . . . . . . . . . . . . . . . . . . . . . . 23<br />
E-22
Parts List<br />
ENGLISH<br />
Wired Remote Controller Accessories<br />
Wired remote<br />
controller<br />
Cable-tie<br />
Cable clamp<br />
M4x16 tapped<br />
screw<br />
Indoor unit power<br />
drawing cable<br />
Owner’s<br />
instructions<br />
Installation<br />
manual<br />
1<br />
2<br />
6<br />
7<br />
1<br />
1<br />
1<br />
Wireless Remote Controller Accessories<br />
Wireless<br />
remote controller<br />
Battery<br />
Remote<br />
control hol<strong>de</strong>r<br />
STS 2S-2x10<br />
tapped screw<br />
Owner’s<br />
instructions<br />
Installation<br />
manual<br />
1<br />
2<br />
1<br />
2<br />
1<br />
1<br />
Centralized Controller Accessories<br />
Centralized<br />
controller<br />
Cable-tie<br />
Cable clamp<br />
M4x16 tapped<br />
screw<br />
Owner’s<br />
instructions<br />
Installation<br />
manual<br />
1<br />
2<br />
5<br />
7<br />
1<br />
1<br />
Function Controller Accessories<br />
Function<br />
controller<br />
Cable-tie<br />
Cable clamp<br />
M4x16 tapped<br />
screw<br />
Owner’s<br />
instructions<br />
Installation<br />
manual<br />
1<br />
2<br />
6<br />
7<br />
1<br />
1<br />
Transmitter Accessories<br />
Transmitter<br />
Transmitter<br />
power cable<br />
Transmitter<br />
communication cable<br />
Installation<br />
manual<br />
1<br />
1<br />
1<br />
1<br />
E-23
THIS AIR CONDITIONER IS MANUFACTURED BY:<br />
ESTE AIRE ACONDICIONADO HA SIDO FABRICADO POR:<br />
CE CLIMATISEUR EST FABRIQUE PAR:<br />
QUESTO CONDIZIONATORE D’ARIA È PRODOTTO DA:<br />
ESTE APARELHO DE AR CONDICIONADO É FABRICADO POR:<br />
DIESE KLIMAANLAGE IST FABRIZIERT VON:<br />
AYTH H YKEYH KATAKEYATHKE AO:<br />
ùíéí äéçÑàñàéçÖê àáÉéíéÇãÖç îàêåéâ:<br />
ELECTRONICS


