

Samsung Samsung Player HD noir - Open market (GT-I8910DKAXEF ) - Manuel de l'utilisateur 1.36 MB, pdf, ANGLAIS (EUROPE)
Samsung Samsung Player HD noir - Open market (GT-I8910DKAXEF ) - Manuel de l'utilisateur 1.36 MB, pdf, ANGLAIS (EUROPE)
Samsung Samsung Player HD noir - Open market (GT-I8910DKAXEF ) - Manuel de l'utilisateur 1.36 MB, pdf, ANGLAIS (EUROPE)

Create successful ePaper yourself
Turn your PDF publications into a flip-book with our unique Google optimized e-Paper software.
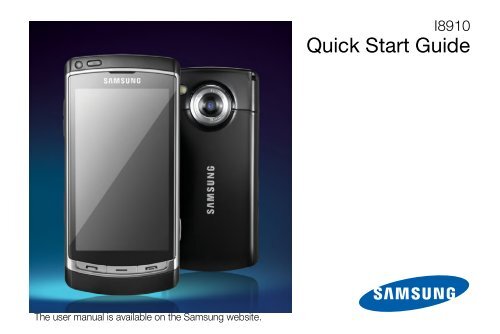
The user manual is available on the <strong>Samsung</strong> website.<br />
I8910<br />
Quick Start Gui<strong>de</strong>
using this<br />
manual<br />
This quick start gui<strong>de</strong> has been specially <strong>de</strong>signed<br />
to gui<strong>de</strong> you through the functions and features of<br />
your <strong>de</strong>vice.<br />
Instructional icons<br />
Before you start, familiarise yourself with the<br />
icons you will see in this manual:<br />
Warning—situations that could cause<br />
injury to yourself or others<br />
Caution—situations that could cause<br />
damage to your <strong>de</strong>vice or other<br />
equipment<br />
Note—notes, usage tips, or additional<br />
information<br />
<br />
Refer to—pages with related<br />
information; for example: p. 12<br />
(represents "see page 12")<br />
2
→<br />
Followed by—the or<strong>de</strong>r of options or<br />
menus you must select to perform a<br />
step; for example: In Menu mo<strong>de</strong>, select<br />
Messaging → New message<br />
(represents Messaging, followed by<br />
New message)<br />
[ ] Square brackets—<strong>de</strong>vice keys; for<br />
example: [ ] (represents the End/<br />
Power key).<br />
Copyrights and tra<strong>de</strong>marks<br />
Rights to all technologies and products that<br />
comprise this <strong>de</strong>vice are the property of their<br />
respective owners:<br />
• This product inclu<strong>de</strong>s software<br />
licensed from Symbian Ltd.<br />
© 1998-2009. Symbian and<br />
Symbian OS are tra<strong>de</strong>marks of<br />
Symbian Ltd.<br />
• Java is a tra<strong>de</strong>mark of Sun<br />
Microsystems, Inc.<br />
• Bluetooth ® is a registered tra<strong>de</strong>mark of the<br />
Bluetooth SIG, Inc. worldwi<strong>de</strong>.<br />
Bluetooth QD ID: B015049<br />
• Windows Media <strong>Player</strong> ® is a registered<br />
tra<strong>de</strong>mark of Microsoft Corporation.<br />
3
• Wi-Fi ® , the Wi-Fi CERTIFIED logo, and the<br />
Wi-Fi logo are registered tra<strong>de</strong>marks of the<br />
Wi-Fi Alliance.<br />
• DivX ® is a registered<br />
tra<strong>de</strong>mark of DivX, Inc., and<br />
is used un<strong>de</strong>r licence.<br />
ABOUT DIVX VIDEO<br />
DivX ® is a digital vi<strong>de</strong>o format created by<br />
DivX, Inc. This is an official DivX Certified <strong>de</strong>vice<br />
that plays DivX vi<strong>de</strong>o. Visit www.divx.com for<br />
more information and software tools to convert<br />
your files into DivX vi<strong>de</strong>o. Devices certified to<br />
play DivX ® vi<strong>de</strong>o at the Mobile Theater profile:<br />
DivX Certified to play DivX ® vi<strong>de</strong>o up to<br />
640x480, including premium content.<br />
ABOUT DIVX VIDEO-ON-DEMAND<br />
This DivX Certified ® <strong>de</strong>vice must be registered<br />
in or<strong>de</strong>r to play DivX Vi<strong>de</strong>o-on-Demand (VOD)<br />
content. To generate the registration co<strong>de</strong>,<br />
locate the DivX VOD section in the <strong>de</strong>vice setup<br />
menu. Go to vod.divx.com with this co<strong>de</strong> to<br />
complete the registration process and learn<br />
more about DivX VOD.<br />
4
safety and<br />
usage<br />
information<br />
Comply with the following precautions to avoid<br />
dangerous or illegal situations and ensure peak<br />
performance of your <strong>de</strong>vice.<br />
Safety warnings<br />
Keep your <strong>de</strong>vice away from small<br />
children and pets<br />
Keep your <strong>de</strong>vice and all accessories out of the<br />
reach of small children or animals. Small parts<br />
may cause choking or serious injury if<br />
swallowed.<br />
Protect your hearing<br />
Listening to a headset at high<br />
volumes can damage your hearing.<br />
Use only the minimum volume setting<br />
necessary to hear your conversation<br />
or music.<br />
5
Install mobile <strong>de</strong>vices and<br />
equipment with caution<br />
Ensure that any mobile <strong>de</strong>vices or related<br />
equipment installed in your vehicle are securely<br />
mounted. Avoid placing your <strong>de</strong>vice and<br />
accessories near or in an air bag <strong>de</strong>ployment<br />
area. Improperly installed wireless equipment<br />
can cause serious injury when air bags inflate<br />
rapidly.<br />
Handle and dispose of batteries and<br />
chargers with care<br />
• Use only <strong>Samsung</strong>-approved batteries and<br />
chargers specifically <strong>de</strong>signed for your<br />
<strong>de</strong>vice. Incompatible batteries and chargers<br />
can cause serious injuries or damage to your<br />
<strong>de</strong>vice.<br />
• Never dispose of batteries or <strong>de</strong>vices in a<br />
fire. Follow all local regulations when<br />
disposing used batteries or <strong>de</strong>vices.<br />
6<br />
• Never place batteries or <strong>de</strong>vices on or in<br />
heating <strong>de</strong>vices, such as microwave ovens,<br />
stoves, or radiators. Batteries may explo<strong>de</strong><br />
when overheated.<br />
Avoid interference with pacemakers<br />
Maintain a minimum of 15 cm (6 inches)<br />
between mobile <strong>de</strong>vices and pacemakers to<br />
avoid potential interference, as recommen<strong>de</strong>d<br />
by manufacturers and the in<strong>de</strong>pen<strong>de</strong>nt<br />
research group, Wireless Technology<br />
Research. If you have any reason to suspect<br />
that your <strong>de</strong>vice is interfering with a pacemaker<br />
or other medical equipment, turn off the <strong>de</strong>vice<br />
immediately and contact the manufacturer of<br />
the pacemaker or medical equipment for<br />
guidance.<br />
Do not use the phone if the screen<br />
is cracked or broken<br />
Broken glass could cause injury to your hand<br />
and face. Bring the phone to <strong>Samsung</strong> service<br />
centre to replace the glass.
Turn off the <strong>de</strong>vice in potentially<br />
explosive environments<br />
Do not use your <strong>de</strong>vice at refuelling points<br />
(service stations) or near fuels or chemicals.<br />
Turn off your <strong>de</strong>vice whenever directed by<br />
warning signs or instructions. Your <strong>de</strong>vice could<br />
cause explosions or fire in and around fuel or<br />
chemical storage and transfer areas or blasting<br />
areas. Do not store or carry flammable liquids,<br />
gases, or explosive materials in the same<br />
compartment as the <strong>de</strong>vice, its parts, or<br />
accessories.<br />
Reduce the risk of repetitive motion<br />
injuries<br />
While using your <strong>de</strong>vice, hold the <strong>de</strong>vice with a<br />
relaxed grip, press the keys lightly, use special<br />
features that reduce the number of keys you<br />
have to press (such as templates and<br />
predictive text), and take frequent breaks.<br />
Safety precautions<br />
Drive safely at all times<br />
Avoid using your <strong>de</strong>vice while driving and obey<br />
all regulations that restrict the use of mobile<br />
<strong>de</strong>vices while driving. Use hands-free<br />
accessories to increase your safety when<br />
possible.<br />
Follow all safety warnings and<br />
regulations<br />
Comply with any regulations that restrict the use<br />
of a mobile <strong>de</strong>vice in a certain area.<br />
Use only <strong>Samsung</strong>-approved<br />
accessories<br />
Using incompatible accessories may damage<br />
your <strong>de</strong>vice or cause injury.<br />
7
Turn off the <strong>de</strong>vice near medical<br />
equipment<br />
Your <strong>de</strong>vice can interfere with medical<br />
equipment in hospitals or health care facilities.<br />
Follow all regulations, posted warnings, and<br />
directions from medical personnel.<br />
Turn off the <strong>de</strong>vice or disable the<br />
wireless functions when in an<br />
aircraft<br />
Your <strong>de</strong>vice can cause interference with aircraft<br />
equipment. Follow all airline regulations and turn<br />
off your <strong>de</strong>vice or switch to a mo<strong>de</strong> that<br />
disables the wireless functions when directed<br />
by the airline personnel.<br />
Protect batteries and chargers from<br />
damage<br />
• Avoid exposing batteries to very cold or very<br />
hot temperatures (below 0° C/32° F or<br />
above 45° C/113° F). Extreme temperatures<br />
can reduce the charging capacity and life of<br />
your batteries.<br />
• Prevent batteries from contacting metal<br />
objects, as this can create a connection<br />
between the + and - terminals of your<br />
batteries and lead to temporary or<br />
permanent battery damage.<br />
• Never use a damaged charger or battery.<br />
• Risk of explosion if a battery or <strong>de</strong>vice is<br />
replaced by an incorrect type. Dispose of<br />
used batteries or <strong>de</strong>vices according to the<br />
instructions.<br />
8
Handle your <strong>de</strong>vice carefully and<br />
sensibly<br />
• Do not allow your <strong>de</strong>vice to get wet—liquids<br />
can cause serious damage. Do not handle<br />
your <strong>de</strong>vice with wet hands. Water damage<br />
to your <strong>de</strong>vice can void your manufacturer’s<br />
warranty.<br />
• Avoid using or storing your <strong>de</strong>vice in dusty,<br />
dirty areas to prevent damage to moving<br />
parts.<br />
• Your <strong>de</strong>vice is ma<strong>de</strong> of complex<br />
electronics—protect it from impacts and<br />
rough handling to avoid serious damage.<br />
• Do not paint your <strong>de</strong>vice, as paint can clog<br />
moving parts and prevent proper operation.<br />
• If your <strong>de</strong>vice has a camera flash or light,<br />
avoid using it close to the eyes of children or<br />
animals.<br />
• Your <strong>de</strong>vice may be damaged by exposure<br />
to magnetic fields. Do not use carrying<br />
cases or accessories with magnetic<br />
closures or allow your <strong>de</strong>vice to come in<br />
contact with magnetic fields for exten<strong>de</strong>d<br />
periods of time.<br />
Avoid interference with other<br />
electronic equipment<br />
Your <strong>de</strong>vice emits radio frequency (RF) signals<br />
that may interfere with unshiel<strong>de</strong>d or improperly<br />
shiel<strong>de</strong>d electronic equipment, such as<br />
pacemakers, hearing aids, and medical<br />
equipment in homes or vehicles. Consult the<br />
manufacturers of your electronic equipment to<br />
solve any interference problems you<br />
experience.<br />
9
Important usage information<br />
Use your <strong>de</strong>vice in the normal<br />
position<br />
Avoid contact with your <strong>de</strong>vice’s internal<br />
antenna.<br />
Allow only qualified personnel to<br />
service your <strong>de</strong>vice<br />
Allowing unqualified personnel to service your<br />
<strong>de</strong>vice may result in damage to your <strong>de</strong>vice and<br />
will void your warranty.<br />
Ensure maximum battery and<br />
charger life<br />
• Avoid charging batteries for more than a<br />
week, as overcharging may shorten battery<br />
life.<br />
• Over time, unused batteries will discharge<br />
and must be recharged before use.<br />
• Disconnect chargers from power sources<br />
when not in use.<br />
• Use batteries only for their inten<strong>de</strong>d<br />
purpose.<br />
Handle SIM cards and memory<br />
cards with care<br />
• Do not remove a card while the <strong>de</strong>vice is<br />
transferring or accessing information, as this<br />
could result in loss of data and/or damage to<br />
the card or <strong>de</strong>vice.<br />
• Protect cards from strong shocks, static<br />
electricity, and electrical noise from other<br />
equipment.<br />
• Frequent writing and erasing will shorten the<br />
life span of memory cards.<br />
• Do not touch gold-coloured contacts or<br />
terminals with your fingers or metal objects. If<br />
dirty, wipe the card with a soft cloth.<br />
10
Ensure access to emergency<br />
services<br />
Emergency calls from your <strong>de</strong>vice may not be<br />
possible in some areas or circumstances.<br />
Before travelling in remote or un<strong>de</strong>veloped<br />
areas, plan an alternate method of contacting<br />
emergency services personnel.<br />
Specific Absorption Rate (SAR)<br />
certification information<br />
Your <strong>de</strong>vice conforms to European Union (EU)<br />
standards that limit human exposure to radio<br />
frequency (RF) energy emitted by radio and<br />
telecommunications equipment. These<br />
standards prevent the sale of mobile <strong>de</strong>vices<br />
that exceed a maximum exposure level (known<br />
as the Specific Absorption Rate, or SAR) of 2.0<br />
watts per kilogram.<br />
During testing, the maximum SAR recor<strong>de</strong>d for<br />
this mo<strong>de</strong>l was 0.426 watts per kilogram. In<br />
normal use, the actual SAR is likely to be much<br />
lower, as the <strong>de</strong>vice has been <strong>de</strong>signed to emit<br />
only the RF energy necessary to transmit a<br />
signal to the nearest base station. By<br />
automatically emitting lower levels when<br />
possible, your <strong>de</strong>vice reduces your overall<br />
exposure to RF energy.<br />
The Declaration of Conformity at the back of<br />
this manual <strong>de</strong>monstrates your <strong>de</strong>vice’s<br />
compliance with the European Radio & Terminal<br />
Telecommunications Equipment (R&TTE)<br />
directive. For more information about the SAR<br />
and related EU standards, visit the <strong>Samsung</strong><br />
mobile website.<br />
11
Correct disposal of this product<br />
(Waste Electrical & Electronic Equipment)<br />
(Applicable in the European Union<br />
and other European countries with<br />
separate collection systems)<br />
This marking on the product,<br />
accessories or literature indicates<br />
that the product and its electronic accessories<br />
(e.g. charger, headset, USB cable) should not<br />
be disposed of with other household waste at<br />
the end of their working life. To prevent possible<br />
harm to the environment or human health from<br />
uncontrolled waste disposal, please separate<br />
these items from other types of waste and<br />
recycle them responsibly to promote the<br />
sustainable reuse of material resources.<br />
Household users should contact either the<br />
retailer where they purchased this product, or<br />
their local government office, for <strong>de</strong>tails of<br />
where and how they can take this item for<br />
environmentally safe recycling.<br />
Business users should contact their supplier<br />
and check the terms and conditions of the<br />
purchase contract. This product and its<br />
electronic accessories should not be mixed<br />
with other commercial wastes for disposal.<br />
This EEE is compliant with RoHS.<br />
12
Correct disposal of batteries in this<br />
product<br />
(Applicable in the European Union<br />
and other European countries with<br />
separate battery return systems)<br />
This marking on the battery, manual<br />
or packaging indicates that the batteries in this<br />
product should not be disposed of with other<br />
household waste at the end of their working life.<br />
Where marked, the chemical symbols Hg, Cd<br />
or Pb indicate that the battery contains mercury,<br />
cadmium or lead above the reference levels in<br />
EC Directive 2006/66. If batteries are not<br />
properly disposed of, these substances can<br />
cause harm to human health or the<br />
environment.<br />
To protect natural resources and to promote<br />
material reuse, please separate batteries from<br />
other types of waste and recycle them through<br />
your local, free battery return system.<br />
Disclaimer<br />
Some content and services accessible through<br />
this <strong>de</strong>vice belong to third parties and are<br />
protected by copyright, patent, tra<strong>de</strong>mark and/<br />
or other intellectual property laws. Such content<br />
and services are provi<strong>de</strong>d solely for your<br />
personal noncommercial use. You may not use<br />
any content or services in a manner that has<br />
not been authorised by the content owner or<br />
service provi<strong>de</strong>r. Without limiting the foregoing,<br />
unless expressly authorised by the applicable<br />
content owner or service provi<strong>de</strong>r, you may not<br />
modify, copy, republish, upload, post, transmit,<br />
translate, sell, create <strong>de</strong>rivative works, exploit,<br />
or distribute in any manner or medium any<br />
content or services displayed through this<br />
<strong>de</strong>vice.<br />
“THIRD PARTY CONTENT AND SERVICES ARE<br />
PROVIDED "AS IS." SAMSUNG DOES NOT<br />
WARRANT CONTENT OR SERVICES SO<br />
PROVIDED, EITHER EXPRESSLY OR<br />
13
IMPLIEDLY, FOR ANY PURPOSE. SAMSUNG<br />
EXPRESSLY DISCLAIMS ANY IMPLIED<br />
WARRANTIES, INCLUDING BUT NOT LIMITED<br />
TO, WARRANTIES OF MERCHANTABILITY OR<br />
FITNESS FOR A PARTICULAR PURPOSE.<br />
SAMSUNG DOES NOT GUARANTEE THE<br />
ACCURACY, VALIDITY, TIMELINESS,<br />
LEGALITY, OR COMPLETENESS OF ANY<br />
CONTENT OR SERVICE MADE AVAILABLE<br />
THROUGH THIS DEVICE AND UNDER NO<br />
CIRCUMSTANCES, INCLUDING<br />
NEGLIGENCE, SHALL SAMSUNG BE LIABLE,<br />
WHETHER IN CONTRACT OR TORT, FOR ANY<br />
DIRECT, INDIRECT, INCIDENTAL, SPECIAL OR<br />
CONSEQUENTIAL DAMAGES, ATTORNEY<br />
FEES, EXPENSES, OR ANY OTHER<br />
DAMAGES ARISING OUT OF, OR IN<br />
CONNECTION WITH, ANY INFORMATION<br />
CONTAINED IN, OR AS A RESULT OF THE<br />
USE OF ANY CONTENT OR SERVICE BY YOU<br />
OR ANY THIRD PARTY, EVEN IF ADVISED OF<br />
THE POSSIBILITY OF SUCH DAMAGES."<br />
Third party services may be terminated or<br />
interrupted at any time, and <strong>Samsung</strong> makes<br />
no representation or warranty that any content<br />
or service will remain available for any period of<br />
time. Content and services are transmitted by<br />
third parties by means of networks and<br />
transmission facilities over which <strong>Samsung</strong> has<br />
no control. Without limiting the generality of this<br />
disclaimer, <strong>Samsung</strong> expressly disclaims any<br />
responsibility or liability for any interruption or<br />
suspension of any content or service ma<strong>de</strong><br />
available through this <strong>de</strong>vice.<br />
<strong>Samsung</strong> is neither responsible nor liable for<br />
customer service related to the content and<br />
services. Any question or request for service<br />
relating to the content or services should be<br />
ma<strong>de</strong> directly to the respective content and<br />
service provi<strong>de</strong>rs.<br />
14
quick start<br />
gui<strong>de</strong><br />
Unpack<br />
Check your product box for the following items:<br />
• Mobile <strong>de</strong>vice<br />
• Battery<br />
• Travel adapter (charger)<br />
• Headset<br />
• PC data cable<br />
• <strong>Samsung</strong> PC Studio CD<br />
• Quick Start Gui<strong>de</strong><br />
The items supplied with your <strong>de</strong>vice may vary<br />
<strong>de</strong>pending on the software and accessories<br />
available in your region or offered by your<br />
service provi<strong>de</strong>r. You can obtain additional<br />
accessories from your local <strong>Samsung</strong> <strong>de</strong>aler.<br />
15
Device layout<br />
The front of your <strong>de</strong>vice inclu<strong>de</strong>s the following<br />
keys and features:<br />
Light/<br />
Proximity<br />
sensor<br />
Speaker<br />
Front camera<br />
lens for vi<strong>de</strong>o<br />
calls<br />
Volume key<br />
Earpiece<br />
Touch screen<br />
The rear of your <strong>de</strong>vice inclu<strong>de</strong>s the following<br />
keys and features:<br />
Mouthpiece<br />
for recording<br />
vi<strong>de</strong>os<br />
Flashbulb<br />
Hold key<br />
Headset jack<br />
Rear<br />
camera lens<br />
Multifunction<br />
jack<br />
Battery cover<br />
Memory card<br />
slot<br />
Camera key<br />
Talk key<br />
Menu key<br />
End/Power key<br />
Mouthpiece<br />
Speaker<br />
Internal<br />
antenna<br />
16
Keys<br />
Key<br />
Function<br />
Make or answer a call; In Standby<br />
mo<strong>de</strong>, retrieve recently dialled,<br />
missed, or received numbers<br />
Access Menu mo<strong>de</strong>; Show all active<br />
applications (press and hold)<br />
Turn the <strong>de</strong>vice on and off (press and<br />
hold); In Standby mo<strong>de</strong>, access the<br />
quick menu (press and hold); End a<br />
call; In Menu mo<strong>de</strong>, return to Standby<br />
mo<strong>de</strong><br />
In Standby mo<strong>de</strong>, adjust the <strong>de</strong>vice’s<br />
volume<br />
Lock or unlock the touch screen and<br />
keys<br />
In Standby mo<strong>de</strong>, turn on the camera<br />
(press and hold); In Camera mo<strong>de</strong>,<br />
take a photo or record a vi<strong>de</strong>o<br />
Icons<br />
Learn about the icons that appear on your<br />
display.<br />
Icon Definition<br />
Signal strength (GSM/GPRS network)<br />
Signal strength (UMTS network)<br />
Signal strength (HSDPA network)<br />
Alarm activated<br />
New text or multimedia message<br />
New voice mail message<br />
New email message<br />
Sending a message<br />
Call diverting active (if you have<br />
multiple lines, a number will indicate<br />
which line is diverted)<br />
Active phone line 2<br />
Missed call<br />
17
Icon<br />
Definition<br />
Bluetooth activated<br />
Stereo headset connected<br />
Mono headset connected<br />
Connected to PC<br />
Keypad locked<br />
Memory card inserted<br />
Wireless LAN available<br />
Battery power level<br />
Assemble and prepare your<br />
<strong>de</strong>vice<br />
Get started by assembling and setting up your<br />
mobile <strong>de</strong>vice for its first use.<br />
Install the SIM or USIM card and<br />
battery<br />
When you subscribe to a cellular service, you<br />
will receive a Subscriber I<strong>de</strong>ntity Module, or SIM<br />
card, with subscription <strong>de</strong>tails, such as your<br />
personal i<strong>de</strong>ntification number (PIN) and<br />
optional services.<br />
To use UMTS or HSDPA services, you can<br />
purchase a Universal Subscriber I<strong>de</strong>ntity<br />
Module (USIM) card.<br />
18
To install the SIM or USIM card and battery,<br />
1. Remove the battery cover.<br />
2. Insert the SIM or USIM card.<br />
If the <strong>de</strong>vice is on, press and hold [<br />
turn it off.<br />
] to<br />
• Place the SIM or USIM card in the <strong>de</strong>vice<br />
with the gold-coloured contacts facing<br />
down.<br />
• Without inserting a SIM or USIM card, you<br />
can use your <strong>de</strong>vice’s non-network<br />
services and some menus.<br />
19
3. Insert the battery.<br />
Charge the battery<br />
Before using the <strong>de</strong>vice for the first time, you<br />
must charge the battery.<br />
1. <strong>Open</strong> the cover to the multifunction jack on<br />
the si<strong>de</strong> of the <strong>de</strong>vice.<br />
2. Plug the small end of the travel adapter into<br />
the multifunction jack.<br />
4. Replace the battery cover.<br />
With the triangle<br />
facing up<br />
Improperly connecting the travel adapter can<br />
cause serious damage to the <strong>de</strong>vice. Any<br />
damages by misuse are not covered by the<br />
warranty.<br />
20
3. Plug the large end of the travel adapter into<br />
a power outlet.<br />
4. When the battery is fully charged (the<br />
icon is no longer moving), unplug the travel<br />
adapter from the power outlet.<br />
5. Unplug the travel adapter from the <strong>de</strong>vice.<br />
6. Close the cover to the multifunction jack.<br />
About the low battery indicator<br />
When your battery is low, the <strong>de</strong>vice will emit<br />
a warning tone and a low battery message.<br />
The battery icon will also be empty and<br />
blinking. If the battery level becomes too low,<br />
the <strong>de</strong>vice will automatically power off.<br />
Recharge your battery to continue using your<br />
<strong>de</strong>vice.<br />
Insert a memory card (optional)<br />
To store additional multimedia files, you must<br />
insert a memory card. Your <strong>de</strong>vice accepts<br />
microSD TM memory cards up to 16 GB<br />
(<strong>de</strong>pending on memory card manufacturer and<br />
type).<br />
1. <strong>Open</strong> the cover to the memory card slot on<br />
the si<strong>de</strong> of the <strong>de</strong>vice.<br />
2. Insert a memory card with the label si<strong>de</strong><br />
facing up.<br />
3. Push the memory card in the memory card<br />
slot until it locks in place.<br />
21
Follow these steps when removing a<br />
memory card<br />
Carefully follow the steps below when<br />
removing a memory card to avoid data loss<br />
or damage to the memory card.<br />
1. Press and hold [ ] and select<br />
Remove F: memory card.<br />
2. Select Yes to confirm.<br />
3. <strong>Open</strong> the cover to the memory card slot<br />
and gently push the memory card in until<br />
it disengages from the <strong>de</strong>vice.<br />
4. Pull the memory card out of the memory<br />
card slot.<br />
5. Select OK.<br />
If you must reboot the <strong>de</strong>vice to finish<br />
installing an application, do not remove the<br />
card until the reboot is complete. Otherwise,<br />
your application files may be corrupted or<br />
erased.<br />
Turn on your <strong>de</strong>vice on and off<br />
To turn your <strong>de</strong>vice on,<br />
1. Press and hold [ ] to turn on your<br />
<strong>de</strong>vice.<br />
2. Follow the onscreen instructions to set the<br />
region, city, current time, and the date.<br />
Your <strong>de</strong>vice will automatically connect to<br />
the cellular network.<br />
To turn your <strong>de</strong>vice off, repeat step 1 above.<br />
Lock or unlock the <strong>de</strong>vice<br />
You can lock the touch screen and the keys to<br />
prevent any unwanted <strong>de</strong>vice operations. To<br />
lock or unlock, press the Hold key.<br />
22
Switch to the offline profile<br />
By switching to the offline profile, you can use<br />
your <strong>de</strong>vice’s non-network services in areas<br />
where wireless <strong>de</strong>vices are prohibited, such as<br />
aeroplanes and hospitals.<br />
To switch to the offline profile, in Menu mo<strong>de</strong>,<br />
select Settings → Personal → Profiles →<br />
Offline → Options → Activate.<br />
Follow all posted warnings and directions<br />
from official personnel when in areas where<br />
wireless <strong>de</strong>vices are prohibited.<br />
Use the touch screen<br />
Your <strong>de</strong>vice’s touch screen lets you easily<br />
select items or perform functions. Learn basic<br />
actions to use the touch screen.<br />
For the optimal use of the touch screen,<br />
remove the screen protection film before<br />
using your <strong>de</strong>vice.<br />
• Select an icon to open a menu or launch an<br />
application.<br />
23
• Drag your finger up or down to scroll through<br />
vertical lists.<br />
• Drag your finger left or right to scroll through<br />
horizontal lists.<br />
24
Work with applications<br />
<strong>Open</strong> applications or fol<strong>de</strong>rs<br />
1. In Standby mo<strong>de</strong>, select Menu or press the<br />
Menu key to access Menu mo<strong>de</strong>.<br />
2. Select an application or a fol<strong>de</strong>r.<br />
• Depending on your region or service<br />
provi<strong>de</strong>r, <strong>de</strong>fault applications on your<br />
<strong>de</strong>vice may vary.<br />
• When you open some applications for the<br />
first time, installation may begin. Follow the<br />
on-screen instructions to install the<br />
application. You can also download<br />
installation files from<br />
www.samsungmobile.com.<br />
• While your <strong>de</strong>vice is connected to a PC for<br />
mass storage, you cannot open<br />
applications installed in the E: drive.<br />
• Refer to the user manual to learn more<br />
about applications on your <strong>de</strong>vice.<br />
Switch applications<br />
Your <strong>de</strong>vice allows you to multi-task by running<br />
multiple applications at the same time.<br />
To switch from one active application to<br />
another,<br />
1. Press and hold the Menu key to open a list<br />
of applications.<br />
2. Select an application.<br />
To close the current application, press<br />
[ ].<br />
25
Use widgets<br />
Learn to use widgets on the toolbar.<br />
<strong>Open</strong> the toolbar<br />
In Standby mo<strong>de</strong>, select the arrow at the<br />
bottom left of the screen to open the toolbar.<br />
You can rearrange widgets on the toolbar or<br />
move them to the idle screen.<br />
Depending on your region or service<br />
provi<strong>de</strong>r, available widgets may vary.<br />
Move the widgets to the idle screen<br />
1. <strong>Open</strong> the toolbar.<br />
2. Drag a widget from the toolbar to the idle<br />
screen. You can position the widget<br />
anywhere on the screen.<br />
Change the widgets<br />
1. In Menu mo<strong>de</strong>, select Settings →<br />
Personal → Widgets → Widgets.<br />
2. Select the widgets you want to inclu<strong>de</strong> to<br />
the toolbar and select Back.<br />
Use widget packages<br />
Group your favourite widgets together as a<br />
widget package.<br />
To create a widget package,<br />
1. In Standby mo<strong>de</strong>, select a package box (1<br />
to 3) at the top right of the idle screen.<br />
2. Drag a widget from the toolbar to the idle<br />
screen.<br />
To open the package, select the corresponding<br />
box. You can open only one package at one<br />
time.<br />
26
Access help information<br />
Learn to access helpful information about your<br />
<strong>de</strong>vice.<br />
1. In Menu mo<strong>de</strong>, select Tools → Help.<br />
2. Enter the first few letters of the help topic<br />
you want to find.<br />
3. Select a help topic to learn about an<br />
application or feature.<br />
4. Scroll the screen to get more information.<br />
To return to the previous level, select Back.<br />
Use basic call functions<br />
Learn to make or answer calls and use basic<br />
call functions.<br />
During a call, your <strong>de</strong>vice automatically<br />
locks the touch screen to prevent<br />
acci<strong>de</strong>ntal inputs. To unlock, press the<br />
Hold key.<br />
Make a call<br />
1. In Standby mo<strong>de</strong>, select Telephone and<br />
enter an area co<strong>de</strong> and phone number.<br />
2. Press [ ] to dial the number.<br />
For a vi<strong>de</strong>o call, select Options → Call →<br />
Vi<strong>de</strong>o call.<br />
3. To end the call, press [ ].<br />
Answer a call<br />
1. When a call comes in, press [ ].<br />
2. For a vi<strong>de</strong>o call, press [ ] and select Yes<br />
to allow the caller to see you via the front<br />
camera lens.<br />
3. To end the call, press [ ].<br />
Adjust the volume<br />
To adjust the volume during a call, press the<br />
Volume key up or down.<br />
27
View and dial missed calls<br />
Your <strong>de</strong>vice will display calls you have missed<br />
on the display. To dial the number of a missed<br />
call,<br />
1. Select Show.<br />
2. Scroll to the missed call you want to dial.<br />
3. Press [ ] to dial.<br />
Call a recently dialled number<br />
1. In Standby mo<strong>de</strong>, press [ ] to display a<br />
list of recent numbers.<br />
2. Scroll to the number you want and press<br />
[ ] to dial.<br />
Call an international number<br />
1. In Standby mo<strong>de</strong>, select Telephone and<br />
twice to insert the + character.<br />
2. Enter the complete number you want to dial<br />
(country co<strong>de</strong>, area co<strong>de</strong>, and phone<br />
number), and then press [ ] to dial.<br />
Call a contact from the phonebook<br />
You can call numbers directly from the<br />
phonebook using stored contacts. p. 31<br />
1. In Menu mo<strong>de</strong>, select Contacts.<br />
2. Scroll to the number you want to dial and<br />
press [ ] to dial.<br />
3. Select a number (if necessary).<br />
28
Send and view messages<br />
Learn to send and view text (SMS) messages.<br />
Send a text message<br />
1. In Menu mo<strong>de</strong>, select Messaging → New<br />
message.<br />
2. Select the recipient input field.<br />
3. Enter a <strong>de</strong>stination number and select .<br />
4. Select the text input field.<br />
5. Enter your message and select .<br />
6. Select Options → Send to send the<br />
message.<br />
Enter text<br />
Enter text and create messages or notes.<br />
Change the text input method<br />
When you open the text input field, the virtual<br />
keypad appears. Select and select one of<br />
the following input methods for entering text:<br />
• Virtual keypad (Alphanumeric keypad)<br />
• Qwerty keyboard (Full screen QWERTY)<br />
• Handwriting method (Handwriting)<br />
Enter text using the virtual keypad<br />
1. Change the text input method to<br />
Alphanumeric keypad.<br />
2. Select the appropriate keys to enter text.<br />
• To change case or switch to Predictive<br />
mo<strong>de</strong> or Number mo<strong>de</strong>, select .<br />
• To switch to Symbol mo<strong>de</strong>, select .<br />
29
You can use the following text input mo<strong>de</strong>s:<br />
Mo<strong>de</strong><br />
ABC<br />
Predictive<br />
Number<br />
Symbol<br />
Function<br />
Select the appropriate virtual key<br />
until the character you want<br />
appears on the display.<br />
1. Select the appropriate<br />
alphanumeric keys to enter an<br />
entire word.<br />
2. When the word displays<br />
correctly, select 0 to insert a<br />
space. If the correct word<br />
does not display, select to<br />
select an alternate word.<br />
Select the appropriate virtual key<br />
to enter a number.<br />
Select the appropriate virtual key<br />
to enter a symbol.<br />
Enter text using the qwerty keyboard<br />
1. Change the text input method to Full<br />
screen QWERTY.<br />
2. Select the appropriate keys to enter text.<br />
• To change case, select .<br />
• To switch to Number or Symbol mo<strong>de</strong>,<br />
select .<br />
• To enter special characters, select .<br />
Enter text using the handwriting<br />
method<br />
1. Change the text input method to<br />
Handwriting.<br />
2. Write characters in the sha<strong>de</strong>d writing area.<br />
• To enter numbers, select .<br />
• To enter symbols, select .<br />
30
View text messages<br />
1. In Menu mo<strong>de</strong>, select Messaging →<br />
Inbox.<br />
2. Select a text message.<br />
Add and find contacts<br />
Learn the basics of using the phonebook<br />
feature.<br />
Add a new contact<br />
To add a new contact in the <strong>de</strong>vice's memory:<br />
1. In Menu mo<strong>de</strong>, select Contacts →<br />
Options → New contact.<br />
2. Enter contact information.<br />
To insert additional information fields, select<br />
Options → Add <strong>de</strong>tail → a field type.<br />
To add a new contact on a SIM or USIM card:<br />
1. In Menu mo<strong>de</strong>, select Contacts →<br />
Options → Settings → Contacts to<br />
display → SIM memory → OK.<br />
2. Select Default saving memory → SIM<br />
memory → OK.<br />
3. Select Back.<br />
4. Select Options → New contact.<br />
5. Enter contact information.<br />
6. When you are finished entering information,<br />
select Done to save the contact card.<br />
Find a contact<br />
1. In Menu mo<strong>de</strong>, select Contacts.<br />
2. Enter the first few letters of the name you<br />
want to find.<br />
3. When you are finished entering information,<br />
select Done to save the contact card.<br />
31
3. Select the contact’s name from the search<br />
list.<br />
Once you have found a contact, you can:<br />
• call the contact by pressing [ ]<br />
• edit the contact information by selecting<br />
Options → Edit<br />
Link your photos to contacts<br />
Learn to tag faces in your photos to make calls<br />
or send messages from photos.<br />
To link your photos to contacts,<br />
1. In Standby mo<strong>de</strong>, drag your finger to the<br />
right to access the photo contact screen.<br />
2. Select Add → a photo → Select.<br />
3. Select Edit → Add Area to add a tag to a<br />
person’s face.<br />
4. Move or resize the rectangle on a face.<br />
5. Select OK → Link to phonebook → a<br />
contact → a number.<br />
The selected contact is linked to the photo.<br />
6. When you are finished, select Done.<br />
Use basic camera functions<br />
Learn the basics to capture and view photos<br />
and vi<strong>de</strong>os.<br />
Capture photos<br />
1. Press and hold the Camera key to turn on<br />
the camera.<br />
2. Rotate the <strong>de</strong>vice anti-clockwise to<br />
landscape view.<br />
3. Aim the lens at the subject and make any<br />
adjustments.<br />
4. Press the Camera key to take a photo.<br />
The photo is saved automatically.<br />
32
View photos<br />
In Menu mo<strong>de</strong>, select Gallery → Images &<br />
vi<strong>de</strong>os → a photo file.<br />
While viewing the photo, touch the screen and<br />
use icons to zoom in or out, send the photo,<br />
start a sli<strong>de</strong>show, and <strong>de</strong>lete the photo.<br />
Use camera options<br />
From the viewfin<strong>de</strong>r, select an icon and change<br />
options:<br />
Icon<br />
Function<br />
Shooting<br />
mo<strong>de</strong><br />
Scene<br />
Resolution<br />
Settings<br />
Flash<br />
Change the shooting<br />
mo<strong>de</strong><br />
Change the scene mo<strong>de</strong><br />
Change the resolution<br />
option<br />
Change the camera<br />
settings<br />
Turn the flash on or off<br />
Icon<br />
Focus<br />
mo<strong>de</strong><br />
Exposure<br />
value<br />
Quickview<br />
Function<br />
Change the camera focus<br />
Set the exposure value<br />
View captured images or<br />
vi<strong>de</strong>o clips<br />
Capture vi<strong>de</strong>os<br />
1. Press and hold the Camera key to turn on<br />
the camera.<br />
2. Rotate the <strong>de</strong>vice anti-clockwise to<br />
landscape view.<br />
3. Select to switch to Recording mo<strong>de</strong>.<br />
4. Aim the lens at the subject and make any<br />
adjustments.<br />
5. Press the Camera key to start recording.<br />
6. Select or press the Camera key to stop<br />
recording.<br />
The vi<strong>de</strong>o is saved automatically. 33
View vi<strong>de</strong>os<br />
In Menu mo<strong>de</strong>, select Gallery → Images &<br />
vi<strong>de</strong>os → a vi<strong>de</strong>o file.<br />
During playback, touch the screen and use<br />
icons to zoom in or out, and control playback.<br />
Use camcor<strong>de</strong>r options<br />
From the viewfin<strong>de</strong>r, select an icon and change<br />
options:<br />
Icon<br />
Function<br />
Recording<br />
mo<strong>de</strong><br />
Change the recording<br />
mo<strong>de</strong><br />
Resolution<br />
Change the resolution<br />
option<br />
Settings<br />
Change the camcor<strong>de</strong>r<br />
settings<br />
Flash Turn the flash on or off<br />
Exposure<br />
value<br />
Set the exposure value<br />
Icon<br />
Quickview<br />
Function<br />
View captured images or<br />
vi<strong>de</strong>o clips<br />
Use advanced camera functions<br />
Learn how to capture photos in various mo<strong>de</strong>s<br />
and customise camera settings.<br />
Capture photos by using options<br />
preset for various scenes<br />
1. Press and hold the Camera key to turn on<br />
the camera.<br />
2. Rotate the <strong>de</strong>vice anti-clockwise to<br />
landscape view.<br />
3. Select → a scene.<br />
4. Make any necessary adjustments.<br />
5. Press the Camera key to take a photo.<br />
34
Capture a series of photos<br />
1. Press and hold the Camera key to turn on<br />
the camera.<br />
2. Rotate the <strong>de</strong>vice anti-clockwise to<br />
landscape view.<br />
3. Select → Continuous.<br />
4. Make any necessary adjustments.<br />
5. Press and hold the Camera key to take a<br />
series of photos.<br />
Capture panoramic photos<br />
1. Press and hold the Camera key to turn on<br />
the camera.<br />
2. Rotate the <strong>de</strong>vice anti-clockwise to<br />
landscape view.<br />
3. Select → Panorama.<br />
4. Make any necessary adjustments.<br />
5. Press the Camera key to take the first<br />
photo.<br />
6. Slowly move the <strong>de</strong>vice to a direction. The<br />
<strong>de</strong>vice captures the next photo<br />
automatically.<br />
7. Repeat step 6 to complete the panoramic<br />
photo.<br />
Capture photos in Smile shot mo<strong>de</strong><br />
1. Press and hold the Camera key to turn on<br />
the camera.<br />
2. Rotate the <strong>de</strong>vice anti-clockwise to<br />
landscape view.<br />
3. Select → Smile shot.<br />
4. Press the Camera key.<br />
5. Aim the camera lens at your subject.<br />
Your <strong>de</strong>vice recognises people in an image<br />
and <strong>de</strong>tects their smiles. When the subject<br />
smiles, the <strong>de</strong>vice automatically takes a<br />
photo.<br />
35
Capture divi<strong>de</strong>d photos<br />
1. Press and hold the Camera key to turn on<br />
the camera.<br />
2. Rotate the <strong>de</strong>vice anti-clockwise to<br />
landscape view.<br />
3. Select → Mosaic.<br />
4. Select an image layout.<br />
5. Make any necessary adjustments.<br />
6. Press the Camera key to take the divi<strong>de</strong>d<br />
photos.<br />
Capture photos with <strong>de</strong>corative<br />
frames<br />
1. Press and hold the Camera key to turn on<br />
the camera.<br />
2. Rotate the <strong>de</strong>vice anti-clockwise to<br />
landscape view.<br />
3. Select → Frame.<br />
4. Select a frame.<br />
5. Make any necessary adjustments.<br />
6. Press the Camera key to take a photo with<br />
the frame.<br />
Record vi<strong>de</strong>os in slow or fast motion<br />
1. Press and hold the Camera key to turn on<br />
the camera.<br />
2. Rotate the <strong>de</strong>vice anti-clockwise to<br />
landscape view.<br />
3. Select to switch to Recording mo<strong>de</strong>.<br />
4. Select → or .<br />
5. Select a speed option.<br />
6. Press the Camera key to start recording.<br />
7. Select or press the Camera key to stop<br />
recording.<br />
The vi<strong>de</strong>o is saved automatically.<br />
36
Use camera options<br />
While using the camera, select → to<br />
access the following options:<br />
Option<br />
Timer<br />
White balance<br />
Effects<br />
ISO<br />
Exposure<br />
meter<br />
Anti-shake<br />
WDR<br />
Blink <strong>de</strong>tection<br />
Function<br />
Select the time <strong>de</strong>lay<br />
Adjust the colour balance of<br />
the image<br />
Apply a special effect<br />
Adjust the sensitivity of<br />
camera imaging sensor<br />
Select a type of exposure<br />
metre<br />
Reduce blur caused by<br />
vibration or movement<br />
Adjust the camera’s sensitivity<br />
to a wi<strong>de</strong> range of available<br />
light<br />
Detect closed eyes after you<br />
capture a photo<br />
Option<br />
Image quality<br />
Adjustment<br />
Function<br />
Set the quality of your digital<br />
images<br />
Adjust contrast, saturation,<br />
and sharpness<br />
While using the camcor<strong>de</strong>r, select → to<br />
access the following options:<br />
Option Function<br />
Timer Select the time <strong>de</strong>lay<br />
White balance<br />
Effects<br />
Anti-shake<br />
WDR<br />
Adjust the colour balance of<br />
the vi<strong>de</strong>o clip<br />
Apply a special effect<br />
Reduce blur caused by<br />
vibration or movement<br />
Adjust the camera’s sensitivity<br />
to a wi<strong>de</strong> range of available<br />
light<br />
37
Customise camera settings<br />
While using the camera, select → to<br />
access the following settings:<br />
Setting Function<br />
Gui<strong>de</strong>lines Display the gui<strong>de</strong>lines<br />
38<br />
Option<br />
Vi<strong>de</strong>o quality<br />
Adjustment<br />
Review<br />
GPS<br />
connection<br />
Shutter sound<br />
Storage<br />
Function<br />
Adjust the quality of your vi<strong>de</strong>o<br />
clips<br />
Adjust contrast, saturation,<br />
and sharpness<br />
Set the camera to switch to<br />
the preview screen after<br />
capturing photos<br />
Set the camera to record<br />
GPS information to images<br />
Select a sound to<br />
accompany the shutter action<br />
Select a memory location to<br />
store new images<br />
While using the camcor<strong>de</strong>r, select → to<br />
access the following settings:<br />
Setting Function<br />
Gui<strong>de</strong>lines Display the gui<strong>de</strong>lines<br />
Recording<br />
Sound<br />
Audio<br />
recording<br />
Storage<br />
Listen to music<br />
Select a sound to<br />
accompany the shutter action<br />
Turn the audio on or off<br />
Select a memory location to<br />
store new vi<strong>de</strong>o clips<br />
Learn how to listen to music via the music<br />
player.<br />
Add music files to your <strong>de</strong>vice<br />
Start by adding files to your <strong>de</strong>vice or memory<br />
card:<br />
• Download from the wireless web.
• Download from a PC with the optional<br />
<strong>Samsung</strong> PC Studio.<br />
• Receive via Bluetooth.<br />
• Copy to your memory card.<br />
• Synchronise with Windows Media <strong>Player</strong> 11.<br />
Copy music files via <strong>Samsung</strong> PC<br />
Studio<br />
1. In Menu mo<strong>de</strong>, select Settings →<br />
Connectivity → USB → USB connection<br />
mo<strong>de</strong> → PC Studio or Mass storage →<br />
OK.<br />
2. Press [ ] to return to Standby mo<strong>de</strong>.<br />
3. Using an optional PC data cable, connect<br />
the multifunction jack on your <strong>de</strong>vice to a<br />
PC.<br />
4. Run <strong>Samsung</strong> PC Studio and copy files<br />
from the PC to the <strong>de</strong>vice.<br />
5. Refer to the <strong>Samsung</strong> PC Studio help for<br />
more information.<br />
Copy music files to a memory card<br />
1. Insert a memory card.<br />
2. In Menu mo<strong>de</strong>, select Settings →<br />
Connectivity → USB → USB connection<br />
mo<strong>de</strong> → Mass storage → OK.<br />
3. Press [ ] to return to Standby mo<strong>de</strong>.<br />
4. Using an optional PC data cable, connect<br />
the multifunction jack on your <strong>de</strong>vice to a<br />
PC.<br />
5. When connected, a pop-up window will<br />
appear on the PC.<br />
6. <strong>Open</strong> the fol<strong>de</strong>r to view files.<br />
7. Copy files from the PC to the memory card.<br />
39
Synchronise your <strong>de</strong>vice with<br />
Windows Media <strong>Player</strong><br />
1. In Menu mo<strong>de</strong>, select Settings →<br />
Connectivity → USB → USB connection<br />
mo<strong>de</strong> → Media transfer → OK.<br />
2. Using an optional PC data cable, connect<br />
the multifunction jack on your <strong>de</strong>vice to a<br />
PC with Windows Media <strong>Player</strong> installed.<br />
When connected, a pop-up window will<br />
appear on the PC.<br />
3. <strong>Open</strong> Windows Media <strong>Player</strong> to<br />
synchronise music files.<br />
4. Edit or enter your <strong>de</strong>vice’s name in the popup<br />
window (if necessary).<br />
5. Select and drag the music files you want to<br />
the sync list.<br />
6. Start synchronisation.<br />
Play music files<br />
1. Add music files to your <strong>de</strong>vice.<br />
2. In Menu mo<strong>de</strong>, select Media → Music<br />
player.<br />
3. Select Options → Refresh library.<br />
4. Select Close.<br />
5. Select a playlist → a music file.<br />
6. Control playback using the following keys:<br />
Icon Function<br />
/ Pause or resume playback<br />
Restart playback; Skip<br />
backward (select within 3<br />
seconds); Scan backward<br />
(select and hold)<br />
Skip forward; Scan forward<br />
(select and hold)<br />
40
Create a playlist<br />
1. In Menu mo<strong>de</strong>, select Media → Music<br />
player → Playlists.<br />
2. Select Options → New playlist.<br />
3. Enter a title for the new playlist and select<br />
OK.<br />
4. Select Yes or select Options → Add<br />
songs.<br />
5. Select a music file and select Add.<br />
To select a music file in a fol<strong>de</strong>r, select<br />
Expand.<br />
To add more music files, repeat this step.<br />
6. When you are finished, select Done.<br />
Customise your <strong>de</strong>vice<br />
Get more from your <strong>de</strong>vice by customising it to<br />
match your preferences.<br />
Adjust the volume of the key tones<br />
In Standby mo<strong>de</strong>, press the Volume key up or<br />
down to adjust the key tone volume.<br />
Change your ringtone<br />
You can change your ringtone by selecting it<br />
from a profile.<br />
Activate a profile<br />
1. In Menu mo<strong>de</strong>, select Settings →<br />
Personal → Profiles.<br />
2. Scroll to a profile and select Options →<br />
Activate.<br />
To quickly change profiles, press and hold<br />
[ ] and select a different profile.<br />
41
Personalise a profile<br />
1. In Menu mo<strong>de</strong>, select Settings →<br />
Personal → Profiles.<br />
2. Select Options → Personalise.<br />
3. Change the settings as <strong>de</strong>sired.<br />
4. When you are finished personalising the<br />
profile, select Back.<br />
Select a theme for the display<br />
1. In Menu mo<strong>de</strong>, select Settings →<br />
Personal → Themes.<br />
2. Select a category:<br />
• General - choose a skin for your display.<br />
• Menu - choose a layout of the display.<br />
• Home scr. theme - choose a theme for<br />
Standby mo<strong>de</strong>.<br />
• Wallpaper - choose a background<br />
image for Standby mo<strong>de</strong>.<br />
• Call image - choose an image for<br />
incoming calls.<br />
42<br />
3. Select a theme or an image and select<br />
Back.<br />
Activate the motion sensor<br />
Your <strong>de</strong>vice features a motion sensor that<br />
recognises the movement and direction of your<br />
<strong>de</strong>vice.<br />
1. In Menu mo<strong>de</strong>, select Settings → Phone<br />
→ Sensor settings.<br />
2. Select Sensors to activate the sensor.<br />
3. Select Motion settings and select a<br />
sensor option.<br />
• Silencing calls - mute the ringtone<br />
when you place the <strong>de</strong>vice face down.<br />
• Snoozing alarms - snooze alarms when<br />
you place the <strong>de</strong>vice face down.<br />
• Auto-rotate display - change the<br />
screen orientation when you rotate the<br />
<strong>de</strong>vice.<br />
4. Select OK.
View the electronic version of<br />
the user manual<br />
For more information, view the I8910 user<br />
manual. The user manual is available on the<br />
<strong>Samsung</strong> website<br />
(http://www.samsungmobile.com).<br />
The manual is available as an Adobe Acrobat<br />
file (.<strong>pdf</strong>).<br />
If you do not have Adobe Rea<strong>de</strong>r, you can<br />
download the free program at<br />
www.adobe.com.<br />
43
We,<br />
Declaration of Conformity (R&TTE)<br />
<strong>Samsung</strong> Electronics<br />
<strong>de</strong>clare un<strong>de</strong>r our sole responsibility that the product<br />
GSM Mobile Phone : I8910<br />
to which this <strong>de</strong>claration relates, is in conformity with the following<br />
standards and/or other normative documents.<br />
SAFETY EN 60950- 1 : 2001 +A11:2004<br />
SAR EN 50360 : 2001<br />
EN 62209-1 : 2006<br />
EMC EN 301 489- 01 V1.6.1 (09-2005)<br />
EN 301 489- 07 V1.3.1 (11-2005)<br />
EN 301 489- 17 V1.2.1 (08-2002)<br />
EN 301 489- 19 V1.2.1 (11-2002)<br />
EN 301 489- 24 V1.4.1 (09-2007)<br />
RADIO EN 301 511 V9.0.2 (03-2003)<br />
EN 300 328 V1.7.1 (10-2006)<br />
EN 301 908- 1 V3.2.1 (05-2007)<br />
EN 301 908- 2 V3.2.1 (05-2007)<br />
We hereby <strong>de</strong>clare that [all essential radio test suites have been<br />
carried out and that] the above named product is in conformity to all<br />
the essential requirements of Directive 1999/5/EC.<br />
The conformity assessment procedure referred to in Article 10 and<br />
<strong>de</strong>tailed in Annex[IV] of Directive 1999/5/EC has been followed with<br />
the involvement of the following Notified Body(ies):<br />
BABT, Balfour House, Churchfield Road,<br />
Walton-on-Thames, Surrey, KT12 2TD, UK*<br />
I<strong>de</strong>ntification mark: 0168<br />
The technical documentation kept at :<br />
<strong>Samsung</strong> Electronics QA Lab.<br />
which will be ma<strong>de</strong> available upon request.<br />
(Representative in the EU)<br />
<strong>Samsung</strong> Electronics Euro QA Lab.<br />
Blackbushe Business Park, Saxony Way,<br />
Yateley, Hampshire, GU46 6GG, UK*<br />
2009. 04. 07 Yong-Sang Park / S. Manager<br />
(place and date of issue) (name and signature of authorised person)<br />
* It is not the address of <strong>Samsung</strong> Service Centre. For the address or the<br />
phone number of <strong>Samsung</strong> Service Centre, see the warranty card or<br />
contact the retailer where you purchased your phone.
Some of the contents in this gui<strong>de</strong> may differ from your <strong>de</strong>vice <strong>de</strong>pending on the software of the<br />
<strong>de</strong>vice or your service provi<strong>de</strong>r.<br />
World Wi<strong>de</strong> Web<br />
http://www.samsungmobile.com<br />
Printed in Korea<br />
Co<strong>de</strong> No.:GH68-22348A<br />
English (EU). 06/2009. Rev. 1.2


