

Dirt Devil Centrino X3.1 2012-3 - Bedienungsanleitung Dirt Devil Centrino 3.1 M2012-3
Dirt Devil Centrino X3.1 2012-3 - Bedienungsanleitung Dirt Devil Centrino 3.1 M2012-3
Dirt Devil Centrino X3.1 2012-3 - Bedienungsanleitung Dirt Devil Centrino 3.1 M2012-3

Create successful ePaper yourself
Turn your PDF publications into a flip-book with our unique Google optimized e-Paper software.
<strong>Centrino</strong> <strong>X<strong>3.1</strong></strong><br />
DE<br />
<strong>Bedienungsanleitung</strong>..........3-9<br />
beutelloser Bodenstaubsauger<br />
GB<br />
Operating Manual............10-17<br />
bagless cylinder vacuum cleaner<br />
ES<br />
Manual de instrucciones 18-25<br />
Aspiradora rodante sin bolsa<br />
Roya-31315-3 • A4 (ohne AS) • 29.03.<strong>2012</strong>
16<br />
17<br />
18<br />
34<br />
15<br />
14<br />
19<br />
13<br />
11<br />
20<br />
12<br />
21<br />
10<br />
9<br />
23<br />
8<br />
24<br />
7<br />
22<br />
27<br />
28<br />
32<br />
3<br />
1<br />
2<br />
4<br />
25<br />
26<br />
29<br />
30<br />
31<br />
5<br />
6<br />
33<br />
1<br />
2
1 Überblick über Ihren <strong>Centrino</strong> <strong>X<strong>3.1</strong></strong><br />
1 Überblick über Ihren <strong>Centrino</strong> <strong>X<strong>3.1</strong></strong><br />
Vielen Dank!<br />
Wir danken Ihnen für den Kauf des <strong>Centrino</strong> <strong>X<strong>3.1</strong></strong> und das entgegengebrachte<br />
Vertrauen.<br />
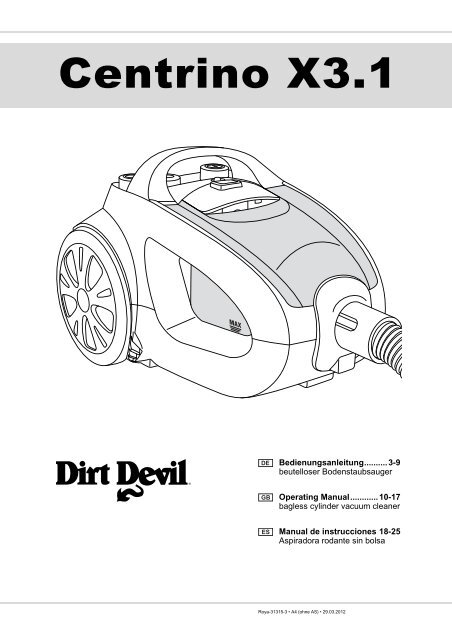
Übersicht über den Lieferumfang (Abb. 1)<br />
1 Ein-/Aus-Schalter<br />
2 Saugleistungsregler<br />
3 Kabelaufrolltaste<br />
4 Parkhalterung<br />
5 Ausblasfilter mit Entnahmelasche<br />
6 Ausblasfilter-Abdeckung<br />
7 Saugschlauchaufnahme<br />
8 Motorschutzfilter<br />
9 Reinigungs-/Entleerungsanzeige<br />
10 Tragegriff<br />
11 Entleerungstaste<br />
12 Staubbehälterboden<br />
13 MAX-Markierung am Staubbehälter<br />
14 Filtervlies<br />
15 Lamellenzentralfilter<br />
16 Entriegelungstaste für den Staubbehälter<br />
17 Staubbehälter<br />
18 Nebenluftregler<br />
19 Saugschlauch<br />
20 Saugschlauchadapter<br />
21 Verstauhalterung<br />
22 Stromkabel mit Stecker<br />
23 Teleskoprohr<br />
24 Teleskoprohr-Arretierung<br />
25 Zubehörhalterung<br />
26 Verstauhaken<br />
27 2-in-1-Kombipinsel, einsetzbar als<br />
- Möbelpinsel oder<br />
- Fugendüse<br />
28 Polsterdüse<br />
29 Bodendüse (Abbildung beispielhaft)<br />
30 Parkhaken<br />
31 Umschalter „Teppich/Hartboden“ (Abbildung beispielhaft)<br />
32 Mini-Turbobürste „Fellino“<br />
33 Parkettbürste<br />
34 <strong>Bedienungsanleitung</strong><br />
Inhaltsverzeichnis<br />
1 Überblick über Ihren <strong>Centrino</strong> <strong>X<strong>3.1</strong></strong> ...................................... 3<br />
Garantiebedingungen ............................................................... 3<br />
Im Garantiefall .......................................................................... 3<br />
2 Sicherheitshinweise ............................................................... 4<br />
2.1 zur <strong>Bedienungsanleitung</strong> .......................................................... 4<br />
2.2 zu bestimmten Personengruppen ............................................ 4<br />
2.3 zur Stromversorgung ................................................................ 4<br />
2.4 zur bestimmungsgemäßen Verwendung ................................. 4<br />
2.5 bei defektem Gerät ................................................................... 4<br />
2.6 zur Entsorgung ......................................................................... 4<br />
3 Vor dem Gebrauch ................................................................. 5<br />
<strong>3.1</strong> Auspacken ............................................................................... 5<br />
3.2 Düse auswählen ....................................................................... 5<br />
3.3 Montieren ................................................................................. 5<br />
4 Gebrauch ................................................................................ 6<br />
4.1 Sicherheit beim Gebrauch ........................................................ 6<br />
4.2 Staubsaugen ............................................................................ 6<br />
4.3 Ausschalten .............................................................................. 6<br />
4.4 Transportieren und Aufbewahren ............................................. 6<br />
5 Wartung ................................................................................... 7<br />
5.1 Staubbehälter leeren und reinigen ........................................... 7<br />
5.2 Lamellenzentralfilter und Motorschutzfilter reinigen ................. 7<br />
5.3 Ausblasfilter reinigen ................................................................ 8<br />
5.4 Ersatzteile und Zubehör ........................................................... 8<br />
5.5 Falls das Gerät nicht arbeitet, wie es soll ................................. 8<br />
Technische Daten<br />
Geräteart<br />
: beutelloser Bodenstaubsauger<br />
Modell : <strong>Centrino</strong> <strong>X<strong>3.1</strong></strong><br />
Modellnummer : M<strong>2012</strong>-3<br />
Spannung<br />
: 220 – 240V ~, 50/60 Hz<br />
Leistung<br />
: 1800 W nom. – 2300 W max.<br />
max. nutzbares Staubbehältervolumen : ca. 1,5 Liter<br />
Stromkabellänge<br />
: ca. 5,0 m<br />
Gewicht<br />
: ca. 5,3 kg<br />
Technische und gestalterische Änderungen im Zuge stetiger Produktverbesserungen<br />
vorbehalten. © Royal Appliance International GmbH<br />
DE<br />
Garantiebedingungen<br />
Wir übernehmen für das von uns vertriebene Gerät die gesetzlich vorgeschriebene<br />
Gewährleistung von 24 Monaten ab Kaufdatum.<br />
Innerhalb dieser Gewährleistungsfrist beseitigen wir nach unserer Wahl<br />
durch Reparatur oder Austausch des Gerätes oder des Zubehörs (Schäden<br />
an Zubehörteilen führen nicht automatisch zum Umtausch des kompletten<br />
Gerätes) unentgeltlich alle Mängel, die auf Material- oder<br />
Herstellungsfehlern beruhen.<br />
Von der Gewährleistung sind Schäden ausgenommen, die auf unsachgemäßen<br />
Gebrauch (Betrieb mit falscher Stromart/-spannung, Anschluss<br />
an ungeeignete Stromquellen, Bruch etc.) zurückzuführen sind, normaler<br />
Verschleiß und Mängel, die den Wert oder die Gebrauchstauglichkeit des<br />
Gerätes nur unerheblich beeinflussen.<br />
Bei Eingriffen durch eine nicht von uns autorisierte Stelle oder bei Verwendung<br />
anderer als original Royal Appliance-Ersatzteile erlischt die Garantie.<br />
Verschleißteile fallen nicht unter die Garantie und sind deshalb kostenpflichtig!<br />
Die Gewährleistung tritt nur in Kraft, wenn das Kaufdatum durch Stempel<br />
und Unterschrift des Händlers auf der Garantiekarte bestätigt ist oder eine<br />
Rechnungskopie dem eingeschickten Gerät beiliegt. Garantieleistungen<br />
bewirken weder eine Verlängerung der Garantiezeit, noch beginnt dadurch<br />
ein Anspruch auf eine neue Garantie!<br />
Im Garantiefall<br />
Versenden Sie das Gerät mit entleertem Staubbehälter und einer kurzen<br />
Fehlerbeschreibung in Blockschrift.<br />
Versehen Sie das Anschreiben mit dem Vermerk „Zur Garantie“. Senden<br />
Sie es zusammen mit der Garantiekarte oder einer Rechnungskopie an<br />
diese Adresse:<br />
Royal Appliance International GmbH<br />
Abt. Kundenservice<br />
Jagenbergstraße 19<br />
41468 Neuss<br />
Deutschland<br />
Tel.: +49 (0) 180 - 501 50 50*<br />
Fax: +49 (0) 2131 - 60 90 60 95<br />
www.dirtdevil.de<br />
servicecenter@dirtdevil.de<br />
*0,14 €/Minute aus dem deutschen<br />
Festnetz (deutscher Mobilfunkhöchstpreis<br />
0,42 €/Minute)<br />
Beheben Sie<br />
Störungen<br />
ganz leicht selbst.<br />
www.dirt-devil.de/service<br />
SERVICE-HOTLINE<br />
0180 501 50 50 *<br />
Mo.– Fr., 8 – 20 Uhr<br />
*0,14 €/Min. aus dem<br />
deutschen Festnetz<br />
(deutscher Mobilfunkhöchstpreis<br />
0,42 €/Min.)<br />
3
2 Sicherheitshinweise<br />
2 Sicherheitshinweise<br />
2.1 zur <strong>Bedienungsanleitung</strong><br />
• Lesen Sie diese <strong>Bedienungsanleitung</strong> vollständig durch, bevor Sie mit<br />
dem Gerät arbeiten. Bewahren Sie die Anleitung gut auf. Falls Sie das Gerät<br />
an Dritte weitergeben, geben Sie die <strong>Bedienungsanleitung</strong> mit.<br />
Die Nichtbeachtung dieser Anleitung kann zu schweren Verletzungen<br />
oder Schäden am Gerät führen.<br />
Für Schäden, die durch Nichtbeachtung dieser <strong>Bedienungsanleitung</strong> entstehen,<br />
übernehmen wir keine Haftung.<br />
• Beachten Sie Hinweise, die wie folgt gekennzeichnet sind, unbedingt,<br />
um Unfälle und Schäden am Gerät zu vermeiden.<br />
WARNUNG:<br />
Warnt vor Gefahren für Ihre Gesundheit und zeigt mögliche Verletzungsrisiken<br />
auf.<br />
ACHTUNG:<br />
Weist auf mögliche Gefährdungen für das Gerät oder andere Gegenstände<br />
hin.<br />
HINWEIS:<br />
Hebt Tipps und Informationen für Sie hervor.<br />
2.2 zu bestimmten Personengruppen<br />
• Dieses Gerät ist nicht dafür bestimmt, durch Personen (einschließlich<br />
Kinder) mit eingeschränkten physischen, sensorischen oder geistigen Fähigkeiten<br />
oder mangels Erfahrung und/oder mangels Wissen benutzt zu werden,<br />
es sei denn, sie werden durch eine für ihre Sicherheit zuständige Person<br />
beaufsichtigt oder erhielten von ihr Anweisungen, wie das Gerät zu benutzen<br />
ist. Bewahren Sie das Gerät für diesen Personenkreis unzugänglich auf.<br />
• Kinder sollten beaufsichtigt werden, um sicherzustellen, dass sie nicht<br />
mit dem Gerät spielen. Kinder dürfen sich unter anderem weder auf das<br />
Gerät stellen oder setzen.<br />
• Verpackungsmaterialien dürfen nicht zum Spielen verwendet werden.<br />
Es besteht Erstickungsgefahr.<br />
2.3 zur Stromversorgung<br />
Das Gerät wird mit elektrischem Strom betrieben, dabei besteht grundsätzlich<br />
die Gefahr eines elektrischen Schlags. Achten Sie daher besonders<br />
auf Folgendes:<br />
• Fassen Sie den Stecker nie mit nassen Händen an.<br />
• Wenn Sie den Stecker aus der Steckdose herausziehen wollen, ziehen<br />
Sie immer direkt am Stecker. Ziehen Sie niemals am Stromkabel, es könnte<br />
beschädigt werden.<br />
• Transportieren Sie das Gerät niemals am Stromkabel. Es könnte beschädigt<br />
werden.<br />
• Achten Sie darauf, dass das Stromkabel nicht geknickt, eingeklemmt,<br />
überfahren wird oder mit Hitzequellen in Berührung kommt. Es darf außerdem<br />
nicht zur Stolperfalle werden.<br />
• Tauchen Sie das Gerät niemals in Wasser oder andere Flüssigkeiten<br />
und halten Sie es von Regen und Nässe fern.<br />
• Stellen Sie vor dem Anschließen an die Stromversorgung sicher, dass<br />
die auf dem Typenschild angegebene elektrische Spannung mit der Spannung<br />
Ihrer Steckdose übereinstimmt. Benutzen Sie nur Steckdosen mit<br />
Schutzkontakt.<br />
• Benutzen Sie nach Möglichkeit keine Verlängerungskabel. Falls dies<br />
unumgänglich ist, benutzen Sie nur GS-geprüfte, spritzwassergeschützte,<br />
einfache Verlängerungskabel (keine Mehrfachsteckdosen), die für die<br />
Leistungsaufnahme des Geräts ausgelegt sind.<br />
• Kontrollieren Sie das Stromkabel vor dem Benutzen auf eventuelle Beschädigungen.<br />
2.4 zur bestimmungsgemäßen Verwendung<br />
Der Bodenstaubsauger darf nur im Haushalt eingesetzt werden. Er ist für<br />
eine gewerbliche Nutzung nicht geeignet.<br />
Verwenden Sie den Bodenstaubsauger ausschließlich für das Reinigen<br />
von trockenen, normal verschmutzten Böden. Wenn Sie die Möbelbürste<br />
montiert haben, können Sie das Gerät ebenso zum Saugen von Möbeln<br />
einsetzen. Bei komplett geöffnetem Nebenluftregler (Abb. 1/18) und mit<br />
entsprechender Vorsicht kann das Gerät sogar zum Saugen von Gardinen<br />
dienen.<br />
Jede weitere Verwendung gilt als nicht bestimmungsgemäß und ist untersagt.<br />
Verboten ist insbesondere:<br />
• Die Verwendung in der Nähe von explosiven oder leicht entzündlichen<br />
Stoffen. Es besteht Brand- oder Explosionsgefahr.<br />
• Die Verwendung im Freien. Es besteht die Gefahr, dass Regen und<br />
Schmutz das Gerät zerstören.<br />
• Das Hineinstecken von Gegenständen in die Öffnungen des Gerätes.<br />
Es könnte überhitzen.<br />
• Das selbstständige Umbauen oder Reparieren des Gerätes.<br />
Verboten ist zudem:<br />
• Das Saugen von:<br />
- Menschen, Tieren, Pflanzen, insbesondere Haaren, Fingern und anderen<br />
Körperteilen sowie am Körper befindlichen Kleidungsstücken.<br />
Sie könnten eingezogen werden und Verletzungen hervorrufen.<br />
- Wasser und anderen Flüssigkeiten, insbesondere feuchten Teppich-<br />
Reinigungsmitteln. Feuchtigkeit im Inneren kann zum Kurzschluss<br />
führen.<br />
- Tonerstaub (für Laserdrucker, Kopierer usw.). Es besteht Brand- und<br />
Explosionsgefahr.<br />
- glühender Asche, brennenden Zigaretten oder Streichhölzern. Es<br />
kann zum Brand kommen.<br />
- spitzen Gegenständen, wie Glassplittern, Nägeln etc. Dadurch kann<br />
das Gerät beschädigt werden.<br />
- Bauschutt, Gips, Zement, feinstem Bohrstaub, Schminke, Puder<br />
usw. Dadurch kann das Gerät beschädigt werden.<br />
2.5 bei defektem Gerät<br />
Wenn die Anschlussleitung dieses Gerätes beschädigt ist, muss sie durch<br />
den Hersteller oder seinen Kundendienst oder eine ähnlich qualifizierte<br />
Person ersetzt werden, um Gefährdungen zu vermeiden.<br />
Betreiben Sie niemals ein defektes Gerät oder ein Gerät mit einem defekten<br />
Stromkabel. Geben Sie ein defektes Gerät zur Reparatur an einen Fachhändler<br />
oder den Royal Appliance-Kundendienst. Adresse Seite 26,<br />
„International Service“.<br />
2.6 zur Entsorgung<br />
Entsorgen Sie das Gerät entsprechend den in Ihrem Land geltenden<br />
Umweltschutzvorschriften. Elektrische Abfälle dürfen nicht zusammen<br />
mit Haushaltsabfällen entsorgt werden. Nutzen Sie stattdessen<br />
die örtlichen Sammelstellen zur Rückgabe von Altgeräten.<br />
Die verwendeten Filter sind aus umweltverträglichen Materialien hergestellt.<br />
Sie können diese im Hausmüll entsorgen.<br />
4
3 Vor dem Gebrauch<br />
3 Vor dem Gebrauch<br />
<strong>3.1</strong> Auspacken<br />
ACHTUNG:<br />
Versenden Sie das Gerät grundsätzlich in der Originalverpackung, damit<br />
es keinen Schaden nimmt. Heben Sie dazu die Originalverpackung auf.<br />
Entsorgen Sie dagegen nicht mehr benötigtes Verpackungsmaterial ordnungsgemäß.<br />
1. Packen Sie das Gerät und sein Zubehör aus.<br />
2. Überprüfen Sie den Inhalt auf Unversehrtheit.<br />
HINWEIS:<br />
Sollten Sie einen Transportschaden bemerken, wenden Sie sich umgehend<br />
an Ihren Händler.<br />
DE<br />
3.2 Düse auswählen<br />
1<br />
2 3<br />
1. Wählen Sie je nach zu saugendem Untergrund eine Düse aus:<br />
• Bodendüse (Abb. 2/1):<br />
Diese ist universal einsetzbar und eignet sich durch ihren Umschalter gleichermaßen<br />
für Teppiche und Hartböden.<br />
• Parkettbürste (Abb. 2/2):<br />
Diese ist mit langen Borsten ausgestattet und dient zum Absaugen besonders<br />
empfindlicher Oberflächen (z. B. Parkett, Laminat).<br />
• Mini-Turbobürste „Fellino“ (Abb. 2/3):<br />
Diese besitzt einen rotierenden Bürstenkopf und eignet sich daher bestens<br />
zur Tiefenreinigung von Polstern und Teppichen.<br />
• Polsterdüse (Abb. 2/4):<br />
Benutzen Sie diese, um Staub von Polstermöbeln zu saugen.<br />
2<br />
1<br />
2<br />
A<br />
B<br />
• 2-in1-Kombipinsel (Abb. 2/5), einsetzbar als:<br />
- Fugendüse (Abb. 3/A1):<br />
Benutzen Sie diese, um Staub aus schwer zugänglichen Stellen zu<br />
saugen.<br />
- Möbelpinsel (Abb. 3/A2):<br />
Benutzen Sie diesen, um Staub von Gegenständen zu saugen, die<br />
empfindliche Oberflächen haben.<br />
2. Stecken Sie nicht benötigte Zubehördüsen, sofern möglich, auf die<br />
Steckplätze der Zubehörhalterung (Abb. 3/B).<br />
3. Bewahren Sie die übrigen Düsen sicher und für Kinder unzugänglich<br />
auf.<br />
3<br />
3.3 Montieren<br />
A<br />
B<br />
1 1<br />
WARNUNG:<br />
Verletzungsgefahr! Montieren Sie Düsen nur, wenn der Stecker aus der<br />
Steckdose gezogen ist. Der Bodenstaubsauger könnte versehentlich<br />
eingeschaltet werden.<br />
ACHTUNG:<br />
Stellen Sie vor dem Saugen sicher, dass die aufgesetzte Düse für den<br />
zu saugenden Untergrund geeignet ist. Beachten Sie die Empfehlungen<br />
des Belagherstellers.<br />
1. Stecken Sie die gewählte Düse auf das untere Ende des Teleskoprohrs<br />
(Abb. 4/A1) bzw. des Handgriffs (Abb. 4/B1).<br />
4<br />
A<br />
B<br />
C<br />
2. Stecken Sie den Saugschlauchadapter wie abgebildet in die Saugschlauchaufnahme<br />
am Gerät (Abb. 5/A). Drehen Sie den Saugschlauchadapter<br />
im Uhrzeigersinn, bis sie spüren, dass seine Verriegelung<br />
greift und er sich nicht weiter drehen lässt.<br />
Bei Verwendung des Teleskoprohrs:<br />
5<br />
3. Stecken Sie den Handgriff in das obere Ende des Teleskoprohrs<br />
(Abb. 5/B).<br />
4. Stellen Sie die Länge des Teleskoprohrs ein (Abb. 5/C). Drücken Sie<br />
dazu die Teleskoprohr-Arretierung nach unten. Ziehen Sie dann das<br />
Teleskoprohr auf die gewünschte Länge. Zum Verriegeln lassen Sie<br />
die Teleskoprohr-Arretierung beim Ziehen los. Sie hören ein deutliches<br />
Klicken.<br />
5
4 Gebrauch<br />
4 Gebrauch<br />
4.1 Sicherheit beim Gebrauch<br />
WARNUNG:<br />
Verletzungsgefahr! Prüfen Sie Gerät und Stromkabel vor jeder Benutzung.<br />
Ein beschädigtes Gerät darf nicht verwendet werden.<br />
WARNUNG:<br />
Verletzungsgefahr! Achten Sie insbesondere beim Saugen von Treppen<br />
darauf, dass Sie sich stets oberhalb des Gerätes befinden.<br />
ACHTUNG:<br />
Verwenden Sie den Bodenstaubsauger nur, wenn alle Filter intakt, trocken<br />
und korrekt eingesetzt sind. Stellen Sie sicher, dass keinerlei<br />
Gegenstände das Teleskoprohr, den Saugschlauch oder andere Öffnungen<br />
verstopfen.<br />
HINWEIS:<br />
Der Bodenstaubsauger besitzt einen Überhitzungsschutz. Er schaltet<br />
sich bei Überhitzung (z. B. durch verstopfte Saugwege) automatisch ab.<br />
Ist dies der Fall:<br />
• Schalten Sie den Bodenstaubsauger aus.<br />
• Ziehen Sie den Stecker.<br />
• Beseitigen Sie die Ursache der Überhitzung.<br />
• Warten Sie ca. 45 Minuten.<br />
Den abgekühlten Bodenstaubsauger können Sie wieder einschalten.<br />
4.2 Staubsaugen<br />
4<br />
5<br />
3<br />
6<br />
1. Ziehen Sie das Stromkabel am Stecker bis zur gelben Markierung<br />
(Abb. 6/1) heraus.<br />
WARNUNG:<br />
Gefahr eines elektrischen Schlags! Falls die rote Markierung (Abb. 6/2)<br />
sichtbar ist, ziehen Sie das Stromkabel mithilfe der Kabelaufrolltaste<br />
(Abb. 6/3) wieder bis zur gelben Markierung (Abb. 6/1) ein. Anderenfalls<br />
kann das Stromkabel beschädigt werden.<br />
2. Stecken Sie den Stecker in eine Steckdose mit Schutzkontakt.<br />
3. Schalten Sie den Bodenstaubsauger am Ein-/Aus-Schalter (Abb. 6/4)<br />
ein.<br />
4. Stellen Sie die Saugleistung am Saugleistungsregler ein (Abb. 6/5).<br />
HINWEIS:<br />
Der Nebenluftregler (Abb. 6/6) muss im Normalfall vollständig geschlossen<br />
sein. Mithilfe des Nebenluftreglers können Sie bei Bedarf die Saugleistung<br />
schnell reduzieren, z. B. um eingesaugte Gardinen wieder freizugeben.<br />
2<br />
1<br />
6<br />
A<br />
B<br />
5. Wenn Sie die Bodendüse einsetzen, stellen Sie den Umschalter „Teppich/Hartboden“<br />
je nach Bodenbelag ein (Abb. 7/1):<br />
Abb. 7/A: für lang- und kurzflorige Teppiche, Läufer<br />
Abb. 7/B: für Hartböden wie Parkett, Fliesen, PVC usw.<br />
7<br />
1<br />
WARNUNG:<br />
Verletzungsgefahr! Wenn Sie den Arbeitsplatz verlassen, schalten Sie<br />
das Gerät aus und beachten Sie die Hinweise unter Kapitel 4.3,<br />
„Ausschalten“. So vermeiden Sie Unfälle.<br />
4.3 Ausschalten<br />
WARNUNG:<br />
Verletzungsgefahr! Beim unkontrollierten Einziehen des Stromkabels<br />
kann dieses umherschlingern, zur Stolperfalle werden oder Gegenstände<br />
umreißen. Behalten Sie daher den Stecker in der Hand und führen<br />
Sie ihn beim Einziehen des Stromkabels mit.<br />
1. Schalten Sie den Bodenstaubsauger am Ein-/Aus-Schalter (Abb. 6/4)<br />
aus und ziehen Sie den Stecker aus der Steckdose.<br />
2. Behalten Sie den Stecker in der Hand.<br />
3. Um das Stromkabel einzuziehen, drücken Sie die Kabelaufrolltaste<br />
(Abb. 6/3).<br />
4.4 Transportieren und Aufbewahren<br />
8<br />
1<br />
A<br />
B<br />
• Tragen Sie den Bodenstaubsauger zum Transport ausschließlich am<br />
Tragegriff (Abb. 8/A1).<br />
• Zum Aufbewahren können Sie das Teleskoprohr entweder<br />
- mithilfe des Parkhakens der Bodendüse parken (Abb. 8/A) oder<br />
- mithilfe des Verstauhakens verstauen (Abb. 8/B).<br />
• Wenn Sie das Gerät längere Zeit lagern möchten, leeren Sie zuvor den<br />
Staubbehälter, Kapitel 5.1, „Staubbehälter leeren und reinigen“.<br />
• Bewahren Sie das Gerät in einem kühlen, trockenen Raum für Kinder<br />
unzugänglich auf.<br />
ACHTUNG:<br />
Stellen Sie das Gerät nie direkt neben Wärmequellen ab (z. B. Heizung,<br />
Ofen). Vermeiden Sie direkte Sonneneinstrahlung. Die Hitze kann das<br />
Gerät beschädigen.<br />
6
5 Wartung<br />
5 Wartung<br />
5.1 Staubbehälter leeren und reinigen<br />
ACHTUNG:<br />
Bevor Sie den Staubbehälter leeren, schalten Sie das Gerät aus. So<br />
vermeiden Sie, dass Staub das Gerät beschädigt.<br />
HINWEIS:<br />
Den Inhalt des Staubbehälters können Sie im Hausmüll entsorgen,<br />
sofern er keine für den Hausmüll verbotenen Bestandteile enthält.<br />
A<br />
2<br />
1<br />
B<br />
1<br />
• Leeren Sie den Staubbehälter am besten nach jedem Saugvorgang.<br />
• Leeren Sie den Staubbehälter jedoch spätestens:<br />
- wenn die Reinigungs-/Entleerungsanzeige (Abb. 9/A1) leuchtet,<br />
- wenn die „MAX“-Markierung (Abb. 9/B1) erreicht ist,<br />
- vor längerer Lagerung oder Versand.<br />
1. Schalten Sie das Gerät aus, Kapitel 4.3, „Ausschalten“.<br />
2. Drücken Sie die Entriegelungstaste für den Staubbehälter (Abb. 9/A2).<br />
3. Nehmen Sie den Staubbehälter aus seiner Konsole.<br />
4. Entleeren Sie den Staubbehälter, indem Sie ihn tief über einen Mülleimer<br />
halten und erst dann die Entleerungstaste drücken (Abb. 9/B2).<br />
5. Reinigen Sie bei dieser Gelegenheit sogleich den Lamellenzentralfilter,<br />
Kapitel 5.2, „Lamellenzentralfilter und Motorschutzfilter reinigen“.<br />
HINWEIS:<br />
Bei eingesetztem Lamellenzentralfilter lässt sich der Staubbehälter nicht<br />
reinigen.<br />
DE<br />
9<br />
2<br />
6. Entfernen Sie Staubrückstände, die sich eventuell noch im Staubbehälter<br />
befinden, mithilfe eines trockenen Tuchs oder einer weichen Bürste,<br />
z. B. der mitgelieferten Möbelbürste.<br />
7. Klappen Sie die Bodenplatte des Staubbehälters wieder an.<br />
5.2 Lamellenzentralfilter und Motorschutzfilter reinigen<br />
ACHTUNG:<br />
Die Filterelemente sind waschbar, jedoch weder spülmaschinen- noch<br />
waschmaschinentauglich. Verwenden Sie außerdem zur Reinigung<br />
keine Reinigungsmittel oder Bürsten mit harten Borsten.<br />
• Reinigen Sie die Filter am besten jedes Mal, wenn Sie den Staubbehälter<br />
reinigen, Kapitel 5.1, „Staubbehälter leeren und reinigen“.<br />
• Reinigen Sie die Filter jedoch spätestens dann, wenn die Reinigungs-/<br />
Entleerungsanzeige (Abb. 9/A1) leuchtet.<br />
A<br />
10<br />
B<br />
OPEN<br />
1. Schalten Sie das Gerät aus, Kapitel 4.3, „Ausschalten“.<br />
2. Entnehmen und leeren Sie den Staubbehälter, Kapitel 5.1,<br />
„Staubbehälter leeren und reinigen“.<br />
3. Ziehen Sie den Motorschutzfilter nach oben aus seiner Halterung<br />
(Abb. 10/A).<br />
4. Entriegeln Sie den Lamellenzentralfilter durch Drehen in Richtung<br />
„open“ (Abb. 11) und nehmen Sie ihn samt übergestülptem Filtervlies<br />
aus dem Staubbehälter.<br />
5. Halten Sie den Lamellenzentralfilter samt übergestülptem Filtervlies<br />
tief über einen Mülleimer.<br />
6. Trennen Sie das Filtervlies vom Filter, indem Sie den Filter gut festhalten<br />
und das Filtervlies vorsichtig abziehen (Abb. 12).<br />
7. Beseitigen Sie gröbere Verschmutzungen an beiden Filterelementen<br />
von Hand.<br />
8. Bürsten Sie den Lamellenzentralfilter mithilfe des mitgelieferten 2-in-1-<br />
Kombipinsels aus.<br />
9. Sollten die Filterelemente nach der Trockenreinigung immer noch verschmutzt<br />
sein, spülen Sie diese von Hand gründlich aus, bis jegliche<br />
Verschmutzungen beseitigt sind.<br />
ACHTUNG:<br />
Lassen Sie die Filterelemente nach einer Nassreinigung ca. 24 Stunden<br />
bei Raumtemperatur trocknen. Setzen Sie sie erst wieder ein, wenn sie<br />
vollkommen trocken sind.<br />
11<br />
10. Sollte eines der Filterelemente beschädigt oder zu stark verschmutzt<br />
sein, ersetzen Sie es durch ein neues (Bestellinformationen Kapitel<br />
5.4, „Ersatzteile und Zubehör“).<br />
11. Setzen den neuen/gereinigten und vollkommen trockenen Motorschutzfilter<br />
wieder in seine Konsole (Abb. 10/B).<br />
12. Stülpen Sie das Filtervlies wieder über den Lamellenzentralfilter, so<br />
dass es die Lamellen vollständig umschließt.<br />
13. Führen Sie den Lamellenzentralfilter wieder in den Staubbehälter und<br />
verriegeln Sie den Filter, indem Sie ihn in Richtung „close“ drehen. Der<br />
Filter rastet hör- und spürbar ein.<br />
14. Setzen Sie den Staubbehälter zurück in seine Konsole. Er rastet hörund<br />
spürbar ein.<br />
15. Prüfen Sie den Staubbehälter auf festen Sitz.<br />
12<br />
7
5 Wartung<br />
5.3 Ausblasfilter reinigen<br />
ACHTUNG:<br />
Der Ausblasfilter ist waschbar, jedoch weder spülmaschinen- noch<br />
waschmaschinentauglich. Verwenden Sie außerdem zur Reinigung<br />
keine Reinigungsmittel oder Bürsten mit harten Borsten.<br />
13<br />
A<br />
A<br />
B<br />
B<br />
• Reinigen Sie die Filter am besten jedes Mal, wenn Sie den Staubbehälter<br />
reinigen, Kapitel 5.1, „Staubbehälter leeren und reinigen“.<br />
• Reinigen Sie die Filter jedoch spätestens dann, wenn die Reinigungs-/<br />
Entleerungsanzeige (Abb. 9/A1) leuchtet.<br />
1. Schalten Sie das Gerät aus, Kapitel 4.3, „Ausschalten“.<br />
2. Drücken Sie die Entriegelung der Ausblasfilter-Abdeckung nach unten<br />
(Abb. 13/A) und klappen Sie die Ausblasfilter-Abdeckung ab.<br />
3. Entnehmen Sie die Ausblasfilter-Abdeckung samt Ausblasfilter.<br />
4. Halten Sie die Ausblasfilter-Abdeckung samt Ausblasfilter tief über einen<br />
Mülleimer.<br />
5. Bürsten Sie Verschmutzungen mithilfe einer weichen Bürste, beispielsweise<br />
dem mitgelieferten 2-in-1-Kombipinsel, aus (Abb. 13/B).<br />
6. Sollte dies nicht genügen, nehmen Sie den Ausblasfilter an der Entnahmelasche<br />
aus der Ausblasfilter-Abdeckung und klopfen Sie beide Elemente<br />
gut aus.<br />
7. Sollte der Ausblasfilter nach der Trockenreinigung immer noch verschmutzt<br />
sein, spülen Sie ihn von Hand gründlich aus, bis jegliche Verschmutzungen<br />
beseitigt sind.<br />
ACHTUNG:<br />
Lassen Sie den Filter nach einer Nassreinigung ca. 24 Stunden bei<br />
Raumtemperatur trocknen. Setzen Sie ihn erst wieder ein, wenn er vollkommen<br />
trocken ist.<br />
14<br />
1<br />
8. Falls der Ausblasfilter beschädigt, verformt oder zu stark verschmutzt<br />
sein sollte, ersetzen Sie ihn (Bestellinformationen Kapitel 5.4,<br />
„Ersatzteile und Zubehör“).<br />
9. Setzen Sie den neuen/gereinigten und vollkommen trockenen Ausblasfilter<br />
zurück in die Ausblasfilter-Abdeckung. Achten Sie darauf, dass die<br />
Entnahmelasche (Abb. 14/A1) nach dem Einsetzen noch sichtbar ist.<br />
10. Setzen Sie die die frisch bestückte Ausblasfilter-Abdeckung zuerst unten<br />
ein (Abb. 14/A) und klappen Sie sie dann oben an. Sie rastet hörund<br />
spürbar ein (Abb. 14/B).<br />
5.4 Ersatzteile und Zubehör<br />
ACHTUNG:<br />
Verwenden Sie nur Originalersatzteile aus dem Lieferumfang oder solche,<br />
die Sie durch Nachbestellung erworben haben.<br />
• Bestellkontakt: Seite 26, „International Service“<br />
• Weitere Informationen: www.dirtdevil.de<br />
• Nebenstehende Zubehör- und Ersatzteile können Sie nachbestellen.<br />
Artikel-Nr.<br />
Beschreibung<br />
2725001 3-teiliges Filterset, bestehend aus<br />
1 Lamellenzentralfilter, 1 Motorschutzfilter, 1 Ausblasfilter<br />
2725077 2 Filtervliese<br />
M203 1 Parkettbürste<br />
M209 1 Turbobürste<br />
5.5 Falls das Gerät nicht arbeitet, wie es soll<br />
WARNUNG:<br />
Verletzungsgefahr! Verwenden Sie niemals ein defektes Gerät! Bevor<br />
Sie auf Problemsuche gehen, schalten Sie das Gerät aus und ziehen<br />
Sie den Stecker aus der Steckdose, Kapitel 4.3, „Ausschalten“.<br />
Bevor Sie Ihren zuständigen Royal-Vertragshändler, Royal-Servicepartner<br />
oder Ihren Fachmarkt kontaktieren oder das Gerät gar einsenden (Seite<br />
26, „International Service“), überprüfen Sie anhand der folgenden Tabelle,<br />
ob Sie das Problem selbst beseitigen können.<br />
Problem<br />
Gerät hört<br />
plötzlich auf<br />
zu saugen.<br />
Reinigungs-/<br />
Entleerungsanzeige<br />
(Abb. 1/9)<br />
leuchtet.<br />
mögliche Ursache / Lösung<br />
Überhitzungsschutz hat angesprochen (möglicherweise<br />
aufgrund verstopfter Saugwege o. Ä.).<br />
Schalten Sie das Gerät aus und ziehen Sie den Stecker<br />
aus der Steckdose. Beseitigen Sie die Ursache der Überhitzung<br />
(z. B. Teleskoprohr und Saugschlauch demontieren<br />
und Verstopfung entfernen). Warten Sie ca. 45 Minuten.<br />
Das abgekühlte Gerät können Sie wieder einschalten.<br />
Lamellenzentralfilter ist verschmutzt.<br />
Reinigen Sie den Lamellenzentralfilter, Kapitel 5.2,<br />
„Lamellenzentralfilter und Motorschutzfilter reinigen“.<br />
Staubbehälter ist voll.<br />
Leeren/Reinigen Sie den Staubbehälter, Kapitel 5.1,<br />
„Staubbehälter leeren und reinigen“<br />
Problem<br />
Saugergebnis<br />
ist trotz<br />
einwandfreier<br />
Funktion<br />
nicht zufriedenstellend.<br />
mögliche Ursache / Lösung<br />
Nebenluftregler (Abb. 1/18) ist geöffnet.<br />
Schließen Sie den Nebenluftregler.<br />
Aufgesteckte Düse ist nicht angemessen.<br />
Wechseln Sie die Düse, Kapitel 3.2, „Düse auswählen“.<br />
Eingestellte Saugleistung ist nicht angemessen.<br />
Passen Sie die Stellung des Saugleistungsreglers an den<br />
Belag an, Kapitel 4.2, „Staubsaugen“, Schritt 4.<br />
Stellung des Umschalters „Teppich/Hartboden“ (Abb. 1/<br />
31) ist nicht angemessen. Passen Sie die Stellung des<br />
Umschalters „Teppich/Hartboden“ an den Belag an,<br />
Kapitel 4.2, „Staubsaugen“, Schritt 5.<br />
Staubbehälter ist überfüllt.<br />
Leeren/Reinigen Sie den Staubbehälter, Kapitel 5.1,<br />
„Staubbehälter leeren und reinigen“.<br />
Filter sind verschmutzt.<br />
Reinigen Sie den entsprechenden Filter, Kapitel 5.2,<br />
„Lamellenzentralfilter und Motorschutzfilter reinigen“ bzw.<br />
Kapitel 5.3, „Ausblasfilter reinigen“.<br />
Düse, Teleskoprohr oder Saugschlauch sind verstopft.<br />
Entfernen Sie die Verstopfung. Benutzen Sie dazu falls erforderlich<br />
einen langen Holzstab (z. B. einen Besenstiel).<br />
8
_________________________________________________________________________________________________________________________<br />
_________________________________________________________________________________________________________________________<br />
_________________________________________________________________________________________________________________________<br />
_________________________________________________________________________________________________________________________<br />
_________________________________________________________________________________________________________________________<br />
_________________________________________________________________________________________________________________________<br />
_________________________________________________________________________________________________________________________<br />
_________________________________________________________________________________________________________________________<br />
_________________________________________________________________________________________________________________________<br />
_________________________________________________________________________________________________________________________<br />
_________________________________________________________________________________________________________________________<br />
_________________________________________________________________________________________________________________________<br />
_________________________________________________________________________________________________________________________<br />
_________________________________________________________________________________________________________________________<br />
_________________________________________________________________________________________________________________________<br />
9
16<br />
17<br />
18<br />
34<br />
15<br />
14<br />
19<br />
13<br />
11<br />
20<br />
12<br />
21<br />
10<br />
9<br />
23<br />
8<br />
24<br />
7<br />
22<br />
27<br />
28<br />
32<br />
3<br />
1<br />
2<br />
4<br />
25<br />
26<br />
29<br />
30<br />
31<br />
5<br />
6<br />
33<br />
15<br />
10
1 An overview of your <strong>Centrino</strong> <strong>X<strong>3.1</strong></strong><br />
1 An overview of your <strong>Centrino</strong> <strong>X<strong>3.1</strong></strong><br />
Thank you!<br />
Thanks for purchasing the <strong>Centrino</strong> <strong>X<strong>3.1</strong></strong> and for your confidence in us.<br />
Overview of the scope of delivery (Fig. 1)<br />
1 On/off switch<br />
2 Suction power control<br />
3 Cable retraction button<br />
4 Parking bracket<br />
5 Exhaust filter with removal tab<br />
6 Exhaust filter cover<br />
7 Suction hose receptacle<br />
8 Motor protection filter<br />
9 Cleaning/emptying indicator<br />
10 Carrying handle<br />
11 Emptying button<br />
12 Dust container bottom<br />
13 MAX marking on the dust container<br />
14 Filter fleece<br />
15 Central lamellae filter<br />
16 Release button for the dust container<br />
17 Dust container<br />
18 Bypass vent<br />
19 Suction hose<br />
20 Suction hose adapter<br />
21 Storage bracket<br />
22 Power cord with plug<br />
23 Telescopic tube<br />
24 Telescopic tube stop catch<br />
25 Accessory bracket<br />
26 Storage hook<br />
27 Two-in-one combi brush, can be used as<br />
- furniture brush or<br />
- crevice nozzle<br />
28 Upholstery nozzle<br />
29 Floor nozzle (illustration serves as an example)<br />
30 Parking hook<br />
31 "Carpet/hard floor" selector (illustration serves as an example)<br />
32 Mini-turbo brush ‘Fellino’<br />
33 Parquet brush<br />
34 Operating manual<br />
Table of Contents<br />
1 An overview of your <strong>Centrino</strong> <strong>X<strong>3.1</strong></strong> ..................................... 11<br />
Warranty conditions ............................................................... 11<br />
In case of a warranty claim .................................................... 11<br />
2 Safety instructions ............................................................... 12<br />
2.1 About the operating manual ................................................... 12<br />
2.2 About certain groups of persons ............................................ 12<br />
2.3 About the power supply .......................................................... 12<br />
2.4 About appropriate use ............................................................ 12<br />
2.5 If the appliance is defective .................................................... 12<br />
2.6 About disposal ........................................................................ 12<br />
3 Before use ............................................................................. 13<br />
<strong>3.1</strong> Unpacking .............................................................................. 13<br />
3.2 Selecting the proper nozzle .................................................... 13<br />
3.3 Assembly ................................................................................ 13<br />
4 Use ......................................................................................... 14<br />
4.1 Operational safety .................................................................. 14<br />
4.2 Vacuum cleaning .................................................................... 14<br />
4.3 Switching off ........................................................................... 14<br />
4.4 Transport and storage ............................................................ 14<br />
5 Maintenance ......................................................................... 15<br />
5.1 Emptying and cleaning the dust container ............................. 15<br />
5.2 Cleaning central lamellae filter and motor protection filter ..... 15<br />
5.3 Cleaning the exhaust filter ...................................................... 16<br />
5.4 Spare parts and accessories .................................................. 16<br />
5.5 If the appliance does not work as it should ............................ 16<br />
Technical data<br />
Type of appliance<br />
: bagless cylinder vacuum cleaner<br />
Model : <strong>Centrino</strong> <strong>X<strong>3.1</strong></strong><br />
Model number : M<strong>2012</strong>-3<br />
Voltage<br />
: 220 – 240V ~, 50/60 Hz<br />
Power<br />
: 1800 W nom. – 2300 W max.<br />
max. available dust container : approx. 1.5 litres<br />
capacity<br />
Power cord length<br />
Weight<br />
: approx. 5.0 m<br />
: approx. 5.3 kg<br />
Technical and design specifications may be changed in the course of continuous<br />
product improvement. © Royal Appliance International GmbH<br />
GB<br />
Warranty conditions<br />
We grant the legally prescribed warranty of 24 months from the date<br />
of purchase for the appliance distributed by us.<br />
Within this period we will, at our discretion, either repair all appliance defects<br />
due to manufacturing or materials or replace the appliance or accessory<br />
(damages to accessories do not automatically cause a replacement of<br />
the complete appliance) at no cost.<br />
Damages due to inappropriate use (operation on wrong voltage or type of<br />
current, connecting to unsuitable power supplies, breakage, etc.) are exempt<br />
from warranty, as are normal wear and minor defects that only negligibly<br />
influence the appliance's serviceability.<br />
Interventions by unauthorised parties and the use of spare parts not supplied<br />
by Royal Appliance make the warranty null and void. Consumable<br />
parts are not included in the warranty and therefore must be purchased by<br />
the customer!<br />
The warranty is only valid if the date of purchase has been acknowledged<br />
by the dealer's stamp and signature on the warranty card or if a copy of the<br />
invoice or sales slip is included with the sent-in appliance. Warranty work<br />
does not extend the warranty period nor does it constitute a claim for a new<br />
warranty!<br />
In case of a warranty claim<br />
Send us the appliance with its dust container empty and a short description<br />
of the defect in printed letters.<br />
Head your accompanying letter with the comment "warranty claim". Send<br />
it to the following address, including the warranty card or a copy of the invoice<br />
or purchase slip:<br />
Page 26, “International Service”<br />
11
2 Safety instructions<br />
2 Safety instructions<br />
2.1 About the operating manual<br />
• Read this operating manual completely before working with the appliance.<br />
Keep the operating manual in a safe place. Include the operating<br />
manual if you pass the appliance on to someone else.<br />
Non-compliance with the operating instructions can lead to severe injuries<br />
as well as damage to the appliance.<br />
We take no responsibility for damage due to violation of these operating instructions.<br />
• Always observe the notices marked as follows to avoid accidents and<br />
damage to the appliance.<br />
WARNING:<br />
Warning concerning health hazards describing possible risks of injury.<br />
ATTENTION:<br />
Warning concerning possible dangers to the appliance or other objects.<br />
NOTE:<br />
Highlights tips and information for you.<br />
2.2 About certain groups of persons<br />
• This appliance is not intended to be used by persons (including children)<br />
with impaired physical, sensory or mental abilities or insufficient experience<br />
or knowledge, unless they are supervised by a person<br />
responsible for their safety or have been instructed in the proper use of the<br />
appliance by this person. Keep the appliance out of reach of people of<br />
these groups.<br />
• Children should be supervised in order to make sure that they do not<br />
play with the appliance. Children must not be allowed to stand or sit on the<br />
appliance.<br />
• Packing material must not be used to play with. There is danger of suffocation.<br />
2.3 About the power supply<br />
The appliance is operated with electrical power which means there is in<br />
principle a risk of electric shock. So please observe the following in particular:<br />
• Never touch the plug with wet hands.<br />
• Always pull directly at the plug if you want to disconnect the appliance<br />
from the mains. Never pull on the cable as this could damage it.<br />
• Never carry the appliance by its power cord. It could get damaged.<br />
• Take care that the power cord is not bent, pinched, or rolled over and<br />
ensure it does not come into contact with heat sources. Also take care that<br />
it does not become a stumbling-hazard.<br />
2.4 About appropriate use<br />
The cylinder vacuum cleaner is intended for home use only. It is not suitable<br />
for commercial use.<br />
Use the cylinder vacuum cleaner only for cleaning dry, normally soiled<br />
floors. With the furniture brush attached, you may also use the appliance<br />
for vacuuming furniture surfaces. You may even use the appliance to vacuum-clean<br />
drapes if the bypass vent (Fig. 1/18) is completely open and you<br />
take appropriate care.<br />
Any other use is considered inappropriate and is prohibited. It is especially<br />
forbidden:<br />
• To use the appliance near explosive or easily flammable substances.<br />
There is danger of fire or explosion.<br />
• To use the appliance outdoors. There is danger of rain or dirt destroying<br />
the appliance.<br />
• To stick objects into the appliance's openings. It could overheat.<br />
• To modify or repair the appliance on your own.<br />
• Never immerse the appliance in water or other liquids; keep it away<br />
from rain and moisture.<br />
• Before connecting to the power supply, make sure that the voltage stated<br />
on the type plate matches the voltage of your plug socket. Only use<br />
sockets with a ground/safety contact.<br />
• If possible, avoid using extension cords. If you must use an extension<br />
cord, use only safety-certified, water-protected single extension cords (nomulti-socket<br />
distributors) designed for the power consumption of the appliance.<br />
• Always check the power cord for possible damage before using the appliance.<br />
It is also forbidden:<br />
• To vacuum-clean:<br />
- Persons, animals, plants, especially hair, fingers and other parts of<br />
the body as well as pieces of clothing worn on the body. They could<br />
be sucked in and cause injuries.<br />
- Water and other fluids, especially damp carpet cleaning agents.<br />
Moisture inside the appliance can cause a short-circuit.<br />
- Toner dust (for laser printers, copying machines, etc.). There is danger<br />
of fire or explosion.<br />
- Hot ash, burning cigarettes or matches. This could cause a fire.<br />
- Pointed objects, such as glass shards, nails, etc. They can damage<br />
the appliance.<br />
- Rubble, plaster, cement, fine drilling-dust, make-up, etc. These might<br />
damage the appliance.<br />
2.5 If the appliance is defective<br />
If the power cord of this appliance is damaged, it must be replaced by the<br />
manufacturers, their authorised service representative or a similarly qualified<br />
person to avoid danger.<br />
Never use a defective appliance or operate an appliance with a defective<br />
power cord. Refer a defective appliance to an authorised dealer or the Royal<br />
Appliance service for repair. Address Page 26, “International Service”.<br />
2.6 About disposal<br />
Dispose of the appliance in compliance with the environmental<br />
protection laws of your country. Electrical waste may not be disposed<br />
of together with domestic waste. Use local old-appliance<br />
collection points instead.<br />
The filters used are made from environment-friendly materials. You may<br />
dispose of them in your household waste.<br />
12
3 Before use<br />
3 Before use<br />
<strong>3.1</strong> Unpacking<br />
ATTENTION:<br />
Always transport/send the appliance in its original packaging to avoid<br />
transport damage. Keep the packaging for such an event. However, dispose<br />
of no-longer-needed packaging material properly.<br />
3.2 Selecting the proper nozzle<br />
1<br />
2 3<br />
1. Unpack the appliance and all its accessories.<br />
2. Check that the contents are intact.<br />
NOTE:<br />
Immediately contact your dealer if you have found damage resulting<br />
from transport.<br />
1. Select the nozzle according to the surface to be cleaned:<br />
• Floor nozzle (Fig. 2/1):<br />
It can be used everywhere and, thanks to its switch, can be used equally<br />
well on carpets and hard floors.<br />
• Parquet brush (Fig. 2/2):<br />
Its long bristles make it especially suitable for cleaning delicate surfaces<br />
(e.g. parquet and laminate floors).<br />
• Mini turbo brush ‘Fellino’ (Fig. 2/3):<br />
This has a rotating brush head and is therefore ideally suited for deepcleaning<br />
upholstery and carpets.<br />
• Upholstery nozzle (Fig. 2/4):<br />
Use this to vacuum up dust off upholstered furniture.<br />
2<br />
1<br />
2<br />
A<br />
B<br />
• 2-in1 combi brush (Fig. 2/5), can be used as:<br />
- a crevice nozzle (Fig. 3/A1):<br />
Use these accessories to vacuum dust from hard to reach places.<br />
- Furniture brush (Fig. 3/A2):<br />
Use this to vacuum dust off objects that have sensitive surfaces.<br />
2. If possible, push nozzles not in use onto the stubs of the accessory<br />
bracket (Fig. 3/B).<br />
3. Keep the other nozzles safe and inaccessible to children.<br />
GB<br />
3<br />
3.3 Assembly<br />
A<br />
B<br />
1 1<br />
WARNING:<br />
Danger of injury! Only attach the nozzles if the appliance is not connected<br />
to the power supply. The cylinder vacuum cleaner could be<br />
switched on by accident.<br />
ATTENTION:<br />
Before vacuuming, make sure that the fitted nozzle suits the surface to<br />
be cleaned. Also observe the flooring manufacturer's recommendations.<br />
1. Attach the selected nozzle to the bottom end of the telescopic tube<br />
(Fig. 4/A1) or handle (Fig. 4/B1).<br />
4<br />
A<br />
B<br />
C<br />
2. Insert the suction hose adapter into the suction hose receptacle on the<br />
appliance (Fig. 5/A) as shown. Turn the suction hose adapter clockwise<br />
until you feel it engage and it can no longer be turned.<br />
If using the telescopic tube:<br />
3. Insert the handle into the upper end of the telescopic tube (Fig. 5/B).<br />
4. Adjust the length of the telescopic tube (Fig. 5/C). Press down the release<br />
latch on the tube to do this. Then extend the telescopic tube to<br />
the desired length. Let go of the release catch while pulling until it locks<br />
in place. You will hear a distinct click.<br />
5<br />
13
4 Use<br />
4 Use<br />
4.1 Operational safety<br />
WARNING:<br />
Danger of injury! Check appliance and power cord before each use. A<br />
damaged appliance must never be used.<br />
WARNING:<br />
Danger of injury! Especially when vacuum-cleaning stairs make sure<br />
that you always stand on a higher level than the appliance.<br />
ATTENTION:<br />
Only use the cylinder vacuum cleaner when all filters are intact, dry and<br />
correctly fitted. Make sure that no objects obstruct the telescopic tube,<br />
the suction hose or other openings.<br />
NOTE:<br />
Your cylinder vacuum cleaner is equipped with a safety switch to prevent<br />
overheating. It will switch off automatically if overheated (e.g. due to<br />
clogged suction channels).<br />
If this happens:<br />
• Switch off the vacuum cleaner.<br />
• Pull the plug from the power socket.<br />
• Eliminate the cause of the overheating.<br />
• Wait for about 45 minutes.<br />
After it has cooled off, you may switch on the vacuum cleaner again.<br />
4.2 Vacuum cleaning<br />
4<br />
5<br />
3<br />
6<br />
1. Pull out the cord by the plug up to the yellow mark (Fig. 6/1).<br />
WARNING:<br />
Danger of electric shock! If the red marking (Fig. 6/2) shows, press the<br />
cord retraction button (Fig. 6/3) to pull in the cord up to the yellow mark<br />
again (Fig. 6/1). Otherwise, the power cord may be damaged.<br />
2. Insert the mains plug into a socket with ground/safety contact.<br />
3. Switch on the cylinder vacuum cleaner with the on/off switch (Fig. 6/4).<br />
4. Adjust the suction power with the suction power control (Fig. 6/5).<br />
NOTE:<br />
In normal situations the bypass vent (Fig. 6/6) must be completely<br />
closed. With the bypass vent you can quickly reduce the suction power,<br />
e.g. to release curtains that have accidentally been sucked in.<br />
6<br />
2<br />
1<br />
A<br />
5. If using the floor nozzle, set the "carpet/hard floor" selector according<br />
to the type of floor to be cleaned (Fig. 7/1):<br />
Fig. 7/A: for deep- and short-pile carpets, runners<br />
Fig. 7/B: for smooth floors, e.g. parquet, tiles, PVC, etc.<br />
1<br />
B<br />
WARNING:<br />
Danger of injury! When leaving your working-area, switch off the appliance<br />
and comply with the notices in Chapter 4.3, “Switching off”. This<br />
will help avoid accidents.<br />
7<br />
4.3 Switching off<br />
WARNING:<br />
Danger of injury! During uncontrolled retraction the power cord can whip<br />
around, become a tripping hazard or knock over objects. Therefore,<br />
keep the plug in your hand and guide the cord when retracting it.<br />
1. Switch off the cylinder vacuum cleaner with the on/off switch (Fig. 6/4)<br />
and pull the plug from the mains socket.<br />
2. Keep the plug in your hand.<br />
3. To retract the power cord, push the cord retracting button (Fig. 6/3).<br />
4.4 Transport and storage<br />
1<br />
A<br />
B<br />
• Only carry the vacuum cleaner by its carrying-handle (Fig. 8/A1).<br />
• For storage you may either park the telescopic tube<br />
- using the parking-hook of the floor nozzle (Fig. 8/A) or<br />
- the storage-hook (Fig. 8/B).<br />
• If you want to store the appliance for a longer period of time, empty the<br />
dust container, Chapter 5.1, “Emptying and cleaning the dust container”.<br />
• Store the appliance in a cool, dry place, out of the reach of children.<br />
ATTENTION:<br />
Never store the appliance next to heat sources (e.g. stoves or radiators).<br />
Avoid exposing it to direct sunlight. Heat can damage the appliance.<br />
8<br />
14
5 Maintenance<br />
5 Maintenance<br />
5.1 Emptying and cleaning the dust container<br />
ATTENTION:<br />
Switch off the appliance before emptying the dust container. This will<br />
prevent dust from damaging the appliance.<br />
NOTE:<br />
You can dispose of the contents of the dust container with your regular<br />
domestic waste as long as it does not contain any substances not permitted<br />
in domestic waste.<br />
A<br />
2<br />
1<br />
B<br />
2<br />
1<br />
• It is best to empty the dust container after each vacuuming session.<br />
• But empty the dust container at the latest:<br />
- if the cleaning/emptying indicator (Fig. 9/A1) lights up;<br />
- if the "MAX" marking (Fig. 9/B1) has been reached; or<br />
- before prolonged storage or dispatch.<br />
1. Switch off the appliance, Chapter 4.3, “Switching off”.<br />
2. Push the release button for the dust container (Fig. 9/A2).<br />
3. Remove the dust container from its receptacle.<br />
4. Empty the dust container by holding it low over a dustbin and only then<br />
press the release button (Fig. 9/B2).<br />
5. Also clean the central lamellae filter on this occasion, Chapter 5.2,<br />
“Cleaning central lamellae filter and motor protection filter”.<br />
NOTE:<br />
The dust container cannot be cleaned with the central lamellae filter fitted.<br />
6. Remove any residual dust from the dust container using a dry cloth or<br />
a soft brush, e.g. the supplied furniture brush.<br />
7. Close the dust compartment bottom plate.<br />
9<br />
5.2 Cleaning central lamellae filter and motor protection filter<br />
ATTENTION:<br />
The filter elements are washable, but may not be cleaned in dishwashers<br />
or washing-machines. Also, do not use detergents or brushes with<br />
hard bristles to clean the filters.<br />
• Clean the filters each time you clean the dust container, Chapter 5.1,<br />
“Emptying and cleaning the dust container”.<br />
• Clean the filters at the latest when the cleaning/emptying indicator<br />
(Fig. 9/A1) lights up.<br />
GB<br />
A<br />
10<br />
B<br />
OPEN<br />
1. Switch off the appliance, Chapter 4.3, “Switching off”.<br />
2. Remove and empty the dust container, Chapter 5.1, “Emptying and<br />
cleaning the dust container”.<br />
3. Remove the motor protection filter by pulling it upwards out of its holder<br />
(Fig. 10/A).<br />
4. Release the central lamellae filter by turning in the ‘open’ direction<br />
(Fig. 11) and remove it along with the filter fleece from the dust<br />
container.<br />
5. Hold the central lamellae filter with the filter fleece low over a dustbin.<br />
6. Separate the filter fleece from the filter by holding the filter firmly and<br />
pulling the filter fleece carefully off (Fig. 12).<br />
7. Remove larger agglomerations of dirt from both filter elements by hand.<br />
8. Brush out the central lamellae filter using the 2-in-1 combi brush supplied.<br />
9. If the filter elements are still dirty after this dry-brushing procedure, thoroughly<br />
rinse them by hand until all dirt is gone.<br />
ATTENTION:<br />
Let the filter elements dry for approx. 24 hours at room temperature after<br />
wet cleaning. Only put them back into the appliance when they are completely<br />
dry.<br />
10. If a filter element is damaged or too dirty, replace it with a new one (ordering<br />
information Chapter 5.4, “Spare parts and accessories”).<br />
11. Put the new / cleaned and completely dry motor protection filter back<br />
into its receptacle (Fig. 10/B).<br />
12. Pull the filter fleece back over the central lamellae filter so that the<br />
lamellae are completely enclosed.<br />
13. Insert the central lamellae filter back into the dust container and lock the<br />
filter by turning it in the ‘close’ direction. You will feel and hear the filter<br />
snap into place.<br />
14. Put the dust container back into its receptacle. You will feel and hear it<br />
snap into place.<br />
15. Check that the dust container is fitted securely.<br />
11<br />
12<br />
15
5 Maintenance<br />
5.3 Cleaning the exhaust filter<br />
ATTENTION:<br />
The exhaust filter is washable, but it may not be cleaned in dishwashers<br />
or washing-machines. Also, do not use detergents or brushes with hard<br />
bristles to clean the filters.<br />
• Clean the filters each time you clean the dust container, Chapter 5.1,<br />
“Emptying and cleaning the dust container”.<br />
• Clean the filters at the latest when the cleaning/emptying indicator<br />
(Fig. 9/A1) lights up.<br />
13<br />
A<br />
B<br />
1. Switch off the appliance, Chapter 4.3, “Switching off”.<br />
2. Push the release catch of the exhaust filter cover down (Fig. 13/A) and<br />
open out the exhaust filter cover.<br />
3. Remove the exhaust filter cover with the exhaust filter.<br />
4. Hold the exhaust filter cover complete with the exhaust filter low over a<br />
dustbin.<br />
5. Brush out dirt using a soft brush, such as the 2-in-1 combi brush supplied<br />
(Fig. 13/B).<br />
6. If this is not enough, remove the exhaust filter from the exhaust filter<br />
cover using the removal tab and knock out remaining dirt from both elements.<br />
7. If the exhaust filter is still dirty after this procedure, thoroughly rinse it<br />
by hand in running water until all dirt is gone.<br />
A<br />
B<br />
ATTENTION:<br />
Let the filter dry for approx. 24 hours at room temperature after wet<br />
cleaning. Only put it back in place when it is completely dry.<br />
1<br />
8. If the exhaust filter is damaged, deformed or too soiled, replace it (ordering<br />
information Chapter 5.4, “Spare parts and accessories”).<br />
9. Put the clean/new and completely dry exhaust filter back into the exhaust<br />
filter cover. Make sure that, after putting it back in, the removal<br />
tab (Fig. 14/A1) is still visible.<br />
10. Fit the exhaust filter cover with the new or cleaned exhaust filter on the<br />
bottom side first (Fig. 14/A) and then pivot it in upwards. You will feel<br />
and hear it snap into place (Fig. 14/B).<br />
14<br />
5.4 Spare parts and accessories<br />
ATTENTION:<br />
Only use original spare parts from the scope of delivery or those that you<br />
have purchased by reordering.<br />
• Ordering address: Page 26, “International Service”<br />
• Further information: www.dirtdevil.de<br />
• The adjacent accessory parts and spare parts can be reordered.<br />
Item number<br />
Description<br />
2725001 Filter set 3 pcs, consisting of 1 central lamellae filter,<br />
1 motor protection filter, 1 exhaust filter<br />
2725077 2 filter fleeces<br />
M203 1 parquet brush<br />
M209 1 turbo brush<br />
5.5 If the appliance does not work as it should<br />
WARNING:<br />
Danger of injury! Never use a defective appliance! Always switch off the<br />
appliance and disconnect it from the mains before starting troubleshooting<br />
Chapter 4.3, “Switching off”.<br />
Before contacting your authorised Royal dealer, Royal service partner or<br />
appliance market or before sending in the appliance (Page 26, “International<br />
Service”), first follow the procedure in the following table to check if<br />
you can solve the problem yourself.<br />
Problem<br />
The vacuum<br />
cleaner<br />
stops suddenly.<br />
Cleaning/<br />
emptying indicator<br />
(Fig. 1/9)<br />
lights up.<br />
Possible cause / solution<br />
The overheating protection has tripped (possibly due to<br />
blocked suction channels, filters, or similar).<br />
Switch the appliance off and pull the plug out of the socket.<br />
Remove the cause of overheating (e.g. by disassembling<br />
telescopic tube and suction hose and removing the obstacle<br />
and/or cleaning filters). Wait for about 45 minutes. After<br />
the appliance has cooled off, you may switch it on again.<br />
The central lamellae filter is dirty.<br />
Clean the central lamellae filter, Chapter 5.2, “Cleaning<br />
central lamellae filter and motor protection filter”.<br />
The dust container is full.<br />
Empty / clean the dust container. Chapter 5.1, “Emptying<br />
and cleaning the dust container”<br />
Problem<br />
The cleaning<br />
results are<br />
unsatisfactory<br />
in spite of<br />
the appliance<br />
working<br />
correctly.<br />
Possible cause / solution<br />
The bypass vent (Fig. 1/18) is open.<br />
Close the bypass vent .<br />
The attached nozzle is unsuitable.<br />
Change the nozzle, Chapter 3.2, “Selecting the proper<br />
nozzle”.<br />
The suction power you set is unsuitable.<br />
Adjust the suction power control to suit the flooring,<br />
Chapter 4.2, “Vacuum cleaning”, step 4.<br />
The position of the "carpet/hard floor" selector (Fig. 1/31)<br />
is unsuitable. Set the "carpet/hard floor" selector to the<br />
correct position for the type of floor, Chapter 4.2, “Vacuum<br />
cleaning”, step 5.<br />
The dust container is full.<br />
Empty/clean the dust container, Chapter 5.1, “Emptying<br />
and cleaning the dust container”.<br />
The filters are dirty. Clean the respective filter, Chapter<br />
5.2, “Cleaning central lamellae filter and motor protection<br />
filter” or Chapter 5.3, “Cleaning the exhaust filter”.<br />
Nozzle, telescopic tube or suction hose is blocked.<br />
Remove the obstacle. If necessary, use a long wooden<br />
stick (e.g. a broomstick) to do this.<br />
16
_________________________________________________________________________________________________________________________<br />
_________________________________________________________________________________________________________________________<br />
_________________________________________________________________________________________________________________________<br />
_________________________________________________________________________________________________________________________<br />
_________________________________________________________________________________________________________________________<br />
_________________________________________________________________________________________________________________________<br />
_________________________________________________________________________________________________________________________<br />
_________________________________________________________________________________________________________________________<br />
_________________________________________________________________________________________________________________________<br />
_________________________________________________________________________________________________________________________<br />
_________________________________________________________________________________________________________________________<br />
_________________________________________________________________________________________________________________________<br />
_________________________________________________________________________________________________________________________<br />
_________________________________________________________________________________________________________________________<br />
_________________________________________________________________________________________________________________________<br />
17
16<br />
17<br />
18<br />
34<br />
15<br />
14<br />
19<br />
13<br />
11<br />
20<br />
12<br />
21<br />
10<br />
9<br />
23<br />
8<br />
24<br />
7<br />
22<br />
27<br />
28<br />
32<br />
3<br />
1<br />
2<br />
4<br />
25<br />
26<br />
29<br />
30<br />
31<br />
5<br />
6<br />
33<br />
15<br />
18
1 Vista de conjunto de su <strong>Centrino</strong> <strong>X<strong>3.1</strong></strong><br />
1 Vista de conjunto de su <strong>Centrino</strong> <strong>X<strong>3.1</strong></strong><br />
¡Muchas gracias!<br />
Le agradecemos la compra del <strong>Centrino</strong> <strong>X<strong>3.1</strong></strong> y la confianza depositada en<br />
nosotros.<br />
Vista de conjunto del alcance del suministro (Fig. 1)<br />
1 Interruptor de conexión / desconexión<br />
2 Regulador de potencia de aspiración<br />
3 Tecla para enrollar el cable<br />
4 Fijación de estacionamiento<br />
5 Filtro de evacuación con lengüeta de extracción<br />
6 Cubierta del filtro de evacuación<br />
7 Alojamiento de la manguera de aspiración<br />
8 Filtro de protección del motor<br />
9 Indicador de limpieza/vaciado<br />
10 Asa de transporte<br />
11 Pulsador de vaciado<br />
12 Base del depósito de polvo<br />
13 Marca MAX en el depósito de polvo<br />
14 Tela de filtración<br />
15 Filtro central de láminas<br />
16 Pulsador de desbloqueo para el depósito de polvo<br />
17 Depósito de polvo<br />
18 Regulador de aire adicional<br />
19 Manguera de aspiración<br />
20 Adaptador de la manguera de aspiración<br />
21 Fijación para guardar<br />
22 Cable eléctrico con clavija<br />
23 Tubo telescópico<br />
24 Inmovilizador del tubo telescópico<br />
25 Sujeción de accesorios<br />
26 Gancho para guardar<br />
27 Cepillo combinado 2 en 1, utilizable como<br />
- cepillo de muebles o<br />
- tobera para ranuras<br />
28 Tobera para tapicerías y cojines<br />
29 Tobera de suelo (ilustración como ejemplo)<br />
30 Gancho de estacionamiento<br />
31 Conmutador "Alfombra/Suelo duro" (ilustración como ejemplo)<br />
32 Minicepillo turbo "Fellino"<br />
33 Cepillo para parqués<br />
34 Manual de instrucciones<br />
Índice<br />
1 Vista de conjunto de su <strong>Centrino</strong> <strong>X<strong>3.1</strong></strong>..................................... 19<br />
Condiciones de la garantía .......................................................... 19<br />
En el caso de garantía ................................................................. 19<br />
2 Advertencias de seguridad ....................................................... 20<br />
2.1 sobre el manual de instrucciones................................................. 20<br />
2.2 sobre determinados grupos de personas..................................... 20<br />
2.3 sobre la alimentación de corriente ............................................... 20<br />
2.4 sobre el uso conforme.................................................................. 20<br />
2.5 En caso de aparato defectuoso ................................................... 20<br />
2.6 sobre la eliminación ..................................................................... 20<br />
3 Antes del uso.............................................................................. 21<br />
<strong>3.1</strong> Desembalaje ................................................................................ 21<br />
3.2 Seleccionar tobera ....................................................................... 21<br />
3.3 Montaje ........................................................................................ 21<br />
4 Uso .............................................................................................. 22<br />
4.1 Seguridad durante el uso............................................................. 22<br />
4.2 Aspirar el polvo ............................................................................ 22<br />
4.3 Desconexión ................................................................................ 22<br />
4.4 Transportar y guardar .................................................................. 22<br />
5 Mantenimiento............................................................................ 23<br />
5.1 Vaciar y limpiar el depósito de polvo............................................ 23<br />
5.2 Limpiar el filtro central de láminas y el filtro de protección del motor 23<br />
5.3 Limpiar filtro de evacuación ......................................................... 24<br />
5.4 Piezas de recambio y accesorios................................................. 24<br />
5.5 Si el aparato no funciona como debe........................................... 24<br />
Datos técnicos<br />
Tipo de aparato<br />
: Aspiradora rodante sin bolsa<br />
Modelo : <strong>Centrino</strong> <strong>X<strong>3.1</strong></strong><br />
Número de modelo : M<strong>2012</strong>-3<br />
Tensión<br />
: 220 – 240V ~, 50/60 Hz<br />
Potencia<br />
: 1800 W nom. – 2300 W máx.<br />
Volumen útil máx. del depósito : aprox. 1,5 litros<br />
Longitud del cable eléctrico : aprox. 5,0 m<br />
Peso<br />
: aprox. 5,3 kg<br />
Nos reservamos el derecho a realizar cambios técnicos y de diseño en el<br />
marco de la mejora permanente de nuestros productos. © Royal Appliance<br />
International GmbH<br />
ES<br />
Condiciones de la garantía<br />
Para el aparato distribuido por nosotros nos hacemos cargo de la garantía<br />
legalmente prescrita de 24 meses a partir de la fecha de compra.<br />
Durante este plazo de garantía eliminaremos gratuitamente todos los fallos<br />
que se deban al material o a defectos de fabricación. Esta eliminación se<br />
efectuará a nuestra elección, por la reparación o el cambio del aparato o<br />
del accesorio (los daños a piezas de accesorios no conducen automáticamente<br />
a un cambio de todo el aparato).<br />
Quedan excluidos de la prestación de garantía, los daños que sean consecuencia<br />
de un uso inadecuado (operación del aparato con un tipo de corriente/tensión<br />
equivocados, conexión a fuentes inadecuadas de alimentación,<br />
rotura, etc.), el desgaste normal y las deficiencias que influyan de<br />
modo irrelevante sobre el valor o la utilidad del aparato.<br />
En caso de que intervengan establecimientos no autorizados por nosotros<br />
o se utilicen piezas de recambio que no sean las originales de Royal<br />
Appliance se extinguirá la garantía. ¡Las piezas de desgaste no están incluidas<br />
en la garantía y por lo tanto no son gratuitas!<br />
La prestación de garantía sólo entrará en vigencia si la tarjeta de garantía<br />
está provista de la fecha de compra, validada por el sello y la firma del vendedor<br />
o si se adjunta una copia de la factura de compra del aparato enviado.<br />
¡Los servicios de garantía no generan una prolongación del período de<br />
garantía, ni comienza por ello el derecho a una nueva garantía!<br />
En el caso de garantía<br />
Envíe el aparato con el depósito de polvo vacío y una breve descripción<br />
del fallo en letra de imprenta.<br />
Indique en la carta de acompañamiento la observación "Para garantía".<br />
Envíelo junto con la tarjeta de garantía o con una copia de la factura de<br />
compra a esta dirección:<br />
Página 26, "International Service"<br />
19
2 Advertencias de seguridad<br />
2 Advertencias de seguridad<br />
2.1 sobre el manual de instrucciones<br />
• Lea este manual de instrucciones por completo antes de utilizar el aparato.<br />
Guarde bien las instrucciones. En caso de que ceda este aparato a<br />
un tercero, entréguele también el manual de instrucciones.<br />
La inobservancia de este manual puede ser origen de graves lesiones<br />
o de daños en el aparato.<br />
No asumimos ningún tipo de responsabilidad por los daños causados debido<br />
a la inobservancia de este manual de instrucciones.<br />
• Para evitar accidentes y daños en el aparato, es imprescindible tener<br />
en cuenta las advertencias marcadas igual que las de al lado.<br />
AVISO:<br />
Advierte sobre peligros para su salud y muestra posibles riesgos de<br />
lesión.<br />
ATENCIÓN:<br />
Indica la posibilidad de que el aparato u otros objetos corran peligro.<br />
ADVERTENCIA:<br />
Destaca consejos e informaciones.<br />
2.2 sobre determinados grupos de personas<br />
• Este aparato no está destinado para ser usado por personas (incluidos<br />
niños) con capacidad física, sensorial o mental restringida o con falta de<br />
experiencia y/o de conocimientos, a no ser que sean supervisadas por una<br />
persona responsable de su seguridad o hayan recibido de ella instrucciones<br />
de cómo usar el aparato. Guarde el aparato de modo inaccesible para<br />
este círculo de personas.<br />
• Los niños deben ser supervisados para asegurarse de que no jueguen<br />
con el aparato. Entre otros no deben ponerse de pie sobre el aparato ni<br />
sentarse encima.<br />
• El material de embalaje no debe ser utilizado para jugar. Existe peligro<br />
de asfixia.<br />
2.3 sobre la alimentación de corriente<br />
El aparato funciona con corriente eléctrica, por tanto existe en general el<br />
peligro de una descarga eléctrica. Por esta razón, tenga especialmente en<br />
cuenta lo siguiente:<br />
• Jamás toque la clavija con las manos mojadas.<br />
• Quite siempre la clavija de la caja de enchufe tirando directamente de<br />
aquélla. No tire nunca directamente del cable eléctrico porque podría dañarlo.<br />
• Jamás transporte el aparato del cable eléctrico. Podría ser dañado.<br />
• Procure que el cable eléctrico no se doble ni quede enganchado y evite<br />
que se pase por encima de él o esté en contacto con fuentes de calor. Además<br />
no se debe convertir en una fuente de tropiezos.<br />
• Jamás sumerja el aparato en agua u otros líquidos y manténgalo alejado<br />
de la lluvia y de la humedad.<br />
• Antes de la conexión a la alimentación de corriente cerciórese que la<br />
tensión eléctrica indicada en la placa de características se corresponde<br />
con la tensión de su caja de enchufe. Emplee solo cajas de enchufe con<br />
toma de tierra.<br />
• De ser posible no use cables de prolongación. Si no hubiese alternativa,<br />
utilice sólo cables de prolongación simples (sin cajas de enchufes múltiples),<br />
protegidos contra chorros de agua, con certificación GS, que estén<br />
diseñados para la toma de potencia del aparato.<br />
• Antes de usar el cable de corriente, controle que no esté dañado.<br />
2.4 sobre el uso conforme<br />
La aspiradora rodante está destinada sólo al uso doméstico. No es adecuada<br />
para un uso comercial.<br />
Emplee la aspiradora rodante exclusivamente para limpiar suelos secos<br />
con un grado normal de suciedad. Si ha montado el cepillo para muebles,<br />
también podrá usar el aparato para aspirar muebles. Con el regulador de<br />
aire adicional (Fig. 1/18) abierto por completo y con el debido cuidado el<br />
aparato hasta puede servir para aspirar cortinas.<br />
Cualquier otra utilización se considera no conforme y está prohibida. Queda<br />
especialmente prohibido lo siguiente:<br />
• El uso en las cercanías de materiales explosivos o fácilmente inflamables.<br />
Existe riesgo de incendio o explosión.<br />
• El empleo al aire libre. Existe el peligro de que la lluvia y la suciedad<br />
dañen el aparato.<br />
• La introducción de objetos en las aberturas del aparato. Se podría sobrecalentar.<br />
• Las modificaciones o reparaciones del aparato por cuenta propia.<br />
Además está prohibido:<br />
• Aspirar:<br />
- Personas, animales, plantas, especialmente cabellos, dedos u otras<br />
partes del cuerpo, así como prendas de ropa llevadas sobre el cuerpo.<br />
Puede ser aspirada y causar lesiones.<br />
- Agua y otros líquidos, en especial productos para la limpieza en húmedo<br />
de alfombras. La humedad en el interior del aparato puede provocar<br />
un cortocircuito.<br />
- Polvo de tóner (para impresoras láser, copiadoras, etc.). Existe el<br />
riesgo de incendio y explosión.<br />
- Rescoldos, cigarrillos y cerillas encendidas. Pueden provocar un incendio.<br />
- Objetos puntiagudos como vidrios rotos, clavos, etc. El aparato podría<br />
ser dañado.<br />
- Escombros, yeso, cemento, polvo finísimo de taladrar, maquillaje,<br />
polvos de talco etc. Por ellos, el aparato podría ser dañado.<br />
2.5 En caso de aparato defectuoso<br />
Para evitar riesgos, si el cable de conexión de este aparato está dañado,<br />
deberá ser reemplazado por el fabricante o por su servicio de asistencia al<br />
cliente o por una persona igualmente calificada.<br />
Jamás utilice un aparato defectuoso o un aparato con un cable de corriente<br />
averiado. Entregue un aparato defectuoso para su reparación a un distribuidor<br />
especializado o al Servicio de Atención al Cliente de Royal Appliance.<br />
Dirección Página 26, "International Service".<br />
2.6 sobre la eliminación<br />
Elimine el aparato de acuerdo con las normas de protección del<br />
medio ambiente vigentes en su país. Los residuos eléctricos no<br />
deben ser desechados con los residuos domésticos. Deséchelos<br />
en los centros de recogida locales para aparatos eléctricos usados.<br />
Los filtros empleados están fabricados de materiales compatibles con el<br />
medio ambiente. Pueden ser eliminados con la basura doméstica.<br />
20
3 Antes del uso<br />
3 Antes del uso<br />
<strong>3.1</strong> Desembalaje<br />
ATENCIÓN:<br />
Envíe el aparato siempre en su embalaje original para que no resulte<br />
dañado. Para ello guarde el embalaje original. Por el contrario, elimine<br />
correctamente el material de embalaje que ya no sea necesario.<br />
1. Desembale el aparato y sus accesorios.<br />
2. Compruebe que el contenido no esté dañado.<br />
ADVERTENCIA:<br />
En caso de descubrir algún daño debido al transporte, diríjase inmediatamente<br />
a su distribuidor.<br />
3.2 Seleccionar tobera<br />
1<br />
2 3<br />
1. Seleccione la tobera según el suelo a aspirar:<br />
• Tobera de suelo (Fig. 2/1):<br />
Puede utilizarla universalmente y, gracias al conmutador, limpiar tanto alfombras<br />
como suelos duros.<br />
• Cepillo para parqués (Fig. 2/2):<br />
Este cepillo está provisto de cerdas largas y sirve para aspirar superficies<br />
muy delicadas (p.ej., parqués o laminados).<br />
• Minicepillo turbo "Fellino" (Fig. 2/3):<br />
Este cepillo dispone de un cabezal giratorio de cepillado y por tanto resulta<br />
idóneo para la limpieza en profundidad de tapicerías y alfombras.<br />
• Tobera para cojines (Fig. 2/4):<br />
Utilícela para aspirar el polvo de los muebles tapizados.<br />
2<br />
1<br />
2<br />
A<br />
B<br />
• Cepillo combinado 2 en 1 (Fig. 2/5), utilizable como:<br />
- Tobera para ranuras (Fig. 3/A1):<br />
Utilícela para aspirar el polvo en lugares de difícil acceso.<br />
- Cepillo de muebles (Fig. 3/A2):<br />
Utilícelo para aspirar el polvo de objetos que tengan superficies delicadas.<br />
2. Dentro de lo posible, inserte las toberas de accesorios que no necesita<br />
sobre los puntos de inserción de la sujeción de accesorios (Fig. 3/B).<br />
3. Guarde las demás toberas de forma segura y alejadas de los niños.<br />
3<br />
3.3 Montaje<br />
A<br />
B<br />
1 1<br />
AVISO:<br />
¡Peligro de lesiones! Monte las toberas sólo cuando la clavija esté desenchufada.<br />
La aspiradora rodante podría conectarse por error.<br />
ES<br />
ATENCIÓN:<br />
Antes de aspirar, asegúrese que la tobera colocada sea apta para la<br />
superficie a aspirar. Observe las recomendaciones de los fabricantes de<br />
revestimientos de suelo.<br />
1. Introduzca la tobera que necesite en el extremo inferior del tubo telescópico<br />
(Fig. 4/A1) o del asidero (Fig. 4/B1).<br />
4<br />
A<br />
B<br />
C<br />
2. Inserte el adaptador de la manguera de aspiración en el alojamiento de<br />
la manguera de aspiración ubicada en el aparato (Fig. 5/A). Gire el<br />
adaptador de la manguera de aspiración en sentido horario hasta que<br />
perciba que el bloqueo encaja y no se deja girar más.<br />
En caso de utilización del tubo telescópico:<br />
3. Introduzca el asidero en el extremo superior del tubo telescópico<br />
(Fig. 5/B).<br />
4. Ajuste la longitud del tubo telescópico (Fig. 5/C). Para ello presione el<br />
inmovilizador del tubo telescópico hacia abajo. A continuación tire el tubo<br />
telescópico hasta la longitud deseada. Para bloquear, suelte el inmovilizador<br />
del tubo telescópico al tirar de éste. Escuchará claramente<br />
como encaja.<br />
5<br />
21
4 Uso<br />
4 Uso<br />
4.1 Seguridad durante el uso<br />
AVISO:<br />
¡Peligro de lesiones! Antes de cada uso controle el aparato y el cable<br />
eléctrico. Un aparato dañado no debe ser utilizado.<br />
AVISO:<br />
¡Peligro de lesiones! Especialmente al aspirar escaleras preste atención<br />
a que usted siempre se encuentre por encima del aparato.<br />
ATENCIÓN:<br />
Emplee la aspiradora rodante únicamente si todos los filtros están intactos,<br />
secos y colocados correctamente. Asegúrese de que el tubo telescópico,<br />
la manguera de aspiración u otras aberturas no estén obstruidos<br />
por ningún objeto.<br />
ADVERTENCIA:<br />
La aspiradora rodante dispone de una protección contra el sobrecalentamiento.<br />
Se desconecta automáticamente en caso de sobrecalentamiento<br />
(p. ej. por conductos obstruidos).<br />
Si esto fuera el caso:<br />
• Desconecte la aspiradora rodante.<br />
• Desenchufe la clavija.<br />
• Elimine la causa del sobrecalentamiento.<br />
• Aguarde aproximadamente 45 minutos.<br />
Una vez que la aspiradora rodante se haya enfriado podrá conectarla<br />
nuevamente.<br />
4.2 Aspirar el polvo<br />
4<br />
5<br />
3<br />
6<br />
1. Tire el cable del enchufe y extráigalo hasta la marca amarilla (Fig. 6/1).<br />
AVISO:<br />
¡Peligro de una descarga eléctrica! En caso de que se vea la marca roja<br />
(Fig. 6/2) vuelva a introducir el cable con la ayuda de la tecla para enrollar<br />
el cable (Fig. 6/3) hasta la marca amarilla (Fig. 6/1). En caso contrario<br />
podría resultar dañado el cable.<br />
2. Enchufe la clavija en una caja de enchufe con contacto de protección.<br />
3. Conecte la aspiradora rodante en el interruptor de conexión / desconexión<br />
(Fig. 6/4).<br />
4. Ajuste la potencia de aspiración en el regulador de potencia de aspiración<br />
(Fig. 6/5).<br />
ADVERTENCIA:<br />
El regulador de aire adicional (Fig. 6/6) debe estar completamente<br />
cerrado en caso normal. Gracias al regulador de aire adicional se puede<br />
reducir rápidamente la potencia de aspiración, p.ej. para soltar cortinas<br />
aspiradas.<br />
2<br />
1<br />
6<br />
A<br />
B<br />
5. Si utiliza la tobera de suelo, ajuste el conmutador "Alfombra/Suelo duro“<br />
según el revestimiento del suelo (Fig. 7/1):<br />
Fig. 7/A: para alfombras de pelo largo y corto, alfombrillas<br />
Fig. 7/B: para suelos duros como parqué, baldosas, PVC, etc.<br />
7<br />
1<br />
AVISO:<br />
¡Peligro de lesiones! Si abandona el lugar de trabajo, desconecte el<br />
aparato y tenga en cuenta las indicaciones en Capítulo 4.3, "Desconexión".<br />
Así evitará accidentes.<br />
4.3 Desconexión<br />
AVISO:<br />
¡Peligro de lesiones! Si el cable eléctrico se enrolla incontroladamente,<br />
puede dar bandazos, hacer que se tropiece o producir la caída de objetos.<br />
Por ello sostenga la clavija en la mano y condúzcala durante el<br />
enrollamiento del cable de corriente.<br />
1. Desconecte la aspiradora rodante mediante el interruptor de conexión<br />
/ desconexión (Fig. 6/4) y desenchufe la clavija de la caja de enchufe.<br />
2. Sostenga la clavija en la mano.<br />
3. Para recoger el cable eléctrico presione la tecla para enrollar el cable<br />
(Fig. 6/3).<br />
4.4 Transportar y guardar<br />
8<br />
1<br />
A<br />
B<br />
• Lleve la aspiradora rodante para el transporte exclusivamente del asa<br />
de transporte (Fig. 8/A1).<br />
• Para guardar puede o bien estacionar el tubo telescópico<br />
- mediante el gancho de estacionamiento de la tobera de suelo (Fig. 8/A)<br />
o<br />
- guardarla mediante el gancho para guardar (Fig. 8/B).<br />
• Si desea almacenar el aparato durante un período prolongado, vacíe<br />
el depósito de polvo antes, Capítulo 5.1, "Vaciar y limpiar el depósito de<br />
polvo".<br />
• Guarde el aparato en un lugar fresco, seco y no accesible para los niños.<br />
ATENCIÓN:<br />
Jamás deje el aparato en la proximidad inmediata de fuentes de calor<br />
(p. ej. de la calefacción o del horno). Evite la incidencia directa de rayos<br />
solares. El calor puede dañar el aparato.<br />
22
5 Mantenimiento<br />
5 Mantenimiento<br />
5.1 Vaciar y limpiar el depósito de polvo<br />
ATENCIÓN:<br />
Antes de vaciar el depósito de polvo, desconecte el aparato. Así evitará<br />
que el polvo dañe el aparato.<br />
ADVERTENCIA:<br />
El contenido del depósito de polvo puede ser eliminado junto con la<br />
basura doméstica, siempre y cuando no contenga ningún componente<br />
prohibido para los residuos domésticos.<br />
A<br />
2<br />
1<br />
B<br />
1<br />
• Lo mejor es vaciar el depósito de polvo después de cada proceso de<br />
aspiración.<br />
• Pero a más tardar debería vaciarse:<br />
- cuando el indicador de limpieza/vaciado (Fig. 9/A1) se prenda,<br />
- cuando se haya alcanzado la marca "MAX" (Fig. 9/B1),<br />
- antes de un almacenamiento prologado o de un envío.<br />
1. Desconecte el aparato, Capítulo 4.3, "Desconexión".<br />
2. Oprima el pulsador de desbloqueo del depósito de polvo (Fig. 9/A2).<br />
3. Extraiga el depósito de polvo de su consola.<br />
4. Vacíe el depósito de polvo, colocándolo profundamente sobre un cubo<br />
de basura y pulsando sólo entonces el pulsador de vaciado (Fig. 9/B2).<br />
5. En esta oportunidad limpie asimismo el filtro central de láminas,<br />
Capítulo 5.2, "Limpiar el filtro central de láminas y el filtro de protección<br />
del motor".<br />
ADVERTENCIA:<br />
Con el filtro central de láminas colocado no puede limpiarse el depósito<br />
de polvo.<br />
9<br />
2<br />
6. Con la ayuda de un trapo seco o de un cepillo blando, p.ej. el cepillo<br />
para muebles suministrado, elimine los restos de polvo que eventualmente<br />
aún se encuentren en el depósito.<br />
7. Vuelva a fijar la placa de fondo del depósito de polvo.<br />
5.2 Limpiar el filtro central de láminas y el filtro de protección del motor<br />
ATENCIÓN:<br />
Los elementos filtrantes son lavables pero no son aptos para lavavajillas<br />
ni para lavadoras. Además, no use para la limpieza ningún producto de<br />
limpieza o cepillos con cerdas duras.<br />
A<br />
10<br />
B<br />
OPEN<br />
• Cuando esté limpiando el depósito de polvo, aproveche la situación para<br />
limpiar también el filtro, Capítulo 5.1, "Vaciar y limpiar el depósito de<br />
polvo".<br />
• Limpie el filtro a más tardar, cuando se prenda el indicador de limpieza/<br />
vaciado (Fig. 9/A1).<br />
1. Desconecte el aparato, Capítulo 4.3, "Desconexión".<br />
2. Extraiga el depósito de polvo y vacíelo, Capítulo 5.1, "Vaciar y limpiar<br />
el depósito de polvo".<br />
3. Extraiga hacia arriba el filtro de protección del motor de su soporte<br />
(Fig. 10/A).<br />
4. Desbloquee el filtro central de láminas girándolo en dirección "open"<br />
(Fig. 11) y extráigalo del depósito de polvo junto con la tela de filtración<br />
puesta por encima.<br />
5. Sostenga el filtro central de láminas junto con la tela de filtración puesta<br />
por encima sobre un cubo de basura.<br />
6. Retire la tela de filtración del filtro teniendo el filtro bien agarrado y quitando<br />
cuidadosamente la tela de filtración (Fig. 12).<br />
7. Elimine manualmente las suciedades más gruesas en ambos elementos<br />
filtrantes.<br />
8. Limpie el filtro central de láminas con ayuda del cepillo combinado 2 en<br />
1 que está incluido en el suministro.<br />
9. Si después de la limpieza en seco los elementos filtrantes estuviesen<br />
todavía sucios, enjuáguelos manualmente a fondo hasta que se elimine<br />
toda suciedad.<br />
ES<br />
ATENCIÓN:<br />
Deje que los elementos filtrantes se sequen durante aprox. 24 horas a<br />
temperatura ambiente después de su limpieza. Vuelva a colocarlos de<br />
nuevo sólo cuando estén totalmente secos.<br />
11<br />
10. Si uno de los elementos filtrantes estuviese dañado o extremadamente<br />
sucio, reemplácelo por uno nuevo (Informaciones para pedidos<br />
Capítulo 5.4, "Piezas de recambio y accesorios").<br />
11. Coloque nuevamente el filtro de protección del motor nuevo / limpio y<br />
completamente seco en su consola (Fig. 10/B).<br />
12. Coloque de nuevo la tela de filtración sobre el filtro central de láminas<br />
de forma que encierra completamente las láminas.<br />
13. Vuelva a colocar el filtro central de láminas en el depósito de polvo y<br />
bloquee el filtro girándolo en dirección "close". El filtro encaja audible y<br />
perceptiblemente.<br />
14. Vuelva a colocar el depósito de polvo en su consola. Encaja audible y<br />
perceptiblemente.<br />
15. Compruebe el ajuste fijo del depósito de polvo.<br />
12<br />
23
5 Mantenimiento<br />
5.3 Limpiar filtro de evacuación<br />
ATENCIÓN:<br />
El filtro de evacuación es lavable pero no es apto para lavavajillas ni<br />
para lavadoras. Además, no use para la limpieza ningún producto de<br />
limpieza o cepillos con cerdas duras.<br />
13<br />
A<br />
A<br />
B<br />
B<br />
• Cuando esté limpiando el depósito de polvo, aproveche la situación para<br />
limpiar también el filtro, Capítulo 5.1, "Vaciar y limpiar el depósito de<br />
polvo".<br />
• Limpie el filtro a más tardar, cuando se prenda el indicador de limpieza/<br />
vaciado (Fig. 9/A1).<br />
1. Desconecte el aparato, Capítulo 4.3, "Desconexión".<br />
2. Oprima el desbloqueo de la cubierta del filtro de evacuación hacia abajo<br />
(Fig. 13/A) y rebátala.<br />
3. Retire la cubierta del filtro de evacuación y el filtro mismo.<br />
4. Sostenga la cubierta del filtro de evacuación junto con el filtro de evacuación<br />
sobre un cubo de basura aproximándolos lo más posible.<br />
5. Limpie las suciedades con un cepillo blando, por ejemplo con el cepillo<br />
combinado 2 en 1 suministrado (Fig. 13/B).<br />
6. Si esto no fuese suficiente, retire el filtro de evacuación de la cubierta<br />
del filtro de evacuación cogiéndolo de la lengüeta de extracción y sacuda<br />
bien ambos elementos.<br />
7. Si después de la limpieza en seco el filtro de evacuación estuviese todavía<br />
sucio, enjuáguelo a fondo hasta que se elimine toda suciedad.<br />
ATENCIÓN:<br />
Deje que el filtro se seque durante aprox. 24 horas a temperatura<br />
ambiente después de la limpieza en húmedo. Introdúzcalo de nuevo<br />
una vez que esté totalmente seco.<br />
14<br />
1<br />
8. En caso de que el filtro de evacuación esté dañado, deformado o demasiado<br />
sucio, reemplácelo (informaciones de pedido Capítulo 5.4,<br />
"Piezas de recambio y accesorios").<br />
9. Vuelva a colocar el filtro de evacuación limpio o nuevo y totalmente seco<br />
en su cubierta. Asegúrese de que la lengüeta de extracción (Fig. 14/<br />
A1) sea visible después de la colocación.<br />
10. Coloque la cubierta del filtro de evacuación con el filtro nuevo o limpio<br />
primero abajo (Fig. 14/A) y rebátala después hacia arriba. Encaja audible<br />
y perceptiblemente (Fig. 14/B).<br />
5.4 Piezas de recambio y accesorios<br />
ATENCIÓN:<br />
Emplee únicamente piezas de recambio originales incluidas en el suministro<br />
o que haya pedido al fabricante con posterioridad.<br />
• Contacto para pedidos: Página 26, "International Service"<br />
• Más información: www.dirtdevil.de<br />
• Los accesorios y las piezas de recambio listados al lado pueden ser adquiridos<br />
con posterioridad.<br />
5.5 Si el aparato no funciona como debe<br />
AVISO:<br />
¡Peligro de lesiones! ¡Jamás utilice un aparato defectuoso! Antes de<br />
ponerse a localizar el problema, desconecte el aparato y desenchufe la<br />
clavija de la caja de enchufe, Capítulo 4.3, "Desconexión".<br />
Antes de contactar a su concesionario oficial Royal‚ al socio de servicio<br />
Royal, a su mercado especializado o, incluso, enviar el aparato (Página<br />
26, "International Service"), verifique con la siguiente tabla si usted puede<br />
solucionar el problema por sí mismo.<br />
Problema<br />
El aparato<br />
deja súbitamente<br />
de<br />
aspirar.<br />
El indicador<br />
de limpieza/<br />
vaciado<br />
(Fig. 1/9)<br />
está iluminado.<br />
24<br />
Posible causa / solución<br />
Ha disparado la protección contra sobrecalentamiento (posiblemente<br />
debido a tuberías o similares obstruidos).<br />
Desconecte el aparato y desenchufe la clavija de la caja<br />
correspondiente. Elimine la causa del sobrecalentamiento<br />
(p. ej. desmontar el tubo telescópico y la manguera de aspiración<br />
y eliminar la obturación). Aguarde aproximadamente<br />
45 minutos. Una vez que el aparato se haya enfriado<br />
podrá conectarlo nuevamente.<br />
El filtro central de láminas está sucio. Limpie el filtro central<br />
de láminas, Capítulo 5.2, "Limpiar el filtro central de láminas<br />
y el filtro de protección del motor".<br />
El depósito de polvo está lleno. Vacíe / limpie el depósito<br />
de polvo. Capítulo 5.1, "Vaciar y limpiar el depósito de<br />
polvo"<br />
Nº de artículo Descripción<br />
2725001 Juego de filtro de 3 piezas, compuesto de 1 filtro central<br />
de láminas, 1 filtro de protección del motor, 1 filtro de<br />
evacuación<br />
2725077 2 telas de filtración<br />
M203 1 cepillo para parqués<br />
M209 1 cepillo turbo<br />
Problema<br />
El resultado<br />
de la aspiración<br />
no es<br />
satisfactorio<br />
a pesar<br />
de un funcionamiento<br />
correcto.<br />
Posible causa / solución<br />
El regulador de aire adicional (Fig. 1/18) está abierto.<br />
Cierre el regulador de aire adicional.<br />
La tobera colocada no está apta para el objeto a aspirar.<br />
Cambie la tobera, Capítulo 3.2, "Seleccionar tobera".<br />
La potencia de aspiración ajustada no es apta. Adapte la<br />
posición del regulador de la potencia de aspiración al revestimiento<br />
de suelo, Capítulo 4.2, "Aspirar el polvo",<br />
paso 4.<br />
La posición del conmutador "Alfombra/Suelo duro" (Fig. 1/<br />
31) no está apta para el objeto a aspirar. Adapte la posición<br />
del conmutador "Alfombra/Suelo duro" al revestimiento<br />
del suelo, Capítulo 4.2, "Aspirar el polvo", paso 5.<br />
El depósito de polvo está excesivamente lleno.<br />
Vacíe / limpie el depósito de polvo, Capítulo 5.1, "Vaciar<br />
y limpiar el depósito de polvo".<br />
Los filtros están sucios.<br />
Limpie el filtro correspondiente, Capítulo 5.2, "Limpiar el<br />
filtro central de láminas y el filtro de protección del motor"<br />
o bien Capítulo 5.3, "Limpiar filtro de evacuación".<br />
La tobera, el tubo telescópico o la manguera de aspiración<br />
están obstruidos.<br />
Elimine la obstrucción. Si fuese necesario, utilice para ello<br />
una vara larga de madera (p. ej. un palo de escoba).
_________________________________________________________________________________________________________________________<br />
_________________________________________________________________________________________________________________________<br />
_________________________________________________________________________________________________________________________<br />
_________________________________________________________________________________________________________________________<br />
_________________________________________________________________________________________________________________________<br />
_________________________________________________________________________________________________________________________<br />
_________________________________________________________________________________________________________________________<br />
_________________________________________________________________________________________________________________________<br />
_________________________________________________________________________________________________________________________<br />
_________________________________________________________________________________________________________________________<br />
_________________________________________________________________________________________________________________________<br />
_________________________________________________________________________________________________________________________<br />
_________________________________________________________________________________________________________________________<br />
_________________________________________________________________________________________________________________________<br />
_________________________________________________________________________________________________________________________<br />
25
International Service<br />
International Service<br />
DE DE DE AT<br />
Kundenservice:<br />
Royal Appliance International GmbH<br />
Abt. Kundenservice<br />
Jagenbergstraße 19<br />
41468 Neuss<br />
DEUTSCHLAND<br />
Tel.: +49 (0) 180 - 501 50 50*<br />
Fax: +49 (0) 2131 - 60 90 60 95<br />
Hotline Ersatzteile: 01805 15 85 08*<br />
E-Mail: Ersatzteilshop@dirtdevil.de<br />
Zubehör und Ersatzteile:<br />
Service-Versand<br />
Ina Riedmüller<br />
Frankenstraße 34<br />
89233 Neu-Ulm<br />
DEUTSCHLAND<br />
Tel.: +49 (0) 1805 - 15 85 08*<br />
Fax: +49 (0) 7307 - 41 56<br />
Riedmueller.service@t-online.de<br />
Zubehör und Ersatzteile:<br />
Service Center Feuerbach KG<br />
Corneliusstr. 75<br />
40215 Düsseldorf<br />
DEUTSCHLAND<br />
Tel.: +49 (0) 1805 - 15 85 08*<br />
Fax: +49 (0) 211 - 37 04 97<br />
dirtdevil-service@t-online.de<br />
www.dirtdevil-service.de<br />
Zmugg Elektronik Service<br />
und Vertriebges. M.b.H.<br />
Fabriksgasse 27<br />
8020 Graz<br />
ÖSTERREICH<br />
Tel. +43 - 316 - 77 21 20<br />
Fax +43 - 316 - 77 21 20 10<br />
Tel. Ersatzteile: +43 - 316 - 77 21 20 14<br />
Fax Ersatzteile: +43 - 316 - 77 21 20 15<br />
www.dirtdevil.de<br />
servicecenter@dirtdevil.de<br />
*0,14 €/Minute aus dem deutschen Festnetz<br />
(deutscher Mobilfunkhöchstpreis 0,42 €/Minute)<br />
*0,14 €/Minute aus dem deutschen Festnetz<br />
(deutscher Mobilfunkhöchstpreis 0,42 €/Minute)<br />
zmuggelektronik@utanet.at<br />
*0,14 €/Minute aus dem deutschen Festnetz<br />
(deutscher Mobilfunkhöchstpreis 0,42 €/Minute)<br />
BE CH CZ DK<br />
Z.E.S. Goes B.V.<br />
T.a.v. afd. Service<br />
Pearyweg 1<br />
4462 GT Goes<br />
NEDERLAND<br />
Tel: +31 - 113 - 24 07 00<br />
Fax: +31 - 113 - 24 07 50<br />
dirtdevil@zesgoes.nl<br />
Support adresse:<br />
WhiteBrown A/S<br />
c/o BSL Baltship Seatainers Logistics<br />
Egeskovvej 6<br />
DK-8700 Horsens<br />
info@whitebrown.eu<br />
Bluepoint-Service SAGL<br />
Via Cantonale 14<br />
6917 Barbengo<br />
SWITZERLAND<br />
Tel. +41 (0) 91 980 49 73<br />
E-Mail: info@bluepoint-service.ch<br />
www.bluepoint-service.ch<br />
Recambios online:<br />
www.recambiosyaccesoriosonline.es<br />
pedidos@recambiosyaccesoriosonline.es<br />
K+P service s.r.o.<br />
Vančurova 83<br />
339 01 Klatovy<br />
Česká Republika<br />
Tel: +420 - 602 366 221<br />
E-mail: k.p.servis@seznam.cz<br />
DK ES ES ES<br />
Reparaciones y recambios:<br />
ELECTRONICA LATINA, S.L.<br />
Paseo Virgen del Puerto 13,<br />
28005 Madrid<br />
Tel.: 91 366 52 02<br />
Tel.: 91 366 52 03<br />
Distribution:<br />
WhiteBrown A/S<br />
Ramsherred 27 1 Sal<br />
DK-6200 Aabenraa<br />
info@whitebrown.eu<br />
Reparaciones y recambios:<br />
M.J. TORIBIO<br />
Calle Tahona, 4,<br />
28223 - Pozuelo de Alarcón - Madrid<br />
Tel.: 91 715 60 52<br />
mjtoribio@telepolis.com<br />
Helpdesk nummer:<br />
Tel.: +45 73326150<br />
eleclatina@hotmail.es<br />
ES FI FI FR<br />
Reparaciones y recambios:<br />
SAT EIXAMPLE<br />
Calabria, 277/279<br />
08029 - Barcelona<br />
Tel.: 93 430 69 50<br />
sateixample@hotmail.com<br />
TD ''MEDJIMURKA'' D.D.<br />
Trg Republike 6<br />
40000 Čakovec<br />
HRVATSKA<br />
Tel.: +385 - 40 - 31 27 60<br />
Fax: +385 - 40 - 32 86 61<br />
Distribution:<br />
HOME APPLIANCE BROKERS HAB OY<br />
HELSINKI, FINLAND<br />
info@haboy.fi<br />
www.haboy.fi<br />
SEKON BT.<br />
1117 Bp. Budafoki út 60<br />
MAGYARORSZÁG<br />
Tel: +36-1-205-3180<br />
Fax: +36-1-205-3181<br />
Mobil: +36-70-297-6985<br />
e-mail: service@invitone.hu<br />
Service:<br />
SIMSON HUOLTOPALVELU OY<br />
KARVAAMOKUJA 1<br />
00380 HELSINKI<br />
FINLAND<br />
TEL:+358 (0) 20 755 87 90<br />
FAX:+358 (0) 20 755 87 99<br />
huolto@simson.fi<br />
www.simson.fi<br />
HR HU IT NL<br />
PL SI SK<br />
OBSŁUGA GWARANCYJNA I<br />
SERWISOWA<br />
QUADRA-NET Sp. z o.o.<br />
61-888 Poznań, ul. Składowa 5<br />
Strojinc Ciril s.p.<br />
Koseskega ul. 1a<br />
1000 Ljubljana<br />
SLOVENIJA<br />
RICAMBI ELETTRODOMESTICI<br />
Corso L. Zanussi, 11<br />
33080 Porcia (PN)<br />
ITALIA<br />
tel: 0434/550833<br />
info@elettrodomesticiricambi.com<br />
Aspico Slovakia s r.o.<br />
Kracanska 40/104<br />
92901 Dunajská Streda<br />
SLOVAKIA<br />
OPM France Nant’Est entreprise<br />
33 rue du bois Briand<br />
44316 Nantes cdx 3<br />
FRANCE<br />
Tel. +33 - 2 - 40 49 64 25<br />
Fax +33 - 2 - 40 93 96 22<br />
www.opm-france.com<br />
Z.E.S. Goes B.V.<br />
T.a.v. afd. Service<br />
Pearyweg 1<br />
4462 GT Goes<br />
NEDERLAND<br />
Tel: +31 - 113 - 24 07 00<br />
Fax: +31 - 113 - 24 07 50<br />
dirtdevil@zesgoes.nl<br />
infolinia: 66 444 88 00<br />
DYSTRYBUTOR I GWARANT<br />
DSV Sp. z o.o. S.K.A. Gdynia,<br />
Plac Kaszubski 8<br />
26<br />
Tel: +386 -1- 42 28 489<br />
Tel: +421 - 31 - 55 11 815
D<br />
Garantie • Warranty • Garantía<br />
DE GB ES<br />
NUR GÜLTIG MIT RECHNUNGSKOPIE!<br />
VALID ONLY INCLUDING A COPY OF THE PURCHASE SLIP!<br />
¡VÁLIDO SÓLO CON COPIA DE FACTURA!<br />
Absender: Bitte Blockschrift in Großbuchstaben<br />
From: Please print in capitals<br />
Remitente: Por favor, escriba en letra de imprenta y en mayúsculas<br />
Name • Name • Nombres y apellidos<br />
Straße und Hausnummer • Street and house number • Calle y número<br />
PLZ und Ort • Zip code and town • C.P. y ciudad<br />
Telefon mit Vorwahl • Phone number (with area code) • Teléfono con prefijo<br />
<strong>Centrino</strong> <strong>X<strong>3.1</strong></strong><br />
E-Mail • email • Correo electrónico<br />
Kaufdatum • Date of purchase • Fecha de compra<br />
Datum, Unterschrift des Käufers • Date and owner's signature • Fecha, firma del comprador<br />
_________________________________________________________________________________________________________________<br />
Fehlerbeschreibung • Description of the malfunction • Descripción del fallo:<br />
_________________________________________________________________________________________________________________<br />
Bitte diesen Abschnitt ausschneiden und dem Gerät beilegen. • Please detach this part and send it in with the appliance. • Por favor, recorte este resguardo y añádelo al aparato.
DE<br />
* 0,14 €/Minute aus dem deutschen Festnetz, deutscher Mobilfunkhöchstpreis 0,42 €/Minute;<br />
Royal Appliance International GmbH<br />
Jagenbergstraße 19<br />
41468 Neuss<br />
Germany<br />
servicecenter@dirtdevil.de<br />
www.dirtdevil.de<br />
+49 (0) 1805 - 10 90 19*<br />
+49 (0) 2131 - 60 90 60 95<br />
Die Gebühren für Telefonate aus dem Ausland (also außerhalb von Deutschland) richten sich nach den Preisen<br />
der jeweiligen ausländischen Anbieter und der jeweils aktuellen Tarife.<br />
GB<br />
* € 0.14 per minute from German landlines, maximum German mobile phone tariff € 0.42 per minute.<br />
The cost of calls from abroad—outside Germany—depend upon the current prices of the respective foreign<br />
telephone company.<br />
ES<br />
* 0,14 €/minuto desde la red fija alemana, precio máximo alemán para telefonía móvil 0,42 €/minuto;<br />
Las tasas para las llamadas telefónicas desde el extranjero (fuera de Alemania) se orientan a los precios de cada<br />
servidor extranjero y a las correspondientes tarifas actuales.


