

Philips Tondeuse à cheveux - Mode d’emploi - IND
Philips Tondeuse à cheveux - Mode d’emploi - IND
Philips Tondeuse à cheveux - Mode d’emploi - IND

Create successful ePaper yourself
Turn your PDF publications into a flip-book with our unique Google optimized e-Paper software.
10<br />
ENGLISH<br />
4 Tilt the appliance in such a way that only one edge of the cutting<br />
element touches the hair ends.<br />
5 Only cut the hair ends. The hairline has to be close to the ear.<br />
6 To contour the neckline and the sideburns, turn the appliance and<br />
make downward strokes.<br />
7 Move the appliance slowly and smoothly. Follow the natural hairline.<br />
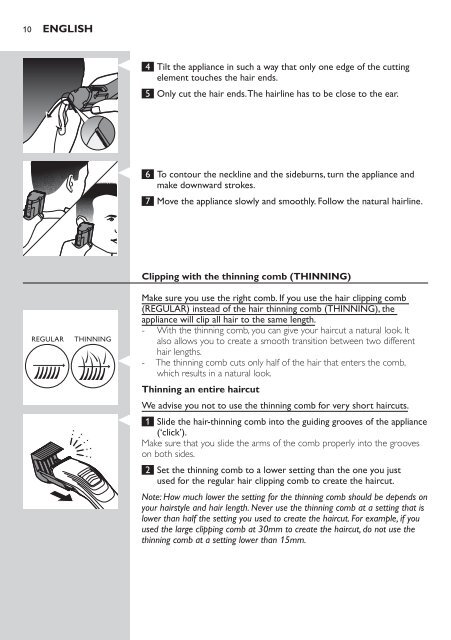
Clipping with the thinning comb (THINNING)<br />
Make sure you use the right comb. If you use the hair clipping comb<br />
(REGULAR) instead of the hair thinning comb (THINNING), the<br />
appliance will clip all hair to the same length.<br />
--<br />
With the thinning comb, you can give your haircut a natural look. It<br />
also allows you to create a smooth transition between two different<br />
hair lengths.<br />
--<br />
The thinning comb cuts only half of the hair that enters the comb,<br />
which results in a natural look.<br />
Thinning an entire haircut<br />
We advise you not to use the thinning comb for very short haircuts.<br />
1 Slide the hair-thinning comb into the guiding grooves of the appliance<br />
(‘click’).<br />
Make sure that you slide the arms of the comb properly into the grooves<br />
on both sides.<br />
2 Set the thinning comb to a lower setting than the one you just<br />
used for the regular hair clipping comb to create the haircut.<br />
Note: How much lower the setting for the thinning comb should be depends on<br />
your hairstyle and hair length. Never use the thinning comb at a setting that is<br />
lower than half the setting you used to create the haircut. For example, if you<br />
used the large clipping comb at 30mm to create the haircut, do not use the<br />
thinning comb at a setting lower than 15mm.


