

Toyota Toyota Touch & Go - PZ490-00331-*0 - Toyota Touch & Go - Toyota Touch & Go Plus - English - mode d'emploi
Toyota Toyota Touch & Go - PZ490-00331-*0 - Toyota Touch & Go - Toyota Touch & Go Plus - English - mode d'emploi
Toyota Toyota Touch & Go - PZ490-00331-*0 - Toyota Touch & Go - Toyota Touch & Go Plus - English - mode d'emploi

Create successful ePaper yourself
Turn your PDF publications into a flip-book with our unique Google optimized e-Paper software.
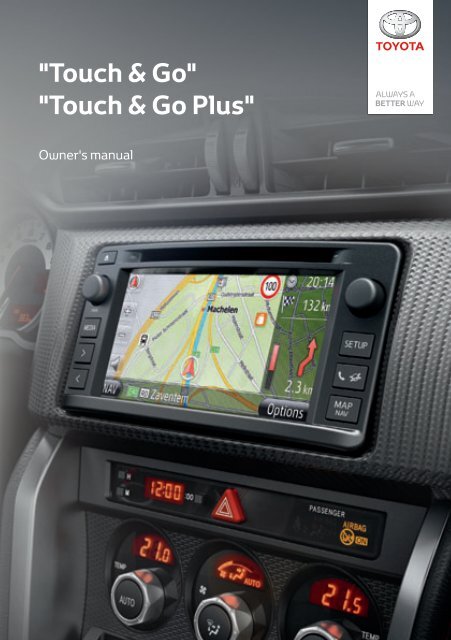
"<strong>Touch</strong> & <strong>Go</strong>"<br />
"<strong>Touch</strong> & <strong>Go</strong> <strong>Plus</strong>"<br />
Owner's manual
<strong>Touch</strong>_<strong>Go</strong>_<strong>Plus</strong>_OM20B71E.book Page i Thursday, September 20, 2012 12:03 PM<br />
Foreword<br />
Foreword<br />
COMMON ILLUSTRATIONS FOR ALL VEHICLE MODELS<br />
In this manual, illustrations showing the typical “<strong>Touch</strong> & <strong>Go</strong> (<strong>Plus</strong>)” layout, USB<br />
port and rear view camera location, etc. has been used. The actual design and<br />
button position may differ depending on the vehicles. For the correct location of<br />
these items, please refer to Section 3 and the pictorial index of the “Owner’s<br />
Manual”.<br />
ENGINE SWITCH NAMES AND MODES<br />
This manual has been written using a vehicle with a gasoline engine vehicle<br />
(without a smart entry & start system) as an ex<strong>amp</strong>le. For vehicles with a smart<br />
entry and start system and hybrid vehicles, please refer to the following table to<br />
confirm the engine switch name and <strong>mode</strong>.<br />
Vehicle system<br />
Vehicles without a<br />
smart entry & start<br />
system<br />
Switch name and <strong>mode</strong><br />
Engine switch ACC ON OFF (LOCK)<br />
Vehicles with a smart<br />
entry & start system<br />
“ENGINE START<br />
STOP” switch<br />
ACCESSORY<br />
IGNITION<br />
ON<br />
OFF<br />
Hybrid vehicles “POWER” switch ACCESSORY ON OFF<br />
i<br />
NAVI_s<strong>amp</strong>le E [Temp ver.1.01(FM7)]
<strong>Touch</strong>_<strong>Go</strong>_<strong>Plus</strong>_OM20B71E.book Page ii Thursday, September 20, 2012 12:03 PM<br />
Foreword<br />
SYMBOLS USED IN ILLUSTRATIONS<br />
Safety symbol<br />
The symbol of a circle with a slash through it means “Do not”, “Do not<br />
do this”, or “Do not let this happen”.<br />
Arrows indicating operations<br />
Indicates the action (pushing, turning, etc.)<br />
used to operate switches and other<br />
devices.<br />
Indicates the outcome of an operation (e.g.<br />
a lid opens).<br />
HOW TO READ THIS MANUAL<br />
No. Name Description<br />
Operational Outlines<br />
Main Operations<br />
Related Operations<br />
Information<br />
An outline of the operation is explained.<br />
The steps of an operation are explained.<br />
A main operation’s supplementary operations are described.<br />
Useful information for the user is described.<br />
ii<br />
NAVI_s<strong>amp</strong>le E [Temp ver.1.01(FM7)]
<strong>Touch</strong>_<strong>Go</strong>_<strong>Plus</strong>_OM20B71E.book Page iii Thursday, September 20, 2012 12:03 PM<br />
Foreword<br />
iii<br />
NAVI_s<strong>amp</strong>le E [Temp ver.1.01(FM7)]
<strong>Touch</strong>_<strong>Go</strong>_<strong>Plus</strong>_OM20B71E.book Page iv Thursday, September 20, 2012 12:03 PM<br />
Foreword<br />
iv<br />
NAVI_s<strong>amp</strong>le E [Temp ver.1.01(FM7)]
<strong>Touch</strong>_<strong>Go</strong>_<strong>Plus</strong>_OM20B71E.book Page 1 Thursday, September 20, 2012 12:03 PM<br />
TABLE OF CONTENTS<br />
TABLE OF CONTENTS<br />
1 QUICK GUIDE 9<br />
2 NAVIGATION SYSTEM 19<br />
3 APPLICATION 79<br />
4 AUDIO SYSTEM 99<br />
5 Bluetooth ® HANDS-FREE SYSTEM 145<br />
6 SPEECH COMMAND SYSTEM 175<br />
7 VEHICLE INFORMATION 179<br />
8 SETUP 185<br />
9 REAR VIEW MONITOR SYSTEM 205<br />
INDEX 213<br />
1<br />
DA_EXT_High_EE
<strong>Touch</strong>_<strong>Go</strong>_<strong>Plus</strong>_OM20B71E.book Page 2 Thursday, September 20, 2012 12:03 PM<br />
Introduction<br />
Introduction<br />
“<strong>Touch</strong> & <strong>Go</strong> (<strong>Plus</strong>)” OWNER’S MANUAL<br />
This manual explains the operation of the “<strong>Touch</strong> & <strong>Go</strong> (<strong>Plus</strong>)”. Please read this<br />
manual carefully to ensure proper use. Keep this manual in your vehicle at all<br />
times.<br />
The screen shots in this document and the actual screens of the “<strong>Touch</strong> & <strong>Go</strong><br />
(<strong>Plus</strong>)” differ depending on whether the functions and/or a contract existed and<br />
the map data available at the time of producing this document.<br />
NAVIGATION SYSTEM<br />
The Navigation System is one of the most technologically advanced vehicle accessories<br />
ever developed. The system receives satellite signals from the Global<br />
Positioning System (GPS) operated by the U.S. Department of Defense. Using<br />
these signals and other vehicle sensors, the system indicates your present position<br />
and assists in locating a desired destination.<br />
The navigation system is designed to select efficient routes from your present<br />
starting location to your destination. The system is also designed to direct you<br />
to a destination that is unfamiliar to you in an efficient manner. The system is<br />
developed by “Harman International” using “Navteq” maps. The calculated<br />
routes may not be the shortest nor the least traffic congested. Your own personal<br />
local knowledge or “short cut” may at times be faster than the calculated<br />
routes.<br />
The navigation system’s database includes Point of Interest categories to allow<br />
you to easily select destinations such as restaurants and hotels. If a destination<br />
is not in the database, you can enter the street address or a major intersection<br />
close to it and the system will guide you there.<br />
The system will provide both a visual map and audio instructions. The audio instructions<br />
will announce the distance remaining and the direction to turn in approaching<br />
an intersection. These voice instructions will help you keep your eyes<br />
on the road and are timed to provide enough time to allow you to maneuver,<br />
change lanes or slow down.<br />
Please be aware that all current vehicle navigation systems have certain limitations<br />
that may affect their ability to perform properly. The accuracy of the vehicle’s<br />
position depends on the satellite condition, road configuration, vehicle<br />
condition or other circumstances. For more information on the limitations of the<br />
system, refer to page 73.<br />
2<br />
Display audio_Ext_EE
<strong>Touch</strong>_<strong>Go</strong>_<strong>Plus</strong>_OM20B71E.book Page 3 Thursday, September 20, 2012 12:03 PM<br />
Introduction<br />
IMPORTANT INFORMATION ABOUT THIS MANUAL<br />
For safety reasons, this manual indicates items requiring particular attention<br />
with the following marks.<br />
CAUTION<br />
● This is a warning against anything which may cause injury to people if the warning is<br />
ignored. You are informed about what you must or must not do in order to reduce the risk<br />
of injury to yourself and others.<br />
NOTICE<br />
● This is a warning against anything which may cause damage to the vehicle or its equipment<br />
if the warning is ignored. You are informed about what you must or must not do in<br />
order to avoid or reduce the risk of damage to your vehicle and its equipment.<br />
3<br />
Display audio_Ext_EE
<strong>Touch</strong>_<strong>Go</strong>_<strong>Plus</strong>_OM20B71E.book Page 4 Thursday, September 20, 2012 12:03 PM<br />
Introduction<br />
SAFETY INSTRUCTION<br />
To use this system in the safest possible<br />
manner, follow all the safety tips shown<br />
below.<br />
This system is intended to assist in reaching<br />
the destination and, if used properly,<br />
can do so. The driver is solely responsible<br />
for the safe operation of your vehicle and<br />
the safety of your passengers.<br />
Do not use any feature of this system to<br />
the extent it becomes a distraction and<br />
prevents safe driving. The first priority<br />
while driving should always be the safe operation<br />
of the vehicle. While driving, be<br />
sure to observe all traffic regulations.<br />
Prior to the actual use of this system, learn<br />
how to use it and become thoroughly familiar<br />
with it. Read the entire “<strong>Touch</strong> & <strong>Go</strong><br />
(<strong>Plus</strong>)” Owner’s manual to make sure you<br />
understand the system. Do not allow other<br />
people to use this system until they have<br />
read and understood the instructions in<br />
this manual.<br />
For your safety, some functions may become<br />
inoperable when driving. Unavailable<br />
screen buttons are dimmed.<br />
CAUTION<br />
● For safety, the driver should not operate<br />
the navigation system while he/she is<br />
driving. Insufficient attention to the road<br />
and traffic may cause an accident.<br />
● While driving, be sure to obey the traffic<br />
regulations and maintain awareness of<br />
the road conditions. If a traffic sign on<br />
the road has been changed, route guidance<br />
may not have the updated information<br />
such as the direction of a one way<br />
street.<br />
While driving, listen to the voice instructions<br />
as much as possible and glance at<br />
the screen briefly and only when it is safe.<br />
However, do not totally rely on voice guidance.<br />
Use it just for reference. If the system<br />
cannot determine the current vehicle<br />
position correctly, there is a possibility of<br />
incorrect, late, or non-voice guidance.<br />
The data in the system may occasionally<br />
be incomplete. Road conditions, including<br />
driving restrictions (no left turns, street closures,<br />
etc.) frequently change. Therefore,<br />
before following any instruction from the<br />
system, look to see whether the instruction<br />
can be done safely and legally.<br />
This system cannot warn about such<br />
things as the safety of an area, condition of<br />
streets, and availability of emergency services.<br />
If unsure about the safety of an area,<br />
do not drive into it. Under no<br />
circumstances is this system a substitute<br />
for the driver’s personal judgement.<br />
Use this system only in locations where it<br />
is legal to do so.<br />
4<br />
Display audio_Ext_EE
<strong>Touch</strong>_<strong>Go</strong>_<strong>Plus</strong>_OM20B71E.book Page 5 Thursday, September 20, 2012 12:03 PM<br />
Introduction<br />
5<br />
Display audio_Ext_EE
<strong>Touch</strong>_<strong>Go</strong>_<strong>Plus</strong>_OM20B71E.book Page 6 Thursday, September 20, 2012 12:03 PM<br />
TABLE OF CONTENTS<br />
1 QUICK GUIDE<br />
1. CONTROLS AND FEATURES........ 10<br />
OVERVIEW BUTTONS......................... 10<br />
SYSTEM FUNCTION INDEX ................ 12<br />
TOUCH SCREEN OPERATION ........... 14<br />
2 NAVIGATION SYSTEM<br />
1. NAVIGATION OPERATION ............ 20<br />
QUICK REFERENCE............................ 20<br />
NAVIGATION SYSTEM<br />
FUNCTION INDEX ............................. 22<br />
MAP SCREEN OPERATION ................ 24<br />
MAP ICONS .......................................... 28<br />
2. DESTINATION SEARCH................. 35<br />
DESTINATION SEARCH ...................... 35<br />
3. ROUTE GUIDANCE ........................ 43<br />
STARTING ROUTE GUIDANCE........... 43<br />
ROUTE GUIDANCE.............................. 45<br />
SETTING AND DELETING<br />
THE ROUTE ....................................... 47<br />
4. MY DESTINATIONS ........................ 55<br />
REGISTERING AN ENTRY .................. 55<br />
DISPLAYING AND EDITING<br />
THE ENTRY INFORMATION ............. 61<br />
SENDING STORED CONTACTS<br />
TO A USB MEMORY.......................... 63<br />
5. NAVIGATION SETTING .................. 65<br />
MAP SETTINGS.................................... 65<br />
ROUTE SETTINGS............................... 69<br />
TRAFFIC MESSAGE SETTINGS ......... 71<br />
6. NAVIGATION SYSTEM<br />
INFORMATION .............................. 73<br />
LIMITATIONS<br />
OF THE NAVIGATION SYSTEM........ 73<br />
MAP DATABASE UPDATES ................ 75<br />
MAP INFORMATION ............................ 76<br />
3 APPLICATION<br />
1. APPLICATIONS OPERATION ....... 80<br />
QUICK REFERENCE ............................ 80<br />
PICTURE SLIDESHOW ........................ 81<br />
EMAIL .................................................... 83<br />
CALENDAR ........................................... 85<br />
2. CONNECTED SERVICE ................. 86<br />
CONNECTED SERVICE<br />
OVERVIEW......................................... 86<br />
BEFORE USING<br />
CONNECTED SERVICE..................... 89<br />
OPERATING NAVIGATION<br />
FUNCTION USING<br />
CONNECTED SERVICE..................... 92<br />
OPERATING AN APPLICATION<br />
USING CONNECTED SERVICE ........ 96<br />
4 AUDIO SYSTEM<br />
1. AUDIO SYSTEM OPERATION..... 100<br />
QUICK REFERENCE .......................... 100<br />
SOME BASICS .................................... 102<br />
RADIO OPERATION ........................... 104<br />
CD PLAYER OPERATION .................. 108<br />
USB MEMORY/iPod OPERATION...... 114<br />
AUX DEVICE OPERATION................. 121<br />
Bluetooth ® AUDIO OPERATION......... 123<br />
STEERING SWITCHES ...................... 131<br />
AUDIO SYSTEM<br />
OPERATING HINTS ......................... 134<br />
6<br />
DA_EXT_High_EE
<strong>Touch</strong>_<strong>Go</strong>_<strong>Plus</strong>_OM20B71E.book Page 7 Thursday, September 20, 2012 12:03 PM<br />
5<br />
Bluetooth ® HANDS-FREE<br />
SYSTEM<br />
1. BASIC INFORMATION<br />
BEFORE OPERATION ............... 146<br />
QUICK REFERENCE .......................... 146<br />
HANDS-FREE SYSTEM...................... 150<br />
CONNECTING<br />
A Bluetooth ® PHONE........................ 153<br />
REGISTERING AN ENTRY ................. 157<br />
2. TELEPHONE OPERATION .......... 162<br />
CALLING ON<br />
A Bluetooth ® PHONE........................ 162<br />
RECEIVING CALLS ON<br />
A Bluetooth ® PHONE........................ 166<br />
TALKING ON A Bluetooth ® PHONE.... 167<br />
3. SHORT MESSAGE FUNCTION ... 170<br />
SHORT MESSAGE FUNCTION .......... 170<br />
6 SPEECH COMMAND SYSTEM<br />
1. SPEECH COMMAND<br />
SYSTEM OPERATION................ 176<br />
SPEECH COMMAND SYSTEM .......... 176<br />
7 VEHICLE INFORMATION<br />
1. VEHICLE INFORMATION............. 180<br />
QUICK REFERENCE .......................... 180<br />
FUEL CONSUMPTION........................ 181<br />
TYRE PRESSURE WARNING<br />
SYSTEM............................................ 183<br />
8 SETUP<br />
1. SETUP OPERATION .................... 186<br />
QUICK REFERENCE.......................... 186<br />
GENERAL SETTINGS ........................ 187<br />
DISPLAY SETTINGS .......................... 190<br />
Bluetooth ® SETTINGS ........................ 193<br />
TELEPHONE SETTINGS.................... 200<br />
AUDIO SETTINGS .............................. 201<br />
VEHICLE SETTINGS .......................... 204<br />
9<br />
REAR VIEW MONITOR<br />
SYSTEM<br />
1. REAR VIEW MONITOR<br />
SYSTEM ...................................... 206<br />
REAR VIEW MONITOR<br />
SYSTEM OPERATION..................... 206<br />
DRIVING PRECAUTIONS<br />
(WITH REAR VIEW<br />
MONITOR GUIDE LINES)................ 210<br />
INDEX<br />
ALPHABETICAL INDEX................... 214<br />
1<br />
2<br />
3<br />
4<br />
5<br />
6<br />
7<br />
8<br />
9<br />
7<br />
DA_EXT_High_EE
<strong>Touch</strong>_<strong>Go</strong>_<strong>Plus</strong>_OM20B71E.book Page 8 Thursday, September 20, 2012 12:03 PM<br />
8<br />
DA_EXT_High_EE
<strong>Touch</strong>_<strong>Go</strong>_<strong>Plus</strong>_OM20B71E.book Page 9 Thursday, September 20, 2012 12:03 PM<br />
1<br />
QUICK GUIDE<br />
1<br />
2<br />
1 CONTROLS AND FEATURES<br />
1. OVERVIEW BUTTONS ................. 10<br />
2. SYSTEM FUNCTION INDEX......... 12<br />
3. TOUCH SCREEN OPERATION .... 14<br />
INPUT SCREEN OPERATION ............. 14<br />
LIST SCREEN OPERATION................. 17<br />
3<br />
4<br />
5<br />
6<br />
7<br />
8<br />
9<br />
9<br />
DA_EXT_High_EE
<strong>Touch</strong>_<strong>Go</strong>_<strong>Plus</strong>_OM20B71E.book Page 10 Thursday, September 20, 2012 12:03 PM<br />
1. CONTROLS AND FEATURES<br />
1. OVERVIEW BUTTONS<br />
• The actual design and button position may differ depending on the vehicle. For<br />
details, see Section 3 of “Owner’s Manual”.<br />
No. Name Function Page<br />
<strong>Touch</strong><br />
display<br />
screen<br />
By touching the screen with your finger, you can<br />
control the selected functions.<br />
14<br />
Disc slot<br />
Insert a disc into this slot. The CD player turns on<br />
immediately.<br />
108<br />
Tune/Scroll knob<br />
button<br />
“CAR” button*<br />
“SETUP” button<br />
Turn this knob to select radio station bands, tracks<br />
and files. Also, the knob can be used for selection<br />
from the list display.<br />
Press this button to access the Bluetooth ® handsfree<br />
system and applications.<br />
Press this button to access the vehicle information<br />
system.<br />
Press this button to customize the function settings.<br />
102<br />
79, 145<br />
179<br />
185<br />
“MAP NAV” button<br />
Press this button to access the navigation system. 19<br />
10<br />
Display_audio_Ext_EE
<strong>Touch</strong>_<strong>Go</strong>_<strong>Plus</strong>_OM20B71E.book Page 11 Thursday, September 20, 2012 12:03 PM<br />
1. CONTROLS AND FEATURES<br />
No. Name Function Page<br />
Seek/Track<br />
button<br />
“MEDIA” button<br />
button*<br />
Press the “ ” or “ ” button to seek up or down for<br />
a radio station, or to access a desired track or file.<br />
Press this button to access the audio system. The<br />
audio system turns on in the last <strong>mode</strong> used.<br />
Press this button to pause or resume playing the<br />
music.<br />
105, 110,<br />
112, 117,<br />
129<br />
100, 102,<br />
103<br />
—<br />
1<br />
QUICK GUIDE<br />
knob<br />
Press this knob to turn the audio system on and off,<br />
and turn it to adjust the volume.<br />
102<br />
*: If equipped<br />
button Press this button to eject a disc. 108<br />
11<br />
Display_audio_Ext_EE
<strong>Touch</strong>_<strong>Go</strong>_<strong>Plus</strong>_OM20B71E.book Page 12 Thursday, September 20, 2012 12:03 PM<br />
1. CONTROLS AND FEATURES<br />
2. SYSTEM FUNCTION INDEX<br />
NAVIGATION SYSTEM<br />
To access the navigation system, press<br />
the “MAP NAV” button. Each time the<br />
“MAP NAV” button is pressed, the screen<br />
will change between the map screen and<br />
“Navigation” menu screen. For details, see<br />
page 19.<br />
AUDIO SYSTEM<br />
To access the audio system, press the<br />
“MEDIA” button. The audio control screen<br />
will be displayed. Audio sources: Radio,<br />
CDs, iPod, USB, AUX and Bluetooth ® audio.<br />
For details, see page 99.<br />
APPLICATION SYSTEM<br />
To access the application system, press<br />
the button. Each time the<br />
button is pressed, the screen will change<br />
between the “Phone” menu screen and the<br />
“Extras” menu screen. The driver can use<br />
applications. For details, see page 79.<br />
Bluetooth ® HANDS-FREE<br />
SYSTEM<br />
To access the Bluetooth ® hands-free system,<br />
press the button. Each time<br />
the button is pressed, the screen<br />
will change between the “Phone” menu<br />
screen and the “Extras” menu screen. The<br />
driver can make or receive phone calls<br />
without taking their hands off the steering<br />
wheel. For details, see page 145.<br />
12<br />
Display_audio_Ext_EE
<strong>Touch</strong>_<strong>Go</strong>_<strong>Plus</strong>_OM20B71E.book Page 13 Thursday, September 20, 2012 12:03 PM<br />
1. CONTROLS AND FEATURES<br />
SPEECH COMMAND SYSTEM<br />
To access the speech command system,<br />
press the switch on the steering<br />
wheel. The driver can operate the “touch<br />
screen” by giving a command. For details,<br />
see page 175.<br />
SETUP<br />
To customize the function settings, press<br />
the “SETUP” button. The interface language<br />
can also be changed from the setup<br />
menu. For details, see page 185.<br />
1<br />
QUICK GUIDE<br />
VEHICLE INFORMATION<br />
(IF EQUIPPED)<br />
To access the vehicle information system,<br />
press the “CAR” button. Fuel consumption<br />
and tyre pressure can be checked. For<br />
details, see page 179.<br />
REAR VIEW MONITOR SYSTEM<br />
Shifting into the “R” position will automatically<br />
show the view behind the rear of the<br />
vehicle on the display screen. For details,<br />
see page 205.<br />
13<br />
Display_audio_Ext_EE
<strong>Touch</strong>_<strong>Go</strong>_<strong>Plus</strong>_OM20B71E.book Page 14 Thursday, September 20, 2012 12:03 PM<br />
1. CONTROLS AND FEATURES<br />
3. TOUCH SCREEN OPERATION<br />
This system is operated mainly by the<br />
screen buttons.<br />
• To prevent damage to the screen, lightly<br />
touch the screen buttons with your finger.<br />
When a screen button is touched, a beep<br />
sounds. (To set a beep sound, see page<br />
187.)<br />
• Do not use objects other than your finger<br />
to touch the screen.<br />
NOTICE<br />
● To prevent the 12-volt battery from being<br />
discharged, do not leave the system on<br />
longer than necessary when the engine<br />
is not running.<br />
INPUT SCREEN OPERATION<br />
When searching for an address or a<br />
name, letters and numbers can be input<br />
via the screen.<br />
INPUTTING LETTERS AND<br />
NUMBERS<br />
1 <strong>Touch</strong> the keys directly to input letters<br />
or numbers.<br />
INFORMATION<br />
● If the system does not respond to a<br />
touch on a screen button, move your finger<br />
away from the screen and then<br />
touch it again.<br />
● Dimmed screen buttons cannot be operated.<br />
● Wipe off fingerprints using a glass cleaning<br />
cloth. Do not use chemical cleaners<br />
to clean the touch screen.<br />
● The displayed image may become<br />
darker and moving images may be<br />
slightly distorted when the display is<br />
cold.<br />
● Under extremely cold conditions, the<br />
screen may not be displayed and the<br />
data input by a user may be deleted.<br />
Also, the screen buttons may be harder<br />
than usual to depress.<br />
● When you look at the screen through<br />
polarized material such as polarized<br />
sunglasses, the screen may be dark and<br />
hard to see. If so, look at the screen<br />
from different angles, adjust the screen<br />
settings (See “DISPLAY SETTINGS” on<br />
page 190.), or take off your sunglasses.<br />
: <strong>Touch</strong> to delete one letter. <strong>Touch</strong><br />
and hold to continue deleting letters.<br />
2 <strong>Touch</strong> “OK”.<br />
INFORMATION<br />
● When a character is input, a hint will<br />
appear displaying a possible match for<br />
the word to be searched.<br />
● Currently unavailable screen buttons will<br />
be dimmed.<br />
● When an entry is too long to be displayed<br />
in the input field, the last section<br />
of the input text will be displayed with<br />
the initial section displayed as “...”.<br />
14<br />
Display_audio_Ext_EE
<strong>Touch</strong>_<strong>Go</strong>_<strong>Plus</strong>_OM20B71E.book Page 15 Thursday, September 20, 2012 12:03 PM<br />
1. CONTROLS AND FEATURES<br />
■CHANGING BETWEEN LOWER<br />
CASE AND UPPER CASE<br />
1 <strong>Touch</strong> or .<br />
■INPUTTING SYMBOLS<br />
1 <strong>Touch</strong> ( ) or .<br />
( ) keyboard layout<br />
1<br />
QUICK GUIDE<br />
: <strong>Touch</strong> to enter in lower case.<br />
: <strong>Touch</strong> to enter in upper case.<br />
• Each time or is touched,<br />
input will change between upper case and<br />
lower case input.<br />
keyboard layout<br />
INFORMATION<br />
● In the following situations, the input<br />
<strong>mode</strong> will automatically change between<br />
upper and lower case.<br />
• When the keyboard layout is<br />
changed to upper case input, the layout<br />
will automatically change back to<br />
lower case input after one letter has<br />
been entered.<br />
• When “/”, “&”, “.” or “(” is input, the<br />
keyboard layout will automatically be<br />
changed to upper case input.<br />
• When all characters are deleted, the<br />
keyboard layout will automatically<br />
change to upper case input.<br />
2 <strong>Touch</strong> the symbol keys directly to input<br />
symbols.<br />
15<br />
Display_audio_Ext_EE
<strong>Touch</strong>_<strong>Go</strong>_<strong>Plus</strong>_OM20B71E.book Page 16 Thursday, September 20, 2012 12:03 PM<br />
1. CONTROLS AND FEATURES<br />
■CHANGING KEYBOARD LAYOUT<br />
1 <strong>Touch</strong> .<br />
ENTERING FROM THE LIST OF<br />
MATCHING ENTRIES<br />
On certain screens, a candidate entry<br />
text or word prediction list based on the<br />
input letters will be displayed. The desired<br />
item can be selected and entered.<br />
1 Enter letters.<br />
2 <strong>Touch</strong> the desired item.<br />
• If a candidate entry text displayed in the<br />
input field is what is desired, touch “OK”.<br />
( ): Latin characters, “ABC”-Layout<br />
( ): Latin characters,<br />
“QWERTY”-Layout<br />
( ): Latin characters,<br />
“QWERTZ”-Layout<br />
• <strong>Touch</strong>ing displays the candidate<br />
entry text list. The number of matching<br />
items is shown. Up to 300 items are displayed.<br />
• The list will be displayed automatically, if<br />
the number of matching entries is 5 or<br />
less.<br />
2 <strong>Touch</strong> desired item.<br />
( ): Latin characters, “AZ-<br />
ERTY”-Layout<br />
( ): Cyrillic characters<br />
( ): Greek characters<br />
16<br />
Display_audio_Ext_EE
<strong>Touch</strong>_<strong>Go</strong>_<strong>Plus</strong>_OM20B71E.book Page 17 Thursday, September 20, 2012 12:03 PM<br />
1. CONTROLS AND FEATURES<br />
LIST SCREEN OPERATION<br />
When a list is displayed, use the appropriate<br />
screen button to scroll through<br />
the list.<br />
CHARACTER JUMP BUTTONS<br />
IN LISTS<br />
Some lists contain character screen<br />
buttons, “A-C”, “D-F” etc., which allow<br />
a direct jump to list entries that begin<br />
with the same letter as the<br />
character screen button.<br />
1 <strong>Touch</strong> one of the character screen buttons.<br />
1<br />
QUICK GUIDE<br />
or : <strong>Touch</strong> to shift to the next or<br />
previous page.<br />
• By touching and holding this screen button,<br />
the screen can be scrolled up or<br />
down. Scrolling will automatically stop<br />
when the top/bottom of the list is reached.<br />
: This indicates the displayed screen’s<br />
position.<br />
INFORMATION<br />
● Every time the same character screen<br />
button is touched, the list starting with<br />
the subsequent character is displayed.<br />
17<br />
Display_audio_Ext_EE
<strong>Touch</strong>_<strong>Go</strong>_<strong>Plus</strong>_OM20B71E.book Page 18 Thursday, September 20, 2012 12:03 PM<br />
1 NAVIGATION OPERATION<br />
1. QUICK REFERENCE..................... 20<br />
2. NAVIGATION SYSTEM<br />
FUNCTION INDEX....................... 22<br />
3. MAP SCREEN OPERATION ......... 24<br />
TO DISPLAY MAP SCREEN ................ 24<br />
MAP SCREEN OPERATION ................ 24<br />
4. MAP ICONS ................................... 28<br />
DISPLAYING VARIOUS<br />
INFORMATION ON THE MAP ........... 28<br />
POI* ICONS .......................................... 29<br />
TRAFFIC MESSAGES .......................... 32<br />
2 DESTINATION SEARCH<br />
1. DESTINATION SEARCH............... 35<br />
DESTINATION SEARCH ON THE<br />
“My destinations” SCREEN ................ 35<br />
DESTINATION SEARCH ON THE<br />
“Enter destination” SCREEN .............. 37<br />
3 ROUTE GUIDANCE<br />
1. STARTING ROUTE GUIDANCE... 43<br />
STARTING ROUTE GUIDANCE<br />
SCREEN ............................................. 43<br />
SETTING THE ROUTE ......................... 44<br />
2. ROUTE GUIDANCE ...................... 45<br />
ROUTE GUIDANCE SCREEN .............. 45<br />
VOICE GUIDANCE................................ 46<br />
3. SETTING AND DELETING THE<br />
ROUTE ........................................ 47<br />
SETTING FROM THE<br />
“Options” SCREEN ............................. 47<br />
ADDING DESTINATIONS ..................... 50<br />
DETOURING A SEGMENT<br />
ON THE ROUTE ................................. 52<br />
RECALCULATING THE ROUTE<br />
BY THE TRAFFIC MESSAGES.......... 54<br />
18<br />
DA_EXT_High_EE
<strong>Touch</strong>_<strong>Go</strong>_<strong>Plus</strong>_OM20B71E.book Page 19 Thursday, September 20, 2012 12:03 PM<br />
2<br />
NAVIGATION SYSTEM<br />
1<br />
2<br />
4 MY DESTINATIONS 5 NAVIGATION SETTING<br />
1. REGISTERING AN ENTRY........... 55<br />
REGISTERING A NEW ENTRY ............ 55<br />
2. DISPLAYING AND EDITING<br />
THE ENTRY INFORMATION...... 61<br />
DISPLAYING AND EDITING<br />
THE ENTRY INFORMATION.............. 61<br />
3. SENDING STORED CONTACTS<br />
TO A USB MEMORY .................. 63<br />
SENDING STORED CONTACTS<br />
TO A USB MEMORY .......................... 63<br />
1. MAP SETTINGS ............................ 65<br />
SETTING THE MAP.............................. 65<br />
2. ROUTE SETTINGS........................ 69<br />
SETTING THE ROUTE OPTIONS........ 69<br />
3. TRAFFIC MESSAGE<br />
SETTINGS................................... 71<br />
6<br />
TRAFFIC MESSAGE SETTINGS ......... 71<br />
NAVIGATION SYSTEM<br />
INFORMATION<br />
1. LIMITATIONS OF<br />
THE NAVIGATION SYSTEM ...... 73<br />
2. MAP DATABASE UPDATES ........ 75<br />
UPDATE MAP ....................................... 75<br />
3. MAP INFORMATION..................... 76<br />
3<br />
4<br />
5<br />
6<br />
7<br />
8<br />
9<br />
Some of the functions cannot be operated while driving.<br />
*: Point of Interest<br />
19<br />
DA_EXT_High_EE
<strong>Touch</strong>_<strong>Go</strong>_<strong>Plus</strong>_OM20B71E.book Page 20 Thursday, September 20, 2012 12:03 PM<br />
1. NAVIGATION OPERATION<br />
1. QUICK REFERENCE<br />
To display the “Navigation” menu screen, touch “NAV” on the map or press the<br />
“MAP NAV” button. When “NAV” is touched or the “MAP NAV” button is pressed,<br />
the screen that was last displayed is returned to. <strong>Touch</strong> to display the “Navigation”<br />
menu screen. From this screen, destinations can be entered and route-related<br />
settings can be changed.<br />
“Navigation” menu screen<br />
No. Function Page<br />
<strong>Touch</strong> to display the “My destinations” screen.<br />
A destination can be entered by selecting an item from the list of stored<br />
destinations, last destinations or the addresses from the connected<br />
phone’s phone book.<br />
<strong>Touch</strong> to display the “Enter destination” screen.<br />
A destination can be entered by address, POI or using advanced options.<br />
It can also be added as a stopover to a destination.<br />
<strong>Touch</strong> to display the “Traffic messages” screen.<br />
It contains a list of traffic messages relating to the set route, all traffic<br />
messages and warnings.<br />
<strong>Touch</strong> to display the “Route options” screen.<br />
The route preferences and avoidance criteria can be adjusted.<br />
<strong>Touch</strong> the corresponding icon to change to the “My destinations”, “Enter<br />
destination”, “Traffic messages” or “Route options” screen.<br />
35<br />
37, 50<br />
32<br />
69<br />
32, 35, 37,<br />
50, 69<br />
20<br />
Display audio_Ext_EE
<strong>Touch</strong>_<strong>Go</strong>_<strong>Plus</strong>_OM20B71E.book Page 21 Thursday, September 20, 2012 12:03 PM<br />
1. NAVIGATION OPERATION<br />
Overview guidance screen<br />
2<br />
NAVIGATION SYSTEM<br />
No. Function Page<br />
This symbol indicates a map layout. <strong>Touch</strong>ing this symbol changes the<br />
map layout.<br />
Displays the distance, the estimated travel time to the destination, or<br />
the estimated arrival time at the destination.<br />
26<br />
45<br />
Displays traffic information on the route. 34<br />
Displays the distance to the next turn with the arrow indicating the turn<br />
direction.<br />
45<br />
<strong>Touch</strong> to display the “Options” screen. 47<br />
Displays the current street name. 45<br />
<strong>Touch</strong> to display the “Navigation” menu screen. 20<br />
<strong>Touch</strong> to hear voice guidance and/or adjust the volume of voice guidance.<br />
46<br />
<strong>Touch</strong> to change the map scale. 26<br />
21<br />
Display audio_Ext_EE
<strong>Touch</strong>_<strong>Go</strong>_<strong>Plus</strong>_OM20B71E.book Page 22 Thursday, September 20, 2012 12:03 PM<br />
1. NAVIGATION OPERATION<br />
2. NAVIGATION SYSTEM FUNCTION INDEX<br />
Map<br />
Displaying maps<br />
Page<br />
Viewing the map screen 24<br />
Displaying the current vehicle position 24<br />
Viewing the current vehicle position vicinity map 25<br />
Changing the scale 26<br />
Changing the map layout 26<br />
Displaying various information on the map 28<br />
Displaying Point of Interest Icons 29<br />
Viewing traffic messages 32<br />
Searching destination<br />
Page<br />
Searching the destination 35<br />
Setting the entry registered with the system as the destination 35<br />
Route guidance<br />
Before starting route guidance<br />
Page<br />
Recalculating the route 44<br />
Viewing alternative routes 43<br />
Starting route guidance 43<br />
Before starting or during route guidance<br />
Page<br />
Viewing the route 47<br />
Adding destinations 50<br />
Recalculating the route 48<br />
Changing the estimated travel/arrival time display 67<br />
During route guidance<br />
Page<br />
Stopping route guidance 47<br />
Adjusting route guidance volume 46<br />
Displaying the entire route map 47<br />
22<br />
Display audio_Ext_EE
<strong>Touch</strong>_<strong>Go</strong>_<strong>Plus</strong>_OM20B71E.book Page 23 Thursday, September 20, 2012 12:03 PM<br />
1. NAVIGATION OPERATION<br />
Memory point<br />
Memory point<br />
Page<br />
Registering the entry 55<br />
Editing the entry 61<br />
Loading the entry from external devices 59<br />
2<br />
NAVIGATION SYSTEM<br />
23<br />
Display audio_Ext_EE
<strong>Touch</strong>_<strong>Go</strong>_<strong>Plus</strong>_OM20B71E.book Page 24 Thursday, September 20, 2012 12:03 PM<br />
1. NAVIGATION OPERATION<br />
3. MAP SCREEN OPERATION<br />
TO DISPLAY MAP SCREEN<br />
1 Press the “MAP NAV” button.<br />
MAP SCREEN OPERATION<br />
CURRENT VEHICLE POSITION<br />
DISPLAY<br />
When starting the navigation system,<br />
the current position is displayed first.<br />
This screen displays the current vehicle<br />
position and a map of the surrounding<br />
area.<br />
• When the “MAP NAV” button is pressed,<br />
any of the “Navigation” screens is displayed,<br />
press the “MAP NAV” button<br />
again.<br />
2 <strong>Touch</strong> “Confirm”.<br />
• The current vehicle position mark<br />
appears in the centre of the map screen.<br />
• After about a few seconds, the caution<br />
screen automatically switches to the map<br />
screen.<br />
INFORMATION<br />
● The caution screen will be displayed<br />
when the screen is changed to the map<br />
screen for the first time after the engine<br />
switch has been in the “ACC” or “ON”<br />
position.<br />
INFORMATION<br />
● While driving, the current vehicle position<br />
mark is fixed on the screen and the<br />
map moves.<br />
● The current position is automatically set<br />
as the vehicle receives signals from the<br />
GPS (Global Positioning System). If the<br />
current position is not correct, it is automatically<br />
corrected after the vehicle<br />
receives signals from the GPS.<br />
● After 12-volt battery disconnection, or on<br />
a new vehicle, the current position may<br />
not be correct. As soon as the system<br />
receives signals from the GPS, the correct<br />
current position is displayed.<br />
24<br />
Display audio_Ext_EE
<strong>Touch</strong>_<strong>Go</strong>_<strong>Plus</strong>_OM20B71E.book Page 25 Thursday, September 20, 2012 12:03 PM<br />
1. NAVIGATION OPERATION<br />
■CURRENT LOCATION AND GPS IN-<br />
FORMATION<br />
Current location, geo-coordinates and<br />
GPS information are displayed.<br />
1 <strong>Touch</strong> “Options” on the map.<br />
2 <strong>Touch</strong> “Location & GPS information”.<br />
3 An information screen will be displayed.<br />
• On this screen, the following information is<br />
displayed.<br />
No.<br />
Information<br />
The information provided varies,<br />
depending whether the road currently<br />
being travelled on is a motorway<br />
or a street.<br />
Latitude and Longitude<br />
Amount of available satellites<br />
and the altitude.<br />
SCREEN SCROLL OPERATION<br />
When any point on the map is touched,<br />
that point moves to the centre of the<br />
screen and is shown by the cursor<br />
mark .<br />
• If a finger is continuously held on the<br />
screen, the map will continue scrolling in<br />
that direction until the finger is removed.<br />
• A street name or geo-coordinates of the<br />
touched point will be shown, depending<br />
on the scale of the map.<br />
• After the screen is scrolled, the map<br />
remains centred at the selected location<br />
until another function is activated. The current<br />
vehicle position mark will continue to<br />
move along your actual route and may<br />
move off the screen. When is<br />
touched, the current vehicle position mark<br />
returns to the centre of the screen and the<br />
map moves as the vehicle proceeds along<br />
the designated route.<br />
• When the scroll feature is used, the current<br />
vehicle position mark may disappear<br />
from the screen. <strong>Touch</strong> to display<br />
the current vehicle position on the map<br />
screen.<br />
• When “<strong>Go</strong>” is touched, the starting<br />
route guidance screen is displayed.<br />
(See page 43.)<br />
• When “Save” is touched, the point is<br />
registered in the “Stored” list on the “My<br />
destinations” screen. (See page 57.)<br />
2<br />
NAVIGATION SYSTEM<br />
25<br />
Display audio_Ext_EE
<strong>Touch</strong>_<strong>Go</strong>_<strong>Plus</strong>_OM20B71E.book Page 26 Thursday, September 20, 2012 12:03 PM<br />
1. NAVIGATION OPERATION<br />
MAP CONFIGURATIONS<br />
Any of the following map configurations<br />
can be selected.<br />
■MAP SCALE<br />
1 <strong>Touch</strong> “+” or “-” to change the scale of<br />
the map screen.<br />
■MAP LAYOUT<br />
The map layout can be changed from<br />
“3D heading”, “2D heading” or “2D<br />
north”.<br />
1 <strong>Touch</strong> or .<br />
2 <strong>Touch</strong> the desired map layout.<br />
INFORMATION<br />
● The scale range is from 10 m to 500 km<br />
(150 ft to 250 miles).<br />
● After the scale has been changed, the<br />
new scale indicator will be displayed in<br />
the upper left area of the screen for a<br />
while.<br />
“3D heading”: <strong>Touch</strong> to display 3D map.<br />
The direction of vehicle travel is always up.<br />
“2D heading”: <strong>Touch</strong> to display 2D map.<br />
The direction of vehicle travel is always up.<br />
“2D north”: <strong>Touch</strong> to display 2D map. Regardless<br />
of the direction of vehicle travel,<br />
north is always up.<br />
26<br />
Display audio_Ext_EE
<strong>Touch</strong>_<strong>Go</strong>_<strong>Plus</strong>_OM20B71E.book Page 27 Thursday, September 20, 2012 12:03 PM<br />
1. NAVIGATION OPERATION<br />
3D heading<br />
2<br />
2D heading<br />
NAVIGATION SYSTEM<br />
2D north<br />
• Map layout can be also changed by<br />
“Map settings”. (See page 65.)<br />
27<br />
Display audio_Ext_EE
<strong>Touch</strong>_<strong>Go</strong>_<strong>Plus</strong>_OM20B71E.book Page 28 Thursday, September 20, 2012 12:03 PM<br />
1. NAVIGATION OPERATION<br />
4. MAP ICONS<br />
DISPLAYING VARIOUS<br />
INFORMATION ON THE MAP<br />
Various information can be displayed<br />
on the map.<br />
■3D LANDMARKS (IF EQUIPPED)<br />
Landmarks can be displayed in 3D on<br />
the map.<br />
■SPEED LIMITS<br />
The speed limit of the road currently<br />
being travelled on can be displayed.<br />
■SAFETY CAMERAS<br />
Safety cameras can be displayed as<br />
icons on the map.<br />
■3D BUILDINGS (IF EQUIPPED)<br />
Buildings can be displayed in 3D on<br />
the map.<br />
• The displaying of the above items can<br />
be switched off. (See page 65.)<br />
INFORMATION<br />
● The above items will be displayed<br />
depending on the map scale.<br />
● The above items will be displayed<br />
depending on the available map data.<br />
28<br />
Display audio_Ext_EE
<strong>Touch</strong>_<strong>Go</strong>_<strong>Plus</strong>_OM20B71E.book Page 29 Thursday, September 20, 2012 12:03 PM<br />
1. NAVIGATION OPERATION<br />
POI ICONS<br />
DISPLAY POI ICONS<br />
Points of Interest such as petrol stations<br />
and restaurants can be displayed<br />
on the map screen. Their location can<br />
also be set as a destination.<br />
• POI icons are displayed on the map.<br />
■LIST OF POI ICONS<br />
Public<br />
Icon<br />
Name<br />
Library<br />
College/University<br />
School<br />
Tourist office<br />
Cemetery, funeral director<br />
2<br />
NAVIGATION SYSTEM<br />
• You can select a particular type of Point<br />
of Interest displayed on the screen.<br />
(See page 65.)<br />
<strong>Go</strong>vernment Office, Institution,<br />
City hall, Community gen.<br />
Community<br />
Court house<br />
Place of worship<br />
Accommodation, Hotel/Motel<br />
Pharmacy<br />
Convention Centre, Exhibition<br />
Centre<br />
Finance, Bank<br />
Cash Dispenser<br />
Post Office<br />
Business, B. General, B. facility<br />
29<br />
Display audio_Ext_EE
<strong>Touch</strong>_<strong>Go</strong>_<strong>Plus</strong>_OM20B71E.book Page 30 Thursday, September 20, 2012 12:03 PM<br />
1. NAVIGATION OPERATION<br />
Icon<br />
Name<br />
Icon<br />
Name<br />
Medical, Doctor, Health & Care<br />
Rent-a-Car,-Facility, -Parking<br />
Ambulance, Hospital/Polyclinic<br />
Ferry Terminal<br />
Fire Station<br />
Parking, Open Parking Area, P.<br />
Area general<br />
Police Station<br />
Parking Garage<br />
Phone Box, Communication<br />
Open P.A. P+R<br />
Dentist<br />
Rest Area<br />
Veterinarian<br />
Motoring Organization, Automobile<br />
Club<br />
Traffic<br />
Mover, Moving Company<br />
Icon<br />
Name<br />
Car Dealer/Repairer, Repair Facility,<br />
Repair General, Car Wash,<br />
Tyre Repair<br />
Clubbing<br />
Motorcycle Dealer<br />
Car Dealer<br />
Icon<br />
Name<br />
Highway Exit<br />
Airport, Dep. /Arrival, Ground, International,<br />
Domestic<br />
Bus Terminal, Bus Stop, Transportation,<br />
Public Transp. Stop,<br />
Transport general<br />
Railway Station<br />
Metropolitan Train<br />
Multiple POI<br />
Bar, Nightlife<br />
Leisure, Cultural Centre, Theater,<br />
Music Centre, Concert Hall<br />
Cinema<br />
Casino<br />
Cafe/Bar, Cafe<br />
Petrol Station<br />
30<br />
Display audio_Ext_EE
<strong>Touch</strong>_<strong>Go</strong>_<strong>Plus</strong>_OM20B71E.book Page 31 Thursday, September 20, 2012 12:03 PM<br />
1. NAVIGATION OPERATION<br />
Icon<br />
Name<br />
Icon<br />
Name<br />
Sport<br />
Icon<br />
Restaurant, French, Belgian,<br />
Chinese, German, Greek, Vegetarian,<br />
Fast Food, Grill, Sea<br />
Food, Sandwich, Steak...<br />
Name<br />
Sport, Sport General, sport activities<br />
<strong>Go</strong>lf Course<br />
Race Track<br />
Tourist Attractions, Important<br />
Tourist Attractions<br />
Park/Recreational Area<br />
Yacht Basin, Harbour<br />
C<strong>amp</strong>ing Ground<br />
Grocery Store<br />
Historical Monument<br />
2<br />
NAVIGATION SYSTEM<br />
Stadium, Sports Centre, Hippodrome<br />
RV Park, C<strong>amp</strong>ing<br />
Water Sports<br />
Bookstore<br />
Bowling<br />
Hair & Beauty<br />
Ski resorts<br />
Photography<br />
Leisure<br />
Shoestore<br />
Icon<br />
Name<br />
Wine & Liquor<br />
Amusement Park<br />
Clothing<br />
Winery<br />
Cleaning & Laundry<br />
Museum<br />
Shopping, Market Place, Shopping<br />
Centre, Factory Outlet<br />
Shop, Department Store, Drivethrough-bottle-shop<br />
31<br />
Display audio_Ext_EE
<strong>Touch</strong>_<strong>Go</strong>_<strong>Plus</strong>_OM20B71E.book Page 32 Thursday, September 20, 2012 12:03 PM<br />
1. NAVIGATION OPERATION<br />
DISPLAYING POI<br />
INFORMATION<br />
1 <strong>Touch</strong> the desired POI icon on the<br />
map.<br />
2 <strong>Touch</strong> .<br />
One POI<br />
TRAFFIC MESSAGES<br />
DISPLAYING TRAFFIC<br />
MESSAGES<br />
1 <strong>Touch</strong> “NAV” on the map or press the<br />
“MAP NAV” button to display the<br />
“Navigation” menu screen.<br />
• If the “Navigation” menu screen is not displayed,<br />
touch until it is displayed.<br />
2 <strong>Touch</strong> “Traffic messages”.<br />
Multiple POI<br />
3 POI information will be displayed.<br />
• The “Traffic messages” screen can be displayed<br />
by touching on any of the<br />
“Navigation” screens.<br />
3 <strong>Touch</strong> “On route”, “Show all” or<br />
“Warnings” to select the desired list.<br />
• When “<strong>Go</strong>” is touched, the starting<br />
route guidance screen is displayed.<br />
(See page 43.)<br />
• When “Save” is touched, the point is<br />
registered in the “Stored” list on the “My<br />
destinations” screen. (See page 57.)<br />
• When is touched, the registered<br />
telephone number is called.<br />
“On route”: During route guidance, the<br />
traffic messages relating to the set route<br />
will be displayed.<br />
“Show all”: All traffic messages will be<br />
displayed.<br />
“Warnings”: Traffic messages with warnings<br />
will be displayed.<br />
32<br />
Display audio_Ext_EE
<strong>Touch</strong>_<strong>Go</strong>_<strong>Plus</strong>_OM20B71E.book Page 33 Thursday, September 20, 2012 12:03 PM<br />
1. NAVIGATION OPERATION<br />
4 <strong>Touch</strong> the desired message.<br />
5 The traffic message will be displayed.<br />
2<br />
• On this screen, the following information is<br />
displayed.<br />
No.<br />
Street number<br />
Information<br />
Route segment<br />
If route segment is not available,<br />
information such as street name,<br />
city name, region or country will<br />
be displayed.<br />
or : <strong>Touch</strong> to display next or previous<br />
traffic message.<br />
• When ∗ is touched, the traffic<br />
message is read out. To cancel this<br />
function, touch<br />
∗ .<br />
• <strong>Touch</strong> “Detour” or “Detour off” to<br />
detour or cancel detouring the segment.<br />
(See page 53.)<br />
NAVIGATION SYSTEM<br />
: Icon of an incident<br />
route<br />
: Icon of an incident on the<br />
: Icon of an incident on<br />
the detoured route<br />
Distance to incident<br />
∗ : If equipped<br />
33<br />
Display audio_Ext_EE
<strong>Touch</strong>_<strong>Go</strong>_<strong>Plus</strong>_OM20B71E.book Page 34 Thursday, September 20, 2012 12:03 PM<br />
1. NAVIGATION OPERATION<br />
■LIST OF TRAFFIC MESSAGE<br />
ICONS<br />
Icon<br />
Name<br />
Slippery<br />
Bad weather<br />
Wind<br />
Snow fall<br />
Traffic<br />
Heavy traffic<br />
Accident<br />
Road construction<br />
Narrow track<br />
Warning<br />
Blockage<br />
Security checkpoint<br />
Information<br />
34<br />
Display audio_Ext_EE
<strong>Touch</strong>_<strong>Go</strong>_<strong>Plus</strong>_OM20B71E.book Page 35 Thursday, September 20, 2012 12:03 PM<br />
2. DESTINATION SEARCH<br />
1. DESTINATION SEARCH<br />
DESTINATION SEARCH ON<br />
THE “My destinations”<br />
SCREEN<br />
There are several ways to search a<br />
destination.<br />
(a)Destination search by stored destinations<br />
(b)Destination search by last destinations<br />
(c)Destination search by the connected<br />
phone’s phone book<br />
1 <strong>Touch</strong> “NAV” on the map or press the<br />
“MAP NAV” button to display the<br />
“Navigation” menu screen.<br />
• If the “Navigation” menu screen is not displayed,<br />
touch until it is displayed.<br />
2 <strong>Touch</strong> “My destinations”.<br />
DESTINATION SEARCH BY<br />
“Stored”<br />
Destinations can be selected from the<br />
destinations registered with the system.<br />
To use this function, it is necessary<br />
to register the entry. (See page<br />
55.)<br />
1 <strong>Touch</strong> “Stored” on the “My destinations”<br />
screen.<br />
2 <strong>Touch</strong> the desired entry.<br />
• <strong>Touch</strong> to display and edit the entry<br />
information. (See page 61.)<br />
3 The starting route guidance screen will<br />
be displayed. (See page 43.)<br />
2<br />
NAVIGATION SYSTEM<br />
• The “My destinations” screen can be displayed<br />
by touching on any of the<br />
“Navigation” screens.<br />
3 <strong>Touch</strong> the tab for the desired method.<br />
INFORMATION<br />
● If “Home” has not been registered, a<br />
message will be displayed and the<br />
setting screen will automatically<br />
appear. (See page 56.)<br />
• Please refer to the following pages for a<br />
description of each operation.<br />
35<br />
Display audio_Ext_EE
<strong>Touch</strong>_<strong>Go</strong>_<strong>Plus</strong>_OM20B71E.book Page 36 Thursday, September 20, 2012 12:03 PM<br />
2. DESTINATION SEARCH<br />
DESTINATION SEARCH BY<br />
“Last”<br />
A destination can be selected from the<br />
past destination list.<br />
1 <strong>Touch</strong> “Last” on the “My destinations”<br />
screen.<br />
2 <strong>Touch</strong> the desired entry.<br />
DESTINATION SEARCH BY<br />
“Phone book”<br />
A destination can be set using the address<br />
of a contact from the phone book<br />
of a connected cellular phone.<br />
Before using this function, connect a<br />
Bluetooth ® phone with a phone profile.<br />
(See page 194.)<br />
If a contact does not have address information<br />
stored, the entry will be<br />
dimmed.<br />
1 <strong>Touch</strong> “Phone book” on the “My destinations”<br />
screen.<br />
2 <strong>Touch</strong> the desired entry.<br />
• <strong>Touch</strong> to display and edit the entry<br />
information. (See page 61.)<br />
3 The starting route guidance screen will<br />
be displayed. (See page 43.)<br />
INFORMATION<br />
● The list can contain a maximum of<br />
100 entries. When the maximum is<br />
reached, the oldest destination is<br />
deleted, making room for the new destination<br />
to be stored in the list.<br />
• <strong>Touch</strong> “Search contact” to search by<br />
the contact's name.<br />
• <strong>Touch</strong> to display and edit the entry<br />
information. (See page 61.)<br />
3 The starting route guidance screen will<br />
be displayed. (See page 43.)<br />
36<br />
Display audio_Ext_EE
<strong>Touch</strong>_<strong>Go</strong>_<strong>Plus</strong>_OM20B71E.book Page 37 Thursday, September 20, 2012 12:03 PM<br />
2. DESTINATION SEARCH<br />
DESTINATION SEARCH ON<br />
THE “Enter destination”<br />
SCREEN<br />
There are several ways to search a<br />
destination.<br />
(a)Destination search by address<br />
(b)Destination search by POI<br />
(c)Destination search by advanced<br />
1 <strong>Touch</strong> “NAV” on the map or press the<br />
“MAP NAV” button to display the<br />
“Navigation” menu screen.<br />
• If the “Navigation” menu screen is not displayed,<br />
touch until it is displayed.<br />
2 <strong>Touch</strong> “Enter destination”.<br />
DESTINATION SEARCH BY<br />
“Address”<br />
A destination can be searched using a<br />
town name or code.<br />
1 <strong>Touch</strong> “Address” on the “Enter destination”<br />
screen.<br />
2 <strong>Touch</strong> “Country”.<br />
3 Enter the desired country.<br />
2<br />
NAVIGATION SYSTEM<br />
• The “Enter destination” screen can be displayed<br />
by touching on any of the<br />
“Navigation” screens.<br />
3 <strong>Touch</strong> the tab for the desired method.<br />
4 <strong>Touch</strong> “Town” or “Code” to enter the<br />
town name or code.<br />
• Please refer to the following pages for a<br />
description of each operation.<br />
• When either a “Town” or “Code” is<br />
entered, the other will be entered automatically.<br />
37<br />
Display audio_Ext_EE
<strong>Touch</strong>_<strong>Go</strong>_<strong>Plus</strong>_OM20B71E.book Page 38 Thursday, September 20, 2012 12:03 PM<br />
2. DESTINATION SEARCH<br />
5 <strong>Touch</strong> “Street” to enter the street<br />
name.<br />
6 <strong>Touch</strong> “No.” or “Intersection” to enter<br />
a street No. or intersection name.<br />
• It is not possible to enter a street No. and<br />
intersection at the same time.<br />
7 <strong>Touch</strong> “Start calculation”.<br />
8 The starting route guidance screen will<br />
be displayed. (See page 43.)<br />
INFORMATION<br />
● “Start calculation” can be selected<br />
once a “Town” or “Code” has been<br />
entered. If “Start calculation” is<br />
touched when only “Town” or “Code”<br />
has been entered, a route search starts<br />
with the centre of the town entered as<br />
the destination.<br />
● If<br />
is touched, entered<br />
data other than “Country” will be<br />
deleted.<br />
DESTINATION SEARCH BY<br />
“POI”<br />
POIs in a specific area can be<br />
searched by category, name or from<br />
the map.<br />
■SEARCHING “By category”<br />
1 <strong>Touch</strong> “POI” on the “Enter destination”<br />
screen.<br />
2 <strong>Touch</strong> “By category”.<br />
3 <strong>Touch</strong> the desired item to search the<br />
area. (See page 40.)<br />
4 <strong>Touch</strong> the desired category.<br />
38<br />
Display audio_Ext_EE
<strong>Touch</strong>_<strong>Go</strong>_<strong>Plus</strong>_OM20B71E.book Page 39 Thursday, September 20, 2012 12:03 PM<br />
2. DESTINATION SEARCH<br />
5 <strong>Touch</strong> for the desired item.<br />
• If you touch the desired item, the starting<br />
route guidance screen will be displayed<br />
directly. (See page 43.)<br />
6 <strong>Touch</strong> “<strong>Go</strong>”.<br />
■SEARCHING “By name”<br />
1 <strong>Touch</strong> “POI” on the “Enter destination”<br />
screen.<br />
2 <strong>Touch</strong> “By name” on the “POI”<br />
screen.<br />
3 <strong>Touch</strong> the desired item to search the<br />
area. (See page 40.)<br />
4 Input POI name.<br />
2<br />
NAVIGATION SYSTEM<br />
• When “Save” is touched, the point is<br />
registered in the “Stored” list on the “My<br />
destinations” screen. (See page 57.)<br />
• When is touched, the registered<br />
telephone number is called.<br />
7 The starting route guidance screen will<br />
be displayed. (See page 43.)<br />
INFORMATION<br />
● The POI search result list is sorted by<br />
distance to the POI. The distance can be<br />
sorted by the following methods:<br />
• When the search area is set to “At<br />
current position”, “Around” or<br />
“Along the route”, the distance will<br />
be calculated from the current position<br />
to the POI.<br />
• When the search area is set to “At<br />
destination”, the distance will be<br />
calculated from the destination to the<br />
POI.<br />
5 <strong>Touch</strong> “OK”.<br />
6 Follow the steps “SEARCHING “By<br />
category”” from “STEP 5”. (See page<br />
38.)<br />
■SEARCHING “By map”<br />
1 <strong>Touch</strong> “POI” on the “Enter destination”<br />
screen.<br />
2 <strong>Touch</strong> “By map” on the “POI” screen.<br />
3 <strong>Touch</strong> the desired item to search the<br />
area. (See page 40.)<br />
4 <strong>Touch</strong> the desired POI icon on the<br />
map.<br />
5 Follow the steps “SEARCHING “By<br />
category”” from “STEP 5”. (See page<br />
38.)<br />
INFORMATION<br />
● Depending on the current map scale,<br />
not all POI icons will be available for<br />
selection.<br />
39<br />
Display audio_Ext_EE
<strong>Touch</strong>_<strong>Go</strong>_<strong>Plus</strong>_OM20B71E.book Page 40 Thursday, September 20, 2012 12:03 PM<br />
2. DESTINATION SEARCH<br />
■SELECTING THE SEARCH AREA<br />
1 <strong>Touch</strong> “By category”, “By name” or<br />
“By map”.<br />
Selecting “Around” area<br />
If you select “Around”, touch “Define”<br />
to select the desired search area.<br />
1 <strong>Touch</strong> “Country” to enter a country.<br />
2 <strong>Touch</strong> the desired item to search the<br />
area.<br />
“At current position”: Around the current<br />
position.<br />
“Around”: Around the defined country<br />
(See page 40.)<br />
“At destination”: Around the main destination<br />
“Along the route”: Along the current<br />
route<br />
2 <strong>Touch</strong> “Town” or “Code” to enter the<br />
name or code.<br />
3 <strong>Touch</strong> “Define as search area”.<br />
INFORMATION<br />
● When either a “Town” or “Code” is<br />
entered, the other will be entered automatically.<br />
● If<br />
is touched, entered<br />
data other than “Country” will be<br />
deleted.<br />
INFORMATION<br />
● When route guidance is not in use, “At<br />
destination” and “Along the route”<br />
cannot be selected.<br />
● When “At destination” is selected,<br />
POIs around the destination will be<br />
searched. POIs around stopovers will<br />
not be searched.<br />
40<br />
Display audio_Ext_EE
<strong>Touch</strong>_<strong>Go</strong>_<strong>Plus</strong>_OM20B71E.book Page 41 Thursday, September 20, 2012 12:03 PM<br />
2. DESTINATION SEARCH<br />
DESTINATION SEARCH BY<br />
“Advanced”<br />
1 <strong>Touch</strong> “Advanced” on the “Enter destination”<br />
screen.<br />
2 <strong>Touch</strong> the desired method to search<br />
the destination.<br />
• Please refer to the following pages for a<br />
description of each operation.<br />
■SELECTING POINT ON MAP<br />
1 <strong>Touch</strong> “Select point on map” on the<br />
“Advanced” screen.<br />
2 <strong>Touch</strong> the desired point on the map.<br />
• When “Save” is touched, the point is<br />
registered in the “Stored” list on the “My<br />
destinations” screen. (See page 57.)<br />
4 The starting route guidance screen will<br />
be displayed. (See page 43.)<br />
■ENTER GEO-COORDINATES<br />
Geo coordinates can be entered in<br />
DMS format (Degrees ° , Minutes’, Seconds”).<br />
Only coordinate values that<br />
can potentially exist are able to be entered.<br />
Impossible coordinate values<br />
and their relevant screen buttons will<br />
be dimmed.<br />
1 <strong>Touch</strong> “Enter geo-coordinates” on<br />
the “Advanced” screen.<br />
2 <strong>Touch</strong> “N” or “S”.<br />
2<br />
NAVIGATION SYSTEM<br />
3 <strong>Touch</strong> “<strong>Go</strong>”.<br />
3 Input the latitude (Degrees ° , Minutes’,<br />
Seconds”).<br />
4 <strong>Touch</strong> “W” or “E”.<br />
5 Input the longitude (Degrees ° , Minutes’,<br />
Seconds”).<br />
6 <strong>Touch</strong> “OK”.<br />
41<br />
Display audio_Ext_EE
<strong>Touch</strong>_<strong>Go</strong>_<strong>Plus</strong>_OM20B71E.book Page 42 Thursday, September 20, 2012 12:03 PM<br />
2. DESTINATION SEARCH<br />
7 <strong>Touch</strong> “<strong>Go</strong>”.<br />
• When “Save” is touched, the point is<br />
registered in the “Stored” list on the “My<br />
destinations” screen. (See page 58.)<br />
8 The starting route guidance screen will<br />
be displayed. (See page 43.)<br />
INFORMATION<br />
● If a destination that is not located on a<br />
road is set, the vehicle will be guided to<br />
the point on a road nearest to the destination.<br />
■ONLINE SEARCH<br />
A destination can be selected via connected<br />
service. For detailed information<br />
about connected services, see<br />
page 86.<br />
42<br />
Display audio_Ext_EE
<strong>Touch</strong>_<strong>Go</strong>_<strong>Plus</strong>_OM20B71E.book Page 43 Thursday, September 20, 2012 12:03 PM<br />
3. ROUTE GUIDANCE<br />
1. STARTING ROUTE GUIDANCE<br />
STARTING ROUTE<br />
GUIDANCE SCREEN<br />
After searching the destination, the<br />
starting route guidance screen will be<br />
displayed.<br />
According to the setting, either the normal<br />
screen or route alternatives screen<br />
will be displayed. (See page 69.)<br />
CAUTION<br />
● Be sure to obey traffic regulations and<br />
keep road conditions in mind while driving.<br />
If a traffic sign on the road has been<br />
changed, the route guidance may not<br />
indicate such changed information.<br />
NORMAL SCREEN<br />
The recommended route will be displayed<br />
on the map.<br />
1 <strong>Touch</strong> “<strong>Go</strong>”.<br />
INFORMATION<br />
● The default recommended route can be<br />
changed. (See pages 44 and 69.)<br />
● The arrival time or the remaining time<br />
will be displayed in the upper right area<br />
of the map. Each time the area is<br />
touched, the display switches between<br />
displaying the arrival time and remaining<br />
time.<br />
● Distance of the entire route is displayed<br />
on the map.<br />
● The starting route guidance screen will<br />
always be displayed in 2D North.<br />
ROUTE ALTERNATIVES<br />
SCREEN<br />
Three recommended routes are displayed<br />
on the map.<br />
1 <strong>Touch</strong> one of the three recommended<br />
routes to select it.<br />
2<br />
NAVIGATION SYSTEM<br />
• “Preferences”: <strong>Touch</strong> to adjust the<br />
route preferences before starting the<br />
route guidance. (See page 44.)<br />
• “Avoid”: <strong>Touch</strong> to adjust the avoidance<br />
criteria before starting the route guidance.<br />
(See page 44.)<br />
2 Starts route guidance. (See page 45.)<br />
• “Avoid”: <strong>Touch</strong> to adjust the avoidance<br />
criteria before starting the route guidance.<br />
(See page 44.)<br />
2 Start route guidance. (See page 45.)<br />
INFORMATION<br />
● The arrival time and distance of the<br />
entire route will be displayed in the list.<br />
● The starting route guidance screen will<br />
always be displayed in 2D North.<br />
43<br />
Display audio_Ext_EE
<strong>Touch</strong>_<strong>Go</strong>_<strong>Plus</strong>_OM20B71E.book Page 44 Thursday, September 20, 2012 12:03 PM<br />
3. ROUTE GUIDANCE<br />
SETTING THE ROUTE<br />
SETTING THE ROUTE<br />
PREFERENCES<br />
1 <strong>Touch</strong> “Preferences” on the starting<br />
route guidance screen.<br />
SETTING THE AVOIDANCE<br />
CRITERIA<br />
1 <strong>Touch</strong> “Avoid” on the starting route<br />
guidance screen.<br />
2 <strong>Touch</strong> the desired item.<br />
2 <strong>Touch</strong> the desired item.<br />
“Fast route”: <strong>Touch</strong> to calculate the fastest<br />
route.<br />
“Short route”: <strong>Touch</strong> to calculate the<br />
shortest route.<br />
“Ecological route”: <strong>Touch</strong> to calculate an<br />
ecological route.<br />
3 The route will be recalculated.<br />
“Avoid motorways”: <strong>Touch</strong> to avoid<br />
motorways.<br />
“Avoid toll roads”: <strong>Touch</strong> to avoid toll<br />
roads.<br />
“Avoid tunnels”: <strong>Touch</strong> to avoid tunnels.<br />
“Avoid ferries/Car trains”: <strong>Touch</strong> to<br />
avoid ferries/Car trains.<br />
3 <strong>Touch</strong> .<br />
4 The route will be recalculated.<br />
INFORMATION<br />
● Setting the route preference and avoidance<br />
can be also changed from the<br />
“Route options” screen. (See page 69.)<br />
44<br />
Display audio_Ext_EE
<strong>Touch</strong>_<strong>Go</strong>_<strong>Plus</strong>_OM20B71E.book Page 45 Thursday, September 20, 2012 12:03 PM<br />
3. ROUTE GUIDANCE<br />
2. ROUTE GUIDANCE<br />
ROUTE GUIDANCE SCREEN<br />
While guiding the route, the following<br />
screen will be displayed.<br />
■SIGNPOSTS<br />
When approaching the turn, a signpost<br />
will automatically be displayed.<br />
2<br />
• On this screen, the following information is<br />
displayed.<br />
No.<br />
Information<br />
Distance and travel/arrival time to<br />
the destination<br />
■LANE RECOMMENDATION<br />
When approaching a maneuver, the<br />
lane recommendation will automatically<br />
be displayed.<br />
NAVIGATION SYSTEM<br />
Traffic message on the route (See<br />
page 34.)<br />
The coloured section of the bar reduces<br />
as the vehicle approaches<br />
the next turn<br />
Distance to the next turn with the arrow<br />
indicating the turn direction<br />
The name of the road currently being<br />
travelled on<br />
Current position<br />
Guidance route<br />
■AUTOMATIC ZOOM<br />
When approaching an intersection, the<br />
map will automatically zoom in.<br />
INFORMATION<br />
● If the vehicle goes off the guided route,<br />
the route will be recalculated.<br />
● For some areas, the roads have not<br />
been completely digitized in our database.<br />
For this reason, the route guidance<br />
may select a road that should not<br />
be traveled on.<br />
● The above items will be displayed<br />
depending on the map scale.<br />
● The displaying of the above items can<br />
be switched off. (See page 65.)<br />
45<br />
Display audio_Ext_EE
<strong>Touch</strong>_<strong>Go</strong>_<strong>Plus</strong>_OM20B71E.book Page 46 Thursday, September 20, 2012 12:03 PM<br />
3. ROUTE GUIDANCE<br />
VOICE GUIDANCE<br />
The voice guidance provides various<br />
messages as you approach an intersection,<br />
or other points where maneuvering<br />
the vehicle is necessary.<br />
CAUTION<br />
● Be sure to obey the traffic regulations<br />
and keep the road condition in mind<br />
especially when you are driving on IPD<br />
roads (roads that are not completely digitized<br />
in our database). The route guidance<br />
may not have the updated<br />
information such as the direction of a<br />
one way street.<br />
JUNCTION VIEW<br />
• When is touched while route guidance<br />
is active, the last navigation<br />
announcement will be repeated.<br />
• After touching , touch “+” or “-” to<br />
adjust the volume level of the navigation<br />
announcements.<br />
• After touching “+” or “-”, short audible<br />
information will be given to control the current<br />
volume level (e.g. turn up/turn down).<br />
• When approaching a junction on a highway,<br />
the junction view can be shown.<br />
INFORMATION<br />
● The voice guidance may not pronounce<br />
certain street names correctly or clearly<br />
due to the limitations of the texttospeech<br />
function.<br />
● On motorways, interstates or other highways<br />
with higher speed limits, the voice<br />
guidance will be made at earlier points<br />
than on city streets in order to allow time<br />
to maneuver the vehicle.<br />
● If the system cannot determine the current<br />
vehicle position correctly (in cases<br />
of poor GPS signal reception), the voice<br />
guidance may be early or delayed.<br />
46<br />
Display audio_Ext_EE
<strong>Touch</strong>_<strong>Go</strong>_<strong>Plus</strong>_OM20B71E.book Page 47 Thursday, September 20, 2012 12:03 PM<br />
3. ROUTE GUIDANCE<br />
3. SETTING AND DELETING THE ROUTE<br />
Routes can be checked, changed and<br />
recalculated during route guidance.<br />
SETTING FROM THE<br />
“Options” SCREEN<br />
No.<br />
Function<br />
<strong>Touch</strong> to change the map setting.<br />
(See page 65.)<br />
<strong>Touch</strong> to stop the current route guidance.<br />
2<br />
Checking and setting routes is mainly<br />
performed from the “Options” screen.<br />
1 <strong>Touch</strong> “Options”.<br />
<strong>Touch</strong> to set the route preferences<br />
and the avoidance criteria for the<br />
route calculation. (See page 48.)<br />
<strong>Touch</strong> to display a list of the different<br />
segments of the route. It is also possible<br />
to define a detour. (See page<br />
48.) (The current status is displayed<br />
on the right of the item.)<br />
<strong>Touch</strong> to display the complete route.<br />
NAVIGATION SYSTEM<br />
2 <strong>Touch</strong> the desired items.<br />
<strong>Touch</strong> to block a fixed distance on<br />
the road ahead. (See page 49.) (The<br />
current status is displayed on the<br />
right of the item.)<br />
<strong>Touch</strong> to display the current location,<br />
geo-coordinates and GPS information.<br />
(See page 25.)<br />
<strong>Touch</strong> to display the destination's information.<br />
(See page 49.)<br />
• On this screen, the following functions can<br />
be operated.<br />
47<br />
Display audio_Ext_EE
<strong>Touch</strong>_<strong>Go</strong>_<strong>Plus</strong>_OM20B71E.book Page 48 Thursday, September 20, 2012 12:03 PM<br />
3. ROUTE GUIDANCE<br />
SETTING THE ROUTE<br />
PREFERENCE OR AVOIDANCE<br />
CRITERIA<br />
1 <strong>Touch</strong> “Route options for current<br />
route” on the “Options” screen.<br />
2 <strong>Touch</strong> the desired item to change the<br />
route setting.<br />
DISPLAYING THE ROUTE LIST<br />
A list of the different segments of the<br />
route can be displayed.<br />
1 <strong>Touch</strong> “Route list” on the “Options”<br />
screen.<br />
2 <strong>Touch</strong> the desired item to display the<br />
segment.<br />
“Preferences”: <strong>Touch</strong> to adjust the route<br />
preferences. (See page 44.)<br />
“Avoid”: <strong>Touch</strong> to adjust the avoidance<br />
criteria. (See page 44.)<br />
3 The route will be recalculated.<br />
• Guidance arrow, street name, distance to<br />
the point are displayed.<br />
3 The detail of the segment is displayed.<br />
or : <strong>Touch</strong> to display the next or previous<br />
segment.<br />
• <strong>Touch</strong> “Detour” to detour the desired<br />
segment. (See page 52.)<br />
48<br />
Display audio_Ext_EE
<strong>Touch</strong>_<strong>Go</strong>_<strong>Plus</strong>_OM20B71E.book Page 49 Thursday, September 20, 2012 12:03 PM<br />
3. ROUTE GUIDANCE<br />
BLOCK ROAD AHEAD<br />
A fixed distance on the road ahead can<br />
be blocked.<br />
1 <strong>Touch</strong> “Block road ahead” on the<br />
“Options” screen.<br />
2 <strong>Touch</strong> the desired item to select the<br />
desired detour distance.<br />
DISPLAYING THE<br />
DESTINATION INFORMATION<br />
The destination information is displayed.<br />
1 <strong>Touch</strong> “Destination information” on<br />
the “Options” screen.<br />
2 The destination information screen will<br />
be displayed.<br />
2<br />
NAVIGATION SYSTEM<br />
“Deactivate block road ahead”: <strong>Touch</strong> to<br />
deactivate the function.<br />
“Block next 2 km” ~ “Block next 20 km”<br />
(“Block next 1 mi” ~ “Block next 12mi”):<br />
<strong>Touch</strong> to detour the next 2 km ~ 20 km<br />
(1 mile ~ 12 miles) of the current route<br />
(road).<br />
• “Deactivate block road ahead” can be<br />
selected when the block road ahead function<br />
has been activated.<br />
3 The route will be recalculated.<br />
• A blocked route will be marked in the map.<br />
• After the blocked route has been<br />
detoured, the block road ahead function<br />
will automatically be deactivated.<br />
• On this screen, the following information is<br />
displayed.<br />
No.<br />
Information<br />
Address of destination<br />
Selected route preference<br />
Selected avoidance criteria<br />
Arrival time, remaining time and<br />
distance to destination<br />
Address of each stopover (if entered)<br />
49<br />
Display audio_Ext_EE
<strong>Touch</strong>_<strong>Go</strong>_<strong>Plus</strong>_OM20B71E.book Page 50 Thursday, September 20, 2012 12:03 PM<br />
3. ROUTE GUIDANCE<br />
ADDING DESTINATIONS<br />
Destinations can be added and the<br />
route changed accordingly.<br />
1 <strong>Touch</strong> “NAV” on the map or press the<br />
“MAP NAV” button to display the<br />
“Navigation” menu screen.<br />
• If the “Navigation” menu screen is not displayed,<br />
touch until it is displayed.<br />
2 <strong>Touch</strong> “Enter destination”.<br />
If you search the destination by “Enter<br />
address”<br />
5 <strong>Touch</strong> “Add as stopover”.<br />
If you search the destination by “Select<br />
point on map” or “Enter geo-coordinates”<br />
5 <strong>Touch</strong> “Add”.<br />
If you search the destination by the other<br />
methods<br />
5 <strong>Touch</strong> the desired entry.<br />
6 <strong>Touch</strong> “Insert stopover” to select the<br />
position of the stopover.<br />
• The “Enter destination” screen can be displayed<br />
by touching on any of the<br />
“Navigation” screens.<br />
3 <strong>Touch</strong> “Stopover” on the “Enter destination”<br />
screen.<br />
4 <strong>Touch</strong> the desired method to search<br />
the destination.<br />
7 The route will be recalculated.<br />
INFORMATION<br />
● In addition to the main destination, a<br />
maximum of 4 stopovers can be set.<br />
● The main destination is marked by ,<br />
the stopovers are marked by .<br />
• For detailed information about searching<br />
the destination on the map, see page 35.<br />
50<br />
Display audio_Ext_EE
<strong>Touch</strong>_<strong>Go</strong>_<strong>Plus</strong>_OM20B71E.book Page 51 Thursday, September 20, 2012 12:03 PM<br />
3. ROUTE GUIDANCE<br />
EDITING DESTINATIONS No. Function<br />
1 <strong>Touch</strong> “Show destination list” on the<br />
“Stopover” screen.<br />
<strong>Touch</strong> to register the point in the<br />
“Stored” list on the “My destinations”<br />
screen. (See page 58.)<br />
<strong>Touch</strong> to change the order of the<br />
2<br />
2 <strong>Touch</strong> the desired destination to be edited.<br />
destinations. <strong>Touch</strong> or<br />
move the destination up or down the<br />
order displayed on the next screen.<br />
<strong>Touch</strong> to delete the destination.<br />
<strong>Touch</strong> to delete all stopovers.<br />
INFORMATION<br />
● If the main destination is deleted, the<br />
last stopover before the deleted destination<br />
will become the new main destination.<br />
NAVIGATION SYSTEM<br />
3 <strong>Touch</strong> desired item.<br />
• On this screen, the following functions can<br />
be operated.<br />
51<br />
Display audio_Ext_EE
<strong>Touch</strong>_<strong>Go</strong>_<strong>Plus</strong>_OM20B71E.book Page 52 Thursday, September 20, 2012 12:03 PM<br />
3. ROUTE GUIDANCE<br />
DETOURING A SEGMENT ON<br />
THE ROUTE<br />
DETOURING A SEGMENT<br />
FROM THE ROUTE LIST<br />
■CANCELLING THE DETOURED<br />
SEGMENT<br />
1 Display the route list. (See page 48.)<br />
2 <strong>Touch</strong> “Detours”.<br />
When detouring a segment, the detour<br />
route can be changed.<br />
■DETOURING THE SEGMENT<br />
1 Display the route list. (See page 48.)<br />
2 <strong>Touch</strong> the desired segment to detour.<br />
3 <strong>Touch</strong> “Detour off”.<br />
3 <strong>Touch</strong> “Detour”.<br />
• If there is more than one point to detour, a<br />
list of points to detour will be displayed.<br />
Select points from the list to cancel<br />
detouring them.<br />
4 The route will be recalculated.<br />
or : <strong>Touch</strong> to display the next or<br />
previous segment.<br />
4 The route will be recalculated.<br />
52<br />
Display audio_Ext_EE
<strong>Touch</strong>_<strong>Go</strong>_<strong>Plus</strong>_OM20B71E.book Page 53 Thursday, September 20, 2012 12:03 PM<br />
3. ROUTE GUIDANCE<br />
DETOURING A SEGMENT<br />
FROM A TRAFFIC MESSAGE<br />
LIST<br />
If a traffic message relates to the route<br />
being travelled, the desired segment<br />
can be detoured.<br />
■DETOURING THE SEGMENT<br />
1 Displaying the traffic information list.<br />
(See page 32.)<br />
2 <strong>Touch</strong> “On route”.<br />
3 <strong>Touch</strong> the desired segment to detour.<br />
5 The route will be recalculated.<br />
• The mark of the TMC on the “On route”<br />
screen changes into .<br />
■CANCELLING THE DETOURED<br />
SEGMENT<br />
1 <strong>Touch</strong> the detoured segment on the<br />
“On route” screen.<br />
2 <strong>Touch</strong> “Detour off”.<br />
2<br />
NAVIGATION SYSTEM<br />
or : <strong>Touch</strong> to display the next or<br />
previous message.<br />
4 <strong>Touch</strong> “Detour”.<br />
• When<br />
∗ is touched, the traffic<br />
message is read out. To cancel this<br />
function, touch ∗ .<br />
3 The route will be recalculated.<br />
• The mark of the TMC on the “On route”<br />
screen changes to .<br />
or : <strong>Touch</strong> to display the next or<br />
previous message.<br />
• When ∗ is touched, the traffic<br />
message is read out. To cancel this<br />
function, touch<br />
∗ .<br />
∗ : If equipped<br />
53<br />
Display audio_Ext_EE
<strong>Touch</strong>_<strong>Go</strong>_<strong>Plus</strong>_OM20B71E.book Page 54 Thursday, September 20, 2012 12:03 PM<br />
3. ROUTE GUIDANCE<br />
RECALCULATING THE<br />
ROUTE BY THE TRAFFIC<br />
MESSAGES<br />
• When Pressing "Show Detour", visual<br />
information is given on your detour route.<br />
On the top corner, information on time<br />
savings and deviation (km) is given.<br />
You will be informed about relevant<br />
traffic messages on the route by a popup<br />
window.<br />
A pop-up window may differ depending<br />
on the traffic message settings. (See<br />
page 71.)<br />
IF “Automatic” IS SELECTED<br />
1 The following screen will be displayed.<br />
2 The route will be recalculated automatically.<br />
IF “Manual” IS SELECTED<br />
1 The following screen will be displayed.<br />
54<br />
Display audio_Ext_EE
<strong>Touch</strong>_<strong>Go</strong>_<strong>Plus</strong>_OM20B71E.book Page 55 Thursday, September 20, 2012 12:03 PM<br />
4. MY DESTINATIONS<br />
1. REGISTERING AN ENTRY<br />
REGISTERING A NEW ENTRY<br />
Up to 200 destinations can be registered<br />
with this system.<br />
REGISTERING FROM THE “My<br />
destinations” SCREEN<br />
1 <strong>Touch</strong> “NAV” on the map or press the<br />
“MAP NAV” button to display the<br />
“Navigation” menu screen.<br />
• If the “Navigation” menu screen is not displayed,<br />
touch until it is displayed.<br />
2 <strong>Touch</strong> “My destinations”.<br />
5 Input the entry address. (See page 37.)<br />
6 <strong>Touch</strong> “Save new entry”.<br />
7 Input the entry name.<br />
2<br />
NAVIGATION SYSTEM<br />
• The “My destinations” screen can be displayed<br />
by touching on any of the<br />
“Navigation” screens.<br />
3 <strong>Touch</strong> “Stored” on the “My destinations”<br />
screen.<br />
4 <strong>Touch</strong> “Create new entry”.<br />
8 <strong>Touch</strong> “OK”.<br />
9 The entry is saved in the “Stored” list.<br />
• <strong>Touch</strong> to display and edit the entry<br />
information. (See page 61.)<br />
55<br />
Display audio_Ext_EE
<strong>Touch</strong>_<strong>Go</strong>_<strong>Plus</strong>_OM20B71E.book Page 56 Thursday, September 20, 2012 12:03 PM<br />
4. MY DESTINATIONS<br />
■REGISTERING “Home”<br />
If “Home” has not been registered,<br />
touching “Home” allows a home address<br />
to be registered.<br />
1 <strong>Touch</strong> “Home”.<br />
2 <strong>Touch</strong> “Yes”.<br />
If you search the destination by “Enter<br />
address”<br />
4 <strong>Touch</strong> “Save as Home address”.<br />
If you search the destination by “Select<br />
point on map” or “Enter geo-coordinates”<br />
4 <strong>Touch</strong> “Save”.<br />
If you search the destination by the other<br />
methods<br />
4 <strong>Touch</strong> the desired entry from the list.<br />
5 The entry is registered as “Home” in<br />
the “Stored” list.<br />
• <strong>Touch</strong> to display and edit the entry<br />
information. (See page 61.)<br />
3 <strong>Touch</strong> the desired method to search<br />
the point.<br />
• For details about searching the point on<br />
the map, see page 35.<br />
56<br />
Display audio_Ext_EE
<strong>Touch</strong>_<strong>Go</strong>_<strong>Plus</strong>_OM20B71E.book Page 57 Thursday, September 20, 2012 12:03 PM<br />
4. MY DESTINATIONS<br />
REGISTERING FROM THE MAP<br />
1 <strong>Touch</strong> the desired point on the map.<br />
2 <strong>Touch</strong> “Save”.<br />
3 Follow the steps “REGISTERING<br />
FROM THE “My destinations”<br />
SCREEN” from “STEP 7”. (See page<br />
55.)<br />
REGISTERING FROM THE LIST<br />
■REGISTERING FROM THE LIST ON<br />
THE “Last” OR “Phone book”<br />
SCREEN<br />
1 Search the point by “Last” or “Phone<br />
book”. (See page 36.)<br />
2 <strong>Touch</strong> next to the desired item.<br />
2<br />
NAVIGATION SYSTEM<br />
REGISTERING FROM POI<br />
1 Search the point by “POI”. (See pages<br />
32 and 38.)<br />
2 <strong>Touch</strong> “Save”.<br />
3 <strong>Touch</strong> “Add to stored destinations”.<br />
3 Follow the steps “REGISTERING<br />
FROM THE “My destinations”<br />
SCREEN” from “STEP 7”. (See page<br />
55.)<br />
4 Follow the steps “REGISTERING<br />
FROM THE “My destinations”<br />
SCREEN” from “STEP 7”. (See page<br />
55.)<br />
INFORMATION<br />
● If the contact includes an address and a<br />
phone number, they will be stored in the<br />
“Stored” list on the “My destinations”<br />
screen and “Contacts” screen. (See<br />
pages 55 and 157.)<br />
57<br />
Display audio_Ext_EE
<strong>Touch</strong>_<strong>Go</strong>_<strong>Plus</strong>_OM20B71E.book Page 58 Thursday, September 20, 2012 12:03 PM<br />
4. MY DESTINATIONS<br />
■REGISTERING FROM THE DESTI-<br />
NATION LIST<br />
1 Display the “Show destination list”<br />
screen. (See page 51.)<br />
2 <strong>Touch</strong> the desired destination.<br />
REGISTERING FROM GEO-<br />
COORDINATES<br />
1 Search the point by “Enter geo-coordinates”.<br />
(See page 41.)<br />
2 <strong>Touch</strong> “Save”.<br />
3 <strong>Touch</strong> “Add to stored contacts”.<br />
3 Follow the steps “REGISTERING<br />
FROM THE “My destinations”<br />
SCREEN” from “STEP 7”. (See page<br />
55.)<br />
4 Follow the steps “REGISTERING<br />
FROM THE “My destinations”<br />
SCREEN” from “STEP 7”. (See page<br />
55.)<br />
58<br />
Display audio_Ext_EE
<strong>Touch</strong>_<strong>Go</strong>_<strong>Plus</strong>_OM20B71E.book Page 59 Thursday, September 20, 2012 12:03 PM<br />
4. MY DESTINATIONS<br />
REGISTERING FROM AN<br />
EXTERNAL DEVICE<br />
“CSI” formatted data can be transferred<br />
from a USB memory to this system.<br />
Transferred addresses and<br />
numbers will be stored in the “Stored”<br />
list on the “My destinations” screen and<br />
“Contacts” screen. (See pages 55 and<br />
157.)<br />
■LOADING ADDRESSES VIA A USB<br />
MEMORY<br />
1 Open the cover of the USB/AUX port<br />
and connect a USB memory.<br />
3 <strong>Touch</strong> “Enter destination”.<br />
• The “Enter destination” screen can be displayed<br />
by touching on any of the<br />
“Navigation” screens.<br />
4 <strong>Touch</strong> “Advanced” on the “Enter destination”<br />
screen.<br />
5 <strong>Touch</strong> “Load contacts from USB”.<br />
2<br />
NAVIGATION SYSTEM<br />
• The USB/AUX port is located on the<br />
instrument panel, or in the console box or<br />
glove box etc. The location and design are<br />
different depending on the vehicle. For<br />
details, see the Pictorial index of “Owner’s<br />
Manual”.<br />
2 <strong>Touch</strong> “NAV” on the map or press the<br />
“MAP NAV” button to display the<br />
“Navigation” menu screen.<br />
• If the “Navigation” menu screen is not displayed,<br />
touch<br />
until it is displayed.<br />
6 The following screen will be displayed<br />
while loading the data.<br />
• To cancel this function, touch “Cancel”.<br />
59<br />
Display audio_Ext_EE
<strong>Touch</strong>_<strong>Go</strong>_<strong>Plus</strong>_OM20B71E.book Page 60 Thursday, September 20, 2012 12:03 PM<br />
4. MY DESTINATIONS<br />
7 The following screen will be displayed<br />
when loading is complete.<br />
■LOADING ADDRESSES FROM<br />
A SERVER<br />
Addresses and numbers can be added<br />
by downloading from an Internet server.<br />
They will be stored in the “Stored”<br />
list on the “My destinations” screen and<br />
“Contacts” screen. (See pages 55 and<br />
157.) For detailed information about<br />
connected services, see page 86.<br />
8 The entry is registered in the “Stored”<br />
list on the “My destinations” screen and<br />
“Contacts” screen. (See pages 55 and<br />
157.)<br />
NOTICE<br />
● Do not turn off the engine while downloading.<br />
INFORMATION<br />
● Downloading may not complete correctly<br />
in the following cases:<br />
• If the engine switch is turned off during<br />
downloading<br />
• If the USB memory is removed before<br />
downloading is complete<br />
● If a message similar to the one below is<br />
displayed, delete X item(s) in the<br />
“Stored” list on the “My destinations”<br />
screen or “Contacts” screen to make<br />
room for the new destination(s). (See<br />
pages 61 and 159.)<br />
60<br />
Display audio_Ext_EE
<strong>Touch</strong>_<strong>Go</strong>_<strong>Plus</strong>_OM20B71E.book Page 61 Thursday, September 20, 2012 12:03 PM<br />
4. MY DESTINATIONS<br />
2. DISPLAYING AND EDITING THE ENTRY INFORMATION<br />
DISPLAYING AND EDITING<br />
THE ENTRY INFORMATION<br />
The entry options screen of “Phone<br />
book” list<br />
Detailed information of entries in the<br />
list can be displayed or edited.<br />
2<br />
1 <strong>Touch</strong> next to the desired item on<br />
the “My destinations” screen.<br />
The entry options screen of “Stored” list<br />
• On this screen, the following functions can<br />
be operated.<br />
No.<br />
Function<br />
<strong>Touch</strong> to display the details of<br />
the entry information. (See page<br />
62.)<br />
<strong>Touch</strong> to change the entry name.<br />
(See page 62.)<br />
NAVIGATION SYSTEM<br />
<strong>Touch</strong> to edit the address. (See<br />
page 62.)<br />
<strong>Touch</strong> to delete the entry.<br />
The entry options screen of “Last” list<br />
<strong>Touch</strong> to delete all entries.<br />
<strong>Touch</strong> to register the entry in the<br />
“Stored” list on the “My destinations”<br />
screen and “Contacts”<br />
screen. (See page 57.)<br />
61<br />
Display audio_Ext_EE
<strong>Touch</strong>_<strong>Go</strong>_<strong>Plus</strong>_OM20B71E.book Page 62 Thursday, September 20, 2012 12:03 PM<br />
4. MY DESTINATIONS<br />
SHOW DETAILS OF THE<br />
ENTRY<br />
1 <strong>Touch</strong> “Show details”.<br />
2 This screen will be displayed.<br />
EDITING THE ADDRESS<br />
1 <strong>Touch</strong> “Edit address”.<br />
2 Input the new address. (See page 37.)<br />
• The address will be marked on the map.<br />
• The address and a picture, if available, of<br />
the contact from the system’s phone book<br />
will be displayed.<br />
• When you touch “<strong>Go</strong>”, the starting<br />
route guidance screen will be displayed.<br />
3 <strong>Touch</strong> “Save changes”.<br />
INFORMATION<br />
● If an entry that is transferred from a cellular<br />
phone is edited, the change will<br />
affect the entry in the “Stored” list on the<br />
“My destinations” screen and “Contacts”<br />
screen. (See pages 55 and 157.)<br />
CHANGING THE ENTRY NAME<br />
1 <strong>Touch</strong> “Rename XX”.<br />
2 Input the new name.<br />
3 <strong>Touch</strong> “OK”.<br />
62<br />
Display audio_Ext_EE
<strong>Touch</strong>_<strong>Go</strong>_<strong>Plus</strong>_OM20B71E.book Page 63 Thursday, September 20, 2012 12:03 PM<br />
4. MY DESTINATIONS<br />
3. SENDING STORED CONTACTS TO A USB MEMORY<br />
SENDING STORED<br />
CONTACTS TO A USB<br />
MEMORY<br />
3 <strong>Touch</strong> “General”.<br />
The entries stored in the “Stored” list<br />
on the “My destinations” screen and<br />
“Contacts” screen (See pages 55 and<br />
157.) can be transferred to a USB<br />
memory.<br />
1 Open the cover of the USB/AUX port<br />
and connect a USB memory.<br />
4 <strong>Touch</strong> “Send stored contacts to<br />
USB”.<br />
2<br />
NAVIGATION SYSTEM<br />
• The USB/AUX port is located on the<br />
instrument panel, or in the console box or<br />
glove box etc. The location and design are<br />
different depending on the vehicle. For<br />
details, see the Pictorial index of “Owner’s<br />
Manual”.<br />
2 Press the “SETUP” button.<br />
5 The following screen will be displayed<br />
while sending the data.<br />
• To cancel this function, touch “Cancel”.<br />
6 The following screen will be displayed<br />
when sending data to the USB memory<br />
is complete.<br />
63<br />
Display audio_Ext_EE
<strong>Touch</strong>_<strong>Go</strong>_<strong>Plus</strong>_OM20B71E.book Page 64 Thursday, September 20, 2012 12:03 PM<br />
4. MY DESTINATIONS<br />
INFORMATION<br />
● Downloading may not complete correctly<br />
in the following cases:<br />
• If the engine switch is turned off during<br />
downloading<br />
• If the USB memory is removed before<br />
downloading is complete<br />
64<br />
Display audio_Ext_EE
<strong>Touch</strong>_<strong>Go</strong>_<strong>Plus</strong>_OM20B71E.book Page 65 Thursday, September 20, 2012 12:03 PM<br />
5. NAVIGATION SETTING<br />
1. MAP SETTINGS<br />
SETTING THE MAP<br />
1 <strong>Touch</strong> “Options”.<br />
2<br />
2 <strong>Touch</strong> “Map settings”.<br />
• On this screen, the following functions can<br />
be set.<br />
No.<br />
Function<br />
<strong>Touch</strong> to change the map layout.<br />
(See page 26.)<br />
<strong>Touch</strong> to set the display of POI<br />
icon categories. (See page 66.)<br />
NAVIGATION SYSTEM<br />
3 <strong>Touch</strong> the item to be set.<br />
<strong>Touch</strong> to change the screen to<br />
“Day” or “Night” <strong>mode</strong>. (See<br />
page 67.)<br />
<strong>Touch</strong> to change the estimated<br />
time between “Arrival time/distance”<br />
and “Remaining time/<br />
distance” to the destination.<br />
(See page 67.)<br />
<strong>Touch</strong> to set the speed limits<br />
function. (See page 68.)<br />
<strong>Touch</strong> to set the display of the automatic<br />
map zoom on or off. (See<br />
page 45.)<br />
<strong>Touch</strong> to set the display of the<br />
route guidance arrow on or off.<br />
(See page 45.)<br />
<strong>Touch</strong> to set the display of the<br />
name of the road currently being<br />
travelled on to on or off. (See<br />
page 45.)<br />
*<br />
*<br />
<strong>Touch</strong> to set the display of 3D<br />
building icons on or off. (See<br />
page 28.)<br />
<strong>Touch</strong> to set the display of 3D<br />
landmark icons on or off. (See<br />
page 28.)<br />
*: If equipped<br />
65<br />
Display audio_Ext_EE
<strong>Touch</strong>_<strong>Go</strong>_<strong>Plus</strong>_OM20B71E.book Page 66 Thursday, September 20, 2012 12:03 PM<br />
5. NAVIGATION SETTING<br />
No. Function POIS ON MAP<br />
<strong>Touch</strong> to set the display of signposts<br />
on or off. (See page 45.)<br />
<strong>Touch</strong> to show junction view.<br />
(See page 46.)<br />
<strong>Touch</strong> to set the display of the<br />
lane recommendation on or off.<br />
(See page 45.)<br />
<strong>Touch</strong> to set the display of the<br />
traffic message icons on or off.<br />
(See page 45.)<br />
<strong>Touch</strong> to set the display of the<br />
safety cameras icons on or off.<br />
(See page 28.)<br />
POI categories displayed on the map<br />
can be selected.<br />
1 <strong>Touch</strong> “POIs on map” on the “Map<br />
settings” screen.<br />
2 Select the POI categories.<br />
INFORMATION<br />
● The current setting of each item is displayed<br />
on its right.<br />
● Selected item’s checkboxes will change<br />
to when the item has been<br />
selected. All selected items will be activated<br />
simultaneously.<br />
• On this screen, the following functions can<br />
be operated.<br />
No.<br />
Function<br />
<strong>Touch</strong> to display all categories.<br />
<strong>Touch</strong> to hide all icons.<br />
<strong>Touch</strong> to display the selected<br />
icons.<br />
3 <strong>Touch</strong> .<br />
66<br />
Display audio_Ext_EE
<strong>Touch</strong>_<strong>Go</strong>_<strong>Plus</strong>_OM20B71E.book Page 67 Thursday, September 20, 2012 12:03 PM<br />
5. NAVIGATION SETTING<br />
DAY/NIGHT MAP<br />
The screen can be changed to day<br />
<strong>mode</strong> or night <strong>mode</strong>.<br />
1 <strong>Touch</strong> “Day/Night map” on the “Map<br />
settings” screen.<br />
2 <strong>Touch</strong> the desired item.<br />
ARRIVAL INFORMATION<br />
The estimated time to the destination<br />
can be changed between arrival time/<br />
distance and remaining time/distance.<br />
It can also be turned off.<br />
1 <strong>Touch</strong> “Arrival information” on the<br />
“Map settings” screen.<br />
2 <strong>Touch</strong> the desired item.<br />
2<br />
NAVIGATION SYSTEM<br />
“Automatic”: <strong>Touch</strong> to change the screen<br />
to day or night <strong>mode</strong> depending on the position<br />
of the headlight switch.<br />
“Day”: <strong>Touch</strong> to always display the map in<br />
day <strong>mode</strong>.<br />
“Night”: <strong>Touch</strong> to always display the map<br />
in night <strong>mode</strong>.<br />
3 <strong>Touch</strong> .<br />
“Off”: <strong>Touch</strong> to turn off the estimated time/<br />
distance.<br />
“Arrival time/distance”: <strong>Touch</strong> to display<br />
the arrival time in the upper right area of<br />
the map. The distance to the destination<br />
will also be displayed.<br />
“Remaining time/distance”: <strong>Touch</strong> to<br />
display the remaining time to reach the<br />
destination in the upper right area of the<br />
map. The distance to the destination will<br />
also be displayed.<br />
3 <strong>Touch</strong> .<br />
67<br />
Display audio_Ext_EE
<strong>Touch</strong>_<strong>Go</strong>_<strong>Plus</strong>_OM20B71E.book Page 68 Thursday, September 20, 2012 12:03 PM<br />
5. NAVIGATION SETTING<br />
SPEED LIMITS<br />
Speed limits functions can be<br />
changed.<br />
1 <strong>Touch</strong> “Speed limits” on the “Map<br />
settings” screen.<br />
2 <strong>Touch</strong> the desired item.<br />
“Show on map”: <strong>Touch</strong> to display the<br />
speed limits on the map.<br />
“Audible warning, if limit exceeded by”:<br />
<strong>Touch</strong> to receive an audible warning, if the<br />
speed limit will be exceeded by a certain<br />
range.<br />
68<br />
Display audio_Ext_EE
<strong>Touch</strong>_<strong>Go</strong>_<strong>Plus</strong>_OM20B71E.book Page 69 Thursday, September 20, 2012 12:03 PM<br />
5. NAVIGATION SETTING<br />
2. ROUTE SETTINGS<br />
SETTING THE ROUTE<br />
OPTIONS<br />
4 <strong>Touch</strong> the desired item.<br />
SETTING THE ROUTE<br />
CALCULATION<br />
2<br />
The route preferences for the route calculation<br />
can be set.<br />
1 <strong>Touch</strong> “NAV” on the map or press the<br />
“MAP NAV” button to display the<br />
“Navigation” menu screen.<br />
• If the “Navigation” menu screen is not displayed,<br />
touch until it is displayed.<br />
2 <strong>Touch</strong> “Route options”.<br />
• The “Route options” screen can be displayed<br />
by touching on any of the<br />
“Navigation” screens.<br />
3 <strong>Touch</strong> “Preferences”.<br />
“Route type”: <strong>Touch</strong> to select the route<br />
type between “Fast route”, “Short<br />
route” and “Ecological route”.<br />
“Use traffic patterns” ∗ : <strong>Touch</strong> to include<br />
the traffic information history in the route<br />
calculation.<br />
“Show route alternatives”: <strong>Touch</strong> to display<br />
3 routes (fastest, shortest and ecological)<br />
on the map after a route calculation.<br />
“Make a round trip”: <strong>Touch</strong> to have the<br />
route automatically calculated back to the<br />
starting point after the set destination has<br />
been reached.<br />
• Entered stopovers will also be considered<br />
on the way back to the starting point.<br />
5 <strong>Touch</strong> .<br />
INFORMATION<br />
● “Show route alternatives” and “Make<br />
a round trip” are not selectable at the<br />
same time.<br />
NAVIGATION SYSTEM<br />
∗ : If equipped<br />
69<br />
Display audio_Ext_EE
<strong>Touch</strong>_<strong>Go</strong>_<strong>Plus</strong>_OM20B71E.book Page 70 Thursday, September 20, 2012 12:03 PM<br />
5. NAVIGATION SETTING<br />
SETTING THE AVOIDANCE<br />
CRITERIA FOR THE ROUTE<br />
CALCULATION<br />
4 <strong>Touch</strong> the desired item.<br />
The avoidance criteria for the route calculation<br />
can be set.<br />
1 <strong>Touch</strong> “NAV” on the map or press the<br />
“MAP NAV” button to display the<br />
“Navigation” menu screen.<br />
• If the “Navigation” menu screen is not displayed,<br />
touch until it is displayed.<br />
2 <strong>Touch</strong> “Route options”.<br />
“Avoid motorways”: <strong>Touch</strong> to avoid motorways.<br />
“Avoid toll roads”: <strong>Touch</strong> to avoid toll<br />
roads.<br />
“Avoid tunnels”: <strong>Touch</strong> to avoid tunnels.<br />
“Avoid ferries/Car trains”: <strong>Touch</strong> to<br />
avoid ferries/Car trains.<br />
5 <strong>Touch</strong> .<br />
• The “Route options” screen can be displayed<br />
by touching<br />
“Navigation” screens.<br />
3 <strong>Touch</strong> “Avoid”.<br />
on any of the<br />
70<br />
Display audio_Ext_EE
<strong>Touch</strong>_<strong>Go</strong>_<strong>Plus</strong>_OM20B71E.book Page 71 Thursday, September 20, 2012 12:03 PM<br />
5. NAVIGATION SETTING<br />
3. TRAFFIC MESSAGE SETTINGS<br />
TRAFFIC MESSAGE<br />
SETTINGS<br />
1 <strong>Touch</strong> “NAV” on the map or press the<br />
“MAP NAV” button to display the<br />
“Navigation” menu screen.<br />
• If the “Navigation” menu screen is not displayed,<br />
touch until it is displayed.<br />
2 <strong>Touch</strong> “Traffic messages”.<br />
SETTING “Radius filter”<br />
Once the radius filter has been set,<br />
only traffic messages within the radius<br />
will be displayed in the traffic message<br />
list.<br />
1 <strong>Touch</strong> “Radius filter” on the “Set<br />
TMC” screen.<br />
2 <strong>Touch</strong> desired item.<br />
2<br />
NAVIGATION SYSTEM<br />
• The “Traffic messages” screen can be displayed<br />
by touching<br />
“Navigation” screens.<br />
3 <strong>Touch</strong> “Set TMC”.<br />
on any of the<br />
“Off”: <strong>Touch</strong> to deactivate the function.<br />
“10km” ~ “100 km” (“6 mi” ~ “60 mi”):<br />
<strong>Touch</strong> to set the radius from 10 km to<br />
100 km (6 miles to 60 miles).<br />
3 <strong>Touch</strong> .<br />
• Please refer to the following pages for a<br />
description of each setting.<br />
71<br />
Display audio_Ext_EE
<strong>Touch</strong>_<strong>Go</strong>_<strong>Plus</strong>_OM20B71E.book Page 72 Thursday, September 20, 2012 12:03 PM<br />
5. NAVIGATION SETTING<br />
SETTING “Dynamic reroute”<br />
The method of reroute can be set.<br />
1 <strong>Touch</strong> “Dynamic reroute” on the “Set<br />
TMC” screen.<br />
2 <strong>Touch</strong> the desired item.<br />
SETTING “TMC radio station”<br />
The tuning of the TMC radio station<br />
can be set.<br />
1 <strong>Touch</strong> “TMC radio station” on the<br />
“Set TMC” screen.<br />
2 <strong>Touch</strong> the desired item.<br />
“Off”: <strong>Touch</strong> to disable receiving traffic<br />
messages and no reroute will be calculated.<br />
“Automatic”: <strong>Touch</strong> to enable relevant<br />
traffic messages on the route to be displayed<br />
as a pop-up window and activate<br />
automatic reroute calculation.<br />
“Manual”: <strong>Touch</strong> to enable relevant traffic<br />
messages on the route to be displayed as<br />
a pop-up window but disable automatic reroute<br />
calculation. The user decides if reroute<br />
calculation is desirable or not.<br />
3 <strong>Touch</strong> .<br />
“Automatic”: <strong>Touch</strong> to allow the system<br />
to automatically tune to the TMC station<br />
with the best reception.<br />
“Manual”: <strong>Touch</strong> to manually tune the<br />
TMC station by touching or .<br />
INFORMATION<br />
● When the manually tuned station can no<br />
longer be received, the station with the<br />
best reception is selected by the system<br />
and the manually tuned station will be<br />
dimmed. Once the manually tuned station<br />
can be received again, it will be<br />
used as the TMC station.<br />
72<br />
Display audio_Ext_EE
<strong>Touch</strong>_<strong>Go</strong>_<strong>Plus</strong>_OM20B71E.book Page 73 Thursday, September 20, 2012 12:03 PM<br />
6. NAVIGATION SYSTEM INFORMATION<br />
1. LIMITATIONS OF THE NAVIGATION SYSTEM<br />
This navigation system calculates the<br />
current vehicle position using satellite<br />
signals, various vehicle signals, map<br />
data, etc. However, an accurate position<br />
may not be shown depending on<br />
satellite condition, road configuration,<br />
vehicle condition or other circumstances.<br />
The Global Positioning System (GPS) developed<br />
and operated by the U.S. Department<br />
of Defense provides an accurate<br />
current vehicle position, normally using 4<br />
or more satellites, and in some case 3 satellites.<br />
The GPS system has a certain level<br />
of inaccuracy. While the navigation system<br />
will compensate for this most of the time,<br />
occasional positioning errors of up to<br />
100 m (300 feet) can and should be expected.<br />
Generally, position errors will be<br />
corrected within a few seconds.<br />
The GPS signal may be physically obstructed,<br />
leading to inaccurate vehicle position<br />
on the map display. Tunnels, tall<br />
buildings, trucks, or even the placement of<br />
objects on the instrument panel may obstruct<br />
the GPS signals.<br />
The GPS satellites may not send signals<br />
due to repairs or improvements being<br />
made to them.<br />
Even when the navigation system is receiving<br />
clear GPS signals, the vehicle position<br />
may not be shown accurately or<br />
inappropriate route guidance may occur in<br />
some cases.<br />
NOTICE<br />
● The installation of window tinting may<br />
obstruct the GPS signals. Most window<br />
tinting contains some metallic content<br />
that will interfere with GPS signal reception<br />
of the antenna. We advise against<br />
the use of window tinting on vehicles<br />
equipped with navigation systems.<br />
• Accurate current vehicle position may not<br />
be shown in the following cases:<br />
• When driving on a small angled Y-<br />
shaped road.<br />
• When driving on a winding road.<br />
• When driving on a slippery road such as<br />
in sand, gravel, snow, etc.<br />
• When driving on a long straight road.<br />
• When motorway and surface streets run<br />
in parallel.<br />
• After moving by ferry or vehicle carrier.<br />
• When a long route is searched during<br />
high speed driving.<br />
• When driving without setting the current<br />
position calibration correctly.<br />
• After repeating a change of direction by<br />
going forward and backward, or turning<br />
on a turntable in the parking lot.<br />
• When leaving a covered parking lot or<br />
parking garage.<br />
• When a roof carrier is installed.<br />
• When driving with tyre chains installed.<br />
• When the tyres are worn.<br />
• After replacing a tyre or tyres.<br />
• When using tyres that are smaller or<br />
larger than the factory specifications.<br />
• When the tyre pressure in any of the four<br />
tyres is not correct.<br />
2<br />
NAVIGATION SYSTEM<br />
73<br />
Display audio_Ext_EE
<strong>Touch</strong>_<strong>Go</strong>_<strong>Plus</strong>_OM20B71E.book Page 74 Thursday, September 20, 2012 12:03 PM<br />
6. NAVIGATION SYSTEM INFORMATION<br />
• Inappropriate route guidance may occur in<br />
the following cases:<br />
• When turning at an intersection off the<br />
designated route guidance.<br />
• If you set more than one destination but<br />
skip one of them, auto reroute will display<br />
a route returning to the destination<br />
that was skipped.<br />
• When turning at an intersection for which<br />
there is no route guidance.<br />
• When passing through an intersection<br />
for which there is no route guidance.<br />
• During auto reroute, the route guidance<br />
may not be available for the next turn to<br />
the right or left.<br />
• It may take a long time to operate auto<br />
reroute during high speed driving. In<br />
auto reroute, a detour route may be<br />
shown.<br />
• After auto reroute, the route may not be<br />
changed.<br />
• An unnecessary U-turn may be shown or<br />
announced.<br />
• A location may have multiple names and<br />
the system will announce one or more.<br />
• Some routes may not be searched.<br />
• If the route to your destination includes<br />
gravel, unpaved roads or alleys, the<br />
route guidance may not be shown.<br />
• Your destination point might be shown<br />
on the opposite side of the street.<br />
• When a portion of the route has regulations<br />
prohibiting the entry of the vehicle<br />
that vary by time or season or other reasons.<br />
• The road and map data stored in the<br />
navigation system may not be complete<br />
or may not be the latest version.<br />
INFORMATION<br />
● This navigation system uses tyre turning<br />
data and is designed to work with factory-specified<br />
tyres for the vehicle.<br />
Installing tyres that are larger or smaller<br />
than the originally equipped diameter<br />
may cause inaccurate display of the current<br />
vehicle position. The tyre pressure<br />
also affects the diameter of the tyres so<br />
make sure the tyre pressure of all four<br />
tyres is correct.<br />
74<br />
Display audio_Ext_EE
<strong>Touch</strong>_<strong>Go</strong>_<strong>Plus</strong>_OM20B71E.book Page 75 Thursday, September 20, 2012 12:03 PM<br />
6. NAVIGATION SYSTEM INFORMATION<br />
2. MAP DATABASE UPDATES<br />
UPDATE MAP<br />
2 <strong>Touch</strong> “Yes”.<br />
Map data can be updated using a USB<br />
memory that contains map updates.<br />
For details, contact <strong>Toyota</strong> dealer or<br />
refer to <strong>Toyota</strong>’s portal site<br />
(www.my.toyota.eu).<br />
1 Open the cover of the USB/AUX port<br />
and connect a USB memory.<br />
3 <strong>Touch</strong> “Confirm”.<br />
2<br />
NAVIGATION SYSTEM<br />
• The USB/AUX port is located on the<br />
instrument panel, or in the console box or<br />
glove box etc. The location and design are<br />
different depending on the vehicle. For<br />
details, see the Pictorial index of “Owner’s<br />
Manual”.<br />
• The following screen is displayed automatically<br />
when map update data is<br />
detected.<br />
4 The update will start.<br />
NOTICE<br />
● Observe the following precautions when<br />
updating the map data.<br />
• Do not remove the media device containing<br />
the update data until the update<br />
process is complete.<br />
• Do not turn the engine switch off until<br />
the update process is complete.<br />
INFORMATION<br />
● The amount of time required to complete<br />
the update process depends on the size<br />
of the data.<br />
75<br />
Display audio_Ext_EE
<strong>Touch</strong>_<strong>Go</strong>_<strong>Plus</strong>_OM20B71E.book Page 76 Thursday, September 20, 2012 12:03 PM<br />
6. NAVIGATION SYSTEM INFORMATION<br />
3. MAP INFORMATION<br />
END-USER TERMS<br />
The data (“Data”) is provided for your<br />
personal, internal use only and not for<br />
resale. It is protected by copyright, and<br />
is subject to the following terms and<br />
conditions which are agreed to by you,<br />
on the one hand, and Harman<br />
(“Harman”) and its licensors (including<br />
their licensors and suppliers) on the<br />
other hand.<br />
© 2011 NAVTEQ B.V., © Bundesamt für<br />
Eich- und Vermessungswesen, ©<br />
EuroGeographics, source: © IGN 2009 -<br />
®<br />
BD TOPO , Die Grundlagendaten<br />
wurden mit<br />
Genehmigung der zustaendigen<br />
Behoerden entnommen, Contains<br />
Ordnance Survey data © Crown<br />
copyright and database right 2010<br />
Contains Royal Mail data © Royal Mail<br />
copyright and database right 2010,<br />
Copyright Geomatics Ltd., Copyright ©<br />
2003; Top-Map Ltd., La Banca Dati<br />
Italiana è stata prodotta usando quale<br />
riferimento anche cartografia numerica<br />
ed al tratto prodotta e fornita dalla<br />
Regione Toscana., Copyright © 2000;<br />
Norwegian Mapping Authority, Source:<br />
IgeoE – Portugal, Información<br />
geográfica propiedad del CNIG, Based<br />
upon electronic data Ó National Land<br />
Survey Sweden., Topografische<br />
Grundlage: Ó Bundesamt für<br />
Landestopographie.. All rights reserved.<br />
TERMS AND CONDITIONS<br />
PLEASE READ THIS END USER<br />
LICENSE AGREEMENT CAREFULLY<br />
BEFORE USING THE NAVTEQ<br />
DATABASE<br />
NOTICE TO THE USER<br />
THIS IS A LICENSE AGREEMENT -<br />
AND NOT AN AGREEMENT FOR SALE<br />
– BETWEEN YOU AND NAVTEQ B.V.<br />
FOR YOUR COPY OF THE NAVTEQ<br />
NAVIGABLE MAP DATA-BASE,<br />
INCLUDING<br />
ASSOCIATED<br />
COMPUTER SOFTWARE, MEDIA AND<br />
EXPLANATORY<br />
PRINTED<br />
DOCUMENTATION PUBLISHED BY<br />
NAVTEQ (JOINTLY “THE<br />
DATABASE”). BY USING THE<br />
DATABASE, YOU ACCEPT AND<br />
AGREE TO ALL TERMS AND<br />
CONDITIONS OF THIS END USER<br />
LICENSE<br />
AGREEMENT<br />
(“AGREEMENT”). IF YOU DO NOT<br />
AGREE TO THE TERMS OF THIS<br />
AGREEMENT, PROMPTLY RETURN<br />
THE DATABASE, ALONG WITH ALL<br />
OTHER ACCOMPANYING ITEMS, TO<br />
YOUR SUP-PLIER FOR A REFUND.<br />
OWNERSHIP<br />
The Database and the copyrights and<br />
intellectual property or neighboring<br />
rights therein are owned by NAVTEQ or<br />
its licensors. Ownership of the media on<br />
which the Database is contained is<br />
retained by NAVTEQ and/or your<br />
supplier until after you have paid in full<br />
any amounts due to NAVTEQ and/or<br />
your supplier pursuant to this Agreement<br />
or similar agreement(s) under which<br />
goods are provided to you.<br />
76<br />
Display audio_Ext_EE
<strong>Touch</strong>_<strong>Go</strong>_<strong>Plus</strong>_OM20B71E.book Page 77 Thursday, September 20, 2012 12:03 PM<br />
6. NAVIGATION SYSTEM INFORMATION<br />
LICENSE GRANT<br />
NAVTEQ grants you a non-exclusive<br />
license to use the Database for your<br />
personal use or, if applicable, for use in<br />
your business’ internal operations. This<br />
license does not include the right to<br />
grant sub-licenses.<br />
LIMITATIONS ON USE<br />
The Database is restricted for use in the<br />
specific system for which it was created.<br />
Except to the extent explicitly permitted<br />
by mandatory laws (e.g. national laws<br />
based on the European Software<br />
Directive (91/250) and the Database<br />
Directive (96/9)), you may not extract or<br />
reutilize substantial parts of the contents<br />
of the Database nor reproduce, copy,<br />
modify, adapt, translate, disassemble,<br />
decompile, reverse engineer any portion<br />
of the Database. If you wish to obtain<br />
interoperability information as meant in<br />
(the national laws based on) the<br />
European Software Directive, you shall<br />
grant NAVTEQ reasonable opportunity<br />
to provide said information on<br />
reasonable terms, including costs, to be<br />
determined by NAVTEQ.<br />
TRANSFER OF LICENSE<br />
You may not transfer the Database to<br />
third parties, except when installed in the<br />
system for which it was created or when<br />
you do not retain any copy of the<br />
Database, and provided that the<br />
transferee agrees to all terms and<br />
conditions of this Agreement and<br />
confirms this in writing to NAVTEQ.<br />
Multi-disc sets may only be transferred<br />
or sold as a complete set as provided by<br />
NAVTEQ and not as subset thereof.<br />
LIMITED WARRANTY<br />
NAVTEQ warrants that, subject to the<br />
warnings set out below, for a period of<br />
12 months after acquisition of your copy<br />
of the Database, it will perform<br />
substantially in accordance with<br />
NAVTEQ’s Criteria for Accuracy and<br />
Completeness existing on the date you<br />
acquired the Database; these criteria are<br />
available from NAVTEQ at your request.<br />
If the Database does not perform in<br />
accordance with this limited warranty,<br />
NAVTEQ will use reasonable efforts to<br />
repair or replace your non-conforming<br />
copy of the Database. If these efforts do<br />
not lead to performance of the Database<br />
in accordance with the warranties set out<br />
herein, you will have the option to either<br />
receive a reasonable refund of the price<br />
you paid for the Database or to rescind<br />
this Agreement. This shall be NAVTEQ’s<br />
entire liability and your sole remedy<br />
against NAVTEQ. Except as expressly<br />
provided in this section, NAVTEQ does<br />
not warrant nor make any<br />
representations regarding the use of<br />
results of the use of the Database in<br />
terms of its correctness, accuracy,<br />
reliability, or otherwise. NAVTEQ does<br />
not warrant that the Database is or will<br />
be error free. No oral or written<br />
information or advice provided by<br />
NAVTEQ, your supplier or any other<br />
person shall create a warranty or in any<br />
way increase the scope of the limited<br />
warranty described above. The limited<br />
warranty set forth in this Agreement<br />
does not affect or prejudice any statutory<br />
legal rights that you may have under the<br />
legal warranty against hidden defects.<br />
2<br />
NAVIGATION SYSTEM<br />
77<br />
Display audio_Ext_EE
<strong>Touch</strong>_<strong>Go</strong>_<strong>Plus</strong>_OM20B71E.book Page 78 Thursday, September 20, 2012 12:03 PM<br />
6. NAVIGATION SYSTEM INFORMATION<br />
If you did not acquire the Database from<br />
NAVTEQ directly, you may have<br />
statutory rights against the person from<br />
whom you have acquired the Database<br />
in addition to the rights granted by<br />
NAVTEQ hereunder according to the<br />
law of your jurisdiction. The above<br />
warranty of NAVTEQ shall not affect<br />
such statutory rights and you may assert<br />
such rights in addition to the warranty<br />
rights granted herein.<br />
LIMITATION OF LIABILITY<br />
The price of the Database does not<br />
include any consideration for<br />
assumption of risk of consequential,<br />
indirect or unlimited direct damages<br />
which may arise in connection with your<br />
use of the Database. Accordingly, in no<br />
event shall NAVTEQ be liable for any<br />
consequential or indirect damages,<br />
including without limitation, loss of<br />
revenue, data, or use, incurred by you or<br />
any third party arising out of your use of<br />
the Database, whether in an action in<br />
contract or tort or based on a warranty,<br />
even if NAVTEQ has been advised of<br />
the possibility of such damages. In any<br />
event NAVTEQ’s liability for direct<br />
damages is limited to the price of your<br />
copy of the Database.<br />
THE LIMITED WARRANTY AND<br />
LIMITATION OF LIABILITY, SET<br />
FORTH IN THIS AGREE-MENT, DO<br />
NOT AFFECT OR PREJUDICE YOUR<br />
STATUTORY RIGHTS WHERE YOU<br />
HAVE ACQUIRED THE DATABASE<br />
OTHERWISE THAN IN THE COURSE<br />
OF A BUSINESS.<br />
WARNINGS<br />
The Database may contain inaccurate or<br />
incomplete information due to the<br />
passage of time, changing<br />
circumstances, sources used and the<br />
nature of collecting comprehensive<br />
geographic data, any of which may lead<br />
to incorrect results. The Database does<br />
not include or reflect information on -<br />
inter alia - neighborhood safety; law<br />
enforcement; emergency assistance;<br />
construction work; road or lane closures;<br />
vehicle or speed restrictions; road slope<br />
or grade; bridge height, weight or other<br />
limits; road or traffic conditions; special<br />
events; traffic congestion; or travel time.<br />
GOVERNING LAW<br />
This Agreement shall be governed by<br />
the laws of the jurisdiction, in which you<br />
reside at the date of acquisition of the<br />
Database. Should you at that moment<br />
reside outside the European Union or<br />
Switzerland, the law of the jurisdiction<br />
within the European Union or<br />
Switzerland where you acquired the<br />
Database shall apply. In all other cases,<br />
or if the jurisdiction where you acquired<br />
the Database cannot be defined, the<br />
laws of the Netherlands shall apply. The<br />
courts competent at your place of<br />
residence at the time you acquired the<br />
Database shall have jurisdiction over<br />
any dispute arising out of, or relating to<br />
this Agreement, without prejudice to<br />
NAVTEQ’ right to bring claims at your<br />
then current place of residence.<br />
78<br />
Display audio_Ext_EE
<strong>Touch</strong>_<strong>Go</strong>_<strong>Plus</strong>_OM20B71E.book Page 79 Thursday, September 20, 2012 12:03 PM<br />
3<br />
APPLICATION<br />
1<br />
2<br />
1 APPLICATIONS OPERATION 2 CONNECTED SERVICE<br />
1. QUICK REFERENCE .................... 80<br />
2. PICTURE SLIDESHOW ................ 81<br />
DISPLAYING THE PICTURES .............. 81<br />
PLAYING PICTURE SLIDESHOWS...... 82<br />
3. EMAIL............................................ 83<br />
NEW EMAIL NOTIFICATION<br />
POP-UP WINDOW.............................. 83<br />
CHECKING EMAIL ................................ 83<br />
4. CALENDAR................................... 85<br />
CHECKING CALENDAR ....................... 85<br />
1. CONNECTED SERVICE<br />
OVERVIEW.................................. 86<br />
2. BEFORE USING<br />
CONNECTED SERVICE ............. 89<br />
OBTAINING A PORTAL SITE<br />
ACCOUNT .......................................... 89<br />
LOGIN PROCESS CONNECTED<br />
SERVICES.......................................... 91<br />
3. OPERATING NAVIGATION<br />
FUNCTION USING<br />
CONNECTED SERVICE ............. 92<br />
ONLINE SEARCH ................................. 92<br />
LOADING ADDRESSES ....................... 94<br />
4. OPERATING AN APPLICATION<br />
USING CONNECTED<br />
SERVICE ..................................... 96<br />
DOWNLOADING AN APPLICATION<br />
TO THE SYSTEM............................... 96<br />
OPERATING AN APPLICATION .......... 97<br />
3<br />
4<br />
5<br />
6<br />
7<br />
8<br />
9<br />
Some of the functions cannot be operated while driving.<br />
79<br />
DA_EXT_High_EE
<strong>Touch</strong>_<strong>Go</strong>_<strong>Plus</strong>_OM20B71E.book Page 80 Thursday, September 20, 2012 12:03 PM<br />
1. APPLICATIONS OPERATION<br />
1. QUICK REFERENCE<br />
The applications can be accessed by pressing the<br />
button.<br />
Each time the button is pressed, the screen will change between the<br />
“Phone” menu screen and the “Extras” menu screen.<br />
When the button is pressed, the screen that was last displayed is returned<br />
to. <strong>Touch</strong> to display the “Extras” menu screen.<br />
“Extras” menu screen<br />
No. Function Page<br />
<strong>Touch</strong> to access the online search. 92<br />
<strong>Touch</strong> to view pictures stored on a USB memory. 81<br />
* <strong>Touch</strong> to display the connected phone’s Emails. 83<br />
* <strong>Touch</strong> to access the connected phone’s calendar, tasks and notes. 85<br />
<strong>Touch</strong> to access applications. 97<br />
*: If equipped<br />
80<br />
Display audio_Ext_EE
<strong>Touch</strong>_<strong>Go</strong>_<strong>Plus</strong>_OM20B71E.book Page 81 Thursday, September 20, 2012 12:03 PM<br />
1. APPLICATIONS OPERATION<br />
2. PICTURE SLIDESHOW<br />
When the vehicle is stopped, pictures<br />
stored on a USB memory can be<br />
viewed.<br />
2 Press the button to display the<br />
“Extras” menu screen.<br />
3<br />
INFORMATION<br />
● Images cannot be viewed while driving.<br />
● When the vehicle starts moving while<br />
viewing pictures, a pop-up window will<br />
be displayed and pictures cannot be displayed.<br />
<strong>Touch</strong> “Previous” to return to<br />
the previous screen.<br />
● Available image data format: JPEG,<br />
PNG and BMP<br />
• If the “Extras” menu screen is not displayed,<br />
press the button until it is<br />
displayed.<br />
3 <strong>Touch</strong> “Pictures”.<br />
APPLICATION<br />
DISPLAYING THE PICTURES<br />
1 Open the cover of the USB/AUX port<br />
and connect a USB memory.<br />
4 The slideshow starts automatically.<br />
• The USB/AUX port is located on the<br />
instrument panel, or in the console box or<br />
glove box etc. The location and design are<br />
different depending on the vehicle. For<br />
details, see the Pictorial index of “Owner’s<br />
Manual”.<br />
: <strong>Touch</strong> to stop the slideshow.<br />
INFORMATION<br />
● All readable pictures on the device are<br />
displayed in chronological order. The<br />
slideshow will repeat when it is finished.<br />
● The pictures will be changed every few<br />
seconds.<br />
81<br />
Display audio_Ext_EE
<strong>Touch</strong>_<strong>Go</strong>_<strong>Plus</strong>_OM20B71E.book Page 82 Thursday, September 20, 2012 12:03 PM<br />
1. APPLICATIONS OPERATION<br />
PLAYING PICTURE<br />
SLIDESHOWS<br />
A slideshow can be played, paused,<br />
and desired images can be selected.<br />
INFORMATION<br />
● When the slideshow is playing, the<br />
pause and skip screen buttons disappear<br />
automatically after a few seconds.<br />
1 <strong>Touch</strong> .<br />
2 Operating switches will be displayed.<br />
: <strong>Touch</strong> to close the slideshow<br />
options.<br />
: <strong>Touch</strong> to pause the slideshow.<br />
: <strong>Touch</strong> to play the slideshow<br />
again.<br />
: <strong>Touch</strong> to display the previous<br />
picture.<br />
: <strong>Touch</strong> to display the next picture.<br />
82<br />
Display audio_Ext_EE
<strong>Touch</strong>_<strong>Go</strong>_<strong>Plus</strong>_OM20B71E.book Page 83 Thursday, September 20, 2012 12:03 PM<br />
1. APPLICATIONS OPERATION<br />
3. EMAIL ∗ 1 Press the button to display the<br />
Incoming Emails to a connected<br />
Bluetooth ® phone can be downloaded.<br />
Before using this application, connect<br />
a Bluetooth ® phone with a phone<br />
profile. (See page 194.)<br />
CHECKING EMAIL<br />
“Extras” menu screen.<br />
3<br />
INFORMATION<br />
● This function may not be available<br />
depending on the phone.<br />
● Emails cannot be sent using this function.<br />
● Downloading may not complete correctly<br />
if the engine switch is turned off<br />
during downloading.<br />
• If the “Extras” menu screen is not displayed,<br />
press the button until it is<br />
displayed.<br />
2 <strong>Touch</strong> “Emails”.<br />
APPLICATION<br />
NEW EMAIL NOTIFICATION<br />
POP-UP WINDOW<br />
When a new Email is received, a pop-up<br />
window is displayed on the screen.<br />
• This function can be set to “On” or<br />
“Off”. (See page 200.)<br />
• When the downloading of an Email has<br />
been completed, the mail list will be displayed.<br />
3 <strong>Touch</strong> the desired Email.<br />
∗ : If equipped<br />
83<br />
Display audio_Ext_EE
<strong>Touch</strong>_<strong>Go</strong>_<strong>Plus</strong>_OM20B71E.book Page 84 Thursday, September 20, 2012 12:03 PM<br />
1. APPLICATIONS OPERATION<br />
• The state of an Email is shown by the following<br />
icons.<br />
: Unread mail<br />
: Read mail<br />
: Important mail<br />
4 The text of the Email is displayed.<br />
• When is touched, the Email message<br />
is read out. To cancel this function,<br />
touch .<br />
84<br />
Display audio_Ext_EE
<strong>Touch</strong>_<strong>Go</strong>_<strong>Plus</strong>_OM20B71E.book Page 85 Thursday, September 20, 2012 12:03 PM<br />
1. APPLICATIONS OPERATION<br />
4. CALENDAR ∗<br />
Calendar entries, tasks and notes from a<br />
connected Bluetooth ® phone can be<br />
downloaded. Before using this<br />
application, connect a Bluetooth ® phone<br />
with a phone profile. (See page 194.)<br />
2 <strong>Touch</strong> “Calendar”.<br />
INFORMATION<br />
● This function may not be available<br />
depending on the phone.<br />
● Calendar entries cannot be edited using<br />
this function.<br />
● Downloading may not complete correctly<br />
if the engine switch is turned off<br />
during downloading.<br />
• When the downloading of the calendar is<br />
complete, the current day’s calendar<br />
entries will be displayed.<br />
3 When a displayed schedule entry is<br />
touched, the entry’s detailed information<br />
is displayed.<br />
3<br />
APPLICATION<br />
CHECKING CALENDAR<br />
1 Press the button to display the<br />
“Extras” menu screen.<br />
: <strong>Touch</strong> to display the previous day’s<br />
schedule.<br />
: <strong>Touch</strong> to display the following day’s<br />
schedule.<br />
: <strong>Touch</strong> to display the current day’s<br />
tasks.<br />
: <strong>Touch</strong> to display the notes.<br />
• If the “Extras” menu screen is not displayed,<br />
press the button until it is<br />
displayed.<br />
∗ : If equipped<br />
85<br />
Display audio_Ext_EE
<strong>Touch</strong>_<strong>Go</strong>_<strong>Plus</strong>_OM20B71E.book Page 86 Thursday, September 20, 2012 12:03 PM<br />
2. CONNECTED SERVICE<br />
1. CONNECTED SERVICE OVERVIEW<br />
The following services are available by connecting the navigation system to<br />
<strong>Toyota</strong>’s portal site via the internet using a cellular phone.<br />
• Online search: New establishments, such as restaurants, bars etc., that are not registered<br />
in the navigation system can be set as a destination.<br />
• Importing points: Establishments that were searched using a computer can be set<br />
as a destination and can be registered in the “Stored” list on the “My destinations”<br />
screen and “Contacts” screen. (See pages 55 and 157.)<br />
• Application: Various functions can be added by downloading applications using a<br />
USB memory.<br />
Online search<br />
No. Name Operation<br />
Navigation<br />
<strong>Toyota</strong> Centre<br />
Input a keyword.<br />
The keyword is sent to the search engine, the results are received<br />
and then changed into navigation format.<br />
86<br />
Display audio_Ext_EE
<strong>Touch</strong>_<strong>Go</strong>_<strong>Plus</strong>_OM20B71E.book Page 87 Thursday, September 20, 2012 12:03 PM<br />
2. CONNECTED SERVICE<br />
Importing memory points: Downloading via a cellular phone<br />
3<br />
Importing memory points: Downloading from a USB memory<br />
APPLICATION<br />
No. Name Operation<br />
Your personal computer<br />
and <strong>Toyota</strong> portal<br />
site*<br />
<strong>Toyota</strong> Centre<br />
Navigation<br />
USB memory<br />
Access the portal site and search POIs.<br />
The POIs are saved at <strong>Toyota</strong> Centre.<br />
Via the internet, the POIs are downloaded to the navigation<br />
system.<br />
Via the USB the POIs are downloaded to the navigation system.<br />
The POIs are saved to a USB.<br />
*: For details about <strong>Toyota</strong>’s portal site, refer to www.my.toyota.eu.<br />
87<br />
Display audio_Ext_EE
<strong>Touch</strong>_<strong>Go</strong>_<strong>Plus</strong>_OM20B71E.book Page 88 Thursday, September 20, 2012 12:03 PM<br />
2. CONNECTED SERVICE<br />
Application<br />
No. Name Operation<br />
Your personal computer<br />
and <strong>Toyota</strong> portal<br />
site*<br />
USB memory<br />
Navigation<br />
Contents provider<br />
Access the portal site and download application.<br />
The downloaded application is saved to a USB.<br />
Via the USB the application is downloaded to the navigation<br />
system.<br />
Runs applications on the navigation system.<br />
Contents received via a cellular phone.<br />
*: For details about <strong>Toyota</strong>’s portal site, refer to www.my.toyota.eu.<br />
88<br />
Display audio_Ext_EE
<strong>Touch</strong>_<strong>Go</strong>_<strong>Plus</strong>_OM20B71E.book Page 89 Thursday, September 20, 2012 12:03 PM<br />
2. CONNECTED SERVICE<br />
2. BEFORE USING CONNECTED SERVICE<br />
OBTAINING A PORTAL SITE<br />
ACCOUNT<br />
Before using connected services, it is<br />
necessary to first access <strong>Toyota</strong>’s<br />
portal site (www.my.toyota.eu) via a<br />
personal computer and create an<br />
account.<br />
Device identification and Vehicle<br />
identification number (VIN) are<br />
required to obtain an account. Check<br />
the identifications before accessing<br />
<strong>Toyota</strong>’s portal site.<br />
• In order to use this service, a Bluetooth ®<br />
DUN/PAN capable cellular phone with a<br />
valid data plan subscription is required.<br />
• When using the connected services,<br />
depending on your phone subscription,<br />
some related fees might apply.<br />
• When a cellular phone is used in a roaming<br />
situation (when outside the geographical<br />
coverage area of mobile network<br />
provider) connection fees will be more<br />
expensive.<br />
INFORMATION<br />
● This system supports the following service.<br />
• Bluetooth ® Specification<br />
Ver.1.1 or higher<br />
(Recommended: Ver.2.1 + EDR or<br />
higher)<br />
•Profiles<br />
HFP (Hands Free Profile)<br />
Ver.1.0 or higher<br />
(Recommended: Ver.1.5 or higher)<br />
DUN (Dial-Up Networking Profile)<br />
Ver.1.1 or higher<br />
PAN (Personal Area Network)<br />
Ver. 1.0<br />
PBAP (Phone Book Access Profile)<br />
Ver.1.0 or higher<br />
MAP (Message Access Profile)<br />
• Application<br />
PIM (Personal Information Manager)<br />
● If your cellular phone does not support<br />
HFP, you cannot register the Bluetooth ®<br />
phone, or use DUN/PAN or PBAP profiles<br />
individually.<br />
● If the connected Bluetooth ® phone version<br />
is older than recommended or<br />
incompatible, this function may not be<br />
used.<br />
3<br />
APPLICATION<br />
89<br />
Display audio_Ext_EE
<strong>Touch</strong>_<strong>Go</strong>_<strong>Plus</strong>_OM20B71E.book Page 90 Thursday, September 20, 2012 12:03 PM<br />
2. CONNECTED SERVICE<br />
■CHECKING DEVICE IDENTIFICA-<br />
TION<br />
1 Press the “SETUP” button.<br />
• “Copy to USB”: <strong>Touch</strong> to copy system<br />
information to the USB memory connected<br />
to the device.<br />
■CHECKING VEHICLE IDENTIFICA-<br />
TION NUMBER<br />
For details, see the vehicle specifications<br />
of “Owner’s Manual”.<br />
2 <strong>Touch</strong> “General”.<br />
3 <strong>Touch</strong> “System information”.<br />
4 Device ID is displayed.<br />
90<br />
Display audio_Ext_EE
<strong>Touch</strong>_<strong>Go</strong>_<strong>Plus</strong>_OM20B71E.book Page 91 Thursday, September 20, 2012 12:03 PM<br />
2. CONNECTED SERVICE<br />
LOGIN PROCESS<br />
CONNECTED SERVICES<br />
4 <strong>Touch</strong> “password”.<br />
1 <strong>Touch</strong> the desired online search provider<br />
or “Load addresses from server”.<br />
(See pages 92 and 94.)<br />
• When the cost warning or roaming warning<br />
screen is displayed, touch “Continue”.<br />
This function can be set to on or<br />
off. (See page 199.)<br />
2 <strong>Touch</strong> “Username”.<br />
5 Input the server password and then<br />
touch “OK”.<br />
6 <strong>Touch</strong> “Confirm login information”.<br />
3<br />
APPLICATION<br />
• When “Remember password” is on, the<br />
entered user login information will be<br />
remembered for every login.<br />
3 Input the server username and then<br />
touch “OK”.<br />
91<br />
Display audio_Ext_EE
<strong>Touch</strong>_<strong>Go</strong>_<strong>Plus</strong>_OM20B71E.book Page 92 Thursday, September 20, 2012 12:03 PM<br />
2. CONNECTED SERVICE<br />
3. OPERATING NAVIGATION FUNCTION USING CONNECTED SERVICE<br />
ONLINE SEARCH<br />
A destination can be selected via<br />
connected service.<br />
Online search will not be available in all<br />
countries.<br />
Before using this function, connect a<br />
Bluetooth ® phone with an internet<br />
profile. (See page 194.)<br />
1 <strong>Touch</strong> “NAV” on the map or press the<br />
“MAP NAV” button to display the<br />
“Navigation” menu screen.<br />
• If there is more than one online search<br />
provider available, these providers will be<br />
displayed.<br />
• If “Update providers” is touched, available<br />
providers are added to the list.<br />
• If “Online search” will be displayed, touch<br />
“Online search” and then select online<br />
search provider.<br />
• The desired online search provider can be<br />
selected on the “Extras” menu screen.<br />
(See page 80.)<br />
5 Login to connected services. (See<br />
page 91.)<br />
6 <strong>Touch</strong> “Search area”.<br />
• If the “Navigation” menu screen is not displayed,<br />
touch until it is displayed.<br />
2 <strong>Touch</strong> “Enter destination”.<br />
7 Select the desired search area.<br />
• The “Enter destination” screen can be displayed<br />
by touching on any of the<br />
“Navigation” screens.<br />
3 <strong>Touch</strong> “Advanced” on the “Enter destination”<br />
screen.<br />
4 <strong>Touch</strong> to select the desired provider,<br />
“Online search by Xxxxxx” etc.<br />
“At current position”: <strong>Touch</strong> to define<br />
the area at the current position.<br />
“Define city”: <strong>Touch</strong> to define the area by<br />
city name. Input the city name and then<br />
touch “OK”.<br />
“From map”: <strong>Touch</strong> to define the area on<br />
the map. <strong>Touch</strong> the desired city on the<br />
map and then touch “Select”.<br />
“At destination”: <strong>Touch</strong> to define the<br />
area around the main destination. When<br />
route guidance is not in use, “At destination”<br />
cannot be selected.<br />
92<br />
Display audio_Ext_EE
<strong>Touch</strong>_<strong>Go</strong>_<strong>Plus</strong>_OM20B71E.book Page 93 Thursday, September 20, 2012 12:03 PM<br />
2. CONNECTED SERVICE<br />
8 <strong>Touch</strong> “Enter search word” on the<br />
online search screen.<br />
11<strong>Touch</strong> “<strong>Go</strong>”.<br />
9 Input the search word and then touch<br />
“OK”.<br />
10The search results will be displayed.<br />
<strong>Touch</strong> the desired item.<br />
“Details”: <strong>Touch</strong> to display the details of<br />
the point information.<br />
: <strong>Touch</strong> to call the registered telephone<br />
number.<br />
12The starting route guidance screen will<br />
be displayed. (See page 43.)<br />
3<br />
APPLICATION<br />
INFORMATION<br />
• Up to 20 items will be searched when performing<br />
an online search.<br />
“Ad:”: Displays sponsored links<br />
“Download more”: <strong>Touch</strong> to search up to<br />
20 new items. Up to 60 non-sponsored<br />
links can be downloaded.<br />
“Previous results”: <strong>Touch</strong> to display the<br />
previous result.<br />
“Next results”: <strong>Touch</strong> to display the next<br />
result.<br />
● indicates if online connection is<br />
active or not. After a timeout of 1 minute,<br />
an active online connection will automatically<br />
be terminated.<br />
93<br />
Display audio_Ext_EE
<strong>Touch</strong>_<strong>Go</strong>_<strong>Plus</strong>_OM20B71E.book Page 94 Thursday, September 20, 2012 12:03 PM<br />
2. CONNECTED SERVICE<br />
LOADING ADDRESSES<br />
Addresses and numbers can be added<br />
by downloading from an Internet<br />
server. They will be stored in the<br />
“Stored” list on the “My destinations”<br />
screen and “Contacts” screen. (See<br />
pages on 55 and 157.)<br />
Before using this function, connect a<br />
Bluetooth ® phone with an internet<br />
profile. (See page 194.)<br />
DOWNLOADING VIA A<br />
CELLULAR PHONE<br />
1 <strong>Touch</strong> “NAV” on the map or press the<br />
“MAP NAV” button to display the<br />
“Navigation” menu screen.<br />
3 <strong>Touch</strong> “Advanced” on the “Enter destination”<br />
screen.<br />
4 <strong>Touch</strong> “Load addresses from server”.<br />
5 Login to connected services. (See<br />
page 91.)<br />
6 The following screen will be displayed<br />
while loading the data.<br />
• If the “Navigation” menu screen is not displayed,<br />
touch until it is displayed.<br />
2 <strong>Touch</strong> “Enter destination”.<br />
• To cancel this function, touch “Cancel”.<br />
7 The following screen will be displayed<br />
when loading is complete.<br />
• The “Enter destination” screen can be displayed<br />
by touching<br />
“Navigation” screens.<br />
on any of the<br />
8 The entry is registered in the “Stored”<br />
list on the “My destinations” screen and<br />
“Contacts” screen. (See pages 55 and<br />
157.)<br />
94<br />
Display audio_Ext_EE
<strong>Touch</strong>_<strong>Go</strong>_<strong>Plus</strong>_OM20B71E.book Page 95 Thursday, September 20, 2012 12:03 PM<br />
2. CONNECTED SERVICE<br />
NOTICE<br />
● Do not turn off the engine while downloading.<br />
DOWNLOADING FROM A USB<br />
MEMORY<br />
For details about downloading from a<br />
USB memory, see page 59.<br />
INFORMATION<br />
● Downloading may not complete correctly<br />
if the engine switch is turned off<br />
during downloading.<br />
● If the “Automatic download of<br />
addresses” function is on, the addresses<br />
from the server will be downloaded automatically.<br />
(See page 199.)<br />
● If a message similar to the one below is<br />
displayed, delete X item(s) in the<br />
“Stored” list on the “My destinations”<br />
screen or “Contacts” screen to make<br />
room for the new destination(s). (See<br />
pages 61 and 159.)<br />
3<br />
APPLICATION<br />
95<br />
Display audio_Ext_EE
<strong>Touch</strong>_<strong>Go</strong>_<strong>Plus</strong>_OM20B71E.book Page 96 Thursday, September 20, 2012 12:03 PM<br />
2. CONNECTED SERVICE<br />
4. OPERATING AN APPLICATION USING CONNECTED SERVICE<br />
DOWNLOADING AN<br />
APPLICATION TO THE<br />
SYSTEM<br />
To download an application, a USB<br />
memory that contains the application<br />
data is required. For details about an<br />
application, refer to <strong>Toyota</strong>’s portal site<br />
(www.my.toyota.eu).<br />
1 Open the cover of the USB/AUX port<br />
and connect a USB memory.<br />
3 <strong>Touch</strong> “Confirm”.<br />
• Downloading will start.<br />
4 When the download is complete, a<br />
pop-up window will be displayed.<br />
<strong>Touch</strong> “Confirm”.<br />
• The USB/AUX port is located on the<br />
instrument panel, or in the console box or<br />
glove box etc. The location and design are<br />
different depending on the vehicle. For<br />
details, see the Pictorial index of “Owner’s<br />
Manual”.<br />
• The following screen is displayed automatically<br />
when application data is<br />
detected.<br />
2 <strong>Touch</strong> “Yes”.<br />
• The screen will return to the previous<br />
screen.<br />
• The downloaded applications are displayed<br />
on the “Extras” menu screen.<br />
NOTICE<br />
● Do not turn off the engine while downloading.<br />
INFORMATION<br />
● Downloading may not complete correctly<br />
in the following cases:<br />
• If the engine switch is turned off during<br />
downloading<br />
• If the USB memory is removed before<br />
downloading is complete<br />
96<br />
Display audio_Ext_EE
<strong>Touch</strong>_<strong>Go</strong>_<strong>Plus</strong>_OM20B71E.book Page 97 Thursday, September 20, 2012 12:03 PM<br />
2. CONNECTED SERVICE<br />
OPERATING AN<br />
APPLICATION<br />
Before using downloaded applications,<br />
connect the Bluetooth ® phone with an<br />
internet profile. (See page 194.) If a<br />
Bluetooth ® connection with an internet<br />
profile is not currently active, downloaded<br />
applications will be dimmed.<br />
For details about operating the application,<br />
refer to www.my.toyota.eu.<br />
OPENING AN APPLICATION<br />
1 Press the button to display the<br />
“Extras” menu screen.<br />
3 The application is opened.<br />
(on some applications): <strong>Touch</strong> to update<br />
the data.<br />
: <strong>Touch</strong> to display the operating<br />
switch.<br />
: <strong>Touch</strong> to close the application.<br />
3<br />
APPLICATION<br />
• If the “Extras” menu screen is not displayed,<br />
press the button until it is<br />
displayed.<br />
2 <strong>Touch</strong> the desired application.<br />
97<br />
Display audio_Ext_EE
<strong>Touch</strong>_<strong>Go</strong>_<strong>Plus</strong>_OM20B71E.book Page 98 Thursday, September 20, 2012 12:03 PM<br />
2. CONNECTED SERVICE<br />
DELETING AN APPLICATION<br />
1 <strong>Touch</strong> on the right side of the application<br />
to be deleted.<br />
2 The following confirmation screen will<br />
be displayed. <strong>Touch</strong> “Yes”.<br />
• The selected application is deleted and<br />
the “Extras” menu screen will be returned<br />
to.<br />
98<br />
Display audio_Ext_EE
<strong>Touch</strong>_<strong>Go</strong>_<strong>Plus</strong>_OM20B71E.book Page 99 Thursday, September 20, 2012 12:03 PM<br />
4<br />
AUDIO SYSTEM<br />
1<br />
1 AUDIO SYSTEM OPERATION<br />
1. QUICK REFERENCE .................. 100<br />
2. SOME BASICS............................ 102<br />
TURNING THE AUDIO SYSTEM<br />
ON OR OFF ...................................... 102<br />
CONTROLS USING THE TUNE/<br />
SCROLL KNOB................................. 102<br />
SWITCHING AUDIO SOURCE............ 103<br />
3. RADIO OPERATION................... 104<br />
SWITCHING TO RADIO MODE .......... 104<br />
PRESETTING A STATION .................. 104<br />
SELECTING A STATION..................... 105<br />
RDS (RADIO DATA SYSTEM) ............ 106<br />
4. CD PLAYER OPERATION.......... 108<br />
INSERTING OR EJECTING<br />
A DISC .............................................. 108<br />
SWITCHING TO CD MODE ................ 109<br />
PLAYING AN AUDIO CD..................... 109<br />
PLAYING A MP3/WMA DISC .............. 111<br />
5. USB MEMORY/iPod<br />
OPERATION ............................. 114<br />
CONNECTING A USB MEMORY<br />
OR iPod............................................. 114<br />
SWITCHING TO USB<br />
OR iPod MODE ................................. 115<br />
PLAYING A USB MEMORY<br />
OR iPod............................................. 115<br />
6. AUX DEVICE OPERATION......... 121<br />
CONNECTING A PORTABLE<br />
AUDIO DEVICE ................................ 121<br />
SWITCHING TO AUX MODE.............. 122<br />
PLAYING A PORTABLE<br />
AUDIO DEVICE ................................ 122<br />
7. Bluetooth ® AUDIO<br />
OPERATION.............................. 123<br />
SWITCHING TO Bluetooth ®<br />
AUDIO MODE................................... 124<br />
CONNECTING Bluetooth ® AUDIO ..... 124<br />
PLAYING Bluetooth ® AUDIO .............. 127<br />
8. STEERING SWITCHES............... 131<br />
STEERING SWITCHES<br />
(WITH TWO DIRECTION<br />
STEERING SWITCH) ....................... 131<br />
STEERING SWITCHES<br />
(WITH FOUR DIRECTION<br />
STEERING SWITCH) ....................... 132<br />
9. AUDIO SYSTEM OPERATING<br />
HINTS ........................................ 134<br />
RADIO RECEPTION ........................... 134<br />
iPod ..................................................... 135<br />
USB MEMORY.................................... 136<br />
CARING FOR YOUR CD PLAYER<br />
AND DISCS ...................................... 136<br />
MP3/WMA FILES ................................ 138<br />
CD-R AND CD-RW DISCS ................. 139<br />
TERMS................................................ 139<br />
Gracenote ® ......................................... 141<br />
2<br />
3<br />
4<br />
5<br />
6<br />
7<br />
8<br />
9<br />
Some of the functions cannot be operated while driving.<br />
99<br />
DA_EXT_High_EE
<strong>Touch</strong>_<strong>Go</strong>_<strong>Plus</strong>_OM20B71E.book Page 100 Thursday, September 20, 2012 12:03 PM<br />
1. AUDIO SYSTEM OPERATION<br />
1. QUICK REFERENCE<br />
To access the audio system, press the “MEDIA” button. The audio system turns<br />
on in the last <strong>mode</strong> used.<br />
• The actual design and button position may differ depending on the vehicle. For<br />
details, see Section 3 of “Owner’s Manual”.<br />
No. Name Function Page<br />
Audio<br />
screen<br />
control<br />
A selected audio source is displayed, and it can be<br />
operated with the touch screen controls.<br />
⎯<br />
Disc slot<br />
Insert a disc into this slot. The CD player turns on<br />
immediately.<br />
108<br />
“Source”/<br />
<strong>Touch</strong> to select your desired audio sources. The<br />
audio source selection screen will be displayed.<br />
103<br />
Tune/Scroll knob<br />
Seek/Track<br />
button<br />
“MEDIA” button<br />
Turn to select radio station bands, tracks and files.<br />
Also, the knob can be used for selection from the<br />
list display.<br />
Press the “ ” or “ ” button to seek up or down for<br />
a station, or to access a desired track or file.<br />
Press to display the audio control screen. The audio<br />
system turns on in the last <strong>mode</strong> used.<br />
102<br />
105, 110,<br />
112, 117,<br />
129<br />
102, 103<br />
100<br />
Display audio_Ext_EE
<strong>Touch</strong>_<strong>Go</strong>_<strong>Plus</strong>_OM20B71E.book Page 101 Thursday, September 20, 2012 12:03 PM<br />
1. AUDIO SYSTEM OPERATION<br />
No. Name Function Page<br />
button* Press to pause or resume playing the music. ⎯<br />
knob<br />
Press to turn the audio system on and off, and turn<br />
to adjust the volume.<br />
102<br />
*: If equipped<br />
button Press to eject a disc. 108<br />
4<br />
AUDIO SYSTEM<br />
101<br />
Display audio_Ext_EE
<strong>Touch</strong>_<strong>Go</strong>_<strong>Plus</strong>_OM20B71E.book Page 102 Thursday, September 20, 2012 12:03 PM<br />
1. AUDIO SYSTEM OPERATION<br />
2. SOME BASICS<br />
This section describes some of the basic<br />
features of the audio system. Some<br />
information may not pertain to your<br />
system.<br />
Your audio system works when the engine<br />
switch is turned to the “ACC” or<br />
“ON” position.<br />
NOTICE<br />
CONTROLS USING THE<br />
TUNE/SCROLL KNOB<br />
Radio <strong>mode</strong><br />
Radio stations can be tuned in manually<br />
using this knob.<br />
Modes other than radio<br />
Tracks or files can be selected using the<br />
knob.<br />
● To prevent the 12-volt battery from being<br />
discharged, do not leave the audio system<br />
on longer than necessary when the<br />
engine is not running.<br />
TURNING THE AUDIO<br />
SYSTEM ON OR OFF<br />
When a list is displayed<br />
When a list is displayed on the screen, turn<br />
the Tune/Scroll knob to move the cursor<br />
box to select a desired item from the list,<br />
and pressing the knob will play it. The track<br />
that is being played is highlighted.<br />
“MEDIA” button: Press this button to display<br />
screen buttons for the audio system.<br />
knob: Press this knob to turn the audio<br />
system on and off. Turn this knob to adjust<br />
the volume. The system turns on in the last<br />
<strong>mode</strong> used.<br />
INFORMATION<br />
● If the volume is adjusted while music is<br />
paused or muted, the pause or mute will<br />
be cancelled.<br />
102<br />
Display audio_Ext_EE
<strong>Touch</strong>_<strong>Go</strong>_<strong>Plus</strong>_OM20B71E.book Page 103 Thursday, September 20, 2012 12:03 PM<br />
1. AUDIO SYSTEM OPERATION<br />
SWITCHING AUDIO SOURCE<br />
3 <strong>Touch</strong> a desired audio source.<br />
1 Press the “MEDIA” button.<br />
• The audio system turns on in the last<br />
<strong>mode</strong> used.<br />
2 <strong>Touch</strong> “Source”, or<br />
press “MEDIA” button to display the<br />
audio source selection screen.<br />
USB memory/iPod and Bluetooth ® audio<br />
<strong>mode</strong>s<br />
INFORMATION<br />
● You cannot select dimmed screen buttons.<br />
Connect the audio device before<br />
selecting.<br />
4<br />
AUDIO SYSTEM<br />
Modes other than USB memory/iPod<br />
and Bluetooth ® audio<br />
103<br />
Display audio_Ext_EE
<strong>Touch</strong>_<strong>Go</strong>_<strong>Plus</strong>_OM20B71E.book Page 104 Thursday, September 20, 2012 12:03 PM<br />
1. AUDIO SYSTEM OPERATION<br />
3. RADIO OPERATION<br />
SWITCHING TO RADIO MODE<br />
1 Press the “MEDIA” button.<br />
PRESETTING A STATION<br />
1 Tune in the desired station.<br />
2 <strong>Touch</strong> one of the channel selector buttons<br />
(1-6) and hold it until a beep is<br />
heard. This sets the preset frequency<br />
to the screen button. The station’s frequency<br />
will be displayed in the screen<br />
button.<br />
• The audio system turns on in the last<br />
<strong>mode</strong> used.<br />
2 <strong>Touch</strong> “Source”, or<br />
press “MEDIA” button to display the<br />
audio source selection screen.<br />
• To change the preset station to a different<br />
one, follow the same procedure.<br />
3 <strong>Touch</strong> “AM” or “FM” on the screen.<br />
• If your vehicle is equipped with a digital<br />
audio broadcast system, “DAB*” appears<br />
and can be selected.<br />
*: DAB radio requires a DAB tuner. Contact<br />
your <strong>Toyota</strong> dealer or repairer, or<br />
another duly qualified professional.<br />
104<br />
Display audio_Ext_EE
<strong>Touch</strong>_<strong>Go</strong>_<strong>Plus</strong>_OM20B71E.book Page 105 Thursday, September 20, 2012 12:03 PM<br />
1. AUDIO SYSTEM OPERATION<br />
SELECTING A STATION<br />
Tune in the desired station using one of<br />
the following methods.<br />
Preset tuning: <strong>Touch</strong> one of the channel<br />
selector buttons to select the desired station.<br />
The screen button is highlighted and<br />
the station frequency appears on the<br />
screen.<br />
Manual tuning: Search for a desired radio<br />
station by turning the Tune/Scroll knob.<br />
Seek tuning: Press the “ ” or “ ” of<br />
Seek/Track button. The radio will begin<br />
seeking up or down for a station of the<br />
nearest frequency and will stop when a<br />
station is found. Each time the button is<br />
pressed, the stations will be searched automatically<br />
one after another.<br />
FM station list: <strong>Touch</strong> one of the channel<br />
selector buttons.<br />
2 <strong>Touch</strong> one of the channel selector buttons.<br />
With single tuner <strong>mode</strong>ls<br />
• FM broadcasts will not be automatically<br />
searched while a radio station is being<br />
tuned in.<br />
4<br />
AUDIO SYSTEM<br />
FM STATION LIST<br />
The FM station list automatically<br />
searches for FM broadcasts by a band<br />
scan to generate a list of available radio<br />
stations.<br />
1 <strong>Touch</strong> “Station list”.<br />
• To update the FM station list, touch and<br />
hold the “Update” until a beep is heard.<br />
• If the FM station list does not seek out any<br />
additional stations, the list will remain the<br />
same as before the update.<br />
• To return the preset screen, touch<br />
“Presets”.<br />
105<br />
Display audio_Ext_EE
<strong>Touch</strong>_<strong>Go</strong>_<strong>Plus</strong>_OM20B71E.book Page 106 Thursday, September 20, 2012 12:03 PM<br />
1. AUDIO SYSTEM OPERATION<br />
RDS (RADIO DATA SYSTEM)<br />
FM ALTERNATIVE<br />
FREQUENCY (AF)<br />
A better reception frequency of the<br />
same broadcasting program will automatically<br />
be re-tuned in if the current<br />
reception worsens.<br />
• This function can be changed to “On” or<br />
“Off” by users in the radio settings. See<br />
“RADIO SETTINGS” on page 203.<br />
FM TRAFFIC ANNOUNCEMENT<br />
(TA)<br />
The radio tuner will automatically seek<br />
stations that regularly broadcast traffic<br />
information as well as stations that<br />
broadcast only when they report traffic<br />
information.<br />
• This function can be changed to “On” or<br />
“Off” by users in the radio settings. See<br />
“RADIO SETTINGS” on page 203.<br />
REGIONAL CODE CHANGE<br />
OFF <strong>mode</strong>: For switching over to a broadcasting<br />
station within the same RDS network;<br />
convenient for following the<br />
appropriate stations in a wide region.<br />
ON <strong>mode</strong>: For switching over to a broadcasting<br />
station within the same local program<br />
network.<br />
• This function can be changed to “On” or<br />
“Off” by users in the radio settings. See<br />
“RADIO SETTINGS” on page 203.<br />
■WHEN RECEIVING FM RADIO-<br />
BROADCASTS<br />
• “TP” (Traffic Program) will appear on the<br />
screen. In TP <strong>mode</strong>, the radio tuner seeks<br />
radio stations that broadcast traffic information.<br />
When the tuner seeks out a traffic<br />
information program, the program name<br />
will appear on the screen.<br />
• If a TA broadcast is received, the radio will<br />
automatically be switched to that traffic<br />
information. When the program ends, the<br />
radio will return to the paused broadcast.<br />
EON (Enhanced Other Network) system: If<br />
an RDS station (with EON data) you are<br />
listening to is not broadcasting a traffic information<br />
program in TA <strong>mode</strong>, the radio<br />
will automatically be switched to a traffic<br />
information broadcast using the EON AF<br />
list. When the traffic information program<br />
ends, the radio will re-tune to the broadcast<br />
that was previously tuned in automatically.<br />
106<br />
Display audio_Ext_EE
<strong>Touch</strong>_<strong>Go</strong>_<strong>Plus</strong>_OM20B71E.book Page 107 Thursday, September 20, 2012 12:03 PM<br />
1. AUDIO SYSTEM OPERATION<br />
■WHILE ANOTHER AUDIO MODE IS<br />
ACTIVE<br />
• Even when CDs or iPods are being<br />
played, the tuner seeks stations broadcasting<br />
traffic information.<br />
• When a traffic report starts, it is automatically<br />
received and the current audio <strong>mode</strong><br />
is interrupted. When the traffic report<br />
ends, the paused audio will resume.<br />
■TRAFFIC ANNOUNCEMENT VOL-<br />
UME<br />
The volume level of a received traffic<br />
information sound is stored in the<br />
memory.<br />
• The range of volume memory is limited. If<br />
the volume received previously is less<br />
than the minimum, the minimum volume<br />
will be used.<br />
4<br />
AUDIO SYSTEM<br />
107<br />
Display audio_Ext_EE
<strong>Touch</strong>_<strong>Go</strong>_<strong>Plus</strong>_OM20B71E.book Page 108 Thursday, September 20, 2012 12:03 PM<br />
1. AUDIO SYSTEM OPERATION<br />
4. CD PLAYER OPERATION<br />
The CD player can play audio CDs, CD<br />
text and MP3/WMA discs.<br />
(a)Audio CD, CD text (see page 109)<br />
(b)MP3/WMA disc (see page 111)<br />
For appropriate discs for this player,<br />
see “AUDIO SYSTEM OPERATING<br />
HINTS” on page 134.<br />
INSERTING OR EJECTING A<br />
DISC<br />
INSERTING A DISC<br />
1 Insert a disc with the label side up.<br />
NOTICE<br />
● Do not stack up two discs for insertion,<br />
or it will cause damage to the CD player.<br />
Insert only one disc into the slot at a<br />
time.<br />
● Never try to disassemble or oil any part<br />
of the CD player. Do not insert anything<br />
other than a disc into the slot.<br />
EJECTING A DISC<br />
1 Press the button.<br />
• When a disc is correctly inserted into the<br />
slot, the CD player will automatically start<br />
playing from the first track or the first file of<br />
the first folder on a disc.<br />
INFORMATION<br />
● If the label is facing down, “Check DISC”<br />
will appear on the screen.<br />
● The player is intended for use with<br />
12 cm (4.7 in.) discs only. To play 8 cm<br />
(3 in.) discs, use an adaptor.<br />
• The disc will be ejected.<br />
108<br />
Display audio_Ext_EE
<strong>Touch</strong>_<strong>Go</strong>_<strong>Plus</strong>_OM20B71E.book Page 109 Thursday, September 20, 2012 12:03 PM<br />
1. AUDIO SYSTEM OPERATION<br />
SWITCHING TO CD MODE<br />
PLAYING AN AUDIO CD<br />
1 Press the “MEDIA” button.<br />
• The audio system turns on in the last<br />
<strong>mode</strong> used.<br />
2 <strong>Touch</strong> “Source”, or<br />
press “MEDIA” button to display the<br />
audio source selection screen.<br />
• If a CD-TEXT disc is inserted, the title of<br />
the track and disc currently being played<br />
will be displayed.<br />
: <strong>Touch</strong> to pause the track.<br />
: <strong>Touch</strong> to resume playing the track.<br />
INFORMATION<br />
● The progress bar indicator does not<br />
always correspond to the actual elapsed<br />
playback position.<br />
4<br />
AUDIO SYSTEM<br />
3 <strong>Touch</strong> “Disc” on the screen.<br />
FAST FORWARD AND<br />
REVERSE<br />
1 Press and hold the “ ” or “ ” of<br />
Seek/Track button to fast forward or reverse.<br />
When the button is released, the<br />
player will start playing from that position.<br />
INFORMATION<br />
● If no disc is in the slot, “Disc” cannot be<br />
selected. Insert a disc into the slot.<br />
109<br />
Display audio_Ext_EE
<strong>Touch</strong>_<strong>Go</strong>_<strong>Plus</strong>_OM20B71E.book Page 110 Thursday, September 20, 2012 12:03 PM<br />
1. AUDIO SYSTEM OPERATION<br />
SELECTING A DESIRED<br />
TRACK<br />
Select a desired track using one of the<br />
following methods.<br />
Seek/Track button: Press the “ ” or “ ”<br />
of Seek/Track button to select a desired<br />
track.<br />
Tune/Scroll knob: Turn this knob to select<br />
a desired track. Also, the knob can be<br />
used for selection from the list display.<br />
Track list: A desired track can be selected<br />
from a list.<br />
• <strong>Touch</strong> a desired track. The player will start<br />
playing the selected track from the beginning.<br />
• <strong>Touch</strong> or to scroll the list.<br />
• If appears to the right of titles, the<br />
complete titles are too long for the display.<br />
<strong>Touch</strong> this screen button to scroll to titles.<br />
• <strong>Touch</strong> “Tracks” on the screen. The list<br />
will be displayed.<br />
110<br />
Display audio_Ext_EE
<strong>Touch</strong>_<strong>Go</strong>_<strong>Plus</strong>_OM20B71E.book Page 111 Thursday, September 20, 2012 12:03 PM<br />
1. AUDIO SYSTEM OPERATION<br />
PLAYING REPEAT AND<br />
RANDOM ORDER<br />
PLAYING A MP3/WMA DISC<br />
(Repeat <strong>mode</strong>): Use it to automatically<br />
repeat the track you are currently listening<br />
to.<br />
• The repeat <strong>mode</strong> changes as follows each<br />
time the screen button is touched.<br />
: Repeating the track<br />
: OFF<br />
(Random <strong>mode</strong>): Use it for automatic<br />
random selection of the track.<br />
• The random <strong>mode</strong> changes as follows<br />
each time the screen button is touched.<br />
: Playing the tracks in random<br />
order<br />
: OFF<br />
• The title of the file and folder currently<br />
being played will be displayed.<br />
: <strong>Touch</strong> to pause the file.<br />
: <strong>Touch</strong> to resume playing the file.<br />
INFORMATION<br />
● The progress bar indicator does not<br />
always correspond to the actual elapsed<br />
playback position.<br />
FAST FORWARD AND<br />
REVERSE<br />
1 Press and hold the “ ” or “ ” of<br />
Seek/Track button to fast forward or reverse.<br />
When the button is released, the<br />
player will start playing from that position.<br />
4<br />
AUDIO SYSTEM<br />
111<br />
Display audio_Ext_EE
<strong>Touch</strong>_<strong>Go</strong>_<strong>Plus</strong>_OM20B71E.book Page 112 Thursday, September 20, 2012 12:03 PM<br />
1. AUDIO SYSTEM OPERATION<br />
SELECTING A DESIRED FILE<br />
Select a desired file using one of the<br />
following methods.<br />
SELECTING A DESIRED<br />
FOLDER<br />
1 <strong>Touch</strong> “Folders” on the screen. The<br />
folder list will be displayed.<br />
Seek/Track button: Press the “ ” or “ ”<br />
of Seek/Track button to select a desired<br />
file.<br />
Tune/Scroll knob: Turn this knob to select<br />
a desired file. Also, the knob can be used<br />
for selection from the list display.<br />
File list: A desired file can be selected<br />
from a list.<br />
• <strong>Touch</strong> “Files” on the screen. The list will<br />
be displayed.<br />
2 <strong>Touch</strong> a desired folder from the list.<br />
The file list for the folder will be displayed.<br />
• When a desired file is touched, the player<br />
will start playing the file.<br />
• <strong>Touch</strong> or to scroll the list.<br />
• If appears to the right of titles, the<br />
complete titles are too long for the display.<br />
<strong>Touch</strong> this screen button to scroll to titles.<br />
• <strong>Touch</strong> a desired file. The player will start<br />
playing the selected file from the beginning.<br />
• <strong>Touch</strong> or to scroll the list.<br />
• If appears to the right of titles, the<br />
complete titles are too long for the display.<br />
<strong>Touch</strong> this screen button to scroll to titles.<br />
112<br />
Display audio_Ext_EE
<strong>Touch</strong>_<strong>Go</strong>_<strong>Plus</strong>_OM20B71E.book Page 113 Thursday, September 20, 2012 12:03 PM<br />
1. AUDIO SYSTEM OPERATION<br />
PLAYING REPEAT AND<br />
RANDOM ORDER<br />
(Repeat <strong>mode</strong>): Use it to automatically<br />
repeat the file or folder you are currently<br />
listening to.<br />
• The repeat <strong>mode</strong> changes as follows each<br />
time the screen button is touched.<br />
: Repeating the file<br />
: Repeating the folder<br />
4<br />
AUDIO SYSTEM<br />
: OFF<br />
(Random <strong>mode</strong>): Use it for automatic<br />
random selection of the file.<br />
• The random <strong>mode</strong> changes as follows<br />
each time the screen button is touched.<br />
: Playing the files on the<br />
folder in random order<br />
: Playing the files in all the<br />
folders in random order<br />
: OFF<br />
113<br />
Display audio_Ext_EE
<strong>Touch</strong>_<strong>Go</strong>_<strong>Plus</strong>_OM20B71E.book Page 114 Thursday, September 20, 2012 12:03 PM<br />
1. AUDIO SYSTEM OPERATION<br />
5. USB MEMORY/iPod OPERATION<br />
The system enables users to enjoy<br />
music played from a USB memory or<br />
iPod on the vehicle's speakers.<br />
CAUTION<br />
● Do not operate the player’s controls or<br />
connect the USB memory or iPod while<br />
driving.<br />
CONNECTING A USB<br />
MEMORY OR iPod<br />
1 Open the cover of the USB/AUX port<br />
and connect a USB memory or iPod<br />
using an iPod cable.<br />
NOTICE<br />
● Do not leave your portable player in the<br />
vehicle. The temperature inside may rise<br />
to a level that could damage the portable<br />
player.<br />
● Do not press down on or apply unnecessary<br />
pressure to the portable player<br />
while it is connected as this may damage<br />
the portable player or its terminal.<br />
● Do not insert foreign objects into the<br />
USB port as this may damage the portable<br />
player or its terminal.<br />
INFORMATION<br />
● This system has a charging function for<br />
iPods.<br />
● When the battery level of an iPod is very<br />
low, the iPod may not operate. If so,<br />
charge the iPod before use.<br />
● Depending on the portable player that is<br />
connected to the system, certain functions<br />
may not be available. If a function<br />
is unavailable due to a malfunction, disconnecting<br />
your portable player and<br />
reconnecting it may resolve the problem.<br />
● When an iPod does not operate, update<br />
the software of the iPod to the latest version,<br />
and then retry. For supported <strong>mode</strong>ls<br />
and software versions, see page<br />
135.<br />
● This system supports MTP devices.<br />
• The USB/AUX port is located on the<br />
instrument panel, or in the console box or<br />
glove box etc. The location and design are<br />
different depending on the vehicle. For<br />
details, see the Pictorial index of “Owner’s<br />
Manual”.<br />
• Turn on the power of the USB memory or<br />
iPod if it is not turned on.<br />
• If a USB memory or iPod is inserted, it<br />
starts playing automatically. As soon as it<br />
is ready to play, the audio control screen is<br />
shown automatically.<br />
114<br />
Display audio_Ext_EE
<strong>Touch</strong>_<strong>Go</strong>_<strong>Plus</strong>_OM20B71E.book Page 115 Thursday, September 20, 2012 12:03 PM<br />
1. AUDIO SYSTEM OPERATION<br />
SWITCHING TO USB OR iPod<br />
MODE<br />
1 Press the “MEDIA” button to display<br />
the audio control screen.<br />
PLAYING A USB MEMORY OR<br />
iPod<br />
PLAYING A SONG<br />
The title of the album, song and artist<br />
name of the song currently being listened<br />
to will be displayed.<br />
■PLAY AND PAUSE<br />
4<br />
• The audio system turns on in the last<br />
<strong>mode</strong> used.<br />
2 <strong>Touch</strong> “Source”, or<br />
press “MEDIA” button to display the<br />
audio source selection screen.<br />
: <strong>Touch</strong> to pause the song.<br />
: <strong>Touch</strong> to resume playing the song.<br />
AUDIO SYSTEM<br />
3 <strong>Touch</strong> “USB” or “iPod”.<br />
INFORMATION<br />
● The progress bar indicator does not<br />
always correspond to the actual elapsed<br />
playback position.<br />
● USB memory only: If the song’s data<br />
does not contain an ID3 tag, the file and<br />
folder name will be displayed instead of<br />
the song and album title. Please note<br />
that the file name will not include the<br />
file’s extension.<br />
• If no USB memory or iPod is connected,<br />
“USB” or “iPod” cannot be selected.<br />
Connect a USB memory or iPod to the<br />
USB port.<br />
115<br />
Display audio_Ext_EE
<strong>Touch</strong>_<strong>Go</strong>_<strong>Plus</strong>_OM20B71E.book Page 116 Thursday, September 20, 2012 12:03 PM<br />
1. AUDIO SYSTEM OPERATION<br />
■FAST FORWARD AND REVERSE<br />
1 Press and hold the “ ” or “ ” of<br />
Seek/Track button to fast forward or reverse.<br />
When the button is released, the<br />
player will start playing from that position.<br />
3 <strong>Touch</strong> the desired list.<br />
• <strong>Touch</strong> the desired item to display its list.<br />
Continue to touch the applicable screen<br />
button until its song list is displayed.<br />
4 <strong>Touch</strong> the desired song.<br />
SELECTING A DESIRED SONG<br />
■SELECTING A PLAYLIST<br />
Songs can be sorted and selected from<br />
various playlists.<br />
1 <strong>Touch</strong> “Options”.<br />
INFORMATION<br />
● USB memory only: Files that do not contain<br />
song title and/or album information<br />
will be displayed as “Unknown” in the<br />
“Artist” and/or “Album” list.<br />
● While the media is being synchronized,<br />
a pop-up window is displayed. When<br />
synchronization is complete, a pop-up<br />
window will be displayed and the function<br />
will be available. <strong>Touch</strong> “OK” to<br />
return to the previous screen.<br />
2 <strong>Touch</strong> “Browse for music”.<br />
116<br />
Display audio_Ext_EE
<strong>Touch</strong>_<strong>Go</strong>_<strong>Plus</strong>_OM20B71E.book Page 117 Thursday, September 20, 2012 12:03 PM<br />
1. AUDIO SYSTEM OPERATION<br />
■SELECTING BY TITLE LIST<br />
The desired song can be selected from<br />
the current playlist.<br />
■SELECTING A DESIRED SONG US-<br />
ING SEEK/TRACK BUTTON OR<br />
TUNE SCROLL KNOB<br />
1 <strong>Touch</strong> “Options”.<br />
4<br />
2 <strong>Touch</strong> “Title list”.<br />
Seek/Track button: Press the “ ” or “ ”<br />
of Seek/Track button to select a desired<br />
song.<br />
Tune/Scroll knob: Turn to select a desired<br />
song.<br />
AUDIO SYSTEM<br />
3 <strong>Touch</strong> the desired song.<br />
117<br />
Display audio_Ext_EE
<strong>Touch</strong>_<strong>Go</strong>_<strong>Plus</strong>_OM20B71E.book Page 118 Thursday, September 20, 2012 12:03 PM<br />
1. AUDIO SYSTEM OPERATION<br />
COVER ART FUNCTION<br />
The album, that the song currently being<br />
listened to is from, is called up so<br />
that a song from it can be selected.<br />
1 <strong>Touch</strong> the cover art.<br />
PLAYING “Play more like this”<br />
FUNCTION (IF EQUIPPED)<br />
The system creates a new playlist containing<br />
songs similar to the one currently<br />
being listened to.<br />
1 <strong>Touch</strong> “Play more like this”.<br />
2 A list of all the songs from the album<br />
will be displayed.<br />
• A pop-up window is displayed until the<br />
playlist is created. If you touch “Cancel”<br />
on the screen, the creation of the new<br />
playlist is cancelled.<br />
3 <strong>Touch</strong> the desired song.<br />
INFORMATION<br />
● If a song other than the one currently<br />
being listened to is selected, the current<br />
list is updated and will include all the<br />
songs from the album being listened to.<br />
● It may take time to display iPod cover<br />
art. Only iPod cover art that is saved in<br />
JPEG format can be displayed.<br />
● When Audio book or Podcast play<br />
<strong>mode</strong>s are selected, this function is not<br />
available.<br />
118<br />
Display audio_Ext_EE
<strong>Touch</strong>_<strong>Go</strong>_<strong>Plus</strong>_OM20B71E.book Page 119 Thursday, September 20, 2012 12:03 PM<br />
1. AUDIO SYSTEM OPERATION<br />
■“Play more like this” SETTING<br />
The size of the playlist of similar songs<br />
can be set.<br />
1 <strong>Touch</strong> “Options”.<br />
REPEAT AND RANDOM PLAY<br />
FUNCTIONS<br />
Repeat and random play functions are<br />
available.<br />
■FROM THE AUDIO CONTROL<br />
SCREEN<br />
1 <strong>Touch</strong> or .<br />
4<br />
2 <strong>Touch</strong> “Play more like this settings”.<br />
3 <strong>Touch</strong> the desired size of the playlist.<br />
(Repeat <strong>mode</strong>): Use it to automatically<br />
repeat the song you are currently listening<br />
to.<br />
• The repeat <strong>mode</strong> changes as follows each<br />
time the screen button is touched.<br />
AUDIO SYSTEM<br />
: Repeating the song<br />
:OFF<br />
4 <strong>Touch</strong> .<br />
(Random <strong>mode</strong>): Use it for automatic<br />
random order in the current playlist.<br />
• The random <strong>mode</strong> changes as follows<br />
each time the screen button is touched.<br />
: Playing the songs in random<br />
order<br />
:OFF<br />
119<br />
Display audio_Ext_EE
<strong>Touch</strong>_<strong>Go</strong>_<strong>Plus</strong>_OM20B71E.book Page 120 Thursday, September 20, 2012 12:03 PM<br />
1. AUDIO SYSTEM OPERATION<br />
■FROM THE “OPTIONS” SCREEN<br />
1 <strong>Touch</strong> “Options”.<br />
2 <strong>Touch</strong> “Random” or “Repeat track”.<br />
• To cancel repeat or random order, touch<br />
“Random” or “Repeat track” again.<br />
INFORMATION<br />
● When “Random” is on, the songs in the<br />
current playlist can be played in random<br />
order.<br />
120<br />
Display audio_Ext_EE
<strong>Touch</strong>_<strong>Go</strong>_<strong>Plus</strong>_OM20B71E.book Page 121 Thursday, September 20, 2012 12:03 PM<br />
1. AUDIO SYSTEM OPERATION<br />
6. AUX DEVICE OPERATION<br />
Connecting a portable audio device<br />
with the AUX port enables users to enjoy<br />
music via the vehicle speakers.<br />
CAUTION<br />
CONNECTING A PORTABLE<br />
AUDIO DEVICE<br />
1 Open the cover of the USB/AUX port<br />
and connect a portable audio device.<br />
● Do not connect a portable audio device<br />
or operate the device controls while driving.<br />
NOTICE<br />
● Do not leave the portable audio device<br />
in the car. In particular, high temperatures<br />
inside the vehicle may damage the<br />
device.<br />
● Do not push down on or apply unnecessary<br />
pressure to the portable audio<br />
device while it is connected as this may<br />
damage the device or its terminal.<br />
● Do not insert foreign objects into the<br />
AUX port as this may damage the portable<br />
audio device or its terminal.<br />
• The USB/AUX port is located on the<br />
instrument panel, or in the console box or<br />
glove box etc. The location and design are<br />
different depending on the vehicle. For<br />
details, see the Pictorial index of “Owner’s<br />
Manual”.<br />
4<br />
AUDIO SYSTEM<br />
121<br />
Display audio_Ext_EE
<strong>Touch</strong>_<strong>Go</strong>_<strong>Plus</strong>_OM20B71E.book Page 122 Thursday, September 20, 2012 12:03 PM<br />
1. AUDIO SYSTEM OPERATION<br />
SWITCHING TO AUX MODE<br />
1 Press the “MEDIA” button.<br />
PLAYING A PORTABLE<br />
AUDIO DEVICE<br />
• The audio system turns on in the last<br />
<strong>mode</strong> used.<br />
• Only the volume can be adjusted using<br />
the audio system controls. The remaining<br />
controls need to be operated on the portable<br />
audio device itself.<br />
2 <strong>Touch</strong> “Source”, or<br />
press “MEDIA” button to display the<br />
audio source selection screen.<br />
3 <strong>Touch</strong> “Aux” on the screen.<br />
INFORMATION<br />
● If no portable audio device is connected,<br />
“Aux” cannot be selected. Connect the<br />
portable audio device to the AUX port.<br />
122<br />
Display audio_Ext_EE
<strong>Touch</strong>_<strong>Go</strong>_<strong>Plus</strong>_OM20B71E.book Page 123 Thursday, September 20, 2012 12:03 PM<br />
1. AUDIO SYSTEM OPERATION<br />
7. Bluetooth ® AUDIO OPERATION<br />
The Bluetooth ® audio system enables<br />
users to enjoy music played on a portable<br />
player from the vehicle speaker<br />
via wireless communication.<br />
If your portable player does not support<br />
Bluetooth ® , the Bluetooth ® audio<br />
system will not function.<br />
CAUTION<br />
● Do not operate the player’s controls or<br />
connect to the Bluetooth ® audio system<br />
while driving.<br />
NOTICE<br />
● Do not leave your portable audio player<br />
in the car. In particular, high temperatures<br />
inside the vehicle may damage the<br />
portable audio player.<br />
INFORMATION<br />
● In the following conditions, the system<br />
may not function.<br />
• The portable audio player is turned<br />
off.<br />
• The portable audio player is not connected.<br />
• The portable audio player has a low<br />
battery.<br />
● Depending on the portable audio player<br />
that is connected to the system, certain<br />
functions may not be available.<br />
● It may take time, the phone connection<br />
is carried out during Bluetooth ® audio<br />
play.<br />
Bluetooth is a registered trademark of<br />
Bluetooth SIG, Inc.<br />
INFORMATION<br />
● Portable audio players must correspond<br />
to the following specifications in order to<br />
be connected to the Bluetooth ® audio<br />
system. However, please note that some<br />
functions may be limited depending on<br />
the type of portable audio player.<br />
• Bluetooth ® Specification<br />
Ver.1.1 or higher<br />
(Recommended: Ver.2.1+EDR or<br />
higher)<br />
•Profile<br />
A2DP (Advanced Audio Distribution<br />
Profile) Ver.1.0 or higher<br />
(Recommended: Ver.1.2 or higher)<br />
AVRCP (Audio/Video Remote Control<br />
Profile) Ver.1.0 or higher<br />
(Recommended: Ver.1.4 or higher)<br />
4<br />
AUDIO SYSTEM<br />
123<br />
Display audio_Ext_EE
<strong>Touch</strong>_<strong>Go</strong>_<strong>Plus</strong>_OM20B71E.book Page 124 Thursday, September 20, 2012 12:03 PM<br />
1. AUDIO SYSTEM OPERATION<br />
SWITCHING TO Bluetooth ®<br />
AUDIO MODE<br />
1 Press the “MEDIA” button to display<br />
the audio control screen.<br />
• If a Bluetooth ® audio device is not connected,<br />
the connecting Bluetooth ® audio<br />
screen will automatically appear. (See<br />
page 125.)<br />
CONNECTING Bluetooth ®<br />
AUDIO<br />
• The audio system turns on in the <strong>mode</strong><br />
that was last used.<br />
2 <strong>Touch</strong> “Source”, or<br />
press “MEDIA” button to display the<br />
audio source selection screen.<br />
3 <strong>Touch</strong> “Bluetooth* Audio”.<br />
In order to use the Bluetooth ® audio<br />
system, it is necessary to pair a portable<br />
player and connect the audio profile<br />
(A2DP) with the system. (In this<br />
manual, pairing refers to a Bluetooth ®<br />
device connecting with the system.<br />
Connecting refers to the paired device’s<br />
profile(s) being connected to the<br />
system.)<br />
Once you have connected a device<br />
with audio profile (A2DP), you can enjoy<br />
your music on the vehicle’s audio<br />
system.<br />
If you have not yet connected a portable<br />
player with audio profile (A2DP),<br />
you must first connect a portable player<br />
with audio profile (A2DP) according<br />
to the following procedures. Connect<br />
your portable player with audio profile<br />
(A2DP) after bringing the vehicle to a<br />
complete stop.<br />
• See “Bluetooth ® SETTINGS” on page<br />
193 of additional registration when registering.<br />
∗ : Bluetooth is a registered trademark of<br />
Bluetooth SIG, Inc.<br />
124<br />
Display audio_Ext_EE
<strong>Touch</strong>_<strong>Go</strong>_<strong>Plus</strong>_OM20B71E.book Page 125 Thursday, September 20, 2012 12:03 PM<br />
1. AUDIO SYSTEM OPERATION<br />
CONNECTING Bluetooth ®<br />
AUDIO<br />
■CONNECTING FROM THE SYSTEM<br />
4 The following screen will be displayed<br />
while searching for a Bluetooth ® device.<br />
1 Switching to Bluetooth ® audio <strong>mode</strong>.<br />
(See page 124.)<br />
2 <strong>Touch</strong> “Bluetooth ∗ Setup”.<br />
• To cancel this function, touch “Cancel”.<br />
5 <strong>Touch</strong> the device to be paired.<br />
4<br />
3 <strong>Touch</strong> “Search for Bluetooth ∗ devices”.<br />
AUDIO SYSTEM<br />
• Connectable Bluetooth ® devices are listed<br />
on the display.<br />
6 The following screen will be displayed.<br />
• When a Bluetooth ® device is currently<br />
connected, a pop-up window is displayed.<br />
To disconnect it, touch “Yes”.<br />
∗ : Bluetooth is a registered trademark of<br />
Bluetooth SIG, Inc.<br />
• To cancel this function, touch “Cancel”.<br />
7 Confirm the PIN.<br />
If the device supports SSP (Secure Simple<br />
Pairing)<br />
• Confirm the PIN displayed on the screen,<br />
and then touch “Accept”.<br />
If the device does not supports SSP (Secure<br />
Simple Pairing)<br />
• Input the PIN displayed on the screen into<br />
your portable player.<br />
125<br />
Display audio_Ext_EE
<strong>Touch</strong>_<strong>Go</strong>_<strong>Plus</strong>_OM20B71E.book Page 126 Thursday, September 20, 2012 12:03 PM<br />
1. AUDIO SYSTEM OPERATION<br />
8 The following screen will be displayed<br />
when pairing is complete.<br />
■CONNECTING FROM THE DEVICE<br />
1 Switching to Bluetooth ® audio <strong>mode</strong>.<br />
(See page 124.)<br />
2 <strong>Touch</strong> “Bluetooth ∗ Setup”.<br />
9 The system waits for connection requests<br />
coming from the paired device.<br />
All requested profiles are connected<br />
automatically.<br />
3 <strong>Touch</strong> “Make this system discoverable”.<br />
• If the automatic connection failed, the following<br />
screen will be displayed. <strong>Touch</strong><br />
“Connect for music”.<br />
• When a Bluetooth ® device is currently<br />
connected, a pop-up window is displayed.<br />
To disconnect it, touch “Yes”.<br />
4 The following screen will be displayed.<br />
• Once a portable player has been connected,<br />
it will be automatically connected<br />
whenever the engine switch is in the<br />
“ACC” or “ON” position.<br />
INFORMATION<br />
● For details on device detection and<br />
operation of the portable player, refer to<br />
the manual that comes with the portable<br />
audio player.<br />
• To cancel this function, touch “Cancel”.<br />
∗ : Bluetooth is a registered trademark of<br />
Bluetooth SIG, Inc.<br />
126<br />
Display audio_Ext_EE
<strong>Touch</strong>_<strong>Go</strong>_<strong>Plus</strong>_OM20B71E.book Page 127 Thursday, September 20, 2012 12:03 PM<br />
1. AUDIO SYSTEM OPERATION<br />
5 Confirm the PIN.<br />
If the device supports SSP (Secure Simple<br />
Pairing)<br />
• Confirm the PIN displayed on the screen,<br />
and then touch “Accept”.<br />
If the device does not supports SSP (Secure<br />
Simple Pairing)<br />
• Input the PIN displayed on the screen into<br />
your portable player.<br />
PLAYING Bluetooth ® AUDIO<br />
PLAYING A SONG<br />
The title of the song, album and artist<br />
name of the song currently being listened<br />
to will be displayed.<br />
■PLAY AND PAUSE<br />
RECONNECTING Bluetooth ®<br />
AUDIO<br />
4<br />
If a portable player is disconnected due<br />
to poor reception from the Bluetooth ®<br />
network when the engine switch is in<br />
the “ACC” or “ON” position, the system<br />
will automatically reconnect the portable<br />
player.<br />
: <strong>Touch</strong> to pause the song.<br />
AUDIO SYSTEM<br />
• If the Bluetooth ® device is disconnected<br />
on purpose, such as it was turned off, this<br />
does not happen. Reconnect it manually<br />
using either of the following methods:<br />
• Select a portable player again. (See<br />
page 197.)<br />
• Connect the audio profile. (See page<br />
198.)<br />
: <strong>Touch</strong> to resume playing the song.<br />
INFORMATION<br />
● The progress bar indicator does not<br />
always correspond to the actual elapsed<br />
playback position.<br />
● If the song’s data does not contain an<br />
ID3 tag, the file and folder name will be<br />
displayed instead of the song and album<br />
title. Please note that the file name will<br />
not include the file's extension.<br />
● Bluetooth ® audio screen may differ<br />
depending on your device.<br />
127<br />
Display audio_Ext_EE
<strong>Touch</strong>_<strong>Go</strong>_<strong>Plus</strong>_OM20B71E.book Page 128 Thursday, September 20, 2012 12:03 PM<br />
1. AUDIO SYSTEM OPERATION<br />
■FAST FORWARD AND REVERSE<br />
1 Press and hold the “ ” or “ ” of<br />
Seek/Track button to fast forward or reverse.<br />
When the button is released, the<br />
player will start playing from that position.<br />
3 <strong>Touch</strong> the desired list.<br />
• <strong>Touch</strong> the desired item to display its list.<br />
Continue to touch the applicable screen<br />
button until its song list is displayed.<br />
4 <strong>Touch</strong> the desired song.<br />
SELECTING A DESIRED SONG<br />
■SELECTING A PLAYLIST<br />
Songs can be sorted and selected from<br />
various playlists.<br />
1 <strong>Touch</strong> “Options”.<br />
INFORMATION<br />
● Files that do not contain song title and/or<br />
album information will be displayed as<br />
“Unknown” in the “Artist” and/or “Album”<br />
list.<br />
● This function may not be available<br />
depending on the portable audio player.<br />
2 <strong>Touch</strong> “Browse for music”.<br />
128<br />
Display audio_Ext_EE
<strong>Touch</strong>_<strong>Go</strong>_<strong>Plus</strong>_OM20B71E.book Page 129 Thursday, September 20, 2012 12:03 PM<br />
1. AUDIO SYSTEM OPERATION<br />
■SELECTING BY LIST<br />
The desired song can be selected from<br />
current playlist.<br />
■SELECTING A DESIRED SONG US-<br />
ING SEEK/TRACK BUTTON OR<br />
TUNE SCROLL KNOB<br />
1 <strong>Touch</strong> “Options”.<br />
4<br />
2 <strong>Touch</strong> “Title list”.<br />
Seek/Track button: Press the “ ” or “ ”of<br />
Seek/Track button to select a desired<br />
song.<br />
Tune/Scroll knob: Turn to select a desired<br />
song.<br />
AUDIO SYSTEM<br />
3 <strong>Touch</strong> the desired song.<br />
INFORMATION<br />
● This function may not be available<br />
depending on the portable audio player.<br />
129<br />
Display audio_Ext_EE
<strong>Touch</strong>_<strong>Go</strong>_<strong>Plus</strong>_OM20B71E.book Page 130 Thursday, September 20, 2012 12:03 PM<br />
1. AUDIO SYSTEM OPERATION<br />
REPEAT AND RANDOM PLAY<br />
FUNCTIONS<br />
■FROM THE “OPTIONS” SCREEN<br />
1 <strong>Touch</strong> “Options”.<br />
Repeat and random play functions are<br />
available.<br />
■FROM THE AUDIO CONTROL<br />
SCREEN<br />
1 <strong>Touch</strong> or .<br />
2 <strong>Touch</strong> “Random” or “Repeat track”.<br />
(Repeat <strong>mode</strong>): Use it to automatically<br />
repeat the song you are currently listening<br />
to.<br />
• The repeat <strong>mode</strong> changes as follows each<br />
time the screen button is touched.<br />
: Repeating the song<br />
• To cancel repeat or random order, touch<br />
“Random” or “Repeat track” again.<br />
INFORMATION<br />
● When “Random” is on, the songs in the<br />
current playlist can be played in random<br />
order.<br />
:OFF<br />
(Random <strong>mode</strong>): Use it for automatic<br />
random order in the current playlist.<br />
• The random <strong>mode</strong> changes as follows<br />
each time the screen button is touched.<br />
: Playing the songs in random<br />
order<br />
:OFF<br />
130<br />
Display audio_Ext_EE
<strong>Touch</strong>_<strong>Go</strong>_<strong>Plus</strong>_OM20B71E.book Page 131 Thursday, September 20, 2012 12:03 PM<br />
1. AUDIO SYSTEM OPERATION<br />
8. STEERING SWITCHES<br />
Some parts of the audio system can be<br />
adjusted with the switches on the<br />
steering wheel.<br />
STEERING SWITCHES (WITH<br />
TWO DIRECTION STEERING<br />
SWITCH)<br />
• The design and switch position may differ<br />
depending on the vehicle. For details, see<br />
the Pictorial index of “Owner’s Manual”.<br />
• Details of the specific switches, controls,<br />
and features are described below.<br />
No.<br />
Switch<br />
Volume control switch<br />
“ ” “ ” switch<br />
“MODE” switch<br />
Volume control switch<br />
• Press the “+” side to increase the volume.<br />
The volume continues to increase while<br />
the switch is being pressed.<br />
• Press the “-” side to decrease the volume.<br />
The volume continues to decrease<br />
while the switch is being pressed.<br />
“ ” “ ” switch<br />
Radio<br />
To select a preset station: Press the “ ”<br />
or “ ” switch.<br />
To seek a radio station: Press and hold<br />
the “ ” or “ ” switch until you hear a beep.<br />
If you press either the “ ” or “ ” switch in<br />
seek <strong>mode</strong>, the seek <strong>mode</strong> will be cancelled.<br />
CD player<br />
To select a desired track or file: Press<br />
the “ ” or “ ” switch.<br />
To select a desired folder (MP3/WMA):<br />
Press and hold the “ ” or “ ” switch until<br />
you hear a beep.<br />
USB memory/iPod<br />
To select a desired song: Press the “ ”<br />
or “ ” switch.<br />
Fast forward and reverse: Press and<br />
hold the “ ” or “ ” switch until you hear a<br />
beep.<br />
Bluetooth ® audio player<br />
To select a desired song: Press the “ ”<br />
or “ ” switch.<br />
Fast forward and reverse: Press and<br />
hold the “ ” or “ ” switch until you hear a<br />
beep.<br />
“MODE” switch<br />
• Press the “MODE” switch to select an<br />
audio <strong>mode</strong>. Each press changes the<br />
<strong>mode</strong> sequentially if the desired <strong>mode</strong> is<br />
ready to use.<br />
• To turn the audio system on, press the<br />
“MODE” switch.<br />
• Press and hold the “MODE” switch until<br />
you hear a beep and the music will pause<br />
or be muted. By the same operation, it is<br />
released.<br />
4<br />
AUDIO SYSTEM<br />
131<br />
Display audio_Ext_EE
<strong>Touch</strong>_<strong>Go</strong>_<strong>Plus</strong>_OM20B71E.book Page 132 Thursday, September 20, 2012 12:03 PM<br />
1. AUDIO SYSTEM OPERATION<br />
STEERING SWITCHES (WITH<br />
FOUR DIRECTION STEERING<br />
SWITCH)<br />
• The design and switch position may differ<br />
depending on the vehicle. For details, see<br />
the Pictorial index of “Owner’s Manual”.<br />
• Details of the specific switches, controls,<br />
and features are described below.<br />
No.<br />
Switch<br />
Volume control switch<br />
“ ” “ ” “ ” “ ” switch<br />
“MODE/HOLD” switch<br />
Back switch<br />
Enter switch<br />
Volume control switch<br />
• Press the “+” side to increase the volume.<br />
The volume continues to increase while<br />
the switch is being pressed.<br />
• Press the “-” side to decrease the volume.<br />
The volume continues to decrease<br />
while the switch is being pressed.<br />
“ ” “ ” “ ” “ ” switch<br />
Radio<br />
To select a preset station: Press the “ ”<br />
or “ ” side of the switch. Repeat this to select<br />
the next preset station.<br />
To seek a station: Press and hold the “ ”<br />
or “ ” side of the switch until a beep is<br />
heard. Repeat this to find the next station.<br />
If either side of the switch is pressed during<br />
seek <strong>mode</strong>, seeking will be canceled.<br />
To change the FM station list page: The<br />
FM station list page can be changed by<br />
pressing the “ ” or “ ” side of the switch.<br />
CD player<br />
To select a desired track or file: Press<br />
the “ ” or “ ” side of the switch until the<br />
desired track or file to play is selected. To<br />
return to the beginning of the current track<br />
or file, press the “ ” side of the switch once<br />
quickly.<br />
To select a desired folder (MP3/WMA):<br />
Press the “ ” or “ ” switch to change to<br />
the next or the previous folder.<br />
USB memory/iPod<br />
To select a desired song: Press the “ ”<br />
or “ ” switch until the desired song is selected.<br />
Fast forward and reverse: Press and<br />
hold the “ ” or “ ” switch until you hear a<br />
beep.<br />
Bluetooth ® audio player<br />
To select a desired song: Press the “ ”<br />
or “ ” side of the switch until the desired<br />
song is selected.<br />
Fast forward and reverse: Press and<br />
hold the “ ” or “ ” switch until you hear a<br />
beep.<br />
132<br />
Display audio_Ext_EE
<strong>Touch</strong>_<strong>Go</strong>_<strong>Plus</strong>_OM20B71E.book Page 133 Thursday, September 20, 2012 12:03 PM<br />
1. AUDIO SYSTEM OPERATION<br />
“MODE/HOLD” switch<br />
• Press the “MODE/HOLD” switch to select<br />
an audio <strong>mode</strong>. Each press changes the<br />
<strong>mode</strong> sequentially if the desired <strong>mode</strong> is<br />
ready to use.<br />
• To turn the audio system on, press the<br />
“MODE/HOLD” switch.<br />
• Press and hold the “MODE/HOLD” switch<br />
until you hear a beep and the music will<br />
pause or be muted. By the same operation,<br />
it is released.<br />
Back switch<br />
• Press the back switch to return to the previous<br />
screen.<br />
4<br />
Enter switch<br />
• When in radio <strong>mode</strong>, pressing the enter<br />
switch returns to the preset screen.<br />
• When in media <strong>mode</strong>, pressing the enter<br />
switch returns to the list screen.<br />
AUDIO SYSTEM<br />
133<br />
Display audio_Ext_EE
<strong>Touch</strong>_<strong>Go</strong>_<strong>Plus</strong>_OM20B71E.book Page 134 Thursday, September 20, 2012 12:03 PM<br />
1. AUDIO SYSTEM OPERATION<br />
9. AUDIO SYSTEM OPERATING HINTS<br />
NOTICE<br />
● To avoid damaging the audio system:<br />
• Be careful not to spill beverages over<br />
the audio system.<br />
• Do not put anything other than on<br />
appropriate discs into the CD player<br />
slot.<br />
INFORMATION<br />
● The use of a cellular phone inside or<br />
near the vehicle may cause a noise from<br />
the speakers of the audio system which<br />
you are listening to. However, this does<br />
not indicate a malfunction.<br />
RADIO RECEPTION<br />
Usually, a problem with radio reception<br />
does not mean there is a problem with<br />
your radio ⎯ it is just the normal result<br />
of conditions outside the vehicle.<br />
For ex<strong>amp</strong>le, nearby buildings and terrain<br />
can interfere with FM reception.<br />
Power lines or telephone wires can interfere<br />
with AM signals. And of course,<br />
radio signals have a limited range, and<br />
the farther you are from a station, the<br />
weaker its signal will be. In addition, reception<br />
conditions change constantly<br />
as your vehicle moves.<br />
Here are some common reception<br />
problems that probably do not indicate<br />
a problem with your radio.<br />
FM<br />
Fading and drifting stations: Generally,<br />
the effective range of FM is about 40 km<br />
(25 miles). Once outside this range, you<br />
may notice fading and drifting, which increase<br />
with the distance from the radio<br />
transmitter. They are often accompanied<br />
by distortion.<br />
Multi-path: FM signals are reflective, making<br />
it possible for two signals to reach your<br />
antenna at the same time. If this happens,<br />
the signals will cancel each other out,<br />
causing a momentary flutter or loss of reception.<br />
Static and fluttering: These occur when<br />
signals are blocked by buildings, trees, or<br />
other large objects. Increasing the bass<br />
level may reduce static and fluttering.<br />
Station swapping: If the FM signal you<br />
are listening to is interrupted or weakened,<br />
and there is another strong station nearby<br />
on the FM band, your radio may tune in the<br />
second station until the original signal can<br />
be picked up again.<br />
AM<br />
Fading: AM broadcasts are reflected by<br />
the upper atmosphere ⎯ especially at<br />
night. These reflected signals can interfere<br />
with those received directly from the radio<br />
station, causing the radio station to sound<br />
alternately strong and weak.<br />
Station interference: When a reflected<br />
signal and a signal received directly from a<br />
radio station are very nearly the same frequency,<br />
they can interfere with each other,<br />
making it difficult to hear the broadcast.<br />
Static: AM is easily affected by external<br />
sources of electrical noise, such as high<br />
tension power lines, lightening, or electrical<br />
motors. This results in static.<br />
134<br />
Display audio_Ext_EE
<strong>Touch</strong>_<strong>Go</strong>_<strong>Plus</strong>_OM20B71E.book Page 135 Thursday, September 20, 2012 12:03 PM<br />
1. AUDIO SYSTEM OPERATION<br />
iPod<br />
• “Made for iPod” and “Made for iPhone”<br />
means that an electronic accessory has<br />
been designed to connect specifically to<br />
iPod, or iPhone, respectively, and has<br />
been certified by the developer to meet<br />
Apple performance standards.<br />
• Apple is not responsible for the operation<br />
of this device or its compliance with safety<br />
and regulatory standards. Please note<br />
that the use of this accessory with iPod or<br />
iPhone may affect wireless performance.<br />
• iPhone, iPod, iPod classic, iPod nano, and<br />
iPod touch are trademarks of Apple Inc.,<br />
registered in the U.S. and other countries.<br />
COMPATIBLE MODELS<br />
The following iPod ® , iPod nano ® , iPod<br />
classic ® , iPod touch ® and iPhone ® devices<br />
can be used with this system.<br />
Made for<br />
• iPod touch (4th generation)<br />
• iPod touch (3rd generation)<br />
• iPod touch (2nd generation)<br />
• iPod touch (1st generation)<br />
• iPod classic<br />
• iPod with video<br />
• iPod nano (6th generation)<br />
• iPod nano (5th generation)<br />
• iPod nano (4th generation)<br />
• iPod nano (3rd generation)<br />
• iPod nano (1st generation)<br />
• iPhone 4<br />
• iPhone 3GS<br />
• iPhone 3G<br />
• iPhone<br />
Depending on differences between <strong>mode</strong>ls<br />
or software versions etc., some <strong>mode</strong>ls<br />
listed above might be incompatible with<br />
this system.<br />
4<br />
AUDIO SYSTEM<br />
135<br />
Display audio_Ext_EE
<strong>Touch</strong>_<strong>Go</strong>_<strong>Plus</strong>_OM20B71E.book Page 136 Thursday, September 20, 2012 12:03 PM<br />
1. AUDIO SYSTEM OPERATION<br />
USB MEMORY<br />
• USB memory that can be used for MP3<br />
and WMA playback.<br />
• USB communication formats: USB 2.0<br />
FS (12 Mbps)<br />
• File formats: FAT 16/32 (Windows ® )<br />
• Correspondence class: Mass storage<br />
class<br />
CARING FOR YOUR CD<br />
PLAYER AND DISCS<br />
• Your CD player is intended for use with<br />
12 cm (4.7 in.) discs only. To play 8 cm<br />
(3 in.) discs, use an adaptor.<br />
• Extremely high temperatures can keep<br />
your CD player from working. On hot<br />
days, use air conditioning to cool the vehicle<br />
interior before you listen to a disc.<br />
• Bumpy roads or other vibrations may<br />
make your CD player skip.<br />
• If moisture gets into your CD player, you<br />
may not hear any sound even though your<br />
CD player appears to be working. Remove<br />
the discs from the CD player and wait until<br />
it dries.<br />
CAUTION<br />
Audio CDs<br />
• Use only discs marked as shown above.<br />
The following products may not be playable<br />
on your CD player.<br />
•SACDs<br />
• dts CDs<br />
• Copy-protected CDs<br />
• Video CDs<br />
Special shaped discs<br />
Transparent/translucent discs<br />
● CD player uses an invisible laser beam<br />
which could cause hazardous radiation<br />
exposure if directed outside the unit. Be<br />
sure to operate the CD player correctly.<br />
136<br />
Display audio_Ext_EE
<strong>Touch</strong>_<strong>Go</strong>_<strong>Plus</strong>_OM20B71E.book Page 137 Thursday, September 20, 2012 12:03 PM<br />
1. AUDIO SYSTEM OPERATION<br />
Low quality discs<br />
Correct<br />
Wrong<br />
Labeled discs<br />
NOTICE<br />
● Do not use special shaped, transparent/<br />
translucent, low quality or labeled discs<br />
such as those shown in the illustrations.<br />
The use of such discs may damage the<br />
player, or it may be impossible to eject<br />
the disc.<br />
● This system is not designed for use of<br />
Dual Disc. Do not use Dual Disc<br />
because it may cause damage to the<br />
player.<br />
• Handle discs carefully, especially when<br />
you are inserting them. Hold them on the<br />
edge and do not bend them. Avoid getting<br />
fingerprints on them, particularly on the<br />
shiny side.<br />
• Dirt, scratches, warping, pin holes, or<br />
other disc damage could cause the CD<br />
player to skip or to repeat a section of a<br />
track. (To see a pin hole, hold the disc up<br />
to the light.)<br />
• Remove discs from the CD player when<br />
you are not using them. Store them in their<br />
plastic cases away from moisture, heat,<br />
and direct sunlight.<br />
• To clean a disc: Wipe it with a soft, lintfree<br />
cloth that has been d<strong>amp</strong>ened with<br />
water. Wipe in a straight line from the centre<br />
to the edge of the disc (not in a circle).<br />
Do not use a conventional record cleaner<br />
or anti-static device.<br />
4<br />
AUDIO SYSTEM<br />
137<br />
Display audio_Ext_EE
<strong>Touch</strong>_<strong>Go</strong>_<strong>Plus</strong>_OM20B71E.book Page 138 Thursday, September 20, 2012 12:03 PM<br />
1. AUDIO SYSTEM OPERATION<br />
MP3/WMA FILES<br />
• MP3 (MPEG Audio Layer 3) and WMA<br />
(Windows Media Audio) are audio compression<br />
standards.<br />
• The MP3/WMA player can play MP3 and<br />
WMA files on CD-ROM, CD-R and CD-<br />
RW discs.<br />
The unit can play disc recordings compatible<br />
with ISO 9660 level 1,2 (Romeo Joliet)<br />
and UDF (2.01 or lower) file system.<br />
• When naming an MP3 or WMA file, add<br />
the appropriate file extension (.mp3 or<br />
.wma).<br />
• The MP3/WMA player plays back files<br />
with .mp3 or .wma file extensions as MP3<br />
or WMA files. To prevent noise and playback<br />
errors, use the appropriate file extensions.<br />
• The player can play only the first session<br />
using multi-session compatible CDs.<br />
• MP3 files are compatible with the ID3 Tag<br />
Ver. 1.0, Ver. 1.1, Ver. 2.2, and Ver. 2.3<br />
formats. The unit cannot display disc title,<br />
track title and artist name in other formats.<br />
• USB memory: MP3 files are compatible<br />
with the ID3 Tag Ver. 1.0, Ver. 1.1, Ver.<br />
2.2, Ver. 2.3 and Ver. 2.4 formats. The unit<br />
cannot display track title and artist name<br />
in other formats.<br />
• WMA files can contain a WMA tag that is<br />
used in the same way as an ID3 tag. WMA<br />
tags carry information such as track title,<br />
artist name.<br />
• The sound quality of MP3/WMA files generally<br />
improves with higher bit rates. In<br />
order to achieve a reasonable level of<br />
sound quality, files recorded with a bit rate<br />
of at least 128 kbps are recommended.<br />
SAMPLING FREQUENCY<br />
MP3 files:<br />
MPEG 1 AUDIO LAYER 3 ⎯ 32, 44.1,<br />
48 kHz<br />
MPEG2 AUDIO LAYER3 ⎯ 16, 22.05,<br />
24 kHz<br />
WMA files for WMA player:<br />
Ver. 7, 8, 9 CBR ⎯ 32, 44.1, 48 kHz<br />
WMA files for USB memory:<br />
Ver. 7, 8, 9 ⎯ HIGH PROFILE 32, 44.1,<br />
48 kHz<br />
PLAYABLE BIT RATES<br />
MP3 files for MP3 player:<br />
MPEG1 LAYER3 ⎯ 32 to 320 kbps<br />
MPEG2 LSF LAYER3 ⎯ 8 to 160 kbps<br />
MP3 files for USB memory:<br />
MPEG 1 AUDIO LAYER 2, 3 ⎯ 32 to<br />
320 kbps<br />
MPEG 2 AUDIO LAYER 2, 3 ⎯ 8 to<br />
160 kbps<br />
WMA files for WMA player:<br />
Ver. 7, 8 CBR ⎯ 48 to 192 kbps<br />
Ver. 9 CBR ⎯ 48 to 320 kbps<br />
WMA files for USB memory:<br />
Ver. 7, 8, 9 CBR ⎯ 48 to 320 kbps<br />
• M3u playlists are not compatible with the<br />
audio player.<br />
• MP3i (MP3 interactive) and MP3PRO formats<br />
are not compatible with the audio<br />
player.<br />
• The player is compatible with VBR (Variable<br />
Bit Rate).<br />
• When playing back files recorded as VBR<br />
(Variable Bit Rate) files, the play time will<br />
not be correctly displayed if fast-forward or<br />
reverse operations are used.<br />
• It is not possible to check folders that do<br />
not include MP3/WMA files.<br />
138<br />
Display audio_Ext_EE
<strong>Touch</strong>_<strong>Go</strong>_<strong>Plus</strong>_OM20B71E.book Page 139 Thursday, September 20, 2012 12:03 PM<br />
1. AUDIO SYSTEM OPERATION<br />
• MP3/WMA files in folders up to 8 levels<br />
deep can be played. However, the start of<br />
playback may be delayed when using<br />
discs containing numerous levels of folders.<br />
For this reason, we recommend creating<br />
discs with no more than two levels of<br />
folders.<br />
• WMA files Ver. 9 depends on “Windows<br />
Media ® Audio Standard”.<br />
001.mp3<br />
002.wma<br />
Folder 1<br />
003.mp3<br />
Folder 2<br />
004.mp3<br />
005.wma<br />
Folder 3<br />
006.mp3<br />
• The play order of the compact disc with<br />
the structure shown on the left is as follows:<br />
001. mp3 002. wma. . . 006. mp3<br />
• MP3/WMA player: It is possible to play up<br />
to 192 folders or 255 files on one disc.<br />
• USB memory:<br />
Maximum number of folder in device:<br />
3000<br />
Maximum number of files in one folder:<br />
255<br />
Maximum number of files in device: 9999<br />
• The order changes depending on the PC<br />
and MP3/WMA encoding software you<br />
use.<br />
CD-R AND CD-RW DISCS<br />
• CD-R/CD-RW discs that have not been<br />
subject to the “finalizing process” (a process<br />
that allows discs to be played on a<br />
conventional CD player) cannot be<br />
played.<br />
• It may not be possible to play CD-R/CD-<br />
RW discs recorded on a music CD<br />
recorder or a personal computer because<br />
of disc characteristics, scratches or dirt on<br />
the disc, or dirt, condensation, etc. on the<br />
lens of the unit.<br />
• It may not be possible to play discs<br />
recorded on a personal computer depending<br />
on the application settings and the<br />
environment. Record with the correct format.<br />
(For details, contact the appropriate<br />
application manufacturers of the applications.)<br />
• CD-R/CD-RW discs may be damaged by<br />
direct exposure to sunlight, high temperatures<br />
or other storage conditions. The unit<br />
may be unable to play some damaged<br />
discs.<br />
• If you insert a CD-RW disc into the MP3/<br />
WMA player, playback will begin more<br />
slowly than with a conventional CD or CD-<br />
R disc.<br />
• Recordings on CD-R/CD-RW cannot be<br />
played using the DDCD (Double Density<br />
CD) system.<br />
TERMS<br />
PACKET WRITE<br />
• This is a general term that describes the<br />
process of writing data on-demand to CD-<br />
R, etc., in the same way that data is written<br />
to floppy or hard discs.<br />
4<br />
AUDIO SYSTEM<br />
139<br />
Display audio_Ext_EE
<strong>Touch</strong>_<strong>Go</strong>_<strong>Plus</strong>_OM20B71E.book Page 140 Thursday, September 20, 2012 12:03 PM<br />
1. AUDIO SYSTEM OPERATION<br />
ID3 TAG<br />
• This is a method of embedding trackrelated<br />
information in an MP3 file. This<br />
embedded information can include the<br />
track title, the artist’s name, the album<br />
title, the music genre, the year of production,<br />
comments and other data. The contents<br />
can be freely edited using software<br />
with ID3 tag editing functions. Although<br />
the tags are restricted to the number of<br />
characters, the information can be viewed<br />
when the track is played back.<br />
WMA TAG<br />
• WMA files can contain a WMA tag that is<br />
used in the same way as an ID3 tag. WMA<br />
tags carry information such as track title,<br />
artist name.<br />
MP3<br />
• MP3 is an audio compression standard<br />
determined by a working group (MPEG) of<br />
the ISO (International Standard Organization).<br />
MP3 compresses audio data to<br />
about 1/10 the size of that on conventional<br />
discs.<br />
WMA<br />
• WMA (Windows Media Audio) is an audio<br />
compression format developed by<br />
Microsoft ® . It compresses files into a size<br />
smaller than that of MP3 files. The decoding<br />
formats for WMA files are Ver. 7, 8,<br />
and 9.<br />
ISO 9660 FORMAT<br />
• This is the international standard for the<br />
formatting of CD-ROM folders and files.<br />
For the ISO 9660 format, there are two<br />
levels of regulations.<br />
• Level 1: The file name is in 8.3 format (8<br />
character file names, with a 3 character<br />
file extension. File names must be composed<br />
of one-byte capital letters and numbers.<br />
The “_” symbol may also be<br />
included.)<br />
• Level 2: The file name can have up to 31<br />
characters (including the separation mark<br />
“.” and file extension). Each folder must<br />
contain fewer than 8 hierarchies.<br />
m3u<br />
• Playlists created using “WINAMP” software<br />
have a playlist file extension (.m3u).<br />
140<br />
Display audio_Ext_EE
<strong>Touch</strong>_<strong>Go</strong>_<strong>Plus</strong>_OM20B71E.book Page 141 Thursday, September 20, 2012 12:03 PM<br />
1. AUDIO SYSTEM OPERATION<br />
Gracenote ®<br />
• Music recognition technology and<br />
related data are provided by<br />
Gracenote ® . Gracenote is the industry<br />
standard in music recognition<br />
technology and related content delivery.<br />
For more information visit<br />
www.gracenote.com.<br />
• Gracenote ® End User License<br />
Agreement<br />
This application or device contains<br />
software from Gracenote, Inc. of<br />
Emeryville, California (“Gracenote”).<br />
The software from Gracenote (the<br />
“Gracenote Software”) enables this<br />
application to perform disc and/or file<br />
identification and obtain music-related<br />
information, including name, artist,<br />
track, and title information<br />
(“Gracenote Data”) from online<br />
servers or embedded databases<br />
(collectively, “Gracenote Servers”)<br />
and to perform other functions. You<br />
may use Gracenote Data only by<br />
means of the intended End-User<br />
functions of this application or device.<br />
You agree that you will use Gracenote<br />
Data, the Gracenote Software, and<br />
Gracenote Servers for your own<br />
personal non-commercial use only.<br />
You agree not to assign, copy, transfer<br />
or transmit the Gracenote Software or<br />
any Gracenote Data to any third party.<br />
YOU AGREE NOT TO USE OR<br />
EXPLOIT GRACENOTE DATA, THE<br />
GRACENOTE SOFTWARE, OR<br />
GRACENOTE SERVERS, EXCEPT<br />
AS EXPRESSLY PERMITTED<br />
HEREIN.<br />
You agree that your non-exclusive<br />
license to use the Gracenote Data, the<br />
Gracenote Software, and Gracenote<br />
Servers will terminate if you violate<br />
these restrictions. If your license<br />
terminates, you agree to cease any<br />
and all use of the Gracenote Data, the<br />
Gracenote Software, and Gracenote<br />
Servers. Gracenote reserves all rights<br />
in Gracenote Data, the Gracenote<br />
Software, and the Gracenote Servers,<br />
including all ownership rights. Under<br />
no circumstances will Gracenote<br />
become liable for any payment to you<br />
for any information that you provide.<br />
You agree that Gracenote, Inc. may<br />
enforce its rights under this<br />
Agreement against you directly in its<br />
own name.<br />
The Gracenote service uses a unique<br />
identifier to track queries for statistical<br />
purposes. The purpose of a randomly<br />
assigned numeric identifier is to allow<br />
the Gracenote service to count<br />
queries without knowing anything<br />
about who you are. For more<br />
information, see the web page for the<br />
Gracenote Privacy Policy for the<br />
Gracenote service.<br />
4<br />
AUDIO SYSTEM<br />
141<br />
Display audio_Ext_EE
<strong>Touch</strong>_<strong>Go</strong>_<strong>Plus</strong>_OM20B71E.book Page 142 Thursday, September 20, 2012 12:03 PM<br />
1. AUDIO SYSTEM OPERATION<br />
The Gracenote Software and each<br />
item of Gracenote Data are licensed to<br />
you “AS IS.” Gracenote makes no<br />
representations or warranties,<br />
express or implied, regarding the<br />
accuracy of any Gracenote Data from<br />
in the Gracenote Servers. Gracenote<br />
reserves the right to delete data from<br />
the Gracenote Servers or to change<br />
data categories for any cause that<br />
Gracenote deems sufficient. No<br />
warranty is made that the Gracenote<br />
Software or Gracenote Servers are<br />
error-free or that functioning of<br />
Gracenote Software or Gracenote<br />
Servers will be uninterrupted.<br />
Gracenote is not obligated to provide<br />
you with new enhanced or additional<br />
data types or categories that<br />
Gracenote may provide in the future<br />
and is free to discontinue its services<br />
at any time.<br />
GRACENOTE DISCLAIMS ALL<br />
WARRANTIES EXPRESS OR<br />
IMPLIED, INCLUDING, BUT NOT<br />
LIMITED TO, IMPLIED<br />
WARRANTIES<br />
OF<br />
MERCHANTABILITY, FITNESS FOR<br />
A PARTICULAR PURPOSE, TITLE,<br />
AND NON-INFRINGEMENT.<br />
GRACENOTE DOES NOT<br />
WARRANT THE RESULTS THAT<br />
WILL BE OBTAINED BY YOUR USE<br />
OF THE GRACENOTE SOFTWARE<br />
OR ANY GRACENOTE SERVER. IN<br />
NO CASE WILL GRACENOTE BE<br />
LIABLE FOR ANY CONSEQUENTIAL<br />
OR INCIDENTAL DAMAGES OR<br />
FOR ANY LOST PROFITS OR LOST<br />
REVENUES.<br />
copyright © 2000 to present<br />
Gracenote<br />
142<br />
Display audio_Ext_EE
<strong>Touch</strong>_<strong>Go</strong>_<strong>Plus</strong>_OM20B71E.book Page 143 Thursday, September 20, 2012 12:03 PM<br />
1. AUDIO SYSTEM OPERATION<br />
4<br />
AUDIO SYSTEM<br />
143<br />
Display audio_Ext_EE
<strong>Touch</strong>_<strong>Go</strong>_<strong>Plus</strong>_OM20B71E.book Page 144 Thursday, September 20, 2012 12:03 PM<br />
1<br />
BASIC INFORMATION BEFORE<br />
OPERATION<br />
1. QUICK REFERENCE .................. 146<br />
2. HANDS-FREE SYSTEM.............. 150<br />
USING THE TELEPHONE SWITCH ... 151<br />
ABOUT THE PHONE BOOK<br />
IN THIS SYSTEM.............................. 152<br />
WHEN YOU RELEASE YOUR CAR ... 152<br />
3. CONNECTING A Bluetooth ®<br />
PHONE...................................... 153<br />
CONNECTING A<br />
Bluetooth ® PHONE ........................... 153<br />
4. REGISTERING AN ENTRY......... 157<br />
REGISTERING A NEW ENTRY .......... 157<br />
DISPLAYING AND EDITING<br />
THE ENTRY INFORMATION............ 159<br />
SENDING STORED CONTACTS<br />
TO A USB MEMORY ........................ 161<br />
144<br />
DA_EXT_High_EE
<strong>Touch</strong>_<strong>Go</strong>_<strong>Plus</strong>_OM20B71E.book Page 145 Thursday, September 20, 2012 12:03 PM<br />
5<br />
Bluetooth ® HANDS-FREE SYSTEM<br />
1<br />
2<br />
2 TELEPHONE OPERATION 3 SHORT MESSAGE FUNCTION<br />
1. CALLING ON<br />
A Bluetooth ® PHONE .............. 162<br />
BY DIAL ............................................... 162<br />
BY “Stored” LIST ON THE<br />
“Contacts” SCREEN.......................... 162<br />
BY PHONE BOOK ............................... 163<br />
BY CALL LISTS ................................... 164<br />
CALLING USING A SHORT<br />
MESSAGE......................................... 165<br />
BY POI* CALL...................................... 165<br />
2. RECEIVING CALLS ON<br />
A Bluetooth ® PHONE .............. 166<br />
3. TALKING ON<br />
A Bluetooth ® PHONE .............. 167<br />
ADJUSTING THE RECEIVER<br />
VOLUME ........................................... 168<br />
SENDING TONES ............................... 168<br />
DIALING A SECOND NUMBER .......... 168<br />
1. SHORT MESSAGE<br />
FUNCTION ................................ 170<br />
NEW SHORT MESSAGE<br />
NOTIFICATION POP-UP<br />
WINDOW (IF EQUIPPED)................ 170<br />
CHECKING RECEIVED<br />
SHORT MESSAGES ........................ 170<br />
CHECKING SENT<br />
SHORT MESSAGES ........................ 171<br />
SENDING A NEW<br />
SHORT MESSAGES ........................ 172<br />
3<br />
4<br />
5<br />
6<br />
7<br />
8<br />
9<br />
Some of the functions cannot be operated while driving.<br />
*: Point of Interest<br />
145<br />
DA_EXT_High_EE
<strong>Touch</strong>_<strong>Go</strong>_<strong>Plus</strong>_OM20B71E.book Page 146 Thursday, September 20, 2012 12:03 PM<br />
1. BASIC INFORMATION BEFORE OPERATION<br />
1. QUICK REFERENCE<br />
Pressing the<br />
button allows access to the “Phone” menu screen.<br />
Each time the button is pressed, the screen will changed to between the<br />
“Phone” menu screen and the “Extras” menu screen.<br />
When the button is pressed, the screen that was last displayed is returned<br />
to. <strong>Touch</strong> to display the “Phone” menu screen.<br />
“Phone” menu screen<br />
• The actual design and button position may differ depending on the vehicle. For<br />
details, see Section 3 of “Owner’s Manual”.<br />
No. Function Page<br />
<strong>Touch</strong> to display the “Dial number” screen.<br />
A call can be made by dialing the number.<br />
<strong>Touch</strong> to display the “Contacts” screen.<br />
An entry from the list of contacts in the “Stored” and “Phone book”<br />
screen can be selected and called.<br />
<strong>Touch</strong> to display the “Call lists” screen.<br />
An entry from the missed, received or dial call lists can be selected<br />
and called.<br />
148, 162<br />
162, 163<br />
164<br />
146<br />
Display audio_Ext_EE
<strong>Touch</strong>_<strong>Go</strong>_<strong>Plus</strong>_OM20B71E.book Page 147 Thursday, September 20, 2012 12:03 PM<br />
1. BASIC INFORMATION BEFORE OPERATION<br />
No. Function Page<br />
<strong>Touch</strong> to display the “Messages” screen.<br />
A list of received and sent short messages and a menu to create new<br />
short messages can be displayed.<br />
Press to display “Phone” menu screen. Each time this button is<br />
pressed, the screen will change between the “Phone” menu screen<br />
and the “Extras” menu screen.<br />
170<br />
—<br />
5<br />
Bluetooth ® HANDS-FREE SYSTEM<br />
147<br />
Display audio_Ext_EE
<strong>Touch</strong>_<strong>Go</strong>_<strong>Plus</strong>_OM20B71E.book Page 148 Thursday, September 20, 2012 12:03 PM<br />
1. BASIC INFORMATION BEFORE OPERATION<br />
To display the dial number screen, touch “Dial number” on the “Phone” menu<br />
screen, or touch on any of the “Phone” screens. The dial number screen can<br />
also be displayed by pressing the switch on the steering wheel.<br />
“Dial number” screen<br />
No. Name Function<br />
Shortcut keys<br />
The Name of<br />
phone and provider<br />
Number keys<br />
Save the number<br />
screen button<br />
<strong>Touch</strong> the corresponding icon to change to the “Dial number”, “Contacts”,<br />
“Call lists” or “Messages” screen.<br />
Displaying name of the phone and provider. These information may<br />
not be displayed depending on the phone.<br />
<strong>Touch</strong> to input a phone number.<br />
<strong>Touch</strong> to register a phone number.<br />
Delete<br />
button<br />
screen<br />
<strong>Touch</strong> to delete an input phone number.<br />
Off hook screen<br />
button<br />
<strong>Touch</strong> to make a phone call.<br />
148<br />
Display audio_Ext_EE
<strong>Touch</strong>_<strong>Go</strong>_<strong>Plus</strong>_OM20B71E.book Page 149 Thursday, September 20, 2012 12:03 PM<br />
1. BASIC INFORMATION BEFORE OPERATION<br />
No. Name Function<br />
The<br />
area<br />
receiving<br />
“R” is displayed when receiving in a Roaming area.<br />
• The receiving area may not be displayed depending on the<br />
phone.<br />
The amount of<br />
battery charge<br />
left<br />
The level of reception<br />
The six bars display the charge level of the phone’s battery.<br />
• The amount displayed does not always correspond with the<br />
amount displayed on the cellular phone. The amount of battery<br />
charge left may not be displayed depending on the phone. This<br />
system does not have a charging function.<br />
• If this information is not available from the connected phone, the<br />
icon will be shown with a question mark.<br />
The five bars display the level of reception.<br />
• The level of reception does not always correspond with the level<br />
displayed on the cellular phone.<br />
• The level of reception may not be displayed depending on the<br />
phone.<br />
• If this information is not available from the connected phone, the<br />
icon will be shown with a question mark.<br />
5<br />
Bluetooth ® connection<br />
Short messages<br />
information<br />
Missed calls information<br />
The icon indicates an active BT-connection<br />
Displays short messages information.<br />
Displays missed calls information.<br />
INFORMATION<br />
● An antenna for the Bluetooth ® connection is built into the instrument panel. The system<br />
may not function when you use the Bluetooth ® phone in the following conditions and<br />
places:<br />
• When the cellular phone is obstructed by certain objects (such as when it is behind the<br />
seat or in the glove box and console box).<br />
• When the cellular phone touches or is covered with metal materials.<br />
Bluetooth ® HANDS-FREE SYSTEM<br />
149<br />
Display audio_Ext_EE
<strong>Touch</strong>_<strong>Go</strong>_<strong>Plus</strong>_OM20B71E.book Page 150 Thursday, September 20, 2012 12:03 PM<br />
1. BASIC INFORMATION BEFORE OPERATION<br />
2. HANDS-FREE SYSTEM<br />
Bluetooth ® hands-free system allows<br />
you to make or receive a call without<br />
taking your hands off the steering<br />
wheel by connecting your cellular<br />
phone.<br />
This system supports Bluetooth ® .<br />
Bluetooth ® is a wireless data system<br />
by which you can call without your<br />
cellular phone being connected with a<br />
cable or placed on a cradle.<br />
The operating procedure of the system<br />
is explained in this section.<br />
• For registering and setting of the phone,<br />
see “Bluetooth ® SETTINGS” on page<br />
193.<br />
CAUTION<br />
● Use a cellular phone or connect the<br />
Bluetooth ® phone only when safe and<br />
legal to do so.<br />
NOTICE<br />
● Do not leave your cellular phone in the<br />
car. The temperature inside may be high<br />
and damage the phone.<br />
● If the Bluetooth ® phone is too close to<br />
the system, quality of the sound may<br />
deteriorate and connecting condition<br />
may go down.<br />
INFORMATION<br />
● If your cellular phone does not support<br />
Bluetooth ® , this system will not function.<br />
● Depending on the cellular phone <strong>mode</strong>ls,<br />
some functions may be restricted.<br />
● In the following conditions, the system<br />
may not function.<br />
• The cellular phone is turned off.<br />
• The current position is outside the<br />
communication area.<br />
• The cellular phone is not connected.<br />
• The cellular phone has a low battery.<br />
• When outgoing is controlled, due to<br />
heavy traffic on telephone lines, etc.<br />
• When the cellular phone itself cannot<br />
be used<br />
• When transferring the phone book<br />
data from the cellular phone<br />
● When using Bluetooth ® audio and<br />
hands-free at the same time, the following<br />
problems may occur.<br />
• The Bluetooth ® connection may be<br />
cut.<br />
• Noise may be heard on the<br />
Bluetooth ® audio playback.<br />
● The Bluetooth ® phone battery will burn<br />
out quickly when it is connected to<br />
Bluetooth ® .<br />
150<br />
Display audio_Ext_EE
<strong>Touch</strong>_<strong>Go</strong>_<strong>Plus</strong>_OM20B71E.book Page 151 Thursday, September 20, 2012 12:03 PM<br />
1. BASIC INFORMATION BEFORE OPERATION<br />
USING THE TELEPHONE<br />
SWITCH<br />
Bluetooth is a registered trademark of Bluetooth<br />
SIG, Inc.<br />
INFORMATION<br />
● This system supports the following service.<br />
•Bluetooth ® Specification<br />
Ver.1.1 or higher<br />
(Recommended: Ver.2.1+EDR or<br />
higher)<br />
•Profile<br />
HFP (Hands Free Profile)<br />
Ver.1.0 or higher<br />
(Recommended: Ver.1.5 or higher)<br />
DUN (Dial-Up Networking Profile)<br />
Ver.1.1 or higher<br />
PAN (Personal Area Network)<br />
Ver. 1.0<br />
• PBAP (Phone Book Access Profile)<br />
Ver.1.0 or higher<br />
MAP (Message Access Profile)<br />
• Application<br />
PIM (Personal Information Manager)<br />
● If your cellular phone does not support<br />
HFP, you cannot register the Bluetooth ®<br />
phone, or use DUN/PAN or PBAP profiles<br />
individually.<br />
● If the connected Bluetooth ® phone version<br />
is older than recommended or<br />
incompatible, this function may not be<br />
used.<br />
The actual design and switch position<br />
may differ depending on the vehicle.<br />
For details, see the Pictorial index of<br />
“Owner’s Manual”.<br />
• By pressing the telephone switch, you can<br />
receive a call or hang up without taking<br />
your hands off the steering wheel.<br />
• By pressing the volume switch, you can<br />
adjust the volume.<br />
5<br />
Bluetooth ® HANDS-FREE SYSTEM<br />
151<br />
Display audio_Ext_EE
<strong>Touch</strong>_<strong>Go</strong>_<strong>Plus</strong>_OM20B71E.book Page 152 Thursday, September 20, 2012 12:03 PM<br />
1. BASIC INFORMATION BEFORE OPERATION<br />
ABOUT THE PHONE BOOK IN<br />
THIS SYSTEM<br />
• The following data is stored for every registered<br />
phone. When another phone is<br />
connecting, you cannot read the registered<br />
data.<br />
• Phone book data<br />
• All of call history<br />
• You can use the microphone when talking<br />
on the phone.<br />
INFORMATION<br />
● The other party’s voice outputs from the<br />
front speaker. When the received calls<br />
or received voice outputs, the audio<br />
from the audio system will be muted.<br />
● Talk alternately with the other party on<br />
the phone. If you talk at the same time,<br />
your voices may not reach each other. (It<br />
is not a malfunction.)<br />
● Keep the volume of receiving voice<br />
down. Otherwise, an echo will be heard<br />
and receiving voice can be heard outside<br />
of the vehicle. When you talk on the<br />
phone, speak clearly towards the microphone.<br />
● In the following situations, your voice<br />
may not reach the other party.<br />
• Driving on an unpaved road. (Due to<br />
traffic noise.)<br />
• Driving at high speed.<br />
• A window is open.<br />
• Turning the air-conditioning vents<br />
towards the microphone.<br />
• The sound of the air-conditioning fan<br />
is loud.<br />
• There is an effect from the cellular<br />
phone network.<br />
INFORMATION<br />
● When you delete the phone, the abovementioned<br />
data is also deleted.<br />
WHEN YOU RELEASE YOUR<br />
CAR<br />
A lot of personal data is registered<br />
when you use the Hands-free system.<br />
When you release your car, initialize<br />
your data. (See “DELETE PERSONAL<br />
DATA” on page 189.)<br />
• You can initialize the following data in the<br />
system.<br />
• Phone book data<br />
• Call history data<br />
• Bluetooth ® phone data<br />
• Volume setting<br />
• Bluetooth ® setting<br />
INFORMATION<br />
● If you initialize it, the former state will<br />
never come back again. Pay attention<br />
when initializing the data.<br />
152<br />
Display audio_Ext_EE
<strong>Touch</strong>_<strong>Go</strong>_<strong>Plus</strong>_OM20B71E.book Page 153 Thursday, September 20, 2012 12:03 PM<br />
1. BASIC INFORMATION BEFORE OPERATION<br />
3. CONNECTING A Bluetooth ® PHONE<br />
CONNECTING A Bluetooth ®<br />
PHONE<br />
In order to use the hands-free system,<br />
it is necessary to pair the phone and<br />
connect the phone’s profile (HFP) with<br />
the system. (In this manual, pairing refers<br />
to a Bluetooth ® device connecting<br />
with the system. Connecting refers to<br />
the paired device’s profile(s) being<br />
connected to the system.)<br />
Once the profile has been connected,<br />
hands-free calls can be made.<br />
If you have not yet connected any<br />
Bluetooth ® phones with phone profile<br />
(HFP), you must first connect your<br />
phone with phone profile (HFP)<br />
according to the following procedure.<br />
Connect your Bluetooth ® phone with<br />
phone profile (HFP) after bringing the<br />
vehicle to a complete stop.<br />
• See “Bluetooth ® SETTINGS” on page<br />
193 of additional registration when registering.<br />
CONNECTING A Bluetooth ®<br />
PHONE<br />
■CONNECTING FROM THE SYSTEM<br />
1 Press the button.<br />
2 <strong>Touch</strong> “Bluetooth ∗ Setup”.<br />
3 <strong>Touch</strong> “Search for Bluetooth ∗ devices”.<br />
5<br />
Bluetooth ® HANDS-FREE SYSTEM<br />
• When a Bluetooth ® device is currently<br />
connected, a pop-up window is displayed.<br />
To disconnect it, touch “Yes”.<br />
∗ : Bluetooth is a registered trademark of<br />
Bluetooth SIG, Inc.<br />
153<br />
Display audio_Ext_EE
<strong>Touch</strong>_<strong>Go</strong>_<strong>Plus</strong>_OM20B71E.book Page 154 Thursday, September 20, 2012 12:03 PM<br />
1. BASIC INFORMATION BEFORE OPERATION<br />
4 The following screen will be displayed<br />
while searching for a Bluetooth ® device.<br />
• To cancel this function, touch “Cancel”.<br />
5 <strong>Touch</strong> the device to be paired.<br />
7 Confirm the PIN.<br />
If the device supports SSP (Secure Simple<br />
Pairing)<br />
• Confirm the PIN displayed on the screen,<br />
and then touch “Accept”.<br />
If the device does not supports SSP (Secure<br />
Simple Pairing)<br />
• Input the PIN displayed on the screen into<br />
the phone.<br />
8 The following screen will be displayed<br />
when pairing is complete.<br />
• Connectable Bluetooth ® devices will be<br />
displayed in the list.<br />
6 The following screen will be displayed.<br />
9 The system waits for connection requests<br />
coming from the paired device.<br />
All requested profiles are connected<br />
automatically.<br />
• To cancel this function, touch “Cancel”.<br />
• If the automatic connection failed, the following<br />
screen will be displayed. <strong>Touch</strong><br />
“Connect for phone”.<br />
154<br />
Display audio_Ext_EE
<strong>Touch</strong>_<strong>Go</strong>_<strong>Plus</strong>_OM20B71E.book Page 155 Thursday, September 20, 2012 12:03 PM<br />
1. BASIC INFORMATION BEFORE OPERATION<br />
3 <strong>Touch</strong> “Make this system discoverable”.<br />
• Once the Bluetooth ® phone has been connected,<br />
it will be automatically connected<br />
whenever the engine switch is in the<br />
“ACC” or “ON” position.<br />
INFORMATION<br />
● For details on device detection and the<br />
operation of your cellular phone, see the<br />
manual that comes with the cellular<br />
phone.<br />
• When a Bluetooth ® device is currently<br />
connected, a pop-up window is displayed.<br />
To disconnect it, touch “Yes”.<br />
4 The following screen will be displayed.<br />
5<br />
■CONNECTING FROM THE DEVICE<br />
1 Press the button.<br />
2 <strong>Touch</strong> “Bluetooth ∗ Setup”.<br />
• To cancel this function, touch “Cancel”.<br />
5 Confirm the PIN.<br />
If the device supports SSP (Secure Simple<br />
Pairing)<br />
• Confirm the PIN displayed on the screen,<br />
and then touch “Accept”.<br />
If the device does not supports SSP (Secure<br />
Simple Pairing)<br />
• Input the PIN displayed on the screen into<br />
the phone.<br />
Bluetooth ® HANDS-FREE SYSTEM<br />
∗ : Bluetooth is a registered trademark of<br />
Bluetooth SIG, Inc.<br />
155<br />
Display audio_Ext_EE
<strong>Touch</strong>_<strong>Go</strong>_<strong>Plus</strong>_OM20B71E.book Page 156 Thursday, September 20, 2012 12:03 PM<br />
1. BASIC INFORMATION BEFORE OPERATION<br />
RECONNECTING THE<br />
Bluetooth ® PHONE<br />
If a Bluetooth ® phone is disconnected<br />
due to poor reception from the<br />
Bluetooth ® network when the engine<br />
switch is in the “ACC” or “ON” position,<br />
the system will automatically<br />
reconnect the Bluetooth ® phone.<br />
• If the Bluetooth ® phone is disconnected<br />
on purpose, such as it was turned off, this<br />
does not happen. Reconnect it manually<br />
using either of the following methods:<br />
• Select the Bluetooth ® phone again. (See<br />
page 197.)<br />
• Connect the phone profile. (See page<br />
198.)<br />
156<br />
Display audio_Ext_EE
<strong>Touch</strong>_<strong>Go</strong>_<strong>Plus</strong>_OM20B71E.book Page 157 Thursday, September 20, 2012 12:03 PM<br />
1. BASIC INFORMATION BEFORE OPERATION<br />
4. REGISTERING AN ENTRY<br />
REGISTERING A NEW ENTRY<br />
Up to 200 numbers can be registered<br />
with this system.<br />
4 Select one of 4 phone types (“Mobile”,<br />
“Home”, “Work” or “Other”)<br />
and input a number.<br />
REGISTERING FROM THE<br />
“Contacts” SCREEN<br />
1 <strong>Touch</strong> “Contacts”.<br />
• The “Contacts” screen can be displayed<br />
by touching on any of the “Phone”<br />
screens.<br />
2 <strong>Touch</strong> “Stored” on the “Contacts”<br />
screen.<br />
3 <strong>Touch</strong> “Create new entry”.<br />
: <strong>Touch</strong> to delete one number. <strong>Touch</strong><br />
and hold to continue deleting numbers.<br />
• You can enter a number for each phone<br />
type.<br />
5 <strong>Touch</strong> .<br />
6 Input the entry name.<br />
7 <strong>Touch</strong> “OK”.<br />
8 The entry is registered in the “Stored”<br />
list.<br />
5<br />
Bluetooth ® HANDS-FREE SYSTEM<br />
• <strong>Touch</strong> to display and edit the entry<br />
information. (See page 159.)<br />
157<br />
Display audio_Ext_EE
<strong>Touch</strong>_<strong>Go</strong>_<strong>Plus</strong>_OM20B71E.book Page 158 Thursday, September 20, 2012 12:03 PM<br />
1. BASIC INFORMATION BEFORE OPERATION<br />
REGISTERING FROM THE “Dial<br />
number” SCREEN<br />
1 <strong>Touch</strong> “Dial number” on the “Phone”<br />
menu screen.<br />
• The “Dial number” screen can be displayed<br />
by touching<br />
“Phone” screens.<br />
on any of the<br />
• You can also press the switch on the<br />
steering wheel to display the “Dial number”<br />
screen.<br />
2 Input the numbers.<br />
3 <strong>Touch</strong> .<br />
4 Follow the steps “REGISTERING<br />
FROM THE “Contacts” SCREEN” from<br />
“STEP 6”. (See page 157.)<br />
INFORMATION<br />
● The phone type is registered as<br />
“Mobile”.<br />
REGISTERING FROM THE<br />
“Phone book” SCREEN<br />
1 Search the entry by “Phone book”.<br />
(See page 163.)<br />
2 <strong>Touch</strong> for desired item.<br />
3 <strong>Touch</strong> “Add to stored phone numbers”.<br />
4 Follow the steps “REGISTERING<br />
FROM THE “Contacts” SCREEN” from<br />
“STEP 6”. (See page 157.)<br />
INFORMATION<br />
● The phone type is registered as<br />
“Mobile”.<br />
● If the contact includes an address and a<br />
phone number, they will be stored in the<br />
“Stored” list on the “My destinations”<br />
screen and “Contacts” screen. (See<br />
pages 55 and 157.)<br />
REGISTERING FROM THE “Call<br />
lists” SCREEN<br />
1 Searching the entry by “Call lists”. (See<br />
page 164.)<br />
2 <strong>Touch</strong> next to the desired item.<br />
3 Follow the steps “REGISTERING<br />
FROM THE “Contacts” SCREEN” from<br />
“STEP 6”. (See page 157.)<br />
INFORMATION<br />
● The phone type is registered as<br />
“Mobile”.<br />
158<br />
Display audio_Ext_EE
<strong>Touch</strong>_<strong>Go</strong>_<strong>Plus</strong>_OM20B71E.book Page 159 Thursday, September 20, 2012 12:03 PM<br />
1. BASIC INFORMATION BEFORE OPERATION<br />
REGISTERING FROM AN<br />
EXTERNAL DEVICE<br />
“CSI” formatted data can be transferred<br />
from a USB memory to this system.<br />
Transferred addresses and<br />
numbers will be stored in the “Stored”<br />
list on the “My destinations” screen and<br />
“Contacts” screen. (See pages 55 and<br />
157.)<br />
DISPLAYING AND EDITING<br />
THE ENTRY INFORMATION<br />
Detailed information of entries in the<br />
list can be displayed or edited.<br />
1 <strong>Touch</strong> next to the desired entry<br />
on the “Contacts” screen.<br />
5<br />
Entry options screen of the “Stored” list<br />
Entry options screen of the “Phone<br />
book” list<br />
Bluetooth ® HANDS-FREE SYSTEM<br />
• On this screen, the following functions can<br />
be operated.<br />
159<br />
Display audio_Ext_EE
<strong>Touch</strong>_<strong>Go</strong>_<strong>Plus</strong>_OM20B71E.book Page 160 Thursday, September 20, 2012 12:03 PM<br />
1. BASIC INFORMATION BEFORE OPERATION<br />
No.<br />
Function<br />
<strong>Touch</strong> to display the details of<br />
the entry information.<br />
• <strong>Touch</strong> the desired entry to call<br />
it.<br />
<strong>Touch</strong> to change the entry name.<br />
(See page 160.)<br />
<strong>Touch</strong> to edit phone numbers.<br />
(See page 160.)<br />
<strong>Touch</strong> to delete the entry.<br />
EDITING PHONE NUMBERS<br />
1 <strong>Touch</strong> “Edit phone numbers”.<br />
2 Select one of 4 phone types and input<br />
a number.<br />
<strong>Touch</strong> to delete all entries.<br />
<strong>Touch</strong> to register the entry in the<br />
“Stored” list on the “My destinations”<br />
screen and “Contacts”<br />
screen. (See page 158.)<br />
: <strong>Touch</strong> to delete one number. <strong>Touch</strong><br />
and hold to continue deleting numbers.<br />
• You can edit a number for each phone<br />
type.<br />
CHANGING THE ENTRY NAME<br />
1 <strong>Touch</strong> “Rename XX”.<br />
2 Input the entry name.<br />
3 <strong>Touch</strong> .<br />
INFORMATION<br />
● If an entry that is transferred from a cellular<br />
phone is edited, the change will<br />
affect the entry in the “Stored” list on the<br />
“My destinations” screen and “Contacts”<br />
screen. (See pages 55 and 157.)<br />
3 <strong>Touch</strong> “OK”.<br />
160<br />
Display audio_Ext_EE
<strong>Touch</strong>_<strong>Go</strong>_<strong>Plus</strong>_OM20B71E.book Page 161 Thursday, September 20, 2012 12:03 PM<br />
1. BASIC INFORMATION BEFORE OPERATION<br />
SENDING STORED<br />
CONTACTS TO A USB<br />
MEMORY<br />
The entries stored in the “Stored” list<br />
on the “My destinations” screen and<br />
“Contacts” screen can be transferred<br />
to a USB memory. (See page 63.)<br />
5<br />
Bluetooth ® HANDS-FREE SYSTEM<br />
161<br />
Display audio_Ext_EE
<strong>Touch</strong>_<strong>Go</strong>_<strong>Plus</strong>_OM20B71E.book Page 162 Thursday, September 20, 2012 12:03 PM<br />
2. TELEPHONE OPERATION<br />
1. CALLING ON A Bluetooth ® PHONE<br />
After a Bluetooth ® phone has been<br />
connected, a call can be made using<br />
the hands-free system. There are several<br />
methods by which a call can be<br />
made. These are described below.<br />
4 The connecting screen will be displayed.<br />
BY DIAL<br />
You can call by inputting the phone<br />
number.<br />
1 Press the switch on the steering<br />
wheel.<br />
• The “Dial number” screen can be displayed<br />
by touching “Dial number” on the<br />
“Phone” menu screen or on any of<br />
the “Phone” screens.<br />
2 <strong>Touch</strong> the desired key to input the<br />
phone number.<br />
• To cancel the call, touch “End call”.<br />
BY “Stored” LIST ON THE<br />
“Contacts” SCREEN<br />
Calls can be made using the “Stored”<br />
list on the “Contacts” screen. To use<br />
this function, it is necessary to register<br />
the entry. (See page 157.)<br />
1 <strong>Touch</strong> “Contacts”.<br />
: <strong>Touch</strong> to delete one number. <strong>Touch</strong><br />
and hold to continue deleting numbers.<br />
• When is touched, the number is<br />
registered in the “Stored” list on the<br />
“Contacts” screen. (See page 158.)<br />
• The “Contacts” screen can be displayed<br />
by touching on any of the “Phone”<br />
screens.<br />
2 <strong>Touch</strong> “Stored” on the “Contacts”<br />
screen.<br />
3 <strong>Touch</strong> .<br />
162<br />
Display audio_Ext_EE
<strong>Touch</strong>_<strong>Go</strong>_<strong>Plus</strong>_OM20B71E.book Page 163 Thursday, September 20, 2012 12:03 PM<br />
2. TELEPHONE OPERATION<br />
3 <strong>Touch</strong> the desired entry.<br />
• <strong>Touch</strong> to display and edit the<br />
entry information. (See page 159.)<br />
• If there are 2 or more phone numbers,<br />
touch the desired number in the list.<br />
BY PHONE BOOK<br />
Calls can be made using the phone<br />
book data of the connected cellular<br />
phone. The phone book changes depending<br />
on the phone connected.<br />
If a contact does not have phone number<br />
stored, the entry will be dimmed.<br />
You can update the Phone book list.<br />
(See page 200.)<br />
1 <strong>Touch</strong> “Contacts”.<br />
5<br />
4 The connecting screen will be displayed.<br />
• To cancel the call, touch “End call”.<br />
• The “Contacts” screen can be displayed<br />
by touching on any of the “Phone”<br />
screens.<br />
2 <strong>Touch</strong> “Phone book” on the “Contacts”<br />
screen.<br />
3 <strong>Touch</strong> the desired entry.<br />
Bluetooth ® HANDS-FREE SYSTEM<br />
• If there are 2 or more phone numbers,<br />
touch the desired number in the list.<br />
• <strong>Touch</strong> “Search contact” to search by<br />
the contact’s name.<br />
• <strong>Touch</strong> to display and edit the entry<br />
information. (See page 159.)<br />
163<br />
Display audio_Ext_EE
<strong>Touch</strong>_<strong>Go</strong>_<strong>Plus</strong>_OM20B71E.book Page 164 Thursday, September 20, 2012 12:03 PM<br />
2. TELEPHONE OPERATION<br />
4 The connecting screen will be displayed.<br />
• To cancel the call, touch “End call”.<br />
INFORMATION<br />
● When a phone is connected for the first<br />
time, its phone book must be downloaded.<br />
If the phone book can not be<br />
downloaded, a pop-up window will be<br />
displayed.<br />
BY CALL LISTS<br />
Calls can be made using one of the 4<br />
call lists functions.<br />
1 <strong>Touch</strong> “Call lists”.<br />
2 <strong>Touch</strong> the desired list.<br />
“All”: <strong>Touch</strong> to display all numbers<br />
(missed, received and dialed).<br />
“Missed”: <strong>Touch</strong> to display missed calls.<br />
“Received”: <strong>Touch</strong> to display received<br />
calls.<br />
“Dialed”: <strong>Touch</strong> to display dialed numbers.<br />
• The state of a call is shown by the following<br />
icons.<br />
: Missed<br />
: Received<br />
: Dialed<br />
• The “Call lists” screen can be displayed by<br />
touching on any of the “Phone”<br />
screens.<br />
• When is touched, the entry is registered<br />
in the “Stored” list on the “Contacts”<br />
screen. (See page 158.)<br />
3 <strong>Touch</strong> the desired entry.<br />
4 The connecting screen will be displayed.<br />
• To cancel the call, touch “End call”.<br />
164<br />
Display audio_Ext_EE
<strong>Touch</strong>_<strong>Go</strong>_<strong>Plus</strong>_OM20B71E.book Page 165 Thursday, September 20, 2012 12:03 PM<br />
2. TELEPHONE OPERATION<br />
CALLING USING A SHORT<br />
MESSAGE<br />
Calls can be made to a short message<br />
sender’s phone number. (See page<br />
170.)<br />
1 <strong>Touch</strong> “Call sender”.<br />
BY POI CALL<br />
Calls can be made to a POI when its<br />
details are displayed on the screen.<br />
(See pages 32 and 38.)<br />
1 <strong>Touch</strong> .<br />
2 The connecting screen will be displayed.<br />
• To cancel the call, touch “End call”.<br />
2 The connecting screen will be displayed.<br />
• To cancel the call, touch “End call”.<br />
5<br />
Bluetooth ® HANDS-FREE SYSTEM<br />
165<br />
Display audio_Ext_EE
<strong>Touch</strong>_<strong>Go</strong>_<strong>Plus</strong>_OM20B71E.book Page 166 Thursday, September 20, 2012 12:03 PM<br />
2. TELEPHONE OPERATION<br />
2. RECEIVING CALLS ON A Bluetooth ® PHONE<br />
When a call is received, this screen is<br />
displayed and a sound is heard.<br />
1 Press the switch on the steering<br />
wheel.<br />
Call waiting<br />
2 The ongoing screen is displayed. (See<br />
page 167.)<br />
“Accept”: <strong>Touch</strong> to talk on the phone.<br />
“Reject”: <strong>Touch</strong> to reject the call.<br />
• The layout of the incoming call screen<br />
may differ depending on the information<br />
available from the connected phone.<br />
• Ringtone and ringtone volume can be<br />
set. (See pages 187 and 200.)<br />
• The first call is put on hold and the information<br />
of the party will be dimmed.<br />
• The second call’s information is displayed<br />
below the first call information.<br />
INFORMATION<br />
● During international phone calls, the<br />
other party’s name may not be displayed<br />
correctly depending on the cellular<br />
phone which you have.<br />
Single call<br />
2 The ongoing screen is displayed. (See<br />
page 167.)<br />
166<br />
Display audio_Ext_EE
<strong>Touch</strong>_<strong>Go</strong>_<strong>Plus</strong>_OM20B71E.book Page 167 Thursday, September 20, 2012 12:03 PM<br />
2. TELEPHONE OPERATION<br />
3. TALKING ON A Bluetooth ® PHONE<br />
While you are talking on a Bluetooth ®<br />
phone, the ongoing screen is displayed.<br />
The operations outlined below<br />
can be performed on this screen.<br />
Single call<br />
No.<br />
Function<br />
<strong>Touch</strong> to transfer the call. <strong>Touch</strong><br />
“Transfer to pho...” to change<br />
from Hands-free call to cellular<br />
phone call. <strong>Touch</strong> “Handsfree<br />
<strong>mode</strong>” to change from cellular<br />
phone call to Hands-free call.<br />
Displays a call duration.<br />
<strong>Touch</strong> to adjust the volume of the<br />
other party’s voice. (See page<br />
168.)<br />
Call waiting<br />
Displays the name, number and<br />
picture of the other party. The information<br />
shown here may differ<br />
depending on the information<br />
available from your phone.<br />
5<br />
• On this screen, the following functions can<br />
be operated.<br />
No.<br />
Function<br />
<strong>Touch</strong> to hang up the phone.<br />
• The switch on the steering<br />
wheel can also be pressed to<br />
hang up the phone.<br />
<strong>Touch</strong> to dial a second number.<br />
(See page 168.)<br />
<strong>Touch</strong> to change parties.<br />
<strong>Touch</strong> to change to a conference<br />
call.<br />
INFORMATION<br />
● When you change from cellular phone<br />
call to Hands-free call, the Hands-free<br />
screen will be displayed and the call can<br />
be operated on the screen.<br />
● Transferring methods will be different<br />
depending on the type of cellular phone<br />
which you have.<br />
● For the operation of the phone, see the<br />
manual that comes with your cellular<br />
phone.<br />
Bluetooth ® HANDS-FREE SYSTEM<br />
<strong>Touch</strong> to send a tone. (See page<br />
168.)<br />
<strong>Touch</strong> to put a call on hold. To<br />
cancel this function, touch “Active<br />
call”.<br />
<strong>Touch</strong> to mute your voice. To<br />
cancel muting your vice, touch<br />
“Unmute call”.<br />
167<br />
Display audio_Ext_EE
<strong>Touch</strong>_<strong>Go</strong>_<strong>Plus</strong>_OM20B71E.book Page 168 Thursday, September 20, 2012 12:03 PM<br />
2. TELEPHONE OPERATION<br />
ADJUSTING THE RECEIVER<br />
VOLUME<br />
1 <strong>Touch</strong> .<br />
SENDING TONES<br />
1 <strong>Touch</strong> “DTMF tones”.<br />
2 Inputting the numbers.<br />
2 <strong>Touch</strong> “-” or “+” to adjust the volume<br />
of the other party’s voice.<br />
• Input numbers are sent immediately as<br />
tones.<br />
• <strong>Touch</strong> “Quit” to return the previous<br />
screen.<br />
DIALING A SECOND NUMBER<br />
1 <strong>Touch</strong> “Dial”.<br />
2 <strong>Touch</strong> the desired method to call.<br />
• The receiver volume can also be<br />
adjusted using the switch on the steering<br />
wheel.<br />
If “Dial number” is selected<br />
3 Input the number and then touch .<br />
168<br />
Display audio_Ext_EE
<strong>Touch</strong>_<strong>Go</strong>_<strong>Plus</strong>_OM20B71E.book Page 169 Thursday, September 20, 2012 12:03 PM<br />
2. TELEPHONE OPERATION<br />
If “Dial from contacts” is selected<br />
3 <strong>Touch</strong> the desired method and then<br />
touch the desired entry.<br />
■CHANGING PARTIES<br />
1 <strong>Touch</strong> “Switch calls”.<br />
• Every time “Switch calls” is touched, the<br />
party who is on hold will be switched.<br />
■CHANGING TO A CONFERENCE<br />
CALL<br />
1 <strong>Touch</strong> “Link calls”.<br />
If “Dial from call lists” is selected<br />
3 <strong>Touch</strong> the desired list and then touch<br />
the desired entry.<br />
INFORMATION<br />
● If your cellular phone is not HFP Ver. 1.5<br />
compatible, this function can not be<br />
used.<br />
● Interrupt call operation may differ<br />
depending on your phone company and<br />
cellular phone.<br />
5<br />
4 The connecting screen will be displayed.<br />
• To cancel the call, touch “End call”.<br />
5 When a new call has been established,<br />
the following screen will be displayed.<br />
Bluetooth ® HANDS-FREE SYSTEM<br />
• The first call is put on hold and the information<br />
of the party will be dimmed.<br />
• The second call’s information is displayed<br />
below the first call information.<br />
169<br />
Display audio_Ext_EE
<strong>Touch</strong>_<strong>Go</strong>_<strong>Plus</strong>_OM20B71E.book Page 170 Thursday, September 20, 2012 12:03 PM<br />
3. SHORT MESSAGE FUNCTION<br />
1. SHORT MESSAGE FUNCTION<br />
Received short messages can be forwarded<br />
from the connected Bluetooth ®<br />
phone, enabling checking and replying<br />
using this system.<br />
CHECKING RECEIVED<br />
SHORT MESSAGES<br />
1 <strong>Touch</strong> “Messages”.<br />
NEW SHORT MESSAGE<br />
NOTIFICATION POP-UP<br />
WINDOW (IF EQUIPPED)<br />
When a new short message is received,<br />
a pop-up window is displayed<br />
on the screen.<br />
• This function can be set to “On” or<br />
“Off”. (See page 200.)<br />
• The “Messages” screen can be displayed<br />
by touching on any of the “Phone”<br />
screens.<br />
2 <strong>Touch</strong> “Inbox” on the “Messages”<br />
screen.<br />
3 <strong>Touch</strong> the desired short message.<br />
• The state of a message is shown by the<br />
following icons.<br />
: New message<br />
: Read message<br />
: Unread message<br />
170<br />
Display audio_Ext_EE
<strong>Touch</strong>_<strong>Go</strong>_<strong>Plus</strong>_OM20B71E.book Page 171 Thursday, September 20, 2012 12:03 PM<br />
3. SHORT MESSAGE FUNCTION<br />
4 The short message will be displayed.<br />
CHECKING SENT SHORT<br />
MESSAGES<br />
1 <strong>Touch</strong> “Messages” on the “Phone”<br />
menu screen.<br />
• The “Messages” screen can be displayed<br />
• On this screen, the following functions can<br />
be operated.<br />
No.<br />
Function<br />
by touching on any of the “Phone”<br />
screens.<br />
2 <strong>Touch</strong> “Sent” on the “Messages”<br />
screen.<br />
3 <strong>Touch</strong> the desired short message.<br />
<strong>Touch</strong> to have the short<br />
message read out. To cancel this<br />
function, touch .<br />
5<br />
<strong>Touch</strong> to call the sender.<br />
<strong>Touch</strong> to reply to the short message<br />
by free text.<br />
<strong>Touch</strong> to reply to the short message<br />
by template.<br />
REPLYING THE SHORT<br />
MESSAGE<br />
1 <strong>Touch</strong> “Reply free text” or “Reply<br />
template”.<br />
2 Input the short message.<br />
3 <strong>Touch</strong> “OK”.<br />
4 The short message will be sent.<br />
4 The short message will be displayed.<br />
• When * is touched, the short message<br />
is read out. To cancel this function,<br />
touch *.<br />
Bluetooth ® HANDS-FREE SYSTEM<br />
∗ : If equipped<br />
171<br />
Display audio_Ext_EE
<strong>Touch</strong>_<strong>Go</strong>_<strong>Plus</strong>_OM20B71E.book Page 172 Thursday, September 20, 2012 12:03 PM<br />
3. SHORT MESSAGE FUNCTION<br />
SENDING A NEW SHORT<br />
MESSAGES<br />
1 <strong>Touch</strong> “Messages” on the “Phone”<br />
menu screen.<br />
• The “Messages” screen can be displayed<br />
by touching on any of the “Phone”<br />
screens.<br />
2 <strong>Touch</strong> “Create new” on the “Messages”<br />
screen.<br />
3 <strong>Touch</strong> “Write text message” or “Use<br />
message template”.<br />
6 Select the desired number/contact to<br />
whom the short message should be<br />
sent.<br />
• “Dial number”, “Select contact” and a list<br />
of former recipients will be displayed.<br />
If “Dial number” is selected<br />
7 Enter the number.<br />
4 Input the short message. (See page<br />
173.)<br />
8 <strong>Touch</strong> .<br />
9 The short message will be sent.<br />
If “Select contact” is selected<br />
7 <strong>Touch</strong> the desired list.<br />
5 <strong>Touch</strong> “OK”.<br />
8 <strong>Touch</strong> the desired contact.<br />
9 The short message will be sent.<br />
172<br />
Display audio_Ext_EE
<strong>Touch</strong>_<strong>Go</strong>_<strong>Plus</strong>_OM20B71E.book Page 173 Thursday, September 20, 2012 12:03 PM<br />
3. SHORT MESSAGE FUNCTION<br />
If a recipient is selected<br />
7 The short message will be sent immediately.<br />
2 Edit the short message.<br />
CREATE A NEW SHORT<br />
MESSAGE<br />
■FROM THE “Write text message”<br />
SCREEN<br />
1 Input the short message.<br />
3 <strong>Touch</strong> “OK”.<br />
2 <strong>Touch</strong> “OK”.<br />
■FROM THE “Use message template”<br />
SCREEN<br />
1 <strong>Touch</strong> the desired template.<br />
INFORMATION<br />
● The cursor’s position can be moved by<br />
touching the desired location in the input<br />
screen. <strong>Touch</strong> or to scroll the<br />
input screen up or down.<br />
● The short messages can contain up to<br />
160 characters. If the entered text<br />
exceeds the characters available for one<br />
short message, a new short message<br />
will begin automatically. This is indicated<br />
by a separation line and an icon in the<br />
input field, which is shown as soon as<br />
there are only 10 characters left for the<br />
short message.<br />
5<br />
Bluetooth ® HANDS-FREE SYSTEM<br />
: <strong>Touch</strong> to delete the template.<br />
• 10 messages have already been registered<br />
to the message template screen.<br />
● The number of characters left for the<br />
short message is displayed.<br />
● A maximum of 6 short messages can be<br />
written in series.<br />
● Entering the text function is not available<br />
while the vehicle is in motion.<br />
173<br />
Display audio_Ext_EE
<strong>Touch</strong>_<strong>Go</strong>_<strong>Plus</strong>_OM20B71E.book Page 174 Thursday, September 20, 2012 12:03 PM<br />
3. SHORT MESSAGE FUNCTION<br />
REGISTER NEW TEMPLATES<br />
New templates can be created. Up to<br />
15 templates can be registered.<br />
1 <strong>Touch</strong> “Prepare own message template”.<br />
2 Input the short message.<br />
3 <strong>Touch</strong> “OK”.<br />
4 The message is registered in the template<br />
list on the “Use message template”<br />
screen.<br />
174<br />
Display audio_Ext_EE
<strong>Touch</strong>_<strong>Go</strong>_<strong>Plus</strong>_OM20B71E.book Page 175 Thursday, September 20, 2012 12:03 PM<br />
6<br />
SPEECH COMMAND SYSTEM<br />
1<br />
2<br />
1<br />
SPEECH COMMAND SYSTEM<br />
OPERATION<br />
1. SPEECH COMMAND<br />
SYSTEM .................................... 176<br />
USING THE SPEECH<br />
COMMAND SYSTEM ....................... 176<br />
SPEECH COMMAND<br />
SYSTEM OPERATION..................... 177<br />
3<br />
4<br />
5<br />
6<br />
7<br />
8<br />
9<br />
175<br />
Display audio_Ext_U
<strong>Touch</strong>_<strong>Go</strong>_<strong>Plus</strong>_OM20B71E.book Page 176 Thursday, September 20, 2012 12:03 PM<br />
1. SPEECH COMMAND SYSTEM OPERATION<br />
1. SPEECH COMMAND SYSTEM ∗<br />
The speech command system enables<br />
the navigation, audio and hands-free<br />
systems to be operated using speech<br />
commands.<br />
INFORMATION<br />
● Voice recognition language can be<br />
changed. (See “SELECTING A LAN-<br />
GUAGE” on page 188)<br />
● This function is compatible with the following<br />
languages:<br />
•Dutch<br />
• <strong>English</strong><br />
• French<br />
•German<br />
•Italian<br />
• Portuguese<br />
• Russian<br />
• Spanish<br />
• Swedish<br />
STEERING SWITCHES FOR<br />
THE SPEECH COMMAND<br />
SYSTEM<br />
Type A (Two direction steering switch)<br />
Type B (Four direction steering switch)<br />
USING THE SPEECH<br />
COMMAND SYSTEM<br />
The actual design and switch position<br />
may differ depending on the vehicle.<br />
For details, see the Pictorial index of<br />
“Owner’s Manual”.<br />
Talk switch<br />
• Press the talk switch to start the speech<br />
command system.<br />
• Press and hold the talk switch to cancel<br />
the speech command system.<br />
Back switch<br />
• Press the back switch to return to the previous<br />
screen.<br />
∗ : If equipped<br />
176<br />
Display audio_Ext_U
<strong>Touch</strong>_<strong>Go</strong>_<strong>Plus</strong>_OM20B71E.book Page 177 Thursday, September 20, 2012 12:03 PM<br />
1. SPEECH COMMAND SYSTEM OPERATION<br />
MICROPHONE<br />
It is unnecessary to speak directly into<br />
the microphone when giving a command.<br />
SPEECH COMMAND SYSTEM<br />
OPERATION<br />
1 Press the talk switch.<br />
• The speech command system is activated.<br />
INFORMATION<br />
● Wait for the confirmation beep before<br />
speaking a command.<br />
● Speech commands may not be recognized<br />
if:<br />
• Spoken too quickly.<br />
• Spoken at a low or high volume.<br />
• The windows are open.<br />
• Passengers are talking while speech<br />
commands are spoken.<br />
• The air conditioning speed is set high.<br />
• The air conditioning vents are turned<br />
towards the microphone.<br />
● In the following conditions, the system<br />
may not recognize the command properly<br />
and using speech commands may<br />
not be possible:<br />
• The command is incorrect or unclear.<br />
Note that certain words, accents or<br />
speech patterns may be difficult for the<br />
system to recognize.<br />
• There is excessive background noise,<br />
such as wind noise.<br />
• Press the talk switch to stop the currently<br />
played prompt and skip to the<br />
next dialog step.<br />
• In case of an activated speech recognizer<br />
waiting for input, press the talk<br />
switch to restart the speech recognizer.<br />
(The recognizer drops the previous<br />
input and waits for new input from the<br />
user.)<br />
2 After a beep sounds, say the desired<br />
command or touch the desired command.<br />
: This icon will be displayed if the user<br />
can speak a command.<br />
: <strong>Touch</strong> to adjust the volume of the<br />
voice guidance volume.<br />
6<br />
SPEECH COMMAND SYSTEM<br />
177<br />
Display audio_Ext_U
<strong>Touch</strong>_<strong>Go</strong>_<strong>Plus</strong>_OM20B71E.book Page 178 Thursday, September 20, 2012 12:03 PM<br />
1. SPEECH COMMAND SYSTEM OPERATION<br />
■DISPLAYING THE COMMAND LIST<br />
SCREEN<br />
Media commands<br />
1 Say “More commands” or touch<br />
“More commands” on the speech<br />
command main menu screen.<br />
2 Say the desired command or touch the<br />
desired command.<br />
3 Say the desired command or touch the<br />
desired command.<br />
Navigation commands<br />
Phone commands<br />
Radio commands<br />
• The command list is read out and the corresponding<br />
command is highlighted. To<br />
cancel this function, press the talk switch.<br />
178<br />
Display audio_Ext_U
<strong>Touch</strong>_<strong>Go</strong>_<strong>Plus</strong>_OM20B71E.book Page 179 Thursday, September 20, 2012 12:03 PM<br />
7<br />
VEHICLE INFORMATION<br />
1<br />
2<br />
1 VEHICLE INFORMATION<br />
1. QUICK REFERENCE .................. 180<br />
2. FUEL CONSUMPTION................ 181<br />
FUEL CONSUMPTION<br />
(VEHICLES WITH<br />
HYBRID SYSTEM) ........................... 181<br />
FUEL CONSUMPTION<br />
(VEHICLES WITHOUT<br />
HYBRID SYSTEM) ........................... 181<br />
3. TYRE PRESSURE<br />
WARNING SYSTEM.................. 183<br />
SHOWING THE TYRE<br />
PRESSURE SCREEN ...................... 183<br />
3<br />
4<br />
5<br />
6<br />
7<br />
8<br />
9<br />
179<br />
Display audio_Ext_U
<strong>Touch</strong>_<strong>Go</strong>_<strong>Plus</strong>_OM20B71E.book Page 180 Thursday, September 20, 2012 12:03 PM<br />
1. VEHICLE INFORMATION<br />
1. QUICK REFERENCE<br />
Fuel consumption information and tyre pressure value can be displayed. To access<br />
the vehicle information system, press the “CAR” button.<br />
• The actual design and button position may differ depending on the vehicle. For<br />
details, see Section 3 of “Owner’s Manual”.<br />
• The “Information” screen shown above is displayed if the vehicle is equipped with<br />
both a fuel consumption and a tyre pressure warning system.<br />
No. Name Function Page<br />
“Fuel consumption”*<br />
Displays the “Trip information”, “Past record” and<br />
“Energy monitor” screen.<br />
181<br />
“Tyre pressure”* Displays the “Tyre pressure” screen. 183<br />
*: If equipped<br />
“CAR” button*<br />
Press this button to access the vehicle information<br />
system.<br />
181,<br />
183<br />
180<br />
Display audio_Ext_EE
<strong>Touch</strong>_<strong>Go</strong>_<strong>Plus</strong>_OM20B71E.book Page 181 Thursday, September 20, 2012 12:03 PM<br />
1. VEHICLE INFORMATION<br />
2. FUEL CONSUMPTION ∗<br />
FUEL CONSUMPTION<br />
(VEHICLES WITH HYBRID<br />
SYSTEM)<br />
TRIP INFORMATION<br />
Fuel consumption such as shown below<br />
can be displayed on the screen.<br />
For details see Section 1-1 of “Owner’s<br />
Manual”.<br />
• Energy monitor<br />
• Trip consumption<br />
• Past record<br />
• If the “Trip information” screen is not displayed,<br />
touch “Trip information”.<br />
FUEL CONSUMPTION<br />
(VEHICLES WITHOUT<br />
HYBRID SYSTEM)<br />
No.<br />
Average speed<br />
Elapsed time<br />
Name<br />
1 Press the “CAR” button.<br />
2 <strong>Touch</strong> “Fuel consumption”.<br />
Cruising range<br />
Previous fuel consumption per<br />
minute<br />
Current fuel consumption per<br />
minute<br />
“Clear”: Trip information data can be deleted<br />
by touching this screen button.<br />
“Past record”: “Past record” screen can<br />
be displayed by touching this screen button.<br />
INFORMATION<br />
● The trip information display indicates<br />
general driving conditions. Accuracy<br />
varies with driving habits and road conditions.<br />
7<br />
VEHICLE INFORMATION<br />
• The “Trip information” or “Past record”<br />
screen will be displayed.<br />
• The “Information” screen is not displayed<br />
if the vehicles not equipped with a tyre<br />
pressure warning system.<br />
∗ : If equipped<br />
181<br />
Display audio_Ext_EE
<strong>Touch</strong>_<strong>Go</strong>_<strong>Plus</strong>_OM20B71E.book Page 182 Thursday, September 20, 2012 12:03 PM<br />
1. VEHICLE INFORMATION<br />
PAST RECORD<br />
• If the “Past record” screen is not displayed,<br />
touch “Past record”.<br />
No.<br />
Name<br />
Previous fuel economy record<br />
Current fuel economy<br />
Best recorded fuel economy<br />
• The average fuel consumption history is<br />
divided by colour into past averages and<br />
the average fuel consumption since the<br />
last reset.<br />
“Clear”: Past record data can be deleted<br />
by touching this screen button.<br />
“Update”: Reset the average fuel consumption<br />
to measure the current fuel consumption<br />
again.<br />
Vehicles with multi-information display<br />
When you touch “Update”, the average<br />
fuel consumption displayed in the multi-information<br />
display will be reset at the same<br />
time.<br />
“Trip information”: “Trip information”<br />
screen can be displayed by touching this<br />
screen button.<br />
182<br />
Display audio_Ext_EE
<strong>Touch</strong>_<strong>Go</strong>_<strong>Plus</strong>_OM20B71E.book Page 183 Thursday, September 20, 2012 12:03 PM<br />
1. VEHICLE INFORMATION<br />
3. TYRE PRESSURE WARNING SYSTEM ∗<br />
Vehicles equipped with a tyre pressure<br />
warning system will display a warning<br />
screen in addition to a warning indication<br />
on the meter if tyre pressure becomes<br />
low. For information on the tyre<br />
pressure warning system, refer to<br />
“Owner’s Manual”.<br />
2 <strong>Touch</strong> “Tyre pressure”.<br />
3 The tyre pressure value of each tyre<br />
will be displayed.<br />
Type A<br />
• To confirm tyre pressure values, touch<br />
“Yes”. To cancel and return to the previous<br />
screen, touch “No”. (This screen will<br />
not be shown if the tyre pressure screen is<br />
already being displayed.)<br />
7<br />
SHOWING THE TYRE<br />
PRESSURE SCREEN<br />
The tyre pressure value of each tyre<br />
can be confirmed using the tyre pressure<br />
screen.<br />
1 Press the “CAR” button.<br />
Type B<br />
VEHICLE INFORMATION<br />
• Low tyre pressure values will be displayed<br />
in orange.<br />
• The display pattern varies depending on<br />
the vehicle. Some vehicles do not show<br />
the spare tyre pressure.<br />
∗ : If equipped<br />
183<br />
Display audio_Ext_EE
<strong>Touch</strong>_<strong>Go</strong>_<strong>Plus</strong>_OM20B71E.book Page 184 Thursday, September 20, 2012 12:03 PM<br />
1. VEHICLE INFORMATION<br />
184<br />
Display audio_Ext_EE
<strong>Touch</strong>_<strong>Go</strong>_<strong>Plus</strong>_OM20B71E.book Page 185 Thursday, September 20, 2012 12:03 PM<br />
8<br />
SETUP<br />
1<br />
2<br />
1 SETUP OPERATION<br />
1. QUICK REFERENCE .................. 186<br />
2. GENERAL SETTINGS................. 187<br />
SCREENS FOR GENERAL<br />
SETTINGS........................................ 187<br />
3. DISPLAY SETTINGS................... 190<br />
TURN OFF DISPLAY .......................... 190<br />
CHANGING BETWEEN<br />
DAY AND NIGHT MODE.................. 191<br />
ADJUST CONTRAST/<br />
BRIGHTNESS .................................. 191<br />
4. Bluetooth ® SETTINGS ............... 193<br />
Bluetooth ® FUNCTION ON/OFF......... 193<br />
PAIRING A Bluetooth ® DEVICE ......... 194<br />
DISPLAYING THE DEVICE LIST........ 197<br />
SETTING PIN...................................... 198<br />
SETTING THE INTERNET<br />
CONNECTION.................................. 199<br />
5. TELEPHONE SETTINGS ............ 200<br />
3<br />
4<br />
5<br />
6<br />
7<br />
8<br />
9<br />
6. AUDIO SETTINGS....................... 201<br />
SOUND SETTINGS ............................ 201<br />
RADIO SETTINGS .............................. 203<br />
7. VEHICLE SETTINGS................... 204<br />
Some of the functions cannot be operated while driving.<br />
185<br />
DA_EXT_High_EE
<strong>Touch</strong>_<strong>Go</strong>_<strong>Plus</strong>_OM20B71E.book Page 186 Thursday, September 20, 2012 12:03 PM<br />
1. SETUP OPERATION<br />
1. QUICK REFERENCE<br />
To customize the function settings, press the “SETUP” button.<br />
• The actual design and button position may differ depending on the vehicle. For<br />
details, see Section 3 of “Owner’s Manual”.<br />
No. Name Function Page<br />
“General”<br />
“Bluetooth* 1 ”<br />
“Display”<br />
“Telephone”<br />
“SETUP” button<br />
Settings are available for language selection,<br />
operation sounds, etc.<br />
Registering, removing, connecting and disconnecting<br />
Bluetooth ® devices and settings are<br />
available for Bluetooth ® .<br />
Settings are available for contrast and brightness<br />
of the screen.<br />
Settings are available for phone sound, phone<br />
book, etc.<br />
Press this button to display the “Setup” screen.<br />
187<br />
193<br />
190<br />
200<br />
187, 190, 193,<br />
200, 201, 204<br />
“Vehicle”* 2 Settings are available for vehicle customization. 204<br />
“Audio”<br />
Settings are available for sound adjustment and<br />
radio.<br />
201<br />
* 1 : Bluetooth is a registered trademark of Bluetooth SIG, Inc.<br />
* 2 : If equipped<br />
186<br />
Display audio_Ext_EE
<strong>Touch</strong>_<strong>Go</strong>_<strong>Plus</strong>_OM20B71E.book Page 187 Thursday, September 20, 2012 12:03 PM<br />
1. SETUP OPERATION<br />
2. GENERAL SETTINGS<br />
Settings are available for language selection,<br />
operation sounds, etc.<br />
1 Press the “SETUP” button.<br />
SCREENS FOR GENERAL<br />
SETTINGS<br />
2 <strong>Touch</strong> “General”.<br />
8<br />
3 <strong>Touch</strong> the items to be set.<br />
SETUP<br />
• On this screen, the following functions are<br />
operational.<br />
No.<br />
Function<br />
4 <strong>Touch</strong> “OK”.<br />
You can change the language.<br />
(See “SELECTING A<br />
LANGUAGE” on page 188.)<br />
“On” or “Off” can be selected to<br />
sound beeps.<br />
The personal data can be deleted.<br />
(See “DELETE PERSONAL<br />
DATA” on page 189.)<br />
187<br />
Display audio_Ext_EE
<strong>Touch</strong>_<strong>Go</strong>_<strong>Plus</strong>_OM20B71E.book Page 188 Thursday, September 20, 2012 12:03 PM<br />
1. SETUP OPERATION<br />
No. Function SELECTING A LANGUAGE<br />
<strong>Touch</strong> to have entries that are<br />
too long to fit in the current field<br />
scrolled automatically from right<br />
to left.<br />
<strong>Touch</strong> to set the distance unit to<br />
“Kilometre” or “Mile”.<br />
<strong>Touch</strong> to set the navigation<br />
prompt volume.<br />
The desired language can be selected.<br />
1 Press the “SETUP” button.<br />
2 <strong>Touch</strong> “General” on the “Setup”<br />
screen.<br />
3 <strong>Touch</strong> “Language”.<br />
<strong>Touch</strong> to set the phone volume.<br />
<strong>Touch</strong> to set the ringtone volume.<br />
The entries stored in the “Stored”<br />
list on the “My destinations”<br />
screen and “Contacts” screen<br />
(See pages 55 and 157.) can be<br />
transferred to a USB memory.<br />
(See “SENDING STORED CON-<br />
TACTS TO A USB MEMORY” on<br />
page 63.)<br />
“CSI” formatted data can be<br />
transferred from a USB memory<br />
to this system. Transferred addresses<br />
and numbers will be<br />
stored in the “Stored” list on the<br />
“My destinations” screen and<br />
“Contacts” screen. (See “LOAD-<br />
ING ADDRESSES VIA A USB<br />
MEMORY” on page 59.)<br />
4 <strong>Touch</strong> the desired screen button.<br />
• The previous screen will be displayed.<br />
5 <strong>Touch</strong> “OK”.<br />
<strong>Touch</strong> to display the system information.<br />
188<br />
Display audio_Ext_EE
<strong>Touch</strong>_<strong>Go</strong>_<strong>Plus</strong>_OM20B71E.book Page 189 Thursday, September 20, 2012 12:03 PM<br />
1. SETUP OPERATION<br />
DELETE PERSONAL DATA<br />
1 Press the “SETUP” button.<br />
2 <strong>Touch</strong> “General” on the “Setup”<br />
screen.<br />
3 <strong>Touch</strong> “Delete personal data”.<br />
4 <strong>Touch</strong> “Delete”.<br />
8<br />
INFORMATION<br />
● The following personal data can be<br />
deleted or returned to their default settings:<br />
• Phone book data<br />
• Call history data<br />
•Bluetooth ® devices data<br />
• Phone sound settings<br />
•Bluetooth ® settings<br />
• Audio settings<br />
SETUP<br />
189<br />
Display audio_Ext_EE
<strong>Touch</strong>_<strong>Go</strong>_<strong>Plus</strong>_OM20B71E.book Page 190 Thursday, September 20, 2012 12:03 PM<br />
1. SETUP OPERATION<br />
3. DISPLAY SETTINGS<br />
You can adjust the contrast and brightness<br />
of the screen. You can also turn<br />
the display off.<br />
1 Press the “SETUP” button.<br />
TURN OFF DISPLAY<br />
1 Press the “SETUP” button.<br />
2 <strong>Touch</strong> “Display” on the “Setup”<br />
screen.<br />
3 <strong>Touch</strong> “Screen off”.<br />
2 <strong>Touch</strong> “Display”.<br />
• The display screen will be turned off. To<br />
turn it on, press the “MEDIA”, “CAR” or<br />
“SETUP” button.<br />
3 <strong>Touch</strong> the items to be set.<br />
• Please refer to the following pages for<br />
each setting.<br />
190<br />
Display audio_Ext_EE
<strong>Touch</strong>_<strong>Go</strong>_<strong>Plus</strong>_OM20B71E.book Page 191 Thursday, September 20, 2012 12:03 PM<br />
1. SETUP OPERATION<br />
CHANGING BETWEEN DAY<br />
AND NIGHT MODE<br />
Depending on the position of the headlight<br />
switch, the screen changes to day<br />
or night <strong>mode</strong>.<br />
1 To display the screen in day <strong>mode</strong><br />
even with the headlight switch on,<br />
touch “Day <strong>mode</strong>” on the adjustment<br />
screen for brightness and contrast control.<br />
ADJUST CONTRAST/<br />
BRIGHTNESS<br />
1 Press the “SETUP” button.<br />
2 <strong>Touch</strong> “Display” on the “Setup”<br />
screen.<br />
3 <strong>Touch</strong> “General” or “Camera”, in<br />
which you want to make an adjustment.<br />
INFORMATION<br />
● If the screen is set in day <strong>mode</strong> with the<br />
headlight switch turned on, this condition<br />
is memorized even with the engine<br />
turned off.<br />
4 Select “Contrast” or “Brightness”<br />
using the or .<br />
8<br />
SETUP<br />
5 Adjust the contrast or brightness using<br />
the “+” or “-”.<br />
Screen button<br />
“Contrast” “+”<br />
“Contrast” “-”<br />
“Brightness” “+”<br />
“Brightness” “-”<br />
Function<br />
Strengthens the contrast<br />
of the screen<br />
Weakens the contrast of<br />
the screen<br />
Brightens the screen<br />
Darkens the screen<br />
191<br />
Display audio_Ext_EE
<strong>Touch</strong>_<strong>Go</strong>_<strong>Plus</strong>_OM20B71E.book Page 192 Thursday, September 20, 2012 12:03 PM<br />
1. SETUP OPERATION<br />
6 After adjusting the screen, touch<br />
“OK”.<br />
192<br />
Display audio_Ext_EE
<strong>Touch</strong>_<strong>Go</strong>_<strong>Plus</strong>_OM20B71E.book Page 193 Thursday, September 20, 2012 12:03 PM<br />
1. SETUP OPERATION<br />
4. Bluetooth ® SETTINGS<br />
To set up a Bluetooth ® device.<br />
1 Press the “SETUP” button.<br />
Bluetooth ® FUNCTION ON/<br />
OFF<br />
The Bluetooth ® function can be<br />
switched on or off.<br />
1 <strong>Touch</strong> “Bluetooth ∗ on” or<br />
“Bluetooth ∗ off”.<br />
2 <strong>Touch</strong> “Bluetooth ∗ ”.<br />
3 The following screen will be displayed.<br />
INFORMATION<br />
● When Bluetooth ® function is turned off,<br />
“Search for Bluetooth* devices”,<br />
“Make this system discoverable”,<br />
“Paired device list”, “Set PIN for pairing”<br />
and “Internet connection” will be<br />
dimmed.<br />
8<br />
∗ : Bluetooth is a registered trademark of<br />
Bluetooth SIG, Inc.<br />
SETUP<br />
• Please refer to the following pages for a<br />
description of each setting.<br />
193<br />
Display audio_Ext_EE
<strong>Touch</strong>_<strong>Go</strong>_<strong>Plus</strong>_OM20B71E.book Page 194 Thursday, September 20, 2012 12:03 PM<br />
1. SETUP OPERATION<br />
PAIRING A Bluetooth ®<br />
DEVICE<br />
3 <strong>Touch</strong> the device to be paired.<br />
Up to 4 Bluetooth ® devices can be<br />
paired. A paired device can be connected<br />
to any of its supported profiles<br />
such as phone (HFP), music (A2DP)<br />
and/or internet (DUN/PAN).<br />
CONNECTING FROM THE<br />
SYSTEM<br />
1 <strong>Touch</strong> “Search for Bluetooth ∗ devices”.<br />
• Connectable Bluetooth ® devices will be<br />
displayed in the list.<br />
4 The following screen will be displayed.<br />
• When a Bluetooth ® device is currently<br />
connected, a pop-up window is displayed.<br />
To disconnect it, touch “Yes”.<br />
2 The following screen will be displayed<br />
while searching for a Bluetooth ® device.<br />
• To cancel this function, touch “Cancel”.<br />
5 Confirm the PIN.<br />
If the device supports SSP (Secure Simple<br />
Pairing)<br />
• Confirm the PIN displayed on the screen,<br />
and then touch “Accept”.<br />
If the device does not supports SSP (Secure<br />
Simple Pairing)<br />
• Input the PIN displayed on the screen into<br />
the device.<br />
6 The following screen will be displayed<br />
when pairing is complete.<br />
• To cancel this function, touch “Cancel”.<br />
∗ : Bluetooth is a registered trademark of<br />
Bluetooth SIG, Inc.<br />
194<br />
Display audio_Ext_EE
<strong>Touch</strong>_<strong>Go</strong>_<strong>Plus</strong>_OM20B71E.book Page 195 Thursday, September 20, 2012 12:03 PM<br />
1. SETUP OPERATION<br />
7 The system waits for connection requests<br />
coming from the paired device.<br />
All requested profiles are connected<br />
automatically.<br />
INFORMATION<br />
● For details on device detection and the<br />
operation of your Bluetooth ® device, see<br />
the manual that comes with the<br />
Bluetooth ® device.<br />
● The music profiles the paired device<br />
supports can be connected individually<br />
as desired. Some devices do not allow<br />
individual profiles to be connected. In<br />
that case, a pop-up window is displayed.<br />
• Internet profile is not connected automatically.<br />
For details on connecting internet<br />
profile, see “LOGIN PROCESS INTER-<br />
NET PROFILE” on page 196.<br />
• If the automatic connection failed, the following<br />
screen will be displayed. <strong>Touch</strong> the<br />
desired profile to be connected.<br />
8<br />
“Connect for phone”: <strong>Touch</strong> to connect<br />
the phone profile.<br />
“Connect for music”: <strong>Touch</strong> to connect<br />
the music profile.<br />
“Connect for Internet”, “Advanced”:<br />
<strong>Touch</strong> to connect the internet profile. The<br />
screen will be changed to the login process.<br />
(See page 196.)<br />
“Connect all”: <strong>Touch</strong> to connect all supported<br />
profiles.<br />
• Once you have connected the Bluetooth ®<br />
device, it is automatically connected<br />
whenever the engine switch is in the<br />
“ACC” or “ON” position.<br />
SETUP<br />
195<br />
Display audio_Ext_EE
<strong>Touch</strong>_<strong>Go</strong>_<strong>Plus</strong>_OM20B71E.book Page 196 Thursday, September 20, 2012 12:03 PM<br />
1. SETUP OPERATION<br />
CONNECTING FROM THE<br />
DEVICE<br />
1 <strong>Touch</strong> “Make this system discoverable”.<br />
LOGIN PROCESS INTERNET<br />
PROFILE<br />
If “Connect for Internet” is selected<br />
1 <strong>Touch</strong> “Connect for Internet”.<br />
• When a Bluetooth ® device is currently<br />
connected, a pop-up window is displayed.<br />
To disconnect it, touch “Yes”.<br />
2 The following screen will be displayed.<br />
2 <strong>Touch</strong> the desired provider.<br />
• To cancel this function, touch “Cancel”.<br />
3 Confirm the PIN.<br />
If the device supports SSP (Secure Simple<br />
Pairing)<br />
• Confirm the PIN displayed on the screen,<br />
and then touch “Accept”.<br />
If the device does not supports SSP (Secure<br />
Simple Pairing)<br />
• Input the PIN displayed on the screen into<br />
the device.<br />
• This screen is displayed only when making<br />
the first connection.<br />
If “Advanced” is selected.<br />
1 <strong>Touch</strong> “Advanced”.<br />
196<br />
Display audio_Ext_EE
<strong>Touch</strong>_<strong>Go</strong>_<strong>Plus</strong>_OM20B71E.book Page 197 Thursday, September 20, 2012 12:03 PM<br />
1. SETUP OPERATION<br />
2 <strong>Touch</strong> “Confirm user login information”.<br />
DISPLAYING THE DEVICE<br />
LIST<br />
Devices can be disconnected and<br />
each profile connection status can be<br />
changed using the “Paired device list”.<br />
Up to 4 devices can be paired at the<br />
same time.<br />
• User login information can be changed on<br />
this screen.<br />
INFORMATION<br />
● When making the first connection,<br />
“Advanced” is not displayed.<br />
● When “Remember user login information”<br />
function is on, the entered user<br />
login information will be remembered for<br />
every login. (See page 199.)<br />
1 <strong>Touch</strong> “Paired device list”.<br />
2 <strong>Touch</strong> the desired device.<br />
8<br />
SETUP<br />
• The tone of the icons show which profiles<br />
the device supports. (Dimmed icons are<br />
not available.)<br />
• The device’s currently connected profiles<br />
are highlighted.<br />
3 The following screen will be displayed.<br />
• On this screen, the following functions can<br />
be operated.<br />
197<br />
Display audio_Ext_EE
<strong>Touch</strong>_<strong>Go</strong>_<strong>Plus</strong>_OM20B71E.book Page 198 Thursday, September 20, 2012 12:03 PM<br />
1. SETUP OPERATION<br />
CHANGING THE DEVICE NAME<br />
1 <strong>Touch</strong> “Rename XX”.<br />
2 Input the device name.<br />
3 <strong>Touch</strong> “OK”.<br />
SETTING PIN<br />
To change the PIN.<br />
1 <strong>Touch</strong> “Set PIN for pairing”.<br />
DELETING A PAIRED DEVICE<br />
1 <strong>Touch</strong> “Delete pairing”.<br />
2 <strong>Touch</strong> “Yes”.<br />
CONNECTING OR<br />
DISCONNECTING PROFILES<br />
2 Input the desired number.<br />
A paired device’s profiles can be individually<br />
connected or disconnected.<br />
1 <strong>Touch</strong> the desired profile to be connected<br />
or disconnected.<br />
• A 4 to 8-digit PIN can be selected.<br />
3 <strong>Touch</strong> “OK”.<br />
“Connect all”: <strong>Touch</strong> to connect all supported<br />
profiles.<br />
“Disconnect all”: <strong>Touch</strong> to disconnect all<br />
supported profiles.<br />
198<br />
Display audio_Ext_EE
<strong>Touch</strong>_<strong>Go</strong>_<strong>Plus</strong>_OM20B71E.book Page 199 Thursday, September 20, 2012 12:03 PM<br />
1. SETUP OPERATION<br />
SETTING THE INTERNET<br />
CONNECTION<br />
To change the internet settings.<br />
1 <strong>Touch</strong> “Internet connection”.<br />
2 <strong>Touch</strong> the desired items to be set.<br />
No.<br />
Function<br />
<strong>Touch</strong> to turn the show cost<br />
warning function on or off.<br />
When this function is activated, a<br />
pop-up window will be displayed<br />
after selecting either load addresses<br />
from server or online<br />
search.<br />
<strong>Touch</strong> to turn the show roaming<br />
warning function on or off. When<br />
this function is activated, a popup<br />
window will be displayed after<br />
selecting either load addresses<br />
from server or online search.<br />
<strong>Touch</strong> to turn the remember user<br />
login information function on or<br />
off.<br />
When this function is activated,<br />
the entered user login information<br />
will be remembered for every<br />
user login.<br />
• On this screen, the following functions can<br />
be set.<br />
No.<br />
Function<br />
<strong>Touch</strong> to turn the automatic<br />
download of addresses function<br />
on or off.<br />
When this function is activated,<br />
the addresses from the server<br />
will be downloaded automatically<br />
and saved in the “Stored” list on<br />
the “My destinations” screen and<br />
“Contacts” screen. (See pages<br />
55 and 157.) When you select<br />
this function, a pop-up window<br />
will be displayed. <strong>Touch</strong> “Continue”<br />
to turn this function on.<br />
<strong>Touch</strong> to turn the automatic synchronization<br />
with the sever settings<br />
function on or off.<br />
INFORMATION<br />
● If “Automatic download of<br />
addresses” is activated, “Show cost<br />
warning” and “Show roaming warning”<br />
will be dimmed.<br />
8<br />
SETUP<br />
199<br />
Display audio_Ext_EE
<strong>Touch</strong>_<strong>Go</strong>_<strong>Plus</strong>_OM20B71E.book Page 200 Thursday, September 20, 2012 12:03 PM<br />
1. SETUP OPERATION<br />
5. TELEPHONE SETTINGS<br />
Settings are available for ringtone selection,<br />
announce incoming short messages<br />
and emails, and “Stored” lists.<br />
1 Press the “SETUP” button.<br />
2 <strong>Touch</strong> “Telephone”.<br />
No.<br />
*<br />
*<br />
Function<br />
<strong>Touch</strong> to select a ringtone. No<br />
ringtone, the phone’s ringtone<br />
and the system’s 4 ringtones are<br />
available for selection.<br />
<strong>Touch</strong> to turn the incoming short<br />
message announcement function<br />
“On” or “Off”.<br />
<strong>Touch</strong> to turn the incoming Email<br />
announcement function “On” or<br />
“Off”.<br />
<strong>Touch</strong> to update the phone book<br />
of the connected phone. The updated<br />
list refers to the “Stored”<br />
list on the “My destinations”<br />
screen and “Contacts” screen.<br />
(See pages 55 and 157.)<br />
*: If equipped<br />
3 <strong>Touch</strong> the desired items to be set.<br />
• On this screen, the following functions can<br />
be set.<br />
200<br />
Display audio_Ext_EE
<strong>Touch</strong>_<strong>Go</strong>_<strong>Plus</strong>_OM20B71E.book Page 201 Thursday, September 20, 2012 12:03 PM<br />
1. SETUP OPERATION<br />
6. AUDIO SETTINGS<br />
You can adjust the tone and balance of<br />
sound.<br />
The level of the automatic sound levelizer<br />
can be set.<br />
1 Press the “SETUP” button.<br />
SOUND SETTINGS<br />
1 Press the “SETUP” button.<br />
2 <strong>Touch</strong> “Audio” on the “Setup” screen.<br />
3 <strong>Touch</strong> “Sound settings”.<br />
2 <strong>Touch</strong> “Audio”.<br />
4 <strong>Touch</strong> “Sound” or “DSP” tab on the<br />
screen.<br />
8<br />
3 <strong>Touch</strong> the items to be set.<br />
SETUP<br />
• Please refer to the following pages for<br />
each setting.<br />
201<br />
Display audio_Ext_EE
<strong>Touch</strong>_<strong>Go</strong>_<strong>Plus</strong>_OM20B71E.book Page 202 Thursday, September 20, 2012 12:03 PM<br />
1. SETUP OPERATION<br />
DSP CONTROL<br />
1 <strong>Touch</strong> the “DSP” tab to display this<br />
screen.<br />
Without JBL sound system<br />
■AUTOMATIC SOUND LEVELIZER<br />
(ASL)<br />
The system adjusts to the optimum volume<br />
and tone quality according to vehicle<br />
speed to compensate for<br />
increased vehicle noise.<br />
Without JBL sound system<br />
1 <strong>Touch</strong> “High”, “Mid” or “Low” of<br />
“Automatic sound levelizer”.<br />
2 <strong>Touch</strong> “OK”.<br />
With JBL sound system<br />
With JBL sound system<br />
1 <strong>Touch</strong> “On” of “Automatic sound<br />
levelizer”.<br />
2 <strong>Touch</strong> “OK”.<br />
■SURROUND FUNCTION<br />
(IF EQUIPPED)<br />
1 <strong>Touch</strong> “On” of “Surround”.<br />
2 <strong>Touch</strong> the desired screen button.<br />
2 <strong>Touch</strong> “OK”.<br />
■TONE<br />
TONE AND BALANCE<br />
How good an audio program sounds is<br />
largely determined by the mix of the<br />
treble, mid and bass levels. In fact, different<br />
kinds of music and vocal programs<br />
usually sound better with<br />
different mixes of treble, mid and bass.<br />
202<br />
Display audio_Ext_EE
<strong>Touch</strong>_<strong>Go</strong>_<strong>Plus</strong>_OM20B71E.book Page 203 Thursday, September 20, 2012 12:03 PM<br />
1. SETUP OPERATION<br />
■BALANCE<br />
A good balance of the left and right stereo<br />
channels and of the front and rear<br />
sound levels is also important.<br />
Keep in mind that when listening to a<br />
stereo recording or broadcast, changing<br />
the right/left balance will increase<br />
the volume of one group of sounds<br />
while decreasing the volume of another.<br />
RADIO SETTINGS<br />
1 Press the “SETUP” button.<br />
2 <strong>Touch</strong> “Audio” on the “Setup” screen.<br />
3 <strong>Touch</strong> “Radio settings”.<br />
1 <strong>Touch</strong> the “Sound” tab to display this<br />
screen.<br />
4 <strong>Touch</strong> the items to be set.<br />
2 <strong>Touch</strong> the desired screen button.<br />
“Treble” “+” or “-”: To adjust highpitched<br />
tones.<br />
“Mid” “+” or “-”: To adjust mid-pitched<br />
tones.<br />
“Bass” “+” or “-”: To adjust low-pitched<br />
tones.<br />
“Front” or “Rear”: To adjust the sound<br />
balance between the front and rear speakers.<br />
“L” or “R”: To adjust the sound balance<br />
between the left and right speakers.<br />
3 <strong>Touch</strong> “OK”.<br />
INFORMATION<br />
● The tone of each <strong>mode</strong> can be adjusted.<br />
• On this screen, the following functions can<br />
be performed.<br />
No.<br />
Function<br />
“On” or “Off” can be selected<br />
for FM traffic announcement.<br />
“On” or “Off” can be selected<br />
for FM alternative frequency.<br />
“On” or “Off” can be selected<br />
for regional code change.<br />
• For details of each setting, see “RDS<br />
(RADIO DATA SYSTEM)” on page 106.<br />
5 <strong>Touch</strong> “OK”.<br />
8<br />
SETUP<br />
203<br />
Display audio_Ext_EE
<strong>Touch</strong>_<strong>Go</strong>_<strong>Plus</strong>_OM20B71E.book Page 204 Thursday, September 20, 2012 12:03 PM<br />
1. SETUP OPERATION<br />
7. VEHICLE SETTINGS ∗<br />
Vehicle customization settings can be<br />
changed.<br />
1 Press the “SETUP” button.<br />
2 <strong>Touch</strong> “Vehicle”.<br />
3 <strong>Touch</strong> the desired items to be set.<br />
• For a list of the settings that can be<br />
changed, see “Owner’s Manual”.<br />
4 After changing the settings, touch<br />
“OK”.<br />
• A message indicating that the settings are<br />
being saved will appear. Do not perform<br />
any other operations while this message is<br />
displayed.<br />
∗ : If equipped<br />
204<br />
Display audio_Ext_EE
<strong>Touch</strong>_<strong>Go</strong>_<strong>Plus</strong>_OM20B71E.book Page 205 Thursday, September 20, 2012 12:03 PM<br />
9<br />
REAR VIEW MONITOR SYSTEM<br />
1<br />
2<br />
1<br />
REAR VIEW MONITOR<br />
SYSTEM<br />
1. REAR VIEW MONITOR<br />
SYSTEM OPERATION.............. 206<br />
REAR VIEW MONITOR<br />
GUIDE LINES (IF EQUIPPED)......... 207<br />
AREA DISPLAYED ON SCREEN ....... 208<br />
THE REAR VIEW MONITOR<br />
SYSTEM CAMERA........................... 208<br />
2. DRIVING PRECAUTIONS<br />
(WITH REAR VIEW<br />
MONITOR GUIDE LINES)......... 210<br />
3<br />
4<br />
5<br />
6<br />
7<br />
8<br />
9<br />
205<br />
DA_EXT_High_EE
<strong>Touch</strong>_<strong>Go</strong>_<strong>Plus</strong>_OM20B71E.book Page 206 Thursday, September 20, 2012 12:03 PM<br />
1. REAR VIEW MONITOR SYSTEM<br />
1. REAR VIEW MONITOR SYSTEM OPERATION<br />
The rear view monitor system assists<br />
the driver by displaying an image of the<br />
view behind the vehicle while backing<br />
up.<br />
1 To display the rear view image on the<br />
screen, the shift lever is in the “R” position<br />
when the engine switch is in the<br />
“ON” position.<br />
• If you move the shift lever out of the “R”<br />
position, the screen returns to the previous<br />
screen.<br />
CAUTION<br />
● Never depend on the rear view monitor<br />
system entirely when backing up.<br />
Always make sure your intended path is<br />
clear.<br />
Use caution, just as you would when<br />
backing up any vehicle.<br />
● Never back up while looking only at the<br />
screen. The image on the screen is different<br />
from actual conditions. Depicted<br />
distances between objects and flat surfaces<br />
will differ from the actual distances.<br />
If you back up while looking only<br />
at the screen, you may hit a vehicle, a<br />
person or an object. When backing up,<br />
be sure to check behind and all around<br />
the vehicle visually and with mirrors<br />
before proceeding.<br />
● Do not use the system when the back<br />
door, trunk or tailgate is not completely<br />
closed.<br />
● Use your own eyes to confirm the vehicle’s<br />
surroundings, as the displayed<br />
image may become faint or dark, and<br />
moving images will be distorted, or not<br />
entirely visible when the outside temperature<br />
is low. When backing up, be sure<br />
to check behind and all around the vehicle<br />
visually and with mirror before proceeding.<br />
● Do not use the system in the following<br />
cases:<br />
• On icy or slick road surfaces, or in<br />
snow.<br />
• When using tire chains or emergency<br />
tires.<br />
• On an uneven road, such as a slope.<br />
With rear view monitor guide lines (If<br />
equipped)<br />
• Always check the vehicle surrounding<br />
area, because the guide lines are<br />
ancillary lines.<br />
• The guide lines are ancillary lines and<br />
do not change even if the steering<br />
wheel is turned.<br />
206<br />
Display audio_Ext_EE
<strong>Touch</strong>_<strong>Go</strong>_<strong>Plus</strong>_OM20B71E.book Page 207 Thursday, September 20, 2012 12:03 PM<br />
1. REAR VIEW MONITOR SYSTEM<br />
NOTICE<br />
● If the back of the vehicle is hit, the position<br />
and mounting angle of the camera<br />
may change. Be sure to have the camera’s<br />
position and mounting angle<br />
checked at any authorized <strong>Toyota</strong> dealer<br />
or another duly qualified and equipped<br />
professional.<br />
● As the camera has a water proof construction,<br />
do not detach, disassemble or<br />
modify it. This may cause incorrect operation.<br />
● If the temperature changes rapidly, such<br />
as when hot water is poured on the vehicle<br />
in cold weather, the system may not<br />
operate normally.<br />
● Do not strongly rub the camera lens. If<br />
the camera lens is scratched, it can not<br />
transmit a clear image.<br />
● Do not allow organic solvent, car wax,<br />
window cleaner or glass coat to adhere<br />
to the camera. If this happens, wipe it off<br />
as soon as possible.<br />
● If the tire size is changed, the area displayed<br />
on the screen may change.<br />
● When washing the vehicle, do not apply<br />
intensive bursts of water to the camera<br />
or camera area. Doing so may result in<br />
the camera malfunctioning.<br />
INFORMATION<br />
● If the camera lens becomes dirty, it cannot<br />
transmit a clear image. If water droplets,<br />
snow, or mud adhere to the lens,<br />
rinse with water and wipe with a soft<br />
cloth. If the lens is extremely dirty, wash<br />
it with a mild cleanser and rinse.<br />
REAR VIEW MONITOR GUIDE<br />
LINES (IF EQUIPPED)<br />
Guide lines are displayed on the<br />
screen.<br />
• Guidelines shown differ from those shown<br />
on the actual screen.<br />
Vehicle width extension guide lines<br />
(blue)<br />
• These lines indicate the estimated vehicle<br />
width.<br />
Distance guide line (blue)<br />
• This line indicates a position on the<br />
ground about 3 ft. (1 m) behind the rear<br />
bumper of the vehicle.<br />
Distance guide line (red)<br />
• This line indicates a position on the<br />
ground about 1.5 ft. (0.5 m) behind the<br />
rear bumper of the vehicle.<br />
Vehicle center guide lines (blue)<br />
• These lines indicate the estimated vehicle<br />
center on the ground.<br />
9<br />
REAR VIEW MONITOR SYSTEM<br />
207<br />
Display audio_Ext_EE
<strong>Touch</strong>_<strong>Go</strong>_<strong>Plus</strong>_OM20B71E.book Page 208 Thursday, September 20, 2012 12:03 PM<br />
1. REAR VIEW MONITOR SYSTEM<br />
AREA DISPLAYED ON<br />
SCREEN<br />
Image is displayed approximately level<br />
on screen.<br />
INFORMATION<br />
● The area displayed on the screen may<br />
vary according to vehicle orientation or<br />
road conditions.<br />
THE REAR VIEW MONITOR<br />
SYSTEM CAMERA<br />
The rear view monitor system camera<br />
is located as shown in the illustration.<br />
Corners of bumper<br />
INFORMATION<br />
● The area detected by the camera is limited.<br />
The camera does not detect<br />
objects which are close to either corner<br />
of the bumper or under the bumper.<br />
• The actual camera location may differ<br />
depending on the vehicle. For details, see<br />
the Pictorial index of “Owner’s Manual”.<br />
208<br />
Display audio_Ext_EE
<strong>Touch</strong>_<strong>Go</strong>_<strong>Plus</strong>_OM20B71E.book Page 209 Thursday, September 20, 2012 12:03 PM<br />
1. REAR VIEW MONITOR SYSTEM<br />
INFORMATION<br />
● The camera uses a special lens. The<br />
distance of the image that appears on<br />
the screen differs from the actual distance.<br />
● In the following cases, it may become<br />
difficult to see the images on the screen,<br />
even when the system is functioning.<br />
• In the dark (for ex<strong>amp</strong>le, at night)<br />
• When the temperature near the lens<br />
is high or low<br />
• When water droplets are adhering to<br />
the camera, or when humidity is high<br />
(for ex<strong>amp</strong>le, when it rains)<br />
• When foreign matter (for ex<strong>amp</strong>le,<br />
snow or mud) is adhering to the camera<br />
• When the camera has scratches or<br />
dirt on it<br />
• When the sun or the beam of headlights<br />
is shining directly into the camera<br />
lens<br />
● When the camera is used under fluorescent<br />
lights, sodium lights, or mercury<br />
lights etc., the lights and the illuminated<br />
areas may appear to flicker.<br />
On some <strong>mode</strong>ls<br />
If a bright light (for ex<strong>amp</strong>le, sunlight reflected<br />
off the vehicle body) is picked up by<br />
the camera, the smear effect* peculiar to<br />
the camera may occur.<br />
*: Smear effect ⎯ A phenomenon that occurs<br />
when a bright light (for ex<strong>amp</strong>le, sunlight<br />
reflected off the vehicle body) is<br />
picked up by the camera; when transmitted<br />
by the camera, the light source appears<br />
to have a vertical streak above and<br />
below it.<br />
9<br />
REAR VIEW MONITOR SYSTEM<br />
209<br />
Display audio_Ext_EE
<strong>Touch</strong>_<strong>Go</strong>_<strong>Plus</strong>_OM20B71E.book Page 210 Thursday, September 20, 2012 12:03 PM<br />
1. REAR VIEW MONITOR SYSTEM<br />
2. DRIVING PRECAUTIONS (WITH REAR VIEW MONITOR GUIDE LINES)<br />
In any of the following situations, there<br />
is a margin of error between the guide<br />
lines on the screen and the actual distance/course<br />
on the road.<br />
• When the grade behind the vehicle slopes<br />
down sharply, objects appear to be closer<br />
than they actually are.<br />
• When the grade behind the vehicle slopes<br />
up sharply, objects appear to be farther<br />
away than they actually are.<br />
• When any part of the vehicle sags due to<br />
the number of passengers or the distribution<br />
of the load, there is a margin of error<br />
between the guide lines on the screen and<br />
the actual distance/course on the road.<br />
210<br />
Display audio_Ext_EE
<strong>Touch</strong>_<strong>Go</strong>_<strong>Plus</strong>_OM20B71E.book Page 211 Thursday, September 20, 2012 12:03 PM<br />
1. REAR VIEW MONITOR SYSTEM<br />
Approx. 0.5 m (1.5 ft.)<br />
The distance that appears on the screen<br />
between three-dimensional objects (such<br />
as vehicles) and flat surfaces (such as the<br />
road) and the actual distance differ as follows.<br />
• In reality, = < ( and are<br />
equally far away; is farther than<br />
and ). However, on the screen, the<br />
situation appears to be < < .<br />
• On the screen, it appears that a truck is<br />
parking approximately 0.5 m (1.5 ft.)<br />
away. However, in reality if you back up<br />
to point , you will hit the truck.<br />
9<br />
REAR VIEW MONITOR SYSTEM<br />
211<br />
Display audio_Ext_EE
<strong>Touch</strong>_<strong>Go</strong>_<strong>Plus</strong>_OM20B71E.book Page 212 Thursday, September 20, 2012 12:03 PM<br />
1. REAR VIEW MONITOR SYSTEM<br />
212<br />
Display audio_Ext_EE
<strong>Touch</strong>_<strong>Go</strong>_<strong>Plus</strong>_OM20B71E.book Page 213 Thursday, September 20, 2012 12:03 PM<br />
INDEX<br />
1<br />
2<br />
3<br />
4<br />
5<br />
6<br />
7<br />
8<br />
9<br />
213<br />
DA_EXT_High_EE
<strong>Touch</strong>_<strong>Go</strong>_<strong>Plus</strong>_OM20B71E.book Page 214 Thursday, September 20, 2012 12:03 PM<br />
ALPHABETICAL INDEX<br />
ALPHABETICAL INDEX<br />
A<br />
Adding destinations ................................. 50<br />
“Address”.................................................. 37<br />
Adjust contrast/brightness ..................... 191<br />
“Advanced” ............................................... 41<br />
“AM”........................................................ 104<br />
Application operation................................ 80<br />
Audio remote controls<br />
(steering switches)............................. 131<br />
Audio system............................................ 99<br />
Audio system operating hints ................ 134<br />
Caring for your CD player and<br />
discs ............................................... 136<br />
CD-R and CD-RW discs .................... 139<br />
iPod.................................................... 135<br />
MP3/WMA files .................................. 138<br />
Radio reception.................................. 134<br />
Terms................................................. 139<br />
USB memory...................................... 136<br />
B<br />
“Beep”..................................................... 187<br />
Bluetooth ® .............................. 123, 145, 193<br />
Bluetooth ® audio.................................... 123<br />
Connecting Bluetooth ® audio<br />
player.............................................. 124<br />
Playing Bluetooth ® audio player ........ 127<br />
Sound setting ..................................... 201<br />
Switching to Bluetooth ® audio<br />
<strong>mode</strong>............................................... 124<br />
Bluetooth ® hands-free system................ 145<br />
Bluetooth ® settings ................................ 193<br />
Bluetooth ® function ON/OFF.............. 193<br />
Displaying the device list.................... 197<br />
Pairing a Bluetooth ® device ............... 194<br />
Setting pin .......................................... 198<br />
214<br />
Display audio_Ext_EE
<strong>Touch</strong>_<strong>Go</strong>_<strong>Plus</strong>_OM20B71E.book Page 215 Thursday, September 20, 2012 12:03 PM<br />
C<br />
“Calendar”................................................. 85<br />
Checking calendar ................................ 85<br />
“Call lists”................................................ 164<br />
Call on a Bluetooth ® phone ................... 162<br />
By call lists ......................................... 164<br />
By dial ................................................ 162<br />
By phone book................................... 163<br />
By POI call ......................................... 165<br />
By “Stored” list on the<br />
“Contacts” screen........................... 162<br />
Calling using a short message........... 165<br />
CAR button............................................. 180<br />
CD .......................................................... 108<br />
Cellular phone ........................................ 145<br />
Connected service.................................... 86<br />
Connecting a Bluetooth ® phone ............ 153<br />
Connecting Bluetooth ® audio ................. 124<br />
Controls using the Tune/Scroll knob....... 102<br />
D<br />
“Day / Night map”...................................... 65<br />
“Delete personal data” ............................ 187<br />
Destination search ................................... 35<br />
On the “Enter destination” screen ........ 37<br />
On the “My destinations” screen .......... 35<br />
Detouring a segment on the route ........... 52<br />
Dial.......................................................... 162<br />
Displaying and editing the entry<br />
information ................................... 61, 159<br />
Download application............................... 96<br />
Downloading application ...................... 96<br />
Operating application ........................... 97<br />
DSP control............................................. 202<br />
Automatic sound levelizer (ASL) ......... 202<br />
E<br />
Eject button............................................. 108<br />
Email......................................................... 83<br />
Checking Email ..................................... 83<br />
New email notification pop-up<br />
window............................................... 83<br />
“Enter destination” .................................... 37<br />
215<br />
Display audio_Ext_EE
<strong>Touch</strong>_<strong>Go</strong>_<strong>Plus</strong>_OM20B71E.book Page 216 Thursday, September 20, 2012 12:03 PM<br />
ALPHABETICAL INDEX<br />
F<br />
“FM”........................................................ 104<br />
Fuel consumption ................................... 181<br />
Past record.......................................... 182<br />
Trip information................................... 181<br />
Function index .......................................... 12<br />
G<br />
“General” ................................................ 187<br />
General settings .................................... 187<br />
H<br />
Home........................................................ 56<br />
I<br />
“Information” screen .............................. 180<br />
Input screen............................................. 14<br />
Inserting or ejecting a disc...................... 108<br />
Ejecting a disc..................................... 108<br />
Inserting a disc.................................... 108<br />
iPod ............................................... 114, 135<br />
Compatible <strong>mode</strong>ls ............................. 135<br />
iPod cover art ......................................... 118<br />
L<br />
“Language” ............................................. 188<br />
Limitations of the navigation system........ 73<br />
List screen ............................................... 17<br />
Loading addresses ................................... 94<br />
M<br />
Map datebase update .............................. 75<br />
Update map.......................................... 75<br />
Map icons ................................................ 28<br />
POI icons.............................................. 29<br />
Traffic messages.................................. 32<br />
Map information ....................................... 76<br />
Map layout ................................................ 26<br />
“MAP NAV” ............................................... 20<br />
Map screen .............................................. 24<br />
Map settings ............................................ 65<br />
“MEDIA” button ....................................... 100<br />
MP3 ................................................ 111, 138<br />
MP3/WMA files ....................................... 138<br />
Playable bit rates................................. 138<br />
S<strong>amp</strong>ling frequency ............................ 138<br />
“My destinations” ................................ 35, 55<br />
216<br />
Display audio_Ext_EE
<strong>Touch</strong>_<strong>Go</strong>_<strong>Plus</strong>_OM20B71E.book Page 217 Thursday, September 20, 2012 12:03 PM<br />
N<br />
“Navigation” menu screen ....................... 20<br />
Navigation operation................................. 20<br />
Navigation setting..................................... 65<br />
Navigation system .................................... 19<br />
O<br />
Online search ........................................... 92<br />
“Options” button........................................ 47<br />
Overview buttons and “Extras”<br />
menu screen ........................................ 80<br />
Overview guidance screen ...................... 21<br />
P<br />
“Phone”................................................... 146<br />
Phone book ............................................ 163<br />
Phone book data .................................... 152<br />
Picture slideshow..................................... 81<br />
Displaying the pictures......................... 81<br />
Playing picture slideshows................... 82<br />
“Pictures” .................................................. 81<br />
Play/Pause button .................................. 100<br />
Playing a MP3/WMA disc ....................... 111<br />
Playing repeat and random order........ 113<br />
Selecting a desired file ........................ 112<br />
Selecting a desired folder.................... 112<br />
Playing a USB memory/iPod .................. 115<br />
Playing repeat and random order........ 119<br />
Selecting a desired song..................... 116<br />
Playing an audio CD ............................... 109<br />
Playing repeat and random order........ 111<br />
Selecting a desired track..................... 110<br />
Playing Bluetooth ® audio........................ 127<br />
Playing repeat and random order........ 130<br />
Selecting a desired song..................... 116<br />
“POI” ......................................................... 29<br />
POI call ................................................... 165<br />
POI icon.................................................... 29<br />
Presetting a station ................................. 104<br />
Q<br />
Quick guide................................................. 9<br />
217<br />
Display audio_Ext_EE
<strong>Touch</strong>_<strong>Go</strong>_<strong>Plus</strong>_OM20B71E.book Page 218 Thursday, September 20, 2012 12:03 PM<br />
ALPHABETICAL INDEX<br />
R<br />
Radio data system.................................. 106<br />
Radio reception ...................................... 134<br />
AM....................................................... 134<br />
FM....................................................... 134<br />
RDS....................................................... 106<br />
Rear view monitor system ...................... 205<br />
Recalculating the route by the<br />
traffic messages................................... 54<br />
Receive on the Bluetooth ® phone ......... 166<br />
Reconnecting the Bluetooth ® phone ..... 156<br />
Registering a entry .......................... 55, 157<br />
Displaying and editing the<br />
entry information....................... 61, 159<br />
Registering a new entry ............... 55, 157<br />
Send stored contacts<br />
to USB memory................................ 63<br />
Registering home .................................... 55<br />
Route guidance ........................................ 45<br />
Route guidance screen............................ 45<br />
“Route options”......................................... 69<br />
Route preference................................ 44, 69<br />
Route settings.......................................... 69<br />
S<br />
Screens for general settings................... 187<br />
Delete personal data ........................... 189<br />
Selecting a language........................... 188<br />
Seek/Track button................................... 100<br />
Selecting a station .................................. 105<br />
Setting home as the destination .............. 35<br />
Setting the route ...................................... 44<br />
Setup ...................................................... 185<br />
SETUP button......................................... 186<br />
“Setup” screen ....................................... 186<br />
Short message function......................... 170<br />
Checking received short messages ... 170<br />
Checking sent short messages.......... 171<br />
New short message notification<br />
pop-up window ................................ 170<br />
Sending a new short messages......... 172<br />
Showing the tire pressure screen ........... 183<br />
SMS message ........................................ 170<br />
Speech command system ...................... 175<br />
Starting route guidance screen................ 43<br />
Steering switch ....................................... 131<br />
Stopover ................................................... 50<br />
Switching audio source........................... 103<br />
Switching to AUX <strong>mode</strong> .......................... 122<br />
Switching to Bluetooth ® audio <strong>mode</strong> ...... 124<br />
Switching to CD <strong>mode</strong> ............................ 109<br />
Switching to radio <strong>mode</strong> ......................... 104<br />
Switching to USB or iPod <strong>mode</strong>.............. 115<br />
218<br />
Display audio_Ext_EE
<strong>Touch</strong>_<strong>Go</strong>_<strong>Plus</strong>_OM20B71E.book Page 219 Thursday, September 20, 2012 12:03 PM<br />
T<br />
Talking on a Bluetooth ® phone.............. 167<br />
Adjusting the receiver volume............ 168<br />
Dialing a second number ................... 168<br />
Sending tones.................................... 168<br />
Telephone............................................... 145<br />
Telephone (hands-free system<br />
for cellular phone) .............................. 145<br />
About the phonebook in this<br />
system............................................ 152<br />
Using the telephone switch................ 151<br />
When you sell or dispose of the<br />
vehicle ............................................ 152<br />
Telephone settings ................................ 200<br />
Terms ..................................................... 139<br />
ID3 tag ................................................ 140<br />
ISO 9660 format.................................. 140<br />
m3u..................................................... 140<br />
MP3..................................................... 140<br />
Packet write ........................................ 139<br />
WMA ................................................... 140<br />
WMA tag ............................................. 140<br />
To display map screen ............................ 24<br />
Tone and balance................................... 202<br />
Balance............................................... 202<br />
Tone.................................................... 202<br />
Traffic announcement............................. 106<br />
Traffic message setting............................ 71<br />
“Traffic messages”.................................... 32<br />
Tune/Scroll knob..................................... 102<br />
Turn off display ....................................... 190<br />
Turning the audio system on or off ......... 102<br />
U<br />
USB memory .......................................... 136<br />
USB memory/iPod ................................. 114<br />
Connecting a USB memory or<br />
iPod ................................................ 114<br />
Playing a USB memory or iPod.......... 115<br />
Sound setting ..................................... 201<br />
Switching to USB or iPod <strong>mode</strong> ......... 115<br />
Using the telephone switch..................... 151<br />
V<br />
Vehicle information ................................. 179<br />
Voice guidance ........................................ 46<br />
Volume adjustment................... 46, 168, 187<br />
W<br />
When you release your car..................... 152<br />
WMA............................................... 111, 140<br />
219<br />
Display audio_Ext_EE
<strong>Touch</strong>_<strong>Go</strong>_<strong>Plus</strong>_OM20B71E.book Page 220 Thursday, September 20, 2012 12:03 PM<br />
ALPHABETICAL INDEX<br />
Z<br />
Zoom in button.......................................... 26<br />
Zoom out button ....................................... 26<br />
220<br />
Display audio_Ext_EE
<strong>Touch</strong>_<strong>Go</strong>_<strong>Plus</strong>_OM20B71E.book Page 221 Thursday, September 20, 2012 12:03 PM<br />
Certification<br />
221<br />
DA_EXT_High_EE
<strong>Touch</strong>_<strong>Go</strong>_<strong>Plus</strong>_OM20B71E.book Page 222 Thursday, September 20, 2012 12:03 PM<br />
222<br />
DA_EXT_High_EE
<strong>Touch</strong>_<strong>Go</strong>_<strong>Plus</strong>_OM20B71E.book Page 223 Thursday, September 20, 2012 12:03 PM<br />
223<br />
DA_EXT_High_EE
Publication no. AOM 001 534-1<br />
PZ49X00332EN<br />
PZ49X00332E<br />
PZ49X00332DE<br />
www.toyota-europe.com<br />
PZ49X00332P<br />
Printed in UK


