

Samsung SCC-B5311P (SCC-B5311P ) - Manuel de l'utilisateur 9.15 MB, pdf, Anglais, Français, JAPONAIS, Espagnol
Samsung SCC-B5311P (SCC-B5311P ) - Manuel de l'utilisateur 9.15 MB, pdf, Anglais, Français, JAPONAIS, Espagnol
Samsung SCC-B5311P (SCC-B5311P ) - Manuel de l'utilisateur 9.15 MB, pdf, Anglais, Français, JAPONAIS, Espagnol

Create successful ePaper yourself
Turn your PDF publications into a flip-book with our unique Google optimized e-Paper software.
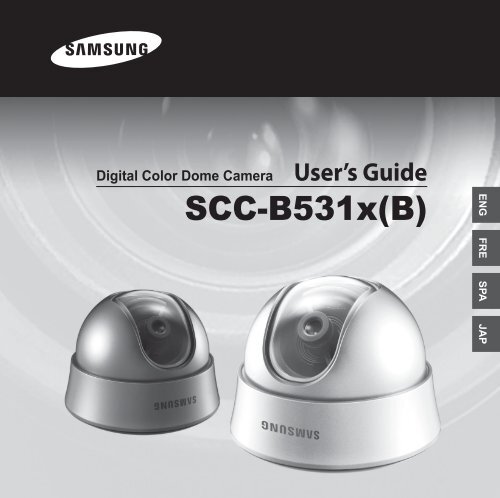
Digital Color Dome Camera User’s Gui<strong>de</strong><br />
<strong>SCC</strong>-B531x(B)<br />
ENG FRE SPA JAP
EXPLANATION OF<br />
SAFETY RELATED SY<strong>MB</strong>OLS<br />
CAUTION<br />
RISK OF ELECTRIC<br />
SHOCK DO NOT OPEN<br />
The lighting flash and<br />
Arrowhead within Triangle is<br />
a warning sign alerting you of<br />
dangerous voltage insi<strong>de</strong> the<br />
product.<br />
CAUTION: TO REDUCE THE RISK<br />
OF ELECTRIC SHOCK, DO NOT<br />
REMOVE REAR COVER. NO USER<br />
SERVICEABLE PARTS INSIDE. REFER<br />
TO QUALIFIED SERVICE PERSONNEL.<br />
The explanation point within<br />
the triangle is a warning sign<br />
alerting you of important<br />
instructions accompanying the<br />
product.<br />
2<br />
This symbol indicates high voltage<br />
is present insi<strong>de</strong>. It is dangerous to<br />
make any kind of contact with any<br />
insi<strong>de</strong> part of this product.<br />
This symbol alerts you that important<br />
literature concerning operation and<br />
maintenance has been inclu<strong>de</strong>d with<br />
this product.<br />
To prevent damage which may result in fire<br />
or electric shock hazard, do not expose this<br />
appliance to rain or moisture.<br />
WARNING<br />
1. Be sure to use only the standard adapter<br />
that is specified in the specification<br />
sheet. Using any other adapter could<br />
cause fire, electrical shock, or damage<br />
to the product<br />
2. Incorrectly connecting the power<br />
supply or replacing battery may cause<br />
explosion, fire, electric shock, or damage<br />
to the product.<br />
3. Do not connect multiple cameras to a<br />
single adapter. Exceeding the capacity<br />
may cause abnormal heat generation or<br />
fire.<br />
4. Securely plug the power cord into the<br />
power receptacle. Insecure connection<br />
may cause fire.<br />
5. When installing the camera, fasten it<br />
securely and firmly. A falling camera may<br />
cause personal injury.<br />
6. Do not place conductive objects (e.g.<br />
screwdrivers, coins, metal things, etc.) or<br />
containers filled with water on top of the<br />
camera. Doing so may cause personal<br />
injury due to fire, electric shock, or falling<br />
objects.<br />
7. Do not install the unit in humid, dusty, or<br />
sooty locations. Doing so may cause fire<br />
or electric shock.<br />
8. If any unusual smells or smoke come<br />
from the unit, stop using the product. In<br />
such case, immediately disconnect the<br />
power source and contact the service<br />
center. Continued use in such a condition<br />
may cause fire or electric shock.
9. If this product fails to operate normally,<br />
contact the nearest service center. Never<br />
disassemble or modify this product<br />
in any way. (SAMSUNG is not liable<br />
for problems caused by unauthorized<br />
modifications or attempted repair.)<br />
10. When cleaning, do not spray water<br />
directly onto parts of the product. Doing<br />
so may cause fire or electric shock.<br />
CAUTION<br />
1. Do not drop objects on the product or<br />
apply strong shock to it. Keep away from<br />
a location subject to excessive vibration<br />
or magnetic interference.<br />
2. Do not install in a location subject to<br />
high temperature (over 122°F, 50°C),<br />
low temperature (below 14°F, -10°C), or<br />
high humidity. Doing so may cause fire<br />
or electric shock.<br />
3. If you want to relocate the already<br />
installed product, be sure to turn off the<br />
power and then move or reinstall it.<br />
4. Remove the power plug from the<br />
outlet when then there is a lightning.<br />
Neglecting to do so may cause fire or<br />
damage to the product.<br />
5. Keep out of direct sunlight and heat<br />
radiation sources. It may cause fire.<br />
6. Install it in a place with good ventilation.<br />
7. Avoid aiming the camera directly towards<br />
extremely bright objects such as sun, as<br />
this may damage the CCD image sensor.<br />
8. Apparatus shall not be exposed to<br />
dripping or splashing and no objects<br />
filled with liquids, such as vases, shall be<br />
placed on the apparatus.<br />
9. The Mains plug is used as a disconnect<br />
<strong>de</strong>vice and shall stay readily operable at<br />
any time.<br />
FCC Statement<br />
This <strong>de</strong>vice complies with part 15 of the FCC<br />
Rules. Operation is subject to the following<br />
two conditions:<br />
1) This <strong>de</strong>vice may not cause harmful<br />
interference, and<br />
2) This <strong>de</strong>vice must accept any interference<br />
received including interference that may<br />
cause un<strong>de</strong>sired operation.<br />
Note<br />
This equipment has been tested and found to<br />
comply with the limits for a Class A digital <strong>de</strong>vice,<br />
pursuant to part 15 of FCC Rules. These limits<br />
are <strong>de</strong>signed to provi<strong>de</strong> reasonable protection<br />
against harmful interference when the equipment<br />
is operated in a commercial environment. This<br />
equipment generates, uses, and can radiate<br />
radio frequency energy and, if not installed<br />
and used in accordance with the instruction<br />
manual, may cause harmful interference to radio<br />
communications. Operation of this equipment<br />
in a resi<strong>de</strong>ntial area is likely to cause harmful<br />
interference in which case the user will be<br />
required to correct the interference at his own<br />
expense.<br />
IC Compliance Notice<br />
This Class A digital apparatus meets<br />
all requirements of the Canadian<br />
interference-Causing Equipment<br />
Regulations of ICES-003.<br />
3<br />
ENG
IMPORTANT SAFETY INSTRUCTIONS<br />
4<br />
1. Read Instructions – All the safety and<br />
operating instructions should be read<br />
before the product is operated.<br />
2. Retain Instructions – The safety and<br />
operating instructions should be retained<br />
for future reference.<br />
3. Heed Warnings – All warnings on the<br />
product and in the operating instructions<br />
should be adhered to.<br />
4. Follow Instructions – All operating and<br />
use instructions should be followed.<br />
5. Cleaning – Unplug this product from the<br />
wall outlet before cleaning. Do not use<br />
liquid cleaners or aerosol cleaners. Use<br />
a damp cloth for cleaning.<br />
6. Attachments – Do not use attachments<br />
not recommen<strong>de</strong>d by the product<br />
manufacturer as they may cause<br />
hazards.<br />
7. Water and Moisture – Do not use this<br />
product near water – for example, near<br />
a bath tub, wash bowl, kitchen sink, or<br />
laundry tub; in a wet basement; or near<br />
a swimming pool; and the like.<br />
8. Accessories – Do not place this product<br />
on an unstable cart, stand, tripod,<br />
bracket, or table. The product may fall,<br />
causing serious injury to a child or adult,<br />
and serious damage to the product.<br />
Use only with a cart, stand, tripod,<br />
bracket, or table recommen<strong>de</strong>d by the<br />
manufacturer, or sold with the product.<br />
Any mounting of the product should<br />
follow the manufacturer’s instructions,<br />
and should use a mounting accessory<br />
recommen<strong>de</strong>d by the manufacturer.<br />
9. A product and cart combination should<br />
be moved with care. Quick stops,<br />
excessive force, and uneven surfaces<br />
may cause the product and cart<br />
combination to overturn.<br />
10. Ventilation – Slots and openings in the<br />
cabinet are provi<strong>de</strong>d for ventilation and to<br />
ensure reliable operation of the product<br />
and to protect it from overheating, and<br />
these openings must not be blocked or<br />
covered. The openings should never be<br />
blocked by placing the product on a bed,<br />
sofa, rug, or other similar surface. This<br />
product should not be placed in a built-in<br />
installation such as a bookcase or rack<br />
unless proper ventilation is provi<strong>de</strong>d or<br />
the manufacturer’s instructions have<br />
been adhered to.<br />
11. Power Sources – This product should<br />
be operated only from the type of power<br />
source indicated on the marking label.<br />
If you are not sure of the type of power<br />
supply to your home, consult your<br />
product <strong>de</strong>aler or local power company.<br />
For products inten<strong>de</strong>d to operate from<br />
battery power, or other sources, refer to<br />
the operating instructions.<br />
12. Grounding or Polarization – This product<br />
may be equipped with a polarized
alternating-current line plug (a plug<br />
having one bla<strong>de</strong> wi<strong>de</strong>r than the other).<br />
This plug will fit into the power outlet<br />
only one way. This is a safety feature.<br />
If you are unable to insert the plug fully<br />
into the outlet, try reversing the plug.<br />
If the plug should still fail to fit, contact<br />
your electrician to replace your obsolete<br />
outlet. Do not <strong>de</strong>feat the safety purpose<br />
of the polarized plug. Alternate Warnings<br />
– This product is equipped with a threewire<br />
grounding-type plug, a plug having<br />
a third (grounding) pin. This plug will only<br />
fit into a grounding-type power outlet.<br />
This is a safety feature. If you are unable<br />
to insert the plug into the outlet, contact<br />
your electrician to replace your obsolete<br />
outlet. Do not <strong>de</strong>feat the safety purpose<br />
of the grounding-type plug.<br />
13. Power-Cord Protection – Power-supply<br />
cords should be routed so that they are<br />
not likely to be walked on or pinched<br />
by items placed upon or against them,<br />
paying particular attention to cords at<br />
plugs, convenience receptacles, and the<br />
point where they exit from the product.<br />
14. Protective Attachment Plug – The<br />
product is equipped with an attachment<br />
plug having overload protection. This is<br />
a safety feature. See Instruction Manual<br />
for replacement or resetting of protective<br />
<strong>de</strong>vice. If replacement of the plug is<br />
required, be sure the service technician<br />
has used a replacement plug specified<br />
by the manufacturer that has the same<br />
overload protection as the original plug.<br />
15. Outdoor Antenna Grounding – If an<br />
outsi<strong>de</strong> antenna or cable system is<br />
connected to the product, be sure the<br />
antenna or cable system is groun<strong>de</strong>d so<br />
as to provi<strong>de</strong> some protection against<br />
voltage surges and built-up static<br />
charges. Article 810 of the National<br />
Electrical Co<strong>de</strong>, ANSI/NFPA 70, provi<strong>de</strong>s<br />
information with regard to proper<br />
grounding of the mast and supporting<br />
structure, grounding of the lead-in wire<br />
to an antenna discharge unit, size<br />
of grounding conductors, location of<br />
antenna-discharge unit, connection to<br />
grounding electro<strong>de</strong>s, andrequirements<br />
for the grounding electro<strong>de</strong>.<br />
ELECTRIC<br />
SERVICE<br />
EQUIPMENT<br />
GROUND<br />
CLAMP<br />
NEC - NATIONAL ELECTRICAL CODE<br />
ANTENNA LEAD<br />
IN WIRE<br />
ANTENNA<br />
DISCHARGE UNIT<br />
(NEC SECTION S10-20)<br />
GROUNDING CONDUCTORS<br />
(NEC SECTION S10-21)<br />
GROUND CLAMPS<br />
POWER SERVICE GROUNDING<br />
ELECTRODE SYSTEM<br />
(NEC ART 250, PART H)<br />
16) Lightning – For ad<strong>de</strong>d protection for this<br />
product during a lightning storm, or when<br />
it is left unatten<strong>de</strong>d and unused for long<br />
periods of time, unplug it from the wall<br />
outlet and disconnect the antenna or<br />
cable system. This will prevent damage<br />
to the product due to lightning and<br />
power-line surges.<br />
ENG<br />
5
17) Power Lines – An outsi<strong>de</strong> antenna<br />
system should not be located in the<br />
vicinity of overhead power lines or other<br />
electric light or power circuits, or where it<br />
can fall into such power lines or circuits.<br />
When installing an outsi<strong>de</strong> antenna<br />
system, extreme care should be taken<br />
to keep from touching such power lines<br />
or circuits as contact with them might be<br />
fatal.<br />
18) Overloading – Do not overload wall<br />
outlets, extension cords, or integral<br />
convenience receptacles as this can<br />
result in a risk of fire or electric shock.<br />
19) Object and Liquid Entry – Never push<br />
objects of any kind into this product<br />
through openings as they may touch<br />
dangerous voltage points or short-out<br />
parts that could result in a fire or electric<br />
hock. Never spill liquid of any kind on the<br />
product.<br />
20) Servicing – Do not attempt to service this<br />
product yourself as opening or removing<br />
covers may expose you to dangerous<br />
voltage or other hazards. Refer all<br />
servicing to qualified service personnel.<br />
21) Damage Requiring Service – Unplug this<br />
product from the wall outlet and refer<br />
servicing to qualified service personnel<br />
un<strong>de</strong>r the following conditions:<br />
a) When the power-supply cord or plug<br />
is damaged,<br />
b) If liquid has been spilled, or objects<br />
have fallen into the product,<br />
c) If the product has been exposed to<br />
rain or water,<br />
d) If the product does not operate<br />
normally by following the operating<br />
instructions. Adjust only those controls<br />
that are covered by the operating<br />
instructions as an improper adjustment<br />
of other controls may result in damage<br />
and will often require extensive work<br />
by a qualified technician to restore the<br />
product to its normal operation,<br />
e) If the product has been dropped or<br />
damaged in any way, and<br />
f) When the product exhibits a distinct<br />
change in performance – this indicates a<br />
need for service.<br />
22) Replacement Parts – When replacement<br />
parts are required, be sure the service<br />
technician has used replacement parts<br />
specified by the manufacturer or have<br />
the same characteristics as the original<br />
part. Unauthorized substitutions may<br />
result in fire, electric shock, or other<br />
hazards.<br />
23) Safety Check – Upon completion of any<br />
service or repairs to this product, ask<br />
the service technician to perform safety<br />
checks to <strong>de</strong>termine that the product is<br />
in proper operating condition.<br />
24) Wall or Ceiling Mounting – The product<br />
should be mounted to a wall or<br />
ceiling only as recommen<strong>de</strong>d by the<br />
manufacturer.<br />
25) Heat – The product should be situated<br />
away from heat sources such as<br />
radiators, heat registers, stoves, or<br />
other products (including amplifiers) that<br />
produce heat.<br />
Apparatus shall not be exposed to<br />
dripping or splashing and no objects<br />
filled with liquids, such as vases,<br />
shall be placed on the apparatus<br />
6
Contents<br />
Overview ...................................................................................... 8<br />
About this gui<strong>de</strong> ............................................................................8<br />
Product overview ...........................................................................8<br />
Main features .................................................................................8<br />
Components ...................................................................................8<br />
Checking components in the package .......................................8<br />
Components of your camera ......................................................9<br />
Installation ................................................................................ 10<br />
Setting switches ..........................................................................10<br />
Setting function switches ..........................................................10<br />
Connecting cables and setting switches ..................................12<br />
Installing camera .........................................................................13<br />
Before installation .....................................................................13<br />
Installation procedure ...............................................................13<br />
Adjusting the camera direction ..................................................14<br />
Appendix A: Specifications for NTSC Standard ................ 15<br />
ENG<br />
Appendix B: Specifications for PAL Standard ....................17<br />
7
Overview<br />
8<br />
❚ About this gui<strong>de</strong><br />
This user gui<strong>de</strong> inclu<strong>de</strong>s basic instructions for<br />
the product. It is recommen<strong>de</strong>d that all users<br />
read this gui<strong>de</strong> before use.<br />
This gui<strong>de</strong> is divi<strong>de</strong>d as follows:<br />
Chapter 1, “Overview,” introduces the user gui<strong>de</strong><br />
and product related information. (This chapter)<br />
Chapter 2, “Installation,” explains how to set and<br />
install the product.<br />
Appendix, “Specifications,” provi<strong>de</strong>s the<br />
specifications of the product.<br />
❚ Product overview<br />
This is the high resolution dome camera<br />
equipped with a fixed focal lens, which has<br />
no dynamic <strong>de</strong>lay when implementing motion<br />
pictures, and provi<strong>de</strong>s the features such as<br />
digital noise reduction (DNR) by real-time<br />
CCD <strong>de</strong>fect compensation, low speed shutter<br />
(LSS: Auto x128) to implement clear picture<br />
quality, Day/Night color compensation, and<br />
the like.<br />
❚ Main features<br />
Power: DC 12V/AC 24V<br />
Special functions<br />
• Line lock (LL) control<br />
• Auto white balancing<br />
• Horizontal/vertical image reversing<br />
• Auto gain control<br />
• Low shutter speed control<br />
• Backlight compensation control<br />
• Automatic switching between color and black<br />
& white mo<strong>de</strong>s<br />
• Digital noise reduction (DNR)<br />
• Dynamic CCD <strong>de</strong>fect compensation<br />
❚ Components<br />
Checking components in the package<br />
Please check your camera and accessories<br />
are inclu<strong>de</strong>d in the package. Those<br />
components are as shown below:<br />
Camera<br />
Tab screw<br />
Test Monitor Cable<br />
User’s Gui<strong>de</strong><br />
Note<br />
The test monitor cable is used to test the camera<br />
by connecting to a portable display. If you really<br />
want to connect the camera to a monitoring<br />
display, use the BNC cable.
Components of your camera<br />
Your camera has the following components:<br />
1<br />
3<br />
2<br />
Lens<br />
5<br />
4<br />
6<br />
7<br />
1. Cover dome: Covers the lens and main<br />
body to protect them.<br />
2. Main body: Inclu<strong>de</strong>s a lens, a switch<br />
board, a PCB board, screws, and such.<br />
3. Locker: Used to open or close the Cover<br />
dome. To open the cover dome, press the<br />
locker.<br />
4. Tilt fixing screw: Using this screw, the<br />
slope of the lens can be adjusted and<br />
fixed.<br />
5. Switch board: Inclu<strong>de</strong>s two kinds<br />
of control switches such as function<br />
switches and phase-control switches.<br />
The board has eight function switches in<br />
the middle and two phase-control buttons<br />
on each si<strong>de</strong> of the function switch area.<br />
6. Lock releaser: Push it outward and<br />
rotate the main body in UNLOCK<br />
direction when you want to remove the<br />
mount bracket from the main body.<br />
7. Mount bracket: Used as a ceiling or wall<br />
fixture. It is fixed using three long tab<br />
screws provi<strong>de</strong>d in the package.<br />
8. Ceiling mount opener: Remove it for<br />
line connection to the ceiling when it is<br />
installed on the ceiling.<br />
ENG<br />
8<br />
9
Installation<br />
❚ Setting switches<br />
Setting function switches<br />
To set the available functions on your camera, adjust eight switches as shown below:<br />
DEC<br />
8<br />
7<br />
6<br />
5<br />
4<br />
3<br />
2<br />
1<br />
INC<br />
No Name Brief <strong>de</strong>scription<br />
1 LL Line lock ON/OFF<br />
2 LSS Sens-up or Low speed shutter ON/OFF<br />
3 H-REV Horizontal reverse ON/OFF<br />
4 V-REV Vertical reverse ON/OFF<br />
5 BLC Backlight compensation ON/OFF<br />
6 AGC Auto gain control ON/OFF<br />
7 D/N<br />
Automatic switching between color and<br />
black & white ON/OFF<br />
8 AWB Automatic white balance ON/OFF<br />
1. Switch 1 (LL): When this switch is set to OFF, the camera operates in the internal<br />
synchronization mo<strong>de</strong>, while when it is set to ON, the camera operates in the line lock mo<strong>de</strong>.<br />
In the internal synchronization mo<strong>de</strong>, the camera always uses an insi<strong>de</strong> crystal oscillator for<br />
synchronization. However if multiple cameras are connected to a sequential switcher, picture<br />
rolling or flickering may occur when switching from one camera to another. In this case, you<br />
can set this switch to ON to solve this problem.<br />
The line lock mo<strong>de</strong> allows the camera to use the phase of the AC power as the<br />
synchronization reference. In this mo<strong>de</strong>, you can use the phase control buttons(INC/DEC).<br />
Note<br />
When you are using the DC 12V power, set this switch to OFF. The line lock feature will not normally<br />
operate even when the switch is set to ON.<br />
Set the LL switch to ON while the AC power is connected. If any picture roll happens, you have<br />
to adjust the phase using the phase-control buttons. Press the INC or DEC button to increase or<br />
<strong>de</strong>crease the phase by one <strong>de</strong>gree.<br />
10
2. Switch 2 (LSS): This sens-up mo<strong>de</strong> accumulates the image fields in memory to reduce<br />
noise but increase the brightness and contrast rate. When this switch is set to ON, the<br />
camera automatically switches to a maximum of 128 times of image acquisition speed to<br />
implement a clear picture for darker image.<br />
3. Switch 3 (H-REV): When this switch is set to ON, the camera image is reversed horizontally.<br />
If you want to monitor your site using a mirror, you can use this feature to see the right<br />
image.<br />
4. Switch 4 (V-REV): When this switch is set to ON, the camera image is reversed vertically.<br />
If your camera reluctantly displays the vertically reversed image, you can use this feature to<br />
see the right image.<br />
5. Switch 5 (BLC): When this switch is set to ON, you can view a clear image even though the<br />
camera faces any excessive light such as sunlight and fluorescent light. When it is set to<br />
OFF, the subject with excessive light is not clearly shown.<br />
6. Switch 6 (AGC): When this switch is set to ON, the camera automatically increase the<br />
sensitivity by amplifying the vi<strong>de</strong>o signal when the strength of the signal falls below a given<br />
value. When any dark images are expected, use this feature.<br />
7. Switch 7 (D/N): When this switch is set to ON, the camera automatically switches between<br />
color and B&W according to the brightness of the vicinity.<br />
8. Switch 8 (AWB): This switch adjusts white balancing. When this switch is set to ON, this<br />
camera operates in ATW mo<strong>de</strong>, and in case of OFF, this camera operates in AWC mo<strong>de</strong>.<br />
• ATW (Auto Tracking White Balance): The color temperature is automatically adjusted according to the<br />
environmental change. (Approx. 2000°K to 11,000°K)<br />
• AWC (Auto White Balance Control): It stores the color temperature just when the switch is changed to<br />
OFF. Accordingly color temperatures are adjusted by the stored value.<br />
ENG<br />
11
❚ Connecting cables and setting switches<br />
BNC Cable<br />
Monitor<br />
To connect cables<br />
1. Connect the BNC cable<br />
to the Vi<strong>de</strong>o connector<br />
attached on your camera.<br />
2. Connect the BNC cable<br />
to the Vi<strong>de</strong>o Input on a<br />
monitor.<br />
3. Connect the power<br />
adapter to the Power<br />
connector attached on<br />
your camera. When the<br />
monitor is turned on, the<br />
camera image appears.<br />
To check the camera view and set the switches<br />
1. Remove the Cover dome. For more <strong>de</strong>tails about the removing procedures, see “Installation<br />
procedure,” in the Installing camera section on the next page.<br />
2. Adjust the function of your camera using the Switch board while you are viewing the image<br />
on the screen.<br />
12
❚ Installing camera<br />
Before installation<br />
Before installing your camera, you have to read the following cautions:<br />
• You have to check whether the location (ceiling or wall) can bear five times the weight of your camera.<br />
• Don’t let the cable to be caught in improper place or the electric line cover to be damaged. Otherwise it<br />
may cause a breakdown or fire.<br />
• When installing your camera, don’t allow any person to approach the installation site. If you have any<br />
valuable things un<strong>de</strong>r the place, move them away.<br />
Installation procedure<br />
1<br />
2<br />
3<br />
Ceiling mount<br />
opener<br />
To install your camera<br />
1. Press the Locker button on the bottom<br />
of your camera and remove the Cover<br />
dome from the Main body using the<br />
other hand. The Main body will be<br />
exposed to you.<br />
2. As shown in the picture, push the Lock<br />
releaser outward and rotate the Main<br />
body in the UNLOCK direction to remove<br />
the Mount bracket. If it is not easily<br />
done, rotate the Mount bracket in the<br />
LOCK direction while holding small holes<br />
on the Mount bracket.<br />
3. Fix the Mount bracket to the location<br />
(ceiling or wall) with supplied three<br />
screws.<br />
Note<br />
The CAMERA FRONT sign on the Mount<br />
bracket should face the camera monitoring<br />
area.<br />
ENG<br />
13
4. When you install the Mount bracket on the ceiling, remove the Ceiling mount opener by<br />
pressing it hard to connect the line attached on your camera through the hole in the ceiling.<br />
Otherwise, you can use the empty space opposite to the CAMERA FRONT sign for line<br />
connection.<br />
5. Now attach the Main body to the Mount bracket by rotating it in the LOCK direction after<br />
aligning the Lock releaser on the Main body with the wi<strong>de</strong> groove around the CAMERA<br />
FRONT inlay.<br />
6. Adjust the camera direction. For more <strong>de</strong>tails on the direction control, see “Adjusting the<br />
camera direction,” on the same page.<br />
7. Finally attach the Cover dome to the Main body by pressing it until a “click” sound is heard<br />
after aligning the wi<strong>de</strong> groove at the lower part of the Cover dome with the Locker on the<br />
Main body.<br />
❚ Adjusting the camera direction<br />
When the camera is fixed on the ceiling, you can adjust<br />
the camera viewing angle. You can rotate your camera<br />
leftward or rightward (Panning), and can change the<br />
slope of your camera upward or downward (Tilting).<br />
Panning<br />
In case of panning, the rotation limit of your camera<br />
is set to 340 <strong>de</strong>gree (220 <strong>de</strong>gree clockwise and 120<br />
<strong>de</strong>gree counterclockwise). The rotation is stopped by the<br />
Stopper insi<strong>de</strong> of the camera. For panning control, first<br />
unfasten two screws located on the bottom and rotate in Tilting<br />
the direction you want, and then fasten them to fix the<br />
camera. When both fixing screws cannot be tightened,<br />
change the location of screws. When inevitable, just<br />
Lens rotation<br />
tightening one screw is alright.<br />
In case of tilting, you can change the slope of your camera from zero to 90 <strong>de</strong>gree. When<br />
the slope angle is un<strong>de</strong>r 23 <strong>de</strong>gree, you can encounter a partial image hi<strong>de</strong> problem. To fix<br />
the location after adjusting the tilting angle, use the Tilt fixing screws.<br />
To adjust the focus of your camera, rotate the fixed lens for clear image. When you install<br />
the camera on the inclined ceiling or wall, you can rotate the camera lens to see a correct<br />
direction image.<br />
14
<strong>SCC</strong>-B531X<br />
ENG<br />
15
Appendix A: Specifications for NTSC Standard<br />
Item<br />
Details<br />
Product type<br />
CCTV color dome camera<br />
Power input AC 24V ± 10% (60Hz ± 0.3 Hz), DC 12V +10%/-5%<br />
Broadcast type<br />
NTSC Standard color system (525 Lines, 60 Fields)<br />
Power consumption Approx. 1.6W<br />
Image <strong>de</strong>vice<br />
1/3 inch IT Type Super-HAD CCD<br />
<strong>SCC</strong>-B5311N, B5313N, B5315N<br />
<strong>SCC</strong>-B5310N<br />
Pixels<br />
Total: 811(H) x 508(V), 410,000 pixels<br />
Effective: 768(H) x 494(V), 380,000 pixels<br />
Total: 537(H) x 505(V), 270,000 pixels<br />
Effective: 510(H) x 492(V), 250,000 pixels<br />
Scanning mo<strong>de</strong> 525 Lines, 2:1 Interlace<br />
Scanning line frequency<br />
Horizontal: 15.734Hz(INT)/15.750Hz(LL)<br />
Vertical: 59.94Hz(INT)/60Hz(LL)<br />
Synchronization mo<strong>de</strong> INT/Line Lock (Adjusting the phase using INC/DEC button)<br />
Horizontal resolution<br />
<strong>SCC</strong>-B5311N, B5313N, B5315N<br />
<strong>SCC</strong>-B5310N<br />
540 TV Lines 330 TV Lines<br />
<strong>SCC</strong>-B5311N, B5313N, B5315N <strong>SCC</strong>-B5310N<br />
50IRE 1Lux 0.6Lux<br />
Sens-up Off 30IRE 0.6Lux 0.4Lux<br />
Min. object illumination<br />
15IRE 0.3Lux 0.2Lux<br />
F2.0<br />
50IRE 0.008Lux 0.005Lux<br />
Sens-up x128 30IRE 0.005Lux 0.003Lux<br />
15IRE 0.002Lux 0.001Lux<br />
Signal output<br />
COMPOSITE Vi<strong>de</strong>o(1.0 Vp-p, 75ohm, BNC), Test Monitor OUT(1.0 Vp-p, 75ohm, Harness cable)<br />
Focal length Zone Limit of viewing angle Mo<strong>de</strong>l<br />
3.0mm<br />
Horizontal<br />
Vertical<br />
92°<br />
72°<br />
<strong>SCC</strong>-B5313N<br />
Lens<br />
3.8mm<br />
Horizontal<br />
Vertical<br />
71°<br />
53°<br />
<strong>SCC</strong>-B5310N,<br />
B5311N<br />
8.0mm<br />
Horizontal<br />
Vertical<br />
33.6°<br />
25.3°<br />
<strong>SCC</strong>-B5315N<br />
PAN function<br />
Range: 0 to 340° (220 <strong>de</strong>gree clockwise and 120 <strong>de</strong>gree counterclockwise)<br />
TILT function Range: 0 to 90°<br />
16
Item<br />
Details<br />
Line Lock (LL)<br />
Sens-up; Low Speed Shutter(LSS)<br />
Horizontal Reverse (H-REV)<br />
Vertical Reverse (V-REV)<br />
Controls<br />
Backlight compensation (BLC)<br />
Auto gain control (AGC)<br />
Switching between color and B&W by day and night change (D/N)<br />
Automatic white balancing (AWB)<br />
Digital noise reduction (DNR)<br />
Dynamic CCD <strong>de</strong>fect compensation<br />
Product color<br />
<strong>SCC</strong>-B531xN : White / <strong>SCC</strong>-B531xBN : Black<br />
Operation temperature -10°C to +50°C<br />
Operation humidity Up to 90%<br />
Size<br />
102(Ø) x 78(H)mm<br />
Weight<br />
190g<br />
ENG<br />
17
Appendix B: Specifications for PAL Standard<br />
Item<br />
Details<br />
Product type<br />
CCTV color dome camera<br />
Power input AC 24V ± 10% (50Hz ± 0.3 Hz), DC 12V +10%/-5%<br />
Broadcast type<br />
PAL Standard color system (625 Lines, 50 Fields)<br />
Power consumption Approx. 1.6W<br />
Image <strong>de</strong>vice<br />
1/3 inch IT Type Super-HAD CCD<br />
<strong>SCC</strong>-<strong>B5311P</strong>, B5313P, B5315P<br />
<strong>SCC</strong>-B5310P<br />
Pixels<br />
Total: 795(H) x 596(V), 470,000 pixels<br />
Effective: 752(H) x 582(V), 440,000 pixels<br />
Total: 537(H) x 597(V), 320,000 pixels<br />
Effective: 500(H) x 582(V), 290,000 pixels<br />
Scanning mo<strong>de</strong> 625 Lines, 2:1 Interlace<br />
Scanning line frequency<br />
Horizontal: 15.625Hz(INT)/15.625Hz(LL)<br />
Vertical: 50Hz(INT)/50Hz(LL)<br />
Synchronization mo<strong>de</strong> INT/Line Lock (Adjusting the phase using INC/DEC button)<br />
Horizontal resolution<br />
<strong>SCC</strong>-<strong>B5311P</strong>, B5313P, B5315P<br />
<strong>SCC</strong>-B5310P<br />
540 TV Lines 330 TV Lines<br />
<strong>SCC</strong>-<strong>B5311P</strong>, B5313P, B5315P <strong>SCC</strong>-B5310P<br />
50IRE 1Lux 0.6Lux<br />
Sens-up Off 30IRE 0.6Lux 0.4Lux<br />
Min. object illumination<br />
15IRE 0.3Lux 0.2Lux<br />
F2.0<br />
50IRE 0.008Lux 0.005Lux<br />
Sens-up x128 30IRE 0.005Lux 0.003Lux<br />
15IRE 0.002Lux 0.001Lux<br />
Signal output<br />
COMPOSITE Vi<strong>de</strong>o(1.0 Vp-p, 75ohm, BNC), Test Monitor OUT(1.0 Vp-p, 75ohm, Harness cable)<br />
Focal length Zone Limit of viewing angle Mo<strong>de</strong>l<br />
3.0mm<br />
Horizontal<br />
Vertical<br />
92°<br />
72°<br />
<strong>SCC</strong>-B5313P<br />
Lens<br />
3.8mm<br />
Horizontal<br />
Vertical<br />
71°<br />
53°<br />
<strong>SCC</strong>-B5310P,<br />
<strong>B5311P</strong><br />
8.0mm<br />
Horizontal<br />
Vertical<br />
33.6°<br />
25.3°<br />
<strong>SCC</strong>-B5315P<br />
PAN function<br />
Range: 0 to 340° (220 <strong>de</strong>gree clockwise and 120 <strong>de</strong>gree counterclockwise)<br />
TILT function Range: 0 to 90°<br />
18
Item<br />
Details<br />
Line Lock (LL)<br />
Sens-up; Low Speed Shutter(LSS)<br />
Horizontal Reverse (H-REV)<br />
Vertical Reverse (V-REV)<br />
Controls<br />
Backlight compensation (BLC)<br />
Auto gain control (AGC)<br />
Switching between color and B&W by day and night change (D/N)<br />
Automatic white balancing (AWB)<br />
Digital noise reduction (DNR)<br />
Dynamic CCD <strong>de</strong>fect compensation<br />
Product color<br />
<strong>SCC</strong>-B531xP : White / <strong>SCC</strong>-B531xBP : Black<br />
Operation temperature -10°C to +50°C<br />
Operation humidity Up to 90%<br />
Size<br />
102(Ø) x 78(H)mm<br />
Weight<br />
190g<br />
ENG<br />
19
Caméra Dôme couleur numérique<br />
Gui<strong>de</strong> <strong>de</strong> l’utilisateur<br />
<strong>SCC</strong>-B531x(B)<br />
FRE
Mesures <strong>de</strong> sécurité<br />
AVERTISSEMENT<br />
DANGER DE CHOC<br />
ÉLECTRIQUE NE PAS OUVRIR<br />
AVERTISSEMENT : POUR RÉDUIRE LE RISQUE<br />
DE CHOC ÉLECTRIQUE, NE PAS RETIRER LE<br />
COUVERCLE ARRIÈRE. AUCUNE PIÈCE INTÉRIEURE<br />
NE PEUT ÊTRE RÉPARÉE PAR L’UTILISATEUR.<br />
CONSULTER LE PERSONNEL D’ENTRETIEN QUALIFIÉ.<br />
Ce symbole indique la présence<br />
d’une haute tension à l’intérieur. Il est<br />
dangereux d’entrer en contact avec<br />
toute pièce interne <strong>de</strong> ce produit.<br />
Ce symbole vous avertis que<br />
<strong>de</strong> la documentation importante<br />
concernant le fonctionnement et<br />
l’entretien a été incluse avec ce<br />
produit.<br />
Pour prévenir tout dommage résultant d’un<br />
incendie ou tout risque <strong>de</strong> choc électrique, ne<br />
pas exposer l’appareil à la pluie ou à<br />
l’humidité.<br />
AVERTISSEMENT<br />
1. Utiliser uniquement l’adaptateur standard<br />
spécifié dans la fiche technique.<br />
L’utilisation <strong>de</strong> tout autre adaptateur peu<br />
causer un incendie, un choc électrique ou<br />
endommager le produit.<br />
2. La connexion incorrecte <strong>de</strong> la source<br />
d’alimentation ou le remplacement<br />
incorrect <strong>de</strong> la batterie peut provoquer une<br />
explosion, un incendie, un choc électrique<br />
ou endommager le produit.<br />
2<br />
3. Ne pas brancher plus d’une caméra à un<br />
adaptateur. Dépasser la capacité peut<br />
générer une chaleur anormale ou un incendie.<br />
4. Brancher le cordon d’alimentation<br />
sécuritairement à la prise secteur. Une<br />
mauv<strong>ais</strong>e connexion peu provoquer un<br />
incendie.<br />
5. Lors <strong>de</strong> l’installation <strong>de</strong> la caméra, la fixer<br />
soli<strong>de</strong>ment et sécuritairement. La chute<br />
d’une caméra peut causer <strong>de</strong>s blessures<br />
corporelles.<br />
6. Ne pas placer d’objets conducteurs<br />
(comme <strong>de</strong>s tournevis, pièces <strong>de</strong> monnaie,<br />
objets métalliques, etc.) ou <strong>de</strong> contenant<br />
remplis d’eau sur la caméra. Cela<br />
peut causer <strong>de</strong>s blessures corporelles<br />
provoquer par un incendie, un choc<br />
électrique ou la chute d’objets.<br />
7. Ne pas installer l’appareil dans un endroit<br />
humi<strong>de</strong>, poussiéreux ou plein <strong>de</strong> suie.<br />
Cela peut causer un incendie ou un choc<br />
électrique.<br />
8. Si <strong>de</strong>s o<strong>de</strong>urs ou <strong>de</strong>s fumées inhabituelles<br />
s’échappent <strong>de</strong> l’appareil, arrêter d’utiliser<br />
l’appareil. Dans un tel cas, débrancher<br />
immédiatement le cordon d’alimentation et<br />
contacter le centre <strong>de</strong> service. Un usage<br />
continu dans <strong>de</strong> telles conditions peut<br />
causer un incendie ou un choc électriqu e.
9. Si l’appareil ne fonctionne pas<br />
normalement, contacter le centre <strong>de</strong><br />
service le plus proche. Ne jam<strong>ais</strong> démonter<br />
ou modifier <strong>de</strong> quelle que façon que ce<br />
soit ce produit. (SAMSUNG n’est pas<br />
responsable <strong>de</strong>s anomalies provoquées<br />
par <strong>de</strong>s modifications ou tentatives <strong>de</strong><br />
réparation non autorisées.)<br />
10. Lors du nettoyage, ne pas vaporiser<br />
d’eau directement sur les composants du<br />
produit. Cela peut causer un incendie ou<br />
un choc électrique.<br />
AVERTISSEMENT<br />
1. Ne pas l<strong>ais</strong>sez tomber d’objet sur le produit<br />
ou le soumettre à <strong>de</strong> violents chocs. Ne<br />
pas placer le produit dans un endroit où<br />
il pourrait subir <strong>de</strong> forte vibration ou <strong>de</strong>s<br />
interférences magnétiques.<br />
2. Ne pas installer la caméra dans un endroit<br />
où la température pourrait dépasser plus<br />
<strong>de</strong> 50°C, ou être inférieure à 10°C, ou à<br />
une humidité élevée. Cela peut causer un<br />
incendie ou un choc électrique.<br />
3. Si vous désirez déplacer le produit<br />
déjà installé, coupez l’alimentation puis<br />
déplacez ou réinstallez le produit.<br />
4. En cas d’orage, retirer la fiche <strong>de</strong> la<br />
prise électrique. Le non-respect <strong>de</strong> cette<br />
consigne peut provoquer un incendie ou<br />
endommager le produit.<br />
5. Placer le produit dans un endroit protégé<br />
<strong>de</strong>s rayons du soleil et <strong>de</strong>s sources <strong>de</strong><br />
chaleur. Cela peut provoquer un incendie.<br />
6. Installer dans un endroit bien ventilé.<br />
7. Éviter <strong>de</strong> diriger la caméra en direction<br />
d’objets extrêmement brillants, tel que le<br />
soleil, pour ne pas endommager le capteur<br />
d’image CCD.<br />
8. Veillez à éviter toute projection sur l’<br />
appareil et ne placez jam<strong>ais</strong> <strong>de</strong> récipients<br />
contenant un liqui<strong>de</strong> (ex. : vase) <strong>de</strong>ssus.<br />
9. La prise d’alimentation fait office <strong>de</strong><br />
système <strong>de</strong> déconnexion ; elle doit donc<br />
rester disponible en permanence.<br />
Déclaration relative à la<br />
Commission fédérale <strong>de</strong>s<br />
communications (FCC)<br />
Cet appareil est conforme à la partie 15 <strong>de</strong>s<br />
règlements <strong>de</strong> la FCC. Le fonctionnement est<br />
assujetti aux <strong>de</strong>ux conditions suivantes :<br />
1) Cet appareil ne doit pas produire<br />
d’interférence nuisible, et<br />
2) Cet appareil doit accepter toute<br />
interférence reçue, dont les interférences<br />
pouvant causer un fonctionnement<br />
indésirable.<br />
Remarque<br />
Cet appareil a été testé et trouvé conforme aux<br />
limites d’un appareil numérique <strong>de</strong> classe A,<br />
en vertu <strong>de</strong> la partie 15 <strong>de</strong>s règlements <strong>de</strong> la<br />
FCC. Ces limites sont conçues pour fournir une<br />
protection r<strong>ais</strong>onnable contre les interférences<br />
nuisibles lorsque l’appareil est utilisé dans<br />
un environnement commercial. Cet appareil<br />
génère, utilise et peut rayonner une énergie<br />
radiofréquence. S’il n’est pas installer ou utiliser<br />
conformément au manuel d’instructions, il peut<br />
provoquer <strong>de</strong>s interférences nuisibles aux<br />
radiocommunications. Le fonctionnement <strong>de</strong><br />
cet appareil dans une zone rési<strong>de</strong>ntielle est<br />
susceptible <strong>de</strong> provoquer <strong>de</strong>s interférences<br />
nuisibles, au quel cas l’utilisateur <strong>de</strong>vra y<br />
remédier à ses fr<strong>ais</strong>.<br />
3<br />
FRE
Consignes <strong>de</strong> sécurité importantes<br />
1. Prendre conn<strong>ais</strong>sance <strong>de</strong> ces consignes.<br />
2. Conserver ces consignes.<br />
3. Tenir compte <strong>de</strong> tous les avertissements.<br />
4. Suivre toutes les consignes.<br />
5. Ne pas utiliser cet appareil à proximité <strong>de</strong><br />
l’eau.<br />
6. Nettoyer seulement avec un tissu sec.<br />
7. Ne pas boucher les ouvertures <strong>de</strong><br />
ventilation. Installer conformément aux<br />
directives du fabricant.<br />
8. Ne pas installer proche d’une source <strong>de</strong><br />
chaleur tel qu’un radiateur, d’une bouche<br />
d’air chaud et d’autres appareils (comme<br />
un amplificateur) qui produisent <strong>de</strong> la<br />
chaleur.<br />
9. Ne pas supprimer le dispositif <strong>de</strong> sécurité<br />
<strong>de</strong> la fiche polarisée ou avec mise à la<br />
terre. Une fiche polarisée est composée <strong>de</strong><br />
<strong>de</strong>ux lames dont l’une est plus large que<br />
l’autre. Une fiche avec mise à la terre est<br />
composée <strong>de</strong> <strong>de</strong>ux lames et d’une broche<br />
<strong>de</strong> mise à la terre. La lame la plus large ou<br />
la broche sont prévues pour votre sécurité.<br />
Si la fiche fournie ne convient pas à votre<br />
prise secteur, consulter un électricien pour<br />
la remplacer.<br />
10. Protéger le cordon d’alimentation pour<br />
éviter qu’il ne soit piétiné ou pincé,<br />
particulièrement aux fiches, aux prises<br />
utilitaires et aux points <strong>de</strong> sortie <strong>de</strong>s<br />
appareils.<br />
11. Utiliser seulement les accessoires/fixations<br />
spécifiés par le fabricant.<br />
12. Utiliser seulement avec le<br />
chariot, le statif, le trépied,<br />
le support ou la plate-forme<br />
spécifiés par le fabricant ou<br />
vendu avec l’appareil.<br />
13. Débrancher cet appareil. Lorsqu’un chariot<br />
est utilisé, pour éviter <strong>de</strong>s blessures dû<br />
au renversement, soyez pru<strong>de</strong>nt lors <strong>de</strong>s<br />
déplacement <strong>de</strong> l’ensemble chariot/<br />
appareil.<br />
14. Pour toute opération d’entretien, se référer<br />
à du personnel qualifié. Un entretien est<br />
nécessaire lorsque l’appareil à subit <strong>de</strong>s<br />
dommages tel que : dommages à la fiche<br />
ou au cordon d’alimentation, renversement<br />
<strong>de</strong> liqui<strong>de</strong> ou chute d’objet sur l’appareil,<br />
exposition <strong>de</strong> l’appareil à la pluie ou à<br />
l’humidité, fonctionnement anormal <strong>de</strong><br />
l’appareil ou chute <strong>de</strong> l’appareil.<br />
Cet appareil numérique <strong>de</strong> classe<br />
A respecte toutes les exigences<br />
du Réglement ICES-003 sur les<br />
équipements produisant <strong>de</strong>s<br />
interférences au Canada.<br />
4
Table <strong>de</strong>s matières<br />
Aperçu ......................................................................................... 6<br />
À propos <strong>de</strong> ce gui<strong>de</strong> ....................................................................6<br />
Aperçu du produit .........................................................................6<br />
Caractéristiques principales ........................................................6<br />
Composants ...................................................................................6<br />
Vérification <strong>de</strong>s composants <strong>de</strong> l’emballage ..............................6<br />
Composants <strong>de</strong> votre caméra ....................................................7<br />
Installation ................................................................................. 8<br />
Réglage <strong>de</strong>s commutateurs ..........................................................8<br />
Réglage <strong>de</strong>s commutateurs <strong>de</strong> fonction .....................................8<br />
Branchement <strong>de</strong>s câbles et réglage <strong>de</strong>s commutateurs .........10<br />
Installation <strong>de</strong> la caméra ............................................................. 11<br />
Avant l’installation .................................................................... 11<br />
Métho<strong>de</strong> d’installation .............................................................. 11<br />
Réglage <strong>de</strong> la direction <strong>de</strong> la caméra ........................................12<br />
Annexe A : Caractéristiques pour la norme NTSC ...... 13<br />
FRE<br />
Annexe B : Caractéristiques pour la norme PAL ......... 15<br />
5
Aperçu<br />
❚ À propos <strong>de</strong> ce gui<strong>de</strong><br />
Ce gui<strong>de</strong> <strong>de</strong> l’utilisateur comprend les<br />
consignes <strong>de</strong> base pour l’utilisation <strong>de</strong> ce<br />
produit. Il est recommandé que tout les<br />
utilisateurs lisent ce gui<strong>de</strong> avant l’utilisation.<br />
Ce gui<strong>de</strong> est divisé comme suit :<br />
Le chapitre 1, Aperçu, présente le gui<strong>de</strong> <strong>de</strong><br />
l’utilisateur et les renseignements relatifs au<br />
produit. (Ce chapitre)<br />
Le chapitre 2, Installation, décrit le réglage et<br />
l’installation <strong>de</strong> ce produit.<br />
Annexe, Caractéristiques, indique les<br />
caractéristiques du produit.<br />
• Commutation automatique entre les mo<strong>de</strong>s<br />
couleur et noir et blanc<br />
• Réduction du bruit numérique (RBN)<br />
• Compensation dynamique <strong>de</strong> défaut du<br />
capteur CCD<br />
❚ Composants<br />
Vérification <strong>de</strong>s composants <strong>de</strong> l’emballage<br />
Vérifier que la caméra et les accessoires se<br />
trouvent dans l’emballage. Ces composants<br />
sont indiqués ci-<strong>de</strong>ssous :<br />
❚ Aperçu du produit<br />
Voici la caméra dôme à haute résolution<br />
équipée d’une lentille à focal fixe, sans retard<br />
dynamique lors <strong>de</strong> prises <strong>de</strong> vue et présentant<br />
<strong>de</strong>s caractéristiques, comme la réduction<br />
du bruit numérique par compensation <strong>de</strong><br />
défaut du capteur CCD en temps réel et un<br />
obturateur à basse vitesse (OBS : Auto x128)<br />
pour la prise d’images claires <strong>de</strong> qualité, la<br />
compensation <strong>de</strong>s couleurs <strong>de</strong> jour/nuit, etc.<br />
Caméra<br />
Vis <strong>de</strong> montage<br />
Câble <strong>de</strong> l’écran <strong>de</strong> contrôle<br />
Gui<strong>de</strong> <strong>de</strong> l’utilisateur<br />
❚ Caractéristiques principales<br />
Alimentation : 12 V c.c./24 V c.a.<br />
Fonctions spéciales<br />
• Comman<strong>de</strong> <strong>de</strong> verrouillage <strong>de</strong> ligne (VL)<br />
• Balance automatique <strong>de</strong>s blancs<br />
• Inversion d’image horizontale/verticale<br />
• Comman<strong>de</strong> automatique <strong>de</strong> gain<br />
• Comman<strong>de</strong> <strong>de</strong> vitesse <strong>de</strong> l’obturateur à basse<br />
vitesse<br />
• Comman<strong>de</strong> <strong>de</strong> compensation <strong>de</strong> contre-jour<br />
Remarque<br />
Le câble <strong>de</strong> l’écran <strong>de</strong> contrôle est utilisé pour<br />
contrôler la caméra en branchant un écran portatif.<br />
Utiliser le câble <strong>de</strong> type BNC pour brancher la<br />
caméra à un écran <strong>de</strong> surveillance.<br />
6
Composants <strong>de</strong> votre caméra<br />
Votre caméra est composée <strong>de</strong>s éléments suivants :<br />
1. Couvercle en forme <strong>de</strong> dôme : Il recouvre<br />
la lentille et le corps principal <strong>de</strong> façon à les<br />
protéger.<br />
2. Corps principal : Il comprend un objectif,<br />
un panneau <strong>de</strong> comman<strong>de</strong>, un circuit<br />
imprimé, <strong>de</strong>s vis, etc.<br />
3. Languette <strong>de</strong> blocage : Sert à ouvrir et<br />
fermer le dôme <strong>de</strong> recouvrement. Pour<br />
ouvrir le couvercle en forme <strong>de</strong> dôme,<br />
appuyer sur la languette <strong>de</strong> blocage.<br />
4. Vis <strong>de</strong> fixation <strong>de</strong> l’inclin<strong>ais</strong>on : À l’ai<strong>de</strong><br />
<strong>de</strong> cette vis, l’angle d’inclin<strong>ais</strong>on <strong>de</strong> l’objectif<br />
peut être ajusté et fixé.<br />
5. Panneau <strong>de</strong> comman<strong>de</strong> : Il comprend<br />
<strong>de</strong>ux types <strong>de</strong> commutateurs <strong>de</strong> comman<strong>de</strong><br />
: <strong>de</strong>s commutateurs <strong>de</strong> fonction et <strong>de</strong>s<br />
commutateurs <strong>de</strong> comman<strong>de</strong> <strong>de</strong> phase. Le<br />
panneau comporte huit commutateurs <strong>de</strong><br />
fonctions au centre et <strong>de</strong>ux commutateurs<br />
<strong>de</strong> réglage <strong>de</strong> phase <strong>de</strong> chaque côté <strong>de</strong> la<br />
zone <strong>de</strong> commutateurs <strong>de</strong> fonction.<br />
6. Dispositif <strong>de</strong> déverrouillage : Le déplacer<br />
vers l’extérieur et faire pivoter le corps<br />
principal pour le DÉVERROUILLER lorsque<br />
vous désirez retirer le corps principale du<br />
support <strong>de</strong> montage.<br />
7. Support <strong>de</strong> montage : Il est utilisé pour<br />
fixation au plafond ou au mur. Il est fixé<br />
à l’ai<strong>de</strong> <strong>de</strong> trois longues vis <strong>de</strong> montage<br />
fournies dans l’emballage.<br />
8. Capsule amovible pour montage au<br />
plafond : La retirer pour la connecter <strong>de</strong><br />
ligne lorsque la caméra est installée au<br />
plafond.<br />
3<br />
4<br />
1<br />
7<br />
8<br />
2<br />
Objectif<br />
5<br />
6<br />
FRE<br />
7
8<br />
Installation<br />
❚ Réglage <strong>de</strong>s commutateurs<br />
Réglage <strong>de</strong>s commutateurs <strong>de</strong> fonction<br />
Pour régler les fonctions disponibles <strong>de</strong> votre caméra, régler les huit commutateurs comme suit :<br />
DEC<br />
8<br />
7<br />
6<br />
5<br />
4<br />
3<br />
2<br />
1<br />
INC<br />
No. Nom Courte <strong>de</strong>scription<br />
1 VL<br />
Marche/Arrêt (ON/OFF) du verrouillage <strong>de</strong><br />
ligne<br />
2 OBV<br />
Marche/Arrêt (ON/OFF) du mo<strong>de</strong> Sens-up ou<br />
obturateur basse vitesse<br />
3 RENV-H<br />
Marche/Arrêt (ON/OFF) <strong>de</strong> l’inversion<br />
horizontale<br />
4 RENV-V<br />
Marche/Arrêt (ON/OFF) <strong>de</strong> l’inversion<br />
verticale<br />
5 CCJ<br />
Marche/Arrêt (ON/OFF) <strong>de</strong> la compensation<br />
du contre-jour<br />
6 CAG<br />
Marche/Arrêt (ON/OFF) <strong>de</strong> la comman<strong>de</strong><br />
automatique <strong>de</strong> gain<br />
7 J/N<br />
Marche/Arrêt (ON/OFF) <strong>de</strong> la commutation<br />
automatique entre les mo<strong>de</strong>s couleur et noir<br />
et blanc<br />
8 BAB<br />
Marche/Arrêt (ON/OFF) <strong>de</strong> la balance<br />
automatique <strong>de</strong>s blancs<br />
1. Commutateur 1 (VL) : Lorsque ce commutateur est en position Arrêt (OFF), la caméra<br />
fonctionne en mo<strong>de</strong> <strong>de</strong> synchronisation interne alors que lorsque le commutateur est en<br />
position Marche (ON), la caméra fonctionne en mo<strong>de</strong> <strong>de</strong> verrouillage sur la tension<br />
d’alimentation.<br />
En mo<strong>de</strong> <strong>de</strong> synchronisation interne, la caméra utilise toujours un oscillateur à cristal<br />
interne pour la synchronisation. Cependant, si plusieurs caméras sont branchées à un<br />
commutateur séquentiel, un roulement ou une oscillation <strong>de</strong> l’image peut se produire lors<br />
<strong>de</strong> la commutation d’une caméra à l’autre. Dans ce cas, régler le commutateur à la position<br />
Marche (ON) pour remédier à ce problème.<br />
Le mo<strong>de</strong> <strong>de</strong> verrouillage <strong>de</strong> ligne permet à la caméra d’utiliser la phase <strong>de</strong> la tension<br />
d’alimentation c.a. comme référence <strong>de</strong> synchronisation. Dans ce mo<strong>de</strong>, il est possible<br />
d’utiliser les boutons <strong>de</strong> comman<strong>de</strong> <strong>de</strong> phase (RED/AUG).<br />
Remarque<br />
Lors <strong>de</strong> l’utilisation <strong>de</strong> la tension d’alimentation 12 V c.c., régler ce commutateur à Arrêt (OFF). La<br />
fonction <strong>de</strong> verrouillage <strong>de</strong> ligne ne fonctionne pas normalement même si le commutateur est en<br />
position Marche (ON).
Régler le commutateur VL en position Marche (ON) lorsque la tension d’alimentation c.a.<br />
est branchée. En présence <strong>de</strong> roulement d’image, ajuster la phase à l’ai<strong>de</strong> <strong>de</strong>s boutons <strong>de</strong><br />
comman<strong>de</strong> <strong>de</strong> phase. Appuyer sur les boutons AUG ou RED (augmenter ou réduire) pour<br />
augmenter ou réduire la phase d’un <strong>de</strong>gré.<br />
2. Commutateur 2 (OBV) : Ce mo<strong>de</strong> Sens-up gar<strong>de</strong> les champs d’image en mémoire <strong>de</strong> façon<br />
à réduire le bruit, m<strong>ais</strong> augmente la luminosité et le contraste. Lorsque ce commutateur est<br />
en position Marche (ON), la caméra passe automatiquement à un maximum <strong>de</strong> 128 fois la<br />
vitesse d’acquisition d’images <strong>de</strong> façon à obtenir une image claire à partir d’une image plus<br />
sombre.<br />
3. Commutateur 3 (RENV-H) : Lorsque le commutateur est en position Marche (ON), l’image<br />
<strong>de</strong> la caméra est inversée horizontalement. Utiliser cette fonction pour voir une image à<br />
l’endroit lors <strong>de</strong> la surveillance à l’ai<strong>de</strong> d’un miroir.<br />
4. Commutateur 4 (RENV-V) : Lorsque le commutateur est en position Marche (ON), l’image<br />
<strong>de</strong> la caméra est inversée verticalement. Utiliser cette fonction pour voir l’image à l’endroit<br />
lorsque l’image est inversée verticalement par reluctivité.<br />
5. Commutateur 5 (CCJ) : Lorsque le commutateur est en position Marche (ON), une image<br />
nette est visible, même lorsque la caméra fait face à une lumière excessive, comme la<br />
lumière du soleil et la lumière d’un fluorescent. Lorsque le commutateur est en position<br />
Arrêt (OFF), un sujet exposé à une lumière excessive n’est pas visible clairement.<br />
6. Commutateur 6 (CAG) : Lorsque le commutateur est en position Marche (ON), la caméra<br />
augmente automatiquement la sensibilité en amplifiant le signal vidéo lorsque celui-ci est<br />
inférieur à une valeur prédéterminée. Utiliser cette fonction lorsque <strong>de</strong>s images sombres<br />
sont prévues.<br />
7. Commutateur 7 (J/N) : Lorsque le commutateur est en position Marche (ON), la caméra<br />
bascule automatiquement entre le mo<strong>de</strong> couleur et le mo<strong>de</strong> noir et blanc en fonction <strong>de</strong> la<br />
luminosité ambiante.<br />
8. Commutateur 8 (BAB) : Ce commutateur règle la balance <strong>de</strong>s blancs. Lorsque le<br />
commutateur est en position Marche (ON), la caméra fonctionne en mo<strong>de</strong> BA (balance<br />
automatique <strong>de</strong>s blancs). Lorsque le commutateur est en position Arrêt (OFF), la caméra<br />
fonctionne en mo<strong>de</strong> BM (balances manuelle <strong>de</strong>s blancs).<br />
• BA (balance automatique <strong>de</strong>s blancs) : La température <strong>de</strong> couleur est automatiquement se règle<br />
automatiquement en fonction <strong>de</strong> l’environnement. (De 2000°K à 11 000°K environ)<br />
• BM (balance manuelle <strong>de</strong>s blancs) : La température <strong>de</strong> couleur est enregistrée lorsque le commutateur<br />
est mis en position Arrêt (OFF). La température <strong>de</strong> couleur est alors réglée en fonction <strong>de</strong> la valeur<br />
mémorisée.<br />
FRE<br />
9
❚ Branchement <strong>de</strong>s câbles et réglage <strong>de</strong>s commutateurs<br />
Câble BNC<br />
Moniteur<br />
Branchement <strong>de</strong>s câbles<br />
1. Brancher le câble BNC<br />
au connecteur vidéo <strong>de</strong> la<br />
caméra.<br />
2. Brancher le câble BNC<br />
à l’entrée vidéo du<br />
moniteur.<br />
3. Brancher l’adaptateur<br />
d’alimentation au<br />
connecteur d’alimentation<br />
<strong>de</strong> la caméra. L’image <strong>de</strong><br />
la caméra apparaît sur le<br />
moniteur lorsque celui-ci<br />
est mis sous tension.<br />
Vérification du cadrage et réglage <strong>de</strong>s commutateurs<br />
1. Retirer le couvercle en forme <strong>de</strong> dôme. Pour <strong>de</strong> plus amples renseignements sur la métho<strong>de</strong><br />
<strong>de</strong> démontage, se reporter à la Métho<strong>de</strong> d’installation du chapitre Installation page suivante.<br />
2. Régler les fonctions <strong>de</strong> votre caméra à l’ai<strong>de</strong> du panneau <strong>de</strong> comman<strong>de</strong> lorsque l’image<br />
apparaît sur le moniteur.<br />
10
❚ Installation <strong>de</strong> la caméra<br />
Avant l’installation<br />
Avant d’installer votre caméra, lire les consignes suivantes :<br />
• Vérifier que l’emplacement (plafond ou mur) peut supporter cinq fois le poids <strong>de</strong> la caméra.<br />
• Ne pas coincer le câble ou endommager la gaine du cordon d’alimentation, cela pourrait provoquer<br />
une panne ou déclencher un incendie.<br />
• Lors <strong>de</strong> l’installation <strong>de</strong> votre caméra, ne l<strong>ais</strong>ser personne approcher du site d’installation. Déplacer tout<br />
objet <strong>de</strong> valeur du site d’installation.<br />
Métho<strong>de</strong> d’installation<br />
1<br />
2<br />
3<br />
Capsule<br />
amovible pour<br />
montage au<br />
plafond<br />
Installation <strong>de</strong> la caméra<br />
1. Appuyer sur la languette <strong>de</strong> blocage au<br />
bas <strong>de</strong> la caméra et retirer le couvercle<br />
en forme <strong>de</strong> dôme du corps principal<br />
à l’ai<strong>de</strong> <strong>de</strong> votre autre main. Le corps<br />
principal est alors dégagé.<br />
2. Déplacer le dispositif <strong>de</strong> déverrouillage<br />
vers l’extérieur et faire pivoter<br />
le corps principal en position<br />
DÉVERROUILLAGE pour retirer le<br />
support <strong>de</strong> montage, comme sur<br />
l’illustration. Si cela ne s’effectue pas<br />
facilement, faire pivoter le support <strong>de</strong><br />
montage en position <strong>de</strong> verrouillage en<br />
maintenant les petits trous sur le support<br />
<strong>de</strong> montage.<br />
3. Fixer le support <strong>de</strong> montage à<br />
l’emplacement choisit (plafond ou mur) à<br />
l’ai<strong>de</strong> <strong>de</strong>s trois vis <strong>de</strong> montage fournies.<br />
Remarque<br />
L’indication CAMERA FRONT (<strong>de</strong>vant <strong>de</strong> la<br />
caméra) sur le support <strong>de</strong> montage doit<br />
faire face à la zone <strong>de</strong> surveillance <strong>de</strong> la<br />
caméra.<br />
11<br />
FRE
4. Lors <strong>de</strong> l’installation du support <strong>de</strong> montage au plafond, retirer la capsule amovible pour<br />
montage au plafond en appuyant fortement <strong>de</strong>ssus afin <strong>de</strong> brancher la ligne <strong>de</strong> votre<br />
caméra à travers l’ouverture dans le plafond. Dans le cas contraire, utiliser l’espace vi<strong>de</strong><br />
côté opposé <strong>de</strong> l’indication CAMERA FRONT (<strong>de</strong>vant <strong>de</strong> la caméra) pour connecter la ligne.<br />
5. Fixer maintenant le corps principal au support <strong>de</strong> montage en le f<strong>ais</strong>ant pivoter en<br />
position VERROUILLAGE après avoir aligné la languette <strong>de</strong> déverrouillage du corps<br />
principal avec la rainure large autour <strong>de</strong> l’indication CAMERA FRONT (<strong>de</strong>vant <strong>de</strong> la<br />
caméra).<br />
6. Régler la direction <strong>de</strong> la caméra. Pour <strong>de</strong> plus amples renseignements sur la comman<strong>de</strong> <strong>de</strong><br />
direction, se reporter au chapitre Réglage <strong>de</strong> la direction <strong>de</strong> la caméra sur la même page.<br />
7. Fixer enfin le couvercle en forme <strong>de</strong> dôme au corps principal en appuyant <strong>de</strong>ssus<br />
jusqu’au déclic après avoir aligné la large rainure sur la partie inférieure du dôme avec la<br />
languette <strong>de</strong> blocage du corps principal.<br />
12<br />
❚ Réglage <strong>de</strong> la direction <strong>de</strong> la caméra<br />
Lorsque la caméra est fixée au plafond, vous pouvez<br />
régler l’angle <strong>de</strong> prise <strong>de</strong> vues. La caméra peut<br />
pivoter vers la gauche et vers la droite (mouvement<br />
panoramique), et peut s’incliner vers l’avant et vers<br />
l’arrière (inclin<strong>ais</strong>on).<br />
En cas <strong>de</strong> mouvement panoramique, la limite <strong>de</strong> rotation<br />
<strong>de</strong> la caméra est fixée à 340 <strong>de</strong>grés (220 <strong>de</strong>grés dans<br />
le sens <strong>de</strong>s aiguilles d’une montre et 120 <strong>de</strong>grés dans le<br />
sens contraire <strong>de</strong>s aiguilles d’une montre).<br />
La rotation est arrêtée par la butée à l’intérieur <strong>de</strong> la<br />
caméra. Pour comman<strong>de</strong>r le mouvement panoramique,<br />
d’abord <strong>de</strong>sserrer les <strong>de</strong>ux vis du bas et faire pivoter<br />
dans la direction voulue, puis les resserrer pour fixer la<br />
Inclin<strong>ais</strong>on<br />
Mouvement panoramique<br />
Rotation <strong>de</strong> l’objectif<br />
caméra. Si les <strong>de</strong>ux vis ne peuvent être serrées, changer l’emplacement <strong>de</strong> ces vis.<br />
Serrer seulement une vis est acceptable si vous n’avez d’autres choix.<br />
En cas d’inclin<strong>ais</strong>on, changer l’inclin<strong>ais</strong>on <strong>de</strong> la caméra <strong>de</strong> zéro à 90 <strong>de</strong>grés. Lorsque<br />
l’angle d’inclin<strong>ais</strong>on est inférieur à 23 <strong>de</strong>grés, une portion <strong>de</strong> l’image peut être masquée.<br />
Fixer l’inclin<strong>ais</strong>on après avoir réglé l’angle d’inclin<strong>ais</strong>on à l’ai<strong>de</strong> <strong>de</strong>s vis <strong>de</strong> fixation <strong>de</strong><br />
l’inclin<strong>ais</strong>on.<br />
Pour faire la mise au point, tourner l’objectif fixe afin d’obtenir une image nette. Lorsque<br />
la caméra est installée sur un plafond ou un mur incliné, l’objectif <strong>de</strong> la caméra peut être<br />
tourné pour obtenir une image dans la bonne direction.
<strong>SCC</strong>-B531X<br />
FRE<br />
13
Annexe A : Caractéristiques pour la norme NTSC<br />
Article<br />
Description<br />
Type <strong>de</strong> produit Caméra dôme couleur <strong>de</strong> télévision en circuit fermé<br />
Entrée d’alimentation 24 V c.a. ±10 % (60 Hz ± 0,3 Hz), 12 V c.c. +10 %/-5 %<br />
Système <strong>de</strong> diffusion Système couleur standard NTSC (525 lignes, 60 trames)<br />
Consommation d’électricité Environ 1,6 W<br />
Dispositif d’imagerie CCD Super-HAD <strong>de</strong> type IT <strong>de</strong> 1/3 po<br />
<strong>SCC</strong>-B5311N, B5313N, B5315N<br />
<strong>SCC</strong>-B5310N<br />
Nombre <strong>de</strong> pixels<br />
Total: 811(H) x 508(V), 410 000 pixels<br />
Effective: 768(H) x 494(V), 380 000 pixels<br />
Total: 537(H) x 505(V), 270 000 pixels<br />
Effective: 510(H) x 492(V), 250 000 pixels<br />
Mo<strong>de</strong> <strong>de</strong> balayage 525 lignes, rapport d’entrelacement 2:1<br />
Fréquence <strong>de</strong> ligne<br />
d’analyse<br />
Horizontal: 15,734 Hz(INT)/15,750 Hz(VL)<br />
Vertical: 59,94 Hz(INT)/60 Hz(VL)<br />
Mo<strong>de</strong> <strong>de</strong> synchronisation Verrouillage INT/ligne (réglage <strong>de</strong> phase à l’ai<strong>de</strong> <strong>de</strong>s boutons AUG/RED)<br />
Résolution horizontale<br />
<strong>SCC</strong>-B5311N, B5313N, B5315N<br />
<strong>SCC</strong>-B5310N<br />
540 lignes TV 330 lignes TV<br />
<strong>SCC</strong>-B5311N, B5313N, B5315N <strong>SCC</strong>-B5310N<br />
50IRE 1Lux 0,6Lux<br />
Sens-up Off 30IRE 0,6Lux 0,4Lux<br />
15IRE 0,3Lux 0,2Lux<br />
Luminosité minimale<br />
<strong>de</strong>s objets<br />
Signal <strong>de</strong> sortie<br />
Objectif<br />
F2,0<br />
50IRE 0,008Lux 0,005Lux<br />
Sens-up x128 30IRE 0,005Lux 0,003Lux<br />
15IRE 0,002Lux 0,001Lux<br />
Sortie vidéo COMPOSITE (1,0 Vc-à-c, 75 ohms, BNC), sortie moniteur OUT (1,0 Vc-à-c, 75 ohm , câble <strong>de</strong> f<strong>ais</strong>ceau)<br />
Distance focale Zone Limite d’angle <strong>de</strong> prise <strong>de</strong> vue Modèle<br />
3,0mm<br />
Horizontal<br />
Vertical<br />
92°<br />
72°<br />
<strong>SCC</strong>-B5313N<br />
3,8mm<br />
Horizontal<br />
Vertical<br />
71°<br />
53°<br />
<strong>SCC</strong>-B5310N,<br />
B5311N<br />
8,0mm<br />
Horizontal<br />
Vertical<br />
33,6°<br />
25,3°<br />
<strong>SCC</strong>-B5315N<br />
Angle <strong>de</strong> rotation : 0 à 340° (220 <strong>de</strong>grés dans le sens d’une aiguille d’une montre et 120<br />
<strong>de</strong>grés dans le sens inverse d’une aiguille d’une montre)<br />
Fonction <strong>de</strong> mouvement<br />
panoramique<br />
Fonction d’inclin<strong>ais</strong>on Angle d’inclin<strong>ais</strong>on : 0 à 90°<br />
14
Article<br />
Description<br />
Verrouillage <strong>de</strong> ligne (VL)<br />
Sens-up, Obturateur basse vitesse (OBV)<br />
Inversion horizontale (RENV-H)<br />
Inversion verticale (RENV-V)<br />
Comman<strong>de</strong>s<br />
Compensation <strong>de</strong> contre-jour (CCJ)<br />
Comman<strong>de</strong> automatique <strong>de</strong> gain (CAG)<br />
Commutation entre les mo<strong>de</strong>s couleur et noir et blanc lors du passage <strong>de</strong> jour à nuit (J/N)<br />
Balance automatique <strong>de</strong>s blancs (BAB)<br />
Réduction du bruit numérique (RBN)<br />
Compensation dynamique <strong>de</strong> défaut du capteur CCD<br />
couleur <strong>de</strong> produit<br />
<strong>SCC</strong>-B531xN : Blanc / <strong>SCC</strong>-B531xBN : noir<br />
Température <strong>de</strong> fonctionnement -10°C à +50°C<br />
Humidité <strong>de</strong> fonctionnement Jusqu’à 90 %<br />
Dimensions<br />
102(Ø) x 78(H)mm<br />
Poids<br />
190g<br />
FRE<br />
15
Annexe B : Caractéristiques pour la norme PAL<br />
Article<br />
Description<br />
Type <strong>de</strong> produit Caméra dôme couleur <strong>de</strong> télévision en circuit fermé<br />
Entrée d’alimentation 24 V c.a. ±10 % (50 Hz ±0,3 Hz), 12 V c.c. +10 %/-5 %<br />
Système <strong>de</strong> diffusion Système couleur <strong>de</strong> norme PAL (625 Lignes, 50 trames)<br />
Consommation d’électricité Environ 1,6 W<br />
Dispositif d’imagerie CCD Super-HAD <strong>de</strong> type IT <strong>de</strong> 1/3 po.<br />
<strong>SCC</strong>-<strong>B5311P</strong>, B5313P, B5315P<br />
<strong>SCC</strong>-B5310P<br />
Nombre <strong>de</strong> pixels<br />
Total: 795(H) x 596(V), 470 000 pixels<br />
Effective: 752(H) x 582(V), 440 000 pixels<br />
Total: 537(H) x 597(V), 320 000 pixels<br />
Effective: 500(H) x 582(V), 290 000 pixels<br />
Mo<strong>de</strong> <strong>de</strong> balayage 625 lignes, rapport d’entrelacement 2:1<br />
Fréquence <strong>de</strong> ligne<br />
d’analyse<br />
Horizontal: 15,625 Hz(INT)/15,625 Hz(VL)<br />
Vertical: 50 Hz(INT)/50 Hz(VL)<br />
Mo<strong>de</strong> <strong>de</strong> synchronisation Verrouillage INT/ligne (réglage <strong>de</strong> phase à l’ai<strong>de</strong> <strong>de</strong>s boutons AUG/RED)<br />
Résolution horizontale<br />
<strong>SCC</strong>-<strong>B5311P</strong>, B5313P, B5315P<br />
<strong>SCC</strong>-B5310P<br />
540 lignes TV 330 lignes TV<br />
<strong>SCC</strong>-<strong>B5311P</strong>, B5313P, B5315P <strong>SCC</strong>-B5310P<br />
50IRE 1Lux 0,6Lux<br />
Sens-up Off<br />
30IRE 0,6Lux 0,4Lux<br />
15IRE 0,3Lux 0,2Lux<br />
Luminosité minimale<br />
<strong>de</strong>s objets<br />
Signal <strong>de</strong> sortie<br />
Objectif<br />
F2,0<br />
50IRE 0,008Lux 0,005Lux<br />
Sens-up x128<br />
30IRE 0,005Lux 0,003Lux<br />
15IRE 0,002Lux 0,001Lux<br />
Sortie vidéo COMPOSITE (1,0 Vc-à-c, 75 ohms, BNC), sortie moniteur OUT (1,0 Vc-à-c, 75 ohm , câble <strong>de</strong> f<strong>ais</strong>ceau)<br />
Distance focale Zone Limite d’angle <strong>de</strong> prise <strong>de</strong> vue Modèle<br />
3,0mm<br />
Horizontal<br />
Vertical<br />
92°<br />
72°<br />
<strong>SCC</strong>-B5313P<br />
3,8mm<br />
Horizontal<br />
Vertical<br />
71°<br />
53°<br />
<strong>SCC</strong>-B5310P, <strong>B5311P</strong><br />
8,0mm<br />
Horizontal<br />
Vertical<br />
33,6°<br />
25,3°<br />
<strong>SCC</strong>-B5315P<br />
Angle d’inclin<strong>ais</strong>on : 0 à 340° (220 <strong>de</strong>grés dans le sens d’une aiguille d’une montre et 120<br />
<strong>de</strong>grés dans le sens inverse d’une aiguille d’une montre)<br />
Fonction <strong>de</strong> mouvement<br />
panoramique<br />
Fonction d’inclin<strong>ais</strong>on Angle d’inclin<strong>ais</strong>on : 0 à 90°<br />
16
Article<br />
Description<br />
Verrouillage <strong>de</strong> ligne (VL)<br />
Sens-up, Obturateur basse vitesse (OBV)<br />
Inversion horizontale (RENV-H)<br />
Inversion verticale (RENV-V)<br />
Comman<strong>de</strong>s<br />
Compensation <strong>de</strong> contre-jour (CCJ)<br />
Comman<strong>de</strong> automatique <strong>de</strong> gain (CAG)<br />
Commutation entre les mo<strong>de</strong>s couleur et noir et blanc lors du passage <strong>de</strong> jour à nuit (J/N)<br />
Balance automatique <strong>de</strong>s blancs (BAB)<br />
Réduction du bruit numérique (RBN)<br />
Compensation dynamique <strong>de</strong> défaut du capteur CCD<br />
couleur <strong>de</strong> produit<br />
<strong>SCC</strong>-B531xP : Blanc / <strong>SCC</strong>-B531xBP : noir<br />
Température <strong>de</strong> fonctionnement -10°C à +50°C<br />
Humidité <strong>de</strong> fonctionnement Jusqu’à 90 %<br />
Dimensions<br />
102(Ø) x 78(H)mm<br />
Poids<br />
190g<br />
FRE<br />
17
Cámara digital a color <strong>de</strong> tipo domo Guía<strong>de</strong>l Usuario<br />
<strong>SCC</strong>-B531x(B)<br />
SPA
Precauciones <strong>de</strong> seguridad<br />
PRECAUCIÓN<br />
NO ABRIR RIESGODE SUFRIR<br />
UNA DESCARGA ELÉCTRICA<br />
PRECAUCIÓN: PARA REDUCIR EL RIESGO DE SUFRIR<br />
UNA DESCARGA ELÉCTRICA, NO EXTRAIGA LA CUBIERTA<br />
POSTERIOR. DENTRO NO HAY PIEZAS QUE PUEDAN SER<br />
REPARADAS POR EL USUARIO. REMITA EL APARATO A<br />
PERSONAL DE MANTENIMIENTO CUALIFICADO.<br />
2<br />
Este símbolo indica que <strong>de</strong>ntro <strong>de</strong>l<br />
aparato hay alto voltaje. Es peligroso<br />
tener cualquier tipo <strong>de</strong> contacto con<br />
cualquier parte <strong>de</strong>l interior <strong>de</strong> este<br />
producto.<br />
Este símbolo le advierte <strong>de</strong> que este<br />
aparato incluye información importante<br />
relacionada con su funcionamiento y<br />
mantenimiento.<br />
Para evitar que el aparato sufra daños, lo<br />
que pue<strong>de</strong> provocar peligro <strong>de</strong> incendio o <strong>de</strong><br />
sufrir una <strong>de</strong>scarga eléctrica, no exponga este<br />
aparato a la lluvia ni a la humedad.<br />
ADVERTENCIA<br />
1. Asegúrese <strong>de</strong> utilizar únicamente el<br />
adaptador estándar que se indica en la<br />
hoja <strong>de</strong> especificaciones. Utilizar cualqueir<br />
otro adaptador pue<strong>de</strong> provocar un<br />
incendio, el riesgo <strong>de</strong> sufrir una <strong>de</strong>scarga<br />
eléctrica o pue<strong>de</strong> dañar el producto.<br />
2. Conectar <strong>de</strong> manera incorrecta el<br />
suministro <strong>de</strong> energía o cambiar las<br />
baterías <strong>de</strong> manera incorrecta pue<strong>de</strong><br />
producir explosiones, incendios, el riesgo<br />
<strong>de</strong> sufrir una <strong>de</strong>scarga eléctrica o pue<strong>de</strong><br />
dañar el producto.<br />
3. No conecte varias cámaras a un único<br />
adaptador. Superar la capacidad pue<strong>de</strong><br />
generar calor <strong>de</strong> manera anormal o crear<br />
un incendio.<br />
4. Enchufe <strong>de</strong> manera segura el cable <strong>de</strong><br />
alimentación en la toma <strong>de</strong> corriente. Una<br />
conexión no segura pue<strong>de</strong> provocar un<br />
incendio.<br />
5. Al instalar la cámara, ajústela firmemente<br />
y <strong>de</strong> manera segura. La caída <strong>de</strong> una<br />
cámara pue<strong>de</strong> causar daños personales.<br />
6. No coloque objetos conductores (p. ej.<br />
<strong>de</strong>stornilladores, monedas, objetos <strong>de</strong> metal,<br />
etc.) o recipientes que contengan agua<br />
sobre la cámara. Se pue<strong>de</strong>n producir daños<br />
personales <strong>de</strong>bido a incendios, <strong>de</strong>scargas<br />
eléctricas u objetos que se caigan.<br />
7. No instale el aparato en lugares húmedos,<br />
cubiertos <strong>de</strong> polvo o <strong>de</strong> hollín. Podría<br />
producirse un incendo o el riesgo <strong>de</strong> sufrir<br />
una <strong>de</strong>scarga eléctrica.<br />
8. Si la unidad <strong>de</strong>spren<strong>de</strong> un olor u humo<br />
inusual, <strong>de</strong>je <strong>de</strong> utilizar el aparato. En<br />
caso <strong>de</strong> que esto ocurra, <strong>de</strong>sconecte<br />
inmediatamente la fuente <strong>de</strong> energía y<br />
póngase en contacto con el servicio técnico.<br />
El uso continuado <strong>de</strong>l aparato en esas<br />
condiciones pue<strong>de</strong> provocar un incendio o<br />
el riesgo <strong>de</strong> sufrir una <strong>de</strong>scarga eléctrica.
9. Si este producto <strong>de</strong>ja <strong>de</strong> funcionar con<br />
normalidad, póngase en contacto con el<br />
servicio técnico más cercano. Nunca intente<br />
<strong>de</strong>smontar o modificar este producto <strong>de</strong><br />
ninguna manera. (SAMSUNG no se hace<br />
responsable <strong>de</strong> los problemas producidos<br />
por modificaciones no autorizadas o por<br />
intentos <strong>de</strong> reparaciones.)<br />
10. Al limpiar el producto, no rocíe sus piezas<br />
directamente con agua. Podría producirse<br />
un incendo o el riesgo <strong>de</strong> sufrir una<br />
<strong>de</strong>scarga eléctrica.<br />
PRECAUCIÓN<br />
1. No <strong>de</strong>je objetos sobre el producto ni aplique<br />
una fuerte presión sobre él. Manténgalo<br />
lejos <strong>de</strong> lugares sujetos una <strong>de</strong>masiadas<br />
vibraciones o a interferencias magnéticas.<br />
2. No lo instale en lugares con temperaturas<br />
elevadas (más <strong>de</strong> 50°C), temperaturas bajas<br />
(menos <strong>de</strong> -10°C) o humedad elevada.<br />
Podría producirse un incendo o el riesgo <strong>de</strong><br />
sufrir una <strong>de</strong>scarga eléctrica.<br />
3. Si <strong>de</strong>sea cambiar <strong>de</strong> ubicación el aparato<br />
ya instalado, asegúrese <strong>de</strong> <strong>de</strong>sconectar<br />
el suministro <strong>de</strong> energía. Una vez esté<br />
<strong>de</strong>sconectado, mueva el aparato o vuelva a<br />
instalarlo.<br />
4. Desconecte el enchufe <strong>de</strong> la toma <strong>de</strong><br />
corriente cuando hay rayos. Si no lo hace,<br />
pue<strong>de</strong> producirse un incendio o el aparato<br />
pue<strong>de</strong> dañarse.<br />
5. Mantenga el aparato alejado <strong>de</strong> la luz solar<br />
directa y <strong>de</strong> las fuentes que irradien calor.<br />
Se pue<strong>de</strong> producir un incendio.<br />
6. Instale el aparato en un lugar bien ventilado.<br />
7. Evite dirigir la cámara directamente hacia<br />
objetos extremadamente brillantes como,<br />
por ejemplo, el sol, puesto que pue<strong>de</strong> dañar<br />
el sensor <strong>de</strong> imagen CCD.<br />
8. No <strong>de</strong>be exponer el aparato a gotas ni<br />
salpicaduras <strong>de</strong> agua ni a objetos con<br />
líquido, como jarrones, evitando colocarlos<br />
sobre el aparato.<br />
9. El enchufe principal se utiliza como un<br />
dispositivo <strong>de</strong> <strong>de</strong>sconexión y <strong>de</strong>be tenerlo a<br />
mano en cualquier momento.<br />
Declaración <strong>de</strong> la Comisión<br />
Fe<strong>de</strong>ral <strong>de</strong> Comunicaciones <strong>de</strong><br />
Estados Unidos <strong>de</strong> América (FCC)<br />
Este aparato cumple con la parte 15 <strong>de</strong> la<br />
normativa <strong>de</strong> la FCC. El funcionamiento está<br />
sujeto a las dos condiciones siguientes:<br />
1) Este aparato no pue<strong>de</strong> producir<br />
interferencias perjudiciales y<br />
2) Este aparato <strong>de</strong>be aceptar cualquier<br />
interferencia recibida, incluidas las<br />
interferencias que puedan provocar un<br />
funcionamiento incorrecto.<br />
Nota<br />
Este aparato ha sido probado y se ha <strong>de</strong>terminado<br />
que se encuentra <strong>de</strong>ntro <strong>de</strong> los límites para<br />
ser clasificado como un aparato digital <strong>de</strong><br />
Clase A, <strong>de</strong> conformidad a la parte 15 <strong>de</strong> la<br />
normativa <strong>de</strong> la FCC. Estos límites se han fijado<br />
para ofrecer protección suficiente contra las<br />
interferencias perjudiciales cuando el equipo<br />
está en funcionamiento en un entorno comercial.<br />
Este aparato genera, utiliza y pue<strong>de</strong> irradiar<br />
energía por radiofrecuencias y si no es instalado<br />
y utilizado siguiendoel manual <strong>de</strong> instrucciones,<br />
pue<strong>de</strong> producir interferencias perjudiciales para<br />
las comunicaciones por radio. Es probable que<br />
el funcionamiento <strong>de</strong> este equipo en una zona<br />
resi<strong>de</strong>ncial provoque interferencias perjudiciales.<br />
En ese caso, el usuario tendrá que hacerse cargo<br />
<strong>de</strong> los gastos que conlleve corregir la emisión <strong>de</strong><br />
interferencias.<br />
SPA<br />
3
Instrucciones <strong>de</strong> seguridad importantes<br />
1. Lea estas instrucciones.<br />
2. Consérvelas.<br />
3. Preste atención a todas las advertencias.<br />
4. Siga todas las instrucciones.<br />
5. No utilice este aparato cerca <strong>de</strong>l agua.<br />
6. Límpielo únicamente con un paño seco.<br />
7. No obstruya ninguna abertura <strong>de</strong> ventilación.<br />
Instale el aparato siguiendo las instrucciones<br />
<strong>de</strong>l fabricante.<br />
8. No lo instale cerca <strong>de</strong> ninguna fuente <strong>de</strong><br />
calor como radiadores, focos <strong>de</strong> calor<br />
o cualquier otro aparato (incluidos los<br />
amplificadores) que emita calor.<br />
9. No olvi<strong>de</strong> que la finalidad <strong>de</strong> los enchufes<br />
polarizados o <strong>de</strong> toma a tierra es<br />
proporcionarle seguridad. Un enchufe<br />
polarizado tiene dos clavijas, una más<br />
ancha que la otra. Un enchufe con toma<br />
a tierra tiene dos clavijas y una tercera <strong>de</strong><br />
toma a tierra. Tanto la clavija más ancha,<br />
en el caso <strong>de</strong>l enchufe polarizado, como la<br />
clavija adicional, en el caso <strong>de</strong>l enchufe con<br />
toma a tierra, tienen como objetivo aportarle<br />
seguridad. Si el encufe <strong>de</strong>l aparato no<br />
encaja en su toma <strong>de</strong> corriente, póngase en<br />
contacto con un electricista para cambiar la<br />
toma <strong>de</strong> corriente obsoleta.<br />
10. Evite pisar o doblar el cable <strong>de</strong> alimentación.<br />
Ponga especial cuidado para no hacerlo<br />
en enchufes, tomas <strong>de</strong> corriente y en los<br />
puntos en los que salen <strong>de</strong>s<strong>de</strong> el aparato.<br />
11. Utilice únicamente los dispositivos y<br />
accesorios especificados por el fabricante.<br />
12. Utilice únicamente la carretilla,<br />
plataforma, trípo<strong>de</strong>, soporte<br />
o mesa especificados por el<br />
fabricante o suministrados junto<br />
con el equipo.<br />
13. Desenchufe el aparato cuando no se vaya<br />
a utilizar. Cuando se utilice una carretilla,<br />
tenga cuidado al mover la carretilla junto con<br />
el aparato con el fin <strong>de</strong> evitar heridas <strong>de</strong>bido<br />
a que la carretilla vuelca.<br />
14. Remita todas las reparaciones a personal<br />
<strong>de</strong> mantenimiento cualificado. Es necesario<br />
enviar el aparato para su reparación cuando<br />
ha sufrido cualquier tipo <strong>de</strong> daño, como,<br />
por ejemplo, que el cable o el enchufe<br />
<strong>de</strong> la alimentación está dañado, se han<br />
<strong>de</strong>rramado líquidos sobre el aparato o<br />
algún objeto ha caído sobre él, el aparato<br />
ha sido expuesto a la lluvia o a humedad,<br />
no funciona correctamente o se ha caído al<br />
suelo.<br />
4
Contenidos<br />
Vista preliminar ........................................................................ 6<br />
Sobre esta guía ..............................................................................6<br />
Vista preliminar <strong>de</strong>l producto .......................................................6<br />
Principales funciones ...................................................................6<br />
Componentes .................................................................................6<br />
Comprobación <strong>de</strong> los componentes <strong>de</strong>l paquete .......................6<br />
Componentes <strong>de</strong> la cámara .......................................................7<br />
Instalación .................................................................................. 8<br />
Ajuste <strong>de</strong> interruptores .................................................................8<br />
Ajuste <strong>de</strong> interrupores <strong>de</strong> función ..............................................8<br />
Conexión <strong>de</strong> cables y configuración <strong>de</strong> interruptores ............10<br />
Instalación <strong>de</strong> la cámara ............................................................. 11<br />
Antes <strong>de</strong> la instalación ............................................................. 11<br />
Procedimiento <strong>de</strong> instalación ................................................... 11<br />
Ajuste <strong>de</strong> la dirección <strong>de</strong> la cámara ...........................................12<br />
Apéndice A: Especificaciones para el estándar NTSC ... 13<br />
SPA<br />
Apéndice B: Especificaciones para el estándar PAL ...... 15<br />
5
Vista preliminar<br />
❚ Sobre esta guía<br />
Esta guía <strong>de</strong> usuario incluye instrucciones<br />
básicas <strong>de</strong>l aparato. Se recomienda que<br />
todos los usuarios lean esta guía antes <strong>de</strong><br />
utilizarlo.<br />
Esta guía se divi<strong>de</strong> en:<br />
Capítulo 1, “Vista preliminar”, presenta a la guía <strong>de</strong>l<br />
usuario y a la información relacionada con el aparato.<br />
(Este capítulo)<br />
Capítulo , “Instalación”, explica cómo configurar e<br />
instalar el aparato.<br />
Apéndice, “Especificaciones”, indica las<br />
especificaciones <strong>de</strong>l producto.<br />
❚ Vista preliminar <strong>de</strong>l producto<br />
Esta es la cámara <strong>de</strong> tipo domo <strong>de</strong> alta<br />
resolución que incluye una lente focal fija,<br />
sin retraso dinámico al captar imágenes<br />
en movimiento y con funciones como<br />
reducción digital <strong>de</strong> ruidos (DNR) mediante<br />
compensación <strong>de</strong> <strong>de</strong>fectos CCD en tiempo<br />
real, obturador a baja velocidad (LSS: Auto<br />
x 128) para añadir una nítida calidad <strong>de</strong><br />
imagen, compensación <strong>de</strong> color Día y Noche<br />
y otro tipo <strong>de</strong> funciones.<br />
❚ Principales funciones<br />
Corriente: 12 VCC/24 VCA<br />
Funciones especiales<br />
• Control <strong>de</strong>l sincronismo <strong>de</strong> línea (LL)<br />
• Autobalance <strong>de</strong> blancos<br />
• Inversión <strong>de</strong> la imagen en horizontal o en vertical<br />
• Control automático <strong>de</strong> ganancia<br />
• Control <strong>de</strong> la velocidad baja <strong>de</strong>l obturador<br />
• Control <strong>de</strong> compensación <strong>de</strong> contraluz<br />
• Cambio automático entre los modos a color y<br />
blanco y negro<br />
• Reducción digital <strong>de</strong> ruidos (DNR)<br />
6<br />
• Compensación <strong>de</strong> <strong>de</strong>fectos dinámica CCD<br />
❚ Componentes<br />
Comprobación <strong>de</strong> los componentes <strong>de</strong>l paquete<br />
Compruebe que su cámara y accesorios<br />
están incluidos en la caja. Los componentes<br />
son los siguientes:<br />
Cámara<br />
Tornillos<br />
Cable para probar el monitor<br />
Guía <strong>de</strong> usuario<br />
Nota<br />
El cable para probar el monitor se utiliza para<br />
probar la cámara conectándola a un monitor<br />
portátil. Si realmente <strong>de</strong>sea conectar la cámara a<br />
una pantalla, utilice el cable BNC.
Componentes <strong>de</strong> la cámara<br />
La cámara tiene los siguientes componentes:<br />
1<br />
3<br />
2<br />
Lente<br />
5<br />
4<br />
6<br />
7<br />
8<br />
1. Cubierta tipo domo: Cubre la lente y el<br />
cuerpo principal, protegiéndolos.<br />
2. Cuerpo principal: Incluye una lenta,<br />
un cuadro <strong>de</strong> control, una placa PCI,<br />
tornillos y similares.<br />
3. Cierre: Utilizado para abrir o cerrar la<br />
cubierta tipo domo. Para abrir la cubierta<br />
tipo domo, pulse el cierre.<br />
4. Tornillo <strong>de</strong> ajuste <strong>de</strong> la inclinación:<br />
Con este tornillo se pue<strong>de</strong> ajustar y<br />
configurar la inclinación <strong>de</strong> la lente.<br />
5. Cuadro <strong>de</strong> control: Incluye dos tipos <strong>de</strong><br />
interruptores <strong>de</strong> control: interruptores <strong>de</strong><br />
función e interruptores <strong>de</strong> control <strong>de</strong> fase.<br />
El cuadro tiene ocho interruptores <strong>de</strong><br />
función en la zona central y dos botones<br />
<strong>de</strong> control <strong>de</strong> fase a cada lado <strong>de</strong> la zona<br />
en la que se encuentran los interruptores<br />
<strong>de</strong> función.<br />
6. Separador <strong>de</strong>l cierre: Púlselo hacia<br />
afuera y gire el cuerpo principal hacia<br />
la dirección UNLOCK (DESBLOQUEO)<br />
cuando <strong>de</strong>see separar el soporte para<br />
montaje <strong>de</strong>l cuerpo principal.<br />
7. Soporte para montaje: Se utiliza como<br />
un soporte para el montaje en el techo<br />
o en la pared. Se ajusta con tres largos<br />
tornillos incluidos en la caja.<br />
8. Apertura <strong>de</strong>l montaje en el techo:<br />
Quítela para conectar la línea al techo al<br />
instalar el aparato en el techo.<br />
SPA<br />
7
8<br />
Instalación<br />
❚ Ajuste <strong>de</strong> interruptores<br />
Ajuste <strong>de</strong> interrupores <strong>de</strong> función<br />
Para ajustar las funciones disponibles <strong>de</strong> su cámara, ajuste los ochos interruptores <strong>de</strong> la<br />
siguiente manera:<br />
DEC<br />
8<br />
7<br />
6<br />
5<br />
4<br />
3<br />
2<br />
1<br />
INC<br />
Núm. Nombre<br />
Breve <strong>de</strong>scripción<br />
1 LL<br />
Sincronismo <strong>de</strong> línea, ACTIVAR/<br />
DESACTIVAR<br />
2 LSS<br />
Sensibilidad u Obturador a baja<br />
velocidad, ACTIVAR/DESACTIVAR<br />
3 H-REV Inversión horizontal, ACTIVAR/DESACTIVAR<br />
4 V-REV Inversión vertical, ACTIVAR/DESACTIVAR<br />
5 BLC<br />
Compensación <strong>de</strong> contraluz, ACTIVAR/<br />
DESACTIVAR<br />
6 AGC<br />
Control automático <strong>de</strong> ganancia,<br />
ACTIVAR/DESACTIVAR<br />
7 D/N<br />
Cambio automático entre color y blanco y<br />
negro, ACTIVAR/DESACTIVAR<br />
8 AWB<br />
Autobalance <strong>de</strong> blancos, ACTIVAR/<br />
DESACTIVAR<br />
1. Interruptor 1 (LL): Cuando este interruptor está en la posición OFF (DESACTIVADO), la<br />
cámara funciona en el modo <strong>de</strong> sincronización interno, mientras que cuando está en la<br />
posición ON (ACTIVADO), la cámara funciona en el modo <strong>de</strong> sincronismo <strong>de</strong> línea.<br />
En el modo <strong>de</strong> sincronización interna, la cámara siempre utiliza un oscilador interno<br />
<strong>de</strong> cristal para la sincronización. Sin embargo, si hay varias cámaras conectadas a un<br />
conmutador secuencial, se pue<strong>de</strong> producir un movimiento <strong>de</strong> barrido o pue<strong>de</strong>n aparecer<br />
<strong>de</strong>stellos al cambiar <strong>de</strong> una cámara a otra. En este caso, se pue<strong>de</strong> ajustar este interruptor<br />
en la posición ON (ACTIVADO) para resolver este problema.<br />
El modo <strong>de</strong> sincronismo <strong>de</strong> línea permite a la cámara utilizar la fase <strong>de</strong> la corriente CA<br />
como la referencia <strong>de</strong> sincronización. En este modo, pue<strong>de</strong> utilizar los botones <strong>de</strong> control<br />
<strong>de</strong> base (INC/DEC).<br />
Nota<br />
Cuando se utiliza la corriente <strong>de</strong> 12 VCC, ajuste este interruptor a OFF (DESACTIVADO). La función<br />
<strong>de</strong> sincronismo <strong>de</strong> línea no funcionará correctamente aunque el interruptor esté en la posición ON<br />
(ACTIVADO).
Ajuste el interruptor LL en la posición ON (ACTIVADO) mientras la corriente CA está conectada.<br />
Si se produce algún movimiento <strong>de</strong> barrido en la imagen, tiene que ajustar la fase mediante los<br />
botones <strong>de</strong> control <strong>de</strong> fase. Pulse el botón INC o DEC para aumentar o disminuir la fase en un<br />
grado.<br />
2. Interruptor 2 (LSS): Este modo <strong>de</strong> sensibilidad acumula los campos <strong>de</strong> la imagen en la<br />
memoria para reducir el ruido pero aumenta el brillo y el contraste. Cuando este interruptor<br />
se encuentra en la posición ON (ACTIVADO), la cámara pasa automáticamente a una<br />
velocidad máxima <strong>de</strong> captura <strong>de</strong> imágenes <strong>de</strong> 128 veces para obtener una imagen clara <strong>de</strong><br />
una imagen oscura.<br />
3. Interruptor 3 (H-REV): Cuando este interruptor está en la posición ON (ACTIVADO), la<br />
imagen <strong>de</strong> la cámara se invierte horizontalmente. Si quiere vigilar un lugar utilizando un<br />
espejo, pue<strong>de</strong> utilizar esta función para ver la imagen correcta.<br />
4. Interruptor 4 (V-REV): Cuando este interruptor está en la posición ON (ACTIVADO),<br />
la imagen <strong>de</strong> la cámara se invierte verticalmente. Si la cámara suele mostrar la imagen<br />
invertida verticalmente, pue<strong>de</strong> utilizar esta función para ver la imagen correcta.<br />
5. Interruptor 5 (BLC): Cuando este interruptor se encuentra en la posición ON (ACTIVADO),<br />
se pue<strong>de</strong> observar una imagen clara aunque la cámara esté enfocando entornos con<br />
excesiva luz, como la luz <strong>de</strong>l sol o la luz fluorescente. Cuando se encuentra en la posición<br />
OFF (DESACTIVADO), la imagen enfocada con excesiva luz no se pue<strong>de</strong> ver con claridad.<br />
6. Interruptor 6 (AGC): Cuando este interruptor se encuentra en la posición ON (ACTIVADO),<br />
la cámara aumenta <strong>de</strong> manera automática la sensibilidad mediante la amplificación <strong>de</strong> la<br />
señal <strong>de</strong> vi<strong>de</strong>o cuando la intensidad <strong>de</strong> la seál se encuentra por <strong>de</strong>bajo <strong>de</strong> <strong>de</strong>terminado<br />
valor. Utilice esta función cuando crea que se van a observar imágenes oscuras.<br />
7. Interruptor 7 (D/N): Cuando este interruptor se encuentra en la posición ON (ACTIVADO),<br />
la cámara alterna automáticamente entre color y blanco y negro según sea el brillo <strong>de</strong>l<br />
entorno.<br />
8. Interruptor 8 (AWB): Este interruptor ajusta el balance <strong>de</strong> blancos. Cuando este interruptor<br />
se encuentra en la posición ON (ACTIVADO), la cámara funciona en modo ATW y si está en<br />
posición OFF (DESACTIVADO), la cámara funciona en modo AWC.<br />
• ATW (Autoajuste <strong>de</strong>l balance <strong>de</strong> blancos): La temperatura <strong>de</strong> color se ajusta <strong>de</strong> manera automática<br />
según los cambios <strong>de</strong>l entorno. (Aprox. 2.000°K to 11.000°K)<br />
• AWC (Control <strong>de</strong>l autobalance <strong>de</strong> blancos): Guarda la temperatura <strong>de</strong> color en el momento en el que el<br />
interruptor se coloca en la posición OFF (DESACTIVADO). Por consiguiente, las temperaturas <strong>de</strong> color<br />
se ajustan según el valor guardado.<br />
SPA<br />
9
❚ Conexión <strong>de</strong> cables y configuración <strong>de</strong> interruptores<br />
Cable BNC<br />
Monitor<br />
Para conectar los cables<br />
1. Conecte el cable BNC al<br />
conector <strong>de</strong> vi<strong>de</strong>o <strong>de</strong> la<br />
cámara.<br />
2. Conecte el cable BNC a<br />
la entrada <strong>de</strong> vi<strong>de</strong>o <strong>de</strong> un<br />
monitor.<br />
3. Conecte el adaptador<br />
<strong>de</strong> corriente al cable<br />
<strong>de</strong> alimentación <strong>de</strong> la<br />
cámara. La imagen <strong>de</strong><br />
la cámara aparece en el<br />
monitor cuando éste se<br />
encien<strong>de</strong>.<br />
Comprobación <strong>de</strong> la visualización <strong>de</strong> la cámara y configuración <strong>de</strong> los<br />
interruptores<br />
1. Quite la cubierta <strong>de</strong> tipo domo. Si <strong>de</strong>sea obtener más información sobre cómo quitar la<br />
cubierta, consulte “Procedimiento <strong>de</strong> instalación” <strong>de</strong> la sección Instalación <strong>de</strong> la cámara <strong>de</strong><br />
la página siguiente.<br />
2. Ajuste la función <strong>de</strong> la cámara utilizando el Cuadro <strong>de</strong> control al mismo tiempo que observa<br />
la imagen en la pantalla.<br />
10
❚ Instalación <strong>de</strong> la cámara<br />
Antes <strong>de</strong> la instalación<br />
Antes <strong>de</strong> la instalación <strong>de</strong>be leer las siguientes advertencias:<br />
• Debe comprobar si la ubicación <strong>de</strong> la cámara (techo o pared) pue<strong>de</strong> aguantar cinco veces el peso <strong>de</strong> la<br />
cámara.<br />
• Evite que el cable se que<strong>de</strong> atrapado en lugares ina<strong>de</strong>cuados o que se dañe la cubierta <strong>de</strong> la línea<br />
eléctrica. De lo contrario, se pue<strong>de</strong> producir una avería o un incendio.<br />
• Al instalar la cámara, no permita que nadie se acerque al lugar en el que se está instalando. Si hay<br />
objetos <strong>de</strong> valor bajo el lugar en el que se colocará la cámara, apártelos.<br />
Procedimiento <strong>de</strong> instalación<br />
1<br />
2<br />
3<br />
Apertura <strong>de</strong>l<br />
montaje en el<br />
techo<br />
Para instalar la cámara<br />
1. Pulse el botón Cierre que se encuentra<br />
en la parte inferior <strong>de</strong> la cámara y retire la<br />
Cubierta tipo domo <strong>de</strong>l Cuerpo principal<br />
ayudándose con la otra mano. Podrá ver el<br />
Cuerpo principal.<br />
2. Tal y como se muestra en la imagen, pulse<br />
el Separador <strong>de</strong>l cierre hacia afuera y gire<br />
el Cuerpo principal hacia la dirección<br />
UNLOCK (DESBLOQUEO) para quitar<br />
el Soporte para montaje. Si no pue<strong>de</strong><br />
realizar este movimiento con facilidad, gire<br />
el Soporte para montaje hacia la dirección<br />
LOCK (BLOQUEO) mientras sujeta los<br />
pequeños agujeros <strong>de</strong>l Soporte para<br />
montaje.<br />
3. Ajuste el Soporte para montaje en el lugar<br />
en el que <strong>de</strong>sea colocar la cámara (techo o<br />
pared) con los tres tornillos incluidos en la<br />
caja.<br />
Nota<br />
La indicación CAMERA FRONT (PARTE<br />
DELANTERA DE LA CÁMARA) <strong>de</strong>l Soporte<br />
para montaje <strong>de</strong>be quedar frente a la zona <strong>de</strong><br />
vigilancia <strong>de</strong> la cámara.<br />
11<br />
SPA
4. Cuando se instala el Soporte para montaje en el techo, quite la Apertura <strong>de</strong>l montaje en<br />
el techo pulsándola fuertemente para conectar el cable <strong>de</strong> la cámara a través <strong>de</strong>l agujero <strong>de</strong>l<br />
techo. A<strong>de</strong>más, pue<strong>de</strong> utilizar el espacio vacío opuesto a la indicación CAMERA FRONT (PARTE<br />
DELANTERA DE LA CÁMARA) para conectar el cable.<br />
5. Ahora pue<strong>de</strong> ajustar el Cuerpo principal en el Soporte para montaje girándolo en la dirección<br />
LOCK (BLOQUEO) <strong>de</strong>spués <strong>de</strong> alinear el Separador <strong>de</strong>l cierre en el Cuerpo principal con<br />
la ranura ancha alre<strong>de</strong>dor <strong>de</strong> la inscripción CAMERA FRONT (PARTE DELANTERA DE LA<br />
CÁMARA).<br />
6. Ajuste la dirección <strong>de</strong> la cámara. Si <strong>de</strong>sea obtener más información sobre el control <strong>de</strong> la<br />
dirección, consulte “Ajuste <strong>de</strong> la dirección <strong>de</strong> la cámara” que se encuentra en esta misma<br />
página.<br />
7. Finalmente, coloque la Cubierta tipo domo sobre el Cuerpo principal presionándola hasta<br />
que escuche un “clic” tras haber alineado la ranura ancha en la parte inferior <strong>de</strong> la Cubierta tipo<br />
domo con el Cierre en el Cuerpo principal.<br />
❚ Ajuste <strong>de</strong> la dirección <strong>de</strong> la cámara<br />
12<br />
Cuando la cámara ya está colocada en el techo se pue<strong>de</strong><br />
ajustar el ángulo <strong>de</strong> visión <strong>de</strong> la cámara. La cámara se<br />
pue<strong>de</strong> girar <strong>de</strong> izquiera a <strong>de</strong>recho o <strong>de</strong> <strong>de</strong>recha a izquierda<br />
(Panorámica) y se pue<strong>de</strong> modificar la inclinación <strong>de</strong> la<br />
cámara hacia a<strong>de</strong>lante y hacia atrás (Inclinación).<br />
En el caso <strong>de</strong> la vista panorámica, el límite <strong>de</strong> rotación<br />
<strong>de</strong> la cámara se encuentra en 340 grados (220 grados<br />
en el sentido <strong>de</strong> las agujas <strong>de</strong>l reloj y 120 grados en el<br />
sentido contrario). La rotación se <strong>de</strong>tiene gracias al Tope<br />
que se encuentra <strong>de</strong>ntro <strong>de</strong> la cámara. Para controlar la Inclinación<br />
vista panorámica, en primer lugar, <strong>de</strong>satornille los dos<br />
tornillos que se encuentran en la parte inferior y gírelos en<br />
la dirección <strong>de</strong>seada. Después, ajústelos <strong>de</strong> nuevo para<br />
configurar la cámara. Cuando no se pueda ajustar ninguno<br />
<strong>de</strong> los dos tornillos, cambie la ubicación <strong>de</strong> los tornillos.<br />
Cuando no que<strong>de</strong> otra opción, es posible ajustar un solo tornillo únicamente.<br />
Panorámica<br />
Rotación <strong>de</strong> la<br />
lente<br />
En el caso <strong>de</strong> la inclinación, se pue<strong>de</strong> modificar la inclinación <strong>de</strong> la cámara <strong>de</strong> cero a 90 grados.<br />
Cuando el ángulo <strong>de</strong> inclinación es inferior a los 23 grados, es posible que haya una parte <strong>de</strong> la<br />
imagen que no se muestre. Para ajustar la ubicación <strong>de</strong>spués <strong>de</strong> configurar el ángulo <strong>de</strong> visión,<br />
utilice los Tornillos <strong>de</strong> ajuste <strong>de</strong> la inclinación.<br />
Para ajustar el foco <strong>de</strong> la cámara, gire la lente fija para obtener una imagen más nítida. Cuando<br />
la cámara se instala en una pared o en un techo inclinado, se pue<strong>de</strong> girar la lente para ver la<br />
imagen en la dirección correcta.
<strong>SCC</strong>-B531X<br />
SPA<br />
13
Apéndice A: Especificaciones para el estándar NTSC<br />
Descripción<br />
Información<br />
Tipo <strong>de</strong> producto Cámara a color <strong>de</strong> tipo domo para circuito cerrado <strong>de</strong> televisión<br />
Alimentación 24 VCA ± 10% (60Hz ± 0,3 Hz), 12 VCC +10%/-5%<br />
Tipo <strong>de</strong> emisión Sistema <strong>de</strong> color NTSC estándar (525 Líneas, 60 Campos)<br />
Consumo <strong>de</strong> energía 1,6 W aprox.<br />
Sensor <strong>de</strong> imagen CCD <strong>de</strong> tipo Super HAD IT <strong>de</strong> 1/3 pulgadas<br />
<strong>SCC</strong>-B5311N, B5313N, B5315N<br />
<strong>SCC</strong>-B5310N<br />
Píxeles<br />
Totales: 811 (H) x 508 (V), 410.000 píxeles<br />
Efectivos: 768 (H) x 494 (V), 380.000 píxeles<br />
Totales: 537 (H) x 505 (V), 270.000 píxeles<br />
Efectivos: 510 (H) x 492 (V), 250.000 píxeles<br />
Modo <strong>de</strong> escaneo 525 Líneas, Entrelazado 2:1<br />
Frecuencia <strong>de</strong> la línea<br />
<strong>de</strong> escaneo<br />
Horizontal: 15,734 Hz (INT)/ 15,750 Hz (LL)<br />
Vertical: 59,94 Hz (INT)/ 60 Hz (LL)<br />
Modo <strong>de</strong> sincronización INT/Sincronismo <strong>de</strong> línea (Ajuste <strong>de</strong> fase mediante el botón INC/DEC)<br />
Resolución horizontal<br />
<strong>SCC</strong>-B5311N, B5313N, B5315N<br />
<strong>SCC</strong>-B5310N<br />
540 líneas <strong>de</strong> TV 330 líneas <strong>de</strong> TV<br />
<strong>SCC</strong>-B5311N, B5313N, B5315N <strong>SCC</strong>-B5310N<br />
50IRE 1Lux 0,6Lux<br />
Sensibilidad Off 30IRE 0,6Lux 0,4Lux<br />
15IRE 0,3Lux 0,2Lux<br />
Iluminación mínima <strong>de</strong><br />
la esena<br />
Salida <strong>de</strong> la señal<br />
Lente<br />
F2,0<br />
Función PAN (panorámica)<br />
Función TILT (inclinación) Intervalo: De 0 a 90°<br />
50IRE 0,008Lux 0,005Lux<br />
Sensibilidad x128 30IRE 0,005Lux 0,003Lux<br />
15IRE 0,002Lux 0,001Lux<br />
COMPOSITE Vi<strong>de</strong>o(1,0 Vp-p, 75ohm, BNC), Test Monitor OUT(1,0 Vp-p, 75ohm, Harness cable)<br />
Distancia focal Zona Límite <strong>de</strong>l ángulo <strong>de</strong> visión Mo<strong>de</strong>lo<br />
3,0mm<br />
Horizontal<br />
Vertical<br />
92°<br />
72°<br />
<strong>SCC</strong>-B5313N<br />
3,8mm<br />
Horizontal<br />
Vertical<br />
71°<br />
53°<br />
<strong>SCC</strong>-B5310N,<br />
B5311N<br />
8,0mm<br />
Horizontal<br />
Vertical<br />
33,6°<br />
25,3°<br />
<strong>SCC</strong>-B5315N<br />
Intervalo: De 0 a 340° (220 grados en el sentido <strong>de</strong> las agujas <strong>de</strong>l reloj y 120 en el sentido contrario)<br />
14
Descripción<br />
Información<br />
Sincronismo <strong>de</strong> línea (LL)<br />
Sensibilidad, Obturador a baja velocidad (LSS)<br />
Inversión horizontal (H-REV)<br />
Inversión vertical (H-REV)<br />
Controls<br />
Compensación <strong>de</strong> contraluz (BLC)<br />
Control automático <strong>de</strong> ganancia (AGC)<br />
Cambio automático entre color y blanco y negro por el día y cambio por la noche (D/N)<br />
Autobalance <strong>de</strong> blancos (AWB)<br />
Reducción digital <strong>de</strong> ruidos (DNR)<br />
Compensación <strong>de</strong> <strong>de</strong>fectos dinámica CCD<br />
color <strong>de</strong> producto <strong>SCC</strong>-B531xN : Blanco / <strong>SCC</strong>-B531xBN : Negro<br />
Temperatura <strong>de</strong> funcionamiento De -10°C hasta +50°C<br />
Humedad <strong>de</strong> almacenamiento Hasta un 90 %<br />
Tamaño<br />
102 (Ø) x 78 (H) mm<br />
Peso<br />
190g<br />
SPA<br />
15
Apéndice B: Especificaciones para el estándar PAL<br />
Descripción<br />
Información<br />
Tipo <strong>de</strong> producto Cámara a color <strong>de</strong> tipo domo para circuito cerrado <strong>de</strong> televisión<br />
Alimentación 24 VCA ± 10% (50Hz ± 0,3 Hz), 12 VCC +10%/-5%<br />
Tipo <strong>de</strong> emisión Sistema <strong>de</strong> color PAL estándar (625 Líneas, 50 Campos)<br />
Consumo <strong>de</strong> energía 1,6 W aprox.<br />
Sensor <strong>de</strong> imagen CCD <strong>de</strong> tipo Super HAD IT <strong>de</strong> 1/3 pulgadas<br />
<strong>SCC</strong>-<strong>B5311P</strong>, B5313P, B5315P<br />
<strong>SCC</strong>-B5310P<br />
Píxeles<br />
Totales: 795 (H) x 596 (V), 470.000 píxeles<br />
Efectivos: 752 (H) x 582 (V), 440.000 píxeles<br />
Totales: 537 (H) x 597 (V), 320.000 píxeles<br />
Efectivos: 500 (H) x 582 (V), 290.000 píxeles<br />
Modo <strong>de</strong> escaneo 625 Líneas, Entrelazado 2:1<br />
Frecuencia <strong>de</strong> la línea<br />
<strong>de</strong> escaneo<br />
Horizontal: 15,625 Hz (INT)/ 15,625 Hz (LL)<br />
Vertical: 50 Hz (INT)/ 50 Hz (LL)<br />
Modo <strong>de</strong> sincronización INT/Sincronismo <strong>de</strong> línea (Ajuste <strong>de</strong> fase mediante el botón INC/DEC)<br />
Resolución horizontal<br />
<strong>SCC</strong>-<strong>B5311P</strong>, B5313P, B5315P<br />
<strong>SCC</strong>-B5310P<br />
540 líneas <strong>de</strong> TV 330 líneas <strong>de</strong> TV<br />
<strong>SCC</strong>-<strong>B5311P</strong>, B5313P, B5315P <strong>SCC</strong>-B5310P<br />
50IRE 1Lux 0,6Lux<br />
Sensibilidad Off 30IRE 0,6Lux 0,4Lux<br />
15IRE 0,3Lux 0,2Lux<br />
Iluminación mínima <strong>de</strong><br />
la esena<br />
Salida <strong>de</strong> la señal<br />
Lente<br />
F2,0<br />
Función PAN (panorámica)<br />
Función TILT (inclinación) Intervalo: De 0 a 90°<br />
50IRE 0,008Lux 0,005Lux<br />
Sensibilidad x128 30IRE 0,005Lux 0,003Lux<br />
15IRE 0,002Lux 0,001Lux<br />
COMPOSITE Vi<strong>de</strong>o(1,0 Vp-p, 75ohm, BNC), Test Monitor OUT(1,0 Vp-p, 75ohm, Harness cable)<br />
Distancia focal Zona Límite <strong>de</strong>l ángulo <strong>de</strong> visión Mo<strong>de</strong>lo<br />
3,0mm<br />
Horizontal<br />
Vertical<br />
92°<br />
72°<br />
<strong>SCC</strong>-B5313P<br />
3,8mm<br />
Horizontal<br />
Vertical<br />
71°<br />
53°<br />
<strong>SCC</strong>-B5310P, <strong>B5311P</strong><br />
8,0mm<br />
Horizontal<br />
Vertical<br />
33,6°<br />
25,3°<br />
<strong>SCC</strong>-B5315P<br />
Intervalo: De 0 a 340° (220 grados en el sentido <strong>de</strong> las agujas <strong>de</strong>l reloj y 120 en el sentido contrario)<br />
16
Descripción<br />
Información<br />
Sincronismo <strong>de</strong> línea (LL)<br />
Sensibilidad, Obturador a baja velocidad (LSS)<br />
Inversión horizontal (H-REV)<br />
Inversión vertical (H-REV)<br />
Controls<br />
Compensación <strong>de</strong> contraluz (BLC)<br />
Control automático <strong>de</strong> ganancia (AGC)<br />
Cambio automático entre color y blanco y negro por el día y cambio por la noche (D/N)<br />
Autobalance <strong>de</strong> blancos (AWB)<br />
Reducción digital <strong>de</strong> ruidos (DNR)<br />
Compensación <strong>de</strong> <strong>de</strong>fectos dinámica CCD<br />
color <strong>de</strong> producto <strong>SCC</strong>-B531xP : Blanco / <strong>SCC</strong>-B531xBP : Negro<br />
Temperatura <strong>de</strong> funcionamiento De -10°C hasta +50°C<br />
Humedad <strong>de</strong> almacenamiento Hasta un 90 %<br />
Tamaño<br />
102 (Ø) x 78 (H) mm<br />
Peso<br />
190g<br />
SPA<br />
17
<strong>SCC</strong>-B531x(B)<br />
JAP
JAP
A NTSC Standard <br />
Specifications for PAL Standard <br />
JAP
❚ <br />
<br />
<br />
<br />
<br />
<br />
<br />
<br />
<br />
<br />
<br />
❚ <br />
<br />
<br />
<br />
<br />
<br />
<br />
<br />
❚ <br />
<br />
<br />
• <br />
• <br />
• <br />
• <br />
• <br />
• <br />
• <br />
• <br />
• <br />
❚
3<br />
4<br />
1<br />
2<br />
7<br />
<br />
5<br />
6<br />
<br />
<br />
<br />
<br />
<br />
<br />
<br />
<br />
<br />
<br />
<br />
<br />
<br />
<br />
<br />
<br />
<br />
<br />
<br />
<br />
<br />
<br />
<br />
<br />
JAP<br />
8
❚
• <br />
<br />
• <br />
<br />
JAP
❚
❚ <br />
<br />
<br />
• <br />
• <br />
<br />
• <br />
<br />
<br />
1<br />
2<br />
3<br />
<br />
<br />
<br />
<br />
<br />
<br />
<br />
<br />
<br />
<br />
<br />
<br />
<br />
<br />
<br />
<br />
<br />
<br />
<br />
<br />
<br />
<br />
JAP
❚
<strong>SCC</strong>-B531X<br />
JAP
JAP
JAP
Part No. AB68-00647C(03)


