

Samsung SCC-B5305GP (SCC-B5305GP ) - Manuel de l'utilisateur 0.56 MB, pdf, Anglais, ESPERANTO, ALLEMAND, RUSSIE, Espagnol
Samsung SCC-B5305GP (SCC-B5305GP ) - Manuel de l'utilisateur 0.56 MB, pdf, Anglais, ESPERANTO, ALLEMAND, RUSSIE, Espagnol
Samsung SCC-B5305GP (SCC-B5305GP ) - Manuel de l'utilisateur 0.56 MB, pdf, Anglais, ESPERANTO, ALLEMAND, RUSSIE, Espagnol

You also want an ePaper? Increase the reach of your titles
YUMPU automatically turns print PDFs into web optimized ePapers that Google loves.
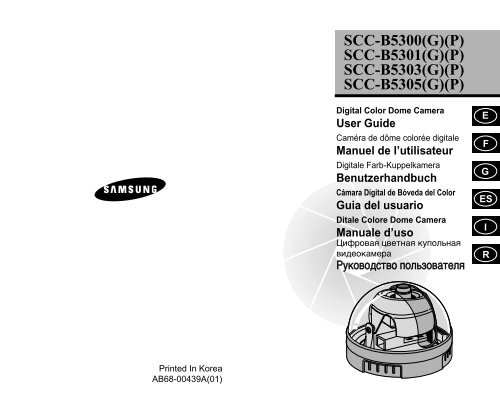
<strong>SCC</strong>-B5300(G)(P)<br />
<strong>SCC</strong>-B5301(G)(P)<br />
<strong>SCC</strong>-B5303(G)(P)<br />
<strong>SCC</strong>-B5305(G)(P)<br />
ELECTRONICS<br />
Digital Color Dome Camera<br />
User Gui<strong>de</strong><br />
Caméra <strong>de</strong> dôme colorée digitale<br />
<strong>Manuel</strong> <strong>de</strong> l’utilisateur<br />
Digitale Farb-Kuppelkamera<br />
Benutzerhandbuch<br />
Cámara Digital <strong>de</strong> Bóveda <strong>de</strong>l Color<br />
Guia <strong>de</strong>l usuario<br />
Ditale Colore Dome Camera<br />
Manuale d’uso<br />
÷ËÙappleÓ‚‡ˇ ˆ‚ÂÚ̇ˇ ÍÛÔÓθ̇ˇ<br />
‚ˉÂÓ͇ÏÂapple‡<br />
–ÛÍÓ‚Ó‰ÒÚ‚Ó ÔÓθÁÓ‚‡ÚÂΡ<br />
E<br />
F<br />
G<br />
ES<br />
I<br />
R<br />
Printed In Korea<br />
AB68-00439A(01)
User Gui<strong>de</strong><br />
User Gui<strong>de</strong><br />
CAUTION: TO REDUCE THE RISK OF<br />
ELECTRIC SHOCK, DO NOT REMOVE REAR<br />
COVER. NO USER SERVICEABLE PARTS<br />
INSIDE. REFER TO QUALIFIED SERVICE<br />
PERSONNEL.<br />
To prevent damage which may result in fire or electric shock<br />
hazard, do not expose this appliance to rain or moisture.<br />
This <strong>de</strong>vice complies with part 15 of the FCC Rules. Operation<br />
is subject to the following two conditions.<br />
1) This <strong>de</strong>vice may not cause harmful interference, and<br />
2) This <strong>de</strong>vice must accept any interference that may cause<br />
un<strong>de</strong>sired operation.<br />
CAUTION:<br />
CAUTION<br />
RISK OF ELECTRIC<br />
SHOCK DO NOT OPEN<br />
This symbol indicates high voltage is present<br />
insi<strong>de</strong>. It is dangerous to make any kind of contact<br />
with any insi<strong>de</strong> part of this product.<br />
This symbol alerts you that important literature<br />
concerning operation and maintenance has been<br />
inclu<strong>de</strong>d with this product.<br />
Danger of explosion if battery is incorrectly replaced.<br />
Replace only with the same or equivalent type recommen<strong>de</strong>d<br />
by the manufacturer.<br />
Dispose of used batteries according to the manufacturer’s<br />
instructions.<br />
1. Read these instructions.<br />
2. Keep these instructions.<br />
3. Heed all warnings.<br />
4. Follow all instructions.<br />
5. Do not use this apparatus near water.<br />
6. Clean only with dry cloth.<br />
7. Do not block any ventilation openings. Install in<br />
accordance with the manufacturer’s instructions.<br />
8. Do not install near any heat sources such as radiators,<br />
heat registers, or other apparatus (including amplifiers)<br />
that produce heat.<br />
9. Do not <strong>de</strong>feat the safety purpose of the polarized or<br />
grounding-type plug. A polarized plug has two bla<strong>de</strong>s with<br />
one wi<strong>de</strong>r than the other. A grounding type plug has two<br />
bla<strong>de</strong>s and a third grounding prong. The wi<strong>de</strong> bla<strong>de</strong> or the<br />
third prong are provi<strong>de</strong>d for your safety. If the provi<strong>de</strong>d<br />
plug does not fit into your outlet, consult an electrician for<br />
replacement of the obsolete outlet.<br />
10. Protect the power cord from being from being walked on or<br />
pinched particularly at plugs, convenience receptacles,<br />
and the point where they exit from the apparatus.<br />
11. Only use attachments/accessories specified by the<br />
manufacturer.<br />
12. Use only with cart, stand, tripod, bracket, or table specified<br />
by the manufacturer, or sold with the apparatus. When a<br />
used, caution when moving the cart/apparatus<br />
combination to avoid injury from tip-over.<br />
13. Unplug this apparatus. When a cart is used, use caution<br />
when moving the cart/apparatus combination to avoid<br />
injury from tip-over.<br />
14. Refer all servicing to qualified service personnel. Servicing<br />
is required when the apparatus has been damaged in any<br />
way, such as power-supply cord or plug is damaged, liquid<br />
has been spilled or objects have fallen into the apparatus,<br />
the apparatus has been exposed to rain or moisture, does<br />
not operate normally, or been dropped.<br />
❈ Avoid aiming the camera directly towards extremely bright<br />
objects such as the sun, as this may damage the CCD<br />
image sensot.<br />
E
User Gui<strong>de</strong><br />
User Gui<strong>de</strong><br />
Contents<br />
1. Overview ....................................................................... 3<br />
2. Component Name ........................................................ 4<br />
3. Function of Each Component ................................... 5<br />
4. Installation ..................................................................... 6<br />
Check what is insi<strong>de</strong> the package ..................... 6<br />
Notes on installation and usage .......................... 6<br />
Cable connection ........................................................ 7<br />
5. Specifications ............................................................... 9<br />
2<br />
1. Overview<br />
CCTV COLOR DOME CAMERA are the monitoring<br />
cameras incorporated with the recent CCD that<br />
provi<strong>de</strong>s the best monitoring function in connection<br />
with the CCTV system equipment.<br />
■ Number of CCD pixels<br />
• <strong>SCC</strong>-B5300(G) : 270,000 pixels<br />
• <strong>SCC</strong>-B5300(G)P : 320,000 pixels<br />
• <strong>SCC</strong>-B5301(G)/<strong>SCC</strong>-B5303(G)/<br />
<strong>SCC</strong>-B5305(G) : 410,000 pixels<br />
• <strong>SCC</strong>-B5301(G)P/<strong>SCC</strong>-B5303(G)P/<br />
<strong>SCC</strong>-B5305(G)P : 470,000 pixels<br />
■ Power supply<br />
• DC 12V/AC 24V<br />
■ Automatic function and special function<br />
• ATW<br />
• BLC<br />
• AGC<br />
• ELC(Electronic shutter iris)<br />
❈ COLOR ROLLING may occur when you use this camera in a<br />
mechanical fluorescent light which is equiped with Manual IRIS<br />
and is set to ELC mo<strong>de</strong> in the ALC/ELC mo<strong>de</strong> setting menu.<br />
In that case, input AC power. (Auto changing Linklock Mo<strong>de</strong>)<br />
(NTSC : 60HZ PAL : 50HZ)<br />
❈ If you want to use Internal mo<strong>de</strong> instead of Line Lock mo<strong>de</strong>,<br />
apply DC power. Internal mo<strong>de</strong> provi<strong>de</strong>s better picture quality<br />
than Line Lock mo<strong>de</strong>.<br />
☞COLOR ROLLING is the problem that color on the monitor<br />
screen changes non-periodically. This happens when White<br />
Balance is not fixed, becouse a mechanical fluorescent light<br />
flickers when it’s cycle is the same to the cycle of the power<br />
frequency.<br />
3<br />
E
User Gui<strong>de</strong><br />
User Gui<strong>de</strong><br />
2. Component Name 3. Function of Each Component<br />
Fixed focus lens<br />
Dome cover<br />
■ Fixed focus lens<br />
• Fixed focus lens installed on the camera.<br />
Please take cautions that any dust or foreign<br />
matter gathers on the front glass surface of the<br />
lens.<br />
E<br />
■ Main body<br />
• A body that supports the camera.<br />
PCB board<br />
Vi<strong>de</strong>o cable<br />
■ PCB board<br />
• This part is quite important since it performs<br />
the camera function. Please handle with care.<br />
Main body<br />
Power cable<br />
■ Power cable<br />
• The terminal that is connected to the power<br />
(adaptor) cable. Connect to DC 12V/AC 24V.<br />
■ Vi<strong>de</strong>o signal output cable<br />
• The cable that sends the vi<strong>de</strong>o signal.<br />
■ Dome cover<br />
• The transparent plastic cover that protects the<br />
camera.<br />
Be careful not to make a scratch on it.<br />
4 5
User Gui<strong>de</strong><br />
User Gui<strong>de</strong><br />
4. Installation<br />
■<br />
Cable connection<br />
■<br />
Check what is insi<strong>de</strong> the package<br />
• Check to see if the following parts are inclu<strong>de</strong>d in the<br />
purchased package.<br />
1. Hold the camera body with one hand and turn<br />
the dome cover counterclockwise with other<br />
hand in or<strong>de</strong>r to disassemble it.<br />
E<br />
■<br />
Camera<br />
tab screw<br />
User's gui<strong>de</strong><br />
Notes on installation and usage<br />
1. Users should not disassemble the camera from the<br />
front direction.<br />
2. Always handle the camera with care. Please do not<br />
apply a shock or vibration as much as possible and<br />
take cautions not to cause damage or make a<br />
scratch on the camera due to careless storage.<br />
3. Please do not install the camera with the rainy place<br />
or highly humid areas. And do not operate the<br />
camera in the wet place.<br />
4. Do not clean the camera body with the strong<br />
abrasives or soaps. When the camera becomes<br />
dirty, clean it with the dry rugs. Especially, make<br />
sure to use the <strong>de</strong>dicated rugs for lens to clean the<br />
dome cover.<br />
5. Please keep the camera at the cool area that is not<br />
exposed to the direct sunlight. If you do, it can<br />
cause bad effects on the product.<br />
2.Connect the BNC cable to the vi<strong>de</strong>o cable<br />
connector attached on the dome camera, and<br />
connect the remained BNC cable to the vi<strong>de</strong>o<br />
input terminal of the monitor.<br />
3.Connect the power adaptor at this time.<br />
Connect the DC 12V/AC 24V power cable of<br />
the connector to the power cable connection<br />
that is attached on the dome camera.<br />
BNC Cable<br />
Monitor<br />
6<br />
7
User Gui<strong>de</strong><br />
User Gui<strong>de</strong><br />
4. Attach the camera on the target location with<br />
the screw driver using the provi<strong>de</strong>d tab screw.<br />
Main body<br />
5. Set the proper image by moving the camera<br />
body (PCB board) insi<strong>de</strong> the dome camera<br />
upward or downward and set the focus by<br />
turning the lens to the left or right direction.<br />
Adjust the<br />
image upward<br />
or downward<br />
Screw Driver<br />
8<br />
Wall or ceiling<br />
Tab screw<br />
Wall or ceiling<br />
Adjust focus by<br />
turning left or right<br />
6. Assemble the dome cover by turning it<br />
clockwise.<br />
NOTE<br />
Please make sure that any foreign matter gathers<br />
on the lens cover when assembling or<br />
disassembling the dome cover.<br />
5. Specifications<br />
Item<br />
Details<br />
Broadcasting system <strong>SCC</strong>-B5300(G)/B5301(G)/B5303(G)<br />
/B5305(G) : NTSC STANDARD<br />
<strong>SCC</strong>-B5300(G)P/B5301(G)P<br />
/B5303(G)P/ B5305(G)P<br />
: PAL STANDARD<br />
Pick-up <strong>de</strong>vice 1/3" SUPER HAD IT CCD<br />
Number of effective <strong>SCC</strong>-B5300(G) : 510(H) x 492(V)<br />
pixel<br />
<strong>SCC</strong>-B5301(G)/B5303(G)/B5305(G)<br />
: 768(H) x 494(V)<br />
<strong>SCC</strong>-B5300(G)P : 500(H) x 582(V)<br />
<strong>SCC</strong>-B5301(G)P /B5303(G)P /B5305(G)P<br />
: 752(H) x 582(V)<br />
Synchronization Internal/Linelock<br />
(Auto control for using DC/AC power)<br />
Resolution<br />
<strong>SCC</strong>-B5300(G)(P): 330 TV Lines (H)<br />
350 TV Lines (V)<br />
<strong>SCC</strong>-B5301(G)(P)/B5303(G)(P)/B5305(G)(P)<br />
: 480 TV Lines (H)<br />
350 TV Lines (V)<br />
Vi<strong>de</strong>o output VBS 1.0Vp-p(75 , composite)<br />
S/N ratio<br />
50dB<br />
Min. illumination <strong>SCC</strong>-B5300(G)(P) : 0.3Lux<br />
<strong>SCC</strong>-B5301(G)(P)/B5303(G)(P)<br />
/B5305(G)(P) : 0.5Lux<br />
Electronic Shatter Speed Max 1/100k sec<br />
Lens (focal length) <strong>SCC</strong>-B5300(G)(P)/B5301(G)(P) : f=3.8mm<br />
<strong>SCC</strong>-B5303(G)(P)<br />
: f=2.9mm<br />
<strong>SCC</strong>-B5305(G)(P)<br />
: f=8mm<br />
Gamma correction 0.45<br />
Body Color <strong>SCC</strong>-B530X(P) : Black<br />
<strong>SCC</strong>-B530XG(P) : Grey<br />
In/out connector Signal output: BNC, Power input : 2P-Jack<br />
Operating temperature -10~+50°C<br />
Power source DC 12V 10%,-5%, AC 24V 10%<br />
(NTSC : 60Hz 0.3Hz, 50Hz 0.3Hz)<br />
Power consumption 3 W<br />
Size<br />
100(ø) x 67(H)mm<br />
Weight<br />
180g<br />
9<br />
E
<strong>Manuel</strong> <strong>de</strong> l’utilisateur<br />
<strong>Manuel</strong> <strong>de</strong> l’utilisateur<br />
L’objectif <strong>de</strong>s précautions <strong>de</strong> sécurité est d’assurer l’utilisation<br />
correcte <strong>de</strong> ce produit afin d’éloigner tout risque et tout dégât à la<br />
propriété. Assurez-vous <strong>de</strong> bien observer toutes les précautions.<br />
Avertissement<br />
Ne pas tenir compte d’un avertissement risque <strong>de</strong> causer<br />
<strong>de</strong>s blessures graves, voire mortelles.<br />
1. Assurez-vous d’utiliser uniquement l’adaptateur fourni avec le<br />
produit. (L’utilisation d’un adaptateur autre que celui fourni peut<br />
endommager le produit ou causer un incendie ou <strong>de</strong>s décharges<br />
électriques.)<br />
2. Avant <strong>de</strong> brancher le cordon d’alimentation et les câbles <strong>de</strong> signal,<br />
vérifiez d’abord les bornes extérieures. Reliez les câbles <strong>de</strong>s<br />
signaux d’alarme à leur borne respective. Branchez l’adaptateur CA<br />
sur la prise CA et l’adaptateur CC sur la prise CC tout en tenant<br />
compte <strong>de</strong> la bonne polarité. (La connexion incorrecte à la source<br />
d’alimentation peut endommager le produit ou causer un incendie<br />
ou <strong>de</strong>s décharges électriques.)<br />
3. Ne branchez jamais plus d’une caméra sur un seul adaptateur.<br />
(Le dépassement <strong>de</strong> la capacité <strong>de</strong> charge risque <strong>de</strong> générer une<br />
chaleur anormale au point <strong>de</strong> causer un incendie.)<br />
4. Branchez le cordon d’alimentation sur la prise murale. Assurezvous<br />
que la connexion est soli<strong>de</strong>ment fixée. (Une mauvaise<br />
connexion peut constituer le risque d’un incendie.)<br />
5. Lorsque vous installez la caméra au mur ou au plafond, assurezvous<br />
qu’elle y soit fixée soli<strong>de</strong>ment et <strong>de</strong> faáon sécuritaire. (La<br />
chute <strong>de</strong> la caméra peut causer <strong>de</strong>s blessures corporelles.)<br />
6. Ne placez jamais d’objets conducteurs (p. ex., un tournevis, <strong>de</strong>s<br />
pièces <strong>de</strong> monnaie, tout autre objet métallique) ni <strong>de</strong> contenants<br />
remplis d’eau sur la caméra. (Cela pourrait présenter un risque <strong>de</strong><br />
blessures corporelles en raison d’un incendie, d’une décharge<br />
électrique ou <strong>de</strong> la chute d’un objet.)<br />
7. N’installez pas la caméra dans un emplacement plein <strong>de</strong> suie, <strong>de</strong><br />
poussière ou d’humidité. Cela pourrait causer un incendie ou<br />
provoquer une décharge électrique.<br />
8. Si vous détectez une o<strong>de</strong>ur étrange ou <strong>de</strong> la fumée qui sort du<br />
produit, débranchez immédiatement le cordon d’alimentation et<br />
contactez le centre <strong>de</strong> soutien technique. (Une sollicitation continue<br />
<strong>de</strong> l’appareil dans ces conditions pourrait causer un incendie ou<br />
provoquer <strong>de</strong>s décharges électriques.)<br />
9. Si ce produit cesse <strong>de</strong> fonctionner correctement, communiquez<br />
avec votre reven<strong>de</strong>ur ou le centre d’entretien dans votre localité. Ne<br />
démontez ni ne modifiez jamais ce produit. (<strong>Samsung</strong> n’est pas<br />
responsable <strong>de</strong>s problèmes techniques découlant d’une<br />
modification non autorisée ou d’une tentative <strong>de</strong> réparation.)<br />
10. Lorsque vous nettoyez le produit, veillez à ne pas vaporiser d’eau<br />
directement sur les composants du produit. (Cela pourrait causer un<br />
incendie ou provoquer une décharge électrique.) Nettoyez la<br />
surface au moyen d’un chiffon doux. N’utilisez jamais <strong>de</strong> détersifs ni<br />
<strong>de</strong> nettoyants chimiques. Cela pourrait provoquer une décoloration<br />
ou endommager le fini du produit.<br />
Mise en gar<strong>de</strong><br />
Ne pas tenir compte d’une mise en gar<strong>de</strong> peut entraåner<br />
<strong>de</strong>s blessures cor porelles ou <strong>de</strong>s dégâts à la propriété.<br />
1. Ne laissez pas tomber d’objets sur le produit ni ne soumettez le<br />
produit à <strong>de</strong> forts coups. Ne placez pas le produit dans un<br />
emplacement où il pourrait subir <strong>de</strong> fortes vibrations ou <strong>de</strong>s<br />
interférences magnétiques.<br />
2. Ne placez pas le produit dans un emplacement où il fait très chaud<br />
(plus <strong>de</strong> 50°C/122°F), très froid (moins <strong>de</strong> ‘10°C/14°¯F) ou très<br />
humi<strong>de</strong>. (Cela pourrait causer un incendie ou provoquer une<br />
décharge électrique.)<br />
3. Évitez un emplacement où le produit est exposé à <strong>de</strong>s rayons<br />
directs du soleil ou à une source <strong>de</strong> chaleur, telle qu’un radiateur ou<br />
un appareil <strong>de</strong> chauffage. (Le non-respect <strong>de</strong> cette consigne<br />
pourrait présenter un risque d’incendie.)<br />
4. Si vous désirez déplacer le produit à la suite <strong>de</strong> son installation,<br />
assurez-vous <strong>de</strong> couper le courant avant son déplacement et sa<br />
réinstallation.<br />
5. Installez le produit dans une aire bien ventilée.<br />
6. En cas d’orage, débranchez le cordon électrique <strong>de</strong> la prise murale.<br />
(Le non-respect <strong>de</strong> cette consigne pourrait provoquer un incendie<br />
ou endommager le produit.)<br />
7. Évitez <strong>de</strong> diriger l’appareil photo directement en direction d’objets<br />
très brillants, tels qur le soleil, cela risque d’endommager le capteur<br />
d’ image CCD.<br />
F
<strong>Manuel</strong> <strong>de</strong> l’utilisateur<br />
<strong>Manuel</strong> <strong>de</strong> l’utilisateur<br />
Contenu<br />
1. Vue d’ensemble ...................................................... 3<br />
2. Description ................................................................ 4<br />
3. Fonction <strong>de</strong> chaque composant ......................... 5<br />
4. Installation ..................................................................... 6<br />
Vérification du contenu <strong>de</strong> l’emballage. .......... 6<br />
Notes sur l’installation et l’utilisation .................. 6<br />
Connexion du câble ................................................. 7<br />
5. Spécifications .......................................................... 9<br />
2<br />
1. Vue d’ensemble<br />
Les dômes couleur sont <strong>de</strong>s caméras <strong>de</strong> surveillance<br />
avec un CCD intégré offrant les meilleures fonctions<br />
<strong>de</strong> surveillance en connexion avec le système CCTV.<br />
■ Nombre <strong>de</strong> pixels CCD<br />
• <strong>SCC</strong>-B5300(G) : 270,000 pixels<br />
• <strong>SCC</strong>-B5300(G)P : 320,000 pixels<br />
• <strong>SCC</strong>-B5301(G)/<strong>SCC</strong>-B5303(G)/<br />
<strong>SCC</strong>-B5305(G) : 410,000 pixels<br />
• <strong>SCC</strong>-B5301(G)P/<strong>SCC</strong>-B5303(G)P/<br />
<strong>SCC</strong>-B5305(G)P : 470,000 pixels<br />
■ Alimentation<br />
• CC 12V/ CA 24V<br />
■ Fonctions automatiques et fonctions spéciales<br />
• ATW<br />
• BLC<br />
• AGC<br />
• ELC(Obturateur électrique Iris)<br />
❈ L’ondulation peut être provoquée lorsque vous utilisez<br />
la caméra équipée d’un IRIS manuel sous lumière un<br />
éclairage fluorescent et lorsqu’elle est réglée sur le mo<strong>de</strong><br />
ELC dans le menu <strong>de</strong> réglage.<br />
Dans ce cas, alimenter en alternatif. (Comman<strong>de</strong> auto<br />
pour Linelock) (NTSC : 60HZ, PAL : 50HZ)<br />
❈ Si vous souhaitez utiliser le mo<strong>de</strong> Interne au lieu du mo<strong>de</strong><br />
Verrouillage <strong>de</strong> fin <strong>de</strong> ligne, appliquez une alimentation CC.<br />
Le mo<strong>de</strong> Interne offre une meilleure qualité d’image que le<br />
mo<strong>de</strong> Verrouillage <strong>de</strong> fin <strong>de</strong> ligne.<br />
☞ L’ondulation <strong>de</strong> couleur est un phénomène <strong>de</strong><br />
changement non périodique <strong>de</strong> la couleur sur l’écran<br />
du moniteur. Ceci arrive lorsque la Balance <strong>de</strong>s Blancs<br />
n’est pas fixée à cause d’une vacillation d’un éclairage<br />
fluorescent et que son cycle est i<strong>de</strong>ntique<br />
à celui <strong>de</strong> la fréquence d’alimentation.<br />
3<br />
F
<strong>Manuel</strong> <strong>de</strong> l’utilisateur<br />
<strong>Manuel</strong> <strong>de</strong> l’utilisateur<br />
2. Description 3. Fonction <strong>de</strong> chaque<br />
composant<br />
Objectif<br />
Couverture<br />
<strong>de</strong> dôme<br />
■ Objectif à focale fixe<br />
• L’objectif à focale fixe installé sur la<br />
caméra.Veuillez faire attention à ce<br />
qu’aucune poussière ou matière venant<br />
<strong>de</strong> l’extérieur ne s’accumule sur la surface<br />
avant <strong>de</strong> l’objectif.<br />
F<br />
PCB planche<br />
Corps principal<br />
Câble vidéo<br />
■ Partie principale<br />
• Une partie supportant la caméra.<br />
■ Panneau PCB<br />
• C’est une partie très importante car elle<br />
exécute les fonctions <strong>de</strong> la caméra.<br />
Veuillez manipuler ce panneau avec<br />
précaution.<br />
Câble électrique<br />
■ Câble d’alimentation<br />
• Le terminal connecté au câble d’alimentation<br />
(d’adaptateur).<br />
Connectez à CC 12V/CA 24V.<br />
■ Câble <strong>de</strong> production <strong>de</strong> signal vidéo<br />
• Le câble qui envoie le signal vidéo.<br />
■ Couvercle en dôme<br />
• Le couvercle transparent en plastique<br />
protégeant la caméra.<br />
Faites attention à ne pas le griffer.<br />
4 5
<strong>Manuel</strong> <strong>de</strong> l’utilisateur<br />
<strong>Manuel</strong> <strong>de</strong> l’utilisateur<br />
4. Installation<br />
■<br />
Vérification du contenu <strong>de</strong> l’emballage<br />
• Vérifiez que les éléments suivants sont inclus<br />
dans l’emballage.<br />
■<br />
Connexion du câble<br />
1. Tenez la caméra dans une main et tournez le<br />
couvercle en dôme dans le sens inverse <strong>de</strong>s<br />
aiguilles d’une montre avec l’autre main pour<br />
le séparer.<br />
F<br />
■<br />
Caméra<br />
Vis<br />
<strong>Manuel</strong> <strong>de</strong><br />
l’utilisateur<br />
Notes sur l’installation et l’utilisation<br />
1. L’utilisateur ne doit pas démonter la partie avant <strong>de</strong> la<br />
caméra.<br />
2. Manipulez toujours la caméra avec précaution.<br />
Evitez tout choc ou vibration et faites attention à ce que la<br />
caméra ne soit pas endommagée ou griffée lors du<br />
stockage.<br />
3. Evitez d’installer la caméra dans un endroit exposé à la<br />
pluie ou à une humidité élevée.<br />
Ne faites pas fonctionner la caméra dans un endroit<br />
humi<strong>de</strong>.<br />
4. N’utilisez pas d’abrasif ou <strong>de</strong> savon pour nettoyer la<br />
caméra. Lors du nettoyage <strong>de</strong> la caméra, utilisez un chiffon<br />
sec. En particulier, le couvercle en dôme doit être nettoyé<br />
avec un chiffon spécifique, conçu pour l’objectif.<br />
5. Conservez la caméra dans un endroit frais en évitant le<br />
rayonnement direct du soleil, afin d’éviter tout mauvais effet<br />
sur l’appareil.<br />
6<br />
2. Connectez le câble BNC au câble vidéo fixé sur<br />
la caméra en dôme et connectez l’autre<br />
extrémité du câble BNC à l’entrée vidéo du<br />
moniteur.<br />
3. Connectez ensuite l’adaptateur d’alimentation.<br />
Connectez le câble d’alimentation CC 12V/CA 24V<br />
<strong>de</strong> l’adaptateur au câble d’alimentation fixé sur la<br />
caméra en dôme.<br />
BNC Câble<br />
7<br />
Moniteur
<strong>Manuel</strong> <strong>de</strong> l’utilisateur<br />
<strong>Manuel</strong> <strong>de</strong> l’utilisateur<br />
4. Fixez la caméra à l’endroit prévu pour son<br />
installation avec les vis fournies, à l’ai<strong>de</strong> d’un<br />
tournevis.<br />
Partie principale<br />
5. Sélectionnez l’image souhaitée en tournant vers le<br />
haut ou vers le bas la partie <strong>de</strong> la caméra<br />
(panneau PCB) situé à l’intérieur <strong>de</strong> la caméra en<br />
dôme et réglez la focale en tournant l’objectif vers<br />
la gauche ou vers la droite.<br />
Réglez la hauteur<br />
<strong>de</strong> l’image<br />
vers le haut ou<br />
vers le bas<br />
Tournevis<br />
8<br />
Mur ou plafond<br />
Vis<br />
Mur ou plafond<br />
Ajustez la focale en<br />
tournant<br />
vers la gauche ou<br />
vers la droite<br />
6. Assemblez la couverture <strong>de</strong> dôme en la<br />
tournant dans le sens <strong>de</strong>s aiguilles d’une<br />
montre.<br />
Note :<br />
Assurez-vous qu’aucune matière venant <strong>de</strong><br />
l’extérieur ne s’accumule sur le couvercle <strong>de</strong> l’objectif<br />
lors du montage ou lors du démontage du couvercle<br />
en dôme.<br />
5. Spécifications<br />
Article<br />
Détails<br />
Métho<strong>de</strong> <strong>de</strong><br />
<strong>SCC</strong>-B5300(G)/B5301(G)/B5303(G)<br />
radiodiffusion /B5305(G) : NTSC STANDARD<br />
<strong>SCC</strong>-B5300(G)P/B5301(G)P/B5303(G)P<br />
/ B5305(G)P: PAL STANDARD<br />
CCD<br />
1/3" SUPER HAD IT CCD<br />
Pixel vali<strong>de</strong> <strong>SCC</strong>-B5300(G) : 510(H) x 492(V)<br />
<strong>SCC</strong>-B5301(G)/B5303(G)/B5305(G)<br />
: 768(H) x 494(V)<br />
<strong>SCC</strong>-B5300(G)P : 500(H) x 582(V)<br />
<strong>SCC</strong>-B5301(G)P /B5303(G)P /B5305(G)P<br />
: 752(H) x 582(V)<br />
Métho<strong>de</strong> <strong>de</strong><br />
interne/Verrouillage <strong>de</strong> ligne<br />
synachronisation (Comman<strong>de</strong> auto pour utilisation alimentation<br />
CC/CA)<br />
Résolution<br />
<strong>SCC</strong>-B5300(G)(P) : 330 TV Lines (H)<br />
350 TV Lines (V)<br />
<strong>SCC</strong>-B5301(G)(P)/B5303(G)(P)/B5305(G)(P)<br />
: 480 TV Lines (H)<br />
350 TV Lines (V)<br />
Sortie vidéo VBS 1.0Vp-p(75 , composite)<br />
Taux S/B<br />
50dB<br />
L’illumination la plus <strong>SCC</strong>-B5300(G)(P) : 0.3 Lux<br />
basse <strong>de</strong> la chose <strong>SCC</strong>-B5301(G)(P)/B5303(G)(P)<br />
décrite /B5305(G)(P) : 0.5 Lux<br />
Vitesse <strong>de</strong> l’obturateur<br />
électronique<br />
Max 1/100k sec<br />
Objectif<br />
<strong>SCC</strong>-B5300(G)(P)/B5301(G)(P) : f=3.8mm<br />
(longueur focal) <strong>SCC</strong>-B5303(G)(P) : f=2.9mm<br />
<strong>SCC</strong>-B5305(G)(P)<br />
: f=8mm<br />
Correction <strong>de</strong> gamme 0.45<br />
Couleur du corps <strong>SCC</strong>-B530X(P) : Noir<br />
<strong>SCC</strong>-B530XG(P) : Gris<br />
Connecteur <strong>de</strong><br />
l’intérieur/l’extérieur<br />
Signal output: BNC, Power input : Prise 2P<br />
Température opérationnelle -10~+50°C<br />
Tension CC 12V 10%,-5%, CA 24V 10%<br />
(NTSC:60Hz 0.3Hz, PAL:50Hz 0.3Hz)<br />
Consommation électriue 3 W<br />
Taille externe 100(ø) x 67(H)mm<br />
Poids<br />
180g<br />
9<br />
F
Benutzerhandbuch<br />
Benutzerhandbuch<br />
Ziel dieser Informationen ist es, <strong>de</strong>n ordnungsgemäßen Gebrauch dieses<br />
Geräts sicherzustellen und dadurch Gefahren o<strong>de</strong>r Sachbeschädigungen zu<br />
vermei<strong>de</strong>n. Bitte befolgen Sie alle Anweisungen.<br />
Warnung<br />
Die Nichtbeachtung eines Warnhinweises kann zum To<strong>de</strong> o<strong>de</strong>r<br />
zu schweren Verletzungen führen.<br />
1. Achten Sie darauf, dass Sie nur <strong>de</strong>n mitgelieferten Adapter verwen<strong>de</strong>n.<br />
(Die Verwendung eines an<strong>de</strong>ren Adapters als <strong>de</strong>s mitgelieferten kann<br />
Feuer, einen Stromschlag o<strong>de</strong>r die Beschädigung <strong>de</strong>s Geräts verursachen.)<br />
2. Beim Anschließen <strong>de</strong>r Netz- und Signalkabel müssen zuvor die externen<br />
Anschlussbuchsen überprüft wer<strong>de</strong>n. Schließen Sie die<br />
Alarmsignalkabela<strong>de</strong>rn an die Alarmanschlüsse, <strong>de</strong>n Netzadapter an die<br />
Netzsteckdose und <strong>de</strong>n Gleichstromadapter an <strong>de</strong>n Gleichstromeingang an,<br />
und achten Sie dabei auf die richrige Polarität. (Ein falscher Anschluss an<br />
das Stromnetz kann Feuer, einen Stromschlag o<strong>de</strong>r die Beschädigung <strong>de</strong>s<br />
Geräts verursachen.)<br />
3. Schließen Sie nicht mehrere Kameras an einen Adapter an. (Wird die<br />
Kapazität überschritten, kann es zu einer anormalen Wärmeentwicklung<br />
o<strong>de</strong>r Feuer kommen.)<br />
4. Stecken Sie das Netzkabel fest in die Steckdose ein. (Ein loser Anschluss<br />
kann Feuer verursachen.)<br />
5. Bei <strong>de</strong>r Wand- o<strong>de</strong>r Deckeninstallation bringen Sie die Kamera sicher und<br />
fest an. (Fällt die Kamera herunter, kann es zur Verletzung von Personen<br />
kommen.)<br />
6. Plazieren Sie keine leitfähigen Gegenstän<strong>de</strong> (wie z. B. Schraubenzieher,<br />
Münzen und metallene Objekte) o<strong>de</strong>r mit Wasser gefüllte Behälter auf <strong>de</strong>r<br />
Kamera. (Das kann zur Verletzung von Personen durch Feuer, Stromschlag<br />
o<strong>de</strong>r herunterfallen<strong>de</strong> Gegenstän<strong>de</strong> führen.)<br />
7. Die Kamera darf nicht an einem rußigen, staubigen o<strong>de</strong>r feuchten Ort<br />
installiert wer<strong>de</strong>n. (An<strong>de</strong>rnfalls besteht die Gefahr eines Bran<strong>de</strong>s o<strong>de</strong>r<br />
Stromschlags.)<br />
8. Beim Auftreten eines ungewöhnlichen Geruchs o<strong>de</strong>r einer<br />
Rauchentwicklung, die vom Gerät ausgehen, ziehen Sie unverzüglich das<br />
Netzkabel aus <strong>de</strong>r Steckdose und wen<strong>de</strong>n Sie sich an Ihr<br />
Kun<strong>de</strong>ndienstzentrum. (Die Fortsetzung <strong>de</strong>s Gebrauchs kann in diesem<br />
Fall zu Feuer o<strong>de</strong>r einem elektrischen Schlag führen.)<br />
9. Sollte das Gerät nicht störungfrei funktionieren, setzen Sie sich mit Ihrem<br />
Händler o<strong>de</strong>r <strong>de</strong>m nächsten Kun<strong>de</strong>ndienstzentrum in Verbindung. Das Gerät<br />
darf niemals in keiner Weise zerlegt o<strong>de</strong>r modifiziert wer<strong>de</strong>n. (<strong>Samsung</strong><br />
übernimmt keine Haftung für Probleme, die durch unbefugte Abän<strong>de</strong>rungen<br />
o<strong>de</strong>r einen Reparaturversuch herbeigeführt sind.)<br />
10. Beim Reinigen darf Wasser niemals direkt auf die Geräteteile gelangen.<br />
(An<strong>de</strong>rnfalls besteht die Gefahr eines Bran<strong>de</strong>s o<strong>de</strong>r Stromschlags.) Die<br />
Oberfläche kann mit einem trockenen Tuch abgewischt wer<strong>de</strong>n.<br />
Verwen<strong>de</strong>n Sie für das Gerät keine Reinigungsmittel o<strong>de</strong>r chemischen<br />
Reiniger, da sich durch solche Mittel die Farbe ablösen und <strong>de</strong>r<br />
Oberflächenüberzug beschädigt wer<strong>de</strong>n kann.<br />
Achtung<br />
Die Nichtbeachtung eines mit Achtung gekennzeichneten<br />
Hinweises kann zu Verletzungen und Sachscha<strong>de</strong>n führen.<br />
1. Lassen Sie keine Gegenstän<strong>de</strong> auf das Gerät fallen, und setzen Sie es<br />
keinen starken Stößen aus. Setzen Sie die Kamera keinen starken<br />
Vibrationen o<strong>de</strong>r magnetischen Störfel<strong>de</strong>rn aus.<br />
2. Die Kamera darf nicht an Orten mit hohen Temperaturen (über 50 °C) bzw.<br />
tiefen Temperaturen (unter -10 °C) o<strong>de</strong>r hoher Luftfeuchtigkeit installiert<br />
wer<strong>de</strong>n. (An<strong>de</strong>rnfalls besteht die Gefahr eines Bran<strong>de</strong>s o<strong>de</strong>r Stromschlags.)<br />
3. Installieren Sie das Gerät nicht in <strong>de</strong>r Nähe von Wärmequellen, wie z. B.<br />
einem Heizgerät o<strong>de</strong>r Heizkörper, und an Orten, an <strong>de</strong>nen es direktem<br />
Sonnenlicht ausgesetzt ist. (Hier besteht Feuergefahr.)<br />
4. Wenn Sie die bereits installierte Kamera an einen an<strong>de</strong>ren Ort verlegen<br />
wollen, achten Sie darauf, die Kamera auszuschalten, bevor Sie sie<br />
abnehmen o<strong>de</strong>r neu installieren.<br />
5. Die Installation sollte an einer gut belüfteten Stelle erfolgen.<br />
6. Ziehen Sie bei einem Gewitter <strong>de</strong>n Netzstecker. (Die Nichtbeachtung kann<br />
zu Feuer o<strong>de</strong>r einer Beschädigung <strong>de</strong>s Geräts führen.)<br />
7. Richten Sie die Kamera niemals direkt auf sehr helle Objekte, wie z.B. die<br />
Sonne, da dadurch <strong>de</strong>r CCD-Bildsensor beschädigt wer<strong>de</strong>n kann.<br />
G
Benutzerhandbuch<br />
Benutzerhandbuch<br />
Inhalt<br />
1. Überblick ............................................................... 3<br />
2. Bezeichnung von Systemkomponenten ...... 4<br />
3. Funktion je<strong>de</strong>r Systemkomponente ..................... 5<br />
4. Installation ................................................................ 6<br />
Kontrollieren Sie <strong>de</strong>n Inhalt <strong>de</strong>r<br />
Verpackung ........................................................... 6<br />
Anmerkungen über Installation und<br />
Benutzung .............................................................. 6<br />
Kabelanschluss ..................................................... 7<br />
5. Technische Daten ............................................. 9<br />
2<br />
1. Überblick<br />
Die Farb-Dome ist eine Überwachungskamera,<br />
die über <strong>de</strong>n neuesten CCD Bildwandler verfügt,<strong>de</strong>r für die<br />
beste Überwachungsfunktion in Verbindung mit einem<br />
CCTV System sorgt.<br />
■ CCD Bil<strong>de</strong>lemente<br />
• <strong>SCC</strong>-B5300(G) : 270,000 pixels<br />
• <strong>SCC</strong>-B5300(G)P : 320,000 pixels<br />
• <strong>SCC</strong>-B5301(G)/<strong>SCC</strong>-B5303(G)/<br />
<strong>SCC</strong>-B5305(G) : 410,000 pixels<br />
• <strong>SCC</strong>-B5301(G)P/<strong>SCC</strong>-B5303(G)P/<br />
<strong>SCC</strong>-B5305(G)P : 470,000 pixels<br />
■ Stromversorgung<br />
• 12 V Gleichstrom/24 V Wechselstrom<br />
■ Automatische Funktion und spezielle Funktion<br />
• ATW Funktion (Automatische Weißabgleichsfunktion)<br />
• BLC<br />
• AGC<br />
• ELC(Elektronische IRIS Blen<strong>de</strong>)<br />
❈ Farbflackern kann bei <strong>de</strong>r Verwendung dieser Kamera in<br />
Verbindung mit Fluoreszenzbeleuchtung entstehen, wenn<br />
die Kamera mit einem Objektiv mit manueller Blen<strong>de</strong><br />
ausgerüstet ist und die Einstellung auf die ELC-Betriebsart<br />
erfolgt ist. Nutzen Sie in diesem Fall die<br />
Wechselstromversorgung. (NTSC : 60HZ PAL : 50HZ)<br />
❊ Wenn Sie anstelle <strong>de</strong>s Line-Lock-Modus die interne<br />
Synchronisierungsart verwen<strong>de</strong>n möchten, müssen Sie<br />
Gleichstrom anlegen. Die interne Synchronisierung liefert eine<br />
bessere Bildqualität als <strong>de</strong>r Line-Lock-Modus.<br />
☞ Farbflackern be<strong>de</strong>utet, dass die Farbdarstellung auf <strong>de</strong>m<br />
Monitor nicht konstant ist. Dieser Effekt entsteht durch<br />
einen schnell wechseln<strong>de</strong>n Weißabgleich, hervorgerufen<br />
durch die in <strong>de</strong>r gleichen Frequenz wie die<br />
Spannungsversorgung <strong>de</strong>r Kamera pulsieren<strong>de</strong>n<br />
Beleuchtung.<br />
3<br />
G
Benutzerhandbuch<br />
Benutzerhandbuch<br />
2. Bezeichnung von<br />
Systemkomponenten<br />
3. Funktion je<strong>de</strong>r<br />
Systemkomponente<br />
Fixobjektiv<br />
Domekuppel<br />
■ Fixiertes Objektiv<br />
• Ein Fixobjektiv ist in <strong>de</strong>r Kameraeinheit<br />
integriert.Bitte achten Sie darauf,dass kein<br />
Staub o<strong>de</strong>r frem<strong>de</strong> Gegenstän<strong>de</strong> auf die<br />
Glasoberfläche <strong>de</strong>s Objektivs gelangen.<br />
■ Haterung<br />
• Halterungsvorrichtung für die<br />
Kameramontage.<br />
G<br />
PCB Board<br />
Halterung<br />
Netzkabel<br />
Vi<strong>de</strong>okabel<br />
■ PCB Board<br />
• Dieses Teil ist sehr wichtig,weil es die<br />
Kamerafunktion ermöglicht.<br />
Bitte vorsichtig anfassen.<br />
■ Netzkabel<br />
• Kabelstecker, <strong>de</strong>r am Adapterkabel<br />
angeschlossen wird. An 12 V Gleichstrom<br />
o<strong>de</strong>r 24 V Wechselstrom anschließen.<br />
■ Kabel für Vi<strong>de</strong>osignalausgang<br />
• Kabel für das Vi<strong>de</strong>osignal.<br />
■ Domekuppel<br />
• Durchsichtige PVC Kuppelhülle,die die<br />
Kameraeinheit schützt.<br />
Achten Sie darauf,dass kein Kratzer darauf<br />
entsteht.<br />
4 5
Benutzerhandbuch<br />
Benutzerhandbuch<br />
4. Installation<br />
■<br />
Kontrollieren Sie <strong>de</strong>n Inhalt <strong>de</strong>r Verpackung<br />
• Überprüfen Sie, ob die folgen<strong>de</strong>n Teile in <strong>de</strong>r<br />
erworbenen Packung enthalten sind.<br />
■<br />
Kabelanschluss<br />
1. Halten Sie die Kamerahalterung mit einer Hand<br />
fest und drehen Sie die Kuppelhülle nach links mit<br />
an<strong>de</strong>rer Hand, um sie abzubauen.<br />
■<br />
Kameraeinheit<br />
Befestigung<br />
s-schrauben<br />
6<br />
Betriebsanleitung<br />
Anmerkungen über Installation und Benutzung<br />
1. Benutzer dürfen die Kameraeinheit nicht von <strong>de</strong>r Frontseite<br />
her zerlegen.<br />
2. Fassen Sie die Kamera immer vorsichtig an. Bitte beugen<br />
Sie je<strong>de</strong>n Anschlag o<strong>de</strong>r je<strong>de</strong> Vibration möglichst vor und<br />
achten Sie darauf, dass bei Lagerung die Kameraeinheit<br />
nicht beschädigt o<strong>de</strong>r zerkratzt wird.<br />
3. Bitte installieren Sie die Kamera nicht in Regen<br />
ausgesetzten Plätzen o<strong>de</strong>r im hohen Grad feuchten<br />
Bereichen. Nehmen Sie die Kameraeinheit nicht im nassen<br />
Platz in Betrieb.<br />
4. Reinigen Sie die Kameraeinheit nicht mit starken<br />
Putzmitteln o<strong>de</strong>r Seifen. Wenn die Kamera verschmutzt ist,<br />
reinigen Sie sie mit einem trockenen Tuch. Beson<strong>de</strong>rs zum<br />
Reinigen <strong>de</strong>r Kuppelab<strong>de</strong>ckung verwen<strong>de</strong>n Sie ein zum<br />
Reinigen eines Objektivs geeignetes Putztuch.<br />
5. Platzieren Sie die Kameraeinheit an einem kühlen Bereich,<br />
wo kein direktes Sonnenlicht einfällt. An<strong>de</strong>rnfalls kann es zu<br />
Schä<strong>de</strong>n am Produkts führen.<br />
2. Schließen Sie das BNC-Kabel an <strong>de</strong>n in <strong>de</strong>r<br />
Kuppelkamera integrierten Vi<strong>de</strong>okabelstecker an<br />
und schließen Sie das an<strong>de</strong>re En<strong>de</strong> <strong>de</strong>s BNC-Kabel<br />
an <strong>de</strong>n Vi<strong>de</strong>eingang <strong>de</strong>s Monitors an.<br />
3. Schließen Sie das 12-V-Gleichstrom-/24-V-<br />
Wechselstrom-Netzkabel <strong>de</strong>s Netzteils an <strong>de</strong>n in <strong>de</strong>r<br />
Kameraeinheit angefügten Netzkabelstecker<br />
an.Beim Anschließen <strong>de</strong>s Wechselstromeingangs<br />
<strong>de</strong>s Adapters stellen Sie vorher <strong>de</strong>n<br />
Spannungauswahlschalter auf 110 V o<strong>de</strong>r 220 V ein.<br />
BNC Kabel<br />
7<br />
Monitor<br />
G
Benutzerhandbuch<br />
Benutzerhandbuch<br />
4. Bringen Sie die Kameraeinheit an Zielort mit <strong>de</strong>m<br />
Schraubenzieher mit <strong>de</strong>n mitgelieferten<br />
Befestigungsschrauben an.<br />
Halterung<br />
5. Stellen Sie das Kamerabild ein,in<strong>de</strong>m Sie das<br />
Kameragehäuse (PCB-Board) innerhalb <strong>de</strong>r<br />
Domekamera aufwärts o<strong>de</strong>r abwärts verschieben,<br />
Justieren Sie das Objektiv in <strong>de</strong>m sie es nach links<br />
o<strong>de</strong>r nach rechts drehen.<br />
Das Bild durch<br />
Verschieben<br />
aufwärts o<strong>de</strong>r<br />
abwärts justieren<br />
Schraubenzieher<br />
8<br />
Wand o<strong>de</strong>r Decke<br />
Wand o<strong>de</strong>r Decke<br />
Befestigungs<br />
schrauben<br />
Den Fokus durch<br />
Drehen nach links<br />
o<strong>de</strong>r nach rechts<br />
justieren<br />
6. Bauen Sie die Kuppelab<strong>de</strong>ckung ein, in<strong>de</strong>m Sie<br />
diese nach rechts drehen.<br />
Anmerkung<br />
Achten Sie bitte beim Zusammenbauen o<strong>de</strong>r<br />
Zerlegen beson<strong>de</strong>rs darauf, dass keine<br />
Fremdkörper in die Objektivkappe gelangen.<br />
5. Technische Daten<br />
Artikel<br />
Spezifikation<br />
Fernsehnorm <strong>SCC</strong>-B5300(G)/B5301(G)/B5303(G)<br />
(Signalsystem) /B5305(G) : NTSC STANDARD<br />
<strong>SCC</strong>-B5300(G)P/B5301(G)P<br />
/B5303(G)P/ B5305(G)P<br />
: PAL STANDARD<br />
CCD-Sen<strong>de</strong>r<br />
1/3" SUPER HAD IT CCD<br />
Effektive Bil<strong>de</strong>lmente <strong>SCC</strong>-B5300(G) : 510(H) x 492(V)<br />
<strong>SCC</strong>-B5301(G)/B5303(G)/B5305(G)<br />
: 768(H) x 494(V)<br />
<strong>SCC</strong>-B5300(G)P : 500(H) x 582(V)<br />
<strong>SCC</strong>-B5301(G)P /B5303(G)P /B5305(G)P<br />
: 752(H) x 582(V)<br />
Synchronisation Intern/Linelock<br />
(Automatische Steuerung <strong>de</strong>s Gleichstrom-<br />
/Wechselstrombetriebs)<br />
Auflösung <strong>SCC</strong>-B5300(G)(P) : 330 TV Zeilen (H)<br />
350 TV Zeilen (V)<br />
<strong>SCC</strong>-B5301(G)(P)/B5303(G)(P)/B5305(G)(P)<br />
: 480 TV Zeilen (H)<br />
350 TV Zeilen (V)<br />
Vi<strong>de</strong>oausgangssignal VBS 1.0Vp-p bei 75 , gemischt<br />
Signal/Rausch abstand 50dB<br />
Min. Belleuchtung <strong>SCC</strong>-B5300(G)(P) : 0.3 Lux<br />
eines abgebil<strong>de</strong>ten <strong>SCC</strong>-B5301(G)(P)/B5303(G)(P)<br />
Objekts /B5305(G)(P) : 0.5 Lux<br />
Elektronische Verschlusszeit Max. 1/100k s<br />
Objektiv ( Brennpunkt) <strong>SCC</strong>-B5300(G)(P)/B5301(G)(P) : f=3.8mm<br />
<strong>SCC</strong>-B5303(G)(P)<br />
: f=2.9mm<br />
<strong>SCC</strong>-B5305(G)(P)<br />
: f=8mm<br />
Gamma-Korrektur 0.45<br />
Gehäusefarbe <strong>SCC</strong>-B530X(P) : Schwarz<br />
<strong>SCC</strong>-B530XG(P) : Grau<br />
Anschlüsse für Signalausgang: BNC Buchse,<br />
Ein/Ausgang<br />
Netzeingang : 2P-Buchse<br />
Betriebs temperatur -10~+50°C<br />
Betribsspannung 12V Wechselstrom 10%,-5%, 24VWechselstrom<br />
10% (NTSC: 60Hz 0.3Hz, PAL: 50Hz 0.3Hz)<br />
Leistungsaufnahme 3 W<br />
Abmessungen 100(ø) x 67(H)mm<br />
Gewicht<br />
180g<br />
9<br />
G
Guía <strong>de</strong>l usuario<br />
Guía <strong>de</strong>l usuario<br />
El propósito <strong>de</strong> esta información es garantizar el uso apropiado <strong>de</strong><br />
este producto con el fin <strong>de</strong> prevenir cualquier peligro o daño a la<br />
propiedad. Sírvase tomar en cuenta todas las medidas <strong>de</strong> seguridad.<br />
Advertencia<br />
El ignorar este aviso <strong>de</strong> advertencia pue<strong>de</strong> ocasionar<br />
una lesióngrave o la muerte.<br />
1. Asegúrese <strong>de</strong> usar solamente el adaptador suministrado.<br />
(El usar un adaptador diferente al suministrado pue<strong>de</strong> ocasionar<br />
un incendio, un choque eléctrico o un daño al producto.)<br />
2. Cuando vaya a conectar la fuente <strong>de</strong> alimentación y los cables <strong>de</strong><br />
las señales, revise antes los terminales <strong>de</strong> conexión externa.<br />
Conecte los cables <strong>de</strong> las señales <strong>de</strong> alarma a los terminales para<br />
las alarmas, el adaptador <strong>de</strong> CA al receptáculo <strong>de</strong> entrada <strong>de</strong> CA y<br />
el adaptador <strong>de</strong> CC a la entrada <strong>de</strong> CC, asegurándose <strong>de</strong> tener en<br />
cuenta las polarida<strong>de</strong>s. (Una conexión incorrecta <strong>de</strong> la fuente <strong>de</strong><br />
alimentación pue<strong>de</strong> ocasionar un incendio, un choque eléctrico o<br />
un daño al producto.)<br />
3. No conecte varias cámaras a un adaptador. (El exce<strong>de</strong>r la<br />
capacidad pue<strong>de</strong> producir una generación anormal <strong>de</strong> calor o<br />
fuego.)<br />
4. Enchufe firmemente el cable eléctrico en el receptáculo <strong>de</strong><br />
corriente. (Una conexión floja pue<strong>de</strong> producir fuego.)<br />
5. Al instalar la cámara en una pared o un techo, sujétela bien y con<br />
firmeza. (Una cámara, al caer, pue<strong>de</strong> causar daños corporales.)<br />
6. No coloque objetos conductores (p.ej., <strong>de</strong>stornilladores, monedas,<br />
u objetos metálicos) o envases llenos <strong>de</strong> agua encima <strong>de</strong> la<br />
cámara. (El hacerlo pue<strong>de</strong> causar daños corporales <strong>de</strong>bido a la<br />
posible ocurrencia <strong>de</strong> fuego, choque eléctrico o la caída <strong>de</strong> los<br />
objetos.)<br />
7. No la instale en un lugar tiznado, polvoriento o húmedo. (El hacerlo<br />
pue<strong>de</strong> ocasionar un incendio o un choque eléctrico.)<br />
8. Si hubiera olores inusuales o humo que parecieran ser causados<br />
por el producto, <strong>de</strong>sconecte inmediatamente la fuente <strong>de</strong><br />
alimentación y comuníquese con el centro <strong>de</strong> servicios.<br />
(El continuar usando la cámara en tales condiciones pue<strong>de</strong><br />
provocar un incendio o un choque eléctrico.)<br />
9. Si este producto presenta una falla <strong>de</strong> operación, comuníquese con<br />
la tienda en don<strong>de</strong> lo adquirió, o con el centro <strong>de</strong> servicios más<br />
cercano. Nunca <strong>de</strong>sarme ni modifique este producto <strong>de</strong> ninguna<br />
manera. (<strong>Samsung</strong> no es responsable por los problemas causados<br />
por modificaciones no autorizadas o por intentos <strong>de</strong> reparación.)<br />
10. Al limpiarlo, no rocíe agua directamente en las piezas <strong>de</strong>l<br />
producto. (Al hacerlo pue<strong>de</strong> provocar un fuego o un choque<br />
eléctrico.) Limpie la superficie con un paño seco. Nunca use<br />
<strong>de</strong>tergentes o limpiadores químicos en el producto, ya que esto<br />
pue<strong>de</strong> causar <strong>de</strong>coloración <strong>de</strong> la superficie o causar un daño al<br />
acabado.<br />
Precaución<br />
El ignorar este aviso <strong>de</strong> precaución pue<strong>de</strong> ocasionar una<br />
lesión o daño a la propiedad.<br />
1. No <strong>de</strong>je caer objetos en el producto ni lo golpee. Manténgalo<br />
alejado <strong>de</strong> lugares sujetos a vibración excesiva o interferencia<br />
magnética.<br />
2. No lo instale en un sitio sujeto a altas temperaturas( por encima <strong>de</strong><br />
500°C/122°F), bajas temperaturas (por <strong>de</strong>bajo <strong>de</strong> -100°C/ 14°F), o<br />
alta humedad. (El hacerlo pue<strong>de</strong> causar un incendio o un choque<br />
eléctrico.)<br />
3. Evite los sitios expuestos a la luz <strong>de</strong>l sol o cercanos a fuentes <strong>de</strong><br />
calor tales como calentadores o radiadores. (El no observar esto<br />
pue<strong>de</strong> ocasionar un riesgo <strong>de</strong> fuego.)<br />
4. Si usted quiere cambiar <strong>de</strong> ubicación el producto ya instalado, no<br />
olvi<strong>de</strong> apagarlo antes <strong>de</strong> moverlo o <strong>de</strong> reinstalarlo.<br />
5. Instale en un sitio con buena ventilación.<br />
6. Saque el enchufe <strong>de</strong>l tomacorriente cuando haya una tormenta<br />
eléctrica. (El no observar esto pue<strong>de</strong> ocasionar un incendio o un<br />
daño al producto.)<br />
7. evite apuntar con la cámara directamente a objetos muy brillantes<br />
como el sol, ya que así pue<strong>de</strong> dañar el wenwor <strong>de</strong> imagen CCD.<br />
ES
Guía <strong>de</strong>l usuario<br />
Guía <strong>de</strong>l usuario<br />
Contenidos<br />
1. Resumen .................................................................... 3<br />
2. Nombre <strong>de</strong> componentes ................................... 4<br />
3. Función <strong>de</strong> cada componente .......................... 5<br />
4. Instalación ................................................................. 6<br />
Compruebe que hay interior <strong>de</strong> paquete ......... 6<br />
Notas <strong>de</strong> instalación y uso ................................... 6<br />
Conexión <strong>de</strong> cable ................................................... 7<br />
5. Especificaciones .................................................... 9<br />
2<br />
1. Resumen<br />
CCTV BÓVEDA DE LA CÁMARA DE COLOR<br />
son incorporadas cámaras <strong>de</strong> monitores con reciente<br />
OSD que ofrece el mejor funcionamiento <strong>de</strong> monitor,<br />
conectado con el sistema dispositivo <strong>de</strong> CCTV.<br />
■ Numero <strong>de</strong> CCD pixeles<br />
• <strong>SCC</strong>-B5300(G) : 270,000 pixeles<br />
• <strong>SCC</strong>-B5300(G)P : 320,000 pixeles<br />
• <strong>SCC</strong>-B5301(G)/<strong>SCC</strong>-B5303(G)/<br />
<strong>SCC</strong>-B5305(G) : 410,000 pixeles<br />
• <strong>SCC</strong>-B5301(G)P/<strong>SCC</strong>-B5303(G)P/<br />
<strong>SCC</strong>-B5305(G)P : 470,000 pixeles<br />
■ Alimentación <strong>de</strong> energía<br />
• CC 12V/CA 24V<br />
■ Función automática y especial<br />
• ATW<br />
• BLC<br />
• AGC<br />
• ELC (Obturador iris electrónico )<br />
❈ ARRASTRE DE COLOR • pue<strong>de</strong> ocurrir cuando usa<br />
esta cámara en luz fluorescente que es equipado con<br />
IRIS manual y es configurado al modo <strong>de</strong> ELC en el<br />
menu <strong>de</strong> configuración <strong>de</strong> modo <strong>de</strong> ALC/ELC<br />
En ese caso, introduzca alimentación <strong>de</strong> CA.<br />
(Control automático para Linelock)<br />
(NTSC : 60HZ PAL : 50HZ)<br />
❈ Si <strong>de</strong>sea utilizar el modo Interno en lugar <strong>de</strong>l modo<br />
Sincronización externa, aplique alimentación <strong>de</strong> CC.<br />
El modo Interno ofrece mejor calidad <strong>de</strong> imagen que el<br />
modo Sincronización externa.<br />
☞ARRASTRE DE COLOR es un problema cuando el<br />
color en la pantalla ,cambia irregularmente .esto suce<strong>de</strong><br />
cuando BALANCE DE BLANCO no está fijado a causa<br />
<strong>de</strong> mecánico luz fluorescente. Esto suce<strong>de</strong> cuando el<br />
Balance no es ajustado a causa <strong>de</strong>l parpa<strong>de</strong>o <strong>de</strong> luz<br />
intensa<br />
3<br />
ES
Guía <strong>de</strong>l usuario<br />
Guía <strong>de</strong>l usuario<br />
2. Nombre <strong>de</strong> Componentes 3. Función <strong>de</strong> cada pieza<br />
Lente focal fija<br />
Cubierta <strong>de</strong><br />
domo<br />
■ Lente fijador <strong>de</strong> foco<br />
• Lente fijador <strong>de</strong> foco está instalado en la<br />
cámara. Por favor, cuidado con la superficie<br />
<strong>de</strong> frente <strong>de</strong>l lente no esté sucia por algún<br />
polvo o problema exterior.<br />
■ Principal armazón<br />
• Armazón que sostiene la cámara.<br />
Tabla <strong>de</strong><br />
PCB<br />
Cable <strong>de</strong> Vi<strong>de</strong>o<br />
■ PCB bordo<br />
• Esta parte es muy importante porque se<br />
realiza la función <strong>de</strong> cámara Por favor<br />
maneje con cuidado.<br />
ES<br />
Cuerpo<br />
principal<br />
Cable <strong>de</strong><br />
energía<br />
■ Cable energético<br />
• Terminal que es conectado a la energia<br />
(Power adaptador )cable. Connect a<br />
CC 12V/CA 24V.<br />
■ Cable <strong>de</strong> salida <strong>de</strong> señal <strong>de</strong>l vi<strong>de</strong>o<br />
• El cable que manda la señal <strong>de</strong>l vi<strong>de</strong>o.<br />
■ Cubierto <strong>de</strong> bóveda<br />
• Transparente plástico cubierto que proteje la<br />
cámara. Precaución, no raje la bóveda.<br />
4 5
Guía <strong>de</strong>l usuario<br />
Guía <strong>de</strong>l usuario<br />
4. Instalación<br />
■<br />
Conexión <strong>de</strong> cable<br />
■<br />
Compruebe que hay en el interior <strong>de</strong>l<br />
paquete<br />
• Compruebe si las siguientes partes están incluidas en<br />
el paquete.<br />
1. Toque el armazón <strong>de</strong> cámara con una mano y<br />
gire el cubierto <strong>de</strong> bóveda en sentido contrario<br />
al <strong>de</strong> las agujas <strong>de</strong>l reloj con la otra mano para<br />
<strong>de</strong>smontarlo.<br />
■<br />
Cámara<br />
Tornillos<br />
Guía <strong>de</strong> usuario<br />
Notas <strong>de</strong> instalación y uso<br />
1. Usuarios tienen que <strong>de</strong>smontar la cámara <strong>de</strong>s<strong>de</strong><br />
dirección frontal.<br />
2. Siempre maneje la cámara con mucho cuidado .<br />
Por favor no dé algún impacto o vibración y tenga<br />
precaución para que no se cause gran daño ni se `<br />
raye la cámara.<br />
3. Por favor instale la cámara en lugares don<strong>de</strong> no<br />
reciba los rayos <strong>de</strong>l sol o en zonas con mucha<br />
humedad.<br />
4. No limpie el armazón <strong>de</strong> la cámara con fuerza ni con<br />
jabón cuando la cámara esté sucia, limpielo con un<br />
paño seco. Especialmente aségurese <strong>de</strong> usar un suave<br />
paño para limpiar la bóveda.<br />
5. Por favor coloque la cámara en zona fresca con el fin<br />
<strong>de</strong> que no sea expuesta a la luz directa . Si expone la<br />
cámara a la luz , pue<strong>de</strong> causar daños en el producto.<br />
2. Conecte el BNC cable con el cable <strong>de</strong> vi<strong>de</strong>o<br />
el conector agregado en la bóveda y conecte<br />
el que queda ( BNC) cable a la terminal <strong>de</strong><br />
entrada <strong>de</strong> monitor <strong>de</strong>l vi<strong>de</strong>o.<br />
3. Conecte el adaptador energético. cuando<br />
conecte el cable energético CC 12V/CA 24V<br />
<strong>de</strong> conector al cable <strong>de</strong> conexión que es<br />
agregado en la bóveda.<br />
Cable BNC<br />
Monitor<br />
ES<br />
6<br />
7
Guía <strong>de</strong>l usuario<br />
Guía <strong>de</strong>l usuario<br />
4. Coloque la cámara en zona <strong>de</strong>seada con el<br />
<strong>de</strong>stornillador proporciado con tab tornillo.<br />
Principal armazón<br />
5. Configure imagen apropiada por mover la<br />
cámara (PCB bor<strong>de</strong>) interior <strong>de</strong>l cámara<br />
bóveda. Ajuste el foco arriba o abajo.<br />
por girarel lente a la izquierda o <strong>de</strong>recha.<br />
Ajuste Imagen<br />
arriba o abajo<br />
Destornillador<br />
8<br />
Pared o Techo<br />
Tab tornillo<br />
Pared o Techo<br />
Ajuste foco por Girar<br />
a la izquierda o<br />
<strong>de</strong>recha<br />
6. Monte la cubierta <strong>de</strong> bóveda por girarlo en el<br />
sentido <strong>de</strong> las agujas <strong>de</strong>l reloj.<br />
NOTA<br />
Por favor ,cuidado con algún material sucio.<br />
pue<strong>de</strong> causar mal función.cuando <strong>de</strong>smontaje el<br />
équipo mantenga la cubieta limpiamente.<br />
5. Esecificaciones Item Detalles<br />
Item<br />
Detalles<br />
Difusión Sistema <strong>SCC</strong>-B5300(G)/B5301(G)/B5303(G)/<br />
B5305(G)<br />
: NTSC STANDARD<br />
<strong>SCC</strong>-B5300(G)P/B5301(G)P/B5303(G)P<br />
/ B5305(G)P : PAL STANDARD<br />
Pick-up dispositivo 1/3" SUPER HAD IT CCD<br />
Numero <strong>de</strong> <strong>SCC</strong>-B5300(G) : 510(H) x 492(V)<br />
effective pixe<br />
<strong>SCC</strong>-B5301(G)/B5303(G)/B5305(G)<br />
: 768(H) x 494(V)<br />
<strong>SCC</strong>-B5300(G)P : 500(H) x 582(V)<br />
<strong>SCC</strong>-B5301(G)P /B5303(G)P /B5305(G)P<br />
: 752(H) x 582(V)<br />
Sincronizacón Internal/Bloqueo <strong>de</strong> línea<br />
(Control automático para utilizar<br />
alimentación CC/CA)<br />
Resolución <strong>SCC</strong>-B5300(G)(P) : 330 TV Lineas (H)<br />
350 TV Lineas (V)<br />
<strong>SCC</strong>-B5301(G)(P)/B5303(G)(P)/B5305(G)(P)<br />
: 480 TV Lineas (H)<br />
350 TV Lineas (V)<br />
Salida <strong>de</strong> Vi<strong>de</strong>o VBS 1.0Vp-p(75 , compuesto)<br />
S/N ratio<br />
50dB<br />
Min. iluminación <strong>SCC</strong>-B5300(G)(P) : 0.3 Lux<br />
<strong>SCC</strong>-B5301(G)(P)/B5303(G)(P)<br />
/B5305(G)(P) : 0.5 Lux<br />
Velocidad <strong>de</strong>l obturador<br />
electrónico<br />
Lente (longitud focal)<br />
Máx 1/100 k seg<br />
<strong>SCC</strong>-B5300(G)(P)/B5301(G)(P) : f=3.8mm<br />
<strong>SCC</strong>-B5303(G)(P)<br />
: f=2.9mm<br />
<strong>SCC</strong>-B5305(G)(P)<br />
: f=8mm<br />
Gamma correction 0.45<br />
Color <strong>de</strong>l cuerpo <strong>SCC</strong>-B530X(P) : Negro<br />
<strong>SCC</strong>-B530XG(P) : Gris<br />
Conector Entrada <strong>de</strong> salida <strong>de</strong> señal : BNC,<br />
<strong>de</strong> energía : Conector 2P<br />
Operación temperatura -10~+50°C<br />
Fuente <strong>de</strong> energía CC 12V 10%,-5%, CA 24V 10%<br />
(NTSC:60Hz 0.3Hz,PAL:50Hz 0.3Hz)<br />
Consumo <strong>de</strong> energía 3 W<br />
Dimensión<br />
100(ø) x 67(H)mm<br />
Peso<br />
180g<br />
9<br />
ES
Manuale d’uso<br />
Manuale d’uso<br />
Scopo di queste informazioni è garantire l’uso corretto <strong>de</strong>l prodotto per<br />
prevenire pericoli o danni alla proprietà. Attenersi a tutte le<br />
precauzioni.<br />
Avvertenza<br />
La mancata osservanza di questa indicazione può<br />
provocare la morte o gravi lesioni.<br />
1. Utilizzare esclusivamente l’adattatore in dotazione. (L’uso di un<br />
adatattatore diverso da quello fornito può provocare incendi, scosse<br />
elettriche o danni al prodotto.)<br />
2. Quando si collegano i cavi <strong>de</strong>ll’alimentatore e <strong>de</strong>l segnale,<br />
controllare i terminali <strong>de</strong>i collegamenti esterni prima di effettuare i<br />
collegamenti. Collegare i cavi <strong>de</strong>l segnale di allarme agli appositi<br />
terminali, l’adattatore AC alla presa di ingresso <strong>de</strong>lla corrente AC, e<br />
l’adattatore DC all’ingresso <strong>de</strong>lla corrente DC, rispettando le<br />
polarità corrette. (Un collegamento non corretto <strong>de</strong>ll’alimentatore<br />
può provocare incendi, scosse elettriche o danni al prodotto.)<br />
3. Non collegare più telecamere allo stesso adattatore. (Il<br />
superamento <strong>de</strong>lla capacità può provocare una generazione<br />
anomala di calore oppure incendi.)<br />
4. Inserire il cavo di alimentazione nell’apposita presa. (Un<br />
collegamento allentato può provocare incendi.)<br />
5. Quando si installa la telecamera a soffitto oppure a parete, fissare<br />
bene l’apparecchio. (Una telecamera instabile può ca<strong>de</strong>re e<br />
provocare lesioni personali.)<br />
6. Non collocare oggetti con capacità conduttive (cacciaviti, monete e<br />
altri oggetti metallici) oppure recipienti pieni d’acqua sopra la<br />
telecamera. (La mancata osservanza di questa norma può<br />
provocare lesioni personali dovute a incendi, scosse elettriche o<br />
alla caduta di oggetti.)<br />
7. Non installare l’apparecchio in luoghi sporchi, polverosi o umidi. (In<br />
caso contrario si possono provocare incendi o scosse elettriche.)<br />
8. Se dall’apparecchio provengono odori insoliti oppure fumo,<br />
scollegare immediatamente dall’alimentazione elettrica e rivolgersi<br />
al centro di assistenza. (Se si continua a utilizzare l’apparecchio in<br />
tali condizioni si possono provocare incendi o scosse elettriche.)<br />
9. In caso di funzionamento difettoso <strong>de</strong>ll’apparecchio, rivolgersi al<br />
rivenditore presso cui è stato effettuato l’acquisto oppure al centro<br />
di assistenza più vicino. Non smontare né modificare il prodotto.<br />
(<strong>Samsung</strong> non è responsabile di problemi causati da modifiche non<br />
autorizzate o da tentativi di riparazione.)<br />
10. Durante la pulizia, non spruzzare acqua direttamente sui<br />
componenti <strong>de</strong>l prodotto. (In caso contrario si possono provocare<br />
incendi o scosse elettriche.) Pulire la superficie con un panno<br />
asciutto. Non usare mai <strong>de</strong>tergenti o prodotti chimici per la pulizia<br />
<strong>de</strong>l prodotto, in quanto questi potrebbero provocare lo<br />
scolorimento <strong>de</strong>lla superficie e danneggiare il rivestimento esterno.<br />
Attenzione<br />
La mancata osservanza di questa indicazione può<br />
provocare lesioni o danni alla proprietà.<br />
1. Non far ca<strong>de</strong>re oggetti sopra il prodotto e non sottoporre<br />
quest’ultimo a forti colpi. Il prodotto non va tenuto in un luogo<br />
soggetto a vibrazioni eccessive o a interferenze magnetiche.<br />
2. Non installare il prodotto in un luogo soggetto ad alte (superiori ai<br />
50 gradi) o basse temperature (- 10 gradi), oppure ad elevata<br />
umidità. (In caso contrario si possono provocare incendi o scosse<br />
elettriche.)<br />
3. Evitare i luoghi esposti alla luce solare diretta e la vicinanza a<br />
sorgenti di calore come caloriferi e radiatori. (La mancata<br />
osservanza di questa norma può provocare incendi.)<br />
4. Per spostare un apparecchio già installato, assicurarsi di averlo<br />
spento prima di spostarlo e reinstallarlo.<br />
5. Installare l’apparecchio in un luogo ben ventilato.<br />
6. In caso di temporali, staccare la spina dalla presa elettrica. (La<br />
mancata osservanza di questa norma può provocare incendi o<br />
danni al prodotto.)<br />
7. evitare di puntare la telecamera direttamente su oggetti molto<br />
luminosi (ad esempio sul sole). In caso contrario si potrebbe<br />
danneggiare il sensore CCD.<br />
I
Manuale d’uso<br />
Manuale d’uso<br />
Indice<br />
1. Descrizione ............................................................... 2<br />
2. Nome componente ................................................ 3<br />
3. Funzione di ogni componente ......................... 4<br />
4. Installazione .............................................................. 5<br />
Controlla Che cosa è <strong>de</strong>ntro il pacco ............... 5<br />
Annota su installazione e l’uso ............................. 6<br />
Cavo collegamento ................................................... 7<br />
5. Specifica ..................................................................... 9<br />
2<br />
1. Descrizione<br />
CCTV COLOR DOME CAMERA sono le telecamere<br />
monitorando incorporato con CCD recente CCD che<br />
fornisce la migliore funzione monitorando in collegamento<br />
con l’equipaggiamento <strong>de</strong>llla sistema CCTV.<br />
■ Numero di CCD pixel<br />
• <strong>SCC</strong>-B5300(G) : 270,000 pixels<br />
• <strong>SCC</strong>-B5300(G)P : 320,000 pixels<br />
• <strong>SCC</strong>-B5301(G)/<strong>SCC</strong>-B5303(G)/<br />
<strong>SCC</strong>-B5305(G) : 410,000 pixels<br />
• <strong>SCC</strong>-B5301(G)P/<strong>SCC</strong>-B5303(G)P/<br />
<strong>SCC</strong>-B5305(G)P : 470,000 pixels<br />
■ Gruppo di alimentazione<br />
• DC 12V/AC 24V<br />
■ Funzione Automatica e Funzione speciale<br />
• ATW<br />
• BLC<br />
• AGC<br />
• ELC (I<strong>de</strong>ntificazioni elettroniche <strong>de</strong>ll' otturatore)<br />
❈ COLOR ROLLING può acca<strong>de</strong>re quando usa questa<br />
telecamera in uu luce di fluorescente meccanico che<br />
è equipaggiato con Manuale IRIS e è messo al modo<br />
ELC nel modo ALC/ELC il menu d’installazione.<br />
In tal caso, immettere l'alimentazione AC. (Controllo<br />
automatico Linelock) (NTSC: 60 HZ, PAL:50 HZ)<br />
❈ Se si <strong>de</strong>si<strong>de</strong>ra utilizzare la modalità di sincronizzazione interna<br />
anziché quella <strong>de</strong>lla linea di alimentazione, applicare la<br />
corrente DC. La modalità di sincronizzazione interna fornisce<br />
una migliore qualità <strong>de</strong>lle immagini rispetto alla<br />
sincronizzazione fornita dalla linea di alimentazione.<br />
☞ COLOR ROLLING è la problema che il colore sullo schermo<br />
monitor cambia niente periodicaemente.Questo acca<strong>de</strong> quando<br />
White Balance non è fissato, perchè un luce di fluorescente<br />
mecanicale scuotere brevemente, quando suo ciclo è lo stesso<br />
al ciclo <strong>de</strong>lla frequenza potenza.<br />
3<br />
I
Manuale d’uso<br />
Manuale d’uso<br />
2. Nome componente 3. Funzione di ogni componente<br />
Lenti fuoco fissato<br />
Domo Coperto<br />
■ Lenti fuoco fissato<br />
• Lenti fuoco fissato installato sulla camera.<br />
Per favore pren<strong>de</strong>re cauzioni che qulache<br />
polvero o materia estero raccogliere sul<br />
suferficio vetro frontale <strong>de</strong>i lenti.<br />
■ Corpo principale<br />
• A body that supports the camera.<br />
Board PCB<br />
Corpo<br />
principale<br />
Cavo<br />
Potenza<br />
Cavo Vi<strong>de</strong>o<br />
■ Board PCB<br />
• Questa parte è molto importante da allora<br />
questo eseguisce la funzione <strong>de</strong>lla<br />
telecamera. Per favore manegiare con<br />
attenzione. con cura.<br />
■ Cavo Potenza<br />
• Il terminale che è collegato al cavo potenza<br />
(adattatore) Collegare a DC 12V/AC 24V.<br />
I<br />
■ Cavo <strong>de</strong>ll' uscita <strong>de</strong>l vi<strong>de</strong>o segnale<br />
• Il cavo che trasmette il vi<strong>de</strong>o segnale.<br />
■ Domo Coperto<br />
• Il coperto plastico trasparente che protegge la<br />
telecamera. Sta attento non fare una grattata<br />
su la.<br />
4 5
Manuale d’uso<br />
Manuale d’uso<br />
4. Installazione<br />
■<br />
Controlla Che cosa è <strong>de</strong>ntro il pacco<br />
• Controlla per ve<strong>de</strong>re se le parte seguente sono<br />
incluso nel pacco acquistato.<br />
■<br />
Cavo collegamento<br />
1. Tenere il corpo <strong>de</strong>lla camera con un mano e<br />
girare il coperto dome d’antiorario con altro<br />
mano per smontarlo.<br />
■<br />
Camera<br />
Vite tab<br />
Guida d’utente<br />
Annota su installazione e l’uso<br />
1. Utente non sarà disassemblea la telecamera dalla<br />
direzione frontale.<br />
2. Sempre maneggia la telecamera con attenzione. Per<br />
favore non applica un shock o vibrazione come il più<br />
molto possible e pren<strong>de</strong> cautele non per causare<br />
danneggio o produrre una grattata sulla camera a causa<br />
di carica trascurato.<br />
3. Per favore non installa la telecamera con posto piovoso<br />
o l’area umidita alta. E non operare la telecamera nel<br />
posto bagnato<br />
4. Non pulire il corpo <strong>de</strong>lla telecamera con abrasivi forte o il<br />
sapone. Quando la telecamera diventa sudicio, pulirlo<br />
con tappeto asciuto . Specialmente, accertarsi usare il<br />
tappeto <strong>de</strong>dicato per lenti per pulire il corpo dome.<br />
5. Per favore mantenere la telecamera all’area fresco che<br />
non è esposto alla luce <strong>de</strong>l sole diretto. Se fa,questo<br />
può ausare gli effetti cattivo sul prodotto.<br />
2. Collegare il cavo BNC al collegatore <strong>de</strong>l cavo<br />
vi<strong>de</strong>o attacato sulla telecamera dome, e<br />
collegare il cavo BNC rimasto al vi<strong>de</strong>o input<br />
terminale <strong>de</strong>l monitor.<br />
3. Collegare l’adattatore <strong>de</strong>lla potenza a questo<br />
tempo. Collegare il DC 12V/AC 24V <strong>de</strong>l cavo<br />
potenza <strong>de</strong>l collegatore al collegamento <strong>de</strong>l<br />
cavo potenza che è attacato sulla telecamera<br />
dome.<br />
Cavo BNC<br />
Monitor<br />
I<br />
6<br />
7
Manuale d’uso<br />
Manuale d’uso<br />
4. Attacare la telecamera sulla loazione di targey<br />
con il driver <strong>de</strong>l vite usando il vite cartellino<br />
fornito.<br />
Corpo Principale<br />
5. Mette l’magine proprio da muovendo la<br />
telecamera <strong>de</strong>l corpo(PCB board) <strong>de</strong>ntro la<br />
telecamera dome verso l’alto o verso il basso e<br />
mette il fuoco da girando i lenti alla direzione<br />
<strong>de</strong>lla sinistra o <strong>de</strong>stra.<br />
Aggiustare<br />
l’imagine verso<br />
l’alto o verso il<br />
basso.<br />
Driver Vite<br />
8<br />
muro o sofitto<br />
Vite Tab<br />
muro o sofitto<br />
Aggiustare fuoco da<br />
girando sinistra o<br />
<strong>de</strong>stra.<br />
6. Assembleare il coperto dome da girandolo<br />
antiorario.<br />
Nota<br />
per favore accertarsi che qualche material<br />
esterna raccogliere sul coperto <strong>de</strong>i lenti quando<br />
assembleando o smontando il coperto dome.<br />
5. Specifica<br />
Voce<br />
Particolari<br />
Metodo di<br />
<strong>SCC</strong>-B5300(G)/B5301(G)/B5303(G)<br />
broadcasting /B5305(G) : NTSC STANDARD<br />
<strong>SCC</strong>-B5300(G)P/B5301(G)P/B5303(G)P/<br />
B5305(G)P : PAL STANDARD<br />
CCD<br />
1/3" SUPERO HAD QUESTO CCD<br />
Stimato pixel<br />
<strong>SCC</strong>-B5300(G) : 510(H) x 492(V)<br />
<strong>SCC</strong>-B5301(G)/B5303(G)/B5305(G)<br />
: 768(H) x 494(V)<br />
<strong>SCC</strong>-B5300(G)P: 500(H) x 582(V)<br />
<strong>SCC</strong>-B5301(G)P /B5303(G)P /B5305(G)P<br />
752(H) x 582(V)<br />
Sincronizazione Internale/Linelock (Blocco linea)<br />
(Controllo automatico per l'utilizzo<br />
<strong>de</strong>ll'alimentazione DC/AC)<br />
Risolizione<br />
<strong>SCC</strong>-B5300(G)(P) : 330 linee TV (H)<br />
350 linee TV (V)<br />
<strong>SCC</strong>-B5301(G)(P)/B5303(G)(P)/B5305(G)(P)<br />
: 480 linee TV (H)<br />
350 linee TV (V)<br />
Segnale prodotto VBS 1.0Vp-p(75 , composite)<br />
Tasso di S/N<br />
50dB<br />
Illuminazione più <strong>SCC</strong>-B5300(G)(P) : 0.3 Lux<br />
bassa <strong>de</strong>lla cosa <strong>SCC</strong>-B5301(G)(P)/B5303(G)(P)<br />
<strong>de</strong>scritto /B5305(G)(P) : 0.5 Lux<br />
Velocità otturatore elettronico Max 1/100.000 sec<br />
Lenti(lunghezza focale) <strong>SCC</strong>-B5300(G)(P)/B5301(G)(P) : f=3.8mm<br />
<strong>SCC</strong>-B5303(G)(P)<br />
: f=2.9mm<br />
<strong>SCC</strong>-B5305(G)(P)<br />
: f=8mm<br />
Correzione Gamma 0.45<br />
Colore corpo <strong>SCC</strong>-B530X(P) : Nero<br />
<strong>SCC</strong>-B530XG(P) : Grigio<br />
Collegamento di In/Out Segnale output:BNC,<br />
PotenzaInput: Presa jack 2P<br />
Operativa temperatura -10~+50°C<br />
Tensione DC 12V 10%,-5%, AC 24V 10%<br />
(NTSC:60Hz 0.3Hz, PAL:60Hz 0.3Hz)<br />
Pontenza<br />
3 W<br />
Esterno formato 100(ø) x 67(H)mm<br />
Peso<br />
180g<br />
9<br />
I
–ÛÍÓ‚Ó‰ÒÚ‚Ó ÔÓθÁÓ‚‡ÚÂΡ<br />
–ÛÍÓ‚Ó‰ÒÚ‚Ó ÔÓθÁÓ‚‡ÚÂΡ<br />
Œ—“Œ–Œ∆ÕŒ! ¬Œ »«¡≈∆¿Õ»≈ œŒ–¿∆≈Õ»fl ›À≈K“–»◊≈—<br />
K»Ã “ŒKŒÃ Õ≈ —ջÿ…“≈ «¿ƒÕfifi K–¤ÿK”. ¬ »«ƒ≈À»»<br />
Õ≈“ ƒ≈“¿À≈…, KŒ“Œ–¤≈ œŒÀ‹«Œ¬¿“≈À‹ ÃŒ∆≈“<br />
«¿Ã≈Õ»“‹ »À» Œ“–≈ÌՓ»–Œ¬¿“‹ —¿ÃŒ—“Œfl“≈À‹ÕŒ.<br />
—Œ ¬—≈û ¬Œœ–Œ—¿Ã» Œ¡–¿Ÿ¿…“≈—‹ K<br />
K¬¿À»‘»÷»–Œ¬¿Õդà —œ≈÷»¿À»—“¿Ã.<br />
¬Ó ËÁ·ÂʇÌË ‚ÓÁ„Óapple‡Ìˡ ËÎË ÔÓapple‡ÊÂÌˡ ˝ÎÂÍÚapple˘ÂÒÍËÏ<br />
ÚÓÍÓÏ Ì ÔÓ‰‚Âapple„‡ÈÚ ‰‡ÌÌÓ ËÁ‰ÂÎË ‚ÓÁ‰ÂÈÒڂ˲ ‰Óʉˇ ËÎË<br />
‚·„Ë.<br />
ƒ‡ÌÌÓ ÛÒÚappleÓÈÒÚ‚Ó ËÁ„ÓÚÓ‚ÎÂÌÓ ‚ ÒÓÓÚ‚ÂÚÒÚ‚ËË Ò ÔÓÎÓÊÂÌˡÏË<br />
ÔÛÌÍÚ‡ 15 œapple‡‚ËÎ ‘‰Âapple‡Î¸ÌÓÈ ÍÓÏËÒÒËË Ò‚ˇÁË (FCC).<br />
≈„Ó ˝ÍÒÔÎÛ‡Ú‡ˆËˇ apple„·ÏÂÌÚËappleÛÂÚÒˇ ÒÎÂ‰Û˛˘ËÏË ‰‚ÛÏˇ<br />
ÛÒÎӂˡÏË:<br />
1) ƒ‡ÌÌÓ ÛÒÚappleÓÈÒÚ‚Ó Ì ‰ÓÎÊÌÓ „ÂÌÂappleËappleÓ‚‡Ú¸ ‚apple‰Ì˚ı ÔÓÏÂı, Ë<br />
2) ƒ‡ÌÌÓ ÛÒÚappleÓÈÒÚ‚Ó ‰ÓÎÊÌÓ ‡·ÒÓapple·ËappleÓ‚‡Ú¸ β·˚ ÔÓÏÂıË,<br />
ÍÓÚÓapple˚ ÏÓ„ÛÚ ÒÚ‡Ú¸ Ôapple˘ËÌÓÈ ÌÂÊ·ÚÂθÌ˚ı Ò·Ó‚ ‚<br />
apple‡·ÓÚÂ.<br />
Œ—“Œ–Œ∆ÕŒ!<br />
Œ—“Œ–Œ∆ÕŒ!<br />
Œœ¿—ÕŒ—“‹ œŒ–¿∆≈Õ»fl<br />
›À≈K“–»◊≈—K»Ã “ŒKŒÃ. Õ≈<br />
Œ“K–¤¬¿“‹!<br />
›ÚÓÚ Á̇˜ÓÍ Û͇Á˚‚‡ÂÚ Ì‡ ÚÓ, ˜ÚÓ ‚ÌÛÚappleË ‰‡ÌÌÓ„Ó<br />
ËÁ‰ÂÎˡ ÔappleËÒÛÚÒÚ‚ÛÂÚ ‚˚ÒÓÍÓ ̇ÔappleˇÊÂÌËÂ. ÕÂ<br />
ÔappleË͇҇ÈÚÂÒ¸ Í ‰ÂÚ‡ÎˇÏ ‚ÌÛÚappleË ÍÓappleÔÛÒ‡.<br />
›ÚÓÚ Á̇˜ÓÍ Û͇Á˚‚‡ÂÚ Ì‡ ‚‡ÊÌ˚ Á‡Ï˜‡Ìˡ ÔÓ<br />
˝ÍÒÔÎÛ‡Ú‡ˆËË Ë ÛıÓ‰Û Á‡ ‰‡ÌÌ˚Ï ËÁ‰ÂÎËÂÏ.<br />
ÕÂÔapple‡‚Ëθ̇ˇ Á‡ÏÂ̇ ·‡Ú‡appleÂË ÏÓÊÂÚ ÔappleË‚ÂÒÚË Í ‚Áapple˚‚Û.<br />
œappleË Á‡ÏÂÌ ËÒÔÓθÁÛÈÚ ·‡Ú‡appleÂË ÚÓ„Ó Ê ÚËÔ‡ ÎË·Ó ·‡Ú‡appleÂË,<br />
appleÂÍÓÏẨӂ‡ÌÌ˚ ËÁ„ÓÚÓ‚ËÚÂÎÂÏ.<br />
”ÚËÎËÁ‡ˆËˇ ·‡Ú‡appleÂÈ ‰ÓÎÊ̇ ÔappleÓËÁ‚Ó‰ËÚ¸Òˇ ‚ ÒÓÓÚ‚ÂÚÒÚ‚ËË Ò<br />
appleÂÍÓÏẨ‡ˆËˇÏË ÔappleÓËÁ‚Ó‰ËÚÂΡ.<br />
1. œappleÓ˜ÚËÚ ‰‡ÌÌÛ˛ ËÌÒÚappleÛÍˆË˛.<br />
2. —Óıapple‡ÌËÚ ‰‡ÌÌÛ˛ ËÌÒÚappleÛÍˆË˛.<br />
3. Œ·apple‡ÚËÚ ‚ÌËχÌË ̇ ‚Ò Ôapple‰ÛÔappleÂʉÂÌˡ.<br />
4. —ΉÛÈÚ ‚ÒÂÏ ÔÛÌÍÚ‡Ï ËÌÒÚappleÛ͈ËË.<br />
5. Õ ËÒÔÓθÁÛÈÚ ËÁ‰ÂÎË ÔÓ·ÎËÁÓÒÚË ÓÚ ‚Ó‰˚.<br />
6. ◊ËÒÚËÚ ËÁ‰ÂÎË ÚÓθÍÓ ÒÛıÓÈ Ú̸͇˛.<br />
7. Õ Á‡Íapple˚‚‡ÈÚ ‚ÂÌÚËΡˆËÓÌÌ˚ ÓÚ‚ÂappleÒÚˡ Ë ÔappleÓÂÏ˚.<br />
œappleÓËÁ‚Ó‰ËÚ ÛÒÚ‡ÌÓ‚ÍÛ ‚ ÒÓÓÚ‚ÂÚÒÚ‚ËË Ò ËÌÒÚappleÛÍˆËˇÏË<br />
ËÁ„ÓÚÓ‚ËÚÂΡ.<br />
8. Õ ÛÒڇ̇‚ÎË‚‡ÈÚ ËÁ‰ÂÎË appleˇ‰ÓÏ Ò ËÒÚÓ˜ÌË͇ÏË ÚÂÔ· -<br />
Ó·Ó„apple‚‡ÚÂΡÏË, ·‡Ú‡apple¡ÏË ÓÚÓÔÎÂÌˡ ËÎË ‰appleÛ„ËÏË<br />
ÚÂÔÎÓËÁÎÛ˜‡˛˘ËÏË ÛÒÚappleÓÈÒÚ‚‡ÏË (‚ Ú.˜. ÛÒËÎËÚÂΡÏË).<br />
9. Õ ÔappleÂÌ·apple„‡ÈÚ ÔappleÂËÏÛ˘ÂÒÚ‚‡ÏË, Ôapple‰ÓÒÚ‡‚ΡÂÏ˚ÏË<br />
ÔÓΡappleÌÓÈ ËÎË Á‡ÁÂÏÎÂÌÌÓÈ ÒÂÚ‚˚ÏË ‚ËÎ͇ÏË. œÓΡapplėˇ ‚ËÎ͇<br />
ËÏÂÂÚ ‰‚‡ ÔÎÓÒÍËı ¯Ú˚apple‚˚ı ÍÓÌÚ‡ÍÚ‡ - ¯ËappleÓÍËÈ Ë ÛÁÍËÈ.<br />
«‡ÁÂÏÎÂÌ̇ˇ ‚ËÎ͇ ËÏÂÂÚ ‰‚‡ ¯Ú˚apple‚˚ı ÍÓÌÚ‡ÍÚ‡ Ë ÚappleÂÚËÈ -<br />
‰Îˇ Á‡ÁÂÏÎÂÌˡ. ÿËappleÓÍËÈ ¯Ú˚appleÂÍ Ë ¯Ú˚appleÂÍ Á‡ÁÂÏÎÂÌˡ<br />
ÒÎÛÊ‡Ú ‰Îˇ Ó·ÂÒÔ˜ÂÌˡ ·ÂÁÓÔ‡ÒÌÓ„Ó ÔÓ‰Íβ˜ÂÌˡ. ≈ÒÎË ‚ËÎ͇<br />
Ì ÒÓÓÚ‚ÂÚÒÚ‚ÛÂÚ Ëϲ˘ÂÈÒˇ appleÓÁÂÚÍÂ, ‚˚ÁÓ‚ËÚ ˝ÎÂÍÚappleË͇ ‰Îˇ<br />
Á‡ÏÂÌ˚ ÛÒÚ‡apple‚¯ÂÈ appleÓÁÂÚÍË.<br />
10. Õ ̇ÒÚÛÔ‡ÈÚ ̇ ¯ÌÛapple, Ì ‰ÓÔÛÒ͇ÈÚ ÔappleÓÍÓ· ¯ÌÛapple‡,<br />
ÓÒÓ·ÂÌÌÓ ‚ÓÁΠ‚ËÎÍË, ‚ıÓ‰Ì˚ı Ë ‚˚ıÓ‰Ì˚ı „ÌÂÁ‰ ËÁ‰ÂÎˡ.<br />
11. »ÒÔÓθÁÛÈÚ ÚÓθÍÓ ÔappleËÒÔÓÒÓ·ÎÂÌˡ/‰ÓÔÓÎÌËÚÂθÌ˚Â<br />
ÔappleË̇‰ÎÂÊÌÓÒÚË, appleÂÍÓÏẨӂ‡ÌÌ˚ ËÁ„ÓÚÓ‚ËÚÂÎÂÏ.<br />
12. »ÒÔÓθÁÛÈÚ ÚÓθÍÓ ÚÂÎÂÊÍË, ÔÓ‰ÒÚ‡‚ÍË, ¯Ú‡ÚË‚˚,<br />
ÍappleÓ̯ÚÂÈÌ˚ ËÎË ÔÓ‰ÒÚ‡‚ÍË, appleÂÍÓÏẨӂ‡ÌÌ˚Â<br />
ËÁ„ÓÚÓ‚ËÚÂÎÂÏ ËÎË ÔappleÓ‰‡‚‡ÂÏ˚ ‚ÏÂÒÚÂ Ò ËÁ‰ÂÎËÂÏ. ¬Ó<br />
ËÁ·ÂʇÌË Úapple‡‚Ï˚ ‚ÒΉÒÚ‚Ë ÓÔappleÓÍˉ˚‚‡Ìˡ<br />
Úapple‡ÌÒÔÓappleÚËappleÛ˛˘ÂÈ ÚÂÎÂÊÍË Ò ËÁ‰ÂÎËÂÏ ·Û‰¸Ú ÓÒÚÓappleÓÊÌ˚<br />
ÔappleË Ëı ÔÂappleÂÏ¢ÂÌËË.<br />
13. œappleË ÔÂappleÂÏ¢ÂÌËË ÚÂÎÂÊÍË/ËÁ‰ÂÎˡ ÓÚÒÓ‰ËÌËÚ ËÁ‰ÂÎËÂ<br />
ÓÚ ËÒÚÓ˜ÌË͇ ÔËÚ‡Ìˡ, ˜ÚÓ·˚ ËÁ·Âʇڸ Úapple‡‚Ï˚ ÔappleË<br />
ÓÔappleÓÍˉ˚‚‡ÌËË ÚÂÎÂÊÍË.<br />
14. “ÂıÌ˘ÂÒÍÓ ӷÒÎÛÊË‚‡ÌË ËÎË appleÂÏÓÌÚ ËÁ‰ÂÎˡ ‰ÓÎÊÌ˚<br />
ÔappleÓ‚Ó‰ËÚ¸Òˇ Í‚‡ÎËÙˈËappleÓ‚‡ÌÌ˚Ï ÔÂappleÒÓ̇ÎÓÏ.<br />
Œ·apple‡˘‡ÈÚÂÒ¸ ‚ ÒÎÛÊ·Û ÚÂıÓ·ÒÎÛÊË‚‡Ìˡ ‚ ÒÎÛ˜‡Â<br />
ÔÓˇ‚ÎÂÌˡ ÌÂËÒÔapple‡‚ÌÓÒÚÂÈ: ÔappleË ÔÓ‚appleÂʉÂÌËË ÒÂÚ‚ӄÓ<br />
¯ÌÛapple‡ ËÎË ‚ËÎÍË, ÔÓÔ‡‰‡ÌËË ÊˉÍÓÒÚË, ‰Óʉˇ ËÎË ‚·„Ë, ‡<br />
Ú‡ÍÊ ÔÓÒÚÓappleÓÌÌËı Ôapple‰ÏÂÚÓ‚ ‚ÌÛÚapple¸ ÍÓappleÔÛÒ‡, ÔappleË<br />
ÌÂÌÓappleχθÌÓÈ apple‡·ÓÚ ËÁ‰ÂÎˡ, ‚ ÚÓÏ ˜ËÒΠ‚ ÒÎÛ˜‡Â<br />
Ô‡‰ÂÌˡ.<br />
❈ ¬Ó ËÁ·ÂʇÌË ÔÓ‚appleÂʉÂÌˡ œ«—-χÚappleˈ˚ ‚ˉÂÓ‰‡Ú˜Ë͇ ÌÂ<br />
̇Ôapple‡‚ΡÈÚ ӷ˙ÂÍÚË‚ ‚ˉÂÓ͇ÏÂapple˚ ̇ Ó˜Â̸ ˇappleÍËÂ<br />
Ó·˙ÂÍÚ˚, ÒÓÎ̈Â.<br />
R
–ÛÍÓ‚Ó‰ÒÚ‚Ó ÔÓθÁÓ‚‡ÚÂΡ<br />
–ÛÍÓ‚Ó‰ÒÚ‚Ó ÔÓθÁÓ‚‡ÚÂΡ<br />
—Ó‰ÂappleʇÌËÂ<br />
1. Œ·˘ËÈ Ó·ÁÓapple ........................................ 3<br />
2. KÓÏÔÎÂÍÚ‡ˆËˇ .............................. 4<br />
3. ¬˚ÔÓÎÌˇÂÏ˚ ÙÛÌ͈ËË................ 5<br />
4. ”ÒÚ‡Ìӂ͇...................................... 6<br />
œappleÓ‚Âapple͇ ÍÓÏÔÎÂÍÚ‡ˆËË ............. 6<br />
Õ‡ ˜ÚÓ ÒΉÛÂÚ Ó·apple‡ÚËÚ¸ ‚ÌËχÌËÂ<br />
ÔappleË ÛÒÚ‡ÌÓ‚ÍÂ Ë ˝ÍÒÔÎÛ‡Ú‡ˆËË.... 6<br />
K‡·ÂθÌ˚ ÒÓ‰ËÌÂÌˡ ............... 7<br />
5. “ÂıÌ˘ÂÒÍË ı‡apple‡ÍÚÂappleËÒÚËÍË...... 9<br />
2<br />
1. Œ·˘ËÈ Ó·ÁÓapple<br />
CCTV COLOR DOME CAMERA - ˝ÚÓ ÒÓ‚appleÂÏÂÌÌ˚Â<br />
‚ˉÂÓ͇ÏÂapple˚ ÒÎÂÊÂÌˡ ̇ ·‡Á œ«—-χÚappleˈ˚,<br />
Ó·ÂÒÔ˜˂‡˛˘ÂÈ ‚˚ÒÓÍÓ͇˜ÂÒÚ‚ÂÌÌ˚È ÏÓÌËÚÓappleËÌ„<br />
ÓÍappleÛʇ˛˘Â„Ó ÔappleÓÒÚapple‡ÌÒÚ‚‡ ‚ ÒÓÒÚ‡‚ Á‡ÏÍÌÛÚÓÈ<br />
“¬-ÒËÒÚÂÏ˚.<br />
■ KÓ΢ÂÒÚ‚Ó ÔËÍÒÂÎÂÈ œ«—<br />
• <strong>SCC</strong>-B5300(G) : 270 Ú˚Ò. ÔËÍÒÂÎÂÈ<br />
• <strong>SCC</strong>-B5300(G)P : 320 Ú˚Ò. ÔËÍÒÂÎÂÈ<br />
• <strong>SCC</strong>-B5301(G)/<strong>SCC</strong>-B5303(G)/<br />
<strong>SCC</strong>-B5305(G) : 410 Ú˚Ò. ÔËÍÒÂÎÂÈ<br />
• <strong>SCC</strong>-B5301(G)P/<strong>SCC</strong>-B5303(G)P/<br />
<strong>SCC</strong>-B5305(G)P : 470 Ú˚Ò. ÔËÍÒÂÎÂÈ<br />
■ œËÚ‡ÌËÂ<br />
• 12 ¬ ÔÓÒÚ. ÚÓ͇/24 ¬ ÔÂappleÂÏ. ÚÓ͇<br />
■ ¿‚ÚÓχÚË͇ Ë ÒÔˆˇθÌ˚ ÙÛÌ͈ËË<br />
• ATW<br />
• BLC<br />
• AGC<br />
• ELC (Electronic shutter iris - ˝ÎÂÍÚappleÓÌÌ˚È Á‡Ú‚Óapple)<br />
❈ ÷¬≈“Œ¬Œ… "œ≈–≈À»¬" - ÔÓÏÂı‡, ÔappleÓˇ‚Ρ˛˘‡ˇÒˇ<br />
ÔappleË ÓÒ‚Â˘ÂÌËË "ÏÂı‡Ì˘ÂÒÍËÏË" (·ÂÁ ‚ÒÚappleÓÂÌÌÓÈ<br />
˝ÎÂÍÚappleÓÌËÍË) ·ÏÔ‡ÏË ‰Ì‚ÌÓ„Ó Ò‚ÂÚ‡, ÍÓ„‰‡<br />
‚ˉÂÓ͇ÏÂapple‡ ÓÒ̇˘Â̇ appleÛ˜ÌÓÈ ‰Ë‡Ùapple‡„ÏÓÈ Ë ‚ ÏÂÌ˛<br />
̇ÒÚappleÓÂÍ ALC/ELC ‚˚·apple‡Ì appleÂÊËÏ ELC. ¬ ˝ÚÓÏ ÒÎÛ˜‡Â<br />
ËÒÔÓθÁÛÈÚ ËÒÚÓ˜ÌËÍ ÔËÚ‡Ìˡ ÔÂappleÂÏÂÌÌÓ„Ó ÚÓ͇.<br />
(—ËÌıappleÓÌËÁ‡ˆËˇ ÓÚ ÒÂÚË) (NTSC: 60 √ˆ PAL: 50 √ˆ)<br />
❈ ◊ÚÓ·˚ ‚ÏÂÒÚÓ ÒËÌıappleÓÌËÁ‡ˆËË ÓÚ ÒÂÚË ËÒÔÓθÁÓ‚‡Ú¸<br />
‚ÌÛÚappleÂÌÌ˛˛ ÒËÌıappleÓÌËÁ‡ˆË˛, ‚Íβ˜ËÚ ÔËÚ‡ÌË ÓÚ<br />
ËÒÚÓ˜ÌË͇ ÔÓÒÚÓˇÌÌÓ„Ó ÚÓ͇. œappleË ‚ÌÛÚappleÂÌÌÂÈ<br />
ÒËÌıappleÓÌËÁ‡ˆËË Í‡˜ÂÒÚ‚Ó ËÁÓ·apple‡ÊÂÌˡ ÎÛ˜¯Â, ˜ÂÏ<br />
ÔappleË ÒËÌıappleÓÌËÁ‡ˆËË ÓÚ ÒÂÚË.<br />
☞ ÷¬≈“Œ¬Œ… "œ≈–≈À»¬" ÔappleÓˇ‚ΡÂÚÒˇ ‚ ‚ˉÂ<br />
ı‡ÓÚ˘ÂÒÍÓ„Ó ËÁÏÂÌÂÌˡ ˆ‚ÂÚ‡ ̇ ˝Íapple‡ÌÂ.<br />
ŒÌ ÔappleÓËÒıÓ‰ËÚ ‚ÒΉÒÚ‚Ë ÏÂappleˆ‡Ìˡ<br />
"ÏÂı‡Ì˘ÂÒÍÓÈ" ·ÏÔ˚ ‰Ì‚ÌÓ„Ó Ò‚ÂÚ‡ c<br />
˜‡ÒÚÓÚÓÈ, ÒÓ‚Ô‡‰‡˛˘ÂÈ Ò ˜‡ÒÚÓÚÓÈ ÒÂÚË ÔËÚ‡Ìˡ,<br />
ÍÓ„‰‡ ‚Íβ˜Â̇ ‡‚ÚÓÔÓ‰ÒÚappleÓÈ͇ ·‡Î‡ÌÒ‡ ·ÂÎÓ„Ó<br />
‚ˉÂÓ͇ÏÂapple˚.<br />
3<br />
R
–ÛÍÓ‚Ó‰ÒÚ‚Ó ÔÓθÁÓ‚‡ÚÂΡ<br />
–ÛÍÓ‚Ó‰ÒÚ‚Ó ÔÓθÁÓ‚‡ÚÂΡ<br />
2. KÓÏÔÎÂÍÚ‡ˆËˇ 3. ¬˚ÔÓÎÌˇÂÏ˚ ÙÛÌ͈ËË<br />
Œ·˙ÂÍÚË‚ Ò<br />
ÙËÍÒËappleÓ‚‡ÌÌÓÈ<br />
ÙÓÍÛÒËappleÓ‚ÍÓÈ<br />
KÛÔÓθ̇ˇ<br />
Íapple˚¯Í‡<br />
■ Œ·˙ÂÍÚË‚ Ò ÙËÍÒËappleÓ‚‡ÌÌÓÈ ÙÓÍÛÒËappleÓ‚ÍÓÈ<br />
• ƒ‡Ì̇ˇ ‚ˉÂÓ͇ÏÂapple‡ ËÏÂÂÚ Ó·˙ÂÍÚË‚ Ò<br />
ÙËÍÒËappleÓ‚‡ÌÌÓÈ ÙÓÍÛÒËappleÓ‚ÍÓÈ (̇‚Ó‰ÍÓÈ<br />
̇ appleÂÁÍÓÒÚ¸).<br />
—ΉËÚ Á‡ ˜ËÒÚÓÚÓÈ ÎËÌÁ˚ Ó·˙ÂÍÚË‚‡,<br />
Û‰‡ÎˇÈÚÂ Ò Ì Ô˚θ Ë ÔÓÒÚÓappleÓÌÌËÂ<br />
Á‡„appleˇÁÌÂÌˡ.<br />
ÕÂÒÛ˘‡ˇ<br />
Ô˜‡Ú̇ˇ<br />
Ô·ڇ<br />
KÓappleÔÛÒ<br />
ÿÌÛapple<br />
ÔËÚ‡Ìˡ<br />
¬Ë‰ÂÓ͇·Âθ<br />
■ KÓappleÔÛÒ<br />
• KÓappleÔÛÒ, ‚ ÍÓÚÓappleÓÏ Ì‡ıÓ‰ËÚÒˇ ‚ˉÂÓ͇ÏÂapple‡.<br />
■ ÕÂÒÛ˘‡ˇ Ô˜‡Ú̇ˇ Ô·ڇ<br />
• Œ˜Â̸ ‚‡Ê̇ˇ ÒÓÒÚ‡‚̇ˇ ˜‡ÒÚ¸, Óڂ˜‡˛˘‡ˇ Á‡<br />
apple‡ÎËÁ‡ˆË˛ ÙÛÌ͈ËÈ ‚ˉÂÓ͇ÏÂapple˚. ¡Û‰¸ÚÂ<br />
ÓÒÚÓappleÓÊÌ˚ ÔappleË Ó·apple‡˘ÂÌËË Ò ÌÂÈ.<br />
■ ÿÌÛapple ÔËÚ‡Ìˡ<br />
• ƒÎˇ ÔÓ‰Íβ˜ÂÌˡ Í ËÒÚÓ˜ÌËÍÛ ÔËÚ‡Ìˡ<br />
12 ¬ ÔÓÒÚ. ÚÓ͇/ 24 ¬ ÔÂappleÂÏ. ÚÓ͇<br />
R<br />
■ ¬Ë‰ÂÓ͇·Âθ<br />
• K‡·Âθ ‰Îˇ ÔÂapple‰‡˜Ë ‚ˉÂÓÒ˄̇·.<br />
■ KÛÔÓθ̇ˇ Íapple˚¯Í‡<br />
• œappleÓÁapple‡˜Ì‡ˇ Ô·ÒÚËÍÓ‚‡ˇ Á‡˘ËÚ̇ˇ<br />
Íapple˚¯Í‡.<br />
—ΉËÚÂ, ˜ÚÓ·˚ ̇ ÌÂÈ Ì ·˚ÎÓ ˆ‡apple‡ÔËÌ.<br />
4 5
–ÛÍÓ‚Ó‰ÒÚ‚Ó ÔÓθÁÓ‚‡ÚÂΡ<br />
–ÛÍÓ‚Ó‰ÒÚ‚Ó ÔÓθÁÓ‚‡ÚÂΡ<br />
4. ”ÒÚ‡Ìӂ͇<br />
■<br />
K‡·ÂθÌ˚ ÒÓ‰ËÌÂÌˡ<br />
■<br />
œappleÓ‚Âapple͇ ÍÓÏÔÎÂÍÚ‡ˆËË<br />
• ”·Â‰ËÚÂÒ¸, ˜ÚÓ ‚ ÍÓÏÔÎÂÍÚ ÔÓÒÚ‡‚ÍË Ì‡ıÓ‰ˇÚÒˇ:<br />
1. ◊ÚÓ·˚ apple‡ÁÓ·apple‡Ú¸ ‚ˉÂÓ·ÎÓÍ, ‰ÂappleÊËÚÂ<br />
ÍÓappleÔÛÒ Ó‰ÌÓÈ appleÛÍÓÈ, ‡ ‰appleÛ„ÓÈ ÔÓ‚ÂappleÌËÚÂ<br />
ÍÛÔÓθÌÛ˛ Íapple˚¯ÍÛ ÔappleÓÚË‚ ˜‡ÒÓ‚ÓÈ ÒÚappleÂÎÍË.<br />
¬Ë‰ÂÓ͇ÏÂapple‡<br />
ÿÛappleÛÔ˚<br />
ÍappleÂÔÎÂÌˡ<br />
–ÛÍÓ‚Ó‰ÒÚ‚Ó<br />
ÔÓθÁÓ‚‡ÚÂΡ<br />
■<br />
Õ‡ ˜ÚÓ ÒΉÛÂÚ Ó·apple‡ÚËÚ¸ ‚ÌËχÌËÂ<br />
ÔappleË ÛÒÚ‡ÌÓ‚ÍÂ Ë ˝ÍÒÔÎÛ‡Ú‡ˆËË<br />
1. Õ apple‡Á·Ëapple‡ÈÚ ‚ˉÂÓ͇ÏÂappleÛ ÒÔÂapple‰Ë.<br />
2. Œ·apple‡˘‡ÈÚÂÒ¸ Ò ‚ˉÂÓ͇ÏÂappleÓÈ ÓÒÚÓappleÓÊÌÓ. œÓ<br />
‚ÓÁÏÓÊÌÓÒÚË Ì ÔÓ‰‚Âapple„‡Èڠ ۉ‡apple‡Ï Ë<br />
‚Ë·apple‡ˆËË, ‚Ó ‚appleÂÏˇ ıapple‡ÌÂÌˡ Ì ‰ÓÔÛÒ͇ÈÚÂ<br />
ÔÓˇ‚ÎÂÌˡ ˆ‡apple‡ÔËÌ Ë ‰appleÛ„Ëı ÔÓ‚appleÂʉÂÌËÈ.<br />
3. Õ ÛÒڇ̇‚ÎË‚‡ÈÚ ‚ˉÂÓ͇ÏÂappleÛ ‚ ÏÂÒÚ‡ı,<br />
ÔÓ‰‚ÂappleÊÂÌÌ˚ı ‚ÓÁ‰ÂÈÒڂ˲ ‰Óʉˇ ËÎË ‚·„Ë. ÕÂ<br />
˝ÍÒÔÎÛ‡ÚËappleÛÈÚ ‚ˉÂÓ͇ÏÂappleÛ ‚ Ò˚apple˚ı ÔÓÏ¢ÂÌˡı.<br />
4. Õ ËÒÔÓθÁÛÈÚ ‰Îˇ ˜ËÒÚÍË ÍÓappleÔÛÒ‡ ‡·apple‡ÁË‚Ì˚Â<br />
χÚÂappleˇÎ˚ ËÎË Ï˚ÎÓ. ≈ÒÎË ‚ˉÂÓ͇ÏÂapple‡ Úapple·ÛÂÚ<br />
˜ËÒÚÍË, ÔappleÓÚappleËڠ ÒÛıÓÈ Ú̸͇˛. œappleÓÚappleËÚ ÎËÌÁ˚<br />
Ó·˙ÂÍÚË‚‡ Ë ÍÛÔÓθÌÛ˛ Íapple˚¯ÍÛ Ïˇ„ÍÓÈ Ú̸͇˛,<br />
ÒÔˆˇθÌÓ Ôapple‰̇Á̇˜ÂÌÌÓÈ ‰Îˇ Ëı ˜ËÒÚÍË.<br />
5. ”Òڇ̇‚ÎË‚‡ÈÚ ‚ˉÂÓ͇ÏÂappleÛ ‚ ÔappleÓı·‰ÌÓÏ<br />
ÔÓÏ¢ÂÌËË ‚Ì ‚ÓÁ‰ÂÈÒڂˡ ÔappleˇÏÓ„Ó ÒÓÎ̘ÌÓ„Ó<br />
Ò‚ÂÚ‡. ¬ ÔappleÓÚË‚ÌÓÏ ÒÎÛ˜‡Â ‚ÓÁÏÓÊÌÓ<br />
ÔÓ‚appleÂʉÂÌË ËÁ‰ÂÎˡ.<br />
2. œÓ‰ÒÓ‰ËÌËÚ ӉËÌ ÍÓ̈ ͇·ÂΡ BNC Í<br />
apple‡Á˙ÂÏÛ ‰Îˇ ‚ˉÂÓ͇·ÂΡ ̇ ‚ˉÂÓ·ÎÓÍÂ, ‡<br />
‰appleÛ„ÓÈ - Í ‚ˉÂÓ‚ıÓ‰Û ÏÓÌËÚÓapple‡.<br />
3. œÓ‰ÒÓ‰ËÌËÚ ‡‰‡ÔÚÂapple ÔÂappleÂÏÂÌÌÓ„Ó ÚÓ͇.<br />
—Ó‰ËÌËÚ ‚ˉÂÓ·ÎÓÍ Ë ‡‰‡ÔÚÂapple ͇·ÂÎÂÏ 12<br />
¬ ÔÓÒÚ. ÚÓ͇/ 24 ¬ ÔÂappleÂÏ. ÚÓ͇.<br />
K‡·Âθ<br />
BNC<br />
ÃÓÌËÚÓapple<br />
R<br />
6<br />
7
–ÛÍÓ‚Ó‰ÒÚ‚Ó ÔÓθÁÓ‚‡ÚÂΡ<br />
4. «‡ÍappleÂÔËÚ ‚ˉÂÓ͇ÏÂappleÛ Ì‡ ÏÂÒÚ ÛÒÚ‡ÌÓ‚ÍË<br />
Ò ÔÓÏÓ˘¸˛ ÓÚ‚ÂappleÚÍË Ë ¯ÛappleÛÔÓ‚.<br />
KÓappleÔÛÒ<br />
ŒÚ‚ÂappleÚ͇<br />
5. ¬˚·ÂappleËÚ ÁÓÌÛ Ì‡·Î˛‰ÂÌˡ, ÔÂappleÂÏ¢‡ˇ<br />
‚ˉÂÓ·ÎÓÍ (Ô˜‡ÚÌÛ˛ Ô·ÚÛ) ‚ÌÛÚappleË ÍÛÔÓ·<br />
‚‚Âappleı Ë ‚ÌËÁ, Á‡ÚÂÏ ÔappleÓËÁ‚‰ËÚ ̇‚Ó‰ÍÛ<br />
̇ appleÂÁÍÓÒÚ¸, ÔÓ‚Óapple‡˜Ë‚‡ˇ Ó·˙ÂÍÚË‚ ‚΂Ó<br />
ËÎË ‚Ôapple‡‚Ó.<br />
¬˚·Óapple ÁÓÌ˚<br />
̇·Î˛‰ÂÌˡ<br />
(ÔÓ‚Óapple‡˜Ë‚‡ÈÚÂ<br />
‚‚Âappleı ËÎË ‚ÌËÁ)<br />
—ÚÂ̇ ËÎË ÔÓÚÓÎÓÍ<br />
8<br />
ÿÛappleÛÔ˚<br />
—ÚÂ̇ ËÎË ÔÓÚÓÎÓÍ<br />
‘ÓÍÛÒËappleӂ͇<br />
(ÔÓ‚Óapple‡˜Ë‚‡ÈÚÂ<br />
‚ÎÂ‚Ó ËÎË ‚Ôapple‡‚Ó)<br />
6. «‡‚Âapple¯ËÚ ÏÓÌÚ‡Ê, ÔÓ‚ÂappleÌÛ‚ ÍÛÔÓθÌÛ˛<br />
Íapple˚¯ÍÛ ÔÓ ˜‡ÒÓ‚ÓÈ ÒÚappleÂÎÍÂ.<br />
¬Õ»Ã¿Õ»≈<br />
—ΉËÚÂ, ˜ÚÓ·˚ ÔappleË apple‡Á·ÓappleÍÂ Ë Ò·ÓappleÍÂ<br />
‚ˉÂÓ·ÎÓ͇ Ó·˙ÂÍÚË‚ ÓÒÚ‡‚‡ÎÒˇ ˜ËÒÚ˚Ï Ë Ì‡<br />
ÌÂ„Ó Ì ÔÓÔ‡‰‡ÎË ÔÓÒÚÓappleÓÌÌË Á‡„appleˇÁÌÂÌˡ.<br />
9<br />
–ÛÍÓ‚Ó‰ÒÚ‚Ó ÔÓθÁÓ‚‡ÚÂΡ<br />
5. “ÂıÌ˘ÂÒÍË ı‡apple‡ÍÚÂappleËÒÚËÍË<br />
÷ËÙappleÓ‚‡ˇ ˆ‚ÂÚ̇ˇ<br />
ÍÛÔÓθ̇ˇ ‚ˉÂÓ͇ÏÂapple‡<br />
ŒÔËÒ‡ÌËÂ<br />
—ËÒÚÂχ ‚ˉÂÓÒ˄̇· <strong>SCC</strong>-B5300(G)/B5301(G)/B5303(G)<br />
/B5305(G): NTSC STANDARD<br />
<strong>SCC</strong>-B5300(G)P/B5301(G)P/B5303(G)P<br />
/ B5305(G)P: PAL STANDARD<br />
œÂapple‰‡˛˘Â ÛÒÚappleÓÈÒÚ‚Ó 1/3-‰˛ÈÏÓ‚‡ˇ œ«—-χÚappleˈ‡ SUPER HAD IT<br />
–‡·Ó˜Â apple‡Áapple¯ÂÌË <strong>SCC</strong>-B5300(G): 510 (√ÓappleËÁ) x 492 (¬ÂappleÚ)<br />
<strong>SCC</strong>-B5301(G)/B5303(G)/B5305(G)<br />
: 768 (√ÓappleËÁ) x 494 (¬ÂappleÚ)<br />
<strong>SCC</strong>-B5300(G)P: 500 (√ÓappleËÁ) x 582(¬ÂappleÚ)<br />
<strong>SCC</strong>-B5301(G)P/B5303(G)P/B5305(G)P<br />
: 752(√ÓappleËÁ) x 582(¬ÂappleÚ)<br />
—ËÌıappleÓÌËÁ‡ˆËˇ<br />
¬ÌÛÚappleÂÌÌˇˇ/ÓÚ ÒÂÚË (¿‚ÚÓÔÂappleÂÍβ˜ÂÌËÂ<br />
ËÒÚÓ˜ÌË͇ ÔËÚ‡Ìˡ - ÔÓÒÚ/ÔÂappleÂÏ ÚÓÍ)<br />
–‡Áapple¯ÂÌËÂ<br />
<strong>SCC</strong>-B5300(G)(P) : 330 “¬-ÒÚappleÓÍ (√ÓappleËÁ)<br />
350 “¬-ÒÚappleÓÍ (¬ÂappleÚ)<br />
<strong>SCC</strong>-B5301(G)(P)/B5303(G)(P)/B5305(G)(P)<br />
: 480 “¬-ÒÚappleÓÍ (√ÓappleËÁ)<br />
350 “¬-ÒÚappleÓÍ (¬ÂappleÚ)<br />
¬˚ıÓ‰ÌÓÈ Ò˄̇Î<br />
KÓÏÔÓÁËÚÌ˚È, 1 ¬ ‡ÏÔ, 75 ŒÏ<br />
—ÓÓÚÌÓ¯ÂÌË Ò˄̇Î/¯ÛÏ50 ‰¡<br />
ÃËÌËχθÌÓ ÓÒ‚Â˘ÂÌË <strong>SCC</strong>-B5300(G)(P) : 0.3 βÍÒ<br />
<strong>SCC</strong>-B5301(G)(P) /B5303(G(P)<br />
/B5305(G)(P) : 0.5 βÍÒ<br />
—ÍÓappleÓÒÚ¸ Òapple‡·‡Ú˚‚‡Ìˡ<br />
˝ÎÂÍÚappleÓÌÌÓ„Ó Á‡Ú‚Óapple‡<br />
ÇÍÒ 1/100000 ÒÂÍ<br />
Œ·˙ÂÍÚË‚<br />
<strong>SCC</strong>-B5300(G)(P) /B5301(G)(P) : f = 3,8 ÏÏ<br />
(ÙÓÍÛÒÌÓ apple‡ÒÒÚÓˇÌËÂ) <strong>SCC</strong>-B5303(G)(P) : f = 2,9 ÏÏ<br />
<strong>SCC</strong>-B5305(G)(P)<br />
: f = 8 ÏÏ<br />
√‡Ïχ-ÍÓappleappleÂÍˆËˇ 0.45<br />
÷‚ÂÚ ÍÓappleÔÛÒ‡<br />
<strong>SCC</strong>-B530X(P): ◊ÂappleÌ˚È<br />
<strong>SCC</strong>-B530XG(P): —Âapple˚È<br />
¬ı/‚˚ı apple‡Á˙ÂÏ˚<br />
¬˚ıÓ‰ÌÓÈ Ò˄̇Î: BNC, ¬ıÓ‰ÌÓÈ apple‡Á˙ÂÏ<br />
ÔËÚ‡Ìˡ: 2P<br />
–‡·Ó˜‡ˇ ÚÂÏÔÂapple‡ÚÛapple‡ -10 ~ +50 ∞C<br />
»ÒÚÓ˜ÌËÍ ÔËÚ‡Ìˡ 12 ¬ ÔÓÒÚ. 10% , -5%, 24 ¬ ÔÂappleÂÏ. 10%<br />
(NTSC: 60 √ˆ 0,3 √ˆ, PAL: 50 √ˆ 0,3 √ˆ)<br />
œÓÚapple·ΡÂχˇ ÏÓ˘ÌÓÒÚ¸ 3 ¬Ú<br />
√‡·‡appleËÚ˚<br />
100(ø) x 67 (¬) ÏÏ<br />
¬ÂÒ 180 „<br />
R


