

Samsung SCC-B9374P (SCC-B9374P ) - Manuel de l'utilisateur 4.62 MB, pdf, Anglais, Français, ALLEMAND, Italien, Espagnol
Samsung SCC-B9374P (SCC-B9374P ) - Manuel de l'utilisateur 4.62 MB, pdf, Anglais, Français, ALLEMAND, Italien, Espagnol
Samsung SCC-B9374P (SCC-B9374P ) - Manuel de l'utilisateur 4.62 MB, pdf, Anglais, Français, ALLEMAND, Italien, Espagnol

Create successful ePaper yourself
Turn your PDF publications into a flip-book with our unique Google optimized e-Paper software.
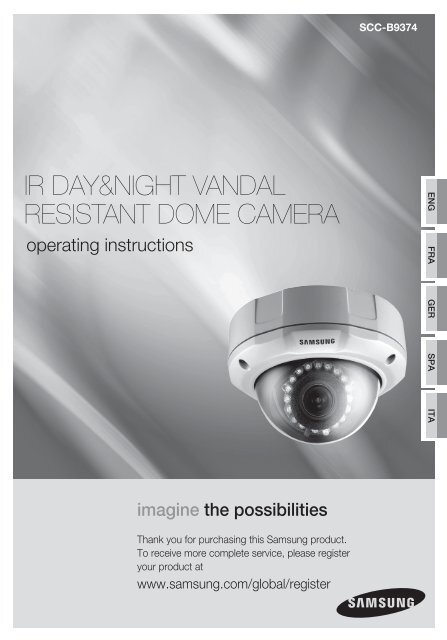
<strong>SCC</strong>-B9374<br />
IR DAY&NIGHT VANDAL<br />
RESISTANT DOME CAMERA<br />
operating instructions<br />
ENG FRA GER SPA ITA<br />
imagine the possibilities<br />
Thank you for purchasing this <strong>Samsung</strong> product.<br />
To receive more complete service, please register<br />
your product at<br />
www.samsung.com/global/register
safety precautions<br />
CAUTION<br />
RISK OF ELECTRIC SHOCK.<br />
DO NOT OPEN<br />
CAUTION: TO REDUCE THE RISK OF ELECTRIC SHOCK,<br />
DO NOT REMOVE COVER (OR BACK)NO USER-SERVICEABLE PARTS<br />
INSIDEREFER SERVICING TO QUALIFIED SERVICE PERSONNEL<br />
This symbol indicates that dangerous voltage consisting a risk of electric shock is present<br />
within this unit.<br />
This symbol indicates that there are important operating and maintenance instructions in<br />
the literature accompanying this unit.<br />
WARNING<br />
WARNING<br />
• To reduce the risk of fire or electric shock, do not expose this appliance to rain or moisture.<br />
1. Be sure to use only the standard adapter that is specified in the specification sheet.<br />
Using any other adapter could cause fire, electrical shock, or damage to the product.<br />
2. Incorrectly connecting the power supply or replacing battery may cause explosion,<br />
fire, electric shock, or damage to the product.<br />
3. Do not connect multiple cameras to a single adapter. Exceeding the capacity may<br />
cause abnormal heat generation or fire.<br />
4. Securely plug the power cord into the power receptacle. Insecure connection may<br />
cause fire.<br />
5. When installing the camera, fasten it securely and firmly. A falling camera may cause<br />
personal injury.<br />
6. Do not place conductive objects (e.g. screwdrivers, coins, metal things, etc.) or<br />
containers filled with water on top of the camera.<br />
Doing so may cause personal injury due to fire, electric shock, or falling objects.<br />
7. Do not install the unit in humid, dusty, or sooty locations.<br />
Doing so may cause fire or electric shock.<br />
8. If any unusual smells or smoke come from the unit, stop using the product.<br />
In such case, immediately disconnect the power source and contact the service<br />
centre. Continued use in such a condition may cause fire or electric shock.<br />
9. If this product fails to operate normally, contact the nearest service centre.<br />
Never disassemble or modify this product in any way. (SAMSUNG is not liable for<br />
problems caused by unauthorized modifications or attempted repair.)<br />
10. When cleaning, do not spray water directly onto parts of the product.<br />
Doing so may cause fire or electric shock.
CAUTION<br />
1. Do not drop objects on the product or apply strong shock to it.<br />
Keep away from a location subject to excessive vibration or magnetic interference.<br />
2. Do not install in a location subject to high temperature (over 122°F), low temperature<br />
(below 14°F), or high humidity. Doing so may cause fire or electric shock.<br />
3. If you want to relocate the already installed product, be sure to turn off the power<br />
and then move or reinstall it.<br />
4. Remove the power plug from the outlet when then there is a lightning.<br />
Neglecting to do so may cause fire or damage to the product.<br />
5. Keep out of direct sunlight and heat radiation sources. It may cause fire.<br />
6. Install it in a place with good ventilation.<br />
7. Avoid aiming the camera directly towards extremely bright objects such as sun,<br />
as this may damage the CCD image sensor.<br />
8. Apparatus shall not be exposed to dripping or splashing and no objects filled with<br />
liquids, such as vases, shall be placed on the apparatus.<br />
9. The Mains plug is used as a disconnect <strong>de</strong>vice and shall stay readily operable at<br />
any time.
important safety instructions<br />
1. Read these instructions.<br />
2. Keep these instructions.<br />
3. Heed all warnings.<br />
4. Follow all instructions.<br />
5. Do not use this apparatus near water.<br />
6. Clean only with dry cloth.<br />
7. Do not block any ventilation openings.<br />
Install in accordance with the manufacturer’s instructions.<br />
8. Do not install near any heat sources such as radiators, heat registers,<br />
or other apparatus (including amplifiers) that produce heat.<br />
9. Do not <strong>de</strong>feat the safety purpose of the polarized or grounding-type plug.<br />
A polarized plug has two bla<strong>de</strong>s with one wi<strong>de</strong>r than the other.<br />
A grounding type plug has two bla<strong>de</strong>s and a third grounding prong.<br />
The wi<strong>de</strong> bla<strong>de</strong> or the third prong is provi<strong>de</strong>d for your safety.<br />
If the provi<strong>de</strong>d plug does not fit into your outlet, consult an electrician for replacement<br />
of the obsolete outlet.<br />
10. Protect the power cord from being walked on or pinched particularly at plugs,<br />
convenience receptacles, and the point where they exit from the apparatus.<br />
11. Only use attachments/accessories specified by the manufacturer.<br />
12. Use only with cart, stand, tripod, bracket, or table specified by the manufacturer,<br />
or sold with the apparatus.<br />
13. Unplug this apparatus. When a cart is used, use caution when moving the cart/<br />
apparatus combination to avoid injury from tip-over.<br />
14. Refer all servicing to qualified service personnel.<br />
Servicing is required when the apparatus has been damaged in any way,<br />
such as power-supply cord or plug is damaged, liquid has been spilled or objects<br />
have fallen into the apparatus, the apparatus has been exposed to rain or moisture,<br />
does not operate normally, or been dropped.
contents<br />
FEATURES<br />
02<br />
THINGS TO KEEP IN MIND<br />
DURING INSTALLATION<br />
AND USE<br />
02<br />
DIMENSIONS &<br />
CABLE CONNECTION<br />
03<br />
CAMERA ASSE<strong>MB</strong>LY &<br />
MOUNT<br />
05<br />
TROUBLESHOOTING<br />
06<br />
SPECIFICATIONS<br />
07<br />
02 Features<br />
02 Things to keep in mind during installation and<br />
use<br />
03 Dimensions & cable connection<br />
03 Auto iris lens & dip switch settings<br />
04 3-Axis gimbal adjustments<br />
05 Camera assembly & mount<br />
06 Troubleshooting<br />
07 Specifications<br />
contents _01
features<br />
• SONY 1/3” Super HAD Colour CCD<br />
• Resolution: 540TVL (Colour) , 570TVL (B/W)<br />
• Day/Night Filter Change and Vari-Focal Aspherical DC<br />
Auto Iris 3.8~9.5mm F1.2 Lens Built-in<br />
• Colour & B/W Auto Switchable by photocell and sensitivity<br />
• DIP Switch control of Day & Night time <strong>de</strong>lay, Flickerless, BLC and White<br />
Balance<br />
• DC Iris Control Level Volume Built-in<br />
• CDS Auto Switching IR-LED Control (18pcs LEDs)<br />
• True 3-Axis Gimbal Bracket (2-Pan, 2-Tilt)<br />
• Vandal Resistant & Waterproof Outdoor Installation (IP-66)<br />
• AC24V / DC12V Dual Voltage Available<br />
things to keep in mind during<br />
installation and use<br />
• Do not disassemble the camera on your own.<br />
• Always be careful when handling the camera. Do not strike the camera by your<br />
fists or shake it. Please be careful not to be careless when storing and operating<br />
it.<br />
• Do not place or operate the camera in any wet environment such as rain or<br />
wet surfaces.<br />
• Do not clean the camera with rough sandpaper. Please always use a dry cloth<br />
when cleaning it.<br />
• Put the camera in a cool area free from direct sunlight. Otherwise, the camera<br />
may be damaged.<br />
02_ features
dimensions & cable connection<br />
ENG<br />
AUTO IRIS LENS & DIP SWITCH SETTINGS<br />
Dip Switch Setting<br />
No. Function<br />
ON OFF<br />
1 Time Delay 2~3sec. 4~5sec.<br />
2 Flickerless OFF ON<br />
3 BLC ON OFF<br />
4 ATW/AWC ATW AWC<br />
dimensions & cable connection _03
3-AXIS GI<strong>MB</strong>AL ADJUSTMENTS<br />
04_ dimensions & cable connection
camera assembly & mount<br />
1. Dome Base Mounting<br />
- Remove the protecting sheet from the rubber bottom and attach it on the base housing.<br />
- Fix the base housing with the supplied 4pcs of screws(No. 8-32 UNC) on the ceiling or wall.<br />
2. Power Supply & Monitor Impedance<br />
(Power supply)<br />
- Adaptor: AC24V / 600mA or DC12V / 800mA (AC24V / DC12V Mo<strong>de</strong>l)<br />
(Monitor Impedance, if available)<br />
- Set the impedance switch to the 75 standard position unless a vi<strong>de</strong>o equipment is connected<br />
to the monitor vi<strong>de</strong>o out.<br />
3. Camera Module Adjustment<br />
(Pan&Tilt Adjustment)<br />
- Adjust the camera direction by turning the pan bracket left or right, the tilt bracket up or down,<br />
then fix the screws tight.<br />
(View Angle Adjustment)<br />
- For a wi<strong>de</strong>r view angle move the zoom lever to wi<strong>de</strong>, for a narrower view angle move it to tele.<br />
- After accurate adjustment of focal length then adjust the focus lever to near or far for the<br />
sharpest focus.<br />
4. Decoration Ring Mounting<br />
- Firmly fix the <strong>de</strong>coration ring into place with the screws and by using the supplied L-wrench on<br />
the base housing.<br />
ENG<br />
camera assembly & mount _05
5. Service Vi<strong>de</strong>o Port Description<br />
troubleshooting<br />
If you have trouble operating the camera, check the following gui<strong>de</strong>s for the<br />
possible problem.<br />
• Nothing appears on the screen.<br />
- Check the power connection and vi<strong>de</strong>o signal line connection.<br />
- Check the brightness level of DC Auto Iris volume of the camera.<br />
• The vi<strong>de</strong>o image is not clear.<br />
- Check if the camera glass has dust on the surface.<br />
Clean the camera glass with a clean cloth or brush.<br />
- Make sure that the screen is not exposed directly to a bright light.<br />
Adjust the position of the camera if necessary.<br />
- Check if protective film of camera glass is removed.<br />
• The screen is dark<br />
- Adjust the brightness feature of the monitor.<br />
- Check the brightness level of DC Auto Iris volume of the camera.<br />
• The screen does not properly display when IR LEDs work.<br />
- Check if the camera glass has dust.<br />
- Clean the camera glass with a clean cloth or brush.<br />
If you cannot solve the problem with above gui<strong>de</strong>lines, please contact an<br />
authorized technician.<br />
06_ troubleshooting
specifications<br />
ITEM NTSC PAL<br />
Image Sensor<br />
1/3" Interline transfer type color CCD (SONY)<br />
Effective Pixels 768H × 494V (380K pixels) 752H × 582V (440K pixels)<br />
Scanning System 525 Lines 2:1 Interlace 625 Lines 2:1 Interlace<br />
Scanning Frequency 15.734KHz (H), 59.94Hz (V) 15.625KHz (H), 50Hz (V)<br />
Resolution<br />
540TVL (Colour) , 570TVL (B/W)<br />
ENG<br />
Shutter Speed 1/60 sec. 1/50 sec.<br />
S/N Ratio<br />
Sync. System<br />
Min. Illumination<br />
White Balance<br />
Vi<strong>de</strong>o Output<br />
Lens<br />
Power Supply(*)<br />
Power Consumption<br />
Operating Temp.<br />
Operational Humidity<br />
Dimensions<br />
More than 48dB (AGC Off)<br />
Internal<br />
0 Lux (IR LED On)<br />
ATW / AWC selectable<br />
VBS 1.0 Vp-p (75 Load)<br />
3.8~9.5mm Vari -Focal, DC Auto Iris F1.2 Day & Night Lens<br />
AC24V±10%, DC12V±10%<br />
2.5W (LED Off)/ 5W (LED On)<br />
-10˚C~50˚C (14˚F~122˚F)<br />
Max. 90% RH<br />
145mm (Ø) × 100mm (L)<br />
(*) Must use regulated & specified power supply.<br />
specifications _07
Correct Disposal of This Product<br />
(Waste Electrical & Electronic Equipment)<br />
(Applicable in the European Union and other European countries with separate<br />
collection systems)<br />
This marking shown on the product or its literature, indicates that it should not be<br />
disposed with other household wastes at the end of its working life. To prevent<br />
possible harm to the environment or human health from uncontrolled waste<br />
disposal, please separate this from other types of wastes and recycle it responsibly<br />
to promote the sustainable reuse of material resources.<br />
Household users should contact either the retailer where they purchased this<br />
product, or their local government office, for <strong>de</strong>tails of where and how they can take<br />
this item for environmentally safe recycling.<br />
Business users should contact their supplier and check the terms and conditions<br />
of the purchase contract. This product should not be mixed with other commercial<br />
wastes for disposal.
<strong>SCC</strong>-B9374<br />
CAMERA LED IR JOUR & NUIT<br />
mo<strong>de</strong> d’emploi<br />
FRA<br />
imaginez les possibilités<br />
Merci d’avoir acheté un produit <strong>Samsung</strong>.<br />
Pour bénéficier d’un service plus complet,<br />
veuillez vous enregistrer sur<br />
www.samsung.com/global/register
précautions <strong>de</strong> sécurité<br />
ATTENTION<br />
ATTENTION<br />
RISQUE DE ECHOC ELECTRIQUE<br />
NE PAS OUVRIR<br />
ATTENTION : POUR REDUIRE LES RISQUES DE CHOCS ELECTRIQUES,<br />
NE RETIREZ PAS LE COUVERCLE (OU LA PARTIE ARRIERE) LES PIECES<br />
INTERIEURES NE SONT PAS ACCESSIBLES A L’UTILISATEUR.<br />
FAITES APPEL AU PERSONNEL DE MAINTENANCE QUALIFIE.<br />
Ce symbole indique la présence, dans cette unité, d’une tension élevée et avise <strong>de</strong>s<br />
risques <strong>de</strong> décharge électrique existants.<br />
Ce symbole indique que la documentation accompagnant l’unité contient <strong>de</strong>s<br />
instructions importantes sur la manipulation et l’entretien.<br />
• Afin <strong>de</strong> réduire le risque d’incendie ou <strong>de</strong> décharge électrique, n’exposez pas cet appareil à<br />
la pluie ni à l’humidité.<br />
ATTENTION<br />
1. Assurez-vous d’utiliser uniquement l’adaptateur standard spécifié dans la fiche <strong>de</strong>s<br />
caractéristiques techniques. Utiliser tout autre adaptateur peut provoquer <strong>de</strong>s risques<br />
d’incendie ou <strong>de</strong>s chocs électriques et endommager le produit.<br />
2. Un branchement incorrect <strong>de</strong> l’alimentation électrique ou un mauv<strong>ais</strong> remplacement <strong>de</strong> la<br />
pile peut provoquer <strong>de</strong>s risques d’incendie, <strong>de</strong>s chocs électriques ou <strong>de</strong>s dommages au<br />
produit.<br />
3. Ne pas connecter plusieurs caméras à un seul adaptateur. Dépasser la capacité peut<br />
générer une chaleur anormale ou un risque d’incendie.<br />
4. Branchez correctement le cordon d’alimentation dans la prise. Une mauv<strong>ais</strong>e connexion<br />
peut provoquer <strong>de</strong>s risques d’incendie.<br />
5. Lors <strong>de</strong> l’installation <strong>de</strong> la caméra, attachez-la fermement et en toute sécurité. Une caméra<br />
qui tombe peut causer <strong>de</strong>s blessures.<br />
6. Ne placez pas d’objets conducteurs (tourne-vis, pièces <strong>de</strong> monnaie, objets en métal,<br />
etc... par exemple) ou <strong>de</strong>s récipients remplis d’eau sur la caméra. Cela peut causer <strong>de</strong>s<br />
blessures dues au feu, au choc électrique ou à la chute d’objets.<br />
7. Ne pas installez l’appareil dans <strong>de</strong>s lieux humi<strong>de</strong>s, poussiéreux ou couverts <strong>de</strong> suie. Cela<br />
peut provoquer <strong>de</strong>s risques d’incendie ou <strong>de</strong>s chocs électriques.<br />
8. Si vous constatez une o<strong>de</strong>ur ou une fumée inhabituelle provenant <strong>de</strong> l’appareil, arrêtez<br />
immédiatement son utilisation. Dans <strong>de</strong> tel cas, déconnectez immédiatement la source<br />
d’alimentation et contactez le centre <strong>de</strong> maintenance. Si vous continuez à utiliser le<br />
produit dans <strong>de</strong> telle condition, cela peut provoquer <strong>de</strong>s risques d’incendie ou <strong>de</strong>s chocs<br />
électriques.<br />
9. Si ce produit ne fonctionne pas normalement, contactez le centre <strong>de</strong> maintenance le<br />
plus proche. Ne jam<strong>ais</strong> démonter ou modifier le produit <strong>de</strong> quelque manière que ce soit.<br />
(SAMSUNG n’est pas responsable <strong>de</strong>s problèmes causés par <strong>de</strong>s modifications ou <strong>de</strong>s<br />
tentatives <strong>de</strong> réparation non autorisées.)<br />
10. Lors du nettoyage, ne pas diriger l’eau directement sur les pièces <strong>de</strong> l’appareil. Cela peut<br />
provoquer <strong>de</strong>s risques d’incendie ou <strong>de</strong>s chocs électriques.
MISE EN GARDE<br />
1. Ne pas faire tomber <strong>de</strong>s objets sur le produit ou lui faire subir <strong>de</strong>s chocs. Eloignez<br />
le produit <strong>de</strong>s emplacements soumis aux vibrations ou interférences magnétiques<br />
excessives.<br />
2. Ne pas installer le produit à <strong>de</strong>s emplacements soumis aux températures élevées<br />
(supérieures à +50°C), aux températures faibles (inférieures à -10°C), ou à<br />
une humidité élevée. Cela peut provoquer <strong>de</strong>s risques d’incendie ou <strong>de</strong>s chocs<br />
électriques.<br />
3. Si vous désirez changer le produit <strong>de</strong> place, assurez-vous <strong>de</strong> le mettre hors<br />
tension, déplacez-le et réinstallez-le.<br />
4. Débranchez le cordon d’alimentation <strong>de</strong> la prise lorsqu’il y a <strong>de</strong>s éclairs. Ne pas<br />
appliquer cette consigne peut provoquer <strong>de</strong>s risques d’incendie ou endommager<br />
le produit.<br />
5. Eloignez le produit <strong>de</strong>s rayons directs du soleil ou <strong>de</strong>s sources <strong>de</strong> radiation <strong>de</strong><br />
chaleur. Cela peut provoquer <strong>de</strong>s risques d’incendie.<br />
6. Installez le produit dans un lieu où la ventilation est suffisante.<br />
7. Evitez <strong>de</strong> pointer la caméra directement vers <strong>de</strong>s objets extrêmement brillants<br />
comme le soleil, cela peut endommager le capteur d’image CCD.<br />
8. Veillez à éviter toute projection sur l’appareil et ne placez jam<strong>ais</strong> <strong>de</strong> récipients<br />
contenant un liqui<strong>de</strong> (ex. : vase) <strong>de</strong>ssus.<br />
9. La prise d’alimentation fait office <strong>de</strong> système <strong>de</strong> déconnexion ; elle doit donc rester<br />
disponible en permanence.<br />
FRA
instructions importantes relatives à la sécurité<br />
1. Veuillez lire ces instructions.<br />
2. Conservez ces instructions.<br />
3. Prêtez attention à tous les avertissements.<br />
4. Veuillez suivre toutes les instructions.<br />
5. N’utilisez pas cet appareil à proximité <strong>de</strong> l’eau.<br />
6. Nettoyez-le avec un tissu sec.<br />
7. N’obstruez pas les ouvertures <strong>de</strong> ventilation. Procé<strong>de</strong>z à l’installation<br />
conformément aux instructions du fabricant.<br />
8. Ne pas installer l’appareil à proximité <strong>de</strong> sources <strong>de</strong> chaleur comme les radiateurs,<br />
les registres <strong>de</strong> chaleur et les autres appareils (incluant les amplificateurs)<br />
produisant <strong>de</strong> la chaleur.<br />
9. Veillez à vous conformer aux sécurités <strong>de</strong>s prises <strong>de</strong> terre et polarisées. Une prise<br />
dite polarisée est composée <strong>de</strong> <strong>de</strong>ux fiches, une plus large que l’autre. Une prise<br />
<strong>de</strong> terre est composée <strong>de</strong> <strong>de</strong>ux fiches et d’une troisième fiche pour la terre. La<br />
troisième fiche, plus large que les <strong>de</strong>ux autres, est fournie pour votre sécurité. Si<br />
la prise qui vous est fournie ne correspond pas à votre prise murale, <strong>de</strong>man<strong>de</strong>z à<br />
un électricien <strong>de</strong> remplacer la prise obsolète.<br />
10. Veillez à ce que personne ne marche ou se prenne les pieds dans le cordon<br />
d’alimentation et particulièrement au niveau <strong>de</strong>s fiches et <strong>de</strong>s prises <strong>de</strong> courant et<br />
au niveau où ils se situent.<br />
11. N’utilisez que <strong>de</strong>s accessoires ou <strong>de</strong>s produits additionnels spécifiés par le<br />
fabricant.<br />
12. N’utilisez que <strong>de</strong>s chariots, <strong>de</strong>s pieds, trépieds, ou tables spécifiés par le fabricant<br />
ou vendus avec l’appareil.<br />
13. Débranchez cet appareil. Si vous utilisez un chariot, faîtes attention lorsque que<br />
vous déplacez l’appareil et le chariot pour éviter les blessures causées par un<br />
renversement.<br />
14. Veuillez faire appel au personnel qualifié pour tous travaux <strong>de</strong> maintenance.<br />
Les travaux <strong>de</strong> maintenance sont nécessaires si l’appareil a été endommagé <strong>de</strong><br />
quelque manière que ce soit, comme cordon d’alimentation endommagé, liqui<strong>de</strong><br />
répandu, objets tombés sur l’appareil, appareil exposé à la pluie et à l’humidité, il<br />
ne fonctionne pas normalement ou est tombé par terre.
table <strong>de</strong>s matières<br />
propriétés<br />
02<br />
ce que vous <strong>de</strong>vez<br />
gar<strong>de</strong>r a l’esprit<br />
pendant<br />
l’installation et<br />
l’utilisation<br />
02<br />
dimensions et<br />
connexion <strong>de</strong>s câbles<br />
03<br />
assemblage et<br />
montage <strong>de</strong> la<br />
caméra<br />
05<br />
recherche <strong>de</strong>s<br />
pannes<br />
06<br />
caractéristiques<br />
07<br />
02 Propriétés<br />
02 Ce que vous <strong>de</strong>vez gar<strong>de</strong>r a l’esprit pendant<br />
l’installation et l’utilisation<br />
03 Dimensions et connexion <strong>de</strong>s câbles<br />
03 Objectif à iris automatique et réglages par<br />
commutateurs dip<br />
04 réglages par cardan 3 axes<br />
05 Assemblage et montage <strong>de</strong> la caméra<br />
06 Recherche <strong>de</strong>s pannes<br />
07 Caractéristiques<br />
FRA<br />
table <strong>de</strong>s matières _0
propriétés<br />
• Capteur CCD couleur Super HAD <strong>de</strong> 1/3 po SONY<br />
• Résolution : 540TVL (Couleur), 570TVL (B/W)<br />
• Objectif asphérique <strong>de</strong> 3,8~9,5 mm, F1,2, jour/nuit à iris automatique à<br />
couplage continu (DC) à focale variable et filtre interchangeable intégré<br />
• Couleur et N/B à commutation automatique par cellule photoélectrique et sensibilité<br />
• Comman<strong>de</strong> <strong>de</strong> temporisation jour/nuit par commutateur DIP, sans scintillement,<br />
CCJ et balance <strong>de</strong>s blancs<br />
• Comman<strong>de</strong> <strong>de</strong> l’iris à couplage continu (DC) intégrée<br />
• Comman<strong>de</strong> automatique <strong>de</strong> LED IR par cellule photoélectrique CDS<br />
(18 LED IR)<br />
• Véritable support à cardan 3 axes (2 pour panoramiques, 2 pour inclin<strong>ais</strong>on)<br />
• Installation à l’extérieur résistant à l’eau (IP-66)<br />
• Alimentation double disponible 24 V c.a./12 V c.c.<br />
ce que vous <strong>de</strong>vez gar<strong>de</strong>r a l’esprit<br />
pendant l’installation et l’utilisation<br />
• Ne démontez pas vous même le produit.<br />
• Soyez toujours pru<strong>de</strong>nt lors <strong>de</strong> la manipulation <strong>de</strong> la caméra. Ne causez pas<br />
<strong>de</strong> choc à la caméra. Ne la secouez pas. Prenez un maximum <strong>de</strong><br />
précautions lors du rangement et <strong>de</strong> l’utilisation <strong>de</strong> la caméra.<br />
• Ne placez pas la caméra dans <strong>de</strong>s environnements humi<strong>de</strong>s (sous la pluie<br />
ou sur <strong>de</strong>s surfaces humi<strong>de</strong>s par exemple).<br />
• Ne nettoyez pas la caméra avec du papier <strong>de</strong> verre abrasif. Utilisez toujours<br />
un chiffon doux pour nettoyer la caméra.<br />
• Placez la caméra dans une zone tempérée, à l’abri du rayonnement direct<br />
du soleil. Dans le cas contraire, la caméra risquerait d’être endommagée.<br />
0_ propriétés
ACTIVE<br />
dimensions et connexion <strong>de</strong>s câbles<br />
ALIMENTATION<br />
FRA<br />
ALIMENTATION<br />
OBJECTIF À IRIS AUTOMATIQUE ET RÉGLAGES PAR COMMUTATEURS DIP<br />
COMMUTATEUR DIP<br />
No<br />
Fonction<br />
Réglage par<br />
commutateur DIP<br />
PORT DE CONTRÔLE<br />
LUMINEUX<br />
SO<strong>MB</strong>RE<br />
MARCHE<br />
ARRÊT<br />
1 Temporisation 2~3 s 4~5 s<br />
2<br />
Sans<br />
scintillement<br />
ARRÊT<br />
MARCHE<br />
VOLUME DU COUPLAGE<br />
CONTINU (DC)<br />
3 CCJ MARCHE ARRÊT<br />
4 ATW/AWC ATW AWC<br />
dimensions et connexion <strong>de</strong>s câbles_0
RÉGLAGES PAR CARDAN 3 AXES<br />
PAN -1 PAN -2<br />
Vis <strong>de</strong> réglage<br />
Vis <strong>de</strong> réglage<br />
(2 chaque)<br />
TILT -1 TILT -2<br />
Vis <strong>de</strong> réglage<br />
(2 chaque)<br />
Vis <strong>de</strong> réglage<br />
(2 chaque)<br />
0_ dimensions et connexion <strong>de</strong>s câbles
assemblage et montage <strong>de</strong> la caméra<br />
1. Montage <strong>de</strong> la base du dôme<br />
- Retirez la pellicule <strong>de</strong> protection du <strong>de</strong>ssous en caoutchouc et fixez-la sur le boîtier <strong>de</strong> la base.<br />
- Fixez au mur ou au plafond le boîtier <strong>de</strong> la base avec les 4 vis fournies (No. 8-32 UNC).<br />
2. Alimentation et impédance du moniteur (Alimentation)<br />
- Adaptateur : 24 V c.a./600 mA ou 12 V c.c./800 mA (modèle 24 V c.a./12 V c.c.)<br />
(Impédance du moniteur, le cas échéant)<br />
- Réglez le commutateur d’impédance sur la position 75 Ω sauf si un équipement vidéo est<br />
branché sur le prise <strong>de</strong> sortie vidéo <strong>de</strong> moniteur.<br />
3. Réglage du module <strong>de</strong> la caméra<br />
(Réglage du panoramique et <strong>de</strong> l’inclin<strong>ais</strong>on)<br />
- Réglez la direction <strong>de</strong> la caméra en tournant le support <strong>de</strong> mouvement panoramique vers la<br />
gauche ou la droite, et le support d’inclin<strong>ais</strong>on vers le haut ou le bas, puis serrez les vis.<br />
(Réglage <strong>de</strong> l’angle <strong>de</strong> prise <strong>de</strong> vue)<br />
- Pour un plus grand angle <strong>de</strong> prise <strong>de</strong> vue, déplacez le levier <strong>de</strong> zoom vers la position grandangle;<br />
pour un angle <strong>de</strong> prise <strong>de</strong> vue plus étroit, déplacez-le vers la position téléobjectif.<br />
- Après le réglage précis <strong>de</strong> la distance focale, bougez le levier <strong>de</strong> mise au point vers la<br />
position proche ou lointaine pour obtenir l’image la plus nette possible.<br />
4. Montage <strong>de</strong> la bague décorative<br />
- Fixez soli<strong>de</strong>ment la bague décorative à sa place sur le boîtier <strong>de</strong> la base avec les vis au<br />
moyen <strong>de</strong> la clé en L fournie.<br />
FRA<br />
FOND EN<br />
CAOUTCHOUC<br />
BOITIER DE<br />
BASE<br />
No 8-32<br />
UNC<br />
BAGUE<br />
ENJOLIVEUSE<br />
M4*10<br />
assemblage et montage <strong>de</strong> la caméra _0
5. Description du port vidéo pour le service<br />
recherche <strong>de</strong>s pannes<br />
Si <strong>de</strong>s problèmes surgissent lors <strong>de</strong> l’utilisation <strong>de</strong> la caméra, veuillez vérifier<br />
le gui<strong>de</strong> suivant pour en déterminer la cause.<br />
• Aucun affichage à l’écran.<br />
- Contrôlez la connexion électrique et la connexion <strong>de</strong> ligne <strong>de</strong> signal vidéo.<br />
- Contrôlez le niveau <strong>de</strong> luminosité du volume <strong>de</strong> diaphragme auto DC <strong>de</strong> la caméra.<br />
• L’image vidéo n’est pas claire.<br />
- Contrôlez si <strong>de</strong>s poussières se trouvent sur la surface du verre <strong>de</strong> caméra..<br />
Nettoyez le verre <strong>de</strong> caméra avec un chiffon propre ou une brosse.<br />
- Veillez à ne pas exposer l’écran à une forte lumière.<br />
Ajustez la position <strong>de</strong> la caméra si nécessaire.<br />
- Contrôlez que le film <strong>de</strong> protection du verre <strong>de</strong> caméra a été retiré.<br />
• L’écran est sombre<br />
- Ajustez la luminosité du moniteur.<br />
- Contrôlez le niveau <strong>de</strong> luminosité du volume <strong>de</strong> diaphragme auto DC <strong>de</strong> la caméra.<br />
• L’affichage <strong>de</strong> l’écran n’est pas correct lorsque les LEDs IR sont activées.<br />
- Contrôlez si <strong>de</strong> la poussière se trouve sur le verre <strong>de</strong> caméra.<br />
- Nettoyez le verre <strong>de</strong> caméra avec un chiffon propre ou une brosse.<br />
Si les indications précé<strong>de</strong>ntes ne vous permettent pas <strong>de</strong> résoudre le<br />
problème, veuillez contacter un technicien autorisé.<br />
0_ recherche <strong>de</strong>s pannes
caractéristiques<br />
ARTICLE NTSC PAL<br />
Capteur d’image<br />
Capteur CCD couleur à transfert interligne <strong>de</strong> 1/3 po (SONY)<br />
Pixels efficaces 768 (H) × 494 (V) (380 K pixels) 752 (H) × 582 (V) (440 K pixels)<br />
Système d’analyse<br />
525 lignes, rapport<br />
d’entrelacement 2:1<br />
625 lignes, rapport<br />
d’entrelacement 2:1<br />
Fréquence d’analyse 15,734 kHz (H), 59,94 Hz (V) 15,625 kHz (H), 50 Hz (V)<br />
Résolution<br />
540TVL (Couleur), 570TVL (B/W)<br />
Vitesse d’obturateur 1/60 s 1/50 s<br />
Rapport S/B<br />
Supérieur à 48 dB (AGC hors fonction)<br />
FRA<br />
Système <strong>de</strong><br />
synchronisation<br />
Éclairement minimal<br />
Balance <strong>de</strong>s blancs<br />
Interne<br />
0 lux (LED IR allumée)<br />
Mo<strong>de</strong>s ATW/AWC sélectionnables<br />
Sortie vidéo Train vidéo 1,0 V c.-à-c. (charge <strong>de</strong> 75 Ω )<br />
Objectif<br />
Objectif jour/nuit <strong>de</strong> 3,8~9,5 mm, F1,2, à focale variable, iris<br />
automatique à couplage continu (DC)<br />
Tension d’alimentation(*) 24 V c.a. ±10 %, 12 V c.c. ±10 %<br />
Puissance<br />
consommée<br />
Temp. <strong>de</strong><br />
fonctionnement<br />
Humidité <strong>de</strong><br />
fonctionnement<br />
Dimensions<br />
2.5W(LED désactivé)/5W(LED activé)<br />
-10˚C~+50˚C (14˚F~122˚F)<br />
Humidité relative max. <strong>de</strong> 90 %<br />
145 mm (Ø) × 100 mm (L)<br />
(*) Doit utiliser un bloc d’alimentation régulé et spécifié.<br />
caractéristiques _0
Comment éliminer ce produit<br />
(déchets d’équipements électriques et électroniques)<br />
(Applicable dans les pays <strong>de</strong> l’Union Européen et aux autres pays européens<br />
disposant <strong>de</strong> systémes <strong>de</strong> collecte sélective)<br />
Ce symbole sur le produit ou sa documentation indique qu’il ne doit pas être éliminé<br />
en fin <strong>de</strong> vie avec les autres déchets ménagers. L’élimination incontrôlée <strong>de</strong>s<br />
déchets pouvant porter préjudice à l’environnement ou à la santé humaine, veuillez<br />
le séparer <strong>de</strong>s autres types <strong>de</strong> déchets et le recycler <strong>de</strong> façon responsable. Vous<br />
favoriserez ainsi la réutilisation durable <strong>de</strong>s ressources matérielles.<br />
Les particuliers sont invités à contacter le distributeur leur ayant vendu le produit<br />
ou à se renseigner auprès <strong>de</strong> leur mairie pour savoir où et comment ils peuvent se<br />
débarrasser <strong>de</strong> ce produit afin qu’il soit recyclé en respectant l’environnement.<br />
Les entreprises sont invitées à contacter leurs fournisseurs et à consulter les<br />
conditions <strong>de</strong> leur contrat <strong>de</strong> vente. Ce produit ne doit pas être éliminé avec les<br />
autres déchets commerciaux.
<strong>SCC</strong>-B9374<br />
VANDALENSICHERE IR TAG & NACHT<br />
KUPPELKAMERA<br />
Bedienungsanleitung<br />
GER<br />
Denken Sie an die Möglichkeiten<br />
Danke für <strong>de</strong>n Kauf eines <strong>Samsung</strong> Gerätes.<br />
Um einen umfassen<strong>de</strong>ren Kun<strong>de</strong>ndienst zu<br />
erhalten, registrieren Sie Ihr Gerät bitte unter<br />
www.samsung.com/global/register
sicherheitsvorkehrungen<br />
WARNUNG<br />
WARNUNG<br />
WARNUNG<br />
GEFAHR EINES<br />
ELEKTROSCHOCKSNICHT ÖFFNEN<br />
WARNUNG: NICHT DIE RÜCKSEITIGE ABDECKUNG ÖFFNEN,<br />
ABDECKUNG (ODER RÜCKSEITE) NICHT ABNEHMEN. KEINE VOM<br />
BENUTZER ZU WARTENDE TEILE INNEN. WENDEN SIE SICH AN<br />
QUALIFIZIERTESKUNDENDIENSTPERSONAL.<br />
Dieses Symbol zeigt an, dass bei diesem Gerät gefährliche Spannung Elektroschock<br />
zur Folge haben kann.<br />
Dieses Symbol zeigt an, dass wichtige Betriebs- und Wartungsanleitungen in <strong>de</strong>m<br />
Prospekt enthalten sind, welche mt diesem Gerät mitgeliefert wer<strong>de</strong>n.<br />
• Setzen Sie dieses Gerät nicht Regen o<strong>de</strong>r Feuchtigkeit aus, um die Gefahr eines<br />
Brands o<strong>de</strong>r Elektroschocks zu reduzieren.<br />
1. Achten Sie darauf, nur <strong>de</strong>n im Datenblatt angegebenen Standard-Adapter zu<br />
verwen<strong>de</strong>n. Die Verwendung eines an<strong>de</strong>ren Adapters kann Brand, Elektroschock<br />
o<strong>de</strong>r Schä<strong>de</strong>n am Produkt verursachen.<br />
2. Falscher Anschluss <strong>de</strong>s Netzkabels o<strong>de</strong>r Austausch <strong>de</strong>r Batterie kann Explosion,<br />
Brand, Elektroschock o<strong>de</strong>r Schä<strong>de</strong>n am Produkt zur Folge haben.<br />
3. Schließen Sie nicht mehrere Kameras an einen einzelnen Adapter an.<br />
Überschreiten <strong>de</strong>r Kapazität kann abnormale Wärme o<strong>de</strong>r Brand erzeugen.<br />
4. Schließen Sie das Netzkabel sicher an die Steckdose an. Ein ungesicherter<br />
Anschluss kann einen Brand verursachen.<br />
5. Wenn Sie die Kamera installieren, befestigen Sie sie sicher und fest. Eine<br />
herunterfallen<strong>de</strong> Kamera kann Körperverletzungen verursachen.<br />
6. Stellen Sie keine leiten<strong>de</strong>n Gegenstän<strong>de</strong> (z.B. Schraubendreher, Münzen,<br />
Metallgegenstän<strong>de</strong>, usw.) o<strong>de</strong>r Behälter mit Wasser auf die Kamera. Dies<br />
kann sonst Körperverletzungen aufgrund von Brand, Elektroschock o<strong>de</strong>r<br />
herunterfallen<strong>de</strong>n Gegenstän<strong>de</strong>n verursachen.<br />
7. Installieren Sie das Gerät nicht an feuchten, staubigen o<strong>de</strong>r rußigen Standorten.<br />
Dies führt sonst zu Brand o<strong>de</strong>r Elektroschock.<br />
8. Verwen<strong>de</strong>n Sie das Produkt nicht weiter, wenn eine ungewöhnliche Geruchso<strong>de</strong>r<br />
Rauchentwicklung auftritt. Ziehen Sie in diesem Fall sofort <strong>de</strong>n Netzstecker<br />
und wen<strong>de</strong>n Sie sich an <strong>de</strong>n Kun<strong>de</strong>ndienst. Wenn Sie das Gerät unter diesen<br />
Bedingungen weiterhin verwen<strong>de</strong>n, kann Brand o<strong>de</strong>r Elektroschock resultieren.<br />
9. Wenn dieses Produkt nicht einwandfrei funktioniert, wen<strong>de</strong>n Sie sich an <strong>de</strong>n<br />
nächstgelegenen Kun<strong>de</strong>ndienst. Zerlegen o<strong>de</strong>r modifizieren Sie dieses Produkt<br />
nie in irgen<strong>de</strong>iner Weise. (SAMSUNG haftet nicht für Schä<strong>de</strong>n, die durch<br />
unbefugte Än<strong>de</strong>rungen o<strong>de</strong>r Reparaturversuche verursacht wer<strong>de</strong>n.)<br />
10. Spritzen Sie während <strong>de</strong>r Reinigung kein Wasser direkt auf die Produktteile. Dies<br />
führt sonst zu Brand o<strong>de</strong>r Elektroschock.
VORSICHT<br />
1. Lassen Sie keine Gegenstän<strong>de</strong> auf das Produkt fallen o<strong>de</strong>r setzen Sie es keinen<br />
starken Stößen aus. Halten Sie sich fern von Standorten die übermäßiger<br />
Erschütterung o<strong>de</strong>r magnetischer Beeinflussung ausgesetzt sind.<br />
2. Installieren Sie das Gerät nicht an einem Standort, <strong>de</strong>r hohen Temperaturen (über<br />
50°C), niedrigen Temperaturen (unter 10°C) o<strong>de</strong>r hoher Feuchtigkeit ausgesetzt<br />
ist. Dies führt sonst zu Brand o<strong>de</strong>r Elektroschock.<br />
3. Wenn Sie das bereits installierte Gerät versetzen möchten, achten Sie darauf,<br />
die Stromversorgung abzuschalten und es dann erst zu versetzen und erneut zu<br />
installieren.<br />
4. Ziehen Sie <strong>de</strong>n Netzstecker bei Gewitter. Nichtbeachtung kann Brand o<strong>de</strong>r<br />
Schä<strong>de</strong>n am Gerät verursachen.<br />
5. Halten Sie das Gerät fern von direktem Sonnenlicht und an<strong>de</strong>ren<br />
Wärmestrahlungsquellen. Dies kann sonst zu Brand führen.<br />
6. Installieren Sie das Gerät an einem Ort mit guter Belüftung.<br />
7. Zielen Sie mit <strong>de</strong>r Kamera nicht direkt in Richtung extrem heller Gegenstän<strong>de</strong> wie<br />
zum Beispiel die Sonne, da dies <strong>de</strong>n CCD-Bildsensor beschädigen kann.<br />
8. Das Gerät darf nicht mit Wasser o<strong>de</strong>r an<strong>de</strong>ren Flüssigkeiten in Berührung<br />
kommen. Außer<strong>de</strong>m dürfen keine mit Flüssigkeiten gefüllten Behälter, wie<br />
beispielsweise Vasen, darauf abgestellt wer<strong>de</strong>n.<br />
9. Der Netzstecker sollte je<strong>de</strong>rzeit in Reichweite und zugänglich sein, da er aus <strong>de</strong>r<br />
Steckdose entfernt wer<strong>de</strong>n muss, um das Gerät vollständig abzuschalten.<br />
GER
wichtige sicherheitshinweise<br />
1. Lesen Sie diese Anweisungen.<br />
2. Bewahren Sie sie auf.<br />
3. Beachten Sie alle Warnungen.<br />
4. Befolgen Sie alle Anweisungen.<br />
5. Verwen<strong>de</strong>n Sie dieses Gerät nicht in <strong>de</strong>r Nähe von Wasser.<br />
6. Reinigen Sie es nur mit einem trockenen Lappen.<br />
7. Blockieren Sie keine Belüftungsöffnungen. Installieren Sie es gemäß <strong>de</strong>n<br />
Herstelleranweisungen.<br />
8. Installieren Sie das Gerät nicht in <strong>de</strong>r Nähe von Wärmequellen wie<br />
beispielsweise von Radiatoren, Heizkörpern o<strong>de</strong>r an<strong>de</strong>ren Geräten<br />
(einschließlich Verstärkern), die Wärme erzeugen.<br />
9. Bitte achten Sie darauf, die Schutzvorrichtung <strong>de</strong>s gepolten bzw. geer<strong>de</strong>ten<br />
Steckers nicht zu beschädigen. Ein gepolter Stecker verfügt über zwei Stifte,<br />
von <strong>de</strong>nen einer breiter als <strong>de</strong>r an<strong>de</strong>re ist. Ein geer<strong>de</strong>ter Stecker hat zwei Stifte<br />
und einen Erdungsstift. Der breite Stift o<strong>de</strong>r <strong>de</strong>r dritte Stift ist für Ihre Sicherheit<br />
vorgesehen. Wenn <strong>de</strong>r vorgesehene Stecker nicht in Ihre Steckdose passt,<br />
wen<strong>de</strong>n Sie sich an einen Elektriker, um die veraltete Steckdose austauschen<br />
zu lassen.<br />
10. Schützen Sie das Netzkabel so, dass nicht darauf getreten wird, und dass es<br />
insbeson<strong>de</strong>re an <strong>de</strong>n Steckern o<strong>de</strong>r passen<strong>de</strong>n Steckdosen bzw. <strong>de</strong>r Stelle,<br />
an <strong>de</strong>r das Kabel das Gerät verlässt, nicht abgeklemmt wird.<br />
11. Verwen<strong>de</strong>n Sie nur die vom Hersteller angegebenen Zusatzgeräte/<br />
Zubehörteile.<br />
12. Verwen<strong>de</strong>n Sie diese nur mit <strong>de</strong>m vom Hersteller angegebenen Wagen,<br />
Stän<strong>de</strong>r, Stativ, Auflage o<strong>de</strong>r Tisch, o<strong>de</strong>r die mit <strong>de</strong>m Gerät zusammen<br />
verkauft wur<strong>de</strong>n.<br />
13. Ziehen Sie <strong>de</strong>n Netzstecker dieses Geräts. Geben Sie Acht bei <strong>de</strong>r<br />
Verwendung eines Wagens, wenn Sie die Wagen-/Gerätekombination<br />
verschieben, um Verletzungen durch Herunterfallen zu vermei<strong>de</strong>n.<br />
14. Überlassen Sie alle Wartungsarbeiten qualifiziertem Kun<strong>de</strong>ndienstpersonal.<br />
Wartungsarbeiten sind erfor<strong>de</strong>rlich, wenn das Gerät in irgen<strong>de</strong>iner Weise<br />
beschädigt wur<strong>de</strong>, wie zum Beispiel ein beschädigtes Netzkabel o<strong>de</strong>r Stecker,<br />
verschüttete Flüssigkeiten o<strong>de</strong>r Gegenstän<strong>de</strong>, die in das Gerät gefallen sind,<br />
das Gerät Regen o<strong>de</strong>r Feuchtigkeit ausgesetzt wur<strong>de</strong>, nicht normal funktioniert<br />
o<strong>de</strong>r fallen gelassen wur<strong>de</strong>.
inhaltsangabe<br />
funktionen<br />
02<br />
dinge die während<br />
<strong>de</strong>r installation und<br />
<strong>de</strong>s gebrauchs zu<br />
beachten sind<br />
02<br />
abmessungen und<br />
kabelanschluss<br />
03<br />
02 funktionen<br />
02 dinge die während <strong>de</strong>r installation und <strong>de</strong>s<br />
gebrauchs zu beachten sind<br />
03 abmessungen und kabelanschluss<br />
03 Auto-blen<strong>de</strong>nobjektiv und dip-schalter<br />
einstellungen<br />
04 Réglages par cardan 3 axes<br />
GER<br />
kamerazusammenbau<br />
und montage<br />
05<br />
fehlersuche<br />
06<br />
spezifikationen<br />
07<br />
05 Kamerazusammenbau und montage<br />
06 Fehlersuche<br />
07 Spezifikationen<br />
inhaltsangabe _0
funktionen<br />
• SONY 1/3” Super HAD CD Farbe<br />
• Auflösung: 540TVL (Farbe), 570TVL (S/W)<br />
• Tag/Nacht Filterwechsel und Varifokal mit asphärischem<br />
DC Auto-Blen<strong>de</strong> 3,8~9,5 mm F1,2 eingebautes Objektiv<br />
• Farbe und S/W automatisch umschaltbar durch Fotozelle und Empfindlichkeit<br />
• DIP-Schaltersteuerung <strong>de</strong>r Tag und Nacht-Zeitverzögerung, flimmerfrei<br />
• BLC und Weißabgleich<br />
• Eingebauter DC Blen<strong>de</strong>nsteuerungs-Pegelumfang<br />
• CDS automatische Umschaltung <strong>de</strong>r IR LED Steuerung (18 St. LEDs)<br />
• Halterung mit echter 3-Achsen-Mechanik (2-Schwenken, 2-Neigen)<br />
• Vandalismussicheres und Wasserfeste Ausseninstallation (IP-66)<br />
• AC 24V/ DC12V Spannungsumschaltung verfügbar<br />
dinge die während <strong>de</strong>r installation und<br />
<strong>de</strong>s gebrauchs zu beachten sind<br />
• Das Gerät nicht selbst auseinan<strong>de</strong>rbauen.<br />
•<br />
•<br />
•<br />
•<br />
Die Kamera darf we<strong>de</strong>r mit <strong>de</strong>n Fäusten gestoßen noch geschüttelt wer<strong>de</strong>n.<br />
Geben Sie Acht, wenn Sie die Kamera aufbewahren und bedienen.<br />
Platzieren o<strong>de</strong>r bedienen Sie die Kamera we<strong>de</strong>r in einer nassen Umgebung wie zum<br />
Beispiel Regen o<strong>de</strong>r nassen Flächen.<br />
Reinigen Sie die Kamera nicht mit grobem Sandpapier. Verwen<strong>de</strong>n Sie immer einen<br />
trockenen Lappen bei <strong>de</strong>r Reinigung.<br />
Bewahren Sie die Kamera an einem kühlen Ort fern von direktem Sonnenlicht auf.<br />
Sie kann sonst beschädigt wer<strong>de</strong>n.<br />
0_ funktionen
EIN<br />
abmessungen und kabelanschluss<br />
VIDEO<br />
ENERGIE<br />
GER<br />
AUTO-BLENDENOBJEKTIV UND DIP-SCHALTER EINSTELLUNGEN<br />
DIP-SCHALTER<br />
Nr.<br />
Funktion<br />
DIP-Schalter Einstellung<br />
SERVICE PORT<br />
HELL<br />
DUNKEL<br />
EIN<br />
AUS<br />
1 Zeitverzögerung 2~3 Sek. 4~5 Sek.<br />
2 Flimmerfrei AUS EIN<br />
DC-PEGELUMFANG<br />
3 BLC EIN AUS<br />
4 ATW/AWC ATW AWC<br />
abmessungen und kabelanschluss_0
RÉGLAGES PAR CARDAN 3 AXES<br />
SCHWENKEN-1<br />
SCHWENKEN-2<br />
Einstellschraube<br />
Einstellschraube<br />
x 2 jew.<br />
NEIGEN-1<br />
NEIGEN-2<br />
Einstellschraube<br />
x 2 jew.<br />
Einstellschraube<br />
x 2 jew.<br />
0_ abmessungen und kabelanschluss
kamerazusammenbau und montage<br />
1. Montage <strong>de</strong>s Domesockels<br />
- Nehmen Sie die Schutzfolie am Gummibo<strong>de</strong>n ab und befestigen Sie ihn am Sockel-gehäuse.<br />
- Befestigen Sie das Sockelgehäuse mit <strong>de</strong>n im Lieferumfang enthaltenen 4 Schrauben (Nr. 8-32<br />
UNC) an <strong>de</strong>r Decke o<strong>de</strong>r <strong>de</strong>r Wand.<br />
2. Stromversorgung und Monitorimpedanz (Stromversorgung)<br />
- Adapter: AC 24V / 600 mA o<strong>de</strong>r DC 12V / 800 mA (AC 24V / DC 12V Mo<strong>de</strong>ll)<br />
(Impédance du moniteur, le cas échéant)<br />
- Setzen Sie <strong>de</strong>n Impedanzschalter auf 75 Ω Standardposition, es sei <strong>de</strong>nn ein Vi<strong>de</strong>ogerät wird<br />
an <strong>de</strong>n Monitor-Vi<strong>de</strong>oausgang angeschlossen.<br />
3. Kameramodul-Justierung<br />
(Schwenken und Neigen Justierung)<br />
- Stellen Sie die Kamerarichtung ein, in<strong>de</strong>m Sie <strong>de</strong>n Schwenkhalter nach links o<strong>de</strong>r rechts, <strong>de</strong>n<br />
Neigungshalter nach oben o<strong>de</strong>r unten drehen, ziehen Sie dann die Schrauben fest an.<br />
(Betrachtungswinkel-Justierung)<br />
- Setzen Sie <strong>de</strong>n Zoomhebel auf weit für einen erweiterten Betrachtungswinkel und für einen<br />
engeren Betrachtungswinke auf Tele.<br />
- Stellen Sie nach einer akkuraten Justierung <strong>de</strong>r Brennweite <strong>de</strong>n Fokushebel auf nah o<strong>de</strong>r<br />
weit ein für die <strong>de</strong>utlichste Bildschärfe.<br />
4. Montage <strong>de</strong>s Dekorationsrings<br />
- Befestigen Sie <strong>de</strong>n Dekorationsring sicher mit <strong>de</strong>n Schrauben, in<strong>de</strong>m Sie <strong>de</strong>n im Lieferumfang<br />
enthaltenen L-Schlüssel am Sockelgehäuse verwen<strong>de</strong>n..<br />
GER<br />
GUMMIBODEN<br />
SOCKELGEHÄUSE<br />
Nr. 8-32 UNC<br />
DEKORATIONSRING<br />
M4*10<br />
kamerazusammenbau und montage _0
5. Service Vi<strong>de</strong>oport-Beschreibung<br />
fehlersuche<br />
Sollten Sie Probleme beim Betrieb <strong>de</strong>r Kamera haben, prüfen Sie folgen<strong>de</strong><br />
Leitfä<strong>de</strong>n bezüglich <strong>de</strong>s möglichen Problems.<br />
• Am Bildschirm wird nichts angezeigt.<br />
- Prüfen Sie <strong>de</strong>n Netzanschluss und <strong>de</strong>n Leitungsanschluss <strong>de</strong>s Vi<strong>de</strong>osignals..<br />
- Prüfen Sie die Helligkeitsstufe <strong>de</strong>r DC Auto-Blen<strong>de</strong>ngröße <strong>de</strong>r Kamera.<br />
• Das Vi<strong>de</strong>obild ist nicht <strong>de</strong>utlich.<br />
- Prüfen Sie ob sich Staub auf <strong>de</strong>m Kameraglas befin<strong>de</strong>t.<br />
Reinigen Sie das Kameraglas mit einem sauberen Lappen o<strong>de</strong>r einer Bürste.<br />
- Achten Sie darauf, dass <strong>de</strong>r Bildschirm nicht direkt hellem Licht ausgesetzt ist.<br />
Stellen Sie die Position <strong>de</strong>r Kamera erfor<strong>de</strong>rlichenfalls ein.<br />
- Kontrollieren Sie, ob die Schutzfolie vom Kameraglas entfernt wur<strong>de</strong>.<br />
• Das Bild ist dunkel<br />
- Stellen Sie die Helligkeitsfunktion <strong>de</strong>s Monitors ein.<br />
- Prüfen Sie die Helligkeitsstufe <strong>de</strong>r DC Auto-Blen<strong>de</strong>ngröße <strong>de</strong>r Kamera.<br />
• Das Bild zeigt nicht korrekt an, ob die IR LEDs funktionieren.<br />
- Prüfen Sie ob sich Staub auf <strong>de</strong>m Kameraglas befin<strong>de</strong>t.<br />
- Reinigen Sie das Kameraglas mit einem sauberen Lappen o<strong>de</strong>r einer Bürste.<br />
Wen<strong>de</strong>n Sie sich an einen befugten Techniker, wenn Sie das Problem mithilfe<br />
<strong>de</strong>r oben aufgeführten Leitfä<strong>de</strong>n nicht lösen können.<br />
0_ fehlersuche
spezifikationen<br />
OBJEKT NTSC PAL<br />
Bildsensor<br />
1/3” Interline Transfer CCD (SONY)<br />
Effektive Pixel 768H × 494V (380K Pixel) 752H × 582V (440K Pixel)<br />
Abtastsystem 525 Linien, 2:1 Interlace 625 Linien, 2:1 Interlace<br />
Abtastfrequenz 15,734KHz (H), 59,94Hz (V) 15,625KHz (H), 50Hz (V)<br />
Auflösung<br />
Shutter-<br />
Geschwindigkeit<br />
Signal-Rausch-<br />
Verhältnis<br />
Sync. System<br />
540TVL (Farbe) , 570TVL (S/W)<br />
1/60 Sek. 1/50 Sek.<br />
Mehr als 48dB (AGC Aus)<br />
Intern<br />
Min. Beleuchtung<br />
0 Lux (IR LED Ein)<br />
GER<br />
Weißabgleich<br />
Vi<strong>de</strong>oausgang<br />
Objektiv<br />
Stromversorgung(*)<br />
Leistungsaufnahme<br />
Betriebstemp.<br />
Betriebsfeuchtigkeit<br />
Abmessungen<br />
ATW / AWC wählbar<br />
VBS 1,0 Vp-p (75Ù Belastung)<br />
3,8~9,5 mm Varifokal, DC Auto-Blen<strong>de</strong> F1,2 Tag und Nacht<br />
Objektiv<br />
AC 24V± 10%, DC 12V±10%<br />
2,5 Watt (LED aus) / 5 Watt (LED an)<br />
-10˚C~50˚C (14˚F~122˚F)<br />
Max. 90% RH<br />
145 mm (Ø) ×100 mm (L)<br />
(*) Muss geregelte und spezifizierte Stromversorgung verwen<strong>de</strong>n.<br />
spezifikationen_0
Korrekte Entsorgung von Altgeräten<br />
(Elektroschrott)<br />
(In <strong>de</strong>n Län<strong>de</strong>rn <strong>de</strong>r Europäischen Union und an<strong>de</strong>ren europäischen Län<strong>de</strong>rn mit<br />
einem separaten Sammelsystem)<br />
Die Kennzeichnung auf <strong>de</strong>m Produkt bzw. auf <strong>de</strong>r dazugehörigen Dokumentation<br />
gibt an, dass es nach seiner Lebensdauer nicht zusammen mit <strong>de</strong>m normalen<br />
Haushaltsmüll entsorgt wer<strong>de</strong>n darf. Entsorgen Sie dieses Gerät bitte getrennt von<br />
an<strong>de</strong>ren Abfällen, um <strong>de</strong>r Umwelt bzw. <strong>de</strong>r menschlichen Gesundheit nicht durch<br />
unkontrollierte Müllbeseitigung zu scha<strong>de</strong>n. Helfen Sie mit, das Altgerät fachgerecht<br />
zu entsorgen, um die nachhaltige Wie<strong>de</strong>rverwertung von stofflichen Ressourcen<br />
zu för<strong>de</strong>rn.<br />
Private Nutzer wen<strong>de</strong>n sich an <strong>de</strong>n Händler, bei <strong>de</strong>m das Produkt gekauft wur<strong>de</strong>,<br />
o<strong>de</strong>r kontaktieren die zuständigen Behör<strong>de</strong>n, um in Erfahrung zu bringen, wo Sie<br />
das Altgerät für eine umweltfreundliche Entsorgung abgeben können.<br />
Gewerbliche Nutzer wen<strong>de</strong>n sich an ihren Lieferanten und gehen nach <strong>de</strong>n<br />
Bedingungen <strong>de</strong>s Verkaufsvertrags vor. Dieses Produkt darf nicht zusammen mit<br />
an<strong>de</strong>rem Gewerbemüll entsorgt wer<strong>de</strong>n.
<strong>SCC</strong>-B9374<br />
CÁMARA DOMO ANTIVANDÁLICA DÍA Y<br />
NOCHE DE INFRARROJOS<br />
manual <strong>de</strong> instrucciones<br />
SPA<br />
Imagine las posibilida<strong>de</strong>s<br />
Muchas gracias por comprar un producto<br />
<strong>Samsung</strong>. Para recibir un servicio más<br />
completo, por favor, registre su producto en<br />
www.samsung.com/global/register
precauciones <strong>de</strong> seguridad<br />
PRECAUCIÓN<br />
NO ABRIR RIESGO DE SUFRIR UNA<br />
DESCARGA ELÉCTRICA<br />
PRECAUCIÓN: PARA REDUCIR EL RIESGO DE SUFRIR UNA DESCARGA<br />
ELÉCTRICA, NO RETIRE LA CUBIERTA (O LA PARTE DE DETRÁS). DENTRO<br />
NO HAY PIEZAS QUE PUEDAN SER REPARADAS POR EL USUARIO. REMITA<br />
EL APARATO A PERSONAL DE MANTENIMIENTO CUALIFICADO.<br />
Este símbolo indica que esta unidad cuenta con un voltaje peligroso y que existe<br />
riesgo <strong>de</strong> cortocircuito.<br />
Este símbolo indica que hay importantes instrucciones <strong>de</strong> funcionamiento y<br />
mantenimiento en el manual que acompaña a la unidad.<br />
ADVERTENCIA<br />
• Para reducir el riesgo <strong>de</strong> incendio o cortocircuito, no exponga este dispositivo a la<br />
lluvia o la humedad.<br />
ADVERTENCIA<br />
1. Asegúrese <strong>de</strong> utilizar únicamente el adaptador estándar que se indica en la hoja <strong>de</strong><br />
especificaciones. Utilizar cualqueir otro adaptador pue<strong>de</strong> provocar un incendio, el<br />
riesgo <strong>de</strong> sufrir una <strong>de</strong>scarga eléctrica o pue<strong>de</strong> dañar el producto.<br />
2. Conectar <strong>de</strong> manera incorrecta el suministro <strong>de</strong> energía o cambiar las baterías<br />
<strong>de</strong> manera incorrecta pue<strong>de</strong> producir explosiones, incendios, riesgo <strong>de</strong> sufrir una<br />
<strong>de</strong>scarga eléctrica o pue<strong>de</strong> dañar el producto.<br />
3. No conecte varias cámaras a un único adaptador. Superar la capacidad pue<strong>de</strong> generar<br />
calor <strong>de</strong> manera anormal o crear un incendio.<br />
4. Enchufe <strong>de</strong> manera segura el cable <strong>de</strong> alimentación en la toma <strong>de</strong> corriente. Una<br />
conexión no segura pue<strong>de</strong> provocar un incendio.<br />
5. Al instalar la cámara, ajústela firmemente y <strong>de</strong> manera segura. La caída <strong>de</strong> una<br />
cámara pue<strong>de</strong> causar daños personales.<br />
6. No coloque objetos conductores (p. ej. <strong>de</strong>stornilladores, monedas, objetos <strong>de</strong> metal,<br />
etc.) o recipientes que contengan agua sobre la cámara. Se pue<strong>de</strong>n producir daños<br />
personales <strong>de</strong>bido a incendios, <strong>de</strong>scargas eléctricas u objetos que se caigan.<br />
7. No instale el aparato en lugares húmedos, cubiertos <strong>de</strong> polvo o <strong>de</strong> hollín. Podría<br />
producirse un incendo o riesgo <strong>de</strong> sufrir una <strong>de</strong>scarga eléctrica.<br />
8. Si la unidad <strong>de</strong>spren<strong>de</strong> un olor o humo inusual, <strong>de</strong>je <strong>de</strong> utilizar el aparato. En caso<br />
<strong>de</strong> que esto ocurra, <strong>de</strong>sconecte inmediatamente la fuente <strong>de</strong> energía y póngase en<br />
contacto con el servicio técnico. El uso continuado <strong>de</strong>l aparato en esas condiciones<br />
pue<strong>de</strong> provocar un incendio o riesgo <strong>de</strong> sufrir una <strong>de</strong>scarga eléctrica.<br />
9. Si este producto <strong>de</strong>ja <strong>de</strong> funcionar con normalidad, póngase en contacto con el<br />
servicio técnico más cercano. Nunca intente <strong>de</strong>smontar o modificar este producto <strong>de</strong><br />
ninguna manera. (SAMSUNG no se hace responsable <strong>de</strong> los problemas producidos<br />
por modificaciones no autorizadas o por intentos <strong>de</strong> reparaciones.)<br />
10. Al limpiar el producto, no rocíe sus piezas directamente con agua. Podría producirse<br />
un incendo o el riesgo <strong>de</strong> sufrir una <strong>de</strong>scarga eléctrica.
PRECAUCIÓN<br />
1. No <strong>de</strong>je objetos sobre el producto ni aplique una fuerte presión sobre<br />
él. Manténgalo lejos <strong>de</strong> lugares sujetos una <strong>de</strong>masiadas vibraciones o a<br />
interferencias magnéticas.<br />
2. No lo instale en lugares con temperaturas elevadas (más <strong>de</strong> 50°C), temperaturas<br />
bajas (menos <strong>de</strong> -10°C) o humedad elevada. Podría producirse un incendo o riesgo<br />
<strong>de</strong> sufrir una <strong>de</strong>scarga eléctrica.<br />
3. Si <strong>de</strong>sea cambiar <strong>de</strong> ubicación el aparato ya instalado, asegúrese <strong>de</strong> <strong>de</strong>sconectar<br />
el suministro <strong>de</strong> energía. Una vez esté <strong>de</strong>sconectado, mueva el aparato o vuelva a<br />
instalarlo.<br />
4. Desconecte el enchufe <strong>de</strong> la toma <strong>de</strong> corriente cuando hay rayos. Si no lo hace,<br />
pue<strong>de</strong> producirse un incendio o el aparato pue<strong>de</strong> dañarse.<br />
5. Mantenga el aparato alejado <strong>de</strong> la luz solar directa y <strong>de</strong> las fuentes que irradien<br />
calor. Se pue<strong>de</strong> producir un incendio.<br />
6. Instale el aparato en un lugar bien ventilado.<br />
7. Evite dirigir la cámara directamente hacia objetos extremadamente brillantes como,<br />
por ejemplo, el sol, puesto que pue<strong>de</strong> dañar el sensor <strong>de</strong> imagen CCD.<br />
8. No <strong>de</strong>be exponer el aparato a gotas ni salpicaduras <strong>de</strong> agua ni a objetos con<br />
líquido, como jarrones, evitando colocarlos sobre el aparato.<br />
9. El enchufe principal se utiliza como un dispositivo <strong>de</strong> <strong>de</strong>sconexión y <strong>de</strong>be tenerlo a<br />
mano en cualquier momento.<br />
SPA
instrucciones <strong>de</strong> seguridad importantes<br />
1. Lea estas instrucciones.<br />
2. Consérvelas.<br />
3. Preste atención a todas las advertencias.<br />
4. Siga todas las instrucciones.<br />
5. No utilice este aparato cerca <strong>de</strong>l agua.<br />
6. Límpielo únicamente con un paño seco.<br />
7. No obstruya ninguna abertura <strong>de</strong> ventilación. Instale el aparato siguiendo las<br />
instrucciones <strong>de</strong>l fabricante.<br />
8. No lo instale cerca <strong>de</strong> ninguna fuente <strong>de</strong> calor como radiadores, focos <strong>de</strong> calor o<br />
cualquier otro aparato (incluidos los amplificadores) que emita calor.<br />
9. No olvi<strong>de</strong> que la finalidad <strong>de</strong> los enchufes polarizados o <strong>de</strong> toma a tierra es<br />
proporcionarle seguridad. Un enchufe polarizado tiene dos clavijas, una más ancha<br />
que la otra. Un enchufe con toma a tierra tiene dos clavijas y una tercera <strong>de</strong> toma a<br />
tierra. Tanto la clavija más ancha, en el caso <strong>de</strong>l enchufe polarizado, como la clavija<br />
adicional, en el caso <strong>de</strong>l enchufe con toma a tierra, tienen como objetivo aportarle<br />
seguridad. Si el encufe <strong>de</strong>l aparato no encaja en su toma <strong>de</strong> corriente, póngase en<br />
contacto con un electricista para cambiar la toma <strong>de</strong> corriente obsoleta.<br />
10. Evite pisar o doblar el cable <strong>de</strong> alimentación. Ponga especial cuidado para no hacerlo<br />
en enchufes, tomas <strong>de</strong> corriente y en los puntos en los que salen <strong>de</strong>s<strong>de</strong> el aparato.<br />
11. Utilice únicamente los dispositivos y accesorios especificados por el fabricante.<br />
12. Utilice únicamente la carretilla, plataforma, trípo<strong>de</strong>, soporte o mesa especificados por<br />
el fabricante o suministrados junto con el equipo.<br />
13. Desenchufe el aparato cuando no se vaya a utilizar. Cuando se utilice una carretilla,<br />
tenga cuidado al mover la carretilla junto con el aparato con el fin <strong>de</strong> evitar heridas<br />
<strong>de</strong>bido a que la carretilla vuelca.<br />
14. Remita todas las reparaciones a personal <strong>de</strong> mantenimiento cualificado. Es necesario<br />
enviar el aparato para su reparación cuando ha sufrido cualquier tipo <strong>de</strong> daño,<br />
como, por ejemplo, que el cable o el enchufe <strong>de</strong> la alimentación está dañado, se han<br />
<strong>de</strong>rramado líquidos sobre el aparato o algún objeto ha caído sobre él, el aparato ha<br />
sido expuesto a la lluvia o a humedad, no funciona correctamente o se ha caído al<br />
suelo.
contenidos<br />
características<br />
02<br />
aspectos que se<br />
<strong>de</strong>ben tener en<br />
cuenta durante<br />
la instalación y el<br />
FUNCIONAMIENTO<br />
02<br />
dimensiones y<br />
conexión por cable<br />
03<br />
montaje <strong>de</strong> la cámara<br />
05<br />
02 características<br />
02 aspectos que se <strong>de</strong>ben tener en cuenta<br />
durante la instalación y el funcionamiento<br />
03 Dimensiones y conexión por cable<br />
03 Lente iris automático y posición <strong>de</strong>l<br />
interruptor dip<br />
04 Ajustes <strong>de</strong>l cardán <strong>de</strong> 3 ejes<br />
05 Montaje <strong>de</strong> la cámara<br />
SPA<br />
solución <strong>de</strong><br />
problemas<br />
06<br />
07<br />
especificaciones<br />
06 Solución <strong>de</strong> problemas<br />
07 Especificaciones<br />
contenidos _0
características<br />
• Super Had <strong>de</strong> SONY 1/3” CCD a Color<br />
• Resolución: 540 TVL (Color), 570 TVL (ByN)<br />
• Cambio <strong>de</strong> Filtro Día/Noche y DC esférico Varifocal<br />
Lente <strong>de</strong> Iris automático 3,8~9,5 mm. F1,2 incorporada<br />
• Color y ByN intercambiables automáticamente a través <strong>de</strong> fotocélulas y sensibilidad<br />
• Interruptor DIP para controlar el retraso Día y Noche, sin parpa<strong>de</strong>o, CLUZ y<br />
Balance <strong>de</strong> Blancos<br />
• Ajuste <strong>de</strong>l Nivel <strong>de</strong>l Iris DC incorporado<br />
• Control <strong>de</strong> LED infrarrojo <strong>de</strong> cambio automático <strong>de</strong> CdS (18 uds. <strong>de</strong> LEDs)<br />
• Auténtico Soporte <strong>de</strong> Cardán con 3 ejes (2-Panorámica, 2-Inclinación)<br />
• Vandalismussicheres und wetterfestes Gehäuse (IP-66)<br />
• Voltaje doble disponible 24 V. CA / 12 V. CC<br />
aspectos que se <strong>de</strong>ben tener en cuenta<br />
durante la instalación y el funcionamiento<br />
• No <strong>de</strong>smonte la cámara por su cuenta.<br />
•<br />
•<br />
•<br />
•<br />
Tenga siempre cuidado cuando maneje la cámara. No golpee la cámara<br />
con sus puños ni la agite.Le rogamos que tenga cuidado cuando la guar<strong>de</strong><br />
o la esté usando.<br />
No ponga o utilice la cámara en un medio húmedo como en ambientes<br />
lluvio sos o superficies húmedas.<br />
No limpie la cámara con papel <strong>de</strong> lija áspero. Utilice siempre un paño seco<br />
cuando la limpie.<br />
Ponga la cámara en un área fresca lejos <strong>de</strong> la luz <strong>de</strong> sol directa. De lo con<br />
trario, la cámara podría resultar dañada.<br />
0_ características
dimensiones y conexión por cable<br />
VÍDEO<br />
POWER<br />
SPA<br />
LENTE IRIS AUTOMÁTICO Y POSICIÓN DEL INTERRUPTOR DIP<br />
INTERRUPTOR DIP<br />
Núm.<br />
Función<br />
Posición <strong>de</strong>l Interruptor<br />
Dip<br />
PUERTO DEL<br />
SERVICIO<br />
CLARO<br />
OSCURO<br />
ON<br />
OFF<br />
1 Retraso 2~3 seg. 4~5 seg.<br />
AJUSTE DE NIVEL DC<br />
Sin<br />
2<br />
OFF<br />
ON<br />
Parpa<strong>de</strong>o<br />
3 CLUZ ON OFF<br />
4 ATW/AWC ATW AWC<br />
dimensiones y conexión por cable _0
AJUSTES DEL CARDÁN DE 3 EJES<br />
PANORÁMICA-1<br />
PANORÁMICA-2<br />
Fijar el Tornillo<br />
Fijar el Tornillo x<br />
2 cada uno<br />
INCLINACIÓN-1<br />
INCLINACIÓN-2<br />
Fijar el Tornillo x<br />
2 cada uno<br />
Fijar el Tornillo x<br />
2 cada uno<br />
0_ dimensiones y conexión por cable
montaje <strong>de</strong> la cámara<br />
1. MONTAJE DE LA BASE DE DOMO<br />
- Quite la película protectora <strong>de</strong> la parte inferior <strong>de</strong> goma y péguela a la cubierta <strong>de</strong> la base<br />
- Fije la cubierta <strong>de</strong> la base con las 4 uds. <strong>de</strong> tornillos entregadas (Núm. 8-32 UNC) al techoo a la pared.<br />
2. Fuente <strong>de</strong> alimentación e impedancia <strong>de</strong>l monitor<br />
(Fuente <strong>de</strong> Alimentación)<br />
- Adaptador: 24 V. <strong>de</strong> CA / 600mA o 12 V. <strong>de</strong> CC / 800mA (24 V. <strong>de</strong> CA / Mo<strong>de</strong>lo 12 V. <strong>de</strong> CC)<br />
- Para evitar fuegos o <strong>de</strong>scargas, <strong>de</strong>be utilizar una fuente <strong>de</strong> alimentación que aparezca en la lista<br />
<strong>de</strong> los Laboratorios Un<strong>de</strong>rwriters.<br />
(Impedancia <strong>de</strong>l Monitor, si está disponible)<br />
- Coloque el conmutador <strong>de</strong> impedancia en la posición estándar <strong>de</strong> 75 Ω a menos que haya<br />
conectado un equipo <strong>de</strong> vi<strong>de</strong>o a la salida <strong>de</strong> vi<strong>de</strong>o.<br />
3. Ajuste <strong>de</strong>l módulo <strong>de</strong> la Cámara<br />
(Ajuste Panorámica e Inclinación)<br />
- Ajuste la dirección <strong>de</strong> la cámara girando el soporte <strong>de</strong> la panorámica a la izquierda o la <strong>de</strong>recha,<br />
y el soporte <strong>de</strong> inclinación arriba o abajo, luego fije los tornillos con fuerza.<br />
(Ajuste <strong>de</strong>l Ángulo <strong>de</strong> Visualización)<br />
- Para obtener un ángulo <strong>de</strong> visualización más amplio, <strong>de</strong>splace el regulador <strong>de</strong>l zoom a<br />
amplio, y para obtener un ángulo más reducido,muévalo a tele.<br />
- Después <strong>de</strong> un ajuste exacto <strong>de</strong> la longitud focal, ajuste el regulador <strong>de</strong>l foco a cerca o lejos<br />
para disfrutar <strong>de</strong> la mayor niti<strong>de</strong>z.<br />
4. Montaje <strong>de</strong> los anillos <strong>de</strong> <strong>de</strong>coración<br />
- Fije firmemente el anillo <strong>de</strong> <strong>de</strong>coración en su lugar con los tornillos y utilizando la llave en<br />
forma <strong>de</strong> L entregada en la cubierta <strong>de</strong> la base.<br />
SPA<br />
PARTE INFERIOR<br />
DE GOMA<br />
CUBIERTA DE LA<br />
BASE<br />
Núm. 8-32 UNC<br />
ANILLO DE<br />
DECORACIÓN<br />
M4*10<br />
montaje <strong>de</strong> la cámara _0
5. Descripción <strong>de</strong>l puerto <strong>de</strong> vi<strong>de</strong>o <strong>de</strong> servicio<br />
solución <strong>de</strong> problemas<br />
Si tiene problemas en el manejo <strong>de</strong> la cámara, compruebe los siguientes<br />
aspectos para obtener una posible solución.<br />
• No aparece nada en la pantalla.<br />
- Compruebe la toma <strong>de</strong> alimentación y la línea <strong>de</strong> conexión <strong>de</strong> la señal <strong>de</strong> ví<strong>de</strong>o..<br />
- Compruebe el nivel <strong>de</strong> brillo <strong>de</strong>l Iris Automático DC <strong>de</strong> la cámara.<br />
• La imagen <strong>de</strong>l ví<strong>de</strong>o no es clara.<br />
- Compruebe si el cristal <strong>de</strong> la cámara tiene polvo en la superficie..<br />
Límpielo con un paño o pincel.<br />
- Asegúrese <strong>de</strong> que la pantalla no está expuesta directamente a la luz brillante..<br />
Ajuste la posición <strong>de</strong> la cámara si es necesario.<br />
- Compruebe si se ha retirado la película protectora <strong>de</strong>l cristal <strong>de</strong> la cámara.<br />
• La pantalla está oscura l<br />
- Ajuste el brillo <strong>de</strong>l monitor.<br />
- Compruebe el nivel <strong>de</strong> brillo <strong>de</strong>l Iris Automático DC <strong>de</strong> la cámara..<br />
• La pantalla no muestra la imagen correctamente cuando están encendi<br />
encendidos los LEDs infrarrojos.<br />
- Compruebe si el cristal <strong>de</strong> la cámara tiene polvo.<br />
- Límpielo con un paño o pincel.<br />
Si no pue<strong>de</strong> solucionar el problema con los consejos anteriores, póngase en<br />
contacto con un técnico autorizado.<br />
0_ solución <strong>de</strong> problemas
especificaciones<br />
ELEMENTO NTSC PAL<br />
Sensor <strong>de</strong> Imagen<br />
CCD a color <strong>de</strong> transferencia interlínea <strong>de</strong> 1/3” (SONY)<br />
Píxeles reales 768 H × 494 V (380 K píxeles) 752 H × 582 V (440 K píxeles)<br />
Sistema <strong>de</strong> escaneo 525 líneas, entrelazadas 2:1 625 líneas, entrelazadas 2:1<br />
Frecuencia <strong>de</strong><br />
escaneo<br />
Resolución<br />
Velocidad <strong>de</strong>l<br />
Obturador<br />
Relación S/R<br />
Sistema <strong>de</strong><br />
sincronización<br />
Iluminación mínima<br />
Balance <strong>de</strong> blancos<br />
15,734 KHz (H), 59,94 Hz (V) 15,625 KHz (H), 50 Hz (V)<br />
540TVL (Color), 570TVL (ByN)<br />
1/60 seg. 1/50 seg.<br />
Más <strong>de</strong> 48dB (AGC Apagado)<br />
Interno<br />
0Lux (LED infrarrojo Encendido)<br />
ATW/AWC seleccionable<br />
Salida <strong>de</strong> Ví<strong>de</strong>o VBS 1.0 Vp-p (Carga <strong>de</strong> 75)<br />
Lente<br />
3,8~9,5mm. Varifocal, Lente <strong>de</strong> Iris automático Día y Noche DC<br />
F1,2<br />
SPA<br />
Alimentación eléctrica(*) 24 V. CA ± 10%, 12 V. CC ± 10%<br />
Consumo <strong>de</strong><br />
electricidad<br />
Temperatura <strong>de</strong><br />
funcionamiento<br />
Humedad <strong>de</strong><br />
funcionamiento<br />
Dimensiones<br />
2,5 W. (LED Apagado) /5 W. (LED Encendido)<br />
-10˚C~50˚C (14˚F~122˚F)<br />
Máx. 90% HR<br />
145mm. (Ø) × 100mm. (L)<br />
(*) Se <strong>de</strong>be utilizar una fuente <strong>de</strong> alimentación regulada y especificada.<br />
especificaciones _0
Eliminación correcta <strong>de</strong> este producto<br />
(material eléctrico y electrónico <strong>de</strong> <strong>de</strong>scarte)<br />
(Aplicable en la Unión Europea y en países europeos con sistenmas <strong>de</strong> recogida<br />
selectiva <strong>de</strong> residuos)<br />
La presencia <strong>de</strong> esta marca en el producto o en el material informativo que lo<br />
acompaña, indica que al finalizar su vida útil no <strong>de</strong>berá eliminarse junto con otros<br />
residuos domésticos. Para evitar los posibles daños al medio ambiente o a la<br />
salud humana que representa la eliminación incontrolada <strong>de</strong> residuos, separe este<br />
producto <strong>de</strong> otros tipos <strong>de</strong> residuos y recíclelo correctamente para promover la<br />
reutilización sostenible <strong>de</strong> recursos materiales.<br />
Los usuarios particulares pue<strong>de</strong>n contactar con el establecimiento don<strong>de</strong><br />
adquirieron el producto, o con las autorida<strong>de</strong>s locales pertinentes, para informarse<br />
sobre cómo y dón<strong>de</strong> pue<strong>de</strong>n llevarlo para que sea sometido a un reciclaje ecológico<br />
y seguro.<br />
Los usuarios comerciales pue<strong>de</strong>n contactar con su proveedor y consultar las<br />
condiciones <strong>de</strong>l contrato <strong>de</strong> compra. Este producto no <strong>de</strong>be eliminarse mezclado<br />
con otros residuos comerciales.
<strong>SCC</strong>-B9374<br />
TELECAMERA DOME RESISTENTE AGLI<br />
ATTI VANDALICI IR NIGHT & DAY<br />
istruzioni di funzionamento<br />
ITA<br />
immagina le possibilità<br />
Grazie per aver acquistato un prodotto<br />
<strong>Samsung</strong>. Per ottenere un servizio più<br />
completo, registri il suo prodotto su<br />
www.samsung.com/global/register
precauzioni di sicurezza<br />
ATTENZIONE<br />
RISCHIO DISCOSSA ELETTRICA<br />
NON APRIRE<br />
ATTENZIONE: PER RIDURRE I RISCHI DI SCOSSA ELETTRICA,<br />
NON RIMUOVERE IL COPERCHIO (O IL PANNELLO POSTERIORE).<br />
ALL’INTERNO NON VI SONO PARTI CHE L’UTENTE POSSA RIPARARE.<br />
RIVOLGERSI A PERSONALEQUALIFICATO.<br />
Questo simbolo indica la presenza di una tensione pericolosa all’interno <strong>de</strong>l<br />
dispositivo, che può provocare scariche elettriche.<br />
Questo simbolo indica che nella documentazione <strong>de</strong>l presente dispositivo sono<br />
contenute importanti istruzioni relative al funzionamento e alla manutenzione.<br />
AVVERTENZA<br />
• Per ridurre il rischio di incendio o di scossa elettrica, non esporre l’apparecchio a<br />
pioggia o a umidità.<br />
AVVERTENZA<br />
1. Assicurarsi di utilizzare solo l’adattatore indicato nel foglio <strong>de</strong>lle specifiche.<br />
Utilizzare altri adattatori può provocare incendi, scossa elettrica o danni al prodotto<br />
2. Collegare scorrettamente l’alimentazione o sostituire le batterie in modo ina<strong>de</strong>guato può<br />
causare esplosione, incendio, scossa elettrica o danni al prodotto.<br />
3. Non collegare più di una telecamera allo stesso adattatore. Ecce<strong>de</strong>rne la capacità può<br />
provocare surriscaldamento o incendio.<br />
4. Inserire il cavo di alimentazione nella presa in modo sicuro. Un collegamento non sicuro può<br />
provocare incendi.<br />
5. Quando si installa la telecamera, fissarla in modo sicuro e saldo. Una telecamera che ca<strong>de</strong><br />
può causare danni alle persone.<br />
6. Non sistemare oggetti conduttori (es. cacciaviti, monete, oggetti metallici, ecc.) o contenitori<br />
con acqua sulla telecamera. Ciò può causare danni alle persone dovuti a incendio, scossa<br />
elettrica o caduta di oggetti.<br />
7. Non installare l’unità in luoghi umidi, con polveri o ceneri. Ciò può causare incendi o scosse<br />
elettriche.<br />
8. Se l’unità emana un odore insolito o fumo, interrompere l’uso <strong>de</strong>l prodotto. In questo caso<br />
scollegare immediatamente l’alimentazione e mettersi in contatto con il centro di assistenza.<br />
Continuare ad utilizzare il prodotto in tali condizioni può causare incendi o scosse.<br />
9. Se il prodotto non funzionasse in modo normale, mettersi in contatto con il centro di<br />
assistenza più vicino. Non smontare o riparare in alcun modo questo prodotto. (SAMSUNG<br />
non è responsabile per problemi causati da modifiche non autorizzate o tentativi di<br />
riparazione)<br />
10. Quando si pulisce, non spruzzare acqua direttamente sulle parti <strong>de</strong>l prodotto. Ciò può causare<br />
incendi o scosse elettriche.
ATTENZIONE<br />
1. Non far ca<strong>de</strong>re oggetti sul prodotto ed evitare colpi forti. Mantenere lontano da luoghi<br />
sottoposti ad eccessive vibrazioni o ad interferenze magnetiche.<br />
2. Non installare in luoghi sottoposti ad alte temperature (più di 50°C), basse temperature<br />
temperature (meno di - 10°C), o gran<strong>de</strong> umidità. Ciò può causare incendi o scosse<br />
elettriche.<br />
3. Se si <strong>de</strong>si<strong>de</strong>ra modificare l’ubicazione <strong>de</strong>l prodotto già installato, assicurarsi di spegnerlo<br />
e quindi spostarlo e installarlo nuovamente.<br />
4. Scollegare la spina dalla presa in caso di lampi. Non farlo può provocare incendi o danni<br />
al prodotto.<br />
5. Mantenere lontano dalla luce diretta e da fonti di radiazioni. Ciò può provocare incendi.<br />
6. Installare in un luogo ben ventilato.<br />
7. Evitare di direzionare la telecamera direttamente verso oggetti molto luminosi quali il<br />
sole, ciò può danneggiare il sensore d’immagine CCD.<br />
8. Non schizzare o sgocciolare liquidi sull’apparecchio e non porre su di esso <strong>de</strong>gli oggetti<br />
contenenti liquidi, come ad esempio <strong>de</strong>i vasi.<br />
9. La presa di rete viene utilizzata per scollegare l’apparecchio e <strong>de</strong>ve essere facilmente<br />
accessibile in qualsiasi istante.<br />
ITA
istruzioni di sicurezza importanti<br />
1. Leggere queste istruzioni.<br />
2. Conservare queste istruzioni.<br />
3. Rispettare tutti gli avvertimenti.<br />
4. Seguire tutte le istruzioni.<br />
5. Non utilizzare questo apparecchio vicino all’acqua.<br />
6. Pulire solo con un panno asciutto.<br />
7. Non bloccare nessuna apertura di ventilazione. Installare seguendo le istruzioni<br />
<strong>de</strong>l fabbricante.<br />
8. Non installare vicino a fonti di calore quali caloriferi, stufe o altri prodotti<br />
(compresi gli amplificatori) che possano produrre calore.<br />
9. Non elu<strong>de</strong>re il sistema di sicurezza <strong>de</strong>lla spina polarizzata o a terra. Una spina<br />
polarizzata è costituita da due spinotti, uno più gran<strong>de</strong> <strong>de</strong>ll’altro. Una spina<br />
con presa a terra ha due spinotti e un terzo per la presa a terra. Lo spinotto<br />
più gran<strong>de</strong> o il terzo spinotto sono stati previsti per la vostra sicurezza. Se la<br />
spina fornita non entra nella presa, mettersi in contatto con l’elettricista per la<br />
sostituzione <strong>de</strong>lla presa obsoleta.<br />
10. Proteggere il cavo <strong>de</strong>ll’alimentazione per evitare che sia calpestato o<br />
schiacciato, facendo particolare attenzione alle spine, alle prese e al punto in<br />
cui i cavi escono <strong>de</strong>ll’apparecchio.<br />
11. Utilizzare solo connettori/accessori indicati dal fabbricante.<br />
12. Utilizzare solo su carrelli, piedistalli, treppiedi, staffe o tavoli indicati dal fornitore<br />
o venduti con l’apparecchio.<br />
13. Scollegare questo apparecchio. Quando si utilizza un carrello, prestare<br />
attenzione quando si muove l’insieme carrello/apparecchio per evitare inci<strong>de</strong>nti<br />
per il possibile rovesciamento.<br />
14. Rivolgersi a personale specializzato per qualsiasi riparazione. Le riparazioni<br />
sono richieste quando l’apparecchio viene in qualche modo danneggiato, ad<br />
esempio quando viene danneggiato il cavo di alimentazione o la spina, se è<br />
stato versato qualche liquido nell’apparecchio o vi sono caduti <strong>de</strong>gli oggetti o se<br />
è stato esposto alla pioggia o all’umidità, se non funziona normalmente o se è<br />
caduto.
indice<br />
caratteristiche<br />
02<br />
cose da ricordare<br />
durante<br />
l’iNstallazione e<br />
l’UTILIZZO<br />
02<br />
dimensioni e<br />
collegamento cavi<br />
03<br />
montaggio<br />
telecamera e<br />
supporto<br />
05<br />
risoluzione <strong>de</strong>i<br />
problemi<br />
06<br />
specifiche<br />
07<br />
02 caratteristiche<br />
02 Cose da ricordare durante l’installazione<br />
e l’utilizzo<br />
03 Dimensioni e collegamento cavi<br />
03 Obiettivo diaframma automatico e impostazioni<br />
microinterruttore<br />
04 Regolazioni tripla sospensione cardanica<br />
05 Montaggio telecamera e supporto<br />
06 Risoluzione <strong>de</strong>i problemi<br />
07 Specifiche<br />
ITA<br />
indice _0
caratteristiche<br />
• SONY Super HAD CCD da 1/3”<br />
• Risoluzione: 540 TVL (Colore), 570 TVL (B/n)<br />
• Sostituzione filtro giorno/Notte e DC varifocale asferico<br />
Diaframma automatico 3,8~9,5mm obiettivo integrato F1,2<br />
• Commutazione automatica da colore a bianco e nero con fotocellula e sensibilità<br />
• Microinterruttore controllo ritardo Giorno/Notte, Sfarfallo,<br />
BLC e bilanciamento <strong>de</strong>l bianco<br />
• Controllo volume livello diaframma DC integrato<br />
• Controllo LED IR CDS commutazione automatica (18 LED IR)<br />
• Staffa a tripla sospensione cardanica (2-Pan, 2-Tilt)<br />
• Resistente agli atti vandalici e installazione esterna impermeabile (IP-66)<br />
• Disponibile doppia alimentazione AC24V/DC12V<br />
cose da ricordare durante l’installazione e l’uso<br />
• Non smontare il prodotto da soli.<br />
•<br />
•<br />
•<br />
•<br />
Prestare sempre attenzione quando si maneggia la telecamera. Non colpire<br />
o scuotere la telecamera. Prestare attenzione quando la si conserva o la si<br />
fa funzionare.<br />
Non sistemare né far funzionare la telecamera in ambienti umidi, quando<br />
piove o su superfici bagnate.<br />
Non pulire la telecamera con carta vetrata. Per la pulizia utilizzare sempre<br />
un pano asciutto.<br />
Sistemare la telecamera in una zona fresca, lontano dalla luce diretta <strong>de</strong>l<br />
sole. In caso contrario il prodotto potrebbe essere danneggiato.<br />
0_ caratteristiche
dimensioni e collegamento cavi<br />
VIDEO<br />
ALIMENTAZIONE<br />
OBIETTIVO DIAFRAMMA AUTOMATICO E IMPOSTAZIONI MICROINTERRUTTORE<br />
ITA<br />
MICROINTERRUTTORE<br />
N. Funzione<br />
Impostazione<br />
microinterruttore<br />
PORTA<br />
SERVIZIO<br />
LUCE<br />
OSCURITÀ<br />
ON<br />
OFF<br />
1 Ritardo 2~3sec. 4~5sec.<br />
2 Sfarfallio OFF ON<br />
VOLUME LIVELLO DC<br />
3 BLC ON OFF<br />
4 ATW/AWC ATW AWC<br />
dimensioni e collegamento cavi _0
REGOLAZIONI TRIPLA SOSPENSIONE CARDANICA<br />
PAN-1<br />
PAN-2<br />
Impostazione vite<br />
Impostazione<br />
vite x 2<br />
TILT-1<br />
TILT-2<br />
Impostazione<br />
vite x 2<br />
Impostazione<br />
vite x 2<br />
0_ dimensioni e collegamento cavi
montaggio telecamera e supporto<br />
1. MONTAGGIO BASE DOME<br />
- Rimuovere la pellicola protettiva dal fondo di gomma e attaccarlo sulla base <strong>de</strong>ll’alloggiamento.<br />
- Fissare la base <strong>de</strong>ll’alloggiamento con le 4 viti in dotazione (No. 8-32 UNC) al soffitto o alla parete.<br />
2. Alimentazione e Impe<strong>de</strong>nza Monitor<br />
(Alimentazione)<br />
- Adattatore : AC24V / 600mA o DC12V / 800mA (Mo<strong>de</strong>llo AC24V / DC12V)<br />
(Impe<strong>de</strong>nza monitor, se disponibile)<br />
- Impostare il tasto <strong>de</strong>ll’impe<strong>de</strong>nza in posizione standard 75 Ω a meno che l’attrezzatura vi<strong>de</strong>o<br />
sia connessa al monitor di uscita.<br />
3. Regolazione modulo telecamera<br />
(Regolazione Pan e Tilt)<br />
- Regolare la direzione <strong>de</strong>lla telecamera girando la staffa pan a sinistra o a <strong>de</strong>stra e la staffa tilt<br />
su o giù, quindi serrare saldamente le viti.<br />
(Regolazione angolo di visione)<br />
- Per un angolo visuale più ampio, spostare la leva <strong>de</strong>llo zoom su grandangolo, per un angolo<br />
visuale più stretto muoverla su teleobiettivo.<br />
- Dopo regolazioni accurate <strong>de</strong>lla distanza focale, regolare la leva <strong>de</strong>lla messa a fuoco su vicino o<br />
lontano per ottenere una messa a fuoco più nitida.<br />
4. Montaggio anello <strong>de</strong>corativo<br />
- Fissare saldamente l’anello <strong>de</strong>corativo con le viti e utilizzando la chiave a L in dotazione alla base<br />
<strong>de</strong>ll’alloggiamento<br />
FONDO DI<br />
GOMMA<br />
BASE<br />
ALLOGGIAMENTO<br />
ITA<br />
No. 8-32 UNC<br />
ANELLO<br />
DECORATIVO<br />
M4*10<br />
montaggio telecamera e supporto _0
5. Descrizione porta vi<strong>de</strong>o assistenza<br />
risoluzione <strong>de</strong>i problemi<br />
In caso di problemi nel funzionamento <strong>de</strong>lla telecamera, leggere le seguenti<br />
indicazioni.<br />
• Non appare nulla sullo schermo.<br />
- Controllare il collegamento <strong>de</strong>ll’alimentazione e <strong>de</strong>l segnale vi<strong>de</strong>o.<br />
- Controllare il livello di luminosità <strong>de</strong>l volume diaframma automatico DC.<br />
• L’immagine vi<strong>de</strong>o non è nitida.<br />
- Controllare se sulla superficie <strong>de</strong>l vetro <strong>de</strong>lla telecamera vi è polvere.<br />
Pulire il vetro <strong>de</strong>lla telecamera con un panno pulito o una spazzola.<br />
- Assicurarsi che lo schermo non sia esposto direttamente alla luce <strong>de</strong>l sole.<br />
Regolare la posiziona <strong>de</strong>lla telecamera se necessario.<br />
- Controllare se è stata rimossa la pellicola protettiva <strong>de</strong>l vetro <strong>de</strong>lla telecamera.<br />
• Lo schermo è scuro<br />
- Regolare le caratteristiche di luminosità <strong>de</strong>l monitor.<br />
- Controllare il livello di luminosità <strong>de</strong>l volume diaframma automatico DC.<br />
• Lo schermo non visualizza correttamente quando i LED IR sono in funzione.<br />
- Controllare se vi è polvere sul vetro <strong>de</strong>lla telecamera.<br />
- Pulire il vetro <strong>de</strong>lla telecamera con un panno pulito o una spazzola.<br />
Se il problema persiste, rivolgersi a un tecnico autorizzato.<br />
0_ risoluzione <strong>de</strong>i problemi
specifiche<br />
ARTICOLO NTSC PAL<br />
Sensore <strong>de</strong>lle<br />
immagini<br />
CCD da 1/3” a colori tipo di trasferimento interline (SONY)<br />
Pixel effettivi 768H × 494V (380K pixel) 752H × 582V (440K pixel)<br />
Sistema di scansione 525 Linee, interlacciato 2:1 625 Linee, interlacciato 2:1<br />
Frequenza di<br />
scansione<br />
Risoluzione<br />
15,734KHz (H), 59,94Hz (V)<br />
540 TVL (Colore), 570 TVL (B/N)<br />
15,625KHz (H), 50Hz (V)<br />
Velocità otturatore 1/60 sec. 1/50 sec.<br />
Rapporto S/N<br />
Sistema Sincronia<br />
Più di 48dB (AGC Off)<br />
Interno<br />
Iilluminazione minima<br />
Bilanciamento <strong>de</strong>l<br />
bianco<br />
Uscita vi<strong>de</strong>o<br />
Obiettivo<br />
Alimentazione(*)<br />
Consumo<br />
energetico<br />
Temp. di esercizio<br />
0Lux (LED IR On)<br />
ATW / AWC selezionabile<br />
VBS 1,0 Vp-p (75Ù Load)<br />
Obiettivo F1,2 da 3,8~9,5mm varifocale, diaframma automatico<br />
DC, Giorno e Notte<br />
AC24V± 10%, DC12V±10%<br />
2,5w(LED Off)/5w(LED On)<br />
-10˚C~50˚C (14˚F~122˚F)<br />
ITA<br />
Umidità di esercizio<br />
Dimensioni<br />
Max. 90% RH<br />
145mm (Ø) ×100mm (L)<br />
(*) Utilizzare l’alimentatore stabilizzato specificato.<br />
specifiche _0
Corretto smaltimento <strong>de</strong>l prodotto<br />
(rifiuti elettrici ed elettronici)<br />
(Applicabile in i paesi <strong>de</strong>ll’Unione Europea e in quelli con sistema di raccolta<br />
differenziata)<br />
Il marchio riportato sul prodotto o sulla sua documentazione indica che il prodotto<br />
non <strong>de</strong>ve essere smaltito con altri rifiuti domestici al termine <strong>de</strong>l ciclo di vita.<br />
Per evitare eventuali danni all’ambiente o alla salute causati dall’inopportuno<br />
smaltimento <strong>de</strong>i rifiuti, si invita l’utente a separare questo prodotto da altri tipi di<br />
rifiuti e di riciclarlo in maniera responsabile per favorire il riutilizzo sostenibile <strong>de</strong>lle<br />
risorse materiali.<br />
Gli utenti domestici sono invitati a contattare il rivenditore presso il quale è stato<br />
acquistato il prodotto o l’ufficio locale preposto per tutte le informazioni relative alla<br />
raccolta differenziata e al riciclaggio per questo tipo di prodotto.<br />
Gli utenti aziendali sono invitati a contattare il proprio fornitore e verificare i termini<br />
e le condizioni <strong>de</strong>l contratto di acquisto. Questo prodotto non <strong>de</strong>ve essere smaltito<br />
unitamente ad altri rifiuti commerciali.


