

BlackandDecker Mini-Four- Tro18 - Type 1 - Instruction Manual (Anglaise - Arabe)
BlackandDecker Mini-Four- Tro18 - Type 1 - Instruction Manual (Anglaise - Arabe)
BlackandDecker Mini-Four- Tro18 - Type 1 - Instruction Manual (Anglaise - Arabe)

Create successful ePaper yourself
Turn your PDF publications into a flip-book with our unique Google optimized e-Paper software.
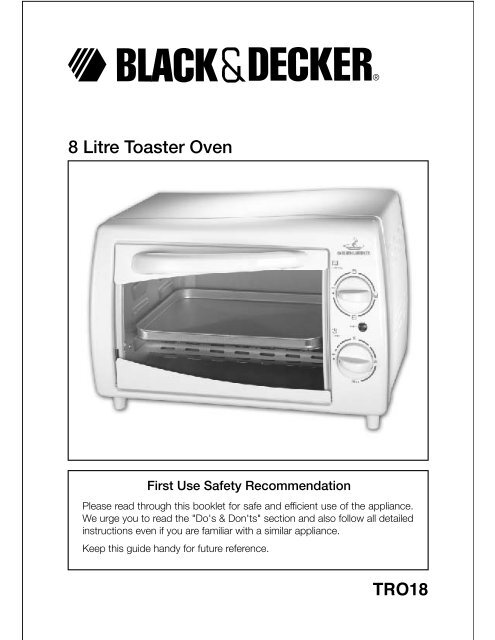
8 Litre Toaster Oven<br />
First Use Safety Recommendation<br />
Please read through this booklet for safe and efficient use of the appliance.<br />
We urge you to read the "Do's & Don'ts" section and also follow all detailed<br />
instructions even if you are familiar with a similar appliance.<br />
Keep this guide handy for future reference.<br />
TRO18
IMPORTANT SAFEGUARDS<br />
While using electrical appliances, in order to reduce the risk of fire, electric shock,<br />
and / or injury to persons, basic safety precautions should be followed, including the<br />
following:<br />
• Read all instructions carefully, even if you are familiar with the appliance.<br />
• DO NOT IMMERSE the appliance, cord set or plug in liquids.<br />
• To clean, wipe the exterior with a damp cloth.<br />
• Allow adequate space around and above the appliance for ventilation.<br />
• Close supervision is necessary when any appliance is used near children. Do not<br />
allow children or any person unfamiliar with these instructions use this appliance.<br />
• Switch off and remove the plug from the power outlet when not in use, before<br />
assembling or disassembling parts, cleaning or carrying out any maintenance of<br />
the appliance. Never pull the cord while unplugging out from power outlet.<br />
• Always route the cord carefully to avoid a tripping hazard.<br />
• If the supply cord is damaged, it must be replaced by the manufacturer or its<br />
service agent or a similarly qualified person in order to avoid a hazard.<br />
• Do not allow the cord hang over bench tops.<br />
• Surfaces may be hot during use and during the cool down period.<br />
• Do not operate or place any part of this appliance on or near any hot surfaces<br />
(such as gas or electric burner or in a heated oven).<br />
• Do not abuse the cord. Never carry the appliance by the cord or yank it to<br />
disconnect it from the outlet; instead, grasp the plug and pull to disconnect.<br />
• When using an extension cord with your appliance, make sure the extension cord<br />
is correctly wired, and rated for its use.<br />
• During use the appliance becomes hot. Care should be taken to avoid touching<br />
heating elements inside the oven.<br />
• WARNING: Accessible parts may become hot when the grill is in use. Children<br />
should be kept away<br />
• This product is intended for household use only.<br />
• Do not attempt to repair the appliance yourself; instead, take it to your Black &<br />
Decker-owned or Authorized Service Centre for repair.<br />
SAVE THESE INSTRUCTIONS<br />
-2-
FUNCTION<br />
TOAST<br />
OFF<br />
BAKE<br />
BROIL<br />
TIMER<br />
10<br />
OFF<br />
20<br />
30 MIN<br />
A<br />
B<br />
C<br />
-3-
Parts Identification:-<br />
1. Function / Setting<br />
7<br />
2. Power Indicator<br />
3. Timer<br />
4. Crumb Tray<br />
6<br />
5<br />
9<br />
5. Shelf<br />
6. Handle<br />
7. Tray<br />
1<br />
8. Glass Door<br />
9. Handle<br />
8<br />
2<br />
3<br />
4<br />
Product Features:<br />
8 litre capacity Right size for your family<br />
Toast/Bake/Broil Function for a variety of applications<br />
Adjustable timer for perfect results everytime<br />
Power on indicator lamp for convenience<br />
Crumb tray for easy cleaning<br />
HOW TO USE YOUR TOASTER OVEN<br />
• Your new toaster oven has been designed for toasting, baking and broiling.<br />
• For indoor domestic use only.<br />
• Your toaster oven should not be used for any other applications.<br />
• Before first use, wipe the surface of the cooking plates with a damp cloth and dry<br />
with cloth or tissue. Then apply a light coating of butter, margarine or cooking fat<br />
to the cooking plate.<br />
-5-
Operation (figure A)<br />
Turn the cooking mode selector knob to the OFF (0) position.<br />
1. Off (0)<br />
2. Toast (Top element on)<br />
3. Broil (Lower element on)<br />
4. Bake (Both elements on)<br />
TOAST<br />
BROIL<br />
BAKE<br />
- Place the Oven on a flat, level surface.<br />
- Place the ingredients in the oven & close the door.<br />
- Connect the appliance to an electrical supply.<br />
- Rotate the timer dial (3) to the required time setting.<br />
- The Oven will commence cooking, and will switch off once the set time<br />
has elapsed, or the unit is turned off at the cooking mode selector knob or<br />
at the electrical supply. Alternatively, the timer knob can be turned back to<br />
the OFF (0) position.<br />
Toasting<br />
• Turn the cooking mode selector knob (1) to Toast.<br />
• Set the timer.<br />
• The oven will be automatically shut off when the selected time has<br />
elapsed.<br />
• A signal bell will ring at the end of the toast cycle. When toasting, the top<br />
heating element will glow to different degrees of red and orange.<br />
• Do not use the appliance near or below combustible material, such as<br />
curtains.<br />
• Do not leave the unit unattended in use.<br />
-6-
Baking and Heating<br />
• Turn the cooking mode selecter knob(1) to bake.<br />
• Always preheat for 5 minutes.<br />
• Turn the timer(3) to the required time setting.<br />
• When baking, both the upper and lower heating elements will cycle on and off<br />
during baking to maintain the selected temperature.<br />
• A signal bell will ring at the end of the baking cycle.<br />
Broiling<br />
• Select the broil option.<br />
• Do not preheat.<br />
• Turn the cooking mode selector knob(1) to broil.<br />
• The heating elements will cycle on and off.<br />
• Always use the shelf(5) and drip tray(7) provided.<br />
Tray position<br />
• Do not cover the drip tray with aluminum foil, as this prevents fats and juices from<br />
dripping into the tray and could cause a scalding hazard. This could also cause<br />
the appliance to overheat.<br />
• Use upper position for faster browning and boiling times, but be sure to allow at<br />
least 1 inch between the food and heating elements.<br />
• Use lower position for longer broiling times or for delicate foods (such a fish or<br />
chicken) when you want less browning.<br />
• Open the door completely to pull out the shelf. Be sure to use protective gloves to<br />
prevent burns. Wash the shelf in hot, sudsy water or in a dish washer. To remove<br />
stubborn spots, use a polyester or nylon mesh pad (Fig. E, F, H).<br />
-7-
HOW TO TAKE CARE FOR YOUR TOASTER OVEN<br />
Cleaning your oven<br />
• Before cleaning, be sure the Oven is off, unplugged, and cool.<br />
• Only the shelf(5) and tray(7) are dishwasher-safe.<br />
• To clean the outside and the inside appliance with a damp cloth. Make sure that<br />
the appliance is dry on the inside and the outside before use.<br />
• Do not use any type of cleaning agent or cleaning pad unless recommended in<br />
this manual.<br />
• A steam cleaner is not to be used to clean this appliance.<br />
• Don't touch the heating elements, even for cleaning!<br />
• The best way to keep your Oven clean is to wipe away spills, spatters and crumbs<br />
after each use.<br />
CAUTION: Before cleaning the inside or outside of your Oven, always turn the Oven<br />
off, unplug it and let it cool.<br />
Glass door<br />
The Glass Door should be cleaned with a damp, sudsy cloth. Dry thoroughly before<br />
using the Oven. Do not use a spray glass cleaner.<br />
Crumb tray (Figures B, C, and D)<br />
• To open, tip the oven onto its back and gently pull down on the Crumb tray knob.<br />
Wipe away crumbs and food spills with a slightly damp cloth.<br />
• Wipe the crumb tray with a damp cloth. Be sure to dry it thoroughly and<br />
close again before using the oven.<br />
Metal, oven proof glass or glass ceramic bakeware may be used in your Oven.<br />
Follow manufacturer's instructions. When using deep ovenproof glass or glass<br />
ceramic containers, make sure the top edge of the container is at least 1" away from<br />
the upper heating elements.<br />
-8-
Many prepared frozen foods are packaged in non-metallic containers<br />
suitable for use in microwave ovens as well as regular ovens. Check<br />
package instructions to determine if the container is suitable for use in a<br />
regular oven.<br />
• When using these containers in a toaster oven, always allow oven to<br />
preheat for about 5 minutes placing the ingredients inside.<br />
• Remove any plastic wrapping and plastic or cardboard covers which may<br />
be suitable for use in microwave ovens only.<br />
• Place the container holding the food to be cooked on the Oven Pan and<br />
cook per instructions or until food is thoroughly heated.<br />
• Never use these containers when broiling or top browning.<br />
• Care must be taken when opening the appliance a hot air may escape on<br />
opening.<br />
Some other items which should NEVER be used in your<br />
Toaster Oven:<br />
• Glass lids on glass or metal bakeware.<br />
• Air-tight packages such as sealed pouches or unopened cans.<br />
• Plastic wrapping or paperboard covers.<br />
• Containers larger than those recommended (larger and higher containers<br />
will interfere with air circulation).<br />
• Containers with specific warnings against use in ovens.<br />
-9-


