

Brother XL-6053/6063 - Guide utilisateur
Brother XL-6053/6063 - Guide utilisateur
Brother XL-6053/6063 - Guide utilisateur

Create successful ePaper yourself
Turn your PDF publications into a flip-book with our unique Google optimized e-Paper software.
;;;;;;;;;;;;;;;;<br />
;;;;;;;;;;;;;;;;<br />
;;;;;;;;;;;;;;;;<br />
;;;;;;;;;;;;;;;;<br />
;;;;;;;;;;;;;;;;<br />
;;;;;;;;;;;;;;;;<br />
;;;;;;;;;;;;;;;;<br />
;;;;;;;;;;;;;;;;<br />
;;;;;;;;;;;;;;;;<br />
;;;;;;;;;;;;;;;;<br />
;;;;;;;;;;;;;;;;<br />
;;;;;;;;;;;;;;;;<br />
;;;;;;;;;;;;;;;;<br />
;;;;;;;;;;;;;;;;<br />
;;;;;;;;;;;;;;;;<br />
;;;;;;;;;;;;;;;;<br />
;;;;;;;;;;;;;;;;<br />
;;;;;;;;;;;;;;;;<br />
;;;;;;;;;;;;;;;;<br />
;;;;;;;;;;;;;;;;<br />
;;;;;;;;;;;;;;;;<br />
;;;;;;;;;;;;;;;;<br />
;;;;;;;;;;;;;;;;<br />
;;;;;;;;;;;;;;;;<br />
@@@@@@@@@@@@@@@@<br />
@@@@@@@@@@@@@@@@<br />
@@@@@@@@@@@@@@@@<br />
@@@@@@@@@@@@@@@@<br />
@@@@@@@@@@@@@@@@<br />
@@@@@@@@@@@@@@@@<br />
@@@@@@@@@@@@@@@@<br />
@@@@@@@@@@@@@@@@<br />
@@@@@@@@@@@@@@@@<br />
@@@@@@@@@@@@@@@@<br />
@@@@@@@@@@@@@@@@<br />
@@@@@@@@@@@@@@@@<br />
@@@@@@@@@@@@@@@@<br />
@@@@@@@@@@@@@@@@<br />
@@@@@@@@@@@@@@@@<br />
@@@@@@@@@@@@@@@@<br />
@@@@@@@@@@@@@@@@<br />
@@@@@@@@@@@@@@@@<br />
@@@@@@@@@@@@@@@@<br />
@@@@@@@@@@@@@@@@<br />
@@@@@@@@@@@@@@@@<br />
@@@@@@@@@@@@@@@@<br />
@@@@@@@@@@@@@@@@<br />
@@@@@@@@@@@@@@@@<br />
<br />
<br />
<br />
<br />
<br />
<br />
<br />
<br />
<br />
<br />
<br />
<br />
<br />
<br />
<br />
<br />
<br />
<br />
<br />
<br />
<br />
<br />
<br />
<br />
<br />
<br />
<br />
<br />
<br />
<br />
<br />
<br />
<br />
<br />
<br />
<br />
<br />
<br />
<br />
<br />
<br />
<br />
<br />
<br />
<br />
<br />
<br />
<br />
;;;;;;;;;;;;;;;;<br />
;;;;;;;;;;;;;;;;<br />
;;;;;;;;;;;;;;;;<br />
;;;;;;;;;;;;;;;;<br />
;;;;;;;;;;;;;;;;<br />
;;;;;;;;;;;;;;;;<br />
;;;;;;;;;;;;;;;;<br />
;;;;;;;;;;;;;;;;<br />
;;;;;;;;;;;;;;;;<br />
;;;;;;;;;;;;;;;;<br />
;;;;;;;;;;;;;;;;<br />
;;;;;;;;;;;;;;;;<br />
;;;;;;;;;;;;;;;;<br />
;;;;;;;;;;;;;;;;<br />
;;;;;;;;;;;;;;;;<br />
;;;;;;;;;;;;;;;;<br />
;;;;;;;;;;;;;;;;<br />
;;;;;;;;;;;;;;;;<br />
;;;;;;;;;;;;;;;;<br />
;;;;;;;;;;;;;;;;<br />
;;;;;;;;;;;;;;;;<br />
;;;;;;;;;;;;;;;;<br />
;;;;;;;;;;;;;;;;<br />
;;;;;;;;;;;;;;;;<br />
yyyyyyyyyyyyyyyy<br />
yyyyyyyyyyyyyyyy<br />
yyyyyyyyyyyyyyyy<br />
yyyyyyyyyyyyyyyy<br />
yyyyyyyyyyyyyyyy<br />
yyyyyyyyyyyyyyyy<br />
yyyyyyyyyyyyyyyy<br />
yyyyyyyyyyyyyyyy<br />
yyyyyyyyyyyyyyyy<br />
yyyyyyyyyyyyyyyy<br />
yyyyyyyyyyyyyyyy<br />
yyyyyyyyyyyyyyyy<br />
yyyyyyyyyyyyyyyy<br />
yyyyyyyyyyyyyyyy<br />
yyyyyyyyyyyyyyyy<br />
yyyyyyyyyyyyyyyy<br />
yyyyyyyyyyyyyyyy<br />
yyyyyyyyyyyyyyyy<br />
yyyyyyyyyyyyyyyy<br />
yyyyyyyyyyyyyyyy<br />
yyyyyyyyyyyyyyyy<br />
yyyyyyyyyyyyyyyy<br />
yyyyyyyyyyyyyyyy<br />
yyyyyyyyyyyyyyyy<br />
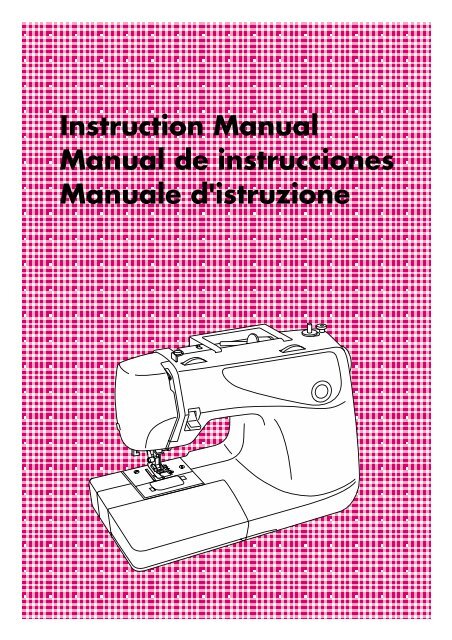
Instruction Manual<br />
Manual de instrucciones<br />
Manuale d'istruzione
"IMPORTANT SAFETY INSTRUCTIONS"<br />
When using this machine, basic safety precautions should always be taken ,<br />
including the following:<br />
"Read all instructions before using."<br />
DANGER – To reduce the risk of electric shock:<br />
1. The machine should never be left unattended when plugged in. Always unplug this machine from the electrical outlet<br />
immediately after using and before cleaning.<br />
2. Always unplug before changing the light bulb.<br />
Replace bulb with same type rated 15 watts.<br />
WARNING – To reduce the risk of burns, fire, electric shock, or injury to persons:<br />
1. Do not allow this machine to be used as a toy. Close attention is necessary when the machine is used by or near children.<br />
2. Use this machine only for its intended use as described in this manual. Use only accessories recommended by the<br />
manufacturer as contained in this manual.<br />
3. Never operate this machine if it has a damaged cord or plug, if it is not working properly, if it has been dropped or damaged,<br />
or dropped into water. Return the machine to the nearest authorized dealer or service center for examination, repair,<br />
electrical or mechanical adjustment.<br />
4. Never operate the machine with any air openings blocked. Keep ventilation openings of the machine and foot control free<br />
from the accumulation of lint, dust, and loose cloth.<br />
5. Never drop or insert any object into any opening.<br />
6. Do not use outdoors.<br />
7. Do not operate where aerosol (spray) products are being used or where oxygen is being administered.<br />
8. To disconnect, turn the main switch to the symbol “O” position which represents off, then remove plug from outlet.<br />
9. Do not unplug by pulling on cord. To unplug, grasp the plug, not the cord.<br />
10. Keep fingers away from all moving parts. Special care is required around the machine needle.<br />
11. Always use the proper needle plate. The wrong plate can cause the needle to break.<br />
12. Do not use bent needles.<br />
13. Do not pull or push fabric while stitching. It may deflect the needle causing it to break.<br />
14. Switch the machine to the symbol “O” position when making any adjustments in the needle area, such as threading needle,<br />
changing needle, threading bobbin, or changing the presser foot, and the like.<br />
15. Always unplug the machine from the electrical outlet when removing covers, lubricating, or when making any of the user<br />
service adjustments mentioned in the instruction manual.<br />
16. The machine is not intended for use by young children or infirm persons without supervision.<br />
17. Young children should be supervised to ensure that do not play with this machine.<br />
"SAVE THESE INSTRUCTIONS"<br />
"This machine is intended for household use."
“IMPORTANTES INSTRUCCIONES DE<br />
SEGURIDAD”<br />
Cuando se usa una máquina de coser, debe seguirse unas precauciones básicas y<br />
que vienen incluidas a continuación.<br />
“Leer las instrucciones antes de usar”<br />
PELIGRO – Para reducir el riesgo de una descarga eléctrica.<br />
1. La máquina no debe dejarse nunca desatendida mientras esté conectada. Desconectar la máquina de la red eléctrica inmediatamente<br />
después de su uso y antes de limpiarla.<br />
2. Antes de cambiar la bombilla, asegúrese siempre de que la máquina de coser está apagada.<br />
Cambie la bombilla por otra del mismo tipo de 15 W.<br />
CUIDADO – Para reducir el riesgo de quemaduras, fuego, descargas eléctricas o causar daños a personas.<br />
1. No usar la máquina como un juguete. Prestar atención si fuese necesario cuando la máquina está siendo usada por niños o cerca<br />
de ellos.<br />
2. Usar la máquina de coser solamente como se describe en este manual. Usar únicamente los accesorios recomendados por el<br />
fabricante y que vienen especificados en este manual.<br />
3. Nunca haga funcionar la máquina de coser si el cordón de alimentación o la clavija están deteriorados, si no funciona correctamente,<br />
si se ha caído o si estuvo mojada. Entregar la máquina de coser al centro de servicio autorizado más cercano para que la<br />
examinen, la reparen o hagan los ajustes eléctricos o mecánicos que correspondan.<br />
4. No usar la máquina con los orificios de ventilación bloqueados. Mantener los orificios de ventilación de la máquina de coser y el<br />
pedal sin acumulacíon de povo. Suciedad y restos de tejido.<br />
5. No introducir no insertar objetos en los orificios de ventilación.<br />
6. No usar al, aire libre.<br />
7. No usar mientras se estén utilizando productos aerosoles (spray) o en lugares donde se esté administrando oxígeno.<br />
8. Para desconectar, girar el interruptor hasta la posición del símbolo “O” que representa off, luego desconectar el enchufe de la red.<br />
9. Nunca desconectar el enchufe tirando del cable. Para desconectar la máquina, tirar de la clavija y no del cable.<br />
10. Mantener los dedos alejados de todas las partes movibles de la máquina. Tener un cuidado especial con la aguja.<br />
11. Usar siempre la placa de agujas apropiada. Una placa de agujas impropia puede producir la rotura de la aguja.<br />
12. No usar agujas torcidas.<br />
13. No presionar ni tirar del tejido mientras se está cosiendo. Esto podría doblar la aguja y romperla.<br />
14. Apagar la máquina de coser, poniendo el interruptor principal en la posición cerrada (en “O”) cuando quiera realizar algún ajuste<br />
en el área de la aguja tal como enhebrar la aguja, cambiarla, bobinar la canilla, cambiar el prensatelas y operaciones similares.<br />
15. Desconectar siempre la máquina de la red eléctrica cuando se retiren las tapas, para lubricar, o cuando quiera realizar algún tipo<br />
de ajuste mecánico tal como mencionado en el manual de instrucciones.<br />
16. La máquina de coser no está pensada para el uso de los niños o personas enfermas sin supervisión.<br />
17. Evite que los niños jueguen con la máquina de coser.<br />
“CONSERVE ESTE MANUAL DE INSTRUCCIONES”<br />
“Esta máquina de coser es para uso doméstico”
“IMPORTANTI ISTRUZIONI DI SICUREZZA”<br />
Quando usate la macchina per cucire, rispettate sempre le precauzioni di sicurezza,<br />
incluso quanto qui di seguito specificato.<br />
“Leggete tutte le istruzioni prima dell’uso.”<br />
PERICOLO – Per ridurre il rischio di shock elettrico.<br />
1. La macchina per cucire non deve essere mai lasciata abbandonata quando la spina è inserita. Rimuovete sempre la spina<br />
della macchina per cucire subito dopo avere finito di lavorare e prima di procedere alla sua pulizia.<br />
2. Staccare sempre la spina della macchina per cucire prima di procedere alla sostituzione della lampadina.<br />
Utilizzare una lampadina dello stesso tipo da 15 watt.<br />
ATTENZIONE – Per ridurre il rischio di bruciature, incendi, shock elettrico o danni alle persone.<br />
1. Non permettete che venga usata come un giocattolo.<br />
Fare molta attenzione quando la macchina viene usata vicino a bambini.<br />
2. Usate questa macchina per cucire solo per l’uso cui è destinata, come descritto all’interno del manuale.<br />
Usare solo accessori consigliati dal produttore, come specificato qui di seguito.<br />
3. Non usate mai questa macchina da cucire nel caso la spina o il cavo di alimentazione risultassero danneggiati, oppure nel<br />
caso non funzionasse correttamente, fosse caduta o si fosse danneggiata, o fosse caduta nell’acqua. Riportate la macchina<br />
da cucire al più vicino rivenditore o centro di assistenza autorizzato per far eseguire un controllo, interventi di riparazione<br />
o regolazioni elettriche o meccaniche.<br />
4. Non usate la macchina per cucire con le aperture dell’aria bloccate. Mantenere le aperture di ventilazione della macchina<br />
per cucire ed il reostato privi di fili, polvere o stoffa.<br />
5. Non far cadere né inserire alcun oggetto in nessuna delle aperture.<br />
6. Non usate la macchina all’aperto.<br />
7. Non fate funzionare la macchina nel caso vengano usati prodotti aerosol (spray) o ossigeno.<br />
8. Per scollegare, girate l’interruttore principale in posizione “O” (che significa OFF = spento), quindi toglieri la spina dalla presa<br />
di corrente.<br />
9. Non scollegate la spina tirandola dal cavo. Togliete la spina impugnando la spina stessa e non il cavo di alimentazione.<br />
10. Tenete le dita lontano da tutte le parti in movimento, specialmente attorno all’ago della macchina per cucire.<br />
11. Usate sempre la placca appropriata all’ago in uso. Una placca sbagliata potrebbe provocare la rottura dell’ago.<br />
12. Non usate aghi piegati.<br />
13. Non tirate o spingete il tessuto mentre cucite, poiché ciò potrebbe far piegare l’ago e quindi romperlo.<br />
14. Spegnete la macchina da cucire spostando l’interruttore sulla posizione “O” quando eseguite qualsiasi operazione in<br />
prossimità dell’ago, come ad esempio l’infilatura o la sostituzione dell’ago, l’infilatura della spolina o la sostituzione del<br />
piedino premistoffa ed altre simili operazioni.<br />
15. Disinserite sempre la spina di alimentazione della macchina da cucire dalla presa elettrica quando togliete i coperchi,<br />
lubrificate la macchina, oppure quando effettuate una qualunque delle operazioni di manutenzione citate nel manuale<br />
d’istruzioni.<br />
16. La macchina da cucire non deve essere utilizzata dai ragazzi o dalle persone invalide senza controllo.<br />
17. I ragazzi devono essere sorvegliati per evitare che giochino con la macchina da cucire.<br />
“CONSERVATE QUESTE ISTRUZIONI”<br />
“La presente macchina per cucire è destinata all’uso domestico.”
FOR USERS IN UK, EIRE, MALTA AND CYPRUS ONLY.<br />
If this machine is fitted with a 3 pin non-rewireable BS plug then please read the following.<br />
IMPORTANT (in the United Kingdom)<br />
Main supply (AC 230/240V~, 50Hz)<br />
DO NOT cut off the main plug from equipment. If the plug<br />
fitted is not suitable for the power point in your home or the<br />
cable is too short to reach a power point, then obtain an<br />
appropriate safety approved extension lead or consult your<br />
dealer.<br />
BE SURE to replace the fuse only with an identical approved<br />
type, as originally fitted and to replace the fuse cover.<br />
If none the less the main plug is cut off be sure to remove the<br />
fuse and dispose of the plug immediately, to avoid a possible<br />
shock hazard by inadvertent connection to the main supply.<br />
IMPORTANT (in the other countries)<br />
If the available socket outlet is not suitable for the plug<br />
supplied with this equipment, it should be cut off and an<br />
appropriate three pin plug fitted. With alternative plugs an<br />
approved fuse must be fitted in the plug.<br />
NOTE: The plug severed from the main leads must be<br />
destroyed as a plug with bared flexible cords is hazardous if<br />
engaged in a live socket outlet. In the event of replacing the<br />
plug fuse, use a fuse approved by ASTA to BS 1362, i.e.<br />
carrying the ASA mark, rating as marked on plug.<br />
Always replace the fuse cover. Never use plugs with the fuse<br />
cover omitted.<br />
WARNING: DO NOT CONNECT EITHER WIRE TO THE<br />
EARTH TERMINAL WHICH IS MARKED WITH<br />
THE LETTER ‘E’, BY THE EARTH SYMBOL OR COL-<br />
OURED GREEN OR YELLOW.<br />
The wires in this main lead are coloured in accordance with<br />
the following code:<br />
Blue<br />
Brown<br />
Neutral<br />
Live<br />
As the colours of the wiring in the main lead of this appliance<br />
may not correspond with the coloured markings identifying<br />
the terminals in your plug, proceed as follows:<br />
The wire which is coloured blue must be connected to the<br />
terminal which is marked with the letter ‘N’ or coloured black<br />
or blue.<br />
The wire which is coloured brown must be connected to the<br />
terminal which is marked with the letter ‘L’ or coloured red or<br />
brown.
Connecting Plugs and Main Power / Sewing Light Switch<br />
2<br />
1<br />
1. Connect the three-prong plug into the machine.<br />
2. Connect the electrical supply plug into a wall outlet.<br />
- When leaving the machine unattended, the main switch of<br />
the machine should be switched off or the plug must be<br />
removed from the socket outlet.<br />
Turn on or off the switch for the main power and sew-light.<br />
1 Turn on<br />
2 Turn off<br />
- When servicing the machine, or when removing covers or<br />
changing bulbs, the machine or the electrical set must<br />
unplugged.
PLEASE READ BEFORE USING THIS MACHINE<br />
For safe operation<br />
1. Be sure to keep your eye on the needle while sewing. Do not touch the balance wheel, thread take-up, needle, or other<br />
moving parts.<br />
2. Remember to turn off the power switch and unplug the cord when:<br />
• Operation is completed<br />
• Replacing or removing the needle or any other parts<br />
• A power failure occurs during use<br />
• Maintaining the machine<br />
• Leaving the machine unattended.<br />
3. Do not store anything on the foot controller.<br />
4. Plug the machine directly into the wall. Do not use extension cords.<br />
For a longer service life<br />
1. When storing this machine, avoid direct sunlight and high humidity locations. Do not use or store the machine near a space<br />
heater, iron, halogen lamp, or other hot objects.<br />
2. Use only neutral soaps or detergents to clean the case. Benzene, thinner, and scouring powders can damage the case<br />
and machine, and should never be used.<br />
3. Do not drop or hit the machine.<br />
4. Always consult the operation manual when replacing or installing any assemblies, the presser feet, needle, or other parts<br />
to assure correct installation.<br />
For repair or adjustment<br />
In the event a malfunction occurs or adjustment is required, first follow the troubleshooting table in the back of the operation<br />
manual to inspect and adjust the machine yourself. If the problem persists, please consult your local authorized dealer.
LEA ESTE MANUAL ANTES DE USAR ESTA MÁQUINA<br />
Para un funcionamiento seguro<br />
1. Esté siempre atento a la aguja cuando cosa. No toque la polea, el tirahilo, la aguja u otras piezas móviles.<br />
2. Acuérdese de apagar la máquina y desenchufarla de la corriente cuando:<br />
• Termine la labor<br />
• Recambie o retire la aguja y otras piezas<br />
• Ocurra un fallo eléctrico durante la costura<br />
• Realice tareas de mantenimiento<br />
• Deje la máquina desatendida<br />
3. No deje ningún objeto encima del pedal.<br />
4. Enchufe la máquina directamente a la toma de contacto de la pared. No utilice alargos.<br />
Para un servicio más duradero<br />
1. Evite exponer la máquina a la luz directa del sol y no la guarde en sitios húmedos. No utilice o guarde la máquina cerca de una fuente<br />
de calor, plancha, lámpara halógena u otros objetos candentes.<br />
2. Utilice sólo detergentes o jabones neutros para limpiar la carcasa. Gasolina, diluyentes y polvos de limpieza pueden dañar la carcasa<br />
y la máquina; no los utilice nunca.<br />
3. No deje caer o golpee la máquina.<br />
4. Consulte siempre el manual de funcionamiento cuando tenga que reponer o instalar cualquier pieza, como el pie prensatela o la aguja.<br />
Así, asegurará una adecuada instalación.<br />
Para reparaciones o ajustes<br />
En el caso de que ocurra una malfunción o se requiera un reajuste, consulte primero la tabla de solución de problemas al final del manual<br />
de funcionamiento para inspeccionar y ajustar usted mismo la máquina. Si el problema continúa, recurra a su distribuidor autorizado local.
LEGGERE PRIMA DELL’USO DI QUESTA MACCHINA<br />
Per un funzionamento sicuro<br />
1. Mentre si cuce guardare sempre l’ago. Non toccare il volantino, il tendifilo, l’ago o le altre parti mobili.<br />
2. Ricordarsi di spegnere l’interruttore generale e di staccare il cavo quando:<br />
• si è completata un’operazione<br />
• si sostituisce o si toglie l’ago o qualsiasi altro componente<br />
• si verifica un black-out durante l’uso<br />
• si esegue la manutenzione della macchina<br />
• si lascia la macchina incustodita<br />
3. Non depositare oggetti sul comando a pedale.<br />
4. Collegare la macchina direttamente a una presa a parete. Non impiegare prolunghe.<br />
Per una maggiore durata<br />
1. Riporre la macchina per cucire evitando luoghi esposti alla luce diretta del sole e con umidità elevata. Non utilizzarla o<br />
collocarla accanto a termosifoni, ferri da stiro, lampade alogene o altri oggetti caldi.<br />
2. Per pulire la custodia, impiegare soltanto saponi o detergenti neutri. Benzene, solventi e polveri abrasive possono danneggiare<br />
sia la macchina che la custodia e vanno quindi evitati.<br />
3. Fare attenzione a non far cadere la macchina.<br />
4. Consultare sempre il presente manuale d’istruzione per sostituire o riparare i vari gruppi, il piedino premistoffa, l’ago o altre<br />
parti, in modo da garantire un’installazione corretta.<br />
Per riparazioni o regolazioni<br />
In caso di cattivo funzionamento o qualora si renda necessaria la regolazione di alcuni elementi, in primo luogo controllare e<br />
regolare la macchina autonomamente seguendo la tabella di identificazione guasti riportata sul retro del manuale d’istruzione.<br />
Se il problema non viene risolto, contattare il più vicino centro di assistenza autorizzato.
TABLE OF CONTENTS<br />
KNOWING YOUR SEWING MACHINE<br />
PRINCIPAL PARTS ......................................................... 1<br />
ACCESSORIES ............................................................... 3<br />
Optional Accessories .............................................. 3<br />
OPERATING YOUR SEWING MACHINE ....................... 5<br />
Connecting Plugs ................................................... 5<br />
Main Power/Sewing Light Switch ........................... 7<br />
Foot Controller ........................................................ 8<br />
Checking the Needle .............................................. 9<br />
Replacing the Needle ............................................. 9<br />
Changing the Presser Foot .................................. 11<br />
Flat Bed Attachment ............................................. 12<br />
VARIOUS CONTROLS .................................................. 13<br />
Pattern Selection Dial ........................................... 13<br />
Recommended Lengths for Stitches .................... 15<br />
Stitch Length Dial ................................................. 24<br />
Reverse Sewing Lever ......................................... 26<br />
Converting to Free-arm Style ............................... 27<br />
THREADING THE MACHINE ........................................ 28<br />
Winding the Bobbin .............................................. 28<br />
Lower Threading................................................... 31<br />
Upper Threading................................................... 33<br />
Drawing Up Lower Thread.................................... 35<br />
Twin Needle Sewing ............................................. 36<br />
Thread Tension .................................................... 38<br />
FABRIC/THREAD/NEEDLE COMBINATIONS .............. 39<br />
STRAIGHT AND ZIGZAG STITCHING<br />
PLEASE READ BEFORE SEWING ............................... 41<br />
Straight Stitching .................................................. 42<br />
Zigzag Stitching .................................................... 45<br />
BUTTONHOLE AND BUTTON SEWING<br />
Making a Buttonhole (For 1-step BH Type) .......... 55<br />
Odd-shaped buttons that do not fit into the button<br />
holder plate ........................................................... 57<br />
Making a Buttonhole (For 4-step BH Type ) ......... 58<br />
Buttonhole Fine Adjustment ................................. 61<br />
Button Sewing ...................................................... 64<br />
USING ATTACHMENTS AND APPLICATIONS<br />
Zipper Insertion..................................................... 65<br />
Gathering .............................................................. 65<br />
Darning ................................................................. 67<br />
Appliqués .............................................................. 68<br />
Monogramming and Embroidering ....................... 69<br />
OPTIONAL ACCESSORIES<br />
Using the Walking Foot ........................................ 71<br />
Using the Spring-action Quilting Foot ................... 73<br />
Using the 1/4-Inch Quilting Foot ........................... 75<br />
MAINTENANCE<br />
Changing the Light Bulb ....................................... 77<br />
Cleaning ............................................................... 79<br />
Performance Check List ....................................... 81<br />
Repacking the Machine ........................................ 87<br />
INDEX<br />
BUILT-IN STITCHES<br />
Blind Hem Stitching .............................................. 46<br />
Shell Tuck Stitching .............................................. 47<br />
Elastic Stitching .................................................... 48<br />
Double Action Stitching ........................................ 49<br />
Scallop Stitching ................................................... 50<br />
Decorative Stitching.............................................. 51<br />
Patchwork ............................................................. 52<br />
Overedge Stitching ............................................... 53<br />
Feather Stitching .................................................. 54<br />
Triple Zigzag Stretch Stitching.............................. 54
CONTENIDO<br />
CONOZCA SU MÁQUINA DE COSER<br />
ELEMENTOS PRINCIPALES ................................................. 2<br />
ACCESORIOS .......................................................................... 4<br />
Accesorios opcionales..................................................... 4<br />
FUNCIONAMIENTO DE LA MÁQUINA DE COSER .......... 6<br />
Conexión de los enchufes ............................................... 6<br />
Interruptor principal/luz de cosido .................................. 7<br />
Pedal ............................................................................... 8<br />
Verificación de la aguja ................................................ 10<br />
Cambio de la aguja ....................................................... 10<br />
Cambio del prensatelas ................................................. 11<br />
Plataforma ..................................................................... 12<br />
DISTINTOS MANDOS .......................................................... 14<br />
Selector de puntadas ..................................................... 14<br />
Largo recomendado para cada puntada ........................ 18<br />
Selector de largo de puntada ......................................... 25<br />
Pulsador de retroceso .................................................... 26<br />
Conversión en modalidad de brazo libre ...................... 27<br />
ENHEBRADO DE LA MÁQUINA ....................................... 28<br />
Bobinado de la canilla ................................................... 28<br />
Enhebrado inferior ........................................................ 32<br />
Enhebrado superior ....................................................... 34<br />
Levantar el hilo inferior ................................................ 35<br />
Costura con aguja doble ................................................ 36<br />
Tensión de los hilos ...................................................... 38<br />
COMBINACIONES DE TEJIDO/HILO/AGUJA .................. 39<br />
PUNTADAS RECTAS Y ZIGZAG<br />
LEA ESTO POR FAVOR ANTES DE COSER ..................... 41<br />
Puntadas rectas .............................................................. 42<br />
Puntadas zigzag ............................................................ 45<br />
OJALES Y COSTURA DE BOTONES<br />
Para coser ojales (Para tipo BH en una operación) ....... 56<br />
Botones con formas extrañas que no caben en<br />
el soporte del botón ....................................................... 57<br />
Para coser ojales (Para tipo BH en cuatro operaciones) 58<br />
Ajuste fino de los ojales ................................................ 62<br />
Costura de botones ........................................................ 64<br />
USO DE ACCESORIOS Y APLICACIONES<br />
Inserción de cremalleras ............................................... 66<br />
Fruncido ........................................................................ 66<br />
Zurcido .......................................................................... 67<br />
Aplicaciones ................................................................. 68<br />
Monogramas y bordados ............................................... 70<br />
ACCESORIOS OPCIONALES<br />
Utilización del pie caminante ....................................... 72<br />
Utilización del prensatelas<br />
enguatador accionado por muelle ................................. 74<br />
Utilización del prensatela para pespunte 1/4 ................ 76<br />
MANTENIMIENTO<br />
Cambio de la bombilla .................................................. 78<br />
Limpieza ....................................................................... 80<br />
Listado de posibles incidencias..................................... 83<br />
Embalaje de la máquina ................................................ 87<br />
ÍNDICE<br />
PUNTADAS INCORPORADAS<br />
Puntadas invisibles ........................................................ 46<br />
Puntada ondas ............................................................... 47<br />
Puntada elástica............................................................. 48<br />
Puntada de acción doble ............................................... 49<br />
Puntada festón ............................................................... 50<br />
Puntadas decorativas ..................................................... 51<br />
Patchwork ..................................................................... 52<br />
Puntada por encima de la orilla..................................... 53<br />
Puntada pluma .............................................................. 54<br />
Triple puntada zigzag elástica....................................... 54
INDICE DEGLI ARGOMENTI<br />
CONOSCERE LA MACCHINA DA CUCIRE<br />
PARTI PRINCIPALI ............................................................ 2<br />
ACCESSORI ...................................................................... 4<br />
Accessori opzionali ................................................. 4<br />
FUNZIONAMENTO DELLA MACCHINA DA CUCIRE ...... 6<br />
Collegamento elettrico ............................................ 6<br />
Interruttore principale/luce area di lavoro ................ 7<br />
Reostato a pedale .................................................... 8<br />
Controllo dell’ago.................................................. 10<br />
Sostituzione dell’ago ............................................. 10<br />
Sostituzione del piedino premistoffa ...................... 11<br />
Scomparto piano ................................................... 12<br />
DISPOSITIVI DI CONTROLLO........................................ 14<br />
Selettore dei punti ................................................. 14<br />
Lunghezze dei punti consigliate ............................ 21<br />
Selettore della lunghezza del punto ....................... 25<br />
Leva di cucitura di ritorno ..................................... 26<br />
Cucitura a braccio libero ....................................... 27<br />
PROCEDURE DI INFILATURA ........................................ 28<br />
Avvolgimento del rocchetto................................... 28<br />
Infilatura inferiore .................................................. 32<br />
Infilatura superiore ................................................ 34<br />
Tiraggio del filo inferiore ....................................... 35<br />
Cucitura con ago gemello...................................... 36<br />
Tensione del filo .................................................... 38<br />
COMBINAZIONE TESSUTO/FILO/AGO ......................... 40<br />
CUCITURA CON PUNTO DIRITTO E ZIG-ZAG<br />
LEGGERE PRIMA DI CUCIRE .......................................... 41<br />
Punto diritto .......................................................... 42<br />
Punto zigzag.......................................................... 45<br />
PUNTI INCORPORATI<br />
OCCHIELLI E BOTTONI<br />
Esecuzione di un occhiello<br />
(per il tipo BH a 1 operazione) .............................. 56<br />
Bottoni di forma strana che non si adattano nella<br />
placca per bottoni ................................................. 57<br />
Esecuzione di un occhiello<br />
(per il tipo BH a 4 operazioni) ............................... 58<br />
Regolazione della densità dei punti dell’<br />
occhiello ............................................................... 62<br />
Cucitura di bottoni ................................................ 64<br />
GUARNIZIONI E APPLICAZIONI<br />
Applicazione di cerniere ....................................... 66<br />
Arricciature ........................................................... 66<br />
Rammendo ............................................................ 67<br />
Applicazioni .......................................................... 68<br />
Monogrammi e ricami ........................................... 70<br />
ACCESSORI OPZIONALI<br />
Utilizzazione del piedino semovente .................... 72<br />
Utilizzazione del piedino per trapunte<br />
azionato a molla.................................................... 74<br />
Utilizzazione del piedino per patchwork ............... 76<br />
MANUTENZIONE<br />
Sostituzione della lampadina ................................. 78<br />
Pulizia ................................................................... 80<br />
Tabella di controllo del funzionamento ................. 85<br />
Imballaggio della macchina................................... 87<br />
INDICE<br />
Punto orlo invisibile .............................................. 46<br />
Punto conchiglia ................................................... 47<br />
Punto elastico ........................................................ 48<br />
Punto doppio ........................................................ 49<br />
Punto smerlo ......................................................... 50<br />
Punto decorativo ................................................... 51<br />
Lavori di patchwork............................................... 52<br />
Rifinitura a sopraggitto........................................... 53<br />
Punto piuma .......................................................... 54<br />
Punto zigzag triplo ................................................. 54
KNOWING YOUR SEWING MACHINE<br />
CONOZCA SU MÁQUINA DE COSER<br />
CONOSCERE LA MACCHINA DA CUCIRE<br />
* 5<br />
4 3 2 1<br />
9<br />
PRINCIPAL PARTS<br />
1 BOBBIN WINDER (Page 28)<br />
Winds the thread onto the bobbin to be used for the lower thread.<br />
2 STITCH LENGTH DIAL (Page 13, 24)<br />
Controls the length of the stitches.<br />
3 SPOOL PIN AND SPOOL CAP (Page 28, 33)<br />
4 UPPER TENSION CONTROL DIAL (Page 38)<br />
Controls the tension of the upper thread.<br />
5 BUTTONHOLE LEVER (Page 55)<br />
* Not available on models <strong>XL</strong>-6040, <strong>XL</strong>-6041, <strong>XL</strong>-6042, and <strong>XL</strong>-<br />
6043.<br />
6 FLAT BED ATTACHMENT WITH ACCESSORY COMPART-<br />
MENT (Page 12, 27)<br />
7 ZIGZAG PRESSER FOOT (Page 3, 11)<br />
8 REVERSE SEWING LEVER (Page 26)<br />
Push for stitching in the reverse direction.<br />
9 PATTERN INDICATION WINDOW (Page 13)<br />
Shows the stitch number to be performed.<br />
6<br />
A<br />
7<br />
0<br />
8<br />
: HOLE FOR VERTICAL SPOOL PIN (Page 37)<br />
Used to hold a second spool of thread for twin needle sewing.<br />
A BALANCE WHEEL<br />
B PATTERN SELECTION DIAL (Page 13)<br />
Turn in either direction to select the desired stitch.<br />
C MAIN POWER/SEWING LIGHT SWITCH (Page 7)<br />
Turn on/off the main power/sewing light switch.<br />
D FOOT CONTROLLER JACK (Page 5)<br />
Insert the foot controller plug for operation and connect the<br />
machine to the power supply.<br />
E BUTTONHOLE FINE ADJUSTMENT SCREW (Page 61)<br />
F PRESSER FOOT LEVER (Page 33)<br />
G FOOT CONTROLLER (Page 8)<br />
Used to control sewing speed/start and stop.<br />
B<br />
E<br />
F<br />
C D<br />
G<br />
1
ELEMENTOS PRINCIPALES<br />
PARTI PRINCIPALI<br />
1 DISPOSITIVO DE BOBINADO DE LA CANILLA (Página 28)<br />
Hace bobina para la canilla que va a ser utilizada como hilo inferior.<br />
2 SELECTOR DE LARGO DE PUNTADA (Página 14, 25)<br />
Controla el largo de las puntadas.<br />
3 EJE DEL CARRETE Y PORTA CARRETES (Página 28, 34)<br />
4 DISCO DE CONTROL DE LA TENSIÓN SUPERIOR (Página<br />
38)<br />
Controla la tensión del hilo superior.<br />
5 PALANCA DE OJALES (Página 56)<br />
* No disponible en los modelos <strong>XL</strong>-6040, <strong>XL</strong>-6041, <strong>XL</strong>-6042, and <strong>XL</strong>-<br />
6043.<br />
6 PLATAFORMA CON COMPARTIMENTO DE ACCESORIOS<br />
(Página 12, 27)<br />
7 PRENSATELAS ZIGZAG (Página 4, 11)<br />
8 PULSADOR DE RETROCESO (Página 26)<br />
Apriete el pulsador para coser hacia atrás.<br />
9 INDICADOR DE PUNTADA (Página 14)<br />
Muestra el número de puntada que se debe realizar.<br />
0 ORIFICIO PARA EL PORTABOBINAS VERTICAL (Página<br />
37)<br />
Sirve para poner un segundo carrete de hilo para coser con una aguja<br />
doble.<br />
A RUEDA MANUAL/POLEA<br />
B SELECTOR DE PUNTADAS (Página 14)<br />
Gírelo en cualquier sentido para seleccionar la puntada deseada.<br />
C INTERRUPTOR PRINCIPAL/LUZ DE COSIDO (Página 7)<br />
Encienda/apague el interruptor principal/luz de cosido.<br />
D RECEPTÁCULO DEL PEDAL (Página 6)<br />
Inserte la clavija del pedal para que éste funcione y enchufe la máquina<br />
a la fuente de alimentación.<br />
E TORNILLO DE AJUSTE FINO DE LOS OJALES (Página 62)<br />
F PALANCA DEL PRENSATELAS (Página 34)<br />
G PEDAL (Página 8)<br />
Se utiliza para controlar la velocidad, el inicio y el final del cosido.<br />
1 DISPOSITIVO DI AVVOLGIMENTO SPOLINA (Pagina 28)<br />
Per avvolgere il rocchetto con il filo da utilizzare inferiormente.<br />
2 SELETTORE DELLA LUNGHEZZA DEL PUNTO (Pagina 14, 25)<br />
Permette di regolare la lunghezza dei punti.<br />
3 PORTAROCCHETTO E FERMAROCCHETTO (Pagina 28, 34)<br />
4 REGOLATORE DI TENSIONE SUPERIORE (Pagina 38)<br />
Consente di regolare la tensione del filo superiore.<br />
5 LEVA DELL'OCCHIELLO (Pagina 56)<br />
* Non disponibile sui modelli <strong>XL</strong>-6040, <strong>XL</strong>-6041, <strong>XL</strong>-6042 e <strong>XL</strong>6043.<br />
6 SCOMPARTO PIANO CON ACCESSORI (Pagina 12, 27)<br />
7 PIEDINO PREMISTOFFA A ZIGZAG (Pagina 4, 11)<br />
8 LEVA DI CUCITURA DI RITORNO (Pagina 26)<br />
Premerlo per eseguire cuciture a marcia indietro.<br />
9 FINESTRELLA INDICATORE PUNTO (Pagina 14)<br />
Mostra il numero del punto da eseguire.<br />
: FORO PER PORTAROCCHETTO VERTICALE (Pagina 37)<br />
Sostiene un secondo rocchetto di filo per cuciture con ago<br />
gemello.<br />
A VOLANTINO<br />
B SELETTORE DEI PUNTI (Pagina 14)<br />
Ruotarlo in entrambe le direzioni per selezionare il punto desiderato.<br />
C INTERRUTTORE PRINCIPALE/LUCE AREA DI LAVORO (Pagina 7)<br />
Per accendere e spegnere la macchina da cucire e allo stesso<br />
tempo la luce dell'area di lavoro.<br />
D PRESA DEL REOSTATO A PEDALE (Pagina 6)<br />
Inserirvi la spina del reostato per mettere in funzione la macchina<br />
da cucire e collegare la macchina alla presa di corrente.<br />
E VITE DELL'EQUILIBRATORE DELL'OCCHIELLO (Pagina 62)<br />
F LEVA DEL PIEDINO PREMISTOFFA (Pagina 34)<br />
G REOSTATO A PEDALE (Pagina 8)<br />
Utilizzato per controllare la velocità, l'avviamento e l'arresto<br />
della macchina per cucire.<br />
KNOWING YOUR SEWING MACHINE<br />
CONOZCA SU MÁQUINA DE COSER<br />
CONOSCERE LA MACCHINA DA CUCIRE<br />
2
KNOWING YOUR SEWING MACHINE<br />
CONOZCA SU MÁQUINA DE COSER<br />
CONOSCERE LA MACCHINA DA CUCIRE<br />
1 X59370-051 2 SA156<br />
XA5539-051<br />
3 X57117-051 4 X57521-001<br />
5 XA4911-151<br />
(<strong>XL</strong>-6060, <strong>XL</strong>-6061, <strong>XL</strong>-6062,<br />
<strong>XL</strong>-<strong>6063</strong>, <strong>XL</strong>-6050, <strong>XL</strong>-6051,<br />
<strong>XL</strong>-6052, <strong>XL</strong>-<strong>6053</strong>)<br />
X59369-251<br />
(<strong>XL</strong>-6040, <strong>XL</strong>-6041,<br />
<strong>XL</strong>-6042, <strong>XL</strong>-6043)<br />
ACCESSORIES<br />
1 Zipper Foot (1 pc.)<br />
2 Bobbin (3 pcs.) SA156 (For U.S.A)<br />
XA5539-051 (For other countries)<br />
Replacements (10-piece set)<br />
3 Needle Pack (Regular Single Needle No. 14) (3 pcs.)<br />
4 Twin Needle (1 pc.)<br />
5 Buttonhole Foot (1 pc.)<br />
6 Spool Cap (Large) (1 pc.)<br />
7 Spool Cap (Small) (1 pc.)<br />
8 Cleaning Brush (1 pc.)<br />
9 Extra Spool Pin (1 pc.)<br />
: Screwdriver (1 pc.)<br />
A Seam Ripper (1 pc.)<br />
B Darning Plate (1pc.)<br />
C Dust Cover (1pc.)<br />
6 130012-054 7 130013-054<br />
8 X59476-051 9 130920-051<br />
Parts Code for Zigzag Presser Foot: X51953-051<br />
Parts Code for Spool Cap (Medium): X55260-153<br />
Foot Controller: Model N<br />
Parts Code: J00360-051 (110/120V Area)<br />
XA6400-051 (220/240V Area)<br />
XA6402-051 (U.K.)<br />
XA6404-051 (Australia, New Zealand)<br />
XA6434-051 (110/220V Dual Ara)<br />
NOTE (For U.S.A. only):<br />
Foot Controller: Model N<br />
Parts Code: J00360-051 (110/120V Area)<br />
This foot controller can be used for Model <strong>XL</strong>-6060, <strong>XL</strong>-6061, <strong>XL</strong>-<br />
6062, <strong>XL</strong>-<strong>6063</strong>, <strong>XL</strong>-6050, <strong>XL</strong>-6051, <strong>XL</strong>-6052, <strong>XL</strong>-<strong>6053</strong>, <strong>XL</strong>-6040,<br />
<strong>XL</strong>-6041, <strong>XL</strong>-6042, <strong>XL</strong>-6043.<br />
The above accessories are stored in the flat bed attachment. These<br />
accessories have been designed to help complete most sewing<br />
tasks.<br />
: X55467-051 A X54243-001<br />
B XA3442-151<br />
C X53984-054<br />
1 SA107<br />
XA8319-002<br />
3 SA125<br />
X80980-002<br />
2 SA129<br />
X81021-002<br />
Optional Accessories<br />
1 Walking Foot SA107 (For U.S.A)<br />
XA8319-002 (For other countries)<br />
2 Springaction Quilting Foot<br />
SA129 (For U.S.A)<br />
X81021-002 (For other countries)<br />
3 1/4-Inch Quilting Foot<br />
SA125 (For U.S.A)<br />
X80980-002 (For other countries)<br />
NOTE:<br />
The content of accessories depends on model.<br />
3
ACCESORIOS<br />
1 Pata de cremalleras (1 pza)<br />
2 Canilla (3 pzas) SA156 (para EE UU)<br />
XA5539-051 (para otros países)<br />
Recambios (paquete de 10 piezas)<br />
3 Paquete de agujas (agujas simples normales No 14) (3 pzas)<br />
4 Aguja doble (1 pza)<br />
5 Prensatelas para ojales (1 pza)<br />
6 Tope para carretes (grande) (1 pza)<br />
7 Tope para carretes (pequeño) (1 pza)<br />
8 Cepillo (1 pza)<br />
9 Porta carretes extra (1 pza)<br />
0 Destornillador (1 pza)<br />
A Cortador para abrir costuras (1 pza)<br />
B Placa de zurcir (1 pza)<br />
C Funda guardapolvo (1 pza)<br />
ACCESSORI<br />
1 Piedino per cerniere (1 pz.)<br />
2 Spoline (3 pz.) SA156 (Per USA)<br />
XA5539-051 (Per gli paesi)<br />
Sostituzioni (set di 10 pezzi)<br />
3 Confezione di aghi (ago singolo normale N° 14) (3 pz.)<br />
4 Ago gemello (1 pz.)<br />
5 Piedino per occhielli (1 pz.)<br />
6 Fermarocchetto (grande) (1 pz.)<br />
7 Fermarocchetto (piccolo) (1 pz.)<br />
8 Spazzolino (1 pz.)<br />
9 Portarocchetto ausiliario (1 pz.)<br />
0 Cacciavite (1 pz.)<br />
A Taglia-asole (1 pz.)<br />
B Placca di rammendo (1 pz.)<br />
C Copertura antipolvere (1 pz.)<br />
KNOWING YOUR SEWING MACHINE<br />
CONOZCA SU MÁQUINA DE COSER<br />
CONOSCERE LA MACCHINA DA CUCIRE<br />
Código del prensatelas para la puntada zigzag: X51953-051<br />
Código del prensatelas para la tope para carretes (mediana):<br />
X55260-153<br />
Pedal: Modelo N<br />
Códigos: J00360-051 (110/120 V Área)<br />
XA6400-051 (220/240 V Área)<br />
XA6402-051 (RU)<br />
XA6404-051 (Australia y Nueva Zelanda)<br />
XA6434-051 (110/220 V Área Dual)<br />
NOTA (sólo para EE UU):<br />
Pedal: modelo N<br />
Código: J00360-051 (110/120 V Área)<br />
Este pedal puede utilizarse para el modelo de máquina de coser <strong>XL</strong>-6060,<br />
<strong>XL</strong>-6061, <strong>XL</strong>-6062, <strong>XL</strong>-<strong>6063</strong>, <strong>XL</strong>-6050, <strong>XL</strong>-6051, <strong>XL</strong>-6052, <strong>XL</strong>-<strong>6053</strong>,<br />
<strong>XL</strong>-6040, <strong>XL</strong>-6041, <strong>XL</strong>-6042, <strong>XL</strong>-6043.<br />
Los accesorios anteriores están almacenados en la mesa extensible. Han<br />
sido diseñados para ayudar en la realización de la mayoría de tareas de<br />
cosido.<br />
Codice parte per il piedino per cerniere: X51953-051<br />
Codice parte per il Fermarocchetto (medio): X55260-153<br />
Reostato a pedale: Modello N<br />
Codice parte: J00360-051 (paesi con corrente elettrica a 110/120V)<br />
XA6400-051 (paesi con corrente elettrica a 220/240V)<br />
XA6402-051 (Regno Unito)<br />
XA6404-051 (Australia, Nuova Zelanda)<br />
XA6434-051 (paesi con doppia corrente elettrica a 110/220V)<br />
NOTA (Solo USA):<br />
Reostato a pedale: modello N<br />
Codice parte: J00360-051 (paesi con corrente elettrica a 110/120V)<br />
Questo reostato a pedale può essere utilizzato per macchina da<br />
cucire modello <strong>XL</strong>-6060, <strong>XL</strong>-6061, <strong>XL</strong>-6062, <strong>XL</strong>-<strong>6063</strong>, <strong>XL</strong>-6050, <strong>XL</strong>-<br />
6051, <strong>XL</strong>-6052, <strong>XL</strong>-<strong>6053</strong>, <strong>XL</strong>-6040, <strong>XL</strong>-6041, <strong>XL</strong>-6042, <strong>XL</strong>-6043.<br />
Gli accessori a corredo della macchina si trovano nell'apposito<br />
contenitore posto all'interno del piano di lavoro. Questi accessori<br />
sono stati studiati per aiutare chi cuce ad eseguire una vasta gamma<br />
di lavori.<br />
Accesorios opcionales<br />
Accessori opzionali<br />
1 Pie caminante SA107 (para EE UU)<br />
XA8319-002 (para otros países)<br />
2 Prensatelas enguatador<br />
SA129 (para EE UU)<br />
X81021-002 (para otros países)<br />
3 Prensatela para pespunte 1/4<br />
SA125 (para EE UU)<br />
X80980-002 (para otros países)<br />
NOTA:<br />
El contenido de los accesorios depende del modelo.<br />
1 Piedino semovente SA107 (Per USA)<br />
XA8319-002 (Per gli paesi)<br />
2 Piedino per trapunte azionato a molla<br />
SA129 (Per USA)<br />
X81021-002 (Per gli paesi)<br />
3 Piedino per patchwork<br />
SA125 (Per USA)<br />
X80980-002 (Per gli paesi)<br />
NOTA:<br />
Il contenuto degli accessori dipende dai modelli.<br />
4
KNOWING YOUR SEWING MACHINE<br />
CONOZCA SU MÁQUINA DE COSER<br />
CONOSCERE LA MACCHINA DA CUCIRE<br />
OPERATING YOUR<br />
SEWING MACHINE<br />
Connecting Plugs<br />
1. Connect the power cord plug into the machine.<br />
2. Connect the power supply plug into a wall outlet.<br />
CAUTION<br />
1. When leaving the machine unattended, the main switch of<br />
the machine should be switched off or the plug must be<br />
removed from the socket-outlet.<br />
2. When servicing the machine, or when removing covers or<br />
changing bulbs, the machine or the electrical set must be<br />
unplugged.<br />
3. For U.S.A. only<br />
This appliance has a polarized plug (one blade wider than<br />
the other). To reduce the risk of electric shock, this plug is<br />
intended to fit in a polarized outlet only one way. If the plug<br />
does not fit fully in the outlet, reverse the plug.<br />
If it still does not fit, contact a qualified electrician to install<br />
the proper outlet. Do not modify the plug in any way.<br />
WARNING<br />
• Use only regular household electricity for the power<br />
source. Using other power sources may result in fire,<br />
electric shock, or damage to the machine.<br />
• Turn off the main power and remove the plug in the<br />
following circumstances:<br />
- When you are away from the machine<br />
- After using the machine<br />
- When the power fails during use<br />
- When the machine does not operate correctly due to<br />
a bad connection or a disconnection<br />
- During electrical storms<br />
CAUTION<br />
• Do not use extension cords or multi-plug adapters with<br />
many other appliances plugged in to them. Fire or<br />
electric shock may result.<br />
• Do not touch the plug with wet hands. Electric shock<br />
may result.<br />
• When unplugging the machine, always turn off the main<br />
power first. Always grasp the plug to remove it from the<br />
outlet. Pulling on the cord may damage the cord, or lead<br />
to fire or electric shock.<br />
• Do not allow the power cord to be cut, damaged, modified,<br />
forcefully bent, pulled, twisted, or bundled. Do not<br />
place heavy objects on the cord. Do not subject the cord<br />
to heat. These things may damage the cord and cause<br />
fire or electric shock. If the cord or plug is damaged, take<br />
the machine to your authorized dealer for repairs before<br />
continuing use.<br />
• Unplug the power cord if the machine is not to be used<br />
for a long period of time. Otherwise a fire may result.<br />
5
FUNCIONAMIENTO DE LA<br />
MÁQUINA DE COSER<br />
Conexión de los enchufes<br />
1. Conecte la clavija del cordón de alimentación a la máquina.<br />
2. Conecte el enchufe de alimentación a una toma de corriente.<br />
PRECAUCIÓN:<br />
1. Si deja la máquina desatendida, debe apagar el interruptor principal<br />
de la corriente o desenchufar el cable de la toma de corriente.<br />
2. Cuando repare la máquina, retire tapas o cambie la bombilla,<br />
desenchufe la máquina de la corriente.<br />
3. Sólo para EE UU<br />
Esta máquina está provista de un enchufe polarizado (un borne<br />
más ancho que el otro). Como medida de seguridad, existe una sola<br />
manera de introducir el enchufe en la toma de corriente. Si no<br />
puede introducir el enchufe a fondo en la toma de corriente,<br />
cambie de lado el enchufe. Si sigue sin poderlo introducir, póngase<br />
en contacto con un electricista cualificado para que le instale una<br />
toma de corriente adecuada. No intente modificar el enchufe.<br />
AVISO<br />
• Utilice sólo la corriente de casa normal para la alimentación de<br />
la máquina. El uso de otras fuentes de alimentación puede<br />
provocar incendio, descarga eléctrica o averías en la máquina.<br />
• Apague la máquina y desenchufe el cable de la corriente en la<br />
siguientes situaciones:<br />
- Cuando esté alejado de la máquina<br />
- Después de usar la máquina<br />
- Cuando la alimentación se corta durante el funcionamiento<br />
- Si la máquina no funciona correctamente debido a una<br />
mala conexión o a una desconexión<br />
- Durante tormentas con relámpagos<br />
PRECAUCIÓN<br />
• No utilice cables de alargo ni adaptadores con demasiados<br />
aparatos conectados. Podría producirse un incendio o una<br />
descarga eléctrica.<br />
• No toque el enchufe con las manos mojadas. Podría recibir una<br />
descarga eléctrica.<br />
• Desenchufe siempre la máquina antes de desmontarla. Sujete<br />
siempre el enchufe para sacarlo de la toma de corriente. Si tira<br />
del cable, podría dañarlo o provocar un incendio o una descarga<br />
eléctrica.<br />
• No corte, estropee, cambie, fuerce, doble, estire, tuerza o<br />
enrolle el cable. No apoye objetos pesados sobre el cable. No<br />
exponga el cable al calor. Todo esto podría estropear el cable<br />
y causar un incendio o una descarga eléctrica. Si el cable está<br />
estropeado, lleve la máquina a su distribuidor autorizado para<br />
que la repare antes de utilizarla de nuevo.<br />
• Desenchufe el cable de la corriente si no va a utilizar la<br />
máquina durante un largo período de tiempo. De otra manera,<br />
podría producirse un incendio.<br />
FUNZIONAMENTO DELLA<br />
MACCHINA DA CUCIRE<br />
Collegamento elettrico<br />
1. Inserire il connettore del cavo di alimentazione nella macchina da<br />
cucire.<br />
2. Inserire la spina di alimentazione in una presa elettrica a muro.<br />
ATTENZIONE<br />
1. Quando si lascia la macchina incustodita, spegnere l’interruttore<br />
generale della macchina o scollegare la spina dalla presa a<br />
parete.<br />
2. Quando si eseguono interventi di assistenza sulla macchina o<br />
quando si rimuovono le coperture o si sostituiscono le lampadine,<br />
scollegare la macchina da cucire dalla presa o togliere<br />
l’alimentazione elettrica alla macchina.<br />
3. Solo per USA<br />
Questa macchina è corredata di una spina di alimentazione<br />
polarizzata per corrente alternata (una spina dotata di uno<br />
spinotto più largo dell'altro). Come misura di sicurezza, questa<br />
spina può essere inserita nella presa in un solo senso. Se non si<br />
riesce ad inserire la spina fino in fondo, provare girando la spina.<br />
Se anche in questo caso la spina non entra nella presa, rivolgersi<br />
ad un elettricista per sostituire la presa con una adatta. Non<br />
smontare la spina polarizzata rendendo inefficace il dispositivo<br />
di sicurezza.<br />
AVVERTENZA<br />
• Utilizzare soltanto corrente derivante da una presa normale<br />
per uso domestico. L’uso di sorgenti di alimentazione diverse<br />
può provocare rischi di incendio, scossa elettrica o danni alla<br />
macchina.<br />
• Spegnere la macchina e scollegare la spina nelle seguenti<br />
situazioni:<br />
- Quando si lascia incustodita la macchina<br />
- Dopo aver utilizzato la macchina<br />
- Se si verifica un’interruzione di corrente durante l’uso<br />
- Quando la macchina non funziona in modo corretto a<br />
causa di un collegamento errato o di un avvenuto<br />
scollegamento<br />
- Durante temporali con scariche elettriche<br />
ATTENZIONE<br />
• Non utilizzare cavi di prolunga o adattatori multi-presa con<br />
molteplici apparecchiature collegate contemporaneamente.<br />
Vi sono rischi di incendio o di scossa elettrica.<br />
• Non toccare la spina con le mani umide. Vi sono rischi di<br />
scossa elettrica.<br />
• Prima di scollegare la macchina dalla presa di corrente,<br />
spegnere sempre l’interruttore generale della macchina. Per<br />
scollegare il cavo, afferrare sempre la spina. Se si scollega il<br />
cavo agendo su di esso, possono verificarsi rischi di incendio<br />
o di scossa elettrica.<br />
• Fare attenzione a non tagliare, danneggiare, modificare,<br />
piegare eccessivamente, tirare, attorcigliare o ingarbugliare<br />
il cavo. Non collocare oggetti pesanti sul cavo. Non esporre<br />
il cavo a sorgenti di calore. Tali condizioni possono danneggiare<br />
il cavo e causare rischi di incendio o di scossa elettrica.<br />
Se il cavo o la spina è danneggiato, portare la macchina presso<br />
un rivenditore autorizzato prima di continuare ad utilizzarla.<br />
• Se la macchina da cucire deve restare a lungo inutilizzata,<br />
scollegare il cavo dalla presa di corrente. In caso contrario,<br />
vi sono rischi di incendio.<br />
KNOWING YOUR SEWING MACHINE<br />
CONOZCA SU MÁQUINA DE COSER<br />
CONOSCERE LA MACCHINA DA CUCIRE<br />
6
KNOWING YOUR SEWING MACHINE<br />
CONOZCA SU MÁQUINA DE COSER<br />
CONOSCERE LA MACCHINA DA CUCIRE<br />
Main Power/Sewing<br />
Light Switch<br />
This switch turns the main power/sewing light on or off.<br />
1 Turn on (toward the “I” mark)<br />
2 Turn off (toward the “O” mark)<br />
1<br />
2<br />
Interruptor principal/luz de cosido<br />
Este interruptor permite apagar y encender la máquina y la luz.<br />
1 Encender (hacia la marca “I”)<br />
2 Apagar (hacia la marca “O”)<br />
Interruttore principale/luce area di<br />
lavoro<br />
Questo interruttore accende e spegne sia la macchina che la luce<br />
dell’area di lavoro.<br />
1 Acceso (verso il simbolo “I”)<br />
2 Spento (verso il simbolo “O”)<br />
7
Foot Controller<br />
When the foot controller is depressed lightly, the machine will run<br />
at a low speed. When the pressure on the foot controller is<br />
increased, the machine’s speed will increase. When pressure on<br />
the foot controller is released, the machine will stop. Care should be<br />
taken that nothing is placed on the foot controller when the machine<br />
is not in use.<br />
1 Foot controller<br />
CAUTION<br />
Do not allow fabric pieces and dust to collect in the foot<br />
controller. Doing so could cause a fire or an electric shock.<br />
KNOWING YOUR SEWING MACHINE<br />
CONOZCA SU MÁQUINA DE COSER<br />
CONOSCERE LA MACCHINA DA CUCIRE<br />
1<br />
NOTE (For U.S.A. only):<br />
Foot Controller: Model N<br />
This foot controller can be used for Model <strong>XL</strong>-6060, <strong>XL</strong>-6061, <strong>XL</strong>-<br />
6062, <strong>XL</strong>-<strong>6063</strong>, <strong>XL</strong>-6050, <strong>XL</strong>-6051, <strong>XL</strong>-6052, <strong>XL</strong>-<strong>6053</strong>, <strong>XL</strong>-6040,<br />
<strong>XL</strong>-6041, <strong>XL</strong>-6042, <strong>XL</strong>-6043.<br />
Pedal<br />
Al presionar ligeramente el pedal, la máquina funcionará a baja velocidad.<br />
Al aumentar la presión, se incrementa también la velocidad de la máquina.<br />
Al soltar el pedal, la máquina se para. Asegúrese siempre de no poner<br />
ningún objeto sobre el pedal cuando la máquina no esté utilizada.<br />
1 Pedal<br />
Reostato a pedale<br />
Premendo leggermente sul reostato, la macchina funzionerà a bassa velocità.<br />
Aumentando la pressione sul reostato, la velocità della macchina aumenterà.<br />
Sollevando il piede dal reostato, la macchina si fermerà. Si raccomanda di non<br />
appoggiare nessun oggetto sul reostato quando la macchina è inattiva.<br />
1 Reostato a pedale<br />
PRECAUCIÓN<br />
Evite que trozos de tela y polvo entren en el pedal. De lo contrario,<br />
podría producirse un incendio o una descarga eléctrica.<br />
ATTENZIONE<br />
Non lasciare che ritagli di stoffa e accumuli di polvere si<br />
depositino nel comando a pedale. In caso contrario, potrebbero<br />
verificarsi rischi di incendio o di scossa elettrica.<br />
NOTA (sólo para EE UU):<br />
Pedal: modelo N<br />
Este pedal puede utilizarse para el modelo de máquina de coser <strong>XL</strong>-6060,<br />
<strong>XL</strong>-6061, <strong>XL</strong>-6062, <strong>XL</strong>-<strong>6063</strong>, <strong>XL</strong>-6050, <strong>XL</strong>-6051, <strong>XL</strong>-6052, <strong>XL</strong>-<strong>6053</strong>,<br />
<strong>XL</strong>-6040, <strong>XL</strong>-6041, <strong>XL</strong>-6042, <strong>XL</strong>-6043.<br />
NOTA (Solo per USA):<br />
Reostato a pedale: modello N<br />
Questo reostato a pedale può essere utilizzato per macchina da<br />
cucire modello <strong>XL</strong>-6060, <strong>XL</strong>-6061, <strong>XL</strong>-6062, <strong>XL</strong>-<strong>6063</strong>, <strong>XL</strong>-6050, <strong>XL</strong>-<br />
6051, <strong>XL</strong>-6052, <strong>XL</strong>-<strong>6053</strong>, <strong>XL</strong>-6040, <strong>XL</strong>-6041, <strong>XL</strong>-6042, <strong>XL</strong>-6043.<br />
8
KNOWING YOUR SEWING MACHINE<br />
CONOZCA SU MÁQUINA DE COSER<br />
CONOSCERE LA MACCHINA DA CUCIRE<br />
Checking the Needle<br />
The sewing needle must always be straight and sharp for smooth<br />
sewing.<br />
2<br />
1<br />
To Check the Needle Correctly:<br />
To check the needle, place the flat side of the needle on a flat<br />
surface. Check the needle from the top and the sides. Throw away<br />
any bent needles.<br />
1 Parallel space<br />
2 Level surface (bobbin cover, glass, etc.)<br />
* Place a level surface under the needle.<br />
Replacing the Needle<br />
CAUTION<br />
• Turn the main power switch to OFF before changing the<br />
needle. If the main power is left on and foot controller is<br />
stepped on, the machine will start and injury may result.<br />
• Use only sewing machine needles for home use. Other<br />
needles may bend or break and cause injury.<br />
• Never sew with a bent needle. A bent needle will easily<br />
break and cause injury.<br />
1<br />
1. Remove the power supply plug from the outlet.<br />
2. Raise the needle bar to its highest position.<br />
3. Lower the presser foot.<br />
4. Remove the needle by loosening the needle clamp screw.<br />
2<br />
1 Presser foot lever<br />
CAUTION<br />
Do not loosen or tighten the needle clamp screw with a strong<br />
force, otherwise it may be damaged.<br />
3<br />
4<br />
5. With the flat side of the needle facing the back, insert the new<br />
needle all the way to the top of the needle stopper (viewing<br />
window) in the needle clamp. Use a screwdriver to securely<br />
tighten the needle clamp screw.<br />
2 Needle stopper<br />
3 Hole for setting needle<br />
4 Flat side of needle<br />
CAUTION<br />
Be sure to push in the needle until it touches the stopper,<br />
and securely tighten the needle clamp screw with a screwdriver.<br />
If the needle is not completely inserted or the needle<br />
clamp screw is loose, the needle may break or the machine<br />
may be damaged.<br />
9
Verificación de la aguja<br />
La aguja de costura siempre debe estar bien recta y afilada para una buena<br />
costura.<br />
Para comprobar la aguja:<br />
Para revisar la aguja, coloque la parte plana de la aguja sobre una superficie<br />
plana. Compruebe la aguja por la parte superior y los laterales. Tire las<br />
agujas que estén dobladas.<br />
1 Espacio paralelo<br />
2 Superficie plana (tapa de la bobina, cristal, etc.)<br />
* Coloque la superficie plana debajo de la aguja.<br />
Controllo dell’ago<br />
Per ottenere una cucitura scorrevole, l’ago utilizzato deve essere<br />
sempre ben diritto ed appuntito.<br />
Per verificare che l’ago non sia piegato:<br />
Per verificare l’ago, posizionare la parte piana dell’ago su una<br />
superficie piana. Osservare attentamente l’ago dalla parte superiore<br />
e sui lati. Gettare gli aghi che risultano piegati.<br />
1 Spazio parallelo<br />
2 Superficie piana (sportello spolina, vetro, ecc.)<br />
* Posizionare l’ago su una superficie piana.<br />
KNOWING YOUR SEWING MACHINE<br />
CONOZCA SU MÁQUINA DE COSER<br />
CONOSCERE LA MACCHINA DA CUCIRE<br />
Cambio de la aguja<br />
Sostituzione dell’ago<br />
PRECAUCIÓN<br />
• Desenchufe la máquina de coser de la alimentación antes de<br />
cambiar la aguja. Si deja la máquina enchufada a la corriente<br />
y pisa el pedal, la máquina se pondrá en marcha y podría<br />
causar lesiones.)<br />
• Utilice sólo agujas de máquina de coser para uso doméstico.<br />
Otras agujas podrían doblarse o romperse y causar lesiones.<br />
• Nunca cosa con una aguja doblada. Una aguja doblada se<br />
rompe fácilmente y podría hacerle daño.<br />
1. Retire el enchufe de alimentación de la toma de corriente.<br />
2. Levante la barra de la aguja a su posición más alta.<br />
3. Baje el prensatelas.<br />
4. Retire la aguja, aflojando la abrazadera de la aguja.<br />
1 Palanca del prensatelas<br />
PRECAUCIÓN<br />
No apriete el tornillo de la presilla de la aguja. De lo contrario, podría<br />
estropear la aguja o la máquina.<br />
5. Con la parte plana de la aguja mirando hacia la parte trasera de la<br />
máquina, inserte la nueva aguja hasta el final de la cavidad (mirilla) en<br />
la presilla de la aguja. Utilice el destornillador para apretar bien el<br />
tornillo de la presilla de la aguja.<br />
2 Cavidad<br />
3 Orificio para la aguja<br />
4 Parte plana de la aguja<br />
PRECAUCIÓN<br />
Asegúrese de empujar la aguja hasta que llegue al tope de la<br />
cavidad y apriete fuertemente el tornillo de la presilla de la aguja<br />
con un destornillador. Si la aguja no está completamente insertada<br />
o el tornillo de la presilla de la aguja está suelto, la aguja podría<br />
romperse o la máquina podría estropearse.<br />
ATTENZIONE<br />
• Prima di sostituire l’ago, spegnere la macchina portando<br />
l’interruttore su OFF. Se la macchina è accesa e viene<br />
premuto inavvertitamente il reostato a pedale la macchina<br />
inizierà a operare con possibili rischi di lesioni personali.<br />
• Utilizzare esclusivamente aghi da macchina da cucire per<br />
uso domestico. Gli altri tipi di ago possono piegarsi o rompersi<br />
e provocare lesioni personali.<br />
• Non cucire con un ago piegato. Gli aghi piegati possono<br />
rompersi facilmente e causare lesioni personali.<br />
1. Disinserire la spina di alimentazione dalla presa di corrente.<br />
2. Far salire la barra dell’ago fino alla sua posizione più alta.<br />
3. Abbassare il piedino premistoffa.<br />
4. Togliere l'ago allentando il morsetto dell'ago.<br />
1 Leva del piedino premistoffa<br />
ATTENZIONE<br />
Non applicare pressione sulla vite della ghiera di serraggio ago. In<br />
caso contrario, l’ago o la macchina potrebbe danneggiarsi.<br />
5. Con il lato piatto dell’ago rivolto verso la parte posteriore della<br />
macchina, inserire completamente il nuovo ago sulla parte superiore<br />
dell’arresto per ago (finestra di visione) della ghiera di<br />
serraggio ago. Utilizzare un cacciavite per serrare saldamente la<br />
vite della ghiera di serraggio ago.<br />
2 Arresto per ago<br />
3 Foro per inserimento ago<br />
4 Lato piatto dell’ago<br />
ATTENZIONE<br />
Assicurarsi di spingere l’ago fino a farlo toccare l’arresto e<br />
serrare saldamente la vite con un cacciavite. Se l’ago non è<br />
completamente inserito o la vite della ghiera di serraggio ago è<br />
allentata, l’ago potrebbe rompersi o la macchina potrebbe<br />
danneggiarsi.<br />
10
KNOWING YOUR SEWING MACHINE<br />
CONOZCA SU MÁQUINA DE COSER<br />
CONOSCERE LA MACCHINA DA CUCIRE<br />
Changing the Presser Foot<br />
CAUTION<br />
• Always turn off the power before changing the presser<br />
foot. If the power is on and controller is stepped on, the<br />
machine will start and may cause injury.<br />
• Always use the correct presser foot for the selected<br />
stitch pattern. If the wrong presser foot is used, the<br />
needle may strike the presser foot and bend or break,<br />
and may cause injury.<br />
• Only use presser feet for this machine. Using other<br />
presser feet may lead to accident or injury.<br />
It may be necessary to change the presser foot according to your<br />
sewing needs.<br />
SNAP-ON TYPE<br />
1. Raise the needle to its highest position by turning the balance<br />
wheel toward you (counter clockwise) and raise the presser foot<br />
lever.<br />
2. Release the foot by raising the lever located at the back of the<br />
holder.<br />
3. Place a different presser foot on the needle plate so that the bar<br />
on the presser foot is in line with the slot on the shank.<br />
4. Lower the presser foot lever and fix the presser foot onto the<br />
shank. If the presser foot is in the correct location, the bar should<br />
snap in.<br />
Cambio del prensatelas<br />
Sostituzione del piedino premistoffa<br />
PRECAUCIÓN<br />
• Desenchufe siempre la máquina de la alimentación antes de<br />
cambiar el pie prensatela. Si la máquina de coser está enchufada<br />
a la corriente y pisa el pedal, la máquina se pondrá en<br />
funcionamiento y podría hacerse daño.<br />
• Utilice siempre el pie prensatela adecuado para el pespunte<br />
seleccionado. Si utiliza un pie prensatela inadecuado, la aguja<br />
podría chocar contra el pie prensatela y doblarse o romperse,<br />
lo que puede causar lesiones.<br />
• Use el pie prensatela sólo para esta máquina de coser. Si usa<br />
otro pie prensatela, podría causar una avería o hacerse daño.<br />
Según sus necesidades de costura, puede ser necesario cambiar el<br />
prensatelas.<br />
TIPO DE ENGANCHE DE GOLPE<br />
1. Levante la aguja a su posición más alta, girando la ruedecilla hacia<br />
usted (en el sentido contrario al de las manecillas de un reloj) y levante<br />
la palanca del prensatelas.<br />
2. Suelte el prensatelas levantando la palanca que hay en la parte trasera<br />
del soporte.<br />
3. Coloque otro prensatelas en la placa de agujas de tal forma que la barra<br />
del prensatelas quede alineada con la ranura del soporte.<br />
4. Baje la palanca del prensatelas y fije el prensatelas en el soporte. Si el<br />
prensatelas está bien colocado, la barra debe engancharse de golpe.<br />
ATTENZIONE<br />
• Prima di sostituire il piedino premistoffa, spegnere sempre la<br />
macchina. Se la macchina è accesa e si preme inavvertitamente<br />
il reostato a pedale la macchina inizierà a operare con rischi<br />
di lesioni personali.<br />
• Utilizzare sempre il piedino premistoffa appropriato per il<br />
motivo di punto selezionato. Se si utilizza un piedino<br />
premistoffa errato, l’ago potrebbe colpire il piedino e piegarsi<br />
o rompersi, con rischi di lesioni personali.<br />
• Utilizzare esclusivamente piedini premistoffa studiati per<br />
questa macchina. L’uso di altri tipi di piedino può provocare<br />
danni o lesioni personali.<br />
In base alle esigenze del lavoro da eseguire, può rendersi necessario<br />
sostituire il piedino premistoffa.<br />
PIEDINO DI TIPO A SCATTO<br />
1. Far salire l’ago fino alla sua posizione più alta girando il volantino<br />
verso se stessi (in senso antiorario) e sollevare la leva del piedino<br />
premistoffa.<br />
2. Staccare il piedino sollevando la levetta situata dietro il gambo.<br />
3. Posizionare il nuovo piedino sulla placca dell’ago in modo che il<br />
perno del piedino sia allineato rispetto alla scanalatura del<br />
gambo.<br />
4. Abbassare la leva del piedino in modo che il piedino si innesti nel<br />
gambo. Se il piedino è nella posizione corretta, il perno scatterà<br />
in posizione.<br />
11
Flat Bed Attachment<br />
The accessories are stored in a compartment under the flat bed<br />
attachment cover, which can be opened by flipping it toward you.<br />
KNOWING YOUR SEWING MACHINE<br />
CONOZCA SU MÁQUINA DE COSER<br />
CONOSCERE LA MACCHINA DA CUCIRE<br />
Plataforma<br />
Los accesorios están almacenados en un compartimiento situado debajo<br />
de la tapa de la platafoma. Para abrir la tapa, tire de ella hacia usted.<br />
Scomparto piano<br />
Gli accessori si trovano nello scomparto sotto il coperchio del<br />
scomparto piano, che può essere aperto tirandolo verso sé stessi.<br />
12
KNOWING YOUR SEWING MACHINE<br />
CONOZCA SU MÁQUINA DE COSER<br />
CONOSCERE LA MACCHINA DA CUCIRE<br />
1 2 3 4 5 6 7 8 9 10 11 12 13 14 15 16 17 18 19<br />
<strong>XL</strong>-6060<br />
<strong>XL</strong>-6061<br />
<strong>XL</strong>-6062<br />
<strong>XL</strong>-<strong>6063</strong> 20 21 22 23 24 25 26 27 28 29 30 31 32 33 34 35 36 37<br />
VARIOUS CONTROLS<br />
Pattern Selection Dial<br />
3<br />
1<br />
CAUTION<br />
When you use the Pattern Selection Dial to select a pattern,<br />
turn the balance wheel to the front (counter-clockwise) by<br />
hand to set the needle in the highest position before selecting<br />
the pattern. If the needle is in the down position when the<br />
Pattern Selection Dial is turned, the needle, presser foot, or<br />
fabric may be damaged.<br />
2<br />
To select a stitch, simply turn the Pattern Selection Dial, located on<br />
the right side of the machine. The Pattern Selection Dial may be<br />
turned in either direction. The recommended lengths and the preset<br />
widths for each stitch are shown on the following page.<br />
1 Pattern selection dial<br />
2 Pattern number<br />
4<br />
·<br />
3<br />
·<br />
2<br />
·<br />
1<br />
3<br />
F<br />
The stitches that are available depend on the Stitch Length Dial<br />
setting. If the Stitch Length Dial is set between 0 and 4, any of the<br />
stitches in the top row can be selected. If the Stitch Length Dial is<br />
set to SS, any of the stitches in the bottom row can be selected.<br />
3 Stitch length dial<br />
3<br />
(Model <strong>XL</strong>-6060, <strong>XL</strong>-6061, <strong>XL</strong>-6062, <strong>XL</strong>-<strong>6063</strong>, <strong>XL</strong>-6050, <strong>XL</strong>-<br />
6051, <strong>XL</strong>-6052, <strong>XL</strong>-<strong>6053</strong>)<br />
SS<br />
NOTE:<br />
Since the Pattern Selection Dial is not a continuous dial, it cannot<br />
be turned directly from the last stitch to the first one or from the first<br />
stitch to the last one. To select the first stitch when the last one is<br />
displayed or to select the last stitch when the first one is displayed,<br />
turn the Pattern Selection Dial in the opposite direction until the<br />
desired stitch is displayed.<br />
13
1 2 3 4 5 6 7 8 9 10 11 12 13 14<br />
<strong>XL</strong>-6050<br />
<strong>XL</strong>-6051<br />
<strong>XL</strong>-6052<br />
<strong>XL</strong>-<strong>6053</strong> 15 16 17 18 19 20 21 22 23 24 25 26 27<br />
1<br />
2 3 4 5 6 7 8 9<br />
<strong>XL</strong>-6040<br />
<strong>XL</strong>-6041<br />
<strong>XL</strong>-6042<br />
<strong>XL</strong>-6043 10 11 12 13 14 15 16 17<br />
KNOWING YOUR SEWING MACHINE<br />
CONOZCA SU MÁQUINA DE COSER<br />
CONOSCERE LA MACCHINA DA CUCIRE<br />
DISTINTOS MANDOS<br />
Selector de puntadas<br />
PRECAUCIÓN<br />
Cuando utilice el selector de puntadas, antes de seleccionar la puntada<br />
gire la ruedecilla hacia delante (hacia la izquierda) con la mano<br />
para poner la aguja en la posición más alta. Si gira el selector de<br />
puntada con la aguja en la poción bajada, la aguja, el prénsatelas o el<br />
tejido podrían dañarse.<br />
Para seleccionar una puntada, sólo hace falta girar el selector de puntadas,<br />
situado en la derecha de la máquina. Este selector se puede girar en<br />
cualquier sentido. Las longitudes recomendadas y la anchura<br />
predeterminada para cada puntada se muestran en la página siguiente.<br />
1 Selector de puntadas<br />
2 Número de puntada<br />
DISPOSITIVI DI CONTROLLO<br />
Selettore dei punti<br />
ATTENZIONE<br />
Quando si usa il selettore dei punti per selezionare un punto, girare<br />
il volantino verso il davanti (senso antiorario) con la mano per<br />
portare l’ago alla posizione più alta prima di selezionare il punto. Se<br />
l’ago si trova nella posizione abbassata quando si gira il selettore dei<br />
punti, l’ago, il piedino premistoffa o il tessuto possono essere<br />
danneggiati.<br />
Per selezionare un determinato punto, ruotare verso sinistra o destra<br />
il selettore dei punti situato sul fianco destro della macchina. Le<br />
lunghezze consigliate e la larghezza preimpostata per ciascun punto<br />
sono indicate alla prossima pagina.<br />
1 Selettore dei punti<br />
2 Numero dei punti<br />
Las puntadas disponibles dependen de la posición del selector de largo de<br />
puntada. Si está situado entre 0 y 4, pueden seleccionarse todas las<br />
puntadas que aparecen en la fila superior. Si está situado en SS, pueden<br />
seleccionarse todas las puntadas que aparecen en la fila inferior.<br />
3 Selector de largo de puntada<br />
I punti disponibili dipendono dalla regolazione della manopola della<br />
lunghezza del punto. Se la manopola è regolata tra 0 e 4, si può<br />
selezionare qualsiasi punto della fila superiore. Se la manopola è<br />
regolata su SS, si può selezionare qualsiasi punto della fila inferiore.<br />
3 Manopola della lunghezza del punto<br />
(Modelo <strong>XL</strong>-6060, <strong>XL</strong>-6061, <strong>XL</strong>-6062, <strong>XL</strong>-<strong>6063</strong>, <strong>XL</strong>-6050, <strong>XL</strong>-6051,<br />
<strong>XL</strong>-6052, <strong>XL</strong>-<strong>6053</strong>)<br />
NOTA:<br />
El selector de puntada no es un selector continuo, y, por tanto, no puede<br />
girarse directamente desde la última puntada hasta la primera o viceversa.<br />
Para seleccionar la primera puntada cuando está seleccionada la última, o<br />
viceversa, gire el selector de puntada en sentido opuesto hasta que<br />
aparezca la puntada deseada.<br />
(Modello <strong>XL</strong>-6060, <strong>XL</strong>-6061, <strong>XL</strong>-6062, <strong>XL</strong>-<strong>6063</strong>, <strong>XL</strong>-6050, <strong>XL</strong>-6051,<br />
<strong>XL</strong>-6052, <strong>XL</strong>-<strong>6053</strong>)<br />
NOTA:<br />
Dato che il selettore dei punti non funziona in modo continuo, non<br />
può essere girato direttamente dall'ultimo punto al primo o dal primo<br />
punto all'ultimo. Per selezionare il primo punto quando è visualizzato<br />
l'ultimo, o per selezionare l'ultimo punto quando è visualizzato il<br />
primo, girare il selettore dei punti nella direzione opposta fino a<br />
quando non viene visualizzato il punto desiderato.<br />
14
KNOWING YOUR SEWING MACHINE<br />
CONOZCA SU MÁQUINA DE COSER<br />
CONOSCERE LA MACCHINA DA CUCIRE<br />
(Model <strong>XL</strong>-6060, <strong>XL</strong>-6061, <strong>XL</strong>-6062, <strong>XL</strong>-<strong>6063</strong>)<br />
RECOMMENDED LENGTHS FOR STITCHES<br />
PATTERN<br />
STITCH NAME<br />
PRESET WIDTH RECOMMENDED INSTRUCTION<br />
[mm(inch)] LENGTH [mm(inch)] MANUAL PAGE<br />
1-STEP AUTOMATIC 5 F-1.5<br />
BUTTONHOLE (3/16) (1/64-1/16)<br />
55<br />
STRAIGHT STITCH<br />
1-4<br />
(Left Needle Position)<br />
—<br />
(1/16-3/16)<br />
42, 65, 67<br />
STRAIGHT STITCH<br />
1-4<br />
(Center Needle Position)<br />
—<br />
(1/16-3/16)<br />
42, 65, 67<br />
1.5 F-4<br />
ZIGZAG STITCH<br />
(1/16) (1/64-3/16)<br />
45, 64, 68, 69<br />
3.5 F-4<br />
ZIGZAG STITCH<br />
(1/8) (1/64-3/16)<br />
45, 64, 68, 69<br />
5 F-4<br />
ZIGZAG STITCH<br />
(3/16) (1/64-3/16)<br />
45, 64, 68, 69<br />
3 F-2<br />
BLIND HEM STITCH<br />
(1/8) (1/64-1/16)<br />
46<br />
5 F-3<br />
SHELL TUCK STITCH<br />
(3/16) (1/64-1/8)<br />
47<br />
5 F-2.5<br />
ELASTIC STITCH<br />
(3/16) (1/64-3/32)<br />
48<br />
4 F-1.5<br />
STRETCH BLIND HEM STITCH<br />
(3/16) (1/64-1/16)<br />
46<br />
5 F-1.5<br />
SCALLOP STITCH<br />
(3/16) (1/64-1/16)<br />
50<br />
DOUBLE ACTION STITCH<br />
5 F-3<br />
BRIDGING STITCH 49<br />
RAMPART STITCH<br />
(3/16) (1/64-1/8)<br />
5 F-3<br />
ELASTIC SHELL TUCK STITCH<br />
53<br />
(3/16) (1/64-1/8)<br />
51<br />
TRIPLE STRETCH STITCH<br />
SS Fixed<br />
(Left Needle Position)<br />
—<br />
2.5 (3/32)<br />
42<br />
TRIPLE STRETCH STITCH<br />
SS Fixed<br />
(Center Needle Position)<br />
—<br />
2.5 (3/32)<br />
42<br />
54<br />
54<br />
54<br />
BEAD STITCH<br />
TRIPLE ZIGZAG<br />
TRIPLE ZIGZAG<br />
TRIPLE ZIGZAG<br />
1.5<br />
3.5<br />
5<br />
SS Fixed<br />
SS Fixed<br />
SS Fixed<br />
ARROWHEAD STITCH<br />
STRETCH STITCH<br />
STRETCH STITCH<br />
STRETCH STITCH<br />
5<br />
(1/16)<br />
(1/8)<br />
(3/16)<br />
F-1<br />
2.5 (3/32)<br />
2.5 (3/32)<br />
2.5 (3/32)<br />
PARALLELOGRAM STITCH (3/16) (1/64-1/16)<br />
TRIANGLE STITCH<br />
ELASTIC OVERLOCK STITCH<br />
ELASTIC OVERLOCK STITCH<br />
FEATHER STITCH<br />
COMB STITCH<br />
DECORATIVE STITCH<br />
FAGOTING STITCH<br />
DECORATIVE STITCH<br />
DECORATIVE HEM STITCH<br />
DECORATIVE STITCH<br />
3 SS Fixed<br />
(1/8) 2.5 (3/32)<br />
5 SS Fixed<br />
(3/16) 2.5 (3/32)<br />
5 SS Fixed<br />
(3/16) 2.5 (3/32)<br />
4 SS Fixed<br />
(3/16) 2.5 (3/32)<br />
5 SS Fixed<br />
(3/16) 2.5 (3/32)<br />
5 SS Fixed<br />
(3/16) 2.5 (3/32)<br />
5 SS Fixed<br />
(3/16) 2.5 (3/32)<br />
5 SS Fixed<br />
(3/16) 2.5 (3/32)<br />
5 SS Fixed<br />
(3/16) 2.5 (3/32)<br />
53<br />
53<br />
54<br />
53<br />
51<br />
52<br />
51<br />
49<br />
51<br />
15
(Model <strong>XL</strong>-6050, <strong>XL</strong>-6051, <strong>XL</strong>-6052, <strong>XL</strong>-<strong>6053</strong>)<br />
PATTERN<br />
RECOMMENDED LENGTHS FOR STITCHES<br />
STITCH NAME<br />
PRESET WIDTH RECOMMENDED INSTRUCTION<br />
[mm(inch)] LENGTH [mm(inch)] MANUAL PAGE<br />
1-STEP AUTOMATIC 5 F-1.5<br />
BUTTONHOLE (3/16) (1/64-1/16)<br />
55<br />
STRAIGHT STITCH<br />
1-4<br />
(Left Needle Position)<br />
—<br />
(1/16-3/16)<br />
42, 65, 67<br />
STRAIGHT STITCH<br />
1-4<br />
(Center Needle Position)<br />
—<br />
(1/16-3/16)<br />
42, 65, 67<br />
ZIGZAG STITCH<br />
1.5 F-4<br />
(1/16) (1/64-3/16)<br />
45, 64, 68, 69<br />
ZIGZAG STITCH<br />
3.5 F-4<br />
(1/8) (1/64-3/16)<br />
45, 64, 68, 69<br />
ZIGZAG STITCH<br />
5 F-4<br />
(3/16) (1/64-3/16)<br />
45, 64, 68, 69<br />
BLIND HEM STITCH<br />
3 F-2<br />
(1/8) (1/64-1/16)<br />
46<br />
SHELL TUCK STITCH<br />
5 F-3<br />
(3/16) (1/64-1/8)<br />
47<br />
ELASTIC STITCH<br />
5 F-2.5<br />
(3/16) (1/64-3/32)<br />
48<br />
STRETCH BLIND HEM STITCH<br />
4 F-1.5<br />
(3/16) (1/64-1/16)<br />
46<br />
SCALLOP STITCH<br />
5 F-1.5<br />
(3/16) (1/64-1/16)<br />
50<br />
DOUBLE ACTION STITCH<br />
5 F-3<br />
BRIDGING STITCH<br />
RAMPART STITCH<br />
(3/16) (1/64-1/8)<br />
49<br />
TRIPLE STRETCH STITCH<br />
SS Fixed<br />
(Left Needle Position)<br />
—<br />
2.5 (3/32)<br />
42<br />
TRIPLE STRETCH STITCH<br />
SS Fixed<br />
(Center Needle Position)<br />
—<br />
2.5 (3/32)<br />
42<br />
TRIPLE ZIGZAG 1.5 SS Fixed<br />
STRETCH STITCH (1/16) 2.5 (3/32)<br />
54<br />
TRIPLE ZIGZAG 3.5 SS Fixed<br />
STRETCH STITCH (1/8) 2.5 (3/32)<br />
54<br />
TRIPLE ZIGZAG 5 SS Fixed<br />
STRETCH STITCH (3/16) 2.5 (3/32)<br />
54<br />
ELASTIC OVERLOCK STITCH<br />
ELASTIC OVERLOCK STITCH<br />
FEATHER STITCH<br />
COMB STITCH<br />
DECORATIVE STITCH<br />
FAGOTING STITCH<br />
DECORATIVE STITCH<br />
DECORATIVE HEM STITCH<br />
3 SS Fixed<br />
(1/8) 2.5 (3/32)<br />
5 SS Fixed<br />
(3/16) 2.5 (3/32)<br />
5 SS Fixed<br />
(3/16) 2.5 (3/32)<br />
4 SS Fixed<br />
(3/16) 2.5 (3/32)<br />
5 SS Fixed<br />
(3/16) 2.5 (3/32)<br />
5 SS Fixed<br />
(3/16) 2.5 (3/32)<br />
5 SS Fixed<br />
(3/16) 2.5 (3/32)<br />
5 SS Fixed<br />
(3/16) 2.5 (3/32)<br />
53<br />
53<br />
54<br />
53<br />
51<br />
52<br />
51<br />
49<br />
KNOWING YOUR SEWING MACHINE<br />
CONOZCA SU MÁQUINA DE COSER<br />
CONOSCERE LA MACCHINA DA CUCIRE<br />
16
KNOWING YOUR SEWING MACHINE<br />
CONOZCA SU MÁQUINA DE COSER<br />
CONOSCERE LA MACCHINA DA CUCIRE<br />
(Model <strong>XL</strong>-6040, <strong>XL</strong>-6041, <strong>XL</strong>-6042, <strong>XL</strong>-6043)<br />
RECOMMENDED LENGTHS FOR STITCHES<br />
PATTERN<br />
STITCH NAME<br />
PRESET WIDTH RECOMMENDED INSTRUCTION<br />
[mm(inch)] LENGTH [mm(inch)] MANUAL PAGE<br />
4-STEP AUTOMATIC 5 F-1.5<br />
BUTTONHOLE (3/16) (1/64-1/16)<br />
STRAIGHT STITCH<br />
1-4<br />
(Left Needle Position)<br />
—<br />
(1/16-3/16)<br />
STRAIGHT STITCH<br />
1-4<br />
(Center Needle Position)<br />
—<br />
(1/16-3/16)<br />
ZIGZAG STITCH<br />
1.5 F-4<br />
(1/16) (1/64-3/16)<br />
ZIGZAG STITCH<br />
3.5 F-4<br />
(1/8) (1/64-3/16)<br />
ZIGZAG STITCH<br />
5 F-4<br />
(3/16) (1/64-3/16)<br />
BLIND HEM STITCH<br />
3 F-2<br />
(1/8) (1/64-1/16)<br />
SHELL TUCK STITCH<br />
5 F-3<br />
(3/16) (1/64-1/8)<br />
ELASTIC STITCH<br />
5 F-2.5<br />
(3/16) (1/64-3/32)<br />
TRIPLE STRETCH STITCH<br />
SS Fixed<br />
(Left Needle Position)<br />
—<br />
2.5 (3/32)<br />
TRIPLE STRETCH STITCH<br />
SS Fixed<br />
(Center Needle Position)<br />
—<br />
2.5 (3/32)<br />
TRIPLE ZIGZAG 1.5 SS Fixed<br />
STRETCH STITCH (1/16) 2.5 (3/32)<br />
TRIPLE ZIGZAG 3.5 SS Fixed<br />
STRETCH STITCH (1/8) 2.5 (3/32)<br />
TRIPLE ZIGZAG 5 SS Fixed<br />
STRETCH STITCH (3/16) 2.5 (3/32)<br />
SLANT OVERLOCK STITCH<br />
3 SS Fixed<br />
(1/8) 2.5 (3/32)<br />
ELASTIC OVERLOCK STITCH<br />
5 SS Fixed<br />
(3/16) 2.5 (3/32)<br />
FEATHER STITCH<br />
5 SS Fixed<br />
(3/16) 2.5 (3/32)<br />
58<br />
42, 65, 67<br />
42, 65, 67<br />
45, 64, 68, 69<br />
45, 64, 68, 69<br />
45, 64, 68, 69<br />
46<br />
47<br />
48<br />
42<br />
42<br />
54<br />
54<br />
54<br />
53<br />
53<br />
54<br />
17
LARGO RECOMENDADO PARA CADA PUNTADA<br />
(Modelo <strong>XL</strong>-6060, <strong>XL</strong>-6061, <strong>XL</strong>-6062, <strong>XL</strong>-<strong>6063</strong>)<br />
PUNTADA NOMBRE<br />
ANCHO PRE-PROGRAMADO LARGO RECOMENDADO PÁGINA DEL<br />
EN [mm (pulgadas)] EN [mm (pulgadas)] MANUAL<br />
OJAL AUTOMÁTICO 5 F-1,5<br />
DE 1 PASO (3/16) (1/64-1/16)<br />
PUNTADA RECTA<br />
1-4<br />
(Aguja a la izquierda)<br />
—<br />
(1/16-3/16)<br />
PUNTADA RECTA<br />
1-4<br />
(Aguja en el centro)<br />
—<br />
(1/16-3/16)<br />
PUNTADA ZIGZAG<br />
PUNTADA ZIGZAG<br />
PUNTADA ZIGZAG<br />
PUNTADA INVISIBLE<br />
PUNTADA ONDAS<br />
1,5 F-4<br />
(1/16) (1/64-3/16)<br />
3,5 F-4<br />
(1/8) (1/64-3/16)<br />
5 F-4<br />
(3/16) (1/64-3/16)<br />
3 F-2<br />
(1/8) (1/64-1/16)<br />
5 F-3<br />
(3/16) (1/64-1/8)<br />
PUNTADA ELÁSTICA<br />
5 F-2,5<br />
(3/16) (1/64-3/32)<br />
PUNTADA INVISIBLE 4 F-1,5<br />
ELÁSTICA (3/16) (1/64-1/16)<br />
PUNTADA FESTÓN<br />
5 F-1,5<br />
(3/16) (1/64-1/16)<br />
56<br />
42, 66, 67<br />
42, 66, 67<br />
45, 64, 68, 70<br />
45, 64, 68, 70<br />
45, 64, 68, 70<br />
PUNTADA DE ACCIÓN DOBLE<br />
5 F-3<br />
PUNTADA PUENTE 49<br />
PUNTADA ONDAS ABIERTAS<br />
(3/16) (1/64-1/8)<br />
PUNTADA ONDAS 5 F-3<br />
53<br />
ELÁSTICAS (3/16) (1/64-1/8)<br />
PUNTADA FESTÓN DOBLE<br />
PUNTADA FLECHA 5 F-1<br />
51<br />
PUNTADA PARALELOGRAMO (3/16) (1/64-1/16)<br />
PUNTADA TRIÁNGULO<br />
TRIPLE PUNTADA PESPUNTO<br />
SS Fija<br />
(Aguja a la izquierda)<br />
—<br />
2,5 (3/32)<br />
TRIPLE PUNTADA PESPUNTO<br />
SS Fija<br />
(Aguja en el centro)<br />
—<br />
2,5 (3/32)<br />
TRIPLE PUNTADA 1,5 SS Fija<br />
ZIGZAG ELÁSTICA (1/16) 2,5 (3/32)<br />
TRIPLE PUNTADA 3,5 SS Fija<br />
ZIGZAG ELÁSTICA (1/8) 2,5 (3/32)<br />
TRIPLE PUNTADA 5 SS Fija<br />
ZIGZAG ELÁSTICA (3/16) 2,5 (3/32)<br />
PUNTADA OVERLOCK 3 SS Fija<br />
ELÁSTICA (1/8) 2,5 (3/32)<br />
PUNTADA OVERLOCK 5 SS Fija<br />
ELÁSTICA (3/16) 2,5 (3/32)<br />
PUNTADA PLUMA<br />
PUNTADA PEINE<br />
PUNTADA DECORATIVA<br />
PUNTADA FAGOTING<br />
5 SS Fija<br />
(3/16) 2,5 (3/32)<br />
4 SS Fija<br />
(3/16) 2,5 (3/32)<br />
5 SS Fija<br />
(3/16) 2,5 (3/32)<br />
5 SS Fija<br />
(3/16) 2,5 (3/32)<br />
PUNTADA DECORATIVA<br />
5 SS Fija<br />
(3/16) 2,5 (3/32)<br />
PUNTADA DECORATIVA 5 SS Fija<br />
INVISIBLE (3/16) 2,5 (3/32)<br />
PUNTADA DECORATIVA<br />
5 SS Fija<br />
(3/16) 2,5 (3/32)<br />
46<br />
47<br />
48<br />
46<br />
50<br />
42<br />
42<br />
54<br />
54<br />
54<br />
53<br />
53<br />
54<br />
53<br />
51<br />
52<br />
51<br />
49<br />
51<br />
18<br />
KNOWING YOUR SEWING MACHINE<br />
CONOZCA SU MÁQUINA DE COSER<br />
CONOSCERE LA MACCHINA DA CUCIRE
KNOWING YOUR SEWING MACHINE<br />
CONOZCA SU MÁQUINA DE COSER<br />
CONOSCERE LA MACCHINA DA CUCIRE<br />
LARGO RECOMENDADO PARA CADA PUNTADA<br />
(Modelo <strong>XL</strong>-6050, <strong>XL</strong>-6051, <strong>XL</strong>-6052, <strong>XL</strong>-<strong>6053</strong>)<br />
PUNTADA NOMBRE<br />
ANCHO PRE-PROGRAMADO LARGO RECOMENDADO PÁGINA DEL<br />
EN [mm (pulgadas)] EN [mm (pulgadas)] MANUAL<br />
OJAL AUTOMÁTICO 5 F-1,5<br />
DE 1 PASO (3/16) (1/64-1/16)<br />
PUNTADA RECTA<br />
1-4<br />
(Aguja a la izquierda)<br />
—<br />
(1/16-3/16)<br />
PUNTADA RECTA<br />
1-4<br />
(Aguja en el centro)<br />
—<br />
(1/16-3/16)<br />
PUNTADA ZIGZAG<br />
PUNTADA ZIGZAG<br />
PUNTADA ZIGZAG<br />
PUNTADA INVISIBLE<br />
PUNTADA ONDAS<br />
1,5 F-4<br />
(1/16) (1/64-3/16)<br />
3,5 F-4<br />
(1/8) (1/64-3/16)<br />
5 F-4<br />
(3/16) (1/64-3/16)<br />
3 F-2<br />
(1/8) (1/64-1/16)<br />
5 F-3<br />
(3/16) (1/64-1/8)<br />
PUNTADA ELÁSTICA<br />
5 F-2,5<br />
(3/16) (1/64-3/32)<br />
PUNTADA INVISIBLE 4 F-1,5<br />
ELÁSTICA (3/16) (1/64-1/16)<br />
PUNTADA FESTÓN<br />
5 F-1,5<br />
(3/16) (1/64-1/16)<br />
56<br />
42, 66, 67<br />
42, 66, 67<br />
45, 64, 68, 70<br />
45, 64, 68, 70<br />
45, 64, 68, 70<br />
PUNTADA DE ACCIÓN DOBLE<br />
5 F-3<br />
PUNTADA PUENTE 49<br />
PUNTADA ONDAS ABIERTAS<br />
(3/16) (1/64-1/8)<br />
TRIPLE PUNTADA PESPUNTO<br />
SS Fija<br />
(Aguja a la izquierda)<br />
—<br />
2,5 (3/32)<br />
TRIPLE PUNTADA PESPUNTO<br />
SS Fija<br />
(Aguja en el centro)<br />
—<br />
2,5 (3/32)<br />
TRIPLE PUNTADA 1,5 SS Fija<br />
ZIGZAG ELÁSTICA (1/16) 2,5 (3/32)<br />
TRIPLE PUNTADA 3,5 SS Fija<br />
ZIGZAG ELÁSTICA (1/8) 2,5 (3/32)<br />
TRIPLE PUNTADA 5 SS Fija<br />
ZIGZAG ELÁSTICA (3/16) 2,5 (3/32)<br />
PUNTADA OVERLOCK 3 SS Fija<br />
ELÁSTICA (1/8) 2,5 (3/32)<br />
PUNTADA OVERLOCK 5 SS Fija<br />
ELÁSTICA (3/16) 2,5 (3/32)<br />
PUNTADA PLUMA<br />
PUNTADA PEINE<br />
PUNTADA DECORATIVA<br />
PUNTADA FAGOTING<br />
5 SS Fija<br />
(3/16) 2,5 (3/32)<br />
4 SS Fija<br />
(3/16) 2,5 (3/32)<br />
5 SS Fija<br />
(3/16) 2,5 (3/32)<br />
5 SS Fija<br />
(3/16) 2,5 (3/32)<br />
PUNTADA DECORATIVA<br />
5 SS Fija<br />
(3/16) 2,5 (3/32)<br />
PUNTADA DECORATIVA 5 SS Fija<br />
INVISIBLE (3/16) 2,5 (3/32)<br />
46<br />
47<br />
48<br />
46<br />
50<br />
42<br />
42<br />
54<br />
54<br />
54<br />
53<br />
53<br />
54<br />
53<br />
51<br />
52<br />
51<br />
49<br />
19
LARGO RECOMENDADO PARA CADA PUNTADA<br />
(Modelo <strong>XL</strong>-6040, <strong>XL</strong>-6041, <strong>XL</strong>-6042, <strong>XL</strong>-6043)<br />
PUNTADA NOMBRE<br />
ANCHO PRE-PROGRAMADO LARGO RECOMENDADO PÁGINA DEL<br />
EN [mm (pulgadas)] EN [mm (pulgadas)] MANUAL<br />
OJAL AUTOMÁTICO 5 F-1,5<br />
DE 4 PASO (3/16) (1/64-1/16)<br />
PUNTADA RECTA<br />
1-4<br />
(Aguja a la izquierda)<br />
—<br />
(1/16-3/16)<br />
PUNTADA RECTA<br />
1-4<br />
(Aguja en el centro)<br />
—<br />
(1/16-3/16)<br />
PUNTADA ZIGZAG<br />
PUNTADA ZIGZAG<br />
PUNTADA ZIGZAG<br />
PUNTADA INVISIBLE<br />
PUNTADA ONDAS<br />
PUNTADA ELÁSTICA<br />
1,5 F-4<br />
(1/16) (1/64-3/16)<br />
3,5 F-4<br />
(1/8) (1/64-3/16)<br />
5 F-4<br />
(3/16) (1/64-3/16)<br />
3 F-2<br />
(1/8) (1/64-1/16)<br />
5 F-3<br />
(3/16) (1/64-1/8)<br />
5 F-2,5<br />
(3/16) (1/64-3/32)<br />
TRIPLE PUNTADA PESPUNTO<br />
SS Fija<br />
(Aguja a la izquierda)<br />
—<br />
2,5 (3/32)<br />
TRIPLE PUNTADA PESPUNTO<br />
SS Fija<br />
(Aguja en el centro)<br />
—<br />
2,5 (3/32)<br />
TRIPLE PUNTADA 1,5 SS Fija<br />
ZIGZAG ELÁSTICA (1/16) 2,5 (3/32)<br />
TRIPLE PUNTADA 3,5 SS Fija<br />
ZIGZAG ELÁSTICA (1/8) 2,5 (3/32)<br />
TRIPLE PUNTADA 5 SS Fija<br />
ZIGZAG ELÁSTICA (3/16) 2,5 (3/32)<br />
PUNTADA OVERLOCK 3 SS Fija<br />
ESTRECHA (1/8) 2,5 (3/32)<br />
PUNTADA OVERLOCK 5 SS Fija<br />
ELÁSTICA (3/16) 2,5 (3/32)<br />
PUNTADA PLUMA<br />
5 SS Fija<br />
(3/16) 2,5 (3/32)<br />
58<br />
42, 66, 67<br />
42, 66, 67<br />
45, 64, 68, 70<br />
45, 64, 68, 70<br />
45, 64, 68, 70<br />
46<br />
47<br />
48<br />
42<br />
42<br />
54<br />
54<br />
54<br />
53<br />
53<br />
54<br />
KNOWING YOUR SEWING MACHINE<br />
CONOZCA SU MÁQUINA DE COSER<br />
CONOSCERE LA MACCHINA DA CUCIRE<br />
20
KNOWING YOUR SEWING MACHINE<br />
CONOZCA SU MÁQUINA DE COSER<br />
CONOSCERE LA MACCHINA DA CUCIRE<br />
(Modello <strong>XL</strong>-6060, <strong>XL</strong>-6061, <strong>XL</strong>-6062, <strong>XL</strong>-<strong>6063</strong>)<br />
LUNGHEZZE DEI PUNTI CONSIGLIATE<br />
PUNTO<br />
NOME PUNTO<br />
AMPIEZZA PREDEFINITA<br />
[mm(inch)]<br />
LUNGHEZZA<br />
CONSIGLIATA [mm(inch)]<br />
PAGINA<br />
OCCHIELLO AUTOMATICO 5 F-1,5<br />
IN 1 TEMPI (3/16) (1/64-1/16)<br />
56<br />
PUNTO DIRITTO<br />
1-4<br />
(ago a sinistra)<br />
—<br />
(1/16-3/16)<br />
42, 66, 67<br />
PUNTO DIRITTO<br />
1-4<br />
(ago al centro)<br />
—<br />
(1/16-3/16)<br />
42, 66, 67<br />
PUNTO ZIGZAG<br />
1,5 F-4<br />
(1/16) (1/64-3/16)<br />
45, 64, 68, 70<br />
PUNTO ZIGZAG<br />
3,5 F-4<br />
(1/8) (1/64-3/16)<br />
45, 64, 68, 70<br />
PUNTO ZIGZAG<br />
5 F-4<br />
(3/16) (1/64-3/16)<br />
45, 64, 68, 70<br />
PUNTO ORLO INVISIBILE<br />
3 F-2<br />
(1/8) (1/64-1/16)<br />
46<br />
PUNTO CONCHIGLIA<br />
5 F-3<br />
(3/16) (1/64-1/8)<br />
47<br />
PUNTO ELASTICO<br />
5 F-2,5<br />
(3/16) (1/64-3/32)<br />
48<br />
PUNTO ELASTICO INVISIBILE<br />
4 F-1,5<br />
(3/16) (1/64-1/16)<br />
46<br />
PUNTO SMERLO<br />
5 F-1,5<br />
(3/16) (1/64-1/16)<br />
50<br />
PUNTO DOPPIO<br />
5 F-3<br />
PUNTO A PONTE<br />
PUNTO BASTIONE<br />
(3/16) (1/64-1/8)<br />
49<br />
PUNTO A CONCHIGLIA 5 F-3<br />
ELASTICO (3/16) (1/64-1/8)<br />
53<br />
PUNTO PERLA<br />
PUNTO FRECCIA 5 F-1<br />
PUNTO PARALLELOGRAMMA (3/16) (1/64-1/16)<br />
51<br />
PUNTO TRIANGOLO<br />
PUNTO ELASTICO TRIPLO<br />
SS Fissa<br />
(ago a sinistra)<br />
—<br />
2,5 (3/32)<br />
42<br />
PUNTO ELASTICO TRIPLO<br />
SS Fissa<br />
(ago al centro)<br />
—<br />
2,5 (3/32)<br />
42<br />
PUNTO ZIGZAG TRIPLO<br />
PUNTO ZIGZAG TRIPLO<br />
1,5 SS Fissa<br />
(1/16) 2,5 (3/32)<br />
3,5 SS Fissa<br />
(1/8) 2,5 (3/32)<br />
PUNTO ZIGZAG TRIPLO<br />
5 SS Fissa<br />
(3/16) 2,5 (3/32)<br />
PUNTO SOPRAGGITTO 3 SS Fissa<br />
ELASTICO (1/8) 2,5 (3/32)<br />
PUNTO SOPRAGGITTO 5 SS Fissa<br />
ELASTICO (3/16) 2,5 (3/32)<br />
PUNTO PIUMA<br />
PUNTO PETTINE<br />
PUNTO DECORATIVO<br />
PUNTO FAGOTING<br />
PUNTO DECORATIVO<br />
PUNTO ORLO DECORATIVO<br />
PUNTO DECOTATIVO<br />
5 SS Fissa<br />
(3/16) 2,5 (3/32)<br />
4 SS Fissa<br />
(3/16) 2,5 (3/32)<br />
5 SS Fissa<br />
(3/16) 2,5 (3/32)<br />
5 SS Fissa<br />
(3/16) 2,5 (3/32)<br />
5 SS Fissa<br />
(3/16) 2,5 (3/32)<br />
5 SS Fissa<br />
(3/16) 2,5 (3/32)<br />
5 SS Fissa<br />
(3/16) 2,5 (3/32)<br />
54<br />
54<br />
54<br />
53<br />
53<br />
54<br />
53<br />
51<br />
52<br />
51<br />
49<br />
51<br />
21
(Modello <strong>XL</strong>-6050, <strong>XL</strong>-6051, <strong>XL</strong>-6052, <strong>XL</strong>-<strong>6053</strong>)<br />
PUNTO<br />
LUNGHEZZE DEI PUNTI CONSIGLIATE<br />
NOME PUNTO<br />
AMPIEZZA PREDEFINITA<br />
[mm(inch)]<br />
LUNGHEZZA<br />
CONSIGLIATA [mm(inch)]<br />
PAGINA<br />
OCCHIELLO AUTOMATICO 5 F-1,5<br />
IN 1 TEMPI (3/16) (1/64-1/16)<br />
56<br />
PUNTO DIRITTO<br />
1-4<br />
(ago a sinistra)<br />
—<br />
(1/16-3/16)<br />
42, 66, 67<br />
PUNTO DIRITTO<br />
1-4<br />
(ago al centro)<br />
—<br />
(1/16-3/16)<br />
42, 66, 67<br />
PUNTO ZIGZAG<br />
1,5 F-4<br />
(1/16) (1/64-3/16)<br />
45, 64, 68, 70<br />
PUNTO ZIGZAG<br />
3,5 F-4<br />
(1/8) (1/64-3/16)<br />
45, 64, 68, 70<br />
PUNTO ZIGZAG<br />
5 F-4<br />
(3/16) (1/64-3/16)<br />
45, 64, 68, 70<br />
PUNTO ORLO INVISIBILE<br />
3 F-2<br />
(1/8) (1/64-1/16)<br />
46<br />
PUNTO CONCHIGLIA<br />
5 F-3<br />
(3/16) (1/64-1/8)<br />
47<br />
PUNTO ELASTICO<br />
5 F-2,5<br />
(3/16) (1/64-3/32)<br />
48<br />
PUNTO ELASTICO INVISIBILE<br />
4 F-1,5<br />
(3/16) (1/64-1/16)<br />
46<br />
PUNTO SMERLO<br />
5 F-1,5<br />
(3/16) (1/64-1/16)<br />
50<br />
PUNTO DOPPIO<br />
5 F-3<br />
PUNTO A PONTE<br />
PUNTO BASTIONE<br />
(3/16) (1/64-1/8)<br />
49<br />
PUNTO ELASTICO TRIPLO<br />
SS Fissa<br />
(ago a sinistra)<br />
—<br />
2,5 (3/32)<br />
42<br />
PUNTO ELASTICO TRIPLO<br />
SS Fissa<br />
(ago al centro)<br />
—<br />
2,5 (3/32)<br />
42<br />
PUNTO ZIGZAG TRIPLO<br />
PUNTO ZIGZAG TRIPLO<br />
1,5 SS Fissa<br />
(1/16) 2,5 (3/32)<br />
3,5 SS Fissa<br />
(1/8) 2,5 (3/32)<br />
PUNTO ZIGZAG TRIPLO<br />
5 SS Fissa<br />
(3/16) 2,5 (3/32)<br />
PUNTO SOPRAGGITTO 3 SS Fissa<br />
ELASTICO (1/8) 2,5 (3/32)<br />
PUNTO SOPRAGGITTO 5 SS Fissa<br />
ELASTICO (3/16) 2,5 (3/32)<br />
PUNTO PIUMA<br />
PUNTO PETTINE<br />
PUNTO DECORATIVO<br />
PUNTO FAGOTING<br />
PUNTO DECORATIVO<br />
PUNTO ORLO DECORATIVO<br />
5 SS Fissa<br />
(3/16) 2,5 (3/32)<br />
4 SS Fissa<br />
(3/16) 2,5 (3/32)<br />
5 SS Fissa<br />
(3/16) 2,5 (3/32)<br />
5 SS Fissa<br />
(3/16) 2,5 (3/32)<br />
5 SS Fissa<br />
(3/16) 2,5 (3/32)<br />
5 SS Fissa<br />
(3/16) 2,5 (3/32)<br />
54<br />
54<br />
54<br />
53<br />
53<br />
54<br />
53<br />
51<br />
52<br />
51<br />
49<br />
KNOWING YOUR SEWING MACHINE<br />
CONOZCA SU MÁQUINA DE COSER<br />
CONOSCERE LA MACCHINA DA CUCIRE<br />
22
KNOWING YOUR SEWING MACHINE<br />
CONOZCA SU MÁQUINA DE COSER<br />
CONOSCERE LA MACCHINA DA CUCIRE<br />
(Modello <strong>XL</strong>-6040, <strong>XL</strong>-6041, <strong>XL</strong>-6042, <strong>XL</strong>-6043)<br />
LUNGHEZZE DEI PUNTI CONSIGLIATE<br />
PUNTO<br />
NOME PUNTO<br />
AMPIEZZA PREDEFINITA<br />
[mm(inch)]<br />
LUNGHEZZA<br />
CONSIGLIATA [mm(inch)]<br />
PAGINA<br />
OCCHIELLO AUTOMATICO 5 F-1,5<br />
IN 4 TEMPI (3/16) (1/64-1/16)<br />
PUNTO DIRITTO<br />
1-4<br />
(ago a sinistra)<br />
—<br />
(1/16-3/16)<br />
PUNTO DIRITTO<br />
1-4<br />
(ago al centro)<br />
—<br />
(1/16-3/16)<br />
PUNTO ZIGZAG<br />
1,5 F-4<br />
(1/16) (1/64-3/16)<br />
PUNTO ZIGZAG<br />
3,5 F-4<br />
(1/8) (1/64-3/16)<br />
PUNTO ZIGZAG<br />
5 F-4<br />
(3/16) (1/64-3/16)<br />
PUNTO ORLO INVISIBILE<br />
3 F-2<br />
(1/8) (1/64-1/16)<br />
PUNTO CONCHIGLIA<br />
5 F-3<br />
(3/16) (1/64-1/8)<br />
PUNTO ELASTICO<br />
5 F-2,5<br />
(3/16) (1/64-3/32)<br />
PUNTO ELASTICO TRIPLO<br />
SS Fissa<br />
(ago a sinistra)<br />
—<br />
2,5 (3/32)<br />
PUNTO ELASTICO TRIPLO<br />
SS Fissa<br />
(ago al centro)<br />
—<br />
2,5 (3/32)<br />
PUNTO ZIGZAG TRIPLO<br />
1,5 SS Fissa<br />
(1/16) 2,5 (3/32)<br />
PUNTO ZIGZAG TRIPLO<br />
3,5 SS Fissa<br />
(1/8) 2,5 (3/32)<br />
PUNTO ZIGZAG TRIPLO<br />
5 SS Fissa<br />
(3/16) 2,5 (3/32)<br />
PUNTO SOPRAGGITTO 3 SS Fissa<br />
INCLINATO (1/8) 2,5 (3/32)<br />
PUNTO SOPRAGGITTO 5 SS Fissa<br />
ELASTICO (3/16) 2,5 (3/32)<br />
PUNTO PIUMA<br />
5 SS Fissa<br />
(3/16) 2,5 (3/32)<br />
58<br />
42, 66, 67<br />
42, 66, 67<br />
45, 64, 68, 70<br />
45, 64, 68, 70<br />
45, 64, 68, 70<br />
46<br />
47<br />
48<br />
42<br />
42<br />
54<br />
54<br />
54<br />
53<br />
53<br />
54<br />
23
1<br />
Stitch Length Dial<br />
Depending on your selected stitch, you may need to adjust the stitch<br />
length for best results.<br />
The numbers marked on the Stitch Length Dial represent the length<br />
of the stitch in millimeters (mm).<br />
THE HIGHER THE NUMBER, THE LONGER THE STITCH.<br />
The “0” setting does not feed the material. This is used for sewing<br />
on a button.<br />
The “F” area is used for making a Satin Stitch (a dense zigzag stitch)<br />
which can be used in making buttonholes and decorative stitches.<br />
The position needed for making the Satin Stitch varies according to<br />
the material and thread being used. To determine the exact dial<br />
position, you should first test the stitch and length settings on a<br />
scrap of fabric to observe the feeding of the material.<br />
KNOWING YOUR SEWING MACHINE<br />
CONOZCA SU MÁQUINA DE COSER<br />
CONOSCERE LA MACCHINA DA CUCIRE<br />
1 Stitch length dial<br />
2 Length<br />
3 Fine → SS<br />
4 Coarse<br />
2<br />
3 4<br />
3<br />
2<br />
· ·<br />
1<br />
CAUTION<br />
Do not set the Stitch Length Dial in the range shown by A. If<br />
the machine is started while the dial is set in the range shown<br />
by A, the fabric will not feed correctly and the fabric or<br />
machine may be damaged.<br />
Turn the dial to the left past “0” for the SS position.<br />
SS (Fixed 2.5)<br />
A<br />
4 · 3 · 2 · 1 · F · 0 .................... SS<br />
CAUTION<br />
If the stitches get bunched together, lengthen the stitch<br />
length and continue sewing. Do not continue sewing without<br />
lengthening the stitch length, otherwise the needle may<br />
break and cause injury.<br />
24
KNOWING YOUR SEWING MACHINE<br />
CONOZCA SU MÁQUINA DE COSER<br />
CONOSCERE LA MACCHINA DA CUCIRE<br />
1<br />
2<br />
3 4<br />
3<br />
2<br />
· ·<br />
1<br />
A<br />
4 · 3 · 2 · 1 · F · 0 .................... SS<br />
Selector de largo de puntada<br />
Según la puntada seleccionada, puede ser necesario ajustar su largo para<br />
lograr mejores resultados.<br />
Los números indicados en el disco representan el largo de las puntadas en<br />
milímetros.<br />
CUANTO MAS ALTO EL NUMERO, MAS LARGA LA PUNTADA.<br />
El ajuste “0” no alimenta el tejido. Sirve para coser un botón.<br />
La zona “F” se usa para realizar bordados de realce (una puntada<br />
densa en zigzag), que puede servir para coser ojales o como puntadas<br />
decorativas. La posición necesaria para realizar puntadas de realce varia<br />
dependiendo del tejido e hilo utilizados. Para determinar la posición<br />
exacta del botón, conviene primero probar la puntada y los ajustes de largo<br />
en un pedazo de tejido para ver como se alimenta el material.<br />
1 Selector de largo de puntada<br />
2 Largo<br />
3 Fina → SS<br />
4 Más largo<br />
PRECAUCIÓN<br />
No ponga el selector de puntada en el rango mostrado por A. Si pone<br />
la máquina en marcha con el selector puesto en el rango mostrado por<br />
A, el tejido no avanzará correctamente y el tejido o la máquina<br />
podrían dañarse.<br />
Para colocarse en la posición SS , gire el selector hacia la izquierda más<br />
allá de “0”.<br />
SS (Fija 2,5)<br />
Selettore della lunghezza del punto<br />
In base al tipo di punto selezionato, può essere necessario regolarne<br />
la lunghezza per ottenere un risultato ottimale.<br />
I numeri sul selettore rappresentano la lunghezza dei punti in<br />
millimetri (mm).<br />
QUANTO PIU’ ALTO E’ IL NUMERO, TANTO PIU’ LUNGO E’<br />
PUNTO.<br />
Con la regolazione “0” il tessuto non viene alimentato dal trasportatore.<br />
Questa regolazione è adatta per cuciture di bottoni.<br />
L'area marcata con “F” va utilizzata per eseguire il punto satin (una<br />
successione di punti zigzag molto fitti), che può essere utilizzato per<br />
fare asole e punti decorativi. La regolazione più idonea per il punto<br />
passato varia in base al tipo di tessuto e al filo che si vogliono<br />
utilizzare. Per stabilire la regolazione esatta, è bene prima provare il<br />
punto e la lunghezza scelta su un campione di stoffa per verificare il<br />
trasporto del tessuto.<br />
1 Manopola della lunghezza del punto<br />
2 Lunghezza<br />
3 Fine → SS<br />
4 Punti radi<br />
ATTENZIONE<br />
Non regolare il selettore della lunghezza del punto nella gamma<br />
indicata da A. Se la macchina viene avviata menre il selettore è<br />
regolato nella gamma indicata da A, il tessuto non avanza correttamente<br />
e il tessuto o la macchina possono essere danneggiati.<br />
Girare il selettore a sinistra oltre “0” per la posizione SS .<br />
SS (Fissa 2,5)<br />
PRECAUCIÓN<br />
Si las puntadas se amontonan, alargue la longitud de la puntada y<br />
siga cosiendo. No continúe cosiendo sin alargar la puntada; de lo<br />
contrario, podría romper la aguja y causar lesiones.<br />
ATTENZIONE<br />
Se i punti sono troppo ravvicinati, aumentare la lunghezza del<br />
punto e continuare a cucire. Non continuare a cucire senza<br />
aumentare la lunghezza del punto; in caso contrario, l’ago<br />
potrebbe rompersi causando lesioni personali.<br />
25
Reverse Sewing Lever<br />
Reverse sewing is used for back tacking and reinforcing seams.<br />
To sew in reverse, push the Reverse Sewing Lever in as far as<br />
possible and hold in that position while pressing lightly on the foot<br />
pedal. To sew forward, release the Reverse Sewing Lever. The<br />
machine will then sew forward.<br />
1 Reverse sewing lever<br />
KNOWING YOUR SEWING MACHINE<br />
CONOZCA SU MÁQUINA DE COSER<br />
CONOSCERE LA MACCHINA DA CUCIRE<br />
1<br />
Pulsador de retroceso<br />
La costura hacia atrás se usa para remates y para reforzar las costuras.<br />
Para coser hacia atrás, apriete a fondo el pulsador de retroceso y manténgalo<br />
en esa posición mientras presiona ligeramente el pedal. Para volver<br />
a coser hacia adelante, suelte el pulsador.<br />
1 Pulsador de retroceso<br />
Tasto di cucitura di ritorno<br />
La cucitura di ritorno è indicata fissare e rinforzare le cuciture.<br />
Per cucire a marcia indietro, spingere più a fondo possibile il tasto di<br />
cucitura di ritorno e mantenerlo in quella posizione premendo allo<br />
stesso tempo leggermente sul reostato a pedale. Per cucire a marcia<br />
avanti, rilasciare il tasto, e la macchina tornerà a cucire nel modo<br />
normale.<br />
1 Tasto di cucitura di ritorno<br />
26
KNOWING YOUR SEWING MACHINE<br />
CONOZCA SU MÁQUINA DE COSER<br />
CONOSCERE LA MACCHINA DA CUCIRE<br />
Converting to Free-arm Style<br />
Free-arm sewing is convenient for sewing tubular and hard-toreach<br />
areas on a garment. To change your machine to the free-arm<br />
style, simply lift out the flat bed attachment.<br />
1 Slide the flat bed attachment to the left.<br />
1 Flat bed attachment<br />
1<br />
1<br />
Conversión en modalidad de brazo<br />
libre<br />
La costura con brazo libre es práctica para coser zonas tubulares y difíciles<br />
de acceso en los tejidos. Para transformar su máquina en esa modalidad,<br />
sólo hace falta levantar el plataforma y sacarlo.<br />
1 Deslice el plataforma hacia la izquierda.<br />
1 Plataforma<br />
Cucitura a braccio libero<br />
L’utilizzo della macchina a braccio libero è ideale per eseguire<br />
cuciture tubolari e di parte di tessuto altrimenti difficili da raggiungere.<br />
Per passare alla cucitura a braccio libero è sufficiente estrarre il<br />
scomparto piano dalla macchina.<br />
1 Sollevare il piano di lavoro.<br />
1 Scomparto piano<br />
27
1<br />
THREADING<br />
THE MACHINE<br />
Winding the Bobbin<br />
CAUTION<br />
• If the thread spool and/or spool cap are set incorrectly,<br />
the thread may tangle on the spool pin.<br />
• Use the spool cap (large, medium, or small) that is<br />
closest in size to the thread spool. If a spool cap smaller<br />
than the thread spool is used, the thread may become<br />
caught in the slit on the end of the spool.<br />
KNOWING YOUR SEWING MACHINE<br />
CONOZCA SU MÁQUINA DE COSER<br />
CONOSCERE LA MACCHINA DA CUCIRE<br />
2<br />
3<br />
1. Place the spool of thread on the horizontal spool pin and firmly<br />
hold it with a spool cap so that the spool of thread will not turn.<br />
Pass the thread through the thread guide as shown following the<br />
dotted line on the machine.<br />
CAUTION<br />
Use only bobbins recommended by the manufacturer of<br />
this machine (see page 3). Using other bobbins may result<br />
in damage or injury.<br />
ENHEBRADO DE LA<br />
MÁQUINA<br />
Bobinado de la canilla<br />
PRECAUCIÓN<br />
• Si el carrete de hilo o la tapa del carrete no están colocados<br />
correctamente, el hilo podría enredarse en el portacarrete.<br />
• Utilice la tapa del carrete (grande, mediana o pequeña) que<br />
mejor se adapte a la medida del carrete de hilo. Si la tapa del<br />
carrete es más pequeña que el carrete de hilo, éste podría<br />
engancharse en la ranura en el borde del carrete.<br />
PROCEDURE DI INFILATURA<br />
Avvolgimento del rocchetto<br />
ATTENZIONE<br />
• Se il rocchetto di filo e/o il fermo per rocchetto sono<br />
posizionati in modo non corretto, il filo potrebbe ingarbugliarsi<br />
sul portarocchetto.<br />
• Utilizzare il fermo per rocchetto (piccolo, medio o grande)<br />
con le dimensioni più simili al rocchetto di filo. Se si utilizza<br />
un fermo per rocchetto con dimensioni inferiori al rocchetto<br />
di filo, il filo potrebbe rimanere preso nella fessura sul bordo<br />
del rocchetto.<br />
1. Coloque un carrete de hillo en el eje horizontal previsto y manténgalo<br />
firmente con un tope para que no dé vueltas. Pase el hilo por la guía,<br />
siguiendo la línea de puntos marcada en la máquina.<br />
PRECAUCIÓN<br />
Use sólo bobinas recomendadas por el fabricante de esta máquina<br />
(vea página 4). El uso de otras bobinas puede causar daños o<br />
lesiones.<br />
1. Mettere una spoletta di filo sul portaspoletta orizzontale e fissarla<br />
con un fermaspoletta in modo che la spoletta di filo non giri. Far<br />
passare il filo attraverso il guidafilo come illustrato seguendo la<br />
linea tratteggiata sulla macchina.<br />
ATTENZIONE<br />
Utilizzare esclusivamente spoline consigliate dal produttore di<br />
questa macchina (vedere pagina 4). L’uso di altri tipi di spolina<br />
può causare danneggiamenti o lesioni personali.<br />
28
KNOWING YOUR SEWING MACHINE<br />
CONOZCA SU MÁQUINA DE COSER<br />
CONOSCERE LA MACCHINA DA CUCIRE<br />
2. Pass the end of the thread through the hole on the bobbin from<br />
the inside.<br />
Place the bobbin onto the bobbin winder shaft and slide the<br />
bobbin winder shaft to the right. Turn the bobbin clockwise, by<br />
hand, until the spring on the shaft slides into the groove of the<br />
bobbin.<br />
3<br />
1<br />
2<br />
1 Spring on the shaft<br />
2 Groove of the bobbin<br />
3 Bobbin winder seat<br />
3. While holding the end of the thread, gently depress the foot<br />
controller to wind the thread around the bobbin a few times.<br />
Then stop the machine.<br />
Trim the excess thread above the bobbin.<br />
4. Step down on the foot controller to start.<br />
5. After the machine stops automatically when the bobbin is full,<br />
take your foot off of the foot controller.<br />
CAUTION<br />
When removing the bobbin, do not pull on the bobbin winder<br />
seat. Doing so could loosen or remove the bobbin winder seat,<br />
resulting in damage to the machine.<br />
6. Cut the thread, slide the bobbin winder shaft to the left and<br />
remove the bobbin.<br />
NOTE:<br />
The needle bar does not move when the bobbin winding shaft is slid<br />
to the right.<br />
Immediately after winding the bobbin, it is normal to hear the sound<br />
of the clutch engaging when beginning to sew or manually turning<br />
the balance wheel.<br />
CAUTION<br />
Be sure to follow the process described. If the thread is not<br />
cut completely, and the bobbin is wound, when the thread<br />
runs low it may tangle around the bobbin and cause the<br />
needle to break.<br />
CAUTION<br />
Setting the bobbin improperly may cause the thread tension<br />
to loosen, breaking the needle and resulting in injury.<br />
1 Wound evenly<br />
2 Wound poorly<br />
1 2<br />
29
2. Pase extremo del hilo por el orificio de la canilla a partir del nterior.<br />
Coloque la canilla en el eje de bobinado correspondiente y deslice<br />
dicho eje hacia la derecha. Gire la canilla en el sentido de las manecillas<br />
de un reloj, con la mano, hasta que el muelle impulsor del eje se deslice<br />
dentro de la ranura de la canilla.<br />
1 Resorte del eje<br />
2 Surco de la canilla<br />
3 Base del girador de la canilla<br />
2. Far passare il capo del filo nel foro sul rocchetto dall’interno.<br />
Inserire il rocchetto sull’alberino di avvolgimento e spostare<br />
l’alberino verso destra. Girare il rocchetto in senso orario con la<br />
mano fino a che la molla dell’alberino entra nella scanalatura del<br />
rocchetto sul rocchetto.<br />
1 Molla sull'alberino<br />
2 Scanalatura del rocchetto<br />
3 Sede di avvolgimento del rocchetto<br />
KNOWING YOUR SEWING MACHINE<br />
CONOZCA SU MÁQUINA DE COSER<br />
CONOSCERE LA MACCHINA DA CUCIRE<br />
3. Sujetando el extremo del hilo, presione suavemente el pedal para que<br />
el hilo dé vueltas alrededor de la canilla. Luego pare la máquina.<br />
4. Pise el pedal para comenzar a coser.<br />
5. Cuando la máquina se detenga automáticamente porque la canilla está<br />
llena, retiree| pie del pedal.<br />
PRECAUCIÓN<br />
Cuando extraiga la bobina, no presione la base de la devanadora. De<br />
lo contrario, podría aflojar o sacar la base del portabobina y provocar<br />
una avería en la máquina de coser.<br />
6. Corte el hilo, deslice el eje de hacer canilla hacia la izquierda y retire<br />
la canilla.<br />
NOTA:<br />
La barra de la aguja no se despla zará cuando el eje de bobinado de la<br />
canilla se deslice hacia la derecha.<br />
Inmediatamente después de bobinar la canilla, si empieza a coser o gira la<br />
polea, normalmente oirá el sonido del encaje del embrague.<br />
3. Tenendo il capo del filo, premere leggermente il reostato di<br />
controllo per avvolgere il filo di qualche giro sul rocchetto. Poi<br />
fermare la macchina.<br />
Tagliare via il filo in eccesso sopra il rocchetto.<br />
4. Premere il reostato a pedale per iniziare a cucire.<br />
5. Dopo che la macchina si è fermata automaticamente quando il<br />
rocchetto è pieno, togliere il piede dal reostato.<br />
ATTENZIONE<br />
Quando si rimuove la spolina, non tirare agendo sull’alloggiamento<br />
dell’avvolgitore spolina. In caso contrario, l’alloggiamento potrebbe<br />
allentarsi o staccarsi, provocando danni alla macchina.<br />
6. Tagliare il filo, spostare verso sinistra l'alberino di avvolgimento<br />
del rocchetto e togliere il rocchetto.<br />
NOTA:<br />
La barra dell'ago non si muove quando l'alberino di avvolgimento<br />
spoletta viene spostato verso destra.<br />
Dopo aver avvolto il rocchetto, appena si avvia la macchina o si gira<br />
il volantino si potrà udire un rumore dovuto all'innesto della frizione.<br />
PRECAUCIÓN<br />
Asegúrese de seguir el proceso descrito. Si no corta el hilo completamente<br />
y la bobina está enrollada, es posible que, cuando el hilo<br />
corra lentamente, éste se enrolle alrededor de la bobina y rompa<br />
la aguja.<br />
ATTENZIONE<br />
Attenersi alla procedura descritta. Se il filo non viene tagliato<br />
completamente e la spolina viene avvolta, quando il filo comincia<br />
a scarseggiare potrebbe impigliarsi attorno alla spolina e<br />
provocare la rottura dell’ago.<br />
PRECAUCIÓN<br />
Si la bobina no está colocada correctamente, el hilo puede perder<br />
tensión, romper la aguja y causar alguna lesión.<br />
1 Bobinado correcto<br />
2 Bobinado incorrecto<br />
ATTENZIONE<br />
Un’impostazione non corretta della spolina può provocare<br />
l’allentamento della tensione del filo, la rottura dell’ago ed<br />
eventuali lesioni personali.<br />
1 Avvolgimento regolare<br />
2 Avvolgimento scadente<br />
30
KNOWING YOUR SEWING MACHINE<br />
CONOZCA SU MÁQUINA DE COSER<br />
CONOSCERE LA MACCHINA DA CUCIRE<br />
Lower Threading<br />
CAUTION<br />
Setting the bobbin improperly may cause the thread tension<br />
to loosen, breaking the needle and resulting in injury.<br />
1 2<br />
1 Wound evenly<br />
2 Wound poorly<br />
CAUTION<br />
Be sure to turn off the power. If you accidentally step on the<br />
foot controller and the machine begins to operate, injury<br />
could result.<br />
1. Raise the needle to its highest position by turning the balance<br />
wheel toward you (counterclockwise) and raise the presser foot<br />
lever.<br />
2. Slide the button and open the cover.<br />
1<br />
1 Slide button<br />
2 Cover<br />
2<br />
3. Insert the bobbin so the thread comes out in the direction shown<br />
by the arrow.<br />
* Use bobbins intended for use with this machine.<br />
CAUTION<br />
Be sure the bobbin is set so the thread unrolls in the correct<br />
direction. If the thread unrolls in the wrong direction, it may<br />
cause the thread tension to be incorrect or the needle to<br />
break.<br />
Hold the thread end, push the bobbin down with your finger, and<br />
pass the thread securely through the thread cutting groove.<br />
2<br />
4. Replace the bobbin cover. Place the left tab in place (see arrow<br />
1 at left), then press lightly on the right side (see arrow 2 at left)<br />
until the cover clicks into place.<br />
* Insert the cover so that the end of the thread comes out from the<br />
back of the cover (as shown by the slanted line in the illustration<br />
at the left).<br />
1<br />
31
Enhebrado inferior<br />
PRECAUCIÓN<br />
Si la bobina no está colocada correctamente, el hilo puede perder<br />
tensión, romper la aguja y causar alguna lesión.<br />
1 Bobinado correcto<br />
2 Bobinado incorrecto<br />
PRECAUCIÓN<br />
Asegúrese de desconectar la alimentación. Si pisa accidentalmente<br />
el pedal y la máquina se pone en marcha, podrá hacerse daño.<br />
Infilatura inferiore<br />
ATTENZIONE<br />
Un’impostazione non corretta della spolina può provocare<br />
l’allentamento della tensione del filo, la rottura dell’ago ed<br />
eventuali lesioni personali.<br />
1 Avvolgimento regolare<br />
2 Avvolgimento scadente<br />
ATTENZIONE<br />
Assicurarsi di spegnere la macchina. Se si preme inavvertitamente<br />
il reostato a pedale e la macchina inizia a funzionare, si può<br />
rimanere feriti.<br />
KNOWING YOUR SEWING MACHINE<br />
CONOZCA SU MÁQUINA DE COSER<br />
CONOSCERE LA MACCHINA DA CUCIRE<br />
1. Levante la aguja a su posición más alta, girando la ruedecilla hacia<br />
usted (en el sentido contrario al de las manecillas de un reloj) y levante<br />
la palanca del prensatelas.<br />
2. Deslice el botón y abra la tapa.<br />
1 Deslizar el botón<br />
2 Tapa<br />
1. Far salire l’ago fino alla sua posizione più alta girando il volantino<br />
verso se stessi (in senso antiorario) e sollevare la leva del piedino<br />
premistoffa.<br />
2. Far scorrere il pulsante di apertura ed aprire il coperchio.<br />
1 Pulsante scorrevole<br />
2 Coperchio<br />
3. Introduzca la bobina de forma que el hilo salga en la dirección<br />
mostrada por la flecha.<br />
* Utilice bobinas diseñadas para usar con esta máquina.<br />
3. Inserire la spolina in modo che il filo fuoriesca nella direzione<br />
indicata dalla freccia.<br />
* Usare spoline create per l’uso con questa macchina.<br />
PRECAUCIÓN<br />
Asegúrese de que la bobina está colocada de tal manera que el hilo<br />
se enrolla en la dirección correcta. Si el hilo se enrolla en la<br />
dirección equivocada, la tensión del hilo podría ser incorrecta o la<br />
aguja podría romperse.<br />
ATTENZIONE<br />
Assicurarsi che la spolina sia posizionata in modo che il filo si<br />
svolga nella direzione corretta. Nel caso lo svolgimento del filo<br />
fosse nella direzione errata, la tensione del filo potrebbe risultare<br />
non appropriata o l’ago potrebbe rompersi.<br />
Sujete el extremo del hilo, empuje la bobina hacia abajo con el dedo, y pase<br />
el hilo firmemente a través de la ranura de cortar el hilo.<br />
Tenere il capo del filo, spingere in basso la spolina con il dito e far<br />
passare saldamente il filo attraverso la scanalatura di taglio del filo.<br />
4. Abra la tapa de la bobina. Coloque la presilla izquierda (vea la flecha<br />
1 a la izquierda) y luego presione ligeramente en la parte derecha (vea<br />
la flecha 2 a la izquierda) hasta que la tapa se ajuste en su lugar.<br />
* Inserte la cubierta de forma que el extremo del hilo salga por la parte<br />
trasera de la misma (como se muestra mediante la línea a trazos en la<br />
ilustración de la izquierda).<br />
4. Rimettere in posizione lo sportello della spolina Collocare in<br />
posizione la linguetta sinistra (vedere la freccia 1 a sinistra), quindi<br />
premere leggermente sul lato destro (vedere la freccia 2 a sinistra)<br />
fino a far scattare in posizione lo sportello.<br />
* Inserire il coperchio in modo che il capo del filo fuoriesca dal retro<br />
del coperchio (come mostrato dalla riga tratteggiata nell’illustrazione<br />
a sinistra).<br />
32
KNOWING YOUR SEWING MACHINE<br />
CONOZCA SU MÁQUINA DE COSER<br />
CONOSCERE LA MACCHINA DA CUCIRE<br />
1<br />
4<br />
2<br />
5<br />
3<br />
Upper Threading<br />
1. Raise the presser foot using the Presser Foot Lever.<br />
2. Raise the needle to its highest position by turning the balance<br />
wheel toward you (counterclockwise).<br />
1<br />
1 Presser foot lever<br />
3. Place a spool of thread on the horizontal spool pin and press a<br />
spool cap onto the spool pin to hold the thread spool firmly in<br />
place.<br />
The thread end should come from the bottom front of the spool.<br />
CAUTION<br />
• If the thread spool and/or spool cap are set incorrectly,<br />
the thread may tangle on the spool pin and cause the<br />
needle to break.<br />
• Use the spool cap (large, medium or small) that is<br />
closest in size to the thread spool. If a spool cap smaller<br />
than the thread spool is used, the thread may become<br />
caught in the slit on the end of the spool and cause the<br />
needle to break.<br />
CAUTION<br />
Be sure to thread the machine properly. Improper threading<br />
can cause the thread to tangle and break the needle, leading<br />
to injury.<br />
2<br />
4. Deliver the upper thread as shown in this diagram.<br />
5. Make sure to guide the thread through the thread take-up lever<br />
from the right to the left.<br />
2 Thread take-up lever<br />
6. Place thread behind the guide above the needle.<br />
7. Thread the needle from front to back leaving a thread tail of<br />
about 5 cm (2").<br />
NOTE:<br />
If the thread take-up lever is lowered, the upper thread can not be<br />
wrapped around the thread take-up lever. Be sure to raise the<br />
Presser Foot Lever and the thread take-up before feeding the upper<br />
thread.<br />
Incorrectly feeding the thread may cause sewing problems.<br />
33
1<br />
5<br />
4<br />
3<br />
2<br />
KNOWING YOUR SEWING MACHINE<br />
CONOZCA SU MÁQUINA DE COSER<br />
CONOSCERE LA MACCHINA DA CUCIRE<br />
Enhebrado superior<br />
1. Levante el prensatelas con la palanca correspondiente.<br />
2. Levante la aguja a su posición más alta, girando la ruedecilla hacia<br />
usted (en el sentido contrario al de las manecillas de un reloj).<br />
1 Palanca del prensatelas<br />
3. Coloque un carrete de hilo en el portabobinas horizontal previsto y<br />
manténgalo firmemente con el fleje para que no se mueva.<br />
El final del hilo debe proceder de la parte inferior del carrete.<br />
PRECAUCIÓN<br />
• Si el carrete de hilo o la tapa del carrete no están colocados<br />
correctamente, el hilo podría enredarse en el portacarrete y<br />
romper la aguja.<br />
• Utilice la tapa del carrete (grande, mediana o pequeña) que<br />
mejor se adapte a la medida del carrete de hilo. Si la tapa del<br />
carrete es más pequeña que el carrete de hilo, éste podría<br />
engancharse en la ranura en el borde del carrete y romper la<br />
aguja.<br />
PRECAUCIÓN<br />
Asegúrese de enhebrar correctamente. Si no enhebra la aguja<br />
correctamente, podría enredarse el hilo y romperse la aguja, lo<br />
que puede causar lesiones.<br />
4. Enhebre el hilo superior tal como indica el diagrama.<br />
5. Asegúrese de guiar el hilo por la palanca tirahilos, de la derecha a la<br />
izquierda.<br />
2 Palanca tirahilos<br />
6. Coloque el hilo detrás de la guía, arriba de la aguja.<br />
7. Enhebre la aguja de delante hacia atrás y saque unos 5 cm (2") de hilo.<br />
NOTA:<br />
Si la palanca tirahilos está bajada, el hilo superior no podrá enrrollarse<br />
alrededor de la palanca tirahilos. Asegúrese de levantar la palanca del<br />
prensatelas y el tirahilos antes de cargar el hilo superior.<br />
Si carga incorrectamente el hilo, pueden surgir problemas al coser.<br />
Infilatura superiore<br />
1. Sollevare il piedino premistoffa tramite l’apposita leva.<br />
2. Far salire l’ago fino alla sua posizione più alta girando il volantino<br />
verso se stessi (in senso antiorario).<br />
1 Leva del piedino premistoffa<br />
3. Mettere una spoletta di filo sul portaspoletta orizzontale e bloccarla<br />
in posizione applicando un fermaspoletta.<br />
L'estremita del filo deve uscire dalla parte anteriore in basso della<br />
spoletta.<br />
ATTENZIONE<br />
• Se il rocchetto di filo e/o il fermo per rocchetto sono<br />
posizionati in modo non corretto, il filo potrebbe ingarbugliarsi<br />
sul portarocchetto e provocare la rottura dell’ago.<br />
• Utilizzare il fermo per rocchetto (piccolo, medio o grande)<br />
con le dimensioni più simili al rocchetto di filo. Se si utilizza<br />
un fermo per rocchetto con dimensioni inferiori al rocchetto<br />
di filo, il filo potrebbe rimanere preso nella fessura sul bordo<br />
del rocchetto e provocare la rottura dell’ago.<br />
ATTENZIONE<br />
Assicurarsi di eseguire in modo appropriato l’infilatura. In caso<br />
contrario, il filo potrebbe impigliarsi e rompere l’ago, con<br />
conseguenti rischi di lesioni personali.<br />
4. Far seguire al filo superiore il percorso illustrato nel seguente<br />
disegno.<br />
5. Accertarsi di infilare il filo nella leva tendifilo passando da destra<br />
verso sinistra.<br />
2 Leva tirafilo<br />
6. Disporre il filo dietro il guidafilo sopra l’ago.<br />
7. Infilare l’ago procedendo dalla zona frontale a quella posteriore<br />
lasciandone sporgere circa 5 cm.<br />
NOTA:<br />
Se la leva tendifilo è abbassata, il filo superiore non può essere<br />
avvolto intorno alla leva tendifilo. Assicurarsi di sollevare la leva del<br />
piedino premistoffa e il tendifilo prima di eseguire il trasporto del filo<br />
superiore.<br />
Si possono avere dei problemi nel caso di trasporto errato.<br />
34
KNOWING YOUR SEWING MACHINE<br />
CONOZCA SU MÁQUINA DE COSER<br />
CONOSCERE LA MACCHINA DA CUCIRE<br />
Drawing Up Lower Thread<br />
1. While lightly holding the end of the upper thread, slowly turn the<br />
balance wheel to the front (counterclockwise) once by hand to<br />
lower and then raise the needle.<br />
2. Pull on the upper thread to draw up the lower thread.<br />
3. Pull out about 10 cm (4") of both threads and place them toward<br />
the back of the machine under the presser foot.<br />
1 Upper thread<br />
2 Lower thread<br />
1<br />
2<br />
Levantar el hilo inferior<br />
1. Coja con suavidad el final del hilo superior y dé con cuidado una vuelta<br />
con la mano a la ruedecilla hacia delante (hacia la izquierda) para bajar<br />
la aguja.<br />
2. Tire del hilo superior para levantar el hilo inferior.<br />
3. Saque unos 10 cm (4") de ambos hilos y colóquelos en dirección a la<br />
parte trasera de la máquina, debajo del prensatelas.<br />
1 Hilo superior<br />
2 Hilo inferior<br />
txt_Sp<br />
Tiraggio del filo inferiore<br />
1. Tenendo leggermente l'estremità del filo superiore, girare<br />
lenatmente con la mano una volta il volantino verso il davanti<br />
(senso antiorario) per abbassare e quindi sollevare l'ago.<br />
2. Tirare il filo superiore per tendere il filo inferiore.<br />
3. Staccare circa 10 cm di entrambi i fili e metterli sul retro della<br />
macchina sotto il reostato.<br />
1 Filo superiore<br />
2 Filo inferiore<br />
35
Twin Needle Sewing<br />
Your machine is designed for twin needle sewing, which allows you<br />
to sew with two top threads. You can use the same color or two<br />
different colors of thread for making decorative stitches. Twin<br />
needle sewing works well with the following stitches: the Straight<br />
Stitch (Center Needle Position), the Zigzag Stitch (1.5 mm), the<br />
Triple Stretch Stitch (Center Needle Position), and the Triple Zigzag<br />
Stretch Stitch (1.5 mm).<br />
CAUTION<br />
• Use only twin needles made for this machine (part code<br />
X57521-001). Other needles could break, resulting in<br />
damage.<br />
• The twin needle should only be used with the Straight<br />
Stitch (Center Needle Position), the Zigzag Stitch (1.5<br />
mm), the Triple Stretch Stitch (Center Needle Position),<br />
and the Triple Zigzag Stretch Stitch (1.5 mm). Do not use<br />
the twin needle with any other stitch.<br />
• Do not sew with bent needles. The needle could break<br />
and cause injury.<br />
• When using the twin needle, be sure to use zigzag<br />
presser foot only.<br />
KNOWING YOUR SEWING MACHINE<br />
CONOZCA SU MÁQUINA DE COSER<br />
CONOSCERE LA MACCHINA DA CUCIRE<br />
Costura con aguja doble<br />
Su máquina de coser ha sido concebida para poder utilizar una aguja doble<br />
y permitir la costura con dos hilos superiores. Puede usar el mismo color<br />
de hilo o dos hilos de colores distintos para puntadas decorativas. El cosido<br />
con la aguja doble da buenos resultados con las siguientes puntadas: la<br />
puntada recta (aguja en el centro), la puntada zigzag (1,5 mm), la triple<br />
puntada elástica (aguja en el centro), y la triple puntada zigzag elástica (1,5<br />
mm).<br />
PRECAUCIÓN<br />
• Utilice sólo las agujas dobles específicas para esta máquina<br />
(código de pieza X57521-001). De lo contrario, la aguja podría<br />
romperse y causar una avería.<br />
• La aguja doble deberá utilizarse solamente con la puntada<br />
recta (aguja en el centro), la puntada zigzag (1,5 mm), la triple<br />
puntada elástica (aguja en el centro), y la triple puntada zigzag<br />
elástica (1,5 mm). No utilice la aguja doble con ninguna otra<br />
puntada.<br />
• No cosa con agujas dobladas. De otra manera, la aguja podría<br />
romperse y causar lesiones.<br />
• Si usa la aguja doble, asegúrese de usar solamente el pie<br />
prensatela de zigzag.<br />
txt_Sp<br />
Cucitura con ago gemello<br />
Questa macchina da cucire è predisposta all’uso dell’ago gemello,<br />
che consente di cucire contemporaneamente con due fili. E’ possibile<br />
eseguire punti decorativi utilizzando fili dello stesso colore o di due<br />
colori diversi. La cucitura con ago gemello è indicata per i seguenti<br />
punti: punto diritto (ago al centro), punto zigzag (1,5 mm), punto<br />
elastico triplo (ago al centro) e punto zigzag triplo (1,5 mm).<br />
ATTENZIONE<br />
• Utilizzare esclusivamente aghi doppi studiati per questa<br />
macchina (codice parte X57521-001). Aghi di altro tipo<br />
potrebbero rompersi e causare danneggiamenti.<br />
• L'ago gemello deve essere usato solo con il punto diritto (ago<br />
al centro), il punto zigzag (1,5 mm), il punto elastico triplo<br />
(ago al centro) e il punto elastico zigzag triplo (1,5 mm). Non<br />
usare l'ago gemello con qualsiasi altro punto.<br />
• Non cucire con aghi piegati. L’ago potrebbe rompersi e<br />
causare lesioni personali.<br />
• Quando si utilizza l’ago doppio, assicurarsi di utilizzare<br />
esclusivamente il piedino premistoffa a zigzag.<br />
36
KNOWING YOUR SEWING MACHINE<br />
CONOZCA SU MÁQUINA DE COSER<br />
CONOSCERE LA MACCHINA DA CUCIRE<br />
A<br />
INSERTING THE TWIN NEEDLE<br />
Insert in the same way a single needle is inserted (refer to page 9).<br />
The flat side of the needle should face toward the back and the<br />
rounded side should face toward you.<br />
PLACING THE EXTRA SPOOL PIN<br />
Place the vertical spool pin in the hole found on top of the machine<br />
near the horizontal spool pin. Place the second spool of thread onto<br />
the vertical spool pin as shown in fig. A.<br />
TWIN NEEDLE THREADING<br />
Each needle should be threaded separately.<br />
1. Threading the Right Needle<br />
Follow the same instructions for single needle threading using<br />
the thread from the spool on the extra spool pin. See page 33 for<br />
more details.<br />
B<br />
2<br />
1<br />
2. Threading the Left Needle<br />
Thread the left needle in the same manner that the right needle<br />
was threaded, but do not pass the thread through the thread<br />
guide above the needle before passing it through the eye of the<br />
left needle as shown below in fig. B.<br />
1 Right needle thread passes through this guide.<br />
2 Left needle thread passes in front of this guide.<br />
PARA INTRODUCIR LA AGUJA DOBLE<br />
Introdúzcala de la misma manera que una aguja simple (véase página 10).<br />
La parte plana de la aguja debe estar cara hacia atrás mientras que la parte<br />
redonda está cara a usted.<br />
COLOCADO EL EJE DE CARRETE SUPLEMENTARIO<br />
Coloque el eje de carrete vertical en el orificio previsto arriba de la<br />
máquina, cerca del eje horizontal. Instale el segundo carrete de hilo en el<br />
eje vertical, tal como ilustrado en la fig. A.<br />
ENHEBRADO DE LA AGUJA DOBLE<br />
Cada una de las agujas debe ser enhebrada por separado.<br />
1. Enhebrado de la aguja derecha<br />
Observe las mismas instrucciones que para el enhebrado de una sola<br />
aguja, pero utilizando el hilo del carrete colocado en el porta carretes<br />
extra. (véase página 34 para mayores detalles al respecto).<br />
2. Enhebrado de la aguja izquierda<br />
Enhebre la aguja izquierda de la misma manera que la aguja derecha.<br />
Sin embargo, no hay que pasar el hilo por la guía que se sitúa arriba de<br />
la aguja. Conviene pasarlo directamente por el ojo de la aguja izquierda,<br />
tal como ilustrado arriba en la fig. B.<br />
1 El hilo de la aguja derecha pasa por la guía.<br />
2 El hilo de la aguja izquierda pasa delante de la guía.<br />
INSERIMENTO DELL’AGO GEMELLO<br />
Per inserire l’ago gemello, procedere come per l’inserimento dell’ago<br />
singolo (vedere a pag. 10). L’ago va posizionato con la parte piatta<br />
dell’ago rivolta indietro e la parte arrotondata rivolta verso se stessi.<br />
APPLICAZIONE DEL PORTASPOLETTA AUSILIARIO<br />
Inserire il portaspoletta verticale nell’apposito foro situato sulla<br />
macchina vicino al portaspoletta orizzontale. Mettere la seconda<br />
spoletta di filo sul portaspoletta verticale come illustrato in fig. A.<br />
INFILATURA DELL’AGO GEMELLO<br />
Infilare ogni ago separatamente.<br />
1. Infilatura dell’ago destro<br />
Seguire le stesse istruzioni relative all’infilatura dell’ago singolo<br />
utilizzando il filo della spoletta montata sul portaspoletta ausiliario.<br />
Vedere a pag. 34 per istruzioni più dettagliate.<br />
2. Infilatura dell’ago sinistro<br />
Infilare l’ago sinistro nello stesso modo dell’ago destro, ma non far<br />
passare il filo per il guidafilo sopra l’ago prima di averlo infilato<br />
nella cruna dell’ago sinistro come illustrato di seguito in fig. B.<br />
1 l filo dell’ago destro passa per questa guida.<br />
2 Il filo dell’ago sinistro passa davanti a questa guida.<br />
37
A<br />
B<br />
1<br />
3<br />
1<br />
3<br />
2<br />
2<br />
5<br />
4<br />
6<br />
4<br />
5<br />
5<br />
~<br />
~<br />
4<br />
4<br />
~<br />
~<br />
3<br />
3<br />
Thread Tension<br />
Thread tension will affect the quality of your stitches. It may need to<br />
be adjusted when you change fabric or thread type.<br />
NOTE:<br />
It is recommended that a test sample be made on a fabric scrap<br />
before sewing on your project.<br />
Possible misadjustments and their results.<br />
Upper tension is too tight. (Fig. A)<br />
Locks appear on the surface of the fabric.<br />
<br />
Decrease the tension by turning the Upper Tension Control<br />
Dial to a lower number.<br />
Upper tension is too loose. (Fig. B)<br />
Locks appear on the reverse side of the fabric.<br />
<br />
Increase the tension by turning the Upper Tension Control Dial<br />
to a higher number.<br />
KNOWING YOUR SEWING MACHINE<br />
CONOZCA SU MÁQUINA DE COSER<br />
CONOSCERE LA MACCHINA DA CUCIRE<br />
C<br />
2<br />
Correct tension (Fig. C)<br />
Correct tension is important since too much or too little tension<br />
will weaken your seams or cause puckers on your fabric.<br />
1<br />
3<br />
4<br />
1 Surface<br />
2 Reverse side<br />
3 Upper thread<br />
4 Lower thread<br />
5 Locks appear on surface of fabric<br />
6 Locks appear on reverse side of fabric<br />
Tensión de los hilos<br />
La tensión de los hilos afectará la calidad de las puntadas: puede requerir<br />
cierto ajuste cuando cambia de tejido o hilo.<br />
NOTA:<br />
Le recomendamos hacer una prueba en un pedazo de tela antes de empezar<br />
a coser en el tejido de trabajo.<br />
Ajustes erróneos posibles y sus resultados<br />
El hilo superior es demasiado tirante. (Fig. A)<br />
Aparecen bagas en la superficie del tejido.<br />
<br />
Disminuya la tensión girando el disco de control de la tensión<br />
superior a un número inferior.<br />
La tensión del hilo superior es insuficiente. (Fig. B)<br />
Aparecen bagas en el revés del tejido.<br />
<br />
Aumente la tensión girando el disco de control de la tensión<br />
superior a un número superior.<br />
Tensión correcta (Fig. C)<br />
Es ecesario tener una tensión correcta dado que una tensión<br />
insuficiente o demasiado fuerte va a debilitar sus costuras o<br />
fruncir el tejido.<br />
1 Derecho<br />
2 Revés<br />
3 Hilo superior<br />
4 Hilo de bobina<br />
5 Aparece pelusa en la superficie del tejido<br />
6 Aparece pelusa en el reverso del tejido<br />
txt_Sp<br />
Tensione del filo<br />
La tensione del filo influenzerà la qualità dei vostri punti. Può<br />
necessitare una regolazione quando si cambia tessuto o tipo di filo.<br />
NOTA:<br />
Si consiglia di fare una prova su un pezzo di stoffa prima di cucire il<br />
vostro modello.<br />
Eventuali regolazioni erronee e relative conseguenze.<br />
La tensione superiore è troppo alta. <br />
Il tessuto si arriccia.<br />
<br />
Diminuire la tensione girando il regolatore di tensione superiore<br />
su un numero più basso.<br />
La tensione superiore è troppo bassa. <br />
Il tessuto si arriccia sul rovescio.<br />
<br />
Aumentare la tensione girando il regolatore di tensione superiore<br />
su un numero più alto.<br />
Tensione corretta <br />
La tensione corretta è importante poiché una tensione troppo<br />
alta o troppo bassa indebolisce le cuciture o provoca delle<br />
pieghettature sul tessuto.<br />
1 Diritto<br />
2 Rovescio<br />
3 Filo superiore<br />
4 Filo spolina<br />
5 Arricciature sulla superficie del tessuto<br />
6 Arricciature sul lato rovescio del tessuto<br />
38
KNOWING YOUR SEWING MACHINE<br />
CONOZCA SU MÁQUINA DE COSER<br />
CONOSCERE LA MACCHINA DA CUCIRE<br />
FABRIC/THREAD/NEEDLE COMBINATIONS<br />
Medium weight fabric<br />
Lightweight fabric<br />
Heavyweight fabric<br />
Stretch fabric<br />
Fabric<br />
Broadcloth<br />
Taffeta<br />
Flannel,<br />
Gabardine<br />
Lawn, Batiste<br />
Georgette<br />
Challis, Satin<br />
Denim<br />
Corduroy<br />
Tweed<br />
Jersey<br />
Tricot<br />
Thread<br />
Type<br />
Cotton<br />
Synthetic mercerized<br />
Silk or silk finished<br />
Cotton<br />
Synthetic mercerized<br />
Silk<br />
Cotton<br />
Synthetic mercerized<br />
Silk<br />
Thread for knits<br />
Size<br />
60 - 80<br />
60 - 80<br />
50 - 80<br />
60 - 80<br />
60 - 80<br />
50 - 80<br />
30 - 50<br />
50<br />
50<br />
50 - 60<br />
Size of needle<br />
75/11 - 90/14<br />
65/9 - 75/11<br />
90/14 - 100/16<br />
Ball point needle (golden colored)<br />
75/11 - 90/14<br />
For top stitching<br />
Synthetic mercerized<br />
Silk<br />
30<br />
30<br />
90/14 - 100/16<br />
NOTE:<br />
1. For transparent nylon thread, always use needle 90/14 - 100/16.<br />
2. The same thread is usually used for the bobbin thread and upper threading.<br />
CAUTION<br />
Be sure to follow the needle, thread, and fabric combinations listed in the table. Using an improper combination, especially a<br />
heavyweight fabric (i.e., denim) with a small needle (i.e., 65/9 - 75/11), may cause the needle to bend or break, and lead to injury.<br />
Also, the seam may be uneven, the fabric may pucker, or the machine may skip stitches.<br />
COMBINACIONES DE TEJIDO/HILO/AGUJA<br />
Tejido mediano<br />
Tejido ligero<br />
Tejido pesado<br />
Tejido elástico<br />
Tejido<br />
Paño<br />
Tafetán<br />
Franela,<br />
Gabardina<br />
Lino, Batista<br />
Punto Georgette<br />
Challis, Satén<br />
Mahón<br />
Cordura<br />
Cheviot<br />
Jersey<br />
Punto<br />
Hilo<br />
Tipo<br />
Algodón<br />
Mercerización sintética<br />
Seda o acabados de seda<br />
Algodón<br />
Mercerización sintética<br />
Seda<br />
Algodón<br />
Mercerización sintética<br />
Seda<br />
Hilo para punto calado<br />
Medida<br />
60 - 80<br />
60 - 80<br />
50 - 80<br />
60 - 80<br />
60 - 80<br />
50 - 80<br />
30 - 50<br />
50<br />
50<br />
50 - 60<br />
Medida de la aguja<br />
75/11 - 90/14<br />
65/9 - 75/11<br />
90/14 - 100/16<br />
Aguja de punta redonda (color dorado)<br />
75/11 - 90/14<br />
Para costuras sobrepuestas<br />
Mercerización sintética<br />
Seda<br />
30<br />
30<br />
90/14 - 100/16<br />
NOTA:<br />
1. Para hilo de nailon transparente, use siempre agujas 90/14 - 100/16.<br />
2. Para el hilo de la bobina y el hilo superior, se suele utilizar siempre el mismo hilo.<br />
PRECAUCIÓN<br />
Asegúrese de utilizar las combinaciones de aguja, hilo y tejido listadas en la tabla. Si sigue una combinación inadecuada, especialmente una<br />
tela gruesa, como el mahón, con una aguja pequeña (65/9 - 75/11), podría doblar o romper la aguja y causar lesiones. Además, la costura puede<br />
resultar irregular, la tela puede fruncirse o se pueden escapar pespuntes.<br />
39
COMBINAZIONE TESSUTO/FILO/AGO<br />
Tessuto medio<br />
Tessuto leggero<br />
Tessuto pesante<br />
Tessuto elastico<br />
Tessuto<br />
Panno rasato<br />
Taffeta<br />
Flanella,<br />
Gabardine<br />
Batista<br />
Georgette<br />
Challis, Satin<br />
Denim<br />
Velluto a coste<br />
Tweed<br />
Jersey<br />
Maglia<br />
Filo<br />
Tipo<br />
Cotone<br />
Sintetico mercerizzato<br />
Seta o finitura in seta<br />
Cotone<br />
Sintetico mercerizzato<br />
Seta<br />
Cotone<br />
Sintetico mercerizzato<br />
Seta<br />
Filo per maglieria<br />
Dimensioni<br />
60 - 80<br />
60 - 80<br />
50 - 80<br />
60 - 80<br />
60 - 80<br />
50 - 80<br />
30 - 50<br />
50<br />
50<br />
50 - 60<br />
Size of needle<br />
75/11 - 90/14<br />
65/9 - 75/11<br />
90/14 - 100/16<br />
Ago con punta a sfera (colore dorato)<br />
75/11 - 90/14<br />
KNOWING YOUR SEWING MACHINE<br />
CONOZCA SU MÁQUINA DE COSER<br />
CONOSCERE LA MACCHINA DA CUCIRE<br />
In caso di filo elastico<br />
Sintetico mercerizzato<br />
Seta<br />
30<br />
30<br />
90/14 - 100/16<br />
NOTA:<br />
1. Per filo di nylon trasparente, utilizzare sempre aghi 90/14 - 100/16.<br />
2. In genere, viene utilizzato lo stesso tipo di filo per il filo della spolina e per l’infilatura superiore.<br />
ATTENZIONE<br />
Accertarsi di seguire le combinazioni di ago, filo e tessuto elencate nella tabella. L’uso di combinazioni non appropriate, in modo particolare<br />
su tessuto pesante (ad esempio, denim), con un ago piccolo (ad esempio, 65/9 - 75/11), può causare il piegamento o la rottura dell’ago<br />
e provocare lesioni personali. Inoltre, la cucitura di giunzione potrebbe risultare irregolare, il tessuto potrebbe arricciarsi o la macchina<br />
potrebbe saltare dei punt.<br />
40
STRAIGHT AND ZIGZAG STITCHING<br />
PUNTADAS RECTAS Y ZIGZAG<br />
CUCITURA CON PUNTO DIRITTO E ZIG-ZAG<br />
PLEASE READ BEFORE SEWING<br />
CAUTION<br />
• To avoid injury, pay special attention to the needle while the machine is in operation. Keep your hands away from moving<br />
parts while the machine is in operation.<br />
• Do not stretch or pull the fabric during sewing. Doing so may lead to injury.<br />
• Do not use bent or broken needles. Doing so may lead to injury.<br />
• Take care that the needle does not strike basting pins or other objects during sewing. Otherwise, the needle may break and<br />
cause injury.<br />
• If stitches become bunched, lengthen the stitch length setting before continuing sewing. Otherwise, the needle may break<br />
and cause injury.<br />
• Always use the correct presser foot. If the wrong presser foot is used, the needle may strike the presser foot and bend or<br />
break, resulting in injury.<br />
• When you turn the balance wheel by hand, always turn it to the front (counterclockwise). Turning it the other way may cause<br />
the thread to tangle, and result in damage to the needle or fabric or injury.<br />
LEA ESTO POR FAVOR ANTES DE COSER<br />
PRECAUCIÓN<br />
• Para evitar lesiones, preste especial atención a la aguja cuando la máquina esté en funcionamiento. Mantenga las manos alejadas de las<br />
piezas móviles mientras la máquina esté en funcionamiento.<br />
• No empuje o estire la tela durante la costura. Podría causar daños.<br />
• No utilice agujas dobladas o rotas. Podría causar daños.<br />
• Asegúrese de que la aguja no tropieza con las patillas del hilvanado durante la costura. De otra manera, la aguja podría romperse y causar<br />
lesiones.<br />
• Si las puntadas se amontonan, alargue la puntada antes de continuar. De otra manera, la aguja podría romperse y causar lesiones.<br />
• Coloque siempre el pie prensatela adecuado. Si utiliza un pie prensatela inadecuado, la aguja podría chocar contra el pie prensatela y<br />
doblarse o romperse, lo que puede causar lesiones.<br />
• Cuando gire la ruedecilla a mano, gírela siempre hacia delante (hacia la izquierda). Si la gira hacia el otro lado el hilo podrá enredarse,<br />
y hacer que la aguja o el tejido se dañen o usted se lastime.<br />
LEGGERE PRIMA DI CUCIRE<br />
ATTENZIONE<br />
• Per evitare lesioni personali, fare particolare attenzione all’ago quando la macchina è in azione. Tenere le mani lontane dalle parti in<br />
movimento quando la macchina è in funzione.<br />
• Non estendere o tirare il tessuto durante le operazioni di cucitura. In caso contrario, vi sono rischi di lesioni personali.<br />
• Non utilizzare aghi piegati o rotti. In caso contrario, vi sono rischi di lesioni personali.<br />
• Assicurarsi che l’ago non colpisca gli spilli di imbastitura o altri oggetti durante la cucitura. In caso contrario, l’ago potrebbe rompersi<br />
e provocare lesioni personali.<br />
• Se i punti sono troppo ravvicinati, aumentare l’impostazione di lunghezza del punto prima di continuare a cucire. In caso contrario,<br />
l’ago potrebbe rompersi e provocare lesioni personali.<br />
• Utilizzare sempre il piedino premistoffa corretto. Se si utilizza un piedino premistoffa errato, l’ago potrebbe colpire il piedino e piegarsi<br />
o rompersi, con rischi di lesioni personali.<br />
• Quando si gira il volantino con la mano, girarlo sempre verso il davanti (senso antiorario). Girandolo nell’altro senso si può ingarbugliare<br />
il filoe causare danni all’ago o al tessuto o lesioni personali.<br />
41
Straight Stitching<br />
Pattern<br />
(Straight Stitch<br />
(Left Needle Position))<br />
(Straight Stitch<br />
(Center Needle Position))<br />
(Triple Stretch Stitch<br />
(Left Needle Position))<br />
(Triple Stretch Stitch<br />
(Center Needle Position))<br />
Stitch Length<br />
1-4<br />
SS<br />
STARTING SEWING<br />
1. Turn the Pattern Selection Dial to show your desired stitch in the<br />
Pattern Indication Window. Setting the Pattern Selection Dial to<br />
Straight Stitch or Triple Stretch Stitch is required.<br />
2. Raise the needle to its highest position and lift the presser foot lever.<br />
3. Pull the upper thread toward the back of the presser foot.<br />
4. Place the fabric under the presser foot and position the needle<br />
1 cm (3/8") from the edge of the fabric.<br />
5. Lower the presser foot.<br />
6. To backtack, push down the Reverse Sewing Lever as far as possible,<br />
then step down on the foot controller to start reverse sewing.<br />
7. Release the Reverse Sewing Lever and start sewing in the<br />
forward direction by applying pressure to the foot controller.<br />
* Reverse sewing is used for locking the end of seams and where<br />
reinforcement is needed.<br />
CAUTION<br />
Be sure the needle does not strike a basting pin, or any<br />
other objects, during sewing. The thread could tangle or the<br />
needle could break, causing injury.<br />
STRAIGHT AND ZIGZAG STITCHING<br />
PUNTADAS RECTAS Y ZIGZAG<br />
CUCITURA CON PUNTO DIRITTO E ZIG-ZAG<br />
Puntadas rectas<br />
Punto diritto<br />
Modelo de puntada<br />
Largo de puntada<br />
Punto<br />
(Punto diritto<br />
(ago a sinistra))<br />
Lunghezza punto<br />
(Puntada recta<br />
(Aguja a la izquierda))<br />
(Puntada recta<br />
(Aguja en el centro))<br />
1-4<br />
(Punto diritto<br />
(ago al centro))<br />
1-4<br />
(Triple puntada pespunto<br />
(Aguja a la izquierda))<br />
(Triple puntada pespunto<br />
(Aguja en el centro))<br />
SS<br />
(Punto elastico triplo<br />
(ago a sinistra))<br />
(Punto elastico triplo<br />
(ago al centro))<br />
SS<br />
PARA EMPEZAR A COSER<br />
1. Gire el selector de puntada hasta que la puntada que desea aparezca en<br />
el indicador de puntada. Es necesario situar el selector de puntada en<br />
puntada recta o en triple puntada pespunte.<br />
2. Levante la aguja a su posición más alta y levante la palanca del<br />
prensatelas.<br />
3. Tire el hilo superior hacia la parte de atrás del prensatelas.<br />
4. Coloque el tejido debajo del prensatelas y posicione la aguja a 1 cm (3/<br />
8") de la orilla del tejido.<br />
5. Baje el prensatelas.<br />
6. Para retroceder, baje a fondo el pulsador de retroceso, luego presione<br />
el pedal para empezar a coser hacia atrás.<br />
7. Suelte el pulsador de retroceso y empiece a coser hacia delante<br />
presionando el pedal.<br />
* El cosido hacia atrás se utiliza para rematar el final de costuras y<br />
cuando es necesario reforzar.<br />
PRECAUCIÓN<br />
Asegúrese de que la aguja no roza el alfiler o cualquier otro objeto.<br />
El hilo podría enrollarse o la aguja podría romperse y causar<br />
lesiones.<br />
Come iniziare una cucitura<br />
1. Ruotare il selettore di punti finché il punto desiderato non appare nella<br />
finestrella indicatore del punto. Disporre il selettore sul punto dritto o sul<br />
punto elastico triplo, in base alle necessità.<br />
2. Far salire l’ago fino alla sua posizione più alta e sollevare la leva del piedino premistoffa.<br />
3. Tirare il filo superiore dietro il piedino premistoffa.<br />
4. Stendere il tessuto sotto il piedino premistoffa e posizionare l’ago a circa 1 cm dal margine.<br />
5. Abbassare il piedino premistoffa.<br />
6. Per fissare il punto, spingere più a fondo possibile il tasto di cucitura di ritorno, poi<br />
premere il reostato di controllo per iniziare la cucitura a marcia indietro.<br />
7. Rilasciare il tasto di cucitura di ritorno e iniziare a cucire a marcia avanti<br />
premendo il reostato di controllo.<br />
* La cucitura a marcia indietro è usata per fermare la fine di un orlo o quando<br />
serve un rinforzo.<br />
ATTENZIONE<br />
Assicurarsi che l’ago non colpisca uno spillo di imbastitura, o<br />
altri oggetti, durante la cucitura. Il filo potrebbe ingarbugliarsi o<br />
l’ago potrebbe rompersi con possibili lesioni personali.<br />
42
STRAIGHT AND ZIGZAG STITCHING<br />
PUNTADAS RECTAS Y ZIGZAG<br />
CUCITURA CON PUNTO DIRITTO E ZIG-ZAG<br />
CHANGING SEWING DIRECTION<br />
1. Stop the machine at the point where you wish to change<br />
direction with the needle still in the fabric.<br />
2. Raise the presser foot and turn the fabric to line up its new<br />
direction using the needle as a turning point.<br />
3. Lower the presser foot and start sewing in the new direction.<br />
FINISHING SEWING<br />
Reverse stitching is used to lock the threads at the end of the seam<br />
or wherever reinforcement is needed.<br />
1. Stitch to the end of the seam and stop.<br />
2. Push the Reverse Sewing Lever and stitch backwards for 1 cm<br />
(3/8") from the end of the fabric.<br />
CAMBIO DE SENTIDO DE COSTURA<br />
1. Pare la máquina donde quiera cambiar de sentido, con la aguja picada<br />
en el tejido.<br />
2. Levante el prensatelas y gire el tejido en la dirección que debe seguir,<br />
usando la aguja como placa giratoria.<br />
3. Baje el prensatelas y empiece a coser en la nueva dirección tal como<br />
ilustrado.<br />
PARA TERMINAR LAS COSTURAS<br />
La puntada de retroceso se usa para trabar los hilos al final de una costura<br />
o en cualquier punto donde sea necesario reforzar la costura.<br />
1. Cosa hasta el final de la costura y pare.<br />
2. Apriete el pulsador de retroceso y cosa hacia atrás sobre 1 cm (3/8") a<br />
partir de la orilla del tejido.<br />
CAMBIO DI DIREZIONE<br />
1. Arrestare la macchina nel punto in cui si desidera cambiare la<br />
direzione della cucitura lasciando l’ago infilato nel tessuto.<br />
2. Sollevare il piedino premistoffa e ruotare il tessuto intorno all’ago<br />
nella direzione voluta.<br />
3. Abbassare il piedino premistoffa e riprendere a cucire nella nuova<br />
direzione.<br />
COME TERMINARE UNA CUCITURA<br />
La cucitura a marcia indietro va eseguita per fissare i fili al termine<br />
della cucitura o quando si vogliono ottenere cuciture di rinforzo.<br />
1. Cucire fino al margine del tessuto e arrestare la macchina.<br />
2. Spingere il tasto di cucitura di ritorno e cucire a marcia indietro<br />
per 1 cm dal bordo del tessuto.<br />
43
REMOVING THE MATERIAL FROM THE MACHINE<br />
1. Stop the machine.<br />
Raise the needle to its highest position and make sure that the<br />
thread take-up lever is also in its highest position.<br />
2. Lift the presser foot and pull the fabric out gently to the left side.<br />
3. Cut both threads with the thread cutter located on the left side of<br />
the machine.<br />
1 Thread cutter<br />
4. To prepare the machine for the next seam, pull about 10 cm (4")<br />
of thread through the toes of the presser foot toward the back of<br />
the machine.<br />
TOP STITCHING AND STRETCH MATERIALS<br />
Straight Stitch is used for top stitching and sewing lightweight<br />
fabrics.<br />
Triple Stretch Stitch is used for stretch fabrics.<br />
1<br />
STRAIGHT AND ZIGZAG STITCHING<br />
PUNTADAS RECTAS Y ZIGZAG<br />
CUCITURA CON PUNTO DIRITTO E ZIG-ZAG<br />
PARA RETIRAR EL TEJIDO DE LA MÁQUINA<br />
1. Pare la máquina.<br />
Levante al máximo la aguja y asegúrese de que la palanca del tirahilos<br />
también está en su posición más elevada.<br />
2. Levante el prensatelas y saque suavemente el tejido por la izquierda.<br />
3. Corte ambos hilos con el cortador ubicado en la parte izquierda de la<br />
máquina.<br />
1 Cortador de hilos<br />
4. Con el fin de dejar la máquina preparada para la próxima costura, tire<br />
unos 10 cm (4") del hilo inferior y páselo por los salientes del<br />
prensatelas hacia la parte posterior de la máquina.<br />
PUNTADAS EN DERECHO Y TEJIDOS ELÁSTICOS<br />
La puntada recta sirve para la costura superior y para la costura de tejidos<br />
ligeros.<br />
La puntada de triple pespunte se usa para los tejidos elásticos.<br />
COME ESTRARRE IL TESSUTO DALLA MACCHINA<br />
1. Arrestare la macchina.<br />
Sollevare l'ago nella posizione più alta e accertarsi che anche la<br />
leva tenditrice del filo sia nella posizione più alta.<br />
2. Alzare il piedino premistoffa ed estrarre il tessuto tirandolo<br />
delicatamente verso sinistra.<br />
3. Tagliare i due fili con il tagliafilo incorporato situato sul fianco<br />
sinistro della macchina.<br />
1 Tagliafilo<br />
4. Per predisporre la macchina alla cucitura successiva, tirare circa<br />
10 cm di filo attraverso la scanalatura del piedino premistoffa<br />
verso la parte posteriore della macchina.<br />
PUNTO DIRITTO E TESSUTI ELASTICI<br />
Il punto diritto è indicato per impunture diritte e per cuciture su tessuti<br />
leggeri.<br />
Il punto elastico triplo è indicato per cuciture su tessuti elastici.<br />
44
STRAIGHT AND ZIGZAG STITCHING<br />
PUNTADAS RECTAS Y ZIGZAG<br />
CUCITURA CON PUNTO DIRITTO E ZIG-ZAG<br />
Zigzag Stitching<br />
Pattern Stitch Length Stitch Width<br />
(Zigzag Stitch) Fixed 1.5<br />
(Zigzag Stitch) F-4 Fixed 3.5<br />
(Zigzag Stitch) Fixed 5<br />
ZIGZAG STITCH<br />
Select the Zigzag Stitch using the Pattern Selection Dial. Then,<br />
select the Stitch Length.<br />
It is recommended to sew using the Straight Stitch at the beginning<br />
and end of the Zigzag Stitches.<br />
(This acts as a reinforcement stitch.)<br />
SATIN STITCH<br />
When the Zigzag Stitch length is set in the “F” range, it produces a<br />
Satin Stitch (a dense Zigzag Stitch). The Satin Stitch can be used<br />
for making decorative stitches. Select the pattern number according<br />
to the desired stitch width. Then, set the stitch length in the “F”<br />
range.<br />
When sewing a satin stitch, use a slightly loose upper thread<br />
tension to produce more beautiful stitches.<br />
Puntadas zigzag<br />
Punto zigzag<br />
Modelo de puntada Largo de puntada Ancho de puntada<br />
(Puntada zigzag) Fija 1,5<br />
(Puntada zigzag) F-4 Fija 3,5<br />
(Puntada zigzag) Fija 5<br />
PUNTADAS ZIGZAG<br />
Seleccione la puntada zigzag con el selector de puntadas. Luego, elija el<br />
largo de la puntada.<br />
Se recomienda coser siempre unas puntadas rectas al principio y al final<br />
de una costura de puntadas zigzag.<br />
(Actúa como puntada de refuerzo.)<br />
PUNTADA DE REALCE<br />
Cuando se define el largo de la puntada en la parte “F”, se coserán puntadas<br />
tupidas (puntada zigzag muy cerradas) que pueden servir para hacer<br />
puntadas decorativas. Seleccione el número de puntada de acuerdo con el<br />
ancho de puntada deseado. Luego, ponga el largo de puntada en la zona<br />
“F”.<br />
Al coser bordados de realce, disminuya ligeramente la tensión del hilo<br />
superior y conseguirá puntadas más bonitas.<br />
Punto Lunghezza punto Ampiezza punto<br />
(Punto zigzag) Fissa 1,5<br />
(Punto zigzag) F-4 Fissa 3,5<br />
(Punto zigzag) Fissa 5<br />
PUNTO ZIGZAG<br />
Selezionare il punto zigzag ruotando il selettore dei punti, quindi<br />
regolare la lunghezza del punto.<br />
Si consiglia di eseguire una cucitura con il punto diritto all’inizio e<br />
alla fine delle cuciture con punto zigzag.<br />
(In questo modo si ottiene una cucitura di rinforzo.)<br />
PUNTO SATIN<br />
Quando la manopola della lunghezza è ruotata sull’area “F”, si<br />
produce un punto satin (una successione di punti zigzag molto fitti).<br />
Il punto satin è utile per eseguire punti decorativi. Selezionare il<br />
numero del punto in base all’ampiezza desiderata, quindi regolare la<br />
lunghezza ruotando la manopola sull’area “F”.<br />
Quando si cuce con il punto satin, utilizzare una tensione leggermente<br />
più bassa del filo superiore, per ottenere dei punti più belli.<br />
45
Blind Hem Stitching<br />
Pattern Stitch Length Stitch Width<br />
(Blind Hem Stitch) F-2 Fixed 3<br />
(Stretch Blind Hem Stitch) F-1.5 Fixed 4<br />
The Blind Hem Stitch is used to finish the edge of a project like the<br />
hem of a pair of pants without the stitch showing. Use the Blind Hem<br />
Stitch for any non-stretch fabrics and the Stretch Blind Hem Stitch<br />
for stretch fabrics.<br />
1. Both the threads should be the same color as the fabric.<br />
2. Fold back the fabric to the desired location of the hem as shown<br />
in fig. A. Then, fold the edge of the fabric as in fig. B. Leave a<br />
6 mm (15/64") overlap at the edge.<br />
3. Set the Pattern Selection Dial to Blind Hem Stitch or Stretch<br />
Blind Hem Stitch and set the stitch length.<br />
4. Sew on the fold as in fig. C.<br />
5. When the fabric is unfolded you will have a Blind Stitch hem as<br />
shown in fig. D.<br />
1 Right side of fabric<br />
2 Wrong side of fabric<br />
NOTE:<br />
The Stretch Blind Hem Stitch is useful for stretch fabrics.<br />
Puntadas invisibles<br />
Punto orlo invisibile<br />
Modelo de puntada Largo de puntada Ancho de puntada<br />
(Puntada invisible) F-2 Fija 3<br />
(Puntada invisible elástica) F-1,5 Fija 4<br />
Punto Lunghezza punto Ampiezza punto<br />
(Punto orlo invisibile) F-2 Fissa 3<br />
(Punto elastico invisibile) F-1,5 Fissa 4<br />
La puntada de dobladillo invisible sirve para terminar la orilla de una<br />
prenda, tal como el borde inferior de los pantalones, sin que se vea la<br />
costura. Utilice la puntada de dobladillo invisible para todos los tejidos<br />
que no sean elásticos y la puntada invisible elástica para los tejidos<br />
elásticos.<br />
1. Ambos hilos deben ser del mismo color que el tejido.<br />
2. Doble el tejido según la orilla que desee hacer tal como ilustra la fig.<br />
A. Luego, dele la vuelta tal como indica la fig. B. Deje unos 6 mm (15/<br />
64") sin coser para esconderlos.<br />
3. Ponga el selector de puntada en puntada invisible o puntada invisible<br />
elástica y ajuste el largo de la puntada.<br />
4. Cosa en el pliegue tal como muestra la fig. C.<br />
5. Al desdoblar el tejido, tendrá un dobladillo con puntada invisible tal<br />
como lo muestra la fig. D.<br />
1 Lado derecho de la te<br />
2 Dorso de la tela<br />
NOTA:<br />
La puntada invisible elástica se recomienda para tejidos elásticos.<br />
Il punto orlo invisibile permette di rifinire gli orli di indumenti, come<br />
ad esempio l’orlo dei pantaloni, senza che la cucitura sia visibile.<br />
Utilizzare il punto orlo invisibile per cucire su tessuti non elastici ed<br />
il punto elastico invisibile su tessuti elastici.<br />
1. I due fili devono essere dello stesso colore del tessuto.<br />
2. Ripiegare in sotto il tessuto formando un orlo dell’altezza desiderata,<br />
come illustrato in fig. A. Quindi, piegare l’orlo come<br />
illustrato in fig. B, formando una piega di 6 mm sull’orlo.<br />
3. Disporre il selettore dei punti sulla posizione Punto orlo invisibile<br />
o Punto elastico invisibile e regolare la lunghezza del punto.<br />
4. Cucire sulla piega come illustrato in fig. C.<br />
5. Stendendo il tessuto si otterrà un orlo a punto invisibile come<br />
mostrato in fig. D.<br />
1 Rovescio del tessuto<br />
2 Diritto del tessuto<br />
NOTA:<br />
Il punto invisibile elastico è adatto per tessuti elastici.<br />
BUILT-IN STITCHES<br />
PUNTADAS INCORPORADAS<br />
PUNTI INCORPORATI<br />
2<br />
1 1 2<br />
A B C D<br />
1<br />
2<br />
2<br />
1<br />
46
BUILT-IN STITCHES<br />
PUNTADAS INCORPORADAS<br />
PUNTI INCORPORATI<br />
Shell Tuck Stitching<br />
Pattern Stitch Length Stitch Width<br />
(Shell Tuck Stitch) F-3 Fixed 5<br />
The Shell Tuck Stitch can be used to sew a picot (lace like) edge on<br />
a lightweight fabric.<br />
1. Set the Pattern Selection Dial to Shell Tuck Stitch.<br />
2. Sew the fabric on the bias, placing it under the presser foot so<br />
that the straight stitches are sewn on the seamline and the<br />
zigzag stitches are sewn slightly over the folded edge.<br />
3. This stitch requires a tighter thread tension than normal.<br />
4. Sew at a slow speed.<br />
Puntada ondas<br />
Punto conchiglia<br />
Modelo de puntada Largo de puntada Ancho de puntada<br />
(Puntada ondas) F-3 Fija 5<br />
La puntada ondas puede usarse para coser una puntilla (como encaje) en<br />
un tejido fino.<br />
1. Ponga el selector de puntada en la puntada ondas.<br />
2. Cosa el tejido en el sesgo, situándolo debajo del prensatelas de tal<br />
forma que la puntada recta se cosa en líneas formando costura y que las<br />
puntadas zigzag cosan las puntillas de los dobladillos.<br />
3. Este trabajo requiere aumentar un poco más la tensión de hilo que en<br />
condiciones normales.<br />
4. Coser a velocidad lenta.<br />
Punto Lunghezza punto Ampiezza punto<br />
(Punto conchiglia) F-3 Fissa 5<br />
Il punto conchiglia permette di eseguire delle rifiniture a picot (simili<br />
al merletto) lungo i bordi di tessuti leggeri.<br />
1. Disporre il selettore dei punti sul punto conchiglia.<br />
2. Cucire il tessuto di sbieco, guidandolo sotto il piedino premistoffa<br />
in modo che i punti diritti cadano sulla linea di cucitura e i punti<br />
a zig-zag appena sopra la piega.<br />
3. Per questo punto è necessaria una tensione del filo più stretta del<br />
normale.<br />
4. Cucire a bassa velocità.<br />
47
A<br />
Elastic Stitching<br />
Pattern Stitch Length Stitch Width<br />
(Elastic Stitch) F-2.5 Fixed 5<br />
B<br />
The Elastic Stitch can be used for 3 functions: mending, sewing<br />
elastic or joining fabric. Each is explained below.<br />
Set the Pattern Selection Dial to Elastic Stitch.<br />
MENDING<br />
1. Place the reinforcement fabric under area to be mended.<br />
2. Following the line of the tear, sew using the Elastic Stitch as<br />
illustrated in fig. A.<br />
SEWING ELASTIC<br />
1. Place the elastic on the fabric.<br />
2. As you sew, stretch the elastic both in the front and behind the<br />
presser foot as shown in fig. B.<br />
C<br />
JOINING FABRIC<br />
The Elastic Stitch can be used to join two pieces of fabric together<br />
and is very effective when sewing knitted fabrics. When nylon<br />
thread is used, the stitch will not be visible.<br />
1. Place the edge of the two pieces of fabric together and center<br />
them under the presser foot.<br />
2. Sew them together using the Elastic Stitch taking care to keep<br />
the two fabric edges close together as shown in fig. C.<br />
Puntada elástica<br />
Punto elastico<br />
Modelo de puntada Largo de puntada Ancho de puntada<br />
(Puntada elástica) F-2,5 Fija 5<br />
Se puede usar la puntada elástica para tres operaciones: los remiendos, la<br />
inserción de gomas elásticas y como puntada de unión para juntar dos<br />
tejidos.<br />
Ponga el selector de puntadas en la puntada elástica.<br />
REMIENDOS<br />
1. Coloque la tela de refuerzo debajo de la zona a rematar.<br />
2. Siguiendo la línea de la rasgadura, cosa con la puntada elástica tal<br />
como ilustrado en la fig. A.<br />
Punto Lunghezza punto Ampiezza punto<br />
(Punto elastico) F-2,5 Fissa 5<br />
Il punto elastico è indicato per eseguire tre funzioni: rammendo,<br />
cucitura di elastici o giunture di tessuti. Queste tre applicazioni sono<br />
descritte di seguito.<br />
Disporre il selettore dei punti sul punto elastico.<br />
RAMMENDO<br />
1. Applicare una tela di rinforzo sotto l’area da rammendare.<br />
2. Seguendo il margine dello strappo, cucire con il punto elastico<br />
come illustrato in fig. A.<br />
BUILT-IN STITCHES<br />
PUNTADAS INCORPORADAS<br />
PUNTI INCORPORATI<br />
INSERCION DE GOMAS ELASTICAS<br />
1. Ponga la goma sobre el tejido.<br />
2. A medida que esté cosiendo, estire el elástico tanto delante como detrás<br />
del prensatelas tal como se muestra en la fig. B.<br />
PUNTADA DE UNION<br />
La puntada elástica puede servir para unir dos trozos de tejido y resulta<br />
muy eficiente para la costura de prendas de punto. Si se usa un hilo de<br />
nilón, la puntada resultará invisible.<br />
1. Junte las orillas de ambos trozos de tejido y céntrelas debajo del<br />
prensatelas.<br />
2. Cosalas juntas con la puntada elástica, teniendo sumo cuidado en<br />
mantener las dos orillas de los tejidos muy juntas, tal como se aprecia<br />
en la fig. C.<br />
CUCITURA DI ELASTICI<br />
1. Applicare l’elastico sul tessuto.<br />
2. Durante la cucitura, tenere teso l’elastico sia davanti che dietro il<br />
piedino premistoffa, come illustrato in fig. B.<br />
GIUNTURE DI TESSUTI<br />
Il punto elastico permette di cucire insieme due pezzi di tessuto ed<br />
è molto efficace su tessuti a maglia. Usando il filo di nylon, il punto<br />
sarà invisibile.<br />
1. Congiungere i bordi dei due tessuti e centrarli sotto il piedino<br />
premistoffa.<br />
2. Eseguire la cucitura lungo i margini con il punto elastico tenendo<br />
ben accostatati i margini, come mostrato in fig. C.<br />
48
BUILT-IN STITCHES<br />
PUNTADAS INCORPORADAS<br />
PUNTI INCORPORATI<br />
Double Action Stitching<br />
Pattern Stitch Length Stitch Width<br />
(Double Action Stitch)<br />
(Bridging Stitch) F-3<br />
(Rampart Stitch)<br />
Fixed 5<br />
(Decorative hem Stitch)<br />
SS<br />
These stitches are used for joining two pieces of fabric, for example,<br />
when making patchwork.<br />
Set the Pattern Selection Dial to Double Action Stitch, Bridging<br />
Stitch, etc.<br />
Puntada de acción doble<br />
Punto doppio<br />
Modelo de puntada Largo de puntada Ancho de puntada<br />
(Puntada de acción doble)<br />
Punto Lunghezza punto Ampiezza punto<br />
(Punto doppio)<br />
(Puntada puente) F-3<br />
(Puntada ondas abiertas) Fija 5<br />
(Punto a ponte) F-3<br />
(Punto bastione)<br />
Fissa 5<br />
(Puntada decorativa<br />
invisible)<br />
SS<br />
(Punto orlo decorativo)<br />
SS<br />
Estas puntadas sirven para unir piezas de tejido o realizar trabajos como<br />
el patchwork.<br />
Coloque el selector de puntadas en la puntada de acción doble o en la<br />
puntada puente.<br />
Questi punti consentono di cucire insieme due pezzi di tessuto, ad<br />
esempio per realizzare un lavoro di patchwork.<br />
Disporre il selettore dei punti sul punto doppio o sul punto a ponte.<br />
49
Scallop Stitching<br />
Pattern Stitch Length Stitch Width<br />
(Scallop Stitch) F-1.5 Fixed 5<br />
This machine automatically produces a Scallop Stitch which may<br />
be used as a decorative edging.<br />
1. Set the Pattern Selection Dial to Scallop Stitch.<br />
2. Sew the Scallop Stitch along the edge of the material.<br />
3. If desired, trim around the scallop with scissors to create a<br />
scalloped edge. Be careful not to cut the thread.<br />
Puntada festón<br />
Punto smerlo<br />
Modelo de puntada Largo de puntada Ancho de puntada<br />
(Puntada festón) F-1,5 Fija 5<br />
Esta máquina puede realizar automáticamente unas ondas decorativas que<br />
pueden servir para decorar los bordes de la tela.<br />
1. Coloque el selector de puntadas en la puntada festón.<br />
2. Cosa las ondas decorativas a lo largo del borde del material.<br />
3. Si lo desea, corte el borde con tijeras, siguiendo las ondas para crear un<br />
borde festonado. Sin embargo, tenga sumo cuidado en no cortar el hilo.<br />
Punto Lunghezza punto Ampiezza punto<br />
(Punto smerlo) F-1,5 Fissa 5<br />
Il punto smerlo incorporato permette di eseguire delle rifiniture<br />
decorative lungo le costure.<br />
1. Disporre il selettore dei punti sul punto smerlo.<br />
2. Cucire lungo il margine del tessuto.<br />
3. Se desiderato, rifilare i margini delle costure con le forbici per<br />
ottenere un bordo smerlato, facendo attenzione a non tagliare il<br />
filo.<br />
BUILT-IN STITCHES<br />
PUNTADAS INCORPORADAS<br />
PUNTI INCORPORATI<br />
50
BUILT-IN STITCHES<br />
PUNTADAS INCORPORADAS<br />
PUNTI INCORPORATI<br />
Decorative Stitching<br />
Pattern Stitch Length Stitch Width<br />
(Bead Stitch)<br />
(Arrowhead Stitch)<br />
(Parallelogram Stitch)<br />
(Triangle Stitch)<br />
(Decorative Stitch)<br />
F-1<br />
SS<br />
Fixed 5<br />
These stitches can be used for making decorative top stitching and<br />
for smocking.<br />
Set the Pattern Selection Dial to Triangle Stitch, Bead Stitch, etc.<br />
Puntadas decorativas<br />
Punto decorativo<br />
Modelo de puntada Largo de puntada Ancho de puntada<br />
(Puntada festón doble)<br />
(Punto perla)<br />
Punto Lunghezza punto Ampiezza punto<br />
(Puntada flecha)<br />
(Puntada paralelogramo)<br />
(Puntada triángulo)<br />
F-1<br />
Fija 5<br />
(Punto freccia)<br />
(Punto parallelogramma)<br />
(Punto triangolo)<br />
F-1<br />
Fissa 5<br />
(Puntada decorativa)<br />
SS<br />
(Punto decorativo)<br />
SS<br />
Estas puntadas pueden utilizarse para hacer puntadas decorativas en los<br />
bordes y para smocking.<br />
Coloque el selector de puntadas en la puntada triángulo o en la puntada de<br />
festón doble.<br />
Questi punti possono essere usati per eseguire cuciture esterne<br />
decorative e punti smock.<br />
Disporre il selettore dei punti sul punto triangolo o sul punto perla.<br />
51
Patchwork<br />
Pattern Stitch Length Stitch Width<br />
(Fagoting Stitch) SS Fixed 5<br />
This stitch is used to join two pieces of fabric while leaving a space<br />
between their edges.<br />
1<br />
1. Fold over the edges of the two pieces of fabric for the hem and<br />
baste the edges to a thin piece of paper leaving a small space<br />
between them.<br />
2. Set the Pattern Selection Dial to Fagoting Stitch.<br />
3. Stitch along the edge, pulling both threads slightly when beginning<br />
to sew.<br />
• Use thicker than normal threads for sewing.<br />
4. After sewing, remove the basting and the paper. Finish by tying<br />
knots on the reverse side at the beginning and the end of the<br />
seams.<br />
1.5 mm<br />
1 First needle drop<br />
Patchwork<br />
Lavori di patchwork<br />
Modelo de puntada Largo de puntada Ancho de puntada<br />
(Puntada fagoting) SS Fija 5<br />
Esta puntada sirve para juntar dos piezas de tejido dejando un espacio entre<br />
las dos orillas.<br />
1. Doble las orillas de las dos piezas de tejido para el dobladillo e<br />
hilvánelas a un papel fino dejando un pequeño espacio entre ambas<br />
piezas.<br />
2. Sitúe el selector de puntada en puntada fagoting.<br />
3. Cosa a lo largo de las orillas, tirando ligeramente de ambos hilos al<br />
comienzo.<br />
• Use hilos más gruesos de lo normal.<br />
4. Después de coser, quite los hilvanes y el papel. Anude los cabos de los<br />
hilos del comienzo y final de la costura por el revés.<br />
1 Primer pespunto de la aguja<br />
Punto Lunghezza punto Ampiezza punto<br />
(Punto fagoting) SS Fissa 5<br />
Questo (Questo) punto consente(consente) di cucire insieme due<br />
pezzi di tessuto lasciando uno spazio fra i due bordi.<br />
1. Piegare il bordo dei due pezzi di tessuto per realizzare l’orlo e<br />
imbastire i bordi con della carta sottile lasciando fra di loro una<br />
piccola distanza.<br />
2. Disporre il selettore dei punti sul punto fagoting.<br />
3. Cucire lungo il bordo tirando leggermente entrambi i fili all’inizio<br />
della cucitura.<br />
• Utilizzare per la cucitura del filo più spesso del normale.<br />
4. Terminata la cucitura, rimuovere l’imbastitura e la carta e fissare<br />
annodando sul rovescio all’inizio e alla fine della cucitura.<br />
1 Primo punto di caduta dell’ago<br />
BUILT-IN STITCHES<br />
PUNTADAS INCORPORADAS<br />
PUNTI INCORPORATI<br />
52
BUILT-IN STITCHES<br />
PUNTADAS INCORPORADAS<br />
PUNTI INCORPORATI<br />
A<br />
Overedge Stitching<br />
Pattern Stitch Length Stitch Width<br />
(Elastic Shell Tuck Stitch) F-3 Fixed 5<br />
(Elastic Overlock Stitch)* Fixed 3<br />
B<br />
(Elastic Overlock Stitch)<br />
Fixed 5<br />
SS<br />
(Comb Stitch) Fixed 4<br />
(Slant Overlock Stitch)* Fixed 3<br />
These stitches are used to join together seams and finish them in<br />
one operation. The Elastic Overlock Stitches are useful when<br />
sewing stretch materials.<br />
C<br />
1. Set the Pattern Selection Dial to Comb Stitch, either Elastic<br />
Overlock Stitch, or Elastic Shell Tuck Stitch.<br />
2. Position the fabric under the presser foot so that the seamline (or<br />
arrowhead point) is approximately 3 mm (1/8") to the left of the<br />
center of the presser foot. This stitch works best with a seam<br />
allowance of approximately 5 mm (3/16") as this allows the right<br />
(zigzag) side of the stitch to overlock the cut edge of the fabric<br />
as shown in fig. A.<br />
3. If the seam allowance is wider than the stitch pattern, trim away<br />
any excess fabric after stitching.<br />
A finished Elastic Overlock Stitch is shown in fig. B.<br />
* When sewing the Elastic Overlock Stitch or Slant Overlock<br />
Stitch, position the fabric so that its edge is on the left of the<br />
needle. (See fig. C)<br />
Puntada por encima de la orilla<br />
Rifinitura a sopraggitto<br />
Modelo de puntada Largo de puntada Ancho de puntada<br />
(Puntada ondas elásticas) F-3 Fija 5<br />
(Puntada overlock elástica)* Fija 3<br />
(Puntada overlock elástica)<br />
SS<br />
Fija 5<br />
(Puntada peine) Fija 4<br />
(Puntada overlock estrecha)* Fija 3<br />
Estas puntadas se usan para juntar costuras y acabarlas en una sola<br />
operación. Las puntadas overlock elástica y overlock estrecha sirven para<br />
coser tejidos elásticos.<br />
1. Sitúe el selector de puntada en puntada peine, puntada overlock<br />
estrecha, puntada overlock elástica o puntada ondas elástica.<br />
2. Coloque el tejido debajo del prensatelas para que la línea de costura<br />
(con la puntada de flecha) quede unos 3 mm (1/8") a la izquierda del<br />
centro del prensatelas. Esta puntada da los mejores resultados con una<br />
tolerancia de costura de unos 5 mm (3/16") dado que así permite a la<br />
parte derecha (zigzag) de la puntada enganchar la orilla cortada del<br />
tejido tal como ilustrado en la fig. A.<br />
3. Si la tolerancia de costura es más ancha que la puntada, corte cualquier<br />
pedazo de tejido que sobre después de coser.<br />
En la fig. B, puede ver una puntada overlock elástica acabada.<br />
* Cuando cosa con la puntada overlock elástica o con la puntada<br />
overlock estrecha, ponga el tejido de forma que su borde que a la<br />
izquierda. (Consulte la Fig. C)<br />
Punto Lunghezza punto Ampiezza punto<br />
(Punto a conchiglia elastico) F-3 Fissa 5<br />
(Punto sopraggito elastico)* Fissa 3<br />
(Punto sopraggitto elastico)<br />
Fissa 5<br />
SS<br />
(Punto pettine) Fissa 4<br />
(Punto sopraggitto inclinato)* Fissa 3<br />
Questi punti consentono di ottenere cuciture elastiche e contemporaneamente<br />
già rifinite con una sola operazione. I punti sopraggitto<br />
elastico e sopraggitto inclinato sono indicati per cucire tessuti elastici.<br />
1. Disporre il selettore dei punti sul punto pettine, sul punto sopraggitto<br />
inclinato, sul punto sopraggitto elastico o sul punto a conchiglia<br />
elastico.<br />
2. Stendere il tessuto sotto il piedino premistoffa in modo che il<br />
margine della cucitura della punta di freccia si trovi a circa 3 mm<br />
dal centro del piedino. La distanza dal margine ottimale per<br />
eseguire questo punto è di circa 5 mm, in quanto la cucitura a zigzag<br />
eseguita a destra del punto sopraggitta adeguatamente il<br />
margine del tessuto, come mostrato in fig. A.<br />
3. Nel caso la distanza dal margine sia più ampia dell’ampiezza del<br />
punto, ritagliare il tessuto in eccesso al termine della cucitura.<br />
La fig. B mostra una rifinitura eseguita con il punto sopraggitto<br />
elastico.<br />
* Quando si cuce il punto sopraggitto elastico o il punto sopraggitto<br />
inclinato, posizionare il tessuto in modo che il suo bordo sia a<br />
sinistra. (Vedere la fig. C)<br />
53
Feather Stitching<br />
Pattern Stitch Length Stitch Width<br />
(Feather Stitch) SS Fixed 5<br />
Use the Feather Stitch as a decorative top stitch or when hemming<br />
blankets, tablecloths or draperies or when embroidering.<br />
1. Set the Pattern Selection Dial to Feather Stitch.<br />
2. Place the fabric right side up and sew 1 cm (3/8") from the edge<br />
of the fabric.<br />
3. Trim close to the stitching.<br />
This stitch will prevent the fabric from unravelling.<br />
Triple Zigzag Stretch Stitching<br />
Pattern Stitch Length Stitch Width<br />
(Triple Zigzag Stretch Stitch) Fixed 1.5<br />
(Triple Zigzag Stretch Stitch) SS Fixed 3.5<br />
(Triple Zigzag Stretch Stitch) Fixed 5<br />
This stitch can be used to sew heavyweight stretch fabrics wherever<br />
a Zigzag Stitch could be used. The Triple Zigzag Stretch Stitch<br />
can also be used as a decorative top stitch.<br />
Set the Pattern Selection Dial to Triple Zigzag Stretch Stitch.<br />
Puntada pluma<br />
Punto piuma<br />
Modelo de puntada Largo de puntada Ancho de puntada<br />
(Puntada pluma) SS Fija 5<br />
La puntada pluma puede usarse como puntada de tope decorativo o para<br />
el dobladillo de frazadas, manteles, cortinas o bien para bordado.<br />
1. Coloque el selector de puntadas en la puntada pluma.<br />
2. Coloque el tejido con el derecho arriba y cosa 1 cm (3/8") a partir de<br />
la orilla.<br />
3. Corte el tejido cerca de las puntadas.<br />
Esta puntada impedirá que el tejido se deshilache.<br />
Punto Lunghezza punto Ampiezza punto<br />
(Punto piuma) SS Fissa 5<br />
Il punto piuma è indicato per cuciture esterne decorative, per rifinire<br />
gli orli di coperte,tovaglie o tendaggi, oppure per eseguire ricami.<br />
1. Disporre il selettore dei punti sul punto piuma.<br />
2. Sistemare il tessuto e cucire a 1 cm dal bordo.<br />
3. Rifilare il tessuto vicinissimo alla cucitura.<br />
Questo punto impedirà al tessuto di sfilacciarsi.<br />
BUILT-IN STITCHES<br />
PUNTADAS INCORPORADAS<br />
PUNTI INCORPORATI<br />
Triple puntada zigzag elástica<br />
Punto zigzag triplo<br />
Modelo de puntada Largo de puntada Ancho de puntada<br />
(Triple puntada zigzag elástica) Fija 1,5<br />
(Triple puntada zigzag elástica) SS Fija 3,5<br />
(Triple puntada zigzag elástica) Fija 5<br />
Esta puntada puede servir para coser materiales gruesos y pesados siempre<br />
y cuando una puntada zigzag pueda utilizarse. Esta puntada elástica de<br />
triple pespunto o puntada festón triple también puede servir como puntada<br />
decorativa en el derecho del tejido.<br />
Coloque el selector de puntadas en la triple puntada zigzag elástica.<br />
Punto Lunghezza punto Ampiezza<br />
(Punto zigzag triplo) Fissa 1,5<br />
(Punto zigzag triplo) SS Fissa 3,5<br />
(Punto zigzag triplo) Fissa 5<br />
Questo punto è indicato per cucire su tessuti elastici pesanti laddove<br />
è possibile applicare il punto zig-zag. Il punto zigzag triplo è indicato<br />
anche per eseguire cuciture esterne decorative.<br />
Disporre il selettore dei punti sul punto zigzag triplo.<br />
54
BUTTONHOLE AND BUTTON SEWING<br />
OJALES Y COSTURA DE BOTONES<br />
OCCHIELLI E BOTTONI<br />
A<br />
1<br />
(Model <strong>XL</strong>-6060, <strong>XL</strong>-6061, <strong>XL</strong>-6062, <strong>XL</strong>-<strong>6063</strong>, <strong>XL</strong>-6050, <strong>XL</strong>-<br />
6051, <strong>XL</strong>-6052, <strong>XL</strong>-<strong>6053</strong>)<br />
2<br />
A<br />
Making a Buttonhole<br />
(For 1-step BH Type)<br />
B<br />
Pattern Stitch Length Stitch Width Foot<br />
F-1.5 Fixed 5 Buttonhole Foot<br />
3<br />
NOTE:<br />
1. It is recommended to practice making a buttonhole on a scrap<br />
piece of fabric before attempting it on the actual garment.<br />
2. When making buttonholes on soft fabrics, place a stabilizer<br />
material on the underside of the fabric.<br />
C<br />
D<br />
4<br />
5<br />
a<br />
One-step buttonhole-making is a simple process that provides<br />
reliable results.<br />
MAKING A BUTTONHOLE<br />
1. Using tailor’s chalk, mark the position of the buttonhole on the<br />
fabric.<br />
2. Set the Pattern Selection Dial to Buttonhole.<br />
3. Attach the buttonhole foot, pull open the button holder and insert<br />
a button. (See fig. B)<br />
* The size of the buttonhole is determined by the button inserted<br />
into the button holder.<br />
4. Align the red line on the presser foot with the mark on the fabric,<br />
then lower the Presser Foot Lever. Be sure to pass the thread<br />
under the presser foot and pull it toward you. (See fig. C)<br />
NOTE:<br />
Do not lower the Presser Foot Lever while pushing in the area of the<br />
presser foot marked a in fig. C. Otherwise the buttonhole will not be<br />
sewn with the correct size.<br />
1 Do not close this gap.(Fig. A)<br />
2 Align the lines on the presser foot.<br />
5. Pull down the buttonhole lever to its lowest position, then lightly<br />
push it toward the back of the machine. (See fig. D)<br />
3 Button holder<br />
4 Mark on fabric<br />
5 Line on presser foot<br />
6. Hold the upper thread and step down on the foot controller to<br />
begin sewing.<br />
CAUTION<br />
Pulling the thread too strongly may bend or break the<br />
needle, and lead to injury.<br />
7. Stitches 1, 2, 3 and 4 are sewn, then stop the machine.<br />
3<br />
2 4<br />
1<br />
55
(Modelo <strong>XL</strong>-6060, <strong>XL</strong>-6061, <strong>XL</strong>-6062, <strong>XL</strong>-<strong>6063</strong>, <strong>XL</strong>-6050, <strong>XL</strong>-<br />
6051, <strong>XL</strong>-6052, <strong>XL</strong>-<strong>6053</strong>)<br />
Para coser ojales<br />
(Para tipo BH en una operación)<br />
(Modello <strong>XL</strong>-6060, <strong>XL</strong>-6061, <strong>XL</strong>-6062, <strong>XL</strong>-<strong>6063</strong>, <strong>XL</strong>-6050, <strong>XL</strong>-<br />
6051, <strong>XL</strong>-6052, <strong>XL</strong>-<strong>6053</strong>)<br />
Esecuzione di un occhiello<br />
(per il tipo BH a 1 operazione)<br />
Modelo de Largo de Ancho de<br />
puntada puntada puntada<br />
F-1,5 Fija 5<br />
Prensatelas<br />
Prensatelas<br />
para ojales<br />
NOTA:<br />
1. Le recomendamos hacer una prueba de costura de ojales en un pedazo<br />
de tela antes de empezar a hacerla en el tejido de trabajo.<br />
2. Para hacer ojales en materiales muy finos, coloque un material estabilizador<br />
debajo del tejido.<br />
La función de costura de ojales en una sola operación es un proceso<br />
simple que ofrece increíbles resultados.<br />
PARA COSER OJALES<br />
1. Con jaboncillo, marque la posición del ojal en el tejido.<br />
2. Sitúe el selector de puntada en ojales.<br />
3. Coloque el prensatelas para ojales, tire del soporte del botón hasta<br />
abrirlo e inserte un botón (véase fig. B).<br />
* El botón insertado en el soporte del botón determina el tamaño del ojal.<br />
4. Alinee la línea roja del prensatelas con la marca del tejido y baje la<br />
palanca del prensatelas. Asegúrese de pasar el hilo por debajo del<br />
prensatelas y tire de él hacia usted (véase fig. C).<br />
NOTA:<br />
No baje la palanca del prensatelas mientras esté presionando la zona del<br />
prensatelas marcada como a en la fig. C, ya que cosería un ojal de tamaño<br />
incorrecto.<br />
1 Permita este espacio. (Fig. A)<br />
2 Alinee las líneas en el prensatelas.<br />
5. Coloque la palanca del prensatelas en su posición más baja y empújela<br />
suavemente hacia la parte trasera de la máquina (véase fig. D).<br />
3 Prensatelas<br />
4 Marca en el tejido<br />
5 Línea en el prensatelas<br />
6. Sujete el hilo superior y presione el pedal para empezar a coser.<br />
Punto Lunghezza punto Ampiezza punto Piedino<br />
F-1,5 Fissa 5<br />
Piedino<br />
per occhielli<br />
NOTA:<br />
1. Eseguire sempre un occhiello di prova su un campione di tessuto<br />
prima di realizzarlo sull’indumento vero e proprio.<br />
2. Per cucire occhielli su tessuti morbidi, applicare una tela di<br />
rinforzo sotto il tessuto.<br />
Il procedimento per cucire occhielli è semplice e garantisce un<br />
ottimo risultato.<br />
ESECUZIONE DI UN OCCHIELLO<br />
1. Segnare con un gessetto per sarti la posizione dell’occhiello<br />
sull’indumento.<br />
2. Disporre il selettore dei punti su occhiello.<br />
3. Fissare il piedino per occhielli, aprire la placca per bottoni e<br />
inserire il bottone (vedere fig. B).<br />
* La dimensione dell'occhiello viene determinata dal bottone inserito<br />
nella placca per bottoni.<br />
4. Allineare la linea rossa sul piedino premistoffa con il segno sul<br />
tessuto, quindi abbassare la leva del piedino premistoffa. Accertarsi<br />
di passare il filo sotto il piedino premistoffa e tirarlo verso sé<br />
stessi (vedere fig. C).<br />
NOTA:<br />
Non abbassare la leva del piedino premistoffa mentre si preme sulla<br />
parte del piedino contrassegnata con a, nella fig. C, altrimenti<br />
l'occhiello non sarà della dimensione giusta.<br />
1 Non chiudere questa apertura. (Fig. A)<br />
2 Allineare le guide sul piedino premistoffa.<br />
5. Abbassare la leva dell'occhiello nella sua posizione più bassa,<br />
quindi spingerla leggermente verso il retro della macchina (vedere<br />
fig. D).<br />
3 Placca per bottoni<br />
4 Segno sul tessuto<br />
5 Guida sul piedino<br />
PRECAUCIÓN<br />
Si tira del hilo demasiado, puede doblar o romper la aguja y causar<br />
lesiones.<br />
7. Las puntadas 1, 2, 3 y 4 se hayan cosido, pare la máquina de coser.<br />
6. Tenere il filo superiore e premere il reostato di controllo per<br />
iniziare a cucire.<br />
ATTENZIONE<br />
Tirare il filo con troppa forza potrebbe piegare o spezzare l’ago<br />
con conseguente rischio di lesioni personali.<br />
7. I punti 1, 2, 3 e 4 vengono cuciti, quindi la macchina si ferma.<br />
BUTTONHOLE AND BUTTON SEWING<br />
OJALES Y COSTURA DE BOTONES<br />
OCCHIELLI E BOTTONI<br />
56
BUTTONHOLE AND BUTTON SEWING<br />
OJALES Y COSTURA DE BOTONES<br />
OCCHIELLI E BOTTONI<br />
Odd-shaped buttons that do not<br />
fit into the button holder plate<br />
Add the button diameter to its thickness, then set the buttonhole<br />
presser foot scale to this measurement. The distance in the scale<br />
between two lines of the same length is 0.5 cm (3/16").<br />
Example:<br />
For a button with a diameter of 1.5 cm (9/16") and a thickness of<br />
1 cm (3/8"), the scale should be set at 2.5 cm (1").<br />
2<br />
1<br />
4<br />
3<br />
1 Thickness [1 cm (3/8")]<br />
2 Diameter [1.5 cm (9/16")]<br />
3 Button holder plate<br />
4 Scale<br />
5 Diameter + thickness [2.5 cm (1")]<br />
6 0.5 cm (3/16")<br />
5<br />
6<br />
Botones con formas extrañas que no<br />
caben en el soporte del botón<br />
Añada el diámetro del botón a su grosor y coloque la escala del prensatelas<br />
de ojales en esta medida. La distancia entre dos líneas de igual longitud de<br />
la escala es de 0,5 cm (3/16").<br />
Ejemplo:<br />
Para un botón cuyo diámetro es de 1,5 cm (9/16") y de 1 cm (3/8") de grosor<br />
, la escala debe situarse en 2,5 cm (1").<br />
1 Grosor [1 cm (3/8")]<br />
2 Diámetro [1,5 cm (9/16")]<br />
3 Soporte del botón<br />
4 Escala<br />
5 Diámetro + grosor [2,5 cm (1")]<br />
6 0,5 cm (3/16")<br />
Bottoni di forma strana che non si<br />
adattano nella placca per bottoni<br />
Aggiungere il diametro del bottone al suo spessore, quindi regolare<br />
la gradazione del piedino premistoffa dell'occhiello su questa misura.<br />
La distanza tra due guide della stessa lunghezza è 0,5 cm.<br />
Esempio:<br />
Per un bottone di diametro 1,5 cm ed uno spessore di 1 cm, la<br />
gradazione deve essere fissata a 2,5 cm.<br />
1 Spessore (1 cm)<br />
2 Diametro (1,5 cm)<br />
3 Placca per bottoni<br />
4 Gradazione<br />
5 Diametro + spessore (2,5 cm)<br />
6 0,5 cm<br />
57
(Model <strong>XL</strong>-6040, <strong>XL</strong>-6041, <strong>XL</strong>-6042, <strong>XL</strong>-6043)<br />
Making a Buttonhole<br />
(For 4-step BH Type )<br />
A<br />
Pattern Stitch Length Stitch Width Foot<br />
F-1.5 Fixed 5 Buttonhole Foot<br />
2<br />
1<br />
NOTE:<br />
1. It is recommended to practice making a buttonhole on a scrap<br />
piece of fabric before attempting it on the actual garment.<br />
2. When making buttonholes on soft fabrics, place a stabilizer<br />
material on the underside of the fabric.<br />
Buttonhole-making is a simple process that provides reliable<br />
results.<br />
MAKING A BUTTONHOLE<br />
1. Using tailor’s chalk, mark the position and length of the buttonhole<br />
on the fabric.<br />
2. Attach the buttonhole foot and push the frame back until it stops<br />
with the plastic insert in the front of the frame.<br />
3. The front bar tack will be sewn first. Place the fabric under the<br />
presser foot so that the center of the front bar tack mark is<br />
directly under the center of the presser foot and aligned with the<br />
two red lines as shown in fig. A.<br />
1 Front of chalk mark<br />
2 Red lines<br />
(Modelo <strong>XL</strong>-6040, <strong>XL</strong>-6041, <strong>XL</strong>-6042, <strong>XL</strong>-6043)<br />
Para coser ojales<br />
(Para tipo BH en cuatro operaciones)<br />
(Modello <strong>XL</strong>-6040, <strong>XL</strong>-6041, <strong>XL</strong>-6042, <strong>XL</strong>-6043)<br />
Esecuzione di un occhiello<br />
(per il tipo BH a 4 operazioni)<br />
Modelo de Largo de Ancho de<br />
puntada puntada puntada<br />
F-1,5 Fija 5<br />
Prensatelas<br />
Prensatelas<br />
para ojales<br />
NOTA:<br />
1. Se recomienda practicar la costura de ojales en un pedazo de tejido<br />
antes de hacerlo realmente en las prendas.<br />
2. Para hacer ojales en materiales muy finos, coloque un material estabilizador<br />
debajo del tejido.<br />
La función que le permite coser ojales es un proceso simple que ofrece<br />
increíbles resultados.<br />
PARA COSER OJALES<br />
1. Con jaboncillo, marque la posición y el largo del ojal en el tejido.<br />
2. Instale la pata para ojales y vuelva a empujar el marco hasta que se pare<br />
y la inserción plástica se encuentre delante del marco.<br />
3. Primero, se cose el remate de la parte delantera del ojal. Coloque el<br />
tejido debajo del prensatelas de tal manera que la marca del centro de<br />
la barra caiga directamente debajo del centro del prensatelas y quede<br />
alineada con las dos líneas rojas, tal como se muestra en la fig. A.<br />
1 Parte delantera de la marca con jaboncillo<br />
2 Lineas rojas<br />
Punto Lunghezza punto Ampiezza punto Piedino<br />
Piedino per<br />
F-1,5 Fissa 5 occhielli<br />
NOTA:<br />
1. Eseguire sempre un occhiello di prova su un campione di tessuto<br />
prma di realizzarlo sull’indumento vero e proprio.<br />
2. Per cucire occhielli su tessuti morbidi, applicare una tela di<br />
rinforzo sotto il tessuto.<br />
Il procedimento per cucire occhielli è semplice e garantisce un<br />
ottimo risultato.<br />
ESECUZIONE DI UN OCCHIELLO<br />
1. Segnare con un gessetto per sarti la posizione e la lunghezza<br />
dell’occhiello sul tessuto.<br />
2. Fissare il piedino per occhielli e spingere indietro il telaio fino a<br />
che si ferma con l’inserto di plastica davanti al telaio.<br />
3. Viene cucita prima la barretta frontale. Posizionare il tessuto sotto<br />
il piedino premistoffa in modo che il centro della barretta frontale<br />
sia direttamente sotto il centro del piedino premistoffa e allineato<br />
con le due righe rosse come mostrato nella fig. A.<br />
1 Davanti del segno del gessetto<br />
2 Linee guida rosse<br />
BUTTONHOLE AND BUTTON SEWING<br />
OJALES Y COSTURA DE BOTONES<br />
OCCHIELLI E BOTTONI<br />
58
BUTTONHOLE AND BUTTON SEWING<br />
OJALES Y COSTURA DE BOTONES<br />
OCCHIELLI E BOTTONI<br />
MAKING A BUTTONHOLE<br />
Step Sewn Portion Pattern How to Sew<br />
Step 1<br />
(Front bar<br />
tack)<br />
a<br />
1. Set the pattern selection dial to “a”.<br />
2. Lower the presser foot and sew 5 to 6 stitches.<br />
3. Stop the machine when the needle is at the left side of the stitches, then raise<br />
the needle from the material.<br />
Step 2<br />
(Left side)<br />
b<br />
1. Turn the pattern selection dial to “b”.<br />
2. Sew the predetermined length of the tailor’s chalk line.<br />
3. Stop the machine when the needle is at the left side of the stitch, then raise the<br />
needle.<br />
Step 3<br />
(Back bar<br />
tack)<br />
c<br />
1. Turn the pattern selection dial to “c” (same position as in step 1).<br />
2. Sew 5 to 6 stitches.<br />
3. Stop the machine when the needle is at the right side of the stitch, then raise the<br />
needle from the material.<br />
Step 4<br />
(Right side)<br />
1. Set the pattern selection dial to “d”.<br />
2. Sew the right side until the needle reaches the stitches sewn in step 1.<br />
PARA COSER OJALES<br />
d<br />
Pasos Zona de cosido Modelo de puntada Como coser<br />
txt_F<br />
Paso 1<br />
(remate de la<br />
parte delantera<br />
del ojal)<br />
a<br />
1. Ponga el selector de diseño en “a”.<br />
2. Baje el prensatelas y cosa 5 ó 6 puntadas.<br />
3. Pare la máquina cuando la aguja se encuentre a la izquierda de las puntadas y levante la<br />
aguja del tejido.<br />
Paso 2<br />
(lado<br />
izquierdo)<br />
b<br />
1. Ponga el selector de diseño en “b”.<br />
2. Cosa el largo pre-definido de la línea con jaboncillo.<br />
3. Pare la máquina cuando la aguja se encuentre a la izquierda de la puntada y levántela.<br />
Paso 3<br />
(remate de la<br />
parte atrás del<br />
ojal)<br />
Paso 4<br />
(lado derecho)<br />
c<br />
1. Ponga el selector de diseño en “c” (como paso 1).<br />
2. Baje el prensatelas y cosa 5 ó 6 puntadas.<br />
3. Pare la máquina cuando la aguja se encuentre a la derecha de las puntadas y levántela del<br />
tejido.<br />
1. Ponga el selector de diseño en “d”.<br />
2. Cosa el lado derecho hasta que la aguja alcance las puntadas cosidas en el primer paso 1.<br />
d<br />
ESECUZIONE DI UN OCCHIELLO<br />
Fase Lato cucito Punto Come cucire<br />
Fase 1<br />
(barretta<br />
frontale)<br />
a<br />
1. Disporre il selettore dei punti su “a”.<br />
2. Abbassare il piedino per asole ed eseguire 5 o 6 punti.<br />
3. Quando l’ago si trova a sinistra della cucitura, arrestare la macchina e alzare l’ago<br />
dal tessuto.<br />
Fase 2<br />
(lato sinistro)<br />
b<br />
1. Disporre il selettore dei punti su “b”.<br />
2. Cucire per la lunghezza prestabilita della linea segnata col gesso.<br />
3. Quando l’ago si trova a sinistra della cucitura, arrestare la macchina e alzare l’ago<br />
dal tessuto.<br />
Fase 3<br />
(barretta<br />
posteriore)<br />
c<br />
1. Disporre il selettore dei punti su “c” (stessa posizione della fase 1).<br />
2. Eseguire 5 o 6 punti.<br />
3. Quando l’ago si trova a destra della cucitura, arrestare la macchina e alzare l’ago<br />
dal tessuto.<br />
Fase 4<br />
(lato destro)<br />
59<br />
d<br />
1. Disporre il selettore dei punti su “d”.<br />
2. Cucire il lato destro dell’asola finché l’ago non incontra la cucitura eseguita nella<br />
fase 1.
(Model <strong>XL</strong>-6060, <strong>XL</strong>-6061, <strong>XL</strong>-6062, <strong>XL</strong>-<strong>6063</strong>, <strong>XL</strong>-6050, <strong>XL</strong>-<br />
6051, <strong>XL</strong>-6052, <strong>XL</strong>-<strong>6053</strong>, <strong>XL</strong>-6040, <strong>XL</strong>-6041, <strong>XL</strong>-6042, <strong>XL</strong>-6043)<br />
SECURING THE STITCHING AND CUTTING THE BUTTON-<br />
HOLE<br />
1. To secure the stitching, turn the material 90 degrees<br />
counterclockwise and sew Straight Stitches to the end of the<br />
front bar tack of the buttonhole.<br />
2. Remove the material from the machine. It is recommended that<br />
pins be placed across both ends of the buttonhole as protection<br />
against cutting the stitches.<br />
3. Cut an opening in the middle of the buttonhole with a seam ripper<br />
tool. Be careful not to cut through any stitches.<br />
CAUTION<br />
When using the seam ripper to open the buttonhole, do not<br />
put your hand or finger in the path of the ripper. The ripper<br />
may slip and cause injury.<br />
(Modelo <strong>XL</strong>-6060, <strong>XL</strong>6061, <strong>XL</strong>6062, <strong>XL</strong>-<strong>6063</strong>, <strong>XL</strong>-6050, <strong>XL</strong>6051,<br />
<strong>XL</strong>6052, <strong>XL</strong>-<strong>6053</strong>, <strong>XL</strong>-6040, <strong>XL</strong>6041, <strong>XL</strong>6042, <strong>XL</strong>-6043)<br />
PARA COMPLETAR LAS PUNTADAS Y CORTAR EL OJAL<br />
1. Para asegurar las puntadas, gire el tejido a 90 grados en el sentido<br />
contrario al de las manecillas de un reloj y cosa unas Puntadas Rectas<br />
hasta el final de la línea del remate de la parte delantera.<br />
2. Retire el tejido de la máquina. Se recomienda colocar alfileres en<br />
ambos extremos del ojal para evitar el corte de las puntadas.<br />
3. Corte una apertura en el medio del ojal con el cortador especial que<br />
sirve para abrir costuras. Tenga cuidado en no cortar ninguna puntada.<br />
(Modello <strong>XL</strong>-6060, <strong>XL</strong>-6061, <strong>XL</strong>-6062, <strong>XL</strong>-<strong>6063</strong>, <strong>XL</strong>-6050, <strong>XL</strong>-6051,<br />
<strong>XL</strong>-6052, <strong>XL</strong>-<strong>6053</strong>, <strong>XL</strong>-6040, <strong>XL</strong>-6041, <strong>XL</strong>-6042, <strong>XL</strong>-6043)<br />
FISSAGGIO DELLA CUCITURA E APERTURA DELL’OCCHIELLO<br />
1. Per fissare i punti, ruotare il tessuto di 90 gradi in senso antiorario<br />
ed eseguire dei punti diritti fino alla fine della barretta frontale<br />
dell’occhiello.<br />
2. Estrarre il tessuto dalla macchina. Si consiglia di infilare degli spilli<br />
sulle due estremità dell’occhiello per evitare di tagliare la cucitura<br />
delle barrette.<br />
3. Tagliare l’apertura al centro dell’occhiello con un taglia cuciture,<br />
facendo attenzione a non scucire i punti.<br />
PRECAUCIÓN<br />
Cuando use el abreojales para abrir el ojal, no ponga la mano o el<br />
dedo en la dirección del corte. Se le podría escapar el abreojales y<br />
hacerse daño.<br />
ATTENZIONE<br />
Quando si utilizza la taglierina per asole per aprire l’asola, non<br />
frapporre la mano o le dita nel percorso della taglierina. La<br />
taglierina potrebbe scivolare e causare lesioni personali.<br />
BUTTONHOLE AND BUTTON SEWING<br />
OJALES Y COSTURA DE BOTONES<br />
OCCHIELLI E BOTTONI<br />
60
BUTTONHOLE AND BUTTON SEWING<br />
OJALES Y COSTURA DE BOTONES<br />
OCCHIELLI E BOTTONI<br />
Buttonhole Fine Adjustment<br />
2<br />
3 4<br />
5<br />
F<br />
1<br />
5<br />
If the stitching on the two sides of the buttonhole do not appear<br />
uniform, the following adjustments can be made.<br />
1. Set the Stitch Length Dial at “F-1.5” and stitch the right side of<br />
the buttonhole on a scrap of fabric while observing how the<br />
material is fed.<br />
2. If the right side of the buttonhole is too coarse or fine, adjust the<br />
feeding of the material with the Stitch Length Dial.<br />
1 Right row<br />
2 Stitch length<br />
3 Shorter<br />
4 Longer<br />
5 Adjusted stitch<br />
3. After obtaining a satisfactory feeding on the right side, stitch the<br />
left side of the buttonhole and observe the feeding.<br />
4. If the left side is too coarse or fine compared to the right side,<br />
adjust the buttonhole fine adjustment screw as described below.<br />
F<br />
6<br />
F<br />
If the left side is too coarse, turn the screw with the enclosed<br />
large screwdriver in the – direction.<br />
If the left side is too fine, turn the screw with the enclosed large<br />
screwdriver in the + direction.<br />
This adjustment allows both sides of the buttonhole to appear<br />
uniform.<br />
6 Stitch length dial<br />
7 Buttonhole fine adjusting screw<br />
8 Right row<br />
9 Adjusted stitch<br />
7<br />
8<br />
9 9<br />
+ –<br />
+ –<br />
61
Ajuste fino de los ojales<br />
Si las puntadas en ambos lados del ojal no parecen ser uniformes, se<br />
pueden hacer los siguientes ajustes.<br />
1. Sitúe el selector de largo de puntada en "F-1,5" y cosa la parte derecha<br />
del ojal en un pedazo de tejido, vigilando la alimentación del tejido.<br />
2. Si la parte derecha del ojal es demasiado gruesa o fina, ajuste la<br />
alimentación del tejido con el selector de largo de puntada.<br />
1 Lado derecho<br />
2 Largo de puntada<br />
3 Más corto<br />
4 Más largo<br />
5 Puntada ajustada<br />
3. Una vez obtenida una buena alimentación en el lado derecho, cosa la<br />
parte izquierda del ojal y vigile la alimentación.<br />
4. Si la parte izquierda es demasiado gruesa o fina respecto a la derecha,<br />
ajuste el tornillo de ajuste fino del ojal, tal como se describe a<br />
continuación.<br />
Regolazione della densità dei punti<br />
dell’occhiello<br />
Se la cucitura ai due lati dell’occhiello non appare uniforme, è<br />
possibile eseguire le seguenti regolazioni.<br />
1. Ruotare la manopola della lunghezza del punto su "F-1,5" e cucire<br />
il lato destro dell'occhiello su un campione di prova osservando<br />
il modo in cui avviene il trasporto del tessuto.<br />
2. Se i punti sul lato destro dell'occhiello sono troppo fitti o troppo<br />
radi, regolare il trasporto del tessuto ruotando il selettore della<br />
lunghezza del punto.<br />
1 Lato destro<br />
2 Lunghezza del punto<br />
3 Corta<br />
4 Lunga<br />
5 Punto equilibrato<br />
3. Una volta ottenuto un trasporto soddisfacente per il lato destro,<br />
cucire il lato sinistro dell'occhiello e osservare il modo in cui<br />
avviene il trasporto del tessuto.<br />
4. Se i punti del lato sinistro sono troppo fitti o troppo radi rispetto<br />
al lato destro, regolare la vite dell'equilibratore dell'occhiello<br />
come descritto di seguito.<br />
Si la parte derecha es demasiada gruesa, con el destornillador grande<br />
incluido, gire el tornillo en el sentido del –.<br />
Si la parte derecha es demasiada fina, gire dicho tornillo en el sentido<br />
del +.<br />
Este ajuste permite que ambos lados del ojal parezcan uniformes.<br />
6 Dial de longitud de puntada<br />
7 Tornillo de ajuste fino de ojal<br />
8 Lado derecho<br />
9 Puntada ajustada<br />
Se i punti del lato destro sono troppo fitti, girare la vite<br />
dell’equilibratore usando il cacciavite grande in dotazione verso la<br />
direzione –.<br />
Se i punti del lato destro sono troppo radi, girare la vite<br />
dell’equilibratore usando il cacciavite grande in dotazione verso la<br />
direzione +.<br />
Questa regolazione consente di ottenere una densità dei punti<br />
uniforme per entrambi i lati dell’occhiello.<br />
6 Selettore della lunghezza del punto<br />
7 Vite dell’equilibratore dell’occhiello<br />
8 Lato destro<br />
9 Punto equilibrato<br />
BUTTONHOLE AND BUTTON SEWING<br />
OJALES Y COSTURA DE BOTONES<br />
OCCHIELLI E BOTTONI<br />
62
BUTTONHOLE AND BUTTON SEWING<br />
OJALES Y COSTURA DE BOTONES<br />
OCCHIELLI E BOTTONI<br />
A<br />
B<br />
When the buttonhole is not sewn correctly:<br />
There are two different procedures for correcting buttonhole<br />
sewing, depending on which part of the buttonhole is not sewn<br />
correctly.<br />
Correction Procedure 1 (See fig. A)<br />
1. Raise the Presser Foot Lever, then remove the fabric, upper<br />
thread and lower thread.<br />
2. Pull the buttonhole lever slightly toward you.<br />
3. Sew about 10 stitches with no fabric, upper thread, or lower<br />
thread in the machine.<br />
4. Place the fabric under the presser foot, and set the upper and<br />
lower thread again, then lightly push the buttonhole lever toward<br />
the back of the machine and sew the buttonhole from the<br />
beginning.<br />
Correction Procedure 2 (See fig. B)<br />
1. Raise the Presser Foot Lever, then remove the fabric and all of<br />
the sewn thread.<br />
2. Place the fabric under the presser foot again, then lightly push<br />
the buttonhole lever toward the back of the machine and sew the<br />
buttonhole from the beginning.<br />
NOTE:<br />
When you are finished sewing all buttonholes be sure to raise the<br />
buttonhole lever.<br />
If the buttonhole lever is pushed toward the back of the machine<br />
while sewing any stitch other than a buttonhole, the buttonhole feed<br />
will be used and the stitch will not be sewn correctly.<br />
If the buttonhole lever is accidentally pushed when you are sewing<br />
a stitch other than a buttonhole, remove the fabric and thread from<br />
the machine, raise the buttonhole lever, and sew about 20 stitches.<br />
Then sew the intended stitch.<br />
Ojales mal cosidos:<br />
Existen dos procedimientos diferentes para corregir el cosido de los<br />
ojales, en función de la parte del ojal que se ha cosido de forma<br />
incorrecta.<br />
Procedimiento de corrección 1 (véase fig. A)<br />
1. Suba la palanca del prénsatela, y después retire el tejido, y los hilos<br />
superior e inferior.<br />
2. Tire ligeramente hacia usted de la palanca de ojales.<br />
3. Cosa unas diez puntadas sin el tejido, ni los hilos superior e inferior en<br />
la máquina.<br />
4. Ponga el tejido debajo del prénsatela, y vuelva a poner los hilos<br />
superior e inferior, después empuje ligeramente la palanca de ojales<br />
hacia la parte trasera de la máquina y cosa el ojal desde el principio.<br />
Procedimiento de corrección 2 (véase fig. B)<br />
1. Levante la palanca del prensatelas y retire el tejido y todo el hilo cosido.<br />
2. Vuelva a colocar le tejido debajo del prensatelas, presione ligeramente<br />
la palanca de ojales hacia la parte trasera de la máquina y cosa el ojal<br />
desde el principio.<br />
NOTA:<br />
Cuando haya terminado de coser todos los ojales, asegúrese de subir la<br />
palanca de ojales.<br />
Si se empuja hacia la parte posterior de la máquina la palanca de ojales al<br />
coser una puntada que no sea un ojal, entrará en acción la alimentación de<br />
ojales y la puntada no se coserá correctamente.<br />
Si empuja accidentalmente la palanca de ojales cuando esté cosiendo con<br />
una puntada que no sea la de ojal, retire el tejido y el hilo de la máquina,<br />
suba la palanca de ojales, y cosa una 20 puntadas. Después cosa con la<br />
puntada que realmente quiere.<br />
Se l'occhiello non viene cucito correttamente, vi sono due diverse<br />
procedure per ottenere una cucitura corretta, a seconda della parte<br />
dell'occhiello che è stata cucita in modo errato.<br />
Procedura correttiva 1 (vedere fig. A)<br />
1. Sollevare la leva del piedino premistoffa, poi togliere il tessuto, il<br />
filo superiore e il filo inferiore.<br />
2. Tirare la leva dell'occhiello leggermente verso sé stessi.<br />
3. Cucire circa 10 punti senza tessuto, filo superiore o filo inferiore<br />
nella macchina.<br />
4. Posizionare il tessuto sotto il piedino premistoffa, inserire di<br />
nuovo il filo superiore e il filo inferiore e poi premere leggermente<br />
la leva occhielli verso il retro della macchina per cucire l’occhiello<br />
dall’inizio.<br />
Procedura correttiva 2 (vedere fig. B)<br />
1. Sollevare la leva del piedino premistoffa, togliere il tessuto e il filo<br />
che è stato cucito.<br />
2. Mettere nuovamente il tessuto sotto il piedino premistoffa, quindi<br />
premere leggermente la leva dell'occhiello verso il retro della<br />
macchina e cucire l'occhiello dall'inizio.<br />
NOTA:<br />
Quando si è finito di cucire tutti gli occhielli, assicurarsi di sollevare<br />
la leva dell’occhiello.<br />
Se si spinge la leva dell'occhiello verso il retro della macchina<br />
durante la cucitura di punti diversi dall'occhiello, verrà utilizzato il<br />
trasporto dell'occhiello e il punto non sarà cucito correttamente.<br />
Se si spinge accidentalmente la leva dell’occhiello durante la cucitura<br />
di altri tipi di punto, tagliare tessuto e filo dalla macchina, alzare<br />
la leva dell’occhiello e cucire circa 20 punti. Poi cucire il punto<br />
desiderato.<br />
63
Button Sewing<br />
Pattern Stitch Length Stitch Width Foot<br />
(Zigzag Stitch) Fixed 1.5<br />
(Zigzag Stitch) 0 Fixed 3.5<br />
(Zigzag Stitch) Fixed 5<br />
Zigzag<br />
Presser Foot<br />
1. Measure the distance between the buttonholes and set the<br />
pattern selection dial to the Zigzag Stitch (1.5 mm, 3.5 mm or 5<br />
mm) with the desired width.<br />
2. Change the foot to the Zigzag presser foot.<br />
3. Remove the power supply plug from the outlet. And place the<br />
darning plate on the needle plate. Connect the power supply<br />
plug into a wall outlet.<br />
4. Place a button between the foot and the fabric and make sure<br />
that the needle enters the holes without hitting the button. If it hits<br />
see Step 1.<br />
5. At a slow speed, sew approximately 10 stitches.<br />
6. Remove the material from the machine. Cut the upper and lower<br />
threads and tie both threads at the back of the material.<br />
CAUTION<br />
Make sure the needle does not strike the button during<br />
sewing. The needle may break, leading to injury.<br />
Costura de botones<br />
Cucitura di bottoni<br />
Modelo de Largo de Ancho de<br />
puntada puntada puntada<br />
(Puntada zigzag) Fija 1,5<br />
(Puntada zigzag) 0 Fija 3,5<br />
(Puntada zigzag) Fija 5<br />
Prensatelas<br />
Prénsatelas para<br />
zigzag<br />
1. Mida la distancia entre los distintos agujeros del botón y ponga el<br />
selector de puntadas en la puntada zigzag (1,5 mm, 3,5 mm ó 5 mm)<br />
con el ancho deseado.<br />
2. Cambie el prensatelas por uno para zigzag.<br />
3. Desenchufe la clavija de alimentación de toma de corriente,y ponga la<br />
placa de zurcir en la placa de la aguja. Conecte el enchufe de<br />
alimentación a una toma de corriente.<br />
4. Coloque un botón entre el prensatelas y el tejido y asegúrese de que la<br />
aguja pase por los agujeros sin picar el botón. Si golpea el botón, véase<br />
el punto 1.<br />
5. Cosa unas 10 puntadas a baja velocidad.<br />
6. Retire el tejido de la máquina. Corte los hilos inferior y superior y haga<br />
un nudo con ambos en el revés del tejido.<br />
PRECAUCIÓN<br />
Asegúrese de que la aguja no roza el botón mientras cose. La aguja<br />
podría romperse y causar lesiones.<br />
Punto Lunghezza punto Ampiezza punto Piedino<br />
(Punto zigzag) Fissa 1,5<br />
(Punto zigzag) 0 Fissa 3,5<br />
(Punto zigzag) Fissa 5<br />
Piedino<br />
premistoffa<br />
a zigzag<br />
1. Misurare la distanza fra i fori del bottone de impostare il selettore<br />
dei punti sul Punto Zigzag (1,5 mm, 3,5 mm o 5 mm) regoland<br />
l’ampiezza desiderata.<br />
2. Rimuovere il piedino premistoffa e applicare il piedino premistoffa<br />
a zigzag.<br />
3. Togliere la spina dalla presa di corrente. Poi posizionare la placca<br />
di rammendo sulla placca dell’ago. Inserire la spina di alimentazione<br />
in una presa elettrica a muro.<br />
4. Inserire il bottone fra il piedino e il tessuto accertandosi che l’ago<br />
entri nei fori senza colpire il bottone. Altrimenti ripetere il punto 1.<br />
5. Eseguire circa 10 punti a bassa velocità.<br />
6. Estrarre il tessuto dalla macchina. Tagliare il filo superiore e<br />
inferiore e legare i capi sul rovescio del tessuto.<br />
ATTENZIONE<br />
Assicurarsi che l’ago non colpisca il bottone durante la cucitura.<br />
L’ago potrebbe rompersi causando lesioni personali.<br />
BUTTONHOLE AND BUTTON SEWING<br />
OJALES Y COSTURA DE BOTONES<br />
OCCHIELLI E BOTTONI<br />
64
USING ATTACHMENTS AND APPLICATIONS<br />
USO DE ACCESORIOS Y APLICACIONES<br />
GUARNIZIONI E APPLICAZIONI<br />
A<br />
1 2<br />
Zipper Insertion<br />
Pattern Stitch Length Foot<br />
(Straight Stitch<br />
(Center Needle Position))<br />
2-3 Zipper Foot<br />
3<br />
The zipper foot is used to sew various types of zippers and can<br />
easily be positioned to the right or left side of the needle.<br />
When sewing the right side of the zipper, attach the shank to the left<br />
pin of the zipper foot. When sewing the left side of the zipper, attach<br />
the shank to the right pin of the zipper foot. (See fig. A)<br />
B<br />
1. Set the Pattern Selection Dial to Straight Stitch (Center Needle<br />
Position). Set the Stitch Length between 2 and 3.<br />
2. Lower the presser foot lever and fix either the left or right pin of<br />
the zipper foot onto the shank.<br />
3. Fold the edge of the material 2 cm (3/4") and place the zipper<br />
under the folded portion.<br />
4. Lower the needle into the notch located either on the left or right<br />
side of the zipper foot.<br />
CAUTION<br />
Turn the balance wheel to make sure the needle does not<br />
strike the presser foot. If another stitch is selected, the<br />
needle will strike the presser foot, causing the needle to<br />
break, possibly leading to injury.<br />
5. Sew from the bottom of the zipper toward the top on both sides.<br />
The needle should be positioned on the zipper side of the foot<br />
for best results. (See fig. B)<br />
6. To sew the opposite side of the zipper, release<br />
the foot by pressing the button located at the back of the presser<br />
foot, install the zipper foot on the other side of the zipper and<br />
continue sewing using the other side notch.<br />
1 Zipper foot<br />
2 Right pin for sewing the left side of the zipper<br />
3 Left pin for sewing the right side of the zipper<br />
CAUTION<br />
Make sure the needle does not strike the zipper during<br />
sewing. If the needle strikes the zipper, the needle may<br />
break, leading to injury.<br />
Gathering<br />
Pattern<br />
(Straight Stitch (Left Needle Position))<br />
(Straight Stitch (Center Needle Position))<br />
Stitch Length<br />
4<br />
1. Set the Pattern Selection Dial to Straight Stitch.<br />
2. Loosen the tension of the upper thread so that the lower thread<br />
lies on the underside of the material.<br />
3. Sew a single row or multiple rows of Straight Stitch(es).<br />
4. Pull the lower thread(s) to gather the material.<br />
65
Inserción de cremalleras<br />
Modelo de puntada Largo de puntada Prensatelas<br />
(Puntada recta<br />
2-3<br />
Pata de<br />
(Aguja en el centro))<br />
cremalleras<br />
La pata de cremalleras sirve para coser varios tipos de cremalleras y puede<br />
colocarse fácilmente hacia la izquierda o derecha de la aguja.<br />
Cuando la cremallera se cose por el lado derecho, instale la pata deslizándola<br />
hacia la izquierda. Cuando se cose la cremallera por el lado izquierdo,<br />
instale la pata deslizándola hacia la derecha, tal como lo muestra la fig. A.<br />
1. Coloque el selector de puntadas en la puntada recta (aguja en el centro).<br />
Ajuste el largo de puntada entre 2 y 3.<br />
2. Baje la palanca del prensatelas y coloque el eje izquierdo o derecho de<br />
la pata de cremalleras en la zanca.<br />
3. Doble la orilla del tejido a 2 cm (3/4") y coloque la cremallera debajo<br />
de la parte doblada.<br />
4. Baje la aguja en la hendidura situada a la izquierda o derecha de la pata<br />
de cremalleras.<br />
Applicazione di cerniere<br />
Punto Lunghezza punto Piedino<br />
(Punto diritto<br />
Piedino per<br />
2-3<br />
(ago a centro))<br />
cerniere<br />
Applicando il piedino per cerniere è possibile cucire vari tipi di<br />
cerniere; questo piedino può essere montato con facilità a destra o a<br />
sinistra dell’ago.<br />
Per cucire il lato destro della cerniera, innestare il gambo sul perno<br />
sinistro del piedino per cerniere.<br />
Per cucire il lato sinistro della cerniera, innestrare il gambo sul perno<br />
destro del piedino per cerniere. (Vedere fig. A.)<br />
1. Disporre il selettore dei punti sul punto diritto (ago al centro).<br />
Regolare la lunghezza del punto fra 2 e 3.<br />
2. Abbassare il piedino premistoffa e innestare il gambo sul perno<br />
sinistro o su quello destro del piedino per cerniere.<br />
3. Piegare di 2 cm il bordo del tessuto e disporre la cerniera sotto la<br />
piega.<br />
4. Abbassare l’ago nella scanalatura situata a sinistra o a destra del<br />
piedino per cerniere.<br />
USING ATTACHMENTS AND APPLICATIONS<br />
USO DE ACCESORIOS Y APLICACIONES<br />
GUARNIZIONI E APPLICAZIONI<br />
PRECAUCIÓN<br />
Gire la rueda de graduación para comprobar que la aguja no roza<br />
el pie prensatela. Si selecciona otro tipo de puntada, la aguja<br />
chocará contra el pie prensatela, romperá la aguja y podrá hacerse<br />
daño.<br />
5. Cuesa a partir de la parte inferior de la cremallera hacia la parte<br />
superior, por ambos lados. Para mejores resultados, se debe colocar la<br />
aguja del lado de la pata y de la cremallera. Véase fig. B para mayores<br />
detalles.<br />
6. Para coser el lado opuesto de la cremallera, suelte la pata al apretar el<br />
botón situado en su parte posterior, instale la pata en el otro lado de la<br />
cremallera y siga cosiendo, pasando la aguja por la hendidura del otro<br />
lado.<br />
1 Pata de cremalleras<br />
2 Eje derecho para coser la parte izquierda de la cremallera<br />
3 Eje izquierdo para coser la parte derecha de la cremallera<br />
ATTENZIONE<br />
Ruotare il volantino per assicurarsi che l’ago non colpisca il<br />
piedino premistoffa. Se si seleziona un altro tipo di punto, l’ago<br />
andrà a battere sul piedino premistoffa e potrà rompersi, causando<br />
lesioni personali.<br />
5. Cucire il nastro della cerniera partendo dal fondo verso il davanti<br />
su entrambi i lati. Per ottenere un buon risultato, l’ago va<br />
posizionato dal lato della cerniera del piedino. (Vedere fig. B.)<br />
6. Per cucire l’altro lato della cerniera, staccare il piedino per<br />
cerniere premendo il bottoncino situato dietro il piedino<br />
premistoffa, applicarlo in modo che la scanalatura sia rivolta<br />
dall’altro lato della cerniera e riprendere a cucire.<br />
1 Piedino per cerniere<br />
2 Perno destro per la cucitura del lato sinistro della<br />
cerniera<br />
3 Perno sinistro per la cucitura del lato destro della<br />
cerniera<br />
PRECAUCIÓN<br />
Asegúrese de que la aguja no roza la cremallera mientras cose. Si<br />
la aguja choca contra la cremallera, podría romperse y causar<br />
lesiones.<br />
ATTENZIONE<br />
Assicurarsi che l’ago non colpisca la cerniera durante la cucitura.<br />
Se l’ago colpisce la cerniera, potrebbe rompersi e causare<br />
lesioni personali.<br />
Fruncido<br />
Modelo de puntada<br />
(Puntada recta (Aguja a la izquierda))<br />
(Puntada recta (Aguja en el centro))<br />
Largo de puntada<br />
1. Coloque el selector de puntadas en la puntada recta.<br />
2. Suelte la tensión del hilo superior para que el hilo inferior se encuentre<br />
tirante en el revés del tejido.<br />
3. Cosa una línea simple o varias líneas de puntadas rectas.<br />
4. Tire del o de los hilos inferiores para fruncir el tejido.<br />
4<br />
Arricciature<br />
Punto<br />
(Punto diritto (ago a sinistra))<br />
(Punto diritto (ago al centro))<br />
Lunghezza punto<br />
1. Disporre il selettore dei punti sul punto diritto.<br />
2. Allentare la tensione del filo superiore in modo che il filo inferiore<br />
si trovi sotto il tessuto.<br />
3. Cucire una o più file di punti diritti.<br />
4. Tirare il filo (o i fili) inferiore per arricciare il tessuto.<br />
4<br />
66
USING ATTACHMENTS AND APPLICATIONS<br />
USO DE ACCESORIOS Y APLICACIONES<br />
GUARNIZIONI E APPLICAZIONI<br />
A<br />
Darning<br />
Pattern Stitch Length Foot<br />
(Straight Stitch<br />
(Left Needle Position))<br />
(Straight Stitch<br />
(Center Needle Position))<br />
Any<br />
Zigzag Presser<br />
Foot<br />
B<br />
1. Remove the power supply plug from the outlet. And place the<br />
darning plate on the needle plate as shown in fig. A. Connect the<br />
power supply plug into a wall outlet.<br />
2. Set the Pattern Selection Dial to Straight Stitch.<br />
3. Place the portion to be darned under the presser foot together<br />
with a fabric for reinforcement.<br />
4. Lower the presser foot.<br />
5. Begin sewing alternating between gently drawing the work away<br />
from you and pulling it toward you.<br />
6. Repeat this motion until the portion to be darned is filled with<br />
parallel lines of stitching.(See fig. B)<br />
Zurcido<br />
Rammendo<br />
Modelo de puntada Largo de puntada Prensatelas<br />
(Puntada recta<br />
(Aguja a la izquierda))<br />
Cualquiera Prénsatelas<br />
(Puntada recta<br />
para zigzag para zigzag<br />
(Aguja en el centro))<br />
Punto Lunghezza Piedino<br />
(Punto diritto<br />
(ago a sinistra))<br />
(Punto diritto<br />
(ago al centro))<br />
Qualsiasi<br />
Piedino<br />
premistoffa a<br />
zigzag<br />
1. Desenchufe la clavija de alimentación de la toma de corriente, y ponga<br />
la placa de zurcir en la placa de la aguja como se muestra en la fig. A.<br />
Conecte el enchufe de alimentación a una toma de corriente.<br />
2. Coloque el selector de puntadas en la puntada recta.<br />
3. Ponga la parte de tejido que se debe zurcir debajo del prensatelas, con<br />
un tejido de refuerzo.<br />
4. Baje el prensatelas.<br />
5. Empiece a coser empujando y tirando alternativamente del tejido.<br />
Cuando la placa de zurcir está puesta en la máquina, los sobre el tejido.<br />
6. Repita esta operación hasta que el zurcido se haya completado,<br />
creando unas cuantas líneas de puntadas paralelas. (véase fig. B)<br />
1. Togliere la spina dalla presa di corrente. Poi posizionare la placca<br />
di rammendo sulla placca dell’ago come mostrato nella fig. A.<br />
Inserire la spina di alimentazione in una presa elettrica a muro.<br />
2. Disporre il selettore dei punti sul punto diritto.<br />
3. Mettere la parte da rammendare sotto il piedino premistoffa<br />
assieme ad una tela di rinforzo.<br />
4. Abbassare il piedino premistoffa.<br />
5. Iniziare a cucire allontanando leggermente il tessuto da sé stessi<br />
e quindi tirandolo verso sé stessi.<br />
6. Ripetere questo movimento finché la parte da rammendare non è<br />
coperta da file parallele di punti. (Vedere fig. B)<br />
67
Appliqués<br />
Pattern Stitch Length Stitch Width<br />
(Zigzag Stitch) Fixed 1.5<br />
(Zigzag Stitch) F-2 Fixed 3.5<br />
(Zigzag Stitch) Fixed 5<br />
An appliqué is created by cutting a contrasting piece of fabric into<br />
a shape to be used as a decoration on a garment or project.<br />
1. Baste the cut design to the fabric in the location where desired.<br />
2. Carefully sew around the edge of the cutout design with a Zigzag<br />
Stitch in the fine stitch length.<br />
3. Cut away the surplus fabric outside of the stitching.<br />
4. Remove the basting, if necessary.<br />
USING ATTACHMENTS AND APPLICATIONS<br />
USO DE ACCESORIOS Y APLICACIONES<br />
GUARNIZIONI E APPLICAZIONI<br />
NOTE:<br />
Make reinforcing Straight Stitches at the beginning and the end of<br />
the stitching to secure.<br />
CAUTION<br />
Be careful that the needle does not strike a basting pin<br />
during sewing. Striking a pin can cause the needle to break,<br />
resulting in injury.<br />
Aplicaciones<br />
Applicazioni<br />
Modelo de puntada<br />
Largo de puntada Ancho de puntada<br />
(Puntada zigzag) Fija 1,5<br />
(Puntada zigzag) F-2 Fija 3,5<br />
(Puntada zigzag) Fija 5<br />
Si queremos colocar un aplique de piel etc. que haga contraste, para<br />
utilizarla como decoración en una prenda.<br />
1. Hilvane la aplicación recortada al tejido, en donde desee ponerla.<br />
2. Cosa cuidadosamente los bordes del diseño con una puntada zigzag en<br />
un largo de puntada fino.<br />
3. Recorte el tejido sobrante que quede fuera del pespunte.<br />
4. Quite los hilvanes, si fuera necesario.<br />
NOTA:<br />
Haga unas puntadas rectas como refuerzo al principio y al final de las<br />
puntadas para que no puedan deshacerse.<br />
PRECAUCIÓN<br />
Asegúrese de que la aguja no tropieza con los alfileres durante la<br />
costura. Si tropieza con un alfiler, podría romperse la aguja y<br />
causar lesiones.<br />
Punto Lunghezza Ampiezza punto<br />
(Punto zigzag) Fissa 1,5<br />
(Punto zigzag) F-2 Fissa 3,5<br />
(Punto zigzag) Fissa 5<br />
Un’applicazione si ottiene sagomando un pezzo di tessuto da inserire<br />
come contrasto per creare una decorazione su un indumento o un<br />
lavoro di cucito in genere.<br />
1. Imbastire l’applicazione sul tessuto nella posizione desiderata.<br />
2. Cucire accuratamente seguendo il contorno del motivo con un<br />
punto zigzag a lunghezza molto corta.<br />
3. Tagliare via il tessuto in eccesso esterno alla cucitura.<br />
4. Se necessario, togliere l’imbastitura.<br />
NOTA:<br />
Fissare l’applicazione con cuciture di rinforzo con punto diritto<br />
all’inizio e alla fine della cucitura.<br />
ATTENZIONE<br />
Assicurarsi che l’ago non colpisca uno spillo di imbastitura<br />
durante la cucitura. In caso contrario, l’ago potrebbe rompersi<br />
e provocare lesioni personali.<br />
68
USING ATTACHMENTS AND APPLICATIONS<br />
USO DE ACCESORIOS Y APLICACIONES<br />
GUARNIZIONI E APPLICAZIONI<br />
A<br />
Monogramming and<br />
Embroidering<br />
Pattern Stitch Length Stitch Width Foot<br />
(Zigzag Stitch) Fixed 1.5<br />
(Zigzag Stitch) Any Fixed 3.5 None<br />
(Zigzag Stitch) Fixed 5<br />
PREPARING FOR MONOGRAMMING AND EMBROIDERING<br />
1. Remove the power supply plug from the outlet. And place the<br />
darning plate on the needle plate as shown in fig. A. Connect the<br />
power supply plug into a wall outlet.<br />
2. Set the Pattern Selection Dial to the appropriate Zigzag Stitch<br />
setting.<br />
3. Draw the lettering (for monogramming) or design (for embroidering)<br />
on the surface of the fabric.<br />
4. Stretch the fabric between embroidery hoops as firmly as<br />
possible with the underside of the fabric on the bottom of the<br />
inside hoop.<br />
5. Place the work under the needle and lower the presser bar with<br />
the foot removed.<br />
6. Pull the lower thread up through the work at the starting position<br />
by turning the balance wheel and make a few holding stitches.<br />
7. Grip the hoop with the thumb and forefingers of both hands while<br />
pressing the fabric with the middle and third fingers and supporting<br />
the outside of the hoop with your smaller fingers.<br />
MONOGRAMMING<br />
1. Sew, moving the hoop slowly along the lettering at a constant<br />
speed.<br />
2. Secure with a few straight stitches at the end of the last letter.<br />
EMBROIDERING<br />
1. Stitch the outline of the design by moving the embroidery hoop.<br />
2. Fill in the design alternating from the outline of the design to the<br />
inside and from the inside to the edge of the outline until the<br />
design is completely filled in. Keep the stitching close together.<br />
NOTE:<br />
A long stitch is made by moving the embroidery hoop rapidly and a<br />
short stitch is made by moving it slowly.<br />
3. Secure with a few Straight Stitches at the end of the design.<br />
69
Monogramas y bordados<br />
Modelo de puntada<br />
Largo de<br />
puntada<br />
Ancho de<br />
puntada<br />
Prensatelas<br />
(Puntada zigzag) Fija 1,5<br />
Quitarlo,<br />
(Puntada zigzag) Cualquiera Fija 3,5 sin<br />
prensatelas<br />
(Puntada zigzag) Fija 5<br />
PREPARACIÓN PARA MONOGRAMAS Y BORDADOS<br />
1. Desenchufe la clavija de alimentación de la toma de corriente, y ponga<br />
la placa de zurcir en la placa de la aguja como se muestra en la fig. A.<br />
Conecte el enchufe de alimentación a una toma de corriente.<br />
2. Ponga el selector de puntadas en la puntada zigzag apropiada.<br />
3. Dibuje las letras (para monogramas) o el diseño (para bordados) en el<br />
derecho del tejido.<br />
4. Estire el tejido en el bastidor tanto como pueda y si es posible con el<br />
revés abajo del círculo interior.<br />
5. Coloque la tela debajo de la aguja y baje la barra del prensatelas,<br />
aunque no haya ningún prensatelas puesto.<br />
6. Girando la ruedecilla, pase el hilo inferior por el trabajo y cosa unas<br />
cuantas puntadas para asegurarlo.<br />
7. Sujete el bastidor con el pulgar e índice de cada mano, presione el tejido<br />
con los dedos medios y anulares y aguante los exteriores del bastidor<br />
con los meñiques.<br />
Monogrammi e ricami<br />
Punto Lunghezza punto Ampiezza punto Piedino<br />
(Punto zigzag) Fissa 1,5<br />
(Punto zigzag) Qualsiasi Fissa 3,5 Nessuno<br />
(Punto zigzag) Fissa 5<br />
PREPARAZIONE PER LA CUCITURA DI MONOGRAMMI E RICAMI<br />
1. Togliere la spina dalla presa di corrente. Poi posizionare la placca<br />
di rammendo sulla placca dell’ago come mostrato nella fig. A.<br />
Conecte el enchufe de alimentación a una toma de corriente.<br />
2. Ruotare il selettore dei punti sul punto zigzag prescelto.<br />
3. Disegnare le lettere che comporranno il monogramma o il motivo<br />
ornamentale da rammendare sul diritto del tessuto.<br />
4. Mettere il tessuto in un cerchietto da ricamo tenendolo ben teso,<br />
con il rovescio del tessuto sotto al cerchietto interno.<br />
5. Porre il lavoro sotto l’ago e abbassare la barra di pressione a cui<br />
sarà stato tolto in precedenza il piedino premistoffa.<br />
6. Girando il volantino, tirare su il filo inferiore facendolo passare<br />
attraverso il lavoro nella posizione di inizio e cucire alcuni punti<br />
di rinforzo.<br />
7. Usando entrambe le mani, tenere il cerchietto fra il pollice e<br />
l’indice e nello stesso tempo premere il tessuto con il medio e<br />
l’anulare reggendo con i mignoli il bordo esterno del cerchietto.<br />
USING ATTACHMENTS AND APPLICATIONS<br />
USO DE ACCESORIOS Y APLICACIONES<br />
GUARNIZIONI E APPLICAZIONI<br />
MONOGRAMAS<br />
1. Cosa moviendo el bastidor lentamente por las letras, a una velocidad<br />
constante.<br />
2. Termine con unas puntadas rectas de seguridad al final de la última<br />
letra.<br />
BORDADOS<br />
1. Remarque el contorno del diseño, moviendo el bastidor de acuerdo con<br />
el dibujo.<br />
2. Rellene el motivo de puntadas, adelantando alternativamente del<br />
contorno hacia el interior y del interior hacia la orilla del contorno hasta<br />
que el motivo quede completamente cubierto de puntadas, teniendo<br />
siempre cuidado en mantener las puntadas muy juntas.<br />
NOTA:<br />
Se pueden realizar puntadas largas al mover el bastidor rápidamente<br />
y puntadas cortas al moverlo lentamente.<br />
3. Termine con unas puntadas rectas de seguridad al final del dibujo.<br />
MONOGRAMMI<br />
1. Cucire muovendo il cerchietto lentamente seguendo le lettere del<br />
monogramma a velocità costante.<br />
2. Terminata l’esecuzione dell’ultima lettera, fissare la cucitura con<br />
alcuni punti diritti.<br />
RICAMI<br />
1. Cucire il contorno del motivo muovendo il cerchietto da ricamo.<br />
2. Riempire il disegno cucendo con movimento alternato dal contorno<br />
verso l’interno e dall’interno verso il bordo del contorno,<br />
finché il motivo non è completamente pieno. Cucire mantenendo<br />
le linee dei punti ravvicinate.<br />
NOTA:<br />
Muovendo il cerchietto da ricamo velocemente si otterranno dei<br />
punti più lunghi, mentre muovendolo lentamente si verranno prodotti<br />
dei punti più corti.<br />
3. Terminata l’esecuzione del motivo, fissare la cucitura con alcuni<br />
punti diritti.<br />
70
USO DE ACCESORIOS Y APLICACIONES<br />
GUARNIZIONI E APPLICAZIONI<br />
USING ATTACHMENTS AND APPLICATIONS<br />
OPTIONAL ACCESSORIES<br />
A<br />
Using the Walking Foot<br />
1<br />
Pattern Stitch Length Stitch Width<br />
(Straight Stitch<br />
(Center Needle Position))<br />
0<br />
(Zigzag Stitch) 1-4 Fixed 1.5<br />
2<br />
(Zigzag Stitch) Fixed 3.5<br />
(Zigzag Stitch) Fixed 5<br />
This foot is very useful for sewing materials such as vinyl cloth,<br />
synthetic leather, thin leather, etc. These materials are difficult to<br />
feed when sewing. The walking foot prevents such materials from<br />
crumpling, slipping or sticking between presser foot and material<br />
due to even feeding of upper and lower materials.<br />
NOTE:<br />
Use foot only for straight sewing (Center Needle Position) and<br />
zigzag stitching. Do not use other patterns.<br />
B<br />
1<br />
1. Remove the power supply plug from the outlet.<br />
2. Raise the needle and the presser foot.<br />
3. Loosen the presser foot screw to remove the presser foot holder.<br />
(See fig. A)<br />
4. Attach the forked section of the connecting lever to the needle<br />
clamp, install the walking foot to the presser bar. (See fig. B)<br />
5. Lower the presser foot lever and then tighten the accessory<br />
presser bar holder fixing screw. (See fig. C)<br />
1 Forked part of operation lever<br />
2 Presser bar holder<br />
1 Use a screwdriver<br />
C<br />
CAUTION<br />
• Use the screwdriver to tighten the screw securely. If the<br />
screw is loose, the needle may strike the presser foot<br />
and cause injury.<br />
• Be sure to turn the balance wheel toward the front of the<br />
machine to check that the needle does not strike the<br />
presser foot. If the needle strikes the presser foot, injury<br />
may result.<br />
• Be careful not to touch the needle during this time,<br />
otherwise injury may result.<br />
CAUTION<br />
When sewing with the walking foot, sew at medium to low<br />
speeds.<br />
71
ACCESORIOS OPCIONALES<br />
Utilización del pie caminante<br />
Modelo de puntada Largo de puntada Ancho de puntada<br />
(Puntada recta<br />
(Aguja en el centro))<br />
(Puntada zigazg) 1-4 Fija 1,5<br />
(Puntada zigazg) Fija 3,5<br />
(Puntada zigazg) Fija 5<br />
Este pie resulta muy útil para coser materiales como la tela de vinilo, el<br />
cuero sintético, cuero fino etc. Es complicado alimentar la máquina con<br />
estos materiales, y el pie caminante impide que se arruguen, que resbalen<br />
o que queden trabados en el prensatelas al coser al mismo tiempo los<br />
materiales superior e inferior.<br />
0<br />
ACCESSORI OPZIONALI<br />
Utilizzazione del piedino semovente<br />
(Punto diritto<br />
(ago al centro)<br />
Punto Lunghezza Ampiezza punto<br />
(Punto zigazg) 1-4 Fissa 1,5<br />
(Punto zigazg) Fissa 3,5<br />
(Punto zigazg) Fissa 5<br />
Questo piedino è molto utile per cucire materiali come tessuti in<br />
vinile, pelle sintetica, pelle fine, ecc. Il trasporto di questi materiali è<br />
difficile e il piedino semovente ne impedisce il raggrinzimento, lo<br />
scivolamento o il bloccaggio nel piedino premistoffa a causa di<br />
trasporto irregolare dei materiali superiore e inferiore.<br />
0<br />
USING ATTACHMENTS AND APPLICATIONS<br />
USO DE ACCESORIOS Y APLICACIONES<br />
GUARNIZIONI E APPLICAZIONI<br />
NOTA:<br />
Sólo puede utilizar este pie para coser puntadas rectas (Aguja en el centro)<br />
y puntadas zigzag. No lo use para otras puntadas.<br />
1. Retire el enchufe de la toma de corriente.<br />
2. Levante la aguja y el prensatelas.<br />
3. Afloje el tornillo del prensatelas para retirar el soporte del prensatelas<br />
(véase fig. A).<br />
4. Sujete la horquilla de la palanca de conexión a la abrazadera de la aguja<br />
e instale el pie caminante en la barra prensadora (véase fig. B).<br />
5. Baje la palanca del prensatelas y apriete el tornillo de fijación del<br />
soporte de la barra prensadora accesoria (véase fig. C).<br />
1 Horquilla de la palanca de operaciones<br />
2 Soporte de la barra prensadora<br />
1 Utilice o un destornillador<br />
NOTA:<br />
Si puó usare questo piedino solo per cucire punto diritto (ago el<br />
centro) e zigzag. Non usare altri punti.<br />
1. Togliere la spina dalla presa di corrente.<br />
2. Sollevare l'ago e il piedino premistoffa.<br />
3. Allentare la vite del piedino premistoffa per togliere il supporto del<br />
piedino (vedere fig. A).<br />
4. Fissare la sezione a forcella della leva di collegamento al morsetto<br />
dell'ago, installare il piedino semovente sull'asta premistoffa<br />
(vedere fig. B).<br />
5. Abbassare la leva del piedino premistoffa, quindi serrare la vite di<br />
fissaggio del supporto dell'asta premistoffa (vedere fig. C).<br />
1 Sezione a forcella della leva di collegamento<br />
2 Supporto asta premistoffa<br />
1 Utilizzare un cacciavite<br />
PRECAUCIÓN<br />
• Use el destornillador para apretar el tornillo fuertemente. Si el<br />
tornillo está suelto, la aguja podría chocar contra el pie<br />
prensatela y causar lesiones.<br />
• Gire la rueda de graduación hacia la parte delantera de la<br />
máquina de coser para comprobar que la aguja no roza el pie<br />
prensatela. Si la aguja roza el pie prensatela, podría hacerse<br />
daño.<br />
• Procure no tocar la aguja durante la operación, pues podría<br />
hacerse daño.<br />
ATTENZIONE<br />
• Utilizzare il cacciavite per serrare saldamente la vite. Se la<br />
vite è allentata, l’ago potrebbe colpire il piedino premistoffa<br />
e provocare lesioni personali.<br />
• Assicurarsi di ruotare il volantino verso la parte anteriore<br />
della macchina per verificare che l’ago non tocchi il piedino<br />
premistoffa. Se l’ago tocca il piedino premistoffa, possono<br />
verificarsi lesioni personali.<br />
• Fare attenzione a non toccare l’ago durante questa operazione,<br />
per evitare lesioni personali.<br />
PRECAUCIÓN<br />
Cuando cosa con el pie móvil, ajuste la velocidad entre media y baja.<br />
ATTENZIONE<br />
Quando si cuce con il piedino mobile, utilizzare una velocità da<br />
media a minima.<br />
72
USO DE ACCESORIOS Y APLICACIONES<br />
GUARNIZIONI E APPLICAZIONI<br />
USING ATTACHMENTS AND APPLICATIONS<br />
A<br />
OPTIONAL ACCESSORIES<br />
Using the Spring-action<br />
Quilting Foot<br />
Pattern<br />
(Straight Stitch (Center Needle Position))<br />
Stitch Length<br />
Any<br />
B<br />
2<br />
1<br />
A<br />
The Spring -action Quilting Foot is useful for darning and freemotion<br />
machine quilting.<br />
1. Remove the power supply plug from the outlet.<br />
2. Raise the needle and the presser foot.<br />
3. Loosen the presser foot screw to remove the presser foot holder.<br />
(See fig. A)<br />
4. Attach the quilting foot, making sure that part indicated by A in<br />
the illustration is above the needle clamp screw, then lower the<br />
Presser Foot Lever and tighten the presser foot screw.<br />
* Be sure that the needle clamp screw is firmly tightened. (See fig.<br />
B)<br />
3<br />
1 Use a screwdriver.<br />
2 Presser Foot Screw<br />
3 Needle Clamp Screw<br />
C<br />
CAUTION<br />
• Be careful not to touch the needle during this time,<br />
otherwise injury may result.<br />
• Use the screwdriver to tighten the presser foot holder<br />
screw securely. If the screw is loose, the needle may<br />
strike the presser foot and cause injury.<br />
• Be sure to turn the balance wheel toward the front of the<br />
machine to check that the needle does not strike the<br />
presser foot. If the needle strikes the presser foot, injury<br />
may result.<br />
5. Place the darning plate on the needle plate as shown in fig. C.<br />
Connect the power supply plug into a wall outlet.<br />
6. Set the Pattern Selection Dial to Straight Stitch.<br />
* Before starting to sew, draw the quilting design on the fabric.<br />
7. Use both hands to keep the fabric firmly stretched and move the<br />
fabric to sew over the drawn design. (See fig. D)<br />
B Quilting design (Line)<br />
D<br />
8. The stitch length depends on how quickly the fabric is moved<br />
and on the machine’s sewing speed. Sew while moving the<br />
fabric slowly.<br />
B<br />
73
ACCESORIOS OPCIONALES<br />
Utilización del prensatelas<br />
enguatador accionado por muelle<br />
Modelo de puntada<br />
(Puntada recta (Aguja en el centro))<br />
Largo de puntada<br />
Cualquiera<br />
El prensatelas enguatador accionado por muelle sirve para zurcir y para<br />
coser acolchados con libertad de movimiento de la máquina.<br />
1. Retire el enchufe de la toma de corriente.<br />
2. Levante la aguja y el prensatelas.<br />
3. Afloje el tornillo del prensatelas y retire el soporte del prensatelas<br />
(véase fig. A).<br />
4. Coloque el prensatelas enguatador y asegúrese de que la parte indicada<br />
como A en el dibujo queda sujeta al tornillo de la abrazadera de la<br />
aguja. Baje la palanca del prensatelas y apriete el tornillo del prensatelas.<br />
* Asegúrese de que el tornillo de la abrazadera de la aguja está bien<br />
apretado (véase fig. B).<br />
1 Utilice o un destornillador.<br />
2 Tornillo del prensatelas<br />
3 Tornillo de la abrazadera de la aguja<br />
ACCESSORI OPZIONALI<br />
Utilizzazione del piedino per<br />
trapunte azionato a molla<br />
Punto<br />
(Punto diritto (ago al centro))<br />
Lunghezza punto<br />
Qualsiasi<br />
Il piedino per trapunte azionato a molla è utile per foderare di tessuto<br />
trapuntato.<br />
1. Togliere la spina dalla presa di corrente.<br />
2. Sollevare l'ago e il piedino premistoffa.<br />
3. Allentare la vite del piedino premistoffa per togliere il supporto del<br />
piedino (Vedere fig. A).<br />
4. Fissare il piedino per trapunte, accertandosi che la parte indicata<br />
con A nella figura sia fissata sulla vite di bloccaggio dell'ago,<br />
quindi abbassare la leva del piedino premistoffa e serrare la vite<br />
del piedino.<br />
* Accertarsi che la vite di bloccaggio dell'ago sia ben serrata<br />
(vedere fig. B).<br />
1 Utilizzare un cacciavite.<br />
2 Vite del piedino premistoffa<br />
3 Vite di bloccaggio dell'ago<br />
USING ATTACHMENTS AND APPLICATIONS<br />
USO DE ACCESORIOS Y APLICACIONES<br />
GUARNIZIONI E APPLICAZIONI<br />
PRECAUCIÓN<br />
• Procure no tocar la aguja durante la operación, pues podría<br />
hacerse daño.<br />
• Use el destornillador para apretar fuertemente tornillo del<br />
soporte del pie prensatela. Si el tornillo está suelto, la aguja<br />
podría chocar contra el pie prensatela y causar lesiones.<br />
• Gire la rueda de graduación hacia la parte delantera de la<br />
máquina de coser para comprobar que la aguja no roza el pie<br />
prensatela. Si la aguja roza el pie prensatela, podría hacerse<br />
daño.<br />
ATTENZIONE<br />
• Fare attenzione a non toccare l’ago durante questa operazione,<br />
per evitare lesioni personali.<br />
• Utilizzare il cacciavite per serrare saldamente la vite del<br />
supporto. Se la vite è allentata, l’ago potrebbe colpire il<br />
piedino premistoffa e provocare lesioni personali.<br />
• Assicurarsi di ruotare il volantino verso la parte anteriore<br />
della macchina per verificare che l’ago non tocchi il piedino<br />
premistoffa. Se l’ago tocca il piedino premistoffa, possono<br />
verificarsi lesioni personali.<br />
5. Ponga la placa de zurcir en la placa de la aguja como se muestra en la<br />
fig. C. Conecte el enchufe de alimentación a una toma de corriente.<br />
6. Sitúe el selector de puntada en puntada recta.<br />
* Antes de empezar a coser, dibuje el acolchado en el tejido.<br />
7. Sujete firmemente el tejido con las dos manos, manténgalo estirado y<br />
cósalo siguiendo el dibujo (véase fig. D).<br />
B Dibujo del acolchado (línea)<br />
8. El largo de puntada depende de la velocidad con que se mueve el tejido<br />
y de la velocidad de cosido de la máquina. Cosa mientras desplaza<br />
lentamente el tejido.<br />
5. Poi posizionare la placca di rammendo sulla placca dell’ago<br />
come mostrato nella fig. C. Inserire la spina di alimentazione in<br />
una presa elettrica a muro.<br />
6. Regolare il selettore dei punti sul punto dritto.<br />
* Prima di iniziare a cucire, disegnare il motivo da trapuntare sul<br />
tessuto.<br />
7. Con ambedue le mani tenere il tessuto ben teso e spostarlo per<br />
cucire sopra il disegno (vedere fig. D).<br />
B Motivo da trapuntare (linea)<br />
8. La lunghezza del punto dipende da quanto velocemente si sposta<br />
il tessuto e dalla velocità della macchina. Cucire muovendo<br />
lentamente il tessuto.<br />
74
USO DE ACCESORIOS Y APLICACIONES<br />
GUARNIZIONI E APPLICAZIONI<br />
USING ATTACHMENTS AND APPLICATIONS<br />
A<br />
OPTIONAL ACCESSORIES<br />
Using the 1/4-Inch Quilting Foot<br />
Pattern<br />
Stitch Length<br />
(Straight Stitch (Center Needle Position)) 2-2.5<br />
1<br />
The 1/4-Inch Quilting Foot is used to sew fixed seam allowance 6.5<br />
mm (1/4") when piecing together a quilt. (See fig. A)<br />
1. Set the Pattern Selection Dial to Straight Stitch.<br />
Set the Stitch Length between 2 and 2.5.<br />
2. Change the foot to the 1/4-Inch Quilting Foot.<br />
1 Seam allowance (1/4", 6.5 mm)<br />
B<br />
2<br />
3<br />
3. Position the presser foot over the fabric and sew as shown in fig.<br />
B and C.<br />
• Achieving an accurate seam allowance. (See fig. B)<br />
2 Beginning of stitching.<br />
3 Align this mark with edge of fabric.<br />
4 End of stitching<br />
5 Align this mark with edge of fabric.<br />
• Quickly stitch together a quilt. (See fig. C)<br />
4<br />
6 Top of fabric.<br />
7 Seam (1/8", 3.2 mm)<br />
5<br />
C<br />
6<br />
7<br />
75
ACCESORIOS OPCIONALES<br />
Utilización del prensatela para<br />
pespunte 1/4<br />
Modelo de puntada<br />
Largo de puntada<br />
(Puntada recta (Aguja en el centro)) 2-2,5<br />
El prensatela para pespunte 1/4 se utiliza para coser costuras con una<br />
anchura fija de 6,5 mm (1/4") al juntar las partes de un acolchado (véase<br />
fig. A).<br />
1. Sitúe el selector de puntadas en puntada recta.<br />
Sitúe el selector de largo de puntada entre 2 y 2,5.<br />
2. Coloque el prensatela para pespunte 1/4.<br />
ACCESSORI OPZIONALI<br />
Utilizzazione del piedino per<br />
patchwork<br />
Punto<br />
Lunghezza punto<br />
(Punto diritto (ago al centro)) 2-2,5<br />
Il piedino per patchwork è utilizzato per cucire con una tolleranza di<br />
cucitura fissa di 6,5 mm (1/4"), quando si eseguono lavori di trapunta<br />
(vedere fig. A).<br />
1. Regolare il selettore dei punti sul punto dritto.<br />
Regolare la lunghezza del punto tra 2 e 2,5.<br />
2. Mettere il piedino nella posizione piedino per patchwork.<br />
USING ATTACHMENTS AND APPLICATIONS<br />
USO DE ACCESORIOS Y APLICACIONES<br />
GUARNIZIONI E APPLICAZIONI<br />
1 Anchura de la costura (1/4", 6,5 mm)<br />
3. Coloque el prensatelas sobre el tejido, y cosa tal como se indica en las<br />
fig. B y C.<br />
1 Tolleranza della cucitura (1/4", 6,5 mm)<br />
3. Posizionare il piedino premistoffa sul tessuto e cucire come<br />
indicato nelle fig. B e C.<br />
• Para hacer una anchura de la costura correcta. (véase fig. B)<br />
2 Principio de la puntada.<br />
3 Alinee esta marca con el borde del tejido.<br />
4 Final de la puntada<br />
5 Alinee esta marca con el borde del tejido.<br />
• Cosido rápido de un acolchado. (véase fig. C)<br />
6 Parte superior del tejido.<br />
7 Costura (1/8", 3,2 mm)<br />
• Permette di ottenere una tollere una tolleranza di cucitura accurata.<br />
(vedere fig. B)<br />
2 Inizio della cucitura<br />
3 Allineare questo segno con l'orlo del tessuto.<br />
4 Fine della cucitura<br />
5 Allineare questo segno con l'orlo del tessuto.<br />
• Cucire rapidamente una trapunta. (vedere fig. C)<br />
6 Parte superiore del tessuto<br />
7 Cucitura (1/8", 3,2 mm)<br />
76
MAINTENANCE<br />
MANTENIMIENTO<br />
MANUTENZIONE<br />
Changing the Light Bulb<br />
CAUTION<br />
• Turn off the main power switch and unplug the machine<br />
before changing the light bulb. If the main power switch<br />
is on when the light bulb is changed, an electric shock<br />
may result. If the machine is on and foot controller is<br />
stepped on, injuries may result.<br />
• To avoid burns, give the light bulb time to cool before<br />
changing it.<br />
A<br />
1. Remove the power supply plug from the outlet.<br />
2. Loosen the screw on the reverse side of sewing head as shown<br />
in fig. A.<br />
3. Remove the light cover from the machine as illustrated in fig. A.<br />
B<br />
1<br />
1<br />
4. Replace the sewing light bulb. (See fig. B)<br />
1 Bulb<br />
1 Loosen<br />
2 Tighten<br />
2<br />
C<br />
5. Reattach the light cover and fasten the screw as shown in fig.<br />
C.<br />
77
Cambio de la bombilla<br />
Sostituzione della lampadina<br />
PRECAUCIÓN<br />
• Apague y desenchufe la máquina de coser de la corriente antes<br />
de cambiar la bombilla. Si cambia la bombilla con la máquina<br />
encendida, podrá sufrir una descarga eléctrica. Si la máquina<br />
está enchufada y pisa el pedal, podría hacerse daño.<br />
• Para evitar quemaduras, deje enfriar la bombilla antes de<br />
cambiarla.<br />
1. Desenchufe la máquina.<br />
2. Afloje el tornillo de la cubierta de la máquina, tal como se indica en la<br />
fig. A.<br />
3. Retire la cubierta de la máquina tal como se indica en la fig. A.<br />
ATTENZIONE<br />
• Prima di sostituire la lampadina, spegnere sempre la macchina<br />
e scollegarla dalla presa di corrente. Se l’interruttore<br />
principale è su ON quando si sostituisce la lampadina, si può<br />
subire una scossa elettrica. Se la macchina è accesa e viene<br />
premuto inavvertitamente il reostato a pedale, possono verificarsi<br />
lesioni personali.<br />
• Per evitare bruciature, attendere che la lampadina si raffreddi<br />
prima di sostituirla.<br />
1. Disinserire la spina di alimentazione dalla presa elettrica.<br />
2. Allentare la vite sul lato posteriore della macchina come mostrato<br />
in fig. A.<br />
3. Rimuovere la placca frontale dalla macchina come illustrato in<br />
fig. A.<br />
4. Cambie la bombilla tal como se muestra en la fig. B.<br />
4. Sostituire la lampadina. (Vedere fig. B)<br />
MAINTENANCE<br />
MANTENIMIENTO<br />
MANUTENZIONE<br />
1 Bombilla<br />
1 Aflojar<br />
2 Apretar<br />
1 Lampadina<br />
1 Allentare<br />
2 Serrare<br />
5. Vuelva a colocar la cubierta y apriete el tornillo tal como indica la fig.<br />
C.<br />
5. Rimontare la placca frontale e stringere la vite come mostrato in<br />
fig. C.<br />
78
MAINTENANCE<br />
MANTENIMIENTO<br />
MANUTENZIONE<br />
A<br />
Cleaning<br />
CAUTION<br />
Be sure to unplug the machine before cleaning it. Otherwise,<br />
electric shock or injury may result.<br />
B<br />
1<br />
1. Remove the power supply plug from the outlet.<br />
2. Raise the needle and the presser foot.<br />
3. Loosen the presser foot screw and the needle clamp screw to<br />
remove the presser foot holder and the needle. (See fig. A)<br />
4. Usibg a coin, remove the screws.<br />
The tab at the front of the needle plate is hooked into the<br />
machine.<br />
Slightly raise the back of the needle plate 1, and slide it back to<br />
remove the tab 2.<br />
Then lift the plate to remove it 3.<br />
3<br />
2<br />
2<br />
1<br />
3<br />
4<br />
1 Use a coin or screwdriver.<br />
2 Tab<br />
5. Turn the balance wheel toward you until the notch of shuttle<br />
aligns with the shelf of race as shown in the illustration.<br />
3 Notch of shuttle race<br />
4 Shelf of race<br />
CAUTION<br />
Be sure to turn the balance wheel towards the front of the<br />
machine. Turning the balance wheel in the other direction<br />
may damage the machine.<br />
C<br />
6. Remove the race. (See fig. C)<br />
7. Clean out lint and dust.<br />
* Use soft fabric to clean the race. DO NOT OIL the race or shuttle.<br />
(See fig. D)<br />
5 Race<br />
6 Shuttle<br />
* DO NOT OIL.<br />
D<br />
5<br />
CAUTION<br />
• Do not use a damaged race or shuttle. Otherwise, the<br />
thread may tangle and cause a poor finish, or the needle<br />
may break. You can get the proper parts from your<br />
authorized dealer.<br />
• Be sure to insert the race in the correct position. Otherwise,<br />
the needle may break.<br />
6<br />
7<br />
8. Assemble the race first then the needle plate.<br />
When installing the race, be sure that the notch of shuttle is in the<br />
same position that it was when the shuttle hook was removed<br />
and that the shelf on the race aligns with the spring.<br />
Install the needle plate by sliding it to the left (the reverse of its<br />
removal procedure).<br />
7 Notch of shuttle<br />
8 Shelf<br />
9 Spring<br />
8 9<br />
79
Limpieza<br />
Pulizia<br />
PRECAUCIÓN<br />
Asegúrese de desenchufar la máquina antes de limpiarla. De otra<br />
manera, podría recibir una descarga eléctrica.<br />
1. Retire la clavija de la toma de corriente.<br />
2. Levante la aguja y el prensatelas.<br />
3. Suelte el tornillo del prensatelas y el tornillo de ajuste de la aguja para<br />
sacar el soporte del prensatelas y la aguja. (véase fig. A)<br />
4. Utilizando una moneda, retire los tornillos.<br />
La lengüeta de la parte delantera de la placa de la aguja está enganchada<br />
en la máquina.<br />
Levante ligeramente la parte trasera de la placa de la aguja 1, y<br />
deslícela hacia atrás para retirar la lengüeta 2.<br />
Después levante la placa para retirarla 3.<br />
1 Utilice una moneda o un destornillador.<br />
2 Lengüeta<br />
5. Gire la ruedecilla hacia usted hasta que la muesca en la pista de la<br />
lanzadera quede alineada con la repisa de la pista gancho de la<br />
lanzadera, tal como se indica en el dibujo.<br />
3 Muesca en la pista de la lanzadera<br />
4 Repisa de la pista<br />
PRECAUCIÓN<br />
Gire la rueda de graduación hacia la parte delantera de la máquina.<br />
Si gira la rueda en el otro sentido, podría averiar la máquina.<br />
6. Retire el garfio de la lanzadera. (véase fig. C.)<br />
7. Limpie el polvo y las suciedades.<br />
* Utilice un trapo suave para limpiar el garfio de la lanzadera. NO<br />
LUBRICAR el garfio de la lanzadera o la pista. (véase fig. D.)<br />
5 Garfio de la lanzadera<br />
6 Pista de la lanzadera<br />
ATTENZIONE<br />
Assicurarsi di scollegare la macchina dalla presa di corrente<br />
prima di pulirla. In caso contrario, vi sono rischi di scossa<br />
elettrica o lesioni personali.<br />
1. Disinserire la spina di alimentazione dalla presa.<br />
2. Far salire l’ago ed il piedino premistoffa nella posizione piu alta.<br />
3. Allentare la vite del piedino premistoffa e la vite del morsetto<br />
dell’ago per smontare il supporto del piedino e l’ago. (Vedere fig.<br />
A)<br />
4. Usando una moneta, rimuovere le viti.<br />
La linguetta sul davanti della placca dell’ago è agganciata alla<br />
macchina.<br />
Sollevare leggermente il retro della placca dell’ago 1 e spostarla<br />
indietro per estrarre la linguetta 2.<br />
Poi sollevare la placca per rimuoverla 3.<br />
1 Utilizzare una moneta o un cacciavite.<br />
2 Linguetta<br />
5. Girare verso di sé il volantino fino a quando la tacca sulla guida<br />
della navetta è allineata al piano della guida, come mostrato nella<br />
figura.<br />
3 Tacca sulla guida della navetta<br />
4 Piano della guida<br />
ATTENZIONE<br />
Assicurarsi di ruotare il volantino verso la parte anteriore della<br />
macchina. Se il volantino viene ruotato nella direzione opposta,<br />
si potrebbe danneggiare la macchina.<br />
6. Estrarre la capsula del crochet. (Vedere fig. C)<br />
7. Togliere rimasugli di filo e polvere.<br />
* Pulire il crochet con un pezzo di stoffa morbida. NON oliare il<br />
crochet o il suo alloggiamento. (Vedere fig. D)<br />
MAINTENANCE<br />
MANTENIMIENTO<br />
MANUTENZIONE<br />
* NO LUBRICAR.<br />
PRECAUCIÓN<br />
• No utilice un cangrejo o una lanzadera estropeados. De otra<br />
manera, el hilo podría enrollarse y causar un acabado feo o la<br />
aguja podría romperse. Puede adquirir las piezas adecuadas<br />
en cualquier tienda especializada.<br />
• Asegúrese de que coloca el cangrejo en la posición correcta. Si<br />
no, la aguja podría romperse.<br />
8. Monte la pista, y a continuación la placa de agujas.<br />
Al instalar el gancho la pista, asegúrese de que la muesca de la<br />
lanzadera sigue en la misma posición en que estaba cuando se retiró el<br />
gancho de la lanzadera, y asegúrese de que la repisa sobre la posta está<br />
alineada con el muelle.<br />
Coloque la placa de agujas deslizándola hacia la izquierda (en el<br />
sentido opuesto a cuando la retiró).<br />
7 Muesca en la pista de la lanzadera<br />
8 Repisa<br />
9 Muelle<br />
5 Capsula del crochet<br />
6 Guida della navetta<br />
* NON LUBRIFICARE<br />
ATTENZIONE<br />
• Se la guida navetta o la navetta risulta danneggiato, non<br />
utilizzarla. In caso contrario, il filo potrebbe ingarbugliarsi e<br />
causare una finitura scadente, oppure l’ago potrebbe rompersi.<br />
Per acquistare le parti appropriate, rivolgersi al rivenditore<br />
autorizzato.<br />
• Assicurarsi di inserire la guida navetta nella posizione corretta.<br />
In caso contrario, l’ago potrebbe rompersi.<br />
8. Montare prima la guida quindi la placca dell'ago.<br />
Installando la guida, accertarsi che la tacca della navetta si trovi<br />
nella stessa posizione in cui era prima di togliere il crochet della<br />
navetta, e che il piano sulla guida sia contro la molla.<br />
Installare la placca dell'ago facendola scorrere verso sinistra<br />
(l'opposto della procedura di rimozione).<br />
7 Tacca sulla guida della navetta<br />
8 Piano<br />
9 Molla<br />
80
MAINTENANCE<br />
MANTENIMIENTO<br />
MANUTENZIONE<br />
PERFORMANCE CHECK LIST<br />
Whenever sewing difficulties are encountered, review the section in this instruction manual that details the operation you are performing to<br />
make sure you are correctly using the machine. If the problem continues, the following check list may help you to improve the operation.<br />
If you still have difficulties, contact your nearest authorized service center.<br />
UPPER THREAD<br />
BREAKS<br />
LOWER THREAD<br />
BREAKS<br />
SKIPPED<br />
STITCHES<br />
LOOP IN SEAM<br />
FABRIC<br />
PUCKERS<br />
Upper thread is not<br />
correctly installed.<br />
Lower thread is<br />
tangled.<br />
Needle is incorrectly<br />
inserted.<br />
Thread tension is<br />
incorrect.<br />
Thread tension is<br />
too tight.<br />
Page 33<br />
No<br />
Page 31<br />
No<br />
Page 9<br />
No<br />
Page 38<br />
No<br />
Page 38<br />
No<br />
Upper thread is<br />
tangled.<br />
Bobbin is not<br />
threaded properly in<br />
the race.<br />
Inferior needle is<br />
used.<br />
Threading is not<br />
correct.<br />
Page 33<br />
No<br />
Page 31<br />
No<br />
Page 9<br />
No<br />
Page 33<br />
No<br />
Upper thread<br />
tension is too tight.<br />
The combination of<br />
needle size/thread<br />
size/fabric is<br />
incorrect.<br />
Wrong needle is<br />
used.<br />
Page 38<br />
No<br />
Page 39<br />
No<br />
Page 9<br />
No<br />
Spool of thread is<br />
not correctly<br />
installed.<br />
Lint is clinging to the<br />
bottom of the needle<br />
plate.<br />
The combination of<br />
needle size/thread<br />
size/fabric is<br />
incorrect.<br />
Page 33<br />
No<br />
Page 79<br />
No<br />
Page 39<br />
No<br />
Needle is bent or<br />
not sharp.<br />
Threading is not<br />
correct.<br />
Page 9<br />
No<br />
Page 33<br />
No<br />
The combination of<br />
needle size/thread<br />
size/fabric is<br />
incorrect.<br />
Page 39<br />
No<br />
CONTACT YOUR LOCAL SERVICE CENTER<br />
81
FABRIC DOES<br />
NOT FEED<br />
PROPERLY<br />
NEEDLE<br />
BREAKS<br />
MACHINE IS<br />
NOISY OR SLOW<br />
MACHINE DOES<br />
NOT START<br />
Stitch Length Dial is<br />
set at no feeding.<br />
("0")<br />
Needle is not<br />
correctly inserted.<br />
Lint is clinging to the<br />
bottom of the needle<br />
plate.<br />
Power supply plug is<br />
removed from outlet.<br />
Page 24<br />
No<br />
The combination of<br />
needle size/thread<br />
size/fabric is<br />
incorrect.<br />
Page 9<br />
No<br />
Inferior needle is<br />
used.<br />
Page 79<br />
No<br />
Page 5<br />
No<br />
Main power switch<br />
is turned off.<br />
MAINTENANCE<br />
MANTENIMIENTO<br />
MANUTENZIONE<br />
Page 39<br />
No<br />
Page 9<br />
No<br />
Page 7<br />
No<br />
Inferior needle is<br />
used.<br />
The combination of<br />
needle size/thread<br />
size/fabric is<br />
incorrect.<br />
The bobbin winder<br />
shaft is slid to the<br />
right.<br />
Page 9<br />
No<br />
Page 39<br />
No<br />
Page 29<br />
No<br />
Thread is tangled.<br />
Fabric is pulled<br />
excessively. Let the<br />
feed dogs move the<br />
fabric. Do not pull<br />
the fabric.<br />
Foot controller is not<br />
used correctly.<br />
Page 33<br />
No<br />
No<br />
Page 8<br />
No<br />
(Not available on models<br />
<strong>XL</strong>-6040, <strong>XL</strong>-6041,<br />
<strong>XL</strong>-6042, and <strong>XL</strong>-6043)<br />
The buttonhole lever<br />
is pushed toward the<br />
back of the machine.<br />
Page 55<br />
No<br />
CONTACT YOUR LOCAL SERVICE CENTER<br />
82
MAINTENANCE<br />
MANTENIMIENTO<br />
MANUTENZIONE<br />
LISTADO DE POSIBLES INCIDENCIAS<br />
Cada vez que encuentre dificultades al coser, vuelva a consultar la parte de este manual de instrucciones que detalla la operación que está realizando, para<br />
comprobar que usa correctamente la máquina. Si el problema persiste, el siguiente listado le puede ayudar a mejorar el funcionamiento.<br />
Si persiste el problema a pesar de estas medidas, póngase en contacto con el servicio técnico autorizado más cercano.<br />
ROTURA DEL<br />
HILO SUPERIOR<br />
ROTURA DEL<br />
HILO INFERIOR<br />
SALTO DE<br />
PUNTADAS<br />
BAGAS EN LAS<br />
PUNTADAS<br />
ARRUGAS EN<br />
EL TEJIDO<br />
El hilo superior no<br />
está bien enhebrado.<br />
El hilo inferior está<br />
enredado.<br />
La aguja está mal<br />
colocada.<br />
La tensión de los hilos<br />
no es correcta.<br />
La tensión de los hilos<br />
es demasiada fuerte.<br />
Página 34<br />
No<br />
Página 32<br />
No<br />
Página 10<br />
No<br />
Página 38<br />
No<br />
Página 38<br />
No<br />
El hilo superior está<br />
enredado.<br />
La canilla no está bien<br />
enhebrada en el garfio.<br />
Se está usando una<br />
aguja inferior.<br />
Los hilos no están<br />
bien enhebrados.<br />
Página 34<br />
No<br />
Página 32<br />
No<br />
Página 10<br />
No<br />
Página 34<br />
No<br />
El hilo superior es<br />
demasiado tirante.<br />
La combinación<br />
tamaño de aguja/<br />
grueso de hilo/tejido<br />
no es correcta.<br />
El tamaño de la aguja<br />
no corresponde.<br />
Página 38<br />
No<br />
Página 39<br />
No<br />
Página 10<br />
No<br />
El carrete está mal<br />
colocado.<br />
Hay polvo en el fondo<br />
de la placa de agujas.<br />
La combinación<br />
tamaño de aguja/<br />
grueso de hilo/tejido<br />
no es correcta.<br />
Página 34<br />
No<br />
Página 80<br />
No<br />
Página 39<br />
No<br />
La aguja está doblada<br />
o gastada.<br />
El hilo no está bien<br />
enhebrado.<br />
Página 10<br />
No<br />
Página 34<br />
No<br />
La combinación<br />
tamaño de aguja/<br />
grueso de hilo/tejido<br />
no es correcta.<br />
Página 39<br />
No<br />
PONGASE EN CONTACTO CON EL SERVICIO TECNICO LOCAL<br />
83
EL TEJIDO NO<br />
ARRASTRA<br />
BIEN<br />
LA AGUJA SE<br />
ROMPE<br />
LA MAQUINA ES<br />
RUIDOSA O<br />
FUNCIONA MUY<br />
DESPACIO<br />
LA MAQUINA<br />
NO ARRANCA<br />
El selector de largo de<br />
puntada está puesto<br />
para que el tejido no<br />
alimente. ("0")<br />
La aguja está mal<br />
colocada.<br />
Hay polvo en la placa<br />
de agujas.<br />
Está desenchufada.<br />
Página 25<br />
No<br />
La combinación<br />
tamaño de aguja/<br />
grueso de hilo/tejido<br />
no es correcta.<br />
Página 10<br />
No<br />
Se está usando una<br />
aguja inferior.<br />
Página 80<br />
No<br />
Páginae 6<br />
No<br />
El interruptor<br />
principal está apagado.<br />
MAINTENANCE<br />
MANTENIMIENTO<br />
MANUTENZIONE<br />
Página 39<br />
No<br />
Página 10<br />
No<br />
Página 7<br />
No<br />
Se está usando una<br />
aguja inferior.<br />
La combinación<br />
tamaño de aguja/<br />
grueso de hilo/tejido<br />
no es correcta.<br />
El eje de bobinado de<br />
la canilla está<br />
deslizado hacia la<br />
derecha.<br />
Página 10<br />
No<br />
Página 39<br />
No<br />
Página 30<br />
No<br />
El hilo está enredado.<br />
Se tira del tejido con<br />
demasiada fuerza.<br />
Deje que el arrastre lo<br />
aliment solos. No tire<br />
del tejido.<br />
No se usa bien el<br />
pedal.<br />
Página 34<br />
No<br />
No<br />
Página 8<br />
No<br />
( No disponible en los<br />
modelos <strong>XL</strong>-6040, <strong>XL</strong>-6041,<br />
<strong>XL</strong>-6042, and <strong>XL</strong>-6043)<br />
La palanca de ojales<br />
está colocada hacia<br />
atrás.<br />
Página 56<br />
No<br />
PONGASE EN CONTACTO CON EL SERVICIO TECNICO LOCAL<br />
84
MAINTENANCE<br />
MANTENIMIENTO<br />
MANUTENZIONE<br />
TABELLA DI CONTROLLO DEL FUNZIONAMENTO<br />
Ogni qualvolta si incontrino delle difficoltà nell'esecuzione del lavoro, riguardare la parte di questo manuale d' istruzioni relativa alla<br />
determinata operazione che si vuole eseguire per assicurarsi che si stia utilizzando la macchina nel modo corretto. Se il problema persiste, la<br />
seguente tabella può essere di aiuto per risolvere l'inconveniente.<br />
Se si incontrano ancora difficoltà, rivolgersi al più vicino centro di assistenza autorizzato.<br />
IL FILO<br />
SUPERIORE<br />
SI ROMPE<br />
IL FILO<br />
INFERIORE<br />
SI ROMPE<br />
PUNTI SALTATI<br />
PUNTI LENTI<br />
ARRICCIAMENTO<br />
DEL TESSUTO<br />
L’infilatura superiore<br />
non è corretta.<br />
Il filo inferiore è<br />
aggrovigliato.<br />
L’ago non è inserito<br />
correttamente.<br />
La tensione non è<br />
corretta.<br />
La tensione del filo è<br />
troppo stretta.<br />
Pag. 34<br />
No<br />
Pag. 32<br />
No<br />
Pag. 10<br />
No<br />
Pag. 38<br />
No<br />
Pag. 38<br />
No<br />
Il filo superiore è<br />
aggrovigliato.<br />
Il rocchetto non è<br />
avvolto<br />
correttamente nel<br />
crochet.<br />
Si sta usando un ago<br />
di misura inferiore.<br />
L’infilatura non è<br />
corretta.<br />
Pag. 34<br />
No<br />
Pag. 32<br />
No<br />
Pag. 10<br />
No<br />
Pag. 34<br />
No<br />
La tensione del filo<br />
superiore è troppo<br />
stretta.<br />
La combinazione fra<br />
ago, filo e tessuto è<br />
sbagliata.<br />
Si sta usando un ago<br />
sbagliato.<br />
Pag. 38<br />
No<br />
Pag. 40<br />
No<br />
Pag. 10<br />
No<br />
La capsula non è<br />
inserita<br />
correttamente.<br />
Il filo si sfilaccia<br />
sotto la placca<br />
dell’ago.<br />
La combinazione fra<br />
ago,filo e tessuto è<br />
sbagliata.<br />
Pag. 34<br />
No<br />
Pag. 80<br />
No<br />
Pag. 40<br />
No<br />
L’ago è piegato o<br />
spuntato.<br />
L’infilatura non è<br />
corretta.<br />
Pag. 10<br />
No<br />
Pag. 34<br />
No<br />
La combinazione fra<br />
ago, filo e tessuto è<br />
sbagliata.<br />
Pag. 40<br />
No<br />
RIVOLGERSI AL CENTRO DI ASSISTENZA<br />
85
IL TESSUTO<br />
NON VIENE<br />
TRASPORTATO<br />
CORRETTAMENTE<br />
L’AGO SI SPEZZA<br />
LA MACCHINA E’<br />
RUMOROSA<br />
OPPURE SI<br />
MUOVE LENTAMENTE<br />
LA MACCHINA<br />
NON CUCE<br />
La manopola della lunghezza<br />
del punto è regolata sulla<br />
posizione di esclusione del<br />
trasporto. (“0”)<br />
Pag. 25<br />
No<br />
La combinazione fra<br />
ago, filo e tessuto è<br />
sbagliata.<br />
L’ago non è inserito<br />
correttamente.<br />
Pag. 10<br />
No<br />
Si sta usando un ago<br />
di misura inferiore.<br />
Il filo si sfilaccia<br />
sotto la placca<br />
dell’ago.<br />
Pag. 80<br />
No<br />
La spina di alimentazione<br />
è staccata<br />
dalla presa.<br />
Pag. 6<br />
No<br />
L’interruttore<br />
principale è spento.<br />
MAINTENANCE<br />
MANTENIMIENTO<br />
MANUTENZIONE<br />
Pag. 40<br />
No<br />
Pag. 10<br />
No<br />
Pag. 7<br />
No<br />
Si sta usando un ago<br />
di misura inferiore.<br />
La combinazione fra<br />
ago, filo e tessuto è<br />
sbagliata.<br />
L’alberino di<br />
avvolgimento<br />
spolina è spostato<br />
verso destra.<br />
Pag. 10<br />
No<br />
Pag. 40<br />
No<br />
Pag. 30<br />
No<br />
Il filo è aggrovigliato.<br />
Il tessuto viene tirato<br />
eccessivamente. Lasciar<br />
muovere il tessuto dal<br />
trasportatore. Non tirare<br />
il tessuto.<br />
Il reostato non è<br />
premuto<br />
correttamente.<br />
Pag. 34<br />
No<br />
No<br />
Pag. 8<br />
No<br />
(Non disponibile sui<br />
modelli <strong>XL</strong>-6040, <strong>XL</strong>-<br />
6041, <strong>XL</strong>-6042 e <strong>XL</strong>6043)<br />
La leva dell'occhiello<br />
è premuta verso il<br />
retro della macchina.<br />
Pag. 56<br />
No<br />
RIVOLGERSI AL CENTRO DI ASSISTENZA<br />
86
MAINTENANCE<br />
MANTENIMIENTO<br />
MANUTENZIONE<br />
Repacking the Machine<br />
Keep the carton and packing materials for future use. It may<br />
become necessary to reship the machine. Improper packing or<br />
improper packing material could result in damage during shipping.<br />
Instructions for repacking the machine are illustrated.<br />
IMPORTANT<br />
This packing material is designed to prevent damage in<br />
transit. Save this packing material in the event it is needed to<br />
transport this machine.<br />
Embalaje de la máquina<br />
Guarde la caja de cartón y el embalaje por si acaso necesita transportar la<br />
máquina en el futuro. Un embalaje inadecuado o con materiales<br />
inapropiados puede causarle daños a la máquina durante el transporte.<br />
Para embalar la máquina correctamente, sírvase seguir las instrucciones<br />
que se ilustran.<br />
Imballaggio della macchina<br />
Conservare il cartone e i materiali di imballaggio per usi futuri, nel<br />
caso si debba trasportare la macchina. Un imballaggio inadeguato o<br />
l’utilizzo di materiali di imballaggio inadatti possono danneggiare la<br />
macchina durante il trasporto. Sono illustrate le istruzioni per eseguire<br />
l’imballaggio della macchina.<br />
IMPORTANTE<br />
El material de embalaje está diseñado para prevenir daños durante<br />
el transporte. Guárdelo siempre en caso de que tenga que volver a<br />
transportar la máquina.<br />
IMPORTANTE<br />
I materiali di imballaggio sono studiati in modo da proteggere<br />
la macchina durante il trasporto. Conservare questi materiali<br />
nel caso si debba trasportare la macchina da cucire.<br />
87
Page<br />
1/4-Icnch Quilting Foot ............................................. 3, 75<br />
A<br />
Accessories .................................................................... 3<br />
Appliqués ..................................................................... 68<br />
Arrowhead Stitch .......................................................... 51<br />
B<br />
Bead Stitch ................................................................... 51<br />
Blind Hem Stitch........................................................... 46<br />
Bobbin Winder.............................................................. 28<br />
Bridging Stitch .............................................................. 49<br />
Buttonhole .................................................................... 55<br />
Buttonhole Fine Adjustment Screw .............................. 61<br />
Buttonhole Lever .......................................................... 55<br />
Button Sewing .............................................................. 64<br />
C<br />
Changing the Light Bulb ............................................... 77<br />
Changing the Presser Foot .......................................... 11<br />
Checking the Needle ...................................................... 9<br />
Cleaning ....................................................................... 79<br />
Comb Stitch.................................................................. 53<br />
Connecting Plugs ........................................................... 5<br />
D<br />
Darning......................................................................... 67<br />
Decorative Hem Stitch ................................................. 49<br />
Decorative Stitch .......................................................... 51<br />
Double Action Stitch ..................................................... 49<br />
Drawing Up Lower Thread ........................................... 35<br />
E<br />
Elastic Overlock Stitch ................................................. 53<br />
Elastic Shell Tuck Stitch ............................................... 53<br />
Elastic Stitch................................................................. 48<br />
Embroidering ................................................................ 69<br />
F<br />
Fabric/Thread/Needle Combinations ........................... 39<br />
Fagoting Stitch ............................................................. 52<br />
Feather Stitch ............................................................... 54<br />
Flat bed attachment with accessory compartment .. 12, 27<br />
Foot Controller ............................................................... 8<br />
Foot Controller Jack ....................................................... 5<br />
Free-arm Style ............................................................. 27<br />
G<br />
Gathering ..................................................................... 65<br />
H<br />
Hole for Vertical Spool Pin ........................................... 37<br />
L<br />
Lower Threading .......................................................... 31<br />
M<br />
Main Power/Sewing Light Switch ................................... 7<br />
Monogramming ............................................................ 69<br />
Page<br />
N<br />
Needle<br />
Inspection ............................................................. 9<br />
Replacement ........................................................ 9<br />
O<br />
Overedge Stitching....................................................... 53<br />
P<br />
Parallelogram Stitch ..................................................... 51<br />
Patchwork .................................................................... 52<br />
Pattern Indication Window ........................................... 13<br />
Pattern Selection Dial................................................... 13<br />
Performance Check List ............................................... 81<br />
Presser Foot Lever....................................................... 33<br />
Principal parts ................................................................ 1<br />
R<br />
Race ............................................................................ 79<br />
Rampart Stitch ............................................................. 49<br />
Repacking the Machine................................................ 87<br />
Reverse Sewing Lever ................................................. 26<br />
S<br />
Scallop Stitch ............................................................... 50<br />
Sewing Ligh<br />
Light Bulb Replacement ................................. 77<br />
Switch ............................................................... 7<br />
Shell Tuck Stitch .......................................................... 47<br />
Shuttle .......................................................................... 79<br />
Slant Overlock Stitch .................................................... 53<br />
Spool Pin and Spool Cap ....................................... 28, 33<br />
Springaction Quilting Foot ........................................ 3, 73<br />
Stitch Length Dial ................................................... 13, 24<br />
Straight Stitch ................................................... 42, 65, 67<br />
Stretch Blind Hem Stitch .............................................. 46<br />
T<br />
Thread Tension ............................................................ 38<br />
Triangle Stitch .............................................................. 51<br />
Triple Stretch Stitch ...................................................... 42<br />
Triple Zigzag Stretch Stitch .......................................... 54<br />
Troubleshooting ........................................................... 81<br />
Twin Needle Sewing .................................................... 36<br />
U<br />
Upper Tension Control Dial .......................................... 38<br />
Upper Threading .......................................................... 33<br />
W<br />
Walking Foot ............................................................ 3, 71<br />
Winding the Bobbin ...................................................... 28<br />
Z<br />
Zigzag Presser Foot ................................................. 3, 11<br />
Zigzag Stitch .............................................. 45, 64, 68, 69<br />
Zipper Foot ............................................................... 3, 65<br />
Zipper Insertion ............................................................ 65<br />
INDEX<br />
ÍNDICE<br />
INDICE<br />
88
INDEX<br />
ÍNDICE<br />
INDICE<br />
Página<br />
A<br />
Accesorios ............................................................................... 4<br />
Aguja<br />
Cambio ........................................................................ 10<br />
Verificación ................................................................ 10<br />
Ajuste fino de los ojales ........................................................ 62<br />
Aplicaciones .......................................................................... 68<br />
B<br />
Bobinado de la canilla ........................................................... 28<br />
Bombilla<br />
Cambio ........................................................................ 78<br />
Interruptor ..................................................................... 7<br />
Bordados ................................................................................ 70<br />
C<br />
Cambio de la bombilla .......................................................... 78<br />
Cambio del prensatelas .......................................................... 11<br />
Combinaciones de tejido/hilo/aguja ...................................... 39<br />
Conexión de los enchufes ........................................................ 6<br />
Costura con aguja doble ........................................................ 36<br />
Costura de botones ................................................................ 64<br />
D<br />
Disco de control de la tensión superior ................................. 38<br />
Dispositivo de bobinado de la canilla .................................... 28<br />
E<br />
Eje del carrete y porta carretes ........................................ 28, 34<br />
Elementos principales .............................................................. 2<br />
Embalaje de la máquina......................................................... 87<br />
Enhebrado inferior ................................................................. 32<br />
Enhebrado superior ................................................................ 34<br />
F<br />
Fruncido ................................................................................. 66<br />
G<br />
Garfio de la lanzadera ............................................................ 80<br />
Guía de localización de errores ............................................. 83<br />
I<br />
Indicador de puntada ............................................................. 14<br />
Inserción de cremalleras ........................................................ 66<br />
Interruptor principal/luz de cosido .......................................... 7<br />
L<br />
Levantar el hilo inferior ......................................................... 35<br />
Limpieza ................................................................................ 80<br />
Listado de posibles incidencias ............................................. 83<br />
M<br />
Modalidad brazo libre............................................................ 27<br />
Monogramas .......................................................................... 70<br />
O<br />
Ojales .................................................................................... 56<br />
Orificio para el portabobinas vertical .................................... 37<br />
Página<br />
P<br />
Palanca de ojales.................................................................... 56<br />
Palanca del prensatelas .......................................................... 34<br />
Pata de cremalleras ............................................................ 4, 66<br />
Patchwork .............................................................................. 52<br />
Pedal ...................................................................................... 8<br />
Pie caminante .................................................................... 4, 72<br />
Pista de la lanzadera .............................................................. 80<br />
Plataforma con compartimento de accesorios ................. 12, 27<br />
Prensatela para pespunte 1/4 ............................................. 4, 76<br />
Prensatelas enguatador ...................................................... 4, 74<br />
Prensatelas zigzag .............................................................. 4, 11<br />
Pulsador de retroceso ............................................................. 26<br />
Puntada de acción doble ........................................................ 49<br />
Puntada decorativa ................................................................. 51<br />
Puntada decorativa invisible .................................................. 49<br />
Puntada elástica ..................................................................... 48<br />
Puntada fagoting .................................................................... 52<br />
Puntada festón ....................................................................... 50<br />
Puntada flecha ....................................................................... 51<br />
Puntada invisible ................................................................... 46<br />
Puntada invisible elástica ...................................................... 46<br />
Puntada ondas ........................................................................ 47<br />
Puntada ondas abiertas .......................................................... 49<br />
Puntada ondas elásticas ......................................................... 53<br />
Puntada overlock elástica ...................................................... 53<br />
Puntada overlock estrecha ..................................................... 53<br />
Puntada paralelogramo .......................................................... 51<br />
Puntada peine ........................................................................ 53<br />
Puntada pluma ....................................................................... 54<br />
Puntada por encima de la orilla ............................................. 53<br />
Puntada puente ...................................................................... 49<br />
Puntada recta ............................................................. 42, 66, 67<br />
Puntada triángulo ................................................................... 51<br />
Puntada zigzag ..................................................... 45, 64, 68, 70<br />
R<br />
Receptáculo del pedal .............................................................. 6<br />
S<br />
Selector de largo de puntada............................................ 14, 25<br />
Selector de puntadas .............................................................. 14<br />
T<br />
Tensión de los hilos ............................................................... 38<br />
Tornillo de ajuste fino de los ojales ....................................... 62<br />
Triple puntada pespunto ........................................................ 42<br />
Triple puntada zigzag elástica ............................................... 54<br />
V<br />
Verificación de la aguja ......................................................... 10<br />
Z<br />
Zurcido .................................................................................. 67<br />
89
A<br />
Ago<br />
Pagina<br />
Controllo ............................................................. 10<br />
Sostituzione ......................................................... 10<br />
Accessori ........................................................................ 4<br />
Applicazione di cerniere ............................................... 66<br />
Applicazioni ................................................................. 68<br />
Arricciature ................................................................... 66<br />
Avvolgimento del rocchetto .......................................... 28<br />
C<br />
Capsula del crochet ...................................................... 80<br />
Collegamento elettrico .................................................... 6<br />
Combinazione tessuto/filo/ago ...................................... 40<br />
Controllo dell'ago ......................................................... 10<br />
Cucitura a braccio libero............................................... 27<br />
Cucitura con ago gemello ............................................. 36<br />
Cucitura di bottoni ........................................................ 64<br />
D<br />
Dispositivo di avvolgimento spolina ............................. 28<br />
F<br />
Finestrella indicatore punto ........................................... 14<br />
Foro per portarocchetto verticale .................................. 37<br />
G<br />
Guida della navetta ....................................................... 80<br />
I<br />
Imballaggio della macchina .......................................... 87<br />
Infilatura inferiore ......................................................... 32<br />
Infilatura superiore ........................................................ 34<br />
Interruttore principale/luce area di lavoro ....................... 7<br />
L<br />
Lavori di patchwork ...................................................... 52<br />
Leva del piedino premistoffa ......................................... 34<br />
Leva dell'occhiello ........................................................ 56<br />
Leva di cucitura di ritorno ............................................. 26<br />
Luce area di lavoro<br />
Interruttote............................................................. 7<br />
Sostituzione della lampadina ............................... 78<br />
M<br />
Monogrammi ................................................................ 70<br />
O<br />
Occhielli ....................................................................... 56<br />
P<br />
Parti principali ................................................................ 2<br />
Piedino per cerniere .................................................. 4, 66<br />
Piedino per patchwork .............................................. 4, 76<br />
Piedino per trapunte azionato a molla ...................... 4, 74<br />
Piedino premistoffa a zigzag ..................................... 4, 11<br />
Piedino semovente .................................................... 4, 72<br />
Portarocchetto e fermarocchetto ............................. 28, 34<br />
Presa del reostato a pedale .............................................. 6<br />
Pulizia........................................................................... 80<br />
Punto a conchiglia elastico ........................................... 53<br />
Punto a ponte................................................................ 49<br />
Pagina<br />
Punto bastione .............................................................. 49<br />
Punt a conchiglia .......................................................... 47<br />
Punto decorativo ........................................................... 51<br />
Punto diritto ...................................................... 42, 66, 67<br />
Punto doppio ................................................................ 49<br />
Punto elastico ............................................................... 48<br />
Punto elastico invisibile ................................................ 46<br />
Punto elastico triplo ...................................................... 42<br />
Punto fagoting ............................................................... 52<br />
Punto freccia ................................................................. 51<br />
Punto orlo decorativo.................................................... 49<br />
Punto orlo invisibile ...................................................... 46<br />
Punto parallelogramma ................................................. 51<br />
Punto perla ................................................................... 51<br />
Punto pettine................................................................. 53<br />
Punto piuma ................................................................. 54<br />
Punto smerlo ................................................................. 50<br />
Punto sopraggitto elastico ............................................. 53<br />
Punto sopraggitto inclinato ........................................... 53<br />
Punto triangolo ............................................................. 51<br />
Punto zigzag ............................................... 45, 64, 68, 70<br />
Punto zigzag triplo ........................................................ 54<br />
R<br />
Rammendo ................................................................... 67<br />
Regolatore di tensione superiore ................................... 38<br />
Regolazione della densità dei punti dell' occhiello ....... 62<br />
Reostato a pedale ............................................................ 8<br />
Ricami .......................................................................... 70<br />
Rifinitura a sopraggitto .................................................. 53<br />
Risoluzione dei problemi .............................................. 85<br />
S<br />
Scomparto piano con accessori ............................... 12, 27<br />
Selettore dei punti ......................................................... 14<br />
Selettore della lunghezza del punto ........................ 14, 25<br />
Sostituzione del piedino premistoffa ............................. 11<br />
Sostituzione della lampadina ........................................ 78<br />
T<br />
Tabella di controllo del funzionamento ........................ 85<br />
Tensione del filo ........................................................... 38<br />
Tiraggio del filo inferiore ............................................... 35<br />
V<br />
Vite dell'equilibratore dell'occhiello ............................. 62<br />
INDEX<br />
ÍNDICE<br />
INDICE<br />
90
ENGLISH<br />
ESPAÑOL<br />
ITALIANO<br />
194283-012<br />
Printed in Taiwan


