

Kenwood DDX319 - Car Electronics English ()
Kenwood DDX319 - Car Electronics English ()
Kenwood DDX319 - Car Electronics English ()

You also want an ePaper? Increase the reach of your titles
YUMPU automatically turns print PDFs into web optimized ePapers that Google loves.
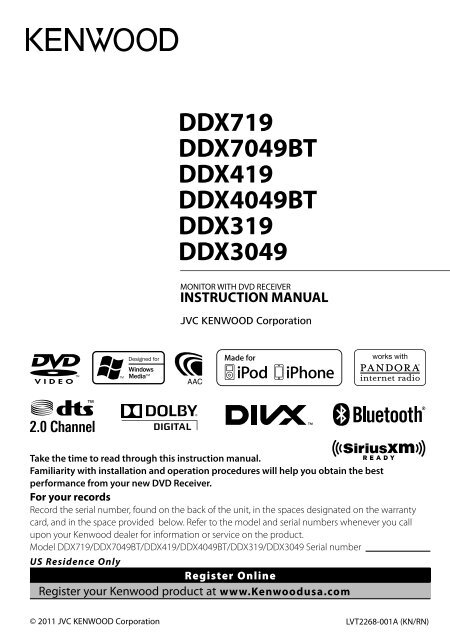
DDX719<br />
DDX7049BT<br />
DDX419<br />
DDX4049BT<br />
<strong>DDX319</strong><br />
DDX3049<br />
MONITOR WITH DVD RECEIVER<br />
INSTRUCTION MANUAL<br />
Take the time to read through this instruction manual.<br />
Familiarity with installation and operation procedures will help you obtain the best<br />
performance from your new DVD Receiver.<br />
For your records<br />
Record the serial number, found on the back of the unit, in the spaces designated on the warranty<br />
card, and in the space provided below. Refer to the model and serial numbers whenever you call<br />
upon your <strong>Kenwood</strong> dealer for information or service on the product.<br />
Model DDX719/DDX7049BT/DDX419/DDX4049BT/<strong>DDX319</strong>/DDX3049 Serial number<br />
US Residence Only<br />
Register Online<br />
Register your <strong>Kenwood</strong> product at www.<strong>Kenwood</strong>usa.com<br />
© 2011 JVC KENWOOD Corporation<br />
LVT2268-001A (KN/RN)
Contents<br />
Before use ...................................... 3<br />
How to reset your unit .............................................3<br />
INTRODUCTIONS<br />
Initial Settings ............................... 5<br />
Initial setup ......................................................................5<br />
Adjusting the panel angle .....................................5<br />
Updating the system .................................................6<br />
Activating the security function .........................7<br />
Component names and<br />
functions .................................. 8<br />
Setting the clock ..........................10<br />
Common operations ...................11<br />
Turning on the power ..........................................11<br />
Turning off the power ..........................................11<br />
Adjusting the volume ...........................................11<br />
Putting the unit in standby ...............................11<br />
Turning off the screen ..........................................11<br />
Switching screens .......................12<br />
AV SOURCE OPERATIONS<br />
Selecting the playback source....13<br />
Displaying the source control screen ..........14<br />
Disc operations ............................15<br />
Playing a disc ..............................................................15<br />
Playable disc types...................................................16<br />
Playback operations ...............................................17<br />
Settings for disc playback ..................................21<br />
USB operations ............................22<br />
Playing a USB device .............................................22<br />
Listening to the iPod/iPhone<br />
device .....................................24<br />
iPod/iPhone playback operations .................25<br />
Selecting a track/video from menu on the<br />
iPod/iPhone .................................................................26<br />
Operating in iPod/iPhone control mode ...26<br />
PANDORA® operations ..........................................27<br />
Listening to the radio ..................29<br />
Listening to the SiriusXM Satellite<br />
Radio ......................................32<br />
Using other external<br />
components ...........................39<br />
AV-IN .................................................................................39<br />
Using the external navigation unit ...............40<br />
Sound adjustment .......................41<br />
2 DDX719/DDX7049BT/DDX419/DDX4049BT/<strong>DDX319</strong>/DDX3049<br />
Using the sound equalization .........................41<br />
Adjusting the cross over frequency ..............42<br />
Changing the display design ......43<br />
Setting for video playback .........45<br />
Picture adjustment .................................................45<br />
Changing the aspect ratio .................................46<br />
Zooming picture .......................................................46<br />
Using a rear view camera ............47<br />
Setting menu items .....................48<br />
Memorizing/recalling the settings ................52<br />
Locking the settings ...............................................52<br />
Adjusting the touch position ............................52<br />
BLUETOOTH OPERATIONS<br />
(Only for DDX719/DDX7049BT/DDX419/<br />
DDX4049BT)<br />
Information for using Bluetooth®<br />
devices ...................................53<br />
Bluetooth operations ..................53<br />
Connecting Bluetooth devices .......................54<br />
Using the Bluetooth mobile phone ............56<br />
Using the Bluetooth audio player .................61<br />
Bluetooth device settings ...................................61<br />
USING THE REMOTE<br />
CONTROLLER<br />
Overview ......................................63<br />
Operations from the remote<br />
controller ...............................64<br />
REFERENCE<br />
Maintenance ................................68<br />
More about this unit ...................69<br />
Troubleshooting ..........................71<br />
Accessories/Installation<br />
Procedure ...............................76<br />
Connecting Wires to Terminals ...78<br />
Connecting a USB device/iPod/<br />
iPhone ....................................79<br />
Connecting Other Products ........80<br />
Installing/Removing the Unit .....81<br />
Specifications ..............................83<br />
KS-UBT1 (USB Bluetooth<br />
Adapter) .................................86
Before use<br />
WARNINGS:<br />
(To prevent accidents and damage)<br />
• DO NOT install any unit or wire any cable in<br />
a location where;<br />
– it may obstruct the steering wheel and<br />
gearshift lever operations.<br />
– it may obstruct the operation of safety<br />
devices such as air bags.<br />
– it may obstruct visibility.<br />
• DO NOT operate the unit while driving.<br />
If you need to operate the unit while<br />
driving, be sure to look around carefully.<br />
• The driver must not watch the monitor<br />
while driving.<br />
Cautions on the monitor:<br />
• The monitor built in this unit has been<br />
produced with high precision, but it<br />
may have some ineffective dots. This is<br />
inevitable and is not considered defective.<br />
• Do not expose the monitor to direct<br />
sunlight.<br />
• Do not operate the touch panel using a<br />
ball-point pen or similar tool with the sharp<br />
tip.<br />
Press the buttons on the touch panel with<br />
your finger directly (if you are wearing a<br />
glove, take it off ).<br />
• When the temperature is very cold or very<br />
hot...<br />
– Chemical changes occur inside, causing<br />
malfunction.<br />
– Pictures may not appear clearly or<br />
may move slowly. Pictures may not<br />
be synchronized with the sound or<br />
picture quality may decline in such<br />
environments.<br />
For safety...<br />
• Do not raise the volume level too much,<br />
as this will make driving dangerous by<br />
blocking outside sounds, and may cause<br />
hearing loss.<br />
• Stop the car before performing any<br />
complicated operations.<br />
Temperature inside the car...<br />
If you have parked the car for a long time<br />
in hot or cold weather, wait until the<br />
temperature in the car becomes normal<br />
before operating the unit.<br />
How to reset your unit<br />
DDX719/DDX7049BT<br />
Reset button<br />
DDX419/DDX4049BT/<strong>DDX319</strong>/DDX3049<br />
Reset button<br />
If the unit fails to operate properly, press<br />
the Reset button. The unit returns to factory<br />
settings when the Reset button is pressed<br />
(except the registered Bluetooth devices).<br />
How to read this manual:<br />
• Illustrations of DDX719 are mainly used for<br />
explanation.<br />
• This manual mainly explains operations<br />
using the buttons on the monitor panel<br />
and touch panel. For operations using the<br />
remote controller (RC-DV340: supplied<br />
only for DDX7049BTX/DDX4049BT/<br />
DDX3049), ☞ page 63.<br />
• < > indicates the variable screens/menus/<br />
operations/settings that appear on the<br />
touch panel.<br />
• [ ] indicates the buttons on the touch<br />
panel.<br />
• Indication language: <strong>English</strong> indications<br />
are used for the purpose of explanation.<br />
You can select the indication language<br />
from the menu. (☞ page 51)<br />
The displays and panels shown in this<br />
manual are examples used to provide<br />
clear explanations of the operations. For<br />
this reason, they may be different from the<br />
actual displays or panels.<br />
<strong>English</strong> 3
FCC WARNING<br />
This equipment may generate or use radio<br />
frequency energy. Changes or modifications<br />
to this equipment may cause harmful<br />
interference unless the modifications are<br />
expressly approved in the instruction manual.<br />
The user could lose the authority to operate<br />
this equipment if an unauthorized change or<br />
modification is made.<br />
FCC NOTE<br />
This equipment has been tested and found<br />
to comply with the limits for a Class B digital<br />
device, pursuant to Part 15 of the FCC<br />
Rules. These limits are designed to provide<br />
reasonable protection against harmful<br />
interference in a residential installation. This<br />
equipment may cause harmful interference<br />
to radio communications, if it is not installed<br />
and used in accordance with the instructions.<br />
However, there is no guarantee that<br />
interference will not occur in a particular<br />
installation. If this equipment does cause<br />
harmful interference to radio or television<br />
reception, which can be determined by<br />
turning the equipment off and on, the user is<br />
encouraged to try to correct the interference<br />
by one or more of the following measures:<br />
• Reorient or relocate the receiving antenna.<br />
• Increase the separation between the<br />
equipment and receiver.<br />
• Connect the equipment into an outlet on<br />
a circuit different from that to which the<br />
receiver is connected.<br />
• Consult the dealer or an experienced radio/<br />
TV technician for help.<br />
DDX719X/DDX419/<strong>DDX319</strong>:<br />
CAUTION<br />
Use of controls or adjustments or<br />
performance of procedures other than<br />
those specified herein may result in<br />
hazardous radiation exposure. In compliance<br />
with Federal Regulations, following are<br />
reproductions of labels on, or inside the<br />
product relating to laser product safety.<br />
JVC KENWOOD Corporation<br />
2967-3, ISHIKAWA-MACHI,<br />
HACHIOJI-SHI, TOKYO, JAPAN<br />
THIS PRODUCT COMPLIES WITH DHHS<br />
RULES 21CFR SUBCHAPTER J IN EFFECT<br />
AT DATE OF MANUFACTURE.<br />
Location : Top Panel<br />
DDX7049BT/DDX4049BT/DDX3049:<br />
The marking of products using lasers<br />
CLASS 1<br />
LASER PRODUCT<br />
The label is attached to the chassis/case and<br />
says that the component uses laser beams<br />
that have been classified as Class 1. It means<br />
that the unit is utilizing laser beams that<br />
are of a weaker class. There is no danger of<br />
hazardous radiation outside the unit.<br />
DDX719/DDX7049BT/DDX419/<br />
DDX4049BT:<br />
About KS-UBT1 (USB Bluetooth Adapter)<br />
The USB Bluetooth Adapter is attached to<br />
this unit when shipped from the factory.<br />
When the adapter is removed, store it in a<br />
safe place.<br />
4 DDX719/DDX7049BT/DDX419/DDX4049BT/<strong>DDX319</strong>/DDX3049
INTRODUCTIONS<br />
Initial Settings<br />
Initial setup<br />
When you power on the unit for the first time<br />
or reset the unit, the initial setting screen<br />
appears.<br />
• You can also change the settings on the<br />
screen. (☞ page 48)<br />
1<br />
Adjusting the panel angle<br />
(Only for DDX719/DDX7049BT )<br />
You can change the panel angle.<br />
1 Select an angle (0 – 6).<br />
Language<br />
Angle<br />
Only for<br />
DDX719/<br />
DDX7049BT<br />
AV Input<br />
R-CAM<br />
Interrupt<br />
Panel Color<br />
Select the text<br />
language used for<br />
on-screen information.<br />
(☞ page 51 )<br />
Adjust the panel<br />
angle. (☞ the right<br />
column)<br />
Select an external<br />
component to play —<br />
or .<br />
(☞ page 50)<br />
Select when<br />
connecting the rear<br />
view camera. (☞<br />
page 50)<br />
Select the color of<br />
the buttons on the<br />
monitor panel. (☞<br />
page 43)<br />
To set the current position as the power<br />
off position, select .<br />
2 Finish the procedure.<br />
<strong>English</strong> 5
Updating the system<br />
You can update the system by connecting a<br />
USB device containing the update file.<br />
1 Create an update file, copy it<br />
to a USB device, and connect<br />
it to the unit.<br />
To connect a USB device, ☞ page 79 .<br />
2 On :<br />
4<br />
It may take a while.<br />
If the update has been complete<br />
successfully, “Update Completed”<br />
appears. Reset the unit.<br />
* If the update has failed, turn the power off<br />
and then on, and retry the update.<br />
* Even if you have turned off the power<br />
during update, you can restart the update<br />
after the power is turned on. The update<br />
will be performed from the beginning.<br />
3<br />
6 DDX719/DDX7049BT/DDX419/DDX4049BT/<strong>DDX319</strong>/DDX3049
Activating the security<br />
function<br />
You can activate the security indicator to<br />
protect your receiver system against theft.<br />
1 On :<br />
2<br />
The security indicator on the monitor<br />
panel flashes when the vehicle ignition<br />
is off.<br />
To cancel, select .<br />
<strong>English</strong> 7
Component names and functions<br />
DDX719/DDX7049BT<br />
Screen (Touch panel)<br />
Monitor panel<br />
1 Reset button/Power indicator/Security<br />
indicator<br />
• Resets the unit. (☞ page 3)<br />
• Lights up while the unit is turned on.<br />
• Flashes when the security function is<br />
activated. (☞ page 7 )<br />
2 ATT button (Press)<br />
• Attenuates the sound.<br />
V.OFF button (Hold)<br />
• Turns off/on the screen. (☞ page 11)<br />
3 Volume (down) button (☞ page 11)<br />
• Decreases the volume.<br />
4 Volume (up) button (☞ page 11)<br />
• Increases the volume.<br />
5 AUD button (Press)<br />
• Displays the screen. (☞<br />
page 41)<br />
R-CAM button (Hold)<br />
• Displays the picture from the rear view<br />
camera.<br />
6 AV button (Press)<br />
• Displays the current source screen.<br />
AV OUT button (Hold)<br />
• Selects the AV source for external<br />
monitor or amplifier.<br />
7 MENU/ button<br />
• Turns off the power. (Hold)<br />
• Turns on the power. (Press)<br />
• Displays the screen.<br />
(Press) (☞ page 12)<br />
8 TEL button (Press)<br />
• Displays the screen. (☞<br />
page 54)<br />
FNC button (Hold)<br />
• Displays the source control screen. (☞<br />
page 12)<br />
9 0 (Eject) button<br />
• Ejects the disc (Tilts the monitor panel<br />
fully).<br />
• Opens/Closes the monitor panel.<br />
p Remote sensor<br />
8 DDX719/DDX7049BT/DDX419/DDX4049BT/<strong>DDX319</strong>/DDX3049
DDX419/DDX4049BT/<strong>DDX319</strong>/DDX3049<br />
Screen (Touch panel)<br />
Monitor panel<br />
1 Loading slot<br />
2 0 (Eject) button<br />
Ejects the disc.<br />
3 Remote sensor<br />
4 Reset button/Power indicator/Security<br />
indicator<br />
• Resets the unit. (☞ page 3)<br />
• Lights up while the unit is turned on.<br />
• Flashes when the security function is<br />
activated. (☞ page 7 )<br />
5 MENU/ button<br />
• Turns off the power. (Hold)<br />
• Turns on the power. (Press)<br />
• Displays the screen.<br />
(Press) (☞ page 12)<br />
6 AV/AV OUT button<br />
• Displays the current source screen.<br />
(Press)<br />
• Selects the AV source for external<br />
monitor or amplifier. (Hold)<br />
7 For DDX419/DDX4049BT :<br />
TEL/V.OFF button<br />
• Displays the screen.<br />
(Press) (☞ page 54)<br />
• Turns off/on the screen. (Hold) (☞<br />
page 11)<br />
For <strong>DDX319</strong>/DDX3049 :<br />
AUD/V.OFF button<br />
• Displays the screen.<br />
(Press) (☞ page 41)<br />
• Turns off/on the screen. (Hold) (☞<br />
page 11)<br />
8 VOL/ATT knob (☞ page 11)<br />
• Attenuates the sound. (Press)<br />
• Adjusts the audio volume. (Turn)<br />
For DDX419/DDX4049BT only:<br />
AUD button<br />
• Displays the screen.<br />
(Hold) (☞ page 41)<br />
9 FNC/R-CAM button<br />
• Displays the source control screen.<br />
(Press) (☞ page 12)<br />
• Displays the picture from the rear view<br />
camera. (Hold)<br />
p USB input terminal<br />
q iPod/AV-IN2 input terminal<br />
Caution on volume setting:<br />
Digital devices (CD/USB) produce very<br />
little noise compared with other sources.<br />
Lower the volume before playing these<br />
digital sources to avoid damaging the<br />
speakers by sudden increase of the output<br />
level.<br />
You can change the color of the buttons<br />
on the monitor panel. (☞ page 43)<br />
<strong>English</strong> 9
Setting the clock<br />
1 Display screen.<br />
4 Set the clock time.<br />
2 Display screen.<br />
3<br />
*<br />
<br />
<br />
Synchronizes the<br />
clock time with the<br />
connected navigation<br />
unit.<br />
Synchronizes the clock<br />
time with FM RBDS.<br />
Sets the clock manually.<br />
(☞ below)<br />
1 Adjust the hour<br />
2 Adjust the minute<br />
[Reset]: Sets the minute to “00.”<br />
Example:<br />
3:00 – 3:29 = 3:00<br />
3:30 – 3:59 = 4:00<br />
5 Finish the procedure.<br />
* Appears only when the navigation unit is<br />
connected.<br />
10 DDX719/DDX7049BT/DDX419/DDX4049BT/<strong>DDX319</strong>/DDX3049
Common operations<br />
Turning on the power<br />
Putting the unit in standby<br />
DDX719/<br />
DDX7049BT<br />
DDX419/<br />
DDX4049BT/<br />
<strong>DDX319</strong>/DDX3049<br />
Turning off the power<br />
DDX719/<br />
DDX7049BT<br />
DDX419/<br />
DDX4049BT/<br />
<strong>DDX319</strong>/DDX3049<br />
(Hold)<br />
Adjusting the volume<br />
(Hold)<br />
To adjust the volume (00 to 35)<br />
DDX719/DDX7049BT<br />
Turning off the screen<br />
DDX719/DDX7049BT<br />
Decrease<br />
Increase<br />
DDX419/DDX4049BT/<strong>DDX319</strong>/DDX3049<br />
Decrease<br />
Increase<br />
(Hold)<br />
DDX419/DDX4049BT <strong>DDX319</strong>/DDX3049<br />
To attenuate the sound<br />
DDX719/<br />
DDX7049BT<br />
DDX419/<br />
DDX4049BT/<br />
<strong>DDX319</strong>/DDX3049<br />
(Hold)<br />
(Hold)<br />
The screen is turned off.<br />
To turn on the screen, press MENU/ .<br />
The ATT indicator lights up.<br />
To cancel the attenuation, press the<br />
ATT button (DDX719/DDX7049BT) or VOL/<br />
ATT knob (DDX419/DDX4049BT/<strong>DDX319</strong>/<br />
DDX3049 ) again.<br />
<strong>English</strong> 11
Switching screens<br />
Source control screen<br />
<br />
• Changes the AV source.<br />
• Displays the screen.<br />
You can select 3 items to be displayed in<br />
this area. (☞ page 13 )<br />
<br />
Changes the detailed settings.<br />
Changes the page<br />
☞ page 11<br />
Press [ ] to return to the previous screen.<br />
Touch screen operation<br />
Displays the video control menu while playing a video.<br />
Goes to the previous<br />
chapter/track.*<br />
Goes to the next chapter/<br />
track.*<br />
Displays the source control screen while playing a video.<br />
• The operation buttons disappear by touching the screen or when no operation is done for<br />
about 5 seconds.<br />
* Not available for video from an external component and rear view camera.<br />
12 DDX719/DDX7049BT/DDX419/DDX4049BT/<strong>DDX319</strong>/DDX3049
AV SOURCE OPERATIONS<br />
Selecting the playback source<br />
DDX719/DDX419/<strong>DDX319</strong><br />
* 1<br />
* 2<br />
DDX7049BT/DDX4049BT/DDX3049<br />
* 1<br />
* 2<br />
NAV* 3 (☞ page 40)<br />
DISC (☞ page 15)<br />
TEL * 4 (☞ page 57)<br />
USB (☞ page 22)<br />
iPod * 5 (☞ page 24)<br />
TUNER (☞ page 29)<br />
AV-IN 1/AV-IN 2 * 5 (☞ page 39)<br />
Bluetooth* 4 (☞ page 61)<br />
PANDORA* 6 (☞ page 27)<br />
SiriusXM* 6 (☞ page 32)<br />
Displays the navigation screen when a navigation unit is<br />
connected.<br />
Plays a disc.<br />
Displays the phone control screen.<br />
Plays files on a USB device.<br />
Plays an iPod/iPhone.<br />
Switches to the radio broadcast.<br />
Switches to an external component connected to AV-IN<br />
input terminal.<br />
Plays a Bluetooth audio player.<br />
Switches to the PANDORA® internet radio broadcast.<br />
Listen to SiriusXM channels.<br />
* 1 You can select 3 items to be displayed in this area. (☞ page 49)<br />
* 2 Switches between the previous and next pages.<br />
* 3 Only for DDX7049BT/DDX4049BT/DDX3049. When no navigation unit is connected, “No Navigation”<br />
appears.<br />
* 4 Only for DDX719/DDX7049BT/DDX419/DDX4049BT.<br />
* 5 Select an appropriate input setting on . (☞ page 50)<br />
* 6 Only for DDX719/DDX419/<strong>DDX319</strong>.<br />
<strong>English</strong> 13
Displaying the source control screen<br />
On each playback screen, perform the following:<br />
or<br />
DDX719/DDX7049BT<br />
DDX419/DDX4049BT/<strong>DDX319</strong>/<br />
DDX3049<br />
(Hold)<br />
• For DDX719/DDX7049BT, pressing and holding TEL hides the operation buttons. For DDX419/<br />
DDX4049BT/<strong>DDX319</strong>/DDX3049, pressing FNC/R-CAM hides the operation buttons.<br />
• The operation buttons disappear by touching the screen or when no operation is done for<br />
about 5 seconds.<br />
14 DDX719/DDX7049BT/DDX419/DDX4049BT/<strong>DDX319</strong>/DDX3049
Disc operations<br />
Playing a disc<br />
• If a disc does not have a disc menu, all tracks on it will be played repeatedly until you change<br />
the source or eject the disc.<br />
Inserting a disc<br />
DDX719/DDX7049BT<br />
To eject a disc<br />
DDX719/DDX7049BT<br />
Label side<br />
DDX419/DDX4049BT/<strong>DDX319</strong>/DDX3049<br />
DDX419/DDX4049BT/<strong>DDX319</strong>/DDX3049<br />
Label side<br />
• You can eject a disc when playing another<br />
AV source.<br />
• If the ejected disc is not removed within<br />
15 seconds, the disc is automatically<br />
inserted again into the loading slot to<br />
protect it from dust.<br />
When removing a disc, pull it horizontally.<br />
Closing the monitor panel<br />
(For DDX719/DDX7049BT )<br />
After removing the disc, press the eject<br />
button again. The monitor panel closes.<br />
The source changes to “DISC” and playback<br />
starts.<br />
• The IN indicator lights up while a disc is<br />
inserted.<br />
• If “ ” appears on the screen, the unit<br />
cannot accept the operation you have<br />
tried to do.<br />
– In some cases, without showing “ ,”<br />
operations will not be accepted.<br />
• When playing back a multi-channel<br />
encoded disc, the multi-channel signals<br />
are downmixed to stereo.<br />
<strong>English</strong> 15
Playable disc types<br />
Disc type Recording format, file type, etc Playable<br />
DVD DVD-Video * 1<br />
DVD Recordable/<br />
Rewritable<br />
(DVD-R/-RW * 2 ,<br />
+R/+RW * 3 )<br />
• DVD Video: UDF bridge<br />
• DVD-VR<br />
• DivX * 5 /MPEG1/MPEG2/<br />
JPEG/MP3/WMA/WAV/<br />
AAC: ISO 9660 level 1,<br />
level 2, Romeo, Joliet<br />
Dual Disc<br />
CD/VCD<br />
CD Recordable/<br />
Rewritable<br />
(CD-R/-RW)<br />
• ISO 9660 level 1, level 2,<br />
Romeo, Joliet<br />
Region Code:<br />
• For DDX719/DDX419/<strong>DDX319</strong>: 1<br />
• For DDX7049BT/DDX4049BT/DDX3049: 4<br />
DVD-Audio/DVD-ROM<br />
DVD-Video<br />
DVD-VR * 4<br />
DivX * 5 /MPEG1/MPEG2<br />
JPEG<br />
MP3/WMA/WAV/AAC<br />
MPEG4/DVD+VR/DVD-RAM<br />
DVD side<br />
Non-DVD side<br />
DTS-CD/Audio CD/CD Text (CD-DA)<br />
VCD (Video CD)<br />
SVCD (Super Video CD)/CD-ROM/CD-I (CD-I<br />
Ready)<br />
CD-DA<br />
VCD (Video CD)<br />
DivX * 5 /MPEG1/MPEG2<br />
JPEG<br />
MP3/WMA/WAV/AAC<br />
MPEG4<br />
* 1 If you insert a DVD Video disc of an incorrect Region Code, “Region code error” appears on the screen.<br />
* 2 DVD-R recorded in multi-border format is also playable (except for dual layer discs). DVD-RW dual layer<br />
discs are not playable.<br />
* 3 It is possible to play back finalized +R/+RW (Video format only) discs. “DVD” is selected as its disc type<br />
when a +R/+RW disc is loaded. +RW double layer discs are not playable.<br />
* 4 This unit cannot play back contents protected with CPRM (Content Protection for Recordable Media).<br />
* 5 Playable only for DDX7049BT/DDX4049BT/DDX3049.<br />
Caution for DualDisc playback<br />
The Non-DVD side of a “DualDisc” does not comply with the “Compact Disc Digital Audio”<br />
standard. Therefore, the use of Non-DVD side of a DualDisc on this product may not be<br />
recommended.<br />
16 DDX719/DDX7049BT/DDX419/DDX4049BT/<strong>DDX319</strong>/DDX3049
Playback operations<br />
To display the source control screen, ☞ page 14 .<br />
For DVD/DVD-VR/VCD/DivX/MPEG1/MPEG2/JPEG<br />
Playing time<br />
Media type<br />
• DVD Video: Title no./Chapter<br />
no.<br />
• DVD-VR: Program no. (or<br />
Playlist no.)/Chapter no.* 1<br />
• DivX/MPEG1/MPEG2: Folder<br />
no./Track no.<br />
• JPEG: Folder no./File no.<br />
• VCD: Track no.<br />
[ ]<br />
Selects playback mode.<br />
[ ]* 2 (☞ page 20)<br />
[3 8] Starts/Pauses playback.<br />
[7]* 3 Stops playback.<br />
[4] [¢] • Selects chapter/track.<br />
(Press)<br />
• Reverse/forward<br />
search.* 4 (Hold)<br />
File type (for DivX/MPEG1/MPEG2/JPEG)<br />
Playback mode<br />
[1] [¡] • Reverse/forward search<br />
during playback.* 4<br />
• Plays back in slowmotion<br />
during pause.<br />
[Mode]* 5<br />
Changes the settings for<br />
disc playback. (☞ page 21)<br />
[MENU] Displays <br />
screen.<br />
• For DivX/MPEG1/MPEG2/JPEG, the following buttons also appear:<br />
[ ] [ ] Selects folder. [ ] Displays folder/track list.<br />
(☞ page 18)<br />
* 1 To display the Original Program/Playlist screen, ☞ page 19.<br />
* 2 Does not appear for DVD/DVD-VR/JPEG.<br />
* 3 Appears only for DVD/DVD-VR/VCD.<br />
* 4 Search speed varies depending on the type of disc or file.<br />
* 5 Does not appear for VCD.<br />
<strong>English</strong> 17
To display the source control screen, ☞ page 14 .<br />
For CD/MP3/WMA/WAV/AAC<br />
Media type<br />
Track/file information<br />
• Pressing [
Video menu operations<br />
You can display the video menu screen<br />
while watching the playback pictures on the<br />
screen.<br />
• Available items on the screen differ<br />
depending on the types of the loaded disc<br />
and playback files.<br />
• The operation buttons disappear by<br />
touching the screen or when no operation<br />
is done for about 5 seconds.<br />
• The screen for MPEG1/MPEG2 differs from<br />
the above.<br />
[Audio] Selects the audio type.<br />
• For DVD-VR: Selects the<br />
audio channel (ST: stereo,<br />
L: left, R: right).<br />
[Subtitle] Selects the subtitle type.<br />
[Angle] Selects view angle.<br />
[MENU] Displays the disc menu<br />
(DVD)/playlist (DVD-VR).<br />
[T MENU] Displays the disc menu<br />
(DVD)/original program<br />
(DVD-VR).<br />
[CUR] Displays the menu/playlist/<br />
original program item<br />
selecting screen.<br />
• [5] [∞] [2] [3]: Selects an<br />
item.<br />
– For DivX only<br />
[2] [3]: Skips back or<br />
forward by about 5<br />
minutes.<br />
• [ENTER]: Confirms the<br />
selection.<br />
• [RETURN]: Returns to the<br />
previous screen.<br />
[Highlight] Switches to the direct menu<br />
selection mode. Press the<br />
target item to select.<br />
[Picture<br />
Adjust]<br />
Displays picture adjustment<br />
screen. (☞ page 45)<br />
[Aspect] Selects aspect ratio. (☞<br />
page 46)<br />
[ZOOM] Displays the picture size<br />
selecting screen. (☞ page 46)<br />
<strong>English</strong> 19
Only for VCD<br />
1<br />
• To deactivate the PBC function, press [7]<br />
then the direct selecting buttons to select<br />
a track number.<br />
Selecting playback mode<br />
For DVD/DVD-VR<br />
2<br />
Selects Repeat playback mode<br />
For VCD (without PBC)/CD/DivX/MPEG1/<br />
MPEG2/MP3/WMA/WAV/AAC<br />
Direct selecting buttons (☞ below)<br />
[Audio] Selects the audio channel (ST:<br />
stereo, L: left, R: right).<br />
[Return] Displays the previous screen<br />
or the menu.<br />
[MENU] Displays the disc menu.<br />
[Picture Displays picture adjustment<br />
Adjust] screen. (☞ page 45)<br />
[Aspect] Selects aspect ratio. (☞<br />
page 46)<br />
[ZOOM] Displays the picture size<br />
selecting screen. (☞ page 46)<br />
[Direct] Displays/hides the direct<br />
selecting buttons. (☞ below)<br />
• To select a track directly<br />
– To switch between chapter/track entry<br />
and title/folder entry, press [Direct/CLR].<br />
– When you enter a wrong number, press<br />
[Direct/CLR] to delete the last entry.<br />
Selects Random<br />
playback mode*<br />
Selects Repeat<br />
playback mode*<br />
* You cannot activate the repeat mode and the<br />
random mode at the same time.<br />
• Each time you press the button,<br />
the playback mode changes. (The<br />
corresponding indicator lights up.)<br />
– Available items differ depending on the<br />
types of loaded disc and playback file.<br />
Indicator Playback mode<br />
C-REP Repeats current chapter.<br />
T-REP Repeats current title/<br />
program.<br />
REP Repeats current track.<br />
FO-REP Repeats all tracks of the<br />
current folder.<br />
RDM Randomly plays all tracks.<br />
FO-RDM Randomly plays all tracks of<br />
current folder, then tracks of<br />
next folders.<br />
To cancel, press the button repeatedly until<br />
the indicator disappears.<br />
20 DDX719/DDX7049BT/DDX419/DDX4049BT/<strong>DDX319</strong>/DDX3049
Settings for disc playback<br />
Disc Setup items Selectable setting/item Initial: Underlined<br />
For DVD/DVD-VR<br />
For discs<br />
except VCD/CD<br />
Menu<br />
Language<br />
Subtitle<br />
Language<br />
Audio<br />
Language<br />
Down Mix<br />
Dynamic<br />
Range Control<br />
Screen Ratio<br />
Select the initial disc menu language; Initial <strong>English</strong> (☞ page 70).<br />
Select the initial subtitle language or erase the subtitle (OFF); Initial<br />
<strong>English</strong> (☞ page 70).<br />
• Initial for DDX7049BT/DDX4049BT/DDX3049: <strong>English</strong>, for DDX719/<br />
DDX419/<strong>DDX319</strong>: OFF<br />
Select the initial audio language; Initial <strong>English</strong> (☞ page 70).<br />
When playing back a multi-channel disc, this setting affects the<br />
signals reproduced through the front and/or rear speakers.<br />
♦ Dolby<br />
: Select this to enjoy multi-channel surround<br />
Surround audio with Dolby Surround.<br />
♦ Stereo : Normally select this.<br />
You can change the dynamic range while playing Dolby Digital<br />
software.<br />
♦ Wide<br />
: Select this to enjoy a powerful sound at a low<br />
volume level with its full dynamic range.<br />
♦ Normal : Select this to reduce the dynamic range a<br />
little.<br />
♦ Dialog : Select this to reproduce the movie dialog<br />
more clearly.<br />
Select the monitor type to watch a wide screen picture on the<br />
external monitor.<br />
♦ 16:9 ♦ 4:3 LB (Letterbox) ♦ 4:3 PS (PanScan)<br />
For discs containing<br />
audio/video/picture files<br />
File Type<br />
Select the playback file type when a disc contains different types of<br />
files.<br />
♦ Audio<br />
: Plays back audio files.<br />
♦ Still Image : Plays back JPEG files.<br />
♦ Video<br />
: Plays back DivX/MPEG1/MPEG2 files.<br />
♦ Audio&Video : Plays back audio files and DivX/MPEG1/MPEG2<br />
files.<br />
• For playable file types, ☞ page 16.<br />
• If the disc contains no files of the selected type, the existing files<br />
are played in the following order: audio, video, then still image.<br />
<strong>English</strong> 21
USB operations<br />
Playing a USB device<br />
• This unit can play JPEG/DivX/MPEG1/<br />
MPEG2/MP3/WMA/WAV/AAC files stored in<br />
a USB mass storage class device.<br />
• This unit can recognize a total of 5 000 files<br />
and 250 folders (a maximum of 999 files per<br />
folder).<br />
• Make sure all important data has been<br />
backed up to avoid losing the data.<br />
Connecting a USB device<br />
You can connect a USB mass storage class<br />
device such as a USB memory, Digital Audio<br />
Player etc. to the unit.<br />
• You cannot connect a computer or<br />
portable HDD to the USB input terminal.<br />
• To connect a USB device, ☞ page 79 .<br />
When a USB device is connected...<br />
The source changes to “USB” and playback<br />
starts.<br />
• All tracks in the USB device will be played<br />
repeatedly until you change the source.<br />
To disconnect the USB device safely<br />
Press [0], then disconnect the USB device<br />
after “No Device” appears.<br />
Cautions:<br />
• This unit may not play back files in a<br />
USB device properly when using a USB<br />
extension cord.<br />
• USB devices equipped with special<br />
functions such as data security functions<br />
cannot be used with the unit.<br />
• Do not use a USB device with 2 or more<br />
partitions.<br />
• Depending on the shape of the USB<br />
devices and connection ports, some USB<br />
devices may not be attached properly or<br />
the connection might be loose.<br />
• This unit cannot recognize a USB device<br />
whose rating is other than 5 V and exceeds<br />
500 mA.<br />
• This unit may not recognize a memory card<br />
inserted into the USB card reader.<br />
• When connecting with a USB cable, use the<br />
USB 2.0 cable.<br />
• The maximum number of characters for:<br />
– Folder names : 50 characters<br />
– File names : 50 characters<br />
• Avoid using the USB device if it might<br />
effect driving safety.<br />
• Do not pull out and connect the USB<br />
device repeatedly while “Reading...” is<br />
shown on the screen.<br />
• Electrostatic shock at connecting a USB<br />
device may cause abnormal playback of<br />
the device. In this case, disconnect the USB<br />
device then reset this unit and the USB<br />
device.<br />
• Operation and power supply may not work<br />
as intended for some USB devices.<br />
• Do not leave a USB device in the car,<br />
or expose to direct sunlight or high<br />
temperature to avoid deformation or<br />
damage to the device.<br />
22 DDX719/DDX7049BT/DDX419/DDX4049BT/<strong>DDX319</strong>/DDX3049
To display the source control screen, ☞ page 14 .<br />
While playing, the<br />
jacket picture is<br />
shown if the file<br />
has the tag data<br />
including the jacket<br />
picture.<br />
Track/file information<br />
(for MP3/WMA/WAV/<br />
AAC)<br />
• Pressing [
Listening to the iPod/iPhone device<br />
Préparation<br />
• Connect iPod/iPhone. (☞page 79)<br />
• Use the following cables:<br />
– To watch the video and to listen to<br />
the music (analog): USB Audio and<br />
Video cable for iPod/iPhone—KCA-iP22F/<br />
KCAiP202 (optional accessory)<br />
– To listen to the music (digital): USB<br />
Audio cable for iPod/iPhone—KCA-iP102<br />
(optional accessory)<br />
• Select appropriate input settings on<br />
according to the connection<br />
method (☞ the right column).<br />
• Do not use extension cables.<br />
iPod/iPhone that can be connected to this<br />
unit:<br />
Made for<br />
– iPod with video<br />
– iPod classic<br />
– iPod nano (6th Generation)<br />
– iPod nano (5th Generation)<br />
– iPod nano (4th Generation)<br />
– iPod nano (3rd Generation)<br />
– iPod nano (2nd Generation)<br />
– iPod nano (1st Generation)<br />
– iPod touch (4th Generation)<br />
– iPod touch (3rd Generation)<br />
– iPod touch (2nd Generation)<br />
– iPod touch (1st Generation)<br />
– iPhone 4<br />
– iPhone 3GS<br />
– iPhone 3G<br />
– iPhone<br />
Settings for iPod playback<br />
When the source is “iPod”...<br />
1<br />
2<br />
Audiobooks<br />
Artwork<br />
Selects the speed of<br />
audio books.<br />
Shows/hides the iPod<br />
artwork.<br />
Setting <br />
You can change the setting only when the<br />
unit is in standby.<br />
1 On :<br />
2<br />
3<br />
AV-IN2<br />
iPod<br />
Select this when connecting<br />
the iPod/iPhone using the<br />
USB Audio cable for iPod/<br />
iPhone.<br />
Select this when connecting<br />
the iPod/iPhone using the<br />
USB Audio and Video cable<br />
for iPod/iPhone.<br />
24 DDX719/DDX7049BT/DDX419/DDX4049BT/<strong>DDX319</strong>/DDX3049
iPod/iPhone playback operations<br />
To display the source control screen, ☞ page 14 .<br />
• Select “iPod” as the source. (☞ page 13 )<br />
• The operations explained in this manual are under the condition when the unit is selected<br />
for controlling playback. (☞ below)<br />
While playing,<br />
Artwork (the<br />
picture displayed<br />
on the screen<br />
of iPod/iPhone)<br />
is shown if the<br />
song contains the<br />
Artwork.* 1<br />
Song/video<br />
information<br />
• Pressing [
Selecting a track/video from<br />
menu on the iPod/iPhone<br />
1<br />
Operating in iPod/iPhone<br />
control mode<br />
You can play back the audio/video using<br />
iPod/iPhone itself instead of the unit.<br />
Audio:<br />
2 Select the menu (Music or<br />
Video) (1), a category (2),<br />
then a desired item (3).<br />
• Select the item in the selected layer<br />
until a desired track starts playing.<br />
Music menu:<br />
Switches between Music ( ) and<br />
Video ( )<br />
Video:<br />
Returns to the previous layer<br />
Returns to the top layer<br />
Video menu:<br />
Switches between Music ( ) and<br />
Video ( )<br />
• When you are using Garmin StreetPilot®<br />
Onboard, the screen appears. For Garmin<br />
StreetPilot® Onboard for iPhone, visit the<br />
Garmin web site: www.garmin.com<br />
Garmin App:<br />
• Available categories differ depending on<br />
the type of your iPod/iPhone.<br />
• The current position of your vehicle<br />
appears on the map. When the vehicle<br />
runs, the map scrolls.<br />
• The screens of the iPhone and unit are<br />
not the same.<br />
• To return to the normal mode, press [APP].<br />
26 DDX719/DDX7049BT/DDX419/DDX4049BT/<strong>DDX319</strong>/DDX3049
PANDORA® operations<br />
(Only for DDX719/DDX419/<strong>DDX319</strong>)<br />
• You can operate PANDORA using the remote controller. Only playing, pausing, and skipping<br />
are available.<br />
• Install the latest version of the PANDORA® application on your iPhone.<br />
The picture data<br />
is displayed if<br />
available from the<br />
current content.<br />
Song information<br />
• Pressing [
About Pandora® internet radio<br />
The requirements for listening to Pandora<br />
are as follows:<br />
• Use an Apple iPhone or iPod touch<br />
running under iOS3 or later.<br />
• Search for “Pandora” in the Apple<br />
iTunes App Store to find and install the<br />
most current version of the Pandora®<br />
application on your device.<br />
• In the application on your device, log in<br />
and create an account with Pandora.<br />
(If you are not already a registered user,<br />
an account can also be created at www.<br />
pandora.com.)<br />
• Internet connection by 3G, EDGE, or WiFi.<br />
• iPhone connected to this unit with a KCAiP22F/KCA-iP202.<br />
• Pandora® is available only in the U.S.<br />
• Because Pandora® is a third-party service,<br />
the specifications are subject to change<br />
without prior notice. Accordingly,<br />
compatibility may be impaired or some<br />
or all of the services may become<br />
unavailable.<br />
• Some functions of Pandora® cannot be<br />
operated from this unit.<br />
• For issues using the application, please<br />
contact Pandora at pandora-support@<br />
pandora.com<br />
28 DDX719/DDX7049BT/DDX419/DDX4049BT/<strong>DDX319</strong>/DDX3049
Listening to the radio<br />
Text information<br />
Scrolls the text<br />
information<br />
ST indicator TI indicator<br />
Seek mode indicator<br />
• The ST indicator lights up when receiving an FM stereo broadcast with sufficient signal<br />
strength.<br />
[P1] – [P6]<br />
[Mode]<br />
[TI]<br />
[Mono] *<br />
[Text]<br />
• Turns in the preset station.<br />
(Press)<br />
• Presets the currently tuned<br />
station. (Hold)<br />
Displays tuner setting screen.<br />
(☞ page 30)<br />
Activates/deactivates TI<br />
standby reception mode.<br />
(☞ page 31)<br />
Activates/deactivates<br />
monaural mode for better FM<br />
reception. (Stereo effect will<br />
be lost.)<br />
• The MONO indicator lights<br />
up while monaural mode is<br />
activated.<br />
Displays/hides the<br />
information of the current<br />
station. (☞ page 30)<br />
[PTY] *<br />
[AM]<br />
[FM]<br />
[SEEK]<br />
[4]<br />
[¢]<br />
[MENU]<br />
Enters FM RBDS program<br />
search mode. (☞ page 31)<br />
Selects AM band.<br />
Selects FM band.<br />
Changes the seek mode.<br />
• AUTO1: Auto Search<br />
• AUTO2: Tunes in stations<br />
in memory one after<br />
another.<br />
• MANU: Manual Search<br />
Searches for a station.<br />
• The search method differs<br />
according to the selected<br />
seek mode. (☞ above)<br />
Displays <br />
screen.<br />
* Appears only when FM is selected as the source.<br />
<strong>English</strong> 29
Displaying the information of the<br />
current station<br />
Manual presetting<br />
1 Tune in to a station you want<br />
to preset. (☞ page 29)<br />
2 Select a preset number.<br />
(Hold)<br />
The station frequency<br />
currently tuned in/PS<br />
(station name) for FM RBDS<br />
when PS signal is coming in<br />
Displays the text<br />
information<br />
Preset list<br />
The station selected in step 1 is stored.<br />
Selecting a preset station<br />
Storing stations in memory<br />
You can preset six stations for each band.<br />
Automatic presetting —AME (Auto<br />
Memory)<br />
1<br />
2<br />
(Hold)<br />
Local stations with the strongest signals are<br />
searched and stored automatically.<br />
30 DDX719/DDX7049BT/DDX419/DDX4049BT/<strong>DDX319</strong>/DDX3049
The following features are available only<br />
for FM RBDS stations.<br />
Activating/deactivating TI<br />
Standby Reception<br />
Searching for FM RBDS<br />
program—PTY Search<br />
You can search for your favorite programs<br />
being broadcast by selecting the PTY code<br />
for your favorite programs.<br />
1<br />
TI indicator<br />
2 Select a PTY code.<br />
TI indicator<br />
Lights in<br />
white<br />
Lights in<br />
orange<br />
Goes off<br />
TI Standby Reception<br />
The unit will temporarily<br />
switch to Traffic Information<br />
(TI) if available.<br />
Not yet activated. Tune in to<br />
another station providing the<br />
RBDS signals.<br />
Deactivated.<br />
(Hold)<br />
• The volume adjustment for Traffic<br />
Information is automatically memorized.<br />
The next time the unit switches to Traffic<br />
Information, the volume is set to the<br />
previous level.<br />
Changes the page<br />
PTY Search starts.<br />
If there is a station broadcasting a<br />
program of the same PTY code as you<br />
have selected, that station is tuned in.<br />
<strong>English</strong> 31
Listening to the SiriusXM Satellite Radio<br />
(Only for DDX719/DDX419/<strong>DDX319</strong>)<br />
Everything worth listening to is on SiriusXM, getting over 130 channels, including the most<br />
commercial-free music, plus the best sports, news, talk and entertainment. To start listening to<br />
the SiriusXM Satellite Radio, A SiriusXM Vehicle Tuner (sold separately) and Subscription are<br />
required. For more information, visits www.siriusxm.com.<br />
Text information<br />
Scrolls the text<br />
information<br />
[P1] – [P6]<br />
[Song Title]<br />
[Content Info]<br />
[Category]<br />
[Mode]<br />
[Direct]<br />
[Text]<br />
[IR]<br />
• Tunes in the preset<br />
channel. (Press)<br />
• Presets the currently<br />
tuned channel. (Hold)<br />
Changes the displayed<br />
information each time<br />
this button is pressed.<br />
Changes the settings<br />
of the reception<br />
restrictions. (☞ page 37)<br />
Displays the Direct<br />
Channel Select screen.<br />
(☞ page 34)<br />
Displays/Hides the<br />
information on the<br />
current channel.<br />
(☞ page 34)<br />
Displays the Instant<br />
Replay screen.<br />
(☞ page 36)<br />
[ ] Obtain information<br />
on channels or select<br />
a category and then a<br />
channel.<br />
(☞ page 35)<br />
[BAND] Changes the band.<br />
SXM1 SXM2<br />
SXM4 SXM3<br />
[SEEK] Changes the seek mode.<br />
• SEEK1: Skip to<br />
another<br />
available<br />
channel.<br />
• SEEK2: Skip to<br />
another preset<br />
channel.<br />
[4] [¢] Seeks forward or<br />
backward (refer to the<br />
above for the SEEK<br />
mode).<br />
[MENU] Displays the screen.<br />
32 DDX719/DDX7049BT/DDX419/DDX4049BT/<strong>DDX319</strong>/DDX3049
Radio activation<br />
SiriusXM Satellite Radio operation requires<br />
the connection of the optional SiriusXM-<br />
Connect Vehicle Tuner (sold separately). To<br />
activate the SiriusXM Vehicle Connect tuner,<br />
you will need the Radio ID.<br />
1 Make a note of your Radio ID.<br />
For each SiriusXM Vehicle Connect tuner,<br />
peculiar Radio ID is assigned. To confirm<br />
your Radio ID, tune to channel 0.<br />
• The letters I, O, S and F are not used in<br />
any Radio ID.<br />
2 How to activate your SiriusXM<br />
Service<br />
Go to www.siriusxm.com/<br />
activatenow or call 1-866-635-<br />
2349 to activate your SiriusXM<br />
Vehicle Connect Tuner.<br />
3 When the following screen<br />
appears, press [Enter].<br />
<strong>English</strong> 33
Displaying the information on the<br />
current channel<br />
Selecting a preset channel<br />
1<br />
Selecting a channel directly<br />
Band no./<br />
Radio ID* (or Preset no. if the<br />
current station is preset)/<br />
Channel no.<br />
Displays the text<br />
information<br />
Preset list<br />
* The Radio ID is displayed when the channel is set<br />
to 0.<br />
Storing channels in memory<br />
You can preset six channels for each band.<br />
(24 in total)<br />
1 Tune in to a channel you want<br />
to preset. (☞ page 32)<br />
2 Select a preset number.<br />
2 Enter a channel no. (1), and<br />
then confirm (2).<br />
• To clear the entry, press [Clear].<br />
• To cancel selecting the channel, press<br />
[Cancel].<br />
(Hold)<br />
The channel selected in step 1 is stored.<br />
34 DDX719/DDX7049BT/DDX419/DDX4049BT/<strong>DDX319</strong>/DDX3049
Displaying information on<br />
channels<br />
You can obtain information on channels or<br />
select a category and then a channel.<br />
1<br />
Channel List<br />
Select a category (1) and then a channel<br />
(2).<br />
2 Select [Preset List] or [Channel<br />
List].<br />
– To list all the channels, select [All<br />
Channels].<br />
– Pressing the info change button<br />
under the list displays information in<br />
the following order:<br />
Channel Name = Artist Name =<br />
Song Title = Content Info<br />
3<br />
Preset List<br />
Select a band (1) and then a preset<br />
channel (2).<br />
Info change button<br />
<strong>English</strong> 35
Using the Instant Replay<br />
function<br />
You can temporarily record up to 30 minutes<br />
of the broadcast from the current time, and<br />
replay the recorded data.<br />
• If you change to another channel during<br />
playback, the recorded content will be lost.<br />
• When the recording time reaches 30<br />
minutes, the older recorded data is deleted<br />
and recording continues.<br />
Entering the Instant Replay mode<br />
Progress bar<br />
Time code<br />
Playback status<br />
(3: play / 8: pause )<br />
Progress<br />
bar<br />
Time code<br />
Shows the remaining capacity<br />
(gray) and the amount of<br />
recorded data (blue). If you<br />
have already recorded 30<br />
minutes, the entire bar is<br />
indicated in blue.<br />
• Updated every second.<br />
This display shows you how<br />
many minutes into a recording<br />
that are being played back.<br />
• Example: –5:00<br />
You are listening<br />
to the data of 5<br />
minutes before the<br />
current broadcast.<br />
• Updated every second.<br />
[4] • Returns to the previous track<br />
if pressed within 2 seconds<br />
from the beginning of the<br />
current track.<br />
• Returns to the beginning of<br />
the current track if pressed<br />
after 2 seconds or more<br />
of the track have been<br />
replayed.<br />
[1] Rewind/Fast forward<br />
[¡]<br />
[38] Starts/Pauses playback.<br />
[¢] Skips the current track.<br />
Exiting the Instant Replay mode<br />
(Returning to the normal display)<br />
36 DDX719/DDX7049BT/DDX419/DDX4049BT/<strong>DDX319</strong>/DDX3049
Setting the reception<br />
restrictions<br />
Display the SiriusXM Mode screen to<br />
configure the settings.<br />
3 Enter a four-digit code (1),<br />
and then confirm (2).<br />
• To clear the entry, press [Clear].<br />
• To cancel setting the code, press<br />
[Cancel].<br />
Setting the parental lock<br />
You can set the parental lock or parental<br />
mature lock in order to, for example, restrict<br />
children from receiving adult channels.<br />
Setting/Changing the parental code<br />
• Changing the code does not change<br />
the Parental Mature Lock/Parental Lock<br />
Channel/Channel Skipping settings.<br />
1<br />
4 Enter the four-digit code and<br />
then press [Enter] again to<br />
confirm the code.<br />
Activating/Deactivating the parental<br />
mature lock<br />
You can set the parental lock on channels<br />
classed as “adult” by SiriusXM.<br />
• To enable the parental control based<br />
on Mature channels, press [ON] next to<br />
“Parental Mature Lock”.<br />
• To release the lock, press [OFF].<br />
2 Enter a four-digit code (1),<br />
and then confirm (2).<br />
• To clear the entry, press [Clear].<br />
• To cancel setting the code, press<br />
[Cancel].<br />
Enter the parental code to confirm your<br />
choice.<br />
• The initial setting is “0000”.<br />
<strong>English</strong> 37
Activating the parental lock on each channel<br />
This parental control option allows you<br />
to pick the channels to be locked by the<br />
parental control feature.<br />
1<br />
Skipping unwanted channels<br />
If you do not want to receive some channels,<br />
you can skip them.<br />
Activating the channel skipping<br />
1<br />
2 Enter the parental code.<br />
3 Select a category (1) and<br />
then a channel (2).<br />
• To list all the channels, select [All<br />
Channels].<br />
• A checkmark appears beside the<br />
selected channel.<br />
2 Select a category (1) and<br />
then a channel (2).<br />
• To list all the channels, select [All<br />
Channels].<br />
• A checkmark appears beside the<br />
selected channel.<br />
Repeat this step if you want to set the<br />
lock on multiple channels.<br />
• Checkmarks appear beside the locked<br />
channels, and the channels are<br />
disabled.<br />
Deactivating the parental lock<br />
Repeat this step if you want to skip<br />
multiple channels.<br />
Clearing the channel skipping<br />
(Hold)<br />
Enter the parental code.<br />
All the locked channels will be<br />
deactivated.<br />
38 DDX719/DDX7049BT/DDX419/DDX4049BT/<strong>DDX319</strong>/DDX3049<br />
All the skipped channels will be cleared.
Using other external components<br />
To display the source control screen, ☞ page 14 .<br />
AV-IN name ( ☞ below)<br />
[Mode]<br />
[MENU]<br />
Changes the AV-IN name.<br />
• Press [2] or [3] to select an AV-IN name.<br />
• This setting does not affect the source name “AV-IN 1”/ “AV-IN 2”<br />
displayed on .<br />
Displays screen.<br />
AV-IN<br />
You can connect an external component to<br />
the AV-IN terminal.<br />
Preparation:<br />
If you want to use AV-IN2, select <br />
for setting. (☞page 50 )<br />
3 Turn on the connected<br />
component and start playing<br />
the source.<br />
1 Connect an external<br />
component.<br />
To connect it, ☞ page 79 , 80 .<br />
2 Select “AV-IN 1” or “AV-IN 2” as<br />
the source. (☞ page 13 )<br />
<strong>English</strong> 39
Using the external navigation unit<br />
(Only for DDX7049BT/DDX4049BT/DDX3049)<br />
You can connect a navigation unit (KNA-G610/KNA-G630: optional accessory) to the navigation<br />
input terminal so that you can view the navigation screen. (☞ page 80 )<br />
The navigation guidance comes out through the front speakers even when you listen to an<br />
audio source.<br />
To view the navigation 2<br />
screen<br />
On :<br />
On any screen:<br />
or<br />
3<br />
The navigation screen is activated.<br />
• While the navigation screen is displayed,<br />
the touch panel operations are available<br />
only for using navigation function.<br />
• The aspect ratio of the navigation screen<br />
is fixed to regardless of the<br />
setting (☞ page 46).<br />
To cancel the navigation screen<br />
DDX7049BT DDX4049BT/<br />
DDX3049<br />
Settings for navigation unit<br />
1 On :<br />
Guidance<br />
Volume<br />
NAV Mute<br />
NAV Setup<br />
Select front speakers<br />
used for the navigation<br />
guidance.<br />
Adjust the volume of the<br />
navigation guidance. (0<br />
to 35)<br />
Select to<br />
attenuate the sound<br />
coming through<br />
speakers other than the<br />
front speakers during<br />
navigation guidance.<br />
Press [Enter] to display<br />
the setup screen for<br />
the navigation unit.<br />
See the instruction<br />
manual supplied for the<br />
navigation unit.<br />
40 DDX719/DDX7049BT/DDX419/DDX4049BT/<strong>DDX319</strong>/DDX3049
Sound adjustment<br />
Using the sound equalization<br />
• The adjustment is memorized for each source until you adjust the sound again. If the source<br />
is a disc, the adjustment is stored for each of the following categories.<br />
– DVD/DVD-VR<br />
– VCD/CD<br />
– DivX/MPEG1/MPEG2/MP3/WMA/WAV/AAC<br />
• You cannot adjust the sound when the unit is in standby.<br />
Selecting a preset sound<br />
mode<br />
1 On :<br />
2<br />
Storing your own<br />
adjustment<br />
Customizing preset sound mode<br />
1 Select a sound mode. (☞<br />
“Selecting a preset sound mode”)<br />
2 Set to <br />
(1), then press [Tone] (2).<br />
3 Select a sound mode.<br />
3 Adjust the level of each band<br />
(1), then select the subwoofer<br />
level * (2).<br />
Changes the page<br />
The adjustments are stored and <br />
is activated.<br />
* Adjustable only when the subwoofer is activated.<br />
(☞ page 48)<br />
<strong>English</strong> 41
Adjusting the sound precisely<br />
1 Perform steps 1 and 2 of<br />
“Selecting a preset sound<br />
mode,” then...<br />
Adjusting the cross over<br />
frequency<br />
1 On :<br />
2<br />
2<br />
3 Adjust the sound of each<br />
band.<br />
3 Select the item to adjust, then<br />
make adjustment.<br />
Adjusts the cross over for front or rear<br />
speakers (high pass filter).<br />
Flat<br />
Frequency<br />
Level<br />
Q Factor<br />
Bass EXT<br />
SW Level<br />
Changes level of Bass/<br />
Middle/Treble to 0.<br />
Selects frequency.<br />
Adjusts level.<br />
Adjusts the width of the<br />
frequency.<br />
Activates/deactivates<br />
bass.<br />
Adjusts subwoofer level.*<br />
The adjustments are stored and <br />
is activated.<br />
* Adjustable only when the subwoofer is activated.<br />
(☞ page 48)<br />
Adjusts the cross over for subwoofer<br />
(low pass filter).* 1<br />
Adjusts the cross over frequency.<br />
Selects the phase for the subwoofer. * 2<br />
Adjusts the subwoofer level.<br />
* 1 Adjustable only when the subwoofer is<br />
activated. (☞ page 48)<br />
* 2 Not selectable when is set to<br />
.<br />
42 DDX719/DDX7049BT/DDX419/DDX4049BT/<strong>DDX319</strong>/DDX3049
Changing the display design<br />
You can change the background and panel color.<br />
1 On :<br />
To select a panel color<br />
Variable color illumination<br />
• Illumination color changes gradually.<br />
2<br />
For making your own color<br />
adjustment, ☞ below<br />
3 Select an item to change<br />
( or ).<br />
Making your own color adjustment<br />
• You can make your own color adjustment<br />
only when is selected.<br />
1<br />
4 Select a background/panel<br />
color.<br />
To select a background<br />
2<br />
3 User color adjuster: You can make your<br />
own color adjustment stored in <br />
For setting your favorite scene as<br />
the background, ☞ page 44<br />
Dimmer setting: You can make the color<br />
adjustment for each dimmer setting<br />
<strong>English</strong> 43
Using your favorite scene as the<br />
background<br />
While playing a video or JPEG, you can<br />
capture an image and use the captured<br />
image as a background.<br />
• You cannot capture copyrighted content<br />
and images from iPod/iPhone.<br />
• When using a JPEG file as the background,<br />
make sure that the resolution is 800 x 600<br />
pixels.<br />
• The color of the captured image may look<br />
different from that of the actual scene.<br />
1 Play back a video or JPEG.<br />
2 Display . (☞<br />
page 43)<br />
3<br />
4 Adjust the image.<br />
[38]* Starts/Pauses playback.<br />
[ 3]* Advances scenes frame-byframe.<br />
[ ] Magnifies the scene.<br />
(, –<br />
)<br />
[5] [∞] Moves the zooming frame.<br />
[2] [3]<br />
• To cancel the capture screen, press<br />
[Cancel].<br />
* Not displayed when playing an external<br />
component connected to AV-IN input<br />
terminal.<br />
5 Capture the image displayed<br />
on the screen.<br />
A confirmation message appears. Press<br />
[Yes] to store the newly captured image.<br />
(The existing image is replaced with the<br />
new one.)<br />
• Press [No] to return to the previous<br />
screen.<br />
44 DDX719/DDX7049BT/DDX419/DDX4049BT/<strong>DDX319</strong>/DDX3049
Setting for video playback<br />
You can change the setting for video playback.<br />
Picture adjustment<br />
You can adjust the picture quality.<br />
1 Display the adjustment menu.<br />
3 Adjust the picture (–15 to<br />
+15).<br />
Adjusts the brightness<br />
Adjusts the contrast<br />
Adjusts the black<br />
Adjusts the color<br />
Adjusts the tint*<br />
Adjusts the sharpness<br />
* Adjustable only when the incoming signal is<br />
NTSC.<br />
2 Select dimmer on ()<br />
or off ().<br />
<strong>English</strong> 45
Changing the aspect ratio<br />
You can change the aspect ratio for video<br />
playback.<br />
1<br />
* While DivX is played back with <br />
set to (for disc: ☞ page 21/ for USB: ☞<br />
page 23), the aspect ratio is not set correctly.<br />
Zooming picture<br />
You can zoom the picture ( to<br />
).<br />
• When is set to or<br />
(☞ left column), the picture<br />
is zoomed with the aspect ratio of the<br />
setting.<br />
1<br />
2<br />
2<br />
FULL*:<br />
For 16:9<br />
original<br />
pictures<br />
JUST:<br />
For 4:3LB<br />
original<br />
pictures<br />
Normal*:<br />
For 4:3 original<br />
pictures<br />
Auto:<br />
4:3 signal 16:9 signal<br />
• For “DISC”/”USB”<br />
only: Aspect ratio is<br />
automatically selected<br />
to match to the<br />
incoming signals.<br />
[5] [∞] [2] [3] : Moves the zooming<br />
frame.<br />
46 DDX719/DDX7049BT/DDX419/DDX4049BT/<strong>DDX319</strong>/DDX3049
Using a rear view camera<br />
• To use a rear view camera, the REVERSE lead connection is required. For connecting a rear<br />
view camera, ☞ page 80.<br />
Activating the rear view<br />
camera<br />
1 On :<br />
Displaying the picture from<br />
the rear view camera<br />
The rear view screen is displayed when you<br />
shift the gear to the reverse (R) position.<br />
2<br />
3<br />
• To erase the caution message, touch the<br />
screen.<br />
To display the picture from the rear<br />
view camera manually<br />
DDX719/<br />
DDX7049BT<br />
DDX419/<br />
DDX4049BT/<br />
<strong>DDX319</strong>/DDX3049<br />
To deactivate, select .<br />
(Hold)<br />
(Hold)<br />
When displaying the picture from the rear<br />
view camera manually, you can change the<br />
setting of the picture. (☞ page 45)<br />
To cancel the rear view screen, press and<br />
hold the same button again.<br />
<strong>English</strong> 47
Setting menu items<br />
• You cannot change settings when the unit is in standby.<br />
Menu item Selectable setting/item Initial: Underlined<br />
Audio<br />
Fader/Balance<br />
Equalizer<br />
Loudness<br />
Fader : Adjust the front and rear speaker output balance.<br />
♦ F6 to R6; Initial 0<br />
• When using a two-speaker system, set the fader to the<br />
center (0).<br />
Balance : Adjust the left and right speaker output balance.<br />
♦ L6 to R6; Initial 0<br />
Press [ 5/∞/2/3 ] or drag [ ] to adjust.<br />
• To clear the adjustment, press [Center].<br />
Change the sound mode or adjust and store the equalization<br />
for each source. (☞ page 41)<br />
♦ Natural/Rock/Pops/Easy/Top40/Jazz/User<br />
You can activate/deactivate the loudness function.<br />
♦ OFF<br />
♦ ON<br />
: Cancels.<br />
: Boost low and high frequencies to<br />
produce a well-balanced sound at a low<br />
volume level. The LOUD indicator lights up.<br />
X’over Adjust the cross over frequency. (☞ page 42)<br />
Volume Offset<br />
Adjust and store the auto-adjustment volume level for each<br />
source. (For discs, the adjustment is stored for each of the<br />
following categories: DVD/DVD-VR, VCD/CD, and DivX/<br />
MPEG1/MPEG2/MP3/WMA/WAV/AAC.) The volume level will<br />
automatically increase or decrease when you change the<br />
source.<br />
♦ –15 to +6; Initial 0<br />
Subwoofer<br />
♦ ON<br />
♦ OFF<br />
: Activates the subwoofer.<br />
: Cancels.<br />
Speaker Select Select the size of the connected speaker.<br />
♦ Standard/Narrow/Middle/Wide<br />
48 DDX719/DDX7049BT/DDX419/DDX4049BT/<strong>DDX319</strong>/DDX3049
Menu item Selectable setting/item Initial: Underlined<br />
Display<br />
Dimmer ♦ Auto : Dims the screen and button illumination<br />
when you turn on the headlights.<br />
• The ILLUMI lead connection is required.<br />
(☞ page 78 )<br />
♦ ON<br />
: Activates dimmer.<br />
♦ OFF<br />
: Cancels.<br />
♦ NAV<br />
: Activates or deactivates dimmer<br />
according to the day/night display<br />
setting of the connected navigation unit.<br />
User Customize Change the display design (background and panel color). (☞<br />
page 43)<br />
OSD Clock ♦ ON : Displays the clock while a video source is<br />
played back.<br />
♦ OFF<br />
: Cancels.<br />
Scroll ♦ ON : Repeats scrolling.<br />
♦ Once : Scrolls the displayed information once.<br />
♦ OFF<br />
: Cancels.<br />
• Pressing [
Menu item Selectable setting/item Initial: Underlined<br />
Input<br />
AV Input<br />
You can determine the use of AV-IN input terminal.<br />
♦ AV-IN2 : Select to play an AV component connected<br />
to the AV-IN input terminal.<br />
♦ iPod : Select when connecting the iPod/iPhone<br />
using the USB Audio and Video cable for<br />
iPod/iPhone. (☞ page 24)<br />
R-CAM Interrupt ♦ ON : Displays the picture from the rear view<br />
camera when you shift the gear to the<br />
reverse (R) position.<br />
♦ OFF<br />
: Cancels.<br />
Navigation<br />
Change the navigation settings. (☞ page 40)<br />
DDX7049BT/<br />
DDX4049BT/DDX3049<br />
NAV Mute<br />
DDX719/DDX419/<br />
<strong>DDX319</strong><br />
Attenuate the sound coming through speakers other than the<br />
front speakers.<br />
50 DDX719/DDX7049BT/DDX419/DDX4049BT/<strong>DDX319</strong>/DDX3049
Menu item Selectable setting/item Initial: Underlined<br />
System<br />
Language *<br />
Select the text language used for on-screen information.<br />
♦ <strong>English</strong>/Spanish/French/German/Italian/Dutch/<br />
Russian/Portuguese/Chinese-Simplified/Chinese-<br />
Traditional/Thai/Turkish/Arabic/Persian/Hebrew/<br />
Greece/Indonesia<br />
• For external monitors, only <strong>English</strong>/Spanish/French/German/<br />
Italian/Dutch/Russian/Portuguese are available. If another<br />
language has been selected, the text language for external<br />
monitors will be set to <strong>English</strong>.<br />
♦ GUI<br />
Language<br />
: Select a language ( or :<br />
the language selected above) used for<br />
displaying operation buttons and menu<br />
items.<br />
Clock Adjust the clock time. (☞ page 10)<br />
Beep<br />
♦ ON<br />
♦ OFF<br />
: Activates the key-touch tone.<br />
: Cancels.<br />
Remote Sensor<br />
SETUP Memory<br />
DivX(R) VOD<br />
Only for DDX7049BT/<br />
DDX4049BT/DDX3049<br />
♦ ON<br />
♦ OFF<br />
: Activates the remote sensor.<br />
: Cancels.<br />
You can memorize, recall, clear, or lock the settings you have<br />
made. (☞ page 52)<br />
This unit has its own Registration Code. Once you have played<br />
back a file with which the Registration Code recorded, this unit’s<br />
Registration Code is overwritten for copyright protection.<br />
• Press [Enter] to display the information.<br />
• To return to the previous screen, press [OK].<br />
SI Activate or deactivate the security function. (☞ page 7)<br />
Serial Number Displays the serial number.<br />
Touch Panel Adjust Adjust the touch position of the buttons on screen. (☞ page 52)<br />
System Information Displays the version information on the software. You can<br />
update the software. (☞ page 6)<br />
* “Please power off” appears when the setting is changed. Turn off the power, then turn on to enable the<br />
change.<br />
<strong>English</strong> 51
Memorizing/recalling the<br />
settings<br />
You can memorize the settings changed<br />
in the menu and recall the<br />
memorized settings anytime.<br />
• The memorized settings are kept even<br />
when the unit is reset.<br />
1 On :<br />
Locking the settings<br />
You can lock the settings to prevent them<br />
from being changed.<br />
• is shown beside the settings that can<br />
be locked.<br />
1 On :<br />
2<br />
2<br />
To unlock the setting, press [Unlock].<br />
• To cancel, press [No].<br />
3 Select an operation.<br />
Adjusting the touch position<br />
You can adjust the touch position on the<br />
touch panel if the position touched and the<br />
operation performed do not match.<br />
1 On :<br />
[Recall]: Recalls the memorized settings.<br />
[Memory]: Memorizes the current<br />
settings.<br />
[Clear]: Clears the currently memorized<br />
settings.<br />
• To cancel, press [Cancel].<br />
2 Touch the center of the marks<br />
at the lower left and at the<br />
upper right as instructed.<br />
Confirmation message appears. Press<br />
[Yes].<br />
• To cancel the current operation, press<br />
[Cancel].<br />
• To reset to the initial setting, press<br />
[Reset].<br />
52 DDX719/DDX7049BT/DDX419/DDX4049BT/<strong>DDX319</strong>/DDX3049
BLUETOOTH OPERATIONS<br />
(Only for DDX719/DDX7049BT/DDX419/DDX4049BT )<br />
Information for using Bluetooth® devices<br />
• While driving, do not perform complicated operations such as dialing the numbers, using<br />
phonebook, etc. When you perform these operations, stop your car in a safe place.<br />
• Some Bluetooth devices may not be connected to this unit depending on the Bluetooth<br />
version of the device.<br />
• This unit may not work for some Bluetooth devices.<br />
• Connecting condition may vary depending on circumstances around you.<br />
• When the unit is turned off, the device is disconnected.<br />
Bluetooth operations<br />
Bluetooth is a short-range wireless radio<br />
communication technology for the mobile<br />
device such as mobile phones, portable PCs,<br />
and other devices. The Bluetooth devices<br />
can be connected without cables and<br />
communicate with each other.<br />
DDX719/DDX7049BT<br />
Bluetooth adaptor (KS-UBT1)<br />
Preparation:<br />
Be sure to connect Bluetooth adapter<br />
KS-UBT1 (supplied) and microphone<br />
(supplied) beforehand. ( ☞ page 78 )<br />
DDX419/DDX4049BT<br />
Bluetooth adaptor (KS-UBT1)<br />
<strong>English</strong> 53
Connecting Bluetooth devices<br />
Connecting a new Bluetooth<br />
device for the first time<br />
When you connect a Bluetooth device to the<br />
unit for the first time, make pairing between<br />
the unit and the device. Pairing allows<br />
Bluetooth devices to communicate each<br />
other.<br />
To make pairing, you may need to enter the<br />
PIN (Personal Identification Number) code of<br />
your Bluetooth device you want to connect.<br />
• Once the connection is established, it is<br />
registered in the unit even if you reset the<br />
unit. Up to 5 devices can be registered in<br />
total.<br />
• Only one device for Bluetooth phone and<br />
one for Bluetooth audio can be connected<br />
at a time.<br />
• To use the Bluetooth function, you need to<br />
turn on Bluetooth function of the device.<br />
• The maximum digit of the PIN code that<br />
can be set is 16.<br />
1 Display the Bluetooth setting<br />
screen.<br />
On :<br />
Mobile phone<br />
For connecting a Bluetooth mobile<br />
phone<br />
is displayed.<br />
For connecting a Bluetooth audio<br />
player<br />
is displayed.<br />
2 Change the PIN code.<br />
• If you skip changing the PIN code, go<br />
to step 3.<br />
On :<br />
PIN code (initial: 0000)<br />
On :<br />
PIN code (initial: 0000)<br />
Audio player<br />
Deletes last character<br />
54 DDX719/DDX7049BT/DDX419/DDX4049BT/<strong>DDX319</strong>/DDX3049
3<br />
4<br />
• All registered devices (mobile phone<br />
and audio player) are listed on<br />
.<br />
– Selectable items depend on the<br />
device you are operating.<br />
To disconnect<br />
Cancel<br />
5 Operate the Bluetooth device<br />
to connect.<br />
“Connected” appears. Press [OK] to<br />
confirm the operation.<br />
Now connection is established and you<br />
can use the Bluetooth device through<br />
the unit.<br />
Connecting/disconnecting a<br />
registered Bluetooth device<br />
1 Display the Bluetooth setting<br />
screen. (☞ page 54)<br />
• For Bluetooth mobile phone:<br />
<br />
• For Bluetooth audio player:<br />
<br />
2 To connect<br />
A confirmation message appears. Press<br />
[Yes].<br />
Deleting a registered<br />
Bluetooth device<br />
1 On (☞ Step 2 on<br />
the left column):<br />
2 Select a device to delete the<br />
registration.<br />
Confirmation message appears. Press<br />
[Yes].<br />
Select the device you want to connect.<br />
<strong>English</strong> 55
Using the Bluetooth mobile phone<br />
Receiving a call<br />
Adjusting the volume of<br />
microphone<br />
When a call comes in...<br />
Rejects the call<br />
Call information<br />
(if acquired)<br />
While talking...<br />
Status of the device/Battery reminder (only<br />
when the information comes from the<br />
device)<br />
• Phone operation is not available while<br />
the picture from the rear view camera is<br />
displayed. (☞ page 47)<br />
When is set to <br />
The unit answers the incoming call<br />
automatically. (☞ page 62)<br />
• This adjustment does not affect the volume<br />
level of the other sources.<br />
• To adjust the volume of calls/earpiece, use<br />
the volume knob on the monitor panel.<br />
Switching between<br />
handsfree mode and phone<br />
mode<br />
While talking...<br />
Ending a call<br />
While talking...<br />
Each time you press the button, the talking<br />
method is switched ( : handsfree<br />
mode / : phone mode).<br />
Checking SMS reception<br />
If the mobile phone is compatible with SMS<br />
(Short Message Service), the unit tells you a<br />
message has been received.<br />
To read a received message, operate the<br />
mobile phone after stopping the car in a<br />
safe place.<br />
• You cannot read, edit, or send a message<br />
through the unit.<br />
56 DDX719/DDX7049BT/DDX419/DDX4049BT/<strong>DDX319</strong>/DDX3049
Making a call<br />
1 On :<br />
Direct number entry<br />
Deletes last character<br />
2 Select a method to make a<br />
call.<br />
Phonebook/Call lists (☞ page 58)<br />
Direct number entry<br />
(☞ the right column)<br />
Hold: Adds “+”<br />
Presets the entered phone number on the<br />
preset list (☞ page 59)<br />
• You can enter up to 32 numbers.<br />
Voice Dialing<br />
• Available only when the connected mobile<br />
phone has the voice recognition system.<br />
Preset list (For presetting,<br />
☞ page 59)<br />
Voice dialing (☞ the right column)<br />
Speak the name you want to call.<br />
To cancel, press [Cancel].<br />
<strong>English</strong> 57
Using the phonebook/call lists<br />
1<br />
2 Select the initial. If the initial<br />
is not a letter or number, press<br />
[Others].<br />
Outgoing<br />
Incoming<br />
Missed<br />
Phonebook<br />
From dialled call list.<br />
From received call list.<br />
From missed call list.<br />
From phonebook.<br />
• For copying the<br />
phonebook, ☞ page<br />
59.<br />
3 Select a phone number from<br />
the list.<br />
To display the details of an entry<br />
When is selected...<br />
1 Press the right arrow icon of<br />
an entry.<br />
2<br />
To use the A-Z search on the phonebook<br />
When is selected, you can<br />
search by initial.<br />
1<br />
2 To make a call, select a phone<br />
number.<br />
58 DDX719/DDX7049BT/DDX419/DDX4049BT/<strong>DDX319</strong>/DDX3049
Presetting the phone<br />
numbers<br />
You can preset up to 6 phone numbers.<br />
1 On :<br />
Copying the phonebook<br />
You can copy the phonebook memory of<br />
a mobile phone into the unit (up to 400<br />
entries).<br />
1 On :<br />
2 Select an item from<br />
phonebook/call lists.<br />
2<br />
3 Select a phone number.<br />
3<br />
(Hold)<br />
4 Select a preset number to<br />
store.<br />
PIN code (initial: 0000)<br />
• You can also preset the phone number<br />
entered on screen by<br />
pressing [Preset]. (☞ page 57)<br />
To delete the preset phone numbers,<br />
initialize the settings from in<br />
. (☞ page 62)<br />
Numbers of the phonebook entries copied<br />
4 Operate the target mobile<br />
phone.<br />
• Refer to the instruction manual<br />
supplied with your mobile phone.<br />
• To cancel the transfer, press [Finish].<br />
5 Finish the procedure.<br />
The phonebook memory is copied from<br />
the mobile phone.<br />
<strong>English</strong> 59
Deleting the phone number<br />
entries in the unit<br />
1 Display the phonebook/call<br />
list you want to delete. (☞ page<br />
58)<br />
2<br />
About mobile phones<br />
compatible with Phone Book<br />
Access Profile (PBAP)<br />
If your mobile phone supports PBAP, the<br />
phonebook and call lists are automatically<br />
copied to the unit when the mobile phone is<br />
connected.<br />
• Phonebook: up to 5 000 entries<br />
• Dialled calls, received calls, and missed<br />
calls: up to 50 entries each<br />
To display the phonebook/call lists of<br />
the mobile phone or the unit<br />
Connected mobile phone<br />
• You cannot delete data when<br />
is selected.<br />
3 Select the item you want to<br />
delete.<br />
Unit<br />
Delete all the numbers/<br />
names in the selected item<br />
A confirmation message appears. Press<br />
[Yes].<br />
60 DDX719/DDX7049BT/DDX419/DDX4049BT/<strong>DDX319</strong>/DDX3049
Using the Bluetooth audio player<br />
• To register a new device, ☞ page 54.<br />
• To connect/disconnect a device, ☞ page 55.<br />
Tag data (current track title/<br />
artist name/album title) *<br />
• Pressing [
Menu items Selectable setting/item Initial: Underlined<br />
Connection<br />
PIN Code<br />
Device Name<br />
Device<br />
Address<br />
Phone<br />
Device* 1<br />
Audio<br />
Device* 2<br />
Auto<br />
Connect<br />
Bluetooth<br />
HF/Audio<br />
Initialize<br />
Auto<br />
Response* 1<br />
SMS Notify* 1<br />
Ring Mode* 1<br />
Ring Tone<br />
Change* 1<br />
♦ Connect<br />
♦ Disconnect<br />
: ☞ page 55<br />
: ☞ page 55<br />
Changes the PIN code of the unit.<br />
• Enter a new PIN code, then press [Enter].<br />
Shows the device name to be shown on the Bluetooth device — “KENWOOD<br />
BT MM-6U2.”<br />
Shows the device address of the unit.<br />
Shows the connected phone device name.<br />
Shows the connected audio device name.<br />
♦ OFF<br />
♦ ON<br />
: Cancels.<br />
: The connection is automatically established with the last<br />
connected Bluetooth device when the unit is turned on.<br />
Select the speakers used for Bluetooth (both phone use and audio player).<br />
♦ Front Only : From front speakers only.<br />
♦ All<br />
: From all speakers.<br />
Hold [Enter] to initialize all settings you have made for using Bluetooth<br />
mobile phone and Bluetooth audio player.<br />
♦ OFF : The unit does not answer the calls automatically. Answer<br />
the calls manually.<br />
♦ ON<br />
: The unit answers the incoming calls automatically within<br />
5 seconds.<br />
♦ OFF<br />
♦ ON<br />
♦ System<br />
♦ Phone<br />
: The unit does not inform you of the arrival of a message.<br />
: The unit informs you of the arrival of a message by ringing<br />
and displaying “Receiving Message.”<br />
: Selects the ring tone set on the unit.<br />
: Selects the ring tone set on the mobile phone. (This<br />
function may not work depending on the mobile phone.)<br />
When is set to , press [Enter], then select the ring<br />
tone for received calls and SMS from , , .<br />
♦ Call Tone : Selects the ring tone for phone calls.<br />
♦ Message<br />
Tone<br />
: Selects the ring tone for SMS.<br />
* 1 Appears only for .<br />
* 2 Appears only for .<br />
62 DDX719/DDX7049BT/DDX419/DDX4049BT/<strong>DDX319</strong>/DDX3049
USING THE REMOTE CONTROLLER<br />
Overview<br />
DDX7049BT/DDX4049BT/DDX3049 :<br />
This unit can be operated using the Remote Controller (RC-DV340) supplied with this unit.<br />
DDX719/DDX419/<strong>DDX319</strong> :<br />
Optional Remote Controller KNA-RCDV331 is designed for controlling this unit. Refer to the<br />
instruction manual that comes with the remote controller.<br />
CAUTION<br />
• Put the Remote Controller in a place where<br />
it will not move during braking or other<br />
operations. A dangerous situation could<br />
result, if the Remote Controller falls down<br />
and gets wedged under the pedals while<br />
driving.<br />
• Do not leave the battery near fire or<br />
under direct sunlight. A fire, explosion or<br />
excessive heat generation may result.<br />
• Do not recharge, short, break up or heat<br />
the battery or place it in an open fire. Such<br />
actions may cause the battery to leak fluid.<br />
If spilled fluid comes in contact with your<br />
eyes or on clothing, immediately rinse with<br />
water and consult a physician.<br />
• Place the battery out of reach of children. In<br />
the unlikely event that a child swallows the<br />
battery, immediately consult a physician.<br />
Battery installation<br />
Use two “AAA”/”R03”-size batteries.<br />
Insert the batteries with the + and – poles<br />
aligned properly, following the illustration<br />
inside the case.<br />
• If the Remote Controller operates only<br />
over shorter distances or does not operate<br />
at all, it is possible that the batteries are<br />
depleted. In such instances, replace the<br />
both batteries with new ones.<br />
Remote Controller mode switch<br />
The functions operated from the remote<br />
controller differ depending on the position of<br />
the mode switch.<br />
AUD<br />
DVD<br />
TV<br />
AUD mode: Switch to this mode when<br />
controlling a selected source or tuner source,<br />
etc.<br />
DVD mode: Switch to this mode when<br />
playing DVDs or CDs etc. with the player<br />
integrated in this unit.<br />
TV mode: Not used.<br />
• The position of the remote control mode<br />
switch is indicated in the title of each<br />
mode, e.g., “(AUD mode)”.<br />
• When controlling a player that is not<br />
integrated in the unit, select “AUD” mode.<br />
<strong>English</strong> 63
Operations from the remote controller<br />
Common operations (AUD mode)<br />
Source switching<br />
Switches to the source to be played.<br />
Hangs up the incoming/current call.<br />
ENTER<br />
Enters options.<br />
Volume control<br />
Adjusts the volume.<br />
Hands-free communication<br />
When a call comes in, it answers the call.<br />
Volume attenuating<br />
Press the key once to lower the volume. Press<br />
again to restore the previous volume.<br />
Function<br />
Switches the function screen.<br />
NAV/V.SEL<br />
Switches to the navigation screen.<br />
MODE<br />
Switches the screen mode.<br />
Screen mode changes each time you press<br />
this key.<br />
Cursor key<br />
Moves the cursor when displaying menu.<br />
OPEN<br />
(Only for DDX719/DDX7049BT )<br />
Adjusts the panel angle.<br />
The panel angle changes each time you press<br />
this key.<br />
64 DDX719/DDX7049BT/DDX419/DDX4049BT/<strong>DDX319</strong>/DDX3049
DVD/VCD (DVD mode)<br />
Track search and file search<br />
Selects the track or file to be played.<br />
Play/Pause<br />
Pauses the track.<br />
Press again to resume playing.<br />
VCD 1.X, VCD 2.X (PBC OFF)<br />
Track number<br />
Cancel<br />
VCD 2.X (PBC ON)<br />
Track number<br />
Cancel<br />
Once you have switched to the direct search<br />
feature, specify the search number from the<br />
numeric keypad, and then press [ENTER] key.<br />
Numeric keypad<br />
Stop<br />
Memorizes the last point where the disc<br />
stopped.<br />
Direct search<br />
Pressing this key switches the features that<br />
can be searched directly.<br />
DVD-VIDEO<br />
Chapter number<br />
Title number<br />
Cancel<br />
• Specify the number to search in direct<br />
search.<br />
• Press 1 2ABC to fast forward/backward.<br />
Switches the fast forward/backward speed<br />
each time you press this key.<br />
• Press 1 2ABC to slow forward/backward<br />
during pause.<br />
DVD Top Menu<br />
Returns to the DVD top menu.<br />
DVD Menu<br />
Displays the DVD menu.<br />
DVD-VR<br />
Chapter number<br />
Program/Playlist<br />
Cancel<br />
<strong>English</strong> 65
SUBTITLE<br />
Switches the subtitle language.<br />
Track search and file search<br />
Selects the track or file to be played.<br />
ZOOM<br />
Switches the zoom ratio each time you press<br />
this key.<br />
Play/Pause<br />
Pauses the track.<br />
Press again to resume playing.<br />
Picture Angle<br />
Switches the picture angle each time you<br />
press this key.<br />
AUDIO<br />
Switches Voice Language.<br />
Switches the voice language each time you<br />
press this key.<br />
Music Disc/Audio file/Video file/<br />
Picture file (AUD mode)<br />
Folder search<br />
Selects the folder to be played.<br />
Direct search<br />
Pressing this key switches the features that<br />
can be searched directly.<br />
Music Disc<br />
Track number<br />
Cancel<br />
Audio files in DVD/CD disc<br />
Folder number<br />
File number<br />
Cancel<br />
Once you have switched to the direct search<br />
feature, specify the search number from the<br />
numeric keypad, and then press [ENTER] key.<br />
Numeric keypad<br />
• Specify the number to search in direct<br />
search.<br />
66 DDX719/DDX7049BT/DDX419/DDX4049BT/<strong>DDX319</strong>/DDX3049
Radio/SiriusXM (AUD mode)<br />
Band switching<br />
Switches to bands received by the unit.<br />
Station selection<br />
Switches to broadcast stations received by<br />
the unit.<br />
• To use preset tuning, press the number of<br />
a programmed broadcast station. ( 1 –<br />
6MNO )<br />
• Press the direct tuning key first, then<br />
specify the frequency of the station to<br />
receive.<br />
iPod (AUD mode)<br />
Music/Video search<br />
Selects the music/video to be played.<br />
Seek mode switching<br />
Switches the Seek mode (AUTO1, AUTO2,<br />
MANU).<br />
Play/Pause<br />
Pauses the music/video.<br />
Press again to resume playing.<br />
Direct tuning<br />
After pressing this key, use the keypad to<br />
specify the broadcast station you wish to<br />
receive.<br />
USB (AUD mode)<br />
Folder search<br />
Selects the folder to be played.<br />
Example: 92.1MHz (FM)<br />
9WXYZ 2ABC 1<br />
<br />
or<br />
Example: 810kHz (AM)<br />
8TUV 1 0<br />
<br />
or<br />
Numeric keypad<br />
File search<br />
Selects the file to be played.<br />
Play/Pause<br />
Pauses the file.<br />
Press again to resume playing.<br />
<strong>English</strong> 67
REFERENCE<br />
Maintenance<br />
Caution on cleaning the unit<br />
Do not use<br />
any solvent<br />
(for example,<br />
thinner,<br />
benzine, etc.),<br />
detergent, or<br />
insecticide. This may damage the monitor or<br />
the unit.<br />
Recommended cleaning method:<br />
Gently wipe the panel with a soft, dry cloth.<br />
Moisture condensation<br />
Moisture may condense on the lens inside<br />
the unit in the following cases:<br />
• After starting the heater in the car.<br />
• If it becomes very humid inside the car.<br />
Should this occur, the unit may malfunction.<br />
In this case, eject the disc and leave the unit<br />
turned on for a few hours until the moisture<br />
evaporates.<br />
How to handle discs<br />
When removing a disc<br />
from its case, press<br />
Center holder<br />
down the center holder<br />
of the case and lift the<br />
disc out, holding it by the<br />
edges.<br />
• Always hold the disc by the edges. Do not<br />
touch its recording surface.<br />
When storing a disc in its case, gently<br />
insert the disc around the center holder (with<br />
the printed surface facing up).<br />
• Make sure to store discs in their cases after<br />
use.<br />
To keep discs clean<br />
A dirty disc may not play correctly.<br />
If a disc does become dirty, wipe<br />
it with a soft cloth in a straight line<br />
from center to edge.<br />
• Do not use any solvents (for<br />
example, conventional record cleaner,<br />
spray, thinner, benzine, etc.) to clean discs.<br />
To play new discs<br />
New discs may have some<br />
rough spots around the inner<br />
and outer edges. If such a disc<br />
is used, this unit may reject the<br />
disc.<br />
To remove these rough spots, rub the<br />
edges with a pencil or ball-point pen, etc.<br />
Do not use the following discs:<br />
3 inch disc Warped disc<br />
Sticker and sticker<br />
residue<br />
Unusual shape<br />
Transparent or semitransparent<br />
parts on<br />
its recording area<br />
Stick-on label<br />
C-thru Disc (semitransparent<br />
disc)<br />
68 DDX719/DDX7049BT/DDX419/DDX4049BT/<strong>DDX319</strong>/DDX3049
More about this unit<br />
File playback<br />
Playing DivX files<br />
(Only for DDX7049BT/DDX4049BT/DDX3049)<br />
• This unit can play back DivX files with the<br />
extension code , , or <br />
(regardless of the letter case—upper/<br />
lower).<br />
• Audio stream should conform to MP3 or<br />
Dolby Digital.<br />
• The file encoded in the interlaced scanning<br />
mode may not be played back correctly.<br />
Playing MPEG1/MPEG2 files<br />
• This unit can play back MPEG1/MPEG2<br />
files with the extension code ,<br />
, or .<br />
• The stream format should conform to<br />
MPEG system/program stream.<br />
The file format should be MP@ML (Main<br />
Profile at Main Level)/SP@ML (Simple Profile<br />
at Main Level)/MP@LL (Main Profile at Low<br />
Level).<br />
• Audio streams should conform to MPEG1<br />
Audio Layer-2 or Dolby Digital.<br />
Playing JPEG files<br />
• This unit can play back JPEG files with the<br />
extension code , or .<br />
• This unit can play back JPEG files that are at<br />
32 x 32 to 8 192 x 7 680 resolution.<br />
It may take time to display the file<br />
depending on its resolution.<br />
• This unit can play back baseline JPEG files.<br />
Progressive JPEG files or lossless JPEG files<br />
cannot be played.<br />
We bear no responsibility for any loss<br />
of data in an iPod/iPhone and USB mass<br />
storage class device while using this<br />
unit.<br />
Playing MP3/WMA/WAV/AAC files<br />
• This unit can play back files with the<br />
extension code , , ,<br />
or (regardless of the letter case—<br />
upper/lower).<br />
• This unit can play back the files meeting<br />
the conditions below:<br />
– Bit rate:<br />
MP3/WMA: 32 kbps — 320 kbps<br />
AAC: 16 kbps — 320 kbps<br />
– Sampling frequency:<br />
48 kHz, 44.1 kHz, 32 kHz (for MPEG1)<br />
24 kHz, 22.05 kHz, 16 kHz (for MPEG2)<br />
48 kHz, 44.1 kHz, 32 kHz, 22.05 kHz (for<br />
WMA)<br />
44.1 kHz (for WAV)<br />
48 kHz, 44.1 kHz (for AAC)<br />
• This unit can show ID3 Tag Version<br />
1.0/1.1/2.2/2.3/2.4 (for MP3).<br />
• This unit can also show WAV/WMA Tag.<br />
• This unit can play back files recorded in VBR<br />
(variable bit rate).<br />
• Files recorded in VBR have a discrepancy in<br />
elapsed time indication.<br />
• This unit cannot play back the following<br />
files:<br />
– MP3 files encoded with MP3i and MP3<br />
PRO format.<br />
– MP3 files encoded with Layer 1/2.<br />
– WMA files encoded with lossless,<br />
professional, and voice format.<br />
– WMA files which are not based upon<br />
Windows Media® Audio.<br />
– WMA/AAC files copy-protected with<br />
DRM.<br />
– AAC files encoded by using any other<br />
application than iTunes.<br />
– AAC files copy-protected with FairPlay<br />
(except those stored on an iPod).<br />
– Files which have the data such as AIFF,<br />
ATRAC3, etc.<br />
<strong>English</strong> 69
Sound signals emitted through the rear terminals<br />
Through the analog terminals (Speaker out/Front Preout/Rear Preout)<br />
2-channel signal is emitted. When playing multi-channel encoded disc, multi-channel signals<br />
are downmixed.<br />
Language codes (for DVD/DivX language selection)<br />
Code Language Code Language Code Language Code Language<br />
AA Afar GL Galician MI Maori SO Somali<br />
AB Abkhazian GN Guarani MK Macedonian SQ Albanian<br />
AF Afrikaans GU Gujarati ML Malayalam SR Serbian<br />
AM Ameharic HA Hausa MN Mongolian SS Siswati<br />
AR Arabic HI Hindi MO Moldavian ST Sesotho<br />
AS Assamese HR Croatian MR Marathi SU Sundanese<br />
AY Aymara HU Hungarian MS Malay (MAY) SW Swahili<br />
AZ Azerbaijani HY Armenian MT Maltese TA Tamil<br />
BA Bashkir IA Interlingua MY Burmese TE Telugu<br />
BE Byelorussian IE Interlingue NA Nauru TG Tajik<br />
BG Bulgarian IK Inupiak NE Nepali TH Thai<br />
BH Bihari IN Indonesian NO Norwegian TI Tigrinya<br />
BI Bislama IS Icelandic OC Occitan TK Turkmen<br />
BN Bengali, Bangla IW Hebrew OM (Afan) Oromo TL Tagalog<br />
BO Tibetan JA Japanese OR Oriya TN Setswana<br />
BR Breton JI Yiddish PA Panjabi TO Tonga<br />
CA Catalan JW Javanese PL Polish TR Turkish<br />
CO Corsican KA Georgian PS Pashto, Pushto TS Tsonga<br />
CS Czech KK Kazakh QU Quechua TT Tatar<br />
CY Welsh KL Greenlandic RM Rhaeto- TW Twi<br />
Romance<br />
DZ Bhutani KM Cambodian RN Kirundi UK Ukrainian<br />
EL Greek KN Kannada RO Rumanian UR Urdu<br />
EO Esperanto KO Korean (KOR) RW Kinyarwanda UZ Uzbek<br />
ET Estonian KS Kashmiri SA Sanskrit VI Vietnamese<br />
EU Basque KU Kurdish SD Sindhi VO Volapuk<br />
FA Persian KY Kirghiz SG Sangho WO Wolof<br />
FI Finnish LA Latin SH Serbo-Croatian XH Xhosa<br />
FJ Fiji LN Lingala SI Singhalese YO Yoruba<br />
FO Faroese LO Laothian SK Slovak ZU Zulu<br />
FY Frisian LT Lithuanian SL Slovenian<br />
GA Irish LV Latvian, Lettish SM Samoan<br />
GD Scots Gaelic MG Malagasy SN Shona<br />
70 DDX719/DDX7049BT/DDX419/DDX4049BT/<strong>DDX319</strong>/DDX3049
Troubleshooting<br />
What appears to be trouble is not always serious. Check the following points before calling a<br />
service center.<br />
• For operations with the external components, refer also to the instructions supplied with<br />
the adapters used for the connections (as well as the instructions supplied with the external<br />
components).<br />
If the following messages appear<br />
Message<br />
“No Signal”<br />
• “Miswiring DC<br />
Offset Error”<br />
• “Warning DC Offset<br />
Error”<br />
“Parking off”<br />
“Authorization Error”<br />
“USB Device Error”<br />
“No BT Dongle”<br />
“Connection Error”<br />
“Please Wait...”<br />
“NO Voice Device”<br />
“NO Data”<br />
“Initialize Error”<br />
“Dial Error”<br />
“Hung Up Error”<br />
“Pick Up Error”<br />
“Pairing Mode Error”<br />
“Panel Mecha Error”<br />
“No Navigation”<br />
Remedy/Cause<br />
• Start the playback on the external component connected to AV-IN<br />
input terminal.<br />
• Check the cords and connections.<br />
• Signal input is too weak.<br />
A speaker cord has shorted or it has come in to contact with the car<br />
chassis. Wire or insulate the speaker cord as appropriate, then reset<br />
the unit (☞ page 3, 78 ).<br />
No playback picture is shown when the parking brake is not engaged.<br />
Check whether the connected iPod/iPhone is compatible with this<br />
unit. (☞ page 24)<br />
• The USB power voltage is abnormal.<br />
• Turn off and turn on the unit.<br />
• Connect another USB device.<br />
Bluetooth adapter (KS-UBT1) is removed.<br />
The device is registered but the connection has failed. Connect the<br />
registered device. ( ☞ page 55)<br />
The unit is preparing to use the Bluetooth function. If the message<br />
does not disappear, turn off and turn on the unit, then connect the<br />
device again (or reset the unit).<br />
The connected mobile phone does not have the voice recognition system.<br />
No phonebook data is contained in the connected Bluetooth phone.<br />
The unit has failed to initialize the Bluetooth module. Try the<br />
operation again.<br />
Dialing has failed. Try the operation again.<br />
The call has not ended yet. Park your car, and use the connected<br />
mobile phone to end the call.<br />
The unit has failed to receive a call.<br />
Pairing between the unit and Bluetooth device has failed. Register<br />
the device again. (☞ page 54)<br />
The panel does not work properly. Reset the unit.<br />
No navigation unit is connected.<br />
<strong>English</strong> 71
Pandora (Only for DDX719/DDX419/<strong>DDX319</strong>)<br />
Message<br />
“Cannot Skip”<br />
“Rating Failed”<br />
“No Station”<br />
“No Active Station”<br />
No more songs can be skipped.<br />
Thumb-up/-down is prohibited.<br />
No station is available.<br />
No station is being played.<br />
Remedy/Cause<br />
SiriusXM (Only for DDX719/DDX419/<strong>DDX319</strong>)<br />
Message<br />
Remedy/Cause<br />
“Check Tuner” The SiriusXM Tuner is disconnected or the unit is having trouble<br />
communicating with the Tuner. Connect the Tuner or check the<br />
Tuner connection to the back of the unit.<br />
“Subscription Your subscription status has been updated.<br />
Updated – Press Enter<br />
to Continue”<br />
• “Chan Unavailable” The selected channel is not available.<br />
• “Ch Unavl”<br />
• “Chan<br />
The selected channel has not been subscribed yet.<br />
UnSubscribed”<br />
• “Ch Unsub”<br />
“Incorrect Lock Code” The selected channel is a mature or parental lock channel, and<br />
locked by parental lock or user lock code. Enter the correct lock code.<br />
• “Check Antenna” The antenna may have a problem. Check the antenna.<br />
• “Chek Ant”<br />
• “No Signal” No satellite or terrestrial signal can be found. This message appears<br />
• “NoSignal”<br />
when the channel selection cannot be complete even in a given<br />
time.<br />
72 DDX719/DDX7049BT/DDX419/DDX4049BT/<strong>DDX319</strong>/DDX3049
General<br />
TUNER<br />
Disc in general<br />
DivX/MPEG1/MPEG2/<br />
JPEG/MP3/WMA/WAV/AAC<br />
If there seems to be a problem<br />
Symptom<br />
No sound comes out of the<br />
speakers.<br />
No picture is displayed on the<br />
screen.<br />
Remedy/Cause<br />
• Adjust the volume to the optimum level.<br />
• Check the cords and connections.<br />
Turn on the screen. (☞ page 11)<br />
The unit does not work at all. Reset the unit. (☞ page 3)<br />
The remote controller* does not Replace the battery.<br />
work.<br />
AME automatic presetting does Store stations manually. (☞ page 30 )<br />
not work.<br />
Static noise while listening to Connect the antenna firmly.<br />
the radio.<br />
• Recordable/Rewritable discs<br />
cannot be played back.<br />
• Tracks on the Recordable/<br />
Rewritable discs cannot be<br />
skipped.<br />
Playback does not start.<br />
No picture appears on the<br />
external monitor.<br />
Disc cannot be played back.<br />
Tracks are not played back as<br />
you have intended them to play.<br />
• Insert a finalized disc.<br />
• Finalize the discs with the component which you<br />
used for recording.<br />
The format of files is not supported by the unit.<br />
• Connect the video cord correctly.<br />
• Select the correct input on the external monitor.<br />
• Record the tracks using a compliant application<br />
on the appropriate discs. (☞ page 16)<br />
• Add appropriate extension codes to the file<br />
names.<br />
Playback order may differ from the one played back<br />
using other players.<br />
AV-IN<br />
No picture appears on the<br />
screen.<br />
• Turn on the video component if it is not on.<br />
• Connect the video component correctly.<br />
* For DDX719/DDX419/<strong>DDX319</strong>, purchase KNA-RCDV331 separately.<br />
<strong>English</strong> 73
iPod/iPhone<br />
USB<br />
Symptom<br />
No sound comes out of the<br />
speakers.<br />
The iPod/iPhone does not turn<br />
on or does not work.<br />
Sound is distorted.<br />
A lot of noise is generated.<br />
No operations are available<br />
when playing back a track<br />
containing Artwork.<br />
Sound does not synchronize<br />
with the video.<br />
• Videos cannot be played.<br />
• No sound of videos comes<br />
out.<br />
“Reading...” keeps flashing on the<br />
screen.<br />
While playing a track, sound is<br />
sometimes interrupted.<br />
Remedy/Cause<br />
• Disconnect the iPod, then connect it again.<br />
• Select another source and then reselect “iPod”.<br />
• Check the connecting cable and its connection.<br />
• Update the firmware version.<br />
• Charge the battery.<br />
• Check whether the iPod control mode is<br />
correctly selected. (☞ page 26)<br />
• Reset the iPod/iPhone.<br />
Deactivate the equalizer either on this unit or the<br />
iPod/iPhone.<br />
Turn off (uncheck) the “VoiceOver” feature of the<br />
iPod. For details, visit .<br />
Operate the unit after the Artwork is loaded. (☞<br />
page 24)<br />
Select for . (☞ page 50 )<br />
• Connect USB Audio and Video cable KCA-iP202/<br />
KCA-iP22F. Other cables cannot be used.<br />
• Select for . (☞ page 50 )<br />
Turn off the power and on again.<br />
The tracks are not properly copied into the USB<br />
device. Copy tracks again, and try again.<br />
74 DDX719/DDX7049BT/DDX419/DDX4049BT/<strong>DDX319</strong>/DDX3049
Bluetooth (only for DDX719/DDX7049BT/DDX419/DDX4049BT )<br />
Symptom<br />
Phone sound quality is poor.<br />
The sound is interrupted or<br />
skipped while using a Bluetooth<br />
audio player.<br />
The connected audio player<br />
cannot be controlled.<br />
Bluetooth device does not<br />
detect the unit.<br />
The unit does not make pairing<br />
with the Bluetooth device.<br />
Echo or noise occurs.<br />
The unit does not respond when<br />
you try to copy the phonebook<br />
to the unit.<br />
Remedy/Cause<br />
• Reduce the distance between the unit and the<br />
Bluetooth mobile phone.<br />
• Move the car to place where you can get a better<br />
signal reception.<br />
• Reduce the distance between the unit and the<br />
Bluetooth audio player.<br />
• Disconnect the device connected for Bluetooth<br />
phone.<br />
• Turn off, then turn on the unit.<br />
• (When the sound is not yet restored) connect the<br />
player again.<br />
Check whether the connected audio player<br />
supports AVRCP (Audio Video Remote Control<br />
Profile).<br />
• Check whether the Bluetooth adapter (KS-UBT1)<br />
is inserted correctly.<br />
• Search from the Bluetooth device again.<br />
Enter the same PIN code for both the unit and<br />
target device. If the PIN code of the device is not<br />
indicated on its instructions, try “0000” or “1234.”<br />
Adjust the microphone unit position.<br />
You may have tried to copy the same entries (as<br />
stored) to the unit.<br />
<strong>English</strong> 75
Accessories/Installation Procedure<br />
Accessories<br />
1<br />
7 Reconnect the - battery.<br />
8 Press the reset button.<br />
9 Perform the Initial Setup.<br />
2<br />
..........1<br />
..........1 (2m: 6.5 ft)<br />
3<br />
4<br />
5<br />
..........6<br />
..........6<br />
..........1<br />
6* 1 ..........2<br />
7* 2 ..........2<br />
8* 2 ..........1<br />
9* 3<br />
Installation Procedure<br />
..........1 (3m: 9.8 ft)<br />
* 1 DDX419/DDX4049BT/<br />
<strong>DDX319</strong>/DDX3049 only.<br />
* 2 DDX719/DDX7049BT<br />
only.<br />
* 3 DDX719/DDX7049BT/<br />
DDX419/DDX4049BT<br />
only.<br />
1 To prevent a short circuit, remove the key<br />
from the ignition and disconnect the -<br />
battery.<br />
2 Make the proper input and output wire<br />
connections for each unit.<br />
3 Connect the speaker wires of the wiring<br />
harness.<br />
4 Connect the wiring harness wires in the<br />
following order: ground, battery, ignition.<br />
5 Connect the wiring harness connector to<br />
the unit.<br />
6 Install the unit in your car.<br />
2WARNING<br />
• If you connect the ignition wire (red) and the<br />
battery wire (yellow) to the car chassis (ground),<br />
you may cause a short circuit, that in turn may<br />
start a fire. Always connect those wires to the<br />
power source running through the fuse box.<br />
• Do not cut out the fuse from the ignition wire<br />
(red) and the battery wire (yellow). The power<br />
supply must be connected to the wires via the<br />
fuse.<br />
After the Installation<br />
After the installation, perform the Initial Setup<br />
by referring to the instruction manual.<br />
¤<br />
• Mounting and wiring this product requires<br />
skills and experience. For best safety, leave the<br />
mounting and wiring work to professionals.<br />
• Make sure to ground the unit to a negative 12V<br />
DC power supply.<br />
• Do not install the unit in a spot exposed to direct<br />
sunlight or excessive heat or humidity. Also avoid<br />
places with too much dust or the possibility of<br />
water splashing.<br />
• Do not use your own screws. Use only the screws<br />
provided. If you use the wrong screws, you could<br />
damage the unit.<br />
• If the power is not turned ON (“Miswiring<br />
DC Offset Error”, “Warning DC Offset Error” is<br />
displayed), the speaker wire may have a shortcircuit<br />
or touched the chassis of the vehicle and<br />
the protection function may have been activated.<br />
Therefore, the speaker wire should be checked.<br />
• If your car’s ignition does not have an ACC<br />
position, connect the ignition wires to a power<br />
source that can be turned on and off with the<br />
ignition key. If you connect the ignition wire to<br />
a power source with a constant voltage supply,<br />
such as with battery wires, the battery may be<br />
drained.<br />
• If the console has a lid, make sure to install the<br />
unit so that the faceplate will not hit the lid when<br />
closing and opening.<br />
• If the fuse blows, first make sure the wires aren’t<br />
touching to cause a short circuit, then replace the<br />
old fuse with one with the same rating.<br />
76 DDX719/DDX7049BT/DDX419/DDX4049BT/<strong>DDX319</strong>/DDX3049
• Insulate unconnected wires with vinyl tape or<br />
other similar material. To prevent a short circuit,<br />
do not remove the caps on the ends of the<br />
unconnected wires or the terminals.<br />
• Connect the speaker wires correctly to the<br />
terminals to which they correspond. The unit may<br />
be damaged or fail to work if you share the -<br />
wires or ground them to any metal part in the car.<br />
• When only two speakers are being connected<br />
to the system, connect the connectors either to<br />
both the front output terminals or to both the<br />
rear output terminals (do not mix front and rear).<br />
For example, if you connect the + connector<br />
of the left speaker to a front output terminal, do<br />
not connect the - connector to a rear output<br />
terminal.<br />
• After the unit is installed, check whether the<br />
brake lamps, blinkers, wipers, etc. on the car are<br />
working properly.<br />
• Mount the unit so that the mounting angle is 30°<br />
or less.<br />
• Do not press hard on the panel surface when<br />
installing the unit to the vehicle. Otherwise scars,<br />
damage, or failure may result.<br />
• This unit has the cooling fan to decrease the<br />
internal temperature. Do not mount the unit<br />
in a place where the cooling fan of the unit are<br />
blocked. Blocking these openings will inhibit the<br />
cooling of the internal temperature and result in<br />
malfunction.<br />
DDX719/ DDX7049BT only<br />
1 Before installation, remove the screws.<br />
⁄ Do not use the removed screws for<br />
installation.<br />
2 Detach the sleeve using the two removal<br />
tools 7 then slide off the sleeve.<br />
Accessory 7<br />
Cooling fan<br />
DDX419/ DDX4049BT only<br />
• Install the Bluetooth adaptor (KS-UBT1) besides<br />
the place enclosed by the metal.<br />
¤ CAUTION<br />
Install this unit in the console of your<br />
vehicle.<br />
Do not touch the metal part of this unit<br />
during and shortly after the use of the<br />
unit. Metal part such as the heat sink and<br />
enclosure become hot.<br />
.<br />
Bluetooth adaptor (KS-UBT1)<br />
<strong>English</strong> 77
Connecting Wires to Terminals<br />
Bluetooth Microphone<br />
(Accessory 9) DDX719/<br />
DDX7049BT/DDX419/DDX4049BT<br />
only<br />
Antenna Cord<br />
Purple/White<br />
(Reverse sensor wire)<br />
Light Green<br />
Subwoofer Preout (monaural)<br />
Connect to vehicle's reverse lamp<br />
harness when using the optional rear<br />
view camera.<br />
Extension cable (Accessory 2)<br />
(Parking sensor wire)<br />
FM/AM antenna input<br />
Accessory 1<br />
FUSE ( 10A )<br />
For best safety, be sure to connect<br />
the parking sensor.<br />
⁄<br />
Connect to the vehicle's parking<br />
brake detection switch harness.<br />
White + / White/black - : To front speaker (left)<br />
Gray + / Gray/black - : To front speaker (right)<br />
Green + / Green/black - : To rear speaker (left)<br />
Purple + / Purple/black - : To rear speaker (right)<br />
If no connections are made, do not let the cable come out from the tab.<br />
Blue<br />
(Antenna control wire)<br />
Blue/White<br />
(Power control wire)<br />
Depending on what antenna you are using, connect<br />
either to the control terminal of the motor antenna, or to<br />
the power terminal for the booster amplifier of the filmtype<br />
antenna.<br />
When using the optional power amplifier, connect to its<br />
power control terminal.<br />
Brown<br />
(Mute control wire)<br />
Light blue/Yellow<br />
(Steering remote control wire)<br />
To the terminal that is grounded when either the<br />
telephone rings or during conversation. (To connect the<br />
<strong>Kenwood</strong> navigation system, consult your navigation<br />
manual.)<br />
To use the steering wheel remote control feature, you<br />
need to an exclusive remote adapter (not supplied)<br />
matches your car is required.<br />
Orange/White<br />
(Dimmer control wire)<br />
To car light control switch<br />
Red (Ignition wire)<br />
Yellow (Battery wire)<br />
Black (Ground wire) - (To car chassis)<br />
ACC<br />
Ignition key switch<br />
<strong>Car</strong> fuse box<br />
(Main fuse)<br />
78 DDX719/DDX7049BT/DDX419/DDX4049BT/<strong>DDX319</strong>/DDX3049<br />
Battery
Connecting a USB device/iPod/iPhone<br />
For DDX719/DDX7049BT<br />
iPod (commercially available)<br />
USB device<br />
(commercially available)<br />
CA-U1EX<br />
(Optional Accessory)<br />
USB terminal<br />
(0.8 m)<br />
KCA-iP202<br />
(Optional Accessory)<br />
(1.8 m)<br />
Audio Visual input 2<br />
(iPod/AV Input 2 switchable)<br />
For DDX419/<strong>DDX319</strong>/DDX4049BT/DDX3049<br />
USB terminal<br />
USB device<br />
(commercially available)<br />
iPod<br />
(commercially available)<br />
CA-U1EX<br />
(Optional Accessory)<br />
Audio Visual input 2<br />
(iPod/AV Input 2 switchable)<br />
KCA-iP22F<br />
(Optional Accessory)<br />
<strong>English</strong> 79
Connecting Other Products<br />
Navigation System (Optional Accessory)<br />
DDX7049BT/DDX4049BT/DDX3049 only<br />
Navigation units that can be connected to this unit.<br />
⁄<br />
(As of December, 2011):<br />
• KNA-G610<br />
• KNA-G630<br />
For latest information, access the www.kenwood.com/cs/ce/.<br />
Rear View Camera Input<br />
• Visual input (Yellow)<br />
Audio/Visual Output<br />
• Visual output (Yellow)<br />
• Audio output (3.5φ mini plug)<br />
Resistance-free stereo type mini plug<br />
Connection cable<br />
(Included in the Navigation System)<br />
SiriusXM Tuner (commercially available)<br />
DDX719/DDX419/<strong>DDX319</strong> only<br />
Rear Preout<br />
• Audio left output (White)<br />
• Audio right output (Red)<br />
Front Preout<br />
• Audio left output (White)<br />
• Audio right output (Red)<br />
Audio Visual input 1<br />
• Visual input (Yellow)<br />
• Audio left input (White)<br />
• Audio right input (Red)<br />
80 DDX719/DDX7049BT/DDX419/DDX4049BT/<strong>DDX319</strong>/DDX3049
Installing/Removing the Unit<br />
Installing the Unit<br />
Installing the Escutcheon<br />
1 Attach accessory 5 to the unit.<br />
Bend the tabs of the mounting sleeve<br />
with a screwdriver or similar utensil and<br />
attach it in place.<br />
For more stable attachment the unit (DDX719/<br />
DDX7049BT only)<br />
Bracket<br />
Accessory 8<br />
⁄<br />
• Make sure that the unit is installed securely in<br />
place. If the unit is unstable, it may malfunction<br />
(eg, the sound may skip).<br />
Installation on Toyota,<br />
Nissan or Mitsubishi <strong>Car</strong><br />
using Brackets<br />
Accessory 3 (M5x6mm)<br />
or Accessory 4 (M5x7mm)<br />
<strong>Car</strong> Bracket<br />
Accessory 5<br />
Removing the Escutcheon<br />
(DDX419/DDX4049BT/<br />
<strong>DDX319</strong>/DDX3049 only)<br />
1 Engage the catch pins on the removal tool<br />
6 and remove the two locks on the lower<br />
level. Lower the frame and pull it forward as<br />
shown in the figure.<br />
Accessory 6<br />
Lock<br />
Catch<br />
⁄<br />
• The frame can be removed from the top side in<br />
the same manner.<br />
2 When the lower level is removed, remove<br />
the upper two locations.<br />
Accessory 3 (M5x6mm)<br />
or Accessory 4 (M5x7mm)<br />
<strong>English</strong> 81
Removing the Unit<br />
(DDX419/DDX4049BT/<br />
<strong>DDX319</strong>/DDX3049 only)<br />
1 Remove the escutcheon by referring to<br />
the removal procedure in the section<br />
.<br />
2 Insert the two removal tools 6 deeply into<br />
the slots on each side, as shown.<br />
Accessory 6<br />
Installing the Microphone<br />
Unit (DDX719/DDX7049BT/<br />
DDX419/DDX4049BT only)<br />
1 Check the installation position of the<br />
microphone (accessory 9).<br />
2 Remove oil and other dirt from the<br />
installation surface.<br />
3 Install the microphone.<br />
4 Wire the microphone cable up to the unit<br />
with it secured at several positions using<br />
tape or the like.<br />
⁄<br />
• Install the microphone as far as possible from the<br />
cell-phone.<br />
3 Lower the removal tool toward the bottom,<br />
and pull out the unit halfway while<br />
pressing towards the inside.<br />
Accessory 9<br />
Fix a cable with a commercial item of tape.<br />
⁄<br />
• Be careful to avoid injury from the catch pins on<br />
the removal tool.<br />
4 Pull the unit all the way out with your<br />
hands, being careful not to drop it.<br />
Peel the release coated paper of double-face<br />
adhesive tape to fix on the place shown above.<br />
Adjust the direction of the microphone to the driver.<br />
82 DDX719/DDX7049BT/DDX419/DDX4049BT/<strong>DDX319</strong>/DDX3049
Specifications<br />
Monitor section<br />
Picture Size<br />
: 6.95 inches (diagonal) wide<br />
156.6 mm (W) × 81.6 mm (H)<br />
(DDX719/DDX7049BT )<br />
: 6.1 inches (diagonal) wide<br />
136.2 mm (W) × 72 mm (H)<br />
( DDX419/DDX4049BT/<strong>DDX319</strong>/<br />
DDX3049 )<br />
Display System<br />
: Transparent TN LCD panel<br />
Drive System<br />
: TFT active matrix system<br />
Number of Pixels<br />
: 1,152,000 (800H × 480V × RGB)<br />
Effective Pixels<br />
: 99.99%<br />
Pixel Arrangement<br />
: RGB striped arrangement<br />
Back Lighting<br />
: LED<br />
DVD player section<br />
D/A Converter<br />
: 24 bit<br />
Audio Decoder<br />
: Linear PCM/Dolby Digital/dts/MP3/<br />
WMA/AAC/WAV<br />
Video Decoder<br />
: MPEG1/MPEG2/<br />
DivX (DDX7049BT/DDX4049BT/DDX3049)<br />
Wow & Flutter<br />
: Below Measurable Limit<br />
Frequency Response<br />
Sampling frequency;<br />
96 kHz: 20 – 22,000 Hz<br />
48 kHz: 20 – 22,000 Hz<br />
44.1 kHz: 20 – 20,000 Hz<br />
Total Harmonic Distortion<br />
: 0.010% (1 kHz)<br />
S/N Ratio (dB)<br />
: 99 dB (DVD-Video 96 kHz)<br />
Dynamic Range<br />
: 98 dB (DVD-Video 96 kHz)<br />
Disc Format<br />
: DVD-Video/VIDEO-CD/CD-DA<br />
Sampling frequency<br />
: 44.1/48/96 kHz<br />
Quantifying Bit Number<br />
: 16/20/24 bit<br />
USB interface section<br />
USB Standard<br />
: USB 2.0 Full Speed<br />
File System<br />
: FAT 16/32<br />
Maximum Power Supply Current<br />
: DC 5 V 1 A<br />
D/A Converter<br />
: 24 Bit<br />
Video Decoder<br />
: MPEG1/MPEG2/<br />
DivX (DDX7049BT/DDX4049BT/DDX3049)<br />
Audio Decoder<br />
: MP3/WMA/AAC/WAV (Linear PCM)<br />
Bluetooth section ( DDX719/<br />
DDX7049BT/DDX419/DDX4049BT )<br />
Technology<br />
: Bluetooth 2.0 Certified<br />
Frequency<br />
: 2.402 – 2.480 GHz<br />
Output Power<br />
: +4dBm (MAX), 0dBm (AVE), Power<br />
Class2<br />
Maximum Communication range<br />
: Line of sight approx. 10m (32.8 ft)<br />
Profile<br />
HFP (Hands Free Profile),<br />
OPP (Object Push Profile),<br />
PBAP (Phonebook Access Profile),<br />
A2DP (Advanced Audio Distribution<br />
Profile),<br />
AVRCP (Audio/Video Remote Control<br />
Profile)<br />
<strong>English</strong> 83
FM tuner section<br />
Frequency Range<br />
200 kHz: 87.9 MHz – 107.9 MHz<br />
(DDX719/DDX419/<strong>DDX319</strong>)<br />
50 kHz: 87.5 MHz – 108.0 MHz<br />
(DDX7049BT/DDX4049BT/DDX3049)<br />
Usable Sensitivity (S/N: 30 dB)<br />
: 9.3 dBf (0.8 μV/75 Ω)<br />
Quieting Sensitivity (S/N: 50 dB)<br />
: 15.2 dBf (1.6 μV/75 Ω)<br />
Frequency Response (± 3.0 dB)<br />
: 30 Hz – 15 kHz<br />
S/N Ratio (dB)<br />
: 70 dB (MONO)<br />
Selectivity (± 400 kHz)<br />
: ≥ 65 dB<br />
Stereo Separation<br />
: 40 dB (1 kHz)<br />
AM tuner section<br />
Frequency Range (10 kHz)<br />
: 530 kHz – 1 700 kHz<br />
Usable Sensitivity<br />
: 28 dBμ<br />
Video section<br />
Color System of External Video Input<br />
: NTSC/PAL<br />
External Video Input Level (RCA/mini jack)<br />
: 1 Vp-p/ 75 Ω<br />
External Audio Max Input Level (RCA/<br />
mini jack)<br />
: 2 V/ 25 kΩ<br />
Video Output Level (RCA jack)<br />
: 1 Vp-p/ 75 Ω<br />
Audio Output Level (mini jack)<br />
: 1.2 V/ 10 kΩ<br />
Analog RGB input<br />
: 0.7 Vp-p/ 75 Ω<br />
Audio section<br />
Maximum Power (Front & Rear)<br />
: 50 W × 4<br />
Full Bandwidth Power (Front & Rear)<br />
(4 Ω, 14.4 V, 1% THD)<br />
: 22 W × 4<br />
Preout Level (V)<br />
: 4 V/10 kΩ<br />
Preout Impedance<br />
: ≤ 600 Ω<br />
Speaker Impedance<br />
: 4 – 8 Ω<br />
Tone<br />
Bass:<br />
100 Hz ± 8 dB<br />
Middle: 1 kHz ± 8 dB<br />
Treble:<br />
12.5 kHz ± 8 dB<br />
General<br />
Operating Voltage<br />
: 14.4 V (10.5 – 16 V allowable)<br />
Maximum Current Consumption<br />
: 10 A<br />
Dimensions (W × H × D)<br />
: 182 × 111 × 160 mm<br />
7-3/16 × 4-6/16 × 6-5/16 inch<br />
(DDX719/DDX7049BT )<br />
182 × 112 × 163 mm<br />
7-3/16 × 4-7/16 × 6-7/16 inch<br />
(DDX419/DDX4049BT/<strong>DDX319</strong>/<br />
DDX3049 )<br />
Operational Temperature Range<br />
: –10°C – +60°C<br />
Storage Temperature Range<br />
: –20°C – +85°C<br />
Weight<br />
: 2.5 kg (5.5 lbs)<br />
(DDX719/DDX7049BT )<br />
2.0 kg (4.4 lbs)<br />
( DDX419/DDX4049BT/<strong>DDX319</strong>/<br />
DDX3049 )<br />
• Although the effective pixels for the<br />
liquid crystal panel is given as 99.99% or<br />
more, 0.01% of pixels may not light or<br />
may light incorrectly.<br />
• Specifications are subject to change<br />
without notice.<br />
84 DDX719/DDX7049BT/DDX419/DDX4049BT/<strong>DDX319</strong>/DDX3049
• “DVD Logo” is a trademark of DVD Format/Logo Licensing Corporation registered in the US,<br />
Japan and other countries.<br />
• The “AAC” logo is a trademark of Dolby Laboratories.<br />
• Microsoft and Windows Media are either registered trademarks or trademarks of Microsoft<br />
Corporation in the United States and/or other countries.<br />
• Manufactured under license from Dolby Laboratories. Dolby and the double-D symbol are<br />
trademarks of Dolby Laboratories.<br />
• Manufactured under license under U.S. Patent Nos: 5,956,674; 5,974,380; 6,487,535 & other<br />
U.S. and worldwide patents issued & pending. DTS, the Symbol, & DTS and the Symbol<br />
together are registered trademarks & DTS 2.0 Channel is a trademark of DTS, Inc. Product<br />
includes software. © DTS, Inc. All Rights Reserved.<br />
• “Made for iPod,” and “Made for iPhone” mean that an electronic accessory has been designed<br />
to connect specifically to iPod, or iPhone, respectively, and has been certified by the<br />
developer to meet Apple performance standards. Apple is not responsible for the operation<br />
of this device or its compliance with safety and regulatory standards. Please note that the use<br />
of this accessory with iPod or iPhone may affect wireless performance.<br />
iPhone, iPod, iPod classic, iPod nano, and iPod touch are trademarks of Apple Inc., registered<br />
in the U.S. and other countries.<br />
• iTunes is a trademark of Apple Inc.<br />
• DivX®, DivX Certified® and associated logos are trademarks of Rovi Corporation or its<br />
subsidiaries and are used under license.<br />
ABOUT DIVX VIDEO: DivX® is a digital video format created by DivX, LLC, a subsidiary of Rovi<br />
Corporation. This is an official DivX Certified® device that plays DivX video. Visit divx.com for<br />
more information and software tools to convert your files into DivX videos.<br />
ABOUT DIVX VIDEO-ON-DEMAND: This DivX Certified® device must be registered in order<br />
to play purchased DivX Video-on-Demand (VOD) movies. To obtain your registration code,<br />
locate the DivX VOD section in your device setup menu. Go to vod.divx.com for more<br />
information on how to complete your registration.<br />
• This item incorporates copy protection technology that is protected by U.S. patents and<br />
other intellectual property rights of Rovi Corporation. Reverse engineering and disassembly<br />
are prohibited.<br />
• PANDORA, the PANDORA logo, and the Pandora trade dress are trademarks or registered<br />
trademarks of Pandora Media, Inc., used with permission.<br />
• Sirius, XM and all related marks and logos are trademarks of Sirius XM Radio Inc. All rights<br />
reserved.<br />
<strong>English</strong> 85
KS-UBT1 (USB Bluetooth Adapter)<br />
Instruction Manual<br />
CAUTION<br />
Changes or modifications not approved by us<br />
could void the user’s authority to operate the<br />
equipment.<br />
• This adapter has been designed exclusively<br />
for use with <strong>Kenwood</strong> car receivers. Do not<br />
use this adapter with any other car receiver.<br />
For details, see also the Instructions<br />
supplied with your receiver.<br />
• The Bluetooth word mark and logos are<br />
owned by the Bluetooth SIG, Inc. and<br />
any use of such marks by JVC KENWOOD<br />
Corporation is under license. Other<br />
trademarks and trade names are those of<br />
their respective owners.<br />
Specifications<br />
Bluetooth Version: Bluetooth 2.0 Certified<br />
Power Class: Class2 Radio<br />
Service Area: 10 m (10.9 yd)<br />
USB Standards: USB V1.1 (Full Speed)<br />
Power Consumption: 54.3 mA/5 V (max.)<br />
Dimensions (L × W × H):<br />
15 mm × 19 mm × 5.6 mm<br />
(5/8 ” × 3/4 ” × 1/4 ”)<br />
Keep the Bluetooth adapter inserted when<br />
using the Bluetooth function.<br />
When the adapter is removed, store it in a<br />
safe place.<br />
Distributor name: JVC KENWOOD DO BRASIL COMERCIO<br />
DE ELETRONICOS LTDA<br />
CNPJ of distributor: JVC KENWOOD DO BRASIL COMERCIO<br />
DE ELETRONICOS LTDA<br />
Manufacturer: JVC KENWOOD Corporation<br />
Model no.: KS-UBT1<br />
Brand:<br />
JVC<br />
0178-11-6733<br />
(01)07898929117502<br />
“Este equipamento opera em caráter secundário, isto<br />
é, não tem direito à proteção contra interferência<br />
prejudicial, mesmo de estações do mesmo tipo, e não<br />
pode causar interferência a sistemas operando em<br />
caráter primário.”<br />
86 DDX719/DDX7049BT/DDX419/DDX4049BT/<strong>DDX319</strong>/DDX3049
FCC WARNING<br />
This equipment may generate or use radio<br />
frequency energy. Changes or modifications<br />
to this equipment may cause harmful<br />
interference unless the modifications are<br />
expressly approved in the instruction manual.<br />
The user could lose the authority to operate<br />
this equipment if an unauthorized change or<br />
modification is made.<br />
FCC NOTE<br />
This equipment has been tested and found<br />
to comply with the limits for a Class B digital<br />
device, pursuant to Part 15 of the FCC<br />
Rules. These limits are designed to provide<br />
reasonable protection against harmful<br />
interference in a residential installation. This<br />
equipment may cause harmful interference<br />
to radio communications, if it is not installed<br />
and used in accordance with the instructions.<br />
However, there is no guarantee that<br />
interference will not occur in a particular<br />
installation. If this equipment does cause<br />
harmful interference to radio or television<br />
reception, which can be determined by<br />
turning the equipment off and on, the user is<br />
encouraged to try to correct the interference<br />
by one or more of the following measures:<br />
• Reorient or relocate the receiving antenna.<br />
• Increase the separation between the<br />
equipment and receiver.<br />
• Connect the equipment into an outlet on<br />
a circuit different from that to which the<br />
receiver is connected.<br />
• Consult the dealer or an experienced radio/<br />
TV technician for help.<br />
IC (Industry Canada) Notice<br />
This device complies with RSS-210 of industry<br />
Canada Rules. Operation is subject to the<br />
following two conditions:<br />
(1)this device may not cause interference,<br />
and (2) this device must accept any<br />
interference, including interference that may<br />
cause undesired operation of the device.<br />
Cet appareil est conforme au règlement<br />
CNR-210 de l’industrie du Canada. L’utilisation<br />
de ce dispositif est autorisée seulement aux<br />
conditions suivantes:<br />
(1) il ne doit pas produire de brouillage et<br />
(2) l’utilisateur du dispositif doit être prêt<br />
à accepter tout brouillage radioélectrique<br />
reçu, même si ce brouillage est susceptible<br />
de compromettre le fonctionnement du<br />
dispositif.<br />
CAUTION<br />
This equipment complies with FCC/IC<br />
radiation exposure limits set forth for an<br />
uncontrolled environment and meets the<br />
FCC radio frequency (RF) Exposure Guidelines<br />
in Supplement C to OET65 and RSS-102 of<br />
the IC radio frequency (RF) Exposure rules.<br />
This equipment has very low levels of RF<br />
energy that it deemed to comply without<br />
maximum permissive exposure evaluation<br />
(MPE). But it is desirable that it should be<br />
installed and operated keeping the radiator at<br />
least 20cm or more away from person’s body<br />
(excluding extremities: hands, wrists, feet and<br />
ankles).<br />
Under Industry Canada regulations, this<br />
radio transmitter may only operate using<br />
an antenna of a type and maximum (or<br />
lesser) gain approved for the transmitter by<br />
Industry Canada. To reduce potential radio<br />
interference to other users, the antenna<br />
type and its gain should be so chosen that<br />
the equivalent isotropically radiated power<br />
(e.i.r.p.) is not more than that necessary for<br />
successful communication.<br />
<strong>English</strong> 87


