

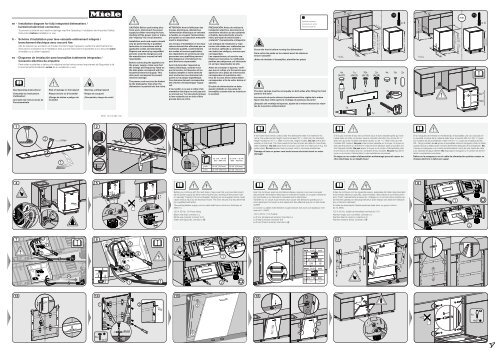
Miele G 6583 SCVi K2O - Plan de montage
Miele G 6583 SCVi K2O - Plan de montage
Miele G 6583 SCVi K2O - Plan de montage

Create successful ePaper yourself
Turn your PDF publications into a flip-book with our unique Google optimized e-Paper software.
en - Installation diagram for fully integrated dishwashers /<br />
hardwired electrical connection<br />
To prevent acci<strong>de</strong>nts and machine damage read the Operating / Installation and Important Safety<br />
Instructions before installation or use.<br />
fr - Schéma d‘installation pour lave-vaisselle entièrement intégrés /<br />
branchement électrique avec raccord fixe<br />
Afin <strong>de</strong> prévenir les acci<strong>de</strong>nts et d‘éviter d‘endommager l‘appareil, veuillez lire attentivement les<br />
instructions d‘utilisation et d‘installation ainsi que les instructions importantes sur la sécurité avant<br />
d‘installer ou d‘utiliser l‘appareil.<br />
es - Diagrama <strong>de</strong> instalación para lavavajillas totalmente integradas /<br />
Conexión eléctrica <strong>de</strong> empalme<br />
Para evitar acci<strong>de</strong>ntes y daños a la máquina lea las Instrucciones Importantes <strong>de</strong> Seguridad y <strong>de</strong><br />
Funcionamiento/Instalación antes <strong>de</strong> su instalación o uso.<br />
See Operating Instructions!<br />
Consultez les instructions<br />
d’utilisation!<br />
¡Consulte las instrucciones <strong>de</strong><br />
Funcionamiento<br />
Risk of damage or fire hazard!<br />
Risque <strong>de</strong> bris ou d’incendie!<br />
¡Riesgo <strong>de</strong> daños o peligro <strong>de</strong><br />
incendio!<br />
Warning, cutting hazard!<br />
Risque <strong>de</strong> coupure!<br />
¡Precaución, riesgo <strong>de</strong> corte!<br />
CAUTION: Before performing electrical<br />
work, disconnect the power<br />
supply by either removing the fuse,<br />
shutting off the power main or manually<br />
“tripping” the circuit breaker.<br />
Installation work and repairs should<br />
only be performed by a qualified<br />
technician in accordance with all<br />
applicable co<strong>de</strong>s and standards.<br />
Repairs and service by unqualified<br />
persons could be dangerous and<br />
the manufacturer cannot be held<br />
responsible.<br />
Before connecting the appliance to<br />
the power supply, make sure that<br />
the voltage and frequency listed on<br />
the data plate correspond with the<br />
household electrical supply. This<br />
data must correspond to prevent<br />
machine damage.<br />
The power cord must not be kinked<br />
by the dishwasher feet when the<br />
dishwasher is pushed into the niche.<br />
ATTENTION: Avant d‘effectuer <strong>de</strong>s<br />
travaux électriques, débranchez<br />
l‘alimentation électrique en enlevant<br />
le fusible, en coupant l‘alimentation<br />
principale ou en basculant manuellement<br />
le disjoncteur.<br />
Les travaux d‘installation et les réparations<br />
doivent être effectués par un<br />
technicien qualifié, conformément<br />
aux co<strong>de</strong>s et normes applicables.<br />
Les réparations et services par <strong>de</strong>s<br />
personnes non qualifiées peuvent<br />
être dangereux et le fabricant ne<br />
peut être tenu responsable.<br />
Avant <strong>de</strong> brancher l‘appareil au<br />
réseau électrique, assurez-vous<br />
que la tension, la fréquence et les<br />
fusibles installés à votre domicile<br />
sont conformes aux données indiquées<br />
sur la plaque signalétique.<br />
Ces données doivent correspondre<br />
afin d’éviter d‘endommager l‘appareil.<br />
Il faut veiller à ce que le câble d‘alimentation<br />
électrique ne soit pas pris<br />
ou enroulé sur l’un <strong>de</strong>s pieds lorsque<br />
le lave-vaisselle est en train d’être<br />
poussé dans la niche.<br />
PRECAUCIÓN: Antes <strong>de</strong> realizar la<br />
instalación eléctrica, <strong>de</strong>sconecte el<br />
suministro eléctrico ya sea quitando<br />
el fusible, <strong>de</strong>sconectando el suministro<br />
principal <strong>de</strong> electricidad o<br />
„botando“ manualmente el disyuntor.<br />
Los trabajos <strong>de</strong> instalación y reparación<br />
sólo <strong>de</strong>ben ser realizados por<br />
un técnico calificado y conforme<br />
con todos los códigos y normas que<br />
correspondan.<br />
Las reparaciones y el servicio realizados<br />
por personas no calificadas<br />
podrían ser peligrosos y el fabricante<br />
no se hace responsable <strong>de</strong> ello.<br />
Antes <strong>de</strong> conectar el aparato, verifique<br />
que el voltaje y la frecuencia que<br />
aparecen en la placa <strong>de</strong> información<br />
correspondan al suministro eléctrico<br />
<strong>de</strong> la casa. Estos datos <strong>de</strong>ben<br />
correspon<strong>de</strong>r a fin <strong>de</strong> evitar daños al<br />
aparato.<br />
El cable <strong>de</strong> alimentación no <strong>de</strong>be<br />
quedar doblado en las patas <strong>de</strong>l<br />
lavavajillas cuando éste se inserta en<br />
la cavidad.<br />
Screw the feet in before moving the dishwasher!<br />
Faire entrer les pieds en les vissant avant <strong>de</strong> déplacer<br />
le lave-vaisselle !<br />
¡Antes <strong>de</strong> <strong>de</strong>slizar el lavavajillas, atornillar las patas!<br />
Optional accessory<br />
Accessoire en option<br />
Accesorio especial<br />
The door springs must be set equally on both si<strong>de</strong>s after fitting the front<br />
panel to the door!<br />
Les ressorts <strong>de</strong> porte doivent impérativement être réglés <strong>de</strong> la même<br />
façon <strong>de</strong>s <strong>de</strong>ux côtés après le <strong>montage</strong> du panneau <strong>de</strong> porte!<br />
¡Después <strong>de</strong>l montaje <strong>de</strong>l aparato, ajuste <strong>de</strong> la misma manera los resortes<br />
<strong>de</strong> la puerta a ambos lados!<br />
M-Nr. 10 014 660 / 00<br />
1 2<br />
3<br />
If the intake hose will be coiled un<strong>de</strong>r the dishwasher after it is inserted in its<br />
niche, the un<strong>de</strong>rcounter height must be at least 32 7 /8´´ (835 mm) for standard<br />
height mo<strong>de</strong>ls) or 34 13 /16´´ (885 mm) for XXL height mo<strong>de</strong>ls. Do not sit the dishwasher<br />
on the hose. The hose needs to be free of kinks and able to move freely<br />
after installation. Do not place hose or power cord next to a heat source e.g. hot<br />
water pipes. Do not expose hose or power cord to corrosive substances.<br />
Damage of hose or power cord could cause electrical shock or water<br />
damage!<br />
Si le tuyau d’arrivée d’eau sera connecté sous le lave-vaisselle après qu’il soit<br />
inséré dans sa niche, la hauteur sous le comptoir doit être d’au moins 32 7 /8´´<br />
(835 mm) pour les modèles standard hauteur ou 34 13 /16´´ (885 mm) pour les<br />
modèles XXL hauteur. Ne pas poser le lave-vaisselle sur le tuyau. Le tuyau ne<br />
doit pas être plié et on doit être en mesure <strong>de</strong> le déplacer sans encombre une<br />
fois l’appareil installé. Ne pas placer le tuyau ou le cordon d’alimentation près<br />
d’une source <strong>de</strong> chaleur (par ex. conduites d’eau chau<strong>de</strong>). Ne pas exposer le<br />
tuyau ou le cordon d’alimentation à <strong>de</strong>s substances corrosives.<br />
Un tuyau ou un cordon d’alimentation endommagé pourrait causer un<br />
choc électrique ou un dégât d’eau!<br />
Si la manguera <strong>de</strong> entrada se enrollará bajo el lavavajillas una vez colocado en<br />
su cavidad, la altura <strong>de</strong> la cubierta <strong>de</strong>be tener al menos 835 mm (32 7 /8´´) para<br />
los mo<strong>de</strong>los <strong>de</strong> altura estândar o 885 mm (34 13 /16´´) para los mo<strong>de</strong>los <strong>de</strong> alto<br />
XXL. Tenga cuidado <strong>de</strong> no poner el lavavajillas sobre la manguera. Ésta no <strong>de</strong>be<br />
quedar torcida y <strong>de</strong>be po<strong>de</strong>r moverse libremente <strong>de</strong>spués <strong>de</strong> la instalación. No<br />
coloque la manguera o el cordón <strong>de</strong> alimentación cerca <strong>de</strong> una fuente <strong>de</strong> calor<br />
p.ej. tuberías <strong>de</strong> agua caliente. No exponga la manguera o el cordón <strong>de</strong> alimentación<br />
a sustancias corrosivas.<br />
Daños en la manguera o en el cable <strong>de</strong> alimentación podrían causar un<br />
choque eléctrico o daños por agua!<br />
4<br />
5<br />
6<br />
Before you continue with the next steps, make sure that you have disconnected<br />
the power supply by either removing the fuse, shutting off the power main<br />
or manually “tripping” the circuit breaker. Working on an energized circuit could<br />
cause serious injury by an electrical shock! This work should only be performed<br />
by a qualified technician!<br />
The existing flexible supply cord or cable shall have a minimum thickness of<br />
AWG 14.<br />
120 V, 60 Hz, 15 A fuse rating<br />
Black wire (live): connect to L<br />
White wire (neutral): connect to N<br />
Green wire (ground): connect to <br />
Avant <strong>de</strong> continuer avec les prochaines étapes, assurez-vous que vous avez<br />
déconnecté l’alimentation électrique en enlevant le fusible, en coupant l’alimentation<br />
principale ou en basculant manuellement le disjoncteur.<br />
Travailler sur un circuit sous tension peut causer <strong>de</strong>s blessures graves par un<br />
choc électrique! Ce travail ne doit seulement être effectué que par un technicien<br />
qualifié!<br />
Le cordon ou câble d’alimentation souple existant doit avoir une épaisseur minimale<br />
<strong>de</strong> 14 AWG.<br />
120 V, 60 Hz, 15 A Fusible<br />
Le fil noir (phase/sous tension): brancher à L<br />
Le fil blanc (neutre): brancher à N<br />
Le fil vert (mise à la terre): brancher à <br />
Antes <strong>de</strong> continuar con los siguientes pasos, asegúrese <strong>de</strong> haber <strong>de</strong>sconectado<br />
el suministro eléctrico; para ello, quite el fusible, <strong>de</strong>sconecte el suministro principal<br />
o “bote” manualmente el disyuntor. ¡Trabajar en un circuito activo podría causar<br />
lesiones graves por <strong>de</strong>scarga eléctrica! ¡Este trabajo sólo <strong>de</strong>be ser realizado<br />
por un técnico calificado!<br />
El cable <strong>de</strong> alimentación flexible existente <strong>de</strong>be tener un grosor mínimo<br />
<strong>de</strong> 14 AWG.<br />
120 V, 60 Hz, fusible <strong>de</strong> intensidad nominal <strong>de</strong> 15 A<br />
Alambre negro (con corriente): conectar a L<br />
Alambre blanco (neutro): conectar a N<br />
Alambre ver<strong>de</strong> (a tierra): conectar a <br />
7<br />
8 9<br />
10<br />
11 12<br />
13<br />
14 15 16 17 18
19 20 21 22 23 24<br />
27<br />
20<br />
25 26<br />
27 28<br />
29<br />
28<br />
3814


