

Philips Lecteur de DVD portable - Mode d’emploi - AEN
Philips Lecteur de DVD portable - Mode d’emploi - AEN
Philips Lecteur de DVD portable - Mode d’emploi - AEN

Create successful ePaper yourself
Turn your PDF publications into a flip-book with our unique Google optimized e-Paper software.
User manual<br />
Manuel d'utilisation<br />
Manual <strong>de</strong>l usuario<br />
INTRODUCTION<br />
Your <strong>portable</strong> <strong>DVD</strong> player<br />
Your <strong>portable</strong> <strong>DVD</strong> player plays digital vi<strong>de</strong>o discs conforming to the universal<br />
<strong>DVD</strong> Vi<strong>de</strong>o standard. With it, you will be able to enjoy full-length movies with<br />
true cinema picture quality, and stereo or multichannel sound (<strong>de</strong>pending on the<br />
disc and on your playback set-up).<br />
The unique features of <strong>DVD</strong>-Vi<strong>de</strong>o, such as selection of soundtrack and subtitle<br />
languages, and of different camera angles (again <strong>de</strong>pending on the disc), are all<br />
inclu<strong>de</strong>d.<br />
What’s more, parental lock lets you <strong>de</strong>ci<strong>de</strong> which discs your children will be able<br />
to see. You will find your player remarkably easy to use with the On-Screen<br />
Display and player display in combination with the remote control.<br />
Unpacking<br />
First check and i<strong>de</strong>ntify the contents of your package, as listed below:<br />
• Portable <strong>DVD</strong> player<br />
• Remote Control<br />
• Car adaptor (12V)<br />
• AC power adaptor (AY4130)<br />
• Rechargeable battery pack<br />
• User Manual<br />
• Warranty<br />
• Audio / Vi<strong>de</strong>o cable<br />
• Second LCD screen (PAC13X)<br />
• Car headrest mounting kit<br />
Placement<br />
• Place the player on a firm, flat surface.<br />
• Keep away from domestic heating equipment and direct sunlight.<br />
• If the player cannot read CDs/<strong>DVD</strong>s correctly, try using a commonly<br />
available cleaning CD/<strong>DVD</strong> to clean the lens before taking the player to be<br />
repaired. Other cleaning methods may <strong>de</strong>stroy the lens.<br />
• Always keep the disc door closed to avoid dust on the lens.<br />
• The lens may cloud over when the player is sud<strong>de</strong>nly moved from cold to warm<br />
surroundings. It is then not possible to play a CD/<strong>DVD</strong>. Leave the player in a warm<br />
environment until the moisture evaporates.<br />
FUNCTIONAL OVERVIEW<br />
Right of player ( see figure 1)<br />
9 PHONE ......................... Headphones jack<br />
0 AV IN ............................ Audio/Vi<strong>de</strong>o input jack<br />
! AV OUT ........................ Audio/Vi<strong>de</strong>o output jack<br />
@ COAXIL......................... Digital audio output jack<br />
# DC IN 12V. ...................Power supply socket<br />
SPECIAL <strong>DVD</strong> FEATURES<br />
Checking the contents of <strong>DVD</strong>-Vi<strong>de</strong>o discs: Menus.<br />
For titles and chapters, selection menus may be inclu<strong>de</strong>d on the disc.<br />
The <strong>DVD</strong>’s menu feature allows you to make selections from these menus. Press<br />
the appropriate numerical key; or use the 3, 4, 1, 2 keys to highlight your<br />
selection, and press OK.<br />
Disc menu<br />
Press MENU. The menu may list, for example, camera angles,<br />
spoken language and subtitle options, and chapters for the title.<br />
Camera angle<br />
If the disc contains sequences recor<strong>de</strong>d from different<br />
camera angles, the angle icon appears, showing the<br />
number of available angles, and the angle being shown.<br />
You can then change the camera angle if you wish.<br />
Press ANGLE repeatedly until you have reached your <strong>de</strong>sired<br />
viewing angle.<br />
To resume to normal viewing angle, press ANGLE repeatedly until no angle<br />
related message is shown on the screen.<br />
Changing the language<br />
Press LANGUAGE. If the current disc has different<br />
langauge options, this now appears on the screen.<br />
Press LANGUAGE repeatedly until you have reached<br />
your <strong>de</strong>sired language option.<br />
Subtitles<br />
Press SUBTITLES. If the current disc has different<br />
subtitles options, this now appears on the screen.<br />
Press SUBTITLES repeatedly until you have reached<br />
your <strong>de</strong>sired subtitles option.<br />
GENERAL FEATURES<br />
Slow motion<br />
Press > once or more for the following slow play options:<br />
x 1 1/2 x 5* 1/2 x backward<br />
x 2 1/4 x 6* 1/4 x backward<br />
x 3 1/8 x 7* 1/8 x backward<br />
x 4 1/16 x 8* 1/16 x backward<br />
Press OK or 2 to resume normal playback.<br />
*for <strong>DVD</strong>s only<br />
Changing the audio output<br />
Press AUDIO repeatedly for the following audio options.<br />
x 1 Mono left x 2 Mono right<br />
x 3 Mixed mono x 4 Stereo<br />
ZOOM<br />
The Zoom function allows you to enlarge the vi<strong>de</strong>o image and to pan<br />
through the enlarged image. Press ZOOM repeatedly to select the following<br />
zooming options.<br />
Zoom x 1 2X Zoom x 2 3X<br />
Zoom x 3 4X Zoom x 4 1/2<br />
Zoom x 5 1/3 Zoom x 6 1/4<br />
Zoom x 7<br />
normal<br />
MUTE<br />
Press MUTE once to mute player volume.<br />
Press MUTE again to disable.<br />
REPEAT<br />
Press REPEAT repeatedly for the following repeat options:<br />
<strong>DVD</strong> actions<br />
VCD actions<br />
x 1 repeats chapter repeats track<br />
x 2 repeats title repeats all<br />
x 3 repeats all cancels repeat<br />
x 4<br />
cancels repeat<br />
PREPARATIONS<br />
Digital Audio Out<br />
TIP<br />
• You can also make use of the COAXIAL jack<br />
for digital audio output.<br />
• Please refer to the user manuals of your<br />
additional equipment for more information<br />
about connection.<br />
• Players support NTSC/PAL/AUTO television sets.<br />
GENERAL EXPLANATION<br />
About this manual<br />
This manual gives the basic instructions for operating this <strong>DVD</strong> player.<br />
Some <strong>DVD</strong> discs however are produced in a way that requires specific<br />
operation or allows only limited operation during playback. In these cases<br />
the player may not respond to all operating commands. When this occurs,<br />
please refer to the instructions in the disc inlay. When a<br />
appears on<br />
the screen, the operation is not permitted by the player<br />
or the disc.<br />
Remote control operation<br />
• Unless otherwise stated, all operations can be carried out with the<br />
remote control. Always point the remote control directly at the player,<br />
making sure there are no obstructions in the path of the infrared beam.<br />
• When there are corresponding keys on the main unit, they can also be used.<br />
Menu navigation<br />
• Your player has an intuitive menu navigation system to gui<strong>de</strong> you through<br />
various settings and operations.<br />
• Use the function keys to activate / disable relevant operations.<br />
• Use 3, 4, 1, 2 to browse through menus.<br />
• Press OK key to confirm your selection.<br />
English<br />
FUNCTIONAL OVERVIEW<br />
Main unit controls ( see figure 1)<br />
1 OPEN ....................Open disc door to insert or remove disc<br />
2 POWER ...............Switch the player on / off<br />
3 9... .......................Press once to stop playback and store the stop position.<br />
Press twice to stop playback completely.<br />
2;.........................Start / pause / resume playback<br />
4 J( / §..................Search backward (J() or search forward ()K)<br />
5 - VOL + .................Volume control<br />
6 SETUP ..................Enters SETUP menu<br />
MENU...................Display MENU page<br />
7 3, 4, 1, 2.........Up / down / left / right cursor<br />
OK .........................Confirm selection<br />
Front of player ( see figure 1)<br />
8 POWER/CHR/IR .....Power and charging indicator / Remote sensor<br />
REMOTE CONTROL<br />
Remote controls ( see figure 2)<br />
1 3, 4, 1, 2.........Up / down / left / right cursor<br />
OK .........................Confirms selection<br />
2 VOL+ / - ................Volume control<br />
3 J( / §... .............For previous (J( ) or next (§) chapters, tracks or titles<br />
;............................Pauses playback<br />
2...........................Starts / resumes playback<br />
9... ........................Press twice to stop playback<br />
5 / 6... ..............Search backward (5 ) or search forward (6)<br />
4 OSD.......................On Screen Display on / off<br />
. ..........................Slow motion<br />
5 AUDIO ..................Audio langauge selector<br />
ZOOM ...................Enlarges vi<strong>de</strong>o image<br />
6 A > B.....................To repeat or loop a sequence in a title<br />
PLAY-MODE ........Selects play or<strong>de</strong>r options<br />
7 0 - 9.......................Numeric keypad<br />
8 MUTE....................Muting player volume<br />
REPEAT ................Repeats chapter / title / disc<br />
9 RETURN ...............For VCD menu page<br />
ANGLE..................Selects <strong>DVD</strong> camera angle<br />
0 SUBTITLE ............Subtitle language selector<br />
LANGUAGE .........Language selector<br />
! MENU...................Displays MENU page<br />
@ SETUP ..................Enters SETUP menu<br />
# Infra Red port<br />
$ BATTERY COMPARTMENT<br />
BASIC FUNCTIONS<br />
Switching on for OSD language setup<br />
English is the <strong>de</strong>fault language of your player’s on screen display. You may<br />
choose to use English, French, Spanish, German, Simplified Chinese or Traditional<br />
Chinese for your player’s on screen display.<br />
Countries<br />
OSD Language Options<br />
European<br />
English, French, German<br />
American<br />
English, French, Spanish<br />
1 Sli<strong>de</strong> the POWER switch to ON to switch on the player.<br />
2 Press SET UP for the set up menu.<br />
3 Select GENERAL SETUP and press OK.<br />
4 Scroll and select OSD LANG and press 2 to<br />
select from OSD language options.<br />
5 Select your preferred language and press OK.<br />
Loading discs and switching on<br />
1 Press OPEN to open the disc door.<br />
2 Insert your chosen disc, label si<strong>de</strong> up (also when a double si<strong>de</strong>d<br />
<strong>DVD</strong> disc is inserted). Make sure it is sitting properly in the correct recess.<br />
3 Gently push to close the door.<br />
4 Sli<strong>de</strong> the POWER switch to ON to switch on the player.<br />
TIP<br />
A normal mechanical noise is heard during playback.<br />
BASIC FUNCTIONS<br />
Playing a <strong>DVD</strong> disc<br />
After switching on, inserting the disc and closing the door, playback starts<br />
automatically. The screen shows the type of disc loa<strong>de</strong>d. The disc may invite you<br />
to select an item from a menu. Use the 3, 4, 1, 2 keys to highlight your<br />
selection,and press OK.<br />
Note: Since it is usual for <strong>DVD</strong> movies to be released at different times in<br />
different regions of the world, all players have region co<strong>de</strong>s and discs can have<br />
an optional region co<strong>de</strong>. If you load a disc of a different region co<strong>de</strong> to your<br />
player, you will see the region co<strong>de</strong> notice on the screen. The disc will not play,<br />
and should be unloa<strong>de</strong>d.<br />
Playing an audio or vi<strong>de</strong>o CD disc<br />
• After switching on, inserting the disc and closing the door, the screen shows<br />
the type of disc loa<strong>de</strong>d as well as information about the disc’s contents.<br />
Press 2 to start playback.<br />
• While playing VCD with MTV/Karaoke, press number keys(0-9) to select the<br />
track and press 2 or OK to play the track. Press RETURN to go back to menu<br />
of the selection.<br />
BASIC FUNCTIONS<br />
Playing a MP3<br />
The following playback features are available for MP3-CDs.<br />
Please refer to the corresponding sections for more information.<br />
Volume control, skipping tracks, searching, repeat, shuffle, etc.<br />
Use the 3, 4, 1, 2 keys to highlight your selected music fol<strong>de</strong>r.<br />
Press OK to play.<br />
Playing a JPEG discs<br />
Use the 3, 4, 1, 2 keys to highlight your selected picture fol<strong>de</strong>r.<br />
Press OK. The player will then automatically enter the sli<strong>de</strong> show mo<strong>de</strong>.<br />
Using the full display screen, this shows the rest of the JPEG files, one-by-one,<br />
located in the selected current fol<strong>de</strong>r.<br />
• Use the 1, 2 to rotate the picture.<br />
• Use the 3 to filp up/down.<br />
• Use the 4 to flip left/right.<br />
• During the sli<strong>de</strong> show, press MENU to go back to fol<strong>de</strong>r screen.<br />
• Press 9 to go to group preview.<br />
• Use the 3, 4, 1, 2 to highlight the preview picture and access the<br />
on-screen functions.<br />
Note: Unless stated otherwise, all operations <strong>de</strong>scribed are based on remote<br />
control operation.<br />
GENERAL FEATURESS<br />
Moving to another title / track / chapter<br />
When a disc has more than one title or track, you can<br />
move to another title/track/chapter as follows:<br />
• Press § briefly during play to select the next title/<br />
track / chapter.<br />
• Press J( briefly during play to step back to the<br />
previous title/track/chapter.<br />
• To go directly to any title, track or chapter, enter the corresponding<br />
number using the numerical keys (0-9).<br />
Still picture and step frame<br />
Press ; once or more for the following still picture<br />
and step frame options:<br />
; x 1 Pause / Still picture<br />
; x 2 screen shows ;2<br />
After the icon ;2 is displayed, press ; repeatedly to play frame by frame.<br />
Press OK to resume normal playback.<br />
Search<br />
Press K repeatedly for the following forward search options:<br />
Press J repeatedly for the following backward search options:<br />
J<br />
K<br />
2 X backwards 2 X forward<br />
4 X backwards 4 X forward<br />
8 X backwards 8 X forward<br />
16 X backwards 16 X forward<br />
32 X backwards 32 X forward<br />
normal speed<br />
normal speed<br />
Press OK or 2 to resume normal playback.<br />
GENERAL FEATURES<br />
Repeat A > B<br />
To repeat or loop a sequence in a title:<br />
• Press A > B at your chosen starting point;<br />
A appears on the screen.<br />
• Press A > B again at your chosen end point;<br />
AB appears on the display, and the repeat sequence begins.<br />
• To exit the sequence, press A > B.<br />
Play mo<strong>de</strong>s<br />
Press PLAY-MODE repeatedly for the following play or<strong>de</strong>r options:<br />
x 1 Shuffle x 2 Random<br />
x 3<br />
Program<br />
Use (0-9) and OK to key in specific settings.<br />
Volume Control<br />
• During playback, press + / - to increase or <strong>de</strong>crease<br />
playback volume in the Remote Control or in the <strong>DVD</strong><br />
player.<br />
Setup (on the main unit)<br />
Press Setup repeatedly and use 1 / 2 to adjust<br />
brightness, color and display mo<strong>de</strong> (normal or full screen).<br />
CAUTION<br />
Use of controls or adjustments or performance of procedures<br />
other than herein may result in hazardous radiation exposure<br />
or other unsafe operation.<br />
Yellow<br />
TROUBLESHOOTING<br />
Symptom<br />
Remedy<br />
Disc can’t be played<br />
– Ensure the disc label is upwards.<br />
– Clean the disc.<br />
– Check if the disc is <strong>de</strong>fective by trying<br />
another disc.<br />
The player does not<br />
– Aim the remote control directly at the<br />
respond to the remote<br />
sensor on the front of the player. Avoid all<br />
control<br />
obstacles that may interfere with the signal<br />
path. Inspect or replace the batteries.<br />
Distorted or B/W<br />
– Use only discs formatted according to the<br />
picture with <strong>DVD</strong><br />
TV-set used (PAL/NTSC).<br />
No audio at digital<br />
– Check the digital connections.<br />
output<br />
– Check the SETUP menu to make sure that<br />
the digital output is set to on.<br />
Player does not respond<br />
– Operations are not permitted by the disc.<br />
to all operating commands<br />
– Refer to the instructions in the disc inlay.<br />
during playback<br />
Player feels warm<br />
– When the player is in use for a long<br />
period of time, the surface will be heated.<br />
This is normal.<br />
Display goes dimmer when<br />
– The unit is saving power to ensure longer<br />
AC is unplugged<br />
playtime with battery. It is normal.<br />
Adjust the brightness using MONITOR<br />
function.<br />
This set complies with the radio interference requirements of the<br />
European Union.<br />
PREPARATIONS<br />
Power supply<br />
Using the AC / DC adaptor<br />
Connect the supplied adapter to the set and<br />
the main power supply (as shown).<br />
TIP<br />
To avoid damage to the player, switch off before plugging or unplugging the<br />
AC adaptor.<br />
Using the car adapter<br />
Connect the supplied car adapter to the set and the<br />
car cigarette lighter outlet.<br />
TIP<br />
• To avoid damage to the player, switch off before plugging or unplugging<br />
the car adaptor.<br />
• When connecting with car power (cigarette lighter) adaptor, be sure the<br />
input voltage of the adaptor is i<strong>de</strong>ntical with car voltage.<br />
Powering your remote control<br />
1 Open the battery compartment. Remove the<br />
protective plastic tab (first time users only).<br />
2 Insert 1 x lithium 3V battery, type CR2025, then close<br />
the compartment.<br />
GENERAL INFORMATION<br />
Handling discs<br />
• Do not attach paper or tape to the disc.<br />
• Keep the disc away from direct sunlight or heat<br />
sources.<br />
• Store the disc in a disc case after playback.<br />
• To clean, wipe the disc outwards from the center<br />
with a soft, lint-free clean cloth.<br />
On handling the LCD screen<br />
The LCD is manufactured using high precision technology. You may, however, see<br />
tiny black points that continuously appear on the LCD. This is a normal result of<br />
the manufacturing process and does not indicate a malfunction.<br />
Environmental information<br />
We have reduced the packaging to its minimum and ma<strong>de</strong> it easy to separate into<br />
mono materials: cardboard, PS, PE and PET.<br />
Your set consists of material which can be recycled if disassembled by a<br />
specialized company. Please observe the local regulations to dispose of<br />
packaging, exhausted batteries and old equipment.<br />
Copyright information<br />
All other brand and product names are tra<strong>de</strong>marks of their respective companies<br />
or organizations.<br />
Unauthorized duplication of any recordings downloa<strong>de</strong>d from the internet or ma<strong>de</strong><br />
from CDs / VCDs / <strong>DVD</strong>s is a violation of copyright laws and international<br />
treaties.<br />
GENERAL INFORMATION<br />
Power Sources<br />
This unit operates on a supplied AC adapter, car adapter, or a rechargeable<br />
battery pack.<br />
• Make sure that the input voltage of the AC adaptor is in line with the local<br />
voltage. Otherwise, the AC adaptor and unit may be damaged.<br />
• Do not touch the AC adaptor with wet hands to prevent electric shock.<br />
• When connecting with car power (cigarette lighter) adaptor, be sure the<br />
input voltage of the adaptor is i<strong>de</strong>ntical with car voltage.<br />
• Unplug the AC adaptor from the outlet or remove the battery pack when<br />
the unit is not used for long periods of time.<br />
• Hold the plug to disconnect the AC adaptor. Do not pull the power cord.<br />
Safety and maintenance<br />
• Do not disassemble the unit for laser rays are dangerous to eyes.<br />
Any service should be done by qualified service personnel.<br />
• Unplug the AC adaptor to cut the power if liquid or objects get insi<strong>de</strong> the unit.<br />
• Take care not to drop the unit or subject it to strong shocks, which may<br />
cause malfunction.<br />
• Do not expose to excessive heat caused by heating equipment or<br />
direct sunlight.<br />
• This product is not waterproof: do not allow your player to be submersed<br />
in water. Water entering the player may cause major damage.<br />
• Do not use any cleaning agents containing alcohol, ammonia, benzene,<br />
or abrasives as these may harm the player.<br />
• Apparatus shall not be exposed to dripping or splashing. Do not place any<br />
sources of danger on the appartus (e.g. liquid filled objects,lighted candles)<br />
• Do not touch the lens!<br />
Note: When the player is in use for a long period of time, the surface will be<br />
heated. This is normal.<br />
OSD OPERATIONS<br />
In addition to using remote control keys, you can also change disc playback<br />
options from OSD.<br />
1 Press OSD during disc playback. A list of features is shown.<br />
2 Use the 3 4 keys to highlight your selection.<br />
When the cursor highlights these settings, press OK to:<br />
FILE<br />
key in <strong>de</strong>sired file number<br />
TITLE<br />
key in <strong>de</strong>sired title number<br />
CHAPTER<br />
key in <strong>de</strong>sired chapter number<br />
AUDIO<br />
select audio options<br />
SUBTITLE<br />
select subtitle options<br />
ANGLE<br />
select camera angle options<br />
FILE TIME<br />
key in starting point for file play time<br />
TT TIME<br />
key in starting point for title play time<br />
CH TIME<br />
key in starting point for chapter play time<br />
REPEAT<br />
select repeat options<br />
TIME DISP.<br />
select time display options<br />
3 Use (0-9) to key in specific settings.<br />
4 Press 1 to abort current settings or go back to previous menu level.<br />
5 Press OSD to exit.<br />
SETUP OPERATIONS<br />
To maximize your playback experience, use SETUP to fine tune your settings.<br />
Use the 3,4,1, 2 keys to highlight your selection, and press OK.<br />
1 Press SETUP. A list of features is shown.<br />
2 Use the 3 4 keys to highlight your selection.<br />
When the cursor highlights these settings, press OK to:<br />
GENERAL SETUP<br />
select display and other options<br />
AUDIO SETUP<br />
select audio options<br />
PREFERENCES<br />
select playback preferences<br />
PASSWORD SETUP<br />
select password options<br />
3 Press 1 to abort current settings or go back to previous menu level.<br />
4 Press SETUP to exit.<br />
General Setup<br />
When the cursor highlights these settings, press OK to:<br />
TV DISPLAY<br />
select display ratio<br />
TV TYPE<br />
select vi<strong>de</strong>o standard of external TV set<br />
OSD LANG<br />
select on screen display language<br />
SPDIF<br />
select digital audio options<br />
CAPTIONS<br />
select captions options<br />
SCREEN SAVER<br />
select screen saver options<br />
Press 1 to abort current settings or go back to previous menu level<br />
SETUP OPERATIONS<br />
Audio Setup<br />
When the cursor highlights these settings, press OK to:<br />
SPEAKER SETUP<br />
select speaker options<br />
DOLBY DIGITAL SETUP<br />
select dobly sound options<br />
CHANNEL EQUALIZER<br />
select equalizer options<br />
3D PROCESSING<br />
select surround sound options<br />
Press 1 to abort current settings or go back to previous menu level<br />
Preferences<br />
When the cursor highlights these settings, press OK to:<br />
AUDIO<br />
select audio language options<br />
SUBTITLE<br />
select subtitle language options<br />
DISC MENU<br />
select disc menu language options<br />
PARENTAL<br />
select parental options<br />
DEFAULT<br />
Restore factory settings<br />
Press 1 to abort current settings or go back to previous menu level<br />
Note: Parental options are only selectable when password mo<strong>de</strong> is <strong>de</strong>activated.<br />
Password Setup<br />
When the cursor highlights these settings, press OK to:<br />
PW MODE<br />
switch password on / off<br />
PASSWORD change existing password (<strong>de</strong>fault: 99999)<br />
Press 1 to abort current settings or go back to previous menu level<br />
TROUBLESHOOTING<br />
If it appears that the <strong>DVD</strong>-Vi<strong>de</strong>o player is faulty, first consult this checklist.<br />
It may be that something has been overlooked.<br />
WARNING<br />
Un<strong>de</strong>r no circumstances should you try to repair the set yourself as this<br />
will invalidate the guarantee.<br />
If a fault occurs, first check the points listed, before taking the set for<br />
repair. If you are unable to solve a problem by following these hints,<br />
consult your <strong>de</strong>aler or service centre.<br />
Symptom<br />
Remedy<br />
No power<br />
– Check if both plugs of the mains cord are<br />
properly connected.<br />
– Check if there is power at the AC outlet by<br />
plugging in another appliance.<br />
– Check if battery pack is inserted appropriately.<br />
– Check if car adaptor is connected appropriately.<br />
Distorted picture<br />
– Check the disc for fingerprints and clean with<br />
a soft cloth, wiping from centre to edge.<br />
– Sometimes a small amount of picture<br />
distortion may appear. This is not a<br />
malfunction.<br />
Completely distorted<br />
– The NTSC/PAL setting may be in the wrong<br />
picture / no colour in<br />
status. Match your TV’s setting with the<br />
the TV screen<br />
player’s setting.<br />
No sound<br />
– Check audio connections. If using a HiFi<br />
amplifier, try another sound source.<br />
TECHNICAL DATA<br />
Dimensions<br />
20.2 x 14.9 x 4.0 cm<br />
7.9 x 5.8 x 1.5 inches<br />
Weight<br />
0.86 kg / 1.89 lb<br />
Power supply<br />
DC 12V 2A<br />
Power Consumption<br />
30W<br />
Operating temperature range<br />
0 - 50°C (32 ~ 122°F)<br />
Laser wavelength<br />
650nm<br />
Vi<strong>de</strong>o system<br />
NTSC / PAL / AUTO<br />
Frequency response<br />
20Hz ~ 20KHz ± 1dB<br />
Signal/noise ratio<br />
≥ 85dB<br />
Audio distortion + noise<br />
≤ -80(1KHz)<br />
Channel separation<br />
≥ 85dB<br />
Dynamic range<br />
≥ 80dB<br />
Output<br />
Audio out (analog audio) Output level: 2V ± 10%<br />
Load impedance:<br />
10KΩ<br />
Vi<strong>de</strong>o out Output level: 1Vp - p ± 20%<br />
Load impedance:<br />
75Ω<br />
PHILIPS reserves the right to make <strong>de</strong>sign and specification<br />
changes for product improvement without prior notice.<br />
Modifications not authorized by the manufacturer may void users<br />
authority to operate this <strong>de</strong>vice.<br />
All rights reserved.<br />
COPYRIGHT INFORMATION<br />
The making of unauthorized copies of copy-protected material, including<br />
computer programmes, files, broadcasts and sound recordings, may be an<br />
infringement of copyrights and constitute a criminal offence. This equipment<br />
should not be used for such purposes.<br />
Windows Media and the Windows logo are tra<strong>de</strong>marks, or registered tra<strong>de</strong>marks<br />
of Microsoft Corporation in the United States and/or other countries.<br />
.<br />
DISPOSAL OF YOUR OLD PRODUCT<br />
Your product is <strong>de</strong>signed and manufactured with high quality materials and<br />
components, which can be recycled and reused.<br />
When this crossed-out wheeled bin symbol is attached to a product it<br />
means the product is covered by the European Directive 2002/96/EC.<br />
Please inform yourself about the local separate collection system for<br />
electrical and electronic products.<br />
Please act according to your local rules and do not dispose of your old products<br />
with your normal household waste. The correct disposal of your old product will<br />
help prevent potential negative consequences for the environment and human<br />
health.<br />
Perchlorate Material - special handling may apply. See<br />
www.dtsc.ca.gov/hazardouswaste/perchlorate."<br />
Meet <strong>Philips</strong> at the Internet<br />
http://www.philips.com/usasupport<br />
or call<br />
1-888-philips (744-5477)<br />
PHILIPS CONSUMER ELECTRONICS COMPANY<br />
Marietta, GA 30006-0026<br />
Printed in China<br />
wk7023<br />
CLASS 1<br />
LASER PRODUCT<br />
Specifications are subject to change without notice.<br />
Tra<strong>de</strong>marks are the property of Koninklijke <strong>Philips</strong> Electronics N.V.<br />
or their respective owners<br />
2006 © Koninklijke <strong>Philips</strong> Electronics N.V. All rights reserved.<br />
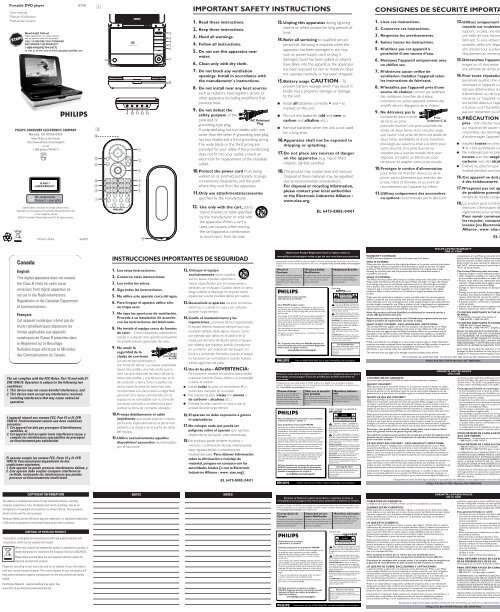
1. Read these instructions.<br />
2. Keep these instructions.<br />
3. Heed all warnings.<br />
4. Follow all instructions.<br />
5. Do not use this apparatus near<br />
water.<br />
6. Clean only with dry cloth.<br />
7. Do not block any ventilation<br />
openings. Install in accordance with<br />
the manufacturer´s instructions.<br />
8. Do not install near any heat sources<br />
such as radiators, heat registers, stoves, or<br />
other apparatus (including amplifiers) that<br />
produce heat.<br />
9. Do not <strong>de</strong>feat the<br />
safety purpose of the<br />
polarized or<br />
grounding-type plug.<br />
A polarized plug has two bla<strong>de</strong>s with one<br />
wi<strong>de</strong>r than the other. A grounding type plug<br />
has two bla<strong>de</strong>s and a third grounding prong.<br />
The wi<strong>de</strong> bla<strong>de</strong> or the third prong are<br />
provi<strong>de</strong>d for your safety. If the provi<strong>de</strong>d plug<br />
does not fit into your outlet, consult an<br />
electrician for replacement of the obsolete<br />
outlet.<br />
10.Protect the power cord from being<br />
walked on or pinched, particularly at plugs,<br />
convenience receptacles, and the point<br />
where they exit from the apparatus.<br />
11.Only use attachments/accessories<br />
specified by the manufacturer.<br />
13. Unplug this apparatus during lightning<br />
storms or when unused for long periods of<br />
time.<br />
14.Refer all servicing to qualified service<br />
personnel. Servicing is required when the<br />
apparatus has been damaged in any way,<br />
such as power-supply cord or plug is<br />
damaged, liquid has been spilled or objects<br />
have fallen into the apparatus, the apparatus<br />
has been exposed to rain or moisture, does<br />
not operate normally, or has been dropped.<br />
15.Battery usage CAUTION – To<br />
prevent battery leakage which may result in<br />
bodily injury, property damage, or damage<br />
to the unit:<br />
●<br />
Install all batteries correctly, + and - as<br />
marked on the unit.<br />
●<br />
Do not mix batteries (old and new or<br />
carbon and alkaline, etc.).<br />
●<br />
Remove batteries when the unit is not used<br />
for a long time.<br />
IMPORTANT SAFETY INSTRUCTIONS<br />
AC Polarized<br />
Plug<br />
16.Apparatus shall not be exposed to<br />
dripping or splashing.<br />
17.Do not place any sources of danger<br />
on the apparatus (e.g. liquid filled<br />
objects, lighted candles).<br />
18.This product may contain lead and mercury.<br />
Disposal of these materials may be regulated<br />
due to environmental consi<strong>de</strong>rations.<br />
For disposal or recycling information,<br />
please contact your local authorities<br />
or the Electronic Industries Alliance :<br />
www.eiae.org.<br />
EL 6475-E005: 04/01<br />
12. Use only with the cart, stand,<br />
tripod, bracket, or table specified<br />
by the manufacturer or sold with<br />
the apparatus.When a cart is<br />
used, use caution when moving<br />
the cart/apparatus combination<br />
to avoid injury from tip-over.<br />
Canada<br />
English<br />
This digital apparatus does not exceed<br />
the Class B limits for radio noise<br />
emissions from digital apparatus as<br />
set out in the Radio Interference<br />
Regulations of the Canadian Department<br />
of Communications.<br />
Français<br />
Cet appareil numérique n'émet pas <strong>de</strong><br />
bruits radioélectriques dépassant les<br />
limites applicables aux appareils<br />
numériques <strong>de</strong> Classe B prescrites dans<br />
le Règlement sur le Brouillage<br />
Radioélectrique édicté par le Ministère<br />
<strong>de</strong>s Communications du Canada.<br />
1. Lisez ces instructions.<br />
2. Conservez ces instructions.<br />
3. Respectez les avertissements.<br />
4. Suivez toutes les instructions.<br />
5. N’utilisez pas cet appareil à<br />
proximité d’une source d’eau.<br />
6. Nettoyez l’appareil uniquement avec<br />
un chiffon sec.<br />
7. N’obstruez aucun orifice <strong>de</strong><br />
ventilation. Installez l’appareil selon<br />
les instructions du fabricant.<br />
8. N’installez pas l’appareil près d’une<br />
source <strong>de</strong> chaleur comme par exemple<br />
<strong>de</strong>s radiateurs, bouches <strong>de</strong> chaleur,<br />
cuisinières, ou autres appareils (même <strong>de</strong>s<br />
amplificateurs) dégageant <strong>de</strong> la chaleur.<br />
9. Ne détruisez pas la<br />
incorporée dans la prise<br />
<strong>de</strong> terre ou prise<br />
polarisée fournie. Une prise polarisée est<br />
dotée <strong>de</strong> <strong>de</strong>ux lames dont une plus large<br />
que l’autre. Une prise <strong>de</strong> terre est dotée <strong>de</strong><br />
<strong>de</strong>ux fiches semblables et d’une troisième,<br />
plus large, qui assure la mise à la terre pour<br />
votre sécurité. Si la prise fournie ne<br />
convient pas à la prise murale dont vous<br />
disposez, consultez un électricien pour<br />
remplacer et adapter votre prise murale.<br />
10.Protégez le cordon d’alimentation<br />
pour éviter <strong>de</strong> marcher <strong>de</strong>ssus ou <strong>de</strong> le<br />
pincer particulièrement aux endroits <strong>de</strong>s<br />
prises, mâles et femelles, et au point <strong>de</strong><br />
raccor<strong>de</strong>ment sur l’appareil lui-même.<br />
11.Utilisez uniquement <strong>de</strong>s accessoires<br />
ou options recommandés par le fabricant.<br />
12.Utilisez uniquement un<br />
meuble sur roulettes,un<br />
support, un pied, une étagère ou<br />
une table <strong>de</strong> type recommandé par le<br />
fabricant. Si vous utilisez un meuble sur<br />
veillez à le<br />
l’équipement se renversait.<br />
13. Débranchez l’appareil pendant les<br />
orages ou s’il doit rester inutilisé pendant<br />
une pério<strong>de</strong> <strong>de</strong> temps prolongée.<br />
14.Pour toute réparation, faites appel à un<br />
personnel qualifié. Une réparation sera<br />
nécessaire si l’appareil a subi <strong>de</strong>s dommages<br />
tels que détérioration du cordon<br />
d’alimentation ou <strong>de</strong> la prise, liqui<strong>de</strong><br />
renversé sur l’appareil, ou encore si un<br />
est tombé <strong>de</strong>ssus,si l’appareil a été<br />
à la pluie ou à l’humidité, s’il ne<br />
pas cor rectement ou s’il a fait une chute.<br />
15.PRÉCAUTION d’<strong>emploi</strong> <strong>de</strong>s<br />
piles – Afin d’éviter toute fuite <strong>de</strong>s piles<br />
qui risquerait <strong>de</strong> causer <strong>de</strong>s blessures<br />
corporelles, <strong>de</strong>s dommages matériels, ou<br />
d’endommager l’appareil :<br />
●<br />
Installez toutes les piles correctement,<br />
+ et - tels qu’indiqués sur l’appareil.<br />
●<br />
Ne mélangez pas les piles (pas <strong>de</strong> piles<br />
neuves avec <strong>de</strong>s usagées ou <strong>de</strong> piles au<br />
carbone avec <strong>de</strong>s alcalines, etc.).<br />
●<br />
Enlevez les piles lorsque l’appareil reste<br />
inutilisé pendant une longue pério<strong>de</strong>.<br />
CONSIGNES DE SÉCURITÉ IMPORTANTES<br />
Prise<br />
polarisée C.A.<br />
N’exposez pas cet appareil à sources<br />
<strong>de</strong> problème potentielles (objets<br />
remplis <strong>de</strong> liqui<strong>de</strong>, bougies allumées, etc.).<br />
16.Cet appareil ne doit pas être exposé<br />
à <strong>de</strong>s éclaboussures.<br />
17.<br />
Ce produit peut contenir du plomb et du<br />
mercure. L’élimination <strong>de</strong> ces matières est<br />
réglementée pour protéger l’environnement.<br />
Pour savoir comment les éliminer ou<br />
les recycler, contactez les autorités<br />
locales [ou Electronic Industries<br />
Alliance : www. eiae.org].<br />
18.<br />
EL 6475-F005: 04/01<br />
roulettes,<br />
déplacer avec précaution<br />
afin d’éviter tout acci<strong>de</strong>nt corporel si<br />
objet<br />
exposé<br />
fonctionne<br />
1. Lea estas instrucciones.<br />
2. Conserve estas instrucciones.<br />
3. Lea todos los avisos.<br />
4. Siga todas las instrucciones.<br />
5. No utilice este aparato cerca <strong>de</strong>l agua.<br />
6. Para limpiar el aparato utilice sólo<br />
un trapo seco.<br />
7. No tape las aperturas <strong>de</strong> ventilación.<br />
Proceda a su instalación <strong>de</strong> acuerdo<br />
con las instrucciones <strong>de</strong>l fabricante.<br />
8. No instale el equipo cerca <strong>de</strong> fuentes<br />
<strong>de</strong> calor – Como radiadores, calentadores,<br />
estufas o cualquier otro aparato (incluyendo<br />
los amplificadores) generador <strong>de</strong> calor.<br />
9. No anule la<br />
seguridad <strong>de</strong> la<br />
clavija <strong>de</strong> corriente<br />
(ya sea <strong>de</strong> tipo polarizado o<br />
con toma <strong>de</strong> tierra). Las clavijas polarizadas<br />
tienen dos patillas, una más ancha que la<br />
otra. Las que disponen <strong>de</strong> toma <strong>de</strong> tierra<br />
tienen dos patillas y una tercera que es la<br />
<strong>de</strong> conexión a tierra.Tanto la patilla más<br />
ancha como la toma <strong>de</strong> tierra han sido<br />
incorporadas a la clavija para su seguridad<br />
personal. Si la clavija suministrada con el<br />
equipo no es compatible con su toma <strong>de</strong><br />
corriente, consulte a un electricista para<br />
sustituir la toma <strong>de</strong> corriente obsoleta.<br />
10.Proteja <strong>de</strong>bidamente el cable<br />
impidiendo que pueda pisarse o incluso<br />
perforarse, especialmente en la parte más<br />
próxima a la clavija y en el punto <strong>de</strong> salida<br />
<strong>de</strong>l equipo.<br />
11. Utilice exclusivamente aquellos<br />
dispositivos/ accesorios recomendados<br />
por el fabricante.<br />
12. Coloque el equipo<br />
exclusivamente sobre aquellos<br />
carros, bases, trípo<strong>de</strong>s, soportes o<br />
mesas especificados por el<br />
vendidos con el equipo. Cuando utilice un carro,<br />
tenga cuidado al <strong>de</strong>splazar el conjunto carro/<br />
equipo par a evitar posibles daños por vuelco.<br />
13. Desenchufe el aparato durante tormentas<br />
eléctricas o cuando no vaya a ser utilizado<br />
largo tiempo.<br />
14.Confíe el mantenimiento y las<br />
reparaciones a personal técnico especializado.<br />
El equipo <strong>de</strong>berá repararse siempre que haya<br />
resultado dañado <strong>de</strong><strong>de</strong> alguna manera, como<br />
por ejemplo por daños en el cable o en la<br />
clavija, por <strong>de</strong>rrame <strong>de</strong> líquido sobre el equipo,<br />
por objetos que hubieran podido introducirse<br />
en su interior, por exposición <strong>de</strong>l equipo a la<br />
lluvia o a ambientes húmedos, cuando el equipo<br />
no funcione con normalidad o cuando hubiera<br />
sufrido algún tipo <strong>de</strong> caída.<br />
15.Uso <strong>de</strong> las pilas – ADVERTENCIA:<br />
Para prevenir escapes en las pilas, que pue<strong>de</strong>n<br />
ocasionar lesiones físicas, daños a su propiedad<br />
o dañar la unidad:<br />
● Instale todas las pilas correctamente, + y -<br />
como está marcado en la unidad.<br />
●<br />
No mezcle las pilas (viejas con nuevas o<br />
<strong>de</strong> carbono y alcalinas, etc.).<br />
●<br />
Extraiga las pilas cuando no vaya a usar la<br />
unidad durante largo tiempo.<br />
INSTRUCCIONES IMPORTANTES DE SEGURIDAD<br />
Clavija<br />
polarizada<br />
<strong>de</strong> CA<br />
comerciante o<br />
16.El aparato no <strong>de</strong>be exponerse a goteos<br />
ni salpicaduras.<br />
17.No coloque nada que pueda ser<br />
peligroso sobre el aparato (por ejemplo,<br />
objetos llenos <strong>de</strong> líquido, velas encendidas).<br />
18.Ese producto pue<strong>de</strong> contener el plomo y<br />
mercurio. La eliminación <strong>de</strong> este material pue<strong>de</strong><br />
estar regulada <strong>de</strong>bido a consi<strong>de</strong>raciones<br />
medioambientales. Para obtener información<br />
sobre la eliminación o reciclaje <strong>de</strong><br />
material, póngase en contacto con las<br />
autorida<strong>de</strong>s locales [o con la Electronic<br />
Industries Alliance : www. eiae.org].<br />
EL 6475-S005: 04/01<br />
durante<br />
The set complies with the FCC-Rules, Part 15 and with 21<br />
CFR 1040.10. Operation is subject to the following two<br />
conditions:<br />
1. This <strong>de</strong>vice may not cause harmful interference, and<br />
2. This <strong>de</strong>vice must accept any interference received,<br />
including interference that may cause un<strong>de</strong>sired<br />
operation.<br />
L’appareil répond aux normes FCC, Part 15 et 21 CFR<br />
1040.10. Fonctionnement soumis aux <strong>de</strong>ux conditions<br />
suivantes :<br />
1. Cet appareil ne doit pas provoquer d’interférences<br />
nuisibles, et<br />
2. Cet appareil doit accepter toute interférence reçue, y<br />
compris les interférences susceptibles <strong>de</strong> provoquer<br />
un fonctionement peu satisfaisant.<br />
El aparato cumple las normas FCC, Parte 15 y 21 CFR<br />
1040.10. Funcionamiento <strong>de</strong>pendiente <strong>de</strong> dos<br />
condiciones siguientes:<br />
1. Este aparato no pue<strong>de</strong> provocar interferencia dañina, y<br />
2. Este aparato <strong>de</strong>be aceptar cualquier interferencia<br />
recibida, incluyendo las interferencias que pue<strong>de</strong>n<br />
provocar un funcionamiento insuficiente.<br />
✔<br />
✔<br />
✔<br />
✔<br />
PREPARATIONS<br />
Attaching and charging the battery pack*<br />
1 Switch off the set. Attach the battery pack<br />
as shown.<br />
2 Connect the supplied adapter to the set and<br />
the main power supply (as shown). Charge<br />
until the red indicator turns off (approximately<br />
4.5 - 6.5 hours when unit is charged from<br />
power off).<br />
TIP<br />
• It is normal for the battery pack to become<br />
warm during charging.<br />
• is shown on the screen when battery<br />
power is running low.<br />
Detaching the battery pack<br />
1 Switch off the set.<br />
2 Unplug the AC adapter.<br />
3 Turn the player upsi<strong>de</strong> down.<br />
4 Press down the battery pack lock switch ➊.<br />
5 Sli<strong>de</strong> off the battery pack as shown ➋ ➌.<br />
* Rechargeable batteries have a limited<br />
number of charge cycles and may<br />
eventually need to be replaced. Battery<br />
life and number of charge cycles vary by<br />
use and settings.<br />
POWER<br />
ON<br />
OFF<br />
POWER<br />
ON<br />
OFF<br />
✔<br />
CAUTION<br />
- Batteries contain chemical substances, so they should be disposed of<br />
properly.<br />
- Danger of explosion if battery is incorrectly replaced. Replace only with<br />
the same or equivalent type.<br />
- Incorrect use of batteries can cause electrolyte leakage<br />
and will corro<strong>de</strong> the compartment or cause the batteries to burst.<br />
- Remove the batteries if the set is not to be used for a long time.<br />
Perchlorate Material – special handling may apply. See<br />
www.dtsc.ca.gov/hazardouswaste/perchlorate.<br />
INTRODUCTION<br />
Playable disc formats<br />
In addition to <strong>DVD</strong>-Vi<strong>de</strong>o disc, you will also be able to play all Vi<strong>de</strong>o CDs and<br />
audio CDs (including CDR, CDRW,<strong>DVD</strong>±R and DVR±RW).<br />
<strong>DVD</strong>-Vi<strong>de</strong>o<br />
Depending on the material on the disc (a movie, vi<strong>de</strong>o clips, a<br />
drama series, etc.) these discs may have one or more Titles, and<br />
each Title may have one or more Chapters. To make access easy<br />
and convenient, your player lets you move between Titles, and also<br />
between Chapters.<br />
Vi<strong>de</strong>o CD<br />
Depending on the material on the disc (a movie, vi<strong>de</strong>o clips, a<br />
drama series, etc.) these discs may have one or more Tracks, and<br />
tracks may have one or more in<strong>de</strong>xes, as indicated on the disc<br />
case.To make access easy and convenient, your player lets you<br />
move between tracks and between in<strong>de</strong>xes.<br />
Audio CD / MP3<br />
Audio CDs / MP3 CD contain music tracks only. You can play them<br />
in the conventional way through a stereo system using the keys<br />
on the remote control and/or main unit, or via the TV using the On<br />
Screen Display (OSD).<br />
CD with JPEG files<br />
You can also view JPEG still photos on this player.<br />
WARRANTY COVERAGE:<br />
PHILIPS warranty obligation is limited to the terms set forth below.<br />
WHO IS COVERED:<br />
<strong>Philips</strong> warrants the product to the original purchaser or the person receiving the product<br />
as a gift against <strong>de</strong>fects in materials and workmanship as based on the date of original<br />
purchase ("Warranty Period") from an Authorized Dealer.The original sales receipt<br />
showing the product name and the purchase date from an authorized retailer is<br />
consi<strong>de</strong>red such proof.<br />
WHAT IS COVERED:<br />
The <strong>Philips</strong> warranty covers new products if a <strong>de</strong>fect arises and a valid claim is received by<br />
<strong>Philips</strong> within the Warranty Period.At its option, <strong>Philips</strong> will either (1) repair the product<br />
at no charge, using new or refurbished replacement parts, or (2) exchange the product<br />
with a product that is new or which has been manufactured from new, or serviceable<br />
used parts and is at least functionally equivalent or most comparable to the original<br />
product in <strong>Philips</strong> current inventory, or (3) refund the original purchase price of the<br />
product.<br />
<strong>Philips</strong> warrants replacement products or parts provi<strong>de</strong>d un<strong>de</strong>r this warranty against<br />
<strong>de</strong>fects in materials and workmanship from the date of the replacement or repair for<br />
ninety (90) days or for the remaining portion of the original product's warranty, whichever<br />
provi<strong>de</strong>s longer coverage for you.When a product or part is exchanged, any replacement<br />
item becomes yourproperty and the replaced item becomes <strong>Philips</strong>' property.When a<br />
refund is given, your product becomes <strong>Philips</strong>' property.<br />
Note: Any product sold and i<strong>de</strong>ntified as refurbished or renewed carries a<br />
ninety (90) day limited warranty.<br />
Replacement product can only be sent if all warranty requirements are met.<br />
Failure to follow all requirements can result in <strong>de</strong>lay.<br />
WHAT IS NOT COVERED - EXCLUSIONS AND LIMITATIONS:<br />
This Limited Warranty applies only to the new products manufactured by or for <strong>Philips</strong><br />
that can be i<strong>de</strong>ntified by the tra<strong>de</strong>mark, tra<strong>de</strong> name, or logo affixed to it.This Limited<br />
Warranty does not apply to any non-<strong>Philips</strong> hardware product or any software, even if<br />
packaged or sold with the product. Non-<strong>Philips</strong> manufacturers, suppliers, or publishers<br />
may provi<strong>de</strong> a separate warranty for their own products packaged with the bundled<br />
product.<br />
<strong>Philips</strong> is not liable for any damage to or loss of any programs, data, or other information<br />
stored on any media contained within the product, or any non-<strong>Philips</strong> product or part not<br />
covered by this warranty. Recovery or reinstallation of programs, data or other<br />
information is not covered un<strong>de</strong>r this Limited Warranty.<br />
This warranty does not apply (a) to damage caused by acci<strong>de</strong>nt, abuse, misuse,<br />
misapplication, or non-<strong>Philips</strong> product, (b) to damage caused by service performed by<br />
anyone other than <strong>Philips</strong> or <strong>Philips</strong> Authorized Service Location, (c) to a product or a<br />
part that has been modified without the written permission of <strong>Philips</strong>, or (d) if any <strong>Philips</strong><br />
serial number has been removed or <strong>de</strong>faced, or (e) product, accessories or consumables<br />
sold "AS IS" without warranty of any kind by including refurbished <strong>Philips</strong> product sold<br />
"AS IS" by some retailers.<br />
This Limited Warranty does not cover:<br />
• Shipping charges to return <strong>de</strong>fective product to <strong>Philips</strong>.<br />
• Labor charges for installation or setup of the product, adjustment of customer controls<br />
on the product, and installation or repair of antenna systems outsi<strong>de</strong> of the product.<br />
• Product repair and/or part replacement because of improper installation, connections to<br />
improper voltage supply, abuse, neglect, misuse, acci<strong>de</strong>nt, unauthorized repair or other<br />
cause not within the control of <strong>Philips</strong>.<br />
• Damage or claims for products not being available for use, or for lost data or lost<br />
software.<br />
• Damage occurring to product during shipping.<br />
• A product that requires modification or adaptation to enable it to operate in any<br />
country other than the country for which it was <strong>de</strong>signed, manufactured, approved<br />
and/or authorized, or repair of products damaged by these modifications.<br />
• A product used for commercial or institutional purposes (including but not limited to<br />
rental purposes).<br />
• Product lost in shipment and no signature verification receipt can be provi<strong>de</strong>d.<br />
• Failure to operate per Owner's Manual.<br />
TO OBTAIN ASSISTANCE IN THE U.S.A., PUERTORICO, OR U.S. VIRGIN<br />
ISLANDS…<br />
Contact <strong>Philips</strong> Customer Care Center at:<br />
1-888-PHILIPS (1-888-744-5477)<br />
TO OBTAIN ASSISTANCE IN CANADA…<br />
1-800-661-6162 (French Speaking)<br />
1-888-PHILIPS (1-888-744-5477) - (English or Spanish Speaking)<br />
REPAIR OR REPLACEMENT AS PROVIDED UNDER THIS WARRANTY IS THE<br />
EXCLUSIVE REMEDY FOR THE CONSUMER. PHILIPS SHALL NOT BE LIABLE FOR<br />
ANY INCIDENTAL OR CONSEQUENTIAL DAMAGES FOR BREACH OF ANY<br />
EXPRESS OR IMPLIED WARRANTY ON THIS PRODUCT. EXCEPT TO THE EXTENT<br />
PROHIBITED BY APPLICABLE LAW,ANY IMPLIED WARRANTY OF<br />
MERCHANTABILITY OR FITNESS FOR A PARTICULAR PURPOSE ON THIS<br />
PRODUCT IS LIMITED IN DURATION TO THE DURATION OF THIS WARRANTY.<br />
Some states do not allow the exclusions or limitation of inci<strong>de</strong>ntal or consequential<br />
damages, or allow limitations on how long an implied warranty lasts, so the above<br />
limitations or exclusions may not apply to you.<br />
This warranty gives you specific legal rights. You may have other rights which vary from state/province to state/province.<br />
<strong>Philips</strong>, P.O. Box 671539, Marietta, GA. 30006-0026<br />
PHILIPS LIMITED WARRANTY<br />
ONE (1) YEAR<br />
COUVERTURE DE GARANTIE:<br />
La provision pour garanties <strong>de</strong> PHILIPS se limite aux termes énumérés ci-<strong>de</strong>ssous.<br />
QUI EST COUVERT?<br />
<strong>Philips</strong> garantit le produit au premier acheteur ou à la personne recevant le produit en ca<strong>de</strong>au<br />
contre tout défaut <strong>de</strong> matière ou <strong>de</strong> main d’oeuvre conformément à la date d’achat originale («<br />
Pério<strong>de</strong> <strong>de</strong> garantie ») d’un distributeur agréé. Le reçu <strong>de</strong> vente original indiquant le nom du<br />
produit ainsi que la date d’achat d’un détaillant agréé est considéré comme une preuve d'achat.<br />
QU'EST-CE QUI EST COUVERT?<br />
La garantie <strong>de</strong> <strong>Philips</strong> couvre les nouveaux produits en cas <strong>de</strong> défaut et suivant la réception par<br />
<strong>Philips</strong> d’une réclamation vali<strong>de</strong> dans les limites <strong>de</strong> la garantie. <strong>Philips</strong> s’engage, à son choix, à<br />
(1) réparer le produit gratuitement avec <strong>de</strong>s pièces <strong>de</strong> rechange neuves ou remises à neuf, ou à<br />
(2) échanger le produit pour un produit neuf ou ayant été fabriqué à partir <strong>de</strong> pièces neuves ou<br />
usagées en bon état et au moins fonctionnellement équivalent ou comparable au produit<br />
d’origine dans l’inventaire actuel <strong>de</strong> <strong>Philips</strong>, ou à (3) rembourser le prix d’achat initial du produit.<br />
<strong>Philips</strong> garantit les produits ou pièces <strong>de</strong> remplacement prévus sous cette garantie contre tout<br />
défaut <strong>de</strong> matière ou <strong>de</strong> main d’oeuvre à partir <strong>de</strong> la date <strong>de</strong> remplacement ou <strong>de</strong> réparation pour<br />
une pério<strong>de</strong> <strong>de</strong> quatre-vingt-dix (90) jours ou pour la portion restante <strong>de</strong> la garantie du produit<br />
d’origine, la plus longue <strong>de</strong> ces couvertures étant à retenir. Lorsqu’un produit ou une pièce est<br />
échangée, tout article <strong>de</strong> rechange <strong>de</strong>vient votre propriété et l’article remplacé <strong>de</strong>vient la propriété<br />
<strong>de</strong> <strong>Philips</strong>. Lorsqu’un remboursement est effectué, votre produit <strong>de</strong>vient la propriété <strong>de</strong> <strong>Philips</strong>.<br />
Remarque : tout produit vendu et i<strong>de</strong>ntifié comme étant remis à neuf ou rénové<br />
porte une garantie limitée <strong>de</strong> quatre-vingt-dix (90) jours.<br />
Un produit <strong>de</strong> remplacement ne pourra être envoyé que si toutes les exigences <strong>de</strong> la<br />
garantie ont été respectées. Tout manquement <strong>de</strong> répondre à toutes les exigences<br />
pourra entraîner un délai.<br />
CE QUI N’EST PAS COUVERT - EXCLUSIONS ET LIMITATIONS:<br />
Cette garantie limitée ne s’applique qu’aux nouveaux produits fabriqués par ou pour <strong>Philips</strong><br />
pouvant être i<strong>de</strong>ntifiés par la marque <strong>de</strong> commerce, le nom commercial ou le logo qui y sont<br />
apposés. Cette garantie limitée ne s’applique à aucun produit matériel ou logiciel non <strong>Philips</strong>,<br />
même si celui-ci est incorporé au produit ou vendu avec celui-ci. Les fabricants, fournisseurs ou<br />
éditeurs non-<strong>Philips</strong> peuvent fournir une garantie séparée pour leurs propres produits intégrés<br />
au produit fourni.<br />
<strong>Philips</strong> ne saurait être tenu responsable <strong>de</strong> tout dommage ou perte <strong>de</strong> programmes, données ou<br />
autres informations mis en mémoire dans tous médias contenus dans le produit ou <strong>de</strong> tout<br />
produit ou pièce non-<strong>Philips</strong> non couvert par cette garantie. La récupération ou réinstallation <strong>de</strong>s<br />
programmes, données ou autres informations n’est pas couverte par cette garantie limitée.<br />
Cette garantie ne s’applique pas (a) aux dommages causés par un acci<strong>de</strong>nt, un abus, un mauvais<br />
usage, une mauvaise application ou à un produit non-<strong>Philips</strong>, (b) aux dommages causés par un<br />
service réalisé par quiconque autre que <strong>Philips</strong> ou qu’un centre <strong>de</strong> service agréé <strong>de</strong> <strong>Philips</strong>, (c) à<br />
un produit ou pièce ayant été modifié sans la permission écrite <strong>de</strong> <strong>Philips</strong>, ou (d) si tout numéro<br />
<strong>de</strong> série <strong>de</strong> <strong>Philips</strong> a été supprimé ou défiguré, ou (e) à un produit, accessoire ou produit non<br />
durable vendu « TEL QUEL » sans garantie <strong>de</strong> quelque <strong>de</strong>scription que ce soit par l’inclusion <strong>de</strong><br />
produits remis à neuf <strong>Philips</strong> vendu « TEL QUEL » par certains détaillants.<br />
Cette garantie limitée ne couvre pas:<br />
• les frais d'expédition pour le renvoi du produit défectueux à <strong>Philips</strong>.<br />
• les frais <strong>de</strong> main-d'oeuvre pour l'installation ou la configuration du produit, le réglage <strong>de</strong>s<br />
comman<strong>de</strong>s sur le produit du client ainsi que l'installation ou la réparation du système<br />
d'antenne externe au produit.<br />
• la réparation du produit et/ou le remplacement <strong>de</strong>s pièces à cause d'une mauvaise installation,<br />
d'un raccor<strong>de</strong>ment à une alimentation électrique incorrecte, d’un <strong>emploi</strong> abusif, d'une<br />
négligence, d’un mauvais usage, d'un acci<strong>de</strong>nt, d'une réparation non autorisée ou <strong>de</strong> toute autre<br />
cause non contrôlable par <strong>Philips</strong>.<br />
• tout dommage ou réclamation pour <strong>de</strong>s produits non disponibles à l’utilisation ou pour <strong>de</strong>s<br />
données perdues ou logiciel perdu.<br />
• tout dommage au produit encouru lors <strong>de</strong> l’expédition.<br />
• un produit nécessitant une modification ou adaptation afin <strong>de</strong> permettre l'utilisation dans tout<br />
pays autre que celui pour lequel il était désigné, fabriqué, approuvé et/ou autorisé ou toute<br />
réparation du produit endommagé par ces modifications.<br />
• un produit utilisé à <strong>de</strong>s fins commerciales ou institutionnelles (y compris mais non <strong>de</strong> façon<br />
limitative les fins <strong>de</strong> location).<br />
• un produit perdu lors <strong>de</strong> l’expédition sans preuve signée <strong>de</strong> la réception.<br />
• tout manquement d’exploiter le produit selon le manuel <strong>de</strong> l’utilisateur.<br />
POUR OBTENIR DE L’AIDE AUX ÉTATS-UNIS, À PUERTO RICO OU<br />
AUX ÎLES VIERGES<br />
Américaines …Communiquez avec le centre <strong>de</strong> service à la clientèle <strong>de</strong> <strong>Philips</strong> au:<br />
1-888-PHILIPS (1-888-744-5477)<br />
POUR OBTENIR DE L’AIDE AU CANADA…<br />
1-800-661-6162 (pour un service en français)<br />
1-888-PHILIPS (1-888-744-5477) (pour un service en anglais ou en espagnol)<br />
LA RÉPARATION OU LE REMPLACEMENT CONFORMÉMENT À CETTE GARANTIE<br />
CONSTITUE LE SEUL REMÈDE POUR LE CONSOMMATEUR. PHILIPS N’EST AUCUNEMENT<br />
RESPONSABLE DE TOUT DOMMAGE ACCESSOIRE OU INDIRECT RÉSULTANT DE LA<br />
VIOLATION DE TOUTE GARANTIE EXPRESSE OU IMPLICITE SUR CE PRODUIT. SAUF<br />
DANS LA MESURE INTERDITE PAR LES LOIS APPLICABLES,TOUTE GARANTIE IMPLICITE<br />
DE QUALITÉ LOYALE ET MARCHANDE OU D’UTILITÉ PARTICULIÈRE DU PRODUIT EST<br />
LIMITÉE DANS LE TEMPS À LA DURÉE DE CETTE GARANTIE.<br />
Certains états ne reconnaissent pas l'exclusion ou la limitation <strong>de</strong> la responsabilité pour<br />
dommages indirects ou accessoires, ou autorisent <strong>de</strong>s limitations sur la durée d’une garantie<br />
implicite, il est donc possible que les limitations ou exclusions mentionnées ci-<strong>de</strong>ssus soient sans<br />
effet dans votre cas.<br />
Cette garantie vous donne <strong>de</strong>s droits légaux spécifiques. Il est possible que vous bénéficiiez <strong>de</strong> droits supplémentaires variant d'un État/Province à l'autre.<br />
<strong>Philips</strong>, P.O. Box 671539, Marietta, GA. 30006-0026<br />
GARANTIE LIMITÉE PHILIPS<br />
UN (1) AN<br />
COBERTURA DE GARANTÍA:<br />
La obligación <strong>de</strong> la garantía PHILIPS se limita a los términos establecidos a continuación.<br />
QUIÉNES ESTÁN CUBIERTOS:<br />
<strong>Philips</strong> le garantiza el producto al comprador original o a la persona que lo recibe como regalo<br />
contra <strong>de</strong>fectos en los materiales y en la mano <strong>de</strong> obra, a partir <strong>de</strong> la fecha <strong>de</strong> la compra original<br />
("período <strong>de</strong> garantía") en el distribuidor autorizado. El recibo <strong>de</strong> ventas, don<strong>de</strong> aparecen el<br />
nombre <strong>de</strong>l producto y la fecha <strong>de</strong> la compra en un distribuidor autorizado, se consi<strong>de</strong>rará<br />
comprobante <strong>de</strong> esta fecha.<br />
LO QUE ESTÁ CUBIERTO:<br />
La garantía <strong>Philips</strong> cubre productos nuevos si aparece algún <strong>de</strong>fecto y <strong>Philips</strong> recibe un reclamo<br />
válido <strong>de</strong>ntro <strong>de</strong>l período <strong>de</strong> garantía.A su propia discreción, <strong>Philips</strong> (1) reparará el producto sin<br />
costo, usando piezas <strong>de</strong> repuesto nuevas o reacondicionadas; (2) cambiará el producto por uno<br />
nuevo o que se ha fabricado con piezas nuevas o usadas utilizables, y que sea al menos<br />
funcionalmente equivalente o lo más parecido al producto original <strong>de</strong>l inventario actual <strong>de</strong><br />
<strong>Philips</strong>; o (3) reembolsará el precio <strong>de</strong> compra original <strong>de</strong>l producto.<br />
<strong>Philips</strong> garantiza productos o piezas <strong>de</strong> repuesto proporcionados bajo esta garantía contra<br />
<strong>de</strong>fectos en los materiales y en la mano <strong>de</strong> obra durante noventa (90) días o por el resto <strong>de</strong> la<br />
garantía <strong>de</strong>l producto original, lo que le promocione más cobertura. Cuando se cambia un<br />
producto o una pieza, el artículo que usted recibe pasa a ser <strong>de</strong> su propiedad y el que le entrega<br />
a <strong>Philips</strong> pasa a ser propiedad <strong>de</strong> éste último. Cuando se proporcione un reembolso, su producto<br />
pasa a ser propiedad <strong>de</strong> <strong>Philips</strong>.<br />
Nota: Cualquier producto que se venda y que esté i<strong>de</strong>ntificado como<br />
reacondicionado o renovado tiene una garantía limitada <strong>de</strong> noventa (90) días.<br />
El producto <strong>de</strong> reemplazo sólo se pue<strong>de</strong> enviar si se cumplen todos los requisitos <strong>de</strong><br />
la garantía. El incumplimiento <strong>de</strong> tales requisitos pue<strong>de</strong> ocasionar un retardo.<br />
LO QUE NO SE CUBRE: EXCLUSIONES Y LIMITACIONES:<br />
La garantía limitada se aplica sólo a los productos nuevos fabricados por <strong>Philips</strong> o para <strong>Philips</strong><br />
que se pue<strong>de</strong>n i<strong>de</strong>ntificar por la marca registrada, el nombre comercial o por tener el logotipo<br />
correspondiente. Esta garantía limitada no se aplica a ningún producto <strong>de</strong> hardware ni <strong>de</strong><br />
software que no sea <strong>Philips</strong>, incluso si viene empacado con el producto o si se ven<strong>de</strong> junto con<br />
éste. Los fabricantes, proveedores o editores que no sean <strong>Philips</strong> pue<strong>de</strong>n proporcionar una<br />
garantía por separado para sus propios productos empacados con el producto <strong>Philips</strong>.<br />
<strong>Philips</strong> no es responsable por ningún daño o pérdida <strong>de</strong> programas, datos u otra información<br />
almacenados en algún medio contenido en el producto, ni por ningún producto o pieza que no<br />
sea <strong>Philips</strong> que no esté cubierta por esta garantía. La recuperación o la reinstalación <strong>de</strong><br />
programas, datos u otra información no está cubierta por esta garantía limitada.<br />
Esta garantía no se aplica (a) a daños causados por acci<strong>de</strong>nte, abuso, mal uso, mala aplicación o a<br />
productos que no sean <strong>Philips</strong>; (b) a daño provocado por servicio realizado por cualquier<br />
persona distinta <strong>de</strong> <strong>Philips</strong> o <strong>de</strong> un establecimiento <strong>de</strong> servicio autorizado <strong>de</strong> <strong>Philips</strong>; (c) a<br />
productos o piezas que se hayan modificado sin la autorización por escrito <strong>de</strong> <strong>Philips</strong>; (d) si se ha<br />
retirado o <strong>de</strong>sfigurado el número <strong>de</strong> serie <strong>de</strong> <strong>Philips</strong>; y tampoco se aplica la garantía a (e)<br />
productos, accesorios o insumos vendidos TAL COMO ESTÁN sin garantía <strong>de</strong> ningún tipo, lo<br />
que incluye productos <strong>Philips</strong> vendidos TAL COMO ESTÁN por algunos distribuidores.<br />
Esta garantía limitada no cubre:<br />
• Los costos <strong>de</strong> envío al <strong>de</strong>volver el producto <strong>de</strong>fectuoso a <strong>Philips</strong>.<br />
• Los costos <strong>de</strong> mano <strong>de</strong> obra por la instalación o configuración <strong>de</strong>l producto, el ajuste <strong>de</strong><br />
controles <strong>de</strong>l cliente en el producto y la instalación o reparación <strong>de</strong> sistemas <strong>de</strong> antena<br />
externos al producto.<br />
• La reparación <strong>de</strong>l producto y/o el reemplazo <strong>de</strong> piezas <strong>de</strong>bido a la instalación ina<strong>de</strong>cuada, a<br />
conexiones hechas a un suministro <strong>de</strong> voltaje ina<strong>de</strong>cuado, al abuso, <strong>de</strong>scuido, mal uso,<br />
acci<strong>de</strong>ntes, reparaciones no autorizadas u otras causas que no se encuentren bajo el control <strong>de</strong><br />
<strong>Philips</strong>.<br />
• Daños o reclamos por productos que no están disponibles para su uso, por datos perdidos o<br />
por pérdida <strong>de</strong> software.<br />
• Daños ocurridos al producto durante el envío.<br />
• Un producto que requiera modificación o adaptación para permitir su funcionamiento en algún<br />
país que no sea el país para el que se diseñó, fabricó, aprobó y/o autorizó o la reparación <strong>de</strong><br />
productos dañados por estas modificaciones.<br />
• Un producto que se use para propósitos comerciales o institucionales (lo que incluye, entre<br />
otros, los <strong>de</strong> alquiler).<br />
• La pérdida <strong>de</strong>l producto en el envío y cuando no se pueda proporcionar una firma que<br />
verifique el recibo.<br />
• No operar según el Manual <strong>de</strong>l propietario.<br />
PARA OBTENER AYUDA EN LOS EE.UU., PUERTO RICO O EN LAS<br />
ISLAS VÍRGENES DE LOS EE.UU...<br />
Comuníquese con el Centro <strong>de</strong> Atención al Cliente al: 1-888-PHILIPS (1-888-744-5477)<br />
PARA OBTENER AYUDA EN CANADÁ…<br />
1-800-661-6162 (si habla francés)<br />
1-888-744-5477 - (Si habla inglés o español)<br />
LA REPARACIÓN O EL REEMPLAZO, SEGÚN LO DISPONE ESTA GARANTÍA, ES LA<br />
SOLUCIÓN EXCLUSIVA PARA EL CLIENTE. PHILIPS NO SERÁ RESPONSABLE DE LOS<br />
DAÑOS INCIDENTALES O INDIRECTOS QUE INFRINJAN ALGUNA GARANTÍA EXPRESA<br />
O IMPLÍCITA SOBRE ESTE PRODUCTO. CON EXCEPCIÓN DE LO QUE PROHÍBA LA LEY<br />
VIGENTE,TODA GARANTÍA IMPLÍCITA DE COMERCIABILIDAD Y ADECUACIÓN PARA<br />
UN PROPÓSITO PARTICULAR EN ESTE PRODUCTO ESTÁ LIMITADA EN DURACIÓN A<br />
LO QUE ESPECIFIQUE ESTA GARANTÍA.<br />
Algunos estados no permiten las exclusiones ni la limitación <strong>de</strong> los daños inci<strong>de</strong>ntales o<br />
indirectos, ni permiten limitaciones sobre la duración <strong>de</strong> la garantía implícita, <strong>de</strong> modo que las<br />
limitaciones o exclusiones anteriores pue<strong>de</strong>n no aplicarse a usted.<br />
Esta garantía le otorga <strong>de</strong>rechos legales específicos. Usted pue<strong>de</strong> tener otros <strong>de</strong>rechos que varían entre los diferentes estados y provincias.<br />
<strong>Philips</strong>, P.O. Box 671539, Marietta, GA. 30006-0026<br />
GARANTÍA LIMITADA PHILIPS<br />
UN (1) AÑO<br />
Registering your mo<strong>de</strong>l with PHILIPS makes you eligible for all of the valuable benefits listed below, so don't miss out.<br />
Complete and return your Product Registration Card at once, or register online at www.philips.com/usasupport<br />
to ensure:<br />
Return your Product Registration Card or register online at<br />
www.philips.com/usasupport today to get the very most from your purchase.<br />
Visit our World Wi<strong>de</strong> Web Site at http://www.philips.com/usasupport<br />
Congratulations on your purchase,<br />
and welcome to the “family!”<br />
Dear PHILIPS product owner:<br />
Thank you for your confi<strong>de</strong>nce in PHILIPS.You’ve selected one of<br />
the best-built, best-backed products available today.We’ll do everything<br />
in our power to keep you happy with your purchase for many<br />
years to come.<br />
As a member of the PHILIPS “family,” you’re entitled to protection<br />
by one of the most comprehensive warranties and outstanding<br />
service networks in the industry.What’s more, your purchase guarantees<br />
you’ll receive all the information and special offers for which<br />
you qualify, plus easy access to accessories from our convenient<br />
home shopping network.<br />
Most importantly, you can count on our uncompromising commitment<br />
to your total satisfaction.<br />
All of this is our way of saying welcome - and thanks for investing<br />
in a PHILIPS product.<br />
P.S. To get the most from your PHILIPS purchase, be<br />
sure to complete and return your Product Registration<br />
Card at once, or register online at:<br />
www.philips.com/usasupport<br />
For Customer Use<br />
Enter below the Serial No. which is located<br />
on the rear of the cabinet. Retain this<br />
information for future reference.<br />
Mo<strong>de</strong>l No.__________________________<br />
Serial No.<br />
________________________<br />
Know these<br />
safetysymbols<br />
This “bolt of lightning” indicates uninsulated<br />
material within your unit may<br />
cause an electrical shock. For the safety of<br />
everyone in your household, please do not<br />
remove product covering.<br />
The “exclamation point” calls attention<br />
to features for which you should<br />
read the enclosed literature closely to prevent<br />
operating and maintenance problems.<br />
WARNING: To reduce the risk of fire or<br />
electric shock, this apparatus should not be<br />
exposed to rain or moisture and objects<br />
filled with liquids, such as vases, should not<br />
be placed on this apparatus.<br />
CAUTION: To prevent electric shock,<br />
match wi<strong>de</strong> bla<strong>de</strong> of plug to wi<strong>de</strong> slot, fully<br />
insert.<br />
ATTENTION: Pour éviter les choc électriques,<br />
introduire la lame la plus large <strong>de</strong> la<br />
fiche dans la borne correspondante <strong>de</strong> la<br />
prise et pousser jusqu’au fond.<br />
CAUTION<br />
RISK OF ELECTRIC SHOCK<br />
DO NOT OPEN<br />
CAUTION: TO REDUCE THE RISK OF ELECTRIC SHOCK, DO NOT<br />
REMOVE COVER (OR BACK). NO USER-SERVICEABLE PARTS<br />
INSIDE. REFER SERVICING TO QUALIFIED SERVICE PERSONNEL.<br />
t<br />
s<br />
*Proof of<br />
Purchase<br />
Returning the enclosed card guarantees<br />
that your date of purchase will be on file,<br />
so no additional paperwork will be<br />
required from you to obtain warranty<br />
service.<br />
*Product Safety<br />
Notification<br />
By registering your product, you'll receive<br />
notification - directly from the manufacturer<br />
- in the rare case of a product<br />
recall or safety <strong>de</strong>fect.<br />
*Additional Benefits<br />
Registering your product guarantees that<br />
you'll receive all of the privileges to<br />
which you're entitled, including special<br />
money-saving offers.<br />
Al registrar su mo<strong>de</strong>lo con PHILIPS usted cumplirá con los requisitos para obtener todos los valiosos beneficios que se<br />
indican a continuación, ¡no se los pierda! Complete y <strong>de</strong>vuelva su Tarjeta <strong>de</strong> registro <strong>de</strong> producto o regístrese en línea<br />
en www.philips.com/usasupport para asegurarse <strong>de</strong>:<br />
Devuelva su Tarjeta <strong>de</strong> registro <strong>de</strong> producto o regístrese en línea en<br />
www.philips.com/usasupport hoy mismo para aprovechar al máximo su compra.<br />
Sólo para uso <strong>de</strong>l cliente<br />
Escriba a continuación el Nº <strong>de</strong> serie, el cual se<br />
ubica en la parte posterior <strong>de</strong>l gabinete.<br />
Guar<strong>de</strong> esta información para futura referencia.<br />
Nº <strong>de</strong> mo<strong>de</strong>lo. __________________________<br />
Nº <strong>de</strong> serie. __________________________<br />
Conozca estos<br />
símbolos <strong>de</strong>seguridad<br />
Este “relámpago” indica material no aislado<br />
<strong>de</strong>ntro <strong>de</strong> la unidad que pue<strong>de</strong> causar una<br />
<strong>de</strong>scarga eléctrica. Para la seguridad <strong>de</strong> todos en<br />
su hogar, por favor no retire la cubierta <strong>de</strong>l producto.<br />
El “signo <strong>de</strong> exclamación” llama la atención<br />
hacia funciones sobre las que <strong>de</strong>bería<br />
leer con atención en la literatura adjunta para<br />
evitar problemas operativos y <strong>de</strong> mantenimiento.<br />
ADVERTENCIA Para reducir el riesgo <strong>de</strong><br />
incendios o <strong>de</strong> <strong>de</strong>scarga eléctrica, este aparato<br />
no se <strong>de</strong>be exponer a la lluvia ni a la humedad, y<br />
no se le <strong>de</strong>ben colocar encima objetos llenos <strong>de</strong><br />
líquido como jarrones.<br />
PRECAUCIÓN: Para evitar <strong>de</strong>scargas eléctricas,<br />
haga que la paleta ancha <strong>de</strong>l enchufe coincida<br />
con la ranura ancha e introdúzcala hasta el<br />
fondo.<br />
ATTENTION: Pour éviter les chocs électriques,<br />
introduire la lame la plus large <strong>de</strong> la fiche<br />
dans la borne correspondante <strong>de</strong> la prise et<br />
pousser jusqu’au fond.<br />
s<br />
t<br />
AVISO<br />
RIESGO DE CHOQUE ELÉCTRICO<br />
NO ABRIR<br />
Atención: Para reducir el riesgo <strong>de</strong> choque elécrico,<br />
no quite la tapa (o el panel posterior).<br />
En su interior no hay piezas que el usuario pueda reparar.<br />
Para servicio dirijase a personel calificado.<br />
Visite nuestro sitio en el World Wi<strong>de</strong> Web en http://www.philips.com/usasupport<br />
t<br />
s<br />
¡Felicitaciones por su compra<br />
y bienvenido a la “familia”!<br />
Estimado propietario <strong>de</strong> un producto PHILIPS:<br />
Gracias por su confianza en PHILIPS. Usted ha escogido uno <strong>de</strong><br />
los productos mejor construidos y con mejor respaldo<br />
disponible hoy en día. Haremos todo lo que esté a nuestro<br />
alcance por mantenerle satisfecho con su compra durante<br />
muchos años.<br />
Como miembro <strong>de</strong> la “familia” PHILIPS, usted tiene <strong>de</strong>recho a<br />
estar protegido con una <strong>de</strong> las garantías más completas y re<strong>de</strong>s<br />
<strong>de</strong> servicio más sobresalientes <strong>de</strong> la industria. Lo que es más: su<br />
compra le garantiza que recibirá toda la información y ofertas<br />
especiales a las que tiene <strong>de</strong>recho, a<strong>de</strong>más <strong>de</strong> un fácil acceso a<br />
los accesorios <strong>de</strong>s<strong>de</strong> nuestra cómoda red <strong>de</strong> compra <strong>de</strong>s<strong>de</strong> el<br />
hogar.<br />
Y lo que es más importante: usted pue<strong>de</strong> confiar en nuestro<br />
irrestricto compromiso con su satisfacción total.<br />
Todo esto es nuestra manera <strong>de</strong> <strong>de</strong>cirle bienvenido y gracias<br />
por invertir en un producto PHILIPS.<br />
P.S.: Para aprovechar al máximo su compra<br />
PHILIPS, asegúrese <strong>de</strong> llenar y <strong>de</strong> <strong>de</strong>volver inmediatamente<br />
su Tarjeta <strong>de</strong> registro <strong>de</strong>l producto o<br />
regístrese en línea en<br />
www.philips.com/usasupport<br />
*Comprobante <strong>de</strong><br />
Compra<br />
La <strong>de</strong>volución <strong>de</strong> la tarjeta incluida garantiza<br />
que se archive la fecha <strong>de</strong> compra, <strong>de</strong><br />
modo que no necesitará más papeleo para<br />
obtener el servicio <strong>de</strong> garantía.<br />
*Seguridad <strong>de</strong>l producto<br />
Notificación<br />
Al registrar su producto, recibirá la notificación<br />
(directamente <strong>de</strong>l fabricante) en el<br />
raro caso <strong>de</strong> un retiro <strong>de</strong> productos o <strong>de</strong><br />
<strong>de</strong>fectos en la seguridad.<br />
*Beneficios adicionales<br />
Registrar su producto garantiza que<br />
recibirá todos los privilegios a los cuales<br />
tiene <strong>de</strong>recho, incluyendo las ofertas<br />
especiales para ahorrar dinero.<br />
L’enregistrement <strong>de</strong> votre modèle auprès <strong>de</strong> PHILIPS confirme votre éligibilité à tous les bénéfices mentionnés<br />
ci-<strong>de</strong>ssous. Remplissez et retournez votre carte d'enregistrement <strong>de</strong> produit le plus tôt possible ou enregistrez-vous en<br />
ligne à www.philips.com/usasupport pour assurer :<br />
Retournez votre carte d'enregistrement <strong>de</strong> produit ou enregistrez-vous en ligne à<br />
www.philips.com/usasupport le plus tôt possible pour profiter pleinement <strong>de</strong><br />
votre achat.<br />
À l’usage du client<br />
Entrez ci-<strong>de</strong>ssous le numéro <strong>de</strong> série qui se trouve<br />
à l’arrière du boîtier du dispositif. Conservez<br />
ces informations pour référence ultérieure.<br />
No. <strong>de</strong> modèle : ________________________<br />
No. <strong>de</strong> série : __________________________<br />
Sachez reconnaître ces symboles <strong>de</strong><br />
sécurité<br />
Ce symbole « d’éclair » s’applique aux<br />
matériaux non isolés présents dans votre<br />
appareil et pouvant causer un choc électrique.<br />
Pour assurer la sécurité <strong>de</strong>s membres <strong>de</strong> votre<br />
famille, veuillez ne pas enlever le couvercle <strong>de</strong><br />
votre produit.<br />
Les « points d’exclamation » ont pour<br />
but d’attirer votre attention sur <strong>de</strong>s caractéristiques<br />
à propos <strong>de</strong>squelles vous <strong>de</strong>vez lire<br />
soigneusement la documentation accompagnant<br />
l’appareil afin d’éviter tout problème d’exploitation<br />
ou d’entretien.<br />
AVERTISSEMENT : Afin <strong>de</strong> réduire les risques<br />
d’incendie ou <strong>de</strong> choc électrique, ne pas exposer<br />
cet appareil à la pluie ou à l’humidité et les objets<br />
remplis <strong>de</strong> liqui<strong>de</strong>, comme les vases, ne doivent<br />
pas être placés sur le <strong>de</strong>ssus <strong>de</strong> l’appareil.<br />
CAUTION : To prevent electric shock, match<br />
wi<strong>de</strong> bla<strong>de</strong> of plug to wi<strong>de</strong> slot, fully insert.<br />
ATTENTION : Pour éviter les chocs électriques,<br />
introduire la lame la plus large <strong>de</strong> la fiche<br />
dans la borne correspondante <strong>de</strong> la prise et<br />
pousser à fond.<br />
s<br />
t<br />
AVIS<br />
RISQUE DE CHOCS ÉLECTRIQUES<br />
NE PAS OUVRIR<br />
Attention: Afin <strong>de</strong> prévenir le risque <strong>de</strong> chocs électriques<br />
ne pas retirer les vis.<br />
Toute réparation <strong>de</strong>vrait être confiée à un personnel qualifié.<br />
Visitez notre site sur le Web à http://www.philips.com/usasupport<br />
t<br />
s<br />
Nous vous félicitons <strong>de</strong> votre achat et vous souhaitons<br />
la bienvenue dans la « famille »!<br />
Cher propriétaire d’un produit PHILIPS :<br />
Merci <strong>de</strong> votre confiance en PHILIPS.Vous avez choisi un produit<br />
<strong>de</strong> fabrication et <strong>de</strong> garantie supérieures parmi les meilleurs<br />
disponibles sur le marché. Et nous ferons tout en notre pouvoir<br />
pour que vous soyez pleinement satisfait <strong>de</strong> votre achat pour<br />
<strong>de</strong>s années à venir.<br />
En tant que membre <strong>de</strong> la « famille » PHILIPS, vous avez droit à<br />
une protection inégalée par l’une <strong>de</strong>s garanties les plus complètes<br />
<strong>de</strong> l’industrie ainsi qu’à <strong>de</strong>s réseaux <strong>de</strong> service sans pareil.<br />
De plus, votre achat garantit que vous recevrez toutes les informations<br />
et offres spéciales auxquelles vous avez droit, ainsi<br />
qu’un accès facile à toute une gamme d’accessoires disponibles<br />
via notre réseau <strong>de</strong> téléachat.<br />
Mais ce qui est encore plus important, vous pouvez compter sur<br />
notre engagement total quand il s’agit <strong>de</strong> votre entière satisfaction.<br />
C’est notre façon <strong>de</strong> vous souhaiter la bienvenue et <strong>de</strong><br />
vous remercier <strong>de</strong> votre investissement dans un produit<br />
PHILIPS.<br />
P.S. Pour bénéficier au maximum <strong>de</strong> votre produit<br />
PHILIPS, assurez-vous <strong>de</strong> remplir et <strong>de</strong> retourner<br />
votre carte d’enregistrement <strong>de</strong> produit le plus tôt<br />
possible ou enregistrez-vous en ligne à<br />
www.philips.com/usasupport<br />
*Preuve d’achat<br />
Retournez la carte d’enregistrement ciincluse<br />
afin <strong>de</strong> garantir que la date<br />
d’achat <strong>de</strong> votre produit sera classée<br />
dans nos dossiers et éviter ainsi le besoin<br />
<strong>de</strong> remplir d’autres formulaires afin<br />
d’obtenir votre service <strong>de</strong> garantie.<br />
*Avis sur la sécurité<br />
<strong>de</strong>s produits<br />
En enregistrant votre produit, vous serez<br />
avisé - directement par le fabriquant - <strong>de</strong><br />
toutes défectuosités compromettant la<br />
sécurité ou <strong>de</strong> tout retrait du produit du<br />
marché.<br />
*Bénéfices additionnels<br />
L’enregistrement <strong>de</strong> votre produit garantit<br />
que vous bénéficierez <strong>de</strong> tous les privilèges<br />
auxquels vous avez droit y compris<br />
<strong>de</strong>s offres-rabais spéciales.<br />
PREPARATIONS<br />
Connections<br />
Connecting headphones<br />
Connect the headphones into the PHONE 1 or the<br />
PHONE 2 jack of your set.<br />
Connecting additional equipment<br />
• Turn off your set before connecting to any additional equipment.<br />
• You can connect the player to a TV or an amplifier to enjoy <strong>DVD</strong>s or karaoke.<br />
AV IN<br />
On the <strong>DVD</strong> player panel, press AV-IN to select<br />
A/V IN (AUX).<br />
Connection<br />
Color<br />
Vi<strong>de</strong>o<br />
Yellow<br />
Audio (Left)<br />
White<br />
Audio (right)<br />
Red<br />
AV OUT<br />
On the <strong>DVD</strong> player panel, press AV IN/OUT to select<br />
A/V OUT.<br />
White<br />
Red<br />
Yellow<br />
White<br />
Red<br />
Ye
INTRODUCCIÓN<br />
Reproductor <strong>DVD</strong> portátil<br />
Su equipo <strong>de</strong> reproductor <strong>DVD</strong> portátil es un reproductor <strong>de</strong> vi<strong>de</strong>odiscos digitales<br />
compatibles con el estándar <strong>DVD</strong>-Ví<strong>de</strong>o universal. Con él podrá disfrutar <strong>de</strong> las<br />
películas en toda su dimensión con verda<strong>de</strong>ra calidad cinematográfica y sonido<br />
estéreo o multicanal (según el disco y la configuración <strong>de</strong>l sistema).<br />
El equipo también incorpora funciones exclusivas, tales como la selección <strong>de</strong><br />
idioma <strong>de</strong> la pista <strong>de</strong> sonido y los subtítulos o la visualización <strong>de</strong>s<strong>de</strong> diferentes<br />
ángulos <strong>de</strong> cámara (también <strong>de</strong>pendiendo <strong>de</strong>l disco).<br />
Más aún, el Bloqueo <strong>de</strong> Disco <strong>de</strong> <strong>Philips</strong> le permitirá <strong>de</strong>cidir qué discos pue<strong>de</strong>n<br />
ver sus hijos y cuáles no. Pronto <strong>de</strong>scubrirá lo sencillo que resulta controlar el<br />
reproductor, gracias a los menús en pantalla (OSD) y a los <strong>de</strong>l propio equipo en<br />
combinación con el mando a distancia.<br />
Desembalaje<br />
En primer lugar, examine el embalaje <strong>de</strong>l reproductor <strong>DVD</strong>-Ví<strong>de</strong>o, comprobando<br />
que contiene los siguientes elementos:<br />
• Reproductor <strong>DVD</strong> portátil<br />
• Mandos a distancia<br />
• Adaptador <strong>de</strong>l automóvil (12V)<br />
• Adaptador <strong>de</strong> CA / CC (AY4130)<br />
• Paquete <strong>de</strong> pilas recargables<br />
• Manual <strong>de</strong> uso<br />
• Garantía<br />
• Cable AV<br />
• Segunda pantalla LCD (PAC13X)<br />
• Kit <strong>de</strong> montaje en reposacabezas<br />
Emplazamiento<br />
• Coloque el reproductor sobre una superficie plana y firme.<br />
• Mantenga el equipo alejado <strong>de</strong> los radiadores y <strong>de</strong> la luz solar directa.<br />
• Si el reproductor <strong>DVD</strong>-Ví<strong>de</strong>o no pue<strong>de</strong> leer correctamente los discos, utilice un<br />
CD/<strong>DVD</strong> <strong>de</strong> limpieza (disponible en el mercado) para limpiar la lente antes <strong>de</strong><br />
solicitar su reparación. Otros métodos <strong>de</strong> limpieza pue<strong>de</strong>n dañar<br />
irreversiblemente la lente.<br />
• Mantenga siempre cerrada la ban<strong>de</strong>ja para evitar la acumulación <strong>de</strong> polvo en<br />
la lente.<br />
• La lente se pue<strong>de</strong> empañar si el reproductor <strong>DVD</strong>-Ví<strong>de</strong>o se traslada rápidamente <strong>de</strong><br />
un entorno frío a uno cálido, en cuyo caso no será posible la reproducción <strong>de</strong> un<br />
CD/<strong>DVD</strong>.Deje la unidad en un entorno cálido hasta que se evapore la humedad.<br />
DESCRIPCIÓN FUNCIONAL<br />
Parte izquierda <strong>de</strong>l reproductor ( ver figura 1)<br />
8 0 OPEN Abra la puerta <strong>de</strong> discos para insertar o<br />
extraer un disco<br />
9 ON . POWER . OFF .....Encien<strong>de</strong> y apaga el reproductor<br />
Parte <strong>de</strong>recha <strong>de</strong>l reproducto ( ver figura 1)<br />
0 E VOLUME..............Aumento / disminución <strong>de</strong> volumen<br />
! PHONE 1 & 2..............Conexión para auriculares<br />
@ AV OUT ........................Conector <strong>de</strong> salida <strong>de</strong> S-ví<strong>de</strong>o<br />
# AV IN ............................Conector <strong>de</strong> entrada <strong>de</strong> audio y ví<strong>de</strong>o<br />
$ COAXIL.........................Conector <strong>de</strong> salida <strong>de</strong> audio digital<br />
% DC IN 12V..................Conector <strong>de</strong> alimentación<br />
CARACTERÍSTICAS ESPECIALES DE LOS DISCOS <strong>DVD</strong><br />
Comprobación <strong>de</strong>l contenido <strong>de</strong> los discos <strong>DVD</strong>-Ví<strong>de</strong>o: Menús<br />
En el caso <strong>de</strong> los títulos y capítulos, los menús <strong>de</strong> selección pue<strong>de</strong>n estar<br />
incluidos en el disco. El menú <strong>de</strong>l <strong>DVD</strong> le permite seleccionar opciones.<br />
Pulse el botón numérico correspondiente, o bien utilice los botones 3, 4, 1, 2<br />
para resaltar la opción y pulse OK.<br />
Menú <strong>de</strong> disco<br />
Pulse MENU. El menú pue<strong>de</strong> incluir ángulos <strong>de</strong> cámara,<br />
idiomas <strong>de</strong> audio y subtítulos, y capítulos <strong>de</strong>l título.<br />
Ángulo <strong>de</strong> cámara<br />
Si el disco contiene secuencias grabadas <strong>de</strong>s<strong>de</strong> distintos<br />
ángulos, aparecerá un icono indicando el número <strong>de</strong><br />
ángulos disponibles, así como el ángulo actual. Si lo<br />
<strong>de</strong>sea, pue<strong>de</strong> cambiar el ángulo <strong>de</strong> cámara.<br />
Pulse ANGLE varias veces hasta alcanzar el ángulo <strong>de</strong><br />
visualización <strong>de</strong>seado.<br />
Para volver al ángulo <strong>de</strong> visualización normal, pulse ANGLE<br />
varias veces hasta que no aparezca en la pantalla ningún mensaje relacionado<br />
con los ángulos.<br />
Cambio <strong>de</strong>l idioma <strong>de</strong> audio<br />
Pulse LANGUAGE. Si el disco actual cuenta con distintas<br />
opciones <strong>de</strong> idioma, éstas aparecerán ahora en pantalla.<br />
Pulse LANGUAGE varias veces hasta alcanzar la opción<br />
<strong>de</strong> idioma <strong>de</strong>seada.<br />
Subtítulos<br />
Pulse SUBTITLES. Si el disco actual cuenta con distintas<br />
opciones <strong>de</strong> subtítulos, éstas aparecerán ahora en<br />
pantalla.<br />
Pulse SUBTITLES varias veces hasta alcanzar la opción<br />
<strong>de</strong> subtítulos <strong>de</strong>seada.<br />
CARACTERÍSTICAS GENERALES<br />
Cámara lenta<br />
Pulse > varias veces para acce<strong>de</strong>r a las siguientes opciones <strong>de</strong> reproducción lenta:<br />
x 1 1/2 x 5* 1/2 x hacia atrás<br />
x 2 1/4 x 6* 1/4 x hacia atrás<br />
x 3 1/8 x 7* 1/8 x hacia atrás<br />
x 4 1/16 x 8* 1/16 x hacia atrás<br />
Pulse OK o 2 para reanudar la reproducción normal.<br />
*Sólo para <strong>DVD</strong><br />
Cambio <strong>de</strong> la salida <strong>de</strong> audio<br />
Pulse AUDIO varias veces para acce<strong>de</strong>r a las siguientes opciones <strong>de</strong> audio.<br />
x 1 MONO IZQUIERDO<br />
x 2 MONO DERECHO<br />
x 3 MONO MIXTO<br />
x 4 ESTÉREO<br />
ZOOM<br />
La función <strong>de</strong> zoom le permite ampliar la imagen y seleccionar distintas<br />
posiciones <strong>de</strong> panorámico. Pulse ZOOM varias veces para seleccionar las<br />
siguientes opciones <strong>de</strong> zoom.<br />
Zoom x 1 2X Zoom x 2 3X<br />
Zoom x 3 4X Zoom x 4 1/2<br />
Zoom x 5 1/3 Zoom x 6 1/4<br />
Zoom x 7<br />
visualización normal<br />
Silencio<br />
Pulse MUTE una vez para silenciar el volumen <strong>de</strong>l<br />
reproductor. Pulse MUTE <strong>de</strong> nuevo para <strong>de</strong>sactivar esta<br />
función.<br />
Repetición<br />
Pulse REPEAT varias veces para las siguientes opciones <strong>de</strong> repetición:<br />
Acciones <strong>de</strong> <strong>DVD</strong><br />
Acciones <strong>de</strong> VCD<br />
x 1 repetir capítulo repetir pista<br />
x 2 repetir título repetir todo<br />
x 3 repetir todo cancelar repetición<br />
x 4<br />
cancelar repetición<br />
PREPARACIÓN<br />
Digital Audio Out<br />
Nota:<br />
• También pue<strong>de</strong> utilizar un conector COAXIAL<br />
para la salida <strong>de</strong> audio digital.<br />
• Consulte los manuales <strong>de</strong> usuario <strong>de</strong>l equipo<br />
adicional para obtener más información sobre la<br />
conexión.<br />
• Los reproductores son compatibles con los<br />
televisores NTSC/PAL/AUTO.<br />
EXPLICACIONES GENERALES<br />
Acerca <strong>de</strong> este manual<br />
Este manual ofrece instrucciones básicas para el funcionamiento <strong>de</strong>l reproductor<br />
<strong>DVD</strong>. Sin embargo, algunos discos <strong>DVD</strong> requieren un uso específico o permiten un<br />
uso limitado durante la reproducción. En tales casos, la unidad quizá no responda<br />
a todas las ór<strong>de</strong>nes, por lo que <strong>de</strong>berá leer las instrucciones facilitadas en el<br />
disco. Si en la pantalla <strong>de</strong>l televisor aparece la indicación<br />
significa que el<br />
reproductor o el disco no permiten realizar la operación.<br />
Mando a distancia<br />
• Salvo indicación en contrario, todas las operaciones pue<strong>de</strong>n realizarse <strong>de</strong>s<strong>de</strong> el<br />
mando a distancia. Apunte siempre con el mando directamente al reproductor,<br />
asegurándose <strong>de</strong> que no haya obstáculos en la trayectoria <strong>de</strong>l haz infrarrojo.<br />
• También pue<strong>de</strong>n usarse los botones correspondientes <strong>de</strong>l panel frontal <strong>de</strong> la<br />
unidad (en su caso).<br />
Navegación por el menú<br />
• El reproductor dispone <strong>de</strong> un sistema intuitivo <strong>de</strong> navegación por los menús que<br />
le guiará a través <strong>de</strong> los diferentes ajustes y operaciones.<br />
• Utilice las teclas <strong>de</strong> función para activar o <strong>de</strong>sactivar las operaciones<br />
correspondientes.<br />
• Utilice 3, 4, 1, 2 para explorar los menús.<br />
• Pulse OK para confirmar la selección.<br />
Español<br />
DESCRIPCIÓN FUNCIONAL<br />
Ban<strong>de</strong>ja <strong>de</strong> disco ( ver figura 1)<br />
1 MENU .................Muestra la página MENU (MENÚ)<br />
2 OSD.......................Activación y <strong>de</strong>sactivación <strong>de</strong>l menú <strong>de</strong> pantalla (OSD)<br />
3 3, 4, 1, 2.........Movimiento <strong>de</strong> cursor izquierda / <strong>de</strong>recha / arriba / abajo<br />
OK .........................Confirmación <strong>de</strong> la selección <strong>de</strong>l menú<br />
4 ;............................Pone en pausa la reproducción<br />
2... ........................Inicia / reanuda la reproducción<br />
9... ........................Pulse dos veces para <strong>de</strong>tener la reproducción<br />
J( / §... .............Para acce<strong>de</strong>r a los capítulos, pistas o títulos anteriores<br />
(J( ) o siguientes (§)<br />
J / K......................Búsqueda hacia atrás (J ) o búsqueda hacia <strong>de</strong>lante (K.)<br />
5 MONITOR ...........Pantalla <strong>de</strong> selección<br />
Para ajustar el brillo con 1 2<br />
Para ajustar el color con 1 2<br />
Para ajustar la pantalla a 16:9 ó 4:3 con 1 2<br />
6 AV IN/OUT ..........– A/V OUT<br />
– A/V IN (AUX)<br />
Parte frontal <strong>de</strong>l reproductor ( ver figura 1)<br />
7 POWER/CHG ......Indicador <strong>de</strong> alimentación y carga<br />
IR ..........................Sensor <strong>de</strong> infrarrojos para el control remoto<br />
MANDO A DISTANCIA<br />
Mando a distancia ( ver figura 2)<br />
1 3, 4, 1, 2.........Movimiento <strong>de</strong> cursor izquierda / <strong>de</strong>recha / arriba / abajo<br />
OK .........................Confirmación <strong>de</strong> la selección<br />
2 VOL+ / - ................Aumento/disminución <strong>de</strong> volumen<br />
3 J( / §... .............Para acce<strong>de</strong>r a los capítulos, pistas o títulos anteriores<br />
(J( ) o siguientes (§)<br />
;............................Pone en pausa la reproducción<br />
2...........................Inicia / reanuda la reproducción<br />
9... ........................Pulse dos veces para <strong>de</strong>tener la reproducción<br />
5 / 6... ..............Búsqueda hacia atrás (5 ) o búsqueda hacia <strong>de</strong>lante (6)<br />
4 OSD.......................Activación y <strong>de</strong>sactivación <strong>de</strong>l menú <strong>de</strong> pantalla (OSD)<br />
. ..........................Cámara lenta<br />
5 AUDIO ..................Selector <strong>de</strong> idioma <strong>de</strong> audio<br />
ZOOM ...................Aumenta la imagen <strong>de</strong> ví<strong>de</strong>o<br />
6 A > B.....................Repetición <strong>de</strong> secuencia<br />
PLAY-MODE ........Selecciona las opciones <strong>de</strong> or<strong>de</strong>n <strong>de</strong> reproducción<br />
7 0 - 9.......................Teclado numérico<br />
8 MUTE....................Silenciamiento<br />
REPEAT ................Repetición <strong>de</strong> capítulo, pista, título,disco<br />
9 RETURN ...............Para la página <strong>de</strong> menú <strong>de</strong> VCD<br />
ANGLE..................Selección <strong>de</strong>l ángulo <strong>de</strong> cámara <strong>de</strong>l <strong>DVD</strong><br />
0 SUBTITLE ............Selector <strong>de</strong> idioma <strong>de</strong> subtítulos<br />
LANGUAGE .........Selector <strong>de</strong> idioma<br />
! MENU...................Muestra la página MENU (MENÚ)<br />
@ SETUP ..................Acce<strong>de</strong> al menú SETUP (Configuración)<br />
# Puerto <strong>de</strong> infrarrojos<br />
$ Compartimento <strong>de</strong> la batería<br />
OPERACIÓN BÁSICA<br />
Cómo acce<strong>de</strong>r a la configuración <strong>de</strong> idioma <strong>de</strong> OSD<br />
El inglés es el idioma pre<strong>de</strong>terminado <strong>de</strong> la presentación en pantalla (OSD) <strong>de</strong>l<br />
reproductor. Pue<strong>de</strong> seleccionar inglés, francés, español, alemán, chino<br />
simplificado o chino tradicional para la visualización en pantalla <strong>de</strong>l reproductor.<br />
Países<br />
Opciones <strong>de</strong> idioma <strong>de</strong> OSD<br />
Europeos<br />
Inglés, Francés, Alemán<br />
Americanos<br />
Inglés, Francés, Español<br />
1 Sitúe el conmutador POWER en ON para encen<strong>de</strong>r el reproductor.<br />
2 Pulse SET UP para abrir el menú <strong>de</strong><br />
configuración.<br />
3 Seleccione GENERAL SETUP (Configuración<br />
general) y pulse OK.<br />
4 Desplácese y seleccione OSD LANG (Idioma <strong>de</strong><br />
OSD) y pulse 2 para seleccionar las opciones <strong>de</strong><br />
idioma <strong>de</strong> la presentación en pantalla (OSD).<br />
5 Seleccione el idioma que <strong>de</strong>see y pulse OK.<br />
Inserción <strong>de</strong> discos y encendido<br />
1 Pulse OPEN para abrir la ban<strong>de</strong>ja <strong>de</strong> discos.<br />
2 Deposite el disco elegido en la ban<strong>de</strong>ja, con la etiqueta hacia arriba (también<br />
en el caso <strong>de</strong> los discos <strong>DVD</strong> <strong>de</strong> doble cara). Compruebe que queda<br />
perfectamente asentado en el hueco correcto.<br />
3 Presiones lentamente la ban<strong>de</strong>ja para cerrarla.<br />
4 Sitúe el conmutador POWER en ON para encen<strong>de</strong>r el reproductor.<br />
Nota:<br />
Durante la reproducción se oirá un ruido mecánico normal.<br />
OPERACIÓN BÁSICA<br />
Reproducción <strong>de</strong> un disco <strong>DVD</strong>-Ví<strong>de</strong>o<br />
Después <strong>de</strong> encen<strong>de</strong>rlo, inserte el disco y cierre la ban<strong>de</strong>ja; la reproducción se<br />
inicia automáticamente. En la pantalla aparece el tipo <strong>de</strong> disco cargado. El disco<br />
pue<strong>de</strong> invitarle a seleccionar una opción <strong>de</strong> un menú. Utilice los botones 3, 4,<br />
1, 2 para resaltar la opción y <strong>de</strong>spués pulse OK.<br />
Observación: Puesto que es habitual que las películas en <strong>DVD</strong> salgan al mercado<br />
en fechas distintas en una u otra parte <strong>de</strong>l mundo, todos los reproductores<br />
poseen un código territorial y los discos pue<strong>de</strong>n incluirlo como opción. Si inserta<br />
un disco cuyo código territorial no coinci<strong>de</strong> con el <strong>de</strong>l reproductor, en la pantalla<br />
aparecerá una advertencia al respecto. El disco no se reproducirá y <strong>de</strong>berá<br />
extraerse <strong>de</strong> la unidad.<br />
Reproducción <strong>de</strong> un CD-audio, CD-Ví<strong>de</strong>o o <strong>de</strong> disco Divx<br />
• Después <strong>de</strong> encen<strong>de</strong>r la unidad, inserte el disco y cierre la ban<strong>de</strong>ja; la pantalla<br />
mostrará el tipo <strong>de</strong> disco cargado e información sobre el contenido <strong>de</strong>l mismo.<br />
Pulse 2 para iniciar la reproducción.<br />
• Mientras reproduce VCD con MTV/Karaoke, pulse las teclas numéricas (0-9)<br />
para seleccionar la pista y pulse 2 o OK para reproducirla. Pulse RETURN<br />
para volver al menú <strong>de</strong> la selección.<br />
OPERACIÓN BÁSICA<br />
Reproducción <strong>de</strong> un discos MP3<br />
Están disponibles las siguientes funciones <strong>de</strong> reproducción para CD <strong>de</strong> MP3.<br />
Consulte las secciones correspondientes para obtener más información.<br />
Control <strong>de</strong> volumen, salto <strong>de</strong> pistas, búsqueda, repetición, reproducción aleatoria<br />
etc.Utilice las teclas 3, 4, 1, 2 para resaltar la carpeta <strong>de</strong> música<br />
seleccionada. Pulse OK para reproducirla.<br />
Reproducción <strong>de</strong> disco JPEG<br />
Utilice las teclas 3, 4, 1, 2 para resaltar la carpeta <strong>de</strong> imágenes seleccionada.<br />
Pulse OK. El reproductor se inicia automáticamente en modo <strong>de</strong> presentación <strong>de</strong><br />
diapositivas.<br />
Con la visualización <strong>de</strong> pantalla completa, aparecerá el resto <strong>de</strong> archivos JPEG,<br />
uno a uno, situados en la carpeta seleccionada en ese momento.<br />
• Utilice 1, 2 para rotar la imagen.<br />
• Utilice 3 para subir o bajar.<br />
• Utilice 4 para girar a la izquierda o a la <strong>de</strong>recha.<br />
• Durante la presentación <strong>de</strong> diapositivas, pulse MENU para volver a la pantalla<br />
<strong>de</strong> la carpeta.<br />
• Pulse 9 para acce<strong>de</strong>r a la previsualización <strong>de</strong> un grupo.<br />
• Utilice 3, 4, 1, 2 para resaltar la imagen <strong>de</strong> previsualización y acce<strong>de</strong>r a las<br />
funciones en pantalla.<br />
Observación: Salvo especificación en contrario, todas las operaciones <strong>de</strong>scritas se<br />
refieren al mando a distancia.<br />
CARACTERÍSTICAS GENERALES<br />
Cambio <strong>de</strong> título / pista / capítulos<br />
Si un disco tiene más <strong>de</strong> un título o pista (lo que se<br />
pue<strong>de</strong> comprobar tanto en la barra <strong>de</strong> menú como en<br />
la pantalla <strong>de</strong>l reproductor), pue<strong>de</strong> cambiar <strong>de</strong> un<br />
título a otro <strong>de</strong> la siguiente manera:<br />
• Pulse § brevemente durante la reproducción para<br />
seleccionar el siguiente título o pista.<br />
• Pulse J( brevemente durante la reproducción para regresar al principio <strong>de</strong>l<br />
título o pista actual.<br />
• Para ir directamente a algún título, pista o capítulo, introduzca el número<br />
correspondiente utilizando las teclas numéricas (0-9).<br />
Imágenes congeladas y por fotogramas<br />
Pulse ; varias veces para acce<strong>de</strong>r a la siguientes<br />
opciones <strong>de</strong> imágenes fijas e individuales (una<br />
imagen cada paso):<br />
; x 1 Pausa / imágenes por fotogramas<br />
; x 2 En la pantalla aparece ;2<br />
Después <strong>de</strong> que aparezca el icono ;2 en la pantalla, pulse ; varias veces para<br />
reproducir imagen a imagen. Pulse OK para reanudar la reproducción normal.<br />
Búsqueda<br />
Pulse K varias veces para acce<strong>de</strong>r a las siguientes<br />
opciones <strong>de</strong> búsqueda hacia <strong>de</strong>lante:<br />
Pulse J varias veces para acce<strong>de</strong>r a las siguientes<br />
opciones <strong>de</strong> búsqueda hacia atrás:<br />
J<br />
K<br />
2 X hacia atrás 2 X hacia <strong>de</strong>lante<br />
4 X hacia atrás 4 X hacia <strong>de</strong>lante<br />
8 X hacia atrás 8 X hacia <strong>de</strong>lante<br />
16 X hacia atrás 16 X hacia <strong>de</strong>lante<br />
32 X hacia atrás 32 X hacia <strong>de</strong>lante<br />
velocidad normal<br />
velocidad normal<br />
Pulse OK o 2 para reanudar la reproducción normal.<br />
CARACTERÍSTICAS GENERALES<br />
Repetición A > B<br />
Para repetir o reproducir en bucle una secuencia <strong>de</strong> un título:<br />
• Pulse A > B <strong>de</strong>s<strong>de</strong> el punto <strong>de</strong>seado <strong>de</strong> comienzo.<br />
En la pantalla aparec A .<br />
• Pulse <strong>de</strong> nuevo A > B cuando llegue al final <strong>de</strong>l<br />
fragmento <strong>de</strong>seado.<br />
En la pantalla aparece<br />
AB y se inicia la reproducción <strong>de</strong> la secuencia.<br />
• Pulse A > B <strong>de</strong> nuevo para salir <strong>de</strong> la secuencia.<br />
Modos <strong>de</strong> reproducción<br />
Pulse PLAY MODE varias veces para acce<strong>de</strong>r a las<br />
siguientes opciones <strong>de</strong> or<strong>de</strong>n <strong>de</strong> reproducción:<br />
x 1 REPRODUCCIÓN ALEATORIA<br />
x 2 ALEATORIO<br />
x 3 PROGRAMA<br />
Utilice (0-9) y OK para introducir ajustes específicos.<br />
Aumento/disminución <strong>de</strong> volumen<br />
• Durante la reproducción, pulse 3/4 en el mando a<br />
distancia o + vol - en el reproductor <strong>de</strong> <strong>DVD</strong> para aumentar<br />
o reducir el volumen <strong>de</strong> reproducción.<br />
• Utilice el interruptor giratorio <strong>de</strong>l lado <strong>de</strong>recho <strong>de</strong> la<br />
unidad.<br />
Setup (controle <strong>de</strong> la unidad principal)<br />
Pulse SETUP varias veces y utilice 1 / 2 para<br />
ajustar el brillo, el color y el modo <strong>de</strong> visualización<br />
(pantalla normal o completa.<br />
Precaución<br />
El uso <strong>de</strong> mandos o ajustes o la ejectuccion <strong>de</strong> metodos que<br />
no sean los aqui <strong>de</strong>scritos pue<strong>de</strong> ocasionar peligro <strong>de</strong><br />
exposición a radiación.<br />
RESOLUCIÓN DE PROBLEMAS<br />
Síntoma<br />
Remedio<br />
Imposible reproducir el disco – Compruebe que el disco está insertado con<br />
la etiqueta hacia arriba. Limpie el disco.<br />
– Compruebe si el <strong>de</strong>fecto está en el disco<br />
probando con otro.<br />
El reproductor no<br />
– Apunte con el mando directamente al sensor<br />
respon<strong>de</strong> al mando a<br />
<strong>de</strong>l panel frontal <strong>de</strong>l reproductor. Evite todos<br />
distancia<br />
los obstáculos que puedan interferir en el<br />
recorrido <strong>de</strong> la señal. Revise o sustituya las<br />
pilas <strong>de</strong>l mando.<br />
Imagen distorsionada o<br />
– Utilice únicamente discos <strong>de</strong> formato<br />
en blanco y negro con<br />
compatible con el televisor (PAL/NTSC).<br />
un disco <strong>DVD</strong> o VCD<br />
No hay sonido en la<br />
– Revise las conexiones digitales.<br />
salida digital<br />
– Compruebe en los menús que está activada la<br />
salida digital.<br />
La unidad no respon<strong>de</strong><br />
– El disco no permite realizar las operaciones.<br />
a todas las ór<strong>de</strong>nes<br />
– Consulte las instrucciones <strong>de</strong>l disco.<br />
durante la reproducción<br />
El reproductor se calienta<br />
– Cuando el reproductor está en uso durante un<br />
largo período <strong>de</strong> tiempo, la superficie se<br />
calienta. Esto es normal.<br />
La pantalla se oscurece al<br />
– La unidad está ahorrando energía para<br />
<strong>de</strong>sconectar la alimentación<br />
proporcionar un mayor tiempo <strong>de</strong> reproducción<br />
con la batería. Esto es normal. Ajuste el brillo<br />
mediante la función MONITOR.<br />
Este producto cumple los requisitos sobre interferencias <strong>de</strong> radio <strong>de</strong><br />
la Unión Europea.<br />
PREPARACIÓN<br />
Alimentación<br />
Uso <strong>de</strong>l adaptador<br />
Conecte el adaptador suministrado al<br />
aparato y a la fuente <strong>de</strong> alimentación<br />
principal (como se muestra).<br />
Nota:<br />
Para evitar daños en el reproductor, apáguelo antes <strong>de</strong> conectar o<br />
<strong>de</strong>sconectar el adaptador <strong>de</strong> ca.<br />
Uso <strong>de</strong>l adaptador <strong>de</strong>l automóvil<br />
Conecte el adaptador <strong>de</strong>l automóvil suministrado al aparato y a la toma <strong>de</strong>l<br />
encen<strong>de</strong>dor <strong>de</strong> cigarrillos <strong>de</strong>l automóvil.<br />
Nota:<br />
• Para evitar daños en el reproductor, apáguelo antes <strong>de</strong> conectar o<br />
<strong>de</strong>sconectar el adaptador para el coche.<br />
• Cuando conecte el adaptador <strong>de</strong> alimentación <strong>de</strong>l automóvil<br />
(encen<strong>de</strong>dor <strong>de</strong> cigarrillos), asegúrese <strong>de</strong> que la tensión <strong>de</strong><br />
entrada <strong>de</strong>l adaptador es igual a la <strong>de</strong>l automóvil.<br />
Mando a distancia<br />
1 Abra la compartimento <strong>de</strong> las pilas. Retire la pestaña<br />
<strong>de</strong> plástico protectora (sólo la primera vez).<br />
2 Inserte 1 batería <strong>de</strong> 3 V <strong>de</strong> litio, tipo CR2025 y, a<br />
continuación, cierre el compartimento.<br />
INFORMACIÓN GENERAL<br />
Manipulación <strong>de</strong> discos<br />
• No escriba nunca en un disc ni le pegue<br />
etiquetas.<br />
• No exponga directamente el disco a la luz solar y<br />
manténgalo alejado <strong>de</strong> fuentes <strong>de</strong> calor.<br />
• Tome siempre el CD por le bor<strong>de</strong> y vuelva<br />
colocarlo en su caja <strong>de</strong>spués <strong>de</strong> utilizarlo para<br />
evitar rayarlo y que se ensucie.<br />
• Si se ensucia el disco, límpielo con un paño en<br />
sentido radial, <strong>de</strong>s<strong>de</strong> el centro hacia afuera.<br />
Uso <strong>de</strong> la pantalla LCD<br />
La pantalla LCD está fabricada con tecnología <strong>de</strong> alta precisión. Sin embargo,<br />
pue<strong>de</strong> apreciar minúsculos puntos negros que aparecen continuamente en la<br />
pantalla LCD. Se trata <strong>de</strong> un resultado normal <strong>de</strong>l proceso <strong>de</strong> fabricación y no<br />
indica un funcionamiento incorrecto.<br />
Información medioambiental<br />
Se ha prescindido <strong>de</strong> cualquier material <strong>de</strong> embalaje innecesario. El embalaje<br />
esta compuesto <strong>de</strong> materiales fácilmente separables: cartón, PS, PE. El aparato<br />
está fabricado con materiales que se pue<strong>de</strong>n reciclar si son <strong>de</strong>smontados por una<br />
empresa especializada. Observe las normas locales concernientes a la<br />
eliminación <strong>de</strong> estos materiales, pilas usadas y equipos <strong>de</strong>sechables.<br />
Información <strong>de</strong> Copyright<br />
Todas las marcas y nombres <strong>de</strong> productos son marcas registradas <strong>de</strong> las<br />
empresas u organizaciones correspondientes.<br />
La copia y distribución no autorizadas <strong>de</strong> grabaciones <strong>de</strong> Internet / CD / VCD /<br />
<strong>DVD</strong> infringen las leyes <strong>de</strong> <strong>de</strong>rechos <strong>de</strong> autor y otros tratados internacionales.<br />
INFORMACIÓN GENERAL<br />
Fuente <strong>de</strong> alimentación<br />
Esta unidad funciona con el adaptador <strong>de</strong> CA suministrado, adaptador <strong>de</strong>l automóvil o paquete<br />
<strong>de</strong> baterías recargables.<br />
• Compruebe que el voltaje que se indica en la placa tipo situada en las base <strong>de</strong>l aprato<br />
coinci<strong>de</strong> con el <strong>de</strong>l suministro <strong>de</strong> la red local. De lo contrario, el adaptador <strong>de</strong> CA y la unidad<br />
podrían resultar dañados.<br />
• No toque el adaptador <strong>de</strong> CA con las manos mojadas para evitar <strong>de</strong>scargas eléctricas.<br />
• Cuando conecte el adaptador <strong>de</strong> alimentación <strong>de</strong>l automóvil (encen<strong>de</strong>dor <strong>de</strong> cigarrillos),<br />
asegúrese <strong>de</strong> que la tensión <strong>de</strong> entrada <strong>de</strong>l adaptador es igual a la <strong>de</strong>l automóvil.<br />
• Desenchufe el adaptador <strong>de</strong> CA <strong>de</strong> la toma o retire el paquete <strong>de</strong> baterías cuando la unidad<br />
no se utilice durante largos períodos <strong>de</strong> tiempo.<br />
• Sujete el enchufe para <strong>de</strong>sconectar el adaptador <strong>de</strong> CA. No tire <strong>de</strong>l cable <strong>de</strong> alimentación.<br />
Seguridad y Mantenimiento<br />
• No <strong>de</strong>smonte la unidad ya que los rayos láser son peligrosos para la vista. Las reparaciones<br />
las <strong>de</strong>be realizar el personal <strong>de</strong> servicio cualificado.<br />
• Desenchufe el adaptador <strong>de</strong> CA para cortar la alimentación si se <strong>de</strong>rrama líquido o caen<br />
objetos en el interior <strong>de</strong> la unidad.<br />
• No <strong>de</strong>je caer el reproductor ni <strong>de</strong>je caer ningún objeto sobre la misma. Los golpes fuertes y<br />
las vibraciones pue<strong>de</strong>n causar averías.<br />
• No exponga el aparato a temperaturas altas, causadas por un sistema <strong>de</strong> calefacción o por la<br />
exposición directa a la luz solar.<br />
• No sumerja el reproductor al agua. El agua pue<strong>de</strong> dañar seriamente el reproductor. La<br />
entrada <strong>de</strong> agua en el reproductor pue<strong>de</strong> provocar daños importantes y oxidarla.<br />
• No utilice productos <strong>de</strong> limpieza que contengan alcohol, amoníaco, benceno o abrasivos ya<br />
que pue<strong>de</strong>n dañar el acabado <strong>de</strong>l reproductor.<br />
• No <strong>de</strong>be exponer el aparato a gotas ni salpicaduras. no coloque ningún objeto peligroso<br />
sorbe el aparato. (por ejemplo recipientes con líquidos,velas encendidas).<br />
• La lente <strong>de</strong>l reproductor no <strong>de</strong>be tocarse nunca!<br />
Observación: Cuando el reproductor está en uso durante un largo período <strong>de</strong> tiempo, la<br />
superficie se calienta. Esto es normal.<br />
FUNCIONAMIENTO DE OSD<br />
A<strong>de</strong>más <strong>de</strong> utilizar las teclas <strong>de</strong>l control remoto, también pue<strong>de</strong> cambiar las<br />
opciones <strong>de</strong> reproducción <strong>de</strong> disco <strong>de</strong>s<strong>de</strong> las opciones <strong>de</strong> presentación en<br />
pantalla (OSD).<br />
1 Pulse OSD durante la reproducción. Aparece una lista <strong>de</strong> funciones.<br />
2 Utilice los botones 3 4 para resaltar la opción.<br />
Cuando el cursor resalte estos ajustes, pulse OK para:<br />
ARCHIVO<br />
introduzca el número <strong>de</strong> archivo <strong>de</strong>seado.<br />
TÍTULO<br />
introducir el número <strong>de</strong> título <strong>de</strong>seado<br />
CAPÍTULO<br />
introducir el número <strong>de</strong> capítulo <strong>de</strong>seado<br />
AUDIO<br />
seleccionar las opciones <strong>de</strong> audio<br />
SUBTÍTULOS<br />
seleccionar las opciones <strong>de</strong> subtítulos<br />
ÁNGULO<br />
seleccionar las opciones <strong>de</strong> ángulo <strong>de</strong> cámara<br />
HORA DEL ARCHIVO introduzca el punto <strong>de</strong> inicio para la hora <strong>de</strong> reproducción<br />
<strong>de</strong>l archivo.<br />
HORA TT<br />
seleccionar las opciones <strong>de</strong> ángulo <strong>de</strong> cámara<br />
HORA CH<br />
introducir el punto <strong>de</strong> inicio <strong>de</strong> la hora <strong>de</strong> reproducción <strong>de</strong>l<br />
capítulo<br />
REPETIR<br />
seleccionar las opciones <strong>de</strong> repetición<br />
TIME DISP.<br />
seleccionar las opciones <strong>de</strong> visualización <strong>de</strong> la hora<br />
3 Utilice (0-9) para introducir ajustes específicos.<br />
4 Pulse 1 para cancelar el ajuste actual o volver al nivel <strong>de</strong> menú anterior.<br />
5 Pulse OSD para salir.<br />
FUNCIONAMIENTO DE SETUP<br />
Para sacar el máximo partido a la reproducción, utilice SETUP para<br />
configurar con precisión los ajustes. Utilice los botones 3,4,1, 2 para resaltar<br />
la opción y <strong>de</strong>spués pulse OK.<br />
1 Pulse SETUP. Aparece una lista <strong>de</strong> funciones.<br />
2 Utilice los botones 3 4 para resaltar la opción.<br />
Cuando el cursor resalte estos ajustes, pulse OK para:<br />
CONFIGURACIÓN GENERAL<br />
seleccionar opciones <strong>de</strong> visualización y otras<br />
CONFIGURACIÓN DE AUDIO<br />
seleccionar las opciones <strong>de</strong> audiow<br />
PREFERENCIAS<br />
seleccionar preferencias <strong>de</strong> reproducción<br />
CONFIGURACIÓN DE CONTRASEÑA seleccionar opciones <strong>de</strong> contraseña<br />
3 Pulse 1 para cancelar el ajuste actual o volver al nivel <strong>de</strong> menú anterior.<br />
4 Pulse SETUP para salir.<br />
CONFIGURACIÓN GENERAL<br />
Cuando el cursor resalte estos ajustes, pulse OK para:<br />
PANTALLA TV<br />
seleccionar la relación <strong>de</strong> visualización<br />
TIPO DE TV<br />
seleccionar el estándar <strong>de</strong> ví<strong>de</strong>o <strong>de</strong>l televisor<br />
externo<br />
IDIOMA OSD<br />
seleccionar el idioma <strong>de</strong> visualización en pantalla<br />
SPDIF<br />
seleccionar las opciones <strong>de</strong> audio digital<br />
SUBTÍTULOS<br />
seleccionar las opciones <strong>de</strong> los subtítulos<br />
PROTECCIÓN PANTALLA<br />
seleccionar las opciones <strong>de</strong>l protector <strong>de</strong> pantalla<br />
Pulse 1 para cancelar el ajuste actual o volver al nivel <strong>de</strong> menú anterior.<br />
FUNCIONAMIENTO DE SETUP<br />
CONFIGURACIÓN DE AUDIO<br />
Cuando el cursor resalte estos ajustes, pulse OK para:<br />
CONFIGURACIÓN DE ALTAVOZ<br />
seleccionar las opciones <strong>de</strong> los altavoces<br />
CONFIG. DOLBY DIGITA<br />
seleccionar las opciones <strong>de</strong>l sonido Dolby<br />
EQ DE CANAL<br />
seleccionar las opciones <strong>de</strong>l ecualizador<br />
PROCESO EN 3D<br />
seleccionar las opciones <strong>de</strong>l sonido envolvente<br />
Pulse 1 para cancelar el ajuste actual o volver al nivel <strong>de</strong> menú anterior.<br />
PREFERENCIAS<br />
Cuando el cursor resalte estos ajustes, pulse OK para:<br />
AUDIO<br />
seleccionar las opciones <strong>de</strong> idioma <strong>de</strong>l audio<br />
SUBTÍTULOS<br />
seleccionar las opciones <strong>de</strong> subtítulos<br />
MENÚ DEL DISCO<br />
seleccionar las opciones <strong>de</strong> idioma <strong>de</strong>l menú <strong>de</strong>l disco<br />
PARENTAL<br />
seleccionar las opciones <strong>de</strong> control infantil<br />
PREDETERMINADO<br />
restaurar los ajustes <strong>de</strong> fábrica<br />
Pulse 1 para cancelar el ajuste actual o volver al nivel <strong>de</strong> menú anterior.<br />
Observación: Las opciones <strong>de</strong> control infantil sólo se pue<strong>de</strong>n seleccionar cuando<br />
está <strong>de</strong>sactivado el modo <strong>de</strong> contraseña.<br />
CONFIGURACIÓN DE CONTRASEÑA<br />
Cuando el cursor resalte estos ajustes, pulse OK para:<br />
MODO CONTRASEÑA<br />
activar o <strong>de</strong>sactivar la contraseña<br />
CONTRASEÑA<br />
cambiar la contraseña existente<br />
(pre<strong>de</strong>terminada: 99999)<br />
Pulse 1 para cancelar el ajuste actual o volver al nivel <strong>de</strong> menú anterior.<br />
INFORMACIÓN TÉCNICA<br />
Dimensiones<br />
20.2 x 14.9 x 4.0 cm<br />
7.9 x 5.8 x 1.5 pulgadas<br />
Peso<br />
0.86 kg / 1.89 lb<br />
Alimentación<br />
DC 12V 2A<br />
Rango <strong>de</strong> temperatura <strong>de</strong> funcionamiento<br />
0 - 50°C (32 ~ 122°F)<br />
Láser longitud <strong>de</strong> ondas<br />
650nm<br />
Sistema <strong>de</strong> ví<strong>de</strong>o<br />
NTSC / PAL / AUTO<br />
Respuesta <strong>de</strong> frecuencia<br />
20Hz ~ 20KHz ± 1dB<br />
Índice <strong>de</strong> señal <strong>de</strong> ruido<br />
≥ 85dB<br />
Distorsión <strong>de</strong> audio + ruido<br />
≤ -80(1KHz)<br />
Separación <strong>de</strong> canales<br />
≥ 85dB<br />
Rango dinámico<br />
≥ 80dB<br />
Salida<br />
Salida <strong>de</strong> audio (audio analógico) Nivel <strong>de</strong> salida: 2V ± 10%<br />
Impedancia <strong>de</strong> carga:<br />
10KΩ<br />
Salida <strong>de</strong> ví<strong>de</strong>o: Nivel <strong>de</strong> salida: 1Vp - p ± 20%<br />
Impedancia <strong>de</strong> carga:<br />
75Ω<br />
PHILIPS se reserva el <strong>de</strong>recho a realizar cambios en el diseño y en<br />
las especificaciones sin previo aviso para mejorar el producto.<br />
Las modificaciones no autorizadas por el fabricante pue<strong>de</strong> invalidar<br />
la facultad <strong>de</strong> los usuarios para utilizar este dispositivo.<br />
Todos los <strong>de</strong>rechos reservados.<br />
NOTES<br />
INTRODUCTION<br />
Votre lecteur <strong>de</strong> <strong>DVD</strong> <strong>portable</strong><br />
Votre lecteur <strong>de</strong> <strong>DVD</strong> <strong>portable</strong> lit les disques vidéonumériques conformes au<br />
standard universel <strong>DVD</strong>-Vidéo. Vous pourrez désormais grâce à lui apprécier<br />
pleinement les films <strong>de</strong> long métrage avec une qualité d'image digne du cinéma<br />
et un son stéréo ou multicanal (selon le disque et votre réglage <strong>de</strong> lecture).<br />
Les caractéristiques uniques du <strong>DVD</strong>-Vidéo, comme la sélection <strong>de</strong> la langue <strong>de</strong><br />
doublage et celle <strong>de</strong>s sous-titres, ainsi que les différents angles <strong>de</strong> caméra (à<br />
nouveau en fonction du disque mis en place) sont toutes présentes.<br />
En outre, la fonction <strong>de</strong> verrouillage du disque <strong>de</strong> <strong>Philips</strong> permet aux parents <strong>de</strong><br />
sélectionner les disques que leurs enfants pourront regar<strong>de</strong>r.<br />
Vous verrez comme la fonction <strong>de</strong> réglage à l'écran, l'afficheur du lecteur et la<br />
télécomman<strong>de</strong> facilitent l'utilisation du lecteur <strong>de</strong> <strong>DVD</strong>.<br />
Déballage <strong>de</strong> l'appareil<br />
Vérifiez et i<strong>de</strong>ntifiez tout d'abord le contenu <strong>de</strong> l'emballage <strong>de</strong> votre lecteur <strong>de</strong><br />
<strong>DVD</strong>-Vidéo qui doit être composé comme suit :<br />
• <strong>Lecteur</strong> <strong>de</strong> <strong>DVD</strong> <strong>portable</strong><br />
• Télécomman<strong>de</strong><br />
• Adaptateur allume-cigares (12V)<br />
• Adaptateur CA/CC (AY4130)<br />
• Piles rechargeables<br />
• Mo<strong>de</strong> d'<strong>emploi</strong><br />
• Garantie<br />
• Câble AV<br />
• Second écran LCD (PAC13X)<br />
• Kit <strong>de</strong> montage sur un repose-tête <strong>de</strong><br />
voiture<br />
Disposition<br />
• Disposez le lecteur sur une surface plate et rigi<strong>de</strong>.<br />
• Veillez à ne pas le placer à proximité <strong>de</strong> sources <strong>de</strong> chaleur, ni au soleil direct.<br />
• Si le lecteur <strong>de</strong> <strong>DVD</strong>-Vidéo ne peut lire correctement les CD/<strong>DVD</strong>, nettoyez la<br />
lentille avec un disque <strong>de</strong> nettoyage spécial avant <strong>de</strong> porter l'appareil à réparer.<br />
D'autres métho<strong>de</strong>s <strong>de</strong> nettoyage peuvent détruire la lentille.<br />
• Gar<strong>de</strong>z toujours le couvercle du disque fermé pour éviter que la poussière ne<br />
se dépose sur la lentille.<br />
• De la buée peut se former sur la lentille lorsque l'appareil passe rapi<strong>de</strong>ment d'un<br />
environnement froid à un environnement chaud. Dans ce cas, il est impossible<br />
<strong>de</strong> lire un CD/<strong>DVD</strong> et il faut attendre que l'humidité s'évapore.<br />
APERÇU DES FONCTIONS<br />
Face gauche du lecteur ( voir figure 1)<br />
8 0 OPEN Pour ouvrir le couvercle et insérer ou retirer<br />
le disque<br />
9 ON . POWER . OFF.......Permet la mise sous/hors tension du lecteur<br />
Face droite du lecteur ( voir figure 1)<br />
0 E VOLUME..............Augmentation / réduction du volume<br />
! PHONE 1 & 2.............. Prise écouteurs<br />
@ AV OUT ........................ Sortie audio/vidéo<br />
# AV IN ............................ Entrée audio/vidéo<br />
$ COAXIL ........................Sortie audio numérique<br />
% DC IN 12V....................Prise d'alimentation<br />
FONCTIONS SPÉCIALES DES DISQUES <strong>DVD</strong>-VIDÉO<br />
Vérification du contenu <strong>de</strong>s disques <strong>DVD</strong>-Vidéo : Menus.<br />
Il est possible d'inclure sur le disque <strong>de</strong>s menus <strong>de</strong> sélection pour<br />
les titres et les chapitres.<br />
La fonction <strong>de</strong> menu du <strong>DVD</strong> vous permet d'effectuer <strong>de</strong>s choix à partir <strong>de</strong> ces<br />
menus. Appuyez sur la touche chiffrée appropriée ou utilisez les touches<br />
3, 4, 1, 2 pour mettre votre sélection en surbrillance et appuyez sur OK.<br />
Menu du disque<br />
Appuyez sur MENU. Le menu peut mentionner, par<br />
exemple, les angles <strong>de</strong> caméra, les langues <strong>de</strong> doublage<br />
et <strong>de</strong> sous-titres, ainsi que les chapitres du titre concerné.<br />
Angle <strong>de</strong> caméra<br />
Si le disque comporte <strong>de</strong>s séquences enregistrées à partir<br />
d'angles <strong>de</strong> caméra différents, une icône spéciale apparaît et<br />
propose le nombre d'angles disponibles, ainsi que l'angle<br />
actuellement présenté. Vous pouvez alors, si vous le désirez,<br />
changer l'angle <strong>de</strong> la caméra.<br />
Appuyez plusieurs fois sur ANGLE jusqu'à atteindre<br />
l'angle <strong>de</strong> vue souhaité.<br />
Pour revenir à l'angle <strong>de</strong> vue normal, appuyez plusieurs fois sur<br />
ANGLE jusqu'à ce que plus aucun message relatif à l'angle ne s'affiche.<br />
Modification <strong>de</strong> la langue <strong>de</strong> doublage<br />
Appuyez sur LANGUAGE. Si le disque actuel offre plusieurs<br />
options <strong>de</strong> langue, celles-ci apparaissent à l'écran.<br />
Appuyez plusieurs fois sur LANGUAGE (LANGUE)<br />
jusqu'à atteindre la langue souhaitée.<br />
Langue <strong>de</strong>s sous-titres<br />
Appuyez sur SUBTITLES. Si le disque actuel offre plusieurs<br />
options <strong>de</strong> sous-titrage, celles-ci apparaissent à l'écran.<br />
Appuyez plusieurs fois sur SUBTITLES (SOUS-TITRES)<br />
jusqu'à atteindre l'option <strong>de</strong> sous-titrage souhaitée.<br />
FONCTIONS GÉNÉRALES<br />
Ralenti<br />
Appuyez plusieurs fois sur > pour afficher les options <strong>de</strong> ralenti suivantes :<br />
x 1 1/2 x 5* 1/2 x en arrière<br />
x 2 1/4 x 6* 1/4 x en arrière<br />
x 3 1/8 x 7* 1/8 x en arrière<br />
x 4 1/16 x 8* 1/16 x en arrière<br />
Appuyez sur OK ou 2 pour reprendre la lecture.<br />
*pour <strong>DVD</strong> uniquement<br />
Modification <strong>de</strong> la sortie audio<br />
Appuyez plusieurs fois sur AUDIO pour afficher les options audio suivantes :<br />
x 1 Mono gauche x 2 Mono droit<br />
x 3 Mono mixte x 4 Stéréo<br />
ZOOM<br />
La fonction <strong>de</strong> zoom permet d'agrandir l'image vidéo et <strong>de</strong> faire un panoramique<br />
sur l'image agrandie. Appuyez plusieurs fois sur ZOOM pour sélectionner une<br />
<strong>de</strong>s options <strong>de</strong> zoom suivantes :<br />
Zoom x 1 2X Zoom x 2 3X<br />
Zoom x 3 4X Zoom x 4 1/2<br />
Zoom x 5 1/3 Zoom x 6 1/4<br />
Zoom x 7<br />
affichage normal<br />
Suppression du son<br />
Appuyez sur MUTE (SUPPRESSION DU SON) pour<br />
désactiver le volume du lecteur. Appuyez <strong>de</strong> nouveau<br />
sur MUTE (SUPPRESSION DU SON) pour le réactiver.<br />
Répétition<br />
Appuyez plusieurs fois sur REPEAT (RÉPÉTER) pour<br />
afficher les options <strong>de</strong> répétition suivantes :<br />
Actions <strong>de</strong> <strong>DVD</strong><br />
Actions <strong>de</strong> VCD<br />
x 1 répète le chapitre répète la piste<br />
x 2 répète le titre répète tout<br />
x 3 répète tout annule la répétition<br />
x 4<br />
annule la répétition<br />
PRÉPARATION<br />
Sortie audio numérique<br />
ASTUCE<br />
• Vous pouvez également utiliser la prise<br />
COAXIAL pour la sortie audio numérique.<br />
• Reportez-vous au manuel d'utilisation <strong>de</strong> votre<br />
équipement auxiliaire pour plus d'informations<br />
sur la connexion.<br />
• Les lecteurs sont compatibles avec les<br />
téléviseurs NTSC/PAL/AUTO.<br />
PRÉSENTATION GÉNÉRALE<br />
Introduction<br />
Ce manuel fournit les instructions <strong>de</strong> base permettant d'utiliser ce lecteur <strong>de</strong><br />
<strong>DVD</strong>. Toutefois, certains disques <strong>DVD</strong> sont produits <strong>de</strong> manière à nécessiter une<br />
utilisation spécifique ou ne permettent qu'une utilisation limitée pendant la<br />
lecture. Dans ces cas, il se peut que le lecteur ne réagisse pas à toutes les<br />
comman<strong>de</strong>s. Veuillez alors vous reporter aux instructions du disque.<br />
Lorsque le symbole<br />
apparaît sur autorisée par le lecteur ou par le disque.<br />
Télécomman<strong>de</strong><br />
• Sauf indication contraire, toutes les opérations peuvent être effectuées à l'ai<strong>de</strong> <strong>de</strong><br />
la télécomman<strong>de</strong>. Orientez toujours la télécomman<strong>de</strong> directement vers le lecteur<br />
en vous assurant qu'il n'y a pas d'obstacles sur le trajet du faisceau infrarouge.<br />
• Les touches correspondantes sur la faça<strong>de</strong> du lecteur peuvent aussi être<br />
utilisées.<br />
Navigation dans les menus<br />
• Votre lecteur dispose d'un système intuitif <strong>de</strong> navigation <strong>de</strong> menus qui vous<br />
gui<strong>de</strong> tout au long <strong>de</strong>s paramétrages et <strong>de</strong>s opérations.<br />
• Utilisez les touches <strong>de</strong> fonction pour activer ou désactiver les opérations<br />
adéquates.<br />
• Utilisez 3, 4, 1, 2 pour vous déplacer dans les menus.<br />
• Appuyez sur OK pour confirmer votre choix.<br />
Français<br />
APERÇU DES FONCTIONS<br />
Comman<strong>de</strong>s <strong>de</strong> l’unité principale ( voir figure 1)<br />
1 MENU .................Accès au menu d'un disque <strong>DVD</strong><br />
2 OSD.......................Accès au menu <strong>de</strong> réglage à l'écran ou sortie <strong>de</strong> ce menu<br />
3 3, 4, 1, 2 ..........Déplacement du curseur (haut, bas, gauche, droite)<br />
OK .........................Pour accepter la sélection du menu<br />
4 ;............................Suspend la lecture<br />
2... ........................Commence / reprend la lecture<br />
9... ........................Appuyer <strong>de</strong>ux fois pour interrompre la lecture<br />
J( / §.... ............Pour les chapitres, pistes ou titres précé<strong>de</strong>nts (J( ) ou<br />
suivants (§)<br />
J / K......................Recherche en arrière (J ) ou recherche en avant ( K)<br />
5 MONITOR ............Sélection <strong>de</strong> l'affichage<br />
(Moniteur)<br />
Pour régler la luminosité au moyen <strong>de</strong> 1 2<br />
Pour régler les couleurs au moyen <strong>de</strong> 1 2<br />
Pour régler le format d'image sur 16:9 ou 4:3 au moyen<br />
<strong>de</strong> 1 2<br />
6 AV IN/OUT .........– A/V OUT<br />
– A/V IN (AUX)<br />
Face avant du lecteur( voir figure 1)<br />
7 POWER/CHG ......Voyant d'alimentation et <strong>de</strong> charge<br />
IR ..........................Capteur infrarouge pour la télécomman<strong>de</strong><br />
TÉLÉCOMMANDE<br />
Télécomman<strong>de</strong> ( voir figure 2)<br />
1 3, 4, 1, 2.........Déplacement du curseur (haut, bas, gauche, droite)<br />
OK .........................Pour accepter la sélection du menu<br />
2 VOL+ / - ................Augmentation/réduction du volume<br />
3 J( / §... .............Pour les chapitres, pistes ou titres précé<strong>de</strong>nts (J( ) ou<br />
suivants (§)<br />
;............................Suspend la lecture<br />
2.. .........................Commence / reprend la lecture<br />
9... ........................Appuyer <strong>de</strong>ux fois pour interrompre la lecture<br />
5 / 6... ..............Recherche en arrière (5 ) ou recherche en avant (6)<br />
4 OSD.......................Accès au menu <strong>de</strong> réglage à l'écran ou sortie <strong>de</strong> ce menu<br />
. ..........................Ralenti<br />
5 AUDIO ..................Sélection <strong>de</strong> la langue du doublage<br />
ZOOM ...................Agrandit l'image vidéo<br />
6 A > B.....................Répétition séquence<br />
PLAY-MODE ........Sélectionne les options d'ordre <strong>de</strong> lecture<br />
7 0 - 9.......................Pavé numérique<br />
8 MUTE....................Activation / désactivation <strong>de</strong> la sourdine<br />
REPEAT ................Répétition chapitre, plage, titre, disque<br />
9 RETURN ...............Pour accé<strong>de</strong>r à la page du menu VCD<br />
ANGLE..................Permet <strong>de</strong> choisir l'angle <strong>de</strong> caméra du <strong>DVD</strong><br />
0 SUBTITLE ............Sélection <strong>de</strong> la langue du doublage<br />
LANGUAGE .........Sélection <strong>de</strong> la langue<br />
! MENU...................Affiche la page MENU<br />
@ SETUP ..................Affiche le menu SETUP (CONFIGURATION)<br />
# Port infrarouge<br />
$ Compartiment <strong>de</strong> la batterie<br />
FONCTIONS DE BASE<br />
Allumage pour le réglage <strong>de</strong> la langue <strong>de</strong> l'affichage à l'écran (OSD)<br />
L'anglais est la langue par défaut <strong>de</strong> l'affichage à l'écran <strong>de</strong> votre lecteur.<br />
Vous avez le choix entre les langues d'affichage suivantes : anglais, français,<br />
espagnol, allemand, chinois simplifié ou chinois traditionnel.<br />
Pays<br />
Options <strong>de</strong> langue OSD<br />
Européens<br />
Anglais, Français, Allemand<br />
Américains<br />
Anglais, Français, Espagnol<br />
1 Réglez l'interrupteur POWER (ALIMENTATION)<br />
sur ON (MARCHE) pour allumer le lecteur.<br />
2 Appuyez sur SET UP (CONFIGURATION)<br />
pour afficher le menu d'installation.<br />
3 Sélectionnez GENERAL SETUP (RÉGLAGES<br />
GÉNÉRAUX), puis appuyez sur OK.<br />
4 Déplacez le curseur et sélectionnez OSD LANG<br />
(LANGUE OSD), puis appuyez sur 2pour<br />
sélectionner les options <strong>de</strong> langue OSD.<br />
5 Sélectionnez votre langue et appuyez sur OK.<br />
Mise en place <strong>de</strong>s disques et mise sous tension<br />
1 Appuyez sur la touche OPEN (OUVRIR) pour ouvrir le tiroir du disque.<br />
2 Posez le disque <strong>de</strong> votre choix dans le tiroir <strong>de</strong> chargement, face comportant<br />
l'étiquette orientée vers le haut (même s'il s'agit d'un disque <strong>DVD</strong> double face).<br />
Assurez-vous qu'il est correctement mis en place dans l'évi<strong>de</strong>ment prévu.<br />
3 Repoussez douccement le tiroir pour le refermer.<br />
4 Réglez l'interrupteur POWER (ALIMENTATION) sur ON (MARCHE)<br />
pour allumer le lecteur.<br />
ASTUCE<br />
Un bruit mécanique normal se fait entendre au cours <strong>de</strong> la lecture.<br />
FONCTIONS DE BASE<br />
Lecture d'un disque <strong>DVD</strong>-Vidéo<br />
Après l'allumage, l'insertion du disque et la fermeture du couvercle, la lecture<br />
commence automatiquement. L'écran indique le type <strong>de</strong> disque chargé. Vous<br />
pouvez être invité à sélectionner une rubrique dans un menu. Utilisez les touches<br />
3, 4, 1, 2 pour mettre votre sélection en surbrillance, puis appuyez sur OK.<br />
Remarque: Les films <strong>DVD</strong> étant en général mis en vente à différents moments<br />
dans les diverses régions du mon<strong>de</strong>, tous les lecteurs sont dotés d'un co<strong>de</strong> <strong>de</strong><br />
zone géographique et les disques peuvent avoir un co<strong>de</strong> régional en option. Si<br />
vous insérez un disque doté d'un co<strong>de</strong> <strong>de</strong> région différent <strong>de</strong> celui <strong>de</strong> votre<br />
lecteur, vous verrez apparaître sur l'écran un message concernant le co<strong>de</strong> <strong>de</strong><br />
région. Le disque ne pourra pas être lu et vous <strong>de</strong>vrez le retirer du lecteur.<br />
Lecture d'un disque CD-Audio ou CD-Vidéo<br />
• Après l'allumage, l'insertion du disque et la fermeture du couvercle, l'écran affiche<br />
le type <strong>de</strong> disque chargé et <strong>de</strong>s informations sur son contenu. Appuyez sur 2<br />
pour commencer la lecture.<br />
• Pendant la lecture d'un VCD via MTV/karaoké, utilisez les touches numérotées<br />
(0~9) pour sélectionner la piste, puis appuyez su 2 ou OK pour lancer la<br />
lecture. Appuyez sur RETURN pour revenir au menu <strong>de</strong> sélection.<br />
FONCTIONS DE BASE<br />
Lecture <strong>de</strong> disque MP3-CD<br />
Les fonctions <strong>de</strong> lecture suivantes sont disponibles pour les CD-MP3.<br />
Pour plus d'informations, reportez-vous aux sections correspondantes.<br />
Réglage du volume, passage à la piste suivante, recherche, répétition,<br />
lecture aléatoire, etc.<br />
Utilisez les touches 3, 4, 1, 2 pour sélectionner votre dossier musical.<br />
Appuyez sur OK pour lire.<br />
Lecture <strong>de</strong> disque JPEG<br />
Utilisez les touches 3, 4, 1, 2 pour sélectionner votre dossier d'image<br />
Appuyez sur OK. Le lecteur bascule automatiquement en mo<strong>de</strong> diaporama.<br />
En mo<strong>de</strong> plein écran, le lecteur affiche les autres fichiers JPEG situés dans le<br />
dossier sélectionné.<br />
• Utilisez 1, 2 pour faire pivoter l'image.<br />
• Utilisez 3 pour retourner l'image verticalement.<br />
• Utilisez 4 pour retourner l'image horizontalement<br />
• En mo<strong>de</strong> diaporama, appuyez sur MENU pour revenir à l'écran <strong>de</strong>s dossiers.<br />
• Appuyez sur 9 pour passer à l'aperçu du groupe..<br />
• Utilisez 3, 4, 1, 2 pour sélectionner l'aperçu <strong>de</strong> l'image et accé<strong>de</strong>r aux<br />
fonctions à l'écran.<br />
Remarque: Sauf indication contraire, toutes les opérations décrites sont<br />
effectuées <strong>de</strong>puis la télécomman<strong>de</strong>.<br />
FONCTIONS GÉNÉRALES<br />
Passage à un autre titre ou à une autre plage<br />
Lorsqu'un disque comporte plus d'un titre ou d'une plage, vous pouvez passer d'un<br />
titre à l'autre comme suit:<br />
• Appuyez brièvement sur § pendant la lecture pour<br />
passer au titre suivant ou à la plage suivante.<br />
• Appuyez brièvement sur J( pendant la lecture pour<br />
revenir au début du titre ou <strong>de</strong> la plage en cours.<br />
• Pour aller directement sur un titre, une piste ou un chapitre, entrez le numéro<br />
correspondant à l'ai<strong>de</strong> <strong>de</strong>s touches numériques (0-9).<br />
Arrêt sur image et lecture image par image<br />
Appuyez plusieurs fois sur ; pour afficher les options<br />
d'arrêt sur image et d'image par image suivantes :<br />
; x 1 Pause / arrêt sur image<br />
; x 2 ;2 apparaît sur l'écran<br />
Lorsque l'icône ;2 s'affiche à l'écran, appuyez plusieurs fois sur ; pour une<br />
lecture image par image.Appuyez sur OK pour reprendre la lecture.<br />
Recherche<br />
Appuyez plusieurs fois sur K pour afficher les options <strong>de</strong> recherche en avant<br />
suivantes: Appuyez plusieurs fois sur J pour afficher les options<br />
<strong>de</strong> recherche en arrière suivantes :<br />
J<br />
K<br />
2 X en arrière 2 X en avant<br />
4 X en arrière 4 X en avant<br />
8 X en arrière 8 X en avant<br />
16 X en arrière 16 X en avant<br />
32 X en arrière 32 X en avant<br />
Vitesse normale<br />
Vitesse normale<br />
Appuyez sur OK ou 2 pour reprendre la lecture.<br />
FONCTIONS GÉNÉRALES<br />
Répétition A > B<br />
Pour répéter une séquence d'un titre ou la lire en boucle :<br />
• Appuyez sur A > B au point <strong>de</strong> départ choisi ;<br />
A apparaît sur l'écran.<br />
• Réappuyez sur A > B au point final choisi ;<br />
AB apparaît sur l'afficheur et la répétition <strong>de</strong> la séquence commence.<br />
• Appuyez <strong>de</strong> nouveau sur A > B pour quitter la séquence.<br />
Mo<strong>de</strong>s <strong>de</strong> lecture<br />
Appuyez plusieurs fois sur PLAY MODE (MODE DE LECTURE) pour afficher les<br />
options d'ordre <strong>de</strong> lecture suivantes :<br />
x 1 Lecture aléatoire x 2 Aléatoire<br />
x 3<br />
Programmation<br />
Utilisez (0-9) et OK pour introduire <strong>de</strong>s réglages spécifiques.<br />
Augmentation / réduction du volume<br />
• Pendant la lecture, appuyez sur 3/4 <strong>de</strong>puis la<br />
télécomman<strong>de</strong> ou sur + vol - sur le lecteur <strong>DVD</strong> même pour<br />
augmenter ou diminuer le volume sonore.<br />
• Utilisez le bouton rotatif situé sur le côté droit<br />
<strong>de</strong> l'appareil.<br />
Setup (comman<strong>de</strong> <strong>de</strong> l'unité principale)<br />
Appuyez plusieurs fois sur SETUP (MONITEUR)<br />
et utilisez 1 / 2 pour régler : la luminosité,<br />
la couleur et le mo<strong>de</strong> d'affichage (normal ou plein écran).<br />
GUIDE DE DÉPANNAGE<br />
Symptôme<br />
Remè<strong>de</strong><br />
Le disque ne peut<br />
– Assurez-vous que l'étiquette du disque est<br />
être lu<br />
orientée vers le haut.<br />
– Nettoyez le disque.<br />
– Vérifiez si le disque est défectueux en<br />
essayant avec un autre disque.<br />
Le lecteur ne réagit pas<br />
– Orientez la télécomman<strong>de</strong> directement vers<br />
à la télécomman<strong>de</strong><br />
le capteur situé en faça<strong>de</strong> du lecteur. Évitez<br />
tout obstacle pouvant interféfer avec le trajet<br />
du signal. Vérifiez ou remplacez les piles.<br />
Image déformée ou<br />
– Utilisez uniquement <strong>de</strong>s disques dont le<br />
image N/B avec disques<br />
format est compatible avec celui du<br />
<strong>DVD</strong>-Vidéo<br />
téléviseur utilisé (PAL/NTSC).<br />
Absence <strong>de</strong> son par<br />
– Vérifiez les branchements numérique.<br />
la sortie numérique<br />
– Vérifiez dans le menu <strong>de</strong>s réglages que la<br />
sortie numérique est activée.<br />
Le lecteur ne répond<br />
– Ces comman<strong>de</strong>s ne sont pas autorisées par<br />
pas à toutes les<br />
le disque.<br />
comman<strong>de</strong>s pendant<br />
– Consultez les instructions du disque.<br />
la lecture<br />
Le lecteur chauffe<br />
– La surface du lecteur chauffe lorsque celui-ci<br />
est utilisé pendant une pério<strong>de</strong> prolongée.<br />
Cette réaction est normale.<br />
L'affichage s'affaiblit<br />
– L'appareil est en mo<strong>de</strong> économie<br />
lorsque le cable<br />
d'énergie afin d'allonger la durée <strong>de</strong><br />
d'alimentation secteur<br />
fonctionement <strong>de</strong> la batterie. C'est normal.<br />
est débranché.<br />
Ajustez la luminosité <strong>de</strong>puis la<br />
fonction MONITOR (SURVEILLANCE).<br />
Cet appareil est conforme aux normes <strong>de</strong> la Communauté européenne<br />
en matière d'interférences radio.<br />
PRÉPARATION<br />
Alimentation<br />
Utiliser l'adaptateur<br />
Connectez l'adaptateur fourni à l'appareil et à<br />
la prise secteur (voir illustration).<br />
ASTUCE<br />
Pour éviter d'endommager le lecteur, éteignez-le avant <strong>de</strong> brancher/débrancher<br />
l'adaptateur CA/CC.<br />
Utilisation <strong>de</strong> l'adaptateur allume-cigares<br />
Connectez l'adaptateur allume-cigares fourni (12V) à l'appareil et<br />
à l'allume-cigares.<br />
ASTUCE<br />
• Pour éviter d'endommager le lecteur, éteignez-le avant <strong>de</strong><br />
brancher/débrancher l'adaptateur <strong>de</strong> voiture<br />
• Si vous connectez l'appareil à l'adaptateur allume-cigares, vérifiez<br />
que la tension d'entrée <strong>de</strong> l'adaptateur est i<strong>de</strong>ntique à celle<br />
<strong>de</strong> la voiture.<br />
Télécomman<strong>de</strong><br />
1 Enlevez le compartiment à piles. Retirez la languette <strong>de</strong><br />
protection en plastique (lors <strong>de</strong> la première utilisation).<br />
2 Insérez 1x pile lithium 3 V, CR2025, puis fermez le<br />
compartiment.<br />
GÉNÉRALITÉS<br />
Manipulation <strong>de</strong>s disques<br />
• N'écrivez jamais et n'apposez jamais d'etiquette<br />
sur un disque.<br />
• Conservez les disques à l'abri <strong>de</strong> la lumière directe<br />
du soleil et <strong>de</strong>s sources <strong>de</strong> chaleur.<br />
• Prenez toujours le disque par le bord et rangez-le<br />
dans sa boîte après usage pour le protéger <strong>de</strong>s<br />
rayures et <strong>de</strong> la poussière.<br />
• Lorsqu'un disque <strong>de</strong>vient sale, nettoyez-le à l'ai<strong>de</strong><br />
d'un chiffon en le frottant du centre vers la périphérie.<br />
À propos <strong>de</strong> l'afficheur LCD<br />
La fabrication <strong>de</strong> l'afficheur LCD repose sur une technologie <strong>de</strong> haute précision. Il<br />
est toutefois possible <strong>de</strong> voir <strong>de</strong> petits points noirs apparaître sur l'afficheur LCD.<br />
Ce phénomène est tout à fait normal et ne constitue en aucun cas un<br />
dysfonctionnement <strong>de</strong> l'appareil.<br />
Informations relatives à l'environnement<br />
Nous n'avons pas utilisé <strong>de</strong> matériaux d'emballage non nécessaires.Vous pouvez<br />
facilement séparer les matériaux d'emballage en éléments principaux: carton,<br />
polystyrène extensible et polyéthylène.<br />
L'appareil est constitué <strong>de</strong> matériaux qu'il est possible <strong>de</strong> recycler, s'il est<br />
démonté par une société spécialisée. Veuillez avoir l'obligeance <strong>de</strong> respecter les<br />
réglementations locales concernant la manière <strong>de</strong> se débarrasser <strong>de</strong>s matériaux<br />
d'emballage, piles épuisées et matériel usé.<br />
Information sur le droit d'auteur<br />
Les marques et noms <strong>de</strong> produits sont <strong>de</strong>s marques commerciales appartenant à<br />
leurs sociétés ou organisations respectives.<br />
La duplication non autorisée et la distribution d'enregistrement à partir d'Internet<br />
ou <strong>de</strong> CD / VCD / <strong>DVD</strong> viole la loi sur le droit d'auteur et les traités<br />
internationaux.<br />
GÉNÉRALITÉS<br />
Alimentation<br />
L'appareil fonctionne avec un adaptateur secteur, un adaptateur allume-cigares ou un boîtier<br />
<strong>de</strong> piles rechargeables (le tout étant fourni).<br />
• Contrôlez si la tension secteur indiquée sur la plaquette signalétique à la base <strong>de</strong><br />
l'équipement correspond à la tension secteur locale. Toute autre source d'alimentation<br />
pourrait endommager l'adaptateur secteur et l'appareil.<br />
• Ne touchez pas l'adaptateur secteur si vos mains sont mouillées : vous risquez une<br />
électrocution.<br />
• Si vous connectez l'appareil à l'adaptateur allume-cigares, vérifiez que la tension d'entrée<br />
<strong>de</strong> l'adaptateur est i<strong>de</strong>ntique à celle <strong>de</strong> la voiture.<br />
• Débranchez l'adaptateur secteur <strong>de</strong> la prise ou le boîtier <strong>de</strong> piles si vous n'utilisez pas<br />
l'appareil pendant un certain temps.<br />
• Tenez la prise pour débrancher l'adaptateur secteur. Ne tirez pas sur le cordon<br />
d'alimentation.<br />
Sécurité et Maintenance<br />
• Ne démontez pas l'appareil car les rayons laser pourraient entraîner <strong>de</strong>s lésions oculaires.<br />
Toute opération d'entretien doit être effectuée par un personnel qualifié.<br />
• Débranchez l'adaptateur secteur si un liqui<strong>de</strong> ou <strong>de</strong>s objets ont pénétré dans l'appareil.<br />
• Ne donnez pas <strong>de</strong> chocs au le lecteur. Les chocs violents et les vibrations importantes<br />
peuvent provoquer <strong>de</strong>s dysfonctionnements.<br />
• Ne pas exposer l'appareil à une chaleur excessive causée par un appareil <strong>de</strong> chauffage ou au<br />
rayonnement direct du soleil.<br />
• Cet appareil n'étant pas étanche, évitez <strong>de</strong> plonger le lecteur dans l'eau. Toute infiltration<br />
d'eau risque d'endommager sérieusement l'appareil et d'entraîner la formation <strong>de</strong> rouille.<br />
• Évitez d'utiliser <strong>de</strong>s agents nettoyants contenant <strong>de</strong> l'alcool, <strong>de</strong> l'ammoniac, du benzène ou<br />
<strong>de</strong>s substances abrasives susceptibles d'endommager le lecteur.<br />
• L'appareil ne doit pas etre exposé a <strong>de</strong>s égouttements ou <strong>de</strong>s éclaboussures. Ne posez<br />
aucun élément pouvant etre source <strong>de</strong> danger sur l'appareil. (ex. <strong>de</strong>s objets contenant du<br />
liqui<strong>de</strong>, <strong>de</strong>s bougies allumèes).<br />
• Ne touchez jamais le lentille du lecteur!<br />
Remarque: La surface du lecteur chauffe s'il est utilisé pendant une pério<strong>de</strong> prolongée.<br />
Cette réaction est normale.<br />
OPÉRATIONS À L'ÉCRAN<br />
Outre l'utilisation <strong>de</strong>s touches <strong>de</strong> la télécomman<strong>de</strong>, vous pouvez modifier les<br />
options <strong>de</strong> lecture du disque à partir <strong>de</strong> l'affichage à l'écran.<br />
1 Appuyez sur OSD (Affichage à l'écran) lors <strong>de</strong> la lecture du disque.<br />
Une liste <strong>de</strong> fonctions apparaît.<br />
2 Utilisez les touches 3 4 pour mettre votre sélection en surbrillance.<br />
Lorsque ces paramètres sont sélectionnés, appuyez sur OK pour :<br />
FICHIER<br />
entrer le nombre <strong>de</strong> fichiers souhaité<br />
TITRE<br />
entrer le nombre <strong>de</strong> titres souhaité<br />
CHAPITRE<br />
entrer le nombre <strong>de</strong> chapitres souhaité<br />
AUDIO<br />
sélectionner les options audio<br />
SOUS-TITRES<br />
sélectionner les options <strong>de</strong> sous-titrage<br />
ANGLE<br />
sélectionner les options d'angle <strong>de</strong> vue<br />
HEURE DU FICHIER<br />
entrer l'heure <strong>de</strong> début pour la lecture du fichier<br />
TEMPS TT<br />
entrer le point <strong>de</strong> départ <strong>de</strong> l'heure <strong>de</strong> lecture d'un titre<br />
TEMPS CH<br />
entrer le point <strong>de</strong> départ <strong>de</strong> l'heure <strong>de</strong> lecture d'un titre<br />
RÉPÉTER<br />
sélectionner les options <strong>de</strong> répétition<br />
TIME DISP.<br />
sélectionner les options d'affichage <strong>de</strong> l'heure<br />
3 Utilisez (0-9) pour introduire <strong>de</strong>s réglages spécifiques.<br />
4 Appuyez sur 1 pour annuler le réglage actuel ou revenir au niveau <strong>de</strong> menu<br />
précé<strong>de</strong>nt.<br />
5 Appuyez sur OSD (Affichage à l'écran) pour quitter.<br />
OPÉRATIONS SETUP (CONFIGURATION)<br />
Pour profiter <strong>de</strong> toutes les options <strong>de</strong> lecture, utilisez SETUP (CONFIGURATION)<br />
pour affiner vos réglages. Utilisez les touches 3,4,1, 2 pour mettre votre<br />
sélection en surbrillance, puis appuyez sur OK.<br />
1 Appuyez sur SETUP. Une liste <strong>de</strong> fonctions apparaît.<br />
2 Utilisez les touches 3 4 pour mettre votre sélection en surbrillance.<br />
Lorsque ces paramètres sont sélectionnés, appuyez sur OK pour:<br />
RÉGLAGES GÉNÉRAUX<br />
sélectionner l'affichage et d'autres options<br />
RÉGLAGES AUDIO<br />
sélectionner les options audio<br />
PRÉFÉRENCES<br />
sélectionner les préférences <strong>de</strong> lecture<br />
DÉFINITION MOT DE PASSE<br />
sélectionner les options <strong>de</strong> mot <strong>de</strong> passe<br />
3 Appuyez sur 1 pour annuler le réglage actuel ou revenir au niveau <strong>de</strong> menu<br />
précé<strong>de</strong>nt.<br />
4 Appuyez su SETUP (CONFIGURATION) pour quitter<br />
Réglages généraux<br />
Lorsque ces paramètres sont sélectionnés, appuyez sur OK pour:<br />
AFFICHAGE TV<br />
sélectionner le rapport d'affichage<br />
TYPE TV<br />
sélectionner le standard vidéo du téléviseur externe<br />
LANGUE OSD<br />
sélectionner la langue d'affichage<br />
SPDIF Sortie<br />
sélectionner les options audio numériques<br />
SS-TITRES<br />
sélectionner les options <strong>de</strong> sous-titres<br />
MALENTENDANTS<br />
ÉCRAN DE VEILLE<br />
sélectionner les options d'économiseur d'écran<br />
Appuyez sur 1 pour annuler le réglage actuel ou revenir au niveau <strong>de</strong> menu<br />
précé<strong>de</strong>nt.<br />
OPÉRATIONS SETUP (CONFIGURATION)<br />
Réglages audio<br />
Lorsque ces paramètres sont sélectionnés, appuyez sur OK pour:<br />
RÉGLAGES HAUT-PARLEURS<br />
sélectionner les options <strong>de</strong> haut-parleurs<br />
RÉGLAGES DOLBY DIGITA<br />
sélectionner les options <strong>de</strong> son Dolby<br />
ÉGALISEUR CANAL<br />
sélectionner les options d'égaliseur<br />
PAGE DE PROCESSUS 3D<br />
sélectionner les options <strong>de</strong> son Surround<br />
Appuyez sur 1 pour annuler le réglage actuel ou revenir au niveau <strong>de</strong> menu<br />
précé<strong>de</strong>nt.<br />
Préférences<br />
Lorsque ces paramètres sont sélectionnés, appuyez sur OK pour:<br />
AUDIO<br />
sélectionner les options <strong>de</strong> langue <strong>de</strong> doublage<br />
SOUS-TITRES<br />
sélectionner les options <strong>de</strong> sous-titrage<br />
MENU DISQUE<br />
sélectionner les options <strong>de</strong> langue <strong>de</strong>s menus du disque<br />
PARENTAL<br />
sélectionner les options parentales<br />
PAR DÉFAUT<br />
restaurer les paramètres par défaut<br />
Appuyez sur 1 pour annuler le réglage actuel ou revenir au niveau <strong>de</strong> menu<br />
précé<strong>de</strong>nt.<br />
Remarque: Les options parentales peuvent être sélectionnées uniquement lorsque<br />
le mo<strong>de</strong> mot <strong>de</strong> passe est désactivé.<br />
Définition mot <strong>de</strong> passe<br />
Lorsque ces paramètres sont sélectionnés, appuyez sur OK pour:<br />
MODE MOT DE PASSE<br />
activer / désactiver le mo<strong>de</strong> mot <strong>de</strong> passe<br />
MOT DE PASSE modifier le mot <strong>de</strong> passe actuel (par défaut : 99999<br />
Appuyez sur 1 pour annuler le réglage actuel ou revenir au niveau <strong>de</strong> menu<br />
précé<strong>de</strong>nt.<br />
CARACTÉRISTIQUES TECHNIQUES<br />
Dimensions<br />
20.2 x 14.9 x 4.0 cm<br />
7.9 x 5.8 x 1.5 pouces<br />
Poids<br />
0.86 kg / 1.89 lb<br />
Alimentation<br />
CC 12V 2A<br />
Plage <strong>de</strong> température <strong>de</strong><br />
0 - 50°C (32 ~ 122°F)<br />
fonctionnement<br />
Longueur d'on<strong>de</strong> du laser<br />
650nm<br />
Système vidéo<br />
NTSC / PAL / AUTO<br />
Ban<strong>de</strong> passante<br />
20Hz ~ 20KHz ± 1dB<br />
Rapport signal sur bruit<br />
≥ 85dB<br />
Distorsion du son + bruit<br />
≤ -80(1KHz)<br />
Séparation <strong>de</strong>s canaux<br />
≥ 85dB<br />
Gamme dynamique<br />
≥ 80dB<br />
Sortie<br />
Sortie audio (audio analogique) Niveau <strong>de</strong> sortie: 2V ± 10%<br />
Impédance <strong>de</strong> charge:<br />
10KΩ<br />
Sortie vidéo. Niveau <strong>de</strong> sortie: 1Vp - p ± 20%<br />
Impédance <strong>de</strong> charge:<br />
75Ω<br />
Dans un souci constant d'amélioration <strong>de</strong> ses produits, PHILIPS<br />
se réserve le droit <strong>de</strong> modifier le <strong>de</strong>sign et les caractéristiques<br />
<strong>de</strong> ce produit à tout moment.<br />
Les modifications non autorisées par le fabricant peuvent annuler<br />
le droit <strong>de</strong>s utilisateurs à utiliser cet appareil.<br />
Tous droits réservés.<br />
ATTENTION<br />
L’utilisation <strong>de</strong>s comman<strong>de</strong>s ou réglages ou le non respect <strong>de</strong>s<br />
procédures ci-incluses peuvent se traduire par une exposition<br />
dangereuse à l’irradiation.<br />
✔<br />
✔<br />
✔<br />
✔<br />
✔<br />
✔<br />
✔<br />
✔<br />
PRÉPARATION<br />
Branchement du boîtier <strong>de</strong> piles et mise en charge*<br />
1 Éteignez l'appareil. Branchez le boîtier <strong>de</strong> piles<br />
comme illustré.<br />
2 Connectez l'adaptateur fourni à l'appareil et à la<br />
prise secteur (voir illustration). Chargez les piles<br />
jusqu'à ce que le voyant rouge s'éteigne (4,5 à 6,5<br />
heures après la mise hors tension).<br />
ASTUCE<br />
• Il est normal que le boîtier <strong>de</strong> piles chauffe au<br />
cours <strong>de</strong> la charge.<br />
• apparaît sur l'écran lorsque le niveau <strong>de</strong><br />
charge <strong>de</strong> la batterie est proche du niveau bas.<br />
Retrait du boîtier <strong>de</strong> piles<br />
1 Éteignez l'appareil.<br />
2 Débranchez l'adaptateur secteur.<br />
3 Retournez le lecteur.<br />
4 Enfoncez l'interrupteur <strong>de</strong> verrouillage du boîtier<br />
<strong>de</strong> piles ➊.<br />
5 Faites glisser le boîtier <strong>de</strong> piles comme illustré<br />
➋ ➌.<br />
*Les piles ne sont rechargeables qu'un<br />
certain nombre <strong>de</strong> fois, aussi aurez-vous<br />
peut-être à les remplacer. La durée <strong>de</strong><br />
fonctionnement <strong>de</strong>s piles et le nombre <strong>de</strong><br />
charges possibles dépen<strong>de</strong>nt <strong>de</strong> votre<br />
utilisation et <strong>de</strong>s réglages.<br />
POWER<br />
ON<br />
OFF<br />
POWER<br />
ON<br />
OFF<br />
✔<br />
PREPARACIÓN<br />
Instalación y carga <strong>de</strong>l paquete <strong>de</strong> baterías*<br />
1 Apague el aparato. Coloque el paquete <strong>de</strong><br />
baterías como se muestra.<br />
2 Conecte el adaptador suministrado al aparato<br />
y a la fuente <strong>de</strong> alimentación principal (como<br />
se muestra). Cárguelo hasta que el indicador<br />
rojo se apague (aproximadamente <strong>de</strong> 4,5 a 6,5<br />
horas con la unidad apagada).<br />
Nota:<br />
• Es normal que el paquete <strong>de</strong> baterías se<br />
caliente al cargarse.<br />
• aparece cuando la energía <strong>de</strong> la batería<br />
es escasa.<br />
Desinstalación <strong>de</strong>l paquete <strong>de</strong> baterías<br />
1 Apague el aparato.<br />
2 Desenchufe el adaptador <strong>de</strong> CA.<br />
3 Dele la vuelta al reproductor.<br />
4 Pulse el conmutador <strong>de</strong> bloqueo <strong>de</strong>l<br />
paquete <strong>de</strong> baterías ➊.<br />
5 Deslice el paquete <strong>de</strong> baterías hasta<br />
sacarlo, como se muestra ➋ ➌.<br />
*Las baterías tienen un número <strong>de</strong> ciclos<br />
<strong>de</strong> carga limitados y podría ser<br />
necesario sustituirlas. La vida útil <strong>de</strong> la<br />
batería y el número <strong>de</strong> ciclos <strong>de</strong> carga<br />
varían según el uso y los ajustes <strong>de</strong><br />
configuración.<br />
POWER<br />
ON<br />
OFF<br />
POWER<br />
ON<br />
OFF<br />
✔<br />
RESOLUCIÓN DE PROBLEMAS<br />
Si el reproductor <strong>DVD</strong>-Ví<strong>de</strong>o presenta alguna anomalía operativa, antes <strong>de</strong><br />
nada revise los puntos <strong>de</strong> la siguiente lista.<br />
ADVERTENCIA:<br />
Bajo ningún concepto <strong>de</strong>be intentar reparar el aparato usted mismo,<br />
puesto que se invalidaría la garantía. Si se produce un fallo, comprobar<br />
en primer lugar los puntos listados a continuación antes <strong>de</strong> llevar el<br />
equipo a reparar. Si el usuario no es capaz <strong>de</strong> resolver un problema<br />
mediante el seguimiento <strong>de</strong> estas ayudas, <strong>de</strong>be consultar al comercio<br />
distribuidor o centro <strong>de</strong> servicio.<br />
Síntoma<br />
Remedio<br />
No hay corriente<br />
– Compruebe si los dos extremos <strong>de</strong>l cable <strong>de</strong><br />
alimentación están <strong>de</strong>bidamente conectados.<br />
– Asegúrese <strong>de</strong> que la toma <strong>de</strong> c.a. utilizada<br />
tiene corriente, conectando para ello otro<br />
aparato.<br />
– Compruebe si el paquete <strong>de</strong> baterías está<br />
insertado correctamente.<br />
– Compruebe si el adaptador <strong>de</strong>l automóvil está<br />
conectado correctamente.<br />
Imagen distorsionada<br />
– Observe si el disco presenta huellas y límpielo<br />
con un paño suave en sentido radial, <strong>de</strong>l<br />
centro hacia afuera.<br />
– En ocasiones, la imagen pue<strong>de</strong> aparecer algo<br />
distorsionada, y no se trata <strong>de</strong> ninguna<br />
anomalía.<br />
Completamente distorsionada – El interruptor NTSC/PAL no está en la<br />
o no hay color en la pantalla<br />
a<strong>de</strong>cuada. Haga coincidir los ajustes<br />
<strong>de</strong> TV<br />
<strong>de</strong>l televisor y <strong>de</strong>l reproductor<br />
No hay sonido<br />
– Revise las conexiones <strong>de</strong> audio. Si está<br />
utilizando un amplificador Hi-Fi, pruebe con<br />
otra fuente <strong>de</strong> sonido.<br />
GUIDE DE DÉPANNAGE<br />
En cas <strong>de</strong> difficultés d'utilisation du lecteur <strong>de</strong> <strong>DVD</strong>-Vidéo, veuillez tout d'abord<br />
consulter cette liste <strong>de</strong> points à vérifier.<br />
AVERTISSEMENT<br />
N'essayez en aucun cas <strong>de</strong> réparer l'appareil vous-même, sous peine<br />
d'invali<strong>de</strong>r la garantie.<br />
Dans le cas d'une anomalie <strong>de</strong> fonctionnement, commencez par vérifier les<br />
points ci-<strong>de</strong>ssous avant <strong>de</strong> donner votre appareil à réparer. Si vous ne<br />
parvenez pas à résoudre le problème en suivant ces instructions, veuillez<br />
consulter votre fournisseur ou votre centre SAV.<br />
Symptôme<br />
Remè<strong>de</strong><br />
Pas d'alimentation – Vérifiez que les <strong>de</strong>ux fiches du câble<br />
d'alimentation sont connectées<br />
correctement.<br />
– Vérifiez qu'il y a bien du courant à la prise<br />
secteur en y branchant un autre appareil.<br />
– Vérifiez que le boîtier <strong>de</strong> piles est inséré<br />
correctement.<br />
– Vérifiez que l'adaptateur allume-cigares est<br />
branché correctement..<br />
Image déformée<br />
– Vérifiez que le disque ne comporte pas <strong>de</strong> traces<br />
<strong>de</strong> doigts et nettoyez le avec un chiffon doux en<br />
partant du centre vers la périphérie.<br />
– Parfois, une légère distorsion <strong>de</strong> l'image peut se<br />
produire. Il ne s'agit pas d'un<br />
dysfonctionnement.<br />
L'image est complètement<br />
– Le réglage NTSC/PAL est peut-être erroné.<br />
déformée /en noir et blanc<br />
Faites correspondre les réglages <strong>de</strong> votre<br />
avec le menu du lecteur<br />
téléviseur et <strong>de</strong> votre lecteur.<br />
Pas <strong>de</strong> son<br />
– Vérifiez les branchements audio. Si vous<br />
utilisez un amplificateur HiFi, essayez une<br />
autre source sonore.<br />
jaune<br />
Amarillo<br />
ATTENTION<br />
- Les piles contiennent <strong>de</strong>s substances chimiques: mettez-les au rebut en<br />
prenant toutes les précautions qui s'imposent.<br />
- Danger d'explosion si la batterie n'est pas placée correctement. Remplacez<br />
uniquement par une batterie i<strong>de</strong>ntique ou d'un type équivalent.<br />
- L'<strong>emploi</strong> incorrect <strong>de</strong>s piles peut causer <strong>de</strong>s fuites électrolytiques et ce<br />
faisant, contaminer le compartiment ou causer l'éclatement <strong>de</strong>s dites piles.<br />
- Enlevez les piles si l'équipement n'est pas utilisé pendant une pério<strong>de</strong><br />
prolongée.<br />
Contient du perchlorate - <strong>de</strong>s précautions spéciales sont peut être nécessaires.<br />
Consultez la page Web www.dtsc.ca.gov/hazardouswaste/perchlorate.<br />
Precaución<br />
- Las pilas contienen sustancias químicas: una vez gastadas, <strong>de</strong>posítelas en el<br />
lugar apropiado.<br />
- Si la batería se sustituye <strong>de</strong> forma incorrecta, podría producirse una explosión.<br />
Sustitúyala sólo por una batería <strong>de</strong>l mismo tipo o <strong>de</strong> un tipo equivalente.<br />
- Una utilización incorrecta <strong>de</strong> las pilas pue<strong>de</strong> ocasionar un <strong>de</strong>rrame electrolítico y<br />
la corrosión <strong>de</strong>l compartimento o provocar un reventón <strong>de</strong> las mismas.<br />
- Saque las pilas si no va a usar el aparato durante mucho tiempo.<br />
Material <strong>de</strong> perclorato: pue<strong>de</strong> que sea necesario aplicar medidas <strong>de</strong> manejo<br />
especiales. consulte www.dtsc.ca.gov/hazardouswaste/perchlorate.<br />
INTRODUCTION<br />
Formats <strong>de</strong> disque acceptés<br />
Outre les disques <strong>DVD</strong>-Vidéo, vous pourrez également visionner tous les CD-Vidéo<br />
et CD audio (y compris les CD-R, CD-RW, <strong>DVD</strong>±R et les DVR±RW).<br />
<strong>DVD</strong>-Vidéo<br />
En fonction <strong>de</strong> leur contenu (film, clips vidéo, série dramatique,<br />
etc.), ces disques peuvent comporter un ou plusieurs titres et<br />
chaque titre peut être subdivisé en un ou plusieurs chapitres. Pour<br />
une lecture aisée et pratique, le lecteur vous permet <strong>de</strong> passer<br />
d'un titre et d'un chapitre à l'autre.<br />
CD-Vidéo<br />
En fonction <strong>de</strong> leur contenu (film, clips vidéo, série dramatique,<br />
etc.), ces disques peuvent comporter une ou plusieurs plages et les<br />
plages peuvent présenter un ou plusieurs in<strong>de</strong>x, comme indiqué sur<br />
le boîtier du disque. Pour une lecture aisée et pratique, le lecteur<br />
vous permet <strong>de</strong> passer d'une plage et d'un in<strong>de</strong>x à l'autre.<br />
CD Audio / MP3-CD<br />
Les CD Audio / CD MP3 comportent uniquement <strong>de</strong>s plages<br />
musicales. Ils peuvent être lus sur un système stéréo classique à<br />
l'ai<strong>de</strong> <strong>de</strong>s touches <strong>de</strong> la télécomman<strong>de</strong> et/ou <strong>de</strong> l'unité principale ou<br />
via le téléviseur à l'ai<strong>de</strong> <strong>de</strong> l'affichage à l'écran (OSD).<br />
CD contenant <strong>de</strong>s fichiers JPEG<br />
Ce lecteur permet également <strong>de</strong> visualiser <strong>de</strong>s photos JPEG.<br />
INTRODUCCIÓN<br />
Formatos <strong>de</strong> disco reproducibles<br />
A<strong>de</strong>más <strong>de</strong> los discos <strong>DVD</strong>-Ví<strong>de</strong>o, también podrá reproducir todo tipo <strong>de</strong> discos<br />
CD-Ví<strong>de</strong>o y CD-Audio (incluidos CDR, CDRW, <strong>DVD</strong>±R y DVR±RW).<br />
<strong>DVD</strong>-Ví<strong>de</strong>o<br />
Dependiendo <strong>de</strong>l material grabado (película, ví<strong>de</strong>o musical, serie,<br />
etc.), un disco pue<strong>de</strong> incluir uno o más títulos, y cada título uno o<br />
más capítulos. Para simplificar el acceso, el reproductor le permite<br />
<strong>de</strong>splazarse por los títulos y por los capítulos.<br />
CD-Ví<strong>de</strong>o<br />
Dependiendo <strong>de</strong>l material grabado (película, ví<strong>de</strong>o musical, serie,<br />
etc.), un disco pue<strong>de</strong> incluir una o más pistas, y las pistas uno o<br />
más índices, según se indica en la carcasa <strong>de</strong>l disco. Para<br />
simplificar el acceso, el reproductor le permite <strong>de</strong>splazarse por las<br />
pistas y por los índices.<br />
CD-Audio / CD-MP3<br />
Los discos <strong>de</strong> CD-Audio / CD-MP3 contienen únicamente pistas<br />
musicales, y se reconocen por el logotipo. Pue<strong>de</strong> realizar<br />
reproducciones <strong>de</strong> la forma tradicional mediante las teclas <strong>de</strong>l<br />
control remoto y/o la unidad principal <strong>de</strong> un sistema estéreo o<br />
mediante las opciones <strong>de</strong> presentación en pantalla (OSD) <strong>de</strong>l televisor.<br />
CD con archivos JPEG<br />
También pue<strong>de</strong> ver fotografías JPEG fijas en este reproductor.<br />
GÉNÉRALITÉS<br />
Sécurité d'écoute<br />
Écoutez à un volume modéré:<br />
• L'utilisation du casque à fort volume peut endommager votre audition. La<br />
puissance du son que peut produire cet équipement peut entraîner<br />
une perte d'audition chez une personne normale, même si celle-ci y<br />
est exposée pendant moins d'une minute. La puissance élevée est<br />
disponible pour les personnes ayant déjà subi une perte partielle<br />
<strong>de</strong> leur audition.<br />
• Le son peut tromper. Avec le temps, votre "niveau confortable" d'écoute<br />
s'adapte à <strong>de</strong>s volumes plus élevés. Par conséquent, après une écoute<br />
prolongée, ce qui semble être un volume "normal" peut en fait être un volume<br />
élevé pouvant causer <strong>de</strong>s dommages à votre audition. Afin <strong>de</strong> vous protéger <strong>de</strong><br />
ceci, réglez le volume à un niveau sûr avant que votre audition ne s'adapte, et<br />
n'augmentez pas ce niveau.<br />
Pour déterminer un niveau <strong>de</strong> volume sûr :<br />
• Réglez le volume à une faible valeur.<br />
• Augmentez progressivement le volume jusqu'à ce que vous puissiez entendre le<br />
son confortablement et clairement, sans distorsion.<br />
Écoutez pendant <strong>de</strong>s pério<strong>de</strong>s raisonnables :<br />
• Une exposition prolongée au son, même à un niveau normalement "sûr", peut<br />
aussi entraîner une perte d'audition.<br />
• Assurez-vous d'utiliser votre équipement <strong>de</strong> façon raisonnable et faites <strong>de</strong>s<br />
pauses appropriées.<br />
Observez les recommandations suivantes lorsque vous utilisez votre<br />
casque:<br />
• Écoutez à <strong>de</strong>s niveaux <strong>de</strong> volume raisonnables et pendant <strong>de</strong>s pério<strong>de</strong>s<br />
raisonnables.<br />
• Ne changez pas le réglage <strong>de</strong> votre volume alors que votre audition s'adapte.<br />
• Ne réglez pas le volume à un niveau tel que vous ne puissiez plus entendre ce<br />
qui se passe autour <strong>de</strong> vous.<br />
• Dans <strong>de</strong>s situations pouvant présenter un danger, soyez pru<strong>de</strong>nt ou cessez<br />
temporairement d'utiliser l'équipement.<br />
• N'utilisez pas le casque lorsque vous conduisez un véhicule à moteur, faites du<br />
vélo, <strong>de</strong> la planche à roulettes, etc.<br />
PRÉPARATION<br />
Connexions<br />
Connexion <strong>de</strong>s écouteurs<br />
Connectez les écouteurs à la prise PHONE <strong>de</strong> votre<br />
appareil.<br />
Connexion d'un équipement auxiliaire<br />
• Éteignez votre appareil avant <strong>de</strong> le connecter à tout équipement auxiliaire.<br />
• Vous pouvez connecter le lecteur à un téléviseur ou à un amplificateur<br />
pour lire un <strong>DVD</strong> ou jouer un karaoké.<br />
AV IN<br />
Appuyez sur le bouton AV-IN du lecteur <strong>de</strong><br />
<strong>DVD</strong> pour sélectionner A/V IN (AUX).<br />
Connexion<br />
Coleur<br />
Vidéo<br />
Jaune<br />
Audio (Gauche)<br />
Blanc<br />
Audio (Droite)<br />
Rouge<br />
AV OUT<br />
Appuyez sur le bouton AV IN/OUT du lecteur <strong>de</strong><br />
<strong>DVD</strong> pour sélectionner A/V OUT.<br />
INFORMATION SUR LE DROIT D'AUTEUR<br />
Toute copie d'une oeuvre protégée par un droit d'auteur, ce incluant les<br />
programmes informatiques, les enregistrements d'images et <strong>de</strong> sons, peut<br />
être une contrefaçon d'un droit d'auteur et constituer un délit. Cet appareil ne doit<br />
pas être utilisé à cette fin.<br />
Windows Media et le logo Windows sont <strong>de</strong>s marques, déposées ou non, <strong>de</strong><br />
Microsoft Corporation aux États-Unis et/ou dans d'autres pays.<br />
MISE AU REBUT DE VOTRE ANCIEN PRODUIT<br />
Votre produit a été conçu et fabriqué à l'ai<strong>de</strong> <strong>de</strong> matériaux et composants <strong>de</strong><br />
haute qualité, recyclables et réutilisables.<br />
Le symbole <strong>de</strong> poubelle barrée sur un produit indique que ce <strong>de</strong>rnier<br />
est conforme à la directive européenne 2002/96/EC.<br />
Veuillez vous renseigner sur les systèmes locaux <strong>de</strong> collecte <strong>de</strong>s<br />
produits électriques ou électroniques.<br />
Veillez à respecter les réglementations locales ; ne mettez pas au<br />
rebut vos anciens produits comme <strong>de</strong>s déchets ménagers. La mise au rebut<br />
citoyenne <strong>de</strong> votre ancien produit permet <strong>de</strong> protéger l'environnement et la santé<br />
INFORMACIÓN DE COPYRIGHT<br />
La realización <strong>de</strong> copias no autorizadas <strong>de</strong> materiales protegidos
PET707_ifu.qxd 2006-11-14 20:03 Page 1<br />
Portable <strong>DVD</strong> player<br />
User manual<br />
Manuel d’utilisation<br />
Manual <strong>de</strong>l usuario<br />
Manual do usuàrio<br />
PET830<br />
English<br />
Content<br />
1 Control elements<br />
and functional<br />
components<br />
1.1 Left si<strong>de</strong> of the player<br />
1.2 Front si<strong>de</strong> of the player<br />
1.3 Right si<strong>de</strong> of the player<br />
2 General information<br />
3 Connection<br />
3.1 Use in car environment<br />
3.2 Use at home<br />
3.3 Connect to headphone<br />
3.4 Connect to camcor<strong>de</strong>r<br />
4 Enjoyment<br />
4.1 Screen brightness and<br />
contrast<br />
4.2 Volume control<br />
4.3 Screen brightness and<br />
contrast<br />
5 Troubleshooting<br />
6 Technical data<br />
1 Control elements and functional components<br />
1.1 Left si<strong>de</strong> of the player (see figure 1)<br />
1 DC IN Adapter connection for power supply<br />
2 DC OUT<br />
3 AUDIO IN Audio input<br />
4 VIDEO IN Vi<strong>de</strong>o input<br />
1.2 Front si<strong>de</strong> of the player (see figure 1)<br />
5,71 / 2 Left/right curser<br />
6 DISPLAY Adjust the display value of the system<br />
8 y POWER Switch the player on / off<br />
1.3 Right si<strong>de</strong> of the player (see figure 1)<br />
9 Headphone jack<br />
10 + VOLUME - Volume control<br />
3 Connection<br />
Make sure that the master <strong>DVD</strong> player; slave LCD screen and any<br />
other electrical equipment are off before connection.<br />
3.1 Use in car environment<br />
Master <strong>DVD</strong> player<br />
1 Mount the <strong>de</strong>vices to the headrest with the mounting kits.<br />
2 Connect the car adapter power plug to the PAC130<br />
3 Connection the power source to the master <strong>DVD</strong> with the<br />
power cord<br />
4 Connection the vi<strong>de</strong>o and audio signal to the <strong>de</strong>vices<br />
3.2 Use at home<br />
3<br />
Master <strong>DVD</strong> player<br />
3<br />
4<br />
4<br />
2<br />
2<br />
PAC130<br />
PAC130<br />
2 General information<br />
Power Sources<br />
This unit operates on a supplied AC adaptor or car adapter.<br />
• Make sure that the input voltage of the AC adaptor is in line<br />
with the local voltage. Otherwise, the AC adaptor and unit may<br />
be damaged.<br />
• Do not touch the AC adaptor with wet hands to prevent<br />
electric shock.<br />
• When connecting with car power (cigarette lighter) adaptor, be<br />
sure the input voltage of the adaptor is i<strong>de</strong>ntical with car voltage.<br />
• Unplug the AC adaptor from the outlet or remove the battery<br />
pack when the unit is not used for long periods of time.<br />
• Hold the plug to disconnect the AC adaptor. Do not pull the<br />
power cord.<br />
1 Connect the AC/DC adapter power plug to the PAC130<br />
2 Connection the power source to the master <strong>DVD</strong> with the<br />
power cord<br />
3 Connection the vi<strong>de</strong>o and audio signal to the <strong>de</strong>vices<br />
3.3 Connect to headphone<br />
Connect the headphones to the right si<strong>de</strong> of the player for<br />
private listening.<br />
p<br />
3.4 Connect to camcor<strong>de</strong>r<br />
Please always use supplied AC/DC adaptor (AY4129)<br />
1<br />
1<br />
2<br />
3<br />
4<br />
Specifications are subject to change without notice.<br />
Tra<strong>de</strong>marks are the property of Koninklijke <strong>Philips</strong> Electronics N.V.<br />
or their respective owners<br />
2006 © Koninklijke <strong>Philips</strong> Electronics N.V. All rights reserved.<br />
Printed in China<br />
5 6<br />
7 8<br />
wk6461<br />
9<br />
10<br />
Safety and maintenance<br />
• Do not disassemble the unit for laser rays are dangerous to<br />
eyes.<br />
Any service should be done by qualified service personnel.<br />
• Unplug the AC adaptor to cut the power if liquid or objects get<br />
insi<strong>de</strong> the unit.<br />
• Take care not to drop the unit or subject it to strong shocks,<br />
which may cause malfunction.<br />
Hearing Safety<br />
Listen at a mo<strong>de</strong>rate volume.<br />
• Using headphones at a high volume can impair your<br />
hearing. This product can produce sounds in <strong>de</strong>cibel<br />
ranges that may cause hearing loss for a normal person,<br />
even for exposure less than a minute. The higher <strong>de</strong>cibel ranges<br />
are offered for those that may have already experienced some<br />
hearing loss.<br />
• Sound can be <strong>de</strong>ceiving. Over time your hearing “comfort level”<br />
adapts to higher volumes of sound. So after prolonged listening,<br />
what sounds “normal” can actually be loud and harmful to your<br />
hearing. To guard against this, set your volume to a safe level<br />
before your hearing adapts and leave it there.<br />
To establish a safe volume level:<br />
• Set your volume control at a low setting.<br />
• Slowly increase the sound until you can hear it comfortably and<br />
clearly, without distortion.<br />
Listen for reasonable periods of time:<br />
• Prolonged exposure to sound, even at normally “safe” levels,<br />
can also cause hearing loss.<br />
• Be sure to use your equipment reasonably and take appropriate<br />
breaks.<br />
Be sure to observe the following gui<strong>de</strong>lines when using<br />
your headphones.<br />
• Listen at reasonable volumes for reasonable periods of time.<br />
• Be careful not to adjust the volume as your hearing adapts.<br />
• Do not turn up the volume so high that you can’t hear what’s<br />
around you.<br />
• You should use caution or temporarily discontinue use in<br />
potentially hazardous situations.<br />
• Do not use headphones while operating a motorized vehicle,<br />
cycling, skateboarding, etc.; it may create a traffic hazard and is<br />
illegal in many areas.<br />
• Important (for mo<strong>de</strong>ls with by-packed headphones): <strong>Philips</strong><br />
guarantees compliance with the maximum sound power of its<br />
audio players as <strong>de</strong>termined by relevant regulatory bodies only<br />
with the original mo<strong>de</strong>l of provi<strong>de</strong>d headphones. In case this one<br />
needs replacement, we recommend that you contact your<br />
retailer to or<strong>de</strong>r a mo<strong>de</strong>l i<strong>de</strong>ntical to that of the original<br />
provi<strong>de</strong>d by <strong>Philips</strong>.<br />
• Traffic safety: do not use while driving or cycling as you may<br />
cause an acci<strong>de</strong>nt.<br />
• Do not expose to excessive heat caused by heating equipment<br />
or direct sunlight.<br />
• This product is not waterproof: do not allow your player to be<br />
submersed in water. Water entering the player may cause major<br />
damage.<br />
• Do not use any cleaning agents containing alcohol, ammonia,<br />
benzene, or abrasives as these may harm the player.<br />
• Apparatus shall not be exposed to dripping or splashing. Do not<br />
place any sources of danger on the appartus (e.g. liquid filled<br />
objects,lighted candles)<br />
• Do not touch the lens!<br />
When the player is in use for a long period of time, the<br />
surface will be heated. This is normal.<br />
On handling the LCD screen<br />
The LCD is manufactured using high precision technology. You may,<br />
however, see tiny black points and/or bright points (red, blue,<br />
green) that continuously appear on the LCD. This is a normal result<br />
of the manufacturing process and does not indicate a malfunction.<br />
Environmental information<br />
We have reduced the packaging to its minimum and ma<strong>de</strong> it easy<br />
to separate into mono materials: cardboard, PS, PE and PET.<br />
Your set consists of material which can be recycled if disassembled<br />
by a specialized company. Please observe the local regulations to<br />
dispose of packaging, exhausted batteries and old equipment.<br />
Copyright information<br />
All other brand and product names are tra<strong>de</strong>marks of their<br />
respective companies or organizations.<br />
You can connect with you Camcor<strong>de</strong>r to view vi<strong>de</strong>o with bigger<br />
screen.<br />
1 Connect the PAC130 to power source<br />
2 Connect to vi<strong>de</strong>o/audio between the the camcor<strong>de</strong>r and<br />
PAC130<br />
4 Enjoyment<br />
During enjoy the vi<strong>de</strong>o you can adjust the sound volume and<br />
screen display brightness.<br />
4.1 Screen brightness and contrast<br />
1 Power on the connected <strong>de</strong>vice such as master <strong>DVD</strong> player,<br />
camcor<strong>de</strong>r etc.<br />
2 Power on the PAC130<br />
3 PAC130 will show the vi<strong>de</strong>o content automatically<br />
4 Power off all the <strong>de</strong>vices when you finish enjoyment<br />
4.2 Volume control<br />
Adjust the rotary volume control on the right si<strong>de</strong> of the screen.<br />
4.3 Screen brightness and contrast<br />
1 Press DISPLAY repeatedly for brightness or contract setting.<br />
2 Press 1 or 2 key to adjust the values.<br />
5 Troubleshooting<br />
If it appears that the <strong>DVD</strong>-Vi<strong>de</strong>o player is faulty, first consult this<br />
checklist. It may be that something has been overlooked.<br />
WARNING Un<strong>de</strong>r no circumstances should you try to<br />
repair the set yourself as this will invalidate the guarantee.<br />
If a fault occurs, first check the points listed, before taking the<br />
set for repair. If you are unable to solve a problem by<br />
following these hints, consult your <strong>de</strong>aler or service centre.<br />
Symptom<br />
Remedy<br />
No sound • Make sure system connection is correct.<br />
• Make sure the speakers are turned on.<br />
• Make sure the audio source is correct.<br />
No sound • Make sure LCD screen is on and in<br />
correct vi<strong>de</strong>o mo<strong>de</strong>.<br />
• Make sure your system connection is<br />
correct.<br />
• Make sure the vi<strong>de</strong>o source is correct.<br />
No vi<strong>de</strong>o • Make sure all the connected <strong>de</strong>vice is<br />
power on.<br />
• Make sure your system connection is<br />
correct.<br />
• Make sure the master <strong>de</strong>vice such as<br />
<strong>DVD</strong> player, camcor<strong>de</strong>r start to<br />
playback vi<strong>de</strong>o<br />
• Sometimes the vi<strong>de</strong>o out of the master<br />
<strong>de</strong>vices have to be switched on /<br />
activated.<br />
6 Technical data<br />
TFT screen size 7 inches<br />
Weight<br />
0.86 kg / 1.89 lb<br />
Power supply DC 9V 1.8A<br />
Power Consumption ≤ 20W<br />
Operating temperature range<br />
0 - 50°C (32 - 122°F)<br />
Vi<strong>de</strong>o system<br />
NTSC / PAL / AUTO<br />
PHILIPS reserves the right to make <strong>de</strong>sign and specification<br />
changes for product improvement without prior notice.<br />
Modifications not authorized by the manufacturer may<br />
void users authority to operate this <strong>de</strong>vice.<br />
All rights reserved.


