

Philips Lecteur interne - Mode d’emploi - FIN
Philips Lecteur interne - Mode d’emploi - FIN
Philips Lecteur interne - Mode d’emploi - FIN

Create successful ePaper yourself
Turn your PDF publications into a flip-book with our unique Google optimized e-Paper software.
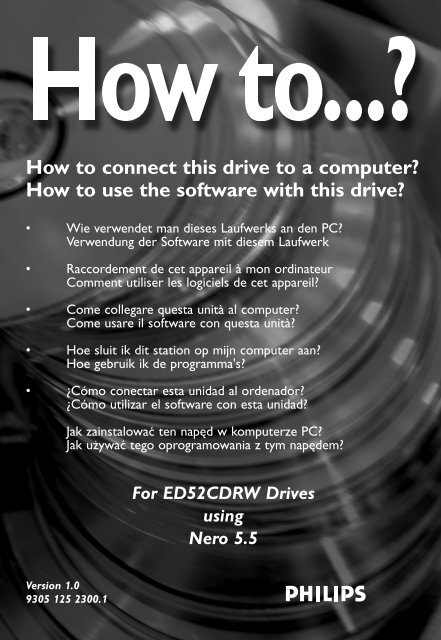
How to connect this drive to a computer?<br />
How to use the software with this drive?<br />
• Wie verwendet man dieses Laufwerks an den PC?<br />
Verwendung der Software mit diesem Laufwerk<br />
• Raccordement de cet appareil à mon ordinateur<br />
Comment utiliser les logiciels de cet appareil?<br />
• Come collegare questa unità al computer?<br />
Come usare il software con questa unità?<br />
• Hoe sluit ik dit station op mijn computer aan?<br />
Hoe gebruik ik de programma's?<br />
• ¿Cómo conectar esta unidad al ordenador?<br />
¿Cómo utilizar el software con esta unidad?<br />
Jak zainstalować ten napęd w komputerze PC?<br />
Jak używać tego oprogramowania z tym napędem?<br />
For ED52CDRW Drives<br />
using<br />
Nero 5.5<br />
Version 1.0<br />
9305 125 2300.1
Contents - Inhalt - Table des matières<br />
UK<br />
Installation How to connect the ED52 to my computer? 5<br />
How to connect specials 19<br />
Copy How to copy a disc? 31<br />
Data How to make a Data disc? 37<br />
Music How to make an Audio disc? 45<br />
Warranty How to find warranty information? 51<br />
D<br />
Installation Wie verwendet man dieses Laufwerk an den PC? 5<br />
Installation in besonderen Fällen 19<br />
Kopieren Wie kopiert man eine Disk? 31<br />
Daten Wie erstellt man eine Daten-Disk? 37<br />
Musik Wie erstellt man einer Audio-Disk? 45<br />
Garantie Wie findet man Garantie-Informationen? 51<br />
F<br />
Installation Raccordement du ED52 à mon ordinateur 5<br />
Connexion d’éléments spéciaux 19<br />
Copie Comment copier un disque? 31<br />
Données Comment créer un disque de données? 37<br />
Musique Comment créer un disque audio? 45<br />
Garantie Comment trouver les informations relatives<br />
à la garantie? 51<br />
2
Indice - Inhoud - Índice - Spis treści<br />
I<br />
Installazione Come collegare il ED52 al computer? 5<br />
Come svolgere installazioni particolari 19<br />
Copia Come copiare un dischi? 31<br />
Dati Come creare un dischi di dati? 37<br />
Musica Come creare un dischi Audio? 45<br />
Garanzia Come si accede alle informazioni<br />
sulla garanzia memorizzate? 51<br />
NL<br />
Installeren Hoe sluit ik de ED52 op mijn computer aan? 5<br />
Aansluiten in speciale gevallen 19<br />
Kopiëren Hoe kopieer ik een disc? 31<br />
Data Hoe maak ik zelf een data-disc? 37<br />
Muziek Hoe maak ik zelf een muziek-disc? 45<br />
Garantie Waar vind ik informatie over de garantie? 51<br />
E<br />
Instalación ¿Cómo conectar ED52 al ordenador? 5<br />
¿Cómo conectar opciones especiales? 19<br />
Copia ¿Cómo copiar un disco? 31<br />
Datos ¿Cómo crear un disco de datos? 37<br />
Música ¿Cómo crear un disco de audio? 45<br />
Garantía ¿Cómo encontrar información sobre la garantía? 51<br />
PL<br />
Instalowanie W jaki sposób podłączyć napęd ED52 do komputera? 5<br />
Informacje specjalne na temat podłączania 19<br />
Kopiowanie Jak kopiować dysk? 31<br />
Dane Jak utworzyć dysk z danymi? 37<br />
Muzyka Jak utworzyć dysk audio? 45<br />
Gwarancji Jak odszukać na dysku z programem Nero<br />
informacje dotyczące gwarancji? 51<br />
3
4
How to connect the ED52<br />
to my computer?<br />
Wie verwendet man diese Laufwerk an den PC?<br />
Raccordement du ED52 à mon ordinateur<br />
Come collegare il ED52 al computer?<br />
Hoe sluit ik de ED52 op mijn computer aan?<br />
¿Cómo conectar ED52 al ordenador?<br />
W jaki sposób podłączyć napęd ED52 do komputera?<br />
UK<br />
D<br />
F<br />
I<br />
NL<br />
E<br />
PL<br />
The next pages show how to connect your new ED52 to a computer. Since there are many brands and types of computers<br />
available, the next photographs show only examples on how your ED52 could be installed.<br />
For specific information on your computer, please refer to your computer manual or contact your local dealer.<br />
Auf den nächsten Seiten wird erläutert, wie Sie Ihren neuen ED52 mit einem Computer verbinden können.<br />
Da Computer von vielen Herstellern in verschiedenen Ausführungen und Typen angeboten werden, zeigen die nachstehenden<br />
Fotos nur Beispiele für eine mögliche Installation Ihres ED52. Für spezielle Informationen zu Ihrem Computer schlagen Sie in<br />
Ihrem Computer-Handbuch nach oder erkundigen Sie sich bei Ihrem Fachhändler vor Ort.<br />
Les pages qui suivent décrivent le raccordement de votre nouveau ED52 à un ordinateur. Du fait de la diversité des marques et<br />
des types d’ordinateur, les photographies suivantes ne montrent que quelques exemples d’installation de votre ED52.<br />
Pour plus de détails sur votre ordinateur, consultez le manuel qui l’accompagne ou contactez votre revendeur.<br />
Nelle seguenti pagine viene spiegato come collegare il vostro nuovo ED52 ad un computer.<br />
Data l'ampia gamma di marche e modelli di computer disponibile sul mercato, le seguenti fotografie vanno considerate come<br />
un esempio di possibile installazione del ED52. Per ottenere informazioni specifiche per il tipo di computer utilizzato,<br />
consultate la guida utente del sistema o contattate il vostro rivenditore.<br />
De volgende pagina's geven aan hoe u uw nieuwe ED52 op een computer aansluit.<br />
Er zijn zo veel typen computers dat de foto's alleen voorbeelden kunnen aangeven van het verbinden van uw ED52.<br />
Raadpleeg de handleiding van uw computer of neem contact op met uw leverancier voor meer informatie over uw computer.<br />
En las páginas siguientes se muestra cómo conectar la nueva ED52 a un ordenador.<br />
Debido a que hay muchas marcas y tipos de ordenadores en el mercado, las fotografías siguientes muestran únicamente<br />
algunos ejemplos de instalación de ED52. Para obtener información específica acerca de su ordenador,<br />
consulte el manual del ordenador o póngase en contacto con su distribuidor local.<br />
Na następnych stronach pokazano sposób podłączenia nowego napędu ED52 do komputera.<br />
Ze względu na różnorodność dostępnych komputerów, przedstawione dalej zdjęcia przedstawiają tylko przykładowe sposoby<br />
zainstalowania napędu ED52. Szczegółowe informacje dotyczące komputera użytkownika można znaleźć w instrukcji jego<br />
obsługi bądź należy skontaktować się z lokalnym przedstawicielem.<br />
5
1<br />
UK<br />
D<br />
F<br />
I<br />
NL<br />
E<br />
PL<br />
You will find a ED52 device and<br />
following accessories in the retail<br />
box:<br />
A: ED52 device.<br />
B: Power supply.<br />
C: HiSpeed USB Cable (black).<br />
Der Verpackungskarton des<br />
ED52 enthält die folgenden Teile:<br />
A: ED52.<br />
B: Netzteil.<br />
C: HiSpeed USB-Kabel (Schwarz).<br />
L’emballage contient un lecteur<br />
ED52 et les accessoires suivants:<br />
A: <strong>Lecteur</strong> ED52.<br />
B:Alimentation.<br />
C: Câble USB haut débit (noir).<br />
La confezione include una periferica ED52 ed i seguenti accessori:<br />
A: Periferica ED52. B:Alimentatore. C: Cavo USB ad alta velocità (nero).<br />
In de verpakking met de ED52 vindt u de volgende onderdelen:<br />
A: ED52-eenheid. B:Voedingseenheid. C: HiSpeed USB-kabel (zwart).<br />
En el embalaje se incluyen el dispositivo ED52 y los siguientes accesorios:<br />
A: Dispositivo ED52. B: Fuente de alimentación. C: Cable USB HiSpeed (negro).<br />
W dostarczonym opakowaniu powinien znajdować się napęd ED52 oraz następujące<br />
akcesoria:<br />
A: Urządzenie ED52. B: Zasilacz. C: Przewód USB HiSpeed (czarny).<br />
6
2<br />
UK<br />
D<br />
F<br />
I<br />
NL<br />
E<br />
PL<br />
At the left side, you will find the<br />
plugs you need for connecting<br />
your ED52 to your computer.<br />
A: Power.<br />
B: HiSpeed USB.<br />
Auf der linken Seite finden Sie die<br />
Anschlüsse, die Sie zum<br />
Anschließen des ED52 an Ihren<br />
Computer benötigen.<br />
A: Stromversorgung.<br />
B: HiSpeed USB.<br />
Sur la gauche figurent les<br />
connecteurs requis pour<br />
brancher votre ED52 à<br />
l’ordinateur.<br />
A:Alimentation. B: Port USB haut débit.<br />
Sul lato sinistro, si trovano le connessioni per collegare il ED52 al vostro computer.<br />
A:Alimentazione. B: USB ad alta velocità.<br />
Links vindt u de pluggen waarmee u de ED52 op uw computer kunt aansluiten.<br />
A:Voedingsspanning. B: HiSpeed USB.<br />
En el lado izquierdo verá los conectores que necesita para conectar ED52 al ordenador.<br />
A:Alimentación. B: HiSpeed USB.<br />
Z lewej strony znajdują się wtyczki, za pomocą których należy podłączyć urządzenie ED52 do<br />
komputera.<br />
A: Zasilanie. B: Przewód USB HiSpeed.<br />
7
3<br />
UK<br />
D<br />
F<br />
I<br />
NL<br />
E<br />
PL<br />
Plug the USB cable in the ED52.<br />
Do not connect the cable to the<br />
computer at this moment.<br />
A: USB Cable connected to the<br />
ED52.<br />
Verbinden Sie das USB-Kabel mit<br />
dem ED52.Verbinden Sie das<br />
Kabel zu diesem Zeitpunkt nicht<br />
mit dem Computer.<br />
A: ED52 mit angeschlossenem<br />
USB-Kabel.<br />
Branchez le câble USB au ED52.<br />
Ne branchez pas le câble à<br />
l’ordinateur pour le moment.<br />
A: Câble USB connecté au ED52.<br />
Collegate il cavo USB al ED52. Non collegate ancora il cavo al computer.<br />
A: Cavo USB collegato al ED52.<br />
Sluit de USB-kabel aan op de ED52. Sluit dit kabeltje nog niet op uw computer aan.<br />
A: USB-kabel aangesloten op de ED52.<br />
Conecte el cable USB a ED52. No conecte el cable al ordenador todavía.<br />
A: Cable USB conectado a ED52.<br />
Podłącz przewód USB do urządzenia ED52. Przewodu nie należy w tym momencie podłączać<br />
również do komputera.<br />
A: Przewód USB podłączony do urządzenia ED52.<br />
8
4<br />
UK<br />
D<br />
F<br />
I<br />
NL<br />
E<br />
PL<br />
Search for the HiSpeed USB connector on your PC.<br />
A: Logo for the preferred HiSpeed USB or connector.<br />
B: Logo for the alternative LowSpeed USB connector.<br />
When connected to LowSpeed USB (also known as USB 1.x),<br />
speeds are limited (4x writing on CD and CDRW and<br />
6x reading on CD).<br />
Suchen Sie den HiSpeed USB-Anschluss an Ihrem PC.<br />
A: Logo für den bevorzugten HiSpeed USB Konnektor.<br />
B: Logo für den alternativen LowSpeed USB Konnektor.<br />
Wenn eine Verbindung mit LowSpeed USB Konnektor<br />
(auch als USB 1.x bekannt) hergestellt wird, sind die<br />
Geschwindigkeiten begrenzt (4fach Schreiben auf CD und<br />
CDRW und 6fach Lesen von CD).<br />
Repérez le connecteur USB haut débit de votre PC.<br />
A: Logo représentant le port USB haut débit ou le connecteur.<br />
B: Logo représentant le connecteur USB 1.x.<br />
Lorsque le câble est connecté au port USB bas débit (également appelé port USB 1.x), la<br />
vitesse est limitée (4x en écriture pour les CD et CD-RW et 6x en lecture de CD).<br />
Individuate il connettore USB ad alta velocità sul PC.<br />
A: Logo connettore USB ad alta velocità (preferibile).<br />
B: Logo connettore USB a bassa velocità (in alternativa).<br />
Utilizzando una connessione USB a bassa velocità (riferita anche come USB 1.x), la velocità è<br />
limitata (4x in scrittura su CD e CDRW e 6x in lettura su CD).<br />
Zoek op uw computer naar de HiSpeed USB-connector.<br />
A: Symbool voor snelle HiSpeed USB-connector.<br />
B: Symbool voor trage LowSpeed USB-connector.<br />
Bij een LowSpeed USB-verbinding (versie USB 1.x) zijn de snelheden beperkt<br />
(4x schrijven op CD en CDRW en 6x lezen van CD).<br />
Localice el conector HiSpeed USB en el PC.<br />
A: Logotipo del conector HiSpeed USB preferente.<br />
B: Logotipo del conector LowSpeed USB alternativo.<br />
Cuando se conecta a LowSpeed USB (denominado también USB 1.x), las velocidades son<br />
limitadas (grabación a 4x en CD y CDRW y lectura a 6x en CD).<br />
Znajdź w komputerze złącze USB HiSpeed.<br />
A: Logo preferowanego przewodu USB HiSpeed lub złącza.<br />
B: Logo alternatywnego złącza USB LowSpeed.<br />
Po podłączeniu przewodu do złącza LowSpeed USB (nazywanego również USB 1.x),<br />
prędkości przesyłania będą ograniczone (4x zapis na CD i CDRW i 6x odczyt z CD).<br />
9
10<br />
5<br />
UK<br />
D<br />
F<br />
I<br />
NL<br />
E<br />
PL<br />
6<br />
UK<br />
D<br />
F<br />
I<br />
NL<br />
E<br />
PL<br />
7<br />
UK<br />
D<br />
F<br />
I<br />
NL<br />
E<br />
PL<br />
Connect the power cable and<br />
plug it in a wall outlet.<br />
Schließen Sie das Stromversorgungskabel<br />
an und verbinden Sie es<br />
mit der Wandsteckdose.<br />
Connectez le câble d’alimentation<br />
et branchez-le à une prise secteur.<br />
Collegate il cavo di alimentazione<br />
ed inseritelo in una presa elettrica<br />
a muro.<br />
Sluit de voedingskabel aan op de<br />
ED52 en op een stopcontact.<br />
Conecte el cable de alimentación y enchúfelo en una toma de corriente.<br />
Podłącz przewód zasilający i włóż wtyczkę do gniazda sieciowego.<br />
Press the open button.<br />
Drücken Sie die Taste zum<br />
Öffnen.<br />
Appuyez sur le bouton<br />
d’ouverture.<br />
Premere pulsante di apertura.<br />
Druk op de knop om de lade te<br />
openen.<br />
Pulse el botón de apertura.<br />
Naciśnij przycisk otwierania.<br />
Find the transportation cover and<br />
take it out (by lifting it up).<br />
Suchen Sie die Transportabdeckung<br />
und nehmen Sie sie<br />
heraus (indem Sie sie anheben).<br />
Soulevez la protection pour le<br />
transport pour la retirer.<br />
Individuate il coperchio<br />
protettivo durante il trasporto e<br />
rimuovetelo (sollevandolo)<br />
Verwijder de transportbescherming<br />
(optillen).<br />
Localice la cubierta para el transporte y extráigala (tirando de ella).<br />
Znajdź pokrywę transportową i wyjmij ją (unosząc do góry).
8<br />
UK<br />
D<br />
F<br />
I<br />
NL<br />
E<br />
PL<br />
If you are using Windows<br />
Millennium Edition,Windows<br />
2000 or Windows XP, connect<br />
the USB cable to the computer.<br />
➜ Skip this step if you are using<br />
Windows 98 Second Edition.<br />
If you do not know which<br />
operating system you are using,<br />
please go to the chapter<br />
"How to install specials", item 1.<br />
Wenn Sie mit dem<br />
Betriebssystem Windows<br />
Millennium Edition,Windows<br />
2000 oder Windows XP arbeiten,<br />
verbinden Sie das USB-Kabel mit dem Computer.<br />
➜ Überspringen Sie diesen Schritt, wenn Sie mit Windows 98 Second Edition arbeiten.<br />
Wenn Sie nicht wissen, mit welchem Betriebssystem Sie arbeiten, gehen Sie bitte zu dem<br />
Kapitel "Wie installiert man Besonderheiten", Position 1.<br />
Si vous utilisez Windows Millennium,Windows 2000 ou Windows XP,<br />
connectez le câble USB à l’ordinateur.<br />
➜ Ignorez cette étape si vous utilisez Windows 98 Deuxième Édition.<br />
Si vous ne savez pas quel est votre système d’exploitation, reportez-vous à la section 1 du<br />
chapitre « Installation d’éléments spéciaux ».<br />
In ambiente Windows Millennium Edition,Windows 2000 o Windows XP,<br />
collegate il cavo USB al computer.<br />
➜ Saltate questo passaggio se utilizzate Windows 98 Second Edition.<br />
Se non siete certi del tipo di sistema operativo utilizzato,<br />
consultate il capitolo "Come svolgere installazioni particolari", argomento 1.<br />
Gebruikt u Windows Millennium Edition,Windows 2000 of Windows XP,<br />
dan sluit u de USB-kabel op uw computer aan.<br />
➜ Sla deze stap over als u Windows 98 Second Edition gebruikt.<br />
Weet u niet welk besturingssysteem u hebt,<br />
kijk dan in het hoofdstuk "Aansluiten in speciale gevallen" bij deel 1.<br />
Si utiliza Windows Millennium Edition,Windows 2000 o Windows XP, conecte el cable USB al<br />
ordenador.<br />
➜ Omita este paso si utiliza Windows 98 Second Edition.<br />
Si ignora cuál es su sistema operativo, consulte "Cómo instalar opciones especiales", punto 1.<br />
Jeśli używasz systemu Windows Millennium Edition, Windows 2000 lub Windows XP, podłącz<br />
przewód USB do komputera.<br />
➜ W przypadku systemu Windows 98 Second Edition punkt ten należy pominąć.<br />
Jeśli nie wiesz jakiego używasz systemu, przejdź do części "Informacje specjalne na temat<br />
instalacji", punkt 1.<br />
11
9<br />
UK<br />
D<br />
F<br />
I<br />
NL<br />
E<br />
PL<br />
Windows will recognize the<br />
ED52 and install the drivers<br />
automatically.<br />
➜ Skip this step if you are using<br />
Windows 98 Second Edition.<br />
Windows wird das ED52-<br />
Laufwerk erkennen und die<br />
Treiber automatisch installieren.<br />
➜ Überspringen Sie diesen<br />
Schritt, wenn Sie mit Windows<br />
98 Second Edition arbeiten.<br />
Windows identifie le ED52 et<br />
installe les pilotes<br />
automatiquement.<br />
➜ Ignorez cette étape si vous utilisez Windows 98 Deuxième Édition.<br />
Windows riconoscerà il ED52 ed installerà automaticamente i driver.<br />
➜ Saltate questo passaggio se utilizzate Windows 98 Second Edition.<br />
Windows zal uw ED52 herkennen en automatisch de stuurprogramma's installeren.<br />
➜ Sla deze stap over als u Windows 98 Second Edition gebruikt.<br />
Windows reconocerá el dispositivo ED52 e instalará los controladores de forma automática.<br />
➜ Omita este paso si utiliza Windows 98 Second Edition.<br />
System Windows rozpozna urządzenie ED52 i automatycznie zainstaluje sterowniki.<br />
➜ W przypadku systemu Windows 98 Second Edition punkt ten należy pominąć.<br />
10<br />
UK<br />
D<br />
F<br />
I<br />
NL<br />
E<br />
PL<br />
Take the Nero disc.<br />
Nehmen Sie die Nero-CD.<br />
Prenez le disque Nero.<br />
Prendete il disco di Nero.<br />
Pak de Nero-CD.<br />
Tome el disco de Nero.<br />
Przygotuj płytę Nero Disc.<br />
12
11<br />
UK<br />
D<br />
F<br />
I<br />
NL<br />
E<br />
PL<br />
12<br />
UK<br />
D<br />
F<br />
I<br />
NL<br />
E<br />
PL<br />
Press the open button.<br />
➜ When you are using<br />
Windows 98 Second Edition,<br />
insert the Nero disc in the<br />
CDROM device of your<br />
computer. If you have no<br />
CD-ROM device, please refer<br />
to the Chapter "How to install<br />
specials", item 2 and/or 3).<br />
Drücken Sie die Taste zum<br />
Öffnen.<br />
➜ Wenn Sie das Betriebssystem Windows 98 Second Edition benutzen, legen Sie die Nero-<br />
CD in das CDROM-Laufwerk Ihres Computer ein.Wenn Sie kein CDROM-Laufwerk<br />
haben, sehen Sie im Kapitel "Installation in besonderen Fällen", Position 2 und/oder 3 nach.<br />
Appuyez sur le bouton d’ouverture.<br />
➜ Si vous utilisez Windows 98 Deuxième Édition, insérez le disque Nero dans le lecteur de<br />
CD-ROM de votre ordinateur.<br />
Sinon, reportez-vous aux sections 2 et/ou 3 du chapitre « Installation d’éléments spéciaux ».<br />
Premere pulsante di apertura.<br />
➜ In Windows 98 Second Edition, inserite il disco di Nero nell'unità CDROM del computer.<br />
Se non è installata un'unità CDROM, consultate il capitolo "Come svolgere installazioni<br />
particolari", argomento 2 e/o 3.<br />
Druk op de knop om de lade te openen.<br />
➜ Als u Windows 98 Second Edition gebruikt, open dan een CD-ROM-station van uw<br />
computer. Hebt u geen CD-ROM-station, kijk dan in het hoofdstuk<br />
"Aansluiten in speciale gevallen" bij deel 2 en/of 3.<br />
Pulse el botón de apertura.<br />
➜ Si utiliza Windows 98 Second Edition, introduzca el disco de Nero en el dispositivo de<br />
CDROM del ordenador. Si no dispone de CD-ROM, consulte el capítulo "Cómo instalar<br />
opciones especiales", punto 2 y/o 3).<br />
Naciśnij przycisk otwierania.<br />
➜ W przypadku systemu Windows 98 Second Edition, włóż płytę z programem Nero do<br />
napędu płyt CD-ROM zainstalowanego w komputerze. Jeśli komputer nie jest wyposażony<br />
w napęd płyt CD-ROM, należy zapoznać się z rozdziałem "Informacje specjalne na temat<br />
instalacji", punkt 2 oraz/lub 3).<br />
Insert the Nero Disc in the<br />
ED52.<br />
Legen Sie die Nero-CD in das<br />
ED52-Laufwerk ein.<br />
Insérez le disque Nero dans le<br />
ED52.<br />
Inserite il disco di Nero nel ED52.<br />
Leg de Nero-CD in de ED52.<br />
Introduzca el disco de Nero en<br />
ED52.<br />
Włóż płytę Nero Disc do<br />
urządzenia ED52.<br />
13
13<br />
UK<br />
D<br />
F<br />
I<br />
NL<br />
E<br />
PL<br />
Click on “Nero” to install the<br />
software:<br />
➜ When you are using Windows<br />
98 SE, please plug in the ED52<br />
when this screen appears.<br />
Klicken Sie auf "Nero", um die<br />
Software zu installieren:<br />
➜ Wenn Sie das Betriebssystem<br />
Windows 98 SE benutzen,<br />
stecken Sie den ED52 ein,<br />
wenn diese Anzeige erscheint.<br />
Cliquez sur "Nero" pour installer<br />
le logiciel:<br />
➜ Si vous utilisez Windows 98<br />
Deuxième Édition, connectez le ED52 lorsque cette fenêtre apparaît.<br />
Fate clic su "Nero" per installare il software:<br />
➜ In Windows 98 SE, collegate il ED52 quando compare questo schermo.<br />
Klik op de software die u wilt installeren:<br />
➜ Als u Windows 98 SE gebruikt, sluit de ED52 dan aan zodra dit scherm verschijnt.<br />
Haga clic en "Nero" para instalar el software:<br />
➜ Si utiliza Windows 98 SE, conecte ED52 cuando aparezca esta pantalla.<br />
Kliknij “Nero” by zainstalować oprogramowanie:<br />
➜ W przypadku systemu Windows 98 SE urządzenie ED52 należy podłączyć po pojawieniu<br />
się tego ekranu.<br />
14
14<br />
UK<br />
D<br />
F<br />
I<br />
NL<br />
E<br />
PL<br />
This step is only valid when you<br />
are using Windows 98 SE.<br />
Windows 98 SE will need drivers.<br />
When the ‘Add New hardware<br />
Wizard’ asks where the drivers<br />
can be found, tick the checkbox<br />
‘Specify a location’ and use the<br />
browse button to point to the<br />
directory ‘<strong>Philips</strong> Drivers’ on the<br />
Nero disc you have inserted.<br />
Dieser Schritt gilt nur, wenn Sie<br />
mit Windows 98SE arbeiten:<br />
Windows 98SE benötigt Treiber.<br />
Wenn der "Add New Hardware<br />
Wizard" (Assistent zum Hinzufügen neuer Hardware) Sie fragt, wo die Treiber zu finden sind,<br />
kreuzen Sie das Kästchen "Specify a location" (Ein Verzeichnis angeben) an und benutzen Sie<br />
die Schaltfläche zum Durchsuchen, um das Verzeichnis "<strong>Philips</strong> Drivers" auf der eingelegten<br />
Nero Disc anzugeben.<br />
Cette étape n’est valable que si vous utilisez Windows 98SE:<br />
Ce système d’exploitation nécessite des pilotes spécifiques. Lorsque l’ «Assistant Ajout de<br />
nouveau matériel» vous demande où se trouvent les pilotes, cochez la case «Définir un<br />
emplacement» et cliquez sur «Parcourir» pour indiquer le répertoire «<strong>Philips</strong> Drivers» sur le<br />
disque Nero que vous avez inséré.<br />
Questo passaggio si riferisce solo all'ambiente Windows 98SE:<br />
Windows 98SE richiede l'installazione di driver. Quando l'"Installazione guidata nuovo<br />
hardware" richiede la posizione dei driver, marcate la casella "Specifica percorso" ed utilizzate il<br />
pulsante Sfoglia per accedere alla directory dei driver <strong>Philips</strong> "<strong>Philips</strong> Drivers" del disco Nero<br />
inserito.<br />
Deze stap is alleen nodig als u Windows 98SE gebruikt:<br />
Windows 98SE heeft stuurprogramma's nodig.Als de wizard "Nieuwe hardware toevoegen"<br />
naar de plaats van stuurprogramma's vraagt, markeer dan "Een locatie specificeren" en ga dan<br />
via de Bladeren-knop naar de map "<strong>Philips</strong> Drivers" op de Nero-CD die u hebt geplaatst.<br />
Este paso sólo es válido si utiliza Windows 98 SE:<br />
Windows 98 SE necesita controladores. Cuando el "Asistente para agregar nuevo hardware"<br />
pregunte dónde se encuentran los controladores, marque la casilla de verificación "Especificar<br />
una ubicación" y utilice el botón Examinar para indicar el directorio "<strong>Philips</strong> Drivers" del disco<br />
de Nero que ha introducido.<br />
Ten krok obowiązuje wyłącznie przy korzystaniu z Windows 98SE:<br />
Windows 98SE wymagają sterowników. Kiedy "Kreator dodawania nowego sprzętu" poprosi o<br />
podanie położenia sterowników, należy zaznaczyć pole "Podaj lokalizację") i użyć przycisku<br />
przeglądania do wskazania katalogu "Sterowniki <strong>Philips</strong>" na włożonym dysku Nero.<br />
15
15<br />
UK<br />
D<br />
F<br />
I<br />
NL<br />
E<br />
PL<br />
This device has both a silent and<br />
a performance mode.When in<br />
silent mode, the ED52 will read<br />
and write at a lower speed.<br />
To switch between the modes,<br />
press for 2 seconds on the<br />
open/close button when a disc is<br />
inserted and the cover is closed.<br />
Dieses Laufwerk kann sowohl im<br />
Silent- als auch im<br />
Leistungsmodus betrieben<br />
werden. Im Silent-Modus führt<br />
das ED52-Laufwerk Schreib- und<br />
Lesezugriffe mit geringerer<br />
Geschwindigkeit aus.<br />
Zwischen den beiden Betriebsarten kann umgeschaltet werden, indem man die Open/Close-<br />
Taste bei eingelegter CD und geschlossener Abdeckung 2 Sekunden lang gedrückt hält.<br />
Ce périphérique offre deux modes de fonctionnement : silencieux et haute performance. En<br />
mode silencieux, l’ED52 exécute les opérations de lecture et d’écriture plus lentement.<br />
Pour passer d’un mode à l’autre, appuyez sur le bouton d’ouverture/fermeture pendant 2<br />
secondes lorsque vous insérez un disque et fermez le couvercle.<br />
Questo dispositivo può funzionare sia in modalità silenziosa sia in modalità prestazioni. In<br />
modalità silenziosa, l'ED52 legge e scrive a velocità inferiore.<br />
Per passare da una modalità all'altra, premete il pulsante di apertura/chiusura per 2 secondi a<br />
disco inserito e coperchio chiuso.<br />
Dit apparaat beschikt zowel over een stille als een snelle modus. In de stille modus leest en<br />
schrijft de ED52 op een lagere snelheid.<br />
Om een andere modus te kiezen, drukt u 2 seconden op de open/sluiten-knop nadat u een<br />
disc hebt geplaatst en de lade hebt gesloten.<br />
Este dispositivo tiene ambos modos, el modo de silencio y el de funcionamiento. La ED52 leerá<br />
y escribirá a una velocidad inferior durante el modo de silencio.<br />
Si un disco está insertado y la tapa está cerrada, pulse durante dos segundos en el botón<br />
open/close para cambiar de modo.<br />
Urządzenie może pracować w dwóch trybach: dyskretnym i wydajnym.<br />
Wtrybie dyskretnym ED52 odczytuje i zapisuje dane z mniejszą szybkością.<br />
Aby zmienić tryb pracy urządzenia, należy przytrzymać przycisk open/close przez dwie<br />
sekundy, przy włożonym dysku i zamkniętej pokrywie.<br />
16
16<br />
UK<br />
D<br />
F<br />
I<br />
NL<br />
E<br />
PL<br />
17<br />
UK<br />
D<br />
F<br />
I<br />
NL<br />
E<br />
PL<br />
Remember the typenumber of<br />
your ED52, which is located on the<br />
sticker on the bottom of the<br />
device.This model number will<br />
allow you to find easily information<br />
and updates on the <strong>Philips</strong> website:<br />
www.philips.com/pcstuff<br />
Merken Sie sich die Typennr Ihres<br />
ED52 – sie befindet sich auf dem<br />
Aufkleber am Boden des Geräts.<br />
Mit Hilfe dieser <strong>Mode</strong>llnummer<br />
können Sie auf einfache Weise<br />
Informationen und Updates auf<br />
der <strong>Philips</strong> Website finden: www.philips.com/pcstuff<br />
N’oubliez pas la référence du modèle de votre ED52; elle est indiquée sur l’autocollant situé au<br />
bas du périphérique. Ce numéro vous permettra de retrouver facilement des informations et<br />
des mises à jour sur le site web de <strong>Philips</strong>: www.philips.com/pcstuff<br />
Annotate il numero di modello del ED52, situato sull'etichetta applicata sul fondo della<br />
periferica. Questo numero è utile per rintracciare agevolmente informazioni ed aggiornamenti<br />
sul sito Web <strong>Philips</strong>: www.philips.com/pcstuff<br />
Onthoud het typenummer van uw ED52. U vindt dit onder op het product. Met dit nummer kunt<br />
u gemakkelijk extra informatie en updates vinden op de site van <strong>Philips</strong>: www.philips.com/pcstuff<br />
Recuerde el número de ED52, que figura en la etiqueta adherida a la parte inferior del<br />
dispositivo. Este número de modelo le permite buscar información y actualizaciones de forma<br />
sencilla en el sitio web de <strong>Philips</strong>: www.philips.com/pcstuff<br />
Zapamiętaj numer urządzenia ED52, który umieszczony jest na naklejce znajdującej się pod<br />
spodem urządzenia. Jest numer modelu, który umożliwi łatwe odszukanie informacji oraz<br />
aktualizacji na stronie <strong>interne</strong>towej firmy <strong>Philips</strong>: www.philips.com/pcstuff<br />
After installing the software, you should reboot your computer. Congratulations.<br />
Your <strong>Philips</strong> device is now ready for use. How to use it and what software applications<br />
you need to perform your tasks, is described in the next chapters of this How To Manual.<br />
Nach der Installation der Software sollten Sie Ihren Computer neu starten.<br />
Herzlichen Glückwunsch. Ihr <strong>Philips</strong> Gerät ist jetzt einsatzbereit.Wie Sie es benutzen und<br />
welche Software-Anwendungen Sie benötigen, um bestimmte Aufgaben auszuführen, wird in<br />
den nächsten Kapiteln dieses Handbuchs beschrieben.<br />
Après avoir installé le logiciel, vous devez redémarrer votre ordinateur. Félicitations!<br />
Votre périphérique <strong>Philips</strong> est maintenant prêt. Son mode d’<strong>emploi</strong> et les applications logicielles<br />
requises sont décrits dans les chapitres suivants de ce manuel d'utilisation.<br />
Terminata l'installazione del software, è necessario riavviare il computer. Congratulazioni.<br />
La periferica <strong>Philips</strong> è ora pronta per l'uso. I seguenti capitoli di questa guida contengono<br />
informazioni sull'uso della periferica e sul software necessario per le varie attività<br />
Na het installeren van de software moet u de computer opnieuw opstarten. Gefeliciteerd!<br />
Uw <strong>Philips</strong>-product is nu startklaar. De volgende hoofdstukken van deze handleiding<br />
beschrijven het gebruik en de software die u nodig hebt.<br />
Una vez instalado el software, debe reiniciar el ordenador. Enhorabuena. Ahora podrá utilizar<br />
el dispositivo <strong>Philips</strong>. En los capítulos siguientes de este manual se describe cómo utilizar el<br />
dispositivo y las aplicaciones de software que necesita para realizar cada tarea.<br />
Po zainstalowaniu programu należy ponownie uruchomić komputer. Gratulacje. Urządzenie<br />
firmy <strong>Philips</strong> jest gotowe do użytku.Informacje na temat jego używania oraz programy<br />
wymagane do wykonywania zadań opisano w następnych rozdziałach tej Instrukcji obsługi.<br />
17
18
How to connect specials<br />
Installation in besonderen Fällen<br />
Connexion d’éléments spéciaux<br />
Come svolgere installazioni particolari?<br />
Aansluiten in speciale gevallen<br />
¿Cómo conectar opciones especiales?<br />
Informacje specjalne na temat podłączania<br />
UK<br />
In this chapter, "Windows 98 Second Edition" is abbreviated to "Windows 98SE"<br />
D<br />
In diesem Kapitel wird "Windows 98 Second Edition" mit "Windows 98SE" abgekürzt.<br />
F Dans ce chapitre, « Windows 98 Deuxième Édition » est abrégé sous la forme « Windows 98SE »<br />
I<br />
In questo capitolo, "Windows 98 Second Edition" viene abbreviato in "Windows 98SE"<br />
NL<br />
In dit hoofdstuk is "Windows 98 Second Edition" ingekort tot "Windows 98SE"<br />
E<br />
En este capítulo, "Windows 98 Second Edition" se abrevia como "Windows 98SE"<br />
PL<br />
W tym rozdziale dla określenia systemu "Windows 98 Second Edition" używany jest skrót "Windows 98SE"<br />
19
UK<br />
D<br />
F<br />
Item 1: How to find out which operating system is running on my computer?<br />
1. Start the computer if not done yet.<br />
2. Click "Start".<br />
3. Click "Settings" (not on all operating systems).<br />
4. Click "Control Panel".<br />
5. Click "System".<br />
6. Choose "Properties".<br />
7. In the "General" tab, you will find your Operating system (see image below).<br />
8.When it says "Microsoft Windows 98 Second Edition", you will have to follow the special<br />
remarks on Windows 98SE.<br />
Position 1:Wie finde ich heraus, welches Betriebssystem auf meinem Computer läuft?<br />
1. Starten Sie den Computer, wenn dies noch nicht geschehen ist.<br />
2. Klicken Sie auf "Start".<br />
3. Klicken Sie auf "Einstellungen" (nicht bei allen Betriebssystemen).<br />
4. Klicken Sie auf "Systemsteuerung".<br />
5. Klicken Sie auf "System".<br />
6.Wählen Sie "Eigenschaften".<br />
7.Auf dem Registerblatt "Allgemein" finden Sie Ihr Betriebssystem<br />
(siehe nachstehende Abbildung).<br />
8.Wenn hier "Microsoft Windows 98 Second Edition" steht,<br />
befolgen Sie bitte die besonderen Anweisungen für Windows 98SE.<br />
Section 1: Quel est le système d’exploitation de mon ordinateur?<br />
1.Allumez l’ordinateur si ce n’est déjà fait.<br />
2. Cliquez sur « Démarrer ».<br />
3. Cliquez sur « Paramètres » (tous les systèmes d’exploitation ne proposent pas cette option).<br />
4. Cliquez sur « Panneau de configuration ».<br />
5. Cliquez sur « Système ».<br />
6. Choisissez « Propriétés ».<br />
7. L’onglet « Général » indique le système d’exploitation utilisé (voir illustration ci-dessous).<br />
8. S’il indique « Microsoft Windows 98 Deuxième Édition », vous devez tenir compte des<br />
remarques spéciales concernant Windows 98SE.<br />
20
I<br />
NL<br />
E<br />
PL<br />
Argomento 1: How to find out which operating system is running on my computer?<br />
1.Avviate il computer (se non lo avete ancora acceso).<br />
2. Fate clic su "Start".<br />
3. Fate clic su "Impostazioni" (non in tutti i sistemi operativi).<br />
4. Fate clic sul "Pannello di controllo".<br />
5. Fate clic su "Sistema".<br />
6. Selezionate "Proprietà".<br />
7. Nella scheda "Generale" è indicata la versione di sistema operativo<br />
(vedi immagine seguente).<br />
8. Se compare "Microsoft Windows 98 Second Edition", dovrete seguire le osservazioni<br />
particolari relative a Windows 98SE.<br />
Deel 1: Hoe kijk ik na welk besturingssysteem op mijn computer wordt gebruikt?<br />
1. Start de computer op als dat nog niet is gebeurd.<br />
2. Klik op "Start".<br />
3. Klik op "Instellingen" (niet bij alle besturingssystemen).<br />
4. Klik op "Configuratiescherm".<br />
5. Klik op "Systeem".<br />
6. Klik op "Eigenschappen".<br />
7. Bij het tabblad "Algemeen" vindt u het gebruikte besturingssysteem (zie volgende afbeelding).<br />
8.Als dat "Microsoft Windows 98 Second Edition" is, dan moet u de speciale instructies voor<br />
Windows 98SE uitvoeren.<br />
Punto 1: Cómo averiguar el sistema operativo que ejecuta el ordenador<br />
1. Encienda el ordenador si está apagado.<br />
2. Haga clic en "Inicio".<br />
3. Haga clic en "Configuración" (no en todos los sistemas operativos).<br />
4. Haga clic en "Panel de control".<br />
5. Haga clic en "Sistema".<br />
6. Seleccione "Propiedades".<br />
7. En la ficha "General" se indica el sistema operativo (ver imagen siguiente).<br />
8. Si ve "Microsoft Windows 98 Second Edition", tendrá que seguir las instrucciones especiales<br />
para Windows 98SE.<br />
Punkt 1: Jak się dowiedzieć, jaki system operacyjny wykorzystywany jest w komputerze<br />
użytkownika?<br />
1. Uruchom komputer, jeśli jeszcze nie pracuje.<br />
2. Kliknij "Start".<br />
3. Kliknij "Ustawienia" (opcja ta nie jest dostępna we wszystkich systemach operacyjnych).<br />
4. Kliknij "Panel sterowania".<br />
5. Kliknij "System".<br />
6. Wybierz "Właściwości".<br />
7. Na zakładce "Ogólne" znajduje się pozycja System<br />
operacyjny (patrz rycina poniżej).<br />
8. Jeśli zawiera ona nazwę "Microsoft Windows 98<br />
Second Edition", należy postępować zgodnie ze<br />
wskazówkami określonymi dla systemu Windows<br />
98SE.<br />
21
UK<br />
D<br />
F<br />
Item 2: How to connect a ED52 to a Windows 98SE computer that has no CD-ROM<br />
device?<br />
• You will need another computer that has a device that can read a CD-ROM.<br />
Otherwise see item 3.<br />
Please follow these steps:<br />
1. Start another computer.<br />
2. Insert the Nero disc for the ED52 into the CDROM.<br />
3. Click "Exit" when the Nero Installation screen appears.<br />
4. Click on "My Computer".<br />
5. Click on the "Nero"-logo.<br />
6. Click on the right mouse button and choose "Explore".<br />
7. Go to the directory "<strong>Philips</strong> Drivers".<br />
8. Copy the contents of this directory on a floppy disc.<br />
9.Attach your ED52 to your Windows 98SE computer.<br />
10.When Windows asks for the drivers, insert the floppy from step 7 and point windows to<br />
this floppy.<br />
11.The drivers will be installed.You can now use your ED52 to install the software by inserting<br />
the Install disc.<br />
Position 2:Wie verbindet man einen ED52 mit einem Windows 98SE Computer,<br />
der kein CDROM-Laufwerk hat?<br />
• Sie benötigen einen anderen Computer, der über eine Vorrichtung zum Lesen einer CDROM<br />
verfügt. Sehen Sie andernfalls bei Position 3 nach.<br />
Bitte befolgen Sie die nachstehenden Schritte:<br />
1. Starten Sie den anderen Computer.<br />
2. Legen Sie die Nero-CD für den ED52 in das CDROM-Laufwerk ein.<br />
3. Klicken Sie auf "Beenden", wenn die Anzeige für die Nero Installation erscheint.<br />
4. Klicken Sie auf "Arbeitsplatz".<br />
5. Klicken Sie auf das "Nero"-Logo.<br />
6. Klicken Sie mit der rechten Maustaste und wählen Sie "Explore".<br />
7. Gehen Sie zum Verzeichnis "<strong>Philips</strong> Drivers".<br />
8. Kopieren Sie den Inhalt dieses Verzeichnisses auf eine Diskette.<br />
9.Verbinden Sie Ihren ED52 mit Ihrem Windows 98SE Computer.<br />
10.Wenn Windows Sie nach den Treibern fragt,<br />
legen Sie die Diskette aus Schritt 7 ein und weisen Sie Windows diese Diskette an.<br />
11. Die Treiber werden installiert. Sie können jetzt Ihren ED52 benutzen,<br />
um die Software zu installieren, indem Sie die Installations-CD einlegen.<br />
Section 2: Raccordement d’un ED52 à un ordinateur Windows 98SE ne disposant pas de<br />
lecteur de CD-ROM<br />
• Vous devez utiliser un ordinateur équipé d’un périphérique capable de lire un CD-ROM.<br />
Sinon, reportez-vous à la section 3.<br />
Procédez comme suit:<br />
1. Démarrez un autre ordinateur.<br />
2. Insérez le disque Nero du ED52 dans le lecteur de CD-ROM.<br />
3. Cliquez sur « Exit » lorsque la fenêtre Nero Installation apparaît.<br />
4. Cliquez sur « Poste de travail ».<br />
5. Cliquez sur le logo « Nero ».<br />
6. Cliquez avec le bouton droit de la souris et choisissez « Explorer ».<br />
7.Accédez au répertoire « <strong>Philips</strong> Drivers ».<br />
8. Copiez le contenu de ce répertoire sur une disquette.<br />
9. Connectez votre ED52 à votre ordinateur fonctionnant sous Windows 98SE.<br />
10. Lorsque Windows vous demande les pilotes, insérez la disquette créée à l’étape 7 et<br />
indiquez à Windows qu’il doit les rechercher sur celle-ci.<br />
11. Les pilotes sont alors installés.Vous pouvez désormais utiliser votre ED52 pour installer le<br />
logiciel en insérant le disque Install.<br />
22
I<br />
NL<br />
Argomento 2: Come collegare un ED52 ad un computer Windows 98SE sprovvisto di unità<br />
CD-ROM<br />
• E' necessario un altro computer, con installata un'unità in grado di leggere un CD.<br />
In caso contrario, consultate l'argomento 3.<br />
Svolgete i seguenti passaggi:<br />
1.Avviate un altro computer.<br />
2. Inserite il disco di Nero per il ED52 nell'unità CDROM.<br />
3. Fate clic su "Exit" (Esci) quando compare lo schermo d'installazione di Nero.<br />
4. Fate clic su "Risorse del computer".<br />
5. Fate clic sul logo "Nero".<br />
6. Fate un clic destro e selezionate "Esplora".<br />
7.Accedete alla cartella dei driver "<strong>Philips</strong> Drivers".<br />
8. Copiate il contenuto di questa cartella su un dischetto.<br />
9. Collegate il ED52 al vostro computer Windows 98SE.<br />
10. Quando Windows richiede i driver, inserite il floppy prodotto al punto 7 e confermate a<br />
Windows l'uso di questo dischetto.<br />
11. I driver verranno installati. Ora è possibile utilizzare il vostro ED52 per installare il software<br />
tramite il disco d'installazione Install.<br />
Deel 2: Hoe sluit ik de ED52 aan op een computer zonder CD-ROM-station?<br />
• U zult een andere computer moeten gebruiken, die een eenheid heeft voor het lezen vanaf<br />
CD-ROM's. Zie anders bij deel 3.<br />
Voer de volgende stappen uit:<br />
1. Start de andere computer op.<br />
2. Leg de Nero-CD voor de ED52 in het CD-ROM-station.<br />
3. Klik op "Verlaten" zodra het Nero-installatiescherm verschijnt.<br />
4. Klik op "Deze computer".<br />
5. Klik op het "Nero"-logo.<br />
6. Klik met de rechtermuisknop en kies "Verkennen".<br />
7. Ga naar de map "<strong>Philips</strong> drivers".<br />
8. Kopieer de inhoud van deze map naar een diskette.<br />
9. Sluit de ED52 aan op uw computer met Windows 98SE.<br />
10.Als Windows om stuurprogramma's vraagt, plaats dan de diskette en kies die in Windows.<br />
11. De stuurprogramma's worden geïnstalleerd. U kunt uw ED52 nu gebruiken om de<br />
software met behulp van de Install-disc te installeren.<br />
23
E<br />
PL<br />
Punto 2: Cómo conectar ED52 a un ordenador con Windows 98SE sin dispositivo de<br />
CD-ROM?<br />
• Necesitará otro ordenador que tenga un dispositivo capaz de leer discos CD-ROM.<br />
En caso contrario, consulte el punto 3.<br />
Siga los pasos que se indican:<br />
1. Encienda otro ordenador.<br />
2. Introduzca el disco de Nero para ED52 en el CDROM.<br />
3. Haga clic en "Exit" (Salir) cuando aparezca la pantalla de instalación de Nero.<br />
4. Haga clic en "Mi PC".<br />
5. Haga clic en el logotipo de "Nero".<br />
6. Haga clic con el botón derecho del ratón y seleccione "Explorar".<br />
7.Vaya al directorio "<strong>Philips</strong> Drivers".<br />
8. Copie el contenido de este directorio en un disquete.<br />
9. Conecte ED52 al ordenador con Windows 98SE.<br />
10. Cuando Windows solicite los controladores, introduzca el disquete del paso 7 e indique<br />
esta ruta.<br />
11. Se instalarán los controladores.<br />
Ahora ya puede instalar el software con el disco de instalación desde ED52.<br />
Punkt 2: Jak podłączyć urządzenie ED52 do komputera obsługiwanego przez system<br />
Windows 98SE, który nie posiada napędu CD-ROM?<br />
•Potrzebny będzie inny komputer wyposażony w napęd CD-ROM.<br />
W innym przypadku zobacz punkt 3.<br />
Należy wykonać następujące czynności:<br />
1. Uruchom inny komputer.<br />
2. Włóż płytę z programem Nero dla urządzenia ED52 do napędu CD-ROM.<br />
3. Po pojawieniu się ekranu instalacji programu Nero kliknij "Zakończ".<br />
4. Kliknij ikonę "Mój komputer".<br />
5. Kliknij logo "Nero".<br />
6. Kliknij prawym przyciskiem myszy i wybierz "Eksploruj".<br />
7. Przejdź do katalogu "<strong>Philips</strong> Drivers".<br />
8. Skopiuj zawartość katalogu na dyskietkę.<br />
9. Podłącz urządzenie ED52 do komputera wyposażonego w system Windows 98SE.<br />
10. Po zgłoszeniu przez system Windows potrzeby zainstalowania sterowników, włóż dyskietkę<br />
z punktu 7 i wskaż ją.<br />
11. Sterowniki zostaną zainstalowane. Teraz można instalować programy zawarte na płytach za<br />
pomocą urządzenia ED52.<br />
24
UK<br />
D<br />
F<br />
Item 3: How to connect a ED52 on a Windows 98SE computer that has no CD-ROM<br />
device?<br />
• You will need access to the <strong>interne</strong>t<br />
Please follow these steps:<br />
1. Start the computer.<br />
2. Start Internet Explorer (or another web browser).<br />
3. Go to the <strong>Philips</strong> PCStuff website: http://www.philips.com/pcstuff<br />
4. Choose "Drivers and manuals".<br />
5. Search for the ED52CDRW.<br />
6. Download the Windows 98SE drivers.<br />
7. Unzip the drivers and remember where you saved the unzipped drivers.<br />
8. Plug in the ED52.<br />
9.When Windows asks for drivers, refer to the location where you saved the drivers in step 7.<br />
10.Your ED52 will work now.<br />
Position 3:Wie verbindet man einen ED52 auf einem Windows 98SE Computer,<br />
der kein CDROM-Laufwerk hat?<br />
• Sie benötigen Zugang zum Internet<br />
Bitte befolgen Sie die nachstehenden Schritte:<br />
1. Starten Sie den Computer.<br />
2. Starten Sie den Internet Explorer (oder einen anderen Web-Browser).<br />
3. Gehen Sie zur <strong>Philips</strong> PCStuff Website: http://www.philips.com/pcstuff<br />
4.Wählen Sie "Drivers and manuals".<br />
5. Suchen Sie ED52CDRW.<br />
6. Laden Sie die Windows 98SE Treiber herunter.<br />
7. Entzippen Sie die Treiber und merken Sie sich, wo Sie die entzippten Treiber speichern.<br />
8. Stecken Sie den ED52 ein.<br />
9.Wenn Windows Sie nach Treibern fragt, verweisen Sie auf das Verzeichnis, in dem Sie die<br />
Treiber bei Schritt 7 gespeichert haben.<br />
10. Ihr ED52 wird jetzt funktionieren.<br />
Section 3: Connexion d’un ED52 à un ordinateur Windows 98SE ne disposant pas de lecteur<br />
de CD-ROM<br />
• Vous devez accéder à Internet<br />
Procédez comme suit:<br />
1. Démarrez l’ordinateur.<br />
2. Lancez Internet Explorer (ou un autre navigateur web).<br />
3.Accédez au site <strong>Philips</strong> PCStuff : http://www.philips.com/pcstuff<br />
4. Choisissez « Drivers and manuals » (Pilotes et manuels).<br />
5. Recherchez le ED52CDRW.<br />
6.Téléchargez les pilotes pour Windows 98SE.<br />
7. Décompressez les pilotes en notant l’emplacement des fichiers décompressés.<br />
8. Branchez le ED52.<br />
9. Lorsque Windows vous demande les pilotes, indiquez l’emplacement où vous les avez<br />
décompressés à l’étape 7.<br />
10.Votre ED52 est alors prêt à être utilisé.<br />
25
I<br />
NL<br />
Argomento 3: Come collegare un ED52 ad un computer Windows 98SE sprovvisto di unità<br />
CD-ROM<br />
• E' necessario accedere ad Internet<br />
Svolgete i seguenti passaggi:<br />
1.Avviate il computer.<br />
2.Aprite Internet Explorer (od un altro browser Web).<br />
3.Accedete al sito Web PCStuff di <strong>Philips</strong>: http://www.philips.com/pcstuff<br />
4. Selezionate "Drivers and manuals" (Driver e manuali).<br />
5. Ricercate ED52CDRW.<br />
6. Scaricate i driver per Windows 98SE.<br />
7. Scompattate il file zip dei driver ed annotate la posizione dove avete salvato i file.<br />
8. Collegate il ED52.<br />
9. Quando Windows richiede i driver, specificate la posizione in cui avete salvato i driver al<br />
punto 7.<br />
10. Il ED52 ora funziona correttamente.<br />
Deel 3: Hoe sluit ik de ED52 aan op een Windows 98SE-computer zonder CD-ROM-station?<br />
• U hebt een Internet-verbinding nodig<br />
Voer de volgende stappen uit:<br />
1. Start de computer op.<br />
2. Start Internet Explorer (of een andere web browser).<br />
3. Ga naar de website met <strong>Philips</strong> PCStuff: http://www.philips.com/pcstuff<br />
4. Kies daar "Drivers and manuals".<br />
5. Zoek naar de ED52CDRW.<br />
6. Download de stuurprogramma's voor Windows 98SE.<br />
7. Pak de stuurprogramma's uit (Unzip) en onthoud waar u de uitgepakte stuurprogramma's<br />
opslaat.<br />
8. Sluit de ED52 aan.<br />
9.Als Windows om stuurprogramma's vraagt, geef dan de locatie aan die in stap 7 is gebruikt.<br />
10. Nu werkt uw ED52.<br />
26
E<br />
PL<br />
Punto 3: Cómo conectar ED52 a un ordenador con Windows 98SE sin dispositivo de CD-<br />
ROM?<br />
• Necesitará tener acceso a Internet<br />
Siga los pasos que se indican:<br />
1. Encienda el ordenador.<br />
2. Inicie Internet Explorer (u otro navegador web)<br />
3.Vaya al sitio web PCStuff de <strong>Philips</strong>: http://www.philips.com/pcstuff<br />
4. Seleccione "Drivers and manuals".<br />
5. Busque ED52CDRW.<br />
6. Descargue los controladores para Windows 98SE<br />
7. Descomprima los controladores y recuerde dónde los guarda<br />
8. Conecte ED52.<br />
9. Cuando Windows solicite los controladores, indique la ubicación donde los guardó en el<br />
paso 7.<br />
10. El dispositivo ED52 ya funciona.<br />
Punkt 3: Jak podłączyć urządzenie ED52 do komputera obsługiwanego przez system<br />
Windows 98SE, który nie posiada napędu CD-ROM?<br />
•Potrzebny będzie dostęp do Internetu.<br />
Należy wykonać następujące czynności:<br />
1. Uruchom komputer.<br />
2. Uruchom program Internet Explorer (lub inną przeglądarkę)<br />
3. Wejdź na stronę firmy <strong>Philips</strong> PCStuff: http://www.philips.com/pcstuff<br />
4. Wybierz pozycję "Drivers and manuals" (Sterowniki i instrukcje)<br />
5. Wyszukaj numer ED52CDRW.<br />
6. Załaduj sterowniki dla systemu Windows 98SE<br />
7. Rozpakuj sterowniki i zapamiętaj, gdzie zostały zapisane<br />
8. Podłącz urządzenie ED52.<br />
9. Po zgłoszeniu przez system Windows konieczności zainstalowania sterowników, wskaż<br />
miejsce, w którym je zapisałeś w punkcie 7.<br />
10. Urządzenie ED52 może teraz pracować.<br />
27
UK<br />
D<br />
F<br />
Item 4:You accidentally connected the ED52 too early to a Windows 98SE computer and<br />
Windows finds no drivers.<br />
If you still have the "Add New Hardware Wizard" on the screen, you can follow these steps:<br />
1. Insert the Nero disc in a cdrom device.<br />
2. Click "Exit" when the Nero Installation screen pops up.<br />
3. In the "Add New Hardware Wizard", click next until the page appears which is shown below.<br />
4. Check "Specify a location" and click 'Browse".<br />
5. Point to the Nero disc.<br />
6. Choose the directory "<strong>Philips</strong> drivers" and click "OK".<br />
7.The drivers will be installed.<br />
Position 4: Sie haben den ED52 versehentlich zu früh mit einem Windows 98SE Computer<br />
verbunden und Windows findet keine Treiber.<br />
Wenn auf dem Bildschirm immer noch der Wizard "Neue Hardware hinzufügen"<br />
(Assistent zum Hinzufügen neuer Hardware) angezeigt wird, können Sie die folgenden Schritte<br />
durchführen:<br />
1. 1. Legen Sie die Nero-CD in ein CDROM-Laufwerk ein.<br />
2. Klicken Sie auf "Beenden", wenn die Anzeige für die Nero Installation erscheint.<br />
3. Klicken Sie im Wizard "Neue Hardware hinzufügen" auf "Weiter", bis die nachstehend<br />
dargestellte Seite erscheint.<br />
4. Kreuzen Sie "Geben Sie eine Position" an und klicken Sie auf 'Blättern".<br />
5. Zeigen Sie auf die Nero-CD.<br />
6.Wählen Sie das Verzeichnis "<strong>Philips</strong> drivers" und klicken Sie auf "OK".<br />
7. Die Treiber werden installiert.<br />
Section 4:Vous avez accidentellement connecté votre ED52 trop tôt à un ordinateur<br />
Windows 98SE et Windows ne trouve pas les pilotes.<br />
Si la fenêtre « Assistant ajout de nouveau matériel » est encore ouverte,<br />
vous pouvez procéder comme suit:<br />
1. Insérez le disque Nero dans un lecteur de CD-ROM.<br />
2. Cliquez sur « Quitter » lorsque la fenêtre Nero Installation s’ouvre.<br />
3. Dans l’ « Assistant Ajout de nouveau matériel », cliquez sur Suivant jusqu’à ce que la page cidessous<br />
apparaisse.<br />
4. Cochez l’option « Définir un emplacement » puis cliquez sur « Parcourir ».<br />
5. Indiquez le disque Nero.<br />
6. Choisissez le répertoire « <strong>Philips</strong> drivers » (pilotes <strong>Philips</strong>) et cliquez sur « OK ».<br />
7. Les pilotes sont alors installés.<br />
28
I<br />
NL<br />
E<br />
PL<br />
Argomento 4:Avete collegato accidentalmente il ED52 troppo presto ad un computer<br />
Windows 98SE e Windows non è in grado di trovare i driver necessari.<br />
Se l'"Installazione guidata nuovo hardware" è ancora aperta, potete procedere come descritto<br />
di seguito:<br />
1. Inserite il disco di Nero nell'unità CDROM.<br />
2. Fate clic su "Exit" (Esci) quando compare lo schermo d'installazione di Nero.<br />
3. Nell'"Installazione guidata nuovo hardware", fate clic su avanti fino a visualizzare la pagina<br />
mostrata di seguito.<br />
4. Selezionate "Specifica percorso" e fate clic su 'Sfoglia".<br />
5. Selezionate il disco di Nero.<br />
6. Selezionate la cartella dei driver "<strong>Philips</strong> drivers" e fate clic su "OK".<br />
7. I driver verranno installati.<br />
Deel 4: U hebt de ED52 ongewild te vroeg aangesloten op een Windows 98SE-computer,<br />
zodat Windows geen stuurprogramma's vindt.<br />
Als het venster "Nieuwe hardware gevonden" nog op uw scherm staat, dan kunt u de volgende<br />
stappen uitvoeren:<br />
1. Leg de Nero-CD in een CD-ROM-station.<br />
2. Klik op "Verlaten" zodra het Nero-installatiescherm verschijnt.<br />
3. Klik in de wizard "Nieuwe hardware toevoegen" op "Volgende" tot de volgende pagina<br />
verschijnt.<br />
4. Klik op "Een locatie specificeren" en daarna op "Bladeren".<br />
5.Verwijs naar de Nero-CD.<br />
6. Ga naar de map "<strong>Philips</strong> drivers" en klik op "OK".<br />
7. De stuurprogramma's worden geïnstalleerd.<br />
Punto 4: Ha conectado ED52 a un ordenador con Windows 98SE antes de tiempo y<br />
Windows no encuentra los controladores.<br />
Si el "Asistente para agregar nuevo hardware" permanece abierto en la pantalla, puede seguir<br />
estos pasos:<br />
1. Introduzca el disco de Nero en un dispositivo de CDROM.<br />
2. Haga clic en "Exit" (Salir) cuando aparezca la pantalla de instalación de Nero.<br />
3. En el "Asistente para agregar nuevo hardware", haga clic en Siguiente hasta llegar a la pantalla<br />
que se muestra abajo.<br />
4. Marque "Especificar una ubicación" y haga clic en 'Examinar".<br />
5. Indique la ruta del disco de Nero.<br />
6. Seleccione el directorio "<strong>Philips</strong> drivers" y haga clic en "Aceptar".<br />
7. Se instalarán los controladores.<br />
Punkt 4: Przypadkowo urządzenie ED52 zostało podłączone zbyt wcześnie do komputera i<br />
system Windows 98SE nie znalazł żadnych sterowników.<br />
Jeśli na ekranie ciągle wyświetlany jest "Kreator dodawania nowego sprzętu”, można wykonać<br />
następujące czynności:<br />
1. Włóż płytę z programem Nero do napędu CD-ROM.<br />
2. Po pojawieniu się ekranu instalacji programu Nero kliknij "Zakończ”.<br />
3. W oknie kreatora "Dodawanie nowego sprzętu”, kliknij polecenie Dalej, aż do pojawienia się<br />
pokazanego niżej ekranu.<br />
4. Zaznacz pole wyboru "Określ lokalizację” i kliknij "Przeglądaj”.<br />
5. Kliknij płytę z programem Nero.<br />
6. Wybierz katalog "<strong>Philips</strong> drivers” i kliknij "OK”.<br />
7. Sterowniki zostaną zainstalowane.<br />
29
30
How to copy a disc?<br />
Wie kopiert man eine Disk?<br />
Comment copier un disque?<br />
Come copiare un dischi?<br />
Hoe kopieer ik een disc?<br />
¿Cómo copiar un disco?<br />
Jak kopiować dysk?<br />
UK<br />
D<br />
F<br />
This manual shows an example of how to copy a disc.<br />
This product is for personal use only.<br />
Unauthorized duplication and distribution of copyrighted materials is a violation of copyright law.<br />
In diesem Handbuch wird an einem Beispiel gezeigt, wie eine Disk kopiert wird.<br />
Dieses Produkt ist nur für den persönlichen Gebrauch. Die ungenehmigte Vervielfältigung und der Vertrieb von urheberrechtlich<br />
geschützten Materialien stellt eine Verletzung des Urheberrechts dar.<br />
Ce manuel illustre la procédure de copie d’un disque. Ce produit est à usage personnel exclusivement.<br />
Toute duplication et diffusion non autorisée de matières soumises au droit d’auteur et de copie (copyright) constituent une<br />
violation de la loi sur les droits d’auteur et de copie (copyright).<br />
I<br />
NL<br />
Questo manuale contiene informazioni su come copiare un dischi.<br />
Questo prodotto è destinato ad un uso esclusivamente personale.<br />
La duplicazione e la distribuzione di materiali protetti dal diritto d'autore rappresentano una violazione della legge sul copyright.<br />
Deze handleiding beschrijft het kopiëren van een disc.<br />
Dit product is alleen bedoeld voor eigen gebruik.<br />
Het zonder toestemming vermenigvuldigen en verspreiden van auteursrechtelijk beschermd materiaal is wettelijk verboden.<br />
E<br />
PL<br />
Este manual muestra un ejemplo de cómo copiar un disco.<br />
Este producto es para uso personal exclusivamente.<br />
La duplicación y distribución no autorizada de materiales con copyright es una violación de las leyes del copyright.<br />
W tym podręczniku opisano przykładową procedurę kopiowania dysku.<br />
Produkt ten jest przeznaczony wyłącznie do użytku osobistego.<br />
Nieautoryzowane powielanie i dystrybucja materiałów chronionych prawami autorskimi stanowi naruszenie praw autorskich.<br />
The application software used here is:<br />
Nero - Burning Rom from Ahead Software<br />
31
1<br />
UK<br />
D<br />
F<br />
I<br />
NL<br />
E<br />
PL<br />
Start "Nero Burning ROM" from<br />
the desktop.<br />
Starten Sie "Nero Burning ROM"<br />
von Ihrer Oberfläche aus.<br />
Lancez "Nero Burning ROM"<br />
depuis le bureau.<br />
Aprire "Nero Burning ROM" dal<br />
desktop.<br />
Start "Nero Burning ROM" vanaf<br />
het bureaublad.<br />
Inicie "Nero Burning ROM" desde<br />
el escritorio.<br />
Uruchom program "Nero Burning ROM", klikając ikonę znajdującą się na pulpicie.<br />
2<br />
UK<br />
D<br />
F<br />
I<br />
NL<br />
E<br />
PL<br />
Choose "CD" and click "Next".<br />
Wählen Sie "CD" und klicken Sie<br />
auf "Weiter".<br />
Choisissez CD et cliquez sur<br />
"Suivant".<br />
Scegliere "CD" e fare clic su<br />
"Success".<br />
Selecteer "CD" en klik op<br />
"Volgende".<br />
Elija "CD" y haga clic en<br />
"Siguiente".<br />
Wybierz "CD" i kliknij "Next".<br />
32
3<br />
UK<br />
D<br />
F<br />
I<br />
NL<br />
E<br />
PL<br />
Choose "Copy a CD" and click<br />
"Next".<br />
Wählen Sie "Eine CD kopieren"<br />
und klicken Sie auf "Weiter".<br />
Choisissez "Copier un CD" et<br />
cliquez sur "Suivant".<br />
Scegliere "Copia un CD" e fare<br />
clic su "Success".<br />
Selecteer "Een CD kopiëren" en<br />
klik op "Volgende".<br />
Elija "Copiar un CD" y haga clic<br />
en "Siguiente".<br />
Wybierz "Copy a CD" ikliknij "Next".<br />
4<br />
UK<br />
D<br />
F<br />
I<br />
NL<br />
E<br />
PL<br />
Choose the device in which you<br />
want to put your source disc.<br />
Wählen Sie das Gerät, in das Sie<br />
die Quell-Disk einlegen möchten.<br />
Choisissez le lecteur dans lequel<br />
le disque source sera introduit.<br />
Scegliere il dispositivo su cui si<br />
desidera inserire il disco<br />
sorgente.<br />
Selecteer het station dat de disk<br />
met het bronmateriaal bevat.<br />
Elija el dispositivo en el que va a<br />
colocar el disco original.<br />
Wybierz urządzenie, w którym umieszczona zostanie płyta źródłowa.<br />
33
5<br />
UK<br />
D<br />
F<br />
I<br />
NL<br />
E<br />
PL<br />
Mark the checkbox "fast copy" if<br />
your source drive is fast enough.<br />
If you are not sure or if you have<br />
a slow drive, unmark the<br />
checkbox. Click "Next".<br />
Kreuzen Sie das Kästchen<br />
"Direktkopie" an, wenn Ihr<br />
Quelllaufwerk schnell genug ist.<br />
Wenn Sie sich nicht sicher sind<br />
oder wenn Sie ein langsames<br />
Laufwerk haben, löschen Sie das<br />
Kreuz in dem Kästchen. Klicken<br />
Sie auf "Weiter".<br />
Cochez l’option "Copie rapide" si<br />
votre lecteur source le permet.<br />
Si vous n’en êtes pas sûr ou si vous avez un lecteur plus lent, décochez cette option. Cliquez<br />
sur "Suivant".<br />
Selezionare la casella "Copia veloce" se l'unità sorgente è sufficientemente veloce.<br />
In caso di dubbi, o se l'unità è lenta, deselezionare questa casella. Fare clic su "Avanti".<br />
Zet een vinkje in het vakje "Snelkopiëren" als het station met de CD met bronmateriaal snel<br />
genoeg is.<br />
Twijfelt u daaraan, verwijder dan de markering in dat vakje. Klik op "Volgende".<br />
Marque la casilla "Copia rápida" si la velocidad de la unidad de origen permite esta opción.<br />
Si no está seguro o la unidad es lenta, no marque la casilla. Haga clic en "Siguiente".<br />
Jeśli napęd z płytą źródłową jest dostatecznie szybki, zaznacz pole wyboru "fast copy".<br />
Jeśli szybkość napędu jest nieznana lub napęd jest wolny, wyłącz zaznaczenie tego pola.<br />
Kliknij "Next".<br />
6<br />
UK<br />
D<br />
F<br />
I<br />
NL<br />
E<br />
PL<br />
Choose "Burn" twice.<br />
Wählen Sie zweimal "Brennen".<br />
Choisissez "Graver" deux fois de<br />
suite.<br />
Selezionare "Scrivi" due volte.<br />
Selecteer twee keer "Branden".<br />
Elija "Grabar" dos veces.<br />
Kliknij dwukrotnie "Burn".<br />
34
7<br />
UK<br />
D<br />
F<br />
I<br />
NL<br />
E<br />
PL<br />
Insert the source disc in the<br />
source drive (see step 5).<br />
Insert an empty disc in your<br />
ReWriter when requested.<br />
Legen Sie die Quell-CD in das<br />
Quelllaufwerk (siehe Schritt 5).<br />
Legen Sie eine leere CD in Ihren<br />
ReWriter, wenn Sie dazu<br />
aufgefordert werden.<br />
Insérez le disque source dans le<br />
lecteur source (voir étape 5).<br />
Insérez un disque vierge dans le<br />
lecteur ReWriter lorsque vous y<br />
êtes invité.<br />
Inserire il disco sorgente nell'unità sorgente (vedi passo 5).<br />
Quando viene richiesto, inserire un disco vuoto nel ReWriter.<br />
Leg de CD met bronmateriaal in het bronstation (zie stap 5).<br />
Leg een lege disc in uw ReWriter zodra dat wordt gevraagd.<br />
Coloque el disco original en la unidad de origen (consulte el paso 5).<br />
Inserte un disco vacío en la regrabadora cuando se solicite.<br />
Włóż płytę źródłową do napędu źródłowego (zob. punkt 5).<br />
Po wyświetleniu ponaglenia włóż czystą płytę do nagrywarki.<br />
8<br />
UK<br />
D<br />
F<br />
I<br />
NL<br />
E<br />
PL<br />
"Nero Burning ROM" will now<br />
burn your disc.<br />
"Nero Burning ROM" wird jetzt<br />
Ihre Disk brennen.<br />
"Nero Burning ROM" grave alors<br />
votre disque.<br />
"Nero Burning ROM " inizierà a<br />
scrivere sul disco.<br />
"Nero Burning ROM" zal nu uw<br />
CD branden.<br />
"Nero Burning ROM" grabará<br />
ahora el disco.<br />
Program "Nero Burning ROM" nagra teraz ten dysk.<br />
35
9<br />
UK<br />
D<br />
F<br />
I<br />
NL<br />
E<br />
PL<br />
Congratulations, your disc has<br />
been written successfully.<br />
Click "Discard".<br />
Herzlichen Glückwunsch – Ihre<br />
Disk wurde erfolgreich erstellt.<br />
Klicken Sie auf "Verwerfen".<br />
Félicitations, votre disque est prêt.<br />
Cliquez sur "Rejeter".<br />
Congratulazioni, il disco è stato<br />
scritto correttamente.<br />
Fare clic su "Elimina".<br />
Gefeliciteerd!<br />
Uw disc is met succes gebrand.<br />
Klik op "Verwijderen".<br />
Enhorabuena, su disco se ha grabado correctamente. Haga clic en "Descatar".<br />
Gratulacje, dysk został zapisany pomyślnie. Kliknij "Discard".<br />
36
How to make a Data disc?<br />
Wie erstellt man eine Daten-Disk?<br />
Comment créer un disque de données?<br />
Come creare un dischi di dati?<br />
Hoe maak ik zelf een data-disc?<br />
¿Cómo crear un disco de datos?<br />
Jak utworzyć dysk z danymi<br />
UK<br />
D<br />
F<br />
I<br />
NL<br />
E<br />
PL<br />
This manual shows you an example of how to make a Data disc.<br />
This product is for personal use only.<br />
Unauthorized duplication and distribution of copyrighted materials is a violation of copyright law.<br />
In diesem Handbuch wird an einem Beispiel gezeigt, wie eine Daten-Disk erstellt wird.<br />
Dieses Produkt ist nur für den persönlichen Gebrauch. Die ungenehmigte Vervielfältigung und der Vertrieb von urheberrechtlich<br />
geschützten Materialien stellt eine Verletzung des Urheberrechts dar.<br />
Ce manuel illustre la procédure de création d’un disque de données.<br />
Ce produit est à usage personnel exclusivement.Toute duplication et diffusion non autorisée de matières soumises au droit<br />
d’auteur et de copie (copyright) constituent une violation de la loi sur les droits d’auteur et de copie (copyright).<br />
Questo manuale contiene informazioni su come creare un dischi di dati.<br />
Questo prodotto è destinato ad un uso esclusivamente personale.<br />
La duplicazione e la distribuzione di materiali protetti dal diritto d'autore rappresentano una violazione della legge sul copyright.<br />
Deze handleiding beschrijft het maken van een data-disc.<br />
Dit product is alleen bedoeld voor eigen gebruik.<br />
Het zonder toestemming vermenigvuldigen en verspreiden van auteursrechtelijk beschermd materiaal is wettelijk verboden.<br />
Este manual muestra un ejemplo de cómo crear un disco de datos.<br />
Este producto es para uso personal exclusivamente.<br />
La duplicación y distribución no autorizada de materiales con copyright es una violación de las leyes del copyright.<br />
W tym podręczniku opisano przykładową procedurę tworzenia dysku z danymi.<br />
Produkt ten jest przeznaczony wyłącznie do użytku osobistego.<br />
Nieautoryzowane powielanie i dystrybucja materiałów chronionych prawami autorskimi stanowi naruszenie praw autorskich.<br />
The application software used here is:<br />
Nero - Burning Rom from Ahead Software<br />
37
1<br />
UK<br />
D<br />
F<br />
I<br />
NL<br />
E<br />
PL<br />
Start "Nero Burning ROM" from<br />
the desktop.<br />
Starten Sie "Nero Burning ROM"<br />
von Ihrer Oberfläche aus.<br />
Lancez "Nero Burning ROM"<br />
depuis le bureau.<br />
Aprire "Nero Burning ROM" dal<br />
desktop.<br />
Start "Nero Burning ROM" vanaf<br />
het bureaublad.<br />
Inicie "Nero Burning ROM" desde<br />
el escritorio.<br />
Uruchom program "Nero Burning ROM", klikając ikonę znajdującą się na pulpicie.<br />
2<br />
UK<br />
D<br />
F<br />
I<br />
NL<br />
E<br />
PL<br />
Choose "CD" and click "Next".<br />
Wählen Sie "CD" und klicken Sie<br />
auf "Weiter".<br />
Choisissez CD et cliquez sur<br />
"Suivant".<br />
Scegliere "CD" e fare clic su<br />
"Success".<br />
Selecteer "CD" en klik op<br />
"Volgende".<br />
Elija "CD" y haga clic en<br />
"Siguiente".<br />
Wybierz "CD" i kliknij "Next".<br />
38
3<br />
UK<br />
D<br />
F<br />
I<br />
NL<br />
E<br />
PL<br />
Choose "Compile a new CD"<br />
and click "Next".<br />
Wählen Sie "Neue CD erstellen"<br />
und klicken Sie auf "Weiter".<br />
Choisissez "Compiler un nouveau<br />
CD" et cliquez sur "Suivant".<br />
Scegliere "Crea un nuovo CD" e<br />
fare clic su "Success".<br />
Selecteer "Een nieuwe CD<br />
compileren" en klik op<br />
"Volgende".<br />
Elija "Compilar un CD nuevo" y<br />
haga clic en "Siguiente".<br />
Wybierz "Copy a CD" ikliknij "Next".<br />
4<br />
UK<br />
D<br />
F<br />
I<br />
NL<br />
E<br />
PL<br />
Choose "Data CD" and click<br />
"Next".<br />
Wählen Sie "Daten-CD" und<br />
klicken Sie auf "Weiter".<br />
Choisissez "CD de données" et<br />
cliquez sur "Suivant".<br />
Scegliere "CD dati" e fare clic su<br />
"Success".<br />
Selecteer "Data-CD" en klik op<br />
"Volgende".<br />
Elija "CD de datos" y haga clic en<br />
"Siguiente".<br />
Wybierz "Data CD" i kliknij "Next".<br />
39
5<br />
UK<br />
D<br />
F<br />
I<br />
NL<br />
E<br />
PL<br />
Choose "Create a new data-CD?"<br />
and choose "Next".<br />
Wählen Sie "Neue Daten-CD<br />
zusammenstellen?" und wählen<br />
Sie "Weiter".<br />
Choisissez "Compiler un nouveau<br />
CD de données?" et cliquez sur<br />
"Suivant".<br />
Scegliere "Crea un nuovo<br />
CD dati?" e fare clic su "Success".<br />
Selecteer "Een nieuwe data CD<br />
aanmaken?" en klik op "Volgende".<br />
Elija "¿Compilar un Nuevo CD de<br />
datos?" y elija "Siguiente".<br />
Wybierz "Create a new data-CD?" i kliknij "Next".<br />
6<br />
UK<br />
D<br />
F<br />
I<br />
NL<br />
E<br />
PL<br />
Choose "Finish".<br />
Wählen Sie "Fertig".<br />
Cliquez sur "Terminer".<br />
Scegliere "Fini".<br />
Klik op "Voltooien".<br />
Elija "Finalizar".<br />
Wybierz "Finish".<br />
40
7<br />
UK<br />
D<br />
F<br />
I<br />
NL<br />
E<br />
PL<br />
Drag the selected file(s) and/or<br />
folder(s) you want to have on<br />
your new CD to the left side<br />
of the screen.<br />
Ziehen Sie die gewünschten<br />
Dateien und/oder Ordner,<br />
die Sie auf Ihrer neuen CD haben<br />
möchten, zur linken Seite des<br />
Bildschirms.<br />
Faites glisser le ou les fichiers ou<br />
dossiers sélectionnés que vous<br />
voulez copier sur le nouveau CD<br />
dans la partie gauche de l’écran.<br />
Trascinare sulla parte sinistra<br />
dello schermo il/i file e/o cartella/e selezionati che si desidera avere sul nuovo CD.<br />
Sleep de door u geselecteerde bestanden en/of mappen die u op de cd wilt branden naar het<br />
linkervenster.<br />
Arrastre los archivos y/o carpetas seleccionados que desee grabar en su nuevo CD a la<br />
izquierda de la pantalla.<br />
Przeciągnij wybrane plik(i) oraz/lub folder(y), które chcesz zapisać na nowej płycie CD na lewą<br />
stronę ekranu.<br />
8<br />
UK<br />
D<br />
F<br />
I<br />
NL<br />
E<br />
PL<br />
Click on the "Write" icon.<br />
Klicken Sie auf das Symbol<br />
"Brennen".<br />
Cliquez sur l'icône "Graver".<br />
Fare clic sull'icona "Scrivi".<br />
Klik op het pictogram voor<br />
"Branden".<br />
Haga clic en el icono "Grabar".<br />
Kliknij ikonę "Write".<br />
41
9<br />
UK<br />
D<br />
F<br />
I<br />
NL<br />
E<br />
PL<br />
Choose "Burn" twice.<br />
Wählen Sie zweimal "Brennen".<br />
Choisissez "Graver" deux fois de<br />
suite.<br />
Selezionare "Scrivi" due volte.<br />
Selecteer twee keer "Branden".<br />
Elija "Grabar" dos veces.<br />
Kliknij dwukrotnie "Burn".<br />
10<br />
UK<br />
D<br />
F<br />
I<br />
NL<br />
E<br />
PL<br />
"Nero Burning ROM" will now<br />
burn your disc.<br />
"Nero Burning ROM" wird jetzt<br />
Ihre Disk brennen.<br />
"Nero Burning ROM" grave alors<br />
votre disque.<br />
"Nero Burning ROM " inizierà a<br />
scrivere sul disco.<br />
"Nero Burning ROM" zal nu uw<br />
CD branden.<br />
"Nero Burning ROM" grabará<br />
ahora el disco.<br />
Program "Nero Burning ROM" nagra teraz ten dysk.<br />
42
11<br />
UK<br />
D<br />
F<br />
I<br />
NL<br />
E<br />
PL<br />
Click "OK". Congratulations,<br />
your CD is ready now.<br />
Choose "Discard".<br />
Klicken Sie auf "OK". Gratulation,<br />
Ihre CD ist jetzt fertig.<br />
Wählen Sie "Verwerfen".<br />
Cliquez sur OK.<br />
Le CD est à présent terminé.<br />
Cliquez sur "Rejeter".<br />
Fare click su "OK".<br />
Congratulazioni, il CD ora è<br />
pronto. Scegliere "Elimina".<br />
Klik op "OK". Na afloop van het<br />
brandproces is uw nieuwe cd klaar voor gebruik. Klik op "Verwijderen".<br />
Haga clic en "OK". Felicitaciones, su CD está preparado para ser utilizado. Elija "Descabar".<br />
Kliknij "OK". Gratulacje, płyta CD jest gotowa. Wybierz "Discard".<br />
43
44
How to make an<br />
Audio disc?<br />
Wie erstellt man einer Audio-Disk?<br />
Comment créer un disque audio?<br />
Come creare un dischi Audio?<br />
Hoe maak ik zelf een muziek-disc?<br />
¿Cómo crear un disco de audio?<br />
Jak utworzyć dysk audio<br />
UK<br />
D<br />
F<br />
I<br />
NL<br />
E<br />
PL<br />
This manual shows you an example of how to make an Audio disc which can be played in any CD-Player<br />
This product is for personal use only.<br />
Unauthorized duplication and distribution of copyrighted materials is a violation of copyright law.<br />
In diesem Handbuch wird beschrieben, wie eine Audio-Disk erstellt wird, die von jedem CD-Player abgespielt werden kann.<br />
Dieses Produkt ist nur für den persönlichen Gebrauch. Die ungenehmigte Vervielfältigung und der Vertrieb von urheberrechtlich<br />
geschützten Materialien stellt eine Verletzung des Urheberrechts dar.<br />
Ce manuel illustre la procédure de création d’un disque audio qui pourra être lu sur n’importe lecteur de CD.<br />
Ce produit est à usage personnel exclusivement.Toute duplication et diffusion non autorisée de matières soumises au droit<br />
d’auteur et de copie (copyright) constituent une violation de la loi sur les droits d’auteur et de copie (copyright).<br />
Questo manuale contiene informazioni su come creare un dischi Audio che potrà essere letto da un CD-Player.<br />
Questo prodotto è destinato ad un uso esclusivamente personale.<br />
La duplicazione e la distribuzione di materiali protetti dal diritto d'autore rappresentano una violazione della legge sul copyright.<br />
Deze handleiding beschrijft het maken van een muziek-disc om in een normale cd-speler af te spelen.<br />
Dit product is alleen bedoeld voor eigen gebruik.<br />
Het zonder toestemming vermenigvuldigen en verspreiden van auteursrechtelijk beschermd materiaal is wettelijk verboden.<br />
Este manual muestra un ejemplo de cómo crear un disco de audio que se puede reproducir en cualquier lector de compact<br />
disc. Este producto es para uso personal exclusivamente.<br />
La duplicación y distribución no autorizada de materiales con copyright es una violación de las leyes del copyright.<br />
W tym podręczniku opisano przykładową procedurę tworzenia dysku audio, który można odtwarzać w każdym odtwarzaczu CD.<br />
Produkt ten jest przeznaczony wyłącznie do użytku osobistego.<br />
Nieautoryzowane powielanie i dystrybucja materiałów chronionych prawami autorskimi stanowi naruszenie praw autorskich.<br />
The application software used here is:<br />
Nero - Burning Rom from Ahead Software<br />
45
1<br />
UK<br />
D<br />
F<br />
I<br />
NL<br />
E<br />
PL<br />
Start "Nero Burning ROM" from<br />
the desktop.<br />
Starten Sie "Nero Burning ROM"<br />
von Ihrer Oberfläche aus.<br />
Lancez "Nero Burning ROM"<br />
depuis le bureau.<br />
Aprire "Nero Burning ROM" dal<br />
desktop.<br />
Start "Nero Burning ROM" vanaf<br />
het bureaublad.<br />
Inicie "Nero Burning ROM" desde<br />
el escritorio.<br />
Uruchom program "Nero Burning ROM", klikając ikonę znajdującą się na pulpicie.<br />
2<br />
UK<br />
D<br />
F<br />
I<br />
NL<br />
E<br />
PL<br />
Choose "CD" and click "Next".<br />
Wählen Sie "CD" und klicken Sie<br />
auf "Weiter".<br />
Choisissez CD et cliquez sur<br />
"Suivant".<br />
Scegliere "CD" e fare clic su<br />
"Success".<br />
Selecteer "CD" en klik op<br />
"Volgende".<br />
Elija "CD" y haga clic en<br />
"Siguiente".<br />
Wybierz "CD" i kliknij "Next".<br />
46
3<br />
UK<br />
D<br />
F<br />
I<br />
NL<br />
E<br />
PL<br />
Choose "Compile a new CD"<br />
and click "Next".<br />
Wählen Sie "Neue CD erstellen"<br />
und klicken Sie auf "Weiter".<br />
Choisissez "Compiler un nouveau<br />
CD" et cliquez sur "Suivant".<br />
Scegliere "Crea un nuovo CD" e<br />
fare clic su "Success".<br />
Selecteer "Een nieuwe CD<br />
compileren" en klik op<br />
"Volgende".<br />
Elija "Compilar un CD nuevo" y<br />
haga clic en "Siguiente".<br />
Wybierz "Copy a CD" ikliknij "Next".<br />
4<br />
UK<br />
D<br />
F<br />
I<br />
NL<br />
E<br />
PL<br />
Choose "Audio CD" and click<br />
"Next".<br />
Wählen Sie "Audio-CD" und<br />
klicken Sie auf "Weiter".<br />
Choisissez "CD Audio" et cliquez<br />
sur "Suivant".<br />
Scegliere "CD Audio" e fare clic<br />
su "Success".<br />
Selecteer "Audio-CD" en klik op<br />
"Volgende".<br />
Elija "CD de audio" y haga clic en<br />
"Siguiente".<br />
Wybierz "Audio CD" i kliknij "Next".<br />
47
5<br />
UK<br />
D<br />
F<br />
I<br />
NL<br />
E<br />
PL<br />
Choose "Finish".<br />
Wählen Sie "Fertig".<br />
Cliquez sur "Terminer".<br />
Scegliere "Fini".<br />
Klik op "Voltooien".<br />
Elija "Finalizar".<br />
Wybierz "Finish".<br />
6<br />
UK<br />
D<br />
F<br />
I<br />
NL<br />
E<br />
PL<br />
Drag the audio files (*.wav) you<br />
want to have on your new audio<br />
disc to the left side.<br />
Ziehen Sie die Audiodateien<br />
(*.wav), die Sie auf Ihrer neuen<br />
Audio-CD haben möchten, zur<br />
linken Seite.<br />
Effectuez un glisser–déposer pour<br />
transférer les fichiers audio (*.wav)<br />
à enregistrer sur le disque dans la<br />
partie gauche de la fenêtre.<br />
Trascinare sul lato sinistro i file<br />
audio (*.wav) che si desiderano<br />
avere sul nuovo disco audio.<br />
Sleep de geluidsbestanden (*.wav) die u op de cd wilt branden naar het linkervenster.<br />
Arrastre los archivos de audio (*.wav) que desee copiar en su nuevo disco de audio a la<br />
izquierda.<br />
Przeciągnij pliki audio (*.wav), które chcesz skopiować na nową płytę, na lewą stronę ekranu.<br />
48
7<br />
UK<br />
D<br />
F<br />
I<br />
NL<br />
E<br />
PL<br />
Click on the "Write" icon.<br />
Klicken Sie auf das Symbol<br />
"Brennen".<br />
Cliquez sur l'icône "Graver".<br />
Fare clic sull'icona "Scrivi".<br />
Klik op het pictogram voor<br />
"Branden".<br />
Haga clic en el icono "Grabar".<br />
Kliknij ikonę "Write".<br />
8<br />
UK<br />
D<br />
F<br />
I<br />
NL<br />
E<br />
PL<br />
Choose "Burn" twice.<br />
Wählen Sie zweimal "Brennen".<br />
Choisissez "Graver" deux fois de<br />
suite.<br />
Selezionare "Scrivi" due volte.<br />
Selecteer twee keer "Branden".<br />
Elija "Grabar" dos veces.<br />
Kliknij dwukrotnie "Burn".<br />
49
9<br />
UK<br />
D<br />
F<br />
I<br />
NL<br />
E<br />
PL<br />
"Nero - Burning Rom" is burning<br />
your Audio CD.<br />
"Nero - Burning Rom" brennt<br />
Ihre Audio-CD.<br />
"Nero - Burning Rom"<br />
commence la gravure du CD<br />
audionumérique.<br />
"Nero - Burning Rom" sta<br />
copiando il CD Audio.<br />
"Nero - Burning Rom" zal nu de<br />
Audio-cd voor u branden.<br />
"Nero - Burning Rom" está<br />
grabando su CD de audio.<br />
Aplikacja "Nero Burning ROM" zapisze płytę Audio CD.<br />
10<br />
UK<br />
D<br />
F<br />
I<br />
NL<br />
E<br />
PL<br />
Click "OK". Congratulations, your<br />
audio disc is ready now.<br />
Click "Discard" to finish the audio<br />
disc creation process.<br />
Klicken Sie auf "OK". Gratulation,<br />
Ihre Audio-CD ist jetzt fertig.<br />
Klicken Sie auf "Verwerfen", um<br />
die Erstellung der Audio-CD<br />
abzuschließen.<br />
Cliquez sur OK. Le disque audio<br />
est à présent terminé.<br />
Cliquez sur "Rejeter" pour clore<br />
le processus de création de<br />
disque audionumérique.<br />
Fare click su "OK". Congratulazioni, il CD Audio ora è pronto. click en "Elimina" per terminare il<br />
processo di creazione del CD audio.<br />
Klik op "OK". Na afloop van het brandproces is uw nieuwe audio-cd klaar voor gebruik.<br />
Klik op "Verwijderen" om het brandproces af te sluiten.<br />
Haga clic en "OK". Felicitaciones, su disco de audio está preparado para ser utilizado.<br />
Click su "Descatar" para terminar el proceso de creación del disco de audio.<br />
Kliknij "OK". Gratulacje, płyta CD jest gotowa. Wybierz "Discard".<br />
50
How to find warranty<br />
information?<br />
Wie findet man Garantie-Informationen?<br />
Comment trouver les informations relatives à la<br />
garantie?<br />
Come si accede alle informazioni sulla garanzia<br />
memorizzate?<br />
Waar vind ik informatie over de garantie?<br />
¿Cómo encontrar información sobre la garantía?<br />
Jak odszukać na dysku z programem Nero<br />
informacje dotyczące gwarancji?<br />
51
1<br />
UK<br />
D<br />
F<br />
I<br />
NL<br />
E<br />
PL<br />
Insert the Nero disc again, and<br />
click "exit".<br />
Legen Sie die Nero Disk wieder<br />
ein und klicken Sie auf "Exit".<br />
Réinsérez le disque Nero et<br />
cliquez sur "Quitter".<br />
Inserire nuovamente il disco<br />
Nero e fare clic su "esci".<br />
Leg de Nero-CD weer in de lade<br />
en klik op "Sluiten".<br />
Vuelva a colocar el disco de Nero<br />
y haga clic en "salir".<br />
Włóż ponownie dysk z programem Nero, a następnie kliknij przycisk "Zakończ".<br />
2<br />
UK<br />
D<br />
F<br />
I<br />
NL<br />
E<br />
PL<br />
Click on the "My Computer" icon<br />
on your desktop (A) or click<br />
"Start", "My Computer" (B).<br />
Klicken Sie auf das Symbol<br />
"My Computer" auf Ihrer<br />
Oberfläche (A) oder klicken Sie<br />
auf "Start", "My Computer" (B).<br />
Cliquez sur l’icône<br />
'Poste de travail' de votre bureau<br />
(A) ou cliquez sur 'Démarrer'<br />
puis 'Poste de travail' (B).<br />
Fare clic sull'icona "Risorse del<br />
computer" nel desktop (A)<br />
oppure fare clic su "Start",<br />
"Risorse del computer" (B)<br />
Klik op het bureaublad op het pictogram "Deze computer" (A) of klik op "Start" en dan op<br />
"Deze computer" (B).<br />
Haga clic en el icono "Mi PC" del escritorio (A) o bien haga clic en "Inicio" y "Mi PC" (B).<br />
Kliknij ikonę "Mój komputer" znajdującą się na pulpicie (A) lub kliknij przycisk "Start" i wskaż<br />
polecenie "Mój komputer" (B).<br />
52
3<br />
UK<br />
D<br />
F<br />
I<br />
NL<br />
E<br />
PL<br />
4<br />
UK<br />
D<br />
F<br />
I<br />
NL<br />
E<br />
PL<br />
Click with the right mouse button<br />
on the "N5510_54" icon (A) and<br />
choose "Explore" (B).<br />
Klicken Sie mit der rechten<br />
Maustaste auf das Symbol<br />
"N5510_54" (A) und wählen Sie<br />
"Explore" (B).<br />
Cliquez avec le bouton droit sur<br />
l’icône "N5510_54" (A) et<br />
choisissez "Explorer" (B).<br />
Fare un clic destro sull'icona<br />
"N5510_54" (A) e selezionare<br />
"Esplora" (B).<br />
Klik met de rechtermuisknop op het pictogram "N5510_54" (A) en daarna op "Verkennen" (B).<br />
Haga clic con el botón derecho del ratón en el icono "N5510_54" (A) y elija "Explorar" (B).<br />
Kliknij prawym przyciskiem myszy ikonę "N5510_54" (A) i wybierz polecenie "Eksploruj" (B).<br />
Choose the "<strong>Philips</strong> Warranty"<br />
folder and you will find the<br />
warranty documents.<br />
If you have no Adobe Acrobat<br />
Reader, please download this for<br />
free on http://www.adobe.com<br />
Wählen Sie den Ordner "<strong>Philips</strong><br />
Warranty"; hier finden Sie die<br />
Garantiedokumente.<br />
Wenn Sie nicht über den Adobe<br />
Acrobat Reader verfügen, können<br />
Sie sich diese Software kostenlos<br />
bei http://www.adobe.com<br />
herunterladen.<br />
Choisissez le dossier "<strong>Philips</strong> Warranty": vous y trouverez les documents relatifs à la garantie.<br />
Si vous ne disposez pas d’Adobe Acrobat Reader, vous pouvez le télécharger gratuitement<br />
depuis le site http://www.adobe.com<br />
Selezionare la cartella "<strong>Philips</strong> Warranty" che contiene i documenti relativi alla garanzia.<br />
Se sul computer non è installato Acrobat Reader, è possibile scaricarlo gratuitamente dal sito<br />
http://www.adobe.com<br />
Ga naar de map "<strong>Philips</strong> Warranty". Daar vindt u documentatie over de garantie.<br />
Als u Adobe Acrobat Reader niet hebt, download dit programma dan gratis vanaf de site<br />
http://www.adobe.com<br />
Seleccione la carpeta "<strong>Philips</strong> Warranty", en la que encontrará los documentos de la garantía.<br />
Si no dispone de Adobe Acrobat Reader, descárguelo gratuitamente desde<br />
http://www.adobe.com<br />
Wybierz folder "<strong>Philips</strong> Warranty". Znajdują się w nim dokumenty gwarancyjne.<br />
W przypadku braku programu Adobe Acrobat Reader, można go pobrać bezpłatnie z witryny<br />
http://www.adobe.com<br />
53
54<br />
Notes
Safety Precautions<br />
USA/Canada:This player is for use only with IBM compatible UL listed Personal<br />
Computers or Macintosh UL listed workstations, weighing less than 18 kg.<br />
LASER SAFETY<br />
This unit employs a laser. Do not remove the cover or attempt to service this device when<br />
connected due to the possibility of eye damage.<br />
LASER-SICHERHEIT<br />
In das Gerät ist ein Laser eingebaut. Nehmen Sie die Abdeckung nicht ab und versuchen Sie nicht,<br />
das Gerät zu reparieren, solange es angeschlossen ist. Es besteht die Gefahr einer Augenverletzung.<br />
CAUTION<br />
USE OF CONTROLS OR ADJUSTMENTS OR PERFORMANCE OF PROCEDURES OTHER<br />
THAN THOSE SPECIFIED HEREIN MAY RESULT IN HAZARDOUS LASER RADIATION<br />
EXPOSURE.<br />
WARNUNG<br />
DIE VORNAHME VON REGELUNGEN ODER EINSTELLUNGEN ODER DIE DURCHFÜHRUNG<br />
VON VERFAHREN, DIE NICHT IN DIESEM DOKUMENT (DIESER BESCHREIBUNG;<br />
IM NACHSTEHENDEN TEXT) ANGEGEBEN SIND, KANN EINE GEFÄHRLICHE EINWIRKUNG<br />
VON LASERSTRAHLUNG ZUR FOLGE HABEN.<br />
CAUTION<br />
VARO!<br />
VARNING<br />
ADVERSEL<br />
DANGER<br />
VORSICHT<br />
INVISIBLE LASER RADIATION.WHEN OPEN AVOID EXPOSURE TO BEAM<br />
AVATTAESSA OLET ALTTIINA NÄKYVÄLLE JA NÄKYMÄTTÖMÄLLE LASER<br />
SÄTEILYLLE. ÄLÄ KATSO SÄTEESEEN<br />
OSYNLIG LASERSTRÅLNING NÄR DENNA DEL ÄR ÖPPNAD BETRAKTA<br />
EJ STRÅLEN<br />
USYNLIG LASERSTRÅLING NÅR DEKSEL ÅPNES UNNGÅ EKSPONERING<br />
FOR STRÅLEN<br />
INVISIBLE LASER RADIATION.WHEN OPEN AVOID DIRECT EXPOSURE<br />
TO BEAM<br />
UNSICHTBARE LASERSTRAHLUNG WENN ABDECKUNG GEÖFFNET<br />
NICHT DEM STRAHL AUSSETZEN<br />
LASER<br />
Type ........................................................................................................Semiconductor laser GaAIAs<br />
Wave length ..........................................................................................................................779-789 nm<br />
Output power ..................................................................(measured above the objective lens)<br />
..........................................................................................................1,4 mW (Read), 90 mW (Write)<br />
Beam divergence ......................................................................................................................60 degree<br />
CLASS 1<br />
LASER PRODUCT<br />
55
Additional information available at our website:<br />
www.philips.com/pcstuff<br />
Specifications subject to change without notice.<br />
All dimensions shown are approximate.<br />
© 2003 Koninklijke <strong>Philips</strong> Electronics N.V.<br />
All rights reserved.<br />
Reproduction, copying, usage, modifying, hiring, renting, public performance,<br />
transmission and/or broadcasting in whole or part is prohibited without the<br />
written consent of <strong>Philips</strong> Electronics N.V.<br />
9305 125 2300.1


