

Philips Sonicare Série 2 plaque defense - Mode d’emploi - KOR
Philips Sonicare Série 2 plaque defense - Mode d’emploi - KOR
Philips Sonicare Série 2 plaque defense - Mode d’emploi - KOR

Create successful ePaper yourself
Turn your PDF publications into a flip-book with our unique Google optimized e-Paper software.
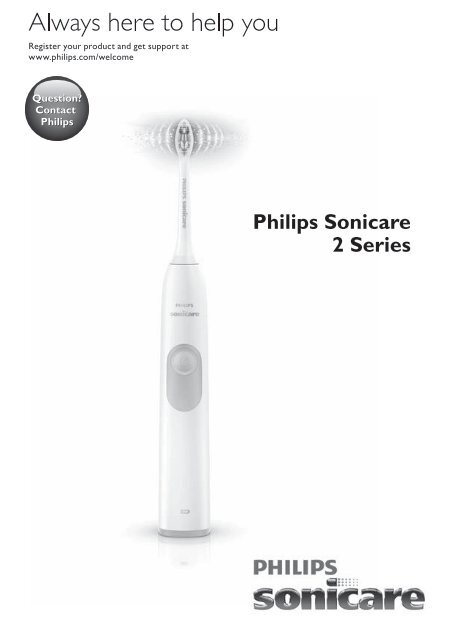
<strong>Philips</strong> <strong>Sonicare</strong><br />
2 Se<strong>rie</strong>s
1<br />
1<br />
2<br />
3<br />
4<br />
5<br />
6
ENGLISH 6<br />
한국어 14<br />
<strong>Sonicare</strong> 2 Se<strong>rie</strong>s
6<br />
ENGLISH<br />
Introduction<br />
Congratulations on your purchase and welcome to <strong>Philips</strong>! To fully<br />
benefit from the support that <strong>Philips</strong> offers, register your product at<br />
www.philips.com/welcome.<br />
Important<br />
Read this user manual carefully before you use the appliance and save it<br />
for future reference.<br />
Danger<br />
--<br />
Keep the charger away from water. Do not place or store it over or<br />
near water contained in a bathtub, washbasin, sink etc. Do not<br />
immerse the charger in water or any other liquid. After cleaning, make<br />
sure the charger is completely dry before you connect it to the mains.<br />
Warning<br />
--<br />
The mains cord cannot be replaced. If the mains cord is damaged,<br />
discard the charger.<br />
--<br />
Always have the charger replaced with one of the original type in<br />
order to avoid a hazard.<br />
--<br />
Do not use the charger outdoors or near heated surfaces.<br />
--<br />
If the appliance is damaged in any way (brush head, toothbrush<br />
handle or charger), stop using it. This appliance contains no serviceable<br />
parts. If the appliance is damaged, contact the Consumer Care<br />
Centre in your country (see chapter ‘Guarantee and support’).<br />
--<br />
This appliance is not intended for use by persons (including children)<br />
with reduced physical, sensory or mental capabilities, or lack of<br />
expe<strong>rie</strong>nce and knowledge, unless they have been given supervision<br />
or instruction concerning use of the appliance by a person<br />
responsible for their safety.<br />
--<br />
Children should be supervised to ensure that they do not play with<br />
the appliance.
ENGLISH 7<br />
Caution<br />
--<br />
Do not clean the brush head, the handle or the charger in the<br />
dishwasher.<br />
--<br />
If you have had oral or gum surgery in the previous 2 months, consult<br />
your dentist before you use the toothbrush.<br />
--<br />
Consult your dentist if excessive bleeding occurs after using this<br />
toothbrush or if bleeding continues to occur after 1 week of use.<br />
Also consult your dentist if you expe<strong>rie</strong>nce discomfort or pain when<br />
you use the <strong>Sonicare</strong>.<br />
--<br />
The <strong>Sonicare</strong> toothbrush complies with the safety standards for<br />
electromagnetic devices. If you have a pacemaker or other implanted<br />
device, contact your physician or the device manufacturer of the<br />
implanted device prior to use.<br />
--<br />
If you have medical concerns, consult your doctor before you use the<br />
<strong>Sonicare</strong>.<br />
--<br />
This appliance has only been designed for cleaning teeth, gums and<br />
tongue. Do not use it for any other purpose. Stop using the appliance<br />
and contact your doctor if you expe<strong>rie</strong>nce any discomfort or pain.<br />
--<br />
The <strong>Sonicare</strong> toothbrush is a personal care device and is not<br />
intended for use on multiple patients in a dental practice or<br />
institution.<br />
--<br />
Stop using a brush head with crushed or bent bristles. Replace the<br />
brush head every 3 months or sooner if signs of wear appear. Do not<br />
use other brush heads than the ones recommended by the<br />
manufacturer.<br />
--<br />
If your toothpaste contains peroxide, baking soda or bicarbonate<br />
(common in whitening toothpastes), thoroughly clean the brush head<br />
with soap and water after each use. This prevents possible cracking of<br />
the plastic.<br />
Electromagnetic fields (EMF)<br />
This <strong>Philips</strong> appliance complies with all applicable standards and<br />
regulations regarding exposure to electromagnetic fields.
8<br />
ENGLISH<br />
General description (Fig. 1)<br />
1 Hygienic travel cap<br />
2 Brush head with unique identifier<br />
3 Handle<br />
4 Power on/off button<br />
5 Battery level indicator<br />
6 Charger<br />
Note: The contents of the box may vary based on the model purchased.<br />
Preparing for use<br />
Attaching the brush head<br />
1 Align the brush head so the bristles face the front of the<br />
handle (Fig. 2).<br />
2 Firmly press the brush head down on the metal shaft until it stops.<br />
Note: <strong>Sonicare</strong> brush heads come with easily identifiable icons to identify your<br />
brush head.<br />
Charging the appliance<br />
1 Put the plug of the charger in a wall socket.<br />
2 Place the handle on the charger (Fig. 3).<br />
,,<br />
The battery level indicator flashes to indicate that the toothbrush<br />
is charging. When the light stops flashing and turns solid green the<br />
toothbrush is fully charged (Fig. 4).<br />
Note: It can take up to 48 hours to fully charge the battery, but the <strong>Sonicare</strong><br />
may be used before it is fully charged.
ENGLISH 9<br />
Using the appliance<br />
Brushing instructions<br />
1 Wet the bristles and apply a small amount of toothpaste.<br />
2 Place the toothbrush bristles against the teeth at a slight angle<br />
towards the gumline (Fig. 5).<br />
3 Press the power on/off button to switch on the <strong>Sonicare</strong>.<br />
4 Apply light pressure to maximise <strong>Sonicare</strong>’s effectiveness and let<br />
the <strong>Sonicare</strong> toothbrush do the brushing for you. Do not scrub.<br />
5 Gently move the brush head slowly across the teeth in a small back<br />
and forth motion so the longer bristles reach between the teeth.<br />
Continue this motion throughout the brushing cycle.<br />
Note: To make sure you brush evenly throughout the mouth, divide the mouth<br />
into 4 sections using the Quadpacer feature (see chapter ‘Features’), (specific<br />
types only).<br />
6 Brush each section for 30 seconds for a total brushing time of<br />
2 minutes. Start with section 1 (outside top teeth) and then brush<br />
section 2 (inside top teeth). Continue with section 3 (outside<br />
bottom teeth) and finally brush section 4 (inside bottom teeth)<br />
(Fig. 6).<br />
Note: After you have completed the brushing cycle, you can spend additional<br />
time brushing the chewing surfaces of your teeth and areas where staining<br />
occurs. You may also brush your tongue, with the toothbrush switched on or<br />
off, as you prefer.<br />
The <strong>Sonicare</strong> is safe to use on:<br />
--<br />
Braces (brush heads may wear out more quickly when used on<br />
braces)<br />
--<br />
Dental restorations (fillings, crowns, veneers, implants)<br />
Note: When the <strong>Sonicare</strong> is used in clinical studies, the handle has to be fully<br />
charged and the Easy-start feature must be deactivated.
10<br />
ENGLISH<br />
Battery status (when handle is not on charger)<br />
--<br />
A yellow battery level indicator indicates a low charge.<br />
--<br />
A green battery level indicator indicates a high charge.<br />
--<br />
The battery level indicator turns off when the battery is in between a<br />
low and a high charge.<br />
Note: When you hear 3 beeps and the yellow LED of the battery level<br />
indicator flashes, this means the battery charge is below 10% and the<br />
toothbrush should be recharged.<br />
Note: To keep the battery fully charged at all times, you may keep the<br />
<strong>Sonicare</strong> on the charger when not in use.<br />
Features<br />
Quadpacer (specific types only)<br />
--<br />
The Quadpacer is an interval timer that has a short beep and pause<br />
to remind you to brush the 4 sections of your mouth (Fig. 7).<br />
Smartimer<br />
The Smartimer indicates that your brushing cycle is complete when it<br />
automatically switches off the toothbrush at the end of the brushing cycle.<br />
Dentists recommend brushing at least 2 minutes twice a day.<br />
Note: After brushing for 2.5 seconds, pressing the power on/off button causes<br />
the toothbrush to pause. After a pause of 30 seconds, the Smartimer resets.<br />
Easy-start<br />
The Easy-start feature gently increases power over the first 14 brushings<br />
to let you get used to brushing with the <strong>Sonicare</strong>.<br />
This <strong>Sonicare</strong> model comes with the Easy-start feature activated.<br />
To activate or deactivate the Easy-start feature:<br />
1 Attach your brush head to the handle.<br />
2 Place the handle in the plugged-in charger.<br />
3 Activate or deactivate Easy-start:
ENGLISH 11<br />
,,<br />
To activate Easy-start: Press and hold the power on/off button for<br />
2 seconds. You hear 2 beeps and the battery level indicator flashes<br />
green to indicate that the Easy-start feature has been activated.<br />
,,<br />
To deactivate Easy-start: Press and hold the power on/off button<br />
for 2 seconds. You hear 1 beep and the battery level indicator<br />
flashes yellow to indicate that the Easy-start feature has been<br />
deactivated.<br />
Note: Each of the first 14 brushings must be at least 1 minute in length to<br />
properly move through the Easy-start ramp-up cycle.<br />
Note: Using the Easy-start feature beyond the initial ramp-up period is not<br />
recommended and reduces <strong>Sonicare</strong>’s effectiveness in removing <strong>plaque</strong>.<br />
Cleaning<br />
Do not clean the brush head, handle or charger in the dishwasher.<br />
Toothbrush handle<br />
1 Remove the brush head and rinse the metal shaft area with warm<br />
water (Fig. 8).<br />
Do not push on the rubber seal on the metal shaft with sharp objects,<br />
as this may cause damage.<br />
2 Use a damp cloth to wipe the entire surface of the handle.<br />
Brush head<br />
1 Rinse the brush head and bristles after each use (Fig. 9).<br />
2 Remove the brush head from the handle and rinse the brush head<br />
connection at least once a week with warm water.<br />
Charger<br />
1 Unplug the charger.<br />
2 Use a damp cloth to wipe the surface of the charger.
12<br />
ENGLISH<br />
Storage<br />
If you are not going to use the appliance for an extended period of time,<br />
remove the mains plug from the wall socket. Then clean the appliance and<br />
store it in a cool and dry place away from direct sunlight.<br />
Replacement<br />
Brush head<br />
Replace <strong>Sonicare</strong> brush heads every 3 months to achieve optimal results.<br />
Only use genuine <strong>Philips</strong> <strong>Sonicare</strong> replacement brush heads that are<br />
suitable for this model.<br />
Ordering accesso<strong>rie</strong>s<br />
To buy accesso<strong>rie</strong>s or spare parts, visit www.shop.philips.com/<br />
service or go to your <strong>Philips</strong> dealer. You can also contact the <strong>Philips</strong><br />
Consumer Care Centre in your country (see the worldwide guarantee<br />
leaflet for contact details).<br />
Recycling<br />
Do not throw away the appliance with the normal household waste at<br />
the end of its life, but hand it in at an official collection point for recycling.<br />
By doing this, you help to preserve the environment.<br />
Removing the rechargeable battery<br />
Only remove the rechargeable battery when you discard the appliance.<br />
Make sure the battery is completely empty when you remove it.<br />
To remove the rechargeable battery, you need a small standard<br />
screwdriver and tape. Observe basic safety precautions when you follow<br />
the procedure below.<br />
1 To deplete the rechargeable battery of any charge, remove the<br />
handle from the charger, turn on the <strong>Sonicare</strong> and let it operate<br />
until it stops. Repeat this step until you can no longer turn on the<br />
<strong>Sonicare</strong>.
ENGLISH 13<br />
2 Insert a small standard screwdriver into the bottom of the handle<br />
and turn it counter-clockwise to remove the screw. Pull the end<br />
cap off of the handle (Fig. 10).<br />
3 Insert the screwdriver between the handle and the internal frame.<br />
Tilt the screwdriver to loosen the handle (Fig. 11).<br />
4 Remove the internal frame from the handle. (Fig. 12)<br />
5 Remove the rubbers that are on top and below the battery<br />
(Fig. 13).<br />
6 Insert the screwdriver between the battery and the frame. Tilt the<br />
screwdriver to pop the battery out of the frame (Fig. 14).<br />
7 Place some tape over the ends of the battery to avoid any<br />
short-circuiting due to residual energy in the battery (Fig. 15).<br />
Guarantee and support<br />
If you need information or support, please visit www.philips.com/<br />
support or read the separate worldwide guarantee leaflet.<br />
Guarantee restrictions<br />
The terms of the international guarantee do not cover the following:<br />
--<br />
Brush heads.<br />
--<br />
Damage caused by use of unauthorised replacement parts.<br />
--<br />
Damage caused by misuse, abuse, neglect, alterations or unauthorised<br />
repair.<br />
--<br />
Normal wear and tear, including chips, scratches, abrasions,<br />
discolouration or fading.
14<br />
한국어<br />
소개<br />
필립스 제품을 구입해 주셔서 감사합니다! 필립스가 드리는 지원<br />
혜택을 받으실 수 있도록 www.philips.co.kr에서 제품을<br />
등록하십시오.<br />
중요 사항<br />
본 제품을 사용하기 전에 이 사용 설명서를 주의 깊게 읽고<br />
나중에 참조할 수 있도록 잘 보관하십시오.<br />
주의<br />
--<br />
충전기는 물이 없는 곳에서 사용하십시오. 욕조, 세면대,<br />
싱크대 등 물이 가까이 있는 곳에서 사용하거나 두지<br />
마십시오. 그리고 충전기를 물이나 기타 액체에 담그지<br />
마십시오. 청소한 후에는 충전기가 완전히 건조된 다음<br />
제품을 본체에 연결하십시오.<br />
경고<br />
--<br />
전원 코드는 교체할 수 없습니다. 전원 코드가 손상된 경우<br />
충전기를 폐기하십시오.<br />
--<br />
위험할 수 있으므로 충전기는 반드시 정품으로 교체하여<br />
사용하십시오.<br />
--<br />
충전기를 실외 또는 발열되는 표면 근처에서 사용하지<br />
마십시오.<br />
--<br />
제품에 손상된 부분(칫솔모, 핸들 또는 충전기)이 나타나면<br />
사용을 중단하십시오. 이 제품에는 서비스되는 부품이<br />
없습니다. 문제가 발생하면 필립스 고객 상담실로<br />
문의하십시오(‘품질 보증 및 지원’란 참조).<br />
--<br />
신체적인 감각 및 인지능력이 떨어지거나 경험과 지식이<br />
풍부하지 않은 성인 및 어린이는 혼자 제품을 사용하지 말고<br />
제품 사용과 관련하여 안전에 책임질 수 있도록 지시사항을<br />
충분히 숙지한 사람의 도움을 받으십시오.<br />
--<br />
어린이가 제품을 가지고 놀지 못하도록 지도해 주십시오.
한국어 15<br />
주의<br />
--<br />
칫솔모, 핸들 또는 충전기를 식기세척기로 세척하지<br />
마십시오.<br />
--<br />
최근 2개월 이내에 구강 또는 잇몸 수술을 받은 경우에는<br />
칫솔을 사용하기 전에 치과 전문의와 상의하십시오.<br />
--<br />
본 제품을 사용한 후 출혈이 심하거나 1주일이 지나도 증상이<br />
호전되지 않는다면 치과 전문의와 상의하십시오. 소닉케어<br />
칫솔을 사용할 때 불편하거나 통증을 느끼는 경우에도 치과<br />
전문의와 상의하십시오.<br />
--<br />
소닉케어 칫솔은 국내 안전 기준에 따라 전자파 장해 검정을<br />
받은 제품입니다. 심장 박동 보조기 등, 보조 기구를 이식<br />
받은 경우에는 주치의나 보조 기구 제조업체에 문의하여<br />
충분히 이해한 후 이용하십시오.<br />
--<br />
의료적 문제는 소닉케어를 사용하기 전에 치과 전문의와<br />
상의하십시오.<br />
--<br />
본 제품은 치아와 잇몸, 그리고 혀만 세정할 수 있도록<br />
만들어졌으므로 다른 용도에는 사용하지 마십시오. 사용 중<br />
불편함이나 통증이 느껴지면 제품 사용을 중단하고 의사와<br />
상의하십시오.<br />
--<br />
소닉케어 칫솔은 개인 용품이므로 치과나 기타 의료 시설에서<br />
공용으로 이용하지 마십시오.<br />
--<br />
부서지거나 휘어진 칫솔모는 사용을 중단하십시오. 3개월에 한<br />
번씩 또는 마모된 상태가 나타나면 칫솔모를 교체하십시오.<br />
제조업체에서 권장한 제품 이외의 칫솔모를 사용하지 마십시오.<br />
--<br />
사용하는 치약 성분에 과산화수소, 탄산수소나트륨, 중탄산염<br />
(미백 치약 주성분)이 포함된 경우, 이용하고 나서 칫솔모를<br />
비누로 닦고 물로 깨끗이 씻어내십시오. 플라스틱 부분이<br />
손상될 수 있습니다.<br />
EMF(전자기장)<br />
이 제품은 EMF(전자기장)와 관련된 모든 기준 및 규정을<br />
준수합니다.
16<br />
한국어<br />
제품정보 (그림 1)<br />
1 위생 칫솔모 캡<br />
2 교체 시기를 알 수 있는 칫솔모<br />
3 손잡이<br />
4 전원 버튼<br />
5 배터리 전력 표시등<br />
6 충전기<br />
참고: 제품 구성품은 구입한 모델에 따라 다릅니다.<br />
사용 준비<br />
칫솔모 부착 방법<br />
1 칫솔모가 핸들 앞면을 향하도록 칫솔모를 조정합니다 (그림 2).<br />
2 칫솔모를 금속 샤프트에 꼭 눌러 고정시킵니다.<br />
참고: 소닉케어 칫솔모에는 쉽게 확인할 수 있는 칫솔모 표시가<br />
되어 있습니다.<br />
제품 충전<br />
1 충전기 플러그를 벽면 콘센트에 꽂으십시오.<br />
2 충전기에 핸들을 꽂으십시오 (그림 3).<br />
,,<br />
배터리 전력 표시등이 깜박이면 칫솔이 충전되고 있다는<br />
표시입니다. 표시등이 깜박거림을 멈추고 녹색으로 계속 켜진<br />
상태가 유지되면 칫솔이 완전히 충전된 것입니다 (그림 4).<br />
참고: 배터리가 완전히 충전되려면 최대 48시간이 걸리지만<br />
소닉케어는 완전히 충전되지 않아도 사용할 수 있습니다.
한국어 17<br />
제품 사용<br />
칫솔질 방법<br />
1 칫솔모에 소량의 치약을 바르십시오.<br />
2 칫솔모가 잇몸과 살짝 각을 이루도록 치아에<br />
올려놓으십시오 (그림 5).<br />
3 전원 버튼을 눌러 소닉케어를 켜십시오.<br />
4 소닉케어를 더욱 효과적으로 사용하려면 손에 힘을 빼고<br />
칫솔이 움직이는 대로 따라가십시오. 직접 문지르지<br />
마십시오.<br />
5 치아를 가로질러 칫솔모를 앞 뒤로 약간씩 움직여서 칫솔모의<br />
끝 부분이 치아 사이 사이에 닿도록 합니다. 칫솔질해야 하는<br />
동안 이 동작을 계속 하십시오.<br />
참고: 쿼드페이서 기능을 사용하여 입안을 4구간으로 나누고<br />
알림음에 따라 입 안 치아를 골고루 양치할 수 있습니다<br />
(‘기능’란 참조), (특정 모델만 해당).<br />
6 각 구간을 30초씩 양치하면 총 칫솔질 시간은 2분이<br />
걸립니다. 1구간(윗니 바깥쪽)부터 칫솔질한 후 2구간(윗니<br />
안쪽)을 닦고 계속해서 3구간(아랫니 바깥쪽)을 닦은 후에<br />
마지막으로 4구간(아랫니 안쪽)을 칫솔질합니다 (그림 6).<br />
참고: 칫솔질 시간이 완료된 다음 추가로 어금니 및 착색 부분을<br />
닦을 수 있습니다. 또한 칫솔의 전원을 켜거나 끈 상태에서<br />
원하는 대로 혀를 닦을 수도 있습니다.<br />
소닉케어는 다음과 같은 경우에 사용해도 안전합니다.<br />
--<br />
치아 교정기(교정기에 사용하는 경우 칫솔모가 보다 빨리<br />
마모될 수 있음)<br />
--<br />
치아 보철물(신경치료, 크라운, 라미네이트, 임플란트)<br />
참고: 소닉케어를 임상 연구용으로 사용하는 경우, 핸들을<br />
완전히 충전하고 이지 스타트 기능을 반드시 해제해야 합니다.
18<br />
한국어<br />
배터리 상태(핸들이 충전기에 없을 때)<br />
--<br />
배터리가 부족하면 배터리 전력 표시등이 노란색으로<br />
나타납니다.<br />
--<br />
배터리가 가득 차면 배터리 전력 표시등이 초록색으로<br />
나타납니다.<br />
--<br />
배터리가 어느 정도 충전되면 배터리 전력 표시등이<br />
꺼집니다.<br />
참고: 신호음이 3번 울리고 배터리 충전 표시등의 LED가<br />
노란색으로 깜박이면 배터리 잔량이 10% 미만 남은 것을<br />
나타내므로 칫솔을 다시 충전해야 합니다.<br />
참고: 배터리를 항상 완전히 충전된 상태로 유지하려면<br />
소닉케어를 사용하지 않을 때에도 충전기에 꽂아 두십시오.<br />
기능<br />
쿼드페이서 기능(특정 모델만 해당)<br />
--<br />
쿼드페이서는 입 안을 양치할 수 있도록 짧은 신호음과 함께<br />
일시 중지하는 간격 타이머입니다 (그림 7).<br />
스마트타이머<br />
칫솔질 종료 시에 칫솔이 자동으로 꺼져 스마트타이머는<br />
칫솔질이 완료되었음을 나타내줍니다.<br />
치과 전문의는 최소 2분 동안 하루에 2회 이상 양치질할 것을<br />
권장합니다.<br />
참고: 2.5초 간 양치질 후 전원 버튼을 누르면 칫솔 작동이 일시<br />
중지됩니다. 30초간 중지된 후 스마트타이머가 초기화됩니다.<br />
이지스타트<br />
이지스타트 기능은 최초 14회 양치하는 동안 서서히 전원을<br />
높여서 소닉케어를 이용한 칫솔질에 익숙해지도록 합니다.<br />
이 소닉케어 모델에는 이지스타트 기능이 설정되어 있습니다.<br />
이지스타트 기능을 설정 또는 해제하는 방법:<br />
1 핸들에 칫솔모를 결합하십시오.
한국어 19<br />
2 전원에 연결된 충전기에 소닉케어 핸들을 꽂으십시오.<br />
3 이지스타트를 설정 또는 해제하려면:<br />
,,<br />
이지스타트 설정: 전원 버튼을 2초 동안 누르십시오.<br />
이지스타트 기능이 설정됨을 알리는 신호음이 2번 울리고<br />
배터리 전력 표시등이 초록색으로 깜박입니다.<br />
,,<br />
이지스타트 해제: 전원 버튼을 2초 동안 누르십시오.<br />
이지스타트 기능이 해제됨을 알리는 신호음이 1번 울리고<br />
배터리 전력 표시등이 노란색으로 깜박입니다.<br />
참고: 최초 14회의 양치 시 이지스타트 점증 사이클이 제대로<br />
기능하는 데 걸리는 최소 양치시간은 1분입니다.<br />
참고: 최초 점증 기간 이후에 이지스타트 기능을 사용하는 것은<br />
소닉케어의 플라그 제거 성능을 저하시키므로 사용하지 않는<br />
것이 좋습니다.<br />
세척<br />
칫솔모, 핸들 또는 충전기를 식기세척기로 세척하지 마십시오.<br />
핸들<br />
1 칫솔모를 제거하고 금속 샤프트 부분을 따뜻한 물로<br />
헹굽니다 (그림 8).<br />
손상될 수 있으므로 금속 샤프트 주위의 고무 덮개를 날카로운<br />
물체로 누르지 마십시오.<br />
2 핸들의 전체 표면을 물에 적신 천으로 닦으십시오.<br />
칫솔모<br />
1 사용 후에는 항상 칫솔모를 물로 헹구십시오 (그림 9).<br />
2 핸들에서 칫솔모를 제거하고 매주 1회 칫솔모와 핸들 사이<br />
연결 부분을 따뜻한 물로 닦아줍니다.<br />
충전기<br />
1 충전기의 전원 코드를 뽑으십시오.<br />
2 충전기의 표면을 물에 적신 천으로 닦으십시오.
20<br />
한국어<br />
보관<br />
제품을 장기간 사용하지 않을 경우 벽면 콘센트에서 전원<br />
플러그를 뽑으십시오. 그런 다음 제품을 청소하고 직사광선이<br />
없는 건냉한 장소에 보관하십시오.<br />
교체<br />
칫솔모<br />
최적의 결과를 얻으려면 3개월에 한 번씩 소닉케어 칫솔모로<br />
교체하십시오.<br />
이 모델에 맞는 정품 필립스 소닉케어 교체용 칫솔모만<br />
사용하십시오.<br />
액세서리 주문<br />
액세서리나 교체 부품을 구입하려면 웹사이트<br />
(www.shop.philips.com/service) 또는 필립스 대리점을<br />
방문하십시오. 해당 지역의 필립스 고객 상담실에 문의하셔도<br />
됩니다. 자세한 연락처는 제품 보증서를 참조하십시오.<br />
재활용<br />
수명이 다 된 제품은 일반 가정용 쓰레기와 함께 버리지 마시고<br />
지정된 재활용 수거 장소에 버리십시오. 이런 방법으로 환경<br />
보호에 동참하실 수 있습니다.<br />
충전식 배터리를 분리하는 방법<br />
제품을 폐기할 때에만 충전식 배터리를 분리하십시오. 분리 시<br />
배터리가 완전히 방전되었는지 확인하십시오.<br />
충전식 배터리를 분리하려면 소형 표준 드라이버와 테이프가<br />
필요합니다. 아래의 절차를 따를 때에는 기본적인 안전<br />
주의사항을 준수하십시오.<br />
1 충전식 배터리를 제거하려면 충전기에서 핸들을 제거하고<br />
소닉케어를 켠 다음 멈출 때까지 작동합니다. 더 이상<br />
소닉케어를 켤 수 없을 때까지 이 단계를 반복합니다.
한국어 21<br />
2 소형 표준 드라이버를 핸들 아래쪽에 끼우고 시계 반대<br />
방향으로 돌려 나사를 분리합니다. 핸들에서 엔드 캡을<br />
떼어냅니다 (그림 10).<br />
3 핸들과 내부 지지대 사이에 드라이버를 끼웁니다. 드라이버를<br />
기울여 핸들을 느슨하게 합니다 (그림 11).<br />
4 핸들에서 내부 지지대를 분리합니다. (그림 12)<br />
5 배터리 위쪽과 아래쪽에 있는 고무를 제거합니다 (그림 13).<br />
6 배터리와 지지대 사이에 드라이버를 끼웁니다. 드라이버를<br />
기울여 배터리를 지지대에서 분리합니다 (그림 14).<br />
7 배터리의 남은 전력으로 인해 누전이 발생할 수 있으므로<br />
배터리 끝에 테이프를 감아서 이를 방지합니다 (그림 15).<br />
보증 및 지원<br />
보다 자세한 정보나 지원이 필요한 경우에는 필립스 웹 사이트<br />
(www.philips.com/support)를 방문하시거나 제품 보증서를<br />
참조하십시오.<br />
보증 제한<br />
국제 보증 약관에서 제외되는 항목은 다음과 같습니다.<br />
--<br />
칫솔모<br />
--<br />
정품이 아닌 교체품의 사용으로 인한 손상<br />
--<br />
오용, 남용, 부주의, 개조 또는 무단 수리로 인한 손상<br />
--<br />
쪼개짐, 긁힘, 마멸, 변색, 탈색 등, 일반적인 마모 또는 손상
2 3 4 5<br />
1<br />
2<br />
6<br />
1<br />
2<br />
7 8 9<br />
3<br />
4<br />
3<br />
4<br />
10<br />
11 12 13<br />
2<br />
1<br />
1<br />
2<br />
14 15
www.philips.com/<strong>Sonicare</strong><br />
©2015 Koninklijke <strong>Philips</strong> N.V. (KPNV). All rights reserved.<br />
<strong>Philips</strong> and the <strong>Philips</strong> shield are trademarks of KPNV.<br />
<strong>Sonicare</strong> and the <strong>Sonicare</strong> logo are trademarks<br />
of <strong>Philips</strong> Oral Healthcare, Inc. and/or KPNV.<br />
4235.020.8047.2


