

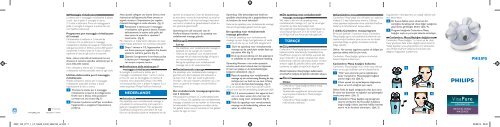
Philips Tête pour VisaPure Advanced - Mode d’emploi - FRA
Philips Tête pour VisaPure Advanced - Mode d’emploi - FRA
Philips Tête pour VisaPure Advanced - Mode d’emploi - FRA

You also want an ePaper? Increase the reach of your titles
YUMPU automatically turns print PDFs into web optimized ePapers that Google loves.
4222.100.2711.1 (07/14)<br />
Massaggio rivitalizzan<strong>te</strong><br />
La <strong>te</strong>stina per il massaggio rivitalizzan<strong>te</strong> è adatta<br />
a tutti i tipi di pelle. Si consiglia di usarla<br />
2-3 vol<strong>te</strong> a settimana. Prima di massaggiare la<br />
pelle, si consiglia di eseguire la pulizia del viso<br />
con <strong>VisaPure</strong> <strong>Advanced</strong>.<br />
Programma per massaggio rivitalizzan<strong>te</strong><br />
di 3 minuti<br />
Il trattamento è suddiviso in 2 in<strong>te</strong>rvalli da<br />
1 minuto e 1/2. La <strong>te</strong>stina per il massaggio<br />
rivitalizzan<strong>te</strong> è studiata per eseguire il trattamento<br />
sulla guancia sinistra e destra. La zona delle guance<br />
comprende il mento, l’area tra il naso e il labbro<br />
superiore e l’area tra gli occhi e le orecchie.<br />
Nota: ciascun in<strong>te</strong>rvallo di trattamento ha una<br />
direzione di rotazione specifi ca ottimizzata per la<br />
zona della pelle trattata.<br />
Non utilizza<strong>te</strong> la <strong>te</strong>stina per il massaggio<br />
rivitalizzan<strong>te</strong> sull’area sensibile intorno agli occhi.<br />
Utilizzo della <strong>te</strong>stina per il massaggio<br />
rivitalizzan<strong>te</strong><br />
Po<strong>te</strong><strong>te</strong> utilizzare la <strong>te</strong>stina per il massaggio<br />
rivitalizzan<strong>te</strong> sulla pelle asciutta o dopo<br />
l’applicazione di olio o crema.<br />
1 Preme<strong>te</strong> la <strong>te</strong>stina per il massaggio<br />
rivitalizzan<strong>te</strong> sul perno di collegamento<br />
fi nché non si blocca nella posizione<br />
corretta con uno scatto (fi g. 1) .<br />
2 Preme<strong>te</strong> il pulsan<strong>te</strong> on/off per accendere<br />
l’apparecchio e scegliere l’impostazione<br />
preferita.<br />
Nota: quando collega<strong>te</strong> una <strong>te</strong>stina diversa, viene<br />
riconosciuta dall’apparecchio. Viene emesso un<br />
segnale acustico e l’impostazione per regolare<br />
l’in<strong>te</strong>nsità lampeggia in modo al<strong>te</strong>rnato. (fi g. 2)<br />
3 Posiziona<strong>te</strong> la <strong>te</strong>stina per il massaggio<br />
rivitalizzan<strong>te</strong> sulla guancia destra. Passa<strong>te</strong><br />
delicatamen<strong>te</strong> la <strong>te</strong>stina sulla pelle, dal<br />
naso verso le orecchie e ripe<strong>te</strong><strong>te</strong> il<br />
movimento. (fi g. 3)<br />
Per ot<strong>te</strong>nere un trattamento delicato, non esercita<strong>te</strong><br />
troppa pressione con la <strong>te</strong>stina sulla pelle.<br />
4 Dopo 1 minuto e 1/2, l’apparecchio fa<br />
una breve pausa per segnalare che dove<strong>te</strong><br />
spostarlo sull’altra guancia (fi g. 4) .<br />
5 Quando il programma è <strong>te</strong>rminato, puli<strong>te</strong><br />
la <strong>te</strong>stina per il massaggio rivitalizzan<strong>te</strong><br />
con acqua e sapone neutro.<br />
Sostituzione della <strong>te</strong>stina per il<br />
massaggio rivitalizzan<strong>te</strong><br />
Si consiglia di sostituire la <strong>te</strong>stina per il<br />
massaggio rivitalizzan<strong>te</strong> dopo 1 anno, o anche<br />
prima, nel caso sia danneggiata. Le <strong>te</strong>stine di<br />
ricambio sono disponibili presso il sito Web<br />
www.shop.philips.com o presso il negozio in cui<br />
ave<strong>te</strong> acquistato <strong>Philips</strong> <strong>VisaPure</strong> <strong>Advanced</strong>.<br />
NEDERLANDS<br />
Introductie<br />
De opzetkop voor revitaliserende massage is<br />
ontwikkeld in samenwerking met experts in<br />
Japanse massage<strong>te</strong>chnieken. Het aangepas<strong>te</strong><br />
DualMotion-programma stimuleert de huid<br />
licht om de bloedcirculatie <strong>te</strong> verbe<strong>te</strong>ren en de<br />
spieren <strong>te</strong> ontspannen. Door de bloedsomloop<br />
<strong>te</strong> stimuleren, wordt de hoeveelheid zuurstof en<br />
voedingsstoffen in de huid verhoogd, waardoor<br />
uw huid er stralend en gerevitaliseerd uitziet en<br />
een gezonde gloed heeft!<br />
Opmerking: Lees alle instructies voor de<br />
<strong>VisaPure</strong> <strong>Advanced</strong> voordat u de opzetkop voor<br />
revitaliserende massage gebruikt.<br />
Belangrijk<br />
Let op<br />
- De opzetkop voor revitaliserende massage is<br />
bedoeld om de wangen <strong>te</strong> masseren.<br />
- Gebruik de opzetkop voor revitaliserende<br />
massage niet als deze beschadigd of kapot is<br />
om verwondingen <strong>te</strong> voorkomen.<br />
- Reinig de opzetkop voor revitaliserende<br />
massage niet in de vaatwasmachine.<br />
Revitaliserende massage<br />
De opzetkop voor revitaliserende massage is<br />
geschikt voor alle huidtypen. We adviseren u<br />
de kop 2 tot 3 keer per week <strong>te</strong> gebruiken.<br />
Voordat u de huid masseert, adviseren wij u om<br />
eerst uw gezicht <strong>te</strong> reinigen met de <strong>VisaPure</strong><br />
<strong>Advanced</strong>.<br />
Het revitaliserende massageprogramma<br />
van 3 minu<strong>te</strong>n<br />
Het programma bestaat uit 2 behandelperioden<br />
van 1,5 minuut. De opzetkop voor revitaliserende<br />
massage is bedoeld om de rech<strong>te</strong>r- en linkerwang<br />
<strong>te</strong> behandelen. De wangzones omvat<strong>te</strong>n de kin,<br />
het gebied tussen neus en bovenlip en het gebied<br />
tussen de ogen en oren.<br />
Opmerking: Elke behandelperiode heeft een<br />
specifi eke draairichting die is geoptimaliseerd voor<br />
de huidzone die wordt behandeld.<br />
Gebruik de opzetkop voor revitaliserende massage<br />
niet op het gevoelige gebied rond de ogen.<br />
De opzetkop voor revitaliserende<br />
massage gebruiken<br />
U kunt de opzetkop voor revitaliserende<br />
massage op een droge huid gebruiken of nadat<br />
u crème of olie op uw huid hebt aangebracht.<br />
1 Duw de opzetkop voor revitaliserende<br />
massage op de aansluitpin totdat deze op<br />
zijn plaats klikt (fi g. 1) .<br />
2 Druk op de aan/uitknop om het apparaat in<br />
<strong>te</strong> schakelen en kies de gewens<strong>te</strong> ins<strong>te</strong>lling.<br />
Opmerking: Wanneer u een ander opzetstuk<br />
aansluit, wordt deze herkend door het apparaat.<br />
U hoort een piepje en de in<strong>te</strong>nsi<strong>te</strong>itslampjes<br />
knipperen afwisselend. (fi g. 2)<br />
3 Plaats de opzetkop voor revitaliserende<br />
massage op uw rech<strong>te</strong>rwang. Beweeg de kop<br />
zachtjes over uw huid van uw neus richting<br />
uw oor, en herhaal deze beweging. (fig. 3)<br />
Druk de opzetkop niet <strong>te</strong> hard op de huid en<br />
zorg ervoor dat de behandeling aangenaam blijft<br />
4 Na 1,5 minuut pauzeert het apparaat kort<br />
om u <strong>te</strong> la<strong>te</strong>n we<strong>te</strong>n dat u het naar de<br />
andere wang moet verplaatsen (fi g. 4) .<br />
5 Maak de opzetkop voor revitaliserende<br />
massage na de behandeling schoon met<br />
wa<strong>te</strong>r en milde zeep.<br />
De opzetkop voor revitaliserende<br />
massage vervangen<br />
Wij raden u aan om de opzetkop voor<br />
revitaliserende massage na 1 jaar <strong>te</strong> vervangen<br />
of eerder als deze beschadigd raakt.<br />
Vervangende opzetkoppen zijn verkrijgbaar via<br />
www.shop.philips.com of in de winkel waar u<br />
uw <strong>Philips</strong> <strong>VisaPure</strong> <strong>Advanced</strong> hebt gekocht.<br />
TÜRKÇE<br />
Giriş<br />
Canlandırıcı Masaj başlığı Japon masajında uzman<br />
kişilerle birlik<strong>te</strong> tasarlanmıştır. Kişiselleştirilmiş<br />
DualMotion programı cildi hafi fçe uyararak kan<br />
akışını hızlandırır ve kasları rahatlatır. Kan akışını<br />
hızlandırarak cildinizin daha fazla oksijen ve besin<br />
almasını sağlar. Bu şekilde cildiniz ışıltılı, yeniden<br />
canlanmış ve sağlıklı bir görünüm kazanır!<br />
Dikkat: Canlandırıcı Masaj başlığını kullanmadan<br />
önce <strong>VisaPure</strong> Gelişmiş ile ilgili tüm talimatları okuyun.<br />
Önemli<br />
Dikkat<br />
- Canlandırıcı Masaj başlığı yanaklara masaj<br />
yapmaya yöneliktir.<br />
- Yaralanmaları engellemek amacıyla hasarlı<br />
veya bozuksa Canlandırıcı Masaj başlığını<br />
kullanmayın.<br />
- Canlandırıcı Masaj başlığını bulaşık<br />
makinesinde yıkamayın.<br />
Canlandırıcı masaj<br />
Canlandırıcı Masaj başlığı, tüm cilt tipleri için uygundur.<br />
Haftada 2-3 kez kullanmanızı öneririz. Cildinize<br />
masaj yapmaya başlamadan önce yüzünüzü <strong>VisaPure</strong><br />
Gelişmiş ile <strong>te</strong>mizlemenizi tavsiye ederiz.<br />
3 dakika Canlandırıcı masaj programı<br />
Bir buçuk dakikalık 2 seanstan oluşur. Canlandırıcı<br />
Masaj başlığı sağ ve sol yanaklarda kullanılmak için<br />
tasarlanmıştır. Yanaklara çene, burun ve üst dudak<br />
arasındaki bölge ve gözler ile kulaklar arasında<br />
bölge dahildir.<br />
Dikkat: Her seansta uygulama yapılan cilt bölgesi için<br />
optimize edilmiş belirli bir yön vardır.<br />
Canlandırıcı Masaj başlığını gözlerin etrafındaki<br />
hassas bölgede kullanmayın.<br />
Canlandırıcı Masaj başlığını kullanma<br />
Canlandırıcı Masaj başlığını kuru cilt<strong>te</strong> veya cildinize<br />
krem ya da yağ sürdük<strong>te</strong>n sonra kullanabilirsiniz.<br />
1 “Klik” sesi çıkararak yerine sabitlenene<br />
kadar Canlandırıcı Masaj başlığını bağlantı<br />
pimine doğru itin (Şek. 1) .<br />
2 Cihazı açmak için açma/kapama düğmesine<br />
basın ve <strong>te</strong>rcih ettiğiniz ayarı seçin.<br />
Dikkat: Farklı bir başlık taktığınızda cihaz bunu tanır.<br />
Bir sinyal sesi duyarsınız ve yoğunluk ayar gös<strong>te</strong>rgeleri<br />
sırayla yanıp söner. (Şek. 2)<br />
3 Canlandırıcı Masaj başlığını sağ yanağınızın<br />
üzerine yerleştirin. Burnunuzdan kulaklara<br />
doğru başlığı cildiniz üzerinde hafifçe hareket<br />
ettirin ve bu hareketi <strong>te</strong>krarlayın. (Şek. 3)<br />
Uygulamanın rahat geçmesi için başlığı cildinize çok<br />
sert bastırmayın<br />
4 Bir buçuk dakika sonra cihaz kısa bir<br />
süreliğine duraklayarak cihazı diğer yanağınıza<br />
geçirmeniz gerektiğini bildirir (Şek. 4) .<br />
5 Program bittiğinde Canlandırıcı Masaj<br />
başlığını suyla ve yumuşak sabunla <strong>te</strong>mizleyin.<br />
Canlandırıcı Masaj Başlığını değiştirme<br />
Canlandırıcı Masaj başlığını 1 yıl sonra ya da cihaz<br />
hasar gördüyse daha erken değiştirmenizi öneririz.<br />
Yedek başlıkları www.shop.philips.com adresinden<br />
veya <strong>Philips</strong> <strong>VisaPure</strong> Gelişmiş ürününüzü satın<br />
aldığınız mağazadan bulabilirsiniz.<br />
1<br />
2<br />
3<br />
4<br />
4222_100_2711_1_LF_53x53_6-fold_530x106_v2.indd 1 05/08/14 08:41
ENGLISH<br />
Introduction<br />
The Revitalising Massage head is designed<br />
together with experts in Japanese massage.<br />
The customised DualMotion program gently<br />
stimula<strong>te</strong>s the skin to encourage the blood flow<br />
and relax the muscles. By encouraging the blood<br />
flow, more oxygen and nutrients are available<br />
in the skin, making your skin look radiant,<br />
revitalised and giving it a healthy glow!<br />
No<strong>te</strong>: Please read all instructions for <strong>VisaPure</strong><br />
<strong>Advanced</strong> before using the Revitalising Massage<br />
head.<br />
Important<br />
Caution<br />
--<br />
The Revitalising Massage head is in<strong>te</strong>nded to<br />
massage the cheeks.<br />
--<br />
Do not use the Revitalised Massage head if it<br />
is damaged or broken to avoid injuries.<br />
--<br />
Do not put the Revitalised Massage head in<br />
the dishwasher.<br />
Revitalising massage<br />
The Revitalising Massage head is suitable for all<br />
skin types. We advise you to use it 2-3 times a<br />
week. Before you massage the skin, we advise<br />
you to first cleanse your face with <strong>VisaPure</strong><br />
<strong>Advanced</strong>.<br />
The 3 minu<strong>te</strong>s Revitalising massage<br />
program<br />
It consists of 2 treatment periods of 1 1/2<br />
minu<strong>te</strong>. The Revitalising Massage head is<br />
in<strong>te</strong>nded to treat the right and left cheek. The<br />
cheek zones include the chin, the area between<br />
the nose and upper lip and the areas between<br />
the eyes and ears.<br />
No<strong>te</strong>: Each treatment period has a specific rotation<br />
direction optimised for the skin zone trea<strong>te</strong>d.<br />
Do not use the Revitalising Massage head on<br />
the sensitive area around the eyes.<br />
Using the Revitalising Massage head<br />
You can use the Revitalising Massage head on dry<br />
skin or af<strong>te</strong>r applying cream or oil to your skin.<br />
1 Push the Revitalising Massage head onto<br />
the connection pin until it locks into<br />
position with a click (Fig. 1).<br />
2 Press the on/off button to switch on the<br />
appliance and choose your preferred<br />
setting.<br />
No<strong>te</strong>: When you attach a different head<br />
the appliance recognises it. You hear a beep<br />
and the in<strong>te</strong>nsity setting indications flash<br />
al<strong>te</strong>rna<strong>te</strong>ly. (Fig. 2)<br />
3 Place the Revitalising Massage head<br />
on your right cheek. Gently move<br />
the head across your skin, from the<br />
nose towards the ear and repeat this<br />
movement. (Fig. 3)<br />
Do not push the head too hard onto the skin to<br />
make sure the treatment remains comfortable<br />
4 Af<strong>te</strong>r 1 1/2 minu<strong>te</strong>, the appliance pauses<br />
briefly to let you know that you have to<br />
move it to the other cheek (Fig. 4).<br />
5 When the program is finished, clean the<br />
Revitalising Massage head with wa<strong>te</strong>r and<br />
mild soap.<br />
Revitalising Massage Head replacement<br />
We advise you to replace the Revitalising<br />
Massage Head af<strong>te</strong>r 1 year, or earlier if it is<br />
damaged. Replacement heads are available from<br />
www.shop.philips.com or from the shop where<br />
you purchased your <strong>Philips</strong> <strong>VisaPure</strong> <strong>Advanced</strong>.<br />
DEUTSCH<br />
Einführung<br />
Der Bürs<strong>te</strong>nkopf zur revitalisierenden Massage<br />
wurde gemeinsam mit Exper<strong>te</strong>n auf dem<br />
Gebiet der japanischen Massage entwickelt.<br />
Das individuelle DualMotion-Programm regt<br />
sanft die Durchblutung der Haut an und<br />
entspannt die Muskeln. Durch die Förderung<br />
der Durchblutung wird die Haut mit Sauerstoff<br />
und Nährstoffen angereichert, sodass Ihre Haut<br />
strahlend, revitalisiert und gesund aussieht!<br />
Hinweis: Bit<strong>te</strong> lesen Sie vor der Verwendung des<br />
Bürs<strong>te</strong>nkopfs zur revitalisierenden Massage alle<br />
Anweisungen zu <strong>VisaPure</strong> <strong>Advanced</strong>.<br />
Wichtig<br />
Achtung<br />
--<br />
Der Bürs<strong>te</strong>nkopf zur revitalisierenden Massage<br />
eignet sich für die Massage der Wangen.<br />
--<br />
Verwenden Sie den Bürs<strong>te</strong>nkopf zur<br />
revitalisierenden Massage nicht, wenn er<br />
beschädigt oder kaputt ist, um Verletzungen<br />
zu vermeiden.<br />
--<br />
Reinigen Sie den Bürs<strong>te</strong>nkopf zur<br />
revitalisierenden Massage nicht in der<br />
Spülmaschine.<br />
Revitalisierende Massage<br />
Der Bürs<strong>te</strong>nkopf zur revitalisierenden Massage<br />
ist für alle Hauttypen geeignet. Wir empfehlen<br />
eine Verwendung von 2 bis 3 Mal pro Woche.<br />
Bevor Sie die Haut massieren, empfehlen wir<br />
Ihnen, zuerst Ihr Gesicht mit <strong>VisaPure</strong> <strong>Advanced</strong><br />
zu reinigen.<br />
Die 3 Minu<strong>te</strong>n-Programm für eine<br />
revitalisierende Massage<br />
Es bes<strong>te</strong>ht aus zwei Behandlungszeiträumen<br />
von je 1,5 Minu<strong>te</strong>n. Der Bürs<strong>te</strong>nkopf zur<br />
revitalisierenden Massage ist zur Behandlung<br />
der rech<strong>te</strong>n und linken Wange geeignet. Die<br />
Wangenzonen umfassen das Kinn, den Bereich<br />
zwischen Nase und Oberlippe sowie den<br />
Bereich zwischen Augen und Ohren.<br />
Hinweis: Jeder Behandlungszeitraum verfügt<br />
über eine spezielle Drehrichtung, die für die zu<br />
behandelnde Hautzone optimiert wurde.<br />
Verwenden Sie den Bürs<strong>te</strong>nkopf zur<br />
revitalisierenden Massage nicht für die<br />
empfindliche Hautpartie um die Augen.<br />
Den Bürs<strong>te</strong>nkopf zur revitalisierenden<br />
Massage verwenden<br />
Sie können den Bürs<strong>te</strong>nkopf zur revitalisierenden<br />
Massage auf trockener Haut oder nach dem<br />
Auftragen von Creme verwenden.<br />
1 Drücken Sie den Bürs<strong>te</strong>nkopf zur<br />
revitalisierenden Massage auf den<br />
Verbindungspin, bis er einras<strong>te</strong>t (Abb. 1).<br />
2 Drücken Sie den Ein-/Ausschal<strong>te</strong>r, um das<br />
Gerät einzuschal<strong>te</strong>n, und wählen Sie Ihre<br />
bevorzug<strong>te</strong> Eins<strong>te</strong>llung.<br />
Hinweis: Wenn Sie einen anderen Kopf<br />
aufsetzen, wird dies vom Gerät erkannt. Es<br />
ertönt ein Signalton, und die Anzeigen für die<br />
In<strong>te</strong>nsitätsstufen blinken abwechselnd. (Abb. 2)<br />
3 Setzen Sie den Bürs<strong>te</strong>nkopf zur<br />
revitalisierenden Massage auf die rech<strong>te</strong><br />
Wange. Bewegen Sie den Bürs<strong>te</strong>nkopf<br />
sanft über die Haut von der Nase in<br />
Richtung Ohr, und wiederholen Sie diese<br />
Bewegung. (Abb. 3)<br />
Drücken Sie den Bürs<strong>te</strong>nkopf nicht zu hart auf<br />
die Haut, um eine angenehme Behandlung zu<br />
gewährleis<strong>te</strong>n.<br />
4 Nach 1,5 Minu<strong>te</strong>n pausiert das Gerät<br />
kurz, um Ihnen anzuzeigen, dass Sie mit<br />
dem Gerät zur anderen Wange wechseln<br />
sollen (Abb. 4).<br />
5 Wenn das Programm beendet ist, reinigen<br />
Sie den Bürs<strong>te</strong>nkopf zur revitalisierenden<br />
Massage mit Wasser und milder Seife.<br />
Den Bürs<strong>te</strong>nkopf zur revitalisie<br />
renden Massage austauschen<br />
Wir empfehlen Ihnen, den Bürs<strong>te</strong>nkopf zur<br />
revitalisierenden Massage nach einem Jahr oder<br />
früher, wenn er beschädigt ist, auszutauschen.<br />
Ersatzbürs<strong>te</strong>nköpfe sind un<strong>te</strong>r<br />
www.shop.philips.com oder in dem Laden, in<br />
dem Sie Ihren <strong>Philips</strong> <strong>VisaPure</strong> <strong>Advanced</strong> gekauft<br />
haben, verfügbar.<br />
<strong>FRA</strong>NÇAIS<br />
Introduction<br />
L’embout de massage revitalisant à été<br />
conçu en collaboration avec des experts en<br />
massage japonais. Le programme personnalisé<br />
DualMotion stimule la peau en douceur <strong>pour</strong><br />
favoriser la circulation sanguine et dé<strong>te</strong>ndre les<br />
muscles. En favorisant la circulation sanguine,<br />
une quantité plus importan<strong>te</strong> d’oxygène et de<br />
nutriments est disponible dans la peau, ce qui<br />
rend la peau lumineuse, revitalisée et éclatan<strong>te</strong> !<br />
Remarque : Veuillez lire tou<strong>te</strong>s les instructions de<br />
<strong>VisaPure</strong> <strong>Advanced</strong> avant d’utiliser l’embout de<br />
massage revitalisant.<br />
Important<br />
At<strong>te</strong>ntion<br />
--<br />
L’embout de massage revitalisant est conçu<br />
<strong>pour</strong> masser les joues.<br />
--<br />
N’utilisez pas l’embout de massage<br />
revitalisant s’il est endommagé ou cassé afin<br />
d’évi<strong>te</strong>r tout accident.<br />
--<br />
Ne met<strong>te</strong>z pas l’embout de massage<br />
revitalisant au lave-vaisselle.<br />
Massage revitalisant<br />
L’embout de massage revitalisant convient à<br />
tous les types de peau. Nous vous conseillons<br />
de l’utiliser 2 à 3 fois par semaine. Avant de<br />
masser la peau, nous vous conseillons de<br />
préalablement nettoyer votre visage avec<br />
<strong>VisaPure</strong> <strong>Advanced</strong>.<br />
Le programme de massage revitalisant<br />
de 3 minu<strong>te</strong>s<br />
Il se compose de 2 périodes d’1 minu<strong>te</strong> et<br />
demie. L’embout de massage revitalisant est<br />
destiné au massage des joues droi<strong>te</strong> et gauche.<br />
Les zones des joues incluent le menton, la zone<br />
entre le nez et la lèvre supérieure et les zones<br />
entre les yeux et les oreilles.<br />
Remarque : Chaque période a un sens de rotation<br />
spécifique <strong>pour</strong> la zone de peau concernée.<br />
N’utilisez pas l’embout de massage revitalisant<br />
sur la zone sensible autour des yeux.<br />
Utilisation de l’embout de massage<br />
revitalisant<br />
Vous pouvez utiliser l’embout de massage<br />
revitalisant sur peau sèche ou après application<br />
de crème ou d’huile sur votre peau.<br />
1 Poussez l’embout de massage revitalisant<br />
sur la broche de connexion jusqu’à ce<br />
que vous en<strong>te</strong>ndiez un clic (fig. 1).<br />
2 Appuyez sur le bouton marche/arrêt<br />
<strong>pour</strong> allumer l’appareil et choisissez votre<br />
réglage préféré.<br />
Remarque : Lorsque vous fixez un autre embout,<br />
l’appareil le reconnaît. Vous en<strong>te</strong>ndez un signal<br />
sonore et les voyants de réglage de l’in<strong>te</strong>nsité<br />
cligno<strong>te</strong>nt en al<strong>te</strong>rnance. (fig. 2)<br />
3 Placez l’embout de massage revitalisant<br />
sur votre joue droi<strong>te</strong>. Déplacez-la<br />
doucement sur votre peau, du nez vers<br />
l’oreille, et répé<strong>te</strong>z ce mouvement. (fig. 3)<br />
N’appuyez pas trop fort l’embout sur la peau<br />
<strong>pour</strong> que l’utilisation res<strong>te</strong> confortable.<br />
4 Après 1 minu<strong>te</strong> et demie, l’appareil<br />
s’in<strong>te</strong>rrompt brièvement <strong>pour</strong> vous<br />
indiquer que vous devez passer à l’autre<br />
joue (fig. 4).<br />
5 Lorsque le programme est <strong>te</strong>rminé,<br />
nettoyez l’embout de massage revitalisant<br />
avec de l’eau et du savon doux.<br />
Remplacement de l’embout de<br />
massage revitalisant<br />
Nous vous conseillons de remplacer l’embout<br />
de massage revitalisant après 1 an, ou plus tôt<br />
si il est endommagé. Les embouts de rechange<br />
sont disponibles à l’adresse www.shop.philips.com<br />
ou dans le magasin où vous avez acheté votre<br />
<strong>Philips</strong> <strong>VisaPure</strong> <strong>Advanced</strong>.<br />
ITALIANO<br />
Introduzione<br />
La <strong>te</strong>stina per il massaggio rivitalizzan<strong>te</strong> è stata<br />
progettata in collaborazione con esperti del<br />
massaggio giapponese. Il programma DualMotion<br />
personalizzato consen<strong>te</strong> di stimolare delicatamen<strong>te</strong><br />
la pelle e quindi il flusso sanguigno nonché rilassare<br />
i muscoli. In questo modo, aumenta l’apporto di<br />
ossigeno e di nutrienti disponibili nella pelle, che<br />
avrà un aspetto radioso, rivitalizzato e sano!<br />
Nota: prima di utilizzare la <strong>te</strong>stina per il<br />
massaggio rivitalizzan<strong>te</strong>, legge<strong>te</strong> at<strong>te</strong>ntamen<strong>te</strong><br />
tut<strong>te</strong> le istruzioni di <strong>VisaPure</strong> <strong>Advanced</strong>.<br />
Importan<strong>te</strong><br />
At<strong>te</strong>nzione<br />
--<br />
La <strong>te</strong>stina per il massaggio rivitalizzan<strong>te</strong> è<br />
progettata per massaggiare le guance.<br />
--<br />
Non usa<strong>te</strong> la <strong>te</strong>stina nel caso in cui sia<br />
danneggiata o rotta al fine di evitare eventuali<br />
feri<strong>te</strong>.<br />
--<br />
Non posiziona<strong>te</strong> la <strong>te</strong>stina per il massaggio<br />
rivitalizzan<strong>te</strong> in lavastoviglie.<br />
4222_100_2711_1_LF_53x53_6-fold_530x106_v2.indd 2 05/08/14 08:41


