

Philips Téléviseur - Manuel de l'utilisateur - ENG
Philips Téléviseur - Manuel de l'utilisateur - ENG
Philips Téléviseur - Manuel de l'utilisateur - ENG

You also want an ePaper? Increase the reach of your titles
YUMPU automatically turns print PDFs into web optimized ePapers that Google loves.
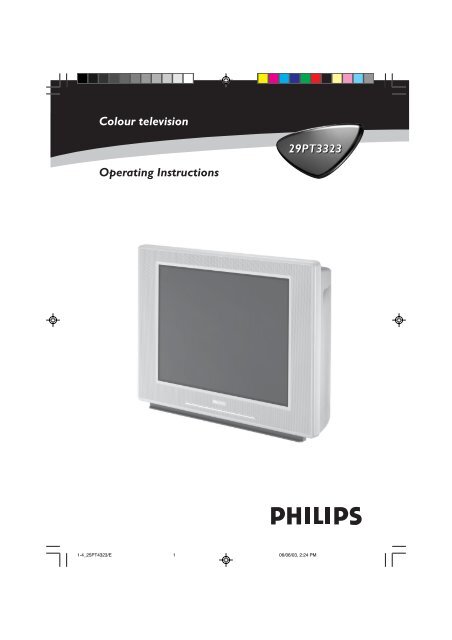
Colour television<br />
29PT3323<br />
Operating Instructions<br />
1-4_25PT4323/E<br />
1<br />
06/06/03, 2:24 PM
TABLE OF CONTENTS<br />
Introduction<br />
Safety Information/Useful Tips .................................................................................................. 3<br />
Before Calling Service ................................................................................................................. 4<br />
Basic Installation/Functions<br />
Hooking Up Your TV (Basic Connection) ............................................................................... 5<br />
Use/Care of remote Control .................................................................................................... 5<br />
Connecting the Audio/Vi<strong>de</strong>o Sockets (Playback) .................................................................. 6<br />
Connecting the Audio/Vi<strong>de</strong>o Sockets (Recording) ............................................................... 8<br />
Functions of Remote Control ................................................................................................... 9<br />
Functions of TV Controls ...........................................................................................................11<br />
TV Installation<br />
Selecting the Menu Language...................................................................................................... 12<br />
Automatic Tuning of Channels .................................................................................................. 13<br />
Manual Tuning of Channels ......................................................................................................... 14<br />
Selecting the Colour/Sound System ........................................................................................ 16<br />
Fine Tuning Of Channels ............................................................................................................. 17<br />
Editing of Channels........................................................................................................................18<br />
Features<br />
Adjusting the TV Picture ............................................................................................................. 19<br />
Adjusting the TV Sound ...............................................................................................................20<br />
Using the Screen Format ............................................................................................................ 21<br />
Activating the Signal Strength .................................................................................................... 22<br />
Smart Picture Control .................................................................................................................23<br />
Smart Sound Control....................................................................................................................24<br />
Personal Zapping ...........................................................................................................................25<br />
Teletext (for certain versions only)........................................................................................... 26<br />
General<br />
Specifications...................................................................................................................................28<br />
Recycling Directive – To minimise harm to the environment, the batteries supplied<br />
with the TV set do not contain mercury or nickel cadmium. If possible, when<br />
disposing of batteries, use recycling means available to you. Your TV set uses materials which<br />
are reusable or which can be recycled. To minimise the amount of waste in the environment,<br />
specialist companies recover used sets for dismantling and collection of reusable materials<br />
(contact your <strong>de</strong>aler).<br />
2<br />
1-4_29PT3323/E<br />
2<br />
07/09/03, 4:44 PM
SAFETY INFORMATION AND USEFUL TIPS<br />
Safety Information<br />
• Disconnect mains plug when :<br />
– the red light below the TV screen is flashing continuously.<br />
– a bright white line is displayed across the screen.<br />
– cleaning the TV screen. Never use abrasive cleaning agents. Use a slight damp chamois<br />
leather or soft cloth.<br />
– there is a lightning storm.<br />
– the set is left unatten<strong>de</strong>d for a prolonged period of time.<br />
• No naked flame sources, such as lighted candles, should be placed on top of the TV or<br />
in the vicinity.<br />
• Do not place your TV set un<strong>de</strong>r direct sunlight or heat.<br />
• Leave at least 5 cm around each si<strong>de</strong> of TV set to allow for proper ventilation.<br />
• Avoid placing your set (e.g. near the window) where it is likely to be exposed to rain<br />
or water.<br />
• No objects filled with liquids should be placed on top the TV so as to avoid dripping<br />
or splashing of liquids on the set.<br />
Useful Tips<br />
• Do not leave your set on standby mo<strong>de</strong> for a prolonged period of time. Switch off set<br />
to allow it to be <strong>de</strong>magnetised. A <strong>de</strong>magnetised set supports good picture quality.<br />
• Do not shift or move the set around when it is switched on. Uneveness in colour in<br />
some parts of the screen may occur.<br />
• Never attempt to repair a <strong>de</strong>fective TV yourself. Always consult a skilled service<br />
personnel.<br />
3<br />
1-4/E<br />
3<br />
01/15/03, 4:59 PM
BEFORE CALLING SERVICE<br />
Below is a list of frequently occurred symptoms. Before you call for service, make these simple<br />
checks. Some of these symptoms can easily be rectified if you know what to do.<br />
Symptom<br />
What you should do<br />
Colour patch • Switch off the TV by the mains power button. Wait for 20<br />
(uneveness)<br />
minutes before switching on again.<br />
• Check the TV is not placed too near speakers or magnetic<br />
objects.<br />
No power<br />
No picture<br />
Good picture<br />
but no sound<br />
Good sound but poor<br />
colour or no picture<br />
Snowish picture and<br />
noise<br />
Horizontal dotted lines<br />
Double images or<br />
“Ghost” images<br />
TV not responding to<br />
remote control handset<br />
• Check the TV’s AC power cord is plugged into the mains<br />
socket. If there is still no power, disconnect plug. Wait for<br />
60 seconds and re-insert plug. Switch on the TV again.<br />
• Check the antenna connection at the rear of the TV.<br />
• Possible TV station problem. Try another channel.<br />
• Try increasing the volume.<br />
• Check that the sound is not muted. If it is muted, press the<br />
Mute button on the remote control to restore sound.<br />
• Try increasing the contrast and brightness setting.<br />
• Check antenna connection at the rear of the TV.<br />
• Possible electrical interference e.g. hairdryer, vacuum<br />
cleaner, etc. Switch off appliances.<br />
• Possible poor positioning of antenna. Using a highly<br />
directional antenna may improve reception.<br />
• Check life span of batteries of remote control handset.<br />
• Aim remote control handset directly at remote control<br />
sensor lens on the TV.<br />
4<br />
1-4/E<br />
4<br />
01/15/03, 4:59 PM
HOOKING UP YOUR TV (BASIC CONNECTION)<br />
Antenna Connection<br />
• Connect the aerial plug to the antenna socket ¬<br />
on the backcover.<br />
• Insert the mains plug into the wall socket.<br />
Mains Connection<br />
• For correct mains voltage, refer to type sticker at<br />
the rear of the TV set<br />
• Consult your <strong>de</strong>aler if mains supply is different.<br />
Note : This diagram is not representative of the<br />
actual plug and socket.<br />
Switching on the Set<br />
• Press the main power button to switch on/<br />
off the TV.<br />
• If the set is on standby (indicator is red),<br />
press the Power button on the remote<br />
control to switch on set.<br />
USE/CARE OF REMOTE CONTROL<br />
• Insert the correct type of batteries into the<br />
compartment.<br />
• Ensure the batteries are placed in the right<br />
direction.<br />
5<br />
5-11_29PT3323/E<br />
5<br />
06/06/03, 2:36 PM
CONNECTING THE AUDIO/VIDEO SOCKETS (PLAYBACK)<br />
Monitor out<br />
VIDEO<br />
L/Mono<br />
AUDIO<br />
AV1 in<br />
Y<br />
Pb<br />
AV2 in<br />
S-VIDEO<br />
AV sockets on<br />
the rear of TV<br />
R<br />
Pr<br />
COMPONENT VIDEO INPUT<br />
OUT<br />
OUT<br />
OUT<br />
ANTENNA<br />
IN<br />
VIDEO<br />
IN<br />
R AUDIO L<br />
IN<br />
Back of VCR<br />
VCR (equipped with Vi<strong>de</strong>o and<br />
Audio output sockets)<br />
You can view the playback of VCR tapes (Vi<strong>de</strong>o Disc players, camcor<strong>de</strong>rs, etc.) by using the AUDIO<br />
and VIDEO INPUT sockets on the rear of the TV.<br />
– Connect the VIDEO and AUDIO IN sockets on the rear of the TV to the AUDIO and<br />
VIDEO OUT sockets on the VCR.<br />
Monitor out<br />
VIDEO<br />
L/Mono<br />
AUDIO<br />
AV1 in<br />
Y<br />
Pb<br />
AV2 in<br />
S-VIDEO<br />
AV sockets on<br />
the rear of TV<br />
R<br />
Pr<br />
COMPONENT VIDEO INPUT<br />
OUT<br />
OUT<br />
OUT<br />
OUT<br />
R AUDIO L VIDEO<br />
S-VIDEO<br />
ANTENNA<br />
IN<br />
IN<br />
IN<br />
Back of S-VHS VCR<br />
The S-Vi<strong>de</strong>o connection on the rear of the TV is used for the playback of S-VHS VCR tapes, Vi<strong>de</strong>o Discs,<br />
Vi<strong>de</strong>o Games or Compact Disc-Interactive (cd-i) discs. Better picture <strong>de</strong>tail and clarity is possible with<br />
the S-Vi<strong>de</strong>o playback as compared to the picture from a normal antenna (RF) connection.<br />
– Connect the S-VIDEO socket on the rear of the TV to the S-VHS OUT socket on a<br />
S-VHS VCR.<br />
– Connect the AUDIO IN sockets from the rear of the TV to the AUDIO OUT sockets<br />
on the VCR. Note : You need not connect the VIDEO IN socket of the TV if S-VIDEO IN<br />
socket is connected.<br />
6<br />
5-11/E<br />
6<br />
01/15/03, 5:00 PM
CONNECTING THE AUDIO/VIDEO SOCKETS (PLACKBACK)<br />
Monitor out<br />
AV1 in<br />
AV2 in<br />
VIDEO<br />
L/Mono<br />
Y<br />
AV sockets on rear of TV<br />
AUDIO<br />
Pb<br />
S-VIDEO<br />
R<br />
Pr<br />
COMPONENT VIDEO INPUT<br />
Y<br />
OUT<br />
Pb<br />
Pr<br />
OUT<br />
L AUDIO R<br />
Back of DVD<br />
DVD (Equipped with “Y”,<br />
“Pb” and “Pr” and Output<br />
sockets)<br />
You can view the playback of DVD discs by using the COMPONENT VIDEO INPUT sockets on the<br />
rear of the TV.<br />
– Connect the “Y”, “Pb” and the “Pr” INPUT sockets on the TV to the “Y”, “Pb” and<br />
“Pr” OUTPUT sockets on the DVD to view playback of DVD discs.<br />
(for certain versions only)<br />
Camcor<strong>de</strong>r<br />
Connect headphone jack to<br />
socket for personal listening<br />
For more convenient direct playback connections, the Si<strong>de</strong> Audio/Vi<strong>de</strong>o Input sockets allow for quick<br />
and easy connections, particularly Camcor<strong>de</strong>r tape recordings.<br />
– Connect the VIDEO socket from the Camcor<strong>de</strong>r to the Si<strong>de</strong> VIDEO in socket of the TV.<br />
– Connect the AUDIO OUT sockets (Right and Left) from the Camcor<strong>de</strong>r to the Si<strong>de</strong><br />
AUDIO IN sockets.<br />
7<br />
5-11_29PT3323/E<br />
7<br />
07/09/03, 4:52 PM
OUT<br />
ANTENNA<br />
IN<br />
OUT<br />
VIDEO<br />
IN<br />
R<br />
OUT<br />
AUDIO<br />
IN<br />
L<br />
OUT<br />
ANTENNA<br />
IN<br />
OUT<br />
VIDEO<br />
R<br />
OUT<br />
AUDIO<br />
L<br />
CONNECTING THE AUDIO/VIDEO SOCKETS (RECORDING)<br />
Connection for recording from the TV channel<br />
Monitor out<br />
VIDEO<br />
AV1 in<br />
Y<br />
AV2 in<br />
AV sockets on<br />
the rear of TV<br />
L/Mono<br />
AUDIO<br />
Pb<br />
S-VIDEO<br />
R<br />
Pr<br />
COMPONENT VIDEO INPUT<br />
OUT<br />
OUT<br />
OUT<br />
ANTENNA<br />
VIDEO<br />
R<br />
AUDIO<br />
L<br />
IN<br />
IN<br />
IN<br />
VCR (equipped with Vi<strong>de</strong>o and<br />
Audio input sockets)<br />
– Connect the corresponding INPUT sockets of the VCR to the MONITOR OUTPUT<br />
sockets on the rear of the TV.<br />
– To enhance the sound of your TV, connect the AUDIO L and R sockets to an external audio<br />
system instead of the VCR. For mono equipment, connect only the AUDIO L socket.<br />
Connection for recording from one VCR to another VCR<br />
Monitor out<br />
VIDEO<br />
L/Mono<br />
AUDIO<br />
AV1 in<br />
Y<br />
Pb<br />
AV2 in<br />
S-VIDEO<br />
AV sockets on<br />
the rear of TV<br />
R<br />
Pr<br />
COMPONENT VIDEO INPUT<br />
Back of VCR<br />
VCR 1<br />
VCR 2<br />
VCR (equipped with Vi<strong>de</strong>o and<br />
Audio input sockets)<br />
– Connect the sockets of the VCR which you wish to record from, to the corresponding<br />
sockets at either AV1 or AV2<br />
– Connect the sockets of the receiving VCR to the MONITOR OUTPUT sockets on the<br />
rear of the TV.<br />
8<br />
5-11/E<br />
8<br />
01/15/03, 5:00 PM
FUNCTIONS OF REMOTE CONTROL<br />
& Power button<br />
– Switch set off temporarily to standby mo<strong>de</strong>.<br />
(The red light indicator lights up when the set &<br />
is on standby mo<strong>de</strong>).<br />
é<br />
– To switch on set from standby mo<strong>de</strong>, press<br />
Channel +/– , Digit (0 -9) or Power button. “<br />
é Teletext Colour/Personal Zapping buttons ‘<br />
(for certain versions only)<br />
(<br />
– In teletext mo<strong>de</strong>, the colour buttons allow you to<br />
access directly an item or corresponding pages. §<br />
– As Personal Zapping buttons, you can surf up to è<br />
10 personal channels for each button. For <strong>de</strong>tailed !<br />
<strong>de</strong>scription of functions, refer to section on ç<br />
“Personal Zapping ”.<br />
“ Teletext buttons<br />
0<br />
(for certain versions only)<br />
Allows you to access teletext information. For 1<br />
<strong>de</strong>tailed <strong>de</strong>scription of functions, refer to section 2<br />
on “Using the Teletext”<br />
‘ Smiley button<br />
Allows to add and store your personal preference<br />
channels in your Personal Preference list. For <strong>de</strong>tailed<br />
<strong>de</strong>scription of functions, refer to section on “Using your<br />
Personal Zapping feature”.<br />
( Timer Button<br />
Not applicable.<br />
§ Smart Sound Button<br />
Press the Smart Sound button repeatedly to access 4<br />
different types of sound settings and choose your <strong>de</strong>sired<br />
setting.<br />
è Menu Button<br />
Displays the main menu. Also exits menu from screen.<br />
! Cursor Up Button<br />
Allows you to select the next item on the menu.<br />
ç Cursor Left Button<br />
Allows you to select the sub-menus and adjust the settings.<br />
0 Volume + / – Button<br />
Increases or <strong>de</strong>creases volume.<br />
1 4<br />
Allows you to switch from Stereo to Mono sound during<br />
stereo transmission or to choose between language5or<br />
language6during dual sound transmission.<br />
2 A/CH(Alternate channel) Button<br />
Allows you to change between the current<br />
channel and the previous channel.<br />
9<br />
5-11_29PT3323/E<br />
9<br />
06/06/03, 2:36 PM
FUNCTIONS OF REMOTE CONTROL<br />
3<br />
4<br />
5<br />
6<br />
7<br />
8<br />
9<br />
20<br />
21<br />
22<br />
23<br />
24<br />
25<br />
3 Main In<strong>de</strong>x Button<br />
(for certain versions only)<br />
In teletext mo<strong>de</strong>, press button to return to the<br />
main in<strong>de</strong>x page.<br />
4 Frownie button<br />
Allows to <strong>de</strong>lete stored personal preference<br />
channels in your Personal Preference list. For<br />
<strong>de</strong>tailed <strong>de</strong>scription of functions, refer to section on<br />
“Personal Zapping ”.<br />
5 Smart Picture Button<br />
Press the Smart Picture button repeatedly to access<br />
5 different types of picture settings and choose<br />
your <strong>de</strong>sired setting.<br />
61Incredible Surround Button<br />
– Allows you to select Incredible Surround sound when<br />
transmission is in stereo mo<strong>de</strong>.<br />
– Allows you to select Spatial Sound when transmission<br />
is in mono mo<strong>de</strong>.<br />
71Cursor Right Button<br />
Allows you to access the sub-menus and adjust the<br />
settings.<br />
8 Cursor Down Button<br />
Allows you to select the next item on the menu.<br />
9 Channel + / – Buttons<br />
Allows you to select channels in ascending or<br />
<strong>de</strong>scending or<strong>de</strong>r.<br />
20 Mute Button<br />
Mutes sound. To restore sound, press button again.<br />
21 Teletext Button<br />
(for certain versions only)<br />
Refer to section on “Using the Teletext”<br />
22 OSD button<br />
Allows you to display the current channel number.<br />
It also allows to exit menu from the screen after<br />
control adjustments.<br />
23 Digit (0 -9) Buttons<br />
Press to select a channel. For a 2-digit channel<br />
number, press the first digit and followed<br />
immediately by the second digit.<br />
24 A/V Button<br />
Allows you to select the AV channels.<br />
25 Sleeptimer Button<br />
Allows you to select a time period after which the<br />
set will switch to standby mo<strong>de</strong> automatically.<br />
10<br />
5-11_29PT3323/E<br />
10<br />
06/06/03, 2:36 PM
FUNCTIONS OF TV CONTROLS<br />
➩<br />
& é “<br />
‘ (<br />
& Mains Power button Switch mains power on or off.<br />
é Standby light indicator Indicate red light when standby mo<strong>de</strong> is activated.<br />
“ Remote Sensor Acts as a sensor for activating the controls of the<br />
TV when remote control handset is aimed at it.<br />
‘ Volume + / – buttons Adjust sound volume softer/lou<strong>de</strong>r.<br />
( Channel 7 / 6 buttons Select channel in <strong>de</strong>scending/ascending or<strong>de</strong>r.<br />
Note<br />
• You can enter the main menu by pressing both the Volume- and+buttons at the<br />
same time.<br />
• Press the Channel 7 or 6 button to select the next item on the menu.<br />
• Press Volume - or + button to access sub-menu and adjust the settings.<br />
11<br />
5-11_29PT3323/E<br />
11<br />
06/06/03, 2:36 PM
SELECTING THE MENU LANGUAGE<br />
Operating instructions generally explains the operation of the TV<br />
set using the buttons on the remote control unless otherwise stated.<br />
Please read the following instructions carefully and follow the steps<br />
as shown to familiarise yourself with the installations and all features<br />
available in your set.<br />
Note: When there is no signal input to the TV, you may encounter instability of the<br />
on screen display. In this instance, please use the v button on your remote<br />
control to select an AV channel.<br />
The Language feature allows you to set the TV’s on-screen menu to be shown in your<br />
<strong>de</strong>sired language.<br />
Step Press button Result on screen<br />
MENU<br />
Enter main menu.<br />
Main<br />
o<br />
✔ Picture π Brightness<br />
■ Sound Colour<br />
■ Features Contrast<br />
■ Install Sharpness<br />
Colour Temp.<br />
More...<br />
œ<br />
¸<br />
Select Install.<br />
Main<br />
o<br />
■ Picture Language<br />
■ Sound Auto Store<br />
■ Features Manual Store<br />
✔ Install π Channel Edit<br />
œ<br />
˙<br />
˙<br />
Enter the Install menu.<br />
Press button repeatedly to cycle<br />
through the language list and<br />
select the language of your choice.<br />
Install o<br />
✔ Language English π<br />
■ Auto Store<br />
■ Manual store<br />
■ Channel Edit<br />
œ<br />
m<br />
Exit menu from screen.<br />
12<br />
12-18/E<br />
12<br />
01/15/03, 5:00 PM
AUTOMATIC TUNING OF CHANNELS<br />
Automatic tuning of channels allows you to store each programme automatically.<br />
Step Press button Result on screen<br />
MENU<br />
Enter main menu.<br />
Main<br />
o<br />
✔ Picture π Brightness<br />
■ Sound Colour<br />
■ Features Contrast<br />
■ Install Sharpness<br />
Colour Temp.<br />
More...<br />
œ<br />
¸<br />
Press button repeatedly until<br />
Install is selected.<br />
Main<br />
o<br />
■ Picture Language<br />
■ Sound Auto Store<br />
■ Features Manual Store<br />
✔ Install π Channel Edit<br />
˙<br />
Enter install menu.<br />
œ<br />
Install o<br />
✔ Language π English<br />
■ Auto Store<br />
■ Manual store<br />
■ Channel Edit<br />
œ<br />
¸<br />
Select Auto Store.<br />
Install<br />
o<br />
■ Language<br />
✔ Auto Store<br />
■ Manual store<br />
■ Channel Edit<br />
π<br />
œ<br />
˙<br />
Start automatic tuning of<br />
channels.<br />
Auto Store<br />
■ Channel 1<br />
■ TV 142 MHz<br />
♦♦♦♦♦♦♦♦♦♦♦♦♦♦π♦♦♦♦♦♦♦♦♦♦♦♦♦♦♦♦<br />
Install<br />
o<br />
■ Language<br />
✔ Auto Store<br />
■ Manual store<br />
■ Channel Edit<br />
π<br />
When tuning is completed,<br />
exit menu from screen.<br />
œ<br />
13<br />
12-18_29PT3323/E<br />
13<br />
07/09/03, 5:04 PM
MANUAL TUNING OF CHANNELS<br />
Manual tuning of channels allows you to select your preferred channel number for every<br />
available programme.<br />
Step Press button Result on screen<br />
MENU<br />
Enter main menu.<br />
Main<br />
o<br />
✔ Picture π Brightness<br />
■ Sound Colour<br />
■ Features Contrast<br />
■ Install Sharpness<br />
Colour Temp.<br />
More...<br />
œ<br />
¸<br />
Press button repeatedly until<br />
Install is selected.<br />
Main<br />
o<br />
■ Picture Language<br />
■ Sound Auto Store<br />
■ Features Manual Store<br />
✔ Install π Channel Edit<br />
œ<br />
˙<br />
Enter install menu.<br />
Install<br />
o<br />
✔ Language π English<br />
■ Auto Store<br />
■ Manual Store<br />
■ Channel Edit<br />
œ<br />
¸<br />
Press button repeatedly until<br />
Manual Store is selected.<br />
Install<br />
o<br />
■ Language Colour System<br />
■ Auto Store Sound System<br />
✔ Manual Store π Search<br />
■ Channel Edit Channel<br />
Fine Tune<br />
Store<br />
œ<br />
˙<br />
¸<br />
Enter manual store menu.<br />
Press button repeatedly until<br />
Search is selected.<br />
Manual Store o<br />
■ Colour System<br />
■ Sound System<br />
✔ Search<br />
■ Channel<br />
■ Fine Tune<br />
■ Store<br />
œ<br />
79 MHz π<br />
MANUAL TUNING OF<br />
14<br />
12-18/E<br />
14<br />
01/15/03, 5:00 PM
MANUAL TUNING CHANNELS OF CHANNELS<br />
Step Press button Result on screen<br />
˙<br />
Start manual searching. Searching<br />
stops once a transmitting signal is<br />
found.<br />
Manual Store o<br />
■ Colour System<br />
■ Sound System<br />
✔ Search<br />
■ Channel<br />
■ Fine Tune<br />
■ Store<br />
œ<br />
128 MHz π<br />
9<br />
¸<br />
1 2 3<br />
4 5 6<br />
7 8<br />
0<br />
9<br />
Select Channel.<br />
Key in the channel number.<br />
Manual Store o<br />
■ Colour System<br />
■ Sound System<br />
■ Search<br />
✔ Channel 2 π<br />
■ Fine Tune<br />
■ Store<br />
œ<br />
10<br />
¸<br />
Press button repeatedly until<br />
Store is selected.<br />
Manual Storeo<br />
■ Colour System<br />
■ Sound System<br />
■ Search<br />
■ Channel<br />
■ Fine Tune<br />
✔ Store<br />
œ<br />
Store?π<br />
11<br />
Store tuned channel.<br />
˙<br />
Manual Storeo<br />
Note : If you want to<br />
■ Colour System<br />
continue searching for<br />
■ Sound System<br />
■ Search<br />
another transmitting<br />
■ Channel<br />
channel, repeat steps<br />
■ Fine Tune<br />
7 to 11.<br />
✔ Store<br />
œ<br />
Stored<br />
12<br />
m<br />
Exit menu from screen.<br />
15<br />
12-18/E<br />
15<br />
01/15/03, 5:00 PM
SELECTING THE COLOUR/SOUND SYSTEM<br />
This feature allows you to select your <strong>de</strong>sired Colour and Sound system. If Auto<br />
is selected, the respective colour and sound system will be automatically selected according<br />
to the transmission system. Note : Select your <strong>de</strong>sired colour and sound system manually if<br />
reception is poor at Auto mo<strong>de</strong>.<br />
Step Press button Result on screen<br />
Repeat step 1<br />
to step 5 as in<br />
“Manual Tuning<br />
of TV Channels”<br />
9<br />
10<br />
11<br />
12<br />
˝<br />
or<br />
˙<br />
¸<br />
˙<br />
¸<br />
or<br />
˚<br />
˝<br />
or<br />
˙<br />
¸<br />
˙<br />
Colour System is selected.<br />
Select the <strong>de</strong>sired colour<br />
system (Auto, PAL,<br />
NTSC 3.58, NTSC 4.43<br />
or SECAM).<br />
Press button repeatedly<br />
until STORE is selected.<br />
Store selected system.<br />
Proceed to select Sound<br />
System.<br />
Select the <strong>de</strong>sired sound<br />
system (Auto, BG, I,<br />
DK or M.<br />
Press button repeatedly<br />
until STORE is selected.<br />
Store selected system.<br />
Manual Store o<br />
✔ Colour System Auto π<br />
■ Sound System<br />
■ Search<br />
■ Channel<br />
■ Fine Tune<br />
■ Store<br />
œ<br />
Manual Store o<br />
✔ Colour System PAL π<br />
■ Sound System<br />
■ Search<br />
■ Channel<br />
■ Fine Tune<br />
■ Store<br />
œ<br />
Manual Store o<br />
■ Colour System<br />
✔ Sound System<br />
■ Search<br />
■ Channel<br />
■ Fine Tune<br />
■ Store Stored<br />
œ<br />
Manual Store o<br />
■ Colour System<br />
✔ Sound System Auto π<br />
■ Search<br />
■ Channel<br />
■ Fine Tune<br />
■ Store<br />
œ<br />
Manual Store o<br />
■ Colour System<br />
✔ Sound System DK π<br />
■ Search<br />
■ Channel<br />
■ Fine Tune<br />
■ Store<br />
œ<br />
Manual Store o<br />
■ Colour System<br />
✔ Sound System<br />
■ Search<br />
■ Channel<br />
■ Fine Tune<br />
■ Store Stored<br />
œ<br />
m<br />
Exit menu from screen.<br />
16<br />
12-18/E<br />
16<br />
01/15/03, 5:00 PM
FINE TUNING OF CHANNELS<br />
This feature allows you to adjust picture reception in areas of weak reception.<br />
Step Press button Result on screen<br />
MENU<br />
Enter main menu.<br />
Main<br />
o<br />
✔ Picture π Brightness<br />
■ Sound Color<br />
■ Features Contrast<br />
■ Install Sharpness<br />
Colour Temp.<br />
More...<br />
œ<br />
¸<br />
Press button repeatedly until<br />
Install is selected.<br />
Main<br />
o<br />
■ Picture Language<br />
■ Sound Auto Store<br />
■ Features Manual Store<br />
✔ Install π Channel edit<br />
œ<br />
˙<br />
¸<br />
Enter install menu.<br />
Press button repeatedly until<br />
Manual Store is selected.<br />
Install<br />
o<br />
■ Language Colour System<br />
■ Auto Store Sound System<br />
✔ Manual Store π Search<br />
■ Channel Edit Channel<br />
Fine Tune<br />
Store<br />
œ<br />
˙<br />
¸<br />
Enter manual store menu.<br />
Press button repeatedly until<br />
Fine Tune is selected.<br />
Manual Storeo<br />
■ Colour System<br />
■ Sound System<br />
■ Search<br />
■ Channel<br />
✓ Fine Tune<br />
■ Store<br />
œ<br />
p❘❘❘❘❘❘❘❘❘❘❘ ❘❘ ❘❘❘❘❘❘❘❘❘❘❘π<br />
˙<br />
or<br />
˝<br />
Fine tune until the best reception<br />
is obtained.<br />
Manual Storeo<br />
■ Colour System<br />
■ Sound System<br />
■ Search<br />
■ Channel<br />
✓ Fine Tune<br />
■ Store<br />
œ<br />
p❘❘❘❘❘❘❘❘❘❘❘❘❘❘❘❘❘❘ ❘❘ ❘❘❘❘π<br />
9<br />
10<br />
¸<br />
˙<br />
Select Store.<br />
Store last fine-tuned status.<br />
Exit menu from screen.<br />
Manual Storeo<br />
■ Colour System<br />
■ Sound System<br />
■ Search<br />
■ Channel<br />
■ Fine Tune<br />
✔ Store<br />
œ<br />
Stored<br />
17<br />
12-18_29/34PT4323/E<br />
17<br />
05/13/03, 3:13 PM
EDITING OF CHANNELS<br />
This feature allows you to skip or edit channels which have bad or weak TV signal or channels<br />
that you do not watch often. Note : Once a channel is skipped, you cannot have access to it by<br />
the CH (Channel) + or – button. You can only have access to the channel by the Digit (0 -9)<br />
buttons.<br />
Step Press button Result on screen<br />
MENU<br />
¸<br />
˙<br />
¸<br />
˙<br />
1 2 3<br />
4 5 6<br />
7 8 9<br />
0<br />
Enter main menu.<br />
Press button repeatedly until<br />
Install is selected.<br />
Enter install menu.<br />
Press button repeatedly until<br />
Channel Edit is selected.<br />
Enter Channel Edit menu.<br />
Key in the channel number to be<br />
skipped.<br />
Main<br />
o<br />
■ Picture Language<br />
■ Sound Auto Store<br />
■ Features Manual Store<br />
✔ Install π Channel Edit<br />
œ<br />
Install<br />
o<br />
■ Language Channel<br />
■ Auto Store Skipped<br />
■ Manual Store<br />
✔ Channel Edit π œ<br />
Channel Edit o<br />
✔ Channel 2 π<br />
■ Skipped<br />
œ<br />
¸<br />
˙<br />
Select Skipped.<br />
Select On to skip channel.<br />
Channel Edit<br />
■ Channel<br />
✔ Skipped<br />
o<br />
On<br />
œ<br />
9<br />
Exit menu from screen.<br />
HOW TO RESTORE SKIPPED CHANNELS<br />
• Repeat Steps 1 to 5 as in”Editing of Channels”.<br />
• Key in the channel number to be restored by the<br />
Digit (0 - 9) button.<br />
• Select Skipped by the ¸ button.<br />
• Select Off to restore channel by the ˙ button.<br />
• Exit menu from screen by the<br />
button.<br />
Channel Edit<br />
■ Channel<br />
✔ Skipped<br />
o<br />
œ<br />
Off<br />
18<br />
12-18_29/34PT4323/E<br />
18<br />
05/13/03, 3:13 PM
ADJUSTING THE TV PICTURE<br />
The picture menu allows you to make adjustments to the picture.<br />
Step Press button Result on screen<br />
MENU<br />
˙<br />
˚<br />
or<br />
¸<br />
˝<br />
or<br />
˙<br />
m<br />
Display the main menu on screen.<br />
Enter Picture menu.<br />
Select item.<br />
Adjust level or select <strong>de</strong>sired<br />
setting.<br />
Exit menu from screen.<br />
Main<br />
o<br />
✔ Picture π Brightness<br />
■ Sound Colour<br />
■ Features Contrast<br />
■ Install Sharpness<br />
Colour Temp<br />
More...<br />
œ<br />
Picture o<br />
✔ Brightnessp❘❘❘❘❘❘❘❘❘❘❘❘ ❘❘❘❘❘❘❘❘❘❘❘59π<br />
■<br />
■<br />
■<br />
■<br />
■<br />
Colour<br />
Contrast<br />
Sharpness<br />
Colour Temp<br />
NR<br />
œ<br />
Picture o<br />
✔ Colour<br />
■ Contrast<br />
■ Sharpness<br />
■ Colour Temp<br />
■ NR<br />
■ Contrast +<br />
œ<br />
p❘❘❘❘❘❘❘❘❘❘❘ ❘ ❘❘❘❘❘❘❘❘❘❘❘59π<br />
Picture menu items<br />
Brightness<br />
Colour<br />
Contrast<br />
Sharpness<br />
Colour temperature<br />
NR (Noise Reduction)<br />
Contrast +<br />
Activities<br />
Increase or <strong>de</strong>crease brightness level.<br />
Increase or <strong>de</strong>crease color level.<br />
Increase or <strong>de</strong>crease contrast level.<br />
Increase or <strong>de</strong>crease sharpness level to improve <strong>de</strong>tail<br />
in picture.<br />
Choose from 3 settings (Normal, Warm or Cool).<br />
Select “On” to reduce “noisy” picture (little dots on<br />
picture) due to weak signal.<br />
Select “On” to allow you to optimise the total contrast<br />
for improved picture quality.<br />
19<br />
19-20/E<br />
19<br />
01/15/03, 5:01 PM
ADJUSTING THE TV SOUND<br />
The sound menu allows you to make adjustments to the sound.<br />
Step Press button Result on screen<br />
MENU<br />
¸<br />
˙<br />
˚<br />
or<br />
¸<br />
˝<br />
or<br />
˙<br />
Display the main menu on screen.<br />
Select Sound menu.<br />
Enter Sound menu.<br />
Select item.<br />
Adjust level or select <strong>de</strong>sired<br />
setting.<br />
Main<br />
o<br />
✔ Picture π Brightness<br />
■ Sound Colour<br />
■ Features Contrast<br />
■ Install Sharpness<br />
Colour Temp.<br />
More...<br />
œ<br />
Main<br />
o<br />
■<br />
Picture Treble<br />
✔ Sound π Bass<br />
■ Features Balance<br />
■ Install AVL<br />
Incr. Surround<br />
Ultra Bass<br />
œ<br />
Sound<br />
o<br />
✔ Treble<br />
■ Bass<br />
■ Balance<br />
■ AVL<br />
■ Incr. Surround<br />
■ Ultra Bass<br />
œ<br />
p❘❘❘❘❘❘❘❘❘❘❘❘ ❘❘❘❘❘❘❘❘❘❘❘0π<br />
m<br />
Exit menu from screen.<br />
Sound menu items<br />
Treble<br />
Bass<br />
Balance<br />
AVL (Auto Volume Leveller)<br />
Incredible Surround<br />
Ultra Bass<br />
Activities<br />
Increase or <strong>de</strong>crease high frequency level.<br />
Increase or <strong>de</strong>crease low frequency level.<br />
Increase or <strong>de</strong>crease to adjust balance level.<br />
Select On to enable volume to remain at a pre<strong>de</strong>termined<br />
level should there be a sud<strong>de</strong>n change in<br />
volume during commercial breaks or channel switching.<br />
Select On to boost the effect of stereo sound.<br />
Select On to enjoy enhanced bass output.<br />
20<br />
19-20/E<br />
20<br />
01/15/03, 5:01 PM
USING THE SCREEN FORMAT<br />
You can have a choice of two formats for your viewing pleasure, namely : - 4:3 mo<strong>de</strong> and the<br />
EXPAND 4:3 mo<strong>de</strong> through the FORMAT menu.<br />
Step Press button Result on screen<br />
MENU<br />
¸<br />
Display the main menu on screen.<br />
Press button repeatedly until<br />
Features is selected.<br />
Main<br />
o<br />
■ Picture Format<br />
■ Sound Signal Strength<br />
✔ Features π<br />
Install<br />
■<br />
˙<br />
¸<br />
Enter the Features menu.<br />
Press button repeatedly until<br />
Format is selected.<br />
œ<br />
Feature o<br />
✔ Format<br />
■ Signal strength<br />
4:3 π<br />
˙<br />
Press the button repeatedly to<br />
cycle through the different formats<br />
(4:3 or Expand 4:3) or and select<br />
your <strong>de</strong>sired format.<br />
Exit menu from screen.<br />
œ<br />
Features o<br />
✔ Format<br />
4:3 Expand π<br />
■ Signal Strength<br />
œ<br />
When to use the Screen Formats<br />
4:3 format<br />
Select the 4:3 format if you want to<br />
display the 4:3 picture using the full<br />
surface of the screen.<br />
Expand 4:3 format<br />
Select the Expand 4:3 format if you<br />
want to expand movie images<br />
recor<strong>de</strong>d in the letterbox format.<br />
When this format is selected, the<br />
black horizontal bars at the top and<br />
bottom are expan<strong>de</strong>d thus filling<br />
up the entire TV screen.<br />
➩<br />
➩<br />
➩<br />
21<br />
21-22_29PT3323/E<br />
21<br />
07/09/03, 4:53 PM
ACTIVATING THE SIGNAL STR<strong>ENG</strong>TH<br />
The Signal Strength feature allows to view the signal strength level when the On option is<br />
selected. The signal strength level will be indicated at the bottom of the screen whenever you<br />
switch channel.<br />
Step Press button Result on screen<br />
MENU<br />
¸<br />
Display the main menu on screen.<br />
Press button repeatedly until<br />
Features is selected.<br />
Main<br />
o<br />
■ Picture Format<br />
■ Sound Signal Strength<br />
✔ Features π<br />
Install<br />
■<br />
œ<br />
˙<br />
Enter the Features menu.<br />
Feature o<br />
■ Format<br />
✔ Signal strength<br />
Off<br />
¸<br />
Press button repeatedly until<br />
Signal Strength is selected.<br />
œ<br />
˙<br />
Press the button to select On<br />
option to activate the Signal Strength<br />
mo<strong>de</strong>.<br />
Feature o<br />
■ Format<br />
✔ Signal strength<br />
On<br />
œ<br />
22<br />
21-22_29PT3323/E<br />
22<br />
07/09/03, 4:53 PM
SMART PICTURE CONTROL<br />
Whether you are watching a movie or vi<strong>de</strong>o game, your TV has automatic vi<strong>de</strong>o control<br />
settings matched to your current program source or content. The Smart Picture feature quickly<br />
resets your TV’s vi<strong>de</strong>o controls of program for a number of different types of programs and<br />
viewing conditions you may have in your home. Each Smart Picture setting is preset at the<br />
factory to automatically adjust the TV’s Brightness, Colour, Picture and Sharpness levels.<br />
Step<br />
Press button<br />
Press botton repeatedly to cycle through the 5 settings namely,<br />
Personal, DVD/VCD, Rich, Natural and Soft and select<br />
your <strong>de</strong>sired picture setting.<br />
Exit menu from screen.<br />
Defintion of Picture Settings<br />
Personal : Picture settings are set to your preference.<br />
DVD/VCD : For optimal picture setting, whenever<br />
the source is connected to DVD/VCD<br />
player, select DVD/VCD setting for AV<br />
mo<strong>de</strong>.<br />
Rich : Emphasize very vibrant colours. This<br />
setting is the optimal setting when you<br />
are viewing TV programmes in a<br />
brightly-lit room.<br />
Natural : Emphasize original colours.<br />
Soft : Emphasize “warm” colours.<br />
(Suitable for dimly-lit room condition and<br />
givescinema-like effect when light is<br />
switched off).<br />
Personal<br />
DVD/VCD<br />
Rich<br />
Natural<br />
Soft<br />
23<br />
23-27_29PT3323/E<br />
23<br />
07/09/03, 4:54 PM
SMART SOUND CONTROL<br />
Whether you are watching a movie or vi<strong>de</strong>o game, your TV has automatic sound control<br />
settings matched to your current program source or content. The Smart Sound feature quickly<br />
resets your TV’s sound controls of program for a number of different types of programs and<br />
viewing conditions you may have in your home. Each Smart Sound setting is preset at the<br />
factory to automatically adjust the TV’s Treble and Bass levels.<br />
Step<br />
Press button<br />
Press botton repeatedly to cycle through the 4 settings namely,<br />
Personal, Theatre, Music and Voice and select your <strong>de</strong>sired<br />
sound setting.<br />
Exit menu from screen.<br />
Definition of Sound Settings<br />
Personal : Sound settings are set to your preference.<br />
Theatre<br />
: Emphasize sensation to action.<br />
(Bass and Treble boosted)<br />
Personal<br />
Music<br />
: Emphasize low tone (Bass boosted).<br />
Theatre<br />
Voice<br />
: Emphasize high tone (treble boosted).<br />
Music<br />
Voice<br />
24<br />
23-27_29PT3323/E<br />
24<br />
07/09/03, 4:54 PM
PERSONAL ZAPPING<br />
A list or series of favourite TV programs can be selected and stored in the 4 coloured buttons<br />
with the Personal Zapping feature. With this feature you can easily viewed up to a total of 10<br />
preferred channels for each coloured button.<br />
Adding Channels to the Favourite list<br />
Step Press button Result on screen<br />
1 2 3<br />
4 5 6<br />
7 8<br />
0<br />
9<br />
Select a channel by the Digit<br />
buttons<br />
8<br />
Press button to display list.<br />
8 { Select List!<br />
Choose your favourite colour<br />
button to store selected channel.<br />
{ 8 Ad<strong>de</strong>d!<br />
Repeat steps 1 to 3 to add and<br />
store your avourite channels to<br />
the list.<br />
Exit menu from screen.<br />
To view through the favourite list<br />
Press the colour button that you<br />
have selected.<br />
Press button repeatedly to cycle<br />
through your favourite list<br />
and view your favourite channel.<br />
Deleting Channels from the Favourite list<br />
Select a colour button and press<br />
button repeatedly to select the<br />
channel you want to <strong>de</strong>lete.<br />
{ 8<br />
Press button to display list.<br />
{ 8 {Remove Item?- Press |<br />
Press button to remove item.<br />
Repeat steps 1 to 3 to <strong>de</strong>lete<br />
more channels from list.<br />
Exit menu from screen.<br />
25<br />
23-27_29PT3323/E<br />
25<br />
07/09/03, 4:54 PM
USING THE TELETEXT(FOR CERTAIN VERSIONS ONLY)<br />
If a TV channel broadcast contains teletext information, each channel that broadcasts<br />
teletext transmits a page (in<strong>de</strong>x page) with information on how to use the teletext system,<br />
usually on page 100. The system transmitted is indicated in the option line at the bottom<br />
of the screen.<br />
Press button<br />
Result on screen<br />
‘<br />
“<br />
(<br />
& On/Off teletext Press the button once to switch on<br />
and Superimpose teletext display. (A channel in which<br />
teletext page teletext is being transmitted must be<br />
over TV<br />
selected).<br />
programme Press the button the second time<br />
superimpose the teletext page over<br />
the TV programme.<br />
Press the button the third time<br />
to exit teletext mo<strong>de</strong>.<br />
é<br />
&<br />
é Selecting a<br />
teletext page<br />
1 2 3<br />
4 5 6<br />
7 8<br />
0<br />
9<br />
Key in the required teletext page<br />
(3 digits). The page number is<br />
displayed at the top left hand corner<br />
of the screen. When the teletext<br />
page is located, the counter stops<br />
searching. If the counter keeps<br />
searching, it means that the page is<br />
not available for selection. If you<br />
make a mistake in keying the page<br />
number, you have to complete<br />
keying the 3-digit number before<br />
re-keying the correct page number.<br />
“ Accessing Press the ˚ button to<br />
a teletext display the next page and the<br />
page<br />
¸ button to display the previous<br />
page.<br />
˚ ¸<br />
‘ Direct Access to The 4-colour buttons allow you to<br />
an item or access directly an item or<br />
corresponding corresponding pages.<br />
pages<br />
( Main In<strong>de</strong>x Press the button to return to the<br />
main in<strong>de</strong>x page.<br />
26<br />
23-27_29PT3323/E<br />
26<br />
07/09/03, 4:54 PM
USING THE TELETEXT (FOR CERTAIN VERSIONS ONLY)<br />
Press button<br />
Result on screen<br />
§<br />
è<br />
!<br />
ç<br />
§ Interrupt Press the button to change to TV<br />
mo<strong>de</strong>. Press the button again to<br />
return to teletext mo<strong>de</strong> and to the<br />
teletext page.<br />
è Enlarge<br />
Press the button once to enlarge<br />
and view the top half of the page.<br />
Press the button the second time<br />
to enlarge and view the bottom<br />
half of the page. Press the button<br />
the third time to return to normal<br />
size page.<br />
! Hold A selected page sometimes<br />
contains a few sub-pages. The subpage<br />
will automatically move to the<br />
next sub-page after about 20<br />
seconds. The total number of subpages<br />
are indicated at the top right<br />
hand corner of the screen. Press<br />
the button once to hold page and<br />
the second time to release holding<br />
of page.<br />
ç Reveal/<br />
Conceal<br />
Press the button once to reveal<br />
hid<strong>de</strong>n information (solutions to<br />
puzzles, riddles, etc). Press the<br />
button the second time to conceal<br />
information.<br />
This button is applicable only to<br />
teletext page with puzzles, riddles,<br />
etc.)<br />
27<br />
23-27_29PT3323/E<br />
27<br />
07/09/03, 4:54 PM
SPECIFICATIONS<br />
29PT3323<br />
Picture tube screen size<br />
Picture tube visible area<br />
Audio Output :<br />
Speaker<br />
TV System<br />
720 mm<br />
680 mm<br />
2 x 5 W<br />
NTSC M<br />
PAL B/G<br />
PAL B/H (only for certain versions)<br />
PAL D/K<br />
PAL I<br />
SECAM B/G<br />
SECAM D/K<br />
SECAM K1<br />
Playback System NTSC 3.58, NTSC 4.43, PAL 60<br />
Set Dimensions :<br />
Width<br />
Depth<br />
Height<br />
Net Weight of Set (approximate )<br />
755 mm<br />
493 mm<br />
578 mm<br />
44 kg<br />
Note<br />
For Operating Voltage, Frequency, Power Consumption and Version Number, refer to the<br />
type number at the rear of the set.<br />
28<br />
28-29_29PT3323/E<br />
28<br />
07/09/03, 4:55 PM
29<br />
3141 055 21831<br />
28-29_29PT3323/E<br />
29<br />
07/09/03, 4:55 PM


