

Sony HDR-AS30 - HDR-AS30 Guide pratique Anglais
Sony HDR-AS30 - HDR-AS30 Guide pratique Anglais
Sony HDR-AS30 - HDR-AS30 Guide pratique Anglais

You also want an ePaper? Increase the reach of your titles
YUMPU automatically turns print PDFs into web optimized ePapers that Google loves.
Table of<br />
contents<br />
Operation<br />
Search<br />
Settings<br />
Search<br />
Index<br />
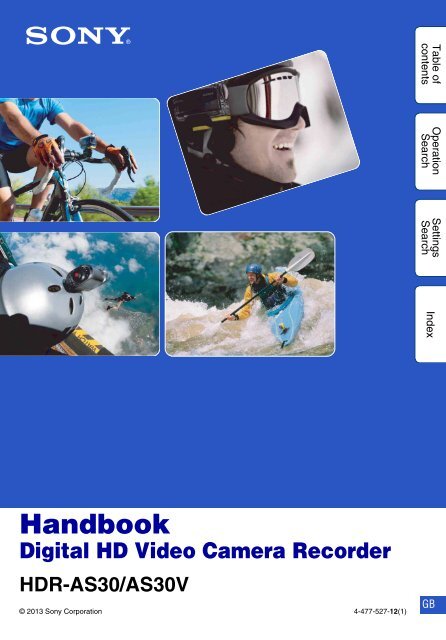
Handbook<br />
Digital HD Video Camera Recorder<br />
<strong>HDR</strong>-<strong>AS30</strong>/<strong>AS30</strong>V<br />
© 2013 <strong>Sony</strong> Corporation 4-477-527-12(1)<br />
GB
How to use this handbook<br />
Click on a button on the right to jump to the corresponding page.<br />
This is convenient when searching for a function you want to view.<br />
Table of<br />
contents<br />
Table of<br />
contents<br />
Search for information by function.<br />
Operation<br />
Search<br />
Settings<br />
Search<br />
Search for information by operation.<br />
Search for information in a listing of<br />
Settings items.<br />
Operation<br />
Search<br />
Search for information by keyword.<br />
Marks and notations used in this handbook<br />
Index<br />
Settings<br />
Search<br />
Index<br />
The default setting is indicated by .<br />
Indicates cautions and limitations relevant<br />
to the correct operation of the camera.<br />
z Indicates information that is useful to<br />
know.<br />
2 GB
Notes on using the camera<br />
About the displayed language<br />
The display panel displays only English.<br />
Other languages are not available.<br />
Notes on recording/playback and<br />
connection<br />
• Before you start recording, make a trial<br />
recording to make sure that the camera is<br />
working correctly.<br />
• To play back images, connect the camera to<br />
another device with a micro HDMI cable (sold<br />
separately).<br />
• The camera is neither dust-proof, nor splashproof,<br />
nor water-proof. Read “Precautions”<br />
(page 67) before operating the camera.<br />
• Avoid exposing the camera to water. If water<br />
enters inside the camera, a malfunction may<br />
occur. In some cases, the camera cannot be<br />
repaired.<br />
• Do not aim the camera at the sun or other bright<br />
light. It may cause malfunctions.<br />
• Do not use the camera near a location that<br />
generates strong radio waves or emits radiation.<br />
Otherwise, the camera may not properly record<br />
or play back images.<br />
• Using the camera in sandy or dusty locations<br />
may cause malfunctions.<br />
• If moisture condensation occurs, remove it<br />
before using the camera (page 67).<br />
• Do not shake or strike the camera. It may cause<br />
a malfunction and you may not be able to record<br />
images. Furthermore, a memory card may<br />
become unusable or image data may be<br />
damaged.<br />
• When connecting the camera to another device<br />
with a cable, be sure to insert the connector plug<br />
in the correct way. Pushing the plug forcibly<br />
into the terminal will damage the terminal and<br />
may result in a malfunction of the camera.<br />
• Playback of movies other than those shot, edited<br />
or composed on this camera is not guaranteed.<br />
• When you switch between NTSC/PAL, the<br />
setting values that can be selected in the<br />
Recording Mode change accordingly. Settings<br />
values for both [NTSC] and [PAL] are shown in<br />
this manual.<br />
On camera’s temperature<br />
The camera may get warm due to continuous use,<br />
but it is not a malfunction.<br />
On the overheat protection<br />
Depending on the camera and battery temperature,<br />
you may be unable to record movies or the power<br />
may turn off automatically to protect the camera.<br />
A message will be displayed on the display panel<br />
before the power turns off or you can no longer<br />
record movies.<br />
Notes on the battery pack<br />
• Charge the battery pack before using for the first<br />
time.<br />
• You can charge the battery pack even if it is not<br />
completely discharged. In addition, even if the<br />
battery pack is not fully charged, you can use the<br />
partially charged capacity of the battery pack as<br />
is.<br />
• For details on the battery packs, see page 65.<br />
Notes on the display panel and lens<br />
• Exposing the display panel or the lens to direct<br />
sunlight for long periods may cause<br />
malfunctions. Be careful when placing the<br />
camera near a window or outdoors.<br />
• Do not press against the display panel. It may<br />
cause a malfunction.<br />
On image data compatibility<br />
• This camera supports "MP4 format" as movie<br />
file format. However, it is not guaranteed that all<br />
MP4 compliant devices can play back images<br />
recorded with this camera.<br />
• The camera conforms with DCF (Design rule<br />
for Camera File system) universal standard<br />
established by JEITA (Japan Electronics and<br />
Information Technology Industries<br />
Association).<br />
Warning on copyright<br />
Television programs, films, videotapes, and other<br />
materials may be copyrighted. Unauthorized<br />
recording of such materials may be contrary to the<br />
provisions of the copyright laws.<br />
No compensation for damaged<br />
content or recording failure<br />
<strong>Sony</strong> cannot compensate for failure to record or<br />
loss or damage of recorded content due to a<br />
malfunction of the camera or memory card, etc.<br />
Table of<br />
contents<br />
Operation<br />
Search<br />
Settings<br />
Search<br />
Index<br />
Continued r<br />
3 GB
The illustrations and images used in<br />
this handbook<br />
• The images used as examples in this handbook<br />
are reproduced images, and are not actual<br />
images shot using the camera.<br />
• In this manual, “Memory Stick Micro” media<br />
and microSD memory card are referred to as<br />
“memory card.”<br />
• Design and specifications are subject to change<br />
without notice.<br />
Notes on playing back on other<br />
devices<br />
• The camera is compatible with MPEG-4 AVC/<br />
H.264 Main Profile for HD (high definition)<br />
image quality recording. Therefore, you cannot<br />
play back images recorded with HD (high<br />
definition) image quality on the camera with the<br />
devices which are not compatible with the<br />
MPEG-4 AVC/H.264.<br />
• Movies recorded using this camera may not play<br />
back normally on devices other than this<br />
camera. Also, movies recorded on other devices<br />
may not play back properly on this camera.<br />
On wireless network function<br />
• The wireless network function built into this<br />
camera has been confirmed to conform with Wi-<br />
Fi specifications set forth by the Wi-Fi Alliance<br />
(WFA).<br />
• Depending on the region, access to a wireless<br />
LAN may not be available, may require a<br />
separate service charge, or communications may<br />
be blocked or suffer from intermittent outages.<br />
For details, check your wireless LAN<br />
administrator and/or service provider.<br />
• <strong>Sony</strong> makes no guarantees whatsoever in the<br />
provision of a network service. <strong>Sony</strong> bears<br />
absolutely no responsibility for damages that<br />
may arise from the use of a network service<br />
even in the case of claims made by a third-party.<br />
• We assume no responsibility whatsoever for any<br />
damage caused by unauthorized access to, or<br />
unauthorized use of, destinations loaded on the<br />
camera, resulting from loss or theft.<br />
Carl Zeiss lens<br />
The camera is equipped with a Carl Zeiss lens<br />
which is capable of reproducing sharp images with<br />
excellent contrast. The lens for the camera has<br />
been produced under a quality assurance system<br />
certified by Carl Zeiss in accordance with the<br />
quality standards of Carl Zeiss in Germany.<br />
On GPS-compatible devices (<strong>HDR</strong>-<br />
<strong>AS30</strong>V only)<br />
• Use GPS in accordance with regulations of<br />
countries and regions where you use it.<br />
• If you do not record the location information, set<br />
the GPS log to [OFF] (page 25).<br />
• If you take images with the GPS log set to [ON],<br />
and upload those images to the internet, the<br />
shooting location may be available to third<br />
parties. To prevent this, set the GPS log to<br />
[OFF] before shooting (page 25).<br />
Table of<br />
contents<br />
Operation<br />
Search<br />
Settings<br />
Search<br />
Index<br />
About the security on using Wireless<br />
LAN products<br />
It is important to set security when using the<br />
wireless network function. <strong>Sony</strong> makes no<br />
guarantees and is not responsible for any damage<br />
resulting from having inadequate security or using<br />
the wireless network function.<br />
4 GB
Operation<br />
Search<br />
How to enjoy the camera<br />
Enjoy more using the accessories<br />
Table of<br />
contents<br />
Handlebar Mount & Waterproof Case<br />
Wrist Mount Strap & Waterproof Case<br />
Settings<br />
Search<br />
Index<br />
Handheld Grip with LCD Screen<br />
Continued r<br />
5 GB
Share your life<br />
Table of<br />
contents<br />
Upload captured moments<br />
You can directly upload images and share<br />
them by using the wireless network function<br />
of this camera (page 45).<br />
Operation<br />
Search<br />
Settings<br />
Search<br />
Record GPS information<br />
(<strong>HDR</strong>-<strong>AS30</strong>V only)<br />
You can view location information and<br />
movement speed while viewing movies using<br />
“PlayMemories Home” (page 25).<br />
Index<br />
Connect to TV<br />
Connect the camera to a TV with a micro<br />
HDMI cable (sold separately), and enjoy<br />
images on the big screen (page 43).<br />
6 GB
Table of contents<br />
Notes on using the camera<br />
How to use this handbook····································· 2<br />
Notes on using the camera ··································· 3<br />
How to enjoy the camera ······································ 5<br />
Operation Search ················································ 10<br />
Settings Search··················································· 11<br />
Identifying parts··················································· 13<br />
Table of<br />
contents<br />
Operation<br />
Search<br />
Getting started<br />
Checking the bundled items································ 14<br />
Inserting the battery pack···································· 15<br />
Inserting a memory card ····································· 18<br />
Recording Mode·················································· 20<br />
SteadyShot·························································· 21<br />
Field Angle ·························································· 22<br />
Scene ·································································· 23<br />
Interval Photo Recording····································· 24<br />
GPS Log (<strong>HDR</strong>-<strong>AS30</strong>V only) ······························ 25<br />
Airplane Mode ····················································· 27<br />
Auto Power Off···················································· 28<br />
Beep···································································· 29<br />
Date & Time Setting ············································ 30<br />
USB Power Supply·············································· 31<br />
Switching NTSC/PAL ·········································· 32<br />
Resetting the Settings ········································· 33<br />
Format································································· 34<br />
Using accessories ··············································· 35<br />
Settings<br />
Search<br />
Index<br />
7 GB
Shooting<br />
Shooting ······························································ 41<br />
Table of<br />
contents<br />
Viewing<br />
Wireless Network (Wi-Fi)<br />
Viewing images on a TV ····································· 43<br />
Preparation for setting Wi-Fi ······························· 45<br />
Setting Wi-Fi························································ 46<br />
Smart Remote Control ········································ 49<br />
Copy···································································· 51<br />
Operation<br />
Search<br />
Settings<br />
Search<br />
Computer<br />
Useful functions when connecting the camera to<br />
your computer ····················································· 52<br />
Preparing a computer·········································· 53<br />
Starting the “PlayMemories Home” software ······ 56<br />
Index<br />
Troubleshooting<br />
Troubleshooting ·················································· 57<br />
Warning indicators and messages ······················ 61<br />
Others<br />
Recordable time ·················································· 63<br />
Battery pack ························································ 65<br />
Using the camera abroad···································· 66<br />
Precautions ························································· 67<br />
Specifications ······················································ 69<br />
8 GB
Operation<br />
Search<br />
Settings<br />
Search<br />
Index<br />
Index ··································································· 72<br />
Table of<br />
contents<br />
Index<br />
9 GB
Operation Search<br />
Shooting movies and<br />
photos<br />
Shooting ································································· 41<br />
Table of<br />
contents<br />
Changing the movie file<br />
size<br />
Recording Mode ·················································· 20<br />
Deleting images Format ···································································· 34<br />
Operation<br />
Search<br />
Changing the date,<br />
time and region<br />
Date & Time Setting············································ 30<br />
Initializing settings Resetting the Settings········································ 33<br />
Settings<br />
Search<br />
Viewing on TVs Viewing images on a TV···································· 43<br />
Operating using a<br />
smartphone or tablet<br />
Smart Remote Control ······································· 49<br />
Index<br />
Uploading images to a<br />
network service<br />
Setting Wi-Fi ························································· 46<br />
Recording the location<br />
information<br />
GPS Log (<strong>HDR</strong>-<strong>AS30</strong>V only) ··························· 25<br />
10 GB
Settings Search<br />
Setting items<br />
Click each item to jump to the corresponding page.<br />
Items Display Default setting<br />
Recording Mode VIDEO HQ (1920×1080/30p)<br />
SteadyShot STEDY ON<br />
Field Angle ANGLE 120°<br />
Scene SCENE NORML<br />
Interval Photo Recording LAPSE 5sec<br />
Smart Remote Control Wi-Fi ON<br />
Copy* SHARE —<br />
GPS Log (<strong>HDR</strong>-<strong>AS30</strong>V only) GPS ON<br />
Airplane Mode PLANE OFF<br />
Auto Power Off A.OFF 60sec<br />
Beep BEEP ON<br />
Date & Time Setting DATE 2013/1/1 00:00 GMT+0<br />
USB Power Supply USBPw ON<br />
Switching NTSC/PAL V.SYS NTSC<br />
Resetting the Settings RESET —<br />
Format FORMT —<br />
* You can change the mode by operating your smartphone when the camera is set to the smart remote<br />
control function.<br />
Table of<br />
contents<br />
Operation<br />
Search<br />
Settings<br />
Search<br />
Index<br />
Notes<br />
• The display panel displays only English. Other languages are not available.<br />
How to set items<br />
You can set items using the following 3 buttons on the<br />
camera.<br />
NEXT*: Goes to the next menu<br />
PREV*: Goes to the previous menu<br />
ENTER: Executes the menu<br />
* Both NEXT and PREV buttons are used to change the menu.<br />
In this manual, we usually use the NEXT button for<br />
description. When using only the PREV button, we describe it<br />
as the PREV button.<br />
REC button/<br />
ENTER button<br />
PREV button<br />
NEXT button<br />
Continued r<br />
11 GB
Operation<br />
Search<br />
Settings<br />
Search<br />
1 Press the NEXT or PREV button to turn on the power.<br />
To power off, select [PwOFF] and press the ENTER button.<br />
2 Press the NEXT button to display [SETUP], then press the ENTER button.<br />
3 Press the NEXT button to display the setting item, then press the ENTER<br />
button.<br />
To return to the [SETUP] menu, select [BACK] and press the ENTER button.<br />
Table of<br />
contents<br />
Index<br />
12 GB
Identifying parts<br />
A REC/access lamp<br />
B REC (Movie/Photo) button<br />
ENTER (Menu execute) button<br />
C b REC HOLD switch* 1<br />
D (N Mark)* 2<br />
E Display panel<br />
F Speaker<br />
G PREV button<br />
H NEXT button<br />
I Microphones<br />
J Lens<br />
K GPS sensor (<strong>HDR</strong>-<strong>AS30</strong>V only)<br />
L Connector cover<br />
M m (Mic) jack* 3<br />
N Expansion connector* 4<br />
O CHG (Charge) lamp<br />
P HDMI OUT jack<br />
Q Multi/Micro USB Terminal* 5<br />
R Battery pack/memory card cover<br />
S Memory card insertion slot<br />
T Battery ejection lever<br />
U Battery insertion slot<br />
Table of<br />
contents<br />
Operation<br />
Search<br />
Settings<br />
Search<br />
Index<br />
* 1 Used to prevent accidental operation. Slide in<br />
the direction of b to lock the REC button. Slide<br />
in the opposite direction to release.<br />
* 2 Touch the mark when you connect the camera<br />
to a smartphone equipped with the NFC<br />
function.<br />
NFC (Near Field Communication) is an<br />
international standard of the short-range<br />
wireless communication technology.<br />
* 3 When an external microphone (sold separately)<br />
is connected, audio cannot be recorded through<br />
the built-in microphone.<br />
* 4 Used to connect accessories.<br />
* 5 Supports Micro USB compatible devices.<br />
13 GB
Settings<br />
Search<br />
Checking the bundled items<br />
Make sure that you have following bundled<br />
items.<br />
The number in parentheses indicates the<br />
quantity of that item bundled.<br />
• Camera (1)<br />
• Micro USB cable (1)<br />
• Rechargeable battery pack (NP-BX1) (1)<br />
Table of<br />
contents<br />
Operation<br />
Search<br />
• Waterproof Case (SPK-AS2) (1)<br />
• Adhesive Mount (VCT-AM1)<br />
Attachment Buckle (1)<br />
Flat Adhesive Mount (1)<br />
Index<br />
Curved Adhesive Mount (1)<br />
• Handbook (this manual)<br />
Included in the internal memory of this<br />
camera.<br />
• Set of printed documentation<br />
14 GB
Inserting the battery pack<br />
1 Slide the battery pack/memory card cover<br />
in the direction of the arrow, then open the<br />
cover.<br />
Table of<br />
contents<br />
2 Insert the battery pack.<br />
Make sure the direction of the battery pack is correct,<br />
then insert it pushing against the battery ejection<br />
lever, until the lever locks.<br />
Operation<br />
Search<br />
3 Close the cover.<br />
zTo set Auto Power Off function<br />
Select [A.OFF] from the [SETUP] screen, then set the Auto Power Off function. The default<br />
setting is [60sec]. Change the setting as necessary.<br />
For details, see “Auto Power Off” (page 28).<br />
Settings<br />
Search<br />
Index<br />
Continued r<br />
15 GB
Charging the battery pack<br />
1 Turn off the power of the camera.<br />
Charging is not possible when the camera is turned<br />
on.<br />
2 Connect the camera to the computer that<br />
is turned on with the micro USB cable<br />
(supplied).<br />
The CHG (Charge) lamp lights up.<br />
Micro USB<br />
cable<br />
(supplied)<br />
CHG (Charge)<br />
lamp<br />
Table of<br />
contents<br />
Operation<br />
Search<br />
Insert until fully<br />
seated<br />
3 When charging is finished, delete the USB connection between the<br />
camera and the computer (page 55).<br />
Charging is complete when the CHG (Charge) lamp turns off (full charge) (page 65).<br />
Notes<br />
• You can use only type X battery with this camera.<br />
• Turn off the camera while charging the battery.<br />
• Do not apply force to the camera, when you connect the camera to a computer. This may cause damage to<br />
the camera or the computer.<br />
• When you connect the camera to a notebook computer that is not connected to an AC power source, the<br />
battery of the notebook computer may be depleted rapidly. Do not leave the camera connected to the<br />
computer for a long time.<br />
• Charging the battery pack or the connection with customized or hand-built computers is not guaranteed.<br />
Depending on the type of USB device used, charging may not function properly.<br />
• Operation with all computers is not assured.<br />
• If you do not intend to use the camera for an extended period, charge the camera once every 6 to 12<br />
months to maintain battery performance.<br />
Settings<br />
Search<br />
Index<br />
zHow long does it take to charge the camera?<br />
Charging time<br />
Battery pack Via a computer Via AC-UD20* (sold separately)<br />
NP-BX1 (supplied) Approx. 245 min. Approx. 175 min.<br />
• Time required to charge a fully depleted battery pack at a temperature of 25°C (77°F). Charging<br />
may take longer under certain circumstances or conditions.<br />
* Rapid charging is possible by using the USB charger AC-UD20 (sold separately). To connect to the<br />
charger, use the micro USB cable (supplied).<br />
Continued r<br />
16 GB
Settings<br />
Search<br />
zChecking the remaining battery charge<br />
A remaining charge indicator appears on the upper right of the display panel.<br />
High<br />
Low<br />
Table of<br />
contents<br />
• The displayed remaining charge indicator may not be correct under certain circumstances.<br />
• It takes about one minute until the correct remaining charge indicator appears.<br />
Operation<br />
Search<br />
Index<br />
17 GB
Inserting a memory card<br />
1 Slide the Battery pack/memory card cover<br />
in the direction of the arrow, then open<br />
the cover.<br />
Table of<br />
contents<br />
2 Insert the memory card until it clicks.<br />
microSD card: Insert in the direction of A.<br />
“Memory Stick Micro (M2)” media: Insert in the<br />
direction of B.<br />
• When [WAIT] appears on the display panel, wait until<br />
the message disappears.<br />
• Insert a memory card squarely in the correct<br />
orientation; otherwise, the camera will not recognize it.<br />
A<br />
Printed side<br />
B<br />
Terminal side<br />
Operation<br />
Search<br />
microSD card<br />
“Memory Stick Micro<br />
(Mark2)” media<br />
Settings<br />
Search<br />
3 Close the cover.<br />
Index<br />
zTo eject the memory card<br />
Open the cover, then lightly push the memory card once.<br />
zWhat types of memory cards you can use with this<br />
camera?<br />
Types of memory cards SD Speed Class Phrase in this book<br />
“Memory Stick Micro<br />
(Mark2)” media<br />
— “Memory Stick Micro” media<br />
microSD memory card<br />
microSDHC memory card<br />
microSDXC memory card<br />
Class 4 or faster<br />
microSD card<br />
• Operation with all memory cards is not assured.<br />
Continued r<br />
18 GB
Notes<br />
• In order to stabilize memory card operation, it is recommended that you format the memory card when<br />
you use it with the camera for the first time (page 34).<br />
All data recorded on the memory card will be erased by formatting, and cannot be recovered.<br />
• Save important data on the memory card on other media such as a computer, before formatting the<br />
memory card.<br />
• If you insert a memory card into the slot in the wrong direction, the memory card, the memory card slot,<br />
or image data may be damaged.<br />
• Do not insert anything other than the compliant size of memory card into the memory card slot.<br />
Otherwise, a malfunction may result.<br />
• When inserting or ejecting the memory card, be careful to prevent the memory card from popping out<br />
and dropping.<br />
• Guaranteed operating temperature of the camera is between –10°C to 40°C (14°F to 104°F). However,<br />
depending on the types of memory cards, guaranteed operating temperature varies.<br />
For details, refer to the operating instructions supplied with the memory card.<br />
• Images recorded in a microSDXC memory card cannot be transferred or played back on a computer or<br />
AV device that is not exFAT*-compatible (via USB connection). Before connecting, make sure that the<br />
device is exFAT-compatible. If the camera is connected to a device that is not exFAT-compatible, a<br />
prompt to format the memory card may appear. In this case, do not format the memory card, otherwise all<br />
its data will be lost.<br />
* exFAT is the file system used by microSDXC memory cards.<br />
Table of<br />
contents<br />
Operation<br />
Search<br />
Settings<br />
Search<br />
Index<br />
19 GB
Recording Mode<br />
Setting<br />
display<br />
You can set the image resolution and frame rate for shooting movies.<br />
To make the setting, select [SETUP] first.<br />
t<br />
Table of<br />
contents<br />
1 Press the NEXT button to display [SETUP], then press the ENTER button.<br />
2 While [VIDEO] (Recording Mode) is displayed, press the ENTER button.<br />
3 Press the NEXT button to select the Recording Mode, then press the<br />
ENTER button.<br />
Display Recorded image Resolution<br />
Highest resolution/smooth image<br />
recorded at 2× frame rate<br />
Imaging<br />
frame rate<br />
Playback<br />
frame rate<br />
1920×1080 60p/50p 60p/50p<br />
Highest resolution 1920×1080 30p/25p<br />
30p/25p<br />
Operation<br />
Search<br />
Settings<br />
Search<br />
High resolution 1280×720 30p/25p<br />
Slow motion image recorded at 2×<br />
frame rate<br />
1280×720 60p<br />
30p<br />
Index<br />
Super slow motion image recorded at<br />
4× frame rate<br />
1280×720 120p<br />
Standard resolution 640×480 30p/25p 30p/25p<br />
Returns to the [VIDEO] menu.<br />
Notes<br />
• Continuous movie shooting time is approximately 13 hours.<br />
In [SLOW] mode, it is approximately 6.5 hours.<br />
In [SSLOW] mode, it is approximately 3 hours.<br />
• If you select [SSLOW], SteadyShot will not be effective even if SteadyShot is set to [ON].<br />
• Audio is not recorded during shooting in the following situation:<br />
– [SSLOW] (720 120p), [SLOW] (720 60p) is set.<br />
• When the Recording Mode is set to [VGA], the angle of view becomes narrower compared to other<br />
Recording Modes.<br />
• Frame rate depends on the NTSC/PAL setting (page 32).<br />
• If the NTSC/PAL setting is switched to [PAL], the frame rate will not be displayed.<br />
20 GB
SteadyShot<br />
You can activate the camera-shake reduction when shooting.<br />
To make the setting, select [SETUP] first.<br />
Setting<br />
display<br />
t<br />
Table of<br />
contents<br />
1 Press the NEXT button to display [SETUP], then press the ENTER button.<br />
2 Press the NEXT button to display [STEDY] (SteadyShot), then press the<br />
ENTER button.<br />
3 Press the NEXT button to select the setting, then press the ENTER<br />
button.<br />
Operation<br />
Search<br />
Uses SteadyShot.<br />
Does not use SteadyShot.<br />
Settings<br />
Search<br />
Returns to the [STEDY] menu.<br />
Notes<br />
• When SteadyShot is set to [ON], the field angle will be set to [120°].<br />
• When the field angle is set to [170°], SteadyShot will be set to [OFF].<br />
• When the Recording Mode is set to [SSLOW], SteadyShot will not be effective.<br />
• SteadyShot is not available when the camera is set to the photo mode.<br />
Index<br />
21 GB
Field Angle<br />
You can change the field angle for recording.<br />
To make the setting, select [SETUP] first.<br />
Setting<br />
display<br />
t<br />
Table of<br />
contents<br />
1 Press the NEXT button to display [SETUP], then press the ENTER button.<br />
2 Press the NEXT button to display [ANGLE] (Angle), then press the<br />
ENTER button.<br />
3 Press the NEXT button to select the setting, then press the ENTER<br />
button.<br />
Operation<br />
Search<br />
Records with a field angle of 170°.<br />
Records with a field angle of 120°.<br />
Settings<br />
Search<br />
Returns to the [ANGLE] menu.<br />
Notes<br />
• When SteadyShot is set to [ON], the field angle will be set to [120°].<br />
• When the field angle is set to [170°], SteadyShot will be set to [OFF].<br />
• When the Recording Mode is set to [VGA], the angle of view becomes narrower compared to other<br />
Recording Modes.<br />
Index<br />
22 GB
Scene<br />
Setting<br />
display<br />
You can select suitable image quality according to the shooting scene.<br />
To make the setting, select [SETUP] first.<br />
t<br />
Table of<br />
contents<br />
1 Press the NEXT button to display [SETUP], then press the ENTER button.<br />
2 Press the NEXT button to display [SCENE] (Scene), then press the<br />
ENTER button.<br />
3 Press the NEXT button to select the setting, then press the ENTER<br />
button.<br />
Operation<br />
Search<br />
Shoots images in the standard quality.<br />
Shoots images in an image quality suitable for underwater shooting.<br />
Settings<br />
Search<br />
Returns to the [SCENE] menu.<br />
Index<br />
23 GB
Interval Photo<br />
Recording<br />
Setting<br />
display<br />
t<br />
Table of<br />
contents<br />
You can set the interval period of the interval photo recording.<br />
To make the setting, select [SETUP] first.<br />
1 Press the NEXT button to display [SETUP], then press the ENTER button.<br />
2 Press the NEXT button to display [LAPSE] (Interval), then press the<br />
ENTER button.<br />
3 Press the NEXT button to select the setting, then press the ENTER<br />
button.<br />
Operation<br />
Search<br />
Continues to record photos at about 5-second intervals.<br />
Continues to record photos at about 10-second intervals.<br />
Settings<br />
Search<br />
Continues to record photos at about 30-second intervals.<br />
Continues to record photos at about 60-second intervals.<br />
Index<br />
Returns to the [LAPSE] menu.<br />
Notes<br />
• The first photo is recorded immediately after recording is started, without waiting for the completion of<br />
the set interval. From the second photo, photos will be recorded at the set intervals.<br />
• If it is not possible to record photos at the set intervals, the recording will be delayed.<br />
• The maximum number of recordable files is 40,000 in total, including movie (MP4) files.<br />
24 GB
GPS Log (<strong>HDR</strong>-<br />
<strong>AS30</strong>V only)<br />
Setting<br />
display<br />
You can record the location information and the movement speed while recording movies using<br />
the camera’s GPS function.<br />
The “PlayMemories Home” software allows you to import movies recorded with GPS log to a<br />
computer and view them with a map showing location information (page 52).<br />
1 Press the NEXT button to display [SETUP], then press the ENTER button.<br />
2 Press the NEXT button to display [GPS] (GPS), then press the ENTER<br />
button.<br />
3 Press the NEXT button to select the setting, then press the ENTER<br />
button.<br />
Records movies with the GPS log and still images with location information.<br />
t<br />
Table of<br />
contents<br />
Operation<br />
Search<br />
Settings<br />
Search<br />
Does not use GPS log.<br />
Returns to the [GPS] menu.<br />
Index<br />
Notes<br />
• GPS log is available only when recording movies.<br />
• If you do not record the location information, set the GPS log to [OFF].<br />
• During take off and landing of an airplane, set the airplane mode to [ON] (page 27).<br />
• Use GPS in accordance with the regulations of the place or situation.<br />
• It may take from several tens of seconds to several minutes to acquire the location information when you<br />
use the GPS for the first time or use it again after long intervals. Triangulating time can be shortened by<br />
taking in GPS assist data (page 26).<br />
• Do not cover the GPS sensor with your finger when searching for GPS satellites or when triangulating.<br />
This decreases the sensitivity of the GPS sensor and triangulation may fail (page 13).<br />
• <strong>Sony</strong> does not collect location information and routing information.<br />
• To display location information and routing information as a map on a computer, <strong>Sony</strong> provides data of<br />
location information and routing information to Google Inc.<br />
• Although the camera does not have the function to delete log files, you can delete them by formatting the<br />
media.<br />
• When shooting still images while GPS log is set to [ON], only the location information will be recorded.<br />
• The maximum number of log files that can be recorded is 256/day. When the maximum number of<br />
recorded log files is reached, you can continue to shoot images, however log files will not be recorded.<br />
Continued r<br />
25 GB
Checking triangulating status<br />
The indicator changes according to the strength of GPS signal reception when GPS is activated.<br />
GPS<br />
Indicators<br />
Triangulating<br />
status<br />
GPS reception status<br />
Table of<br />
contents<br />
No<br />
indicator<br />
OFF<br />
The GPS log is set to [OFF] or an error occurred.<br />
Searching/Difficult<br />
Triangulating<br />
Searching for GPS satellites. It may take several minutes to start<br />
triangulating.<br />
Your camera is receiving a GPS signal, and can acquire location<br />
information.<br />
Operation<br />
Search<br />
zAbout GPS assist data<br />
The time for the GPS acquiring location information can be shortened by taking in GPS<br />
assist data. If connection via Internet is made using the software, “PlayMemories Home,”<br />
the GPS assist data can be updated automatically.<br />
• If the Date & Time Setting is not set, or set time is shifted greatly, the time for the GPS acquiring<br />
location information cannot be shortened.<br />
• If the term of validity of GPS assist data has run out, the time until you can record location<br />
information cannot be shortened.<br />
Using the GPS support tool<br />
You can also update the GPS assist data by inserting a memory card into the computer.<br />
Display the main screen of the “PlayMemories Home” and select the connected model<br />
name t [GPS Support Tool] t the desired memory card drive to be installed from your<br />
computer, and then update the GPS assist data. If you insert this memory card, the GPS<br />
assist data will be reflected on the camera.<br />
Settings<br />
Search<br />
Index<br />
26 GB
Airplane Mode<br />
Setting<br />
display<br />
When you are in an airplane or another restricted place, you can set the camera to disable all<br />
functions related to the wireless applications such as Wi-Fi, etc. If you set the airplane mode to<br />
[ON], an airplane mark will be displayed on the display panel.<br />
1 Press the NEXT button to display [SETUP], then press the ENTER button.<br />
2 Press the NEXT button to display [PLANE] (Airplane Mode), then press<br />
the ENTER button.<br />
3 Press the NEXT button to select the setting, then press the ENTER<br />
button.<br />
t<br />
Table of<br />
contents<br />
Operation<br />
Search<br />
Select this when you are on board an airplane.<br />
Select this for normal use.<br />
Settings<br />
Search<br />
Returns to the [PLANE] menu.<br />
Index<br />
27 GB
Auto Power Off<br />
You can change the setting of the Auto Power Off function.<br />
To make the setting, select [SETUP] first.<br />
Setting<br />
display<br />
t<br />
Table of<br />
contents<br />
1 Press the NEXT button to display [SETUP], then press the ENTER button.<br />
2 Press the NEXT button to display [A.OFF] (Auto Power Off), then press<br />
the ENTER button.<br />
3 Press the NEXT button to select the setting, then press the ENTER<br />
button.<br />
Operation<br />
Search<br />
Turns the power off after about 10 seconds.<br />
Turns the power off after about 60 seconds.<br />
Settings<br />
Search<br />
Does not turn off automatically.<br />
Returns to the [A.OFF] menu.<br />
Notes<br />
• This function is not available in the following situations.<br />
– Recording data to media<br />
– Shooting movies, or shooting in interval photo recording mode<br />
– During movie playback, or a slideshow<br />
– Wi-Fi connection is in process, smart remote control is being connected, or an image is being uploaded<br />
to a smartphone<br />
– HDMI connection is being made<br />
– Supplying power from a connected USB device<br />
– Connecting a mass storage device<br />
• In the following cases, even if you have selected [10sec] or [60sec] in the Auto Power Off function, the<br />
time that elapses before the power turns off will be extended.<br />
– while adjusting [SETUP] settings<br />
– while playing back photos<br />
– when [Wi-Fi] is set to [ON] and the Wi-Fi icon is displayed.<br />
Index<br />
28 GB
Beep<br />
You can set the audible notification of operations to ON/OFF.<br />
To make the setting, select [SETUP] first.<br />
Setting<br />
display<br />
t<br />
Table of<br />
contents<br />
1 Press the NEXT button to display [SETUP], then press the ENTER button.<br />
2 Press the NEXT button to display [BEEP] (Beep), then press the ENTER<br />
button.<br />
3 Press the NEXT button to select the setting, then press the ENTER<br />
button.<br />
Operation<br />
Search<br />
All operation sounds are enabled.<br />
Operation sounds are emitted for the following operations only.<br />
• Power turned on<br />
• Recording started<br />
• Recording stopped<br />
• Shutter pressed<br />
• A disabled operation was selected or an error occurred<br />
Settings<br />
Search<br />
All operation sounds are disabled.<br />
Returns to the [BEEP] menu.<br />
Index<br />
29 GB
Date & Time Setting<br />
You can set the year/month/day and region.<br />
To make the setting, select [SETUP] first.<br />
Setting<br />
display<br />
t<br />
Table of<br />
contents<br />
1 Press the NEXT button to display [SETUP], then press the ENTER button.<br />
2 Press the NEXT button to display [DATE] (Date Time), then press the<br />
ENTER button.<br />
3 Press the NEXT button to select the desired date, time and region, then<br />
press the ENTER button to confirm.<br />
Select 00:00 for midnight, 12:00 for noon.<br />
Display<br />
Default setting<br />
Operation<br />
Search<br />
2013 Sets the year.<br />
01 Sets the month.<br />
Settings<br />
Search<br />
01 Sets the day.<br />
00 Sets the hour.<br />
Index<br />
00 Sets the minutes.<br />
GMT+0<br />
Sets the region in which you use the camera. (Regions are defined<br />
by time difference from Greenwich Mean Time (GMT)).<br />
Notes<br />
• When you set the GPS log to [ON], the camera adjusts date, time and region automatically during<br />
shooting mode (<strong>HDR</strong>-<strong>AS30</strong>V only).<br />
zSetting the region<br />
You can set the clock to the local time of a country you visit by selecting the region.<br />
Regions are defined by time difference from Greenwich Mean Time (GMT). Refer also to<br />
“World time difference” (page 66).<br />
30 GB
USB Power Supply<br />
Setting<br />
display<br />
When connecting the camera to a computer or USB device with the micro USB cable (supplied),<br />
the camera can be set so the connected device supplies power to it.<br />
To make the setting, select [SETUP] first.<br />
1 Press the NEXT button to display [SETUP], then press the ENTER button.<br />
2 Press the NEXT button to display [USBPw] (USB Power), then press the<br />
ENTER button.<br />
3 Press the NEXT button to select the setting, then press the ENTER<br />
button.<br />
t<br />
Table of<br />
contents<br />
Operation<br />
Search<br />
Supplies power from a connected device, through the micro USB cable.<br />
Does not supply power from a connected device, through the micro USB cable.<br />
Settings<br />
Search<br />
Returns to the [USBPw] menu.<br />
Notes<br />
• If you change the setting while the micro USB cable is connected, disconnect the cable, then reconnect.<br />
• Power may not be supplied properly from a USB device with a power supply capacity of less than 1.5 A.<br />
Index<br />
zHow to supply power from a wall outlet (wall socket)<br />
Rapid charging is possible by using the USB charger AC-UD20 (sold separately). To<br />
connect to the charger, use the micro USB cable (supplied).<br />
31 GB
Switching NTSC/PAL<br />
You can select NTSC/PAL, depending on the TV system of the country or region where you use<br />
this camera.<br />
To make the setting, select [SETUP] first.<br />
1 Press the NEXT button to display [SETUP], then press the ENTER button.<br />
2 Press the NEXT button to display [V.SYS] (Video System), then press the<br />
ENTER button.<br />
3 Press the NEXT button to select the setting, then press the ENTER<br />
button.<br />
4 Press the NEXT button, then press the ENTER button while [OK] is<br />
displayed on the display panel.<br />
To cancel the NTSC/PAL setting, press the NEXT button while [OK] is displayed, select<br />
[CANCL], then press the ENTER button.<br />
When the TV system is NTSC.<br />
Setting<br />
display<br />
t<br />
Table of<br />
contents<br />
Operation<br />
Search<br />
Settings<br />
Search<br />
When the TV system is PAL.<br />
Returns to the [V.SYS] menu.<br />
Index<br />
Notes<br />
• When you select [PAL], the camera behaves as follows.<br />
– [SLOW] and [SSLOW] are not available.<br />
– When the camera is set to the movie mode, the frame rate is not displayed.<br />
– On the Recording Mode setting screen, the frame rate is not displayed.<br />
• When you change the NTSC/PAL setting, the camera will restart automatically.<br />
• Recording media formatted or recorded in NTSC cannot be recorded or played in PAL, and vice versa. If<br />
[FORMT] appears on the display panel after switching the NTSC/PAL setting, go to the confirmation<br />
screen and select [OK], then format the current recording media, or use another recording media<br />
(page 34).<br />
32 GB
Settings<br />
Search<br />
Resetting the Settings<br />
You can reset the settings to their defaults.<br />
If you activate [RESET], images are not deleted.<br />
Setting<br />
display<br />
t<br />
Table of<br />
contents<br />
1 Press the NEXT button to display [SETUP], then press the ENTER button.<br />
2 Press the NEXT button to display [RESET] (Reset), then press the<br />
ENTER button.<br />
3 Press the ENTER button to display [SURE?] while [OK] is displayed, then<br />
press the ENTER button again.<br />
The camera automatically restarts when resetting is complete.<br />
To cancel resetting, press the NEXT button to select [CANCL] while [SURE?] or [OK] is<br />
displayed, then press the ENTER button.<br />
Operation<br />
Search<br />
Index<br />
33 GB
Format<br />
Formatting is the process of deleting all images in the memory card, and restoring the memory<br />
card to its initial state.<br />
To make the setting, select [SETUP] first.<br />
1 Press the NEXT button to display [SETUP], then press the ENTER button.<br />
2 Press the NEXT button to display [FORMT] (Format), then press the<br />
ENTER button.<br />
3 Press the ENTER button to display [SURE?] while [OK] is displayed, then<br />
press the ENTER button again.<br />
Formatting starts and [DONE] appears when formatting finishes.<br />
To cancel formatting, press the NEXT button to select [CANCL] while [SURE?] or [OK] is<br />
displayed, then press the ENTER button.<br />
Notes<br />
• Save important images before formatting.<br />
• Do not perform any of the following operations while formatting.<br />
– Press a button.<br />
– Eject the memory card.<br />
– Connect/disconnect a cable.<br />
– Insert/remove the battery pack.<br />
Setting<br />
display<br />
t<br />
Table of<br />
contents<br />
Operation<br />
Search<br />
Settings<br />
Search<br />
Index<br />
34 GB
Using accessories<br />
Refer to the website of this camera for the latest information on accessories.<br />
Waterproof Case (SPK-AS2)<br />
By inserting the camera in the Waterproof Case, you can shoot movies in the rain or at a beach.<br />
HOLD lever<br />
Case body<br />
REC button<br />
NEXT button<br />
PREV button<br />
Table of<br />
contents<br />
Operation<br />
Search<br />
Cord<br />
attachment<br />
hole<br />
Attachment method<br />
Case cover<br />
Tripod screw<br />
hole<br />
Buckle lock<br />
Buckle<br />
Settings<br />
Search<br />
1 Slide the buckle lock in the direction of 1 and<br />
hold it, then hold the circled parts and swing out<br />
the buckle in the direction of 2.<br />
Index<br />
2 Open the case cover.<br />
Cord of the<br />
case cover<br />
3 Insert the camera in the case body.<br />
• Release the bREC HOLD switch on the camera.<br />
Continued r<br />
35 GB
4 Insert the tab of the case body into the slot of the<br />
case cover.<br />
Table of<br />
contents<br />
5 Hook the buckle over the tab on the lower part of<br />
the case cover 1, then close the buckle in the<br />
direction of 2, until it clicks into place.<br />
• Close the buckle until the buckle lock returns to the original<br />
position.<br />
On waterproof performance<br />
• The camera is operable up to a water depth of 5 m for 30 minutes. *<br />
*When the camera is inserted.<br />
• The waterproof performance is based on the testing standards of our company.<br />
• Do not subject the Waterproof Case to pressurized water, such as from a tap.<br />
• Do not use the Waterproof Case in hot springs.<br />
• Use the Waterproof Case in the recommended operating water temperature range of 0°C to +40°C (32°F<br />
to 104°F).<br />
• Sometimes waterproof performance is lost if the Waterproof Case is subject to a strong shock such as<br />
from being dropped. We recommend the Waterproof Case be inspected at an authorized repair shop<br />
(chargeable).<br />
• If you use the camera at a water depth of 5 m or more, or in marine sports, use the Waterproof Case<br />
(SPK-AS1) (sold separately).<br />
Notes<br />
• You cannot operate the REC button when the HOLD lever is set to the<br />
lock position. Release the lock before operation.<br />
• When recording images underwater with the camera in the Waterproof<br />
Case, recorded images appear less clear than those of normal<br />
recording. This is not a malfunction.<br />
• You can record audio while the camera is in the Waterproof Case, but<br />
the sound level is reduced.<br />
• Thread a suitable cord through the attachment hole of the Waterproof<br />
Case, then attach the cord to an item you intend to use with the camera.<br />
Operation<br />
Search<br />
Settings<br />
Search<br />
Index<br />
Continued r<br />
36 GB
Notes on use<br />
• Do not throw the Waterproof Case into the water.<br />
• Avoid using the Waterproof Case under the following situations:<br />
– in a very hot or humid place.<br />
– in water hotter than 40°C (104°F).<br />
– at temperatures lower than –10°C (14°F).<br />
In these situations moisture condensation or water leakage may occur and damage the camera.<br />
• Do not leave the Waterproof Case under direct sunlight or in a very hot and humid place for a long period<br />
of time. If you cannot avoid leaving the Waterproof Case under direct sunlight, be sure to cover the<br />
Waterproof Case with a towel or other protection.<br />
• When the camera overheats, it may automatically turn off or recording may malfunction. To use the<br />
camera again, leave it in the cool place for a while to cool down.<br />
• If sun oil is on the Waterproof Case, be sure to wash it off thoroughly using lukewarm water. If the<br />
Waterproof Case is left with sun oil on its body, the surface of the Waterproof Case may become<br />
discolored or damaged (such as cracks on the surface).<br />
Water leakage<br />
If water happens to leak in, stop exposing the Waterproof Case to water immediately.<br />
• If the camera gets wet, take it to the nearest <strong>Sony</strong> dealer immediately. Repair costs must be borne by the<br />
customer.<br />
• In the unlikely event that a malfunction of the Waterproof Case causes damage due to water leakage,<br />
<strong>Sony</strong> does not guarantee against damages to the equipment contained in it (camera, battery pack, etc.)<br />
and the recorded contents, nor expenses entailed in the photography.<br />
O-ring<br />
The Waterproof Case uses an O-ring to maintain its water resistance.<br />
O-ring maintenance is very important. Failure to do O-ring maintenance according to the instructions may<br />
lead to water leaks and cause the Waterproof Case to sink.<br />
Inspect the O-ring<br />
• Carefully check that there is any dirt, sand, hair, dust, salt, threads, etc. on the O-ring. If found, be sure to<br />
wipe off with a soft cloth.<br />
• Lightly run your fingertip around the O-ring to check for any invisible dirt.<br />
• Be careful not to leave any cloth fibers on the O-ring after wiping it.<br />
• Check the O-ring for cracks, skewing, distortion, fine splitting, scratches, embedded sand, etc. Replace<br />
the O-ring if you find any of these.<br />
• Inspect the O-ring contact surface on the case body in the same way.<br />
Table of<br />
contents<br />
Operation<br />
Search<br />
Settings<br />
Search<br />
Index<br />
How to check for water leaks<br />
Before installing the camera, always close the Waterproof Case and immerse it in water to make<br />
sure no water leaks in.<br />
O-ring serviceable life<br />
The serviceable life of the O-ring varies with frequency of use of the Waterproof Case and conditions.<br />
Generally, it is about one year.<br />
Continued r<br />
37 GB
Maintenance<br />
• After recording in a location with a sea breeze, wash this unit thoroughly in fresh water with the buckle<br />
fastened to remove salt and sand, then wipe with a soft dry cloth. It is recommended that you submerge<br />
the Waterproof Case in fresh water for about 30 minutes. If it is left with salt on it, metal portions may be<br />
damaged or rust may form and cause water leakage.<br />
• If sun oil is on the Waterproof Case, be sure to wash it off thoroughly using lukewarm water.<br />
• Wipe the inside of the Waterproof Case with a soft dry cloth. Do not wash it with water.<br />
Be sure to perform the above maintenance each time you use the Waterproof Case.<br />
Do not use any type of solvent such as alcohol, benzine or thinner for cleaning, as this might damage the<br />
surface finish of the Waterproof Case.<br />
When storing the Waterproof Case<br />
• To prevent deterioration of the O-ring, store the Waterproof Case in a cool, well-ventilated location. Do<br />
not fasten the buckle.<br />
• Prevent dust from collecting on the O-ring.<br />
• Avoid storing the Waterproof Case in a cold, very hot or humid place, or together with naphthalene or<br />
camphor, as these conditions might damage the Waterproof Case.<br />
Table of<br />
contents<br />
Operation<br />
Search<br />
Settings<br />
Search<br />
Index<br />
Continued r<br />
38 GB
Adhesive Mount (VCT-AM1)<br />
The Adhesive Mount is used for fixing the Waterproof Case to an item you intend to use. The<br />
Adhesive Mount is a general term for the Attachment Buckle, Flat Adhesive Mount, and Curved<br />
Adhesive Mount. Insert the camera in the Waterproof Case before attaching.<br />
Attachment Buckle Flat Adhesive Mount Curved Adhesive Mount<br />
Tripod<br />
screw Positioning pin<br />
Table of<br />
contents<br />
Operation<br />
Search<br />
Attachment method<br />
1 Align the tripod screw hole in the bottom of<br />
the Waterproof Case with the tripod screw<br />
hole of the Attachment Buckle, and fix firmly<br />
with the tripod screw.<br />
• Confirm that the assembly is fixed securely.<br />
2 Attach the Attachment Buckle (with the<br />
Waterproof Case set in step 1) to the Flat<br />
Adhesive Mount or Curved Adhesive Mount by<br />
sliding it until it clicks into place.<br />
3 Remove dust, moisture and oily substances<br />
completely from the surface where the Adhesive<br />
Mount is to be attached.<br />
4 Peel off the release paper on the back, and fix the Adhesive Mount in the<br />
desired location.<br />
• Adhesive power reaches its maximum strength 24 hours after the Adhesive Mount is attached to the<br />
desired location.<br />
Settings<br />
Search<br />
Index<br />
zTo attach to or detach from the Attachment Buckle<br />
Press and hold the circled part to unlock, then slide it<br />
in the opposite direction of step 2.<br />
Continued r<br />
39 GB
Settings<br />
Search<br />
Notes<br />
• The Flat Adhesive Mount and Curved Adhesive Mount cannot be used again once they are detached from<br />
the location surface.<br />
• When detaching, peel off slowly. If peeled off forcibly, the surface on which the mount is fixed might be<br />
damaged.<br />
• Before attaching, check the surface of the item to be used. If it is dirty, or dust, moisture or oily<br />
substances are attached, adhesive strength may be impaired and the item could detach with slight impact.<br />
• Use the appropriate Adhesive Mount (flat or curved) for the surface where the camera will be located. If<br />
the mount is not suitable for the surface, it may detach by slight impact.<br />
• Thread a suitable cord through the attachment hole of the Waterproof Case, then attach the cord to an<br />
item you intend to use with the camera.<br />
• Before use, confirm that the screw hole on the Attachment Buckle is not loose, and the flat or curved<br />
Adhesive Mount is securely attached to the surface.<br />
Table of<br />
contents<br />
Operation<br />
Search<br />
Index<br />
40 GB
Shooting<br />
About the b REC HOLD switch<br />
The b REC HOLD switch can prevent accidental operation. Slide the b REC HOLD switch in<br />
the direction of b to lock. To release the lock, slide it in the opposite direction of b.<br />
• Before recording, release the lock.<br />
• If you lock the camera while recording, the recording state will be kept*.<br />
• If you lock the camera after you stop recording, the stopped state will be kept*.<br />
* Release the lock to change the setting.<br />
REC button<br />
REC/access lamp<br />
Display<br />
Table of<br />
contents<br />
Operation<br />
Search<br />
b REC HOLD switch<br />
Settings<br />
Search<br />
Movie mode<br />
1 Turn on the power, then press NEXT button to display [MOVIE].<br />
2 Press the REC button to start shooting.<br />
3 Press the REC button again to stop shooting.<br />
Photo mode<br />
Index<br />
1 Turn on the power, then press NEXT button to display [PHOTO].<br />
2 Press the REC button to start shooting.<br />
Interval photo recording mode<br />
After you start shooting, the camera records still images at regular intervals until you stop<br />
shooting.<br />
1 Turn on the power, then press NEXT button to display [INTVL].<br />
2 Press the REC button to start shooting.<br />
3 Press the REC button again to stop shooting.<br />
Notes<br />
• If the shooting mode is changed, the mode set when the camera is turned off will be resumed when the<br />
camera is turned on the next time.<br />
Continued r<br />
41 GB
Settings<br />
Search<br />
zNotes on long-time recording<br />
• When you continue to shoot for a long time, the temperature of the camera rises. If the temperature<br />
reaches above a certain level, shooting stops automatically.<br />
Leave the camera for 10 minutes or longer to allow the temperature inside the camera to decrease to<br />
a safe level.<br />
• Under high ambient temperatures, the temperature of the camera rises quickly.<br />
• When the temperature of the camera rises, the image quality may deteriorate. It is recommended<br />
that you wait until the temperature of the camera drops before continuing to shoot.<br />
• The surface of the camera may get hot. This is not a malfunction.<br />
Table of<br />
contents<br />
Operation<br />
Search<br />
Index<br />
42 GB
Viewing images on a TV<br />
Display<br />
Connect the camera to a TV which has an HDMI terminal using a micro HDMI cable (sold<br />
separately).<br />
Refer also to the instruction manuals of the TV.<br />
1 Turn off both the camera and the TV.<br />
2 Open the connector cover and connect the camera to the TV with the<br />
micro HDMI cable (sold separately).<br />
Table of<br />
contents<br />
Operation<br />
Search<br />
HDMI jack<br />
1 To HDMI jack<br />
Micro HDMI cable (sold separately)<br />
2 To HDMI OUT jack<br />
3 Set the input of the TV to [HDMI input].<br />
4 Press the NEXT button on the camera to turn on.<br />
5 Press the NEXT button to display [PLAY], then press the ENTER button.<br />
6 Press the NEXT button to display [MP4] or [PHOTO], then press the<br />
ENTER button.<br />
Select [MP4] to play back movies, or [PHOTO] to view photos.<br />
Press the ENTER button again to stop playback.<br />
Settings<br />
Search<br />
Index<br />
Notes<br />
• Connect the micro HDMI jack of the micro HDMI cable (sold separately) to the HDMI OUT jack of the<br />
camera.<br />
• Do not connect the output terminal of the camera to that of other devices. This may result in malfunction.<br />
• Some devices may not work properly. Image and sound may not be output.<br />
• Use a micro HDMI cable (sold separately) with the HDMI logo.<br />
• It is recommended that you use an authorized cable with HDMI logo or a <strong>Sony</strong> HDMI cable.<br />
Continued r<br />
43 GB
Settings<br />
Search<br />
zTo control a content being played back<br />
• Viewing the previous/next image: Press the PREV/NEXT button.<br />
• Fast-rewind/fast-forward (movies only): Press and hold the PREV/NEXT<br />
button.<br />
• Pause (movies only): Press the PREV and NEXT buttons simultaneously.<br />
If you press and hold the PREV or NEXT button during pause, slow<br />
rewind or slow forward can be performed.<br />
• Adjusting the volume (movies only): Press and hold the PREV and NEXT<br />
buttons simultaneously.<br />
• Starting a slideshow (photos only): Press the PREV and NEXT buttons<br />
simultaneously.<br />
• Ending playback: Press the ENTER button.<br />
PREV button<br />
NEXT button<br />
Table of<br />
contents<br />
Operation<br />
Search<br />
Index<br />
44 GB
Preparation for setting Wi-Fi<br />
Installing the “PlayMemories Mobile” software on<br />
your smartphone<br />
Install the “PlayMemories Mobile” on your smartphone. Update “PlayMemories Mobile” to the<br />
latest version if you have already installed it on your smartphone.<br />
For more information, refer to the following website.<br />
http://www.sony.net/pmm/<br />
Android 2.3 or later (Android 4.0 or later is required to use<br />
One-touch functions (NFC))<br />
Search for “PlayMemories Mobile” on Google Play, then install it.<br />
Table of<br />
contents<br />
Operation<br />
Search<br />
Settings<br />
Search<br />
iOS 4.3 or later (One-touch functions (NFC) are not available)<br />
Search for “PlayMemories Mobile” on App Store, then install it.<br />
Index<br />
Notes<br />
• An NFC-enabled smartphone or tablet is required for using One-touch functions (NFC).<br />
Preparing the ID/password<br />
• Have ready the sticker attached to the Operating <strong>Guide</strong>, on which the ID/password is printed.<br />
• It is not necessary when using one-touch connect by a smartphone.<br />
zIf the password is lost<br />
1 Connect the camera to a computer with the micro USB cable (supplied).<br />
2 Turn on the power.<br />
3 Display [Computer] t [PMHOME] t [INFO] t [WIFI_INF.TXT] on your computer, then<br />
check the user ID and password.<br />
45 GB
Settings<br />
Search<br />
Setting Wi-Fi<br />
Android supporting NFC<br />
Setting<br />
display<br />
1 Turn on the power of the camera, then press the NEXT button and select<br />
a shooting mode.<br />
MOVIE: Movie mode<br />
PHOTO: Photo mode<br />
INTVL: Interval photo recording mode<br />
2 Select [Settings] on the<br />
smartphone, then select [More...]<br />
and check that [NFC] is enabled<br />
(First time only).<br />
Table of<br />
contents<br />
Operation<br />
Search<br />
3 Touch the smartphone to the<br />
camera.<br />
• Cancel sleep and the screen lock of the<br />
smartphone beforehand.<br />
• Continue touching without moving until<br />
“PlayMemories Mobile” starts (1-2 seconds).<br />
• Touch the (N Mark) of the smartphone to<br />
the (N Mark) of the camera. If there is no<br />
(N Mark) on the smartphone, refer to the<br />
instruction manual of the smartphone for the<br />
touch area.<br />
• If the camera and the smartphone cannot be<br />
connected by NFC, see “Android/iPhone not<br />
supporting NFC” and connect them.<br />
Index<br />
Notes<br />
• When the airplane mode is set to [ON], the Wi-Fi function is not available.<br />
zAbout NFC<br />
NFC is a technology for short-range wireless communication between various devices, such<br />
as a mobile phone and IC tag etc. Data communication is achieved simply by touching<br />
devices together at a specific point.<br />
NFC (Near Field Communication) is an international standard of the short-range wireless<br />
communication technology.<br />
Continued r<br />
46 GB
Settings<br />
Search<br />
Android/iPhone not supporting NFC<br />
Turn on the power of the camera, then press the NEXT button and select a<br />
shooting mode.<br />
MOVIE: Movie mode<br />
PHOTO: Photo mode<br />
INTVL: Interval photo recording mode<br />
Android<br />
1 Start “PlayMemories Mobile.”<br />
Table of<br />
contents<br />
Operation<br />
Search<br />
2 Select the SSID, as printed on the sticker<br />
attached to the Operating <strong>Guide</strong>.<br />
Index<br />
3 Input the password, as printed on the sticker<br />
attached to the Operating <strong>Guide</strong> (First time<br />
only).<br />
Continued r<br />
47 GB
iPhone<br />
1 Select [Settings] on the smartphone, then<br />
select [Wi-Fi] and the SSID of the camera.<br />
Table of<br />
contents<br />
2 Input the password, as printed on the sticker<br />
attached to the Operating <strong>Guide</strong> (First time<br />
only).<br />
Operation<br />
Search<br />
3 Confirm the connection to the SSID, as printed<br />
on the sticker attached to the Operating<br />
<strong>Guide</strong>.<br />
Settings<br />
Search<br />
4 Return to the home screen and start<br />
“PlayMemories Mobile.”<br />
Index<br />
48 GB
Smart Remote<br />
Control<br />
Setting<br />
display<br />
By connecting the camera and a smartphone through Wi-Fi, you can operate the camera by the<br />
smartphone.<br />
To make the setting, select [SETUP] first.<br />
1 Press the NEXT button to display [SETUP], then press the ENTER button.<br />
2 Press the NEXT button to display [Wi-Fi] (Wi-Fi), then press the ENTER<br />
button.<br />
3 Press the NEXT button to select the setting, then press the ENTER<br />
button.<br />
t<br />
Table of<br />
contents<br />
Operation<br />
Search<br />
Operates by the smartphone.<br />
Settings<br />
Search<br />
Does not operate by the smartphone.<br />
Returns to the [Wi-Fi] menu.<br />
4 Select [MOVIE], [PHOTO] or [INTVL].<br />
5 Activate a suitable application on the smartphone, and connect to the<br />
camera through Wi-Fi.<br />
For details on the smartphone setting, see “Setting Wi-Fi” on page 46.<br />
6 Operate the camera by the smartphone.<br />
Index<br />
Sample smartphone screen display<br />
Features of the smart remote<br />
control function<br />
• To check the field of view<br />
before and while recording<br />
• To monitor images while<br />
recording<br />
Various settings<br />
• [VIDEO]<br />
• [STEDY]<br />
• [ANGLE]<br />
• [SHARE]<br />
Start/stop recording<br />
Shooting mode settings<br />
• [MOVIE]<br />
• [PHOTO]/[INTVL]<br />
Continued r<br />
49 GB
Settings<br />
Search<br />
Notes<br />
• The smart remote control function allows you to perform the following using a smartphone:<br />
– Checking the field angle<br />
– Recording start/stop<br />
– Changing the shooting mode (movie mode/photo mode/interval photo recording mode)<br />
– Copy mode (copy movies and photos shot by the camera)<br />
– Changing the Recording Mode setting (in movie mode only)<br />
– Changing the SteadyShot setting<br />
– Changing the field angle setting<br />
• To use the smart remote control function, a compatible application is necessary on your smartphone.<br />
See page 45 for details on downloading applications.<br />
• The camera battery charge may be consumed quickly if the camera is operated by a smartphone.<br />
• If a Wi-Fi Direct connection request from a Wi-Fi Direct device appears on the shooting screen, press the<br />
ENTER button on the [ACPT?] screen. You can then operate the camera using the smart remote control<br />
function via the Wi-Fi Direct connection.<br />
Table of<br />
contents<br />
Operation<br />
Search<br />
Index<br />
50 GB
Copy<br />
Setting<br />
display<br />
g / g / g<br />
You can copy movies and photos shot by the camera by operating a smartphone.<br />
1 Turn on the power of the camera, then press the NEXT button and select<br />
a shooting mode.<br />
MOVIE: Movie mode<br />
PHOTO: Photo mode<br />
INTVL: Interval photo recording mode<br />
2 Start “PlayMemories Mobile” on the smartphone and establish the Wi-Fi<br />
connection.<br />
For details on the smartphone setting, see “Setting Wi-Fi” on page 46.<br />
3 Change the mode of the camera to the copy mode on the “PlayMemories<br />
Mobile” screen of the smartphone.<br />
4 Select the image(s) to be copied.<br />
Notes<br />
• Before activating the smart remote control function, update the “PlayMemories Mobile” software to the<br />
latest (ver.3.1 or later).<br />
• You can copy images to your smartphone when the camera is set to a shooting mode (movie mode/photo<br />
mode/interval photo recording mode).<br />
• You can change the mode only when shooting is in standby.<br />
Table of<br />
contents<br />
Operation<br />
Search<br />
Settings<br />
Search<br />
Index<br />
51 GB
Useful functions when<br />
connecting the camera to your<br />
computer<br />
The “PlayMemories Home” software allows you to import movies and still images to your<br />
computer to use them in a variety of ways.<br />
Visit the following URL to install the software.<br />
www.sony.net/pm/<br />
Playback<br />
Table of<br />
contents<br />
Operation<br />
Search<br />
Importing images<br />
Edit<br />
Display movies with<br />
tracking information<br />
and movement speed.<br />
Settings<br />
Search<br />
• Use the micro USB cable (supplied) when connecting the camera to your computer.<br />
• Functions of “PlayMemories Home” that can be used differ for Windows and for Mac.<br />
• For details on other applications, visit the following URL.<br />
Windows: http://www.sony.co.jp/imsoft/Win/<br />
Mac: http://www.sony.co.jp/imsoft/Mac/<br />
Index<br />
52 GB
Preparing a computer<br />
Step 1 Checking the computer system<br />
Windows:<br />
OS* 1 Windows Vista SP2/Windows 7 SP1/Windows 8<br />
CPU* 2<br />
Memory<br />
Hard disk<br />
Display<br />
Others<br />
Mac:<br />
OS* 1<br />
Hard disk<br />
Display<br />
Intel Core Duo 1.66 GHz or faster, or Intel Core 2 Duo 1.66 GHz or faster<br />
1 GB or more<br />
Disk space required for installation: Approximately 600 MB<br />
Minimum 1,024×768 dots<br />
USB port (this must be provided as standard, Hi-Speed USB (USB 2.0 compatible))<br />
Either NTFS or exFAT file system is recommended as the hard disk file system.<br />
* 1 Standard installation is required. Operation is not assured if the OS has been upgraded or in a multi-boot<br />
environment.<br />
* 2 Faster processor is recommended.<br />
Notes<br />
Mac OS X (v10.6- v10.8), Equipped with Intel processor<br />
Disk space required for installation: Approximately 100 MB<br />
Minimum 1,024×768 dots<br />
• Operation with all computer environments is not assured.<br />
Table of<br />
contents<br />
Operation<br />
Search<br />
Settings<br />
Search<br />
Index<br />
Continued r<br />
53 GB
Step 2 Installing the “PlayMemories Home”<br />
software<br />
1 Turn on the computer.<br />
• Log on as an Administrator.<br />
• Close all applications running on the computer before installing the software.<br />
2 Visit the following URL and download the software.<br />
www.sony.net/pm/<br />
The AutoPlay wizard is displayed.<br />
3 Follow the instructions that appear on the<br />
computer screen to continue the<br />
installation.<br />
When the installation completes, “PlayMemories<br />
Home” starts up.<br />
• If the “PlayMemories Home” software is already 2 To Multi/Micro USB 1 To USB jack<br />
installed on your computer, connect the camera to the Terminal<br />
computer, and register the camera with the<br />
“PlayMemories Home” software. Functions that can be<br />
used with this camera will then be available.<br />
• If the “PMB (Picture Motion Browser)” software is installed on your computer, it will be overwritten<br />
by the “PlayMemories Home” software.<br />
• For details on “PlayMemories Home” select (“PlayMemories Home” Help <strong>Guide</strong>) on the software<br />
or visit the PlayMemories Home support page (http://www.sony.co.jp/pmh-se/).<br />
• You can play movies recorded with the camera on the screen of the computer, when the camera is<br />
connected to a computer which has “PlayMemories Home” installed.<br />
Table of<br />
contents<br />
Operation<br />
Search<br />
Settings<br />
Search<br />
Index<br />
Continued r<br />
54 GB
To delete the USB connection<br />
Windows7/Windows8<br />
1 Click on the task tray.<br />
2 Click the disconnect icon in Customize.<br />
3 Click the device to remove.<br />
Windows Vista<br />
Perform the procedure from step 1 to 3 below before:<br />
• Disconnecting the micro USB cable (supplied).<br />
• Turning off the camera.<br />
Disconnect icon<br />
Table of<br />
contents<br />
Operation<br />
Search<br />
1 Double-click the disconnect icon on the task tray.<br />
2 Click (USB Mass Storage Device) t [Stop].<br />
3 Confirm the device on the confirmation window, then click [OK].<br />
Notes<br />
• Do not format the memory card of the camera using a computer. If you do this, the camera will not<br />
operate correctly.<br />
• When you access the camera from the computer, use the “PlayMemories Home” software. Do not<br />
directly modify the files or folders on the camera from the computer. The image files may be damaged or<br />
may not be played back.<br />
• Operation is not guaranteed, if you operate the data on the memory card of the camera from the<br />
computer.<br />
• Use the “PlayMemories Home” software when you import long movies or edited images from the camera<br />
to a computer. If you use other software, the images may not be imported correctly.<br />
• Drag and drop the drive icon to the “Trash” icon when you use a Mac computer, and the camera is<br />
disconnected from the computer.<br />
Settings<br />
Search<br />
Index<br />
55 GB
Starting the “PlayMemories<br />
Home” software<br />
1 Double-click the “PlayMemories Home” icon on the<br />
computer screen.<br />
The “PlayMemories Home” software starts up.<br />
2 For how to use “PlayMemories Home,” refer to the<br />
help of the “PlayMemories Home.”<br />
Table of<br />
contents<br />
Operation<br />
Search<br />
zPlease register your product<br />
• <strong>Sony</strong> asks you to register your product for enhanced support.<br />
• For Mac users, use the Mac application “Product registration software.”<br />
Settings<br />
Search<br />
Index<br />
56 GB
Settings<br />
Search<br />
Troubleshooting<br />
If you experience trouble with the camera, try the following solutions.<br />
1 Check the items on pages 58 to 62.<br />
Table of<br />
contents<br />
2 Turn the power off and then on again.<br />
3 Consult your <strong>Sony</strong> dealer or local authorized <strong>Sony</strong> service<br />
facility.<br />
Operation<br />
Search<br />
Index<br />
Continued r<br />
57 GB
Battery pack and power<br />
Cannot turn on the camera.<br />
• Attach a charged battery pack.<br />
• Make sure that the battery pack is inserted correctly (page 15).<br />
The power turns off suddenly.<br />
• Depending on the camera and battery temperature, the power may turn off automatically to protect<br />
the camera. In this case, a message is displayed on the display panel before the power turns off.<br />
• If you do not operate the camera for a certain period of time while the power is on, the camera turns<br />
off automatically to prevent wearing down the battery pack. Turn the camera on again.<br />
• If you have selected [OFF] in the Auto Power Off function, the power does not turn off automatically.<br />
Battery life is short.<br />
• You are using the camera in an extremely hot or cold location, or the charging is insufficient. This is<br />
not a malfunction.<br />
• If you have not used the camera for a prolonged period, the efficiency of the battery will be improved<br />
by repeatedly charging and discharging it.<br />
• When usable battery life becomes half the usual time, even after charging the battery pack fully, the<br />
battery pack may need to be replaced. Consult your nearest <strong>Sony</strong> dealer.<br />
Cannot charge the camera.<br />
• Turn off the camera and make the USB connection.<br />
• Disconnect the micro USB cable (supplied), and then reconnect it.<br />
• Use the micro USB cable (supplied).<br />
• Charge the battery pack in an ambient temperature of 10°C to 30°C (50°F to 86°F).<br />
• Turn on the computer and connect the camera.<br />
• Release the computer from sleep or hibernation status.<br />
• Connect the camera directly to a computer using the micro USB cable (supplied).<br />
• Connect the camera to a computer with the operating system that is supported by the camera.<br />
Table of<br />
contents<br />
Operation<br />
Search<br />
Settings<br />
Search<br />
Index<br />
The remaining charge indicator is incorrect.<br />
• This phenomenon occurs when you use the camera in an extremely hot or cold location.<br />
• A discrepancy arose between the remaining charge indicator and the actual remaining battery charge.<br />
Fully discharge the battery pack once, then charge it to correct the indication.<br />
• Fully charge the battery pack again. If the problem persists, the battery pack is worn out. Replace the<br />
battery pack with a new one.<br />
Memory card<br />
Operations using the memory card cannot be performed.<br />
• If you use a memory card formatted on a computer, format it again on the camera (page 34).<br />
Shooting images<br />
Cannot record images.<br />
• Check the free capacity of the memory card.<br />
Continued r<br />
58 GB
Cannot insert dates on images.<br />
• The camera does not have a feature for superimposing dates on images.<br />
Viewing images<br />
Cannot play back images.<br />
• The folder/file name has been changed on your computer.<br />
• Connect a micro HDMI cable (sold separately).<br />
The image does not appear on the TV.<br />
• Check whether the connection is correct (page 43).<br />
Table of<br />
contents<br />
Operation<br />
Search<br />
GPS (<strong>HDR</strong>-<strong>AS30</strong>V only)<br />
The camera is not receiving a GPS signal.<br />
• Set the GPS log to [ON].<br />
• Your camera may not be able to receive radio signals from GPS satellites because of obstructions.<br />
• To triangulate the location information correctly, bring your camera to an open area, and turn on the<br />
camera again.<br />
Excessive error in location information.<br />
• The margin of error can be up to several-hundred meters depending on surrounding buildings, weak<br />
GPS signals, etc.<br />
It takes time to triangulate although the GPS assist data is taken in.<br />
• Date & Time Setting is not set, or set time is shifted greatly. Set the date and time correctly.<br />
• The term of validity of GPS assist data has expired. Update GPS assist data.<br />
• As the positions of GPS satellites vary constantly, it may take longer to determine the location or the<br />
receiver may not be able to determine the location at all, depending on the location and time you use<br />
the camera.<br />
• “GPS” is a system for determining geographic location by triangulating radio signals from GPS<br />
satellites. Avoid using the camera in places where radio signals are blocked or reflected, such as a<br />
shadowy place surrounded by buildings or trees, etc. Use the camera in open sky environments.<br />
Settings<br />
Search<br />
Index<br />
The location information has not been recorded.<br />
• Use “PlayMemories Home” to import the movies with GPS location information to your computer.<br />
Computers<br />
Your computer does not recognize the camera.<br />
• When the battery level is low, charge the camera.<br />
• Turn on the camera and connect to a computer.<br />
• Use the micro USB cable (supplied).<br />
• Disconnect the micro USB cable (supplied) from both the computer and the camera, and connect it<br />
again firmly.<br />
• Disconnect all equipment other than the camera, the keyboard and the mouse from the USB<br />
connectors of your computer.<br />
• Connect the camera directly to your computer without passing through a USB hub or other device.<br />
Continued r<br />
59 GB
Cannot import images.<br />
• Connect the camera and your computer correctly making a USB connection (page 53).<br />
“PlayMemories Home” cannot be installed.<br />
• Check the computer environment or installation procedure required to install “PlayMemories Home.”<br />
“PlayMemories Home” does not work correctly.<br />
• Quit “PlayMemories Home” and restart your computer.<br />
Cannot play back images on your computer.<br />
• Consult the computer or software manufacturer.<br />
Table of<br />
contents<br />
Operation<br />
Search<br />
Wi-Fi<br />
It takes too much time to transfer an image.<br />
• Microwave ovens or Bluetooth-enabled devices use the 2.4 GHz wavelength and could hinder the<br />
communication. If such devices are in the vicinity, move the camera away from those devices or shut<br />
those devices down.<br />
Settings<br />
Search<br />
Others<br />
The lens gets fogged.<br />
• Moisture condensation has occurred. Turn off the camera and wait about an hour for the moisture to<br />
evaporate.<br />
Index<br />
The camera becomes warm when you use it for a long time.<br />
• This is not a malfunction.<br />
The date or time is incorrect.<br />
• Set the date and time again (page 30).<br />
60 GB
Warning indicators and<br />
messages<br />
If the following messages appear, follow the instructions.<br />
Table of<br />
contents<br />
• The battery level is low. Charge the battery pack immediately.<br />
ERROR<br />
• Turn the power off and then on again.<br />
HEAT<br />
• The camera temperature has risen. The power may turn off automatically, or you may be unable to<br />
record images. Leave the camera in a cool location until the temperature goes down.<br />
• If you record images for an extended period, the camera temperature rises. In this case, stop recording<br />
images.<br />
NoIMG<br />
• The memory card does not contain playable images.<br />
LowPw<br />
• There is no remaining battery charge.<br />
BATT<br />
• Battery charge is insufficient for operation.<br />
• The battery pack is delivering current exceeding the maximum discharge current (beyond which<br />
proper operation of the camera cannot be assured when an external microphone, etc., is connected).<br />
• A different battery pack is detected when the camera is powered on.<br />
• Battery pack deterioration is detected.<br />
Operation<br />
Search<br />
Settings<br />
Search<br />
Index<br />
FULL<br />
• Remaining capacity of the memory card is insufficient for recording.<br />
MAX<br />
• The maximum number of files that can be recorded has been reached.<br />
MEDIA<br />
• The memory card is not inserted properly.<br />
• The memory card is damaged.<br />
• The memory card format is incompatible with this camera.<br />
NoCRD<br />
• There is no memory card inserted.<br />
NoDSP<br />
• The camera is not connected to a TV when playback is started.<br />
Continued r<br />
61 GB
PLANE<br />
• When the airplane mode is set to [ON], GPS and Wi-Fi cannot be used (page 27).<br />
Table of<br />
contents<br />
Operation<br />
Search<br />
Settings<br />
Search<br />
Index<br />
62 GB
Recordable time<br />
Estimated duration of recording and playback for<br />
each battery pack<br />
Recording time<br />
Approximate time available when you use a fully charged battery pack.<br />
(Units: minutes)<br />
Battery pack Continuous recording time Typical recording time<br />
Image quality HQ VGA HQ VGA<br />
NP-BX1 (supplied) 120 (140) 140 (175) 60 (80) 85 (110)<br />
• Times measured when using the camera at 25°C (77°F). It is recommended that you use the camera from<br />
10°C to 30°C (50°F to 86°F).<br />
• The recording and playback time will be shorter when you use the camera in low temperatures.<br />
• The recording and playback time may be shorter, depending on the recording conditions.<br />
• () indicates the recording time when the smart remote control function is set to [OFF].<br />
Playing time<br />
Approximate time available when you use a fully charged battery pack.<br />
Approximate time when images are played back on a TV connected with a micro HDMI cable<br />
(sold separately).<br />
(Units: minutes)<br />
Battery pack<br />
Playing time<br />
Image quality HQ VGA<br />
NP-BX1 (supplied) 205 210<br />
Table of<br />
contents<br />
Operation<br />
Search<br />
Settings<br />
Search<br />
Index<br />
Estimated recording time of movies<br />
MP4AVC 2ch Average<br />
Recording<br />
Mode<br />
(Units: minutes)<br />
8GB 16GB 32GB<br />
PS 35 80 160<br />
HQ 60 125 250<br />
SSLOW 40 80 165<br />
SLOW 80 165 330<br />
STD 160 325 650<br />
VGA 295 600 1205<br />
• In the SLOW/SSLOW setting, the above figure indicates the recordable time when shooting and differs<br />
from actual playback time.<br />
• When using a <strong>Sony</strong> memory card.<br />
Continued r<br />
63 GB
Notes<br />
• The recordable time may vary depending on the recording conditions, subjects, and the Recording Mode<br />
(page 20).<br />
• Continuous movie shooting time is approximately 13 hours.<br />
In [SLOW] mode, it is approximately 6.5 hours.<br />
In [SSLOW] mode, it is approximately 3 hours.<br />
Estimated number of recordable photos<br />
2M (Interval photo<br />
recording) (16:9)<br />
(unit: image)<br />
8GB 16GB 32GB<br />
10500 21000 40000<br />
12M (Still images) 1300 2650 5300<br />
• When using a <strong>Sony</strong> memory card.<br />
• The number of recordable photos for the memory card shown is for the maximum image size for your<br />
camera. The actual number of recordable photos is displayed on the LCD screen during shooting.<br />
• The number of recordable photos for a memory card may vary depending on the shooting conditions.<br />
Table of<br />
contents<br />
Operation<br />
Search<br />
Settings<br />
Search<br />
Index<br />
64 GB
Battery pack<br />
On charging the battery pack<br />
• Charge the battery pack before using the camera for the first time.<br />
• We recommend charging the battery pack in an ambient temperature of between 10°C to 30°C (50°F to<br />
86°F) until the CHG (Charge) lamp turns off. The battery pack may not be effectively charged in<br />
temperatures outside this range.<br />
• The CHG (Charge) lamp may blink in the following situation:<br />
– Battery pack is not attached correctly.<br />
– Battery pack is damaged.<br />
• When the battery pack temperature is low, detach the battery pack and place it in warm surroundings.<br />
• When the battery pack temperature is high, detach the battery pack and place it in cool surroundings.<br />
Effective use of the battery pack<br />
• Battery pack performance decreases in low temperature surroundings (less than 10°C (50°F)). So in cold<br />
places, the operational time of the battery pack is shorter. We recommend the following to ensure longer<br />
battery pack use: Put the battery pack in a pocket close to your body to warm it up, and insert it in the<br />
camera immediately before you start shooting.<br />
• The battery pack will run out quickly if you use the playback, fast-forward, and fast-rewind frequently.<br />
• Turn off the camera every time you do not shoot or playback on the camera. Battery pack is wearing out<br />
when the shooting is in standby.<br />
• We recommend having spare battery packs handy for two times or three times the expected shooting<br />
time, and making trial shots before taking the actual shots.<br />
• You may not be able to turn on the camera or the battery pack may not be effectively charged if the<br />
terminal section of the battery pack is dirty. In this case, wipe any dust with a soft cloth lightly to clean<br />
the battery pack.<br />
• Do not expose the battery pack to water. The battery pack is not water-resistant.<br />
About the remaining battery charge<br />
• If the battery pack runs out so fast although the remaining charge indicator is high, fully charge the<br />
battery pack again. Remaining charge indicator will be displayed correctly. Note that it may not be<br />
displayed correctly in the following situations:<br />
– Using the camera for a long time in high temperature<br />
– Leaving the camera with fully charged battery pack<br />
– Using a heavily used battery pack<br />
Table of<br />
contents<br />
Operation<br />
Search<br />
Settings<br />
Search<br />
Index<br />
How to store the battery pack<br />
• Fully discharge the battery pack before storing and store it in a cool, dry place. To maintain the battery<br />
pack’s function, fully charge the battery pack and then fully discharge it on the camera at least once a<br />
year while storing.<br />
• To prevent staining the terminal, short-circuiting, etc., be sure to use a plastic bag to keep away from<br />
metal materials when carrying or storing.<br />
On battery pack life<br />
• The battery pack life is limited. Battery capacity decreases over time and through repeated use. If<br />
decreased usage time between charges becomes significant, it is probably time to replace it with a new<br />
one.<br />
• The battery pack life varies according to how a battery pack is used.<br />
65 GB
Using the camera abroad<br />
On TV color systems<br />
To view images shot by the camera on a TV, you need a TV (or monitor) with an HDMI jack and<br />
a micro HDMI cable (sold separately).<br />
Before shooting, be sure to set [V.SYS] to the TV system of the country and region where you<br />
will view recordings. The following shows which countries and regions you can view [NTSC] or<br />
[PAL] images.<br />
Countries and regions where you can view images when<br />
[V.SYS] is set to [NTSC]<br />
Barbados, Bermuda, Bolivia, Canada, Chile, Columbia, Costa Rica, Cuba, Dominica, Ecuador,<br />
El Salvador, Guam, Guatemala, Guyana, Haiti, Honduras, Japan, Mexico, Micronesia,<br />
Myanmar, Nicaragua, Panama, Peru, Philippines, Puerto Rico, Republic of Korea, Saint Lucia,<br />
Samoa, Suriname, Taiwan, Trinidad and Tobago, United States of America, Venezuela etc.<br />
Countries and regions where you can view images when<br />
[V.SYS] is set to [PAL]<br />
Australia, Austria, Argentina, Belgium, Bulgaria, Brazil, China, Croatia, Czech Republic,<br />
Denmark, Finland, France, French Guiana, Germany, Greece, Hong Kong, Hungary, Indonesia,<br />
Iran, Iraq, Italy, Kuwait, Malaysia, Monaco, Netherlands, New Zealand, Norway, Paraguay,<br />
Poland, Portugal, Romania, Russia, Singapore, Slovakia, Spain, Sweden, Switzerland, Thailand,<br />
Turkey, Ukraine, United Kingdom, Uruguay, Vietnam etc.<br />
World time difference<br />
Table of<br />
contents<br />
Operation<br />
Search<br />
Settings<br />
Search<br />
Index<br />
Time-zone Area setting<br />
differences<br />
GMT Lisbon, London<br />
+01:00 Berlin, Paris<br />
+02:00 Helsinki, Cairo, Istanbul<br />
+03:00 Nairobi<br />
+03:30 Tehran<br />
+04:00 Abu Dhabi, Baku, Moscow<br />
+04:30 Kabul<br />
+05:00 Karachi, Islamabad<br />
+05:30 Kolkata, New Delhi<br />
+06:00 Almaty, Dhaka<br />
+06:30 Yangon<br />
+07:00 Bangkok, Jakarta<br />
+08:00 Hong Kong, Singapore,<br />
Beijing<br />
+09:00 Seoul, Tokyo<br />
+09:30 Adelaide, Darwin<br />
Time-zone Area setting<br />
differences<br />
+10:00 Melbourne, Sydney<br />
+11:00 Solomon Is<br />
+12:00 Fiji, Wellington, Eniwetok,<br />
Kwajalein<br />
-11:00 Samoa<br />
-10:00 Hawaii<br />
-9:00 Alaska<br />
-8:00 Los Angeles, Tijuana<br />
-7:00 Denver, Arizona<br />
-6:00 Chicago, Mexico City<br />
-5:00 New York, Bogota<br />
-4:00 Santiago<br />
-3:30 St.John’s<br />
-3:00 Brasilia, Montevideo<br />
-2:00 Fernando de Noronha<br />
-1:00 Azores, Cape Verde Is.<br />
66 GB
Precautions<br />
Do not use/store the camera in the following places<br />
• In an extremely hot, cold or humid place<br />
In places such as in a car parked in the sun, the camera body may become deformed and this may cause a<br />
malfunction.<br />
• Under direct sunlight or near a heater are not suitable places for storage.<br />
The camera body may become discolored or deformed, and this may cause a malfunction.<br />
• In a location subject to strong vibration<br />
• Near strong magnetic fields<br />
• In sandy or dusty places<br />
Be careful not to let sand or dust get into the camera. This may cause the camera to malfunction, and in<br />
some cases may be irreparable.<br />
On carrying<br />
Do not sit down in a chair or other place with the camera in the back pocket of your trousers or skirt, as this<br />
may cause malfunction or damage the camera.<br />
Care and storage of the lens<br />
• Wipe the surface of the lens clean with a soft cloth in the following instances:<br />
– When there are fingerprints on the lens surface.<br />
– In hot or humid locations<br />
– When the lens is exposed to salty air such as at the seaside.<br />
• Store in a well-ventilated location subject to little dirt or dust.<br />
• To prevent mold, periodically clean the lens as described above.<br />
On cleaning<br />
Clean the camera surface with a soft cloth slightly moistened with water, then wipe the surface with a dry<br />
cloth. Do not use any of the following as they may damage the finish or the casing.<br />
– Chemical products such as thinner, benzine, alcohol, disposable cloths, insect repellent, sunscreen or<br />
insecticide, etc.<br />
– Do not touch the camera with any of the above on your hand.<br />
– Do not leave the camera in contact with rubber or vinyl for a long time.<br />
Table of<br />
contents<br />
Operation<br />
Search<br />
Settings<br />
Search<br />
Index<br />
On operating temperatures<br />
The camera is designed for use in temperatures between –10°C and 40°C (14°F and 104°F). Shooting in<br />
extremely cold or hot places that exceed this range is not recommended.<br />
On moisture condensation<br />
If the camera is brought directly from a cold to a warm location, moisture may condense inside or outside<br />
the camera. This moisture condensation may cause a malfunction of the camera.<br />
If moisture condensation occurs<br />
Turn off the camera and wait about 1 hour for the moisture to evaporate.<br />
Note on moisture condensation<br />
Moisture may condense when you bring the camera from a cold place into a warm place (or vice versa) or<br />
when you use the camera in a humid place as shown below.<br />
– When you bring the camera from a ski slope into a warm place.<br />
– When you bring the camera from an air conditioned car or room into a hot place outside.<br />
– When you use the camera after a squall or a shower.<br />
– When you use the camera in a hot and humid place.<br />
Continued r<br />
67 GB
How to avoid moisture condensation<br />
When you bring the camera from a cold place into a warm place, put the camera in a plastic bag and seal it<br />
tightly. Remove the bag when the air temperature inside the plastic bag has reached the ambient<br />
temperature (after about 1 hour).<br />
Notes on optional accessories<br />
• Genuine <strong>Sony</strong> accessories may not be available in some countries/regions.<br />
Note on disposal/transfer of the memory card<br />
Even if you delete data in the memory card or format the memory card on the camera or a computer, you<br />
may not delete data from the memory card completely. When you give the memory card to somebody, it is<br />
recommended that you delete data completely using data deletion software on a computer. Also, when you<br />
dispose of the memory card, it is recommended that you destroy the actual body of the memory card.<br />
On GPS (<strong>HDR</strong>-<strong>AS30</strong>V only)<br />
• As the positions of GPS satellites vary constantly, it may take longer to determine the location or the<br />
receiver may not be able to determine the location at all, depending on the location and time you use the<br />
camera.<br />
• GPS is a system that determines your position by receiving signals from satellites. Avoid using the GPS<br />
feature on your camera in places where radio signals are blocked or reflected, such as a shadowy place<br />
surrounded by buildings or trees, etc. Use the camera in open sky environments.<br />
• You may not be able to record location information at locations or in situations where radio signals from<br />
the GPS satellites do not reach the camera as follows.<br />
– In tunnels, indoors or under the shade of buildings.<br />
– Between tall buildings or at narrow streets surrounded by buildings.<br />
– In underground locations, locations surrounded by dense trees, under an elevated bridge, or in<br />
locations where magnetic fields are generated, such as near high voltage cables.<br />
– Near devices that generate radio signals of the same frequency band as the camera: near 1.5 GHz band<br />
mobile telephones, etc.<br />
• If you take images with the GPS log set to [ON], and upload those images to the Internet, the shooting<br />
location may be available to third parties. To prevent this, set GPS log to [OFF] before shooting.<br />
Table of<br />
contents<br />
Operation<br />
Search<br />
Settings<br />
Search<br />
Index<br />
On triangulation errors (<strong>HDR</strong>-<strong>AS30</strong>V only)<br />
• If you move to another location right after turning the camcorder on, it may take a longer time for the<br />
camcorder to start triangulating, compared to when you stay in the same place.<br />
• Error caused by the position of GPS satellites<br />
The camcorder automatically triangulates your current location when the camcorder receives radio<br />
signals from 3 or more GPS satellites. The triangulating error allowed by the GPS satellites is about 10 m<br />
(33 feet). Depending on the environment of the location, the triangulating error can be greater. In this<br />
case, your actual location may not match the location on the map based on the GPS information.<br />
Meanwhile, the GPS satellites are controlled by the United States Department of Defense, and the degree<br />
of accuracy may be changed intentionally.<br />
• Error during the triangulating process<br />
The camcorder acquires location information periodically during triangulating. There is a slight time lag<br />
between when the location information is acquired and when the location information is recorded on an<br />
image, therefore, the actual recording location may not match the exact location on the map based on the<br />
GPS information.<br />
On GPS use restriction (<strong>HDR</strong>-<strong>AS30</strong>V only)<br />
• Use GPS in accordance with the situation and regulations of the countries/regions where you use the<br />
camcorder.<br />
68 GB
Specifications<br />
Camera<br />
[System]<br />
Video signal<br />
NTSC color, EIA standards<br />
HDTV 1080/60i, 1080/60p specification<br />
PAL color, CCIR standards<br />
HDTV 1080/50i, 1080/50p specification<br />
Image device:<br />
7.77 mm (1/2.3 type)<br />
Exmor R CMOS sensor<br />
Recording pixels (16:9):<br />
Interval photo recording mode:<br />
Max. 2 000 000 pixels equivalent<br />
Photo mode: Max 11 900 000 pixels equivalent<br />
Gross: Approx. 16 800 000 pixels<br />
Effective (movie, 16:9):<br />
Approx. 11 900 000 pixels<br />
Effective (still, 16:9): Approx. 11 900 000 pixels<br />
Lens: Carl Zeiss Tessar Lens<br />
F2.8<br />
f = 2.5 mm (1/8 in.)<br />
When converted to a 35 mm still camera<br />
For movies: 15.3 mm (5/8 in.) (16:9)*<br />
Exposure control: Automatic exposure<br />
File format:<br />
Still images: JPEG (DCF Ver. 2.0, Exif Ver. 2.3,<br />
MPF Baseline) compliant<br />
Movies: MPEG-4 AVC/H.264 (MP4)<br />
Audio: MPEG AAC<br />
Recording media:<br />
“Memory Stick Micro” (Mark2) media<br />
microSD card (Class4 or faster)<br />
Minimum illumination: 6 lx (lux)<br />
* SteadyShot set to [OFF]<br />
[Input and Output connectors]<br />
HDMI OUT jack: HDMI micro connector<br />
Multi/Micro USB Terminal*: micro-B/USB2.0<br />
Hi-Speed (mass-storage)<br />
* Supports Micro USB compatible devices.<br />
• USB connection is only for output.<br />
(For customers in Europe)<br />
[Power, general]<br />
Power requirements:<br />
Rechargeable battery pack: 3.6 V (NP-BX1<br />
(supplied))<br />
Multi/Micro USB Terminal: 5.0 V<br />
USB charging (Multi/Micro USB Terminal):<br />
DC 5.0 V, 500 mA/800 mA<br />
Charging time:<br />
Via a computer<br />
NP-BX1 (supplied): Approx. 245 min<br />
Via a AC-UD20 (sold separately)<br />
NP-BX1 (supplied): Approx. 175 min<br />
Power consumption: 1.9 W (when the movie<br />
image size is [1920×1080/30p])<br />
Operating temperature: –10°C to 40°C (14°F to<br />
104°F)<br />
Storage temperature: –20°C to +60°C (–4°F to<br />
+140°F)<br />
Dimensions: Approx. 24.5 mm × 47.0 mm ×<br />
82.0 mm (31/32 inches × 1 7/8 inches ×<br />
3 1/4 in.) (W/H/D, excluding protrusions)<br />
Mass: Approx. 65 g (2 oz) (camera only)<br />
Mass (when shooting):<br />
Approx. 90 g (3.2 oz) (including NP-BX1<br />
(supplied))<br />
Microphone: Stereo<br />
Speaker: Monaural<br />
Rechargeable battery pack:<br />
NP-BX1 (supplied)<br />
Maximum output voltage: DC 4.2 V<br />
Output voltage: DC 3.6 V<br />
Capacity: 4.5 Wh (1,240 mAh)<br />
Type: Li-ion<br />
[Wireless LAN]<br />
Corresponding standard: IEEE 802.11 b/g/n<br />
Frequency: 2.4GHz<br />
Supported security protocols: WPA-PSK/WPA2-<br />
PSK<br />
NFC: NFC Forum Type 3 Tag compliant<br />
[Accessories]<br />
Waterproof Case (SPK-AS2)<br />
Dimensions: Approx. 35.5 mm × 62.0 mm ×<br />
96.0 mm (1 7/16 in. × 2 1/2 in. × 3 7/8 in.) (W/<br />
H/D, excluding protrusions)<br />
Mass: Approx. 55 g (1.9 oz)<br />
Pressure-resistance: Shooting underwater at a<br />
depth of 5 m (16 feet) for 30 continuous minutes<br />
is possible. *<br />
*When the camera is inserted.<br />
Adhesive Mount (VCT-AM1)<br />
Attachment Buckle<br />
Dimensions: Approx. 43.5 mm × 14.0 mm ×<br />
58.5 mm (1 3/4 in. × 9/16 in. × 2 3/8 in.) (W/H/<br />
D, excluding protrusions)<br />
Mass: Approx. 15 g (0.5 oz)<br />
Flat Adhesive Mount<br />
Table of<br />
contents<br />
Operation<br />
Search<br />
Settings<br />
Search<br />
Index<br />
Continued r<br />
69 GB
Settings<br />
Search<br />
Dimensions: Approx. 50.0 mm × 12.5 mm ×<br />
58.5 mm (2 in. × 1/2 in. × 2 3/8 in.) (W/H/D,<br />
excluding protrusions)<br />
Mass: Approx. 14 g (0.5 oz)<br />
Curved Adhesive Mount<br />
Dimensions: Approx. 50.0 mm × 16.0 mm ×<br />
58.5 mm (2 in. × 21/32 in. × 2 3/8 in.) (W/H/D,<br />
excluding protrusions)<br />
Mass: Approx. 16 g (0.6 oz)<br />
Design and specifications are subject to change<br />
without notice.<br />
Table of<br />
contents<br />
Operation<br />
Search<br />
Index<br />
70 GB
Trademarks<br />
• “Memory Stick,” “ ,” “Memory Stick Duo,” “ ,” “Memory Stick PRO Duo,”<br />
“ ,” “Memory Stick PRO-HG Duo,” “ ,” “Memory Stick<br />
Micro,” “MagicGate,” “<br />
,” “MagicGate Memory Stick,” “MagicGate Memory Stick<br />
Duo,” “PlayMemories Home,” “PlayMemories Home” logo, “PlayMemories Mobile” and<br />
“PlayMemories Mobile” logo are trademarks or registered trademarks of <strong>Sony</strong> Corporation.<br />
• The terms HDMI and HDMI High-Definition Multimedia Interface, and the HDMI Logo are trademarks<br />
or registered trademarks of HDMI Licensing LLC in the United States and other countries.<br />
• Microsoft, Windows and Windows Vista are either registered trademarks or trademarks of Microsoft<br />
Corporation in the United States and/or other countries.<br />
• Mac, Mac OS and App Store are registered trademarks of Apple Inc.<br />
• Intel, Intel Core, and Pentium are trademarks or registered trademarks of Intel Corporation or its<br />
subsidiaries in the United States and other countries.<br />
• Adobe, the Adobe logo, and Adobe Acrobat are either registered trademarks or trademarks of Adobe<br />
Systems Incorporated in the United States and/or other countries.<br />
• microSDXC logo is a trademark of SD-3C, LLC.<br />
• The N Mark is a trademark or registered trademark of NFC Forum, Inc. in the United States and in other<br />
countries.<br />
• iOS is a registered trademark or trademark of Cisco Systems, Inc. and/or its affiliates in the United States<br />
and certain other countries.<br />
• Android, Google Play are trademarks of Google Inc.<br />
• iPhone is a trademark or a registered trademark of Apple Inc.<br />
• Wi-Fi, the Wi-Fi logo, Wi-Fi PROTECTED SET-UP are registered trademarks of the Wi-Fi Alliance.<br />
In addition, system and product names used in this manual are, in general, trademarks or registered<br />
trademarks of their respective developers or manufacturers. However, the or ® marks are not used in all<br />
cases in this manual.<br />
On GNU GPL/LGPL applied software<br />
The software that is eligible for the following GNU General Public License (hereinafter referred to as<br />
“GPL”) or GNU Lesser General Public License (hereinafter referred to as “LGPL”) are included in the<br />
camera.<br />
This informs you that you have a right to have access to, modify, and redistribute source code for these<br />
software programs under the conditions of the supplied GPL/LGPL.<br />
Source code is provided on the web. Use the following URL to download it. When downloading<br />
the source code, select <strong>HDR</strong>-<strong>AS30</strong>V as the model for your camera.<br />
http://www.sony.net/Products/Linux/<br />
We would prefer you do not contact us about the contents of source code.<br />
Copies of the licenses (in English) are stored in the internal memory of your camera.<br />
Establish a Mass Storage connection between your camera and a computer, and read the files in the<br />
“LICENSE” folder in “PMHOME.”<br />
Table of<br />
contents<br />
Operation<br />
Search<br />
Settings<br />
Search<br />
Index<br />
71 GB
Index<br />
A<br />
A.OFF....................................................................................28<br />
Airplane mode....................................................................27<br />
ANGLE.................................................................................22<br />
Auto power off...................................................................28<br />
B<br />
Battery pack ........................................................................65<br />
BEEP......................................................................................29<br />
Beep........................................................................................29<br />
C<br />
Charging ...............................................................................16<br />
CHG (Charge) lamp ........................................................16<br />
Copy .......................................................................................51<br />
D<br />
DATE.....................................................................................30<br />
Date & Time setting ........................................................30<br />
E<br />
ENTER (Menu execute) button..................................11<br />
F<br />
Field angle ...........................................................................22<br />
Format ...................................................................................34<br />
FORMT.................................................................................34<br />
G<br />
GPS.........................................................................................25<br />
GPS Log ...............................................................................25<br />
H<br />
HDMI OUT jack...............................................................43<br />
I<br />
Identifying parts ................................................................13<br />
Interval photo recording ................................................24<br />
Interval photo recording mode....................................41<br />
INTVL...................................................................................41<br />
L<br />
LAPSE...................................................................................24<br />
M<br />
MOVIE .................................................................................41<br />
Multi/Micro USB Terminal .........................................54<br />
N<br />
NEXT button ......................................................................11<br />
NFC ........................................................................................46<br />
Number of recordable photos......................................64<br />
P<br />
PHOTO .................................................................................41<br />
PLANE..................................................................................27<br />
PLAY.....................................................................................43<br />
PREV button.......................................................................11<br />
R<br />
REC button..........................................................................41<br />
REC HOLD switch ..........................................................41<br />
REC/access lamp ..............................................................41<br />
Recordable time of movies...........................................63<br />
Recording mode ................................................................20<br />
RESET...................................................................................33<br />
Resetting the settings ......................................................33<br />
S<br />
SCENE ..................................................................................23<br />
Scene......................................................................................23<br />
Settings..................................................................................11<br />
Shooting<br />
Movies............................................................................41<br />
Still image.....................................................................41<br />
Smart remote control.......................................................49<br />
SteadyShot...........................................................................21<br />
STEDY..................................................................................21<br />
Switching NTSC/PAL....................................................32<br />
T<br />
Troubleshooting ................................................................57<br />
U<br />
USB ........................................................................................16<br />
USB power supply ...........................................................31<br />
USBPw..................................................................................31<br />
Continued r<br />
Table of<br />
contents<br />
Operation<br />
Search<br />
Settings<br />
Search<br />
72 GB<br />
Index
V<br />
V.SYS....................................................................................32<br />
VIDEO ..................................................................................20<br />
View<br />
Movies............................................................................43<br />
Still image.....................................................................43<br />
Table of<br />
contents<br />
W<br />
Warning messages............................................................61<br />
Wi-Fi......................................................................................46<br />
Operation<br />
Search<br />
Settings<br />
Search<br />
Index<br />
73 GB


