

Sony DCR-PJ6E - DCR-PJ6E Consignes d’utilisation Anglais
Sony DCR-PJ6E - DCR-PJ6E Consignes d’utilisation Anglais
Sony DCR-PJ6E - DCR-PJ6E Consignes d’utilisation Anglais

You also want an ePaper? Increase the reach of your titles
YUMPU automatically turns print PDFs into web optimized ePapers that Google loves.
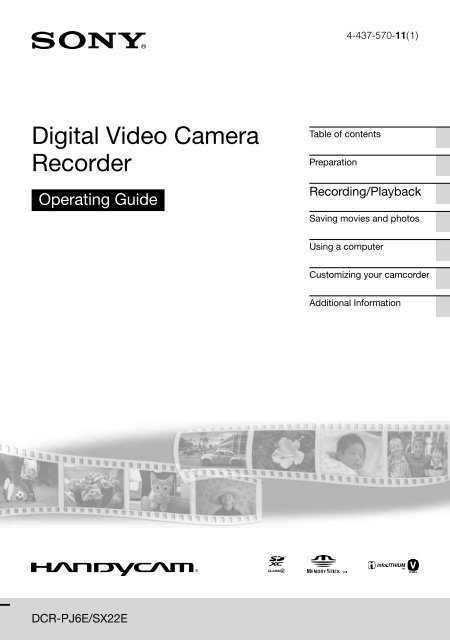
4-437-570-11(1)<br />
Digital Video Camera<br />
Recorder<br />
Operating Guide<br />
Table of contents<br />
Preparation<br />
Recording/Playback<br />
Saving movies and photos<br />
Using a computer<br />
Customizing your camcorder<br />
Additional Information<br />
<strong>DCR</strong>-<strong>PJ6E</strong>/SX22E
GB
Read this first<br />
Before operating the unit, please read this<br />
manual thoroughly, and retain it for future<br />
reference.<br />
WARNING<br />
To reduce fire or shock hazard, do not<br />
expose the unit to rain or moisture.<br />
Do not expose the batteries to<br />
excessive heat such as sunshine, fire or<br />
the like.<br />
CAUTION<br />
Battery pack<br />
If the battery pack is mishandled, the<br />
battery pack can burst, cause a fire or even<br />
chemical burns. Observe the following<br />
cautions.<br />
Do not disassemble.<br />
Do not crush and do not expose the battery<br />
pack to any shock or force such as hammering,<br />
dropping or stepping on it.<br />
Do not short circuit and do not allow metal<br />
objects to come into contact with the battery<br />
terminals.<br />
Do not expose to high temperature above 60°C<br />
(140 °F) such as in direct sunlight or in a car<br />
parked in the sun.<br />
Do not incinerate or dispose of in fire.<br />
Do not handle damaged or leaking lithium ion<br />
batteries.<br />
Be sure to charge the battery pack using a<br />
genuine <strong>Sony</strong> battery charger or a device that<br />
can charge the battery pack.<br />
Keep the battery pack out of the reach of small<br />
children.<br />
Keep the battery pack dry.<br />
Replace only with the same or equivalent type<br />
recommended by <strong>Sony</strong>.<br />
Dispose of used battery packs promptly as<br />
described in the instructions.<br />
Replace the battery with the specified type<br />
only. Otherwise, fire or injury may result.<br />
AC Adaptor<br />
Do not use the AC Adaptor placed in a<br />
narrow space, such as between a wall and<br />
furniture.<br />
Use the nearby wall outlet (wall socket)<br />
when using the AC Adaptor. Disconnect<br />
the AC Adaptor from the wall outlet (wall<br />
socket) immediately if any malfunction<br />
occurs while using your camcorder.<br />
Even if your camcorder is turned off, AC<br />
power source (mains) is still supplied to<br />
it while connected to the wall outlet (wall<br />
socket) via the AC Adaptor.<br />
FOR CUSTOMERS IN EUROPE<br />
Notice for the customers in the<br />
countries applying EU Directives<br />
The manufacturer of this product is <strong>Sony</strong><br />
Corporation, 1-7-1 Konan Minato-ku<br />
Tokyo, 108-0075 Japan. The Authorized<br />
Representative for EMC and product safety<br />
is <strong>Sony</strong> Deutschland GmbH, Hedelfinger<br />
Strasse 61, 70327 Stuttgart, Germany. For<br />
any service or guarantee matters please<br />
refer to the addresses given in separate<br />
service or guarantee documents.<br />
This product has been tested and found<br />
compliant with the limits set out in the<br />
EMC Directive for using connection cables<br />
shorter than 3 meters (9.8 feet).<br />
ATTENTION<br />
The electromagnetic fields at the specific<br />
frequencies may influence the picture and<br />
sound of this unit.<br />
Notice<br />
If static electricity or electromagnetism<br />
causes data transfer to discontinue midway<br />
(fail), restart the application or disconnect<br />
and connect the communication cable<br />
(USB, etc.) again.<br />
GB
Disposal of Old Electrical<br />
& Electronic Equipment<br />
(Applicable in the European<br />
Union and other European<br />
countries with separate<br />
collection systems)<br />
This symbol on the product or on its<br />
packaging indicates that this product shall<br />
not be treated as household waste. Instead<br />
it shall be handed over to the applicable<br />
collection point for the recycling of<br />
electrical and electronic equipment.<br />
By ensuring this product is disposed of<br />
correctly, you will help prevent potential<br />
negative consequences for the environment<br />
and human health, which could otherwise<br />
be caused by inappropriate waste handling<br />
of this product. The recycling of materials<br />
will help to conserve natural resources.<br />
For more detailed information about<br />
recycling of this product, please contact<br />
your local Civic Office, your household<br />
waste disposal service or the shop where<br />
you purchased the product.<br />
Disposal of waste batteries<br />
(applicable in the European<br />
Union and other European<br />
countries with separate<br />
collection systems)<br />
This symbol on the battery or on the<br />
packaging indicates that the battery<br />
provided with this product shall not be<br />
treated as household waste.<br />
On certain batteries this symbol might<br />
be used in combination with a chemical<br />
symbol. The chemical symbols for mercury<br />
(Hg) or lead (Pb) are added if the battery<br />
contains more than 0.0005% mercury or<br />
0.004% lead.<br />
By ensuring these batteries are disposed of<br />
correctly, you will help prevent potentially<br />
negative consequences for the environment<br />
and human health which could otherwise<br />
be caused by inappropriate waste handling<br />
of the battery. The recycling of the materials<br />
will help to conserve natural resources.<br />
In case of products that for safety,<br />
performance or data integrity reasons<br />
require a permanent connection with an<br />
incorporated battery, this battery should<br />
be replaced by qualified service staff only.<br />
To ensure that the battery will be treated<br />
properly, hand over the product at end-oflife<br />
to the applicable collection point for<br />
the recycling of electrical and electronic<br />
equipment.<br />
For all other batteries, please view the<br />
section on how to remove the battery from<br />
the product safely. Hand the battery over<br />
to the applicable collection point for the<br />
recycling of waste batteries.<br />
For more detailed information about<br />
recycling of this product or battery, please<br />
contact your local Civic Office, your<br />
household waste disposal service or the<br />
shop where you purchased the product.<br />
GB
Notice for customers in the United<br />
Kingdom<br />
A moulded plug complying with BS 1363 is<br />
fitted to this equipment for your safety and<br />
convenience.<br />
Should the fuse in the plug supplied need to<br />
be replaced, a fuse of the same rating as the<br />
supplied one and approved by ASTA or BSI<br />
to BS 1362, (i.e., marked with an or<br />
mark) must be used.<br />
If the plug supplied with this equipment has<br />
a detachable fuse cover, be sure to attach<br />
the fuse cover after you change the fuse.<br />
Never use the plug without the fuse cover.<br />
If you should lose the fuse cover, please<br />
contact your nearest <strong>Sony</strong> service station.<br />
To select a MENU item<br />
You can use the multi-selector to select/<br />
decide the items in the MENU.<br />
To change the language setting<br />
The on-screen displays in each local language<br />
are used for illustrating the operating<br />
procedures. Change the screen language before<br />
using your camcorder if necessary.<br />
[Show others] [CLOCK/<br />
LANG] (under [GENERAL SET]<br />
category) [ LANGUAGE SET] a<br />
desired language <br />
.<br />
Supplied items<br />
The numbers in ( ) are the supplied<br />
quantity.<br />
AC Adaptor (1)<br />
Power cord (Mains lead) (1)<br />
A/V connecting cable (1) <br />
USB cable (1) <br />
Rechargeable battery pack NP-FV30 (1)<br />
CD-ROM “Handycam” Application<br />
Software (1)<br />
“PMB” (software, including “PMB Help”)<br />
“Handycam” Handbook (PDF)<br />
“Operating Guide” (This manual) (1)<br />
Select a button by placing an orange<br />
frame over it using /// of the<br />
multi-selector.<br />
Press the center of the multi-selector to<br />
confirm your selection.<br />
GB
Everyday as unforgettable moment with “Handycam”<br />
Capturing<br />
Page 11 (Recording)<br />
GB
Sharing<br />
Page 20 (Creating a disc)<br />
Sharing now<br />
Page 17 (Projector)<br />
<strong>DCR</strong>-<strong>PJ6E</strong> Only<br />
GB
Table of contents<br />
Read this first. . . . . . . . . . . . . . . . . . . . . . . . . . . . . . . . . . . . . . . . . . . . . . . . . . . . . . . . . . . . . . . . . . . . . . . . . . . . . . . . . . . . . . . . . 3<br />
Everyday as unforgettable moment with “Handycam”.. . . . . . . . . . . . . . . . . . . . . . . . . . . . . . . . . . . . . . 6<br />
Preparation<br />
Charging.. . . . . . . . . . . . . . . . . . . . . . . . . . . . . . . . . . . . . . . . . . . . . . . . . . . . . . . . . . . . . . . . . . . . . . . . . . . . . . . . . . . . . . . . . . . . . . 9<br />
Setting. . . . . . . . . . . . . . . . . . . . . . . . . . . . . . . . . . . . . . . . . . . . . . . . . . . . . . . . . . . . . . . . . . . . . . . . . . . . . . . . . . . . . . . . . . . . . . . 10<br />
Recording/Playback<br />
Recording. . . . . . . . . . . . . . . . . . . . . . . . . . . . . . . . . . . . . . . . . . . . . . . . . . . . . . . . . . . . . . . . . . . . . . . . . . . . . . . . . . . . . . . . . . . 11<br />
Playback on the camcorder.. . . . . . . . . . . . . . . . . . . . . . . . . . . . . . . . . . . . . . . . . . . . . . . . . . . . . . . . . . . . . . . . . . . . . 13<br />
Deleting movies and photos. . . . . . . . . . . . . . . . . . . . . . . . . . . . . . . . . . . . . . . . . . . . . . . . . . . . . . . . . . . . . . . . . . . . 15<br />
Playing back images through the built-in projector (<strong>DCR</strong>-<strong>PJ6E</strong>). . . . . . . . . . . . . . . . . . . . . . . . . 17<br />
Playing images on a TV.. . . . . . . . . . . . . . . . . . . . . . . . . . . . . . . . . . . . . . . . . . . . . . . . . . . . . . . . . . . . . . . . . . . . . . . . . . 19<br />
Saving movies and photos<br />
Saving images on a disc.. . . . . . . . . . . . . . . . . . . . . . . . . . . . . . . . . . . . . . . . . . . . . . . . . . . . . . . . . . . . . . . . . . . . . . . . . 20<br />
Saving images in external media (DIRECT COPY). . . . . . . . . . . . . . . . . . . . . . . . . . . . . . . . . . . . . . . . . . . 22<br />
Using a computer<br />
Useful functions available if you connect the camcorder to a computer.. . . . . . . . . . . . . . 24<br />
Preparing a computer.. . . . . . . . . . . . . . . . . . . . . . . . . . . . . . . . . . . . . . . . . . . . . . . . . . . . . . . . . . . . . . . . . . . . . . . . . . . . 25<br />
Starting PMB (Picture Motion Browser). . . . . . . . . . . . . . . . . . . . . . . . . . . . . . . . . . . . . . . . . . . . . . . . . . . . . . . 27<br />
Using “PMB Portable”. . . . . . . . . . . . . . . . . . . . . . . . . . . . . . . . . . . . . . . . . . . . . . . . . . . . . . . . . . . . . . . . . . . . . . . . . . . . . 28<br />
Customizing your camcorder<br />
Using menus.. . . . . . . . . . . . . . . . . . . . . . . . . . . . . . . . . . . . . . . . . . . . . . . . . . . . . . . . . . . . . . . . . . . . . . . . . . . . . . . . . . . . . . . 29<br />
Dividing a movie.. . . . . . . . . . . . . . . . . . . . . . . . . . . . . . . . . . . . . . . . . . . . . . . . . . . . . . . . . . . . . . . . . . . . . . . . . . . . . . . . . . 34<br />
Getting detailed information from the “Handycam” Handbook.. . . . . . . . . . . . . . . . . . . . . . . . . 34<br />
Additional Information<br />
Screen indicators. . . . . . . . . . . . . . . . . . . . . . . . . . . . . . . . . . . . . . . . . . . . . . . . . . . . . . . . . . . . . . . . . . . . . . . . . . . . . . . . . . 35<br />
Parts and controls. . . . . . . . . . . . . . . . . . . . . . . . . . . . . . . . . . . . . . . . . . . . . . . . . . . . . . . . . . . . . . . . . . . . . . . . . . . . . . . . . 36<br />
Troubleshooting. . . . . . . . . . . . . . . . . . . . . . . . . . . . . . . . . . . . . . . . . . . . . . . . . . . . . . . . . . . . . . . . . . . . . . . . . . . . . . . 38<br />
Specifications.. . . . . . . . . . . . . . . . . . . . . . . . . . . . . . . . . . . . . . . . . . . . . . . . . . . . . . . . . . . . . . . . . . . . . . . . . . . . . . . . . . . . . . 40<br />
Precautions. . . . . . . . . . . . . . . . . . . . . . . . . . . . . . . . . . . . . . . . . . . . . . . . . . . . . . . . . . . . . . . . . . . . . . . . . . . . . . . . . . . . . . . . . 42<br />
Index. . . . . . . . . . . . . . . . . . . . . . . . . . . . . . . . . . . . . . . . . . . . . . . . . . . . . . . . . . . . . . . . . . . . . . . . . . . . . . . . . . . . . . . . . . . . . . . . . 47<br />
GB
Preparation<br />
Charging<br />
1<br />
Attach the battery pack.<br />
To remove the battery pack<br />
Close the LCD screen. Slide the BATT<br />
(battery) release lever and remove the<br />
battery pack.<br />
Battery pack<br />
BATT (battery) release lever<br />
2<br />
Connect<br />
the AC Adaptor to<br />
the DC IN jack and the wall<br />
outlet (wall socket).<br />
Preparation<br />
DC plug<br />
Power cord<br />
(Mains lead)<br />
To the wall outlet<br />
(wall socket)<br />
GB
Setting<br />
1<br />
Open<br />
the LCD screen to turn<br />
on your camcorder.<br />
To turn off the power<br />
Close the LCD screen.<br />
2<br />
Set<br />
the geographical area and<br />
the time using the multiselector.<br />
3<br />
Insert<br />
the memory card into<br />
the memory card slot.<br />
Access lamp<br />
To eject the memory card<br />
Lightly push the memory card in once.<br />
Note direction of notched corner.<br />
Notes<br />
The date and time are automatically recorded on the recording media, and can be displayed during<br />
playback.<br />
[Show others] [PLAYBACK SET] (under [PLAYBACK] category) [DATA CODE]<br />
[DATE/TIME] .<br />
You can turn off the operation beeps.<br />
[Show others] [SOUND/DISP SET] (under [GENERAL SET] category) [BEEP] <br />
[OFF] .<br />
10 GB
Recording/Playback<br />
Recording<br />
1<br />
Open the lens cover.<br />
2<br />
Select<br />
a mode (Movie/Photo).<br />
Movie:<br />
Photo:<br />
MODE<br />
3 Movie:<br />
Press START/STOP.<br />
Photo:<br />
Press PHOTO.<br />
Notes<br />
If you close the LCD screen while recording movies, the camcorder stops recording.<br />
The maximum continuous recordable time of movies is about 13 hours.<br />
When a movie file exceeds 2 GB, the next movie file is created automatically.<br />
You can check the recordable time, estimated remaining capacity, etc.<br />
[Show others] [MEDIA INFO] (under [MANAGE MEDIA] category).<br />
11<br />
GBRecording/Playback
You can turn on the LED VIDEO LIGHT by pressing LIGHT.<br />
Recording in a dimly-lit place<br />
Zooming<br />
12 GB<br />
You can magnify images up to 70 times the original size with the power zoom lever.<br />
Displaying the icons and indicators again<br />
You can display the icons and indicators by pressing the multi-selector if they are not shown.
Playback on the camcorder<br />
1<br />
Press (VIEW IMAGES) to<br />
(VIEW IMAGES)<br />
display the VISUAL INDEX<br />
screen.<br />
2 Movie:<br />
Select (Movie).<br />
Photo:<br />
Select (Photo).<br />
3<br />
Select the desired image.<br />
13<br />
GBRecording/Playback
Movie playback screen<br />
Volume adjustment<br />
Previous<br />
To stop<br />
To fast-reverse<br />
Photo playback screen<br />
Previous<br />
To the VISUAL INDEX<br />
screen<br />
14 GB<br />
You can adjust the volume.<br />
adjust with / .<br />
Next<br />
OPTION<br />
To fast-forward<br />
To pause/play<br />
To start/stop slide<br />
show<br />
Next<br />
OPTION
Deleting movies and photos<br />
1<br />
Select [Show others]<br />
[DELETE] (under [EDIT]<br />
category).<br />
Recording/Playback<br />
EDIT<br />
2 Movie:<br />
Select [ DELETE] <br />
[ DELETE].<br />
Photo:<br />
Select [ DELETE] <br />
[ DELETE].<br />
15<br />
GB
3<br />
Select<br />
the images to be<br />
deleted.<br />
The<br />
mark appears.<br />
4<br />
Select<br />
[YES] <br />
.<br />
Notes<br />
You cannot restore images once they are deleted. Save important movies and photos in advance.<br />
Do not remove the battery pack or the AC Adaptor from your camcorder while deleting the images. It<br />
may damage the recording media.<br />
16 GB
Playing back images through<br />
the built-in projector (<strong>DCR</strong>-<br />
<strong>PJ6E</strong>)<br />
1<br />
Press<br />
PROJECTOR.<br />
2<br />
Adjust<br />
the projected image.<br />
Recording/Playback<br />
3<br />
Select<br />
the image you want to<br />
project.<br />
Notes<br />
Be careful of the following operations or situations while using the projector.<br />
Make sure not to project images towards the eyes.<br />
Make sure not to touch the projector lens.<br />
The LCD screen and the projector lens become hot while in use.<br />
Using the projector shortens battery life.<br />
If you connect the camcorder to a TV and use the projector function, sound will be output from the<br />
TV; however, no image will be output.<br />
17<br />
GB
Viewing images recorded on other devices, using the projector<br />
[Show others] [PROJECTOR] (under [OTHERS] category) [SOURCE]<br />
[PROJECTOR INPUT] .<br />
Connect your camcorder to the other device with the A/V connecting cable.<br />
Output<br />
Signal flow<br />
VIDEO<br />
(Yellow)<br />
IN<br />
Press PROJECTOR.<br />
Sound of other devices cannot be input to the camcorder.<br />
Operation buttons are not displayed on images projected when [PROJECTOR INPUT] is set. If the<br />
camcorder is not connected to another device, a blank blue screen will be projected.<br />
Perform the following operations when you want to project images on the camcorder.<br />
Firstly, press PROJECTOR to stop projecting. Select [Show others] [PROJECTOR]<br />
(under [OTHERS] category) [SOURCE] [MEMORY CARD] , and then press<br />
PROJECTOR again.<br />
Turn the power of the camcorder off, then on again, and then press PROJECTOR.<br />
Changing the aspect ratio of the image<br />
You can change the aspect ratio of the image projected by the projector according to the recorded<br />
image size.<br />
Select [Show others] [PROJECTOR] (under [OTHERS] category).<br />
Select [SCREEN FORMAT] [16:9 WIDE] or [4:3].<br />
18 GB
Playing images on a TV<br />
Set the input selector of the TV to the input your camcorder will be connected to.<br />
1<br />
Connect your camcorder to a<br />
TVs<br />
VCRs<br />
TV with the A/V connecting<br />
cable (supplied).<br />
IN<br />
(Red)<br />
AUDIO<br />
(White)<br />
VIDEO<br />
(Yellow)<br />
Recording/Playback<br />
Signal flow<br />
2<br />
Play<br />
back movies and photos<br />
on your camcorder.<br />
(VIEW IMAGES)<br />
Notes<br />
For details, refer to the instruction manuals supplied with the TV.<br />
19<br />
GB
Saving movies and photos<br />
Saving images on a disc<br />
Connect the AC Adaptor and the power cord (mains lead) to the DC IN jack of your<br />
camcorder and the wall outlet (wall socket).<br />
Using a recorder, etc.<br />
1<br />
Insert the recording media<br />
into the recording device (a<br />
disc recorder, etc.).<br />
2<br />
Connect your camcorder to<br />
the recording device with<br />
the A/V connecting cable<br />
Input<br />
(supplied).<br />
VIDEO<br />
(Yellow)<br />
(White)<br />
AUDIO<br />
(Red)<br />
Signal flow<br />
3<br />
Start playback on your<br />
camcorder, and record it on<br />
(VIEW IMAGES)<br />
the recording device.<br />
4<br />
When dubbing is finished,<br />
stop the recording device, and<br />
then your camcorder.<br />
20 GB
Notes<br />
Since dubbing is performed via analog data transfer, the image quality may deteriorate.<br />
You can hide the screen indicators (such as a counter, etc.) on the screen of the monitor device connected.<br />
[Show others] [OUTPUT SETTINGS] (under [GENERAL SET] category) [DISP<br />
OUTPUT] [LCD PANEL] (the default setting) .<br />
You can record the date/time or camera settings data.<br />
[Show others] [PLAYBACK SET] (under [PLAYBACK] category) [DATA CODE]<br />
a desired setting .<br />
[Show others] [OUTPUT SETTINGS] (under [GENERAL SET] category) [DISP<br />
OUTPUT] [V-OUT/PANEL] .<br />
You can change the aspect ratio according to the screen size of display devices (TV, etc.).<br />
[Show others] [OUTPUT SETTINGS] (under [GENERAL SET] category) [TV<br />
TYPE] [4:3] .<br />
When you connect a monaural device, connect the yellow plug of the A/V connecting cable to the video<br />
input jack, and the white (left channel) or the red (right channel) plug to the audio input jack on the<br />
device.<br />
Saving movies and photos<br />
21<br />
GB
Saving images in external<br />
media (DIRECT COPY)<br />
Connect the AC Adaptor and the power cord (mains lead) to the DC IN jack of your<br />
camcorder and the wall outlet (wall socket).<br />
1<br />
If<br />
2<br />
Connect<br />
the external media has the<br />
AC power cable, connect it to<br />
the wall outlet (wall socket).<br />
the external<br />
media to the (USB) jack<br />
of your camcorder with the<br />
USB Adaptor Cable (sold<br />
separately).<br />
To the wall outlet (wall<br />
socket)<br />
3<br />
Select [Copy.].<br />
4<br />
Select after the operation<br />
is completed.<br />
<br />
<br />
<br />
Notes<br />
For this operation, you need the USB Adaptor Cable VMC-UAM1 (sold separately).<br />
The USB Adaptor Cable VMC-UAM1 may not be available in some countries/regions.<br />
The number of scenes you can save on the external media are as follows.<br />
Movies: 9,999 movies<br />
Photos: 9,999 frames × 899 folders<br />
The number of scenes may be smaller depending on the type of images recorded.<br />
22 GB
Viewing images recorded on external media, with your<br />
camcorder<br />
Select [Play without copying.] in step 4 above.<br />
The VISUAL INDEX screen of the external media is displayed.<br />
Play back the image.<br />
You can also view images on a TV connected to your camcorder.<br />
Saving movies and photos<br />
23<br />
GB
Using a computer<br />
Useful functions available if you connect the<br />
camcorder to a computer<br />
The software PMB stored in the CD-ROM (supplied) includes functions that enable you to do<br />
more with the images recorded with the camcorder. (Windows)<br />
View<br />
Calendar<br />
Save on a disc<br />
Upload<br />
DVD<br />
Network services<br />
Edit<br />
Joining image files<br />
Easy uploading when away from home<br />
With PMB Portable, which is pre-installed on the camcorder, you can play back or upload<br />
your images to the Web by connecting your camcorder to a computer away from home.<br />
24 GB
Preparing a computer<br />
Step 1 Checking the computer<br />
system<br />
Windows<br />
OS* 1<br />
Microsoft Windows XP SP3* 2 /Windows Vista<br />
SP2* 3 /Windows 7 SP1<br />
CPU* 4<br />
Intel Pentium III 1 GHz or faster<br />
Application<br />
PMB/PMB Portable<br />
Memory<br />
256 MB or more<br />
Other system requirements for OS should<br />
be met.<br />
Hard disk<br />
Disk volume required for installation:<br />
Approximately 500 MB (5 GB or more may<br />
be necessary when creating DVD discs.)<br />
Display<br />
Minimum 1,024 dots × 768 dots<br />
Others<br />
USB port (this must be provided as standard,<br />
Hi-Speed USB (USB 2.0 compatible)), DVD<br />
burner (CD-ROM drive is necessary for<br />
installation)<br />
Mac<br />
OS<br />
PMB Portable: Mac OS X* 5 (v10.5-v10.6)<br />
* 1 Standard installation is required. Operation is<br />
not assured if the OS has been upgraded or in a<br />
multi-boot environment.<br />
* 2 64-bit editions and Starter (Edition) are not<br />
supported. Windows Image Mastering API<br />
(IMAPI) Ver.2.0 or newer is required to use disc<br />
creation function, etc.<br />
* 3 Starter (Edition) is not supported.<br />
* 4 Faster processor is recommended.<br />
* 5 Mac equipped with Intel processor<br />
Notes<br />
Operation with all computer environments is<br />
not assured.<br />
When using a Mac<br />
The supplied software “PMB” is not<br />
supported by Mac computers. To import<br />
the movies and photos to the computer,<br />
please contact Apple Inc..<br />
Step 2 Installing the supplied<br />
software “PMB”<br />
Install “PMB” before connecting your<br />
camcorder to a computer.<br />
<br />
Notes<br />
If a version of “PMB” under 5.0.00 has been<br />
installed on your computer, you may be unable<br />
to use some functions of those “PMB” when<br />
installing the “PMB” from the supplied CD-<br />
ROM. Also, “PMB Launcher” is installed from<br />
the supplied CD-ROM and you can start “PMB”<br />
or other software by using the “PMB Launcher.”<br />
Double-click the “PMB Launcher” short-cut<br />
icon on the computer screen to start “PMB<br />
Launcher.”<br />
Confirm that your camcorder is<br />
not connected to the computer.<br />
Turn on the computer.<br />
Log on as an Administrator for<br />
installation.<br />
Close all applications running on the<br />
computer before installing the software.<br />
Place the supplied CD-ROM in<br />
the disc drive of your computer.<br />
The installation screen appears.<br />
If the screen does not appear, click<br />
[Start] [Computer] (in Windows<br />
XP, [My Computer]), then double-click<br />
[SONYPMB (E:)] (CD-ROM)*.<br />
25<br />
GB<br />
Using a computer
* Drive names (such as (E:)) may vary<br />
depending on the computer.<br />
Click [Install].<br />
Select the country or region.<br />
Select the language for the<br />
application to be installed, then<br />
proceed to the next screen.<br />
Read the terms of the license<br />
agreement carefully. If you agree<br />
to the terms, change to , and<br />
then click [Next] [Install].<br />
Turn on your camcorder, then<br />
connect the camcorder to the<br />
computer using the supplied USB<br />
cable.<br />
The [USB SELECT] screen appears on<br />
the camcorder screen automatically.<br />
26 GB<br />
Select the one of the media types<br />
displayed on the screen to make<br />
the computer recognize your<br />
camcorder.<br />
[ USB CONNECT]: Memory card<br />
If the [USB SELECT] screen does not<br />
appear, select [Show others] <br />
[USB CONNECT] (under [OTHERS]<br />
category).<br />
Click [Continue] on the computer<br />
screen.<br />
Follow the on-screen instructions<br />
to install the software.<br />
Depending on the computer, you may<br />
need to install third party software. If<br />
the installation screen appears, follow<br />
the instructions to install the required<br />
software.<br />
Restart the computer if required to<br />
complete the installation.<br />
When the installation is completed,<br />
following icons will appear.<br />
Remove the CD-ROM from your<br />
computer.<br />
: Starts “PMB.”<br />
: Displays “PMB Help.”<br />
: Displays “PMB Launcher.” “PMB<br />
Launcher” enables you to start “PMB”<br />
or other software, or to open web sites.<br />
Other icons may appear.<br />
No icon may appear depending on the<br />
installation procedure.
Starting PMB (Picture<br />
Motion Browser)<br />
To disconnect your camcorder from the<br />
computer<br />
Click the icon at the bottom right of the<br />
desktop of the computer [Safely remove<br />
USB Mass Storage Device].<br />
Double-click the “PMB” short-cut icon on<br />
the computer screen.<br />
Select [END] [YES] on the camcorder<br />
screen.<br />
Disconnect the USB cable.<br />
<br />
Notes<br />
If the icon is not displayed on the computer<br />
screen, click [Start] [All Programs] [<br />
PMB] to start “PMB.”<br />
<br />
<br />
<br />
Notes<br />
Do not format the media of your camcorder<br />
from a computer. Your camcorder may not<br />
operate correctly.<br />
Access from the computer using the supplied<br />
software “PMB.” Do not modify the files or<br />
folders on the camcorder from the computer.<br />
The image files may be destroyed or may not be<br />
played back.<br />
Operation is not guaranteed, if you perform the<br />
above operation.<br />
Reading “PMB Help”<br />
For details on how to use “PMB,” read the<br />
“PMB Help.” Double-click the “PMB Help”<br />
short-cut icon on the computer screen to<br />
open the “PMB Help.”<br />
Using a computer<br />
Notes<br />
If the icon is not displayed on the computer<br />
screen, click [Start] [All Programs] <br />
[PMB] [PMB Help]. You can also open the<br />
“PMB Help” from [Help] of “PMB.”<br />
27<br />
GB
“PMB Portable” which allows you to easily<br />
upload images to a network service starts<br />
up by connecting your camcorder to a<br />
computer.<br />
You can see the detailed usage when you<br />
click the help button in the upper right after<br />
starting “PMB Portable.”<br />
1 Turn on your camcorder, then<br />
connect it to a computer with the<br />
USB cable.<br />
The [USB SELECT] screen appears on<br />
the LCD of your camcorder.<br />
2 Select the recording media for<br />
which you wish to use “PMB<br />
Portable.”<br />
Using “PMB Portable”<br />
[ USB CONNECT]: Memory card<br />
If the [USB SELECT] screen does not<br />
appear, [Show others] <br />
[USB CONNECT] (under<br />
category).<br />
“PMB Portable” starts up.<br />
28 GB<br />
[OTHERS]<br />
3 Click “PMB Portable.”<br />
The User Agreement screen appears.<br />
4 Configure the settings, following<br />
the instructions on the screen.<br />
For more details on “PMB Portable,” see the<br />
“PMB Portable” help.
Customizing your camcorder<br />
Using menus<br />
Using the menus, you can perform useful functions and change various settings. If you make<br />
good use of menu operations, you can enjoy using your camcorder.<br />
The camcorder has various menu items under each of eight menu categories.<br />
MANUAL SETTINGS (Items to adjust for scene condition) p. 31<br />
SHOOTING SET (Items for customized shooting) p. 31<br />
PHOTO SETTINGS (Items for recording photos) p. 31<br />
PLAYBACK (Items for playback) p. 31<br />
EDIT (Items for editing) p. 32<br />
OTHERS (Items for other settings) p. 32<br />
MANAGE MEDIA (Items for recording media) p. 32<br />
GENERAL SET (Other setup items) p. 33<br />
Operating menus<br />
Multi-selector<br />
Select with /// and press the center of the multi-selector to confirm your selection.<br />
An orange frame appears on the selected item.<br />
Customizing your camcorder<br />
: To finish setting the menu.<br />
/ : The menu list moves from category to category.<br />
/ : The menu list moves through 4 items at once.<br />
: To return to the [MY MENU].<br />
29<br />
GB
Select [Show others] on the [MY MENU] screen.<br />
Select the menu item to be changed.<br />
After changing the setting, select .<br />
To finish setting the menu, select .<br />
To return to the previous menu screen, select .<br />
may not be displayed depending on the menu item.<br />
Select .<br />
<br />
<br />
Using the<br />
appear.<br />
Select<br />
<br />
<br />
<br />
Notes<br />
You may not be able to set some menu items, depending on the recording or playback conditions.<br />
OPTION MENU<br />
The OPTION MENU appears just like the pop-up window that appears when you right-click<br />
the mouse on a computer. When is displayed at bottom-right of the screen, you can use<br />
the OPTION MENU. You select , and the menu items you can change in the context<br />
Menu item<br />
(OPTION).<br />
Select the desired tab the item to change the setting.<br />
After completing the setting, select .<br />
Tab<br />
Notes<br />
Grayed out menu items or settings are not available.<br />
When the item you want is not on the screen, select another tab. (There may be no tab.)<br />
The tabs and items that appear on the screen depend on the recording/playback status of your camcorder<br />
at the time.
Menu lists<br />
(MANUAL SETTINGS) category<br />
SCENE SELECTION................... Selects an appropriate recording setting according to the type of scene,<br />
such as night view or beach.<br />
FADER.................................... Fades scenes in or out.<br />
WHITE BAL................................. Adjusts the color balance to the brightness of the recording environment.<br />
EXPOSURE.................................. Adjusts the brightness of movies and photos.<br />
FOCUS......................................... Focuses manually.<br />
TELE MACRO............................. Shoots a subject in focus with, the background out of focus.<br />
(SHOOTING SET) category<br />
REC MODE............................ Sets the mode to record movies. When recording fast moving subject, a<br />
high image quality is recommended.<br />
GUIDEFRAME............................ Displays the frame to make sure the subject is horizontal or vertical.<br />
STEADYSHOT...................... Sets the SteadyShot function when recording movies.<br />
AUTO SLW SHUTTR................. Adjusts the shutter speed automatically.<br />
FACE DETECTION..................... Adjusts the image quality of the face(s) automatically.<br />
AUDIO REC SET<br />
BLT-IN ZOOM MIC.......... Records movies with vivid sound appropriate to the zoom position.<br />
MICREF LEVEL................. Sets the microphone level.<br />
OTHER REC SET<br />
DIGITAL ZOOM.......... Sets the maximum zoom level of the digital zoom that exceeds the zoom<br />
level of the optical zoom.<br />
BACK LIGHT...................... Adjusts the exposure for backlit subjects.<br />
WIDE SELECT............. Sets the horizontal to vertical ratio when recording movies.<br />
(PHOTO SETTINGS) category<br />
SELF-TIMER.......................... Sets the self-timer when your camcorder is in photo recording mode.<br />
IMAGE SIZE.......................... Sets the photo size.<br />
FILE NO........................................ Sets how to assign the file number.<br />
Customizing your camcorder<br />
(PLAYBACK) category<br />
VISUAL INDEX........................... Displays recording images as thumbnails (p. 13).<br />
VIEW IMAGES<br />
DATE INDEX..................... Enables searching for desired images by date.<br />
FILM ROLL.................. Displays and plays the scenes by a certain interval.<br />
FACE.............................. Displays and plays the face scenes.<br />
PLAYLIST..................................... Displays and plays the playlist of movies.<br />
PLAYBACK SET<br />
DATA CODE...................... Displays the detailed recording data during playback.<br />
31<br />
GB
DELETE<br />
DELETE......................... Deletes movies.<br />
DELETE......................... Deletes photos.<br />
PROTECT<br />
PROTECT..................... Protects movies to avoid deleting.<br />
PROTECT..................... Protects photos to avoid deleting.<br />
DIVIDE................................... Divides movies.<br />
PLAYLIST EDIT<br />
ADD.............................. Adds movies in a playlist.<br />
ADD by date.............. Adds movies recorded on a same day at one time in a playlist.<br />
ERASE............................ Erases movies from a playlist.<br />
ERASE ALL................... Erases all movies from a playlist.<br />
MOVE............................ Changes the order of movies in a playlist.<br />
(OTHERS) category<br />
PROJECTOR*<br />
SOURCE............................. Projects the images recorded on other devices (p. 18).<br />
SCREEN FORMAT............ Changes the aspect ratio of the projected images (p. 18).<br />
USB CONNECT<br />
USB CONNECT.......... Connects the memory card via USB.<br />
DISC BURN........................ Allows you to save images onto discs (p. 20).<br />
BATTERY INFO.......................... Displays the battery information.<br />
(MANAGE MEDIA) category<br />
MEDIA INFO............................... Displays information on the recording media, such as free space.<br />
MEDIA FORMAT........................ Deletes all data on the memory card.<br />
REPAIR IMG.DB F...................... Repairs the image database file on the memory card (p. 39).<br />
32 GB (EDIT) category
(GENERAL SET) category<br />
SOUND/DISP SET<br />
VOLUME............................ Adjusts the volume of playback sound (p. 14).<br />
BEEP.................................... Sets whether the camcorder sounds operation beeps or not.<br />
LCD BRIGHT..................... Adjusts the brightness of the LCD screen.<br />
LCD BL LEVEL................... Adjusts the backlight of the LCD screen.<br />
LCD COLOR...................... Adjusts the color intensity of the LCD screen.<br />
DISPLAY SET..................... Sets the duration that icons or indicators are displayed on the LCD screen.<br />
OUTPUT SETTINGS<br />
TV TYPE............................. Converts the signal depending on the TV connected (p. 19).<br />
DISP OUTPUT.................. Sets whether the on-screen displays appears on the TV screen or not.<br />
CLOCK/ LANG<br />
CLOCK SET........................ Sets the date and time.<br />
AREA SET........................... Adjusts for a time difference without stopping the clock.<br />
SUMMERTIME.................. Sets the summertime.<br />
LANGUAGE SET......... Sets the display language (p. 5).<br />
POWER SETTINGS<br />
A.SHUT OFF...................... Changes the [A.SHUT OFF] setting.<br />
OTHER SETTINGS<br />
DEMO MODE................... Sets whether the demonstration appears or not.<br />
USB LUN SETTING.......... Sets the compatibility when using a USB connection.<br />
* <strong>DCR</strong>-<strong>PJ6E</strong><br />
Customizing your camcorder<br />
33<br />
GB
1 Select [Show others]<br />
[ DIVIDE] (under [EDIT]<br />
category).<br />
2 Select the movie to be divided.<br />
3 Select at the point where<br />
you want to divide the movie into<br />
scenes.<br />
The movie pauses. Play and pause<br />
toggles as you press .<br />
Adjusts the dividing point with more<br />
precision after you selected the dividing<br />
point with .<br />
Returns to the beginning of the selected<br />
movie<br />
4 Select [YES] .<br />
Notes<br />
You cannot restore movies once they are<br />
divided.<br />
Dividing a movie<br />
<br />
Tips<br />
<br />
from OPTION MENU.<br />
<br />
34 GB<br />
You can divide a movie on the playback screen<br />
You can combine divided movies using the<br />
supplied “PMB”. Refer to “PMB Help” (p. 27)<br />
for details.<br />
Getting detailed<br />
information from the<br />
“Handycam” Handbook<br />
For details on advanced operations, please<br />
read “Handycam” Handbook, on the CD-<br />
ROM (supplied) using a computer.<br />
1 To install the “Handycam”<br />
Handbook on a Windows<br />
computer, place the supplied<br />
CD-ROM in the disc drive of your<br />
computer.<br />
2 Click [Handbook].<br />
3 Select the desired language<br />
and the model name of your<br />
camcorder, then click [Install].<br />
<br />
The model name of your camcorder is<br />
printed on its bottom surface.<br />
To view the “Handycam” Handbook,<br />
double-click the short-cut icon on the<br />
computer screen.<br />
<br />
<br />
When using a Mac, open the [Handbook]<br />
– [GB] folder in the CD-ROM, then copy<br />
[Handbook.pdf].<br />
You need Adobe Reader to read “Handycam”<br />
Handbook. If it is not installed on your<br />
computer, you can download it from the Adobe<br />
Systems web page:<br />
http://www.adobe.com/
Additional Information<br />
Screen indicators<br />
Upper left Center Upper right<br />
Bottom<br />
Upper left<br />
Indicator<br />
Meaning<br />
MENU button<br />
Self-timer recording<br />
MICREF LEVEL low<br />
WIDE SELECT<br />
BLT-IN ZOOM MIC<br />
60 min Remaining battery<br />
Center<br />
Indicator<br />
[STBY]/[REC]<br />
<br />
<br />
Upper right<br />
Indicator<br />
0:00:00<br />
Recording folder of<br />
memory card<br />
VIDEO LIGHT<br />
Return button<br />
Meaning<br />
Recording status<br />
Photo size<br />
Slide show set<br />
Warning<br />
Playback mode<br />
Meaning<br />
Recording mode (HQ/<br />
SP/LP)<br />
Recording/playback/<br />
editing media<br />
Counter (hour:minute:<br />
second)<br />
Indicator<br />
[00min]<br />
9999<br />
100/112<br />
Bottom<br />
Indicator<br />
<br />
<br />
<br />
<br />
Meaning<br />
Estimated recording<br />
remaining time<br />
FADER<br />
Approximate number of<br />
recordable photos and<br />
recording media<br />
Playback folder of<br />
memory card<br />
Current playing movie or<br />
photo/Number of total<br />
recorded movies or photos<br />
Meaning<br />
[FACE DETECTION] set<br />
to [OFF]<br />
Manual focus<br />
SCENE SELECTION<br />
White balance<br />
SteadyShot off<br />
EXPOSURE<br />
TELE MACRO<br />
BACK LIGHT<br />
INTELLIGENT AUTO<br />
OPTION button<br />
VIEW IMAGES button<br />
Slide show button<br />
101-0005 Data file name<br />
<br />
Protected image<br />
Index button<br />
Movie mode/photo mode<br />
Indicators and their positions are approximate<br />
and may differ from what you actually see.<br />
Some indicators may not appear, depending on<br />
your camcorder model.<br />
Additional Information<br />
35<br />
GB
Parts and controls<br />
Figures in ( ) are reference pages.<br />
Speaker (<strong>DCR</strong>-<strong>PJ6E</strong>)<br />
Lens<br />
LENS COVER switch<br />
Built-in microphone<br />
LED VIDEO LIGHT (12)<br />
<strong>DCR</strong>-SX22E<br />
LCD screen<br />
LIGHT button (12)<br />
Multi-selector (5)<br />
<strong>DCR</strong>-<strong>PJ6E</strong><br />
36 GB<br />
(VIEW IMAGES) button (13, 19, 20)<br />
LCD screen<br />
LIGHT button (12)<br />
Multi-selector (5)<br />
(VIEW IMAGES) button (13, 19, 20)<br />
PROJECTOR button (17)<br />
Projector lens<br />
PROJECTOR FOCUS lever<br />
Speaker (<strong>DCR</strong>-SX22E)<br />
(USB) jack (20, 22, 26)<br />
A/V OUT jack (19, 20)<br />
PROJECTOR IN jack (<strong>DCR</strong>-<strong>PJ6E</strong>) (18)<br />
MODE button (11)<br />
(INTELLIGENT AUTO) button<br />
RESET button (38)
Power zoom lever<br />
PHOTO button (11)<br />
POWER lamp<br />
START/STOP button (11)<br />
Battery pack (9)<br />
CHG (charge) lamp (9)<br />
Grip belt<br />
DC IN jack (9)<br />
Access lamp (memory card) (10)<br />
BATT (battery) release lever (9)<br />
Tripod receptacle<br />
Memory card slot (10)<br />
Additional Information<br />
Fastening the grip belt<br />
37<br />
GB
If you run into any problems using your<br />
camcorder, follow the steps below.<br />
Troubleshooting<br />
Check the list (p. 38 to 39), and<br />
inspect your camcorder.<br />
RESET button<br />
The power does not turn on.<br />
Attach a charged battery pack to the<br />
<br />
<br />
<br />
<br />
38 GB<br />
Remove the power source, attach<br />
the power source again after about 1<br />
minute, and turn the camcorder on.<br />
Press RESET (p. 36) using a pointed<br />
object, and turn the camcorder on.<br />
If you press RESET, all settings,<br />
including the clock setting, are reset.<br />
Contact your <strong>Sony</strong> dealer or local<br />
authorized <strong>Sony</strong> service facility.<br />
camcorder (p. 9).<br />
Connect the plug of the AC Adaptor to the<br />
wall outlet (wall socket).<br />
The camcorder does not operate even<br />
when the power is set to on.<br />
It takes a few seconds for your camcorder to<br />
be ready to shoot after the power is turned on.<br />
This is not a malfunction.<br />
Disconnect the AC Adaptor from the wall<br />
outlet (wall socket) or remove the battery<br />
pack, then reconnect it after about 1 minute.<br />
If your camcorder still does not work, press<br />
RESET (p. 36) using a pointed object. (If you<br />
press RESET, all settings, including the clock<br />
setting, are reset.)<br />
The temperature of your camcorder is<br />
extremely high. Turn off the camcorder and<br />
leave it for a while in a cool place.<br />
<br />
The temperature of your camcorder is<br />
extremely low. Leave the camcorder with the<br />
power turned on. If you still cannot operate<br />
your camcorder, turn off the camcorder and<br />
take it to a warm place. Leave the camcorder<br />
there for a while, then turn on the camcorder.<br />
Your camcorder gets warm.<br />
Your camcorder may become warm during<br />
operation. This is not a malfunction.<br />
The power abruptly turns off.<br />
Use the AC Adaptor.<br />
Turn on the power again.<br />
Charge the battery pack (p. 9).<br />
In the default setting, the power turns off<br />
automatically if you leave your camcorder<br />
without any operation for about 5 minutes, to<br />
save battery power ([A.SHUT OFF]).<br />
Pressing START/STOP or PHOTO does not<br />
record images.<br />
Press MODE to display the (Movie) or<br />
(Photo) icons.<br />
Your camcorder is recording the image you<br />
have just shot on the recording media. You<br />
cannot make any new recordings during this<br />
period.<br />
The recording media is full. Delete<br />
unnecessary images (p. 15).<br />
Total number of movie scenes or photos has<br />
exceeded the recordable capacity of your<br />
camcorder. Delete unnecessary images (p. 15).<br />
The recording stops.<br />
The temperature of your camcorder is<br />
extremely high/low. Turn off your camcorder<br />
and leave it for a while in a cool/warm place.<br />
“PMB” cannot be installed.<br />
Check the computer environment or<br />
installation procedure required to install<br />
“PMB” (p. 25).
“PMB” does not work correctly.<br />
Quit “PMB” and restart your computer.<br />
The camcorder is not recognized by the<br />
computer.<br />
Disconnect devices from the USB jack of the<br />
computer other than the keyboard, mouse,<br />
and your camcorder.<br />
Disconnect the USB cable from the computer<br />
and your camcorder, and restart the computer,<br />
then connect the computer and your<br />
camcorder again in an orderly manner.<br />
<br />
Battery power is low.<br />
<br />
<br />
The battery pack temperature is high. Change<br />
the battery pack or place it in a cool place.<br />
The temperature of your camcorder is getting<br />
high. Turn off your camcorder and leave it in<br />
a cool place.<br />
Self-diagnosis display/Warning<br />
indicators<br />
If indicators appear on the LCD screen,<br />
check the following.<br />
If the problem persists even after you<br />
have tried to fix a couple of times, contact<br />
your <strong>Sony</strong> dealer or local authorized <strong>Sony</strong><br />
service facility. In this case, when you<br />
contact them, give them all the numbers of<br />
the error code beginning with C or E.<br />
C:04:<br />
The battery pack is not an “InfoLITHIUM”<br />
battery pack V series. Use an “InfoLITHIUM”<br />
battery pack (V series).<br />
Connect the DC plug of the AC Adaptor to<br />
your camcorder securely (p. 9).<br />
<br />
The temperature of your camcorder is low.<br />
Make the camcorder warm.<br />
No memory card is inserted (p. 10).<br />
The indicator flashes when the memory card<br />
becomes full. Delete unnecessary images<br />
(p. 15), or format the memory card (p. 46)<br />
after storing the images on other media.<br />
The Image Database File is damaged. Check<br />
the data base file by selecting [Show<br />
others] [REPAIR IMG.DB F.] (under<br />
[MANAGE MEDIA] category).<br />
<br />
The memory card is damaged. Format the<br />
memory card with your camcorder (p. 46).<br />
Additional Information<br />
C:06:<br />
The battery pack temperature is high. Change<br />
the battery pack or place it in a cool place.<br />
C:13: / C:32:<br />
Remove the power source. Reconnect it and<br />
operate your camcorder again.<br />
E::<br />
Follow the steps from to on page 38.<br />
Incompatible memory card is inserted (p. 45).<br />
<br />
<br />
Access to the memory card was restricted on<br />
another device.<br />
The camcorder is unsteady. Hold the camcorder<br />
steady with both hands. However, note that<br />
the camera-shake warning indicator does not<br />
disappear.<br />
39<br />
GB
Specifications<br />
System<br />
Projector (<strong>DCR</strong>-<strong>PJ6E</strong>)<br />
Signal format: PAL color, CCIR standards<br />
Movie recording format:<br />
Video: MPEG-2 PS<br />
Audio recording system:<br />
Dolby Digital 2ch<br />
Dolby Digital Stereo Creator<br />
Photo file format<br />
: DCF Ver.2.0 Compatible<br />
: Exif Ver.2.21 Compatible<br />
: MPF Baseline Compatible<br />
Recording media (Movie/Photo)<br />
“Memory Stick PRO Duo” media<br />
SD memory card (Class 2 or faster)<br />
Image device<br />
2.25 mm (1/8 type) CCD (Charge Coupled<br />
Device)<br />
Gross: Approx. 800 000 pixels<br />
Effective (Movie, 16:9): Approx.<br />
490 000 pixels<br />
Effective (Photo, 16:9): Approx. 490 000 pixels<br />
Effective (Photo, 4:3): Approx. 560 000 pixels<br />
Lens<br />
60 (Optical), 70 (Extended), 1 800 <br />
(Digital)<br />
F1.8 ~ F6.0<br />
Focal length:<br />
f=1.8 mm ~ 108 mm (3/32 in. ~ 4 3/8 in.)<br />
When converted to a 35 mm still camera<br />
For movies: 39 mm ~ 2 340 mm (1 9/16 in. ~<br />
92 1/4 in.) (16:9)<br />
For photos: 44 mm ~ 2 640 mm (1 3/4 in. ~<br />
104 in.) (4:3)<br />
Color temperature: [AUTO], [ONE PUSH],<br />
[INDOOR] (3 200 K), [OUTDOOR]<br />
(5 800 K)<br />
Minimum illumination<br />
3 lx (lux) ([AUTO SLW SHUTTR] is set to [ON],<br />
shutter speed 1/25 second)<br />
Input/Output connectors<br />
A/V OUT jack: Video/audio output jack<br />
USB jack: mini-AB (Output only)<br />
LCD screen<br />
Picture: 6.7 cm (2.7 type, aspect ratio 16:9)<br />
Total number of pixels: 230 400 (960 240)<br />
40 GB<br />
Projection type: DLP<br />
Light source: LED (R/G/B)<br />
Focus: Manual<br />
Image size: 10 type ~ 60 type<br />
Throw Distance: Approx. 0.5 m ~ 3.0 m (1.6 feet<br />
~ 9.8 feet)<br />
Color repeatability: Approx. 16 700 000<br />
Brightness*: Max. 10 lumens<br />
Contrast ratio: 1500:1<br />
Resolution (output): nHD (640 × 360)<br />
Continuous projection time (when using the<br />
supplied battery pack): Approx. 1.0 h<br />
* The specification of the brightness given here<br />
is the average value for this camcorder at the<br />
time of shipment and is indicated in the format<br />
specified in JIS X 6911:2003 for data projectors.<br />
The measurement method and conditions are<br />
based on Appendix 2 of the standard.<br />
General<br />
Power requirements: DC 6.8 V/7.2 V (battery<br />
pack) DC 8.4 V (AC Adaptor)<br />
Average power consumption: During camera<br />
recording, using LCD screen at normal<br />
brightness: 1.9W<br />
Operating temperature: 0 C to 40 C (32 °F to<br />
104 °F)<br />
Storage temperature: –20 C to + 60 C (-4 °F to<br />
+140 °F)<br />
Dimensions (approx.)<br />
<strong>DCR</strong>-<strong>PJ6E</strong>:<br />
58.5 mm × 55.5 mm × 113.5 mm (2 3/8 in.<br />
× 2 1/4 in. × 4 1/2 in.) (w/h/d) including the<br />
projecting parts<br />
58.5 mm × 55.5 mm × 124.5 mm (2 3/8<br />
in. × 2 1/4 in. × 5 in.) (w/h/d) including<br />
the projecting parts, and the supplied<br />
rechargeable battery pack attached<br />
<strong>DCR</strong>-SX22E:<br />
54 mm × 55.5 mm × 113.5 mm (2 1/4 in. ×<br />
2 1/4 in. × 4 1/2 in.) (w/h/d) including the<br />
projecting parts<br />
54 mm × 55.5 mm × 124.5 mm (2 1/4<br />
in. × 2 1/4 in. × 5 in.) (w/h/d) including<br />
the projecting parts, and the supplied<br />
rechargeable battery pack attached
Mass (approx.)<br />
<strong>DCR</strong>-<strong>PJ6E</strong>:<br />
230 g (8.0 oz) main unit only<br />
270 g (9.0 oz) including the supplied<br />
rechargeable battery pack and memory card<br />
<strong>DCR</strong>-SX22E:<br />
195 g (6.0 oz) main unit only<br />
240 g (8.0 oz) including the supplied<br />
rechargeable battery pack and memory card<br />
AC Adaptor AC-L200C/AC-L200D<br />
Power requirements: AC 100 V - 240 V,<br />
50 Hz/60 Hz<br />
Current consumption: 0.35 A - 0.18 A<br />
Power consumption: 18 W<br />
Output voltage: DC 8.4 V*<br />
Operating temperature: 0 C to 40 C (32 °F to<br />
104 °F)<br />
Storage temperature: –20 C to + 60 C (-4 °F to<br />
+140 °F)<br />
Dimensions (approx.): 48 mm 29 mm 81 mm<br />
(1 15/16 in. × 1 3/16 in. × 3 1/4 in.) (w/h/d)<br />
excluding the projecting parts<br />
Mass (approx.): 170 g (6.0 oz) excluding the<br />
power cord (mains lead)<br />
* See the label on the AC Adaptor for other<br />
specifications.<br />
Rechargeable battery pack NP-FV30<br />
Maximum output voltage: DC 8.4 V<br />
Output voltage: DC 7.2 V<br />
Maximum charge voltage: DC 8.4 V<br />
Maximum charge current: 2.12 A<br />
Capacity<br />
typical: 3.6 Wh (500 mAh)<br />
minimum: 3.6 Wh (500 mAh)<br />
Type: Li-ion<br />
Design and specifications of your camcorder and<br />
accessories are subject to change without notice.<br />
Manufactured under license from Dolby<br />
Laboratories.<br />
Expected charging and running times<br />
for the supplied battery pack (in<br />
minutes)<br />
These tables show the approximate<br />
available running times when you use a<br />
fully charged battery pack.<br />
<strong>DCR</strong>-SX22E <strong>DCR</strong>-<strong>PJ6E</strong><br />
Recording media<br />
Memory card<br />
Charging time<br />
(full charge)<br />
115<br />
Continuous<br />
recording time<br />
105<br />
Typical<br />
recording time<br />
50<br />
Playback time 145<br />
Each recording time is measured when the<br />
[ REC MODE] is set to SP.<br />
Typical recording time shows the time when<br />
you repeat recording start/stop, switching the<br />
movie or photo mode, and zooming.<br />
When using a <strong>Sony</strong> memory card.<br />
Times measured when using the camcorder at<br />
25 C (77 °F). 10 C to 30 C (50 °F to 86 °F) is<br />
recommended.<br />
The recording and playback time will be<br />
shorter when you use your camcorder in low<br />
temperatures.<br />
The recording and playback time will be shorter<br />
depending on the conditions under which you<br />
use your camcorder.<br />
The maximum recording time of movies and<br />
the number of photos that can be recorded, are<br />
displayed on the screen (p. 35)<br />
The recordable time may vary depending on<br />
the recording and subject conditions, [ REC<br />
MODE].<br />
Additional Information<br />
41<br />
GB
Precautions<br />
On trademarks<br />
Recording<br />
“Handycam” and<br />
are<br />
<br />
registered trademarks of <strong>Sony</strong> Corporation.<br />
“Memory Stick,” “ ,” “Memory Stick Duo,”<br />
“ ,” “Memory Stick PRO<br />
Duo,” “ ,”<br />
“Memory Stick PRO-HG Duo,”<br />
“ ,” “Memory Stick<br />
Micro,” “MagicGate,” “ ,”<br />
“MagicGate Memory Stick” and “MagicGate<br />
Memory Stick Duo” are trademarks or<br />
<br />
registered trademarks of <strong>Sony</strong> Corporation.<br />
“InfoLITHIUM” is a trademark of <strong>Sony</strong><br />
Corporation.<br />
<br />
Dolby and the double-D symbol are trademarks<br />
of Dolby Laboratories.<br />
Microsoft, Windows, Windows Vista, and<br />
DirectX are either registered trademarks or<br />
<br />
trademarks of Microsoft Corporation in the<br />
United States and/or other countries.<br />
Mac and Mac OS are registered trademarks of<br />
Apple Inc. in the U.S. and other countries.<br />
<br />
Intel, Intel Core, and Pentium are trademarks<br />
or registered trademarks of Intel Corporation<br />
or its subsidiaries in the United States and other<br />
countries.<br />
<br />
Adobe, the Adobe logo, and Adobe Acrobat<br />
are either registered trademarks or trademarks<br />
of Adobe Systems Incorporated in the United<br />
States and/or other countries.<br />
SDXC logo is a trademark of SD-3C, LLC.<br />
MultiMediaCard is a trademark of<br />
<br />
MultiMediaCard Association.<br />
<br />
All other product names mentioned herein may<br />
screen is flashing<br />
be the trademarks or registered trademarks of<br />
their respective companies. Furthermore, and Note on playback<br />
are not mentioned in each case in this manual.<br />
<br />
<br />
<br />
When you use a memory card with your<br />
camcorder for the first time, formatting the<br />
memory card with your camcorder (p. 46) is<br />
recommended for stable operation.<br />
All data recorded on the memory card will<br />
be deleted when it is formatted, and cannot<br />
be recovered. Save important data to your<br />
computer, etc., beforehand.<br />
Before starting to record, test the recording<br />
function to make sure that the image and sound<br />
are recorded without any problems.<br />
Compensation for the contents of recordings<br />
cannot be provided, even if recording or<br />
playback is not possible due to a malfunction of<br />
the camcorder, storage media, etc.<br />
TV color systems differ depending on the<br />
country/region. To view your recordings on a<br />
TV, you need a PAL system-based TV.<br />
Television programs, films, video tapes,<br />
and other materials may be copyrighted.<br />
Unauthorized recording of such materials may<br />
be contrary to copyright laws.<br />
The following states will be indicated if<br />
data is still being written onto the recording<br />
media after recording has finished. During<br />
this time, do not apply shock or vibration to<br />
the camcorder, or remove the battery or AC<br />
Adaptor.<br />
Access lamp (p. 10) is lit or flashing<br />
The media icon in the upper right of the LCD<br />
Images recorded on your camcorder may not<br />
play correctly on other devices.<br />
Conversely, images recorded on other devices<br />
may not play correctly on this camcorder.<br />
Movies recorded on SD memory cards<br />
cannot be played on A/V equipment of other<br />
manufacturers.<br />
About images, illustrations, and screen<br />
displays of this manual<br />
The example images used in this manual for<br />
illustration purposes are captured using a<br />
digital still camera, and therefore may appear
different from images and screen indicators that<br />
actually appear on your camcorder. And, the<br />
illustrations of your camcorder and its screen<br />
indication are exaggerated or simplified for<br />
understandability.<br />
In this manual, the memory card is called<br />
“recording media.”<br />
Design and specifications of your camcorder<br />
and accessories are subject to change without<br />
notice.<br />
Confirm the model name of your<br />
camcorder<br />
The model name is shown in this manual when<br />
there is a difference in specification between<br />
models. Confirm the model name on the<br />
bottom of your camcorder.<br />
The main differences in specification of this<br />
series are as follows.<br />
<strong>DCR</strong>-<br />
SX22E<br />
<strong>DCR</strong>-<br />
<strong>PJ6E</strong><br />
Recording<br />
media<br />
Memory<br />
card<br />
Capacity<br />
of internal<br />
recording<br />
media<br />
<br />
Projector<br />
On use and care<br />
The camcorder is not dustproofed, dripproofed<br />
or waterproofed.<br />
Do not use or store the camcorder and<br />
accessories in the following locations:<br />
Anywhere extremely hot, cold or humid.<br />
Never leave them exposed to temperatures<br />
above 60 C (140 °F), such as under direct<br />
sunlight, near heaters or in a car parked in<br />
the sun. They may malfunction or become<br />
deformed.<br />
Near strong magnetic fields or mechanical<br />
vibration. The camcorder may malfunction.<br />
Near strong radio waves or radiation. The<br />
camcorder may not be able to record properly.<br />
Near AM receivers and video equipment.<br />
Noise may occur.<br />
<br />
On a sandy beach or anywhere dusty. If<br />
sand or dust gets in your camcorder, it may<br />
malfunction. Sometimes this malfunction<br />
cannot be repaired.<br />
Near windows or outdoors, where the LCD<br />
screen or the lens may be exposed to direct<br />
sunlight. This damages the inside of the LCD<br />
screen.<br />
Operate your camcorder on DC 6.8 V/7.2 V<br />
(battery pack) or DC 8.4 V (AC Adaptor).<br />
For DC or AC operation, use the accessories<br />
recommended in these operating instructions.<br />
Do not let your camcorder get wet, for example,<br />
from rain or sea water. If your camcorder<br />
gets wet, it may malfunction. Sometimes this<br />
malfunction cannot be repaired.<br />
If any solid object or liquid gets inside the<br />
casing, unplug your camcorder and have it<br />
checked by a <strong>Sony</strong> dealer before operating it<br />
any further.<br />
Avoid rough handling, disassembling,<br />
modifying, physical shock, or impact such<br />
as hammering, dropping or stepping on the<br />
product. Be particularly careful of the lens.<br />
Keep the camcorder turning off when you are<br />
not using your camcorder.<br />
Do not wrap your camcorder with a towel, for<br />
example, and operate it. Doing so might cause<br />
heat to build up inside.<br />
When disconnecting the power cord (mains<br />
lead), pull it by the plug and not the cord (lead).<br />
Do not damage the power cord (mains lead)<br />
such as by placing anything heavy on it.<br />
Do not use a deformed or damaged battery<br />
pack.<br />
Keep metal contacts clean.<br />
If the battery electrolytic liquid has leaked:<br />
Consult your local authorized <strong>Sony</strong> service<br />
facility.<br />
Wash off any liquid that may have contacted<br />
your skin.<br />
If any liquid gets in your eyes, wash with<br />
plenty of water and consult a doctor.<br />
Additional Information<br />
43<br />
GB
When not using your camcorder for a<br />
long time<br />
<br />
<br />
LCD screen<br />
Do not exert excessive pressure on the LCD<br />
screen, as it may cause damage.<br />
<br />
<br />
To clean the LCD screen<br />
If fingerprints or dust make the LCD screen<br />
dirty, it is recommended that you use a soft<br />
To clean the projector lens (<strong>DCR</strong>-<strong>PJ6E</strong>)<br />
<br />
<br />
<br />
On handling the casing<br />
<br />
<br />
Using chemicals such as thinner, benzine,<br />
44 GB<br />
To keep your camcorder in optimum state for a<br />
long time, turn it on and let it run by recording<br />
and playing back images about once a month.<br />
Use up the battery pack completely before<br />
storing it.<br />
If your camcorder is used in a cold place, a<br />
residual image may appear on the LCD screen.<br />
This is not a malfunction.<br />
While using your camcorder, the back of<br />
the LCD screen may heat up. This is not a<br />
malfunction.<br />
cloth to clean it. When you use the LCD<br />
Cleaning Kit (sold separately), do not apply the<br />
cleaning liquid directly to the LCD screen. Use<br />
cleaning paper moistened with the liquid.<br />
Wipe the lens gently with a soft cloth such as a<br />
cleaning cloth or glass cleaning cloth.<br />
Stubborn stains may be removed with a soft<br />
cloth such as a cleaning cloth or glass cleaning<br />
cloth lightly dampened with water.<br />
Never use a solvent such as alcohol, benzene or<br />
thinner; acid, alkaline or abrasive detergent; or<br />
a chemical cleaning cloth, as they will damage<br />
the lens surface.<br />
If the casing is soiled, clean the camcorder body<br />
with a soft cloth lightly moistened with water,<br />
and then wipe the casing with a dry soft cloth.<br />
Avoid the following to avoid damage to the<br />
finish:<br />
alcohol, chemical cloths, repellent, insecticide<br />
and sunscreen<br />
Handling the camcorder with above<br />
substances on your hands<br />
Leaving the casing in contact with rubber or<br />
vinyl objects for a long period of time<br />
About care and storage of the lens<br />
Wipe the surface of the lens clean with a soft<br />
cloth in the following instances:<br />
When there are fingerprints on the lens<br />
surface<br />
In hot or humid locations<br />
When the lens is exposed to salty air such as<br />
at the seaside<br />
Store in a well-ventilated location subject to<br />
little dirt or dust.<br />
To prevent mold, periodically clean the lens as<br />
described above.<br />
On charging the pre-installed<br />
rechargeable battery<br />
Your camcorder has a pre-installed rechargeable<br />
battery to retain the date, time, and other settings<br />
even when the camcorder is turned off. The preinstalled<br />
rechargeable battery is always charged<br />
while your camcorder is connected to the wall<br />
outlet (wall socket) via the AC Adaptor or while<br />
the battery pack is attached. The rechargeable<br />
battery will be fully discharged in about 3 months<br />
if you do not use your camcorder at all. Use<br />
your camcorder after charging the pre-installed<br />
rechargeable battery. However, even if the preinstalled<br />
rechargeable battery is not charged, the<br />
camcorder operation will not be affected as long<br />
as you are not recording the date.<br />
Procedures<br />
Connect your camcorder to a wall outlet (wall<br />
socket) using the supplied AC Adaptor, and leave<br />
it with the LCD screen closed for more than 24<br />
hours.<br />
Battery pack<br />
When you remove the battery pack or<br />
disconnect the AC Adaptor, close the LCD<br />
screen and make sure that the POWER lamp<br />
(p. 10), the access lamp (p. 10) are turned off.
The CHG (charge) lamp flashes during charging<br />
under the following conditions:<br />
The battery pack is not attached correctly.<br />
The battery pack is damaged.<br />
The temperature of the battery pack is low.<br />
Remove the battery pack from your<br />
camcorder and put it in a warm place.<br />
The temperature of the battery pack is high.<br />
Remove the battery pack from your<br />
camcorder and put it in a cool place.<br />
AC Adaptor<br />
Use the nearby wall outlet (wall socket) when<br />
using the AC Adaptor. Disconnect the AC<br />
Adaptor from the wall outlet (wall socket)<br />
immediately if any malfunction occurs while<br />
using your camcorder.<br />
Do not use the AC Adaptor placed in a narrow<br />
space, such as between a wall and furniture.<br />
Do not short-circuit the DC plug of the AC<br />
Adaptor or battery terminal with any metallic<br />
objects. This may cause a malfunction.<br />
Memory card<br />
Types of memory card you can use with your<br />
camcorder<br />
Only “Memory Stick PRO Duo” media,<br />
“Memory Stick PRO-HG Duo” media, SD<br />
memory cards (Class 2 or faster), SDHC<br />
memory cards (Class 2 or faster) and SDXC<br />
memory cards (Class 2 or faster) can be<br />
used with this camcorder. Operation with all<br />
memory cards is not assured.<br />
“Memory Stick PRO Duo” media of up to<br />
32 GB and SD memory cards of up to 64 GB<br />
have been tested and proven to operate with<br />
your camcorder.<br />
For recording movies on “Memory Stick PRO<br />
Duo” media, it is recommended that you use<br />
“Memory Stick PRO Duo” media of 512 MB<br />
or larger.<br />
In this manual, “Memory Stick PRO Duo”<br />
media and “Memory Stick PRO-HG Duo”<br />
media are called “Memory Stick PRO Duo”<br />
media and SD memory cards, SDHC memory<br />
cards and SDXC memory cards are called SD<br />
memory cards.<br />
MultiMediaCard cannot be used.<br />
Images recorded on SDXC memory<br />
cards cannot be played back or imported<br />
on non-exFAT*-compatible computers,<br />
AV components, etc., connected to this<br />
camcorder by USB cable. Check that the<br />
connected devices are compatible with exFAT<br />
beforehand. If you connect a device that is<br />
not compatible with exFAT, the screen for<br />
initialization may appear. Never execute<br />
initialization, otherwise all recorded contents<br />
will be lost.<br />
* exFAT is the file system used in SDXC<br />
memory cards.<br />
Size of memory cards that can be used with<br />
your camcorder<br />
Only “Memory Stick Duo” media that is about<br />
a half the size of the standard “Memory Stick”<br />
media, and standard-sized SD memory cards<br />
can be used.<br />
Do not attach a label, etc., to a memory card<br />
or memory card adaptor. Doing so may cause<br />
a malfunction.<br />
Menu items<br />
A menu item that is grayed out is not available<br />
under the current recording or playback<br />
conditions.<br />
Save all your recorded image data<br />
To prevent your image data from being lost,<br />
save all your recorded images on external media<br />
periodically. It is recommended that you save<br />
the image data on a disc such as a DVD-R using<br />
your computer. Also, you can save your image<br />
data using a VCR or a DVD/HDD recorder,<br />
etc. (p. 20).<br />
<br />
45<br />
GB<br />
Additional Information
Note on the camcorder/battery pack<br />
temperature<br />
When the temperature of the camcorder<br />
or battery pack becomes extremely high or<br />
extremely low, you may not be able to record<br />
or play back on the camcorder, due to the<br />
protection features of the camcorder being<br />
activated in such situations. In this case, an<br />
indicator appears on the LCD screen.<br />
When the camcorder is connected to a<br />
computer or accessories<br />
Do not try to format the recording media of the<br />
camcorder using a computer. If you do so, your<br />
camcorder may not operate correctly.<br />
When connecting your camcorder to another<br />
device with a cable, be sure to insert the<br />
connector plug in the correct way. Pushing the<br />
plug forcibly into the terminal will damage the<br />
terminal and may result in a malfunction of<br />
your camcorder.<br />
If you cannot record/play back images,<br />
perform [MEDIA FORMAT]<br />
If you repeat recording/deleting images for<br />
a long time, fragmentation of data occurs on<br />
the recording media. Images cannot be saved<br />
or recorded. In such a case, save your images<br />
on some type of external media first, and then<br />
perform [MEDIA FORMAT] by selecting<br />
[Show others] [MEDIA FORMAT]<br />
(under [MANAGE MEDIA] category) <br />
[YES] [YES] .<br />
Notes on use<br />
Do not do any of the following, otherwise, the<br />
recording media may be damaged, recorded<br />
images may be impossible to play back or may<br />
be lost, or other malfunctions could occur.<br />
Eject the memory card when the access lamp<br />
(p. 10) is lit or flashing<br />
Remove the battery pack or AC Adaptor from<br />
the camcorder, or subject the camcorder to<br />
shock or vibration when the POWER lamp<br />
(p. 10) or the access lamp (p. 10) are lit or<br />
flashing<br />
46 GB
Index<br />
A<br />
O<br />
W<br />
A/V connecting cable.... 18, 19, 20<br />
Operation beeps..........................10<br />
Wall outlet (wall socket)...............9<br />
B<br />
battery pack....................................9<br />
C<br />
Care...............................................43<br />
Charging and running times.....41<br />
Charging the battery pack............9<br />
CLOCK SET................................10<br />
Computer.....................................25<br />
Computer system........................25<br />
D<br />
DATA CODE...............................10<br />
DATE/TIME................................10<br />
DELETE.......................................15<br />
Disc recorder...............................20<br />
Dividing a movie.........................34<br />
E<br />
OPTION MENU.........................30<br />
P<br />
Photos.....................................11, 13<br />
Playback.......................................13<br />
PMB (Picture Motion Browser)<br />
.......................................................27<br />
PMB Help.....................................27<br />
Power on.......................................10<br />
Precautions...................................42<br />
R<br />
Recording.....................................11<br />
Recording media.........................10<br />
RESET...........................................36<br />
S<br />
Saving images in external media<br />
.......................................................22<br />
Saving images on a disc..............20<br />
Warning indicators.....................39<br />
Windows......................................25<br />
Z<br />
Zoom............................................37<br />
External media............................22<br />
H<br />
“Handycam” Handbook.............34<br />
I<br />
Install............................................25<br />
L<br />
LANGUAGE SET..........................5<br />
M<br />
Mac...............................................25<br />
Maintenance................................43<br />
Memory card...............................45<br />
“Memory Stick” media...............45<br />
“Memory Stick PRO-HG Duo”<br />
media............................................45<br />
“Memory Stick PRO Duo” media<br />
.......................................................45<br />
Menus.....................................29, 31<br />
Movies....................................11, 13<br />
MY MENU...................................29<br />
Screen indicators.........................35<br />
Self-diagnosis display.................39<br />
Setting the date and time...........10<br />
Software........................................25<br />
Specifications...............................40<br />
Supplied items...............................5<br />
T<br />
Tripod...........................................37<br />
Troubleshooting..........................38<br />
Turning the power on.................10<br />
TV.................................................19<br />
U<br />
USB cable.....................................26<br />
USB CONNECT.........................26<br />
V<br />
VIDEO LIGHT............................12<br />
VIEW IMAGES...........................13<br />
VISUAL INDEX..........................13<br />
Volume.........................................14<br />
You will find the menu lists<br />
on pages 31 to 33.<br />
Additional Information<br />
MY MENU SETTING................29<br />
47<br />
GB
GB<br />
Additional information on this product and<br />
answers to frequently asked questions can<br />
be found at our Customer Support Website.<br />
http://www.sony.net/<br />
2012 <strong>Sony</strong> Corporation<br />
Printed in China


