You also want an ePaper? Increase the reach of your titles
YUMPU automatically turns print PDFs into web optimized ePapers that Google loves.
and C31 after checking the correct verticality (fig. 1). Seal the support point of element F01 to the ground with<br />
silicone.<br />
27.Position the first baluster C07 (H. 1230 mm) together with the reinforcement element C30 after cutting it by<br />
35 mm (fig. 1).<br />
28.Heat the handrail A02 until it is malleable:<br />
1) rest the handrail on the cover of the wooden box,<br />
2) slowly heat it performing circular movements without stopping,<br />
3) overturn the handrail and repeat the operation (fig. 8).<br />
29.Position the handrail A02 on the balusters C07 (using gloves). Fix it on the first column C07 at the top with<br />
elements B54 and B55 after drilling it with a Ø 5 mm bit in its lower part before it cools (fig. 6).<br />
30.Cut the exceeding part of handrail A02 so that it does not hamper the operations.<br />
31.Drill handrail A02 in correspondence with the holes present on all the elements B53 and fix it with elements<br />
B54 and B55.<br />
32.Insert in close succession the remaining balusters C07 on treads L02 (for Ø 120 cm staircase only one<br />
intermediate column H.1135. For Ø 140 cm and Ø 160 cm staircases two intermediate balusters H. 1100 and<br />
H. 1170 mm). Tighten elements C31 taking care that they are vertical and fix to them to the handrail A02 using<br />
elements B54 and B55.<br />
33.In correspondence with the first baluster C07 of the staircase, perform the final cut of the handrail A02.<br />
34.Insert element A03 on handrail A02 (eliminate burrs due to cut) using the glue X01 after heating the end of<br />
handrail A02 (fig. 1).<br />
35.Secure elements C31, D32 and D33 in a permanent manner using the part C36.<br />
36.Complete railing assembly by inserting elements B82 into the lower part of the balusters C07 (fig. 1).<br />
Assembling the balustrade<br />
37.Screw column C04 onto element G01 protruding from the landing E03 (fig. 1).<br />
38.Fix element B01 onto column C04 using element C31 and sealing with silicone (fig. 1).<br />
39.Fix elements F01 using elements B89, B27 and B23 into the non-slip holes already present on the landing<br />
E03, maintaining a similar distance between centres to that present on balusters C07 of the railing previously<br />
assembled (fig. 1). For the missing holes use a Ø 9 mm bit.<br />
40.Position the shorter balusters C07 (H. 975 mm) into elements F01 using silicone to seal the space between the<br />
two elements and tighten element C31.<br />
41.Calculate the number of poles C07 according to the size of the staircase as indicated in the tables (fig. 7).<br />
42.Secure the handrail A18 using elements B54 and B55 (fig. 1).<br />
43.Connect the end part of the railing to the short part of the balustrade on landing E03 using the appropriate<br />
fixture obtained when assembling elements A20, A03, C92 and B08 (fig. 7). Clean the cut on handrail A02 and<br />
heat its end, fix the caps A03 of the fixture obtained using the glue X01. Secure in a permanent manner with<br />
screws C87.<br />
Final Assembly<br />
44.To further stiffen the staircase in the intermediate points, secure elements F09 to the wall and join them to the<br />
balusters C07 using elements F08. Drill using a Ø 8 bit and use elements B36, B37, B11 and B12 (fig. 11).<br />
45.Remove any debris and iron chips that may have fallen while drilling the landing E03 from the surface of all the<br />
treads in order to prevent the early appearance of rust on the zinc-coated surface layer.<br />
Features of the external staircase<br />
PIXIMA products are made of top-quality components and processed with the best technological techniques. In<br />
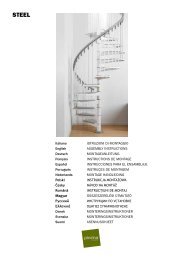
particular, model <strong>STEEL</strong> <strong>ZINK</strong> has the following features:<br />
• Stainless steel screws.<br />
• Balusters in pre-zinc coated steel sheet with further cold-dip galvanizing on the fixture welding.<br />
• Treads and landing welded with robotized processes and hot-dip galvanized in molten zinc at 450°C, after<br />
degreasing and stabilization in accordance with UNI E 14.07.000.0 regulations and ISO 9002 certification.<br />
Hot-dip galvanized products usually feature small areas where the zinc is not perfectly adherent.<br />
Moreover, the zinc-coated surface may be damaged during assembly.<br />
A bottle of liquid zinc is provided to guarantee the long durability of the product, which can be applied with a brush<br />
for any necessary touch-ups after assembly.<br />
We recommend periodically checking the integrity of the staircase retouching any damaged points with<br />
similar products available on the market.<br />
Hot-dip galvanized products may become opaque over time due to a normal oxidation process<br />
when zinc is exposed to weathering agents.<br />
You may also paint the staircase immediately after assembly using an appropriate primer, or<br />
after the exposure (12 - 18 months) to weathering agents without any particular precautions.<br />
After you have finished assembling the staircase,<br />
please visit our website and send us your suggestions: www.pixima.it<br />
7 - <strong>STEEL</strong> <strong>ZINK</strong>