
Create successful ePaper yourself
Turn your PDF publications into a flip-book with our unique Google optimized e-Paper software.
www.hughes-and-kettner.com<br />
1.2<br />
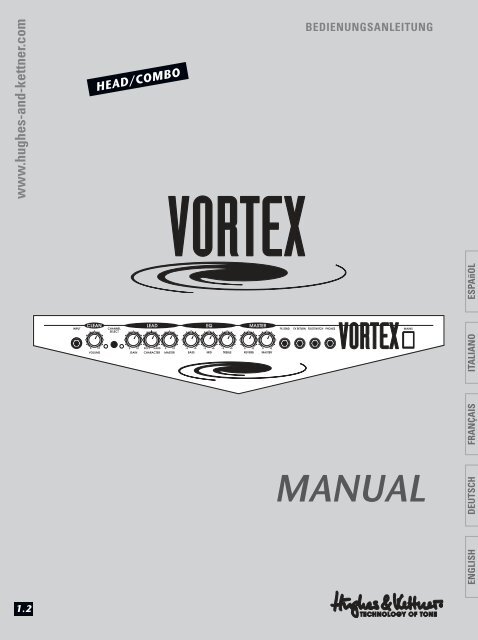
HEAD/COMBO<br />
BEDIENUNGSANLEITUNG<br />
MANUAL<br />
ESPAñOL<br />
ITALIANO<br />
FRANÇAIS<br />
DEUTSCH<br />
ENGLISH
VORTEX - MANUAL<br />
2<br />
IMPORTANT:<br />
Before powering up please read<br />
the Important Safety Instructions<br />
on page 36 - 38!<br />
WICHTIG:<br />
Bitte lesen Sie vor der Inbetriebnahme<br />
unbedingt die Sicherheitshinweise<br />
auf Seite 36 - 38!<br />
IMPORTANT:<br />
Avant la mise en service, prière de lire<br />
les instructions de sécurité<br />
sur les pages 36 - 38!<br />
IMPORTANTE:<br />
Prima di utilizzare lo strumento leggete<br />
attentamente gli avvisi di<br />
sicurezza su pagina 36 - 38!<br />
IMPORTANT:<br />
¡Antes de la puesta en marcha, lea Ud.<br />
las instrucctiones de seguridad en las<br />
páginas 36 - 38!
VOTRTEX - MANUAL<br />
CONGRATULATIONS AND THANK YOU FOR CHOOSING<br />
THE HUGHES & KETTNER ® VORTEX AMP!<br />
A team of guitarists and technicians developed<br />
the VORTEX line of amps with a single purpose in<br />
mind: to provide you with great guitar sounds and<br />
practical features in an easy-to-handle package.<br />
The VORTEX is the ideal workhorse for the<br />
discerning player. The VORTEX's highperformance<br />
Current Feedback power amp<br />
delivers the sought-after, wide-open tube tone<br />
that other amps so sorely lack. It also makes the<br />
VORTEX far louder than other amps with the<br />
same output rating.<br />
Its clear and convenient handling concept makes<br />
it so easy for you to access the VORTEX's world<br />
of sound. This <strong>manual</strong> gives you a detailed look at<br />
its features and possibilities. It also provides the<br />
information you need to be able to handle this<br />
amp with confidence.<br />
ENJOY THE TONE OF YOUR VORTEX!<br />
YOUR HUGHES & KETTNER ® TEAM<br />
TABLE OF CONTENTS<br />
BEFORE POWERING UP ............................................. 4<br />
1.0 THE CHANNELS OF THE VORTEX ..................... 4<br />
2.0 JACKS AND CONTROL FEATURES ....................... 5<br />
3.0 STANDARD SETUP/CABLE CONNECTIONS ........ 6<br />
4.0 OPERATING THE VORTEX ................................ 6<br />
4.1 SELECTING CHANNELS ....................................... 6<br />
4.2 THE VORTEX AND SIGNAL PROCESSORS ...... 6<br />
4.3 HOW TO CONNECT A SIGNAL PROCESSOR..... 7<br />
4.4 THE VORTEX AND MIXING CONSOLES .......... 7<br />
5.0 MAINTENANCE AND SERVICE ............................ 7<br />
6.0 TROUBLESHOOTING ............................................ 8<br />
7.0 TECHNICAL SPECIFICATIONS ........................... 33<br />
3<br />
ENGLISH
4<br />
VORTEX - MANUAL<br />
BEFORE POWERING UP<br />
• Check that the local current and the VORTEX’s<br />
AC power rating are identical before you plug<br />
the power cord into an AC outlet.<br />
• Ensure that air can circulate freely around your<br />
amp's ventilation ducts.<br />
1.0 THE CHANNELS OF THE VORTEX<br />
At higher gain settings, the preamp of the<br />
VORTEX generates warm harmonic overdrive<br />
that is exceptionally dynamic. Based on semiconductors,<br />
this innovative circuitry simulates the<br />
sound-shaping elements of tube amps and –<br />
unmatched in this price range – lends the<br />
VORTEX the kind of sound quality and dynamics<br />
the ambitious guitarist can’t do without for<br />
musical expression.<br />
CLEAN:<br />
Depending on preamp control settings,<br />
the VORTEX delivers a variety of contemporary<br />
and vintage clean tones. At higher VOLUME knob<br />
settings, the "SoftClip" circuitry generates precisely<br />
the warm overdrive that made vintage tube amps<br />
so desirable. If desired, the CLEAN channel can<br />
put out plenty of crunch.<br />
• Place the amp on a stable platform where it is<br />
not exposed to mechanical shocks and<br />
temperature extremes which may damage the<br />
amp or endanger the safety of bystanders.<br />
• Hughes & Kettner ® is not liable for damages due<br />
to improper use.<br />
LEAD:<br />
The LEAD channel CHARACTER knob lets you dial<br />
in both classic British rock tone – direct and<br />
dynamic (HARD) – and warm blues tone with<br />
more of an American vibe (SOFT). With the capability<br />
to sweep smoothly between these two very<br />
different worlds of sound, you have unprecedented<br />
lead sound sculpting options at your fingertips.<br />
REVERB:<br />
The VORTEX features an onboard spring reverb<br />
located after FX SEND in the signal chain.
VOTRTEX - MANUAL<br />
2.0 JACKS AND CONTROL FEATURES<br />
INPUT: Input for guitars equipped with humbuckers,<br />
active pickups, or single coils.<br />
CLEAN VOL: Determines the CLEAN channel's<br />
volume. Depending on the type of pickups your<br />
instrument is equipped with, the amp will begin<br />
to clip somewhere around the 12 o'clock setting;<br />
you can control the amount of grit very precisely<br />
by varying your picking attack.<br />
CHANNEL SELECT: Switches back and forth<br />
between the CLEAN and LEAD channels. The LEAD<br />
channel is active when the button is pressed.<br />
RED LEAD LED: The red LED illuminates when the<br />
LEAD channel is active.<br />
LEAD GAIN: Controls the amount of distortion in<br />
the LEAD channel.<br />
CHARACTER: Sweeps between the different tonal<br />
characteristics HARD (British) or SOFT (American).<br />
LEAD MASTER: Determines the LEAD channel<br />
volume level.<br />
BASS, MID and TREBLE: Common controls for both<br />
channels. MID and TREBLE controls influence each<br />
other, as is standard in tube amps. This soundshaping<br />
feature lets you to dial in a wide variety<br />
of subtle tonal variations.<br />
REVERB: Controls how much integrated reverb is<br />
added to the signal. The reverb amount is automatically<br />
adjusted for each channel when you<br />
switch channels.<br />
MASTER: Controls the VORTEX‘s master volume<br />
level. The FX-SEND signal level is not affected by<br />
the MASTER control.<br />
FX-SEND: Connect this jack to the input of an<br />
effect device or outboard power amp. You can<br />
also route the signal through a RED BOX ® to a<br />
mixing console.<br />
FX-RETURN: Connect this jack to the output of an<br />
effect device.<br />
FOOTSWITCH: Connect a standard footswitch<br />
(e.g. Hughes & Kettner ® FS-1) here. This lets you to<br />
switch back and forth between the CLEAN and<br />
LEAD channels. When using a footswitch, ensure<br />
the CHANNEL SELECT switch on the amp‘s front<br />
panel is set to CLEAN.<br />
PHONES: Headphone jack. The speaker is automatically<br />
switched off when a plug is inserted into<br />
this jack.<br />
5<br />
ENGLISH
6<br />
VORTEX - MANUAL<br />
REAR PANEL:<br />
MAINS: Connect the included Euro-norm mains<br />
cord to this socket. Ensure the amp's voltage<br />
rating matches your local AC voltage rating<br />
before you plug the cord into the wall socket.<br />
SPEAKER OUTPUTS:<br />
Serial on combos: Connect an auxiliary cabinet<br />
with a minimum impedance of 2 ohms here.<br />
Parallel on heads: Connect the included<br />
4x12" cabinet and another auxiliary cabinet with<br />
a rating of at least 8 ohms here. The minimum<br />
permissible impedance is 4 ohms. This means if you<br />
connect cabinets to both outs, each cabinet’s<br />
impedance may be no lower than 8 ohms.<br />
Combo-versions Head-version<br />
4.0 OPERATING THE VORTEX<br />
4.1 SELECTING CHANNELS<br />
You can activate the channels of the VORTEX<br />
via the front panel CHANNEL SELECT button or an<br />
external footswitch. The Hughes & Kettner ® range<br />
of accessories offers a footswitch that fits the bill,<br />
the FS 1.<br />
3.0 STANDARD SETUP /<br />
CABLE CONNECTIONS<br />
HEAD/COMBO:<br />
4.2 THE VORTEX<br />
AND SIGNAL PROCESSORS<br />
The VORTEX is equipped with a serial effects<br />
loop, meaning that the entire preamp signal is<br />
routed to the FX device and processed there.
VOTRTEX - MANUAL<br />
4.3 HOW TO CONNECT<br />
A SIGNAL PROCESSOR:<br />
• Connect the processor‘s input to the VORTEX<br />
FX-SEND jack and its output to the VORTEX<br />
FX-RETURN jack.<br />
• To avoid noise, signal degradation, and interrupted<br />
signals, use high-quality patch cords only.<br />
• Make sure the processor is not distorting the<br />
signal. Check the processor's gain LEDs and<br />
use the input and output controls to dial in a<br />
suitable level.<br />
• Distortion devices are not designed for use in an<br />
FX loop. As a rule of thumb, any kind of device<br />
that compresses the signal should be connected<br />
first in the signal chain. Depending on the type<br />
of effect you want to achieve, you may want<br />
to connect a compressor directly between the<br />
instrument and the amp's input.<br />
5.0 MAINTENANCE AND SERVICE<br />
The VORTEX does not require service of any<br />
type. However, there are a few precautions<br />
you should heed to ensure your amp lasts for<br />
many years.<br />
• Ensure all peripheral devices and cables are in<br />
a state of good repair.<br />
• Defective speaker cables are the most common<br />
cause of power amp failure. Poor-quality cables<br />
will cause hum and undesirable noise.<br />
• Make certain the back of your amp' is not<br />
blocked or covered. Proper cooling will prolong<br />
the life of your amp.<br />
• Avoid mechanical shocks and exposure to extreme<br />
heat, dust and especially moisture.<br />
• If you are using several processors or stomp<br />
boxes, ensure you connect them in the proper<br />
order. If you don’t like what you’re hearing,<br />
experiment with the order to find the sound<br />
that suits you best.<br />
4.4 THE VORTEX<br />
AND MIXING CONSOLES<br />
If you want to feed the VORTEX's signal to<br />
a mixing console, we recommend you route it<br />
through a Hughes & Kettner ® RED BOX ® . Connect<br />
it to the amp’s FX-SEND jack, as this signal path's<br />
level is not influenced by the MASTER setting.<br />
The RED BOX ® balances the signal and simulates a<br />
speaker cabinet.<br />
• When connecting peripheral devices, always<br />
pay close attention to their specifications.<br />
Never connect devices with high output signal<br />
levels (e.g. power amps) to your amp's input.<br />
• Ensure you have the correct AC power rating<br />
available before you plug in the amp. If in<br />
doubt, ask the venue's sound technician or the<br />
custodian of the building you are rehearsing in.<br />
• Refrain from do-it-yourself repairs! Have a qualified<br />
service technician replace internal fuses.<br />
• With the unit off and unplugged, use a soft<br />
damp cloth to clean the exterior surface of<br />
the VORTEX.<br />
7<br />
ENGLISH
8<br />
VORTEX - MANUAL<br />
6.0 TROUBLESHOOTING<br />
6.1 If the VORTEX will not switch on:<br />
• The amp is not getting any AC power.<br />
Check the mains cable to see if it is connected<br />
properly.<br />
• The mains fuse is defective. Replace the fuse<br />
with another identical fuse. If this fuse also trips,<br />
consult your Hughes & Kettner ® dealer.<br />
6.2 If the VORTEX is connected properly,<br />
but no sound is audible.<br />
• One or several GAIN and MASTER controls<br />
may be turned all the way down. Dial in<br />
a higher setting.<br />
• Never overlook the possibility that the guitar<br />
cable may be damaged. Try another one.<br />
• A short circuit in the speaker signal chain may<br />
have tripped an internal fuse. Make sure none<br />
of the connections are shorted out and have<br />
a qualified service technician replace the fuse<br />
(identical specifications are a must).<br />
6.3 If the CLEAN channel will not activate<br />
via an external footswitch:<br />
• The footswitch is not connected to the<br />
VORTEX. Plug it into the appropriate jack.<br />
• Check whether the footswitch is the correct<br />
type. We recommend a Hughes & Kettner ® FS-1.<br />
6.4 If you use the effects loop, the FX-SEND/<br />
FX-RETURN jacks cause annoying hum.<br />
• An electrical or magnetic field is causing interference.<br />
Use higher-quality cables or re-arrange<br />
the cables you are using to minimize interference.<br />
If this still doesn't improve the situation, use<br />
a DI-box.<br />
• The grounding of the connected devices may<br />
be causing a ground loop. DO NOT SEVER THE<br />
GROUND OF THE CONNECTED DEVICES UNDER<br />
ANY CIRCUMSTANCES! Try plugging all devices<br />
into the same socket via an AC power distributor/power<br />
strip. If this doesn't eliminate the noise,<br />
you must ensure the connection is galvanically<br />
separated by routing the signal through<br />
a DI-box.<br />
6.5 If you have connected an FX processor to<br />
the FX-SEND jack and the signal is totally<br />
distorted, even when you have dialed in<br />
a clean sound.<br />
• The FX-SEND signal is overloading the input of<br />
the FX processor. Reduce the processor‘s input<br />
sensitivity ("INPUT" or "GAIN").<br />
6.6 If you have connected an FX processor<br />
to the FX-SEND jack of the VORTEX and<br />
the signal's volume level is way too low.<br />
• The FX processor's output level is set incorrectly.<br />
Turn it up.
VOTRTEX - MANUAL<br />
WIR FREUEN UNS, DASS DU DICH FÜR DEN<br />
VORTEX ENTSCHIEDEN HAST!<br />
Ein Team aus Gitarristen und Technikern hat die<br />
VORTEX Verstärker Linie mit dem Ziel entwickelt,<br />
amtliche Gitarrensounds mit einfachster<br />
Bedienung und praxisgerechter Ausstattung zu<br />
kombinieren. Der VORTEX ist das ideale<br />
Arbeitsgerät für anspruchsvolle Gitarristen. Eine<br />
äußerst leistungsstarke „Current Feedback“-<br />
Endstufe sorgt für den offenen ”Röhrencharakter”,<br />
den andere Amps vermissen lassen. Damit ist Dein<br />
VORTEX deutlich lauter als andere Amps mit<br />
gleicher Ausgangsleistung. Ein übersichtliches und<br />
komfortables Bedienkonzept macht es möglich,<br />
ohne Umstände in die Soundwelt des VORTEX<br />
einzusteigen. Diese Bedienungsanleitung dient<br />
dazu einen detailierteren Einblick in die Möglichkeiten<br />
dieses Verstärkers zu bekommen. Sie wird Dir<br />
darüber hinaus Informationen vermitteln die Dir<br />
einen souveränen Umgang mit diesem Amp<br />
ermöglicht.<br />
WIR WÜNSCHEN DIR VIEL SPASS UND FREUDE<br />
AM „TONE“ MIT DEINEM VORTEX!<br />
DEIN HUGHES & KETTNER ® TEAM.<br />
INHALT<br />
VOR DER INBETRIEBNAHME......................................10<br />
1.0 DIE KANÄLE DES VORTEX ...............................10<br />
2.0 ANSCHLÜSSE UND BEDIENELEMENTE.................11<br />
3.0 STANDARD SET-UP/VERKABELUNG ....................12<br />
4.0 BEDIENUNG DES VORTEX ...............................12<br />
4.1 DAS ANWÄHLEN DER KANÄLE ..........................12<br />
4.2 DER VORTEX MIT EFFEKTGERÄTEN .................13<br />
4.3 ANSCHLUSS EINES EFFEKTGERÄTES....................13<br />
4.4 DER VORTEX AM MISCHPULT .........................13<br />
5.0 WARTUNG UND SERVICE ....................................13<br />
6.0 FEHLERBESEITIGUNG/TROUBLESHOOTING ........14<br />
7.0 TECHNISCHE DATEN ...........................................33<br />
9<br />
DEUTSCH
VORTEX - MANUAL<br />
10<br />
VOR DER INBETRIEBNAHME<br />
• Vergewissere Dich vor dem Anschluss des<br />
VORTEX, dass der nahe der Netzbuchse angegebene<br />
Spannungswert mit der vorhandenen<br />
Netzspannung übereinstimmt.<br />
• Stelle eine ausreichende Luftzufuhr<br />
an die Kühlflächen des Gerätes sicher.<br />
1.0 DIE KANÄLE DES VORTEX<br />
Die Vorstufe des VORTEX erzeugt (bei höherer<br />
Aussteuerung) einen runden und harmonischen<br />
Overdrive mit einer außergewöhnlichen Dynamik.<br />
Sein innovatives Schaltungskonzept, das alle<br />
soundgestaltenden Elemente von Röhrenamps in<br />
Halbleitertechnik simuliert, verleiht dem VORTEX<br />
eine bisher in dieser Preisklasse nicht erreichte<br />
Tonqualität und Dynamik, die ein anspruchsvoller<br />
Gitarrist für seinen musikalischen Ausdruck unbedingt<br />
benötigt.<br />
CLEAN: Je nach Einstellung der Vorstufe können<br />
moderne oder ”Vintage”- Cleansounds realisiert<br />
werden. Bei höheren Einstellungen des VOLUME-<br />
Reglers sorgt die ”SoftClip”-Schaltung für genau<br />
den weichen Overdrive, durch den alte<br />
Vollröhrenamps so beliebt geworden sind.<br />
So wird bei Bedarf aus diesem CLEANein<br />
CRUNCH-Kanal.<br />
• Achte auf einen festen Stellplatz, der mechanische<br />
und thermische Fremdeinwirkungen,<br />
welche die Betriebssicherheit des Gerätes oder<br />
die Sicherheit von Personen beeinträchtigen<br />
könnten, ausschließt.<br />
• Für Schäden am Gerät, die durch unsachgemäßen<br />
Betrieb entstehen, wird seitens des<br />
Herstellers keine Haftung übernommen.<br />
LEAD: Durch den CHARACTER-Regler lassen<br />
sich im LEAD-Kanal klassische, sowohl offene<br />
Rocksounds mit ”britischem” Charakter - direkt<br />
und dynamisch (HARD) – als auch weiche, bluesige<br />
Sounds mit einem mehr ”amerikanischen” Ton<br />
(SOFT) verwirklichen. Durch das stufenlose<br />
Überblenden dieser unterschiedlichen Soundwelten<br />
ergeben sich völlig neue, bisher nicht<br />
gekannte Variationsmöglichkeiten.<br />
HALL: Ausgestattet ist der VORTEX mit einem<br />
internen Federhall, der im Signalweg vor dem<br />
FX-SEND liegt.
VOTRTEX - MANUAL<br />
2.0 ANSCHLÜSSE UND BEDIENELEMENTE<br />
INPUT: Anschlussbuchse für Gitarren mit<br />
Humbuckern, aktiven Tonabnehmersystemen<br />
oder Single-Coils.<br />
CLEAN VOL: Regelt die Lautstärke des CLEAN-<br />
Kanals. Je nach Ausgangsleistung der Pickups<br />
lassen sich ab ca. ”12 Uhr”-Stellung bereits leicht<br />
übersteuerte Sounds realisieren, die sich mit dem<br />
„Attack“ der Anschlagshand äußerst feinfühlig<br />
kontrollieren lassen.<br />
CHANNEL SELECT: Schaltet zwischen dem CLEANund<br />
LEAD-Kanal um. Bei gedrücktem Schalter ist<br />
der LEAD-Kanal aktiv.<br />
ROTE LEAD-LED: Die leuchtende LED zeigt den aktiven<br />
LEAD-Kanal an.<br />
LEAD GAIN: Kontrolliert den Übersteuerungsgrad<br />
des LEAD-Kanals.<br />
CHARACTER: Blendet zwischen den verschiedenen<br />
Sound-Charakteristiken von HARD („britisch“) bis<br />
SOFT („amerikanisch“) über.<br />
LEAD MASTER: Regelt die Lautstärke des LEAD-<br />
Kanals.<br />
BASS, MID und TREBLE: Regler für beide Kanäle.<br />
BASS, MID und TREBLE beeinflussen sich (wie bei<br />
Röhrenamps üblich) gegenseitig. Diese<br />
Charakteristik ermöglicht ein größtmögliches<br />
Spektrum von Soundnuancen.<br />
REVERB: Regelt den Anteil des integrierten<br />
Halleffektes. Die Anpassung des Hallpegels erfolgt<br />
automatisch bei der Kanalumschaltung.<br />
MASTER: Regelt die Gesamtlautstärke des<br />
VORTEX. Der Pegel des FX-SEND bleibt von<br />
diesem Regler unbeeinflusst.<br />
FX-SEND: Verbinde diese Buchse mit dem Eingang<br />
eines Effektgerätes oder einer Zusatzendstufe.<br />
Ferner besteht die Möglichkeit eine RED BOX ®<br />
zwischen Amp und Mischpult zu schalten.<br />
FX-RETURN: Verbinde diese Buchse mit dem<br />
Ausgang eines Effektgerätes.<br />
FOOTSWITCH: Anschlussmöglichkeit für einen handelsüblichen<br />
Fußschalter (z.B. Hughes & Kettner ®<br />
FS-1). Damit kann zwischen CLEAN- und LEAD-<br />
Kanal umgeschaltet werden. Der CHANNEL SEL-<br />
ECT- Schalter auf der Frontseite muss dabei auf<br />
CLEAN geschaltet sein.<br />
PHONES: Klinkenbuchse zum Anschluss eines<br />
Kopfhörers. Die Buchse schaltet den internen<br />
Lautsprecher ab.<br />
11<br />
DEUTSCH
VORTEX - MANUAL<br />
12<br />
RÜCKSEITE:<br />
MAINS: Netzbuchse für das mitgelieferte Euro-<br />
Netzkabel. Bevor der Netzstecker eingesteckt wird<br />
vergewissere Dich, dass die vorhandene<br />
Netzspannung mit dem auf dem Gerät<br />
angegebenen Wert übereinstimmt.<br />
SPEAKER OUTPUTS:<br />
Seriell beim 2x 12“ Combo, zum Anschluss einer<br />
Zusatzbox mit einer Mindestimpedanz von 2 Ohm.<br />
Parallel beim Head und 1x 12“ Combo, zum<br />
Anschluss der mitgelieferten 4x 12” Box und einer<br />
anderen Zusatzbox mit mindestens 8 Ohm.<br />
Die Gesamtimpedanz von 4 Ohm darf nicht unterschritten<br />
werden. Das heißt, bei Belegung beider<br />
Buchsen dürfen nur Boxen mit je 8 Ohm angeschlossen<br />
werden.<br />
Combo Versionen Head Version<br />
4.0 BEDIENUNG DES VORTEX<br />
4.1 DAS ANWÄHLEN DER KANÄLE<br />
Die Kanäle des VORTEX werden über den<br />
CHANNEL SELECT-Schalter oder einen externen<br />
Fußschalter angewählt.<br />
Ein geeigneter Fußschalter (FS-1) wird im<br />
Zubehörprogramm von Hughes & Kettner ®<br />
angeboten.<br />
3.0 STANDARD SET UP /<br />
VERKABELUNG<br />
4.2 DER VORTEX MIT<br />
EFFEKTGERÄTEN<br />
Der VORTEX ist mit einem seriellen Effektweg<br />
ausgestattet. Dabei wird das Vorstufensignal<br />
des Amps komplett durch ein eingeschliffenes<br />
Effektgerät geführt und bearbeitet.
VOTRTEX - MANUAL<br />
4.3 ANSCHLUSS EINES<br />
EFFEKTGERÄTES:<br />
• Verbinde die FX-SEND Buchse mit dem Input,<br />
die FX-RETURN Buchse mit den Output<br />
Deines Effektgerätes.<br />
• Verwende ausschließlich hochwertige<br />
Patchkabel um Signalverluste, Störgeräusche<br />
oder Aussetzer zu verhindern.<br />
• Achte stets darauf, dass das Effektgerät nicht<br />
übersteuert wird. Beachte dazu ggf. die<br />
Aussteuerungsanzeige des Effektgerätes und<br />
benutze den INPUT- und OUTPUT-Regler am<br />
Effektgerät zum Auspegeln.<br />
• ”Verzerrer” haben im Einschleifweg nichts zu<br />
suchen. Grundsätzlich gehören komprimierende<br />
Effekte immer an den Anfang der Signalkette.<br />
Auch Kompressoren sollten (je nach gewünschtem<br />
Soundeffekt) ggf. vor den Input des Amps<br />
geschaltet werden.<br />
5.0 WARTUNG UND SERVICE<br />
Der VORTEX Amp ist wartungsfrei. Dennoch gibt<br />
es einige Grundregeln, deren Einhaltung die<br />
Lebensdauer Deines Amps enorm verlängern:<br />
• Sorge immer für eine technisch einwandfreie<br />
Geräteperipherie!<br />
• Defekte Boxenkabel sind mit Abstand die<br />
häufigste Ursache für Endstufenausfälle.<br />
Schlechte Kabel führen immer wieder<br />
zu Brummproblemen.<br />
• Sorge stets für freie Luftzirkulation an den<br />
Kühlflächen Deines Amps (Rückseite<br />
Amp Chassis).<br />
• Vermeide in jedem Fall starke mechanische<br />
Erschütterungen, extreme Hitze, das Eindringen<br />
von Staub und insbesondere Nässe.<br />
• Achte immer darauf, dass mehrere eingeschliffene<br />
Effektgeräte in korrekter Reihenfolge<br />
angeschlossen werden. Das heißt, wenn das<br />
Sound Ergebnis nicht zufriedenstellend ausfällt,<br />
sollte man mit der Reihenfolge der Effektgeräte<br />
experimentieren.<br />
4.4 DER VORTEX<br />
AM MISCHPULT<br />
Zum Anschluss des VORTEX an ein Mischpult<br />
empfehlen wir die Signalführung über eine<br />
Hughes & Kettner ® RED BOX ® PRO. Diese muss an<br />
den FX-SEND des Amps angeschlossen werden.<br />
Der Ausgangspegel ist hier masterunabhängig.<br />
Das Signal ist am Ausgang der RED BOX ® symmetrisch<br />
(= balanced) und speakersimuliert.<br />
• Beachte peinlich genau die Spezifikationen<br />
von Zusatzgeräten. Schließe nie Ausgänge<br />
mit zu großem Pegel (z.B. Endstufen) an Deinen<br />
Amp an.<br />
• Prüfe vor Anschluss des Gerätes immer die vorhandene<br />
Netzspannung. Kontaktiere im Zweifelsfall<br />
den Bühnentechniker, Hausmeister o.ä..<br />
• Versuche keine ”Do it yourself”-Reparaturen!<br />
Auch der Tausch interner Sicherungen wird<br />
besser von einem erfahrenen Techniker<br />
vorgenommen.<br />
• Die Oberfläche des VORTEX lässt sich am<br />
besten mit einem leicht angefeuchteten Tuch<br />
säubern.<br />
13<br />
DEUTSCH
VORTEX - MANUAL<br />
14<br />
6.0 MÖGLICHE FEHLERQUELLEN / TROUBLESHOOTING<br />
6.1 Der VORTEX lässt sich nicht einschalten.<br />
• Es liegt keine Netzspannung an. Überprüfe den<br />
korrekten Anschluss des Netzkabels!<br />
• Die Netzsicherung ist defekt. Bitte ersetze<br />
die Netzsicherung durch eine neue Sicherung<br />
mit entsprechendem Wert. Wende dich bei<br />
erneutem Defekt an Deinen Hughes & Kettner ®<br />
Fachhändler.<br />
6.2 Der VORTEX ist korrekt verkabelt,<br />
aber es ist nichts zu hören.<br />
• Einer oder mehrere der GAIN- bzw. MASTER-<br />
Regler sind abgedreht. Drehe den/die Regler<br />
auf.<br />
• Das Gitarrenkabel ist evtl. nicht in Ordnung,<br />
probiere es mit einem anderen.<br />
• Durch einen Kurzschluss am Lautsprecheranschluss<br />
hat eine der internen Sicherungen<br />
angesprochen. Stelle sicher, dass die Anschlüsse<br />
überbrückungsfrei sind und lasse durch einen<br />
Servicetechniker die Sicherung wechseln<br />
(korrekten Wert beachten!).<br />
6.3 Der CLEAN-Kanal kann über einen externen<br />
Fußschalter nicht aktiviert werden.<br />
• Der Stecker des Fußschalters ist nicht eingesteckt.<br />
Verkabele den VORTEX entsprechend.<br />
• Prüfe, ob der angeschlossene Fußschalter dem<br />
richtigen Typ entspricht. Wir empfehlen den FS-1<br />
aus dem Hughes & Kettner ® Zubehörprogramm.<br />
6.4 Bei der Benutzung des Effektweges,<br />
FX-SEND und FX-RETURN entsteht<br />
ein Brummgeräusch.<br />
• Ein elektrisches / magnetisches Wechselfeld<br />
streut auf die Leitung ein. Benutze ein besseres<br />
Kabel und versuche durch geschicktes Verlegen<br />
der Leitung die Einstreuung zu minimieren.<br />
Hilft dies nicht, empfiehlt sich die Benutzung<br />
einer DI-Box.<br />
• Über die Erdung der verbundenen Geräte<br />
entsteht eine Brummschleife. Unterbreche in<br />
keinem Fall die Schutzleiter der Geräte! Betreibe<br />
beide Geräte am selben Netzverteiler. Schafft<br />
dies noch keine Abhilfe, muss die Verbindung<br />
mittels einer DI-Box galvanisch getrennt werden.<br />
6.5 Beim Anschluss eines Effektgerätes am<br />
FX-SEND ist das Signal (selbst bei<br />
Cleansounds) völlig verzerrt.<br />
• Der Eingang des Effektgerätes wird übersteuert.<br />
Regle die Eingangsempfindlichkeit (”Input” oder<br />
”Gain”) am Effektgerät zurück.<br />
6.6 Beim Anschluss eines Effektgerätes am<br />
FX-RETURN wird das Ausgangssignal<br />
deutlich leiser.<br />
• Das Effektgerät ist an seinem Ausgang falsch<br />
ausgepegelt. Regle den ”Output” am Effektgerät<br />
hoch.
VOTRTEX - MANUAL<br />
NOUS VOUS FÉLICITONS POUR LE CHOIX<br />
DU VORTEX DE HUGHES & KETTNER ® !<br />
Une équipe composée de guitaristes et de<br />
techniciens a développé la gamme d’amplis<br />
VORTEX dans le but de combiner des sons de<br />
haute qualité, avec une utilisation très simple et<br />
des caractéristiques pratiques. Le VORTEX est<br />
l’outil de travail idéal pour les guitaristes exigeants.<br />
L’étage de puissance « Current Feedback »,<br />
particulièrement efficace, apporte aussi un<br />
caractère sonore de type amplificateur à lampes<br />
que les autres amplis n’offrent pas. Ainsi, votre<br />
VORTEX est nettement plus puissant que d’autres<br />
amplis présentant une puissance de sortie équivalente.<br />
Le concept d’utilisation clair et convivial<br />
du VORTEX vous permet de vous plonger<br />
directement dans son univers sonore. À cet effet,<br />
le présent manuel d’utilisation vous exposera en<br />
détails les différentes possibilités offertes par cet<br />
ampli. Sans compter qu’il vous fournira aussi des<br />
informations pour vous permettre de l’utiliser en<br />
toute facilité.<br />
NOUS VOUS SOUHAITONS BEAUCOUP DE SUCCÈS ET<br />
DE PLAISIR AVEC VOTRE VORTEX! VOTRE ÉQUIPE<br />
HUGHES & KETTNER ® .<br />
TABLE DES MATIERES<br />
AVANT LA MISE EN FONCTION . . . . . . . . . . . . . . .16<br />
1.0 LES CANAUX DU VORTEX . . . . . . . . . . . . . .16<br />
2.0 RACCORDS ET COMMANDES . . . . . . . . . . . . .17<br />
3.0 CONFIGURATION ET CABLAGE STANDARD . . .18<br />
4.0 UTILISATION DU VORTEX . . . . . . . . . . . . . . .18<br />
4.1 SELECTION DES CANAUX . . . . . . . . . . . . . . . .18<br />
4.2 LE VORTEX ET LES PROCESSEURS D’EFFETS .18<br />
4.3 BRANCHEMENT DE UNITE D’EFFETS . . . . . . . . .19<br />
4.4 LE VORTEX ET LA TABLE DE MIXAGE . . . . . .19<br />
5.0 SERVICE ET ENTRETIEN . . . . . . . . . . . . . . . . . . .19<br />
6.0 DEPISTAGE DES PANNES . . . . . . . . . . . . . . . . .20<br />
7.0 CARACTERISTIQUES TECHNIQUES . . . . . . . . . .34<br />
15<br />
FRANÇAIS
VORTEX - MANUAL<br />
16<br />
AVANT LA MISE EN FONCTION<br />
• Avant de brancher le VORTEX, assurez-vous<br />
que la tension du VORTEX correspond à la<br />
tension du réseau.<br />
• Veillez à ce que les surfaces d’aération de<br />
l’appareil soient suffisamment ventilées.<br />
• Assurez-vous que l’appareil soit disposé sur un<br />
emplacement stable, à l’abri de toute influence<br />
mécanique ou thermique extérieure susceptible<br />
1.0 LES CANAUX DU VORTEX<br />
Le préampli du VORTEX réalise (en modulation<br />
plus élevée) des Overdrive ronds et harmonieux<br />
avec une dynamique exceptionnelle.<br />
Son concept de circuit novateur simule, par une<br />
technique de semi-conducteurs, tous les éléments<br />
créateurs de sons d’un ampli à lampes.<br />
Ce concept permet au VORTEX d’atteindre une<br />
qualité sonore et une dynamique jusque là<br />
irréalisables dans cette catégorie de prix, et dont<br />
le guitariste exigeant a absolument besoin pour<br />
son expression musicale.<br />
CLEAN : Selon le réglage du préampli, vous pouvez<br />
réaliser des sons clean modernes ou « Vintage ».<br />
En augmentant le VOLUME, vous obtiendrez<br />
exactement – grâce au circuit « SoftClip » –<br />
le doux overdrive qui a fait le succès des purs<br />
amplis à lampes de jadis. Si besoin est, ce canal «<br />
Clean » devient un canal « Crunch ».<br />
de porter préjudice à la sécurité de l’appareil<br />
ou de son utilisateur.<br />
• Le fabricant décline toute responsabilité en cas<br />
de dégât à l’appareil, lorsque celui-ci n’a pas<br />
été utilisé conformément aux instructions du<br />
mode d’emploi.<br />
LEAD : Le bouton CHARACTER vous permet non<br />
seulement d’obtenir, sur le canal lead, des<br />
sonorités rock classiques et très larges, avec un<br />
son typé « britannique » (HARD), direct et dynamique,<br />
mais aussi des sons doux et bluesy, avec<br />
une touche plus « américaine » (SOFT). Le mixage<br />
progressif de ces univers sonores différents ouvre<br />
des possibilités de variations tout à fait inédites et<br />
jusqu’ici inconnues.<br />
HALL : le VORTEX est équipé d’une réverbération<br />
interne qui se trouve en amont du FX SEND.
VOTRTEX - MANUAL<br />
2.0 RACCORDS ET COMMANDES<br />
INPUT : Prise de connexion pour guitares avec<br />
Humbucker, systèmes de micros actifs ou de type<br />
Single Coil.<br />
CLEAN VOL : Contrôle le volume du canal CLEAN.<br />
En fonction de la puissance de sortie du micro,<br />
on peut réaliser des sons légèrement saturés<br />
à partir d’une position « 12 heures », sons qui<br />
peuvent être contrôlés très précisément par les<br />
nuances dans le toucher.<br />
CHANNEL SELECT : Commute du canal CLEAN au<br />
canal LEAD et inversement. Lorsque l'interrupteur<br />
est enfoncé, c’est le canal LEAD qui est activé.<br />
LEAD, DEL ROUGE : La DEL allumée indique que<br />
le canal LEAD est activé.<br />
LEAD GAIN : Contrôle le niveau de distorsion du<br />
canal LEAD.<br />
CHARACTER : Permet d’obtenir toutes les nuances<br />
de timbre, du son HARD (« britannique ») au son<br />
SOFT (« américain »).<br />
LEAD MASTER : Règle le volume du canal LEAD.<br />
POTENTIOMÈTRES BASS, MID ET TREBLE : Pour les<br />
deux canaux : BASS, MID et TREBLE s’influencent<br />
mutuellement (comme sur un ampli à lampes).<br />
Cette caractéristique permet d’offrir le plus grand<br />
éventail de nuances sonores possible.<br />
REVERB : Règle l’intensité de l’effet de réverbération<br />
intégrée. L’adaptation de l’intensité de<br />
réverbération s’effectue automatiquement lors<br />
de la sélection du canal.<br />
MASTER : Contrôle le volume général du VORTEX.<br />
Ce potentiomètre n’influence pas le niveau<br />
du FX-SEND.<br />
FX-SEND : Reliez ce jack à l’entrée d’une unité<br />
d’effets ou d’un étage de puissance supplémentaire.<br />
Il est en outre possible de brancher une<br />
RED BOX ® entre l’ampli et la table de mixage.<br />
FX-RETURN : Reliez ce jack à la sortie d’un processeur<br />
d’effets.<br />
FOOTSWITCH : Possibilité de connexion pour un<br />
pédalier standard (p. ex. Hughes & Kettner ® FS-1).<br />
Avec ce pédalier, il est possible d’effectuer la<br />
commutation entre le canal CLEAN et le canal<br />
LEAD. Le bouton CHANNEL SELECT sur le panneau<br />
avant doit alors se trouver en position CLEAN.<br />
PHONES : Prise jack pour le branchement d’un<br />
casque d’écoute. Le jack déconnecte le baffle<br />
interne.<br />
17<br />
FRANÇAIS
VORTEX - MANUAL<br />
18<br />
PANNEAU ARRIÈRE :<br />
MAINS : Prise secteur pour le câble d’alimentation<br />
Euro livré avec l’appareil. Avant de raccorder<br />
la fiche secteur, assurez-vous que la tension<br />
d’alimentation indiquée sur l’appareil est<br />
identique à la tension du secteur.<br />
SPEAKER OUTPUTS :<br />
En série sur les combos, pour raccorder un baffle<br />
supplémentaire d’une impédance minimale de<br />
2 ohms. En parallèle sur les têtes, pour raccorder<br />
le baffle livré (4x 12") ainsi qu’un baffle supplementaire<br />
d’une impédance minimale de 8 ohms.<br />
L’impédance totale ne peut être inférieure<br />
à 4 ohms. En d’autres termes, seuls des baffles de<br />
8 ohms doivent être raccordés en cas d'utilisation<br />
des deux sorties.<br />
les versions Combo la version Head<br />
4.0 UTILISATION DU VORTEX<br />
4.1 SELECTION DES CANAUX<br />
La sélection des canaux du VORTEX s'effectue<br />
au niveau du bouton CHANNEL SELECT ou via un<br />
pédalier externe. Nous suggérons à cet égard<br />
le FS 1 du catalogue Hughes & Kettner ® .<br />
3.0 CONFIGURATION ET<br />
CABLAGE STANDARD<br />
HEAD/COMBO:<br />
4.2 LE VORTEX ET<br />
LES PROCESSEURS D’EFFETS<br />
Le VORTEX est doté d’une boucle d’effets en<br />
série. Le signal du préampli passe par une unité<br />
d’effets branchée et y est travaillé.
VOTRTEX - MANUAL<br />
4.3 BRANCHEMENT DE<br />
L’UNITÉ D’EFFETS<br />
• Reliez la prise FX-SEND avec l’input, et la prise<br />
FX-RETURN avec l’output de votre unité d’effets.<br />
• Utilisez exclusivement des câbles Patch de<br />
haute qualité, afin d’éviter les pertes de signaux,<br />
les bruits parasites ou des défaillances au niveau<br />
du son.<br />
• Veillez toujours à ce que votre unité d’effets ne<br />
soit pas surmodulée. Le cas échéant, tenez<br />
compte du niveau de modulation indiqué par<br />
votre unité d’effets et utilisez les potentiomètres «<br />
Input » et « Output » de votre unité d’effets pour<br />
niveler.<br />
• Ne branchez jamais d'effets distordants dans la<br />
boucle d’effets. En principe, les effets de compression<br />
doivent toujours se trouver au début de<br />
la chaîne des signaux. Les compresseurs (selon<br />
votre choix d’effet sonore) doivent être<br />
5.0 ENTRETIEN ET SERVICE<br />
L’ampli VORTEX ne requiert aucun entretien<br />
particulier. Toutefois, nous vous recommandons de<br />
suivre certaines règles de base, qui augmenteront<br />
considérablement la longévité de votre appareil :<br />
• Assurez-vous toujours que tous les appareils<br />
périphériques soient en bon état technique !<br />
• Des câbles d’enceintes défectueux sont de loin<br />
la cause la plus fréquente de défaillances au<br />
niveau de l’étage de puissance. Un mauvais<br />
câble provoque souvent des bourdonnements.<br />
• Assurez-vous que la ventilation de votre ampli<br />
est toujours garantie au niveau des surfaces<br />
d’aération (face arrière du châssis de l’ampli).<br />
• Évitez absolument les chocs importants,<br />
l’‘exposition à une chaleur élevée, la poussière<br />
et surtout l’humidité.<br />
branchés, le cas échéant, en amont de l’entrée<br />
de l’ampli.<br />
• Veillez toujours à ce que les diverses unités<br />
d’effets soient branchées dans le bon ordre. En<br />
d’autres termes, vous devez, si le son obtenu ne<br />
vous satisfait pas, modifier l’ordre dans lequel<br />
vous avez branché vos unités d’effets.<br />
4.4 LE VORTEX ET LA TABLE<br />
DE MIXAGE<br />
Pour le branchement du VORTEX à une table de<br />
mixage, nous recommandons de faire passer le<br />
signal par une RED BOX ® PRO de Hughes &<br />
Kettner ® . Celle-ci doit être reliée à la prise FX-SEND<br />
de l’ampli, le niveau de sortie étant ici indépendant<br />
du Master. À la sortie de la RED BOX ® , le<br />
signal est rendu symétriquement (= balanced),<br />
avec une simulation de haut-parleur.<br />
• Soyez particulièrement attentif aux caractéristiques<br />
de tout appareil supplémentaire.<br />
Ne branchez donc jamais de sorties à niveau<br />
trop élevé (par exemple, des étages de -<br />
puissance) sur votre ampli.<br />
• Contrôlez toujours la tension du secteur avant<br />
de brancher l’appareil. En cas de doute,<br />
contactez un technicien de scène, le concierge<br />
etc.<br />
• Ne « bricolez » jamais une réparation ! Même<br />
pour le remplacement d’un fusible intérieur,<br />
il est préférable de faire appel à un technicien<br />
qualifié.<br />
• Pour un nettoyage extérieur optimal du VORTEX,<br />
utilisez un chiffon légèrement humide.<br />
19<br />
FRANÇAIS
VORTEX - MANUAL<br />
20<br />
6.0 DEPISTAGE DES PANNES<br />
6.1 Le VORTEX ne peut être allumé :<br />
• L’ampli n’est pas alimenté. Assurez-vous que le<br />
câble secteur est correctement branché !<br />
• Le fusible de secteur est défectueux.<br />
Remplacez-le par un fusible de même valeur. Si<br />
le problème persiste, consultez votre revendeur<br />
Hughes & Kettner ® .<br />
6.2 Le VORTEX est raccordé correctement,<br />
mais aucun son n’est audible :<br />
• Un ou plusieurs des potentiomètres GAIN et<br />
MASTER sont réglés sur 0. Tournez le(s) bouton(s)<br />
de réglage concerné(s).<br />
• Le câble de liaison guitare-ampli est peut-être<br />
endommagé, essayez un autre câble.<br />
• L'un des fusibles internes a sauté à cause d’un<br />
court-circuit dans un raccord du haut-parleur.<br />
Recherchez tout faux contact au niveau des<br />
raccords et faites remplacer le fusible par un<br />
technicien qualifié (attention à la valeur !).<br />
6.3 Le canal CLEAN ne peut être activé par<br />
un pédalier externe :<br />
• Le connecteur du pédalier n’est pas branché.<br />
Branchez correctement votre VORTEX.<br />
• Assurez-vous que le type de pédalier utilisé est<br />
compatible. Nous recommandons les FS 1, dans<br />
la gamme d'accessoires Hughes & Kettner ® .<br />
6.4 L’utilisation de la boucle d’effets et des<br />
prises FX-SEND et FX-RETURN produit<br />
un bourdonnement :<br />
• Un champ électrique ou magnétique alternatif<br />
interfère dans votre circuit. Utilisez un câble<br />
de meilleure qualité, et déplacez votre circuit<br />
de façon à minimiser l’interférence. Si cette<br />
intervention ne suffit pas, nous recommandons<br />
l’utilisation d’un boîtier de direct.<br />
• Une boucle de bourdonnement se produit par<br />
la prise de terre des différents appareils connectés.<br />
Ne coupez jamais l’interrupteur de sécurité<br />
des appareils! Utilisez les deux appareils sur le<br />
même répartiteur. S’il n’est pas possible d’éliminer<br />
le bourdonnement de cette façon, il faut<br />
rerouter la connexion au travers d’un boîtier<br />
de direct.<br />
6.5 Le signal est tout à fait distordu lors du<br />
branchement d’une unité d’effets sur<br />
FX-SEND (même en son Clean) :<br />
• L’entrée de l’unité d’effets est surmodulée.<br />
Baissez le niveau de sensibilité d'entrée (INPUT ou<br />
GAIN) sur l’unité d’effets.<br />
6.6 Le signal de sortie diminue nettement<br />
lors du branchement d’une unité d’effets<br />
sur FX-RETURN :<br />
• L’unité d’effets est mal nivelée à sa sortie.<br />
Augmentez « l'Output » sur l’unité d’effets.
VOTRTEX - MANUAL<br />
CONGRATULAZIONI E GRAZIE PER AVER SCELTO<br />
IL VORTEX DI HUGHES & KETTNER ® !<br />
Un gruppo di chitarristi e tecnici ha sviluppato la<br />
gamma di amplificatori VORTEX per creare uno<br />
strumento dotato di un equipaggiamento professionale<br />
e nello stesso tempo facile ad usare che<br />
vi permette di ottenere il miglior sound per la<br />
vostra chitarra. Il VORTEX è lo strumento ideale<br />
per i chitarristi ambiziosi. Una potentissima sezione<br />
finale di potenza “Current Feedback” gli da<br />
quelle tipiche caratteristiche valvolari che spesso<br />
cercate invano in molti altri amplificatori. Inoltre,<br />
il volume massimo del VORTEX risulta ben più<br />
alto di quello offerto da altri amplificatori della<br />
stessa potenza. Grazie al suo confortevole e<br />
comprensibile concetto di utilizzo, potete cominciare<br />
subito ad avventurarvi nel mondo dei suoni<br />
offriti dal vostro VORTEX. Questo <strong>manual</strong>e vi<br />
presenterà in dettaglio tutte le possibilità che vi<br />
offre questo amplificatore e vi fornirà informazioni<br />
utili per un sicuro utilizzo dell’amplificatore.<br />
VI AUGURIAMO MOLTO DIVERTIMENTO E SUCCESSO<br />
CON IL VOSTRO NUOVO VORTEX! IL TEAM DI<br />
HUGHES & KETTNER ® .<br />
INDICE<br />
PRIMA DI UTILIZZARE LO STRUMENTO . . . . . . . . . . 22<br />
1.0 CANALI DEL VORTEX . . . . . . . . . . . . . . . . . . 22<br />
2.0 CARATTERISTICHE DEI JACK E DEI CONTROLLI 23<br />
3.0 CONFIGURAZIONE STANDARD /<br />
COLLEGAMENTO DEI CAVI . . . . . . . . . . . . . . . 24<br />
4. 0 UTILIZZARE IL VORTEX . . . . . . . . . . . . . . . . . 24<br />
4.1 SELEZIONARE I CANALI . . . . . . . . . . . . . . . . . . 24<br />
4.2 IL VORTEX E I PROCESSORI EFFETTI . . . . . . . 24<br />
4.3 COLLEGARE UN PROCESSORE EFFETTI . . . . . . 25<br />
4.4 IL VORTEX E I MIXER . . . . . . . . . . . . . . . . . . . 25<br />
5.0 ASSISTENZA E MANUTENZIONE PREVENTIVA . . 25<br />
6.0 RICERCA E SOLUZIONE DEI PROBLEMI . . . . . . 26<br />
7.0 CARATTERISTICHE TECNICHE. . . . . . . . . . . . . . 34<br />
21<br />
ITALIANO
VORTEX - MANUAL<br />
22<br />
PRIMA DI UTILIZZARE LO STRUMENTO<br />
• Verificate che la tensione elettrica locale<br />
corrisponda a quella indicata sull'amplificatore<br />
prima di collegare il cavo di alimentazione alla<br />
presa di corrente.<br />
• Assicurati che l'aria possa circolare liberamente<br />
intorno alla parte posteriore dell'amplificatore.<br />
1.0 I CANALI DEL VORTEX<br />
Regolata su livelli elevati, la sezione di preamplificazione<br />
produce un armonioso e saturato overdrive<br />
con un straordinario spettro dinamico.<br />
Applicando la tecnologia di semiconduttori,<br />
il suo rivoluzionario circuito è stato progettato per<br />
simulare tutte le caratteristiche responsabili per il<br />
sound dei amplificatori a valvola ed è responsabile<br />
per le qualità tonali e dinamiche del VORTEX;<br />
caratteristiche essenziali per chitarristi ambiziosi<br />
che vogliono esprimersi con tutta la loro musicalità<br />
e che finora potevano solo trovare in amplificatori<br />
a prezzi molto più elevati.<br />
CLEAN: secondo il livello della sezione di preamplificazione,<br />
potete realizzare suoni clean moderni<br />
oppure tipicamente “vintage”. A livelli elevati del<br />
regolatore VOLUME, il circuito „SoftClip“ emula<br />
proprio quel overdrive armonioso per cui i vecchi<br />
amplificatori a valvola sono diventati così famosi.<br />
Così, potete anche realizzare un bel „crunch“ col<br />
vostro canale CLEAN.<br />
• Posiziona l'amplificatore su una piattaforma<br />
stabile dove non venga esposto a possibili<br />
shock meccanici né a temperature estreme che<br />
potrebbero danneggiare l'amplificatore o<br />
attentare alla sicurezza di chi lo utilizza o gli<br />
è vicino.<br />
• Hughes & Kettner ® non è responsabile per i danni<br />
causati da un utilizzo improprio dello strumento.<br />
LEAD: il regolatore CHARACTER del canale LEAD<br />
vi permette di realizzare sia classici e aperti suoni<br />
rock di tipico carattere “inglese” (diretti e dinamici /<br />
HARD), sia armoniosi suoni blues, con un carattere<br />
un po’ più “americano” (SOFT). Dissolvendo continuamente<br />
fra questi due universi tonali, questo<br />
regolatore vi offre nuove, mai sentite possibilità<br />
di variazione.<br />
REVERB: Il VORTEX è munito di un riverbero a<br />
molle integrato che nella catena del segnale si<br />
trova davanti al FX-SEND.
VOTRTEX - MANUAL<br />
2.0 CARATTERISTICHE DEI JACK E DEI CONTROLLI<br />
INPUT: Presa d’ingresso per chitarre con humbucker,<br />
single coils o pickup attivi.<br />
CLEAN VOL: Regola il volume del canale CLEAN:<br />
secondo la potenza di uscita del pickup usato,<br />
potete realizzare suoni leggermente saturati e<br />
sensibilmente controllabili col “attack” della<br />
vostra mano suonante mettendo il regolatore<br />
oltre la posizione “mezzogiorno”.<br />
CHANNEL SELECT: Attiva o il canale CLEAN oppure<br />
il canale LEAD. A tasto schiacciato, il canale LEAD<br />
è attivato.<br />
LED rossa LEAD: La spia LED si accende quando il<br />
canale LEAD è attivato.<br />
LEAD GAIN: determina il grado di saturazione del<br />
canale LEAD.<br />
CHARACTER: regola le caratteristiche diverse del<br />
canale LEAD, dissolvendo continuamente da<br />
suoni "inglesi" fino a suoni "americani".<br />
LEAD MASTER: Controlla il livello di volume del<br />
canale LEAD.<br />
Controlli BASS, MID e TREBLE: Per entrambi canali.<br />
I controlli BASS, MID e TREBLE influiscono uno sul<br />
altro (come consueto e desiderato coi amplificatori<br />
a valvola): Questa caratteristica vi permette<br />
di creare una varietà di suoni pressoché infinita.<br />
REVERB: Controlla la quantità con cui il riverbero<br />
integrato viene aggiunto al segnale. Selezionando<br />
un canale, il livello del riverbero viene automatcamente<br />
adattato alle sue caratteristiche.<br />
MASTER: Controlla il livello generale del volume del<br />
VORTEX. Il segnale di FX-SEND non viene modificato<br />
da questo controllo.<br />
FX-SEND: Collegate questa presa all’ingresso del<br />
vostro processore effetti o di un’addizionale sezione<br />
finale di potenza. Inoltre, avete la possibilità di<br />
collegare una RED BOX fra il vostro amplificatore<br />
e il mixer.<br />
FX-RETURN: Collegate questa presa al uscita del<br />
vostro processore effetti.<br />
FOOTSWITCH: Presa che vi permette collegare un<br />
selettore a pedale (per esempio Hughes & Kettner ®<br />
FS-1). Che potete utilizzare per cambiare fra i<br />
canali CLEAN e WARP. Il tasto CHANNEL SELECT<br />
che si trova sul panello frontale deve essere messo<br />
su CLEAN.<br />
PHONES: Presa cuffia. Se inserite il jack della cuffia,<br />
l´altoparlante interno viene disattivato.<br />
23<br />
ITALIANO
VORTEX - MANUAL<br />
24<br />
PANNELLO POSTERIORE:<br />
MAINS: Spina d’alimentazione per collegare il<br />
cavo incluso ad una presa di corrente a norme<br />
Euro. Assicuratevi che la tensione elettrica del<br />
amplificatore corrisponda a quella della rete a cui<br />
vi state collegando.<br />
SPEAKER OUTPUTS:<br />
Uscita seriale delle versioni combo per collegare<br />
un addizionale cabinet con un impedenza minima<br />
di 2 Ohm. Uscita parallela delle testate per<br />
collegare il cabinet 4x12” compreso e un addizionale<br />
cabinet con un impedenza di almeno<br />
8 Ohm. Non sottopassare mai l’impedenza minima<br />
di 4 Ohm. Questo significa che dovete collegare<br />
due cabinet di 8 Ohm se state usando entrambe<br />
le prese.<br />
le Combo-versioni la Head-versione<br />
4. 0 UTILIZZARE IL VORTEX<br />
4.1 SELEZIONARE I CANALI<br />
I canali del VORTEX vengono selezionati tramite<br />
il tasto CHANNEL SELECT oppure tramite un selettore<br />
a pedale esteriore. In vendita opzionale,<br />
vi offriamo un selettore a pedale adatto,<br />
il Hughes & Kettner ® FS 1.<br />
3.0 CONFIGURAZIONE<br />
STANDARD / COLLEGA-<br />
MENTO DEI CAVI<br />
HEAD/COMBO:<br />
4.2 IL VORTEX<br />
E I PROCESSORI EFFETTI<br />
Il VORTEX è fornito con un loop effetti seriale.<br />
Questo significa che il segnale della sezione<br />
preamp viene completamente elaborato nel<br />
processore effetti collegato in serie.
VOTRTEX - MANUAL<br />
4.3 COLLEGARE UN<br />
PROCESSORE EFFETTI:<br />
• Collegate la presa FX-SEND con l’INPUT e<br />
la presa FX-RETURN con l’OUTPUT del vostro<br />
processore effetti.<br />
• L’uso di cavi di alta qualità vi aiuterà ad evitare<br />
perdite di segnale, ronzii o altre malfunzioni.<br />
• Badate che l’ingresso del processore effetti non<br />
venga saturato. Consultate eventualmente il<br />
display del vostro processore effetti e riducete<br />
la sua sensibilità d’ingresso tramite i controlli<br />
”Input” e ”Output”<br />
• Mai collegare effetti di distorsione al loop seriale.<br />
Gli effetti di questa categoria vengono sempre<br />
collegati all’inizio della catena del segnale, cioè<br />
prima dell’Input dell’amplificatore. Secondo il<br />
sound-effect desiderato, vi consigliamo di collegare<br />
eventualmente anche un compressore<br />
all’inizio della catena del segnale.<br />
L’amplificatore VORTEX non richiede alcuna<br />
manutenzione. Tuttavia, ci sono alcune precauzioni<br />
da prendere per assicurare una vita lunga<br />
al vostro amplificatore.<br />
• Assicuratevi che tutte le unità esterne, i cavi e<br />
i cavi di alimentazione siano in ottimo stato.<br />
• I cavi degli speaker difettosi sono tra le principali<br />
cause della rottura degli amplificatori, danneggiando<br />
la loro sezione finale di potenza. I cavi<br />
di scarsa qualità causano rumori di fondo e<br />
ronzii indesiderabili.<br />
• Assicuratevi che la ventilazione dell'amplificatore<br />
(pannello posteriore, chassis) non venga<br />
ostruita da nessun oggetto.<br />
• Evitate che lo strumento subisca shock meccanici<br />
o che venga esposto ad eccessivo calore,<br />
polvere o umidità.<br />
• Se state usando più di un effetto seriale, badate<br />
di collegarli nella giusta sequenza. Vale a dire<br />
se il suono non risulta convincente, provate a<br />
migliorarlo sperimentando con la sequenza di<br />
collegamento dei processori.<br />
4.4 IL VORTEX E I MIXER<br />
Per collegare il vostro VORTEX a un mixer vi<br />
suggeriamo di utilizzare la RED BOX ® PRO di<br />
Hughes & Kettner ® . Questa viene collegata alla<br />
presa FX-SEND dell’amplificatore. Il controllo<br />
Master non influisce sul livello del segnale di<br />
questa uscita. Il segnale di uscita della RED BOX ®<br />
è simmetrico (=balanced) e gli viene aggiunto<br />
una simulazione di cabinet.<br />
5.0 ASSISTENZA E MANUTENZIONE PREVENTIVA<br />
• Quando state collegando delle unità esterne,<br />
fate sempre attenzione alle loro specifiche<br />
tecniche. Non collegate mai delle unità con<br />
livelli di uscita del segnale troppo elevati (come<br />
altri amplificatori) all'ingresso dell'amplificatore.<br />
• Assicuratevi che la tensione della rete di corrente<br />
alla quale state per collegarvi sia compatibile<br />
con quella dell'amplificatore. Nel caso foste<br />
in dubbio chiedete informazioni al tecnico<br />
del suono o al custode del locale in cui<br />
state suonando.<br />
• Evitate di riparare lo strumento da solo! Fate<br />
in modo che sia un tecnico di assistenza<br />
qualificato a sostituire anche i fusibili interni del<br />
vostro amplificatore.<br />
• Potete pulire la superficie del vostro VORTEX<br />
con uno straccio leggermente inumidito.<br />
25<br />
ITALIANO
VORTEX - MANUAL<br />
26<br />
6.0 RICERCA E SOLUZIONE DEI PROBLEMI<br />
6.1 Il VORTEX non si accende:<br />
• All'amplificatore non arriva corrente. Controllate<br />
il cavo di alimentazione e verificate che sia<br />
collegato correttamente.<br />
• Il fusibile principale è difettoso. Sostituitelo con<br />
un altro identico. Se anche quest'altro si brucia,<br />
consultate il vostro rivenditore Hughes & Kettner ® .<br />
6.2 Il VORTEX è collegato correttamente<br />
ma non si sente alcun suono.<br />
• Uno o più controlli GAIN risp. MASTER potrebbero<br />
trovarsi a livello zero. Girate i controlli ad un<br />
valore più alto.<br />
• Il cavo della vostra chitarra potrebbe essere<br />
rotto, provate usarne un altro.<br />
• Un corto circuito nel segnale dello speaker può<br />
aver bruciato un fusibile interno. Assicuratevi<br />
che nessun collegamento sia in corto circuito<br />
e chiamate un tecnico qualificato per la<br />
sostituzione del fusibile (ovviamente con<br />
caratteristiche identiche).<br />
6.3 È impossibile selezionare il canale CLEAN<br />
tramite un selettore a pedale esterno:<br />
• Il selettore a pedale non è collegato<br />
correttamente. Inserite il jack nell'apposita<br />
presa.<br />
• Assicuratevi che il selettore a pedale corrisponda<br />
al tipo richiesto. Vi consigliamo di usare il FS1,<br />
in vendita opzionale presso il vostro rivenditore<br />
Hughes & Kettner ® .<br />
6.4 Quando vengono utilizzati, il loop effetti<br />
e/o le prese FX-SEND e/o FX-RETURN<br />
causano del rumore di fondo (ronzio).<br />
• Un campo elettrico o magnetico che influisca<br />
sul cavo ne è la causa. Utilizzate cavi di alta<br />
qualità oppure scambiate i cavi che state<br />
utilizzando per ridurre le interferenze al minimo.<br />
Se tutto ciò non migliora la situazione, utilizzate<br />
un DI-box.<br />
• Le messe a terra delle unità esterne collegate<br />
creano un loop di terra che causa ronzii indesiderati.<br />
Mai staccare la messa a terra delle<br />
unità collegate per nessun motivo! Provate a<br />
collegare tutte le unità alla stessa presa di<br />
corrente utilizzando una ciabatta. Se questo non<br />
serve ad eliminare il rumore, dovrete assicurarvi<br />
che il collegamento sia separato galvanicamente<br />
facendo passare il segnale attraverso<br />
un DI-box.<br />
6.5 Collegando un processore effetti esterno<br />
al FX-SEND, il segnale (anche se usando<br />
suoni clean) risulta tutto distorto:<br />
• Il segnale sta saturando l’ingresso del processore<br />
effetti. Abbassate la sensibilità d’ingresso usando<br />
i controlli ”Input” o ”Gain”del processore effetti.<br />
6.6 Collegando un processore effetti esterno<br />
al FX-RETURN, il livello di volume del<br />
segnale d’uscita si diminuisce.<br />
• Il livello del segnale all’uscita del processore<br />
effetti risulta troppo basso. Alzatelo tramite il<br />
controllo ”Output” del processore effetti.
VOTRTEX - MANUAL<br />
¡MUCHAS GRACIAS! NOS COMPLACE QUE TE HAYAS<br />
DECIDIDO POR UN VORTEX DE HUGHES & KETTNER ® !<br />
Un grupo de técnicos y guitarristas han<br />
desarrollado la línea de amplificadores VORTEX<br />
con el objetivo de combinar sonidos de guitarra<br />
legales con un equipamiento conforme a la<br />
práctica. VORTEX es la herramienta de trabajo<br />
ideal para los guitarristas exigentes, Una etapa<br />
final extremadamente potente „Current<br />
Feedback“ se encarga de darle un "carácter de<br />
válvulas de tubo" abierto que no te ofrecen los<br />
otros amplificadores. Con ello tu VORTEX tiene<br />
un sonido notablemente más potente que los<br />
otros amplificadores a igual potencia de salida.<br />
Un concepto de manejo y operación con buena<br />
visión global y confortable facilita entrar sin<br />
problemas en el mundo del sonido del VORTEX.<br />
El presente <strong>manual</strong> de instrucciones, te ayudará a<br />
obtener una visión global detallada de las<br />
posibilidades de este amplificador. Además te<br />
ofrecerá informaciones que te permitirán un<br />
control absoluto del amplificador.<br />
¡Que disfrutes del sonido de tu VORTEX!<br />
Tu equipo Hughes & Kettner ® .<br />
CONTENIDO<br />
ANTES DE LA PUESTA EN MARCHA . . . . . . . . . . . .28<br />
1.0 LOS CANALES DEL VORTEX . . . . . . . . . . . . .28<br />
2.0 CONEXIONES Y ELEMENTOS DE MANDO . . . .29<br />
3.0 SETUP ESTÁNDAR / CABLEADO . . . . . . . . . . . .30<br />
4.0 MANEJO DEL VORTEX . . . . . . . . . . . . . . . . .30<br />
4.1 LA SELECCIÓN DE LOS CANALES . . . . . . . . . .30<br />
4.2 EL VORTEX CON APARATOS DE EFECTOS . .30<br />
4.3 CONEXIóN DEL APARATO DE EFECTOS . . . . .31<br />
4.4 EL VORTEX EN LA MESA DE MEZCLAS . . . . .31<br />
5.0 MANTENINMIENTO Y SERVICIO . . . . . . . . . . . .31<br />
6.0 SOLUCIÓN DE ERRORES / TROUBLESHOOTING 32<br />
7.0 DATOS TÉCNICOS . . . . . . . . . . . . . . . . . . . . . .35<br />
27<br />
ESPAñOL
VORTEX - MANUAL<br />
28<br />
ANTES DE LA PUESTA EN MARCHA<br />
• Antes de conectar el VORTEX, comprueba<br />
que el valor de tensión indicado próximo al<br />
conector hembra de red coincide con la<br />
tensión de red existente.<br />
• Asegúrate de que entra suficiente aire por<br />
las superficies de ventilación.<br />
1.0 LOS CANALES DEL VORTEX<br />
La etapa previa del VORTEX genera (con<br />
sobremodulación elevada) un Overdrive redondo<br />
y armónico con una dinámica extraordinaria.<br />
Su concepto de conmutación innovador, que<br />
simula todos los elementos configuradores del<br />
sonido de amplificadores por tubos en técnica<br />
de semiconductores, proporciona al VORTEX<br />
una calidad de sonido y dinámica no igualados<br />
hasta ahora en su categoría de precios, que<br />
un guitarrista exigente para lograr su expresión<br />
musical necesita a toda costa.<br />
CLEAN: Según el ajuste de la etapa previa se pueden<br />
lograr sonidos limpios modernos o "vintage".<br />
Con ajustes superiores del regulador de VOLUMEN,<br />
un circuito ”SoftClip” se encarga de el exacto<br />
Overdrive blando, con el que se han popularizado<br />
tanto los amplificadores de válvulas de<br />
tubos. De este modo el canal "clean" puede<br />
convertirse en un canal "Crunch".<br />
• Intenta que el aparato tenga un sitio fijo firme,<br />
exento de acciones mecánicas y térmicas ajenas<br />
que pudieran perjudicar su buen funcionamiento<br />
o la seguridad de las personas.<br />
• El fabricante no se hace responsable de los<br />
daños en el aparato que aparezcan por una<br />
utilización y funcionamiento incorrecto.<br />
LEAD: Por medio del regulador de CHARACTER<br />
se pueden realizar en el canal Lead tanto sonidos<br />
clásicos, como sonidos de Rock abiertos con<br />
carácter “británico” – directa y dinámicamente<br />
(HARD) – como también sonidos blandos de blues<br />
con un sonido “americano” (SOFT). Con el paso<br />
gradual entre estos tres mundos de sonido diferentes<br />
resultan posibilidades de variación hasta<br />
ahora desconocidas.<br />
HALL: El VORTEX va equipado con una<br />
reverberación de muelle interna antepuesto en el<br />
recorrido de la señal al FX SEND.
VOTRTEX - MANUAL<br />
2.0 CONEXIONES Y ELEMENTOS DE MANDO<br />
INPUT: Conector para guitarras con Humbucker,<br />
sistema fonocaptor activo o Single Coils.<br />
CLEAN VOL: Regula el volumen del canal CLEAN,<br />
según la potencia de los Pickups permite realizar<br />
sonidos ligeramente sobremodulados a partir de<br />
la posición aprox. ”12 horas” , dejándose controlar<br />
con sensibilidad y precisión con el "ataque"<br />
de la mano de contacto.<br />
CHANNEL SELECT: Conmuta entre el canal CLEAN<br />
y LEAD. Con pulsador accionado el canal LEAD<br />
está activo.<br />
LEAD LED ROJO: El LED encendido indica el canal<br />
LEAD activo.<br />
LEAD GAIN: Controla el grado de sobremodulación<br />
del canal LEAD.<br />
CHARACTER: Realiza un paso entre las diferentes<br />
características de sonido pasando del HARD<br />
(„británico“) hasta el SOFT („americano“) .<br />
LEAD MASTER: Regula el volumen del canal LEAD.<br />
Regulador BASS, MID y TREBLE para ambos canales.<br />
BASS, MID y TREBLE se influyen entre sí (igual<br />
como sucede con los amplificadores de válvulas<br />
de tubos) entre sí. Esta característica ofrece el<br />
abanico más amplio de matices de sonido.<br />
REVERB: Regula la componente del efecto de<br />
reverberación integrado. La adaptación del nivel<br />
de reverberación se produce automáticamente<br />
al conmutar de canal.<br />
MASTER: Controla el volumen total del VORTEX.<br />
El nivel del FX-SEND no es influenciado por<br />
este regulador.<br />
FX-SEND: Conecta este conector hembra con la<br />
entrada de un aparato de efecto o etapa final<br />
adicional. Además, aquí puede conectarse una<br />
etapa final RED BOX ® entre el amplificador y la<br />
mesa de mezclas.<br />
FX-RETURN: Conecta este conector hembra con<br />
la salida de un aparato de efectos.<br />
FOOTSWITCH: Opción de conexión de un interruptor<br />
de pedal de uso comercial normal (p. ej.<br />
Hughes & Kettner ® FS-1). De este modo puede<br />
conmutarse entre el canal CLEAN y LEAD. El<br />
conmutador CHANNEL SELECT de la cara frontal<br />
deberá estar colocado en la posición CLEAN.<br />
PHONES: Jack hembra para conectar unos auriculares.<br />
El conector hembra desconecta los altavoces<br />
internos.<br />
29<br />
ESPAñOL
VORTEX - MANUAL<br />
30<br />
LADO POSTERIOR:<br />
MAINS: Conector de red para el cable de red<br />
Euro suministrado. Antes de enchufar el conector<br />
de red, asegúrate de que la tensión de red existente<br />
coincida con el valor indicado en el aparato.<br />
SPEAKER OUTPUTS:<br />
Serie en los Combos, para la conexión de un<br />
altavoz adicional con una impedancia mínima de<br />
2 ohmios. Paralelo en los Tops, para la conexión<br />
del altavoz suministrado de 4x 12” Box y un altavoz<br />
adicional de como mínimo 8 ohmios.<br />
En ningún caso se deberá quedar por debajo de<br />
los 4 ohmios. Es decir cuando se utilicen ambos<br />
conectores hembras sólo se podrá conectar altavoces<br />
con 8 ohmios respectivamente.<br />
Las Combo-Versiones La Head-Versio'n<br />
4.0 MANEJO DEL VORTEX<br />
4.1 LA SELECCIÓN<br />
DE LOS CANALES<br />
Los canales del VORTEX se seleccionan por<br />
medio del conmutador CHANNEL SELECT o un<br />
interruptor de pedal externo. En el programa de<br />
accesorios de Hughes & Kettner ® se ofrece un<br />
interruptor de pedal (FS 1) .<br />
3.0 SETUP ESTÁNDAR /<br />
CABLEADO<br />
HEAD/COMBO:<br />
4.2 EL VORTEX CON<br />
APARATOS DE EFECTOS<br />
El VORTEX está equipado con un tramo de<br />
efecto serie. De este modo la señal de etapa<br />
previa del amplificador se conduce y procesa<br />
completa a través del aparato de efectos<br />
en bucle.
VOTRTEX - MANUAL<br />
4.3 CONEXIÓN DEL<br />
APARATO DE EFECTOS:<br />
• Conecta el conector hembra FX-SEND a la<br />
enrada, el conector hembra de FX-RETURN<br />
a la salida de tu aparato de efectos.<br />
• Utiliza exclusivamente un cable Patch de alta<br />
calidad, para impedir las pérdidas de señal, ruidos<br />
parásitos o fallos.<br />
• Comprueba siempre que el aparato de efectos<br />
no se sobremodule. Si procede, ten en cuenta<br />
además el display de modulación del aparato<br />
de efectos y utiliza el regulador ”Input” y<br />
”Output” en el aparato de efectos para regular<br />
el nivel.<br />
• Los ”distorsionadores” no tienen nada que<br />
hacer en el tramo del bucle. Básicamente los<br />
efectos de compresión se generan siempre al<br />
comienzo de la cadena se señales. También los<br />
compresores deben conectarse (según el efec-<br />
5.0 MANTENIMIENTO Y SERVICIO<br />
El amplificador VORTEX esta libre de mantenimiento.<br />
Sin embargo existen algunas reglas básicas<br />
cuyo cumplimiento prolongará la vida útil de<br />
tu amplificador notablemente.:<br />
• ¡Procura que los aparatos periféricos conectados<br />
se encuentren siempre en un estado<br />
técnico correcto!<br />
• ¡Los cables de altavoces defectuosos son la<br />
causa más frecuente de los fallos de las etapas<br />
finales. Los cables incorrectos conllevan en la<br />
mayoría de las veces problemas de zumbidos.<br />
• Procura que exista una circulación libre de aire<br />
en las superficies de refrigeración del amplificador<br />
(lado posterior del chasis del amplificador).<br />
• Evita en todo caso vibraciones mecánicas<br />
intensas, calor extremo así como la penetración<br />
de polvo y sobretodo humedad.<br />
to de sonido deseado), si procede, delante de<br />
la entrada del amplificador.<br />
• Presta atención también de que si se encadenan<br />
en bucles varios aparatos de efectos, se<br />
conecten en orden correlativo correcto. Es<br />
decir si el sonido no es satisfactorio, deberás<br />
experimentar con el orden de conexión de los<br />
aparatos de efectos.<br />
4.3 EL VORTEX EN<br />
LA MESA DE MEZCLAS<br />
Para conectar el VORTEX a una mesa de<br />
mezclas, recomendamos conducir la señal a través<br />
de una RED BOX ® PRO de Hughes & Kettner ® .<br />
Esta debe conectarse al FX-SEND del amplificador.<br />
El nivel de salida es aquí independiente<br />
del master. La señal a la salida del RED BOX ®<br />
es simulada simétricamente (= balanced)<br />
y de altavoz.<br />
• Presta gran atención a las especificaciones de<br />
los aparatos adicionales. No conectes nunca a<br />
la salida niveles demasiados altos (p. ej. etapas<br />
finales) al amplificador.<br />
• erifica siempre la tensión de la red existente<br />
antes de conectar el aparato. En caso de duda<br />
contacta con el técnico de escenario, portero<br />
o similar.<br />
• ¡No intentes hacer reparaciones tu mismo!<br />
Incluso el cambio de fusibles internos es mejor<br />
que lo realice un técnico especialista experto.<br />
• La superficie del VORTEX se puede limpiar muy<br />
bien usando un paño ligeramente húmedo.<br />
31<br />
ESPAñOL
VORTEX - MANUAL<br />
32<br />
6.0 POSIBLES FALLOS DE ERROR / TROUBLESHOOTING<br />
6.1 No se puede conectar el VORTEX.<br />
• No llega tensión de red. ¡Comprueba la<br />
conexión correcta del cable de red!<br />
• El fusible de red está defectuoso. Sustituye por<br />
favor el fusible de red por otro fusible de valor<br />
adecuado. En caso de que se vuelva a producir<br />
el defecto, contacta con tu comercial especializado<br />
de Hughes & Kettner ® .<br />
6.2 El VORTEX está cableado correctamente<br />
pero no se escucha nada.<br />
• Uno o varios reguladores de ganancia o bien<br />
maestros están apagados. Vuelve a abrir el /los<br />
regulador/es.<br />
• El cable de la guitarra eventualmente no está<br />
correcto. Inténtalo con otro.<br />
• A través de un cortocircuito en la toma de altavoz<br />
ha saltado uno de los fusibles internos.<br />
Asegúrate de que las conexiones no están<br />
puenteadas y deja que un técnico de asistencia<br />
técnica sustituya los fusibles (¡prestar atención<br />
al valor correcto!).<br />
6.3 El canal CLEAN no puede activarse mediante<br />
un interruptor de pedal externo.<br />
• El conector del interruptor de pedal no está insertado.<br />
Cablea el VORTEX correspondientemente.<br />
• Comprueba si el interruptor de pedal conectado<br />
concuerda con el tipo correcto.<br />
Recomendamos usar el FS 1 del programa de<br />
accesorios Hughes & Kettner® .<br />
6.4 Al usar el tramo de efectos, FX-SEND<br />
y FX-RETURN se produce un ruido<br />
de zumbido.<br />
• Existe un campo magnético / eléctrico variable<br />
que genera una inducción sobre la línea. Utiliza<br />
un cable con mejor apantallamiento e intenta<br />
colocar el cable de modo que se minimice la<br />
inducción incidente. Si no es suficiente deberás<br />
usar una caja DI.<br />
• A través de la toma de tierra de los aparatos<br />
conectados se produce un bucle de zumbido<br />
¡En ningún caso deberá desconectar el cable<br />
de protección de puesta a tierra de los<br />
aparatos! Utiliza ambos aparatos en el mismo<br />
circuito de red. Si sigue sin mejorar deberás<br />
separar galvánicamente la conexión mediante<br />
un caja DI.<br />
6.5 Al conectar el aparato de efecto en el FX-<br />
SEND se aprecia un distorsionamiento total<br />
de las señal (incluso con sonidos Clean).<br />
• La entrada del aparato de efecto está sobremodulada.<br />
Baja un poco la sensibilidad de<br />
entrada mediante el regulador (”Input” o bien<br />
”Gain”) en el aparato de efectos.<br />
6.6 Al conectar un aparato de efectos en<br />
el FX-RETURN se aprecia una reducción<br />
notable de la señal de salida.<br />
• El aparato de efecto tiene un nivel incorrecto<br />
en su salida. Aumenta el ”Output” en el aparato<br />
de efectos.
VOTRTEX - MANUAL<br />
7.0 TECHNICAL DATA<br />
Preamp section:<br />
INPUT: -12 dBV; max. input level +4 dB / 1 MΩ<br />
FX-SEND: 0 dBV; max. output level +14 dB / 850 Ω<br />
FX-RETURN: -4 dBV; max. input level +24 dB / 50 kΩ<br />
Power amp section: 'CURRENT FEEDBACK' solid<br />
state power amp<br />
Output Power:<br />
80 watts RMS into 4 Ω (1x12” Combo)<br />
80 watts RMS into 4 Ω (2x12” Combo)<br />
80 watts RMS into 4 Ω (Head)<br />
Headphones output: 100 mW into 4 - 600 Ω<br />
Frequency response: 20 Hz - 30 kHz (into 8 Ω)<br />
Speaker:<br />
Combos: Celestion ® 12” Rockdriver Junior<br />
Cabinet: 4x CELESTION ® 12” RockDriver Junior<br />
Power handling capacity: 200 watts RMS / 8 Ω<br />
GENERAL FEATURES:<br />
Voltage:<br />
230 V~ (European model)<br />
117 V~ (North American model)<br />
100 V~ (Japanese model)<br />
Max. power consumption: 175 VA<br />
Mains Fuse:<br />
T 500 mA (230 V model)<br />
T 1 A (117 V model)<br />
T 1,25 A (100 V model)<br />
Internal fuses: 2x T2A<br />
Dimensions: (W x H x D)<br />
Combo 1x 12”: 570 x 520 x 265 mm<br />
Combo 2x 12”: 655 x 520 x 265 mm<br />
Head: 610 x 235 x 255 mm<br />
Cabinet: 740 x 755 x 350 mm<br />
Weight:<br />
Combo 1x 12”: 17 kg<br />
Combo 2x 12”: 20.5 kg<br />
Head: 10 kg<br />
Cabinet: 33 kg<br />
7.0 TECHNISCHE DATEN<br />
Vorstufensektion:<br />
INPUT: -12 dB; max. Eingangspegel +4 dB/1 MΩ<br />
FX-SEND: 0 dB; max. Ausgangspegel +14 dB/850 Ω<br />
FX-RETURN: -4 dB; max. Eingangspegel +24 dB/50 kΩ<br />
Endstufe: 'CURRENT FEEDBACK' Halbleiterendstufe<br />
Ausgangsleistung:<br />
80 Watt RMS an 4 Ω (1x 12“Combo)<br />
80 Watt RMS an 4 Ω (2x 12“Combo )<br />
80 Watt RMS an 4 Ω (Topteil)<br />
Kopfhörerausgang: 100 mW an 4 - 600 Ω<br />
Frequenzgang: 20 Hz - 30 Khz<br />
Speaker:<br />
Combos: Celestion ® 12“ Rockdriver Junior<br />
Cabinet: 4x CELESTION ® 12“ RockDriver Junior,<br />
Belastbarkeit: 200 Watt RMS/8 Ω<br />
ALLGEMEINE DATEN:<br />
Betriebsspannung:<br />
230 V~ (europäisches Modell)<br />
117 V~ (nordamerikanisches Modell)<br />
100 V~ (japanisches Modell)<br />
Max. Leistungsaufnahme: 175 VA<br />
Netzsicherung:<br />
T 500 mA (230 V Modell)<br />
T 1 A (117 V Modell)<br />
T 1,25 A (100 V Modell)<br />
Interne Sicherungen: 2 x T 2 A<br />
Abmessungen (B x H x T):<br />
Combo 1x 12“: 570 x 520 x 265 mm<br />
Combo 2x 12“: 655 x 520 x 265 mm<br />
Topteil: 610 x 235 x 255 mm<br />
Cabinet: 740 x 755 x 350 mm<br />
Gewicht:<br />
Combo 1x 12“: 17 kg<br />
Combo 2x 12“: 20,5 kg<br />
Topteil: 10 kg<br />
Cabinet: 33 kg<br />
33<br />
TECHNICAL DATA
34<br />
VORTEX - MANUAL<br />
7.0 CARACTERISTIQUES<br />
TECHNIQUES<br />
Section préamplificateur:<br />
INPUT : -12 dB ; impédance d’entrée max. +4 dB/1 MΩ<br />
FX-SEND : 0 dB ; impédance de sortie max. +14 dB/850 Ω<br />
FX-RETURN : -4 dB ; impédance d’entrée max. +24 dB/50 KΩ<br />
Étage de puissance : étage de puissance à semiconducteurs<br />
de type « CURRENT FEEDBACK »<br />
Puissance de sortie :<br />
80 watts RMS sous 4 Ω (1x 12" combo)<br />
80 watts RMS sous 4 Ω (2x 12" combo)<br />
80 watts RMS sous 4 Ω (tête)<br />
Sortie casque d’écoute : 100 mW sous 4 - 600 Ω<br />
Bande passante : 20 Hz – 30 Hz<br />
Combo : Celestion ® 12" RockDriver Junior<br />
Cabinet : 4x CELESTION ® 12" RockDriver Junior,<br />
Capacité de charge : 200 watts RMS sous 8 Ω<br />
CARACTERISTIQUES GENERALES :<br />
Tension de service :<br />
230 V~ (modèle européen)<br />
117 V~ (modèle nord-américain)<br />
100 V~ (modèle japonais)<br />
Puissance absorbée max. : 175 VA<br />
Fusibles de secteur :<br />
T 500 mA (modèle européen)<br />
T 1 A (modèle américain)<br />
T 1,25 A (modèle japonais)<br />
Fusibles internes : 2x T 2 A<br />
Dimensions (l x H x P):<br />
Combo 1x 12" : 570 x 520 x 265 mm<br />
Combo 2x 12" : 655 x 520 x 265 mm<br />
Tête : 610 x 235 x 255 mm<br />
Caisse : 740 x 755 x 350 mm<br />
Poids :<br />
Combo 1x 12" : 17 kg<br />
Combo 2x 12" : 20,5 kg<br />
Tête : 10 kg<br />
Caisse : 33 kg<br />
7.0 CARATTERISTICHE<br />
TECNICHE<br />
Sezione Preamp:<br />
INPUT: -12 dB; livello d’ingresso massimo +4 dB/1 MΩ<br />
FX-SEND: 0 dB; livello d’ingresso massimo +14 dB/850 Ω<br />
FX-RETURN: -4 dB; livello d’ingresso massimo +24 dB/50 kΩ<br />
Sezione finale di potenza: Sezione finale di potenza<br />
a semiconduttore 'CURRENT FEEDBACK'<br />
Potenza di uscita:<br />
80 Watt RMS su 4 Ω (1x 12” Combo)<br />
80 Watt RMS su 4 Ω (2x 12” Combo)<br />
80 Watt RMS su 4 Ω (testata)<br />
Presa cuffia: 100 mW su 4 - 600 Ω<br />
Risposta in frequenza: 20 Hz -30 KHz<br />
versioni combo: Celestion ® 12“ Rockdriver Junior<br />
Cabinet: 4x CELESTION ® 12“ RockDriver Junior<br />
Capacità di carico: 200 Watt RMS su 8 Ω<br />
CARATTERISTICHE GENERALI:<br />
Voltaggio:<br />
230 V~ (modello per l’Europa)<br />
117 V~ (modello per l’America settentrionale)<br />
100 V~ (modello per il Giappone)<br />
Assorbimento massimo: 175 VA<br />
Fusibile di linea:<br />
T 500 mA (modello 230 V)<br />
T 1 A (modello 117 V)<br />
T 1,25 A (modello 100 V)<br />
Fusibili interni: 2 x T 2 A<br />
Dimensioni (larghezza, altezza, profondità):<br />
Combo 1x 12“: 570 x 520 x 265 mm<br />
Combo 2x 12“: 655 x 520 x 265 mm<br />
Testata: 610 x 235 x 255 mm<br />
Cabinet: 740 x 755 x 350 mm<br />
Peso:<br />
Combo 1x 12“: 17 kg<br />
Combo 2x 12“: 20,5 kg<br />
Testata: 10 kg<br />
Cabinet: 33 kg
VOTRTEX - MANUAL<br />
7.0 DATOS TÉCNICOS<br />
Sección de etapa previa:<br />
INPUT: -12 dB; Nivel de entrada máx. +4 dB/1 MΩ<br />
FX-SEND: 0 dB; Nivel de salida máx +14 dB/850 Ω<br />
FX-RETURN: -4 dB; Nivel de entrada máx. +24<br />
dB/50 kΩ<br />
Etapa final: 'CURRENT FEEDBACK' Etapa final<br />
de semiconductores<br />
Potencia de salida:<br />
80 vatios RMS a 4 Ω (1x 12“Combo)<br />
80 vatios RMS a 4 Ω (2x 12“Combo)<br />
80 vatios RMS an 4 Ω (Parte Top)<br />
Salida de auriculares: 100 mW an 4 - 600 Ω<br />
Respuesta de frecuencia: 20 Hz - 30 Khz<br />
Combos: Celestion ® 12“ Rockdriver Junior<br />
Cabinet: 4x CELESTION ® 12“ RockDriver Junior<br />
Cargabilidad: 200 vatios RMS/8 Ω<br />
DATOS GENERALES:<br />
Tensión de servicio:<br />
230 V~ (Modelo europeo)<br />
117 V~ (Modelo norteamericano)<br />
100 V~ (Modelo japonés)<br />
Consumo máx de potencia: 175 VA<br />
Fusible de red:<br />
T 500 mA (230 V Modelo)<br />
T 1 A(117 V Modelo)<br />
T 1,25 A (100 V Modelo)<br />
Fusibles internos: 2 x T 2 A<br />
Dimensiones (B x H x T):<br />
Combo 1x 12“: 570 x 520 x 265 mm<br />
Combo 2x 12“: 655 x 520 x 265 mm<br />
Pieza: 610 x 235 x 255 mm<br />
Cabinet: 740 x 755 x 350 mm<br />
Peso:<br />
Combo 1x 12“: 17 kg<br />
Combo 2x 12“: 20,5 kg<br />
Pieza: 10 kg<br />
Cabinet: 33 kg<br />
35<br />
TECHNICAL DATA
IMPORTANT SAFETY INSTRUCTIONS<br />
BEFORE CONNECTING, READ INSTRUCTIONS<br />
• Read all of these instructions!<br />
• Save these instructions for later use!<br />
• Follow all warnings and instructions marked on the product!<br />
• Do not use this product near water, i.e. bathtub, sink, swimming pool, wet basement,<br />
etc.<br />
• Do not place this product on an unstable cart, stand or table. The product may fall,<br />
causing serious damage to the product or to persons!<br />
• Slots and openings in the cabinet and the back or bottom are provided for ventilation;<br />
to ensure reliable operation of the product and to protect it from overheating,<br />
these openings must not be blocked or covered. This product should not be placed<br />
in a built-in installation unless proper ventilation is provided.<br />
• This product should not be placed near a source of heat such as a stove, radiator, or<br />
another heat producing amplifier.<br />
• Use only the supplied power supply or power cord. If you are not sure of the type of<br />
power available, consult your dealer or local power company.<br />
• Do not allow anything to rest on the power cord. Do not locate this product where<br />
persons will walk on the cord.<br />
• Never break off the ground pin on the power supply cord.<br />
• Power supply cords should always be handled carefully. Periodically check cords for<br />
cuts or sign of stress, especially at the plug and the point where the cord exits the<br />
unit.<br />
• The power supply cord should be unplugged when the unit is to be unused for long<br />
periods of time.<br />
• If this product is to be mounted in an equipment rack, rear support should be provided.<br />
• This product should be used only with a cart or stand that is recommended by<br />
Hughes & Kettner.<br />
• Never push objects of any kind into this product through cabinet slots as they may<br />
touch dangerous voltage points or short out parts that could result in risk of fire or<br />
electric shock. Never spill liquid of any kind on the product.<br />
• Do not attempt to service this product yourself, as opening or removing covers may<br />
expose you to dangerous voltage points or other risks. Refer all servicing to qualified<br />
service personnel.<br />
• Unplug this product from the wall outlet and refer servicing to qualified service<br />
personnel under the following conditions:<br />
• When the power cord or plug is damaged or frayed.<br />
• If liquid has been spilled into the product.<br />
• If the product has been exposed to rain or water.<br />
• If the product does not operate normally when the operating instructions are followed.<br />
• If the product has been dropped or the cabinet has been damaged.<br />
• If the product exhibits a distinct change in performance, indicating a need of<br />
service!<br />
• Adjust only these controls that are covered by the operating instructions since improper<br />
adjustment of other controls may result in damage and will often require extensive<br />
work by a qualified technician to restore the product to normal operation.<br />
• Exposure to extremely high noise levels may cause a permanent hearing loss.<br />
• Individuals vary considerably in susceptibility to noise induced hearing loss, but nearly<br />
everyone will lose some hearing if exposed to sufficiently intense noise for a sufficient<br />
time. The U.S. Government´s Occupational Safety and Health Administration<br />
(OSHA) has specified the following permissible noise level exposures:<br />
Duration Per Day In Hours Sound LeveldBA, Slow Response<br />
8 90<br />
6 92<br />
4 95<br />
3 97<br />
2 100<br />
11 /2<br />
102<br />
1 105<br />
1<br />
/2 110<br />
1<br />
/4 or less 115<br />
• According to OSHA, any exposure in excess of the above permissible limits could<br />
result in some hearing loss.<br />
• Ear plug protectors in the ear canals or over the ears must be worn when operating<br />
this amplification system in order to prevent a permanent hearing loss if exposure is<br />
in excess of the limits as set forth above. To ensure against potentially dangerous<br />
exposure to high sound pressure levels, it is recommended that all persons exposed<br />
to equipment capable of producing high sound pressure levels such as this amplification<br />
system be protected by hearing protectors while this unit is in operation.<br />
• Fuses: For continued protection against risk of fire, replace fuses only with the same<br />
type and ratings.<br />
TO PREVENT THE RISK OF FIRE AND SHOCK HAZARD, DO NOT EXPOSE THIS APPLIANCE TO<br />
MOISTURE OR RAIN. DO NOT OPEN CASE; NO USER SERVICE-ABLE PARTS INSIDE.<br />
REFER SERVICING TO QUALIFIED SERVICE PERSONNEL.<br />
WICHTIGE SICHERHEITSHINWEISE!<br />
BITTE VOR GEBRAUCH LESEN UND FÜR SPÄTEREN GEBRAUCH<br />
AUFBEWAHREN!<br />
• Das Gerät wurde von Hughes & Kettner gemäss IEC 9239 gebaut und hat das Werk in<br />
sicherheitstechnisch einwandfreiem Zustand verlassen. Um diesen Zustand zu erhalten<br />
und einen gefahrlosen Betrieb sicherzustellen, muss der Anwender die Hinweise und die<br />
Warnvermerke beachten, die in der Bedienungsanleitung enthalten sind. Das Gerät entspricht<br />
der Schutzklasse I (schutzgeerdet).<br />
• DIE SICHERHEIT, ZUVERLÄSSIGKEIT UND LEISTUNG DES GERÄTES WIRD VON HUGHES & KETT-<br />
NER NUR DANN GEWÄHRLEISTET, WENN:<br />
• Montage, Erweiterung, Neueinstellung, Änderungen oder Reparaturen von Hughes &<br />
Kettner oder von dazu ermächtigten Personen ausgeführt werden.<br />
• die elektrische Installation des betreffenden Raumes den Anforderungen von IEC (ANSI)-<br />
Festlegungen entspricht.<br />
• das Gerät in Übereinstimmung mit der Gebrauchsanweisung verwendet wird.<br />
WARNUNG:<br />
• Wenn Abdeckungen geöffnet oder Gehäuseteile entfernt werden, ausser wenn dies von<br />
Hand möglich ist, können Teile freigelegt werden, die Spannung führen.<br />
• Wenn ein Öffnen des Gerätes erforderlich ist, muss das Gerät von allen Spannungsquellen<br />
getrennt sein. Berücksichtigen Sie dies vor dem Abgleich, vor einer Wartung, vor<br />
einer Instandsetzung und vor einem Austausch von Teilen.<br />
• Ein Abgleich, eine Wartung oder eine Reparatur am geöffneten Gerät unter Spannung<br />
darf nur durch eine vom Hersteller autorisierte Fachkraft (nach VBG 4) geschehen, die<br />
mit den verbundenen Gefahren vertraut ist.<br />
• Lautsprecher-Ausgänge, die mit dem IEC 417/5036-Zeichen (Abb.1, s.unten) versehen<br />
sind können berührungsgefährliche Spannungen führen. Deshalb vor dem Einschalten<br />
des Gerätes Verbindung nur mit dem vom Hersteller empfohlenen Anschlusskabel zum<br />
Lautsprecher herstellen.<br />
• Alle Stecker an Verbindungskabeln müssen mit dem Gehäuse verschraubt oder verriegelt<br />
sein, sofern möglich.<br />
• Es dürfen nur Sicherungen vom angegebenen Typ und der angegebenen<br />
Nennstromstärke als Ersatz verwendet werden.<br />
• Eine Verwendung von geflickten Sicherungen oder Kurzschliessen des Halters ist unzulässig.<br />
• Niemals die Schutzleiterverbindung unterbrechen.<br />
• Oberflächen, die mit dem „HOT“-Zeichen (Abb.2, s.unten) versehen sind, Rückwände<br />
oder Abdeckungen mit Kühlschlitzen, Kühlkörper und deren Abdeckungen, sowie Röhren<br />
und deren Abdeckungen können im Betrieb erhöhte Temperaturen annehmen und sollten<br />
deshalb nicht berührt werden.<br />
• Hohe Lautstärkepegel können dauernde Gehörschäden verursachen. Vermeiden Sie<br />
deshalb die direkte Nähe von Lautsprechern, die mit hohen Pegeln betrieben werden.<br />
Verwenden Sie einen Gehörschutz bei dauernder Einwirkung hoher Pegel.<br />
NETZANSCHLUSS:<br />
• Das Gerät ist für Dauerbetrieb ausgelegt.<br />
• Die eingestellte Betriebsspannung muss mit der örtlichen Netzspannung übereinstimmen.<br />
• Achtung: Der Netzschalter des Gerätes muss in 0FF - Position stehen, wenn das Netzkabel<br />
angeschlossen wird.<br />
• Der Anschluss an das Stromnetz erfolgt mit dem mitgelieferten Netzteil oder Netzkabel.<br />
• Netzteil: Eine beschädigte Anschlussleitung kann nicht ersetzt werden. Das Netzteil darf<br />
nicht mehr betrieben werden.<br />
• Vermeiden Sie einen Anschluss an das Stromnetz in Verteilerdosen zusammen mit vielen<br />
anderen Stromverbrauchern.<br />
• Die Steckdose für die Stromversorgung muss nahe am Gerät angebracht und leicht<br />
zugänglich sein.<br />
AUFSTELLUNGSORT:<br />
• Das Gerät sollte nur auf einer sauberen, waagerechten Arbeitsfläche stehen.<br />
• Das Gerät darf während des Betriebs keinen Erschütterungen ausgesetzt sein.<br />
• Feuchtigkeit und Staub sind nach Möglichkeit fernzuhalten.<br />
• Das Gerät darf nicht in der Nähe von Wasser, Badewanne, Waschbecken, Küchenspüle,<br />
Nassraum, Swimmingpool oder feuchten Räumen betrieben werden. Keine mit Flüssigkeit<br />
gefüllten Gegenstände -Vase, Gläser, Flaschen etc. auf das Gerät stellen.<br />
• Sorgen Sie für ausreichende Belüftung der Geräte.<br />
• Eventuelle Ventilationsöffnungen dürfen niemals blockiert oder abgedeckt werden. Das<br />
Gerät muss mindestens 20 cm von Wänden entfernt aufgestellt werden. Das Gerät darf<br />
nur dann in ein Rack eingebaut werden, wenn für ausreichende Ventilation gesorgt ist<br />
und die Einbauanweisungen des Herstellers eingehalten werden.<br />
• Vermeiden Sie direkte Sonneneinstrahlung sowie die unmittelbare Nähe von Heizkörpern<br />
und Heizstrahlern oder ähnlicher Geräte.<br />
• Wenn das Gerät plötzlich von einem kalten an einen warmen Ort gebracht wird, kann sich<br />
im Geräteinnern Kondensfeuchtigkeit bilden. Dies ist insbesondere bei Röhrengeräten zu<br />
beachten. Vor dem Einschalten solange warten bis das Gerät Raumtemperatur angenommen<br />
hat.<br />
• Zubehör: Das Gerät nicht auf einen instabilen Wagen, Ständer, Dreifuß, Untersatz oder<br />
Tisch stellen. Wenn das Gerät herunterfällt, kann es Personenschäden verursachen und<br />
selbst beschädigt werden. Verwenden Sie das Gerät nur mit einem vom Hersteller empfohlenen<br />
oder zusammen mit dem Gerät verkauften Wagen, Rack, Ständer, Dreifuß oder<br />
Untersatz. Bei der Aufstellung des Gerätes müssen die Anweisungen des Herstellers<br />
befolgt und muss das vom Hersteller empfohlene Aufstellzubehör verwendet werden.<br />
Eine Kombination aus Gerät und Gestell muss vorsichtigt bewegt werden. Plötzliches<br />
Anhalten, übermässige Kraftanwendung und ungleichmässige Böden können das<br />
Umkippen der Kombination aus Gerät und Gestell bewirken.<br />
• Zusatzvorrichtungen: Verwenden Sie niemals Zusatzvorrichtungen, die nicht vom Hersteller<br />
empfohlen wurden, weil dadurch Unfälle verursacht werden können<br />
• Zum Schutz des Gerätes bei Gewitter oder wenn es längere Zeit nicht beaufsichtigt oder<br />
benutzt wird, sollte der Netzstecker gezogen werden. Dies verhindert Schäden am Gerät<br />
aufgrund von Blitzschlag und Spannungsstössen im Wechselstromnetz.<br />
Abb.1 Abb.2
IMPORTANT ADVICE ON SAFETY!<br />
PLEASE READ BEFORE USE AND KEEP FOR LATER USE!<br />
• The unit has been built by Hughes & Kettner in accordance with IEC 9239 and left the<br />
factory in safe working order. To maintain this condition and ensure non-risk operation,<br />
the user must follow the advice and warning comments found in the operating<br />
instructions. The unit conforms to Protection Class 1 (protectively earthed).<br />
• HUGHES & KETTNER ONLY GUARANTEE THE SAFETY, RELIABILITY AND EFFICIENCY OF THE<br />
UNIT IF:<br />
• Assembly, extension, re-adjustment, modifications or repairs are carried out by Hughes<br />
& Kettner or by persons authorized to do so.<br />
• The electrical installation of the relevant area complies with the requirements of IEC<br />
(ANSI) specifications.<br />
•The unit is used in accordance with the operating instructions.<br />
• The unit is regularly checked and tested for electrical safety by a competent technician.<br />
WARNING:<br />
• If covers are opened or sections of casing are removed, except where this can be<br />
done <strong>manual</strong>ly, live parts can become exposed.<br />
• If it is necessary to open the unit this must be isolated from all power sources. Please<br />
take this into account before carrying out adjustments, maintenance, repairs and<br />
before replacing parts.<br />
• Adjustment, maintenance and repairs carried out when the unit has been opened<br />
and is still live may only be performed by specialist personnel who are authorized by<br />
the manufacturer (in accordance with VBG 4) and who are aware of the associated<br />
hazards.<br />
• Loudspeaker outputs which have the IEC 417/5036 symbol (Diagram 1, below) can<br />
carry voltages which are hazardous if they are made contact with. Before the unit is<br />
switched on, the loudspeaker should therefore only be connected using the lead<br />
recommended by the manufacturer.<br />
• Where possible, all plugs on connection cables must be screwed or locked onto the<br />
casing.<br />
• Replace fuses using only those of the specified type and current rating.<br />
• It is not permitted to use repaired fuses or to short-circuit the fuse holder.<br />
• Never interrupt the protective conductor connection.<br />
• Surfaces which are equipped with the „HOT“ mark (Diagram 2, below), rear panels or<br />
covers with cooling slits, cooling bodies and their covers, as well as tubes and their<br />
covers are purposely designed to dissipate high temperatures and should therefore<br />
not be touched.<br />
• High loudspeaker levels can cause permanent hearing damage. You should therefore<br />
avoid the direct vicinity of loudspeakers operating at high levels. Wear hearing<br />
protection if continuously exposed to high levels.<br />
MAINS CONNECTION:<br />
• The unit is designed for continuous operation.<br />
• The set operating voltage must match the local mains supply voltage.<br />
• Caution: The unit mains switch must be in position OFF before the mains cable is<br />
connected.<br />
• The unit is connected to the mains via the supplied power unit or power cable.<br />
• Power unit: Never use a damaged connection lead. Any damage must be rectified<br />
by a competent technician.<br />
• Avoid connection to the mains supply in distributor boxes together with several other<br />
power consumers.<br />
• The plug socket for the power supply must be positioned near the unit and must be<br />
easily accessible.<br />
PLACE OF INSTALLATION:<br />
• The unit should stand only on a clean, horizontal working surface.<br />
• The unit must not be exposed to vibrations during operation.<br />
• Keep away from moisture and dust where possible.<br />
• Do not place the unit near water, baths, wash basins, kitchen sinks, wet areas,<br />
swimming pools or damp rooms. Do not place objects containing liquid on the unit -<br />
vases, glasses, bottles etc.<br />
• Ensure that the unit is well ventilated.<br />
• Any ventilation openings must never be blocked or covered. The unit must be positioned<br />
at least 20 cm away from walls. The unit may only be fitted in a rack if adequate<br />
ventilation is ensured and if the manufacturer’s installation instructions are followed.<br />
• Keep away from direct sunlight and the immediate vicinity of heating elements and<br />
radiant heaters or similar devices.<br />
• If the unit is suddenly moved from a cold to a warm location, condensation can form<br />
inside it. This must be taken into account particularly in the case of tube units. Before<br />
switching on, wait until the unit has reached room temperature.<br />
• Accessories: Do not place the unit on an unsteady trolley, stand, tripod, base or table.<br />
If the unit falls down, it can cause personal injury and itself become damaged. Use<br />
the unit only with the trolley, rack stand, tripod or base recommended by the<br />
manufacturer or purchased together with the unit. When setting the unit up, all the<br />
manufacturer’s instructions must be followed and the setup accessories recommended<br />
by the manufacturer must be used. Any combination of unit and stand must be<br />
moved carefully. A sudden stop, excessive use of force and uneven floors can cause<br />
the combination of unit and stand to tip over.<br />
• Additional equipment: Never use additional equipment which has not been<br />
recommended by the manufacturer as this can cause accidents.<br />
• To protect the unit during bad weather or when left unattended for prolonged<br />
periods, the mains plug should be disconnected. This prevents the unit being<br />
damaged by lightning and power surges in the AC mains supply.<br />
Diagram 1 Diagram 2<br />
CONSEILS DE SECURITE IMPORTANTS!<br />
PRIERE DE LIRE AVANT L’EMPLOI ET A CONSERVER POUR UTILISATION ULTERIEURE!<br />
•L’appareil a été conçu par Hughes & Kettner selon la norme IEC 9239 et a<br />
quitté l’entreprise dans un état irréprochable. Afin de conserver cet état et<br />
d’assurer un fonctionnement sans danger de l’appareil nous conseillons à l’utilisateur<br />
la lecture des indications de sécurité contenues dans le mode d’emploi.<br />
L’appareil est conforme à la classification I (mise à terre de protection).<br />
•SURETE, FIABILITE ET EFFICACITE DE L’APPAREIL NE SONT GARANTIS PAR<br />
HUGHES & KETTNER QUE SI:<br />
• Montage, extension, nouveau réglage, modification ou réparation sont<br />
effectués par Hughes & Kettner ou par toute personne autorisée par Hughes &<br />
Kettner.<br />
• L’installation électrique de la pièce concernée correspond aux normes IEC<br />
(ANSI).<br />
• L’utilisation de l’appareil suit le mode d’emploi.<br />
AVERTISSEMENT:<br />
•A moins que cela ne soit manuellement possible, tout enlèvement ou ouverture<br />
du boîtier peut entrainer la mise au jour de pieces sous tension.<br />
• Si l’ouverture de l’appareil est nécessaire, celui-ci doit être coupé de chaque<br />
source de courant. Ceci est à prendre en considération avant tout ajustement,<br />
entretien, réparation ou changement de pieces.<br />
•Ajustement, entretien ou réparation sur l’appareil ouvert et sous tension ne<br />
peuvent être éffectués que par un spécialiste autorisé par le fabricant (selon<br />
VBG4). Le spécialiste étant conscient des dangers liés à ce genre de<br />
réparation.<br />
• Les sorties de baffles qui portent le signe IEC 417/5036 (fig. 1, voir en bas)<br />
peuvent être sous tension dangereuse. Avant de brancher l’appareil utiliser<br />
uniquement le câble de raccordement conseillé par le fabricant pour<br />
raccorder les baffles.<br />
•Toutes les prises des câbles de raccordement doivent être, si possible, vissées<br />
ou verrouillées sur le boîtier.<br />
• Utilisez subsidiairement uniquement des fusibles de type et de puissance de<br />
courant nominale donnés.<br />
• L’utilisation de fusibles rafistolés ou court-circuites est inadmissible.<br />
• Ne jamais interrompre la connexion du circuit protecteur.<br />
• Il est conseillé de ne pas toucher aux surfaces pourvues du signe „HOT“ (fig. 2,<br />
voir en bas), aux parois arrières ou caches munis de fentes d’aération,<br />
éléments d’aération et leurs caches ansi qu’aux tubes et leurs caches. Ces<br />
éléments pouvant atteindre des températures élévées pendant l’utilisation de<br />
l’appareil.<br />
• Les Niveaux de puissance élévés peuvent entrainer des lésions auditives<br />
durables. Evitez donc la proximité de haut-parleurs utilisés à haute puissance.<br />
Lors de haute puissance continue utilisez une protection auditive.<br />
BRANCHEMENT SUR LE SECTEUR:<br />
•L’appareil est conçu pour une utilisation continue.<br />
• La tension de fonctionnement doit concorder avec la tension secteur locale.<br />
• Attention: L’interrupteur de secteur de l’appareil doit être sur la position OFF,<br />
lorsque le câble de réseau est raccordé.<br />
• Le raccordement au réseau éléctrique s’effectue avec l’adaptateur ou le<br />
cordon d´alimentation livré avec l’appareil.<br />
• Adaptateur: Un câble de raccordement abimé ne peut être remplacé.<br />
L’adaptateur est inutilisable.<br />
• Evitez un raccordement au réseau par des boîtes de distribution surchargées.<br />
• La prise de courant doit être placée à proximité de l’appareil et facile à<br />
atteindre.<br />
LIEU D’INSTALLATION:<br />
•L’appareil doit être placé sur une surface de travail propre et horizontale.<br />
•L’appareil en marche ne doit en aucun cas subir des vibrations.<br />
• Evitez dans la mesure du possible poussière et humidité.<br />
•L’appareil ne doit pas être placé à proximité d’eau, de baignoire, lavabo,<br />
évier, pièce d’eau, piscine ou dans une pièce humide. Ne placez aucun vase,<br />
verre, bouteille ou tout objet rempli de liquide sur l’appareil.<br />
•L’appareil doit être suffisamment aéré.<br />
• Ne jamais recouvrir les ouvertures d’aération. L’appareil doit être placé à 20<br />
cm du mur au minimum. L’appareil peut être monté dans un Rack si une<br />
ventilation suffisante est possible et si les conseils de montage du fabricant<br />
sont suivis.<br />
• Evitez les rayons de soleil et la proximité de radiateurs, chauffages etc.<br />
• Une condensation d’eau peut se former dans l’appareil si celui-ci est transporté<br />
brusquement d’un endroit froid à un endroit chaud. Ceci est particulièrement<br />
important pour des appareils à tubes. Avant de brancher l’appareil attendre<br />
qu’il ait la température ambiante.<br />
• Accessoires: L’appareil ne doit être placé sur un chariot, support, trépied, bâti<br />
ou table instable. Une chute de l’appareil peut entrainer aussi bien des<br />
dommages corporels que techniques. Utilisez l’appareil uniquement avec un<br />
chariot, Rack, support, trépied ou bâti conseillé par le fabricant ou vendu en<br />
combinaison avec l’appareil. Les indications du fabricant pour l’installation de<br />
l’appareil sont à suivre, et les accessoires d’installation conseillés par le<br />
fabricant sont à utiliser. Un ensemble support et appareil doit être déplacé<br />
avec précaution. Des mouvements brusques et des revêtements de sol<br />
irreguliers peuvent entrainer la chute de l´ensemble.<br />
• Equipements supplémentaires: Ne jamais utiliser un équipement supplémentaire<br />
n’ayant pas été conseillé par le fabricant, ceci pouvant entrainer des<br />
accidents.<br />
• Afin de protéger l’appareil pendant un orage ou s’il ne doit pas être utilisé<br />
pendant un certain temps, il est conseillé d’enlever la prise au secteur. Ceci<br />
évite des dommages dûs à la foudre ou à des coups de tension dans le réseau<br />
à courant alternatif.<br />
Fig. 1 Fig. 2
IMPORTANTI AVVERTIMENTI DI SICUREZZA!<br />
Leggere attentamente prima dell’uso e conservare per<br />
un utilizzo successivo:<br />
• L’apparecchio è stato costruito dalla Hughes & Kettner secondo la normativa europea<br />
IEC 9239 ed ha lasciato il nostro stabilimento in stato ineccepibile. Per garantire<br />
il mantenimento di tale stato e un utilizzo assolutamente privo di rischi l’utente è<br />
tenuto ad osservare le indicazioni e gli avvertimenti di sicurezza contenuti nelle<br />
istruzioni per l’uso. L’apparecchio rispecchia il livello di sicurezza I (collegato a terra).<br />
• Sicurezza, affidabilità e prestazioni dell’apparecchio vengono garantiti dalla Hughes<br />
& Kettner solo ed esclusivamente se:<br />
• Montaggio, ampliamento, rimessa a punto, modifiche e riparazioni vengono<br />
eseguite dalla Hughes & Kettner stessa o da personale da essa autorizzato.<br />
• Gli impianti elettrici nei locali prescelti per l’uso dell’apparecchio rispondono alle<br />
normative stabilite dall’ANSI.<br />
• L’apparecchio viene utilizzato come indicato nel libretto delle istruzioni per l’uso.<br />
Avvertimenti:<br />
• In caso di apertura di parti di rivestimento o rimozione di parti dell’involucro, a meno<br />
che non si tratti di pezzi rimovibili semplicemente a mano, possono venire alla luce<br />
parti dell’apparecchio conduttrici di tensione.<br />
• Se l’apertura dell’apparecchio dovesse risultare necessaria è indispensabile<br />
staccare precedentemente quest’ultimo da tutte le fonti di tensione. Rispettare tale<br />
misura di prevenzione anche prima di un allineamento, di operazioni di manutenzione,<br />
della messa in esercizio o della sostituzione di componenti all’interno<br />
dell’apparecchio.<br />
• Allineamento, operazioni di manutenzione o eventuali riparazioni dell’apparecchio<br />
in presenza di tensione vanno eseguite esclusivamente da personale specializzato<br />
ed autorizzato, in grado di eseguire tali operazioni evitandone i rischi connessi.<br />
• Le uscite degli altoparlanti contrassegnate dai caratteri IEC 417/5036 (vedi illustrazione<br />
1 a fondo pag.) possono essere conduttrici di tensione pericolosa con cui evitare<br />
il contatto. Per questo motivo, prima di accendere l’apparecchio, collegare<br />
quest’ultimo agli altoparlanti servendosi esclusivamente del cavetto<br />
d’allacciamento indicato dal produttore.<br />
• Tutte le spine e i cavi di collegamento devono essere avvitati o fissati all’involucro<br />
dell’apparecchio per quanto possibile.<br />
• Tutti i fusibili di sicurezza vanno sostituiti esclusivamente con fusibili del tipo prescritto<br />
e valore della corrente nominale indicato.<br />
• L’utilizzo di fusibili di sicurezza non integri e la messa in corto circuito del sostegno di<br />
metallo sono proibite.<br />
• Non interrompere mai il collegamento con il circuito di protezione.<br />
• Superfici contrassegnate dalla parola „HOT“ (vedi illustrazione 2 a fondo pag.), cosi<br />
come griglie di aerazione, dispositivi di raffreddamento e i loro rivestimenti di<br />
protezione, oppure valvole e i relativi rivestimenti protettivi possono surriscaldarsi<br />
notevolmente durante l’uso e per questo motivo non vanno toccate.<br />
• L’ascolto di suoni ad alto volume può provocare danni permanenti all’udito. Evitate<br />
perciò la diretta vicinanza con altoparlanti ad alta emissione di suono e utilizzate<br />
cuffie protettive in caso ciò non sia possibile.<br />
Alimentazione:<br />
• L’apparecchio è concepito per il funzionamento continuo.<br />
• La tensione di esercizio deve corrispondere alla tensione di rete a cui ci si allaccia.<br />
• Attenzione: l’interruttore di alimentazione dell’apparecchio deve essere in posizione<br />
OFF quando viene allacciato il cavetto d’alimentazione.<br />
• L’allacciamento alla rete elettrica avviene tramite alimentatore o cavetto<br />
d’alimentazione consegnato insieme all’apparecchio.<br />
• Alimentatore: un cavo di connessione danneggiato non può essere sostituito.<br />
L’alimentatore non può più essere utilizzato.<br />
• Evitate un allacciamento alla rete di corrente utilizzando cassette di distribuzione<br />
sovraccariche.<br />
• La spina di corrente deve essere situata nelle vicinanze dell’apparecchio e<br />
facilmente raggiungibile in qualsiasi momento.<br />
Locali di collocamento:<br />
• Opportuno collocare l’apparecchio su una superficie pulita e orizzontale.<br />
• Non sottoporre l’apparecchio in funzione a scosse e vibrazioni.<br />
• Proteggere l’apparecchio per quanto possibile da umidità e polvere.<br />
• Non collocare l’apparecchio vicino ad acqua, vasche da bagno, lavandini, lavelli<br />
da cucina, locali umidi o piscine. Non appoggiare recipienti contenenti liquidi - vasi,<br />
bicchieri, bottiglie, ecc. - sull’apparecchio.<br />
• Provvedere ad una buone aerazione dell’apparecchio.<br />
• Eventuali aperture previste per la ventilazione dell’apparecchio non vanno ne<br />
bloccate, ne mai coperte. L’apparecchio va collocato ad almeno 20 cm di<br />
distanza dalle pareti circostanti e può essere inserito tra altre componenti di un<br />
impianto solo in caso di sufficiente ventilazione e qualora le direttive di montaggio<br />
del produttore vengano rispettate.<br />
• Evitare di esporre l’apparecchio ai raggi del sole e di collocarlo direttamente nelle<br />
vicinanze di fonti di calore come caloriferi, stufette, ecc.<br />
• Se l’apparecchio viene trasportato rapidamente da un locale freddo ad uno<br />
riscaldato può succedere che al suo interno si crei della condensa. Ciò va tenuto in<br />
considerazione soprattutto in caso di apparecchi a valvole. Attendere che<br />
l’apparecchio abbia assunto la temperatura ambiente prima di accenderlo.<br />
• Accessori: non collocare l’apparecchio su carrelli, supporti, treppiedi, superfici o<br />
tavoli instabili. Se l’apparecchio dovesse cadere a terra potrebbe causare danni a<br />
terzi o danneggiarsi irreparabilmente. Utilizzate per il collocamento dell’apparecchio<br />
supporti, treppiedi e superfici che siano consigliate dal produttore o direttamente<br />
comprese nell’offerta di vendita. Per il collocamento dell’apparecchio attenetevi<br />
strettamente alle istruzioni del produttore, utilizzando esclusivamente accessori da<br />
esso consigliati. L’apparecchio in combinazione ad un supporto va spostato con<br />
molta attenzione. Movimenti bruschi o il collocamento su pavimenti non piani<br />
possono provocare la caduta dell’apparecchio e del suo supporto.<br />
• Accessori supplementari: non utilizzate mai accessori supplementari che non siano<br />
consigliati dal produttore, potendo essere ciò causa di incidenti.<br />
• Per proteggere l’apparecchio in caso di temporali o nel caso questo non venisse<br />
utilizzato per diverso tempo si consiglia di staccarne la spina di corrente. In questo<br />
modo si evitano danni all’apparecchio dovuti a colpi di fulmine o ad improvvisi<br />
aumenti di tensione nel circuito di corrente alternata.<br />
Illustrazione 1 Illustrazione 2<br />
¡INDICACIONES DE SEGURIDAD IMPORTANTES!<br />
¡LÉANSE ANTES DE UTILIZAR EL APARATO Y GUARDENSE<br />
PARA SU USO POSTERIOR!<br />
• El aparato ha sido producido por Hughes & Kettner según el IEC 9239 y salió de la<br />
fábrica en un estado técnicamente perfecto. Para conservar este estado y<br />
asegurar un funcionamiento sin peligros el usuario debe tener en cuenta las<br />
indicaciones y advertencias contenidas en las instrucciones de manejo. El aparato<br />
corresponde a la clase de protección l (toma de tierra protegida).<br />
• LA SEGURIDAD, LA FIABILIDAD Y EL RENDIMIENTO DEL APARATO SOLO ESTAN<br />
GARANTIZADOS POR HUGHES & KETTNER CUANDO:<br />
• el montaje, la ampliación, el reajuste, los cambios o las reparaciones se realicen por<br />
Hughes & Kettner o por personas autorizadas para ello;<br />
• la instalación eléctrica del recinto en cuestión corresponda a los requisitos de la<br />
determinación del IEC (ANSI);<br />
• el aparato se use de acuerdo con las indicaciones de uso.<br />
ADVERTENCIA:<br />
• Si se destapan protecciones o se retiran piezas de la carcasa, exceptuando si se<br />
puede hacer <strong>manual</strong>mente, se pueden dejar piezas al descubierto que sean<br />
conductoras de tensión.<br />
• Si es necesario abrir el aparato, éste tiene que estar aislado de todas las fuentes de<br />
alimentación. Esto se debe tener en cuenta antes del ajuste, de un entretenimiento,<br />
de una reparación y de una sustitución de las piezas.<br />
• Un ajuste, un entretenimiento o una reparación en el aparato abierto y bajo tensión<br />
sólo puede ser llevado a cabo por un especialista autorizado por el productor<br />
(según VBG 4) que conozca a fondo los peligros que ello conlleva.<br />
• Las salidas de altavoces que estén provistas de la característica IEC 417/5036 (figura<br />
1, véase abajo) pueden conducir tensiones peligrosas al contacto. Por ello es<br />
indispensable que antes de poner en marcha el aparato; la conexión se haya<br />
realizado únicamente con el cable de empalmes recomendado por el productor.<br />
• Las clavijas de contacto al final de los cables conectores tienen que estar atornilladas<br />
o enclavadas a la carcasa, en tanto que sea posible.<br />
• Los fusibles de repuesto que se utilicen sólo pueden ser del tipo indicado y tener la<br />
intensidad nominal indicada.<br />
• El uso de fusibles reparados o la puesta en cortocircuito del soporte es inadmisible.<br />
• El empalme del conductor de protección no se puede interrumpir en ningún caso.<br />
• Las superficies provistas de la característica "HOT" (figura 2, véase abajo), los<br />
paneles de fondo trasero o las protecciones con ranuras de ventilación, los cuerpos<br />
de ventilación y sus protecciones, así como las válvulas electrónicas y sus<br />
protecciones pueden alcanzar temperaturas muy altas durante el funcionamiento y<br />
por ello no se deberían tocar.<br />
• Niveles elevados de la intensidad de sonido pueden causar continuos daños<br />
auditivos; por ello debe evitar acercarse demasiado a altavoces que funcionen a<br />
altos niveles. En tales casos utilice protecciones auditivas.<br />
ACOMETIDA A LA RED:<br />
• El aparato está proyectado para un funcionamiento continuo.<br />
• La tensión de funcionamiento ajustada tiene que coincidir con la tensión de la red<br />
del lugar.<br />
• Advertencia: el interruptor de la red del aparato tiene que estar en la posición OFF<br />
cuando se conecte el cable de red.<br />
• La conexión a la red eléctrica se efectuará con la fuente de alimentación o con el<br />
cable de red que se entreguen con el aparato.<br />
• Fuente de alimentación: una linea de conexión dañada no se puede sustituir. La<br />
fuente de alimentación no puede volver a ponerse en funcionamiento.<br />
• Evite una conexión de la red eléctrica a distribuidores con muchas tomas de corriente.<br />
• El enchufe para el suministro de corriente tiene que estar cerca del aparato y ser de<br />
fácil acceso.<br />
SITUACION:<br />
• El aparato debería estar situado en una superficie limpia y totalmente horizontal.<br />
• El aparato no puede estar expuesto a ningún tipo de sacudidas durante su<br />
funcionamiento.<br />
• Se deben evitar la humedad y el polvo.<br />
• El aparato no puede ponerse en funcionamiento cerca del agua, la bañera, el<br />
lavamanos, la pila de la cocina, un recinto con tuberías de agua, la piscina o en<br />
habitaciones húmedas. Tampoco se pueden poner objetos llenos de líquido -<br />
jarrones, vasos, botellas, etc. - encima de él.<br />
• Procure que el aparato tenga suficiente ventilación.<br />
• Las aberturas de ventilación existentes no se deben bloquear ni tapar nunca. El<br />
aparato debe estar situado como mínimo a 20 cm de la pared. El aparato sólo se<br />
puede montar en un rack, si se ha procurado la suficiente ventilación y se han<br />
cumplido las indicaciones de montaje del productor.<br />
• Evite los rayos del sol directos así como la proximidad a radiadores, electroradiadores<br />
o aparatos similares.<br />
• Si el aparato pasa repentinamente de un lugar frío a otro caliente, se puede<br />
condensar humedad en su interior. Esto se debe tener en cuenta sobretodo en los<br />
aparatos con válvulas electrónicas. Antes de poner en marcha el aparato se debe<br />
esperar hasta que éste haya adquirido la temperatura ambiental.<br />
• Accesorios: el aparato no se puede colocar encima de carros, estantes, trípodes,<br />
soportes o mesas inestables. Si el aparato se cae puede causar daños personales y<br />
se puede estropear. Coloque el aparato sólo en un carro, rack, estante, trípode o<br />
soporte recomendado por el productor o que se le haya vendido junto con el<br />
aparato. En la instalación se deben seguir las indicaciones del productor así como<br />
utilizar los accesorios recomendados por el mismo para colocarlo encima. El<br />
conjunto del aparato con el pedestal se debe mover con mucho cuidado. Un paro<br />
brusco, la aplicación de una fuerza desmesurada o un suelo irregular puede<br />
ocasionar la caida de todo el conjunto.<br />
• Piezas adicionales: no utilice nunca piezas adicionales que no estén recomendadas<br />
por el productor, ya que se podrían provocar accidentes.<br />
• Para protejer el aparato de una tormenta o si no se supervisa ni utiliza durante algún<br />
tiempo, se debería desconectar la clavija de la red. Así se evitan daños en el<br />
aparato a causa de un rayo y golpes de tensión en la red de corriente alterna.<br />
Figura 1 Figura 2
VOTRTEX - MANUAL<br />
This is to certify that<br />
HUGHES & KETTNER VORTEX TM<br />
complies with the provisions of the Directive of the<br />
Council of the European Communities on the<br />
approximation of the laws of the Member States relating<br />
to electromagnetic compatibility (EMC Directive<br />
89/336/EEC) and the low voltage Directive (73/23/EEC).<br />
This declaration of conformity of the European<br />
Communities is the result of an examination carried out<br />
by the Quality Assurance Department of STAMER GmbH<br />
in accordance with European Standards EN 50081-1,<br />
EN 50082-1and EN 60065 for low voltage, as laid down in<br />
Article 10 of the EMC Directive.<br />
Stamer Musikanlagen GmbH*<br />
Magdeburger Str. 8<br />
66606 St.Wendel<br />
* Stamer Musikanlagen manufactures exclusively<br />
for Hughes & Kettner<br />
Lothar Stamer Dipl.Ing.<br />
Managing Director<br />
St.Wendel, 07/20/2002<br />
Für das folgend bezeichnete Erzeugnis<br />
HUGHES & KETTNER VORTEX TM<br />
wird hiermit bestätigt, dass es den wesentlichen Schutzanforderungen<br />
entspricht, die in der Richtlinie des Rates<br />
zur Angleichung der Rechtsvorschriften der Mitgliedsstaaten<br />
über die elektromagnetische Verträglichkeit<br />
(89/336/EWG) und der Niederspannungsrichtlinie<br />
(73/23/EWG) festgelegt sind. Diese Erklärung gilt für<br />
alle Exemplare, und bestätigt die Ergebnisse der<br />
Messungen, die durch die Qualitätssicherung der<br />
Fa. Stamer Musikanlagen GmbH durchgeführt wurden.<br />
Zur Beurteilung des Erzeugnisses hinsichtlich elektromagnetischer<br />
Verträglichkeit wurden folgende Normen<br />
herangezogen: EN 50081-1 • EN 50082-1. Zur Beurteilung<br />
der Einhaltung der Niederspannungsrichtlinie<br />
wurde folgende Norm herangezogen: EN 60065<br />
Diese Erklärung wird verantwortlich für den Hersteller<br />
abgegeben durch<br />
Stamer Musikanlagen GmbH*<br />
Magdeburger Str. 8<br />
66606 St.Wendel<br />
Lothar Stamer Dipl.Ing.<br />
Geschäftsführer<br />
St.Wendel, den 20.07.2002<br />
* Stamer Musikanlagen stellt exklusiv für Hughes & Kettner her<br />
39
MS D-841 06/03<br />
40<br />
VORTEX - MANUAL<br />
AUSTRALIA<br />
CMI, Brooklyn, Vic 3025<br />
AUSTRIA<br />
EXACT Vertriebs-GmbH, 8020 Graz<br />
BENELUX<br />
WILS MUZIEKIMPORT, 4706 NJ Roosendaal<br />
BOSNIA and HERZEGOVINA<br />
Allied Music Exports GmbH, Munich/Germany<br />
CANADA<br />
EFKAY MUSIC, Lachine, Quebec H8T 2P1<br />
CROATIA<br />
Allied Music Exports GmbH, Munich/Germany<br />
CZECH REPUBLIC<br />
MUSICDATA, 59401 Velké<br />
DENMARK<br />
REHOLM MUSIK EN-GROS, 7000 Fredericia<br />
ESTONIA<br />
STANFORD TRADING, Tallinn<br />
FINLAND<br />
F-MUSIIKKI INC., 00100 Helsinki<br />
FRANCE<br />
CAMAC S.A., 44470 Thouaré<br />
GERMANY<br />
‘MUSIC & SALES’ GmbH, 66606 St. Wendel<br />
HUNGARY<br />
LAHA K.F.T., 9400 Sopron<br />
INDONESIA<br />
WIJAYA MUSIC, Jakarta 10710<br />
ITALY<br />
SISME SPA, 60028 Osimo Scalo<br />
JAPAN<br />
Y&P Corp., Yachiyo Chiba 2760034<br />
LETTLAND<br />
MUSIC SERVICE Ltd., Riga<br />
MACEDONIA<br />
Allied Music Exports GmbH, Munich/Germany<br />
MALAYSIA<br />
GUITAR COLLECTION, 60 000 Kuala Lumpur<br />
NEW ZEALAND<br />
MUSIC WORKS, Onehunga, Aukland<br />
NORWAY<br />
BELCO A/S, 3921 Porsgrunn<br />
POLAND<br />
AMTEC, 51-663 Wroclaw<br />
PORTUGAL<br />
ALRICA, 1100 Lisboa<br />
RUSSIA<br />
Bayland Music House, 119146 Moscow<br />
SLOVAK REPUBLIC<br />
GB Music spol. s.r.o., 8111 06 Bratislava<br />
SOUTH KOREA<br />
Firtra Trading Co., Ltd., Seoul<br />
SPAIN<br />
ADAGIO, 08110 Montcada I Reixach<br />
SWEDEN<br />
ILT AB, 84100 Ånge<br />
SWITZERLAND<br />
SDS Music Factory AG, 8048 Zürich<br />
TAIWAN<br />
OMEGA MUSIC, Taichung<br />
TURKEY<br />
Lay Lay Lom A.S., Istanbul<br />
UNITED KINGDOM & EIRE<br />
SENNHEISER, Highwycombe, Bucks HP12 3SL<br />
USA<br />
HUGHES & KETTNER Inc., Mt Prospect, IL 60056<br />
YUGOSLAVIA<br />
Allied Music Exports GmbH, Munich/Germany<br />
WORLDWIDE<br />
HUGHES & KETTNER • Postfach 1509 • 66595 St. Wendel • Germany • TEL. 0 68 51 - 90 50 • FAX 0 68 51 - 905 100<br />
INTERNATIONAL INQUIRIES: FAX +49 - 68 51 - 905 200 • E-Mail: h+k-intl@musicandsales.com<br />
www.hughes-and-kettner.com<br />
© 2003 by Music & Sales GmbH<br />
Printed in Germany, June 2003