


Create successful ePaper yourself
Turn your PDF publications into a flip-book with our unique Google optimized e-Paper software.
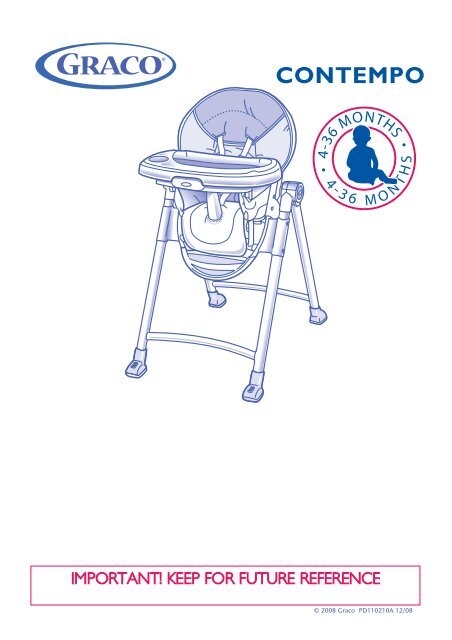
CONTEMPO<br />
IMPORTANT! KEEP FOR FUTURE REFERENCE<br />
© 2008 <strong>Graco</strong> PD110210A 12/08
PARTS<br />
ACCESSORIES (certain models only)<br />
Attaching Front Casters (Certain models only)<br />
1<br />
CLIK!<br />
Attaching Rear Feet (Certain models only)<br />
2<br />
CLIK!<br />
2
Opening Highchair<br />
3<br />
6<br />
4 5<br />
CLIK!<br />
Reclining Seat<br />
7 8<br />
Adjusting Height<br />
9<br />
3
To Secure your Child<br />
10 11 12<br />
13 14<br />
15<br />
3 Point Buckle<br />
16<br />
17 18<br />
19 20<br />
4
Attaching Tray<br />
Head Support (on certain models)<br />
21 22 25<br />
Tray Insert<br />
23 24<br />
26<br />
Storage<br />
27<br />
28 29<br />
1<br />
2<br />
30 31 32<br />
CLIK!<br />
5
Removing Seat Pad<br />
33 34 35<br />
36 37 38<br />
1<br />
2<br />
39 40 41<br />
42<br />
6
Casters (Certain models only)<br />
43 44<br />
Mix ‘N Move Toys (certain models only)<br />
45<br />
46<br />
47 48<br />
7
EN<br />
WARNINGS<br />
IMPORTANT! KEEP FOR FUTURE REFERENCE<br />
PLEASE SAVE OWNER’S<br />
MANUAL FOR FUTURE USE.<br />
EN 14988-1:2006<br />
WARNING: DO NOT leave your child unattended.<br />
Always keep your child in view.<br />
WARNING: DO NOT use highchair unless all<br />
components are correctly fitted and adjusted.<br />
WARNING: Always make sure that the harness<br />
is correctly fitted and adjusted.<br />
DO NOT use the highchair until the child can<br />
sit up unaided.<br />
DO NOT move highchair with child inside.<br />
Use only on a level stable surface.<br />
STORE HIGHCHAIR away from children<br />
when not in use.<br />
ENSURE THAT all additional hazards such as<br />
electrical flex are kept out of reach of the<br />
child in the highchair. If the highchair is used<br />
by someone unfamiliar with it, e. g. grandparents,<br />
always show them how it works.<br />
PREVENT SERIOUS INJURY OR DEATH<br />
FROM FALLS OR SLIDING OUT. Always use<br />
seat belt. Secure your child at all times with<br />
the restraint system provided, in either the<br />
reclining or upright position. The tray is not<br />
designed to hold your child in the highchair.<br />
Regularly check the locks and fittings for security.<br />
DO NOT FORCE TRAY against child. Use<br />
only the four adjustment positions. Be sure<br />
both adjustment fingers are engaged in armrest<br />
slots.<br />
STRANGULATION HAZARD:<br />
Do not place highchair in any location where<br />
there are cords, such as window blind cords,<br />
drapes, phone cords, etc.<br />
THIS HIGHCHAIR IS DESIGNED TO BE used<br />
by a child up to 3 years of age. Maximum<br />
weight 40 pounds (18. 1 kg).<br />
FOLLOW ASSEMBLY INSTRUCTIONS<br />
CAREFULLY.<br />
If you experience any difficulties, please cotact<br />
the Customer Service Department.<br />
DO NOT TO USE THE HIGHCHAIR if any<br />
part is broken, torn or missing.<br />
WARNING: A child’s safety is your responsibility.<br />
Child should be harnessed at all times and<br />
the highchair must be fully open and locked<br />
before placing child inside.<br />
For extra safety, D-rings are provided for a<br />
separate safety harness approved to BS6684<br />
and EN13210.<br />
WARNING: Be aware of the risk of open fire<br />
and other sources of strong heat, such as electric<br />
bar fires, gas fires etc. in the vicinity of the<br />
high chair.<br />
CARE AND MAINTENANCE<br />
FROM TIME TO TIME CHECK YOUR HIGH-<br />
CHAIR for worn parts, torn vinyl or stitching.<br />
Replace or repair the parts as needed. Use<br />
only <strong>Graco</strong> replacement parts.<br />
TO CLEAN HIGHCHAIR FRAME, use onlyhousehold<br />
soap and warm water. NO<br />
BLEACH or detergent.<br />
TO CLEAN REMOVABLE SEAT COVER, DO<br />
NOT machine wash or dry. Use only household<br />
soap and warm water. NO BLEACH or<br />
detergent.<br />
8
EN Instructions<br />
Attaching Casters (Certain models only)<br />
1<br />
2<br />
Attach front casters with locks onto front legs.<br />
Reclining Seat<br />
7<br />
3 recline positions<br />
Adjusting Height<br />
See images – 8<br />
To Secure Your Child<br />
See images – 10<br />
Head Support<br />
9<br />
20<br />
15 Use slide adjuster at shoulder and waist for<br />
further adjustment. Repeat on other side.<br />
16<br />
Snap rear feet onto rear legs.<br />
Opening Highchair<br />
See images 3 – 6<br />
When changing harness strap slots, MAKE<br />
SURE harness straps are going through same<br />
slots in seat pad and seat back.<br />
The harness straps must go into the slot<br />
that is even with or slightly above the shoulders.<br />
Avoid twisting straps.<br />
Attaching Tray<br />
21 Slide tray onto snack tray.<br />
22 Squeeze adjustment button on front of tray<br />
to adjust tray to fit child.<br />
Tray Insert<br />
23 Snap tray insert onto tray.<br />
24 To remove, lift tray up from corner.<br />
See images 25 –<br />
26<br />
Storage<br />
27 Remove tray before folding highchair.<br />
28<br />
Push red buttons on each side of snack tray to<br />
release, as you push side bars back.<br />
31 Place tray on highchair for storage, as shown.<br />
32<br />
Optional: for maximum storage, lower highchair.<br />
Removing Seat Pad<br />
33 Unhook elastic straps on seat pad from the<br />
back of footrest.<br />
34 Unfasten hook and loop tape on back of<br />
seat pad.<br />
35 Pull bottom of seat pad out through opening<br />
behind snack tray.<br />
36<br />
37<br />
38<br />
39<br />
Push red buttons on each side of snack tray<br />
to release, as you push side bars back.<br />
Push crotch strap through<br />
bottom slot.<br />
Pull sides of seat pad fabric out of the channels<br />
located in the back of the snack tray.<br />
40 Push waist straps through slots in seat pad.<br />
41<br />
Pull harness straps through slots in seat<br />
pad.<br />
42 Pull seat pad off backrest.<br />
Casters (Certain models only)<br />
43 To lock casters.<br />
44 To unlock casters.<br />
Mix ‘N Move Toys (Certain models only)<br />
45 To remove plugs.<br />
46 – 47 To attach toy<br />
48 To reattach plugs when not using<br />
Mix “N Move Toys.<br />
9
10
11
<strong>Graco</strong> Children’s Products UK & Ireland<br />
Halifax Avenue<br />
Fradley Park<br />
Lichfield WS 13 8SS<br />
United Kingdom<br />
<strong>Graco</strong> Continential Europe<br />
Newell Rubbermaid Luxembourg SARL<br />
1 rue Edmond Reuter<br />
L-5326 CONTERN<br />
Luxembourg<br />
www. graco.eu<br />
12


