

Samsung CE2927 - User Manual_0.43 MB, pdf, MULTI LANGUAGE
Samsung CE2927 - User Manual_0.43 MB, pdf, MULTI LANGUAGE
Samsung CE2927 - User Manual_0.43 MB, pdf, MULTI LANGUAGE

Create successful ePaper yourself
Turn your PDF publications into a flip-book with our unique Google optimized e-Paper software.
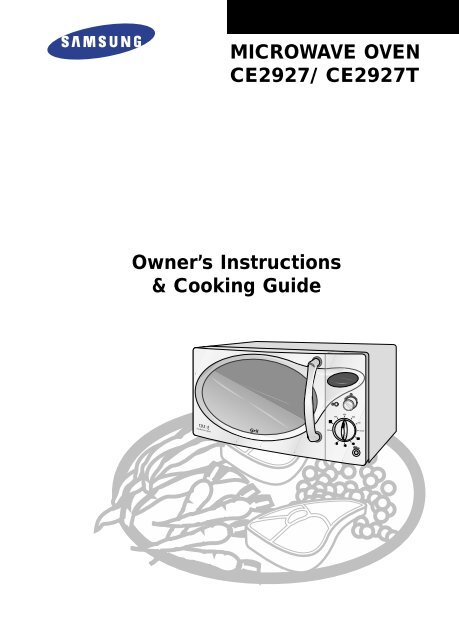
MICROWAVE OVEN<br />
<strong>CE2927</strong>/ <strong>CE2927</strong>T<br />
Owner’s Instructions<br />
& Cooking Guide
Quick Look-up Guide<br />
GB<br />
If you want to cook some food<br />
1 Place the food in the oven.<br />
Select the power level by rotating the COOKING POWER<br />
CONTROL knob.<br />
2 Select the cooking time by rotating the TIMER( ) dial.<br />
Result: Cooking starts after about two seconds.<br />
If you want to defrost some food<br />
1 Turn the COOKING POWER CONTROL knob to the Defrost( )<br />
symbol.<br />
2 Turn the TIMER( ) dial to select the appropriate time.<br />
Result: Cooking starts after about two seconds.<br />
If you want to adjust the cooking time<br />
Leave the food in the oven.<br />
Turn the TIMER( ) dial to the desired time.<br />
Result: Cooking starts after about two seconds.<br />
If you want to grill some food<br />
1 Turn the COOKING POWER CONTROL knob to the Grill( )<br />
symbol.<br />
2 Turn the TIMER( ) knob to select the appropriate time.<br />
Result: Cooking starts after about two seconds.<br />
2 SAMSUNG ELECTRONICS
Contents<br />
Quick Look-up Guide ................................................................................2<br />
Oven ........................................................................................................4<br />
Control Panel ............................................................................................5<br />
Accessories ..............................................................................................6<br />
Using this Instruction Booklet ..................................................................7<br />
Safety Precautions....................................................................................8<br />
Installing Your Microwave Oven................................................................10<br />
Setting the Time........................................................................................11<br />
How a Microwave Oven Works ................................................................12<br />
Checking that Your Oven is Operating Correctly......................................12<br />
What to Do if You are in Doubt or Have a Problem..................................13<br />
Cooking/Reheating....................................................................................14<br />
Power Levels ............................................................................................14<br />
Stopping the Cooking................................................................................15<br />
Adjusting the Cooking Time ......................................................................15<br />
<strong>Manual</strong> Defrost Food ................................................................................15<br />
Using the Crusty Plate (<strong>CE2927</strong>T) ..........................................................16<br />
Crusty Plate Settings (<strong>CE2927</strong>T)..............................................................17<br />
Choosing the Heating Element Position ..................................................18<br />
Choosing the Accessories ......................................................................18<br />
Grilling ......................................................................................................19<br />
Combining Microwaves and the Grill ......................................................20<br />
<strong>Manual</strong> Stop Turntable Functionl ............................................................21<br />
Cookware Guide ......................................................................................22<br />
Cooking Guide ..........................................................................................23<br />
Cleaning Your Microwave Oven................................................................34<br />
Storing and Repairing Your Microwave Oven ..........................................35<br />
Technical Specifications ............................................................................36<br />
GB<br />
SAMSUNG ELECTRONICS 3
Oven<br />
GB<br />
VENTILATION HOLES<br />
LIGHT<br />
TIMER DIAL<br />
HANDLE<br />
GRILL<br />
ROLLER RING<br />
VARIABLE COOKING<br />
DOOR<br />
POWER CONTROL<br />
KNOB<br />
COUPLER<br />
SAFETY<br />
DOOR LATCHES<br />
INTERLOCK HOLES<br />
TURNTABLE<br />
4 SAMSUNG ELECTRONICS
Control Panel<br />
GB<br />
DISPLAY<br />
CLOCK SETTING<br />
BUTTON<br />
TIME DIAL<br />
DEFROST<br />
VARIABLE<br />
COOKING POWER<br />
CONTROL KNOB<br />
GRILL<br />
CO<strong>MB</strong>I<br />
TURNTABLE<br />
ON/OFF BUTTON<br />
SAMSUNG ELECTRONICS 5
Accessories<br />
GB<br />
Depending on the model that you have purchased, you are supplied<br />
with several accessories that can be used in a variety of ways.<br />
1 Coupler, already placed over the motor shaft in the base of the oven.<br />
Purpose: The coupler rotates the turntable.<br />
2 Roller ring, to be placed in the centre of the oven.<br />
Purpose: The roller ring supports the turntable.<br />
3 Turntable, to be placed on the roller ring with the centre fitting on to<br />
the coupler.<br />
Purpose: The turntable serves as the main cooking surface; it can be<br />
easily removed for cleaning.<br />
4 Metal rack, to be placed on the turntable.<br />
Purpose: The metal rack can be used to cook two dishes at the same<br />
time. One dish may be placed on the turntable and the other<br />
dish on the rack. The metal rack can be used in grill and<br />
combination cooking.<br />
☛<br />
5 Crusty plate(<strong>CE2927</strong>T only), see page 16.<br />
Purpose: The crusty plate is used to brown food better in the<br />
microwave or grill combination cooking modes. It helps keep<br />
pasty and pizza dough crisp.<br />
DO NOT operate the microwave oven without the roller ring<br />
and turntable.<br />
6 SAMSUNG ELECTRONICS
Using this Instruction Booklet<br />
You have just purchased a SAMSUNG microwave oven. Your Owner’s<br />
Instructions contain much valuable information on cooking with your<br />
microwave oven:<br />
◆ Safety precautions<br />
◆ Suitable accessories and cookware<br />
◆ Useful cooking tips<br />
Inside the cover you will find a quick look-up guide explaining four basic<br />
cooking operations:<br />
◆ Cooking food<br />
◆ Defrosting food<br />
◆ Grilling food<br />
◆ Adding extra cooking time<br />
At the front of the booklet you will find illustrations of the oven, and more<br />
importantly the control panel, so that you can find the buttons more easily.<br />
GB<br />
The step-by-step procedures use four different symbols.<br />
☛<br />
➢ ✽<br />
Important<br />
Note<br />
Caution<br />
Turn<br />
PRECAUTIONS TO AVOID POSSIBLE EXPOSURE TO<br />
EXCESSIVE MICROWAVE ENERGY<br />
Failure to observe the following safety precautions may result in harmful exposure to<br />
microwave energy.<br />
(a)<br />
(b)<br />
(c)<br />
(d)<br />
Under no circumstances should any attempt be made to operate the oven with<br />
the door open or to tamper with the safety interlocks (door latches) or to insert<br />
anything into the safety interlock holes.<br />
Do not place any object between the oven door and front face or allow food or<br />
cleaner residues to accumulate on sealing surfaces. Ensure that the door and<br />
door sealing surfaces are kept clean by wiping after use first with a damp cloth<br />
and then with a soft dry cloth.<br />
Do not operate the oven if it is damaged until it has been repaired by a qualified<br />
microwave service technician trained by the manufacturer.<br />
It is particularly important that the oven door closes properly and that there is no<br />
damage to the:<br />
(1) Door, door seals and sealing surfaces<br />
(2) Door hinges (broken or loose)<br />
(3) Power cable<br />
The oven should not be adjusted or repaired by anyone other than a properly<br />
qualified microwave service technician trained by the manufacturer.<br />
SAMSUNG ELECTRONICS 7
Safety Precautions<br />
GB<br />
Before cooking food or liquids in your microwave oven, please check that the<br />
following safety precautions are taken.<br />
1. DO NOT use any metallic cookware in the microwave oven:<br />
◆ Metallic containers<br />
◆ Dinnerware with gold or silver trimmings<br />
◆ Skewers, forks, etc.<br />
Reason: Electric arcing or sparking may occur and may damage the oven.<br />
2. DO NOT heat:<br />
◆ Airtight or vacuum-sealed bottles, jars, containers<br />
Ex) Baby food jars<br />
◆ Airtight food.<br />
Ex) Eggs, nuts in shells, tomatoes<br />
Reason: The increase in pressure may cause them to explode.<br />
Tip: Remove lids and pierce skins, bags, etc.<br />
3. DO NOT operate the microwave oven when it is empty.<br />
Reason: The oven walls may be damaged.<br />
Tip: Leave a glass of water inside the oven at all times.<br />
The water will absorb the microwaves if you accidentally set the oven going when<br />
it is empty.<br />
4. DO NOT cover the rear ventilation slots with cloths or paper.<br />
Reason: The cloths or paper may catch fire as hot air is evacuated from the oven.<br />
5. ALWAYS use oven gloves when removing a dish from the oven.<br />
Reason: Some dishes absorb microwaves and heat is always transferred from the food to<br />
the dish.The dishes are therefore hot.<br />
6. DO NOT touch heating elements or interior oven walls.<br />
Reason: These walls may be hot enough to burn even after cooking has finished, enen<br />
though they do not appear to be so. Do not allow inflammable materials to come<br />
into contact with any interior area of the oven. Let the oven cool down first.<br />
7. To reduce the risk of fire in the oven cavity:<br />
◆ Do not store flammable materials in the oven<br />
◆ Remove wire twist ties from paper or plastic bags<br />
◆ Do not use your microwave oven to dry newspapers<br />
◆ If smoke is observed, keep the oven door closed and switch off or disconnect the oven<br />
from the power supply<br />
8 SAMSUNG ELECTRONICS
Safety Precautions (continued)<br />
8. Take particular care when heating liquids and baby foods.<br />
◆ ALWAYS allow a standing time of at least 20 seconds after the oven has been switched<br />
off so that the temperature can equalize.<br />
◆ Stir during heating, if necessary, and ALWAYS stir after heating.<br />
◆ Take care when handling the container after heating. You may burn yourself, if the<br />
container is too hot.<br />
◆ A risk of delayed eruptive boiling exists.<br />
◆ To prevent delayed boiling and possible scalding, you should put a plastic spoon or glass<br />
stick into the beverages and stir before, during and after heating.<br />
Reason: During the heating of liquids the boiling point can be delayed; this<br />
means that eruptive boiling can start after the container is removed from the<br />
oven. You may scald yourself.<br />
◆ In the event of scalding, follow these FIRST AID instructions:<br />
• Immerse the scalded area in cold water for at least 10 minutes.<br />
• Cover with a clean, dry dressing.<br />
• Do not apply any creams, oils or lotions.<br />
◆ NEVER fill the container to the top and choose a container that is wider at the top than at<br />
the bottom to prevent the liquid from boiling over. Bottles with narrow necks may also<br />
explode if overheated.<br />
◆ ALWAYS check the temperature of baby food or milk before giving it to the baby.<br />
◆ NEVER heat a baby’s bottle with the teat on, as the bottle may explode if overheated.<br />
GB<br />
9. Be careful not to damage the power cable.<br />
◆ Do not immerse the power cable or plug in water and keep the power cable away from<br />
heated surfaces.<br />
◆ Do not operate this appliance if it has a damaged power cable or plug.<br />
10. Stand at arm’s length from the oven when opening the door.<br />
Reason: The hot air or steam released may cause scalding.<br />
11. Keep the inside of the oven clean.<br />
Reason: Food particles or spattered oils stuck to oven walls or floor can cause paint<br />
damage and reduce the efficiency of the oven.<br />
12. You may notice a “Clicking” sound during operation(especially when the oven is in defrosting).<br />
Reason: This sound is normal when the electrical power output is changing..<br />
13. When the microwave oven is operating without any load, the power will be cut off automatically<br />
for safety. You can operate the oven normally after letting it stand for over 30 minutes.<br />
IMPORTANT SAFETY INSTRUCTIONS<br />
During cooking, you should look into the oven from time to time when food is being heated or<br />
cooked in disposable containers of plastic, paper or other combustible materials.<br />
IMPORTANT<br />
Young children should NEVER be allowed to use or play with the microwave oven. Nor should<br />
they be left unattended near the microwave oven when it is in use. Items of interest to children<br />
should not be stored or hidden just above the oven.<br />
SAMSUNG ELECTRONICS 9
Installing Your Microwave Oven<br />
GB<br />
Place the oven on a flat, level surface that is strong enough to safely bear the<br />
weight of the oven.<br />
20 cm<br />
above<br />
10 cm<br />
behind<br />
10 cm<br />
on the side<br />
1 When you install your oven, make sure there is adequate ventilation for<br />
your oven by leaving at least 10 cm (4 inches) of space behind and, on the<br />
sides of the oven and 20 cm (8 inches) of space above the oven.<br />
2 Remove all packing materials inside the oven.<br />
Install the roller ring and turntable.<br />
Check that the turntable rotates freely.<br />
✽ Never block the air vents as the oven may overheat and automatically switch itself off. It will<br />
remain inoperable until it has cooled sufficiently.<br />
✽ For your personal safety, plug the cable into a 3-pin, 230 Volt, 50Hz, AC earthed socket. If<br />
the power cable of this appliance is damaged, it must be replaced by a special cable<br />
(I-SHENG SP022, KDK KKP4819D, EUROELECTRIC 3410, SAMIL SP-106B, MOONSUNG<br />
EP-48E). Contact your local dealer to have it replaced. The power cable of ISRAEL is<br />
PENCON(ZD16A), S/AFRICA APEX LEADS SA16 and NIGERIA, GHANA, KENYA and<br />
U.A.E is PENCON(UD13A1).<br />
✽ Do not install the microwave oven in hot or damp surroundings like next to a traditional oven<br />
or radiator. The power supply specifications of the oven must be respected and any<br />
extension cable used must be of the same standard as the power cable supplied with the<br />
oven. Wipe the interior and the door seal with a damp cloth before using your microwave<br />
oven for the first time.<br />
10 SAMSUNG ELECTRONICS
Setting the Time<br />
Your microwave oven has an inbuilt clock. The time can be displayed in either<br />
the 24-hour or 12-hour notation. You must set the clock:<br />
◆ When you first install your microwave oven<br />
◆ After a power failure<br />
➢<br />
Do not forget to reset the clock when you switch to and from summer or<br />
winter time.<br />
GB<br />
1 To display the time in the... Then press the button...<br />
24-hour notation<br />
Once<br />
12-hour notation<br />
Twice<br />
2 Turn the Time( ) dial to set hour.<br />
3 Press the button.<br />
4 Turn the Time( ) dial to set minute.<br />
5 Press the button.<br />
SAMSUNG ELECTRONICS 11
How a Microwave Oven Works<br />
GB<br />
Microwaves are high-frequency electromagnetic waves; the energy released<br />
enables food to be cooked or reheated without the foods form or colour<br />
changing.<br />
You can use your microwave oven to:<br />
◆ Defrost<br />
◆ Cook<br />
Cooking Principle<br />
1 The microwaves generated by the magnetron are distributed uniformly<br />
as the food rotates on the turntable. The food is thus cooked evenly.<br />
2 The microwaves are absorbed by the food up to a depth of about<br />
1 inch (2.5 cm). Cooking then continues as the heat is dissipated<br />
within the food.<br />
☛<br />
3 Cooking times vary according to the recipient used and the properties of<br />
the food:<br />
◆ Quantity and density<br />
◆ Water content<br />
◆ Initial temperature (refrigerated or not)<br />
As the centre of the food is cooked by heat dissipation, cooking<br />
continues even when you have taken the food out of the oven.<br />
Standing times specified in recipes and in this booklet must<br />
therefore be respected to ensure:<br />
◆ Even cooking of the food right to the centre<br />
◆ The same temperature throughout the food<br />
Checking that Your Oven is Operating Correctly<br />
The following simple procedure enables you to check that your oven is working<br />
correctly at all times.<br />
Open the oven door by pulling the handle on the right side of the door. Place a<br />
glass of water on the turntable. Close the door.<br />
1 Set the power level to maximum by turning COOKING POWER<br />
CONTROL knob.<br />
➢<br />
2 Set the time by turning the TIMER( ) dial.<br />
Result: The oven light comes on and the turntable starts rotating.<br />
1) Cooking starts and when it has finished the oven beeps four times.<br />
2) The end reminder signal will beep 3 times(once every minute).<br />
3) The current time is displayed again.<br />
The oven must be plugged into an appropriate wall socket. The turntable<br />
must be in position in the oven. If a power level other than the maximum<br />
is used, the water takes longer to boil.<br />
12 SAMSUNG ELECTRONICS
What to Do if You are in Doubt or Have a Problem<br />
If you have any of the problems listed below try the solutions given.<br />
● This is normal.<br />
• Condensation inside the oven<br />
• Air flow around the door and outer casing<br />
• Light reflection around the door and outer casing<br />
• Steam escaping from around the door or vents<br />
GB<br />
● The oven does not start when you turn the TIMER(<br />
• Is the door completely closed?<br />
) dial.<br />
● The food is not cooked at all<br />
• Have you set the timer correctly?<br />
• Is the door closed?<br />
• Have you overloaded the electric circuit and caused a fuse to blow or a breaker to<br />
be triggered?<br />
● The food is either overcooked or undercooked<br />
• Was the appropriate cooking length set for the type of food?<br />
• Was an appropriate power level chosen?<br />
● Sparking and cracking occur inside the oven (arcing)<br />
• Have you used a dish with metal trimmings?<br />
• Have you left a fork or other metal utensil inside the oven?<br />
• Is aluminium foil too close to the inside walls?<br />
● The oven causes interference with radios or televisions<br />
• Slight interference may be observed on televisions or radios when the oven is<br />
operating. This is normal.To solve this problem, install the oven away from<br />
televisions, radios and aerials.<br />
• If interference is detected by the oven’s microprocessor, the display may be<br />
reset.To solve this problem, disconnect the power plug and reconnect it. Reset<br />
the time.<br />
➢ If the above guidelines do not enable you to solve the problem, contact your<br />
local dealer or SAMSUNG after-sales service.<br />
SAMSUNG ELECTRONICS 13
Cooking / Reheating<br />
GB<br />
The following procedure explains how to cook or reheat food.<br />
ALWAYS check your cooking settings before leaving the oven unattended.<br />
First, place the food in the centre of the turntable. Close the door<br />
1 Set the power level to maximum by turning COOKING POWER<br />
CONTROL knob.<br />
(MAXIMUM POWER : 900 W)<br />
☛<br />
➢<br />
2 Set the time by turning TIMER( ) dial.<br />
Result: The oven light comes on and the turntable starts rotating.<br />
1) Cooking starts and when it has finished the oven beeps<br />
four times.<br />
2) The end reminder signal will beep 3 times (once every minute).<br />
3) The current time is displayed again.<br />
Never switch the microwave oven on when it is empty<br />
You can change the power level during cooking by turning the COOKING<br />
POWER CONTROL knob.<br />
Power Levels<br />
You can choose any of the power levels listed below.<br />
Power Level<br />
MWO<br />
Output<br />
GRILL<br />
HIGH<br />
900 W<br />
REHEAT<br />
700 W<br />
MEDIUM HIGH<br />
600 W<br />
MEDIUM<br />
450 W<br />
MEDIUM LOW<br />
300 W<br />
DEFROST( ) 180 W<br />
LOW / KEEP WARM<br />
100 W<br />
GRILL - 1100 W<br />
CO<strong>MB</strong>I I 300 W( ) 1100 W<br />
CO<strong>MB</strong>I II 450 W( ) 1100 W<br />
CO<strong>MB</strong>I III 600 W( ) 1100 W<br />
➢<br />
◆ If you select a higher power level, the cooking time must be decreased.<br />
◆ If you select a lower power level, the cooking time must be increased.<br />
14 SAMSUNG ELECTRONICS
Stopping the Cooking<br />
You can stop cooking at any time to check the food.<br />
1 To stop temporarily;<br />
GB<br />
Open the door.<br />
Result: Cooking stops. To resume cooking, close the door.<br />
2 To stop completely;<br />
Turn the TIMER( ) dial to the left.<br />
“: 0” will be displayed.<br />
Adjusting the Cooking Time<br />
Adjust the remaining cooking time by rotating the<br />
TIMER( ) dial.<br />
During the cooking to increase or decrease the cooking time of you<br />
food, turn the dial right or left.<br />
<strong>Manual</strong> Defrosting of Food<br />
The Defrost feature enables you to defrost meat, poultry, fish.<br />
First, place the frozen food in the centre of the turntable and close the door.<br />
1 Turn the COOKING POWER CONTROL knob to the Defrost( )<br />
symbol.<br />
➢<br />
2 Turn the TIMER( ) dial to select the appropriate time.<br />
Result:The oven light comes on and the turntable starts rotating.<br />
1) Cooking starts and when it has finished the oven beeps<br />
four times.<br />
2) The end reminder signal will beep 3 times<br />
(once every minute).<br />
3) The current time is displayed again.<br />
Use only recipients that are microwave-safe.<br />
SAMSUNG ELECTRONICS 15
Using the Crusty Plate (<strong>CE2927</strong>T)<br />
GB<br />
Your <strong>Samsung</strong> microwave oven features a crusty plate as an additional accessory.<br />
This crusty plate allows you to brown food not only on the top with the grill,<br />
but also the bottom of the food turns crispy and brown due to the high temperature<br />
of the crusty plate. Several items which you can prepare on the crusty plate<br />
can be found in the chart (see next page).<br />
The crusty plate can also be used for bacon, eggs, sausages, etc.<br />
1 Place the crusty plate directly on the turntable and preheat it with the<br />
highest Microwave-Grill-Combination[600W+Grill( )] setting by following<br />
the times and instructions in the chart.<br />
☛ Always use oven gloves to take out the crusty plate, as will become very<br />
hot.<br />
2 Brush the plate with oil if you are cooking food, such as bacon and eggs, in<br />
order to brown the food nicely.<br />
✽ - Please note that the crusty plate has a teflon layer which is not scratch-resis<br />
tant. Do not use any sharp objects like a knife to cut on the crusty plate.<br />
- Use plastic accessories to avoid scratches on the surface of the crusty plate<br />
or remove the food from the plate before cutting<br />
3 Place the food on the crusty plate.<br />
☛ - Do not place any objects on the crusty plate that are not heat-resistant;<br />
e.g. plastic bowels.<br />
- Never place the crusty plate in the oven without the turntable.<br />
4 Place the crusty plate on the metal rack(or turntable) in the microwave.<br />
5 Select the appropriate cooking time and power.<br />
Refer to the table on the opposite page .<br />
➢<br />
➢<br />
How to clean the Crusty Plate<br />
Clean the crusty plate with warm water and detergent and rinse off with clean water.<br />
Do not use a scrubbing brush or a hard sponge otherwise the top layer will be damaged.<br />
✽ Please Note<br />
The crusty plate is not dishwasher-safe.<br />
16 SAMSUNG ELECTRONICS
Crusty Plate Setting (<strong>CE2927</strong>T)<br />
We recommend that you preheat the crusty plate directly on the turn-table.<br />
Preheat the crusty plate with the 600W+Grill( ) function and follow the times and<br />
instructions in the table.<br />
GB<br />
Food Portion Power Preheating Cooking Recommendations<br />
Time Time<br />
Bacon 4 slices (80g) 600W+Grill 3 min. 3 - 3 1 /2 min. Preheat crusty plate. Put slices side by side on<br />
8 Slices (160g) ( ) 4 1 /2 - 5 min. crusty plate. Put crusty plate on the rack.<br />
Grilled 200 g (2pc) 450W+Grill 3 min. 3 min. Preheat crusty plate. Cut tomatoes in halves.<br />
Tomatoes 400 g (4pc) ( ) 4 min. Put some cheese on top. Arrange in a circle on<br />
crusty plate. Put crusty plate on the rack.<br />
Burger 2 pieces (125g) 600W+Grill 3 min 6 - 6 1 /2 min. Preheat crusty plate. Put frozen burger in a<br />
(frozen) 4 pieces (250g) ( ) 8 - 8 1 /2 min. circle on crusty plate. Put crusty plate on the<br />
rack. Turn over after 4-5 min.<br />
Baguettes 100-150 g (1pc) 450W+Grill 5 min 5 - 6 min. Preheat crusty plate. Put one baguette beside<br />
(frozen) 200-250 g (2pc) ( ) 6 - 7 min. the centre, 2 baguettes side by side on the<br />
plate. Put crusty plate on rack.<br />
Pizza 300 - 350 g 600W+Grill 5 min 7 - 8 min. Preheat crusty plate. Put the frozen pizza on<br />
(frozen) 400 - 450 g ( ) 9 - 10 min. the crusty plate. Put crusty plate on the rack.<br />
Mini Pizza 100 - 150 g 600W+Grill 5 min 3 - 3 1 /2 min. Preheat crusty plate. Put the chilled pizza<br />
(chilled) 200 - 250 g ( ) 4 - 4 1 /2 min. pieces in a circle on the plate. Set crusty<br />
plate on the rack.<br />
Oven 200 g 450W+Grill 4 min 9 min. Preheat crusty plate. Distribute oven chips on<br />
Chips 300 g ( ) 12 min. crusty plate. Put the plate on the rack. Turn<br />
(frozen) 400 g 15 min. over after half of cooking time.<br />
Baked 250 g 600W+Grill 4 min. 4 1 /2 - 5 min. Preheat crusty plate. Cut potatoes in halves.<br />
Potatoes 500 g ( ) 7 - 7 1 /2 min. Put them on the crusty plate with the cut side<br />
to the bottom. Arrange in a circle. Put the plate<br />
on the rack.<br />
Fish 150 g (5 pc) 600W+Grill 4 min. 6 - 6 1 /2 min. Preheat crusty plate. Brush plate with 1 tbsp.<br />
Fingers 300 g (10 pc) ( ) 8 1 /2 - 9 min. oil. Put fish fingers in a circle on the plate. Turn<br />
(frozen)<br />
over after 3 1/2 min (5 pc) or after 5 min (10 pc).<br />
Chicken 125 g 600W+Grill 4 min. 4 1 /2 - 5 min. Preheat crusty plate. Brush plate with 1 tbsp.<br />
Nuggets 250 g ( ) 6 1 /2 - 7 min. oil. Put chicken nuggets on the plate. Put<br />
(frozen)<br />
crusty plate on the rack. Turn over after 3 min<br />
(125g) or 5 min (250g).<br />
SAMSUNG ELECTRONICS 17
Choosing the Heating Element Position<br />
GB<br />
The heating element is used when grilling. It can be placed in one of two<br />
positions:<br />
◆<br />
☛<br />
Horizontal position for grilling or combined microwave<br />
+ grill cooking<br />
Only change the position of the heating element when it is cold and do<br />
not apply excessive force when placing it in the vertical position.<br />
To set the heating element to the...<br />
Then...<br />
Horizontal position<br />
(grill or combined microwave + grill)<br />
◆ Pull the heating element towards you<br />
◆ Push it upwards until it is parallel with the<br />
roof of the oven<br />
45°<br />
When cleaning the upper part inside the cavity, it will be convenient to turn<br />
the heater downward by 45° and clean it.<br />
Choosing the Accessories<br />
Use microwave-safe recipients; do not use plastic containers, dishes, paper<br />
cups, towels, etc.<br />
If you wish to select the combined cooking mode (grill and microwave), use<br />
only dishes that are microwave-safe and oven-proof. Metallic cookware or<br />
utensils may damage your oven.<br />
➢<br />
For further details on suitable cookware and utensils, refer to the Cookware Guide on<br />
page 22.<br />
18 SAMSUNG ELECTRONICS
Grilling<br />
The grill enables you to heat and brown food quickly, without using<br />
microwaves. For this purpose, a grill rack is supplied with your microwave<br />
oven.<br />
GB<br />
1 Preheat the grill to the required temperature, by the turning the<br />
cooking power control knob to grill symbol( ) and turning the<br />
timer knob to the appropriate position.<br />
2 Open the door and place the food on the rack.<br />
➢<br />
☛<br />
3 Set the time by turning the TIMER( ) dial.<br />
Result: The oven light comes on and the turntable starts rotating.<br />
1) Cooking starts and when it has finished the oven beeps<br />
four times.<br />
2) The end reminder signal will beep 3 times<br />
(once every minute).<br />
3) The current time is displayed again.<br />
Do not worry if the heater turns off and on while grilling.<br />
This system is designed to prevent overheating of the oven.<br />
Always use oven gloves when touching the dishes in the oven, as they<br />
will be very hot.<br />
Check that the heating element is in the horizontal position.<br />
SAMSUNG ELECTRONICS 19
Combining Microwaves and the Grill<br />
GB<br />
You can also combine microwave cooking with the grill, to cook quickly and<br />
brown at the same time.<br />
☛ ◆ ALWAYS use microwave-safe and oven-proof cookware. Glass or<br />
ceramic dishes are ideal as they allow the microwaves to<br />
penetrate the food evenly.<br />
◆<br />
ALWAYS use oven gloves when touching the recipients in the<br />
oven, as they will be very hot.<br />
1 Make sure that the heating element is in the horizontal position;<br />
refer to page 18 for further details.<br />
2 Open the oven door. Place the food on the rack and the rack<br />
on the turntable. Close the door.<br />
3 Turn the Cooking Power Control knob to the appropriate<br />
power Level( , , ).<br />
4 Set the time by turning TIMER( ) dial.<br />
Result: The oven light comes on and the turntable starts rotating.<br />
1) Cooking starts and when it has finished the oven beeps<br />
four times.<br />
2) The end reminder signal will beep 3 times<br />
(once every minute).<br />
3) The current time is displayed again.<br />
➢<br />
The maximum microwave power for the combined microwave and grill mode is 600W.<br />
20 SAMSUNG ELECTRONICS
<strong>Manual</strong> Stop Turntable Function<br />
The Turntable on/off( ) button stops the turntable from rotating, allowing<br />
you to use large dishes that fill the whole oven.<br />
☛ The results will be less satisfactory in this case as the cooking is less<br />
even. We recommend that you turn the dish by hand halfway through the<br />
cooking process.<br />
☛ Warning! Never operate the oven without local when turntable button is off.<br />
Result: The oven may catch fire and become extremely damaged.<br />
GB<br />
1 Push the Turntable on/off( ) button.<br />
Result: If the turntable button can be pressed, it will rotate.<br />
If the turntable button pops, it will not rotate.<br />
➢ • Don’t press Turntable on/off(<br />
) button during cooking process.<br />
SAMSUNG ELECTRONICS 21
Cookware Guide<br />
GB<br />
To cook food in the microwave oven, the microwaves must be able to penetrate<br />
the food, without being reflected or absorbed by the dish used.<br />
Care must therefore be taken when choosing the cookware. If the cookware is<br />
marked microwave-safe, you do not need to worry.<br />
The following table lists various types of cookware and indicates whether and<br />
how they should be used in a microwave oven.<br />
Cookware<br />
Aluminium foil<br />
Microwave-Safe<br />
✓✗<br />
Comments<br />
Can be used in small quantities to protect<br />
areas against overcooking. Arcing can occur if<br />
the foil is too close to the oven wall or if too<br />
much foil is used.<br />
Browning plate<br />
China and earthenware<br />
Disposable polyester<br />
cardboard dishes<br />
Fast-food packaging<br />
• Polystyrene cups<br />
containers<br />
• Paper bags or newspaper<br />
• Recycled paper or metal trims<br />
Glassware<br />
• Oven-to-table ware<br />
• Fine glassware<br />
• Glass jars<br />
Metal<br />
• Dishes<br />
• Freezer bag twist ties<br />
Paper<br />
• Plates, cups, napkins and<br />
Kitchen paper<br />
• Recycled paper<br />
Plastic<br />
• Containers<br />
• Cling film<br />
• Freezer bags<br />
Wax or grease-proof paper<br />
✓<br />
✓<br />
✓<br />
✓<br />
✗<br />
✗<br />
✓<br />
✓<br />
✓<br />
✗<br />
✗<br />
✓<br />
✗<br />
✓<br />
✓<br />
✓✗<br />
✓<br />
Do not preheat for more than eight minutes.<br />
Porcelain, pottery, glazed earthenware and<br />
bone china are usually suitable, unless decorated<br />
with a metal trim.<br />
Some frozen foods are packaged in these dishes.<br />
Can be used to warm food. Overheating may<br />
cause the polystyrene to melt.<br />
May catch fire.<br />
May cause arcing.<br />
Can be used, unless decorated with a metal<br />
trim.<br />
Can be used to warm foods or liquids. Delicate<br />
glass may break or crack if heated suddenly.<br />
Must remove the lid. Suitable for warming only.<br />
May cause arcing or fire.<br />
For short cooking times and warming. Also to<br />
absorb excess moisture.<br />
May cause arcing.<br />
Particularly if heat-resistant thermoplastic.<br />
Some other plastics may warp or discolour at<br />
high temperatures. Do not use Melamine plastic.<br />
Can be used to retain moisture. Should not<br />
touch the food. Take care when removing the<br />
film as hot steam will escape.<br />
Only if boilable or oven-proof. Should not be<br />
airtight. Prick with a fork, if necessary.<br />
Can be used to retain moisture and prevent<br />
spattering.<br />
22 SAMSUNG ELECTRONICS
Cooking Guide<br />
MICROWAVES<br />
Microwave energy actually penetrates food, attracted and absorbed by its water, fat<br />
and sugar content.<br />
The microwaves cause the molecules in the food to move rapidly. The rapid movement<br />
of these molecules creates friction and the resulting heat cooks the food.<br />
GB<br />
COOKING<br />
Cookware for microwave cooking:<br />
Cookware must allow microwave energy to pass through it for maximum efficiency.<br />
Microwaves are reflected by metal, such as stainless steel, aluminium and copper, but<br />
they can penetrate through ceramic, glass, porcelain and plastic as well as paper and<br />
wood. So food must never be cooked in metal containers.<br />
Foods suitable for microwave cooking:<br />
Many kinds of food are suitable for microwave cooking, including fresh or frozen vegetables,<br />
fruit, pasta, rice, grains, beans, fish, and meat. Sauces, custard, soups,<br />
steamed puddings, preserves, and chutneys can also be cooked in a microwave<br />
oven. Generally speaking, microwave cooking is ideal for any food that would normally<br />
be prepared on a hob. Melting butter or chocolate, for example (see the chapter<br />
with tips, techniques and hints).<br />
Covering during cooking<br />
It is very important to cover the food during cooking because evaporated water rises<br />
as steam and contributes to the cooking process. Food can be covered in different<br />
ways: e.g. with a ceramic plate, plastic cover or microwave suitable cling film.<br />
Standing times<br />
It is important to allow standing time when you have finished cooking the food in order<br />
to allow the temperature within the food to even out.<br />
Cooking Guide for frozen vegetables<br />
Use a suitable glass pyrex bowl with lid. Cook covered for the minimum time - see<br />
table. Continue cooking to get the result you prefer.<br />
Stir twice during cooking and once after cooking. Add salt, herbs or butter after<br />
cooking. Cover during standing time.<br />
Food Portion Power Time Standing Instructions<br />
(min.) Time (min.)<br />
Spinach 150 g 600 W 5-6 2-3 Add 15 ml (1 tablespoon)<br />
cold water.<br />
Broccoli 300 g 600 W 8-9 2-3 Add 30 ml (2 tbsp.)<br />
cold water.<br />
Peas 300 g 600 W 7-8 2-3 Add 15 ml (1 tbsp.)<br />
cold water.<br />
Green Beans 300 g 600 W 7 1 /2-8 1 /2 2-3 Add 30 ml (2 tbsp.)<br />
cold water.<br />
Mixed Vegetables 300 g 600 W 7-8 2-3 Add 15 ml (1 tbsp.)<br />
(carrots/peas/corn)<br />
cold water.<br />
Mixed Vegetables 300 g 600 W 7 1 /2-8 1 /2 2-3 Add 15 ml (1 tbsp.)<br />
(Chinese style)<br />
cold water.<br />
SAMSUNG ELECTRONICS 23
Cooking Guide<br />
GB<br />
Cooking Guide for fresh vegetables<br />
Use a suitable glass pyrex bowl with lid. Add 30-45 ml cold water (2-3 tbsp.) for every<br />
250 g unless another water quantity is recommended - see table. Cook covered for<br />
the minimum time - see table. Continue cooking to get the result you prefer. Stir once<br />
during and once after cooking. Add salt, herbs or butter after cooking.<br />
Cover during a standing time of 3 minutes.<br />
Hint: Cut the fresh vegetables into even sized pieces. The smaller they are cut, the<br />
quicker they will cook.<br />
All fresh vegetables should be cooked using full microwave power (900 W).<br />
Food Portion Time Standing Instructions<br />
(min.) Time (min.)<br />
Broccoli 250 g 3 1 /2-4 3 Prepare even sized florets. Arrange the stems<br />
500 g 6-7 to the centre.<br />
Brussels Sprouts 250 g 5-5 1 /2 3 Add 60-75 ml (5-6 tbsp.) water.<br />
Carrots 250 g 3 1 /2-4 3 Cut carrots into even sized slices.<br />
Cauliflower 250 g 4-4 1 /2 3 Prepare even sized florets. Cut big florets<br />
500 g 6 1 /2-7 1 /2 into halves. Arrange stems to the centre.<br />
Courgettes 250 g 3-3 1 /2 3 Cut courgettes into slices. Add 30 ml (2 tbsp.)<br />
water or a knob of butter.<br />
Cook until just tender.<br />
Egg Plants 250 g 2 1 /2 -3 3 Cut egg plants into small slices and sprinkle<br />
with 1 tablespoon lemon juice.<br />
Leeks 250 g 3-3 1 /2 3 Cut leeks into thick slices.<br />
Mushrooms 125 g 1-1 1 /2 3 Prepare small whole or sliced mushrooms.<br />
250 g 2-2 1 /2 Do not add any water. Sprinkle with lemon juice.<br />
Spice with salt and pepper. Drain before serving.<br />
Onions 250 g 4-4 1 /2 3 Cut onions into slices or halves. Add only<br />
15 ml (1 tbsp.) water.<br />
Pepper 250 g 3 1 /2 -4 3 Cut pepper into small slices.<br />
Potatoes 250 g 3-4 3 Weigh the peeled potatoes and cut them into<br />
500 g 6-7 similar sized halves or quarters.<br />
Turnip Cabbage 250 g 4 1 /2-5 3 Cut turnip cabbage into small cubes.<br />
24 SAMSUNG ELECTRONICS
Cooking Guide<br />
Cooking Guide for rice and pasta<br />
Rice :<br />
Use a large glass pyrex bowl with lid - rice doubles in volume during cook<br />
ing. Cook covered.<br />
After the cooking time is over, stir before standing time and salt or add<br />
herbs and butter.<br />
Remark: the rice may not have absorbed all water after the cooking time is<br />
finished.<br />
GB<br />
Pasta : Use a large glass pyrex bowl. Add boiling water, a pinch of salt and stir well.<br />
Cook uncovered.<br />
Stir occasionally during and after cooking. Cover during standing time and<br />
drain thoroughly afterwards.<br />
Food Portion Power Time Standing Instructions<br />
(min.) Time (min.)<br />
White Rice 250 g 900 W 15-16 5 Add 500 ml cold water.<br />
(parboiled) 375 g 17 1 /2-18 1 /2 Add 750 ml cold water.<br />
Brown Rice 250 g 900 W 20-21 5 Add 500 ml cold water.<br />
(parboiled) 375 g 22-23 Add 750 ml cold water.<br />
Mixed Rice<br />
(rice + wild rice) 250 g 900 W 16-17 5 Add 500 ml cold water.<br />
Mixed Corn<br />
(rice + grain) 250 g 900 W 17-18 5 Add 400 ml cold water.<br />
Pasta 250 g 900 W 10-11 5 Add 1000 ml hot water.<br />
SAMSUNG ELECTRONICS 25
Cooking Guide<br />
GB<br />
REHEATING<br />
Your microwave oven will reheat food in a fraction of the time that conventional ovens<br />
hobs normally take.<br />
Use the power levels and reheating times in the following chart as a guide. The times in<br />
the chart consider liquids with a room temperature of about +18 to +20°C or a chilled<br />
food with a temperature of about +5 to +7°C.<br />
Arranging and covering<br />
Avoid reheating large items such as joint of meat - they tend to overcook and dry out<br />
before the centre is piping hot. Reheating small pieces will be more successful.<br />
Power levels and stirring<br />
Some foods can be reheated using 900 W power while others should be reheated using<br />
600 W, 450 W or even 300 W.<br />
Check the tables for guidance. In general, it is better to reheat food using a lower power<br />
level, if the food is delicate, in large quantities, or if it is likely to heat up very quickly<br />
(mince pies, for example).<br />
Stir well or turn food over during reheating for best results. When possible, stir again<br />
before serving.<br />
Take particular care when heating liquids and baby foods. To prevent eruptive boiling of<br />
liquids and possible scalding , stir before, during and after heating. Keep them in the<br />
microwave oven during standing time. We recommend putting a plastic spoon or glass<br />
stick into the liquids. Avoid overheating (and therefore spoiling) the food.<br />
It is preferable to underestimate cooking time and add extra heating time, if necessary.<br />
Heating and standing times<br />
When reheating food for the first time, it is helpful to make a note of the time taken - for<br />
future reference.<br />
Always make sure that the reheated food is piping hot throughout.<br />
Allow food to stand for a short time after reheating - to let the temperature even out.<br />
The recommended standing time after reheating is 2-4 minutes, unless another time is<br />
recommended in the chart..<br />
Take particular care when heating liquids and baby food. See also the chapter with the<br />
safety precautions.<br />
REHEATING LIQUIDS<br />
Always allow a standing time of at least 20 seconds after the oven has been switched off<br />
to allow the temperature to even out. Stir during heating, if necessary, and ALWAYS stir<br />
after heating. To prevent eruptive boiling and possible scalding, you should put a spoon<br />
or glass stick into the beverages and stir before, during and after heating.<br />
REHEATING BABY FOOD<br />
BABY FOOD: Empty into a deep ceramic plate. Cover with plastic lid. Stir well after<br />
reheating! Let stand for 2-3 minutes before serving. Stir again and check<br />
the temperature. Recommended serving temperature: between 30-40°C.<br />
BABY MILK: Pour milk into a sterilised glass bottle. Reheat uncovered. Never heat a<br />
baby’s bottle with teat on, as the bottle may explode if overheated. Shake<br />
well before standing time and again before serving ! Always carefully<br />
check the temperature of baby milk or food before giving it to the baby.<br />
Recommended serving temperature: ca. 37°C.<br />
REMARK:<br />
Baby food particularly needs to be checked carefully before serving to prevent burns.<br />
Use the power levels and times in the next table as a guide lines for reheating.<br />
26 SAMSUNG ELECTRONICS
Cooking Guide<br />
Reheating Liquids and Food<br />
Use the power levels and times in this table as guide lines for reheating.<br />
GB<br />
Food Portion Power Time Standing Instructions<br />
(min.) Time (min.)<br />
Drinks 150 ml (1 cup) 900 W 1-1 1 /2 1 - 2 Pour into cups and reheat uncovered:<br />
(coffee, tea 300 ml (2 cups) 1 1 /2 -2 1 cup in the centre, 2 cups opposite<br />
and water) 450 ml (3 cups) 2 1 /2-3 of each other, 3 cups in a circle. Keep<br />
600 ml (4 cups) 3-3 1 /2 in microwave oven during standing<br />
time and stir well.<br />
Soup 250 g 900 W 2-2 1 /2 2 - 3 Pour into a deep ceramic plate or<br />
(chilled) 350 g 2 1 /2-3 deep ceramic bowl. Cover with<br />
450 g 3-3 1 /2 plastic lid. Stir well after reheating.<br />
550 g 3 1 /2-4 Stir again before serving.<br />
Stew 350 g 600 W 4 1 /2 - 5 1 /2 2 - 3 Put stew in a deep ceramic plate.<br />
(chilled)<br />
Cover with plastic lid.Stir occasionally<br />
during reheating and again before<br />
standing and serving.<br />
Pasta with 350 g 600 W 3 1 /2 - 4 1 /2 3 Put pasta (e.g. spaghetti or egg noodles)<br />
sauce<br />
on a flat ceramic plate. Cover with<br />
(chilled)<br />
microwave cling film. Stir before serving.<br />
Filled pasta 350 g 600 W 4- 5 3 Put filled pasta (e.g. ravioli, tortellini)<br />
with sauce<br />
in a deep ceramic plate. Cover with<br />
(chilled)<br />
plastic lid. Stir occasionally during<br />
reheating and again before standing<br />
and serving.<br />
Plated Meal 350 g 600 W 4 1 /2 - 5 1 /2 3 Plate a meal of 2-3 chilled compo-<br />
(chilled) 450 g 5-6 nents on a ceramic dish. Cover with<br />
550 g 5 1 /2 - 6 1 /2 microwave cling-film.<br />
SAMSUNG ELECTRONICS 27
Cooking Guide<br />
GB<br />
Guide for Dual Reheating<br />
Use the power levels and times in this table as guide lines for reheating.<br />
Food Portion Power Time Standing Instructions<br />
(min.) Time (min.)<br />
Soup 2 x 250 g 900 W 3 1 /2-4 1 /2 2 - 3 Pour into two deep ceramic plates<br />
(chilled) 2 x 350 g 5-6 and cover. Put one plate directly on<br />
the turntable, other on the rack.<br />
Stir well after reheating.<br />
Stir again before serving.<br />
Chicken Curry 2 x 350 g 600 W 7-8 1 /2 3 Plate two meals of each 2 chilled<br />
& Rice<br />
components on two ceramic plates<br />
(chilled)<br />
dishes. Cover with microwave<br />
cling-film. Put one plate directly on the<br />
turn table, other on the rack.<br />
Plate Meal 2 x 350 g 600 W 7 1 /2-9 3 Plate two meals of 2-3 chilled com-<br />
(chilled)<br />
ponents on two flat ceramic plates.<br />
Cover with microwave cling-film.<br />
Put one plate directly on the turntable,<br />
other on the rack.<br />
Reheating Baby Food and Milk<br />
Use the power levels and times in this table as guide lines for reheating.<br />
Food Portion Power Time Standing Instructions<br />
Time (min.)<br />
Baby food 190 g 600 W 30 sec. 2 - 3 Empty into ceramic deep plate.<br />
(vegetables<br />
Cook covered. Stir after cooking<br />
+ meat) time. Stand for 2-3 minutes. Before<br />
serving, stir well and check the temperature<br />
carefully.<br />
Baby porridge 190 g 600 W 20 sec. 2 - 3 Empty into ceramic deep plate.<br />
(grain + milk<br />
Cook covered. Stir after cooking<br />
+ fruit) time. Stand for 2-3 minutes. Before<br />
serving, stir well and check the temperature<br />
carefully.<br />
Baby milk 100 ml 300 W 30-40 sec. 2 - 3 Stir or shake well and pour into a<br />
200 ml 1 min. to sterilised glass bottle. Place into<br />
1 min. 10 sec. the centre of turntable. Cook<br />
uncovered. Shake well and stand for<br />
at least 3 minutes. Before serving,<br />
shake well and check the temperature<br />
carefully.<br />
28 SAMSUNG ELECTRONICS
Cooking Guide<br />
DEFROSTING<br />
Microwaves are an excellent way of defrosting frozen food. Microwaves gently defrost<br />
frozen food in a short period of time. This can be of great advantage, if unexpected<br />
guests suddenly show up.<br />
Frozen poultry must be thoroughly thawed before cooking. Remove any metal ties and<br />
take it out of any wrapping to allow thawed liquid to drain away.<br />
Put the frozen food on a dish without cover. Turn over halfway, drain off any liquid and<br />
remove any giblets as soon as possible.<br />
Check the food occasionally to make sure that it does not feel warm.<br />
If smaller and thinner parts of the frozen food start to warm up, they can be shielded<br />
by wrapping very small strips of aluminium foil around them during defrosting.<br />
Should poultry start to warm up on the outer surface, stop thawing and allow it to<br />
stand for 20 minutes before continuing.<br />
Leave the fish, meat and poultry to stand in order to complete defrosting. The standing<br />
time for complete defrosting will vary depending on the quantity defrosted. Please refer<br />
to the table below.<br />
Hint: Flat food defrosts better than thick and smaller quantities need less time than<br />
bigger ones. Remember this hint while freezing and defrosting food.<br />
For defrosting of frozen food with a temperature of about -18 to - 20 °C, use the following<br />
table as a guide.<br />
GB<br />
All frozen food should be defrosted using the defrosting power level (180 W).<br />
Food Portion Time Standing Instructions<br />
(min.) Time (min.)<br />
Meat<br />
Minced beef 200 g 6 - 7 15 - 30 Place the meat on a flat ceramic plate.<br />
400 g 10 - 12 Shield thinner edges with aluminium foil.<br />
Turn over after half of defrosting time!<br />
Pork steaks 250 g 7 - 8<br />
Poultry<br />
Chicken pieces 500 g 14 - 15 15 - 60 First, put chicken pieces skin-side down,<br />
(2 pc) whole chicken breast-side-down on a flat<br />
ceramic plate. Shield the thinner parts like<br />
Whole chicken 1200 g 32 - 34 wings and ends with aluminium foil. Turn over<br />
after half of defrosting time!<br />
Fish<br />
Fish fillets/ 200 g 6 - 7 10 - 25 Put frozen fish in the middle of a flat ceramic<br />
Whole fish 400 g 11 - 13 plate. Arrange the thinner parts under the<br />
thicker parts. Shield narrow ends of fillets and tail<br />
whole fish with aluminium foil. Turn over after half<br />
of defrosting time!<br />
Fruits<br />
Berries 250 g 6 - 7 5 - 10 Spread fruits on a flat, round glass dish<br />
(with a large diameter).<br />
Bread<br />
Bread rolls 2 pc 1-1 1 /2 5 - 20 Arrange rolls in a circle or bread horizontally on<br />
(each ca. 50 g) 4 pc 2 1 /2 -3 kitchen paper in the middle of turntable.<br />
Toast/ Sandwich 250 g 4-4 1 /2 Turn over after half of defrosting time!<br />
German bread 500 g 7-9<br />
(wheat + rye flour)<br />
SAMSUNG ELECTRONICS 29
Cooking Guide<br />
GB<br />
GRILL<br />
The grill-heating element is located underneath the ceiling of the cavity. It operates<br />
while the door is closed and the turntable is rotating. The turntable’s rotation makes the<br />
food brown more evenly. Preheating the grill for 4 minutes will make the food brown<br />
more quickly.<br />
Cookware for grilling:<br />
Should be flameproof and may include metal. Do not use any type of plastic cookware,<br />
as it can melt.<br />
Food suitable for grilling:<br />
Chops, sausages, steaks, hamburgers, bacon and gammon rashers, thin fish portions,<br />
sandwiches and all kinds of toast with toppings.<br />
IMPORTANT REMARK:<br />
Whenever the grill only mode is used, make sure that the grill-heating element is under<br />
the ceiling in the horizontal position and not on the back-wall in the vertical position.<br />
Please remember that food must be placed on the high rack, unless another instruction<br />
is recommended.<br />
MICROWAVE + GRILL<br />
This cooking mode combines the radiant heat that is coming from the grill with the<br />
speed of microwave cooking. It operates only while the door is closed and the turntable<br />
is rotating. Due to the rotation of the turntable, the food browns evenly. Three combination<br />
modes are available with this model:<br />
600 W + Grill, 450 W + Grill and 300 W + Grill.<br />
Cookware for cooking with microwave + grill<br />
Please use cookware that microwaves can pass through. Cookware should be flameproof.<br />
Do not use metal cookware with combination mode. Do not use any type of plastic<br />
cookware, as it can melt.<br />
Food suitable for microwave + grill cooking:<br />
Food suitable for combination mode cooking include all kinds of cooked food which<br />
needs reheating and browning (e.g. baked pasta), as well as foods which require a<br />
short cooking time to brown the top of the food. Also, this mode can be used for thick<br />
food portions that benefit from a browned and crispy top (e.g. chicken pieces, turning<br />
them over half way through cooking). Please refer to the grill table for further details.<br />
IMPORTANT REMARK:<br />
Whenever the combination mode (microwave + grill) is used, make sure that the grill<br />
heating element is under the ceiling in the horizontal position and not on the back-wall<br />
in the vertical position. The food should be placed on the high rack, unless another<br />
instruction is recommended. Otherwise it has to be placed directly on the turntable.<br />
Please refer to the instructions in the following chart.<br />
The food must be turned over, if it is to be browned on both sides.<br />
30 SAMSUNG ELECTRONICS
Cooking Guide<br />
Grill Guide for fresh food<br />
Preheat the grill with the grill-function for 4 minutes.<br />
Use the power levels and times in this table as guide lines for grilling.<br />
GB<br />
Fresh Portion Power 1. Side 2. Side Instructions<br />
Food Time Time<br />
(min) (min.)<br />
Toast Slices 4 pc Grill only 3 1 /2-4 1 /2 3-4 Put the toast slices side by side on<br />
(each 25g)<br />
the rack.<br />
Bread Rolls 2-4 pieces Grill only 2 1 /2-3 1 /2 1 1 /2-2 1 /2 Put bread rolls first with the bottom<br />
(already baked)<br />
side up in a circle directly on the<br />
turntable.<br />
Grilled 200 g (2pc) 300 W + 3 1 /2-4 1 /2 ---- Cut tomatoes into halves. Put some<br />
Tomatoes 400 g (4pc) Grill 5-6 cheese on top. Arrange in a circle in a<br />
flat glass pyrex dish. Place it on the<br />
rack.<br />
Tomato-Cheese 4 pc(300 g) 300 W + 4-5 ---- Toast the breas slices first.<br />
Toast Grill Put the toast with topping on the rack.<br />
Stand for 2-3 minutes.<br />
Toast Hawaii 2 pc(300 g) 450 W + 3 1 /2-4 1 /2 ---- Toast the bread slices first. Put the<br />
(pineapple, 4 pc(600 g) Grill 6-7 toast with topping on the rack. Put 2<br />
ham, cheese<br />
toasts opposite directly on the rack.<br />
slices)<br />
Stand for 2-3 minutes.<br />
Baked 250 g 600 W + 4 1 /2 - 5 1 /2 ---- Cut potatoes into halves. Put them in<br />
Potatoes 500 g Grill 6 1 /2 - 7 1 /2 a circle on the rack with the cut side<br />
to the grill.<br />
Gratin 500 g 450 W + 9-11 ---- Put the fresh gratin into a small glass<br />
Potatoes/ Grill pyrex dish. Put the dish on the rack.<br />
vegetables<br />
After cooking stand for 2-3 minutes.<br />
(chilled)<br />
Chicken 450 g(2pc) 300 W + 7-8 7-8 Brush chicken pieces with oil and<br />
Pieces 650 g(2-3pc) Grill 9-10 8-9 spices. Put them in a circle with the<br />
850 g(4pc) 11-12 9-10 bones to the middle. Do not place a<br />
chicken plece in the centre of the<br />
rack. Stand for 2-3 minutes.<br />
Roast Chicken 900 g 450 W + 10-12 9-11 Brush chicken with oil and spices.<br />
1100 g Grill 12-14 11-13 Put chicken first breast side down,<br />
second side breast side up directly on<br />
turntable. Stand for 5 minutes after<br />
grilling.<br />
Lamb Chops 400 g (4pc) Grill only 10-12 8-9 Brush the lamb chops with oil and<br />
(medium)<br />
spices. Lay them in a circle on the<br />
rack.After grilling stand for 2-3<br />
minutes.<br />
SAMSUNG ELECTRONICS 31
Cooking Guide<br />
GB<br />
Grill Guide for fresh food<br />
Fresh Portion Power 1. Side 2. Side Instructions<br />
Food Time Time<br />
(min) (min.)<br />
Pork Steaks MW +Grill (300W+Gril) (Grill only) Brush the pork steaks with oil and<br />
250 g (2pc) 6-7 5-6 spices. Lay them in a circle on the<br />
500 g (4pc) 8-10 7-8 rack. After grilling stand for 2-3<br />
minutes.<br />
Roast Fish 450 g 300 W + 6-7 7-8 Brush skin of whole fish with oil and<br />
650 g Grill 7-8 8-9 herbs and spices. Put fish side by<br />
side (head to tail) on rack<br />
Baked 2 apple 300 W + 6-7 ---- Core the apples and fill them with<br />
Apples (ca. 400g) Grill raisins and jam. Put some almond<br />
4 apples 10-12 slices on top. Put apples on a flat<br />
(ca. 800g)<br />
glass pyrex dish. Place the dish<br />
directly on the turntable.<br />
Grill Guide for frozen food<br />
Use the power levels and times in this table as guide lines for grilling.<br />
Fresh Portion Power 1. Side 2. Side Instructions<br />
Food Time Time<br />
(min) (min.)<br />
Bread Rolls MW+Grill 300W+Grill Grill only Arrange rolls in a circle with the bot-<br />
(each ca. 50 g) 2 pc 1 1 /2-2 2-3 tom side up directly on the turntable.<br />
4 pc 2 1 /2-3 2-3 Grill the rolls until they are crispy.<br />
Stand for 2-5 minutes.<br />
Baguettes/ MW+Grill 450W+Grill Grill only Put frozen baguette diagonally on<br />
Garlic Bread 200-250 g (1pc) 3 1 /2-4 2-3 baking paper on the rack.<br />
After grilling stand for 2-3 minutes.<br />
Gratin 400 g 450 W + 13-15 ---- Put frozen gratin into a small glass<br />
(vegetables or Grill pyrex dish. Put the dish on the rack.<br />
potatoes)<br />
After cooking stand for 2-3 minutes.<br />
Pasta 400 g 600 W + 14-16 ---- Put frozen pasta into a small flat rec-<br />
(Cannelloni, Grill tangular glass pyrex dish. Put the dish<br />
Macaroni,<br />
directly on the turntable. After cooking<br />
Lasagne)<br />
stand for 2-3 minutes.<br />
Fish Gratin 400 g 450 W + 16-18 ---- Put frozen fish gratin into a small flat<br />
Grill<br />
rectangular glass pyrex dish.<br />
Put the dish directly on the turntable.<br />
After cooking stand for 2-3 minutes.<br />
32 SAMSUNG ELECTRONICS
Cooking Guide<br />
SPECIAL HINTS<br />
GB<br />
MELTING BUTTER<br />
Put 50 g butter into a small deep glass dish. Cover with plastic lid.<br />
Heat for 30-40 seconds using 900 W, until butter is melted.<br />
MELTING CHOCOLATE<br />
Put 100 g chocolate into a small deep glass dish.<br />
Heat for 3-5 minutes, using 450W until chocolate is melted.<br />
Stir once or twice during melting. Use oven gloves while taking out!<br />
MELTNG CRYSTALLIZED HONEY<br />
Put 20 g crystallized honey into a small deep glass dish.<br />
Heat for 20-30 seconds using 300 W, until honey is melted.<br />
MELTING GELATINE<br />
Lay dry gelatine sheets (10 g) for 5 minutes into cold water.<br />
Put drained gelatine into a small glass pyrex bowl.<br />
Heat for 1 minute using 300 W.<br />
Stir after melting.<br />
COOKING GLAZE/ICING (FOR CAKE AND GATEAUX)<br />
Mix instant glaze (approximately 14 g) with 40 g sugar and 250 ml cold water.<br />
Cook uncovered in a glass pyrex bowl for 3 1 /2 to 4 1 /2 minutes using 900 W,<br />
until glaze/icing is transparent. Stir twice during cooking.<br />
COOKING JAM<br />
Put 600 g fruits (for example mixed berries) in a suitable sized glass<br />
pyrex bowl with lid. Add 300 g preserving sugar and stir well.<br />
Cook covered for 10-12 minutes using 900 W.<br />
Stir several times during cooking. Empty directly into small jam<br />
glasses with twist-off lids. Stand on lid for 5 minutes.<br />
COOKING PUDDING<br />
Mix pudding powder with sugar and milk (500 ml) by following the<br />
manufacturers instructions and stir well. Use a suitable sized glass pyrex<br />
bowl with lid. Cook covered for 6 1 /2 to 7 1 /2 minutes using 900 W.<br />
Stir several times well during cooking.<br />
BROWNING ALMOND SLICES<br />
Spread 30 g sliced almonds evenly on a medium sized ceramic plate.<br />
Stir several times during browning for 3 1 /2 to 4 1 /2 minutes using 600 W.<br />
Let it stand for 2-3 minutes in the oven. Use oven gloves while taking out!<br />
SAMSUNG ELECTRONICS 33
Cleaning Your Microwave Oven<br />
GB<br />
The following parts of your microwave oven should be cleaned regularly to prevent<br />
grease and food particles from building up:<br />
● Inside and outside surfaces<br />
● Door and door seals<br />
● Turntable and Roller rings<br />
☛ ALWAYS ensure that the door seals are clean and the door closes properly.<br />
1. Clean the outside surfaces with a soft cloth and warm, soapy water.Rinse and dry.<br />
2. Remove any splashes or stains on the inside surfaces or on the roller ring with a soapy cloth.<br />
Rinse and dry.<br />
3. To loosen hardened food particles and remove smells, place a cup of diluted<br />
lemon juice on the turntable and heat for ten minutes at maximum power.<br />
4. Wash the dishwasher-safe plate whenever necessary.<br />
➢<br />
➢<br />
DO NOT spill water in the vents. NEVER use any abrasive products or chemical<br />
solvents.Take particular care when cleaning the door seals to ensure that no particles:<br />
• Accumulate<br />
• Prevent the door from closing correctly<br />
Clean the microwave oven cavity right after each use with a mild detergent solution, but<br />
let the microwave oven cool down before cleaning in order to avoid injury.<br />
45°<br />
For your convenience, we recommend that you turn the heater downward<br />
while cleaning the upper inside part of the cavity.<br />
34 SAMSUNG ELECTRONICS
Storing and Repairing Your Microwave Oven<br />
A few simple precautions should be taken when storing or having your<br />
microwave oven serviced.<br />
The oven must not be used if the door or door seals are damaged:<br />
GB<br />
●<br />
●<br />
●<br />
Broken hinge<br />
Deteriorated seals<br />
Distorted or bent oven casing<br />
Only a qualified microwave service technician should can repair this oven.<br />
☛ NEVER remove the outer casing from the oven. If the oven is faulty and needs servicing<br />
or you are in doubt about its condition:<br />
• Unplug it from the wall socket<br />
• Contact the nearest after-sales service centre<br />
➢ If you wish to store your oven away temporarily, choose a dry, dust-free place.<br />
Reason: Dust and damp may adversely affect the working parts in the oven.<br />
➢ This microwave oven is not intended for commercial use.<br />
SAMSUNG ELECTRONICS 35
Technical Specification<br />
GB<br />
SAMSUNG strives to improve its products at all times. Both the design specifications<br />
and these user instructions are thus subject to change without notice.<br />
Model<br />
Power source<br />
Power consumption<br />
Microwave<br />
Grill<br />
Combined mode<br />
Output power<br />
Operating frequency<br />
Magnetron<br />
Cooling method<br />
Dimensions (W x H x D)<br />
Outside<br />
Oven cavity<br />
Volume<br />
Weight<br />
Net<br />
<strong>CE2927</strong>/<strong>CE2927</strong>T<br />
230V ~ 50 Hz<br />
1500 W<br />
1300 W<br />
2800 W<br />
100 W/900 W -7 Level (IEC-705)<br />
2450 MHz<br />
OM75P(31)<br />
Cooling fan motor<br />
517 x 297 x 424 mm<br />
336 x 241 x 349 mm<br />
0.9 cubic feet<br />
18 kg approx<br />
36 SAMSUNG ELECTRONICS
ELECTRONICS<br />
Printed in Korea


