

Samsung SD-616B - User Manual_0.27 MB, pdf, ENGLISH
Samsung SD-616B - User Manual_0.27 MB, pdf, ENGLISH
Samsung SD-616B - User Manual_0.27 MB, pdf, ENGLISH

Create successful ePaper yourself
Turn your PDF publications into a flip-book with our unique Google optimized e-Paper software.
FCC Compliance<br />
DVD-ROM DRIVE<br />
<strong>SD</strong>-616<br />
<strong>User</strong>'s Guide<br />
This equipment has been tested and found to comply with the limits for a<br />
Class B digital device, pursuant to Part 15 of the FCC rules.<br />
These limits are designed to provide reasonable protection against harmful<br />
interference in a residential installation.<br />
This equipment generates, uses, and can radiate radio frequency energy<br />
and, if not installed and used in accordance with the instructions, may cause<br />
harmful interference to radio communications. However, there is no guarantee<br />
that interference will not occur in a particular installation. If this equipment<br />
does cause harmful interference to radio or television reception, which can be<br />
deter-mined by turning the equipment off and on, the user is encouraged to<br />
try to correct the interference by one or more of the following measures:<br />
• Re-orient or relocate the receiving antenna.<br />
• Increase the separation between the equipment and receiver.<br />
• Connect the equipment into an outlet on a circuit different from that to<br />
which the receiver is connected.<br />
• Consult the dealer or an experienced radio/TV technician for help.<br />
http://www.samsungodd.com<br />
www.samsungelectronics.com<br />
BG68-00342A Rev.03<br />
Safety Precautions<br />
The following diagrams illustrate the precautions to be taken when using<br />
your DVD-ROM drive.<br />
✱ Changes or modifications not expressly approved by the party responsible for compliance<br />
could void the user’s authority to operate the equipment<br />
You must not use the drive in any manner other than that specified in this guide.<br />
CAUTION<br />
Do not attempt to repair the DVD-ROM drive yourself. Contact<br />
your dealer or local SAMSUNG representative for all repairs.<br />
If you make any adjustments or perform any operations other<br />
than those specified in this guide, you run the risk of exposure to<br />
hazardous radiation.<br />
Avoid exposing your eyes or skin to direct or scattered radiation.<br />
WARRANTY Please refer to the <strong>Samsung</strong> limited warranty statements.<br />
Precautions<br />
1. To reduce the risk of fire or electric shock, do not expose<br />
this appliance to rain or moisture.<br />
2. Always check each disc for cracks before using it. If there are<br />
cracks on the surfaces, especially around the border of the center<br />
hole, we recommend that you make a copy of the disc<br />
immediately and then stop using it. If you continue using the<br />
disc, it will probably develop more cracks and eventually cause<br />
irreparable damage.<br />
3. Do not use poor quality discs:<br />
● From unknown sources<br />
● Without any copyright<br />
● Scratched or damaged in any way<br />
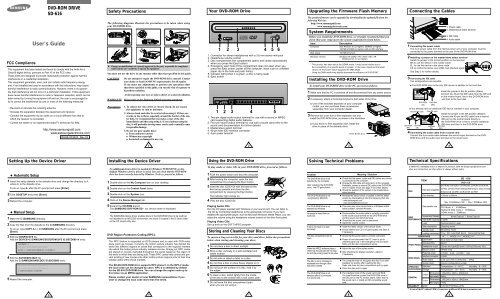
Your DVD-ROM Drive<br />
1 2 3 4 5 6<br />
1. Connector for stereo headphones with a 3.6 mm stereo mini-jack<br />
2. Headphone volume control<br />
3. Disc compartment (the compartment opens and closes automatically<br />
when you press the Eject button)<br />
4. Emergency eject hole (if the compartment does not open when you<br />
press the Eject button, power off the computer, insert a pin or unfolded<br />
paper clip in the hole and push firmly)<br />
5. Indicator light (when it is green, a disc is being read)<br />
6. Eject button<br />
1 2 3 4 5<br />
1. Two-pin digital audio output terminal for use with a sound or MPEG<br />
card supporting digital audio features<br />
2. Four-pin sound output terminal for use with a sound card (refer to the<br />
sound card documentation for further details)<br />
3. Master/slave select terminal<br />
4. 40-pin host IDE interface connector<br />
5. 4-pin power terminal<br />
Upgrading the Firmware Flash Memory<br />
The product firmware can be upgraded by downloading the updated file from the<br />
following Web site:<br />
http://www.samsungodd.com<br />
www.samsungelectronics.com<br />
System Requirements<br />
Before you install the DVD-ROM drive, we strongly recommend that you<br />
check that your setup meets the system requirements listed below.<br />
Item<br />
Description<br />
Computer<br />
Intel Pentium III (or higher), 350MHz or higher,<br />
128 <strong>MB</strong> of RAM (or higher) with an IDE interface<br />
Disk space<br />
100 <strong>MB</strong> minimum<br />
Windows version<br />
Windows 95 OSR2 / 98 / 2000 / ME / XP<br />
/Windows NT 4.0 (or higher)<br />
* This product has been set at the UDMA mode. It may cause trouble due to<br />
the compatibility of a specific board or system. In this case, download the latest<br />
version of “Firmware” which supports the DMA Mode.<br />
Using the DMA mode may slightly decrease the efficiency of DVD-ROM.<br />
Installing the DVD-ROM Drive<br />
To install your DVD-ROM drive in the PC, proceed as follows.<br />
1 Make sure that the PC is powered off and disconnected from any power source.<br />
2 If necessary, attach a horizontal bracket to both sides of the drive.<br />
● Use of the brackets depends on your computer<br />
model; you can purchase these accessories<br />
separately from your computer dealer.<br />
3 Remove the cover from a free expansion slot and<br />
install the DVD-ROM drive, as shown in the illustration.<br />
● If you have no free expansion slot, install the<br />
drive in place of the diskette drive.<br />
DVD-ROM drive<br />
Connecting the Cables<br />
1. Power cable<br />
2. Master/slave select terminal<br />
3. IDE cable<br />
4. Audio cable<br />
1 Connecting the power cable<br />
The 4-pin power cable from the internal power unit of your computer must be<br />
connected to the power terminal on the rear of the DVD-ROM drive.<br />
2 Installing a jumper on the master/slave select terminal<br />
Install the jumper in the correct position on the terminal:<br />
MA to use the device in the master mode<br />
SL to use the device in the slave mode<br />
CS to control the device via a CSEL host interface signal<br />
See Step 3 for further details.<br />
3 Connecting the IDE cable<br />
Two configurations are possible.<br />
● The DVD-ROM drive is the only IDE device in addition to the hard disk.<br />
Install the jumper in the SL position (Slave).<br />
IDE port<br />
Connect the 40-pin flat IDE cable from the IDE port<br />
Mother board<br />
on the mother board, first to the DVD-ROM drive<br />
and then to the hard disk.<br />
DVD-ROM Hard disk<br />
(SL) (MA)<br />
● You already have an additional IDE device installed in your computer.<br />
Second IDE cable First IDE cable<br />
Install the jumper in the MA position (Master).<br />
Connect the 40-pin flat IDE cable from a second<br />
IDE port on the mother board directly to<br />
Mother<br />
board<br />
the DVD-ROM drive or first to another additional<br />
IDE drive and then to the DVD-ROM drive.<br />
DVD-ROM CD-ROM Hard disk Hard disk<br />
(MA) (SL)<br />
(SL) (MA)<br />
4 Connecting the audio cable from a sound card<br />
Connect the 4-pin audio cable between the sound output terminal on the DVD-<br />
ROM drive and the audio input terminal on the sound card.<br />
1<br />
2 3 4<br />
Setting Up the Device Driver Installing the Device Driver Using the DVD-ROM Drive<br />
◆ Automatic Setup<br />
1 Insert the setup diskette in the diskette drive and change the directory to A:,<br />
where A: is the diskette drive.<br />
To do so, type A: after the C:\ prompt and press [Enter].<br />
2 Type CDSETUP and press [Enter].<br />
3 Reboot the computer.<br />
◆ <strong>Manual</strong> Setup<br />
1 Make the C:\SAMSUNG directory.<br />
2 Copy the files from the diskette to the C:\SAMSUNG directory.<br />
To do so, type COPY A: * . * C:\SAMSUNG after the C:\ prompt and press<br />
[Enter].<br />
3 Edit the CONFIG.SYS file.<br />
Add the DEVICE=C:\SAMSUNG\SSCDROM.SYS \D:SSCD000 /V entry.<br />
LAST DRIVE = Z<br />
- - - - - - - - - - - - - - - - - - - - - - - - - - - - - - - - - - - -<br />
- - - - - - - - - - - - - - - - - - - - - - - - - - - - - - - - - - - -<br />
DEVICE = C :\SAMSUNG\SSCDROM.SYS /D : SSCD000 /V<br />
4 Edit the AUTOEXEC.BAT file.<br />
Add the C:\SAMSUNG\MSCDEX /D:SSCD000 entry.<br />
- - - - - - - - - - - - - - - - - - - - - - - - - - - - - - - - - - - -<br />
- - - - - - - - - - - - - - - - - - - - - - - - - - - - - - - - - - - -<br />
C :\SAMSUNG\MSCDEX /D:SSCD000<br />
5 Reboot the computer.<br />
No additional device driver is needed for Windows 95/98/XP/NT, as the<br />
default Windows device driver is used. You can check that the DVD-ROM<br />
drive has been correctly detected by Windows. To do so, proceed as follows.<br />
1 Double-click on the My Computer icon on your desktop.<br />
2 Double-click on the Control Panel folder.<br />
3 Double-click on the System icon.<br />
4 Click on the Device Manager tab.<br />
5 Expand the CD-ROM branch.<br />
The SAMSUNG DVD-ROM <strong>SD</strong> - *** device name is displayed.<br />
The SAMSUNG device driver enables discs in the DVD-ROM drive to be read but<br />
not recorded in an MS-DOS environment; the driver is located in the D driver folder<br />
on the CD record utility disc.<br />
DVD Region Protection Coding (RPC):<br />
The RPC feature is supported on DVD players and is used with DVD-video<br />
discs (such as movies). Currently, the motion picture industry has divided the<br />
world into different regions or zones that correspond to the regional markets<br />
into which the motion picture industry releases movies. Simply put, RPC codes<br />
are placed on movies marketed throughout the world, based on the region of<br />
the world in which they are being sold. These RPC codes help control and prevent<br />
pirating of new movies into other motion picture regions prior to their true<br />
release dates within those markets.<br />
The <strong>SD</strong>-616 DVD-ROM drive supports RPC phase II. In the RPC-2 mode,<br />
the local code can be changed by users. RPC-2 is selected by default<br />
for the <strong>SD</strong>-616 DVD-ROM drive. You can change the region code up to<br />
five times via an MPEG application.<br />
Please contact your dealer or local SAMSUNG representative if you<br />
wish to change the local code more than five times.<br />
To play audio or video CDs in your DVD-ROM drive, proceed as follows.<br />
1 Push the power button and boot the computer.<br />
2 After booting the computer, open the disc<br />
compartment by pressing the Eject button.<br />
3 Insert the disc (CD/DVD) with the label on the<br />
disc facing upwards and close the disc<br />
compartment by pressing the Eject button.<br />
The indicator light comes on.<br />
4 Play the disc (CD/DVD).<br />
Playing Audio CDs<br />
Run the CD player supplied with Windows or your sound card. You can listen to<br />
the CD by connecting headphones to the appropriate connector. If you have<br />
installed the appropriate player, such as Microsoft Windows Media Player, you can<br />
adjust the volume using the headphone volume control on the drive front panel.<br />
Playing Video CDs<br />
Set up and run the SOFT MPEG program.<br />
Storing and Cleaning Your Discs<br />
To ensure a long service life for your discs and drive, follow the precautions<br />
below when storing and cleaning your discs.<br />
1 Do not place a disc in direct sunlight.<br />
2 Store a disc vertically in a well-ventilated and<br />
stable location.<br />
3 Do not write or attach a label on a disc.<br />
4 Do not drop a disc or place heavy objects on it.<br />
5 Do not touch the surface of a disc; hold it by<br />
the edges.<br />
6 To clean a disc, polish lightly from the inside<br />
of the disc to the outside with a soft cotton cloth.<br />
7 Do not leave the disc compartment open<br />
when you are not using it.<br />
Solving Technical Problems<br />
Problem<br />
The DVD-ROM drive is not<br />
detected by the computer.<br />
After installing the DVD-ROM<br />
drive, the PC gets slower.<br />
The DVD-ROM drive is not<br />
recognized by MS-DOS.<br />
The DVD-ROM drive is not<br />
detected by Windows.<br />
No sound is heard from an<br />
audio CD.<br />
A CD is not read or is read<br />
too slowly.<br />
The disc compartment will not<br />
open.<br />
When the MPEG software plays a<br />
Video CD, the pictures are not regular<br />
and the running speed is too slow.<br />
The Disc is not in message is<br />
displayed even though a disc<br />
has been inserted.<br />
The DVD-ROM drive is not<br />
detected after it is connected<br />
to a sound card.<br />
Meaning / Solution<br />
◆ Check that the power, audio and IDE cables are correctly<br />
connected to the computer.<br />
◆ Change the IDE cable and reconnect it to the computer.<br />
Preferably, connect a second IDE cable to the DVD-ROM<br />
drive in master mode; see page 7 for further details.<br />
◆ Check the position of the jumper in the master/slave<br />
select terminal.<br />
◆ Reinstall the device driver or update it with the latest<br />
version by downloading it from the <strong>Samsung</strong> Web site.<br />
- www.samsungodd.com<br />
- www.samsungelectronics.com<br />
◆ This case may occur when there is a Windows installation<br />
problem; reinstall Windows.<br />
◆ Check whether the audio cable is correctly connected<br />
to the sound output terminal on the DVD-ROM drive<br />
and the sound card CD-IN terminal.<br />
◆ Check that the sound card is operational.<br />
◆ Adjust the volume control.<br />
◆ Install the latest version of the device driver.<br />
◆ Check whether the CD is of good quality and clean it,<br />
if necessary.<br />
◆ Check that the power cable is correctly connected.<br />
◆ Power off and disconnect the PC. Insert a pin or<br />
unfolded paper clip in the emergency hole and push<br />
firmly until the disc compartment opens.<br />
◆ Adjust the size of the replay screen.<br />
◆ After checking the display resolution, adjust it,<br />
if necessary.<br />
◆ The computer may not recognize the disc if you start<br />
playback too quickly after inserting the disc.<br />
Open and close the disc compartment and try again.<br />
◆ Clean the disc and try again.<br />
◆ The interface mode of the sound card is AT-BUS.<br />
You must therefore connect the DVD-ROM drive to<br />
the IDE port on the PC mother board, rather than to<br />
the sound card, or install an IDE-compatible sound<br />
card.<br />
Technical Specifications<br />
SAMSUNG continually strives to improve its products. Both the design specifications and<br />
these user instructions are thus subject to change without notice.<br />
DISC<br />
DRIVE<br />
PERFORMANCE<br />
FRONT PANEL<br />
REAR PANEL<br />
ERROR RATE<br />
OPERATING Operation<br />
ENVIRONMENT Storage<br />
GENERAL<br />
RELIABILITY<br />
ITEM<br />
Disc types supported<br />
Disc diameter<br />
Data transfer rate<br />
Access time(1/3stroke)<br />
Data buffer capacity<br />
Laser<br />
Slide mechanism<br />
Spindle motor<br />
Loading mechanism<br />
Eject button<br />
Indicator(LED)<br />
Headphone output<br />
Volume control<br />
Required power<br />
Interface connector<br />
Audio output<br />
Jumper block<br />
<strong>616B</strong>/F<br />
616T<br />
MTBF<br />
Dimensions<br />
Net weight<br />
Dimensions<br />
Net weight<br />
DVD-ROM, DVD-VIDEO, CD-DA(Audio), CD-ROM, CD-ROM XA,<br />
CD-Plus, CD-Extra, Photo-CD(Single,Multi-session), Video CD ready,<br />
Enhanced CD, CD-I/FMV, CD-R,CD-RW. CD-TEXT.<br />
120mm or 80mm<br />
Sustained :<br />
Max. 21,600KB/sec (16X) / Max. 7,200KB/sec (48X)<br />
PIO Mode 4 : 16.6<strong>MB</strong>/sec<br />
Multiword DMA mode 2 : 16.6<strong>MB</strong>/sec<br />
UDMA mode 2 : 33<strong>MB</strong>/sec<br />
512KB<br />
Semiconductor Laser<br />
Stepping motor<br />
Brushless motor<br />
Tray. DC motor(Soft Eject). Horizontal/Vertical<br />
10 -15 / MODE1:10 -12 , MODE2:10 -9<br />
Auto eject or Auto inject<br />
BUSY<br />
Stereo mini-jack(Ø3.6mm) 0.60V±20%(rms) 33Ω<br />
Wheel knob<br />
+5VDC : 2.0A, +12VDC : 1.0A<br />
ATAPI<br />
Line out 0.70V ± 20%(rms) : 47KΩ<br />
Device configuration jumper<br />
Temperature : 5 ~ 45°C, Humidity : 8 ~ 80%<br />
Temperature : -20 ~ 55°C, Humidity : 5 ~ 85%<br />
148,2(W) x 42(H) x 202(D)mm<br />
880g<br />
90ms(Typical) / 90ms(Typical)<br />
148,2(W) x 42(H) x 184(D)mm<br />
750g<br />
125,000 POH(Duty 20%)<br />
<strong>SD</strong> - 616<br />
DVD / CD<br />
* In case of the PC without UDMA, it may have a different DVD data transmission rate.<br />
5 6 7<br />
8 9
DVD-ROM LAUFWERK<br />
<strong>SD</strong>-616<br />
Sicherheitshinweise<br />
Die folgenden Abbildungen veranschaulichen die Vorsichtsmaßnahmen, die bei der<br />
Benutzung des DVD-ROM-Laufwerks getroffen werden müsen.<br />
Vorderseite des DVD-ROM-Laufwerks<br />
Rückseite des DVD-ROM-Laufwerks<br />
System-Anforderungen<br />
Bevor Sie das DVD-ROM Laufwerk einbauen, sollten Sie sich unbedingt vergewissern,<br />
daß Ihr Computer die nachstehenden System-Anforderungen erfüllt.<br />
Betrifft...<br />
Beschreibung<br />
Art des Computers<br />
Intel Pentium III, 350MHz(oder mehr),<br />
RAM 128<strong>MB</strong>(oder mehr) mit einer IDE Schnittstelle<br />
(oder ein 100% IBM-kompatibler Computer)<br />
Freier Speicherplatz auf Festplatte<br />
mindestens 100 <strong>MB</strong><br />
Windows-Version<br />
ab 95 OSR2 / 98 / 2000 / ME / XP / NT 4.0<br />
1 2 3 4 5 6<br />
1 2 3 4 5<br />
Bedienungsanleitung<br />
✱ Bei Aenderungen oder Modifikationen,die der Anwender ohne Bestaetigung<br />
vorgenommen hat, verliert der Anwender das Recht den Produkt zu benutzen.<br />
Das Laufwerk darf auf keine andere Weise benutzt werden als in diesem Handbuch beschrieben.<br />
ACHTUNG<br />
GARANTIE<br />
Versuchen Sie nicht, das DVD-ROM-Laufwerk selbst zu reparieren.<br />
Wenden Sie sich bei allen eventuellen Reparaturen an Ihren Händler<br />
oder Ihre SAMSUNG-Vertretung vor Ort.<br />
Wasser und Feuchtigkeit vom Gerät fernhalten, da sonst Gefahr durch<br />
elektrische Schläge besteht bzw. Geräteschäden auftreten können.<br />
Garantie-Reparaturen müssen von <strong>Samsung</strong>-Fachhändlern oder<br />
<strong>Samsung</strong>-Vertragswerkstätten ausgeführt werden.<br />
Vorsichtsmaßnahme 1. Vor dem Gebrauch von Discs sollte man diese auf Sprünge kontrolieren.<br />
Fall ein Sprung vorhanden ist (besonders am Rande des Zentralloches),<br />
empfehlen wir dringend, eine Kopie der CD zu erstellen.<br />
Bei weiterem Benutzen der CD, können zusätzliche Sprünge auftreten,<br />
die die CD zerstören und dadurch auch das Laufwerk.<br />
2. Bei Benutzung von Discs achten Sie bitte auf gute Quallität.<br />
Es finden sich immer wieder Produkte, die illegal hergestellt werden,<br />
verkratzt oder beschädigt sind.<br />
* Beim Starten (SPIN-UP) und beim Anhalten(STOP) entsteht ein Reibungsgeräusch.<br />
Dieses ist kein fehlerhaftes Geräusch sondern auf das ABS(Auto Balance Systeme)<br />
zurückzuführen.<br />
1 Kopfhöreranschluß<br />
An diese Buchse können Sie einen Stereo-Kopfhörer mit 3,6 mm-Klinkenstecker<br />
anschließen.<br />
2 Lautstärkeregler<br />
Mit diesem Regler wird die Lautstärke des Kopfhörers eingestellt.<br />
☛ Der Kopfhörer-Anschluß und die Lautstärke-Einstelltasten sind nur funktionsfähig,<br />
☛ wenn die erforderlichen Software-Utilities installiert wurden. Sie können zum Beispiel<br />
☛ den Microsoft WINDOWS Media Player benutzen.<br />
3 Discschublade<br />
Die Discschublade öffnet und schließt sich automatisch, wenn die Taste Open/Close<br />
gedrückt wird.<br />
4 Notöffnung<br />
Wenn sich die Schublade nach dem Drücken der Taste Open/Close nicht öffnet,<br />
stecken Sie einen kleinen Metallstiff (z.B. von einer aufgebogenen Büroklammer)<br />
in dieses Loch, um die Schublade zu öffnen.<br />
5 LED<br />
Sie leuchtet, wenn auf einer DVD/CD Disc ein Zugriff erfolgt.<br />
6 Open/Close-Taste<br />
Drücken Sie diese Taste während der CD-ROM-Wiedergabe, um die CD zu stoppen.<br />
Bei gestoppter bzw. nicht eingelegter CD drücken Sie diese Taste, um die CD-ROM-<br />
Schublade zu öffnen bzw. zu schließen.<br />
1 Digitaler Audioanschluß<br />
Über diesen Anschluß können Sie eine Karte die einen digitalen Ausgang besitzt<br />
an das Laufwerk anschließen (z.B. manche Sound- oder MPEC-Karten).<br />
2 Audio-Ausgangsanschluß<br />
Über diesen 4poligen Steckverbinder kann das Laufwerk mit einer Sound-Karte<br />
verbunden werden.<br />
➢ Diese Funktion wird in der vorliegenden Anleitung nicht ausführlich beschrieben.<br />
Sehen Sie in der Dokumentation für das Audio-Zubehör nach.<br />
3 Jumper für Geräte-Konfiguration<br />
Normalerweise sieht die vorgegebene Konfiguration wie folgt aus:<br />
C S M<br />
S L A<br />
☛ Überprüfen Sie, daß die vorliegende Einstellung der abgebildeten Einstellung entspricht.<br />
Wenn dies nicht der Fall ist, einfach den Jumper entfernen und in die richtige Stellung<br />
bringen.<br />
4 Host IDE-Schnittstellen- Anschluß<br />
Schließen Sie das 40polige Flachbandkabel von der IDE-Schnittstelle an diesen<br />
Eingangs-/Ausgangs-Schnittstellen-Anschluß an.<br />
5 Stromversorgungsanschluß<br />
Der Stromversorgungsanschluß ist ein vieradriger Stecker.<br />
* Dieses Produkt ist auf dem UDMA-Modus eingestellt. Diese Einstellung kann aber im<br />
Zusammenhang mit der Kompatibilität auf einer bestimmten Platte oder einem<br />
System Probleme verursachen. Im solchen Fall laden Sie bitte die “Firmware Flash Memory”<br />
herunter, die den DMA-Modus unterstüzt. Bei Gebrauch des DMA-Modus’ kann die<br />
Kapazität des DVD-Treibers leicht zurückgehen.<br />
◆ Regionale Codierung (RPC: Region Protection Code)<br />
Regionschutzcode (RPC) von DVD Discs: Diese Besonderheit wird vom DVD<br />
Abspielger ten unterst tzt und wird f r die DVD Video Discs (z.B. Filme) ben tigt.<br />
Die weltweite Filmindustrie hat die Welt in verschiedenen Regionen aufgeteilt. Diese<br />
Regionen oder Zonen beziehen sich auf die regionalen Filmm rkte in die Filme verkauft<br />
werden sollen. Durch einsetzen eines RPC Codes auf der CD kann diese nur in den<br />
freigegebenen Regionen, mit Abspielger te dieses Codes, abgespielt werden.<br />
Der RPC Code soll vor Piraterie von neuen Filmen vorbeugen.<br />
Das DVD Laufwerk <strong>SD</strong>-616 unterst tzt RPC der Phase II. RPC 2 l §t die nderungen<br />
des Regionalcodes durch den Benutzer zu. Das DVD <strong>SD</strong>-616 Laufwerk hat RPC 2<br />
als Standard. Der Regionalcode wird in der MPEG Software eingestellt und kann<br />
bis zu f nft mal von Benutzer ver ndert werden.<br />
1<br />
2 3 4<br />
Einbauen des DVD-ROM Laufwerks<br />
Bauen Sie das DVD-ROM Laufwerk in horizontaler Lage in den Computer ein. Achten Sie<br />
dabei darauf, daß sich die Taste Open/Close auf der rechten Seite befindet.<br />
Zum Einbauen des Laufwerks ist folgendermaßen vorzugehen:<br />
1 Den Computer ausschalten. Nicht vergessen, die Einstellung des<br />
Konfigurations-Jumpers auf der Rückseite des DVD-ROM<br />
Laufwerks zu überprüfen.<br />
2 Die Abdeckung vom PC (Zentraleinheit des Computers)<br />
abnehmen.<br />
3 Die Blende für die 5,25-Zoll-Einheit, in der das DVD-ROM<br />
Laufwerk installiert werden soll, entfernen.<br />
4 Das IDE Schnittstellenkabel und die Stromversorgungskabel im<br />
Computer an das DVD-ROM Laufwerk anschließen.<br />
☛ Die Steckverbinder sind so beschaffen, daß sie nur in einer<br />
Stellung passen. Üben Sie keine Kraft aus, wenn sie nicht zu<br />
passen scheinen.<br />
5 Das DVD-ROM Laufwerk in die Einheit einbauen und mit den<br />
Befestigungsschrauben (empfohlen werden Standardschrauben<br />
M3x6x4) befestigen.<br />
☛ ◆ Je nach PC-Modell müssen eventuell Führungsschienen<br />
an dem Laufwerk angebracht werden, damit das Laufwerk<br />
gut fixiert wird.<br />
◆ Wenn Schrauben verwendet werden, die länger sind als die<br />
empfohlene Standardgröße, kann das Laufwerk beschädigt<br />
werden.<br />
6 Die Abdeckung wieder am PC anbringen.<br />
Anweisung für den Gebrauch/Lagerung und Pflege von CDs<br />
Dies ist eine Anmerkung zur Vermeidung von Schäden an Ihren CDs.<br />
Bitte beachten Sie die folgenden Hinweise.<br />
1 Gebrauchsanweisung<br />
1 Starten des Computers.<br />
2<br />
Nach dem hochfahren des PCs, drücken Sie<br />
dieTaste zum Öffnen/Schließen der<br />
Disc-Schublade.<br />
3 Nach dem Einschieben der Disc(CD/DVD)<br />
drücken Sie die Taste zum Öffnen/Schließen.<br />
* damit die Disc-Schublade sich schließt.<br />
4 Die Disc wird abgespielt.<br />
Spielen die Audio CDs<br />
* Starten Sie das CD-Wiedergabeprogramm, das mit der Soundkarte geliefert wurde.<br />
Oder starten Sie das CD-Wiedergabeprogramm von WINDOWS.<br />
* Durch Einstecken des Kopfhörers in den Kopfhöreranschluß können<br />
Sie Musik hören.<br />
Spielen die Video CDs<br />
* Stellen Sie ein und führen Sie das SOFT MPEG Programm aus.<br />
2 Discaufbewahrung<br />
1 Nicht unter direkten Sonnenstrahleneinfluß<br />
aufbewahren.<br />
2<br />
Auf einen temperierten und ebenen Platz<br />
legen.<br />
3 Kein Kratzer, keine Aufkleber...usw. auf<br />
der Disc<br />
4 Die Disc nicht zu stark pressen oder fallen<br />
lassen.<br />
3 Discpflegemethode<br />
Die Discoberfläche<br />
Mit einem weichen Tuch<br />
1 2<br />
nicht berühren sondern<br />
die Disc von innen<br />
nur am Discrand<br />
nach außen zum<br />
anfassen.<br />
Rande leicht abwischen.<br />
❈ Bei Berührung der Discoberfläche oder bei Flecken- oder Staubbedeckung der<br />
Disc kann eine Funktionsstörung auftauchen.<br />
Installieren der Treibersoftware<br />
Für WINDOWS 95/98/XP/NT wird kein zusätzlicher Gerätetreiber benötigt.<br />
Es wird der im WINDOWS mitgelieferte Gerätetreiber genutzt.<br />
◆ Automatische Installation<br />
1 Die 3,5" SETUP Diskette ins FDD einführen und dann auf das A: Laufwerk<br />
wechseln.<br />
2<br />
3<br />
● Das 3,5" FDD wird als A: Laufwerk betrachtet.<br />
[C:\ A:] eingeben und EINGABE Taste drücken.<br />
Wenn im Display [A:\] erscheint, [CDSETUP] eingeben und die<br />
EINGABE Taste drücken. Die Treiber werden automatisch geladen.<br />
Nach der Installation den Computer neu starten.<br />
◆ Manuelles Installieren<br />
1 Einen neuen Ordner anlegen [C:\SAMSUNG].<br />
2 [SSCDROM.SYS] in diesen Ordner kopieren.<br />
● [C:\ COPY A: * . * C:\SAMSUNG] eingeben und dann EINGABE Taste drücken.<br />
3<br />
4<br />
5<br />
[CONFIG.SYS] Datei bearbeiten.<br />
● DEVICE=C:\SAMSUNG\SSCDROM.SYS /D:SSCD000 /V eingeben.<br />
LAST DRIVE = Z<br />
- - - - - - - - - - - - - - - - - - - - - - - - - - - - - - - - - - - -<br />
- - - - - - - - - - - - - - - - - - - - - - - - - - - - - - - - - - - -<br />
DEVICE = C :\SAMSUNG\SSCDROM.SYS /D : SSCD000 /V<br />
[AUTOEXEC.BAT] Datei bearbeiten.<br />
● C:\SAMSUNG\MSCDEX /D:SSCD000 eingeben.<br />
- - - - - - - - - - - - - - - - - - - - - - - - - - - - - - - - - - - -<br />
C :\SAMSUNG\MSCDEX /D:SSCD000<br />
- - - - - - - - - - - - - - - - - - - - - - - - - - - - - - - - - - - -<br />
- - - - - - - - - - - - - - - - - - - - - - - - - - - - - - - - - - - -<br />
Neustarten des Computer.<br />
Falls Probleme auftreten<br />
☛ Beim Starten (SPIN-UP) und beim Anhalten(STOP) entsteht ein<br />
Reibungsgeräusch Dieses ist kein fehlerhaftes Geräusch sondern auf das<br />
ABS(Auto Balance Systeme) zurückzuführen.<br />
Problem<br />
Ursache/Abhilfe<br />
Das DVD-ROM Laufwerk wird ◆ Überprüfen der Strom-, Audio- und IDE Kabel.<br />
nicht erkannt.<br />
◆ Auswechseln des IDE Kabels ( Möglichst am<br />
Nach dem Einbau des DVD-ROM anderen IDE Port verbinden ).<br />
Laufwerkes verlangsamt sich die ◆ Überprüfen der Master/Slave Einstellung<br />
Geschwindigkeit des PCs.<br />
Das DVD-ROM Laufwerk wird ◆ Den DOS-Treiber wieder neu installieren oder<br />
unter DOS nicht erkannt.<br />
eine neue Version des Treibers von der <strong>Samsung</strong><br />
Homepage herunter laden und installieren.<br />
- www.samsungodd.com<br />
- www.samsungelectronics.com<br />
Das DVD-ROM Laufwerk wird ◆ Dieses kann auftreten bei einer fehlerhaften<br />
unter WINDOWS nicht erkannt.<br />
WINDOWS Installation. Dann sollte WINDOWS<br />
neu installiert werden.<br />
Kein Klang aus der Audio CD ◆ Überprüfen des Audiokabels, ob es richtig mit<br />
dem DVD-ROM Laufwerk (Audioausgang) und<br />
der Soundkarte (CD IN ) angeschlossen ist.<br />
◆ Überprüfen der Funktionalität der Soundkarte<br />
◆ Lautstärke verändern durch den Soundregler.<br />
Die CD wird nicht erkannt und ◆ Installieren der neuesten Version des Treibers<br />
die Geschwindigkeit<br />
( z.B. aus dem Internet ).<br />
verlangsamt sich.<br />
◆ Überprüfen der CD. Gegebenenfalls reinigen.<br />
Der CD Schublade öffnet sich ◆ Überprüfen der Strom zufuhr, ob das Stromkabel,<br />
nicht.<br />
richtig angeschlossen ist.<br />
◆ Einen kleinen Stift (z.B. Büroklammer) in die Notöffnung<br />
stecken und stark drücken. Die Schublade öffnet sich.<br />
Beim Benutzen von S/W MPEC ◆ Verkleinern der Wiedergabebildfläche auf dem<br />
treten ständige Unterbrechungen Bildschirm.<br />
der Video CD Wiedergabe auf, ◆ Überprüfen der Auflösungsstufe des Bildschirms.<br />
und die Geschwindigkeit<br />
Gegebenenfalls die Auflösungsstufe in der<br />
verlangsamt sich.<br />
Systemsteuerung von WINDOW verändern.<br />
Anzeige " keine CD vorhanden" ◆ Wenn die Starttaste zu schnell gedrückt wird, kann der<br />
trotz eingelegter Disc.<br />
Computer die Disc nicht erkennen.<br />
In diesem Fall öffnen und schließen der<br />
Schublade und erneut versuchen.<br />
◆ Reinigen der CD und erneut versuchen.<br />
CD<br />
Technische Daten<br />
SAMSUNG ist dauernd bestrebt, ihre Erzeugnisse zu verbessern. Dadurch ändern sich Design<br />
und Bedienungsanweisungen jederzeit ohne vorherige Ankündigung.<br />
LEISTUNGS-<br />
DATEN<br />
RÜCKSEITE<br />
FEHLERRATE<br />
BEDIENFELD LED-Anzeige<br />
VORDERSEITE Kopfhörer-AnschluB<br />
Lautstärkeregler<br />
Gerätebetrieb<br />
UMGEBUNGS-<br />
BEDINGUNGEN<br />
ALLGEMEINES<br />
Betrifft...<br />
CD - Typen<br />
CD - Durchmesser<br />
Datenübertragungsrate<br />
Zugriffszeit(1/3 Strob)<br />
Datenpufferkapazität<br />
Laser<br />
Bewegungsmechanismus<br />
Spindelmotor<br />
Lademechanismus<br />
Open/Close-Taste<br />
Leistungsaufnahme<br />
Schnittstellen-Anschluß<br />
Audio-Ansgang<br />
Jumper-Block<br />
Lagerung<br />
<strong>616B</strong>/F<br />
616T<br />
ZUVERLÄSSIGKEIT MTBF<br />
Abmessungen<br />
Nettogewichtt<br />
Abmessungen<br />
Nettogewichtt<br />
<strong>SD</strong> -616<br />
DVD / CD<br />
DVD-ROM. DVD-VIDEO. CD-DA(Audio). CD-ROM. CD-ROM XA.<br />
CD-Plus. CD-Extra. Photo-CD(Single/Multi-session). Video CD ready.<br />
Enhanced CD. CD-I/FMV. CD-R. CD-RW. CD-TEXT.<br />
80mm oder 120mm<br />
Dauerleistung :<br />
Max. 21.600KB/sec (16X) / Max. 7.200KB/sec (48X)<br />
PIO Mode 4 : 16,6<strong>MB</strong>/sec. Multiword DMA mode 2 : 16,6<strong>MB</strong>/sec<br />
UDMA mode 2 : 33<strong>MB</strong>/sec<br />
90ms(Typisch) / 90ms(Typisch)<br />
512KB<br />
Halbleiter Laser<br />
Getriebemotor<br />
Stromrichter motor<br />
Disc-Schublade. Horizontal/Stehend<br />
10 -15 / Modus1:10 -12 , Modus2:10 -9<br />
Automatischer Einzug/Auswurf<br />
leuchtet bei Betrieb<br />
Stereoklinkenstecker(Ø3,6mm) 0,60V±20%(vrms)33Ω<br />
Rändelrad<br />
+5V Gleichspannung, 2,0A, +12V Gleichspannung,1,0A<br />
ATAPI<br />
Line out 0,70V ± 20%(vrms) : 47KΩ<br />
Jumper für Geräte-Konfigurierung<br />
Temperatur : 5 ~ 45°C<br />
Luftfeuchtigkeit : 8 ~ 80% (nicht kondensierend)<br />
Temperatur : -20 ~ 55°C<br />
Luftfeuchtigkeit : 5 ~ 85% (nicht kondensierend)<br />
148,2(W) x 42(H) x 202mm (Einschliesslich front bezel)<br />
880g<br />
148,2(W) x 42(H) x 184mm (Einschliesslich front bezel)<br />
750g<br />
125.000 POH(Auslastung 20%)<br />
* Bei PCs ohne Unterstützung von UDMA , kann die Datenübertragungsrate abweichen.<br />
5 6 7 8<br />
9


