

Samsung TV 32" HD Flat J4000 Serie 4 - User Manual_0.01MB, pdf, ENGLISH
Samsung TV 32" HD Flat J4000 Serie 4 - User Manual_0.01MB, pdf, ENGLISH
Samsung TV 32" HD Flat J4000 Serie 4 - User Manual_0.01MB, pdf, ENGLISH

Create successful ePaper yourself
Turn your PDF publications into a flip-book with our unique Google optimized e-Paper software.
❑❑<br />
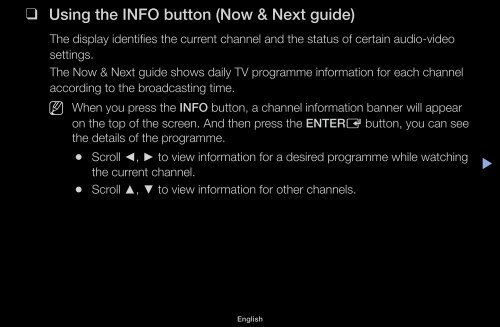
Using the INFO button (Now & Next guide)<br />
The display identifies the current channel and the status of certain audio-video<br />
settings.<br />
The Now & Next guide shows daily <strong>TV</strong> programme information for each channel<br />
according to the broadcasting time.<br />
NN<br />
When you press the INFO button, a channel information banner will appear<br />
on the top of the screen. And then press the ENTERE button, you can see<br />
the details of the programme.<br />
●●<br />
Scroll ◄, ► to view information for a desired programme while watching<br />
the current channel.<br />
●●<br />
Scroll ▲, ▼ to view information for other channels.<br />
▶<br />
English
❑❑<br />
Memorizing channels<br />
■■<br />
Aerial<br />
OO<br />
MENUm → Broadcasting → Aerial → ENTERE<br />
Before your television can begin memorising the available channels, you must<br />
specify the type of signal source that is connected to the <strong>TV</strong>.<br />
◀<br />
▶<br />
English
■■<br />
Auto Tuning<br />
(Depending on the country)<br />
◀<br />
OO<br />
MENUm → Broadcasting → Auto Tuning → ENTERE<br />
NN<br />
Automatically allocated programme numbers may not correspond to actual<br />
or desired programme numbers. If a channel is locked, the PIN input window<br />
appears.<br />
●●<br />
Auto Tuning<br />
Aerial (Air/Cable): Select the aerial source to memorise.<br />
NN<br />
When selecting Air, scans for a channel automatically and stores in the<br />
<strong>TV</strong>.<br />
Channel Type (Digital & Analogue / Digital / Analogue): Select the channel<br />
source to memorise.<br />
Channel Ordering (Depending on the country): Select the channel order type.<br />
▶<br />
English
◀<br />
When selecting Cable → Digital & Analogue, Digital or Analogue<br />
––<br />
Operator Selection (Depending on the country): Selects a provider of<br />
cable services.<br />
––<br />
Search Mode: Scans for all channels with active broadcast stations and<br />
stores them in the <strong>TV</strong>.<br />
NN<br />
If you select Quick, you can set up the Network, Network ID,<br />
Frequency, Modulation and Symbol Rate manually by pressing the<br />
button on the remote control.<br />
––<br />
Network: Selects the Network ID setting mode among Auto or <strong>Manual</strong>.<br />
●●<br />
Network ID: When Network is <strong>Manual</strong>, you can set up Network ID<br />
using the numeric buttons.<br />
▶<br />
English
◀<br />
●●<br />
Frequency: Displays the frequency for the channel (differs in each<br />
country).<br />
●●<br />
Modulation: Displays available modulation values.<br />
●●<br />
Symbol Rate: Displays available symbol rates.<br />
●●<br />
Cable Search Option<br />
(Depending on the country & cable channels only)<br />
Sets additional search options such as the frequency and symbol rate for a<br />
cable network search.<br />
Start Frequency / Stop Frequency: Set the start or stop frequency (differs in<br />
each country).<br />
Symbol Rate: Displays available symbol rates.<br />
Modulation: Displays available modulation values.<br />
▶<br />
English
❑❑<br />
Using the Channel menu<br />
OO<br />
MENUm → Broadcasting → Channel List → ENTERE<br />
◀<br />
■■<br />
Channel List<br />
The Channel List contains the channels your <strong>TV</strong> displays when you press the<br />
channel button. You can view channel information, All, <strong>TV</strong>, Radio, Data/Other,<br />
Analogue or Favourites 1-5.<br />
Press ► (Mode) button to change the channel mode, or press ◄ (Sorting)<br />
button to change the channel order according to channel number or name on the<br />
list.<br />
NN<br />
When you press the CH LIST button on the remote control, Channel List<br />
screen will be displayed at once.<br />
▶<br />
English
◀<br />
Channel Sorting<br />
●●<br />
Number / Name: Arranges the channel order according to channel number or<br />
name on the list.<br />
Channel Mode<br />
●●<br />
Aerial: Switches to Air or Cable.<br />
●●<br />
Edit Favourites: Set channels you watch frequently as favourites.<br />
NN<br />
For detailed information about using Edit Favourites, refer to “Edit<br />
Favourites”.<br />
●●<br />
Favourites 1-5: Shows all favourite channels, arranged in up to five groups.<br />
Each group has a separate screen.<br />
NN<br />
The <strong>TV</strong> displays Favourites 1-5 only if you have added favourites using<br />
Edit Favourites.<br />
▶<br />
English
●●<br />
All: Shows all currently available channels.<br />
●●<br />
<strong>TV</strong>: Shows all currently available <strong>TV</strong> channels.<br />
●●<br />
Radio: Shows all currently radio channels.<br />
●●<br />
Data/Other: Shows all currently available MHP or other channels.<br />
●●<br />
Analogue: Shows all currently available analogue channels.<br />
◀<br />
▶<br />
English
◀<br />
■■<br />
Guide<br />
OO<br />
MENUm → Broadcasting → Guide → ENTERE<br />
The EPG (Electronic Programme Guide) information is provided by broadcasters.<br />
Using programme schedules provided by broadcasters, you can specify<br />
programmes you want to watch in advance so that the channel automatically<br />
changes to the selected programme channel at the specified time. Programme<br />
entries may appear blank or out of date depending on a channel status.<br />
●●<br />
a Red (Quick Nav): Viewing the <strong>TV</strong> programmes on the list quickly using<br />
▲/▼/◄/► buttons.<br />
●●<br />
b Green (Channel Category): Select the type of channels you want to<br />
display.<br />
● ● { Yellow (Schedule Manager): Moves to the reserved programmes in<br />
Schedule Manager.<br />
▶<br />
English
◀<br />
■■<br />
Schedule Manager<br />
OO<br />
MENUm → Broadcasting → Schedule Manager → ENTERE<br />
You can set a desired channel to be displayed automatically at the intended time.<br />
In addition, you can view, modify or delete a channel you have reserved to watch.<br />
NN<br />
You must set the current time first using the Time → Clock function in the<br />
System menu to use this function.<br />
1. Press the Schedule on the Schedule Manager screen. The Schedule<br />
Viewing menu appears.<br />
2. Press the ▲/▼/◄/► buttons to set each option menu.<br />
●●<br />
Aerial: Select the desired broadcasting signal.<br />
●●<br />
Channel: Select the desired channel.<br />
▶<br />
English
◀<br />
●●<br />
Repeat: Select Once, <strong>Manual</strong>, Sat~Sun, Mon~Fri or Everyday to set at<br />
your convenience. If you select <strong>Manual</strong>, you can set the day you want.<br />
NN<br />
The (c) mark indicates the day you’ve selected.<br />
●●<br />
Date: You can set the desired date.<br />
NN<br />
It is available when you select Once in Repeat.<br />
●●<br />
Start Time: You can set the start time you want.<br />
NN<br />
If you want to edit or cancel a reserved schedule, select the reserved<br />
schedule on Schedule Manager. Then press the ENTERE button and<br />
select the Edit or Delete.<br />
▶<br />
English
◀<br />
■■<br />
Edit Channel<br />
OO<br />
MENUm → Broadcasting → Edit Channel → ENTERE<br />
You can edit or delete channels.<br />
1. Go to Edit Channel screen.<br />
2. Press the ▲/▼ buttons to select the desired channel, then press the<br />
ENTERE button. The (c) mark indicates the channel you’ve selected.<br />
NN<br />
You can select more than one channel.<br />
NN<br />
Press the ENTERE again to deselect the channel.<br />
▶<br />
English
◀<br />
NN<br />
Using the coloured and function buttons with the Edit Channel.<br />
●●<br />
a Red (Change Number): Changes channel order on the channel list.<br />
––<br />
E (Done): Completes changing the channel order.<br />
NN<br />
Digital channel does not support this function when the Edit Channel<br />
Number (Depending on the country) is set to Disable.<br />
●●<br />
b Green (Delete): Deletes a channel from the channel list.<br />
● ● { Yellow (Lock / Unlock): Lock a channel so that the channel cannot be<br />
selected and viewed. / Unlock the channel that you locked.<br />
NN<br />
This function is available only when the Channel Lock is set to On.<br />
NN<br />
The PIN input screen appears. Enter your 4-digit PIN. Change the<br />
PIN using the Change PIN option.<br />
▶<br />
English
◀<br />
● ● } Blue (Select All / Deselect All): Selects or deselects all channels at<br />
once.<br />
● ● (Go To): Goes to channel directly by pressing numbers (0~9).<br />
●●<br />
k (Page): Moves to previous or next page.<br />
●●<br />
T (Tools): Displays the option menu. The option menu items that appear<br />
may differ depending on the channel status and type.<br />
––<br />
Sorting (digital channels only): Changes the list ordered by channel<br />
number or channel name.<br />
––<br />
Aerial: Selects the desired broadcasting signal.<br />
▶<br />
English
◀<br />
––<br />
Category: Change the channel mode to All, <strong>TV</strong>, Radio, Data/Other,<br />
Analogue, Recently Viewed, Most Viewed. The selected channel<br />
mode is displayed.<br />
––<br />
Edit Favourites: Go to Edit Favourites screen directly.<br />
––<br />
Rename channel (analogue channels only): Assign a name of up to<br />
five characters to a channel. For example, Food, Golf, etc. This makes<br />
it easier to find and select the channel.<br />
––<br />
Channel Info: Display details of the selected channel.<br />
––<br />
Information: Display details of the selected programme.<br />
▶<br />
English
◀<br />
■■<br />
Edit Favourites t<br />
OO<br />
MENUm → Broadcasting → Edit Favourites → ENTERE<br />
You can add, edit or delete favourite channels.<br />
1. Go to Edit Favourites screen.<br />
2. Press the ▲/▼ buttons to select the desired channel, and then press<br />
ENTERE button.<br />
3. Choose a specific favourite list among Favourites 1-5 using b (Change Fav.)<br />
button, and then press the } (Add) button. The selected channel has been<br />
added in Favourites 1-5.<br />
NN<br />
One favourite channel can be added in several of favourites among<br />
Favourites 1-5.<br />
▶<br />
English
N<br />
N Using the coloured and function buttons with the Edit Favourites.<br />
●●<br />
a Red (Category / Change order)<br />
––<br />
Category: Changes the channel mode to All, <strong>TV</strong>, Radio, Analogue,<br />
Data/Other, Recently Viewed, Most Viewed. The selected channel<br />
mode is displayed.<br />
––<br />
Change order: Changes the favourite channel order.<br />
––<br />
E (Done): Completes changing the channel order.<br />
◀<br />
▶<br />
English
●●<br />
b Green (Change Fav.): Changes favourite list among Favourites 1-5.<br />
● ● { Yellow (Select All / Deselect All): Selects or deselects all channels at<br />
once.<br />
● ● } Blue (Add / Delete)<br />
––<br />
Add: Adds selected channels to Favourites 1-5.<br />
––<br />
Delete: Deletes the favourite channel from Favourites 1-5.<br />
◀<br />
▶<br />
English
◀<br />
● ● (Go To): Goes to channel directly by pressing numbers (0~9).<br />
●●<br />
k (Page): Moves to previous or next page.<br />
●●<br />
T (Tools): Displays the option menu. The option menu items that appear<br />
may differ depending on the channel status and type.<br />
––<br />
Copy to Favourites: Edit the selected favourite channel in Favourites<br />
1-5.<br />
––<br />
Rename Favourites: Assign your own favourite channel name.<br />
––<br />
Aerial: Selects the desired broadcasting signal.<br />
––<br />
Edit Channel: Go to Edit Channel screen directly.<br />
––<br />
Information: Display details of the selected programme.<br />
▶<br />
English
❑❑<br />
Locking Programme<br />
■■<br />
Programme Rating Lock<br />
(Depending on the country)<br />
OO<br />
MENUm → Broadcasting → Programme Rating Lock → ENTERE<br />
◀<br />
Prevent unauthorised users, such as children, from watching unsuitable<br />
programme with a user-defined 4-digit PIN code. If the selected channel is<br />
locked, the “\” symbol will be displayed.<br />
NN<br />
The items of Programme Rating Lock differs depending on the country.<br />
▶<br />
English
■■<br />
Channel Lock<br />
OO<br />
MENUm → Broadcasting → Channel Lock → ENTERE<br />
Lock channels in Channel menu to prevent unauthorised users, such as children,<br />
from watching unsuitable programme.<br />
NN<br />
Available only when the Source is set to <strong>TV</strong>.<br />
◀<br />
▶<br />
English
❑❑<br />
Other Features<br />
◀<br />
■■<br />
Channel Settings<br />
OO<br />
MENUm → Broadcasting → Channel Settings → ENTERE<br />
●●<br />
Country (Area)<br />
(Depending on the country)<br />
The PIN input screen appears. Enter your 4 digit PIN number.<br />
Digital Channel: Change the country for digital channels.<br />
Analogue Channel: Change the country for analogue channels.<br />
▶<br />
English
◀<br />
●●<br />
<strong>Manual</strong> Tuning<br />
Scans for a channel manually and stores in the <strong>TV</strong>.<br />
NN<br />
If a channel is locked, the PIN input window appears.<br />
NN<br />
According to the channel source, <strong>Manual</strong> Tuning may be supported.<br />
●●<br />
Digital Channel Tuning: Scans for a digital channel manually and stores<br />
in the <strong>TV</strong>. Press the New button to search the digital channels. When<br />
scanning has finished, a channel is updated in the channel list.<br />
––<br />
When selecting Aerial → Air: Channel, Frequency, Bandwidth<br />
––<br />
When selecting Aerial → Cable: Frequency, Modulation, Symbol<br />
Rate<br />
▶<br />
English
◀<br />
●●<br />
Analogue Channel Tuning: Scans for an analogue channel. Press the<br />
New button to search the channels by adjusting the Programme, Colour<br />
System, Sound System, Channel, Search.<br />
NN<br />
Channel mode<br />
––<br />
P (programme mode): When tuning is complete, the broadcasting<br />
stations in your area have been assigned to the position numbers<br />
from P0 to P99. You can select a channel by entering the position<br />
number in this mode.<br />
––<br />
C (aerial channel mode) / S (cable channel mode): These two<br />
modes allow you to select a channel by entering the assigned<br />
number for each aerial broadcasting station or cable channel.<br />
▶<br />
English
◀<br />
●●<br />
Fine Tune<br />
(analogue channels only)<br />
If the signal is weak or distorted, fine tune the channel manually.<br />
NN<br />
Fine tuned channels are marked with an asterisk “*”.<br />
NN<br />
To reset the fine-tuning, select Reset.<br />
●●<br />
Transfer Channel List<br />
(Depending on the country)<br />
Imports or exports the channel map. You should connect a USB storage to<br />
use this function.<br />
NN<br />
The PIN number input screen appears. Enter your 4 digit PIN number.<br />
NN<br />
Supported file systems are FAT and exFAT.<br />
●●<br />
Delete CAM Operator Profile: Selects the CAM operator to delete.<br />
▶<br />
English
◀<br />
■■<br />
Subtitle t<br />
OO<br />
MENUm → Broadcasting → Subtitle → ENTERE<br />
Use this menu to set the Subtitle mode.<br />
●●<br />
Subtitle: Switches subtitles on or off.<br />
●●<br />
Subtitle Mode: Sets the subtitle mode.<br />
●●<br />
Subtitle Language: Sets the subtitle language.<br />
NN<br />
If the programme you are watching does not support the Hearing<br />
Impaired function, Normal automatically activates even if the Hearing<br />
Impaired mode is selected.<br />
▶<br />
English
◀<br />
■■<br />
NN<br />
English is the default in cases where the selected language is unavailable<br />
in the broadcast.<br />
●●<br />
Primary Subtitle: Sets the primary subtitle.<br />
●●<br />
Secondary Subtitle: Sets the secondary subtitle.<br />
Edit Channel Number (Depending on the country)<br />
OO<br />
MENUm → Broadcasting → Edit Channel Number → ENTERE<br />
Use this change channel number. When channel number is changed, channel<br />
information is not updated automatically.<br />
▶<br />
English
■■<br />
Audio Options<br />
(digital channels only)<br />
OO<br />
MENUm → Broadcasting → Audio Options → ENTERE<br />
◀<br />
●●<br />
Audio Language t<br />
Change the default value for audio languages.<br />
Primary Audio / Secondary Audio: You can set the primary or secondary<br />
audio.<br />
NN<br />
The available language may differ depending on the broadcast.<br />
▶<br />
English
◀<br />
●●<br />
Audio Format<br />
When sound is emitted from both the main speaker and the audio receiver,<br />
a sound echo may occur due to the decoding speed difference between<br />
the main speaker and the audio receiver. In this case, use the <strong>TV</strong> Speaker<br />
function.<br />
NN<br />
Audio Format option may differ depending on the broadcast. 5.1ch<br />
Dolby digital sound is only available when connecting an external speaker<br />
through an optical cable.<br />
●●<br />
Audio Description (not available in all locations)<br />
This function handles the Audio Stream for the AD (Audio Description) which<br />
is sent along with the Main audio from the broadcaster.<br />
Audio Description: Turn the audio description function on or off.<br />
Volume: Adjust the audio description volume.<br />
▶<br />
English
◀<br />
■■<br />
Teletext Language<br />
(Depending on the country)<br />
OO<br />
MENUm → Broadcasting → Teletext Language → ENTERE<br />
●●<br />
Teletext Language<br />
NN<br />
English is the default in cases where the selected language is unavailable<br />
in the broadcast.<br />
●●<br />
Primary teletext / Secondary teletext<br />
NN<br />
Primary teletext and Secondary teletext may not be supported in<br />
some locations.<br />
▶<br />
English
■■<br />
Digital Text<br />
(UK only)<br />
OO<br />
MENUm → Broadcasting → Digital Text → ENTERE<br />
◀<br />
If the programme broadcasts with digital text, this feature is enabled.<br />
NN<br />
MHEG (Multimedia and Hypermedia Information Coding Experts Group)<br />
An International standard for data encoding systems used in multimedia and<br />
hypermedia. This is at a higher level than the MPEG system which includes<br />
data-linking hypermedia such as still images, character service, animation,<br />
graphic and video files as well as multimedia data. MHEG is user runtime<br />
interaction technology and is being applied to various fields including VOD<br />
(Video-On-Demand), I<strong>TV</strong> (Interactive <strong>TV</strong>), EC (Electronic Commerce), tele<br />
education, teleconferencing, digital libraries and network games.<br />
▶<br />
English
◀<br />
■■<br />
Common Interface<br />
OO<br />
MENUm → Broadcasting → Common Interface → ENTERE<br />
●●<br />
CI Menu: This enables the user to select from the CAM-provided menu.<br />
Select the CI Menu based on the menu CI CARD.<br />
●●<br />
CAM video transcoding: You can configure the setting to transcode the<br />
video codec from the CAM automatically. Turn it Off if you do not want to use<br />
it.<br />
NN<br />
You must use a CAM that supports transcoding the video codec.<br />
▶<br />
English
◀<br />
●●<br />
Application Info: View information on the CAM inserted into the CI slot and<br />
on the “CI or CI+ CARD” which is inserted into the CAM. You can install the<br />
CAM anytime whether the <strong>TV</strong> is on or off.<br />
1. Purchase a CI CAM module at your nearest dealer or by phone.<br />
2. Firmly insert the “CI or CI+ CARD” into the CAM in the direction of the<br />
arrow.<br />
3. Insert the CAM with the “CI or CI+ CARD” into the common interface slot,<br />
in the direction of the arrow so that it aligns parallel with the slot.<br />
4. Check if you can see a picture on a scrambled signal channel.<br />
▶<br />
English
❑❑<br />
Changing the Preset Picture Mode<br />
◀<br />
■■<br />
Picture Mode t<br />
OO<br />
MENUm → Picture → Picture Mode → ENTERE<br />
Select your preferred picture type.<br />
NN<br />
When connecting a PC, you can only make changes to the Entertain and<br />
Standard.<br />
●●<br />
Dynamic: Suitable for a bright room.<br />
●●<br />
Standard: Suitable for a normal environment.<br />
●●<br />
Natural (Depending on the model): Suitable for reducing eye strain.<br />
●●<br />
Movie: Suitable for watching movies in a dark room.<br />
●●<br />
Entertain: Suitable for watching movies and games.<br />
N<br />
N It is only available when connecting a PC.<br />
▶<br />
English
❑❑<br />
Adjusting Picture Settings<br />
◀<br />
■■<br />
<strong>Samsung</strong> MagicAngle for LED 19", 22" models<br />
OO<br />
MENUm → Picture → <strong>Samsung</strong> MagicAngle → ENTERE<br />
Adjust screen viewing Angle to optimise screen quality according to your viewing<br />
position.<br />
●●<br />
<strong>Samsung</strong> MagicAngle: When viewing the screen at an angle from below or<br />
above by setting the appropriate mode for each position, you can obtain a<br />
similar picture quality as viewing the screen directly from the front.<br />
▶<br />
English
Off: Select when viewing from the front position.<br />
Lean Back Mode: Select when viewing from a slightly lower position.<br />
Standing Mode: Select when viewing from the upper position.<br />
●●<br />
Mode: Adjust screen viewing angle.<br />
NN<br />
When <strong>Samsung</strong> MagicAngle is set to Lean Back Mode or Standing Mode,<br />
Gamma is not available.<br />
◀<br />
▶<br />
English
◀<br />
■■<br />
Backlight for LED <strong>TV</strong> / Cell Light for PDP <strong>TV</strong> / Contrast / Brightness /<br />
Sharpness / Colour / Tint (G/R)<br />
Your television has several setting options for picture quality control.<br />
N<br />
N NOTE<br />
●●<br />
In analogue <strong>TV</strong>, Ext., AV modes of the PAL system, the Tint (G/R)<br />
function is not available.<br />
●●<br />
When connecting a PC, you can only make changes to<br />
Backlight for LED <strong>TV</strong> / Cell Light for PDP <strong>TV</strong> , Contrast, Brightness and<br />
Sharpness.<br />
●●<br />
Settings can be adjusted and stored for each external device connected<br />
to the <strong>TV</strong>.<br />
●●<br />
Lowering picture brightness reduces power consumption.<br />
▶<br />
English
■■<br />
Picture Size<br />
◀<br />
OO<br />
MENUm → Picture → Picture Size → ENTERE<br />
Set the various picture options such as picture size and aspect ratio.<br />
NN<br />
The available items may differ depending on the selected mode.<br />
N<br />
●●<br />
Picture Size t: Your cable box/satellite receiver may have its own set<br />
of screen sizes as well. However, we highly recommend you use 16:9 mode<br />
most of the time.<br />
Auto Wide: Automatically adjusts the picture size to the 16:9 aspect ratio.<br />
N Depending on the input source, the picture size options may vary.<br />
16:9: Sets the picture to 16:9 wide mode.<br />
▶<br />
English
◀<br />
Wide Zoom: Magnifies the picture size more than 4:3.<br />
NN<br />
Adjusts the Position by using ▲, ▼ buttons.<br />
Zoom: Magnifies the 16:9 wide pictures vertically to fit the screen size.<br />
NN<br />
Adjusts the Zoom or Position by using ▲, ▼ button.<br />
4:3: Sets the picture to basic (4:3) mode.<br />
NN<br />
Do not watch in 4:3 format for a long time. Traces of borders displayed<br />
on the left, right and centre of the screen may cause image retention<br />
(screen burn) which are not covered by the warranty.<br />
Screen Fit: Displays the full image without any cut-off when <strong>HD</strong>MI (720p /<br />
1080i / 1080p) or Component (1080i / 1080p) signals are inputted (Depending<br />
on the country and model).<br />
▶<br />
English
◀<br />
●●<br />
Smart View 1 for LED 5 series 32" and above : Reduces the 16:9 picture by 50%.<br />
●●<br />
Smart View 2 for LED 5 series 32" and above : Reduces the 16:9 picture by 25%.<br />
NN<br />
NOTE<br />
●●<br />
Smart View 1 for LED 5 series 32" and above is enabled only in <strong>HD</strong>MI<br />
mode.<br />
●●<br />
Smart View 2 for LED 5 series 32" and above is enabled only in D<strong>TV</strong> and<br />
<strong>HD</strong>MI modes.<br />
●●<br />
The picture size can vary depending on the input resolution when<br />
content is played using Videos under Media Play.<br />
●●<br />
Zoom/Position: Adjust the picture size and position. It is only available in<br />
Zoom.<br />
●●<br />
Position: Adjust the picture position. It is only available in Screen Fit or Wide<br />
Zoom.<br />
▶<br />
English
◀<br />
N<br />
N NOTE<br />
●●<br />
After selecting Screen Fit in <strong>HD</strong>MI (1080i / 1080p) or Component (1080i<br />
/ 1080p) mode, you may need to centre the picture (Depending on the<br />
country and model):<br />
1. Select the Position. Press the ENTERE button.<br />
2. Press the ▲, ▼, ◄ or ► button to move the picture.<br />
●●<br />
If you want to reset the position you adjusted, select Reset in the<br />
Position screen. The picture will be set to its default position.<br />
●●<br />
If you use the Screen Fit function with <strong>HD</strong>MI 720p input, 1 line will be cut<br />
at the top, bottom, left and right as in the overscan function.<br />
●●<br />
4:3 Screen Size: Available only when picture size is set to Auto Wide. You<br />
can determine the desired picture size at the 4:3 WSS (Wide Screen Service)<br />
size or the original size. Each European country requires different picture size.<br />
▶<br />
English
◀<br />
■■<br />
PIP t<br />
OO<br />
MENUm → Picture → PIP → ENTERE<br />
You can watch the <strong>TV</strong> tuner and one external video source simultaneously. For<br />
example, if you have a cable box connected to the Cable In jack, you can use PIP<br />
to watch programs from the cable box and watch a movie from a Blu-ray player<br />
attached to the <strong>HD</strong>MI In jack. PIP does not function in the same mode.<br />
NN<br />
NOTE<br />
●●<br />
If you turn the <strong>TV</strong> off while watching in PIP mode, the PIP window will<br />
disappear.<br />
●●<br />
You may notice that the picture in the PIP window becomes slightly<br />
unnatural when you use the main screen to view a game or karaoke.<br />
▶<br />
English
●●<br />
PIP settings<br />
Main picture<br />
(Depending on the country and model)<br />
Component, <strong>HD</strong>MI, <strong>HD</strong>MI2/DVI<br />
Sub picture<br />
<strong>TV</strong><br />
◀<br />
●●<br />
PIP: Activate or deactivate the PIP function.<br />
●●<br />
Aerial: Select either Air or Cable as the input source for the sub-screen.<br />
●●<br />
Channel: Select the channel for the sub-screen.<br />
●●<br />
Size (õ / ã): Select a size for the sub-picture.<br />
●●<br />
Position (ã / – / — / œ): Select a position for the sub-picture.<br />
●●<br />
Sound Select: You can choose the desired sound in PIP mode.<br />
▶<br />
English
❑❑<br />
Changing the Picture Options<br />
◀<br />
■■<br />
Advanced Settings<br />
OO<br />
MENUm → Picture → Advanced Settings → ENTERE<br />
(available in Standard / Movie mode)<br />
You can adjust the detailed setting for the screen including colour and contrast.<br />
NN<br />
When connecting a PC, you can only make changes to the White Balance<br />
and Gamma.<br />
●●<br />
Dynamic Contrast: Adjust the screen contrast.<br />
●●<br />
Black Tone: Select the black level to adjust the screen depth.<br />
●<br />
● Flesh Tone: Adjust the flesh tone colour.<br />
▶<br />
English
◀<br />
●●<br />
RGB Only Mode: Displays the Red, Green and Blue colour for making fine<br />
adjustments to the hue and saturation.<br />
●●<br />
Colour Space: Adjust the range of colours available to create the image.<br />
NN<br />
To adjust Colour, Red, Green, Blue and Reset, set Colour Space to<br />
Custom. for PDP <strong>TV</strong><br />
●●<br />
White Balance: You can adjust the colour temperature of the picture to make<br />
white objects look white, and the overall picture appear natural.<br />
2 Point: You can adjust each of the 3 colour's luminosity with the offset menu<br />
and the brightness with the gain menu. To restore the default values, select<br />
Reset.<br />
▶<br />
English
10 Point for PDP <strong>TV</strong> : You can adjust the white balance by adjusting the<br />
brightness of each of the 10 sections of red, green, and blue colours of the<br />
input signal. To choose a section, select a desired section in Level field.<br />
NN<br />
You can use the 10 Point function only when the Picture Mode is set to<br />
Movie. Some external devices may not support the function.<br />
◀<br />
▶<br />
English
●●<br />
Gamma: Adjust the primary colour intensity.<br />
●●<br />
Motion Lighting: Reduce power consumption by brightness control adapted<br />
motion.<br />
NN<br />
This function is not supported in 3D mode. for PDP 4900<br />
NN<br />
Only available in Standard mode.<br />
NN<br />
When changing a setting value of Backlight for LED <strong>TV</strong> / Cell<br />
Light for PDP <strong>TV</strong> , Brightness or Contrast, Motion Lighting will be set to<br />
Off.<br />
◀<br />
▶<br />
English
◀<br />
■■<br />
Picture Options<br />
OO<br />
MENUm → Picture → Picture Options → ENTERE<br />
NN<br />
When connecting a PC, you can only make changes to the Colour Tone.<br />
●●<br />
Colour Tone<br />
N<br />
N Warm1 or Warm2 will be deactivated when the picture mode is<br />
Dynamic.<br />
NN<br />
Settings can be adjusted and stored for each external device connected<br />
to an input on the <strong>TV</strong>.<br />
●●<br />
Digital Clean View: If the broadcast signal received by your <strong>TV</strong> is weak, you<br />
can activate the Digital Clean View feature to reduce any static and ghosting<br />
that may appear on the screen.<br />
NN<br />
When the signal is weak, try other options until the best picture is<br />
displayed.<br />
▶<br />
English
◀<br />
Auto Visualisation: When changing analogue channels, displays signal<br />
strength.<br />
NN<br />
Only available for analogue channels.<br />
NN<br />
When the INFO button is pressed, the signal strength bar is displayed.<br />
NN<br />
When bar is green, you are receiving the best possible signal.<br />
●●<br />
MPEG Noise Filter: Reduces MPEG noise to provide improved picture<br />
quality.<br />
●●<br />
<strong>HD</strong>MI Black Level: Selects the black level on the screen to adjust the screen<br />
depth.<br />
NN<br />
Available only in <strong>HD</strong>MI mode (RGB signals).<br />
▶<br />
English
●●<br />
Film Mode: Sets the <strong>TV</strong> to automatically sense and process film signals from<br />
all sources and adjust the picture for optimum quality.<br />
NN<br />
The Cinema Smooth function is only activated when <strong>HD</strong>MI 24Hz signal<br />
is inputted. for PDP <strong>TV</strong><br />
NN<br />
Available in <strong>TV</strong> mode and external input mode which supports SD (480i /<br />
576i) and <strong>HD</strong> (1080i) except in PC mode.<br />
NN<br />
If the screen does not seem natural, change its option to Off / Auto1 /<br />
Auto2 in Film Mode.<br />
◀<br />
▶<br />
English
◀<br />
●●<br />
LED Clear Motion for LED <strong>TV</strong> : Removes drag from fast scenes with a lot of<br />
movement to provide a clear picture.<br />
NN<br />
It will be deactivated when the picture mode is set to Natural.<br />
NN<br />
The screen may become slightly darker when you play LED Clear<br />
Motion.<br />
●●<br />
Black Optimiser for PDP <strong>TV</strong> : Realizes of the black colour deeply and expands<br />
the contrast ratio.<br />
NN<br />
When connecting a PC, it will be set to off and deactivated.<br />
NN<br />
When the <strong>TV</strong> is operating other applications, it will be deactivated. (ex.<br />
Media Play, PIP, Teletext)<br />
▶<br />
English
■■<br />
Picture Off t<br />
OO<br />
MENUm → Picture → Picture Off → ENTERE<br />
The screen is turned off but the sound remains on. Press any button except<br />
volume button to turn on the screen.<br />
◀<br />
▶<br />
English
■■<br />
Reset Picture<br />
OO<br />
MENUm → Picture → Reset Picture → ENTERE<br />
Resets your current picture mode to its default settings.<br />
◀<br />
▶<br />
English
❑❑<br />
Changing the Preset Sound Mode<br />
◀<br />
■■<br />
Sound Mode<br />
OO<br />
MENUm → Sound → Sound Mode → ENTERE<br />
●●<br />
Standard: Selects the normal sound mode.<br />
●●<br />
Music: Emphasises music over voices.<br />
●●<br />
Movie: Provides the best sound for movies.<br />
●●<br />
Clear Voice: Emphasises voices over other sounds.<br />
●●<br />
Amplify: Increase the intensity of high-frequency sound to allow a better<br />
listening experience for the hearing impaired.<br />
NN<br />
If Speaker Select is set to External Speaker, Sound Mode is disabled.<br />
▶<br />
English
❑❑<br />
Adjusting Sound Settings<br />
◀<br />
■■<br />
Sound Effect<br />
(standard sound mode only)<br />
OO<br />
MENUm → Sound → Sound Effect → ENTERE<br />
●●<br />
DTS TruSurround<br />
This function provides a virtual 5.1 channel surround sound experience<br />
through a pair of speakers using HRTF (Head Related Transfer Function)<br />
technology.<br />
●●<br />
DTS TruDialog<br />
This function allows you to increase the intensity of a voice over background<br />
music or sound effects so that dialogue can be heard more clearly.<br />
▶<br />
English
●●<br />
Equaliser<br />
Use Equaliser to customize sound setting for each speaker.<br />
Balance: Adjusts the balance between the right and left speaker.<br />
100Hz / 300Hz / 1kHz / 3kHz / 10kHz (Bandwidth Adjustment): Adjusts the<br />
level of specific bandwidth frequencies.<br />
Reset: Resets the equaliser to its default settings.<br />
NN<br />
If Speaker Select is set to External Speaker, Sound Effect is disabled.<br />
◀<br />
▶<br />
English
■■<br />
3D Audio for PDP 4900<br />
OO<br />
MENUm → Sound → 3D Audio → ENTERE<br />
3D audio technology provides the immersive sound corresponding to the pop-up<br />
effect of 3D video by audio depth control in perspective.<br />
NN<br />
Available in only when watching 3D image.<br />
◀<br />
▶<br />
English
■■<br />
Speaker Settings<br />
OO<br />
MENUm → Sound → Speaker Settings → ENTERE<br />
◀<br />
●●<br />
Speaker Select t<br />
A sound echo may occur due to a difference in decoding speed between<br />
the main speaker and the audio receiver. In this case, set the <strong>TV</strong> to External<br />
Speaker.<br />
NN<br />
When Speaker Select is set to External Speaker, the volume and<br />
MUTE buttons will not operate and the sound settings will be limited.<br />
▶<br />
English
N<br />
N When Speaker Select is set to External Speaker.<br />
●●<br />
<strong>TV</strong> Speaker: Off, External Speaker: On<br />
NN<br />
When Speaker Select is set to <strong>TV</strong> Speaker.<br />
●●<br />
<strong>TV</strong> Speaker: On, External Speaker: On<br />
NN<br />
If there is no video signal, both speakers will be mute.<br />
◀<br />
▶<br />
English
●●<br />
Auto Volume<br />
To equalize the volume level on each channel, set to Normal.<br />
Night: This mode provides an improved sound experience compared to<br />
Normal mode, making almost no noise. It is useful at night.<br />
NN<br />
To use the volume control on the source device connected to the <strong>TV</strong>,<br />
set Auto Volume to Off on the <strong>TV</strong>. Otherwise, a change to the volume<br />
control of the source device may not be applied.<br />
◀<br />
▶<br />
English
◀<br />
■■<br />
Additional Settings<br />
OO<br />
MENUm → Sound → Additional Settings → ENTERE<br />
●●<br />
D<strong>TV</strong> Audio Level (digital channels only): This function allows you to reduce<br />
the disparity of a voice signal (which is one of the signals received during a<br />
digital <strong>TV</strong> broadcast) to a desired level.<br />
NN<br />
According to the type of broadcast signal, MPEG / HE-AAC can be<br />
adjusted between -10dB and 0dB.<br />
NN<br />
To increase or decrease the volume, adjust between the range 0 and -10<br />
respectively.<br />
▶<br />
English
◀<br />
●●<br />
Digital Audio Out: Digital Audio out is used to provide digital sound, reducing<br />
interference going to speakers and various digital devices such as a DVD<br />
player.<br />
Audio Format: You can select the Digital Audio output format. The available<br />
Digital Audio output format may differ depending on the input source.<br />
NN<br />
By connecting to 5.1ch speakers in a Dolby Digital setup, maximize your<br />
interactive 3D sound experience.<br />
Audio Delay: Correct audio-video sync problems, when watching <strong>TV</strong> or<br />
video, and when listening to digital audio output using an external device such<br />
as an AV receiver (0ms ~ 250ms).<br />
▶<br />
English
●●<br />
Dolby Digital Comp: This function minimizes signal disparity between a dolby<br />
digital signal and a voice signal (i.e. MPEG Audio, HE-AAC, A<strong>TV</strong> Sound).<br />
NN<br />
Select Line to obtain dynamic sound, and RF to reduce the difference<br />
between loud and soft sounds at night time.<br />
Line: Set the output level for signals greater or less than -31dB (reference) to<br />
either -20dB or -31dB.<br />
RF: Set the output level for signals greater or less than -20dB (reference) to<br />
either -10dB or -20dB.<br />
◀<br />
■■<br />
Reset Sound<br />
OO<br />
MENUm → Sound → Reset Sound → ENTERE<br />
▶<br />
Reset all sound settings to the factory defaults.<br />
English
❑❑<br />
Selecting the Sound Mode t<br />
When you set to Dual I-II, the current sound mode is displayed on the screen.<br />
Audio Type Dual I-II Default<br />
Mono<br />
Mono<br />
A2 Stereo<br />
Stereo<br />
Stereo ↔ Mono<br />
Automatic change<br />
Dual Dual I ↔ Dual II Dual I<br />
◀<br />
NICAM Stereo<br />
Mono<br />
Stereo<br />
Dual<br />
Mono<br />
Mono ↔ Stereo<br />
Mono → Dual I<br />
Dual II <br />
Automatic change<br />
Dual I<br />
▶<br />
NN<br />
If the stereo signal is weak and an automatic switching, occurs, then switch<br />
to the mono.<br />
NN<br />
Only activated in stereo sound signal.<br />
NN<br />
Only available when the Source is set to <strong>TV</strong>.<br />
English
❑❑<br />
Executing initial setup<br />
■■<br />
Setup<br />
OO<br />
MENUm → System → Setup → ENTERE<br />
Configure the channels and the time when setting up the <strong>TV</strong> for the first time or<br />
when resetting the unit.<br />
NN<br />
Execute the initial setup following instructions that the <strong>TV</strong> guides.<br />
◀<br />
▶<br />
English
❑❑<br />
Setting the Time<br />
◀<br />
■■<br />
Time<br />
OO<br />
MENUm → System → Time → ENTERE<br />
The current time will appear every time you press the INFO button.<br />
●●<br />
Clock: Setting the clock is for using various timer features of the <strong>TV</strong>.<br />
NN<br />
If you disconnect the power cord, you have to set the clock again.<br />
Clock Mode: Set up the current time manually or automatically.<br />
––<br />
Auto: Set the current time automatically using the time from a digital<br />
channel.<br />
▶<br />
English
N<br />
N The aerial must be connected in order to set the time automatically.<br />
––<br />
<strong>Manual</strong>: Set the current time manually.<br />
NN<br />
Depending on the broadcast station and signal, the auto time set up may<br />
not be correct. In this case, set the time manually.<br />
◀<br />
▶<br />
English
Clock Set: Set the Date and Time.<br />
N<br />
N<br />
N Available only when Clock Mode is set to <strong>Manual</strong>.<br />
N You can set the Date and Time directly by pressing the number buttons<br />
on the remote control.<br />
Time Zone (Depending on the country): Select your time zone.<br />
N<br />
N<br />
N This function is only available when the Clock Mode is set to Auto.<br />
N When selecting <strong>Manual</strong> in Time Zone, GMT and DST will be activated.<br />
◀<br />
▶<br />
English
Time Offset (Depending on the country): Adjusts the time when your <strong>TV</strong><br />
receives the time information via Internet. Set the right time by selecting an<br />
offset.<br />
NN<br />
The current time will be set through a network, if the <strong>TV</strong> fails to receive<br />
the time information including the broadcast signal from <strong>TV</strong> stations. (ex:<br />
Watching <strong>TV</strong> via set-top box, Satellite receiver, or etc)<br />
◀<br />
▶<br />
English
❑❑<br />
Using the Sleep Timer<br />
OO<br />
MENUm → System → Time → Sleep Timer → ENTERE<br />
●●<br />
Sleep Timer t: Automatically shuts off the <strong>TV</strong> after a preset period of<br />
time. (30, 60, 90, 120, 150 and 180 minutes)<br />
NN<br />
Use the ▲/▼ buttons to select a period of time, and then press<br />
ENTERE. To cancel the Sleep Timer, select Off.<br />
◀<br />
▶<br />
English
◀<br />
❑❑<br />
Setting the On / Off Timer<br />
OO<br />
MENUm → System → Time → On Timer Off Timer → ENTERE<br />
●●<br />
On Timer: You can set up three separate On Timer configurations. (On Timer<br />
1, On Timer 2, On Timer 3)<br />
Setup: Select Off, Once, Everyday, Mon~Fri, Mon~Sat, Sat~Sun or<br />
<strong>Manual</strong> to set at your convenience. If you select <strong>Manual</strong>, you can set up the<br />
day you want to activate the timer.<br />
NN<br />
The c mark indicates the day you’ve selected.<br />
Time: Set the hour and minute.<br />
Volume: Set the desired volume level.<br />
▶<br />
English
◀<br />
Source: To select the source of the content that will play when the <strong>TV</strong> turns<br />
on. You can:<br />
––<br />
Select <strong>TV</strong> and have the <strong>TV</strong> display a specific air or cable channel.<br />
––<br />
Select USB and have the <strong>TV</strong> play back photo or audio files from a USB<br />
device.<br />
––<br />
Select a source on your <strong>TV</strong> that you have connected a set-top box to, and<br />
have the <strong>TV</strong> display a channel from the set-top box.<br />
NN<br />
The USB device must be connected to your <strong>TV</strong> before you can select<br />
USB.<br />
▶<br />
English
◀<br />
N<br />
N If you select a source other than <strong>TV</strong> or USB, you must:<br />
●●<br />
Have a cable or satellite set-top box attached to that source<br />
●●<br />
Set the set-top box to the channel you want to watch when the <strong>TV</strong><br />
goes on<br />
●●<br />
Leave the set-top box turned on.<br />
NN<br />
When you select a source other than <strong>TV</strong> or USB, the Aerial and Channel<br />
options will disappear.<br />
Aerial (when the Source is set to <strong>TV</strong>): Select A<strong>TV</strong> or D<strong>TV</strong>.<br />
Channel (when the Source is set to <strong>TV</strong>): Select the desired channel.<br />
▶<br />
English
◀<br />
Music / Photo (when the Source is set to USB): Select a folder in the USB<br />
device containing music or photo files to be played when the <strong>TV</strong> is turned on<br />
automatically.<br />
––<br />
If there is no music file on the USB device or the folder containing a music<br />
file is not selected, the timer function does not operate correctly.<br />
––<br />
When there is only one photo file in the USB device, the slide show will not<br />
play.<br />
––<br />
If a folder name is too long, the folder cannot be selected.<br />
––<br />
Each USB you use is assigned its own folder. When using more than one<br />
of the same type of USB, make sure the folders assigned to each USB<br />
have different names.<br />
▶<br />
English
◀<br />
––<br />
It is recommended that you use a USB memory stick and a multi card<br />
reader when using On Timer.<br />
––<br />
The On Timer function may not work with USB devices with a built-in<br />
battery, MP3 players, or PMPs made by some manufacturers because<br />
these devices take a long time to be recognised.<br />
●●<br />
Off Timer: You can set up three separate Off Timer configurations. (Off Timer<br />
1, Off Timer 2, Off Timer 3)<br />
Setup: Select Off, Once, Everyday, Mon~Fri, Mon~Sat, Sat~Sun or<br />
<strong>Manual</strong> to set at your convenience. If you select <strong>Manual</strong>, you can set up the<br />
day you want to activate the timer.<br />
NN<br />
The c mark indicates the day you’ve selected.<br />
Time: Set the hour and minute.<br />
▶<br />
English
❑❑<br />
Economical Solutions<br />
◀<br />
■■<br />
Eco Solution<br />
OO<br />
MENUm → System → Eco Solution → ENTERE<br />
●●<br />
Energy Saving: This adjusts the brightness of the <strong>TV</strong> in order to reduce<br />
power consumption.<br />
●●<br />
Eco Sensor (depending on the model): To enhance your power savings; the<br />
picture settings will automatically adapt to the light in the room.<br />
NN<br />
If you adjust the Backlight for LED <strong>TV</strong> / Cell Light for PDP <strong>TV</strong> , the Eco<br />
Sensor will be set to Off.<br />
▶<br />
English
◀<br />
Min. Backlight for LED <strong>TV</strong> / Min Cell Light for PDP <strong>TV</strong> : When Eco Sensor is<br />
On, the minimum screen brightness can be adjusted manually.<br />
NN<br />
If Eco Sensor is On, the display brightness may change (become slightly<br />
darker or brighter) depending on the surrounding light intensity.<br />
●●<br />
No Signal Power Off: To avoid unnecessary energy consumption, set how<br />
long you want the <strong>TV</strong> to remain on if it’s not receiving a signal.<br />
NN<br />
Disabled when the PC is in power saving mode.<br />
●●<br />
Auto Power Off: If the <strong>TV</strong> remains turned on for four hours without any user<br />
input, the <strong>TV</strong> will automatically turn off to prevent overheating.<br />
NN<br />
In some areas, you can establish a period of up to 8 hours.<br />
▶<br />
English
❑❑<br />
Other Features<br />
■■<br />
Menu Language<br />
OO<br />
MENUm → System → Menu Language → ENTERE<br />
Set the menu language.<br />
◀<br />
▶<br />
English
■■<br />
Auto Protection Time for LED <strong>TV</strong><br />
OO<br />
MENUm → System → Auto Protection Time → ENTERE<br />
●●<br />
Auto Protection Time (Off / 2 hours / 4 hours / 8 hours / 10 hours):<br />
If the screen remains idle with a still image for a certain period of time defined by<br />
the user, the screen saver is activated to prevent the formation of ghost images<br />
on the screen.<br />
◀<br />
▶<br />
English
◀<br />
■■<br />
Screen Burn Protection for PDP <strong>TV</strong><br />
OO<br />
MENUm → System → Screen Burn Protection → ENTERE<br />
To reduce the possibility of screen burn, this unit is equipped with Pixel Shift<br />
screen burn prevention technology. Pixel Shift moves the picture slightly on the<br />
screen. The Time function setting allows you to programme the time between<br />
movement of the picture in minutes.<br />
Your <strong>TV</strong> also has the following additional screen burn protection functions:<br />
●●<br />
Pixel Shift<br />
●●<br />
Auto Protection Time<br />
●●<br />
Scrolling<br />
●●<br />
Side Grey<br />
▶<br />
English
●●<br />
Pixel Shift: Using this function, you can set the <strong>TV</strong> to move pixels minutely on<br />
the PDP screen in a horizontal or vertical direction to minimize after images on<br />
the screen.<br />
NN<br />
Available Pixel Shift Settings and Optimum Settings<br />
◀<br />
Item<br />
<strong>TV</strong> / <strong>HD</strong>MI<br />
Horizontal 0~4 4<br />
Vertical 0~4 4<br />
Time (minute) 1~4 min 4 min<br />
NN<br />
The Pixel Shift value may differ depending on the monitor size (inches)<br />
and mode.<br />
N<br />
N This function is not available in the Screen Fit mode.<br />
●●<br />
Auto Protection Time: If the screen displays a still image for a certain period<br />
of time you define, the <strong>TV</strong> activates the screen saver to prevent the formation<br />
of burnt in ghost images on the screen.<br />
▶<br />
English
◀<br />
●●<br />
Scrolling: This function removes after-images on the screen by illuminating all<br />
the pixels on the PDP according to a pattern. Use this function when there are<br />
after images or symbols on the screen, especially when you displayed a still<br />
image on the screen for a long time.<br />
NN<br />
The after-image removal function has to be executed for a long time<br />
(approximately 1 hour) to effectively remove after-images on the screen.<br />
If the after-image is not removed after you apply the function, repeat the<br />
function again.<br />
NN<br />
Press any key on the remote control to cancel this feature.<br />
●●<br />
Side Grey: When you watch <strong>TV</strong> with the screen ratio set to 4:3, using the<br />
Side Grey function can prevent damage to the edges of the screen by<br />
adjusting the white balance on the extreme left and right sides.<br />
▶<br />
English
◀<br />
■■<br />
General<br />
OO<br />
MENUm → System → General → ENTERE<br />
●●<br />
Game Mode: When connecting to a game console such as PlayStation or<br />
Xbox, you can enjoy a more realistic gaming experience by selecting game<br />
mode.<br />
NN<br />
NOTE<br />
●●<br />
Precautions and limitations for game mode<br />
––<br />
To disconnect the game console and connect another external<br />
device, set Game Mode to Off in the setup menu.<br />
––<br />
If you display the <strong>TV</strong> menu in Game Mode, the screen shakes<br />
slightly.<br />
▶<br />
English
◀<br />
●●<br />
Game Mode is not available in <strong>TV</strong> mode.<br />
●●<br />
After connecting the game console, set Game Mode to On.<br />
Unfortunately, you may notice reduced picture quality.<br />
●●<br />
If Game Mode is On:<br />
––<br />
Picture Mode is set to Standard and Sound Mode is set to<br />
Movie.<br />
●●<br />
Panel Lock: Lock or unlock all the keys on the panel at once. when Panel<br />
Lock is on, none of the keys on the panel will work.<br />
●●<br />
Boot Logo: Display <strong>Samsung</strong> logo when the <strong>TV</strong> is turned on.<br />
▶<br />
English
■■<br />
Change PIN<br />
OO<br />
MENUm → System → Change PIN → ENTERE<br />
Change your password required to set up the <strong>TV</strong>.<br />
NN<br />
The PIN input screen appears before the setup screen.<br />
NN<br />
Enter your 4-digit PIN. Change the PIN using the Change PIN option.<br />
◀<br />
▶<br />
English
■■<br />
DivX® Video On Demand<br />
OO<br />
MENUm → System → DivX® Video On Demand → ENTERE<br />
Shows the registration code authorised for the <strong>TV</strong>. If you connect to the DivX<br />
web site and register with 10-digit registration code, you can download the VOD<br />
activation file.<br />
Once you play it using Videos, the registration is completed.<br />
NN<br />
For more information on DivX® VOD, visit http://vod.divx.com.<br />
◀<br />
▶<br />
English
❑❑<br />
Using the Source List<br />
■■<br />
Source List<br />
OO<br />
MENUm → Applications → Source List → ENTERE<br />
◀<br />
NN<br />
When you press the SOURCE button, Source screen will be displayed at<br />
once.<br />
NN<br />
You can only choose external devices that are connected to the <strong>TV</strong>. In<br />
Source, connected inputs are highlighted.<br />
NN<br />
For the detailed information, refer to “Changing the Input Source” in <strong>User</strong><br />
<strong>Manual</strong>.<br />
▶<br />
English
❑❑<br />
Connecting a USB Device<br />
1. Turn on your <strong>TV</strong>.<br />
2. Connect a USB device containing photo, music and movie files to the USB<br />
port on the side of the <strong>TV</strong>.<br />
3. When USB is connected to the <strong>TV</strong>, popup window appears. You can select<br />
the Photos, Videos or Music directly.<br />
◀<br />
▶<br />
English
◀<br />
NN<br />
It might not work properly with unlicenced multimedia files.<br />
N<br />
N Need-to-Know List before using Media Contents<br />
●●<br />
MTP (Media Transfer Protocol) is not supported.<br />
●●<br />
Supported file systems are FAT and exFAT.<br />
●●<br />
Certain types of USB Digital camera and audio devices may not be<br />
compatible with this <strong>TV</strong>.<br />
●●<br />
Media Play only supports sequential jpeg format.<br />
●●<br />
Media Play only supports USB Mass Storage Class (MSC) devices. MSC<br />
is a Mass Storage Class Bulk-Only Transport device. Examples of MSC<br />
are Thumb drives, Flash Card Readers (USB HUB are not supported).<br />
Devices should be connected directly to the <strong>TV</strong>’s USB port.<br />
▶<br />
English
◀<br />
●●<br />
Before connecting your device to the <strong>TV</strong>, please back up your files to<br />
prevent them from damage or loss of data. SAMSUNG is not responsible<br />
for any data file damage or data loss.<br />
●●<br />
Do not disconnect the USB device while it is loading.<br />
●●<br />
The higher the resolution of the image, the longer it takes to display on<br />
the screen.<br />
●●<br />
The maximum supported JPEG resolution is 15360 x 8640 pixels.<br />
●●<br />
For unsupported or corrupted files, the “Not Supported File Format”<br />
message is displayed.<br />
●●<br />
The scene search and thumbnail functions are not supported in the<br />
Videos.<br />
▶<br />
English
◀<br />
●●<br />
MP3 files with DRM that have been downloaded from a non-free site<br />
cannot be played. Digital Rights Management (DRM) is a technology that<br />
supports the creation, distribution and management of the content in an<br />
integrated and comprehensive way, including the protection of the rights<br />
and interests of the content providers, the prevention of the illegal copying<br />
of contents, as well as managing billings and settlements.<br />
●●<br />
A USB device that requires high power (more than 500mA or 5V) may<br />
not be supported. The <strong>HD</strong>D (Hard Disk Drive) connected to USB is not<br />
supported.<br />
●●<br />
If the <strong>TV</strong> has been no input during time set in Auto Protection Time, the<br />
screen saver will run.<br />
●●<br />
The power-saving mode of some external hard disk drives may be<br />
released automatically when connected to the <strong>TV</strong>.<br />
▶<br />
English
◀<br />
●●<br />
If a USB extension cable is used, the USB device may not be recognised<br />
or the files on the device may not be read.<br />
●●<br />
If a USB device connected to the <strong>TV</strong> is not recognised, the list of files on<br />
the device is corrupted or a file in the list is not played, connect the USB<br />
device to the PC, format the device and check the connection.<br />
●●<br />
If a file deleted from the PC is still found when Media Contents is run, use<br />
the “Empty the Recycle Bin” function on the PC to permanently delete the<br />
file.<br />
●●<br />
If the number of files and folders saved on a USB storage device is<br />
approximately over 4000, the files and folders may not appear and some<br />
folders may not be opened.<br />
▶<br />
English
◀<br />
Disconnecting a USB Device<br />
1. Press the SOURCE button.<br />
2. Select a desired USB device, and then press the TOOLS button. The Tools<br />
menu appears.<br />
3. Select Disconnect USB Device, and then wait until the selected USB device<br />
is disconnected. You can remove a USB device from the <strong>TV</strong>.<br />
NN<br />
To remove a USB device from the <strong>TV</strong>, we recommend use Disconnect USB<br />
Device function.<br />
▶<br />
English
❑❑<br />
Using the Media Contents<br />
◀<br />
OO<br />
MENUm → Applications → Media Play → ENTERE<br />
Enjoy photos, music and movie files saved on a USB Mass Storage Class (MSC)<br />
device.<br />
1. Press the MEDIA.P button.<br />
2. Press ◄/► button to select desired menu (Photos, Videos, Music), then<br />
press the ENTERE button.<br />
3. Press ◄/► button to select desired device, then press the ENTERE button<br />
again.<br />
4. Press the ▲/▼/◄/► button to select the desired file in the list, then press the<br />
ENTERE button or ∂ (Play) button.<br />
▶<br />
English
◀<br />
Playing the selected files<br />
1. Press the ▲ button to select Options at the top of each main screen and<br />
select Play Selected.<br />
2. Select the desired files.<br />
NN<br />
The check box appears to the left of the selected files.<br />
NN<br />
Press ENTERE button again to deselect the file.<br />
3. Press the ▲ button to select Play.<br />
NN<br />
You can select or deselect all files pressing the Select All / Deselect All.<br />
▶<br />
English
◀<br />
❑❑<br />
Playing the Photos / Videos / Music<br />
During playing a file, press the ▲/▼/◄/► button to select the desired menu.<br />
NN<br />
When the option menu is not displayed, press the TOOLS button or<br />
ENTERE button.<br />
NN<br />
You can also use ∂/∑/∫/π/µ buttons on the remote control during<br />
playback.<br />
NN<br />
If you press the INFO button during playback, you can view the playback<br />
information.<br />
▶<br />
English
Playback menu<br />
◀<br />
Button Operation Photos Videos Music<br />
/ Previous / Next●<br />
/ Start Slide Show / Stop Slide Show●<br />
Play / Pause Mini Player*●●<br />
/ Previous / Next Mini Player*●●<br />
/ Rewind / Fast Forward ●●<br />
* When setting the Background Music to Mini Player in Photos, these buttons previous appear.<br />
▶<br />
English
◀<br />
Setting menu<br />
● Photos<br />
Button Operation<br />
Slideshow Settings You can set the Speed and Effects during the slide show.<br />
Zoom You can zoom the image.<br />
Rotate You can rotate images in full screen mode.<br />
Background Music /<br />
Mini Player<br />
You can set background music when watching a slide show. /<br />
You can control simple playback menus.<br />
Settings Picture Mode / Sound Mode: You can adjust the picture or<br />
sound setting.<br />
Information: You can see detailed information about the played<br />
file.<br />
▶<br />
English
NN<br />
During the slide show, all files in the file list will be displayed in order.<br />
NN<br />
When you press the ∂ (Play) button (or ▲ button → Options → Slide<br />
Show) in the file list, slide show will be started immediately.<br />
NN<br />
During the slide show, you can adjust the slide show speed using π (REW)<br />
or μ (FF) button.<br />
●●<br />
Supported Photo Formats<br />
NN<br />
For the details, refer to “Specifications” in <strong>User</strong> <strong>Manual</strong>.<br />
◀<br />
▶<br />
English
● Videos<br />
Button Operation<br />
Search Search Titles: You can move the other file directly.<br />
Search Time Bar: You can search the video using ◄ and ► button<br />
at one minute interval or entering the number directly.<br />
N It may not be supported depending on the input source.<br />
Repeat Mode You can play movie files repeatedly.<br />
Picture Size You can adjust the picture size to your preference.<br />
◀<br />
▶<br />
English
Button Operation<br />
Settings Subtitle Settings: You can play the video with subtitles. This function<br />
only works if the subtitles are the same file name as the video.<br />
Picture Mode / Sound Mode: You can adjust the picture or sound<br />
setting.<br />
Audio Language: You can change the audio language if the video<br />
has more than one language.<br />
Information: You can see detailed information about the played file.<br />
◀<br />
▶<br />
English
NN<br />
If video time information is unknown, play time and progress bar are not<br />
displayed.<br />
NN<br />
In this mode, you can enjoy movie clips contained on a Game, but you<br />
cannot play the Game itself.<br />
●●<br />
Supported Subtitle / Video Formats<br />
NN<br />
For the details, refer to “Specifications” in <strong>User</strong> <strong>Manual</strong>.<br />
◀<br />
▶<br />
English
● Music<br />
Button Operation<br />
Repeat You can play music files repeatedly.<br />
Shuffle You can play the music randomly.<br />
Sound Mode You can adjust the sound setting.<br />
◀<br />
N Only displays the files with supported music file extension. Other file<br />
extensions are not displayed, even if they are saved on the same USB device.<br />
N If the sound is abnormal when playing music files, adjust the Equaliser in the<br />
Sound menu. (An over-modulated music file may cause a sound problem.)<br />
● Supported Music Formats<br />
N For the details, refer to “Specifications” in <strong>User</strong> <strong>Manual</strong>.<br />
▶<br />
English
Setting the Encoding language<br />
Set the encoding language if the text is not supported.<br />
1. Press the ▲ button to select Options at the top of music main screen and<br />
select Encoding.<br />
2. Select the desired encoding language.<br />
◀<br />
▶<br />
English
❑❑<br />
Using the 3D function<br />
◀<br />
for PDP 4900<br />
Viewing <strong>TV</strong> using the 3D function<br />
IMPORTANT HEALTH AND SAFETY INFORMATION FOR 3D PICTURES.<br />
Read and understand the following safety information before using the <strong>TV</strong>’s 3D<br />
function.<br />
[WARNING [<br />
●●<br />
Some viewers may experience discomfort while viewing 3D <strong>TV</strong> such as<br />
dizziness, nausea and headaches. If you experience any such symptom,<br />
stop viewing 3D <strong>TV</strong>, remove 3D Active Glasses and rest.<br />
●●<br />
Watching 3D images for an extended period of time may cause eye<br />
strain. If you feel eye strain, stop viewing 3D <strong>TV</strong>, remove your 3D Active<br />
Glasses and rest.<br />
▶<br />
English
◀<br />
●●<br />
A responsible adult should frequently check on children who are using the<br />
3D function. If there are any reports of tired eyes, headaches, dizziness,<br />
or nausea, have the child stop viewing 3D <strong>TV</strong> and rest.<br />
●●<br />
Do not use the 3D Active Glasses for other purposes (such as general<br />
eyeglasses, sunglasses, protective goggles, etc.)<br />
●●<br />
Do not use the 3D function or 3D Active Glasses while walking or moving<br />
around. Using the 3D function or 3D Active Glasses while moving around<br />
may result in injuries due to running into objects, tripping, and/or falling.<br />
Before using 3D function...<br />
●●<br />
3D Active Glasses from <strong>Samsung</strong>’s previous product (IR type) or other<br />
manufacturers not be supported.<br />
●●<br />
When the <strong>TV</strong> is initially powered on, may take some time until the 3D display<br />
is optimised.<br />
▶<br />
English
◀<br />
●●<br />
The 3D Active Glasses may not work properly if there is any other 3D product<br />
or electronic devices turned on near the glasses or <strong>TV</strong>. If there is a problem,<br />
keep other electronic devices as far away as possible from the 3D Active<br />
Glasses.<br />
●●<br />
Be sure to stay within the viewing angle and optimum <strong>TV</strong> viewing distance<br />
when watching 3D pictures. Otherwise, you may not be able to enjoy proper<br />
3D effects.<br />
●●<br />
The ideal viewing distance should be three times or more the height of the<br />
screen. We recommend sitting with viewer’s eyes on a level with the screen.<br />
●●<br />
If you can not play 3D videos in some of the BD players, take out the disk<br />
from player and put it again, or restart the BD player.<br />
▶<br />
English
■■<br />
3D<br />
OO<br />
MENUm → Picture → 3D → ENTERE<br />
◀<br />
This exciting new feature enables you to view 3D content.<br />
N N "Full <strong>HD</strong> 3D Glasses" Logo indicates compatibility between display<br />
products and 3D Glasses which are compliant with the "Full <strong>HD</strong> 3D<br />
Glasses" format, and does not indicate picture quality of display products.<br />
NN<br />
Some 3D modes may not be available depending on the format of the image<br />
source.<br />
NN<br />
When you watch 3D images under flickering lighting such as a fluorescent<br />
lamp (50Hz ~ 60Hz) or a 3 wavelength lamp, you may notice some screen<br />
flickering. If this occurs, dim or turn off the light.<br />
▶<br />
English
●●<br />
3D Mode<br />
If you want to feel the 3D effect fully, please wear the 3D Active Glasses<br />
first, and then select 3D Mode from the list below that provides the best 3D<br />
viewing experience.<br />
3D Mode<br />
Off Off Turns the 3D function off.<br />
Operation<br />
◀<br />
2D → 3D Changes a 2D image to 3D.<br />
Side by Side<br />
Top & Bottom<br />
NN<br />
Some file format may not be supported.<br />
Displays two images next to each other.<br />
Displays one image above another.<br />
NN<br />
3D Mode is set to Off automatically when you access Media Play or<br />
e-<strong>Manual</strong> functions.<br />
N<br />
N 3D Mode is set to memorised configuration value automatically, when<br />
changing the input source.<br />
▶<br />
English
●●<br />
3D Perspective: Adjust overall 3D perspective of on-screen image.<br />
●●<br />
Depth: Adjust overall depth.<br />
●●<br />
L/R Change: Swap the left and right pictures.<br />
●●<br />
3D → 2D: Displays the image for the left eye only.<br />
NN<br />
This function is deactivated when 3D Mode set to “ ” or “ Off<br />
Off ”.<br />
◀<br />
▶<br />
English
◀<br />
Support resolution (16:9 only)<br />
●●<br />
<strong>HD</strong>MI<br />
Source Resolution Frequency (Hz)<br />
/<br />
1280 x 720p 50 / 59.94 / 60 Hz<br />
1920 x 1080i 50 / 59.94 / 60 Hz<br />
1920 x 1080p 23.98 / 24 / 25 / 29.97 / 30 / 50 / 59.94 / 60 Hz<br />
Frame Packing 1280 x 720p 50 / 59.94 / 60 Hz<br />
1920 x 1080i 50 / 59.94 / 60 Hz<br />
1920 x 1080p 23.98 / 24 / 25 / 29.97 / 30 Hz<br />
▶<br />
English
●●<br />
Components & D<strong>TV</strong><br />
(Depending on the country and model)<br />
◀<br />
Source Resolution Frequency (Hz)<br />
Components 1280 x 720p 50 / 59.94 / 60 Hz<br />
1920 x 1080i 50 / 59.94 / 60 Hz<br />
1920 x 1080p 23.98 / 24 / 25 / 29.97 / 30 / 50 / 59.94 / 60 Hz<br />
D<strong>TV</strong> 1280 x 720p 50 / 59.94 / 60 Hz<br />
1920 x 1080i 50 / 59.94 / 60 Hz<br />
1920 x 1080p 25 Hz<br />
●●<br />
Videos / Photos (In Media Play)<br />
For the details, refer to “Specifications” in <strong>User</strong> <strong>Manual</strong>.<br />
▶<br />
English
❑❑<br />
Viewing the e-<strong>Manual</strong><br />
■■<br />
e-<strong>Manual</strong><br />
OO<br />
MENUm → Support → e-<strong>Manual</strong> → ENTERE<br />
◀<br />
You can read the introduction and instructions about the <strong>TV</strong> features stored in<br />
your <strong>TV</strong>.<br />
NN<br />
For the detailed information about e-<strong>Manual</strong> Screen, refer to “How to use the<br />
e-<strong>Manual</strong>” in <strong>User</strong> <strong>Manual</strong>.<br />
▶<br />
English
❑❑<br />
Using the Self Diagnosis<br />
◀<br />
■■<br />
Self Diagnosis<br />
OO<br />
MENUm → Support → Self Diagnosis → ENTERE<br />
NN<br />
Self Diagnosis might take few seconds, this is part of the normal operation<br />
of the <strong>TV</strong>.<br />
●●<br />
Picture Test: Use to check for picture problems.<br />
●●<br />
3D Picture Test for PDP 4900 series : Use to check for 3D picture problems.<br />
●<br />
● Sound Test: Use the built-in melody sound to check for sound problems.<br />
NN<br />
If you hear no sound from the <strong>TV</strong>’s speakers, before performing the<br />
sound test, make sure Speaker Select is set to <strong>TV</strong> Speaker in the<br />
Sound menu.<br />
▶<br />
English
NN<br />
The melody will be heard during the test even if Speaker Select is set to<br />
External Speaker or the sound is muted by pressing the MUTE button.<br />
●●<br />
Signal Information (digital channels only): <strong>HD</strong><strong>TV</strong> channel’s reception quality<br />
is either perfect or the channels are unavailable. Adjust your aerial to increase<br />
signal strength.<br />
●●<br />
Reset: Reset all settings to the factory defaults except network settings.<br />
NN<br />
The PIN input screen appears before the setup screen.<br />
NN<br />
Enter your 4-digit PIN. Change the PIN using the Change PIN option.<br />
◀<br />
▶<br />
English
❑❑<br />
Updating the Software<br />
■■<br />
Software Update<br />
OO<br />
MENUm → Support → Software Update → ENTERE<br />
◀<br />
The Software Update menu lets you upgrade your <strong>TV</strong>’s software to the latest<br />
version.<br />
NN<br />
When software is upgraded, video and audio settings you have made will<br />
return to their default settings. We advise you to write down your settings so<br />
that you can easily reset them after the upgrade.<br />
▶<br />
English
●●<br />
Update now<br />
The <strong>TV</strong>'s firmware can be updated through either USB connection or<br />
broadcast signal.<br />
––<br />
By USB: Insert a USB drive containing the firmware upgrade file,<br />
downloaded from “www.samsung.com” into the <strong>TV</strong>.<br />
NN<br />
Please be careful not to disconnect the power or remove the USB<br />
drive until upgrades are complete. The <strong>TV</strong> will be turned off and on<br />
automatically after completing the firmware upgrade.<br />
◀<br />
▶<br />
English
◀<br />
––<br />
By Channel: Upgrade the software using the broadcasting signal.<br />
NN<br />
If the function is selected during the software transmission period,<br />
software will be automatically searched and downloaded.<br />
NN<br />
The time required to download the software is determined by the<br />
signal status.<br />
●●<br />
Auto update: This option upgrades the <strong>TV</strong> while it is in Standby Mode. This<br />
allows the <strong>TV</strong> to upgrade itself automatically while it is not in use. Because<br />
the <strong>TV</strong>’s internal processes are operating, the screen may emit a faint glow,<br />
and this may continue for more than 1 hour until the software download is<br />
complete.<br />
●<br />
● Manage Satellite Channels (depending on the model)<br />
(When the Aerial was set to Satellite) Manage software downloads via a<br />
satellite channel.<br />
▶<br />
English
❑❑<br />
Changing the Use Mode<br />
◀<br />
■■<br />
Use Mode<br />
OO<br />
MENUm → Support → Use Mode → ENTERE<br />
Select the Use Mode suitable for your place. We strongly recommend you select<br />
Home Use.<br />
●●<br />
Home Use: Home Use is the default setting.<br />
●●<br />
Store Demo: Store Demo is for retail environments only. If you select Store<br />
Demo, some functions will not work, and the picture settings will be reset<br />
every 5 minutes.<br />
▶<br />
English
❑❑<br />
Viewing the Contact <strong>Samsung</strong><br />
■■<br />
Contact <strong>Samsung</strong><br />
OO<br />
MENUm → Support → Contact <strong>Samsung</strong> → ENTERE<br />
View this information when your <strong>TV</strong> does not work properly or when you want to<br />
upgrade the software. You can find information regarding our call centres, and<br />
how to download products and software.<br />
◀<br />
▶<br />
English
❑❑<br />
Using the Football Mode<br />
◀<br />
■■<br />
Football Mode t<br />
OO<br />
MENUm → Applications → Football Mode → ENTERE<br />
This mode provides optimised condition for watching sports games.<br />
●●<br />
a (Zoom): Pause playback and divide the picture into 9 parts. Select a part<br />
to zoom it in. Press this button again to resume.<br />
NN<br />
When the Football Mode is on, the picture and sound modes are set to<br />
Stadium automatically.<br />
NN<br />
If you turn the <strong>TV</strong> off while watching Football Mode, the Football Mode will<br />
be disable.<br />
NN<br />
When the Data Service is running, the Zoom is not available.<br />
▶<br />
English
❑❑<br />
Using the Satellite System (depending on the model)<br />
NN<br />
For the details, you can find an additional web manual on our website "www.<br />
samsung.com".<br />
◀<br />
▶<br />
English
❑❑<br />
Using the Wireless Network<br />
(Depending on the model - UK only) / for PDP 4900 series<br />
NN<br />
For the details, you can find an additional web manual on our website "www.<br />
samsung.com".<br />
◀<br />
▶<br />
English
❑❑<br />
Managing the Network Connected Devices<br />
for PDP 4900 series<br />
NN<br />
For the details, you can find an additional web manual on our website "www.<br />
samsung.com".<br />
◀<br />
▶<br />
English
❑❑<br />
Using the DLNA Functions<br />
for PDP 4900 series<br />
NN<br />
For the details, you can find an additional web manual on our website "www.<br />
samsung.com".<br />
◀<br />
English


