

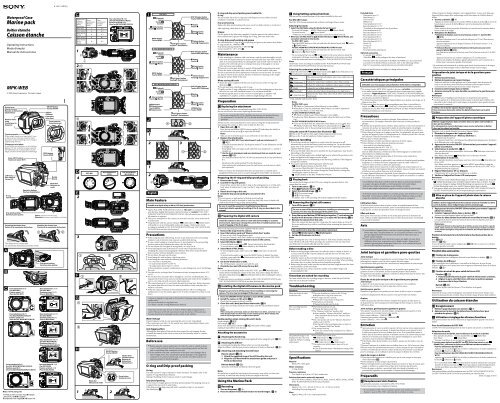
Sony MPK-WEB - MPK-WEB Istruzioni per l'uso Inglese
Sony MPK-WEB - MPK-WEB Istruzioni per l'uso Inglese
Sony MPK-WEB - MPK-WEB Istruzioni per l'uso Inglese

You also want an ePaper? Increase the reach of your titles
YUMPU automatically turns print PDFs into web optimized ePapers that Google loves.
4-155-113-11(1)<br />
O<strong>per</strong>ating Instructions<br />
Mode d’emploi<br />
Manual de instrucciones<br />
<strong>MPK</strong>-<strong>WEB</strong><br />
© 2009 <strong>Sony</strong> Corporation Printed in Japan<br />
<br />
<br />
<br />
Drip-proof packing<br />
Garniture pare-gouttes<br />
3<br />
<br />
<br />
<br />
<br />
1 2<br />
1<br />
2<br />
<br />
<br />
<br />
1<br />
2<br />
O-ring and drip-proof packing serviceable life<br />
O-ring<br />
The serviceable life of the O-ring varies with frequency of use of this unit and<br />
conditions. Generally, it is about one year.<br />
Drip-proof packing<br />
Replace the drip-proof packing with a new one if you find scratches or cracks on it.<br />
After replacing, check that no water leaks in.<br />
Grease<br />
Use the grease in the blue tube (supplied). Using the grease in the yellow tube or<br />
other manufacturer’s grease will damage the O-ring, and cause water leaks.<br />
O-ring, drip-proof packing and grease<br />
You can obtain the O-ring, drip-proof packing and grease at the nearest <strong>Sony</strong> dealer.<br />
O-ring (model No. 3-080-065-0 )<br />
Drip-proof packing (model No. 3-080-066-0 )<br />
Grease (model No. 3-071-370-0 )<br />
Maintenance<br />
After recording in a location with a sea breeze, wash this unit thoroughly in fresh<br />
water with the buckles fastened to remove salt and sand, then wipe with a soft dry<br />
cloth. It is recommended that you submerge this unit in fresh water for about 30<br />
minutes. If it is left with salt on it, metal portions may be damaged or rust may<br />
form and cause water leakage.<br />
If sun oil is on this unit, be sure to wash it off thoroughly using lukewarm water.<br />
Wipe the inside of this unit with a soft dry cloth. Do not wash it with water.<br />
Be sure to <strong>per</strong>form the above maintenance each time you use this unit. Do not use<br />
any type of solvent such as alcohol, benzine or thinner for cleaning, as this might<br />
damage the surface finish of this unit.<br />
When storing this unit<br />
Attach the spacer supplied with this unit to prevent wear of the O-ring. (See<br />
illustration )<br />
Prevent dust from collecting on the O-ring.<br />
Lightly coat the O-ring with grease and insert it into the seating groove, then store<br />
this unit in a cool, well-ventilated location. Do not fasten the buckle.<br />
Avoid storing this unit in a cold, very hot or humid place, or together with<br />
naphthalene or camphor, as these conditions might damage this unit.<br />
Preparation<br />
Replacing the attachment<br />
The following procedures are explained using DSC-WX1/W230.<br />
Do not use excessive force when replacing the attachment.<br />
* If you are using the DSC-WX1, the following steps are not required because<br />
the attachment C for the DSC-WX1 is already attached to this unit at<br />
purchase.<br />
Always use the correct attachment for your camera. Using the wrong attachment<br />
may damage the camera or allow water to leak into this unit.<br />
1 Open this unit. (-1)<br />
Press the top and bottom OPEN buttons together and release the buckle in<br />
the direction of the arrow to open this unit body.<br />
Notes<br />
Take care not to lose the spacer as you will need it to store this unit.<br />
2 Replace the attachments.<br />
Detach the DSC-WX1 front attachment C and rear attachment C-1<br />
(-2)<br />
Grasp the front attachment C by the parts marked in the illustration and lift<br />
it straight out.<br />
Press lightly with your finger inside wall of the rear attachment C-1 and lift it<br />
straight out.<br />
Use the front attachment and rear attachment that are made for your<br />
camera (-2).<br />
The illustration shows the DSC-W230 front attachment B and rear attachment<br />
B-1.<br />
Firmly press the points marked in the illustration.<br />
After replacing the attachment, press this unit buttons several times to check<br />
their o<strong>per</strong>ation.<br />
* After you remove the attachment from this unit and store it, it should not be<br />
straightened before you store it. It can be damaged if stored while it is deformed.<br />
Preparing the O-ring and drip-proof packing<br />
1 Remove the O-ring.<br />
2 Coat the O-ring with grease.<br />
Clean off any sand or dirt on the O-ring, in the seating groove, or on this unit’s<br />
body where it touches the O-ring. Coat the O-ring with a light, even layer of<br />
grease.<br />
3 Attach the O-ring to this unit.<br />
4 Check the drip-proof packing for any sand or dirt.<br />
Notes<br />
Do not remove or apply grease to the drip-proof packing.<br />
This unit’s body may be scratched or water may leak if the cover is closed with<br />
sand or dirt on the O-ring or drip-proof packing.<br />
Be sure to read the separate O-ring Maintenance Manual.<br />
Important details regarding handling of the O-ring are described in this<br />
manual.<br />
Preparing the digital still camera<br />
Install the camera in this unit in a room with low-humidity or a similar<br />
environment. Opening or closing this unit in hot or humid locations may<br />
result in fogging of the front glass.<br />
Refer to the o<strong>per</strong>ating instructions supplied with the camera.<br />
1 Remove the strap from the camera.<br />
2 Insert the battery pack and “Memory Stick Duo” media.<br />
Be sure to use a fully charged battery pack.<br />
Be sure that “Memory Stick Duo” media has enough space to record images.<br />
3 Press the ON/OFF (Power) button to turn on the camera.<br />
4 Select REC Mode. (-4)<br />
To record digital images, select<br />
(Scene Selection) by the Mode dial.<br />
To record movies, select<br />
(Movie Mode) by the Mode dial.<br />
5 Select Mode in REC Mode.<br />
To record digital images under water, select<br />
(Underwater) on the LCD<br />
screen.<br />
To record movies under water, press the MENU button to display the mode<br />
selection screen and select<br />
(Underwater) on the LCD screen. (DSC-WX1/<br />
W290/W275/W270 only)<br />
6 Set the AF Illuminator to [Off].<br />
The AF Illuminator cannot be used with this unit.<br />
7 Check the lens and LCD screen for any dirt.<br />
Notes<br />
To set the [Burst/Bracket] mode on the DSC-WX1, press<br />
(Burst/Bracket)<br />
button before installing the camera in this unit. You cannot change the [Burst/<br />
Bracket] setting by pressing<br />
(Burst/Bracket) button after installing the camera<br />
in this unit.<br />
Underwater movie recording is available in DSC-WX1/W290/W275/W270 only.<br />
DSC-W230/W220/W215/W210 do not have that function.<br />
Installing the digital still camera in the marine pack<br />
Always be sure to turn off the power when installing or removing the<br />
camera. The lens may be damaged if the power is on.<br />
1 Press the ON/OFF (Power) button to turn off the camera.<br />
2 Install the camera in this unit. (-2)<br />
Check that the camera is placed correctly.<br />
3 Close this unit’s body and fasten the buckle. (-3)<br />
Secure this unit body, and fasten the buckles until the top and bottom latches<br />
catch.<br />
Notes<br />
When closing this unit’s body, make sure that there is no debris, sand, hair or any<br />
other foreign matter on the O-ring or in the seating groove. Water leakage may<br />
result if any foreign matter is caught in these places.<br />
Buckle position when closing this unit’s body<br />
Good example (-3)<br />
Bad example (-3)<br />
If you close the buckle as shown in -3, the buckle will be caught,<br />
making it impossible to lock this unit.<br />
Attaching the accessories<br />
Attaching the hand strap<br />
We recommend attaching the hand strap (supplied) before using this unit. (-)<br />
Attaching the diffuser<br />
We recommend attaching the diffuser when you record using flash.<br />
Align the diffuser with the front protector and press it firmly as illustrated. (-)<br />
Attaching and detaching the LCD hood<br />
How to attach (-)<br />
1 Attach the supplied strap of the LCD hood to this unit.<br />
2 Align the LCD hood with the attachment guide and press it<br />
firmly as illustrated.<br />
How to detach (-)<br />
Spread the LCD hood and detach it from the guide.<br />
Notes<br />
Be careful not to pinch the hand strap or the accessory strap when you close this<br />
unit body. A water leak may develop if they are caught in the body.<br />
Using the Marine Pack<br />
Recording<br />
1 Turn on the power. (-1)<br />
2 Press the shutter lever/shutter button to record images. (-2)<br />
<br />
<br />
<br />
<br />
<br />
<br />
<br />
<br />
<br />
<br />
<br />
<br />
<br />
Using/Setting various functions<br />
You can use the various functions of the camera installed in this unit.<br />
For DSC-WX1 users<br />
The DSC-WX1 focuses automatically without switching to Macro mode.<br />
Selecting the mode<br />
Select the REC Mode using the Mode dial on this unit.<br />
To record still images all REC Mode except for (Movie Mode)<br />
To record movies<br />
(Movie Mode)<br />
* While you are recording movies, audio cannot be recorded correctly.<br />
When you set REC mode to (Scene Selection) or (Movie Mode), you<br />
can select submode in that mode.<br />
For DSC- WX1 users<br />
Press the MENU button on this unit and select the desired mode with<br />
(Smile)<br />
or<br />
(Flash) button.<br />
For DSC-W290/W275/W270/W230/W220/W215/W210 users<br />
Press the MENU button on this unit and select the desired mode with<br />
(Macro) or<br />
(Flash) button.<br />
* We recommend that you use (Underwater) in the scene selection mode for<br />
underwater still image recording, or<br />
(Underwater) in the movie recording<br />
mode for underwater movie recording (DSC-WX1/W290/W275/W270 only).<br />
Notes<br />
Underwater movie recording is available in DSC-WX1/W290/W275/W270 only.<br />
DSC-W230/W220/W215/W210 do not have that function.<br />
Selecting the underwater white balance<br />
Adjusts the color tone in (Underwater) mode under (Scene Selection) or in<br />
(Underwater) mode under<br />
(Movie Mode).<br />
(Auto)<br />
The camera automatically adjusts color tones underwater so<br />
they appear natural.<br />
(Underwater 1)<br />
Adjusts for underwater conditions where blue is strong.<br />
(Underwater 2)<br />
Adjusts for underwater conditions where green is strong.<br />
(Flash)<br />
Adjusts for use of flash underwater.<br />
(One Push)*<br />
Adjusts the white balance depending on the light source.<br />
(One Push Set)*<br />
Memorizes the basic white color which will be used in [One<br />
Push] mode.<br />
* Only available with the DSC-WX1.<br />
Notes<br />
For DSC-WX1 users<br />
(Flash) in [Underwater White Balance] is not available.<br />
When flash is [On] the underwater white balance can only be adjusted to<br />
[Auto], [One Push], or [One Push Set].<br />
For DSC-W290/W275/W270 users<br />
(Flash) in [Underwater White Balance] is not available.<br />
[Underwater White Balance] is not available when the flash is set to [Flash<br />
On].<br />
For DSC-W230/W220/W215/W210 users<br />
If you use the flash while the underwater white balance is set to other than<br />
(Flash), [Underwater White Balance] is automatically set to<br />
(Auto).<br />
* For setting details, refer to the o<strong>per</strong>ating instructions supplied with the camera.<br />
Using the zoom (W/T) button (See illustration )<br />
Press on the W side for wide-angle. (Subject appears farther away.)<br />
Press on the T side for telephoto. (Subject appears closer.)<br />
Notes on recording<br />
If you do not record any images for a certain time, the camera turns off<br />
automatically to prevent the battery pack from running out. To use the camera<br />
again, turn on the power again. For details, refer to the o<strong>per</strong>ating instructions<br />
supplied with the camera.<br />
If you use the flash when this unit is attached, the shooting distance may shorten<br />
depending on the situation.<br />
If you use the flash underwater, the flash light may be reflected by particles in the<br />
water and appear in the image as circles of light.<br />
Reflected glare may occur depending on the shooting condition. If this happens,<br />
change the condition.<br />
You cannot o<strong>per</strong>ate the following buttons with this unit.<br />
(Burst/Bracket) button on the DSC-WX1<br />
You can use [Burst/Bracket] if you set the desired mode before installing<br />
the camera in this unit. You cannot change the [Burst/Bracket] setting after<br />
installing the camera in this unit.<br />
(Smile) button on the DSC-W290/W275/W270<br />
Playing back<br />
You can play back images on the LCD screen using the o<strong>per</strong>ation button. You<br />
cannot hear the sound.<br />
1 Turn on the power. (-1)<br />
2 Press (Playback) button. (-2)<br />
3 Select the desired image. (-3)<br />
-3 To previous image<br />
-3 To next image<br />
For details, refer to the o<strong>per</strong>ating instructions supplied with the camera.<br />
Removing the digital still camera<br />
1 Turn off the power. (-1)<br />
Be sure to turn off the power whenever installing or removing the<br />
camera. The lens may be damaged if the power is on.<br />
2 Press the top and bottom OPEN buttons together and release the<br />
buckle in the direction of the arrow to open this unit body. (-2)<br />
3 Remove the camera from this unit.<br />
When the camera has been used for a long time, the camera heats up. Turn off<br />
the power and leave for a while to cool down before removing the camera from<br />
this unit.<br />
Be careful not to drop the camera when removing it.<br />
4 Cancel (Underwater) or (Underwater).<br />
5 Set the AF Illuminator to [Auto].<br />
Notes<br />
Before opening this unit, rinse it with tap water or fresh water and then wipe the<br />
water off with a soft cloth. When opening it, be careful not to let any water from<br />
your body, hair or wetsuit cuffs drip onto the camera.<br />
Before making a dive<br />
Before recording images underwater, first take this unit to a depth of about 1 m<br />
(3.3 feet) and check that it o<strong>per</strong>ates pro<strong>per</strong>ly and that there are no leaks, then<br />
commence your dive.<br />
Install the camera in this unit before diving, and avoid opening and closing this<br />
unit while on board boats or at the seashore as much as possible. When installing<br />
the camera, do it in a place that has as low a humidity as possible.<br />
Before using this unit, make sure that no debris has been caught between the front<br />
and back halves of this unit’s body.<br />
Before using this unit, always check the number of recordable images and<br />
remaining battery life.<br />
Times that are suited for recording<br />
The most suitable time for recording images is between 10:00 AM and 2:00 PM,<br />
when the sun is directly overhead.<br />
Troubleshooting<br />
Symptom<br />
Cause/Corrective Actions<br />
There are drops of water<br />
inside this unit.<br />
There are scratches or cracks on the O-ring.<br />
Replace the O-ring with a new one.<br />
The O-ring is not set correctly.<br />
Place the O-ring evenly in the groove.<br />
The buckle is not fastened.<br />
Fasten the buckle until it clicks.<br />
<br />
<br />
<br />
<br />
<br />
<br />
The recording function<br />
does not work.<br />
The battery pack has run out.<br />
Charge the battery pack fully.<br />
The “Memory Stick Duo” media is full.<br />
Insert another “Memory Stick Duo” media or<br />
erase unneeded data from the “Memory Stick<br />
Duo” media.<br />
The write-protect tab on the “Memory Stick Duo”<br />
media is set to LOCK.<br />
Set the tab to the recording position or insert a<br />
new “Memory Stick Duo” media.<br />
The camera heats up.<br />
Leave the camera in the cool place for a while to<br />
cool down.<br />
<br />
<br />
<br />
<br />
<br />
<br />
<br />
<br />
The playback image is not<br />
displayed in the color you<br />
expected. (When recording<br />
underwater)<br />
The camera may not be set to<br />
(Underwater) or<br />
(Underwater).<br />
Check that the camera is set to<br />
(Underwater) or<br />
(Underwater).<br />
The underwater white balance may not be set<br />
correctly.<br />
Check the underwater white balance setting of the<br />
camera.<br />
<br />
<br />
<br />
<br />
Specifications<br />
Material<br />
Plastic (PC, ABS), glass<br />
Water-resistance<br />
O-ring, buckle<br />
Pressure-resistance<br />
To a depth of up to 40 m (132 feet) underwater<br />
Switches that can be externally o<strong>per</strong>ated<br />
ON/OFF (Power), Shutter, Zoom (W/T), Mode, Control, MENU, Delete, HOME<br />
(DSC-W230/W220/W215/W210 only), Playback<br />
Dimensions<br />
Approx. 148 × 112 × 89 mm (5 7/8 × 4 1/2 × 3 5/8 in.) (w/h/d)<br />
(excluding the projecting parts)<br />
Mass<br />
Approx. 480 g (1 lb 1 oz.) (marine pack only)<br />
<br />
<br />
<br />
<br />
<br />
<br />
<br />
<br />
<br />
<br />
<br />
<br />
<br />
<br />
<br />
<br />
<br />
<br />
Spacer (remove to use this unit)<br />
Entretoise (la retirer avant d’utiliser ce boîtier)<br />
Drip-proof packing<br />
Garniture pare-gouttes<br />
O-ring<br />
Joint torique 2<br />
<br />
<br />
Shutter lever<br />
(Shutter button)<br />
Manette du déclencheur<br />
(Déclencheur)<br />
Front protector<br />
Protection avant<br />
Tripod receptacle<br />
When using a tripod, use a tripod with 5.5 mm<br />
or shorter screws. This unit cannot be firmly<br />
fastened on a tripod with long screws. Doing so<br />
might damage this unit.<br />
Filetage pour pied photo<br />
Si vous utilisez un pied photo, sa vis ne doit pas<br />
dépasser 5,5 mm. Ce boîtier ne pourra pas être<br />
fixé stablement si la vis du pied photo est plus<br />
longue. De plus le boîtier peut être endommagé.<br />
ON/OFF button<br />
Touche ON/OFF<br />
Hook for hand<br />
strap<br />
Crochet pour la<br />
dragonne<br />
Front glass<br />
Vitre avant<br />
Diffuser<br />
Diffuseur<br />
Buckle<br />
Boucle<br />
OPEN button<br />
Touche OPEN<br />
LCD hood<br />
Pare-soleil de<br />
l’écran LCD<br />
Zoom (W/T) buttons<br />
Touches de zoom (W/T)<br />
Mode dial<br />
Sélecteur de<br />
mode<br />
O<strong>per</strong>ation buttons<br />
Touches d’exploitation<br />
Front attachment A (1)<br />
(For DSC-W290/W275/W270)<br />
Fixation avant A (1)<br />
(Pour les DSC-W290/W275/W270)<br />
<br />
<br />
<br />
<br />
<br />
<br />
3<br />
Detaching the shutter lever<br />
Retrait de la manette du déclencheur<br />
The shutter lever is removable.<br />
La manette du déclencheur peut être retirée.<br />
Attaching the shutter lever<br />
Fixation de la manette du déclencheur<br />
1<br />
2-<br />
<br />
<br />
Rear attachment A-1 (1)<br />
(For DSC-W290)<br />
Fixation arrière A-1 (1)<br />
(Pour le DSC-W290)<br />
Front attachment B (1)<br />
(For DSC-W230/W220/W215/W210)<br />
Fixation avant B (1)<br />
(Pour les DSC-W230/W220/W215/W210)<br />
Rear attachment B-1 (1)<br />
(For DSC-W230)<br />
Fixation arrière B-1 (1)<br />
(Pour le DSC-W230)<br />
<br />
<br />
4<br />
Waterproof Case<br />
Marine pack<br />
Boîtier étanche<br />
Caisson étanche<br />
button<br />
Touche <br />
(Flash) button<br />
Touche<br />
(Flash)<br />
MENU button<br />
Touche MENU<br />
(Macro) button<br />
Touche<br />
(Macro)<br />
(Self-timer) button<br />
Touche<br />
(Retardateur)<br />
(Playback)<br />
button<br />
Touche<br />
(Lecture)<br />
DISP (Display) button<br />
Touche DISP (Affichage)<br />
(Delete) button<br />
Touche<br />
(Suppression)<br />
English<br />
Main Feature<br />
Useable at a depth of up to 40 m (132 feet) underwater.<br />
Marine Pack <strong>MPK</strong>-<strong>WEB</strong> (referred to below as “this unit”) is exclusively for use<br />
with the <strong>Sony</strong> Digital Still Camera (referred to below as “camera”) DSC-WX1/<br />
W290/W275/W270/W230/W220/W215/W210. (Not all cameras are available in<br />
all countries or regions.)<br />
This unit is waterproof so the camera can be used in the rain, snow, at the beach,<br />
or underwater.<br />
Using this unit with the camera setting to (Underwater) or (Underwater)<br />
will enable you to record beautiful underwater images. (Underwater movie<br />
recording is available in DSC-WX1/W290/W275/W270 only. DSC-W230/W220/<br />
W215/W210 do not have that function.)<br />
Precautions<br />
When using this unit while diving, be sure to pay attention to the surrounding<br />
situation. Lack of attention may cause an accident while diving.<br />
In case a water leakage is occurred, be sure to pay attention to the surrounding<br />
situation and surface following the safety rules for diving.<br />
Do not subject the front glass to strong shock, as it may crack.<br />
Avoid opening this unit at the beach or on the water. Preparation such as<br />
installing the camera and changing the “Memory Stick Duo” media should be<br />
done in a place with low humidity and no salty air.<br />
Do not throw this unit into the water.<br />
Avoid using this unit in places with strong waves.<br />
Avoid using this unit under the following situations:<br />
in a very hot or humid place.<br />
in water hotter than 40˚C (104˚F).<br />
at tem<strong>per</strong>atures lower than 0˚C (32˚F).<br />
In these situations moisture condensation or water leakage may occur and damage<br />
this unit.<br />
Use this unit for no longer than 30 minutes at a time in tem<strong>per</strong>atures above 35˚C<br />
(95˚F).<br />
Do not leave this unit under direct sunlight in a very hot and humid place for a<br />
long <strong>per</strong>iod of time. If you cannot avoid leaving this unit under direct sunlight, be<br />
sure to cover this unit with a towel or other protection.<br />
The camera heats up if it is used inside this unit for a long time. Before removing<br />
the camera from this unit, leave this unit in the shade or other cool place for a<br />
while to cool down.<br />
When the camera overheats, it may automatically turn off or recording may<br />
malfunction. To use the camera again, leave it in the cool place for a while to cool<br />
down.<br />
A loose or nipped O-ring, sand or dirt on the O-ring may cause water leaks<br />
under water.<br />
Be sure to check the O-ring before use.<br />
For details, read the O-ring Maintenance Manual.<br />
If sun oil is on this unit, be sure to wash it off thoroughly using lukewarm<br />
water. If this unit is left with sun oil on its body, the surface of this unit may<br />
become discolored or damaged (such as cracks on the surface).<br />
Water leakage<br />
If water happens to leak in, stop exposing this unit to water immediately.<br />
If the camera gets wet, take it to the nearest <strong>Sony</strong> dealer immediately. Repair costs<br />
must be borne by the customer.<br />
Anti-fogging effect<br />
Although the front glass of this unit has been treated for anti-fogging, be sure<br />
to install the camera in this unit in a room with low-humidity room or a similar<br />
environment.<br />
Before use<br />
Before using the camera underwater, first take this unit to a depth of about<br />
1 m (3.3 feet) and check that the camera is o<strong>per</strong>ating pro<strong>per</strong>ly and that this<br />
unit is not leaking, then commence your dive.<br />
In the unlikely event that a malfunction of this unit causes damage due to<br />
water leakage, <strong>Sony</strong> does not guarantee against damages to the equipment<br />
contained in it (camera, battery pack, etc.) and the recorded contents, nor<br />
expenses entailed in the photography.<br />
<br />
<br />
O-ring and Drip-proof packing<br />
O-ring<br />
This unit uses an O-ring to maintain its water resistance. For details, refer to the<br />
separate O-ring Maintenance Manual.<br />
Impro<strong>per</strong> handling of the O-ring can result in water leakage.<br />
Drip-proof packing<br />
Do not remove or apply grease to the drip-proof packing. If the packing rises up or<br />
is nipped, this may result in water leaks.<br />
If the drip-proof packing comes off, refit it carefully so that it is not twisted.<br />
(See illustration )<br />
<br />
<br />
<br />
<br />
<br />
<br />
<br />
<br />
<br />
<br />
<br />
<br />
<br />
<br />
<br />
<br />
<br />
Rear attachment A-2 (1)<br />
(For DSC-W275/W270)<br />
Fixation arrière A-2 (1)<br />
(Pour les DSC-W275/W270)<br />
Rear attachment B-2 (1)<br />
(For DSC-W220/W215/W210)<br />
Fixation arrière B-2 (1)<br />
(Pour les DSC-W220/W215/W210)<br />
DSC-W290/W275/<br />
W270<br />
DSC-W230/W220/<br />
W215/W210<br />
DSC-W290/W275/W270<br />
DSC-W230/W220/W215/W210<br />
MENU button/<br />
(Delete) button<br />
Touche MENU/<br />
(Suppression)<br />
(Macro) button<br />
Touche<br />
(Macro)<br />
(Playback)<br />
button<br />
Touche<br />
(Lecture)<br />
(Self-timer) button<br />
Touche<br />
(Retardateur)<br />
HOME button<br />
Touche HOME<br />
(Flash) button<br />
Touche<br />
(Flash)<br />
button<br />
Touche <br />
DISP (Display) button<br />
Touche DISP (Affichage)<br />
Digital still<br />
camera/<br />
Appareil<br />
photo<br />
numérique<br />
Front<br />
attachment/<br />
Fixation<br />
avant<br />
Rear<br />
attachment/<br />
Fixation<br />
arrière<br />
DSC-WX1 C C-1<br />
DSC-W290 A A-1<br />
DSC-W275/<br />
W270<br />
A A-2<br />
DSC-W230 B B-1<br />
DSC-W220/<br />
W215/<br />
W210<br />
B B-2<br />
Front attachment C (1)<br />
(For DSC-WX1)<br />
Fixation avant C (1)<br />
(Pour les DSC-WX1)<br />
Rear attachment C-1 (1)<br />
(For DSC-WX1)<br />
Fixation arriere C-1 (1)<br />
(Pour le DSC-WX1)<br />
DSC-WX1<br />
button<br />
Touche <br />
(Flash) button<br />
Touche<br />
(Flash)<br />
MENU button<br />
Touche MENU<br />
(Smile) button<br />
Touche<br />
(Sourire)<br />
(Self-timer) button<br />
Touche<br />
(Retardateur)<br />
(Playback)<br />
button<br />
Touche<br />
(Lecture)<br />
DISP (Display) button<br />
Touche DISP (Affichage)<br />
(Delete) button<br />
Touche<br />
(Suppression)<br />
DSC-WX1<br />
<br />
Mode dial<br />
Sélecteur de mode<br />
Shutter lever<br />
(Shutter button)<br />
Manette du<br />
déclencheur<br />
(Déclencheur)<br />
ON/OFF button<br />
Touche ON/OFF<br />
Zoom button<br />
Touche de zoom<br />
Included items<br />
Waterproof case (1)<br />
Hand strap (1)<br />
LCD hood (1)<br />
Diffuser (1)<br />
Front attachment C (1)*<br />
Rear attachment C-1 (1)*<br />
*Attached to the waterproof case at purchase.<br />
Front attachment A (1)<br />
Rear attachment A-1 (1)<br />
Rear attachment A-2 (1)<br />
Front attachment B (1)<br />
Rear attachment B-1 (1)<br />
Rear attachment B-2 (1)<br />
Grease (1)<br />
O-ring (1)<br />
Spacer (1)<br />
Set of printed documentation<br />
Optional accessories<br />
O-ring kit ACC-MP105<br />
(Check for<br />
on the package at the time of purchase.)<br />
This unit allows the attachment of SEA&SEA SUNPAK CO., Ltd. underwater<br />
accessories. For details of those accessories, refer to the following website.<br />
http://www.seaandsea.co.jp/products/accessory/mpk/index.html<br />
Design and specifications are subject to change without notice.<br />
Français<br />
Caractéristiques principales<br />
Utilisable sous l’eau jusqu’à une profondeur de 40 mètres (132 pieds).<br />
Le caisson étanche <strong>MPK</strong>-<strong>WEB</strong> (appelé ci-dessous « ce boîtier ») est destiné<br />
à être utilisé exclusivement avec les appareils photo numériques <strong>Sony</strong> (appelés<br />
ci-dessous « l’appareil photo ») DSC-WX1/ W290/W275/W270/W230/W220/<br />
W215/W210. (Tous ces appareils photos numériques ne sont pas disponibles dans<br />
tous les pays ou toutes les régions.)<br />
Ce boîtier étanche <strong>per</strong>met d’utiliser l’appareil photo sous la pluie ou la neige, sur la<br />
plage ou sous l’eau.<br />
Vous pourrez faire des prises de vue magnifiques sous l’eau si vous utilisez ce<br />
boîtier avec (Sous l’eau) or (Sous l’eau). (Vous pouvez filmer sous l’eau<br />
seulement avec les DSC-WX1/W290/W275/W270. Les DSC-W230/W220/W215/<br />
W210 ne possèdent pas cette fonction.)<br />
Précautions<br />
Si vous utilisez ce boîtier pendant la plongée, faites attention à votre<br />
environnement. Un manque d’attention peut causer un accident pendant la<br />
plongée.<br />
Si de l’eau devait pénétrer dans ce boîtier, faites attention à votre environnement et<br />
remontez à la surface en respectant les règles de sécurité propres à la plongée.<br />
Ne soumettez pas la vitre avant à des chocs trop forts, car elle pourrait se briser.<br />
Evitez d’ouvrir ce boîtier sur la plage ou sur l’eau. Les préparatifs, tels que la mise<br />
en place de l’appareil photo et le remplacement du « Memory Stick Duo » doivent<br />
être effectués à l’abri de l’humidité et de l’air salin.<br />
Ne pas jeter ce boîtier dans l’eau.<br />
Evitez d’utiliser ce boîtier aux endroits exposés à de fortes vagues.<br />
Evitez d’utiliser ce boîtier dans les situations suivantes :<br />
à un endroit très chaud ou humide ;<br />
dans une eau à plus de 40˚C (104 ˚F) ;<br />
à des températures inférieures à 0˚C (32 ˚F).<br />
Dans de telles situations, ce boîtier peut être endommagé par la condensation<br />
d’humidité ou les infiltrations d’eau.<br />
Ne pas utiliser ce boîtier pendant plus de 30 minutes à une température<br />
supérieure à 35˚C (95 ˚F).<br />
Ne pas laisser ce boîtier en plein soleil à un endroit très chaud et humide pendant<br />
longtemps. Si ce boîtier doit rester longtemps exposé au soleil, veillez à le<br />
recouvrir d’une serviette ou d’un tissu quelconque.<br />
L’appareil photo devient chaud s’il est utilisé pendant un certain temps avec ce<br />
boîtier. Avant de retirer l’appareil photo de ce boîtier, laissez ce boîtier un moment<br />
à l’ombre ou à un endroit frais pour qu’il refroidisse.<br />
Lorsque l’appareil photo est trop chaud, il peut s’éteindre ou l’enregistrement peut<br />
ne pas s’effectuer normalement. Laissez l’appareil photo un moment à un endroit<br />
frais avant de le réutiliser.<br />
Une infiltration d’eau dans ce boîtier peut être due à un joint torique détendu<br />
ou coupé, à des grains de sable ou à de la poussière sur le joint torique.<br />
Veillez à bien vérifier le joint torique avant d’utiliser ce boîtier.<br />
Pour de plus amples informations, reportez-vous à la notice du joint torique.<br />
Si de l’huile solaire devait tomber sur ce boîtier, prenez soin de l’enlever avec de<br />
l’eau tiède. Si vous laissez ce boîtier avec des taches d’huile au soleil, sa surface<br />
risque de se décolorer ou d’être endommagée (elle peut se craqueler).<br />
Infiltration d’eau<br />
Si de l’eau devait pénétrer dans ce boîtier, retirez-le immédiatement de l’eau.<br />
Si l’appareil photo devait être mouillé, portez-le immédiatement au revendeur <strong>Sony</strong><br />
le plus proche. Les frais de réparation seront à la charge du client.<br />
Effet anti-buée<br />
Bien que la vitre avant de ce boîtier ait été traitée pour prévenir la formation de<br />
buée, veillez à installer l’appareil photo dans ce boîtier dans une pièce non humide<br />
ou à un endroit similaire.<br />
Avis<br />
Avant d’utiliser l’appareil photo sous l’eau et avant la plongée, mettez ce<br />
boîtier dans l’eau à une profondeur de 1 m (3,3 pieds) et assurez-vous d’une<br />
part que l’appareil photo fonctionne correctement et d’autre part que ce<br />
boîtier est bien étanche.<br />
Si une défectuosité du boîtier devait provoquer des dégâts à la suite d’une<br />
infiltration d’eau, <strong>Sony</strong> ne garantira pas les dégâts causés à l’appareil qu’il<br />
contient (appareil photo numérique, batterie, etc.) ni le contenu de la prise<br />
de vue ou les frais liés à la prise de vue.<br />
<br />
<br />
Joint torique et garniture pare-gouttes<br />
Joint torique<br />
L’étanchéité de ce boîtier est garantie par un joint torique. Pour de plus amples<br />
informations, reportez-vous à la notice séparée du joint torique.<br />
Une infiltration d’eau peut être due à une mauvaise manipulation du joint torique.<br />
Garniture pare-gouttes<br />
N’enlevez pas et n’appliquez pas de graisse sur la garniture pare-gouttes. Si la<br />
garniture ressort ou est abîmée, de l’eau risque de pénétrer dans le boîtier.<br />
Si la garniture pare-gouttes se détache, remettez-la délicatement dans la rainure sans<br />
la tordre. (Voir l’illustration )<br />
Durée de vie du joint torique et de la garniture pare-gouttes<br />
Joint torique<br />
La durée de vie du joint torique varie selon la fréquence et les conditions<br />
d’utilisation de ce boîtier. Le joint torique dure environ un an.<br />
Garniture pare-gouttes<br />
Remplacez la garniture pare-gouttes par une neuve si elle est rayée ou craquelée.<br />
Une fois le remplacement effectué, assurez-vous que le boîtier est étanche.<br />
Graisse<br />
Utilisez la graisse du tube bleu (fourni). L’emploi de la graisse du tube jaune ou<br />
de la graisse d’une autre marque peut endommager le joint torique et causer des<br />
infiltrations d’eau.<br />
Joint torique, garniture pare-gouttes et graisse<br />
Vous pouvez vous procurer un joint torique, une garniture pare-gouttes et de la<br />
graisse auprès du revendeur <strong>Sony</strong> le plus proche.<br />
Joint torique (référence : 3-080-065-0 )<br />
Garniture pare-gouttes (référence : 3-080-066-0 )<br />
Graisse (référence : 3-071-370-0 )<br />
Entretien<br />
Après une prise de vue à un endroit exposé à la brise marine, lavez soigneusement<br />
ce boîtier à l’eau douce, en laissant la boucle bien fermée, pour enlever le sel et<br />
le sable, puis essuyez-le avec un chiffon doux et sec. Il est conseillé de laisser ce<br />
boîtier dans de l’eau douce pendant 30 minutes environ. Si le caisson n’est pas bien<br />
nettoyé, le sel restant peut attaquer les deux parties métalliques et causer de la<br />
corrosion, et par la suite une infiltration d’eau.<br />
Si de l’huile solaire devait tomber sur ce boîtier, prenez soin de l’enlever avec de<br />
l’eau tiède.<br />
Essuyez l’intérieur de ce boîtier avec un chiffon doux et sec. Ne le lavez pas à l’eau.<br />
Effectuez toutes les opérations mentionnées ci-dessus chaque fois que vous utilisez<br />
ce boîtier. N’utilisez pas de solvant, comme de l’alcool, de la benzine ou du diluant<br />
pour le nettoyage, car ces substances peuvent attaquer la finition de ce boîtier.<br />
Avant de ranger ce boîtier<br />
Fixez l’entretoise fournie avec ce boîtier pour que le joint torique ne s’use pas.<br />
(Voir l’illustration )<br />
Eviter d’exposer le joint torique à la poussière.<br />
Recouvrez légèrement le joint torique de graisse et insérez-le dans la rainure, puis<br />
rangez ce boîtier à un endroit frais et bien aéré. Ne fermez pas la boucle.<br />
Evitez de ranger ce boîtier à un endroit froid, très chaud ou humide, ou à<br />
proximité de naphtaline ou de camphre. Cela pourrait l’endommager.<br />
Préparatifs<br />
Remplacement de la fixation<br />
Les opérations suivantes concernent les DSC-WX1/W230.<br />
Ne forcez pas lorsque vous remplacez la fixation.<br />
* Si vous utilisez le DSC-WX1, les points suivants sont inutiles parce que la<br />
fixation C pour le DSC-WX1 a été rattachée à ce boîtier en usine.<br />
<br />
<br />
<br />
<br />
<br />
<br />
<br />
<br />
<br />
<br />
<br />
<br />
<br />
<br />
<br />
<br />
<br />
<br />
<br />
<br />
<br />
<br />
<br />
<br />
<br />
<br />
Utilisez toujours la fixation adaptée à votre appareil photo. Si vous ne le faites pas,<br />
l’appareil photo risque d’être endommagé ou de l’eau risque de s’infiltrer dans ce<br />
boîtier.<br />
1 Ouvrez ce boîtier. (-1)<br />
Appuyez en même temps sur les touches OPEN du haut et du bas et ouvrez la<br />
boucle dans le sens de la flèche pour ouvrir les deux parties du boîtier.<br />
Remarques<br />
Faites attention de ne pas <strong>per</strong>dre l’entretoise car vous devrez la remettre dans ce<br />
boîtier avant de le ranger.<br />
2 Remplacez les fixations.<br />
Détachez la fixation avant C et la fixation arrière C-1 du DSC-WX1<br />
(-2)<br />
Saisissez la fixation avant C aux endroits indiqués par sur l’illustration et<br />
tirez-la tout droit.<br />
Appuyez légèrement avec le doigt à l’intérieur de la fixation arrière C-1 et<br />
tirez-la tout droit.<br />
Utilisez la fixation avant et la fixation arrière prévues pour votre<br />
appareil photo (-2).<br />
Les illustrations montrent la fixation avant B et la fixation arrière B-1 du DSC-<br />
W230.<br />
Appuyez fermement aux endroits indiqués par sur l’illustration.<br />
Après avoir remplacé la fixation, appuyez plusieurs fois sur les touches de ce<br />
boîtier pour vous assurer qu’elles fonctionnent.<br />
* Ne redressez pas la fixation de ce boîtier après l’avoir retirée et avant de la ranger.<br />
Elle peut être endommagée si elle est déformée lorsque vous la rangez.<br />
Préparation du joint torique et de la garniture paregouttes<br />
1 Retirez le joint torique.<br />
2 Mettez de la graisse sur le joint torique.<br />
Enlevez le sable ou la saleté présente sur le joint torique, dans la rainure du<br />
joint ou sur les deux parties du boîtier touchant le joint torique. Revêtez<br />
uniformément le joint torique d’une fine couche de graisse.<br />
3 Insérez le joint torique dans ce boîtier.<br />
4 Assurez-vous qu’il n’y a pas de sable ou saleté sur la garniture paregouttes.<br />
Remarques<br />
N’enlevez pas et n’appliquez pas de graisse sur la garniture pare-gouttes.<br />
Les deux parties de ce boîtier peuvent être rayées ou de l’eau peut s’infiltrer s’il y<br />
a du sable ou de la saleté sur le joint torique ou la garniture pare-gouttes lorsque<br />
vous fermez le couvercle.<br />
Veillez à lire la notice séparée du joint torique.<br />
Vous trouverez dans cette notice des détails importants sur le joint<br />
torique.<br />
Préparation de l’appareil photo numérique<br />
Mettez l’appareil photo dans ce boîtier dans une pièce non humide ou<br />
dans un lieu similaire.<br />
La vitre avant se couvrira de buée si vous ouvrez ou fermez ce boîtier<br />
dans un lieu chaud ou humide.<br />
Reportez-vous au mode d’emploi fourni avec l’appareil photo.<br />
1 Détachez la dragonne de l’appareil photo.<br />
2 Insérez la batterie et un « Memory Stick Duo ».<br />
La batterie doit être pleine.<br />
Le « Memory Stick Duo » doit disposer de suffisamment d’espace pour les photos<br />
ou le film que vous voulez prendre.<br />
3 Appuyez sur la touche ON/OFF (Alimentation) pour mettre l’appareil<br />
photo sous tension.<br />
4 Sélectionnez le mode REC. (-4)<br />
Pour prendre des photos numériques, sélectionnez<br />
(Sélection scène) avec le<br />
sélecteur de mode.<br />
Pour filmer, sélectionnez<br />
(Mode film) avec le sélecteur de mode.<br />
5 Sélectionnez le mode REC.<br />
Pour prendre des photos numériques sous l’eau, sélectionnez<br />
(Sous l’eau) sur<br />
l’écran LCD.<br />
Pour filmer sous l’eau, appuyez sur la touche MENU pour afficher la page de<br />
sélection de mode et sélectionnez<br />
(Sous l’eau) sur l’écran LCD. (DSC-WX1/<br />
W290/W275/W270 seulement)<br />
6 Réglez l’illuminateur AF sur [Désact].<br />
L’illuminateur AF ne peut pas être utilisé avec ce boîtier.<br />
7 Vérifiez si l’objectif et l’écran LCD sont propres.<br />
Remarques<br />
Pour choisir le mode [Rafale/Bracketing] sur le DSC-WX1, appuyez sur la touche<br />
(Rafale/Bracketing) avant d’installer l’appareil photo dans ce boîtier. Vous ne<br />
pouvez pas changer le réglage [Rafale/Bracketing] en appuyant sur la touche<br />
(Rafale/Bracketing) après avoir installé l’appareil photo dans ce boîtier.<br />
Vous pouvez filmer sous l’eau seulement avec les DSC-WX1/W290/W275/W270.<br />
Les DSC-W230/W220/W215/W210 ne possèdent pas cette fonction.<br />
Mise en place de l’appareil photo dans le caisson<br />
étanche<br />
Veillez à mettre l’appareil photo hors tension avant de l’installer ou de le<br />
sortir du boîtier. Sinon l’objectif pourrait être endommagé.<br />
1 Appuyez sur la touche ON/OFF (Alimentation) pour mettre l’appareil<br />
photo hors tension.<br />
2 Installez l’appareil photo dans ce boîtier. (-2)<br />
Assurez-vous que l’appareil photo est bien en place.<br />
3 Fermez les deux parties de ce boîtier et verrouillez la boucle. (-3)<br />
Les taquets du haut et du bas de la boucle doivent être encliquetés pour que ce<br />
boîtier soit bien fermé.<br />
Remarques<br />
Lorsque vous fermez les deux parties de ce boîtier, assurez-vous qu’il n’y a pas de<br />
saleté, sable, cheveux ou d’autres matières sur le joint torique ou dans sa rainure.<br />
Si des matières étrangères sont prises à ces endroits, de l’eau peut pénétrer dans<br />
ce boîtier.<br />
Position de la boucle lors de la fermeture des deux parties de ce<br />
boîtier<br />
Bon (-3)<br />
Mauvais (-3)<br />
Si vous fermez la boucle comme indiqué dans -3, elle se coincera et ce boîtier<br />
ne pourra pas être verrouillé.<br />
Fixation des accessoires<br />
Fixation de la dragonne<br />
Il est conseillé de fixer la dragonne (fournie) avant d’utiliser ce boîtier. (-)<br />
Fixation du diffuseur<br />
Il est conseillé de fixer le diffuseur si vous utilisez le flash pour la prise de vue.<br />
Alignez le diffuseur sur le protecteur avant et appuyez fermement dessus de la façon<br />
illustrée. (-)<br />
Fixation et retrait du pare-soleil de l’écran LCD<br />
Fixation (-)<br />
1 Fixez la lanière fournie du pare-soleil de l’écran LCD à ce boîtier.<br />
2 Alignez le pare-soleil de l’écran LCD avec le guide et appuyez<br />
fermement de la façon illustrée.<br />
Retrait (-)<br />
Ecartez le pare-soleil de l’écran LCD et détachez-le du guide.<br />
Remarques<br />
Attention de ne pas coincer la dragonne ou la lanière de l’accessoire lorsque vous<br />
fermez les deux parties de ce boîtier. Sinon le boîtier risque de laisser l’eau s’infiltrer.<br />
Utilisation du caisson étanche<br />
Enregistrement<br />
1 Mettez l’appareil photo sous tension. (-1)<br />
2 Appuyez sur la manette du déclencheur/le déclencheur pour<br />
prendre des photos. (-2)<br />
Utilisation et réglage des diverses fonctions<br />
Vous pouvez utiliser les diverses fonctions de l’appareil photo quand il est dans ce<br />
boîtier.<br />
Pour les utilisateurs du DSC-WX1<br />
Le DSC-WX1 fait automatiquement la mise au point sans passer au mode Macro.<br />
Sélection du mode<br />
Sélectionnez le mode REC avec le sélecteur de mode de ce boîtier.<br />
Pour prendre des photos Tous les modes REC sauf (Mode film)<br />
Pour filmer<br />
(Mode film)<br />
* Lorsque vous filmez, le son ne peut pas s’enregistrer correctement.<br />
Lorsque vous réglez le mode REC sur<br />
(Sélection scène) ou sur<br />
(Mode Film), vous avez le choix entre différents modes secondaires.<br />
Pour les utilisateurs du DSC-WX1<br />
Appuyez sur la touche MENU de ce boîtier et sélectionnez le mode souhaité avec<br />
la touche (Sourire) ou (Flash).<br />
Pour les utilisateurs des DSC-W290/W275/W270/W230/W220/W215/<br />
W210<br />
Appuyez sur la touche MENU de ce boîtier et sélectionnez le mode souhaité avec<br />
la touche (Macro) ou (Flash).<br />
* Il est conseillé d’utiliser (Sous l’eau) dans le mode de sélection de scène pour<br />
prendre de photos sous l’eau ou<br />
(Sous l’eau) dans le mode d’enregistrement<br />
de film pour filmer sous l’eau (DSC-WX1/W290/W275/W270 seulement).<br />
Remarques<br />
Vous pouvez filmer sous l’eau seulement avec les DSC-WX1/W290/W275/W270.<br />
Les DSC-W230/W220/W215/W210 ne possèdent pas cette fonction.<br />
(Suite à la page arrière)
Français<br />
(Suite de la page avant)<br />
Sélection de la balance des blancs sous l’eau<br />
Permet de régler les teintes des couleurs dans le mode<br />
(Sous l’eau) de<br />
(Sélection scène) ou dans le mode (Sous l’eau) de (Mode film).<br />
(Auto)<br />
L’appareil photo ajuste automatiquement les teintes des<br />
couleurs pour qu’elles paraissent plus naturelles.<br />
(Sous l’eau 1)<br />
Ajuste la balance des blancs lorsque le bleu prédomine.<br />
(Sous l’eau 2)<br />
Ajuste la balance des blancs lorsque le vert prédomine.<br />
(Flash)<br />
Ajuste la balance des blancs pour la prise de vue sous l’eau<br />
au flash.<br />
(Press. Uniq)*<br />
Ajuste la balance des blancs en fonction de la source<br />
lumineuse.<br />
(Rég pres uniq)*<br />
Mémorise la couleur blanche de base qui sera utilisée en<br />
mode [Press. Uniq].<br />
* Disponible seulement avec le DSC-WX1.<br />
Remarques<br />
Pour les utilisateurs du DSC-WX1<br />
(Flash) dans [Balance blanc sous l’eau] n’est pas disponible.<br />
Lorsque le flash est [Activé] la balance des blancs sous l’eau peut être réglée<br />
seulement sur [Auto], [Press. Uniq] ou [Rég pres uniq].<br />
Pour les utilisateurs des DSC-W290/W275/W270<br />
(Flash) dans [Balance blanc sous l’eau] n’est pas disponible.<br />
[Balance blanc sous l’eau] n’est pas disponible lorsque le flash est réglé sur<br />
[Flash activé].<br />
Pour les utilisateurs des DSC-W230/W220/W215/W210<br />
Si vous utilisez le flash lorsque la balance des blancs sous l’eau est réglée<br />
sur autre chose que<br />
(Flash), [Balance blanc sous l’eau] se règle<br />
automatiquement sur<br />
(Auto).<br />
* Pour le détail sur les réglages, reportez-vous au mode d’emploi fourni avec<br />
l’appareil photo.<br />
Utilisation du bouton de zoom (W/T) (Voir l’illustration )<br />
Appuyez sur le côté W pour un zoom arrière. (Le sujet semble s’éloigner.)<br />
Appuyez sur le côté T pour un zoom avant. (Le sujet semble se rapprocher.)<br />
Remarques sur l’enregistrement<br />
Si vous ne prenez pas de photos ou ne filmez pas pendant un certain temps,<br />
l’appareil photo se mettra de lui-même hors tension pour préserver la batterie.<br />
Pour utiliser de nouveau l’appareil photo, remettez-le sous tension. Pour plus<br />
d’informations, reportez-vous au mode d’emploi fourni avec l’appareil photo.<br />
Si vous utilisez le flash quand l’appareil photo est dans ce boîtier, la distance de<br />
prise de vue peut être plus courte dans certaines situations.<br />
Si vous utilisez le flash sous l’eau, la lumière du flash peut être réfléchie par les<br />
particules présentes dans l’eau et apparaître sur la photo sous forme de cercles de<br />
lumière.<br />
Dans certaines situations, des reflets seront visibles lors de la prise de vue. Dans ce<br />
cas, changez de position.<br />
Vous ne pouvez pas utiliser les touches suivantes avec ce boîtier.<br />
Touche<br />
(Rafale/Bracketing) sur le DSC-WX1<br />
Vous pouvez utiliser [Rafale/Bracketing] si vous choisissez le mode souhaité<br />
avant d’installer l’appareil photo dans ce boîtier. Vous ne pouvez pas changer le<br />
réglage [Rafale/Bracketing] après avoir installé l’appareil photo dans ce boîtier.<br />
Touche<br />
(Sourire) sur les DSC-W290/W275/W270<br />
Lecture<br />
Vous pouvez voir les images sur l’écran LCD à l’aide de la touche d’exploitation. Le<br />
son par contre n’est pas audible.<br />
1 Mettez l’appareil photo sous tension. (-1)<br />
2 Appuyez sur la touche (Lecture). (-2)<br />
3 Sélectionnez l’image souhaitée. (-3)<br />
-3 Pour voir l’image précédente<br />
-3 Pour voir l’image suivante<br />
Pour plus d’informations, reportez-vous au mode d’emploi fourni avec l’appareil<br />
photo.<br />
Retrait de l’appareil photo numérique<br />
1 Mettez l’appareil photo hors tension. (-1)<br />
Veillez à mettre l’appareil photo hors tension avant de l’installer ou<br />
de le sortir du boîtier. Sinon l’objectif pourrait être endommagé.<br />
2 Appuyez en même temps sur les touches OPEN du haut et du bas <br />
et ouvrez la boucle dans le sens de la flèche pour ouvrir les deux<br />
parties du boîtier. (-2)<br />
3 Retirez l’appareil photo du boîtier.<br />
L’appareil photo devient chaud si vous l’utilisez longtemps. Dans ce cas, mettez<br />
l’appareil photo hors tension et laissez le refroidir avant de le retirer du boîtier.<br />
Faites attention à ne pas laisser tomber l’appareil photo lorsque vous<br />
le retirez.<br />
4 Annulez (Sous l’eau) ou (Sous l’eau).<br />
5 Réglez l’illuminateur AF sur [Auto].<br />
Remarques<br />
Avant d’ouvrir ce boîtier, rincez-le à l’eau du robinet ou à l’eau fraîche et séchez-le<br />
avec un chiffon doux. Lorsque vous ouvrez ce boîtier, séchez-vous, vos cheveux ou<br />
votre vêtement pour ne pas risquer de mouiller l’appareil photo.<br />
Avant la plongée<br />
Avant d’utiliser l’appareil photo sous l’eau et avant la plongée, mettez ce boîtier<br />
dans l’eau à une profondeur de 1 m (3,3 pieds) et assurez-vous d’une part que<br />
l’appareil photo fonctionne correctement et d’autre part que ce boîtier est bien<br />
étanche.<br />
Installez l’appareil photo dans ce boîtier avant la plongée et évitez si possible<br />
d’ouvrir et de fermer ce boîtier à bord d’un bateau ou sur la plage. Lorsque vous<br />
installez l’appareil photo, choisissez un endroit qui n’est pas exposé à l’humidité si<br />
possible.<br />
Avant d’utiliser ce boîtier, assurez-vous qu’aucune saleté n’est prise entre les deux<br />
parties avant et arrière de ce boîtier.<br />
Avant d’utiliser ce boîtier, vérifiez toujours la capacité d’enregistrement de la carte<br />
et l’autonomie de la batterie.<br />
Heures les mieux adaptées à la prise de vue<br />
Les heures les mieux adaptées à la prise de vue sont les heures comprises entre 10:00<br />
du matin et 2:00 de l’après-midi, c’est-à-dire quand le soleil est au zénith.<br />
Résolution de problèmes<br />
Symptôme<br />
Cause/Mesures à prendre<br />
Il y a des gouttelettes d’eau<br />
dans ce boîtier.<br />
Le joint torique présente des craquelures ou des<br />
rayures.<br />
Remplacez le joint torique par un neuf.<br />
Le joint torique n’a pas été mis en place<br />
correctement.<br />
Placez le joint torique uniformément dans la<br />
rainure.<br />
La boucle n’est pas verrouillée.<br />
Fermez la boucle de sorte qu’elle s’encliquette.<br />
<br />
<br />
<br />
<br />
<br />
<br />
<br />
<br />
<br />
<br />
<br />
<br />
<br />
<br />
<br />
<br />
<br />
<br />
<br />
<br />
<br />
<br />
Grasa<br />
Utilice la grasa del tubo azul (suministrado). La utilización de la grasa del<br />
tubo amarillo o la grasa de otros fabricantes dañaría la junta tórica, y causaría<br />
infiltraciones de agua.<br />
Junta tórica, empaquetadura a prueba de goteo, y grasa<br />
Usted podrá adquirir la junta tórica, la empaquetadura a prueba de goteo, y la grasa<br />
en el distribuidor <strong>Sony</strong> más próximo.<br />
Junta tórica (Núm. de modelo 3-080-065-0 )<br />
Empaquetadura a prueba de goteo (Núm. de modelo 3-080-066-0 )<br />
Grasa (Núm. de modelo 3-071-370-0 )<br />
Mantenimiento<br />
Después de haber grabado en un lugar con brisa del mar, lave bien esta unidad<br />
con agua dulce, con la hebilla abrochada para eliminar la sal y la arena, y después<br />
frótela con un paño suave y seco. Se le recomienda que sumerja esta unidad en<br />
agua dulce durante unos 30 minutos. Si la dejase con sal, las partes metálicas<br />
podrían dañar u oxidarse y provocar la infiltración de agua.<br />
Si esta unidad entra en contacto con aceite bronceador, lávela bien con agua<br />
cálida.<br />
Frote el interior de esta unidad con un paño suave y seco. No la lave con agua.<br />
Cerciórese de realizar el mantenimiento indicado arriba cada vez que utilice esta<br />
unidad. No utilice ningún tipo de disolvente, como alcohol, bencina, ni diluyente<br />
de pintura para la limpieza, ya que podría dañar el acabado de la su<strong>per</strong>ficie de esta<br />
unidad.<br />
Para almacenar esta unidad<br />
Fije el espaciador suministrado con esta unidad para evitar el desgaste de la junta<br />
tórica. (Consulte la ilustración .)<br />
Evite que se acumule polvo en la junta tórica.<br />
Aplique una ligera capa de grasa a la junta tórica e inserte ésta en la ranura de<br />
asiento, y después guarde esta unidad en un lugar fresco y bien ventilado. No<br />
abroche la hebilla.<br />
Evite almacenar esta unidad en un lugar frío, muy cálido o húmedo, o junto con<br />
naftalina o alcanfor, ya que en estas condiciones podría dañarse esta unidad.<br />
Preparación<br />
Reemplazo del acoplamiento<br />
Los procedimientos siguientes se explican utilizando la DSC-WX1/W230.<br />
No utilice fuerza excesiva cuando reemplace el acoplamiento.<br />
* Si está utilizando la DSC-WX1, no se requerirán los pasos siguientes porque<br />
el acoplamiento C para la DSC-WX1 ya está fijado a esta unidad en el<br />
momento de su adquisición.<br />
Utilice siempre el acoplamiento correcto para su cámara. La utilización de un<br />
acoplamiento erróneo podría dañar la cámara o hacer que se infiltrase agua en esta<br />
unidad.<br />
1 Abra esta unidad. (-1)<br />
Presione juntos los botones OPEN su<strong>per</strong>ior e inferior y suelte la hebilla en el<br />
sentido de la flecha para abrir el cuerpo de esta unidad.<br />
Notas<br />
Tenga cuidado de no <strong>per</strong>der el espaciador porque lo necesitará para guardar esta<br />
unidad.<br />
2 Reemplace los acoplamientos.<br />
Separe el acoplamiento frontal C y el acoplamiento posterior C-1 de la<br />
DSC-WX1 (-2).<br />
Sujete el acoplamiento frontal C por las partes marcadas con en la<br />
ilustración y levántelo directamente hacia afuera.<br />
Presione ligeramente con su dedo la pared interior del acoplamiento posterior<br />
C-1 y levántelo directamente hacia afuera.<br />
Utilice el acoplamiento frontal y el acoplamiento posterior designados<br />
para su cámara (-2).<br />
En la ilustración se muestran el acoplamiento frontal B y el acoplamiento<br />
posterior B-1 de la DSC-W230.<br />
Presione firmemente los puntos marcados con en la ilustración.<br />
Después de reemplazar el acoplamiento, pulse varias veces los botones de esta<br />
unidad para verificar su o<strong>per</strong>ación.<br />
* Después de separar el acoplamiento de esta unidad, no deberá enderezarse antes<br />
de guardarlo. Podría dañarse si lo guardase estando deformado.<br />
Preparación de la junta tórica y la empaquetadura a<br />
prueba de goteo<br />
1 Quite la junta tórica.<br />
2 Recubra la junta tórica con grasa.<br />
Limpie la arena y la suciedad de la junta tórica, de la ranura de asiento, o del<br />
cuerpo de esta unidad donde toque la junta tórica. Recubra la junta tórica con<br />
una capa fina y uniforme de grasa.<br />
3 Fije la junta tórica a esta unidad.<br />
4 Verifique que no haya arena ni suciedad en la empaquetadura a<br />
prueba de goteo.<br />
Notas<br />
No quite ni aplique grasa a la empaquetadura a prueba de goteo.<br />
El cuerpo de esta unidad podría rayarse o podría infiltrarse agua si la cubierta se<br />
cierra con arena o suciedad en la junta tórica o en la empaquetadura a prueba de<br />
goteo.<br />
Cerciórese de leer el Manual de instrucciones separado de la junta tórica.<br />
En este manual se describen los detalles importantes en el manejo de la<br />
junta tórica.<br />
Preparación de la cámara fotográfica digital<br />
Instale la cámara en esta unidad en una sala o en un entorno similar con<br />
poca humedad.<br />
Si abriese o cerrase esta unidad en lugares cálidos o húmedos, se podría<br />
empañar el vidrio frontal.<br />
Consulte el manual de instrucciones suministrado con la cámara.<br />
1 Quite la correa de la cámara.<br />
2 Inserte la batería y el medio “Memory Stick Duo”.<br />
Cerciórese de utilizar una batería completamente cargada.<br />
Cerciórese de que el medio “Memory Stick Duo” disponga de espacio suficiente<br />
para grabar imágenes.<br />
3 Pulse el botón ON/OFF (alimentación) para encender la cámara.<br />
4 Seleccione el modo REC. (-4)<br />
Para grabar imágenes digitales, seleccione<br />
(Selección escena) con el dial de<br />
modo.<br />
Para grabar películas, seleccione<br />
(Modo película) con el dial de modo.<br />
5 Seleccione el modo en el modo REC.<br />
Para grabar imágenes digitales bajo el agua, seleccione<br />
(Submarino) en la<br />
pantalla de cristal líquido.<br />
Para grabar películas bajo el agua, pulse el botón MENU para hacer que se<br />
visualice la pantalla de selección de modo y seleccione<br />
(Submarino) en la<br />
pantalla de cristal líquido. (DSC-WX1/W290/W275/W270 solamente)<br />
6 Ajuste el iluminador de AF a [Desact].<br />
El iluminador de AF no podrá utilizarse con esta unidad.<br />
7 Compruebe que no haya suciedad en el objetivo ni en la pantalla de<br />
cristal líquido.<br />
Notas<br />
Para ajustar el modo [Ráfaga/Variación] en la DSC-WX1, pulse el botón<br />
(Ráfaga/Variación) antes de instalar la cámara en esta unidad. Usted no podrá<br />
cambiar el ajuste de [Ráfaga/Variación] pulsando el botón<br />
(Ráfaga/Variación)<br />
después de haber instalado la cámara en esta unidad.<br />
La grabación de películas bajo el agua solamente será posible con la DSC-WX1/<br />
W290/W275/W270. La DSC-W230/W220/W215/W210 no posee tal función.<br />
Instalación de la cámara fotográfica digital en esta<br />
unidad<br />
Cerciórese de desconectar siempre la alimentación antes de instalar o<br />
extraer la cámara. El objetivo podría dañarse si la alimentación estuviese<br />
conectada.<br />
1 Pulse el botón ON/OFF (alimentación) para apagar la cámara.<br />
2 Instale la cámara en esta unidad. (-2)<br />
Compruebe que la cámara haya quedado correctamente colocada.<br />
3 Cierre el cuerpo de esta unidad y abroche la hebilla. (-3)<br />
Asegure el cuerpo de esta unidad, y abroche la hebilla hasta que los hasta que los<br />
seguros su<strong>per</strong>ior e inferior queden trabados.<br />
Notas<br />
Cuando cierre el cuerpo de esta unidad, cerciórese de que no haya restos, arena,<br />
pelo, ni otras materias extrañas en la junta tórica ni en la ranura de asiento. Si<br />
cualquier materia extraña quedase atrapada en estos lugares, podría producirse la<br />
infiltración de agua.<br />
Posición de la hebilla cuando se cierra el cuerpo de la unidad<br />
Buen ejemplo (-3)<br />
Mal ejemplo (-3)<br />
Si abrochase la hebilla como se muestra en -3, ésta se pillaría, imposibilitando<br />
el cierre de esta unidad.<br />
Colocación de los accesorios<br />
Colocación de la correa de mano<br />
Se recomienda colocar la correa de mano (suministrada) antes de utilizar esta<br />
unidad. (-)<br />
Colocación del difusor<br />
Se recomienda colocar el difusor cuando se vaya a grabar utilizando el flash.<br />
Alinee el difusor con el protector frontal y presiónelo firmemente como se muestra<br />
en la ilustración. (-)<br />
Colocación y extracción de la cubierta de la pantalla de cristal<br />
líquido<br />
Forma de colocar (-)<br />
1 Fije la correa suministrada de la cubierta de la pantalla de cristal<br />
líquido a esta unidad.<br />
2 Alinee la cubierta de la pantalla de cristal líquido con la guía del<br />
acoplamiento y presiónela firmemente como se muestra en la<br />
ilustración.<br />
Forma de extraer (-)<br />
Despliegue la cubierta de la pantalla de cristal líquido y extráigala de la guía.<br />
<br />
<br />
<br />
<br />
<br />
<br />
<br />
<br />
<br />
<br />
<br />
<br />
<br />
Notas<br />
Tenga cuidado de no pillar la correa de mano ni la correa de accesorios cuando<br />
cierre el cuerpo de esta unidad. Si quedasen pilladas en el cuerpo, podría producirse<br />
infiltración de agua.<br />
Utilización de esta unidad<br />
Grabación<br />
1 Conecte la alimentación. (-1)<br />
2 Para grabar imágenes, pulse el botón/palanca del disparador. (-2)<br />
Utilización/ajuste de varias funciones<br />
Usted podrá utilizar varias funciones de la cámara instalada en esta unidad.<br />
Para los usuarios de la DSC-WX1<br />
La DSC-WX1 enfoca automáticamente sin cambiar al modo de macro.<br />
Selección del modo<br />
Seleccione el modo REC utilizando el dial de modo de esta unidad.<br />
Para grabar imágenes fijas<br />
todos los modos de REC excepto para<br />
(Modo película)<br />
Para grabar películas<br />
(Modo película)<br />
* Durante la grabación de películas, el sonido no podrá grabarse correctamente.<br />
Cuando ajuste el modo de REC a (Selección escena) o (Modo<br />
película), podrá seleccionar un modo secundario de tal modo.<br />
Para los usuarios de la DSC-WX1<br />
Pulse el botón MENU de esta unidad y seleccione el modo deseado con el botón<br />
(Sonrisa) o<br />
(Flash).<br />
Para los usuarios de la DSC-W290/W275/W270/W230/W220/W215/W210<br />
Pulse el botón MENU de esta unidad y seleccione el modo deseado con el botón<br />
(Macro) o<br />
(Flash).<br />
* Le recomendamos que utilice (Submarino) en el modo de selección de<br />
escena para grabación de imágenes fijas bajo el agua, o<br />
(Submarino) en el<br />
modo de grabación de películas para grabar películas bajo el agua (DSC-WX1/<br />
W290/W275/W270 solamente).<br />
Notas<br />
La grabación de películas bajo el agua solamente será posible con la DSC-WX1/<br />
W290/W275/W270. La DSC-W230/W220/W215/W210 no posee tal función.<br />
Selección del balance blanco submarino<br />
Ajusta el tono de color en el modo (Submarino) bajo (Selección escena) o<br />
en el modo (Submarino) bajo (Modo película).<br />
(Auto)<br />
La cámara ajusta automáticamente los tonos de color bajo<br />
el agua de forma que aparezcan naturales.<br />
(Submarino 1)<br />
Ajusta para las condiciones bajo el agua donde el azul sea<br />
intenso.<br />
(Submarino 2)<br />
Ajusta para las condiciones bajo el agua donde el verde<br />
sea intenso.<br />
(Flash)<br />
Ajusta para utilizar el flash bajo el agua.<br />
(Una pulsación)*<br />
Ajusta el balance blanco dependiendo de la fuente de<br />
iluminación.<br />
(Config 1 puls)*<br />
Memoriza el color blanco básico que se utilizará en el<br />
modo [Una pulsación].<br />
* Disponible solamente con la DSC-WX1.<br />
Notas<br />
Para los usuarios de la DSC-WX1<br />
(Flash) en [Balance Blanco submarino] no está disponible.<br />
Cuando el flash esté [Activado] el balance blanco submarino solamente podrá<br />
ajustarse a [Auto], [Una pulsación], o [Config 1 puls].<br />
Para los usuarios de la DSC-W290/W275/W270<br />
(Flash) en [Balance blanco submarino] no está disponible.<br />
[Balance blanco submarino] no estará disponible cuando el flash esté ajustado<br />
a [Flash activado].<br />
Para los usuarios de la DSC-W230/W220/W215/W210<br />
Si usted utiliza el flash mientras el balance blanco submarino esté en un<br />
ajuste que no sea<br />
(Flash), [Balance blanco submarino] se ajustará<br />
automáticamente a<br />
(Auto).<br />
* Con respecto a los detalles sobre el ajuste, consulte el manual de instrucciones<br />
suministrado con la cámara.<br />
Utilización del botón (W/T) del zoom (Consulte la ilustración .)<br />
Pulse el lado W para gran angular. (El motivo aparecerá más alejado.)<br />
Pulse el lado T para telefoto. (El motivo aparecerá más cerca.)<br />
Notas sobre la grabación<br />
Si no graba ninguna imagen durante cierto tiempo, la cámara se apagará<br />
automáticamente para evitar que se agote la batería. Para volver a utilizar la<br />
cámara, conecte de nuevo la alimentación. Con respecto a los detalles, consulte el<br />
manual de instrucciones suministrado con la cámara.<br />
Si utiliza el flash cuando esta unidad esté instalada, la distancia de toma puede<br />
acortarse dependiendo de la situación.<br />
Si utiliza el flash bajo el agua, la luz del flash puede reflejarse en partículas del<br />
agua y puede aparecer en la imagen como círculos de luz.<br />
Dependiendo de la condición de toma de imágenes, es posible que se produzcan<br />
reflejos. Cuando suceda esto, cambie la condición.<br />
Usted no podrá accionar los botones siguientes con esta unidad.<br />
Botón (Ráfaga/Variación) con la DSC-WX1<br />
Usted no podrá utilizar [Ráfaga/Variación] si desea ajusta el modo deseado antes<br />
de instalar la cámara en esta unidad. Usted no podrá cambiar el ajuste de [Ráfaga/<br />
Variación] después de haber instalado la cámara en esta unidad.<br />
Botón<br />
(Sonrisa) de la DSC-W290/W275/W270<br />
Reproducción<br />
Usted podrá reproducir imágenes en la pantalla de cristal líquido utilizando el botón<br />
de o<strong>per</strong>ación. No podrá oír el sonido.<br />
1 Conecte la alimentación. (-1)<br />
2 Pulse el botón (reproducción). (-2)<br />
3 Seleccione la imagen deseada. (-3)<br />
-3 Para la imagen anterior<br />
-3 Para la imagen siguiente<br />
Con respecto a los detalles, consulte el manual de instrucciones suministrado<br />
con la cámara.<br />
Extracción de la cámara fotográfica digital<br />
1 Desconecte la alimentación. (-1)<br />
Cerciórese de desconectar la alimentación antes de instalar o extraer<br />
la cámara. El objetivo podría dañarse si la alimentación estuviese<br />
conectada.<br />
2 Presione juntos los botones OPEN su<strong>per</strong>ior e inferior y suelte<br />
la hebilla en el sentido de la flecha para abrir el cuerpo de esta<br />
unidad. (-2)<br />
3 Extraiga la cámara de esta unidad.<br />
La cámara se calentará cuando se utilice durante mucho tiempo. Desconecte<br />
la alimentación y deje que la cámara se enfríe durante cierto tiempo antes de<br />
extraerla de esta unidad.<br />
Tenga cuidado de no dejar caer la cámara cuando la extraiga.<br />
4 Cancele (Submarino) o (Submarino).<br />
5 Ajuste el iluminador de AF a [Auto].<br />
Notas<br />
Antes de abrir esta unidad, lávela con agua corriente y seque el agua con un paño<br />
suave. Cuando la abra, tenga cuidado para no <strong>per</strong>mitir que entre agua de su cuerpo,<br />
pelo, ni gotas de agua de las mangas de su traje de submarinista en la cámara.<br />
Antes de bucear<br />
Antes de grabar imágenes bajo el agua, sumerja esta unidad a una profundidad de<br />
aproximadamente 1 metro y compruebe que funcione adecuadamente y que no<br />
haya infiltraciones de agua, y después comience su buceo.<br />
Instale la cámara en esta unidad antes de bucear, y evite en lo posible abrir y<br />
cerrar la unidad mientras se encuentre a bordo de embarcaciones o en la playa.<br />
Cuando instale la cámara, hágalo en un lugar que tenga la menor humedad<br />
posible.<br />
Antes de utilizar esta unidad, cerciórese de que no haya restos pillados entre las<br />
mitades frontal y posterior del cuerpo de esta unidad.<br />
Antes de utilizar esta unidad, compruebe siempre el número de imágenes que<br />
pueden grabarse y la duración restante de la batería.<br />
Horas adecuadas para grabar<br />
El tiempo más adecuado para grabar imágenes es entre las 10:00 AM y las 2:00 PM,<br />
cuando el sol se encuentra directamente sobre la cabeza.<br />
Solución de problemas<br />
Síntoma<br />
Causa/Soluciones<br />
Hay gotas de agua en el<br />
interior de esta unidad.<br />
La junta tórica está rayada o rajada.<br />
Reemplace la junta tórica por otra nueva.<br />
La junta tórica no está correctamente colocada.<br />
Coloque uniformemente la junta tórica en la<br />
ranura.<br />
La hebilla no está abrochada.<br />
Abroche la hebilla hasta que chasquee.<br />
<br />
<br />
<br />
<br />
<br />
<br />
La función de grabación no<br />
trabaja.<br />
La batería está agotada.<br />
Cargue completamente la batería.<br />
El medio “Memory Stick Duo” está lleno.<br />
Inserte otro medio “Memory Stick Duo” o borre<br />
datos innecesarios del medio “Memory Stick Duo”.<br />
La lengüeta de protección contra escritura del medio<br />
“Memory Stick Duo” está puesta en LOCK.<br />
Ponga la lengüeta en la posición para grabación o<br />
inserte un nuevo medio “Memory Stick Duo”.<br />
La cámara se ha calentado.<br />
Deje la cámara en un lugar fresco durante cierto<br />
tiempo para que se enfríe.<br />
<br />
<br />
<br />
<br />
<br />
<br />
<br />
<br />
<br />
<br />
<br />
<br />
<br />
<br />
<br />
<br />
<br />
<br />
<br />
<br />
<br />
<br />
<br />
<br />
<br />
<br />
Symptôme<br />
Cause/Mesures à prendre<br />
La prise de vue n’est pas<br />
possible.<br />
La batterie est épuisée.<br />
Rechargez complètement la batterie.<br />
Le « Memory Stick Duo » est plein.<br />
Insérez un autre « Memory Stick Duo » ou effacez<br />
les données inutiles du « Memory Stick Duo ».<br />
L’onglet de protection du « Memory Stick Duo » est<br />
en position LOCK.<br />
Mettez l’onglet en position d’enregistrement ou<br />
insérez un nouveau « Memory Stick Duo ».<br />
L’appareil photo est chaud.<br />
Laissez l’appareil photo refroidir en le mettant un<br />
instant à un endroit frais.<br />
<br />
<br />
<br />
<br />
<br />
<br />
<br />
<br />
Lors de la lecture, l’image<br />
n’a pas les couleurs<br />
attendues. (Lors de la prise<br />
de vue sous l’eau)<br />
L’appareil photo n’est peut-être pas réglé sur<br />
(Sous l’eau) ou<br />
(Sous l’eau).<br />
Assurez-vous que l’appareil photo est réglé sur<br />
(Sous l’eau) ou<br />
(Sous l’eau).<br />
La balance des blancs sous l’eau n’est pas réglée<br />
correctement.<br />
Vérifiez le réglage de la balance des blancs sous<br />
l’eau de l’appareil photo.<br />
<br />
<br />
<br />
<br />
Spécifications<br />
Matériau<br />
Plastique (PC, ABS), verre<br />
Étanchéité<br />
Joint torique, boucle<br />
Résistance à la pression<br />
Jusqu’à 40 mètres (132 pieds) de profondeur d’eau.<br />
Commutateurs pouvant être actionnés de l’extérieur<br />
ON/OFF (Alimentation), Déclencheur, Zoom (W/T), Mode, Commande,<br />
MENU, Suppression, HOME (DSC-W230/W220/W215/W210 seulement),<br />
Lecture<br />
Dimensions<br />
Environ 148 × 112 × 89 mm (5 7/8 × 4 1/2 × 3 5/8 po.) (l/h/p)<br />
(parties saillantes non comprises)<br />
Poids<br />
Environ 480 g (1 li 1 oz) (caisson étanche seulement)<br />
Articles inclus<br />
Boîtier étanche (1)<br />
Dragonne (1)<br />
Pare-soleil de l’écran LCD (1)<br />
Diffuseur (1)<br />
Fixation avant C (1)*<br />
Fixation arrière C-1 (1)*<br />
*Rattaché au boîtier étanche lors de l’achat.<br />
Fixation avant A (1)<br />
Fixation arrière A-1 (1)<br />
Fixation arrière A-2 (1)<br />
Fixation avant B (1)<br />
Fixation arrière B-1 (1)<br />
Fixation arrière B-2 (1)<br />
Graisse (1)<br />
Joint torique (1)<br />
Entretoise (1)<br />
Jeu de documents imprimés<br />
Accessoires en option<br />
Kit de joint torique ACC-MP105<br />
(S’assurer de la présence de<br />
sur l’emballage lors de l’achat.)<br />
Ce boîtier <strong>per</strong>met de fixer les accessoires sous-marins SEA&SEA SUNPAK<br />
CO., Ltd. Pour de plus amples informations sur ces accessoires, consultez le site<br />
suivant.<br />
http://www.seaandsea.co.jp/products/accessory/mpk/index.html<br />
La conception et les spécifications peuvent être modifiées sans préavis.<br />
Español<br />
Características principales<br />
Utilizable hasta una profundidad de 40 metros bajo el agua.<br />
El portacámara subacuático <strong>MPK</strong>-<strong>WEB</strong> (en adelante “esta unidad”) es para<br />
utilizarse exclusivamente con la cámara fotográfica digital (en adelante “cámara”)<br />
DSC-WX1/W290/W275/W270/W230/W220/W215/W210 <strong>Sony</strong>. (No todas las<br />
cámaras están disponibles en todos los países o regiones.)<br />
Esta unidad es resistente al agua, lo que <strong>per</strong>mite utilizar la cámara bajo la lluvia,<br />
nieve, en la playa, o bajo el agua.<br />
Utilizando esta unidad con la cámara ajustada a<br />
(Submarino) o<br />
(Submarino) podrá tomar hermosas imágenes bajo el agua. (La grabación<br />
de películas bajo el agua solamente será posible con la DSC-WX1/W290/W275/<br />
W270. La DSC-W230/W220/W215/W210 no posee tal función.)<br />
Precauciones<br />
Cuando utilice esta unidad mientras bucee, preste atención a la situación<br />
circundante. La falta de atención puede causar un accidente durante el buceo.<br />
En caso de producirse una infiltración de agua, preste atención a la situación<br />
circundante y emerga siguiendo las normas de seguridad para buceo.<br />
No someta el vidrio frontal a golpes fuertes, ya que podría rajarse.<br />
Evite abrir esta unidad en la playa o cerca del agua. Los preparativos, tales como<br />
la instalación de la cámara y el cambio de medio “Memory Stick Duo” deberán<br />
realizarse en un lugar con poca humedad y sin aire salado.<br />
No arroje esta unidad al agua.<br />
Evite utilizar esta unidad en lugares con mucho oleaje.<br />
Evite utilizar esta unidad en las situaciones siguientes:<br />
en un lugar muy cálido o húmedo.<br />
en agua con tem<strong>per</strong>atura su<strong>per</strong>ior a 40 ˚C<br />
a tem<strong>per</strong>aturas inferiores a 0 ˚C<br />
En estas situaciones podría condensarse humedad o infiltrarse agua, y esta unidad<br />
podría dañarse.<br />
Utilice esta unidad durante no más de 30 minutos cada vez a tem<strong>per</strong>aturas<br />
su<strong>per</strong>iores a 35 ˚C<br />
No deje esta unidad bajo la luz solar directa en un lugar muy cálido y húmedo<br />
durante mucho tiempo. Si no puede evitar dejar esta unidad bajo la luz solar<br />
directa, cerciórese de cubrirla con una toalla u otro tipo de material protector.<br />
La cámara se calentará cuando se utilice durante mucho tiempo dentro de esta<br />
unidad. Antes de extraer la cámara de esta unidad, deje esta unidad a la sombra o<br />
en otro lugar fresco durante cierto tiempo para que se enfríe.<br />
Cuando la cámara se recaliente, puede apagarse automáticamente o la grabación<br />
puede funcionar mal. Para volver a utilizar la cámara, déjela en un lugar fresco<br />
durante cierto tiempo para que se enfríe.<br />
Una junta tórica floja o roída, o arena o suciedad en la junta tórica pueden<br />
causar infiltraciones de agua al sumergir esta unidad.<br />
Cerciórese de comprobar la junta tórica antes de la utilización.<br />
Con respecto a los detalles, lea el Manual de instrucciones de la junta tórica.<br />
Si esta unidad entra en contacto con aceite bronceador, lávela bien con agua<br />
cálida. Si dejase la unidad con aceite bronceador en el cuerpo de la misma,<br />
su su<strong>per</strong>ficie podría decolorar o dañarse (como, por ejemplo, rajas en la<br />
su<strong>per</strong>ficie).<br />
Infiltración de agua<br />
Si se infiltra agua, deje inmediatamente de exponer esta unidad al agua.<br />
Si la cámara se moja, llévela inmediatamente a su proveedor <strong>Sony</strong> más próximo. El<br />
coste de las reparaciones tendrá que abonarlo el usuario.<br />
Efecto de desempañamiento<br />
Aunque el vidrio frontal de esta unidad ha sido tratado para desempañamiento,<br />
cerciórese de instalar la cámara en esta unidad en una sala con baja humedad o en<br />
un entorno similar.<br />
Antes de la utilización<br />
Antes de utilizar la cámara bajo el agua, sumerja esta unidad a una<br />
profundidad de aproximadamente 1 metro y compruebe que la cámara<br />
funcione adecuadamente y que esta unidad no infiltre agua, y después<br />
comience su buceo.<br />
En el caso improbable de que un mal funcionamiento de esta unidad cause<br />
daños debido a la infiltración de agua, <strong>Sony</strong> no se responsabilizará de los<br />
daños ocasionados en el equipo que contenga (cámara, batería, etc.) o en el<br />
contenido grabado, ni de los gastos relacionados con la fotografía.<br />
<br />
<br />
Junta tórica y empaquetadura a prueba<br />
de goteo<br />
Junta tórica<br />
Esta unidad utiliza una junta tórica para mantener su resistencia al agua. Con<br />
respecto a los detalles, lea el Manual de instrucciones separado de la junta tórica.<br />
El manejo inadecuado de la junta tórica puede resultar en infiltración de agua.<br />
Empaquetadura a prueba de goteo<br />
No quite ni aplique grasa a la empaquetadura a prueba de goteo. Si la<br />
empaquetadura se levanta o pellizca, se puede producir la infiltración de agua.<br />
Si la empaquetadura a prueba de goteo se desprende, vuelva a fijarla de forma que<br />
no quede retorcida. (Consulte la ilustración .)<br />
Duración útil de la junta tórica y la empaquetadura a prueba de<br />
goteo<br />
Junta tórica<br />
La duración útil de la junta tórica variará con la frecuencia de utilización de esta<br />
unidad y las condiciones. En general, durará aproximadamente un año.<br />
Empaquetadura a prueba de goteo<br />
Reemplace la empaquetadura a prueba de goteo por otra nueva si encuentra en ella<br />
arañazos o rajas.<br />
Después de haberla reemplazado, compruebe que no haya infiltración de agua.<br />
<br />
<br />
<br />
<br />
<br />
<br />
<br />
<br />
<br />
<br />
<br />
<br />
<br />
<br />
<br />
<br />
<br />
Síntoma<br />
Causa/Soluciones<br />
Las imágenes de<br />
reproducción no se<br />
visualizan en el color<br />
es<strong>per</strong>ado. (Al grabar bajo<br />
el agua)<br />
La cámara puede no estar ajustada a<br />
(Submarino) o<br />
(Submarino).<br />
Compruebe que la cámara esté ajustada a<br />
(Submarino) o<br />
(Submarino).<br />
El balance blanco submarino puede no estar<br />
ajustado correctamente.<br />
Compruebe el ajuste del balance blanco<br />
submarino de la cámara.<br />
<br />
<br />
<br />
<br />
Especificaciones<br />
Material<br />
Plástico (PC, ABS), vidrio<br />
Resistencia al agua<br />
Junta tórica, hebilla<br />
Resistencia a la presión<br />
Hasta una profundidad de 40 metros bajo el agua<br />
Controles que pueden o<strong>per</strong>arse externamente<br />
ON/OFF (Alimentación), Disparador, Zoom (W/T), Modo, Control, MENU,<br />
Borrado, HOME (DSC-W230/W220/W215/W210 solamente), Reproducción<br />
Dimensiones<br />
Aprox. 148 × 112 × 89 mm (an/al/prf)<br />
(excluyendo las partes salientes)<br />
Peso<br />
Aprox. 480 g (esta unidad solamente)<br />
Elementos incluidos<br />
Funda resistente al agua (1)<br />
Correa de mano (1)<br />
Cubierta de la pantalla de cristal líquido (1)<br />
Difusor (1)<br />
Acoplamiento frontal C (1)*<br />
Acoplamiento posterior C-1 (1)*<br />
*Fijado a la funda resistente al agua en el momento de la adquisición.<br />
Acoplamiento frontal A (1)<br />
Acoplamiento posterior A-1 (1)<br />
Acoplamiento posterior A-2 (1)<br />
Acoplamiento frontal B (1)<br />
Acoplamiento posterior B-1 (1)<br />
Acoplamiento posterior B-2 (1)<br />
Grasa (1)<br />
Junta tórica (1)<br />
Espaciador (1)<br />
Juego de documentación impresa<br />
Accesorios opcionales<br />
Juego de juntas tóricas ACC-MP105<br />
(Compruebe<br />
en el paquete en el momento de la adquisición.)<br />
Esta unidad <strong>per</strong>mite la instalación de accesorios subacuáticos de SEA&SEA<br />
SUNPAK CO., Ltd. Con respecto a los detalles sobre tales accesorios, visite el<br />
sitio Web siguiente.<br />
http://www.seaandsea.co.jp/products/accessory/mpk/index.html<br />
El diseño y las especificaciones están sujetos a cambio sin previo aviso.<br />
<br />
<br />
<br />
Empaquetadura a prueba de<br />
goteo<br />
Espaciador (retire el espaciador para utilizar<br />
esta unidad)<br />
Empaquetadura a<br />
prueba de goteo<br />
Junta tórica<br />
Palanca del disparador<br />
(Botón del disparador)<br />
Protector frontal<br />
Rosca para trípode<br />
Cuando utilice un trípode, use uno con tornillo<br />
de 5,5 mm o más corto. Esta unidad no podrá<br />
fijarse firmemente a un trípode con tornillos<br />
largos. Si lo hiciese podría dañar esta unidad.<br />
Botón ON/OFF<br />
Gancho para<br />
la correa de<br />
mano<br />
Vidrio frontal<br />
Difusor<br />
Hebilla<br />
Botón OPEN<br />
Cubierta de<br />
la pantalla<br />
de cristal<br />
líquido<br />
Botones del zoom (W/T)<br />
Dial de modo<br />
Botones de o<strong>per</strong>ación<br />
Acoplamiento frontal A (1)<br />
(Para DSC-W290/W275/W270)<br />
Extracción de la palanca del<br />
disparador<br />
La palanca del disparador es desmontable.<br />
Colocación de la palanca del<br />
disparador<br />
Acoplamiento posterior A-1 (1)<br />
(Para DSC-W290)<br />
Acoplamiento frontal B (1)<br />
(Para DSC-W230/W220/W215/W210)<br />
Acoplamiento posterior B-1 (1)<br />
(Para DSC-W230)<br />
<br />
<br />
Acoplamiento posterior A-2 (1)<br />
(Para DSC-W275/W270)<br />
Acoplamiento frontal C (1)<br />
(Para DSC-WX1)<br />
Acoplamiento posterior C-1 (1)<br />
(Para DSC-WX1)<br />
<br />
3<br />
<br />
<br />
<br />
<br />
1 2<br />
2<br />
<br />
<br />
<br />
<br />
1<br />
<br />
4<br />
Acoplamiento posterior B-2 (1)<br />
(Para DSC-W220/W215/W210)<br />
DSC-W290/W275/<br />
W270<br />
DSC-W230/W220/<br />
W215/W210<br />
DSC-WX1<br />
<br />
Dial de modo<br />
Palanca del<br />
disparador (Botón<br />
del disparador)<br />
Botón ON/OFF<br />
Botón del zoom<br />
<br />
<br />
2- 1<br />
2<br />
<br />
<br />
<br />
1<br />
2<br />
<br />
<br />
<br />
<br />
3<br />
<br />
DSC-W290/W275/W270<br />
Botón MENU /<br />
botón<br />
(borrado)<br />
Botón<br />
(macro)<br />
Botón<br />
(reproducción)<br />
Botón<br />
(autodisparador)<br />
Botón HOME<br />
Botón<br />
(flash)<br />
Botón <br />
Botón DISP<br />
(visualización)<br />
DSC-W230/W220/W215/W210<br />
DSC-WX1<br />
<br />
Cámara<br />
fotográfica<br />
digital<br />
Acoplamiento<br />
frontal<br />
Acoplamiento<br />
posterior<br />
DSC-WX1 C C-1<br />
DSC-W290 A A-1<br />
DSC-W275/<br />
W270<br />
A A-2<br />
DSC-W230 B B-1<br />
DSC-W220/<br />
W215/<br />
W210<br />
B B-2<br />
Botón <br />
Botón<br />
(flash)<br />
Botón MENU<br />
Botón<br />
(Sonrisa)<br />
Botón<br />
(autodisparador)<br />
Botón<br />
(reproducción)<br />
Botón DISP<br />
(visualización)<br />
Botón<br />
(borrado)<br />
Botón <br />
Botón<br />
(flash)<br />
Botón MENU<br />
Botón<br />
(macro)<br />
Botón<br />
(autodisparador)<br />
Botón<br />
(reproducción)<br />
Botón DISP<br />
(visualización)<br />
Botón<br />
(borrado)


