

Sony SAL50M28 - SAL50M28 Istruzioni per l'uso Francese
Sony SAL50M28 - SAL50M28 Istruzioni per l'uso Francese
Sony SAL50M28 - SAL50M28 Istruzioni per l'uso Francese

Create successful ePaper yourself
Turn your PDF publications into a flip-book with our unique Google optimized e-Paper software.
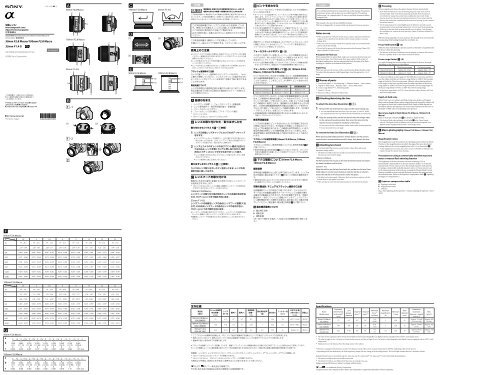
Interchangeable Lens/<br />
Objectif interchangeable/<br />
/O<strong>per</strong>ating Instructions/Mode d'emploi/Manual de<br />
instrucciones/<br />
50mm F2.8 Macro/100mm F2.8 Macro<br />
35mm F1.4 G<br />
<strong>SAL50M28</strong>/SAL100M28/SAL35F14G<br />
©2006 <strong>Sony</strong> Corporation<br />
Printed in Japan<br />
4-261-650-03(1)<br />
A-mount<br />
<br />
50mm F2.8 Macro 100mm F2.8 Macro 35mm F1.4 G<br />
1<br />
<br />
–1<br />
2 3<br />
6<br />
5<br />
100mm F2.8 Macro<br />
2 3<br />
2<br />
6<br />
35mm F1.4 G<br />
6<br />
5<br />
(1) (2)<br />
–2<br />
<br />
5<br />
3<br />
4<br />
4<br />
4<br />
7<br />
7 8<br />
7<br />
9<br />
8<br />
9<br />
9<br />
<br />
<br />
(1) (2)<br />
(3)<br />
<br />
50mm F2.8 Macro<br />
1:5<br />
1:3<br />
100mm F2.8 Macro<br />
1:7<br />
1:5<br />
<br />
<br />
<br />
<br />
<br />
<br />
<br />
<br />
<br />
<br />
<br />
<br />
A<br />
<br />
E<br />
E<br />
<br />
<br />
<br />
<br />
50mm F2.8 Macro,100mm F2.8 Macro)<br />
<br />
1<br />
<br />
<br />
<br />
<br />
<br />
2<br />
<br />
<br />
1* 2 3<br />
4 5 6<br />
7<br />
8** 9<br />
* 35mm F1.4 G<br />
** 50mm F2.8 Macro, 100mm F2.8 Macro<br />
<br />
<br />
1 <br />
<br />
(1)(2)2<br />
(2)<br />
<br />
2 <br />
<br />
<br />
<br />
<br />
<br />
<br />
<br />
<br />
<br />
<br />
<br />
* 50mm F2.8 Macro<br />
<br />
100mm F2.8 Macro:<br />
<br />
<br />
35mm F1.4 G:<br />
<br />
<br />
<br />
<br />
<br />
<br />
<br />
<br />
<br />
<br />
<br />
<br />
<br />
<br />
<br />
)<br />
<br />
<br />
<br />
<br />
50mm F2.8 Macro,100mm F2.8 Macro)<br />
<br />
<br />
<br />
–(2)<br />
<br />
<br />
<br />
<br />
<br />
–(3) 50mm F2.8<br />
Macro, 100mm F2.8 Macro<br />
<br />
LIMIT<br />
<br />
<br />
<br />
<br />
50mm F2.8 Macro 20cm 27cm 30cm <br />
100mm F2.8 Macro 35cm 54cm 59cm <br />
<br />
<br />
LIMIT<br />
<br />
<br />
LIMIT<br />
FULL<br />
<br />
FULL<br />
<br />
<br />
<br />
<br />
<br />
<br />
<br />
50mm F2.8 Macro, 100mm<br />
F2.8 Macro<br />
<br />
<br />
35mmAPS-C<br />
<br />
<br />
50mm F2.8 Macro,<br />
100mm F2.8 Macro<br />
<br />
<br />
1:1<br />
<br />
<br />
<br />
<br />
AUTO<br />
<br />
<br />
<br />
<br />
<br />
<br />
a <br />
b <br />
c <br />
22<br />
<br />
English<br />
You will find information on using each lens in this manual. Precautions<br />
common to lenses, such as notes on use will be found in “Precautions<br />
before using” on a separate sheet. Be sure to read both documents before<br />
using the lens.<br />
This manual is for use with several different lenses.<br />
This lens is designed for A-mount, which can be used on <strong>Sony</strong> α cameras.<br />
Notes on use<br />
When using this lens with an E-mount camera, attach a separately sold Mount<br />
Adaptor. Do not attach the lens directly to the E-mount camera or you may<br />
damage both.<br />
When you carry the camera with the lens attached, make sure to hold both the<br />
camera and the lens steadily.<br />
Do not hold by any part of the lens that protrudes when focusing. (50mm F2.8<br />
Macro,100mm F2.8 Macro only)<br />
Precaution for flash use<br />
When using a built-in camera flash, make sure to remove the lens hood and<br />
shoot from at least 1m (3.3feet) away from your subject. With certain of<br />
lens/flash combinations, the lens may partially block the light of the flash,<br />
resulting in a shadow at the bottom of the picture.<br />
Vignetting<br />
When you use lens, the corners of the screen become darker than the center.<br />
To reduce this phenomena (called vignetting), close the a<strong>per</strong>ture by 1 to 2<br />
stops.<br />
Names of parts<br />
1…Lens hood index* 2…Focusing ring 3…Distance index 4…Lens contacts<br />
5…Depth-of-field scale 6…Distance scale 7…Focus-hold button<br />
8…Focus-range limiter** 9…Mounting index<br />
* 35mm F1.4 G only<br />
** 50mm F2.8 Macro, 100mm F2.8 Macro only<br />
Attaching/detaching the lens<br />
To attach the lens (See illustration -.)<br />
1 Remove the rear and front lens caps and the camera body cap.<br />
You can attach/detach the lens front cap in two ways, (1) and (2). When<br />
you attach/detach the lens cap with the lens hood attached, use method (2).<br />
2 Align the orange index on the lens barrel with the orange index<br />
on the camera (mounting index), then insert the lens into the<br />
camera mount and rotate it clockwise until it locks.<br />
Do not press the lens release button on the camera when mounting the lens.<br />
Do not mount the lens at an angle.<br />
To remove the lens (See illustration -.)<br />
While pressing and holding the lens release button on the camera,<br />
rotate the lens counterclockwise until it stops, then detach the lens.<br />
Attaching lens hood<br />
It is recommended that you use a lens hood to reduce flare and ensure<br />
maximum image quality.<br />
* The 50mm F2.8 Macro does not include an external lens hood. The lens barrel<br />
functions as a lens hood by design.<br />
100mm F2.8 Macro:<br />
Fit the hood into the mount on the end of the lens barrel and rotate<br />
the hood clockwise until it clicks.<br />
35mm F1.4 G:<br />
Align the red line on the lens hood with the red dot on the lens (Lens<br />
hood index). Turn the hood clockwise until the red dot on the lens<br />
meets the red dot on the hood and it clicks into place.<br />
Attach the lens hood pro<strong>per</strong>ly. Otherwise, the lens hood may interfere with the<br />
desired effect or may appear in pictures.<br />
When storing, turn over the lens hood and place it onto the lens backwards.<br />
Focusing<br />
When using the auto focus, the camera focuses the lens automatically.<br />
Even when the auto focus is set, the focusing ring may rotate if you move it<br />
unintentionally. Only rotate the focusing ring manually when the camera is<br />
set to the direct manual focus, otherwise a malfunction may result. (Some<br />
cameras do not have the direct manual focus function. If your camera has this<br />
function, this restriction is explained in the section on focusing, in your camera’s<br />
instruction manual.)<br />
The focusing ring can be rotated slightly past the infinity to provide accurate<br />
focusing under various o<strong>per</strong>ating tem<strong>per</strong>atures. Do not rotate the focusing ring<br />
all the way to the end when focusing manually even at infinity. Look through<br />
the viewfinder, etc., and set the focus precisely. (50mm F2.8 Macro,100mm F2.8<br />
Macro only)<br />
When focusing manually, set your camera to the manual focus and rotate the<br />
focusing ring while looking through the viewfinder, etc.<br />
Focus-hold button –(2)<br />
While the focus-hold button is pressed, auto focus function is suspended and<br />
the focus is fixed for shooting.<br />
The function of the focus-hold button can be changed on cameras with custom<br />
function capability. Refer to the camera manuals for details.<br />
Focus-range limiter –(3)<br />
For quick focusing, the focusing range can be limited to close or far range,<br />
depending on the distance to your subject.<br />
Close-focusing range<br />
Far-focusing range<br />
50mm F2.8 Macro Approx. 20 - 27cm Approx. 30cm - <br />
100mm F2.8 Macro Approx. 35 - 54cm Approx. 59cm - <br />
To focus on subjects at close range (see the table above), set focus anywhere<br />
near the subject and then set the focus-range limiter to LIMIT; the focusing<br />
range is limited to Close-focusing range. Likewise, when shooting subjects<br />
at far range, set the focus anywhere near the subject and then set the focusrange<br />
limiter to LIMIT; the focus range is limited to Far-focusing range. Set<br />
the focus-range limiter to FULL to allow the entire focusing range.<br />
Set the focus-range limiter to FULL, when shooting a subject between the Close<br />
and Far focusing ranges.<br />
Depth-of-field scale<br />
When focus is set on a subject, anything at that same distance will appear<br />
sharp, and anything within a certain range before and beyond the subject will<br />
also appear in focus; this is called depth of field. Depth of field depends on<br />
the subject distance and a<strong>per</strong>ture you choose and is indicated by the lines on<br />
the depth-of-field scale corresponding to the a<strong>per</strong>ture.<br />
Macro lens depth of field (50mm F2.8 Macro, 100mm F2.8<br />
Macro)<br />
Refer to the depth-of-field table for details on depth of field.<br />
The depth-of-field scale and depth-of-field table is for 35mm-format<br />
cameras. The depth-of-field is shallower when you use Interchangeable Lens<br />
Digital Cameras equipped with an APS-C sized image sensor.<br />
Macro photography (50mm F2.8 Macro, 100mm F2.8<br />
Macro)<br />
Magnification ratios<br />
The magnification scale is located on the extending section of the lens barrel.<br />
The line on the magnification scale which the edge of the outer lens barrel<br />
overlaps indicates the current magnification ratio (1:1 in illustration ).<br />
As the magnification increases, the camera is more vulnerable to shaking. Use a<br />
tripod to steady the camera when shooting.<br />
Precautions on using a commercially available exposure<br />
meter or manual flash shooting function<br />
The brightness of the lens decreases with macro shooting. This is<br />
automatically compensated for in all auto-exposure modes, or in metered<br />
manual mode. If your camera is set to the manual exposure mode and you<br />
are using a commercially available exposure meter, or if your camera is set<br />
to the manual exposure mode and you are using the Manual Flash Control<br />
function available on some external flash units, increase the exposure from<br />
the indicated value. (Refer to the Exposure compensation table regarding<br />
the degree of compensation.)<br />
Exposure compensation table<br />
a Exposure correction<br />
b Magnification ratios<br />
c Distance<br />
(E.g., when adjusting by the a<strong>per</strong>ture, +2 means opening the a<strong>per</strong>ture 2 more<br />
stops.)<br />
<br />
50mm F2.8 Macro:<br />
m F 2.8 4 5.6 8 11 16 22 32<br />
– 28.0 – 20.1 – 14.3 – 10.1 – 7.16 – 5.08 – 3.61 – 2.57<br />
2 2.14 – 1.88 2.20 – 1.83 2.29 – 1.77 2.45 – 1.69 2.70 – 1.59 3.17 – 1.47 4.22 – 1.32 7.96 – 1.16<br />
0.4 0.404 – 0.396 0.405 – 0.395 0.407 – 0.393 0.410 – 0.390 0.415 – 0.386 0.422 – 0.381 0.431 – 0.373 0.446 – 0.364<br />
0.27 0.271 – 0.269 0.272 – 0.268 0.273 – 0.268 0.274 – 0.266 0.275 – 0.265 0.277 – 0.263 0.281 – 0.260 0.285 – 0.257<br />
0.23 0.231 – 0.229 0.231 – 0.229 0.232 – 0.228 0.232 – 0.228 0.233 – 0.227 0.235 – 0.226 0.237 – 0.224 0.239 – 0.222<br />
0.21 0.211 – 0.209 0.211 – 0.209 0.211 – 0.209 0.212 – 0.208 0.212 – 0.208 0.213 – 0.207 0.215 – 0.205 0.217 – 0.204<br />
0.203 0.204 – 0.202 0.204 – 0.202 0.204 – 0.202 0.205 – 0.202 0.205 – 0.201 0.206 – 0.200 0.207 – 0.199 0.209 – 0.198<br />
0.200 0.201 – 0.200 0.201 – 0.200 0.201 – 0.200 0.201 – 0.200 0.201 – 0.200 0.201 – 0.199 0.202 – 0.199 0.202 – 0.198<br />
100mm F2.8 Macro:<br />
m F 2.8 4 5.6 8 11 16 22 32<br />
– 107 – 75.8 – 53.6 – 38.0 – 26.9 – 19.0 – 13.5 – 9.55<br />
3 3.07 – 2.93 3.11 – 2.90 3.16 – 2.86 3.23 – 2.80 3.33 – 2.73 3.50 – 2.63 3.76 – 2.50 4.21 – 2.34<br />
1 1.00 – 0.993 1.00 – 0.991 1.01 – 0.987 1.01 – 0.982 1.02 – 0.975 1.03 – 0.965 1.05 – 0.951 1.08 – 0.932<br />
0.6 0.602 – 0.598 0.602 – 0.598 0.603 – 0.597 0.605 – 0.595 0.607 – 0.593 0.610 – 0.593 0.614 – 0.587 0.619 – 0.582<br />
0.45 0.451 – 0.449 0.451 – 0.449 0.451 – 0.449 0.452 – 0.448 0.452 – 0.448 0.453 – 0.447 0.455 – 0.445 0.457 – 0.443<br />
0.4 0.400 – 0.400 0.400 – 0.400 0.401 – 0.399 0.401 – 0.399 0.401 – 0.399 0.402 – 0.398 0.403 – 0.397 0.404 – 0.396<br />
0.37 0.370 – 0.370 0.370 – 0.370 0.370 – 0.370 0.370 – 0.370 0.371 – 0.369 0.371 – 0.369 0.371 – 0.369 0.372 – 0.368<br />
0.352 0.352 – 0.352 0.352 – 0.352 0.352 – 0.352 0.352 – 0.352 0.352 – 0.352 0.352 – 0.351 0.353 – 0.351 0.353 – 0.351<br />
<br />
50mm F2.8 Macro:<br />
a<br />
+2<br />
b<br />
c<br />
1.00X<br />
(1:1)<br />
0.89X<br />
(1:1.13)<br />
+1 3/4+ +1 1/2 +1 1/40<br />
+1<br />
3/4 + 1/2 + 1/4<br />
0.74X<br />
(1:1.36)<br />
0.59X<br />
(1:1.68)<br />
0.47X<br />
(1:2.15)<br />
0.35X<br />
(1:2.9)<br />
0.24X<br />
(1:4.2)<br />
0.14X<br />
(1:7.2)<br />
0.04X<br />
(1:22.6)<br />
0.200 0.202 0.207 0.217 0.235 0.267 0.329 0.482 1.27 m<br />
100mm F2.8 Macro:<br />
a<br />
+2<br />
b<br />
c<br />
1.00X<br />
(1:1)<br />
0.93X<br />
(1:1.08)<br />
+1 3/4+ +1 1/2 +1 1/40<br />
+1<br />
3/4 + 1/2 + 1/4<br />
0.81X<br />
(1:1.23)<br />
0.64X<br />
(1:1.56)<br />
0.49X<br />
(1:2.04)<br />
0.36X<br />
(1:2.78)<br />
0.19X<br />
(1:5.26)<br />
0.077X<br />
(1:12.99)<br />
0.025X<br />
(1:40)<br />
0.352 0.355 0.363 0.385 0.420 0.481 0.678 1.47 4.06 m<br />
<br />
<br />
<br />
50mm F2.8 Macro<br />
(<strong>SAL50M28</strong>)<br />
100mm F2.8 Macro<br />
(SAL100M28)<br />
35mm F1.4 G<br />
(SAL35F14G)<br />
35mm<br />
* 1<br />
(mm)<br />
<br />
<br />
2*<br />
1*2 2 * 3<br />
(m)<br />
<br />
<br />
<br />
<br />
(mm)<br />
<br />
<br />
(mm)<br />
(g)<br />
75 6-7 47 32 0.2 1 F32 55 71.560 295<br />
150 8-8 24 16 0.35 1 F32 55 7598.5 505<br />
52.5 8-10 63 44 0.3 0.2 F22 55 6976 510<br />
* 1 35mmAPS-C<br />
* 2 135mm2APS-C<br />
* 3 <br />
ADIADI<br />
<br />
(1)(1)(1)* 1 (1)* 2 (1)<br />
* 1 50mm F2.8 Macro<br />
* 2 50mm F2.8 Macro,100mm F2.8 Macro<br />
<br />
<br />
<br />
Specifications<br />
Name<br />
(Model name)<br />
50mm F2.8 Macro<br />
(<strong>SAL50M28</strong>)<br />
100mm F2.8 Macro<br />
(SAL100M28)<br />
35mm F1.4 G<br />
(SAL35F14G)<br />
Equivalent<br />
35mm-format<br />
focal length* 1<br />
(mm)<br />
Lens<br />
groupselements<br />
Angle of<br />
view 1* 2<br />
Angle of<br />
view 2* 2<br />
75 6-7 47˚ 32˚<br />
150 8-8 24˚ 16˚<br />
52.5 8-10 63˚ 44˚<br />
Minimum<br />
focus* 3<br />
(m (feet))<br />
0.2<br />
(0.65)<br />
0.35<br />
(1.2)<br />
0.3<br />
(1)<br />
Maximum<br />
magnification<br />
(X)<br />
Minimum<br />
f-stop<br />
Filter<br />
diameter<br />
(mm)<br />
1 f/32 55<br />
1 f/32 55<br />
0.2 f/22 55<br />
Dimensions<br />
(maximum<br />
diameter × height)<br />
(mm (in.))<br />
Approx. 71.5×60<br />
(2 13/16×2 3/8)<br />
Approx. 75×98.5<br />
(3×4)<br />
Approx. 69×76<br />
(2 3/4×3)<br />
* 1 The value for the equivalent 35mm-format focal length is based on Interchangeable Lens Digital Cameras equipped with an APS-C sized image sensor.<br />
Mass<br />
(g (oz.))<br />
Approx. 295<br />
(10 3/8)<br />
Approx. 505<br />
(18)<br />
Approx. 510<br />
(18)<br />
* 2 The value of angle of view 1 is based on 35mm-format cameras, and that of angle of view 2 is based on Interchangeable Lens Digital Cameras equipped with an APS-C sized<br />
image sensor.<br />
* 3 Minimum focus is the distance from the image sensor to the subject.<br />
This lens is equipped with a distance encoder. The distance encoder allows more accurate measurement (ADI) by employing a flash for the process.<br />
Depending on the lens mechanism, the focal length may change with any change of the shooting distance. The focal length assumes the lens is focused at infinity.<br />
Included items: Lens (1), Lens front cap (1), Lens rear cap (1), Lens hood* 1 (1), Lens case* 2 (1), Set of printed documentation<br />
* 1 The 50mm F2.8 Macro does not include a lens hood.<br />
* 2 The 50mm F2.8 Macro and 100mm F2.8 Macro do not include a lens case.<br />
Designs and specifications are subject to change without notice.<br />
and is a trademark of <strong>Sony</strong> Corporation.<br />
Company names and company product names are trademarks or registered trademarks of those companies.
50mm F2.8 Macro 100mm F2.8 Macro 35mm F1.4 G<br />
1<br />
2 3<br />
6<br />
5<br />
100mm F2.8 Macro<br />
<br />
2 3<br />
2<br />
6<br />
35mm F1.4 G<br />
<br />
–1<br />
6<br />
5<br />
(1) (2)<br />
–2<br />
<br />
5<br />
50mm F2.8 Macro:<br />
3<br />
4<br />
4<br />
4<br />
7<br />
7 8<br />
7<br />
9<br />
8<br />
9<br />
9<br />
<br />
<br />
(1) (2)<br />
(3)<br />
<br />
50mm F2.8 Macro<br />
1:5<br />
1:3<br />
100mm F2.8 Macro<br />
1:7<br />
1:5<br />
Français<br />
Des informations relatives à l’utilisation de chaque objectif sont<br />
disponibles dans ce manuel. La section « Précautions avant toute<br />
utilisation », qui fait l’objet d’un document séparé, contient des<br />
précautions relatives aux objectifs, telles que des remarques sur leur<br />
utilisation. Veuillez lire attentivement ces deux documents avant<br />
d’utiliser l’objectif.<br />
Ce manuel est destiné à être utilisé pour plusieurs objectifs différents.<br />
Cet objectif est conçu pour les montures A, à utiliser sur les appareils photo<br />
α <strong>Sony</strong>.<br />
Remarques sur l’utilisation<br />
Lorsque cet objectif est utilisé avec un appareil photo à monture E, rattachez<br />
un adaptateur pour monture d’objectif vendu séparément. Ne rattachez pas<br />
directement l’objectif à l’appareil photo à monture E sinon l’objectif et l’appareil<br />
pourraient être endommagés.<br />
Tenez fermement à la fois l’appareil photo et l’objectif lorsque vous transportez<br />
l’appareil photo avec l’objectif fixé.<br />
Ne tenez pas l’appareil par une partie saillante de l’objectif lors d’une mise au<br />
point. (50mm F2.8 Macro, 100mm F2.8 Macro uniquement)<br />
Précaution concernant l’utilisation du flash<br />
Lorsque vous utilisez un flash intégré, veillez à retirer le pare-soleil et à<br />
prendre la photo à une distance d’au moins 1 m (3,3 pieds) du sujet. Dans<br />
le cas de certaines combinaisons objectif/flash, l’objectif peut partiellement<br />
bloquer la lumière du flash, ce qui génère une ombre en bas de<br />
l’image.<br />
Vignetage<br />
Lorsque vous utilisez l’objectif, les coins de l’écran peuvent s’assombrir par<br />
rapport au centre. Pour réduire ce phénomène (appelé vignetage), l’ouverture<br />
doit être réglée à une valeur comprise entre 1 et 2 par rapport à la position de<br />
fermeture complète.<br />
Noms des pièces<br />
1…Repère du pare-soleil* 2…Bague de mise au point 3…Index de distance<br />
4…Contacts de l’objectif 5…Echelle de profondeur de champ<br />
6…Echelle de mise au point 7…Bouton de désactivation de la mise au point<br />
8…Limiteur de plage de mise au point** 9…Repère de montage<br />
* 35mm F1.4 G uniquement<br />
** 50mm F2.8 Macro, 100mm F2.8 Macro uniquement<br />
Fixation/retrait de l’objectif<br />
Fixation de l’objectif (Voir l’illustration –.)<br />
1 Retirez les capuchons d’objectif situés à l’avant et l’arrière, ainsi<br />
que le capuchon de l’appareil photo.<br />
Vous pouvez fixer/détacher le capuchon avant de l’objectif de deux façons,<br />
(1) et (2). Lorsque vous fixez/détachez le capuchon d’objectif alors que le<br />
pare-soleil est en place, utilisez la méthode (2).<br />
2 Alignez le repère orange situé sur la monture de l’objectif sur le<br />
repère orange de l’appareil (repère de montage), puis insérez<br />
l’objectif dans la monture de l’appareil et tournez-le dans le sens<br />
horaire jusqu’à ce qu’il se bloque.<br />
N’appuyez pas sur le bouton de déblocage de l’objectif de l’appareil lorsque<br />
vous fixez l’objectif.<br />
Ne fixez pas l’objectif de travers.<br />
Retrait de l’objectif (Voir l’illustration –.)<br />
Tout en appuyant et en maintenant enfoncé le bouton de déblocage<br />
de l’objectif sur l’appareil, tournez l’objectif dans le sens anti-horaire<br />
jusqu’à la butée, puis détachez l’objectif.<br />
Fixation du pare-soleil<br />
Il est recommandé d’utiliser un pare-soleil afin de réduire la lumière parasite<br />
et d’assurer une qualité d’image maximale.<br />
* L’objectif 50mm F2.8 Macro ne comprend pas de pare-soleil externe. Par sa<br />
conception même, la monture de l’objectif fonctionne comme un pare-soleil.<br />
100mm F2.8 Macro:<br />
Insérez le pare-soleil dans la monture située à l’extrémité de<br />
l’objectif et tournez-le dans le sens horaire jusqu’au déclic.<br />
35mm F1.4 G:<br />
Alignez la ligne rouge située sur le pare-soleil sur le point rouge de<br />
l’objectif (repère du pare-soleil). Tournez le pare-soleil dans le sens<br />
horaire jusqu’à ce que le point rouge de l’objectif se trouve en face du<br />
point rouge du pare-soleil et qu’il émette un déclic de mise en place.<br />
Fixez correctement le pare-soleil. Sinon, le pare-soleil risque de <strong>per</strong>turber l’effet<br />
souhaité ou d’apparaître sur les images.<br />
Lorsque vous le rangez, retournez le pare-soleil et placez-le sur l’objectif à<br />
l’arrière.<br />
Mise au point<br />
Lorsque vous utilisez la mise au point automatique, l’appareil photo fait la<br />
mise au point automatiquement au niveau de l’objectif.<br />
Même lorsque le mode de mise au point automatique est sélectionné, la bague<br />
de mise au point peut tourner si vous la déplacez par inadvertance. Ne tournez<br />
la bague de mise au point manuellement que lorsque l’appareil photo est en<br />
mode de mise au point manuelle sous peine de provoquer un problème de<br />
fonctionnement. (Certains appareils photos ne sont pas équipés de la fonction de<br />
mise au point manuelle directe. Si votre appareil photo est doté de cette fonction,<br />
cette restriction est décrite dans la section relative à la mise au point du mode<br />
d’emploi de l’appareil photo.)<br />
La bague de mise au point peut être tournée légèrement au-delà de l’infini afin<br />
d’obtenir une mise au point précise à diverses températures de fonctionnement.<br />
Ne tournez pas la bague de mise au point au maximum lorsque vous effectuez<br />
une mise au point manuelle, même sur l’infini. Regardez dans le viseur, etc., et<br />
réglez la mise au point avec précision. (50mm F2.8 Macro, 100mm F2.8 Macro<br />
uniquement)<br />
Pour effectuer une mise au point manuelle, réglez votre appareil en mode<br />
de mise au point manuelle et tournez la bague de mise au point tout en<br />
regardant dans le viseur, etc.<br />
Bouton de désactivation de la mise au point –(2)<br />
Lorsque vous appuyez sur le bouton de désactivation de la mise au point, la<br />
fonction de mise au point est désactivée temporairement et la mise au point<br />
est définie pour la prise de vue.<br />
Le fonctionnement du bouton de désactivation de la mise au point peut être<br />
modifié sur les appareils photos dotés de la fonction de <strong>per</strong>sonnalisation. Pour<br />
plus de détails, consultez les manuels de l’ appareil photo.<br />
Limiteur de plage de mise au point –(3)<br />
Pour une mise au point rapide, la plage de mise au point peut être limitée à<br />
une plage réduite ou élargie, selon la distance de votre sujet.<br />
Plage de mise au point<br />
réduite<br />
Plage de mise au point<br />
élargie<br />
50mm F2.8 Macro Environ 20 - 27cm Environ 30cm - <br />
100mm F2.8 Macro Environ 35 - 54cm Environ 59cm - <br />
Pour faire la mise au point sur des sujets très proches (voir le tableau cidessus),<br />
réglez la mise au point à un endroit situé à proximité du sujet, puis<br />
réglez le limiteur de plage de mise au point sur LIMIT. La plage de mise au<br />
point est limitée à une plage réduite. De même, pour effectuer des prises<br />
de vue de sujets très éloignés, réglez la mise au point à un endroit situé à<br />
proximité du sujet, puis réglez le limiteur de plage de mise au point sur<br />
LIMIT. La plage de mise au point est limitée à une plage élargie. Réglez le<br />
limiteur de plage de mise au point sur FULL pour utiliser la totalité de la<br />
plage de mise au point.<br />
Réglez le limiteur de plage de mise au point sur FULL lorsque vous effectuez une<br />
prise de vue d’ un sujet situé entre les plages de mise au point proche et éloignée.<br />
Echelle de profondeur de champ<br />
La profondeur de champ est la zone de netteté située devant et derrière le<br />
sujet sur lequel est réglée la mise au point de l’appareil, ainsi que la zone<br />
située à la même distance que le sujet. La profondeur de champ dépend de la<br />
distance à laquelle se trouve le sujet, ainsi que de l’ouverture du diaphragme<br />
choisie. Elle est indiquée par les lignes situées sur l’échelle de profondeur de<br />
champ qui correspondent à l’ouverture du diaphragme.<br />
Profondeur de champ de l’ objectif macro (50mm F2.8 Macro,<br />
100mm F2.8 Macro)<br />
Consultez le tableau concernant la profondeur de champ pour plus de<br />
détails à ce sujet.<br />
Le tableau des profondeurs de champ et des échelles de profondeur de<br />
champ concerne les appareils photo 35 mm. La profondeur de champ est<br />
réduite lorsque vous utilisez des appareils photos numériques à objectifs<br />
interchangeables avec un capteur d’image au format APS-C.<br />
Photographie en mode macro (50mm F2.8 Macro,<br />
100mm F2.8 Macro)<br />
Rapports de grossissement<br />
L’ échelle de grossissement se trouve sur la partie déployée de la monture<br />
d’ objectif. La ligne sur l’ échelle de grossissement sur laquelle le bord<br />
extérieur de la monture d’ objectif se su<strong>per</strong>pose correspond au rapport de<br />
grossissement (1:1 sur l’ illustration ).<br />
Lorsque le grossissement augmente, l’ appareil photo est plus sensible aux<br />
bougés. Utilisez un trépied pour stabiliser l’ appareil photo lors d’ une prise de<br />
vue.<br />
Précautions lors de l’utilisation d’un posemètre<br />
disponible dans le commerce ou de la fonction de prise de<br />
vue avec flash manuel<br />
La luminosité de l’objectif décroît avec lorsque vous effectuez des prises de<br />
vue rapprochées. Cela est automatiquement compensé dans tous les modes<br />
d’exposition automatique, ainsi qu’en mode d’exposition manuelle. Si votre<br />
appareil photo est réglé sur le mode d’exposition manuelle et que vous<br />
utilisez un posemètre disponible dans le commerce ou si votre appareil photo<br />
est réglé en mode d’exposition manuelle et que vous utilisez la fonction<br />
de commande manuelle du flash disponible sur certains flash externes,<br />
augmentez la valeur indiquée pour l’exposition. (Reportez-vous au tableau<br />
des compensations d’exposition concernant la compensation nécessaire.)<br />
Tableau des compensations d’ exposition<br />
a Correction de l’ exposition<br />
b Rapports de grossissement<br />
c Distance<br />
(par exemple lors du réglage du diaphragme, +2 signifie une ouverture de 2<br />
incréments supplémentaires.)<br />
Español<br />
En este manual encontrará información sobre la utilización de cada<br />
objetivo. Las precauciones comunes que se aplican a los objetivos,<br />
como por ejemplo las notas sobre la utilización, se encuentran en una<br />
hoja separada con el título “Precauciones previas a la utilización del<br />
producto”. Asegúrese de leer ambos documentos antes de utilizar el<br />
objetivo.<br />
Este manual es aplicable a distintos objetivos.<br />
Este objetivo está diseñado para las monturas A, que se pueden utilizar en las<br />
cámaras <strong>Sony</strong> α.<br />
Notas sobre el uso<br />
Cuando utilice este objetivo en una cámara con montura E, fíjele un adaptador<br />
de montura de objetivo a la venta por separado. No fije el objetivo directamente<br />
al la cámara con montura E o podría dañar ambos.<br />
Cuando transporte la cámara con el objetivo colocado, sujete firmemente tanto<br />
la cámara como el objetivo.<br />
No sujete ninguna parte sobresaliente del objetivo al realizar el enfoque. (sólo los<br />
modelos 50mm F2.8 Macro y 100mm F2.8 Macro)<br />
Precaución en el uso del flash<br />
Al usar una cámara con flash incorporado, asegúrese de extraer el parasol<br />
y tomar fotografías desde como mínimo 1 m de distancia desde el motivo.<br />
Con algunas combinaciones de objetivo y flash, el objetivo puede bloquear<br />
parcialmente la luz del flash, lo que podría provocar una sombra en la parte<br />
inferior de la imagen.<br />
Viñeteado<br />
Si utiliza el objetivo, las esquinas de la pantalla se vuelven más oscuras que el<br />
centro. Para reducir este fenómeno (llamado viñeteado), cierre la abertura de<br />
1 a 2 puntos.<br />
Nombres de las piezas<br />
1…Índice de cubierta del objetivo* 2…Anillo de enfoque<br />
3…Índice de distancia 4…Contactos del objetivo<br />
5…Escala de profundidad de campo 6…Escala de distancia<br />
7…Botón mantener-enfoque 8…Limitador del rango de enfoque**<br />
9…Índice de montaje<br />
* Sólo los modelos 35mm F1.4 G<br />
** Sólo los modelos 50mm F2.8 Macro y 100mm F2.8 Macro<br />
Colocación/extracción del objetivo<br />
Para colocar el objetivo (consulte la ilustración –.)<br />
1 Extraiga las tapas frontal y posterior del objetivo y la tapa del<br />
cuerpo de la cámara.<br />
Puede colocar o extraer la tapa frontal del objetivo de dos modos, (1) y (2).<br />
Cuando coloque o extraiga la tapa del objetivo con el parasol colocado,<br />
utilice el método (2).<br />
2 Alinee el índice naranja del tambor del objetivo con el índice<br />
naranja de la cámara (índice de montaje) y, a continuación,<br />
inserte el objetivo en la montura de la cámara y gírelo hacia la<br />
derecha hasta que quede encajado.<br />
No pulse el botón de liberación del objetivo de la cámara cuando monte el<br />
objetivo.<br />
No monte el objetivo inclinado.<br />
Para extraer el objetivo (consulte la ilustración –.)<br />
Gire el objetivo hacia la izquierda hasta que se detenga mientras<br />
mantiene el botón de liberación del objetivo pulsado y, a<br />
continuación, extráigalo.<br />
Colocación del parasol<br />
Es recomendable utilizar un parasol para reducir los reflejos y garantizar la<br />
máxima calidad de imagen.<br />
* El modelo 50mm F2.8 Macro no incluye una cubierta de objetivo externa. El<br />
tambor del objetivo ha sido diseñado para funcionar también como cubierta del<br />
objetivo.<br />
100mm F2.8 Macro:<br />
Inserte el parasol en la montura del extremo del tambor del objetivo y<br />
gire el parasol hacia la derecha hasta que haga clic.<br />
35mm F1.4 G:<br />
Alinee la línea roja de la cubierta del objetivo con el punto rojo<br />
del objetivo (Índice de cubierta del objetivo). Gire la cubierta en el<br />
sentido de las agujas del reloj hasta que el punto rojo del objetivo<br />
coincida con el punto rojo de la cubierta y encaje correctamente.<br />
Fije el parasol correctamente. Si no, es posible que la cubierta impida el efecto<br />
deseado o puede que aparezca en las fotografías.<br />
Cuando la guarde, gire el parasol y colóquelo al revés en el objetivo.<br />
Enfoque<br />
Cuando utilice el enfoque automático, la cámara enfocará el objetivo<br />
automáticamente.<br />
Incluso cuando esté activado el enfoque automático, es posible que el anillo<br />
de enfoque gire si lo mueve accidentalmente. Gire manualmente el anillo de<br />
enfoque únicamente cuando la cámara esté ajustada en el modo de enfoque<br />
manual directo. De lo contrario, podría provocar un fallo de funcionamiento<br />
(algunas cámaras no disponen de la función de enfoque manual directo. Si su<br />
cámara presenta esta función, encontrará la explicación sobre esta restricción en<br />
la sección acerca del enfoque del manual de instrucciones de la cámara).<br />
El anillo de enfoque puede girarse ligeramente hasta el infinito para<br />
proporcionar un enfoque adecuado en diferentes tem<strong>per</strong>aturas de<br />
funcionamiento. No gire el anillo de enfoque por completo hasta el final cuando<br />
enfoque manualmente, incluso al infinito. Mire a través del visor, etc., y ajuste<br />
el enfoque con precisión. (sólo los modelos 50mm F2.8 Macro y 100mm F2.8<br />
Macro)<br />
Cuando enfoque manualmente, ajuste la cámara en el modo de enfoque<br />
manual y gire el anillo de enfoque mientras mira a través del visor, etc.<br />
Botón mantener-enfoque –(2)<br />
Mientras el botón mantener-enfoque esté pulsado, la función de enfoque<br />
automático se suspenderá y el enfoque se fijará para tomar fotografías.<br />
Es posible cambiar la función del botón mantener-enfoque de las cámaras que<br />
<strong>per</strong>miten la <strong>per</strong>sonalización de funciones. Consulte el manual de instrucciones<br />
de la cámara para obtener más información.<br />
Limitador del rango de enfoque –(3)<br />
Para enfocar rápidamente, es posible limitar el rango de enfoque a cercano o<br />
lejano, en función de la distancia del objeto.<br />
Rango de enfoque<br />
cercano<br />
Rango de enfoque lejano<br />
50mm F2.8 Macro Aprox. 20 - 27cm Aprox. 30cm - <br />
100mm F2.8 Macro Aprox. 35 - 54cm Aprox. 59cm - <br />
Para enfocar objetos cercanos, (consulte la tabla anterior), ajuste el enfoque<br />
hacia el objeto y ajuste el limitador del rango de enfoque en LIMIT; el rango<br />
de enfoque quedará limitado al enfoque cercano. Igualmente, cuando tome<br />
imágenes de objetos lejanos, (consulte la tabla anterior), ajuste el enfoque<br />
hacia el objeto y ajuste el limitador del rango de enfoque en LIMIT; el rango<br />
de enfoque quedará limitado al enfoque lejano. Ajuste el limitador del rango<br />
de enfoque en FULL para activar el rango de enfoque completo.<br />
Ajuste el limitador del rango de enfoque en FULL cuando tome imágenes de un<br />
objeto que se encuentre entre los rangos cercano y lejano de enfoque.<br />
Escala de profundidad de campo<br />
Cuando se ajusta el enfoque a un motivo, todo lo que se encuentre a la<br />
misma distancia aparecerá nítido y lo que esté dentro de un rango anterior<br />
o posterior al motivo también aparecerá enfocado. Este efecto se denomina<br />
profundidad de campo. La profundidad de campo depende de la distancia<br />
del motivo y la abertura seleccionadas y se indica con las líneas de la escala de<br />
profundidad de campo correspondientes a la abertura.<br />
Profundidad de campo del objetivo de macro (50mm F2.8<br />
Macro, 100mm F2.8 Macro)<br />
Consulte la tabla de profundidad de campo para obtener información<br />
acerca de la profundidad de campo.<br />
La escala de profundidad de campo y la tabla de profundidad de campo son<br />
para cámaras con formato de 35 mm La profundidad de campo es menor si se<br />
utilizan Cámaras digitales de objetivo intercambiable equipadas con un sensor<br />
de imágenes de tamaño APS-C.<br />
Fotografía macro (50mm F2.8 Macro, 100mm F2.8<br />
Macro)<br />
Proporción de ampliación<br />
La escala de ampliación se encuentra en la sección de extensión del tambor<br />
del objetivo. El borde del tambor del objetivo externo se su<strong>per</strong>pone a la línea<br />
de la escala de ampliación, la cual indica la proporción de ampliación actual<br />
(1:1 en la ilustración ).<br />
Cuanto más se aumente la ampliación, la cámara será más vulnerable a las<br />
sacudidas. Utilice un trípode para estabilizar la cámara durante la toma de<br />
imágenes.<br />
Precauciones acerca del uso de un medidor de exposición<br />
disponible en el mercado o de la función de toma de<br />
imágenes manual con flash<br />
El brillo del objetivo disminuye con el modo de toma con macro. Se<br />
compensa automáticamente en todos los modos de exposición automática<br />
o en el modo de medición manual. Si la cámara está ajustada en el modo de<br />
exposición manual y está utilizando un medidor de exposición disponible en<br />
el mercado, o si la cámara está ajustada en el modo de exposición manual y<br />
está utilizando la función de control manual de flash disponible en algunas<br />
unidades externas de flash, aumente la exposición a partir del valor indicado.<br />
(Consulte la tabla de compensación de exposición referente al grado de<br />
compensación).<br />
Tabla de compensación de la exposición<br />
a Corrección de la exposición<br />
b Proporción de ampliación<br />
c Distancia<br />
(Por ejemplo, cuando se realice el ajuste por la a<strong>per</strong>tura, +2 significa un<br />
incremento de 2 puntos en la a<strong>per</strong>tura).<br />
<br />
<br />
<br />
<br />
<br />
<br />
<br />
<br />
<br />
<br />
m F 2,8 4 5,6 8 11 16 22 32<br />
– 28,0 – 20,1 – 14,3 – 10,1 – 7,16 – 5,08 – 3,61 – 2,57<br />
2 2,14 – 1,88 2,20 – 1,83 2,29 – 1,77 2,45 – 1,69 2,70 – 1,59 3,17 – 1,47 4,22 – 1,32 7,96 – 1,16<br />
0,4 0,404 – 0,396 0,405 – 0,395 0,407 – 0,393 0,410 – 0,390 0,415 – 0,386 0,422 – 0,381 0,431 – 0,373 0,446 – 0,364<br />
0,27 0,271 – 0,269 0,272 – 0,268 0,273 – 0,268 0,274 – 0,266 0,275 – 0,265 0,277 – 0,263 0,281 – 0,260 0,285 – 0,257<br />
0,23 0,231 – 0,229 0,231 – 0,229 0,232 – 0,228 0,232 – 0,228 0,233 – 0,227 0,235 – 0,226 0,237 – 0,224 0,239 – 0,222<br />
0,21 0,211 – 0,209 0,211 – 0,209 0,211 – 0,209 0,212 – 0,208 0,212 – 0,208 0,213 – 0,207 0,215 – 0,205 0,217 – 0,204<br />
0,203 0,204 – 0,202 0,204 – 0,202 0,204 – 0,202 0,205 – 0,202 0,205 – 0,201 0,206 – 0,200 0,207 – 0,199 0,209 – 0,198<br />
0,200 0,201 – 0,200 0,201 – 0,200 0,201 – 0,200 0,201 – 0,200 0,201 – 0,200 0,201 – 0,199 0,202 – 0,199 0,202 – 0,198<br />
100mm F2.8 Macro:<br />
m F 2,8 4 5,6 8 11 16 22 32<br />
– 107 – 75,8 – 53,6 – 38,0 – 26,9 – 19,0 – 13,5 – 9,55<br />
3 3,07 – 2,93 3,11 – 2,90 3,16 – 2,86 3,23 – 2,80 3,33 – 2,73 3,50 – 2,63 3,76 – 2,50 4,21 – 2,34<br />
1 1,00 – 0,993 1,00 – 0,991 1,01 – 0,987 1,01 – 0,982 1,02 – 0,975 1,03 – 0,965 1,05 – 0,951 1,08 – 0,932<br />
0,6 0,602 – 0,598 0,602 – 0,598 0,603 – 0,597 0,605 – 0,595 0,607 – 0,593 0,610 – 0,593 0,614 – 0,587 0,619 – 0,582<br />
0,45 0,451 – 0,449 0,451 – 0,449 0,451 – 0,449 0,452 – 0,448 0,452 – 0,448 0,453 – 0,447 0,455 – 0,445 0,457 – 0,443<br />
0,4 0,400 – 0,400 0,400 – 0,400 0,401 – 0,399 0,401 – 0,399 0,401 – 0,399 0,402 – 0,398 0,403 – 0,397 0,404 – 0,396<br />
0,37 0,370 – 0,370 0,370 – 0,370 0,370 – 0,370 0,370 – 0,370 0,371 – 0,369 0,371 – 0,369 0,371 – 0,369 0,372 – 0,368<br />
0,352 0,352 – 0,352 0,352 – 0,352 0,352 – 0,352 0,352 – 0,352 0,352 – 0,352 0,352 – 0,351 0,353 – 0,351 0,353 – 0,351<br />
Spécifications<br />
Nom<br />
(Désignation du<br />
modèle)<br />
50mm<br />
F2.8 Macro<br />
(<strong>SAL50M28</strong>)<br />
100mm<br />
F2.8 Macro<br />
(SAL100M28)<br />
35mm F1.4 G<br />
(SAL35F14G)<br />
Longueur focale<br />
équivalente au<br />
format 35 mm* 1<br />
(mm)<br />
Elément en<br />
groupes de<br />
l’objectif<br />
Angle de<br />
vue 1* 2<br />
Angle de<br />
vue 2* 2<br />
75 6-7 47˚ 32˚<br />
150 8-8 24˚ 16˚<br />
52,5 8-10 63˚ 44˚<br />
Mise au<br />
point<br />
minimale* 3<br />
(m (pieds))<br />
0,2<br />
(0,65)<br />
0,35<br />
(1,2)<br />
0,3<br />
(1)<br />
Agrandissement<br />
maximum (X)<br />
Valeur f<br />
minimale<br />
Diamètre<br />
du filtre<br />
(mm)<br />
1 f/32 55<br />
1 f/32 55<br />
0,2 f/22 55<br />
Dimensions<br />
(diamètre<br />
maximum ×<br />
hauteur) (mm (po))<br />
Environ 71,5×60<br />
(2 13/16×2 3/8)<br />
Environ 75×98,5<br />
(3×4)<br />
Environ 69×76<br />
(2 3/4×3)<br />
Poids<br />
(g (on.))<br />
Environ<br />
295<br />
(10 3/8)<br />
Environ<br />
505<br />
(18)<br />
Environ<br />
510<br />
(18)<br />
Especificaciones<br />
Nombre<br />
(Nombre del<br />
modelo)<br />
50mm<br />
F2.8 Macro<br />
(<strong>SAL50M28</strong>)<br />
100mm<br />
F2.8 Macro<br />
(SAL100M28)<br />
35mm F1.4 G<br />
(SAL35F14G)<br />
Distancia<br />
focal* 1 (mm)<br />
equivalente<br />
al formato de<br />
35 mm<br />
Elementos y<br />
grupos del<br />
objetivo<br />
Ángulo de<br />
visión 1* 2<br />
Ángulo de<br />
visión 2* 2<br />
Enfoque<br />
mínimo* 3<br />
(m)<br />
Ampliación<br />
máxima (X)<br />
F-stop<br />
mínimo<br />
Diámetro<br />
del filtro<br />
(mm)<br />
Dimensiones<br />
(diámetro<br />
máximo ×<br />
altura) (mm)<br />
75 6-7 47˚ 32˚ 0,2 1 f/32 55 Aprox. 71,5×60<br />
150 8-8 24˚ 16˚ 0,35 1 f/32 55 Aprox. 75×98,5<br />
52,5 8-10 63˚ 44˚ 0,3 0,2 f/22 55 Aprox. 69×76<br />
Peso (g)<br />
Aprox.<br />
295<br />
Aprox.<br />
505<br />
Aprox.<br />
510<br />
<br />
<br />
<br />
<br />
<br />
50mm F2.8 Macro:<br />
a<br />
+2<br />
+1 3/4+ +1 1/2 +1 1/40<br />
+1<br />
3/4 + 1/2 + 1/4<br />
* 1 Les valeurs pour une longueur focale équivalente au format 35 mm sont basées sur des Appareils photos numériques à objectifs interchangeables équipés d’un capteur<br />
d’image au format APS-C.<br />
* 2 La valeur pour un angle de vue 1 est basée sur des appareils photos au format 35 mm et celle de l’angle de vue 2 est basée sur des Appareils photos numériques à objectifs<br />
interchangeables équipés d’un capteur d’image au format APS-C.<br />
* 3 La mise au point minimale est la distance entre le capteur d’image et le sujet.<br />
* 1 El valor de la distancia focal equivalente al formato de 35 mm se basa en Cámaras digitales de objetivo intercambiable equipadas con un sensor de imágenes de tamaño<br />
APS-C.<br />
* 2 El valor del ángulo de visión 1 se basa en las cámaras de formato de 35 mm y el del ángulo de visión 2, en las Cámaras digitales de objetivo intercambiable equipadas con<br />
sensor de imágenes de tamaño APS-C.<br />
* 3 El enfoque mínimo es la distancia desde el sensor de imágenes hasta el motivo.<br />
b<br />
c<br />
1,00X<br />
(1:1)<br />
0,89X<br />
(1:1,13)<br />
0,74X<br />
(1:1,36)<br />
0,59X<br />
(1:1,68)<br />
0,47X<br />
(1:2,15)<br />
0,35X<br />
(1:2,9)<br />
0,24X<br />
(1:4,2)<br />
0,14X<br />
(1:7,2)<br />
0,04X<br />
(1:22,6)<br />
0,200 0,202 0,207 0,217 0,235 0,267 0,329 0,482 1,27 m<br />
100mm F2.8 Macro:<br />
a<br />
+2<br />
b<br />
c<br />
1,00X<br />
(1:1)<br />
0,93X<br />
(1:1,08)<br />
+1 3/4+ +1 1/2 +1 1/40<br />
+1<br />
3/4 + 1/2 + 1/4<br />
0,81X<br />
(1:1,23)<br />
0,64X<br />
(1:1,56)<br />
0,49X<br />
(1:2,04)<br />
0,36X<br />
(1:2,78)<br />
0,19X<br />
(1:5,26)<br />
0,077X<br />
(1:12,99)<br />
0,025X<br />
(1:40)<br />
0,352 0,355 0,363 0,385 0,420 0,481 0,678 1,47 4,06 m<br />
Cet objectif dispose d’un encodeur de distance. L’encodeur de distance <strong>per</strong>met d’effectuer des mesures plus précises (ADI) à l’aide d’un flash.<br />
Selon le mécanisme d’objectif, la longueur focale peut varier en fonction de la distance de prise de vue. La longueur focale suppose que l’objectif est réglé sur l’infini.<br />
Articles inclus: Objectif (1), capuchon d’objectif avant (1), capuchon d’objectif arrière (1), pare-soleil* 1 (1), étui pour objectif* 2 (1), jeu de documents imprimés<br />
* 1 L’objectif 50mm F2.8 Macro ne comprend pas de pare-soleil.<br />
* 2 Les objectifs 50mm F2.8 Macro et 100mm F2.8 Macro ne comprennent pas d’étui d’objectif.<br />
La conception et les spécifications peuvent être modifiées sans préavis.<br />
et sont des marques commerciales de <strong>Sony</strong> Corporation.<br />
Les noms des compagnies et les noms des produits sont des marques de fabrique ou des marques déposées de ces compagnies.<br />
Este objetivo está equipado con un codificador de distancia. El codificador de distancia <strong>per</strong>mite una medición más exacta (ADI) mediante el uso de un flash para la<br />
realización del proceso.<br />
En función del mecanismo del objetivo, es posible que la distancia focal varíe si la distancia de toma de imagen también lo hace. La distancia focal asume que el objetivo está<br />
enfocado al infinito.<br />
Elementos incluidos: Objetivo (1), tapa frontal del objetivo (1), tapa posterior del objetivo (1), parasol* 1 (1), estuche para objetivo* 2 (1), juego de documentación<br />
impresa<br />
* 1 En el modelo 50mm F2.8 Macro, no se incluye la cubierta del objetivo.<br />
* 2 En los modelos 50mm F2.8 Macro y 100mm F2.8 Macro no se incluye la funda del objetivo.<br />
El diseño y las especificaciones están sujetos a cambio sin previo aviso.<br />
y es una marca comercial de <strong>Sony</strong> Corporation.<br />
Los nombres de compañías y los nombres de productos de compañías son marcas comerciales o marcas comerciales registradas de esas compañías.


