

Sony BDV-E490 - BDV-E490 Guida di configurazione rapid Tedesco
Sony BDV-E490 - BDV-E490 Guida di configurazione rapid Tedesco
Sony BDV-E490 - BDV-E490 Guida di configurazione rapid Tedesco

You also want an ePaper? Increase the reach of your titles
YUMPU automatically turns print PDFs into web optimized ePapers that Google loves.
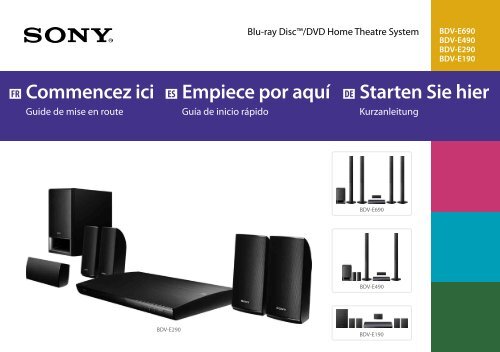
Blu-ray Disc/DVD Home Theatre System<br />
<strong>BDV</strong>-E690<br />
<strong>BDV</strong>-<strong>E490</strong><br />
<strong>BDV</strong>-E290<br />
<strong>BDV</strong>-E190<br />
FR<br />
Commencez ici<br />
Guide de mise en route<br />
ES<br />
Empiece por aquí<br />
Guía de inicio rápido<br />
DE<br />
Starten Sie hier<br />
Kurzanleitung<br />
<strong>BDV</strong>-E690<br />
<strong>BDV</strong>-<strong>E490</strong><br />
<strong>BDV</strong>-E290<br />
<strong>BDV</strong>-E190
1<br />
FR<br />
Contenu du carton/Installation des enceintes<br />
ES Contenido de la caja/Instalación de los altavoces<br />
DE Lieferumfang/Aufstellen der Lautsprecher<br />
<strong>BDV</strong>-E690<br />
<br />
2<br />
FR Raccordement de votre téléviseur<br />
ES Conexión del televisor<br />
DE Anschließen des Fernsehgeräts<br />
<br />
<strong>BDV</strong>-<strong>E490</strong><br />
<br />
<br />
<br />
<br />
3<br />
FR Raccordement d’autres appareils<br />
ES Conexión de otros <strong>di</strong>spositivos<br />
DE Anschließen anderer Geräte<br />
<br />
<br />
<br />
<br />
4<br />
FR Réglage facile à l’écran<br />
ES Configuración fácil en la pantalla<br />
DE Die Schnellkonfiguration am Fernsehschirm<br />
<strong>BDV</strong>-E290<br />
<br />
<br />
<br />
<br />
<br />
<br />
5<br />
FR Lecture d’un <strong>di</strong>sque et utilisation d’autres fonctions<br />
ES Reproducción de <strong>di</strong>scos y uso de otras funciones<br />
DE Wiedergeben einer Disc und andere Funktionen<br />
<strong>BDV</strong>-E190
Unité principale<br />
Unidad principal<br />
Hauptgerät<br />
<br />
<br />
<br />
<br />
Enceintes avant<br />
Altavoces frontales<br />
Vordere Lautsprecher<br />
Enceintes surround<br />
Altavoces de sonido envolvente<br />
Raumklanglautsprecher<br />
Enceinte centrale<br />
Altavoz central<br />
Mittlerer Lautsprecher<br />
Caisson de graves<br />
Altavoz potenciador de graves<br />
Tiefsttonlautsprecher<br />
FR<br />
Contenu du carton<br />
Couvercles inférieurs des enceintes<br />
Cubiertas inferiores para los altavoces<br />
Abdeckungen für <strong>di</strong>e Lautsprecherunterseite<br />
(<strong>BDV</strong>-E690 (4) /<strong>BDV</strong>-<strong>E490</strong> (2))<br />
Tampons<br />
Almoha<strong>di</strong>llas protectoras<br />
Dämpfer<br />
(<strong>BDV</strong>-E190 (2))<br />
ES<br />
Contenido de la caja<br />
Vis (avec rondelle)<br />
Tornillos (con arandela)<br />
Schrauben (mit Unterlegscheibe)<br />
(<strong>BDV</strong>-E690 (4) /<strong>BDV</strong>-<strong>E490</strong> (2))<br />
DE<br />
Lieferumfang<br />
Vis (sans rondelle)<br />
Tornillos (sin arandela)<br />
Schrauben (ohne Unterlegscheibe)<br />
(<strong>BDV</strong>-E690 (12) /<strong>BDV</strong>-<strong>E490</strong> (6))<br />
Télécommande<br />
Mando a <strong>di</strong>stancia<br />
Fernbe<strong>di</strong>enung<br />
Piles R6 (AA) (2)<br />
Pilas R6 (tamaño AA) (2)<br />
R6-Batterien der Größe AA (2)<br />
Fil d’antenne FM<br />
Antena monofilar de FM<br />
UKW-Wurfantenne<br />
Socle pour iPod/iPhone<br />
Acoplador para iPod/iPhone<br />
Dock für iPod/iPhone<br />
Cordon vidéo<br />
Cable de vídeo<br />
Videokabel<br />
(<strong>BDV</strong>-E690/<strong>BDV</strong>-<strong>E490</strong>/<strong>BDV</strong>-E290)<br />
ou / o / oder<br />
(TDM-iP30)<br />
Câble USB<br />
Cable USB<br />
USB-Kabel<br />
(<strong>BDV</strong>-E690/<strong>BDV</strong>-<strong>E490</strong>/<strong>BDV</strong>-E290)<br />
03
1<br />
FR<br />
Commencez par positionner les<br />
enceintes conformément aux<br />
étiquettes situées sur le panneau<br />
arrière.<br />
ES<br />
En primer lugar, coloque los<br />
altavoces como in<strong>di</strong>can las<br />
etiquetas del panel posterior.<br />
DE<br />
Stellen Sie zunächst <strong>di</strong>e<br />
Lautsprecher auf und richten Sie<br />
sich dabei nach den Etiketten auf<br />
der Rückseite.<br />
SUBWOOFER FRONT L FRONT R CENTER Main unit<br />
SUR L<br />
SUR R<br />
04
FR<br />
Ensuite, raccordez les enceintes à<br />
l’unité principale.<br />
Pour l’assemblage des enceintes<br />
du <strong>BDV</strong>-E690/<strong>BDV</strong>-<strong>E490</strong>, reportezvous<br />
au « Guide d’installation des<br />
enceintes » fourni.<br />
ES<br />
A continuación, conecte los<br />
altavoces a la unidad principal.<br />
Si se trata del modelo <strong>BDV</strong>-E690/<br />
<strong>BDV</strong>-<strong>E490</strong>, consulte la “Guía de<br />
instalación de los altavoces”<br />
suministrada para montar los<br />
altavoces.<br />
DE<br />
Als Nächstes schließen Sie <strong>di</strong>e<br />
Lautsprecher an das Hauptgerät<br />
an.<br />
Informationen zum<br />
Zusammenbauen der<br />
Lautsprecher für <strong>di</strong>e Modelle<br />
<strong>BDV</strong>-E690/<strong>BDV</strong>-<strong>E490</strong> finden<br />
Sie in der mitgelieferten<br />
„Montageanleitung für<br />
Lautsprecher“.<br />
05
2<br />
FR<br />
Pour bénéficier d’un son et<br />
d’une image d’excellente qualité,<br />
procédez au raccordement à<br />
l’aide d’un câble HDMI haut débit<br />
(non fourni).<br />
Si votre téléviseur ne possède pas<br />
de prise HDMI ARC, vous devez<br />
aussi vous procurer un cordon<br />
optique numérique (non<br />
fourni) pour reproduire le son du<br />
téléviseur via les enceintes du<br />
système.<br />
ES<br />
Para <strong>di</strong>sfrutar de un vídeo y un<br />
au<strong>di</strong>o de gran calidad, conecte<br />
un cable HDMI de alta velocidad<br />
(no suministrado).<br />
Si el televisor no <strong>di</strong>spone de<br />
toma HDMI ARC, también será<br />
necesario un cable <strong>di</strong>gital óptico<br />
(no suministrado) para<br />
<strong>di</strong>sfrutar del sonido del televisor<br />
a través de los altavoces del<br />
sistema.<br />
DE<br />
Eine hohe Bild- und Tonqualität<br />
erzielen Sie, indem Sie den<br />
Anschluss über ein High-<br />
Speed-HDMI-Kabel (nicht<br />
mitgeliefert) vornehmen.<br />
Wenn Ihr Fernsehgerät nicht<br />
mit einer HDMI ARC-Buchse<br />
ausgestattet ist, benötigen Sie<br />
auch ein optisches Digitalkabel<br />
(nicht mitgeliefert), um den<br />
Ton vom Fernsehgerät über<br />
<strong>di</strong>e Lautsprecher der Anlage<br />
wiedergeben zu können.<br />
<br />
<br />
06
3<br />
FR<br />
Pour raccorder votre décodeur, votre<br />
console de jeu ou votre récepteur<br />
satellite numérique, effectuez<br />
un raccordement au<strong>di</strong>o à l’unité<br />
principale à l’aide d’un cordon optique<br />
numérique (non fourni). Effectuez<br />
séparément un raccordement vidéo au<br />
téléviseur.<br />
Pour la ra<strong>di</strong>o FM, raccordez le fil<br />
d’antenne fourni et déployez-le pour<br />
améliorer la réception. <br />
Vous pouvez également raccorder<br />
votre iPod ou votre iPhone au système<br />
et au téléviseur via le socle fourni.<br />
(<strong>BDV</strong>-E690/<strong>BDV</strong>-<strong>E490</strong>/<strong>BDV</strong>-E290<br />
uniquement)<br />
ES<br />
Para conectar un deco<strong>di</strong>ficador,<br />
una consola o un receptor <strong>di</strong>gital<br />
vía satélite, realice una conexión<br />
de au<strong>di</strong>o con la unidad principal<br />
me<strong>di</strong>ante un cable <strong>di</strong>gital óptico <br />
(no suministrado). Aparte, realice una<br />
conexión de vídeo con el televisor.<br />
Para escuchar la ra<strong>di</strong>o FM, conecte<br />
la antena monofilar suministrada y<br />
extiéndala con el fin de obtener la<br />
mejor recepción posible. <br />
También puede conectar el iPod<br />
o iPhone al sistema y al televisor<br />
me<strong>di</strong>ante el acoplador suministrado.<br />
(sólo en los modelos <strong>BDV</strong>-E690/<br />
<strong>BDV</strong>-<strong>E490</strong>/<strong>BDV</strong>-E290)<br />
DE<br />
Zum Anschließen von Set-Top-<br />
Box, Spielekonsole oder <strong>di</strong>gitalem<br />
Satellitenempfänger stellen Sie über<br />
ein optisches Digitalkabel (nicht<br />
mitgeliefert) eine Au<strong>di</strong>overbindung zum<br />
Hauptgerät her. Stellen Sie separat eine<br />
Videoverbindung zum Fernsehgerät her.<br />
Für den UKW-Ra<strong>di</strong>oempfang schließen<br />
Sie <strong>di</strong>e mitgelieferte Wurfantenne<br />
an und breiten sie so aus, dass ein<br />
optimaler Empfang erzielt wird. <br />
Über das mitgelieferte Dock können<br />
Sie auch einen iPod oder ein iPhone<br />
mit der Anlage und dem Fernsehgerät<br />
verbinden. (nur <strong>BDV</strong>-E690/<br />
<strong>BDV</strong>-<strong>E490</strong>/<strong>BDV</strong>-E290)<br />
<br />
<br />
ou /<br />
o /<br />
oder<br />
<br />
07
3<br />
FR<br />
Vous pouvez vous connecter<br />
à Internet et au réseau<br />
domestique à l’aide d’un câble<br />
LAN (non fourni). Si vous utilisez<br />
l’adaptateur USB réseau local<br />
sans fil en option, le Wi-Fi est<br />
<strong>di</strong>sponible.<br />
Vous trouverez les paramètres<br />
réseau dans le menu d’accueil<br />
(page 12). Pour plus de détails,<br />
visitez le site Web suivant :<br />
http://support.sony-europe.com/<br />
ES<br />
Puede conectarse a Internet y a<br />
la red doméstica con un cable<br />
LAN (no suministrado). Si utiliza<br />
el adaptador de LAN inalámbrica<br />
USB opcional, <strong>di</strong>sfrutará de una<br />
conexión Wi-Fi.<br />
En el menú de inicio (página 12)<br />
se in<strong>di</strong>can los ajustes de red. Para<br />
obtener más información, visite<br />
la página:<br />
http://support.sony-europe.com/<br />
DE<br />
Sie können über ein LAN-<br />
Kabel (nicht mitgeliefert) eine<br />
Verbindung zum Internet und<br />
zum Heimnetzwerk herstellen.<br />
Mit dem gesondert erhältlichen<br />
USB WLAN Adapter steht Wi-Fi<br />
zur Verfügung.<br />
Netzwerkeinstellungen finden Sie<br />
im Hauptmenü (Seite 12). Weitere<br />
Informationen finden Sie hier:<br />
http://support.sony-europe.com/<br />
Vers un routeur large bande<br />
Al enrutador de banda ancha<br />
An einen Breitbandrouter<br />
08
FR<br />
Raccordez le cordon<br />
d’alimentation à une prise<br />
murale.<br />
ES<br />
Conecte el cable de alimentación<br />
de ca a una toma de pared.<br />
DE<br />
Schließen Sie das Netzkabel an<br />
eine Netzsteckdose an.<br />
09
4<br />
FR<br />
Appuyez sur / pour mettre le<br />
système sous tension. « SETUP »<br />
apparaît sur l’affichage du panneau<br />
frontal.<br />
Pour préparer le système en vue de<br />
son utilisation, parcourez le Réglage<br />
initial facile affiché à l’écran à l’aide<br />
de la télécommande fournie. Cette<br />
opération ne devrait prendre que<br />
quelques minutes.<br />
Si l’écran de configuration ne s’affiche<br />
pas, sélectionnez l’entrée AV correcte<br />
sur votre téléviseur.<br />
Lorsque [Le Réglage initial facile<br />
est terminé.] s’affiche à l’écran,<br />
sélectionnez [Terminer]. Le système est<br />
prêt à l’emploi.<br />
ES<br />
Pulse / para encender el sistema.<br />
En el visor del panel frontal aparecerá<br />
“SETUP”.<br />
Para preparar el sistema para su uso,<br />
desplácese con el mando a <strong>di</strong>stancia<br />
suministrado por los ajustes de la<br />
configuración de inicio fácil que<br />
aparece en pantalla. Sólo tardará unos<br />
minutos.<br />
Si no aparece la pantalla de<br />
configuración, seleccione la entrada de<br />
AV correcta en el televisor.<br />
Cuando aparezca en la pantalla el<br />
mensaje [La configuración de inicio<br />
fácil se ha completado.], seleccione<br />
[Finalizar]: el sistema estará listo para<br />
su uso.<br />
DE<br />
Schalten Sie <strong>di</strong>e Anlage mit / ein.<br />
„SETUP“ erscheint im Display an der<br />
Vorderseite.<br />
Um <strong>di</strong>e Anlage für den Gebrauch<br />
vorzubereiten, nehmen Sie mit<br />
der mitgelieferten Fernbe<strong>di</strong>enung<br />
<strong>di</strong>e Schnellkonfiguration am<br />
Fernsehschirm vor. Dieser Vorgang<br />
dauert nur wenige Minuten.<br />
Wenn der Konfigurationsbildschirm<br />
nicht angezeigt wird, wählen Sie am<br />
Fernsehgerät den richtigen AV-Eingang<br />
aus.<br />
Wenn [Die Schnelleinrichtung ist damit<br />
beendet.] auf dem Fernsehschirm<br />
erscheint, wählen Sie [Beenden] und<br />
<strong>di</strong>e Anlage ist betriebsbereit.<br />
/<br />
///,<br />
10
5<br />
FR<br />
Pour lire un <strong>di</strong>sque, appuyez sur<br />
, puis posez le <strong>di</strong>sque dans<br />
le tiroir du <strong>di</strong>sque. Appuyez à<br />
nouveau sur pour fermer le<br />
tiroir du <strong>di</strong>sque.<br />
ES<br />
Para reproducir un <strong>di</strong>sco, pulse<br />
y, a continuación, coloque el<br />
<strong>di</strong>sco en la bandeja de <strong>di</strong>scos.<br />
Pulse de nuevo para cerrar la<br />
bandeja de <strong>di</strong>scos.<br />
DE<br />
Zum Wiedergeben einer Disc<br />
drücken Sie und legen eine<br />
Disc in <strong>di</strong>e Disc-Lade. Drücken Sie<br />
erneut, um <strong>di</strong>e Disc-Lade zu<br />
schließen.<br />
Si la lecture ne commence pas<br />
automatiquement, sélectionnez<br />
dans la catégorie [Vidéo],<br />
[Musique] ou [Photo], puis<br />
appuyez sur .<br />
Si la reproducción no se inicia<br />
de forma automática, seleccione<br />
en la categoría [Vídeo],<br />
[Música], o [Foto] y pulse .<br />
Wenn <strong>di</strong>e Wiedergabe nicht<br />
automatisch startet, wählen Sie<br />
in der Kategorie [Video],<br />
[Musik] oder [Foto] und<br />
drücken .<br />
<br />
Bon amusement !<br />
¡Y a <strong>di</strong>sfrutar!<br />
Viel Spaß!<br />
<br />
11
FR<br />
Pour accéder à d’autres fonctions, il vous<br />
suffit d’appuyer sur HOME.<br />
Exemples :<br />
Ecouter la ra<strong>di</strong>o via les enceintes du<br />
système<br />
Présélectionner des stations de ra<strong>di</strong>o<br />
Accéder à du contenu Internet<br />
Lire votre iPod ou votre iPhone via les<br />
enceintes du système<br />
ES<br />
Para acceder a otras funciones, no tiene más<br />
que pulsar HOME.<br />
Ejemplos:<br />
Escuchar la ra<strong>di</strong>o a través de los altavoces<br />
del sistema<br />
Memorizar emisoras de ra<strong>di</strong>o<br />
Acceder a contenidos de Internet<br />
Escuchar el iPod o iPhone a través de los<br />
altavoces del sistema<br />
DE<br />
Ihnen stehen weitere Funktionen zur<br />
Verfügung. Drücken Sie dazu einfach<br />
HOME.<br />
Beispiele:<br />
Ra<strong>di</strong>ohören über <strong>di</strong>e Lautsprecher der<br />
Anlage<br />
Speichern von Ra<strong>di</strong>osendern<br />
Zugriff auf Internetinhalte<br />
Wiedergabe von Inhalten auf dem iPod<br />
oder iPhone über <strong>di</strong>e Lautsprecher der<br />
Anlage<br />
<br />
<br />
<br />
<br />
<br />
<br />
<br />
<br />
<br />
FR Vous pouvez définir<br />
les paramètres<br />
réseau à l’aide de<br />
ce menu lorsque<br />
l’unité principale est<br />
connectée à un routeur<br />
large bande.<br />
ES Podrá realizar ajustes<br />
de red a través de<br />
este menú cuando<br />
la unidad principal<br />
esté conectada a un<br />
enrutador de banda<br />
ancha.<br />
DE Sie können über<br />
<strong>di</strong>eses Menü<br />
Netzwerkeinstellungen<br />
vornehmen, wenn<br />
das Hauptgerät an<br />
einen Breitbandrouter<br />
angeschlossen ist.<br />
HOME<br />
12
FUNCTION<br />
///,<br />
OPTIONS<br />
HOME<br />
PRESET +/–<br />
TUNING +/–<br />
FR<br />
Présélection des stations de ra<strong>di</strong>o<br />
1 Appuyez plusieurs fois sur<br />
FUNCTION jusqu’à ce que<br />
l’in<strong>di</strong>cation « FM » apparaisse sur<br />
l’affichage du panneau frontal.<br />
2 Appuyez sur TUNING +/– et<br />
maintenez la touche enfoncée<br />
jusqu’à ce que le balayage<br />
automatique démarre.<br />
3 Appuyez sur OPTIONS.<br />
4 Appuyez sur / pour<br />
sélectionner [Mémoire<br />
présélect.], puis appuyez sur<br />
.<br />
5 Appuyez sur / pour<br />
sélectionner le numéro de<br />
présélection de votre choix,<br />
puis appuyez sur .<br />
6 Répétez les étapes 2 à 5 pour<br />
enregistrer d’autres stations.<br />
Sélection d’une station<br />
présélectionnée<br />
1 Appuyez plusieurs fois sur<br />
FUNCTION jusqu’à ce que<br />
l’in<strong>di</strong>cation « FM » apparaisse sur<br />
l’affichage du panneau frontal.<br />
2 Appuyez plusieurs fois sur<br />
PRESET +/– pour sélectionner<br />
la station présélectionnée.<br />
ES<br />
Memorización de emisoras de<br />
ra<strong>di</strong>o<br />
1 Pulse FUNCTION varias veces<br />
hasta que aparezca “FM” en el<br />
visor del panel frontal.<br />
2 Mantenga pulsado el botón<br />
TUNING +/– hasta que se inicie<br />
la exploración automática.<br />
3 Pulse OPTIONS.<br />
4 Pulse / para seleccionar<br />
[Memoria preajustada] y, a<br />
continuación, pulse .<br />
5 Pulse / para seleccionar<br />
el número preajustado que<br />
desee y, a continuación, pulse<br />
.<br />
6 Repita los pasos del 2 al 5 para<br />
almacenar más emisoras.<br />
Selección de emisoras<br />
memorizadas<br />
1 Pulse FUNCTION varias veces<br />
hasta que aparezca “FM” en el<br />
visor del panel frontal.<br />
2 Pulse PRESET +/– varias veces<br />
para seleccionar la emisora<br />
memorizada.<br />
DE<br />
Speichern von Ra<strong>di</strong>osendern<br />
1 Drücken Sie FUNCTION so<br />
oft, bis „FM“ im Display an der<br />
Vorderseite erscheint.<br />
2 Halten Sie TUNING +/–<br />
gedrückt, bis der automatische<br />
Sendersuchlauf beginnt.<br />
3 Drücken Sie OPTIONS.<br />
4 Wählen Sie mit / <strong>di</strong>e Option<br />
[Sender speichern] und<br />
drücken Sie .<br />
5 Wählen Sie mit / <strong>di</strong>e<br />
gewünschte Speichernummer<br />
und drücken Sie .<br />
6 Weitere Sender können Sie<br />
wie in Schritt 2 bis 5 erläutert<br />
speichern.<br />
Auswählen eines gespeicherten<br />
Senders<br />
1 Drücken Sie FUNCTION so<br />
oft, bis „FM“ im Display an der<br />
Vorderseite erscheint.<br />
2 Drücken Sie mehrmals PRESET<br />
+/– und wählen Sie den<br />
gewünschten gespeicherten<br />
Sender.<br />
13
FR<br />
Dépannage<br />
Si vous rencontrez l’une des <strong>di</strong>fficultés suivantes lors de<br />
l’utilisation de ce système, consultez ce guide de dépannage pour<br />
tenter de remé<strong>di</strong>er au problème.<br />
Consultez également le Mode d’emploi <strong>di</strong>sponible sur le site Web<br />
suivant :<br />
http://support.sony-europe.com/<br />
Le système ne se met pas sous tension.<br />
Vérifiez que le cordon d’alimentation est correctement<br />
raccordé à la prise murale.<br />
Le système ne fonctionne pas normalement.<br />
Débranchez le cordon d’alimentation au niveau de la prise<br />
murale, puis rebranchez-le quelques minutes plus tard.<br />
Le système ne reproduit pas le son du programme TV lorsqu’il<br />
est raccordé à un décodeur.<br />
Vérifiez les raccordements.<br />
Sélectionnez l’entrée correcte du système sur laquelle le<br />
décodeur est raccordé.<br />
La lecture du <strong>di</strong>sque ne démarre pas.<br />
Le code local du <strong>di</strong>sque n’est pas compatible avec le système.<br />
De l’humi<strong>di</strong>té s’est condensée sur l’optique, à l’intérieur de<br />
l’unité principale. Retirez le <strong>di</strong>sque et laissez l’unité principale<br />
sous tension pendant environ une demi-heure.<br />
Le <strong>di</strong>sque n’est pas correctement finalisé.<br />
Réduction de la consommation électrique à<br />
moins de 0,3 W en mode de veille<br />
Appuyez sur HOME, puis sur /// pour sélectionner [Config.]<br />
dans [Réglages Système]. Vérifiez que les paramètres suivants<br />
sont définis :<br />
ˎ ˎ<br />
ˎ ˎ<br />
[Commande pour HDMI] est réglé sur [Non] dans [Réglages<br />
HDMI].<br />
[Mode de démarrage <strong>rapid</strong>e] est réglé sur [Non].<br />
ES<br />
Solución de problemas<br />
Si le surge cualquiera de las siguientes <strong>di</strong>ficultades mientras<br />
emplea el sistema, utilice esta guía de solución de problemas para<br />
resolver el problema antes de solicitar asistencia técnica.<br />
Consulte también el manual de instrucciones en la siguiente<br />
página web:<br />
http://support.sony-europe.com/<br />
La unidad no se enciende.<br />
Compruebe si el cable de alimentación de ca está bien<br />
conectado a la toma de pared.<br />
El sistema no funciona correctamente.<br />
Desconecte el cable de alimentación de ca de la toma de pared<br />
y vuelva a conectarlo al cabo de varios minutos.<br />
Cuando el sistema está conectado a un deco<strong>di</strong>ficador no<br />
emite el sonido de los programas de televisión.<br />
Compruebe las conexiones.<br />
Seleccione la entrada del sistema correcta en la que está<br />
conectado el deco<strong>di</strong>ficador.<br />
El <strong>di</strong>sco no se reproduce.<br />
El có<strong>di</strong>go de región del <strong>di</strong>sco no coincide con el del sistema.<br />
Se ha condensado humedad en las lentes del interior de la<br />
unidad principal. Extraiga el <strong>di</strong>sco y deje la unidad principal<br />
encen<strong>di</strong>da durante me<strong>di</strong>a hora aproximadamente.<br />
El <strong>di</strong>sco no se ha finalizado correctamente.<br />
Reducción del consumo energético a menos de<br />
0,3 W en el modo de espera<br />
Pulse HOME y, a continuación, pulse /// para seleccionar<br />
[Configurar] en [Ajustes del sistema]. Compruebe que se hayan<br />
realizado los siguientes ajustes:<br />
ˎ ˎ<br />
ˎ ˎ<br />
[Control por HDMI] en [Configuración HDMI] está ajustado en<br />
[No].<br />
[Modo Inicio rápido] está ajustado en [No].<br />
DE<br />
Störungsbehebung<br />
Sollten an der Anlage Störungen auftreten, versuchen Sie, <strong>di</strong>ese<br />
anhand der folgenden Checkliste zu beheben, bevor Sie das Gerät<br />
zur Reparatur bringen.<br />
Lesen Sie auch in der Be<strong>di</strong>enungsanleitung auf der folgenden<br />
Webseite nach:<br />
http://support.sony-europe.com/<br />
Die Anlage lässt sich nicht einschalten.<br />
Überprüfen Sie, ob das Netzkabel richtig an <strong>di</strong>e Netzsteckdose<br />
angeschlossen ist.<br />
Die Anlage funktioniert nicht ordnungsgemäß.<br />
Ziehen Sie das Netzkabel aus der Netzsteckdose und schließen<br />
Sie es nach einigen Minuten wieder an.<br />
Die Anlage ist an eine Set-Top-Box angeschlossen, aber der<br />
Ton vom Fernsehgerät wird nicht ausgegeben.<br />
Überprüfen Sie <strong>di</strong>e Verbindungen.<br />
Wählen Sie an der Anlage den korrekten Eingang, an den <strong>di</strong>e<br />
Set-Top-Box angeschlossen ist.<br />
Eine Disc lässt sich nicht abspielen.<br />
Der Regionalcode der Disc entspricht nicht dem der Anlage.<br />
Auf den Linsen im Hauptgerät hat sich Feuchtigkeit<br />
niedergeschlagen. Nehmen Sie <strong>di</strong>e Disc heraus und lassen Sie<br />
das Hauptgerät etwa eine halbe Stunde lang eingeschaltet.<br />
Die Disc ist nicht ordnungsgemäß abgeschlossen.<br />
Verringern des Stromverbrauchs auf weniger<br />
als 0,3 W im Bereitschaftsmodus<br />
Drücken Sie HOME und wählen Sie dann mit /// <strong>di</strong>e Option<br />
[Einrichtung] unter [System-Einstellungen]. Überprüfen Sie, ob <strong>di</strong>e<br />
folgenden Einstellungen vorgenommen wurden:<br />
[Steuerung für HDMI] unter [HDMI-Einstellungen] muss auf<br />
[Aus] gesetzt sein.<br />
[Schnellstartmodus] muss auf [Aus] gesetzt sein.<br />
ˎ ˎ<br />
ˎ ˎ<br />
14
15
Le présent Guide de mise en route<br />
économise le papier<br />
Pour préserver les ressources naturelles, <strong>Sony</strong> a considérablement réduit sa consommation<br />
de papier en décidant de ne plus fournir de manuels imprimés complets. Cependant,<br />
vous trouverez un mode d’emploi complet et d’autres informations en ligne, à l’adresse<br />
suivante :<br />
Esta guía de inicio rápido ahorra papel<br />
Para ahorrar recursos naturales, <strong>Sony</strong> ha reducido drásticamente el consumo de papel<br />
no incluyendo manuales completos impresos. No obstante, encontrará el manual de<br />
instrucciones completo y más cosas en línea:<br />
Für <strong>di</strong>ese Kurzanleitung wird nur wenig<br />
Papier verbraucht<br />
Zum schonenden Umgang mit natürlichen Ressourcen hat <strong>Sony</strong> den Papierverbrauch<br />
drastisch reduziert und liefert <strong>di</strong>e vollstän<strong>di</strong>ge Be<strong>di</strong>enungsanleitung nicht mehr in<br />
gedruckter Form aus. Die vollstän<strong>di</strong>ge Be<strong>di</strong>enungsanleitung und weitere Informationen<br />
finden Sie stattdessen im Internet:<br />
http://support.sony-europe.com/<br />
4-418-867-21(1)<br />
2012 <strong>Sony</strong> Corporation<br />
Printed in Malaysia<br />
(1)


